
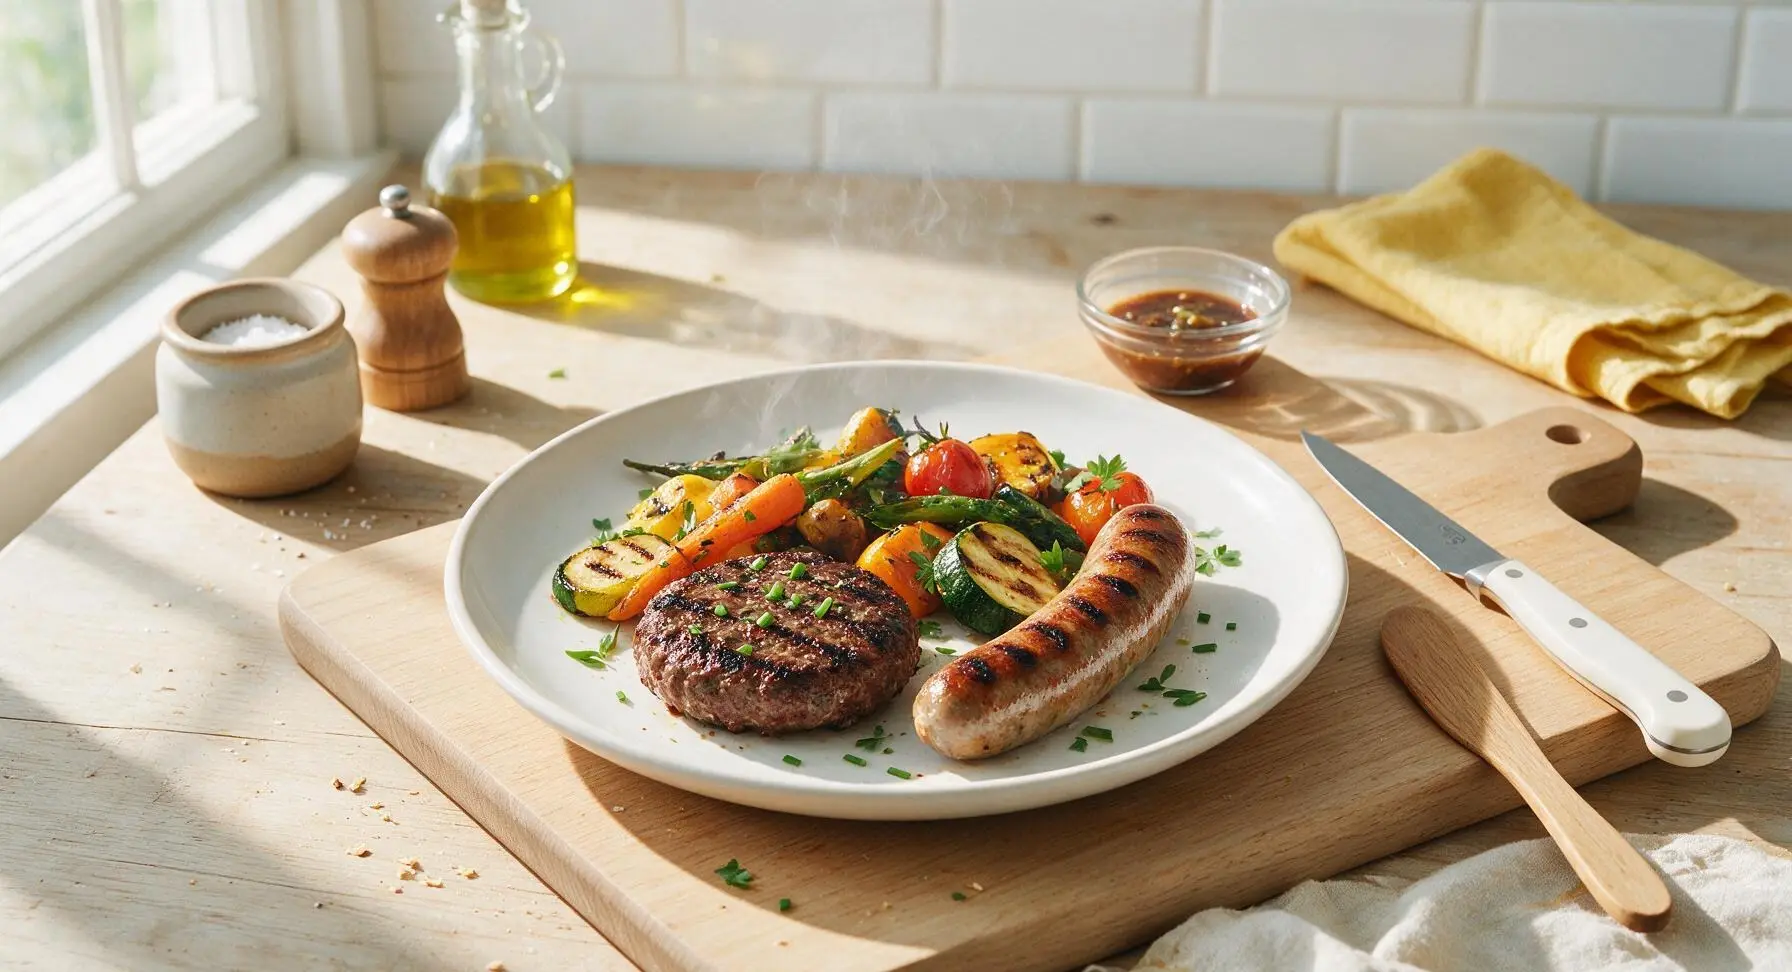
grilling tips

title 1
grilling tips
⏱️ cook time 15 minutes
🍽️ servings 4
⚡ Difficulty easy

intro

Master pro-level summer grilling with no-fuss tips for juicy, char-kissed burgers, brats, and veggies—no dry meat, no burnt edges, no messy flare-ups, just perfect cookout food every time.

Ingredients
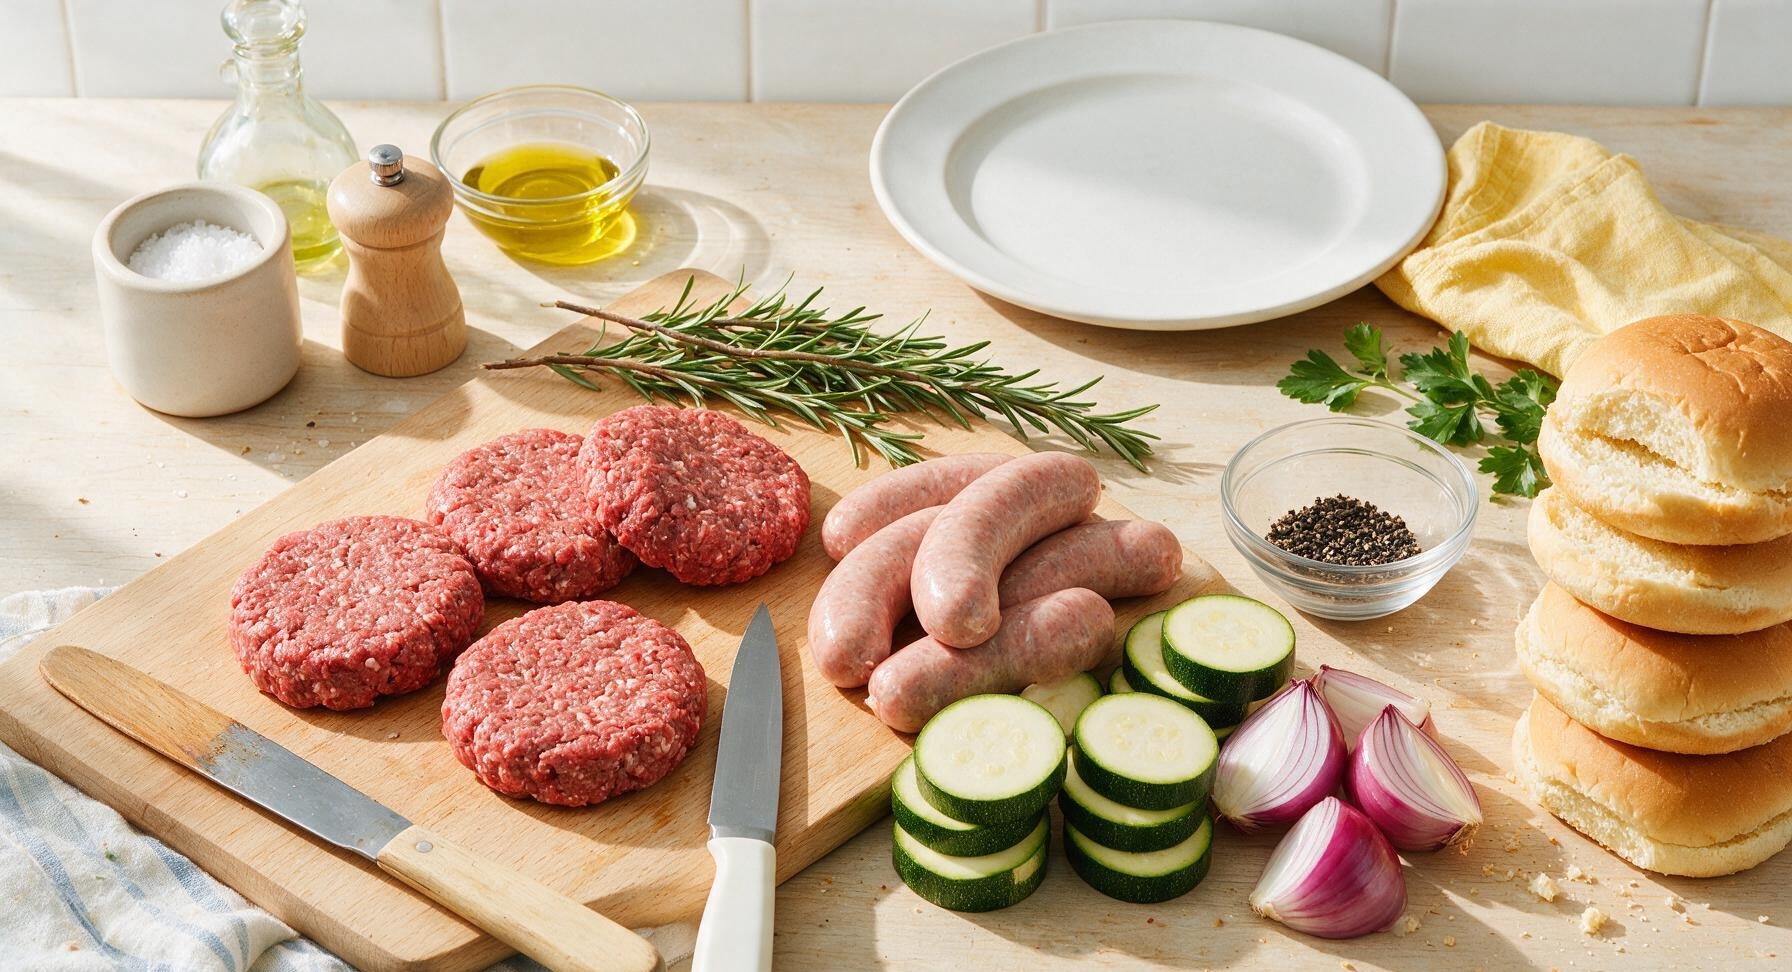
80/20 ground beef 600g (divided into four 150g patties)
Pork bratwursts 4 links (110g each)
Medium zucchini 2, sliced into 1cm thick rounds
Small red onion 2, cut into 2cm thick wedges
Soft hamburger buns 4
Avocado oil 3 tablespoons
Kosher salt 2 tablespoons
Coarse black pepper 1 tablespoon
Fresh rosemary sprigs 4 sprigs

Steps

1

Preheat and Clean Grates

First, preheat your charcoal grill to 230°C (450°F) with a two-zone fire: spread lit hot coals across one half of the grill bed for direct high heat, leave the opposite half coal-free for indirect, lower-heat cooking. Once preheated, wad 2 plain paper towels, hold them with the long-handled matte black stainless steel grill tongs, dip lightly in avocado oil from the glass squeeze bottle, and scrub the grates until smooth and lightly oiled to prevent sticking. You will see faint pale gray smoke rise from the clean, oiled grates, with no leftover food debris visible on the grate surface.
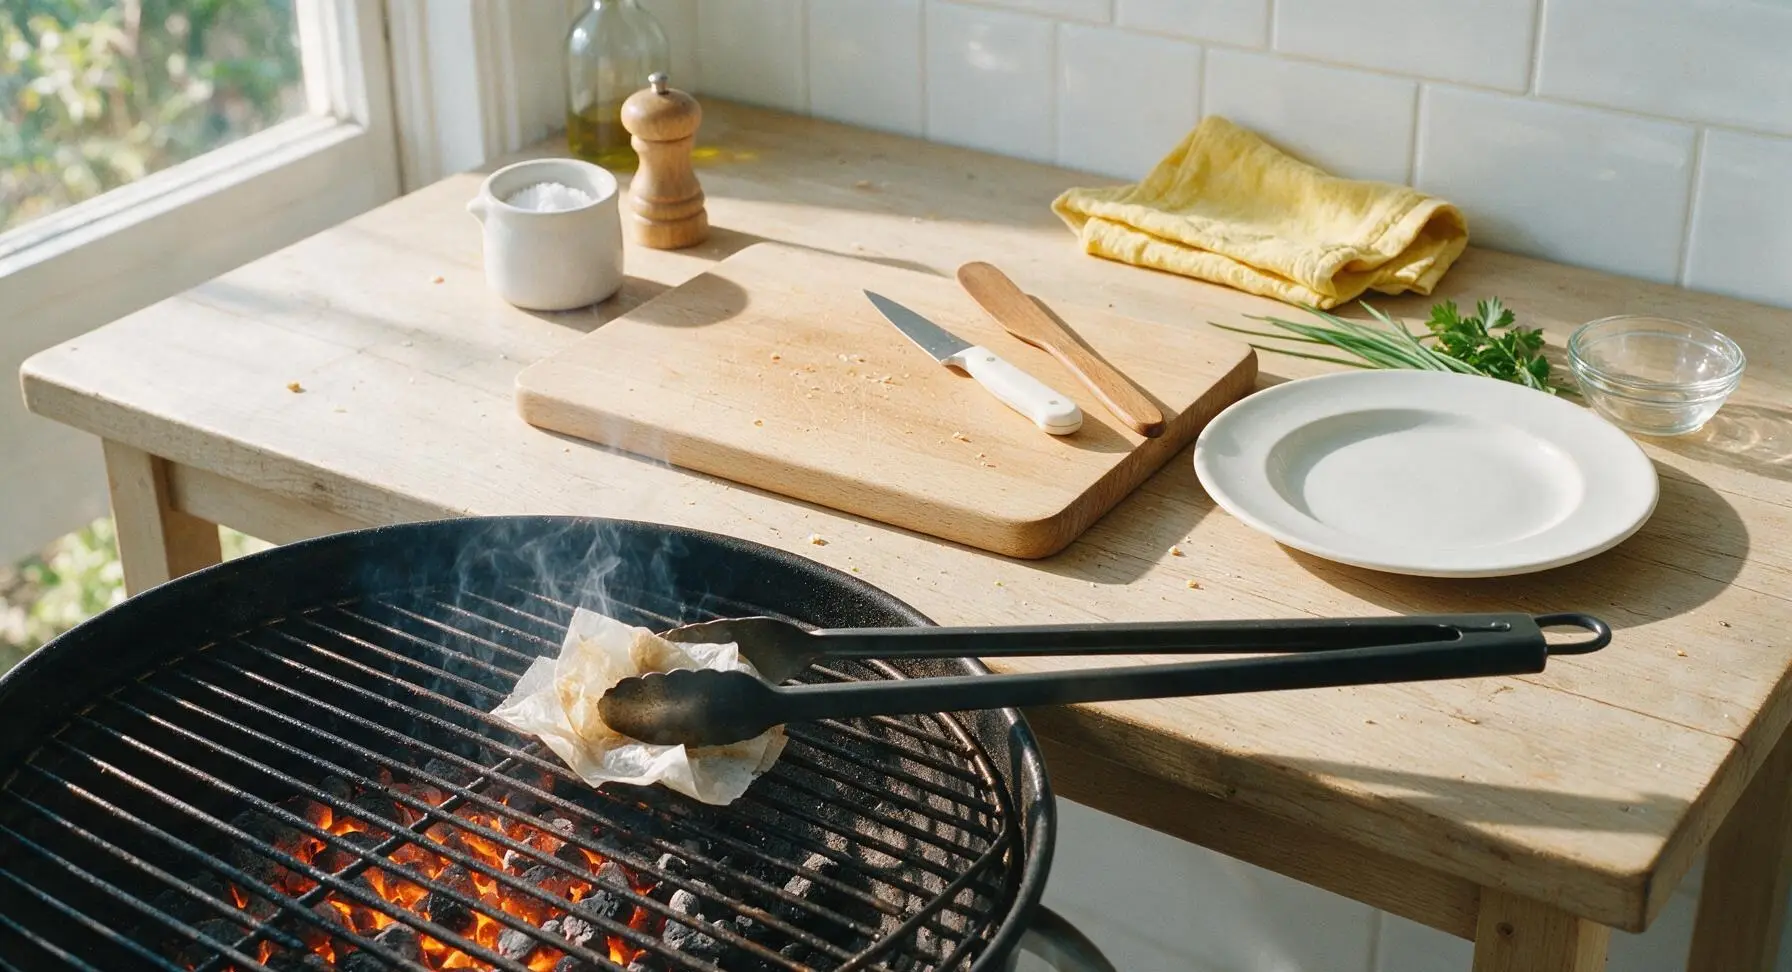
Step 1
step1:Preheat and Clean Grates
2

Form Burger Patties

Divide the 600g 80/20 ground beef into four equal 150g portions, gently shaping into 1cm-thick patties slightly wider than your hamburger buns (they will shrink 10-15% as they cook). Press a 1cm deep indent in the center of each patty with your thumb to prevent doming and bulging during cooking. Do not overwork the meat—overmixing or tightly packing the beef leads to tough, dense burgers. Season both sides generously with 1 tablespoon kosher salt and ½ tablespoon coarse black pepper right before grilling, as salting too early draws out moisture.
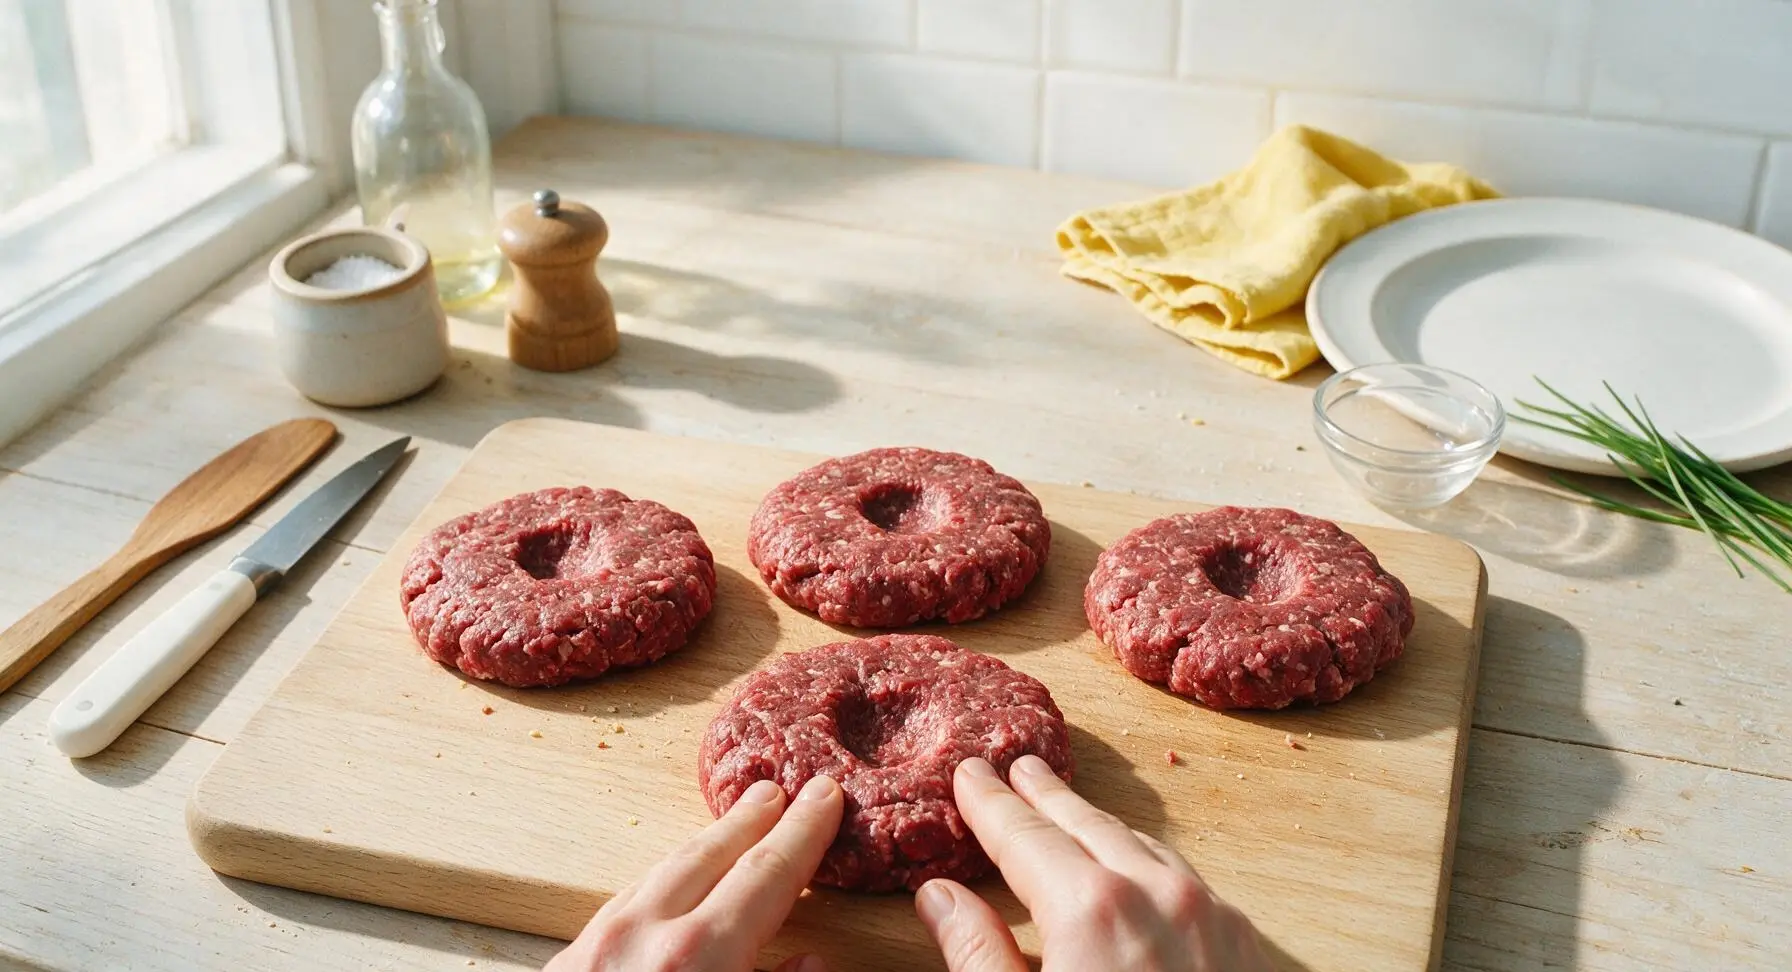
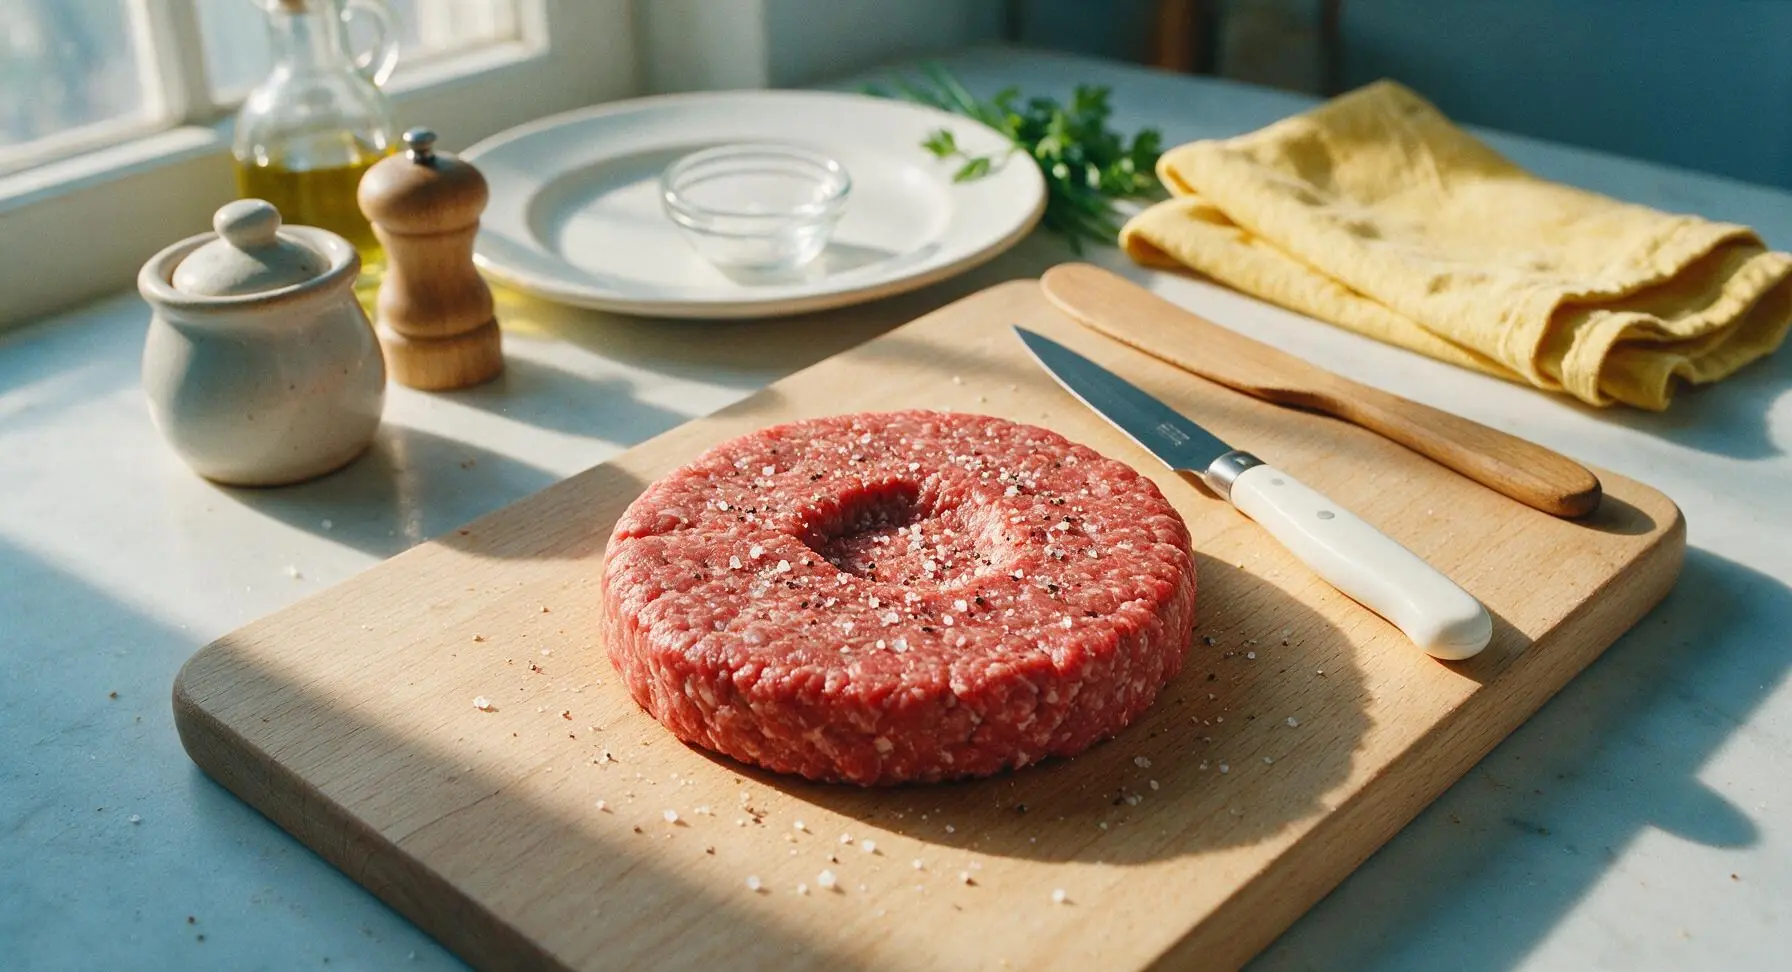
Step 2
step2:Form Burger Patties
Step 2
step2:Form Burger Patties
3

Prep Remaining Ingredients

Toss the zucchini rounds and red onion wedges in 2 tablespoons avocado oil, remaining 1 tablespoon kosher salt, and ½ tablespoon coarse black pepper until evenly coated with a thin glistening layer of oil. Pat the bratwurst links dry with a corner of the fixed gingham cotton napkin to remove surface moisture, which encourages even browning and crisp char instead of steaming. Split the hamburger buns open lightly, leaving one edge attached to keep toppings contained, and set them near the edge of the charcoal serving platter for toasting later.
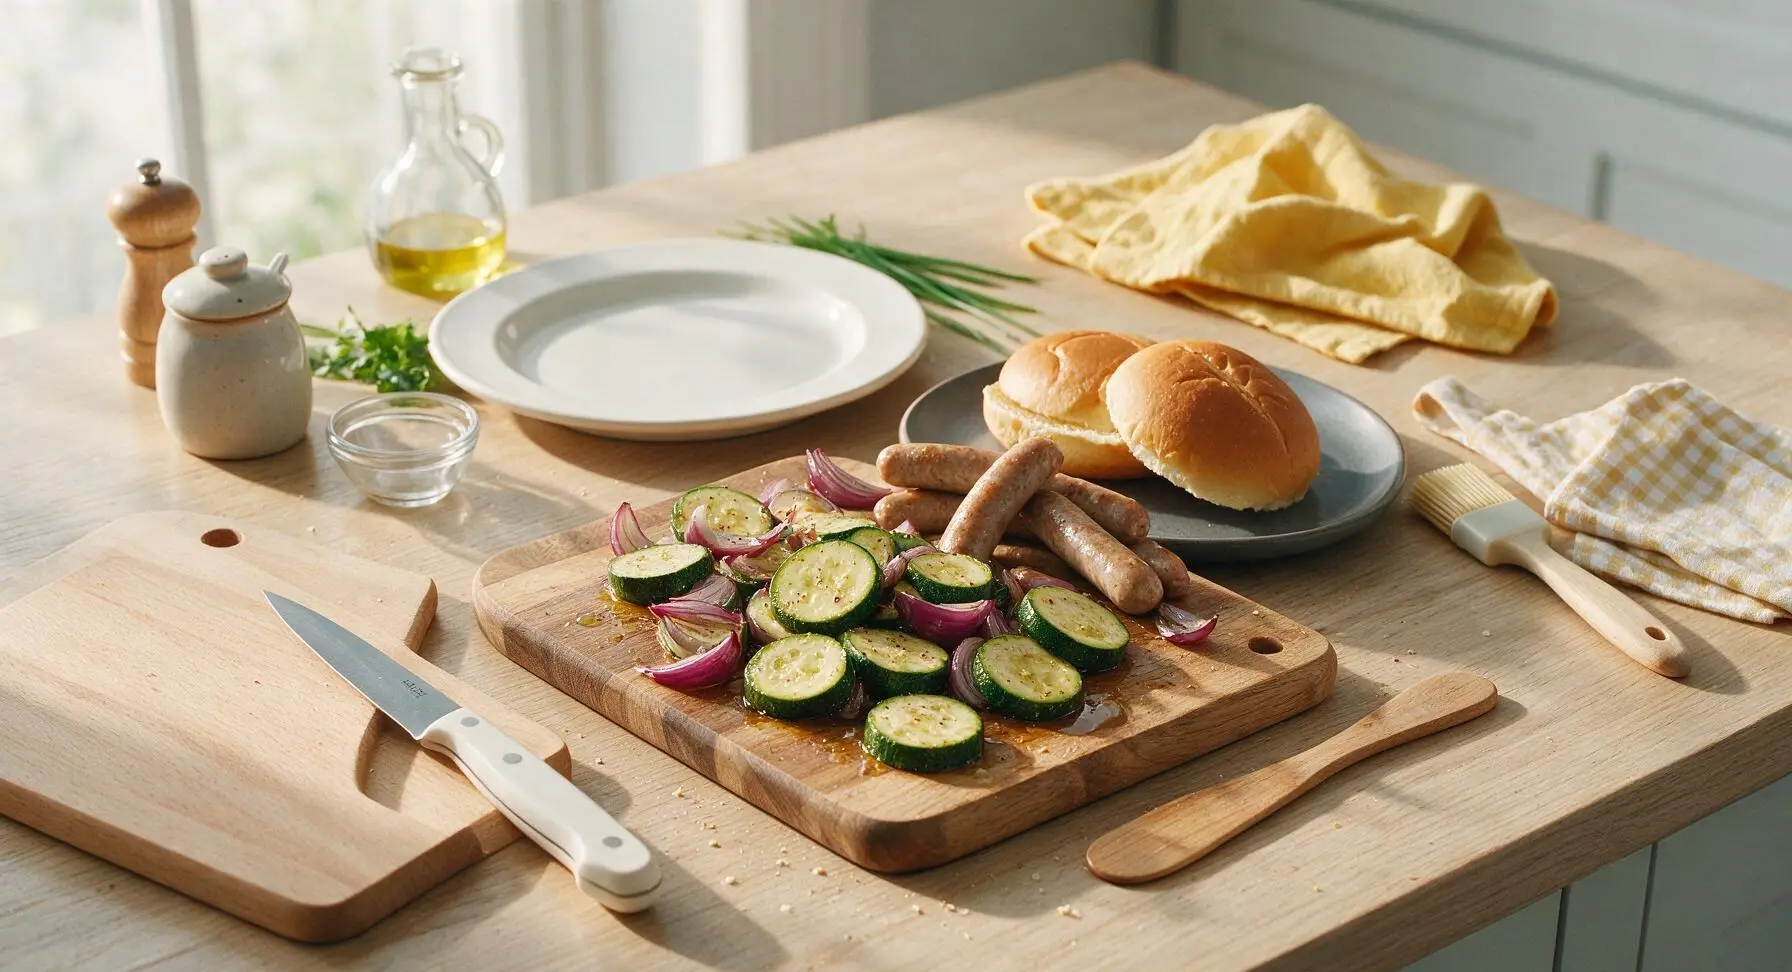
Step 3
step3:Prep Remaining Ingredients
4

Sear Over Direct Heat

Use the slotted stainless steel grill spatula to place the burger patties indent-side up on the direct high-heat side of the grill, followed by the bratwursts. Arrange the zucchini and onion wedges on the grate beside them in a single layer, no overlapping. Do not move, flip, or press the patties for the first full 3 minutes—this uninterrupted contact builds a deep, flavorful maillard crust and distinct grill marks. After 3 minutes, use the grill tongs to flip all items once: the seared side should show dark, golden-brown crosshatch marks, with fat rendering gently.
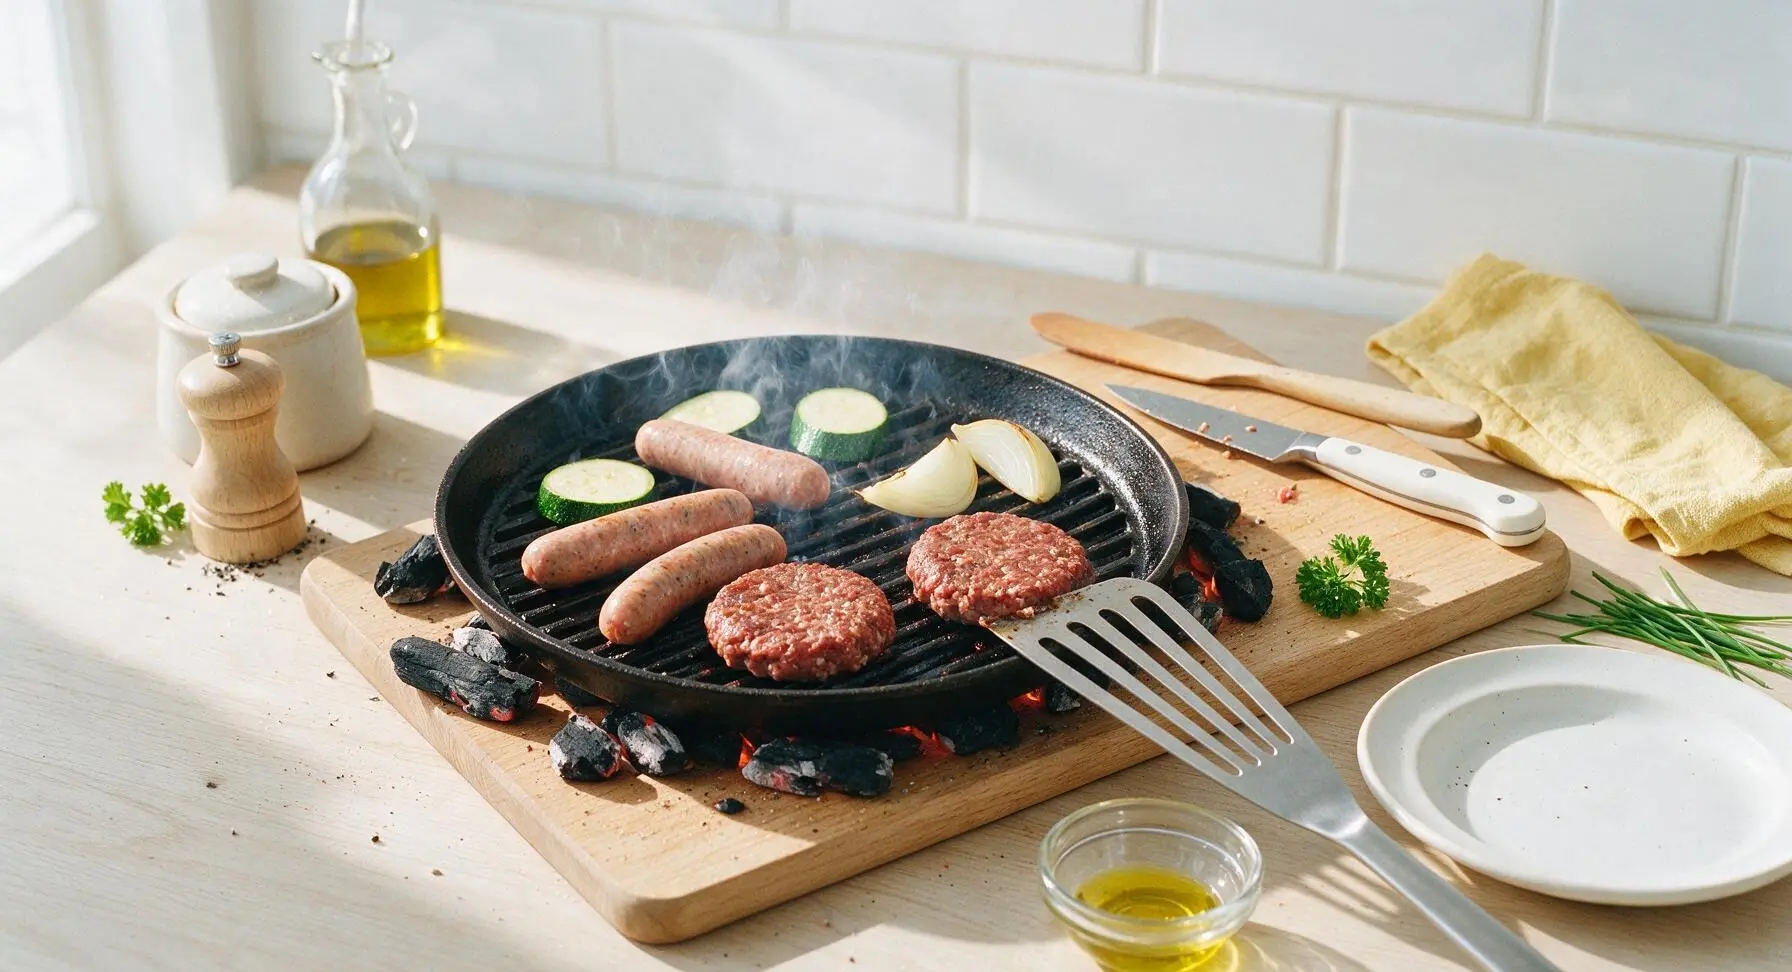
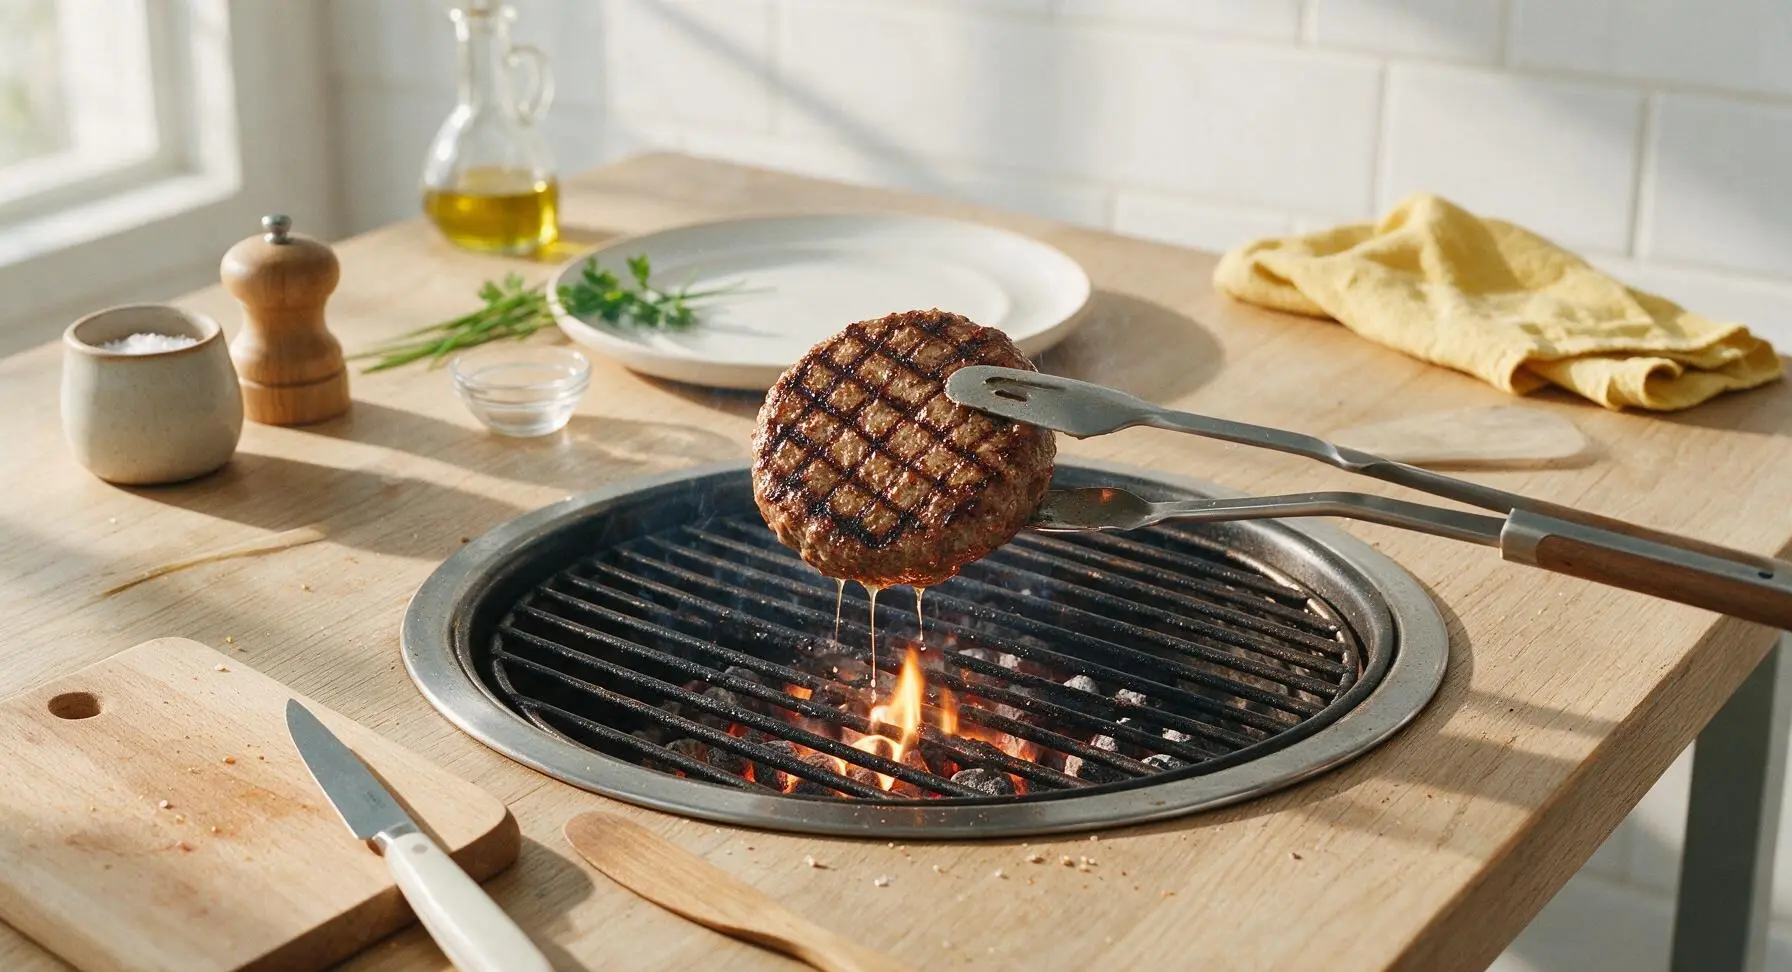
Step 4
step4:Sear Over Direct Heat
Step 4
step4:Sear Over Direct Heat
5

Cook to Safe Temps

Once seared on both sides (another 3 minutes on the second side for burgers), move the patties and brats to the coal-free indirect heat zone of the grill to finish cooking without burning the exterior. Insert the instant-read digital meat thermometer horizontally into the thickest center of each item: burgers reach safe doneness at 71°C (160°F) for medium, brats at 74°C (165°F) with no pink remaining in the center. Veggies are done when fork-tender with caramelized, slightly charred edges, about 8 total minutes of grilling. Close the grill lid for 4 minutes to circulate heat and cook food evenly.
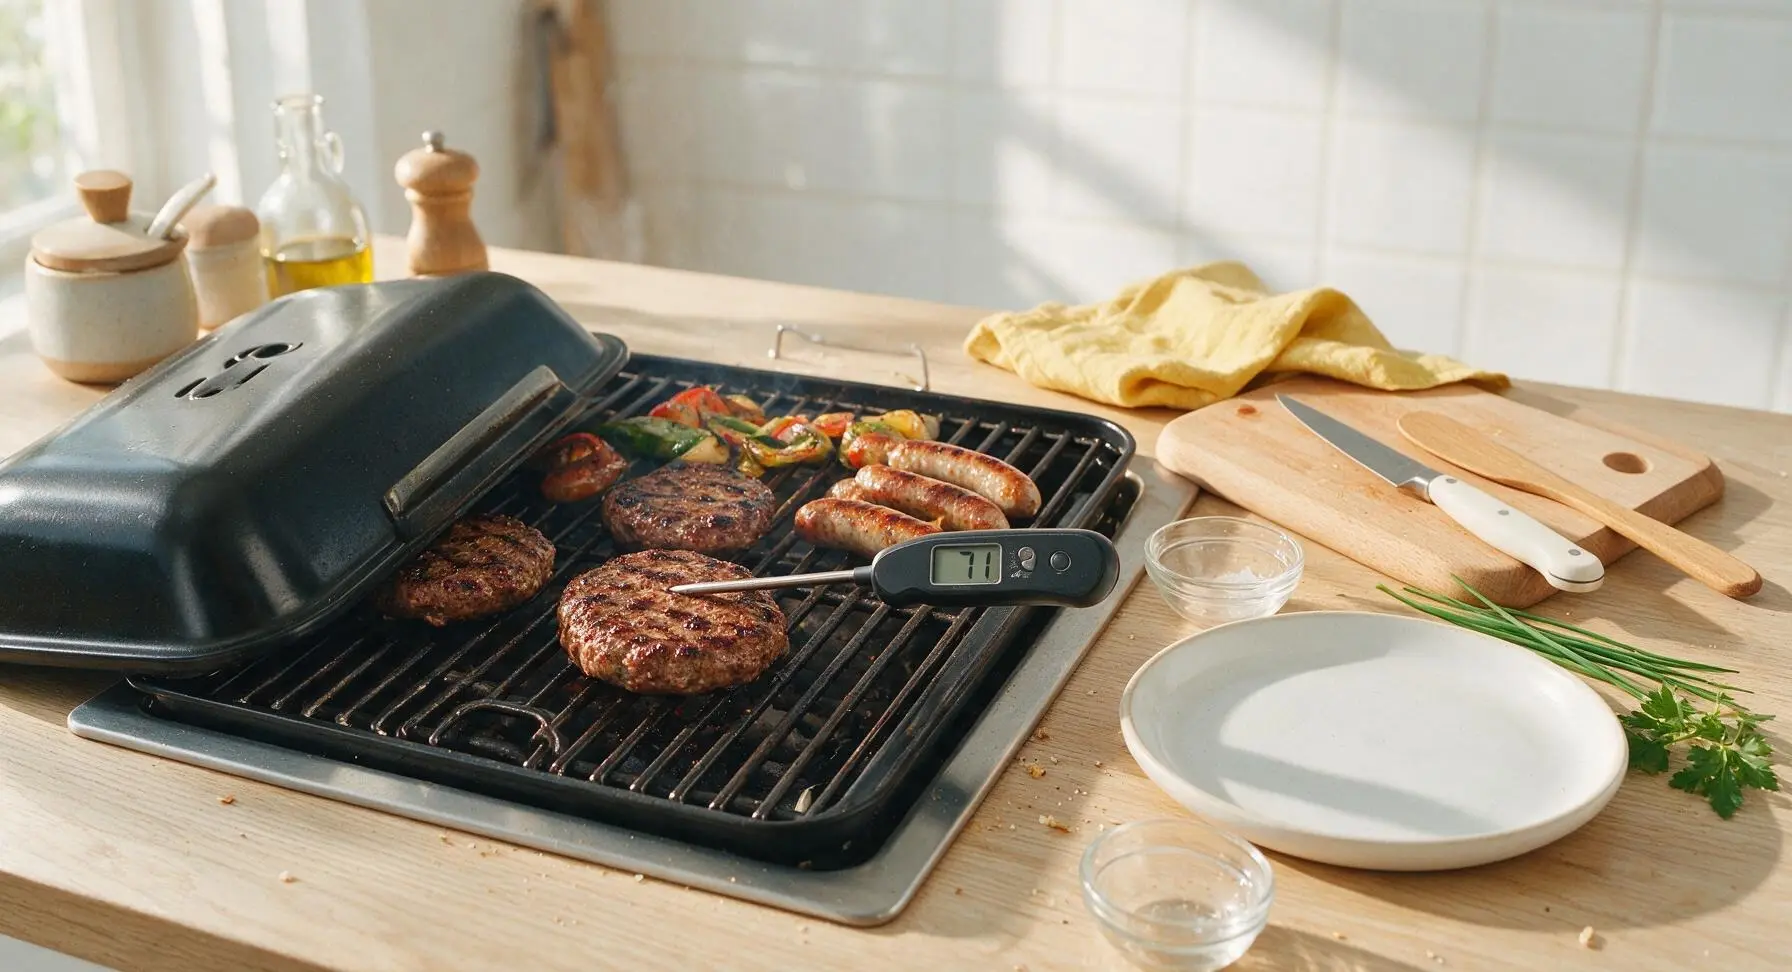
Step 5
step5:Cook to Safe Temps
6

Toast Buns Briefly

During the last 1 minute of cooking, place the split hamburger buns cut-side down on the direct heat side of the grill. Toast just until light golden brown with faint grill marks, 45 seconds to 1 minute total—watch closely to avoid burning, as the cut bread surface toasts very quickly over high heat and can char in as little as 10 extra seconds.
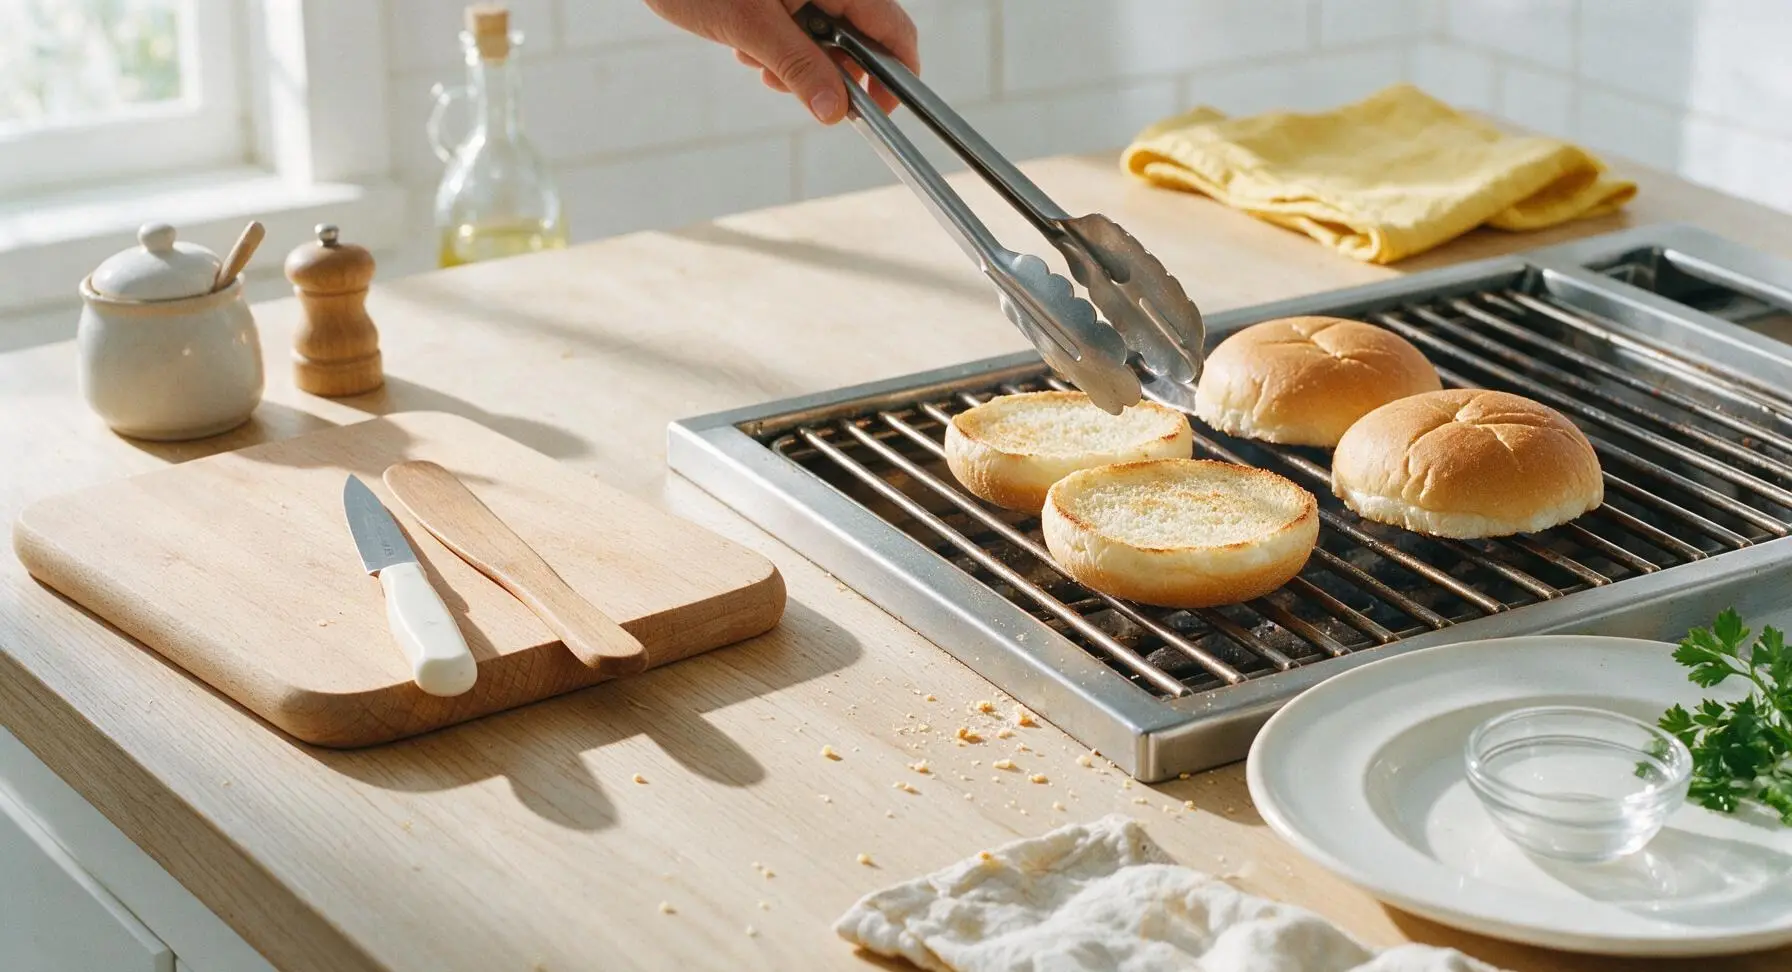
Step 6
step6:Toast Buns Briefly
7

Rest Before Serving

Use the slotted spatula and grill tongs to transfer all cooked food from the grill to the matte charcoal gray ceramic serving platter. Tuck the fresh rosemary sprigs between items for a bright, herby aroma, and let all meat rest for 5 full minutes before serving. This rest period allows muscle fibers to relax and juices to redistribute through the meat, so every bite is juicy instead of having juices run out onto the plate at the first bite.
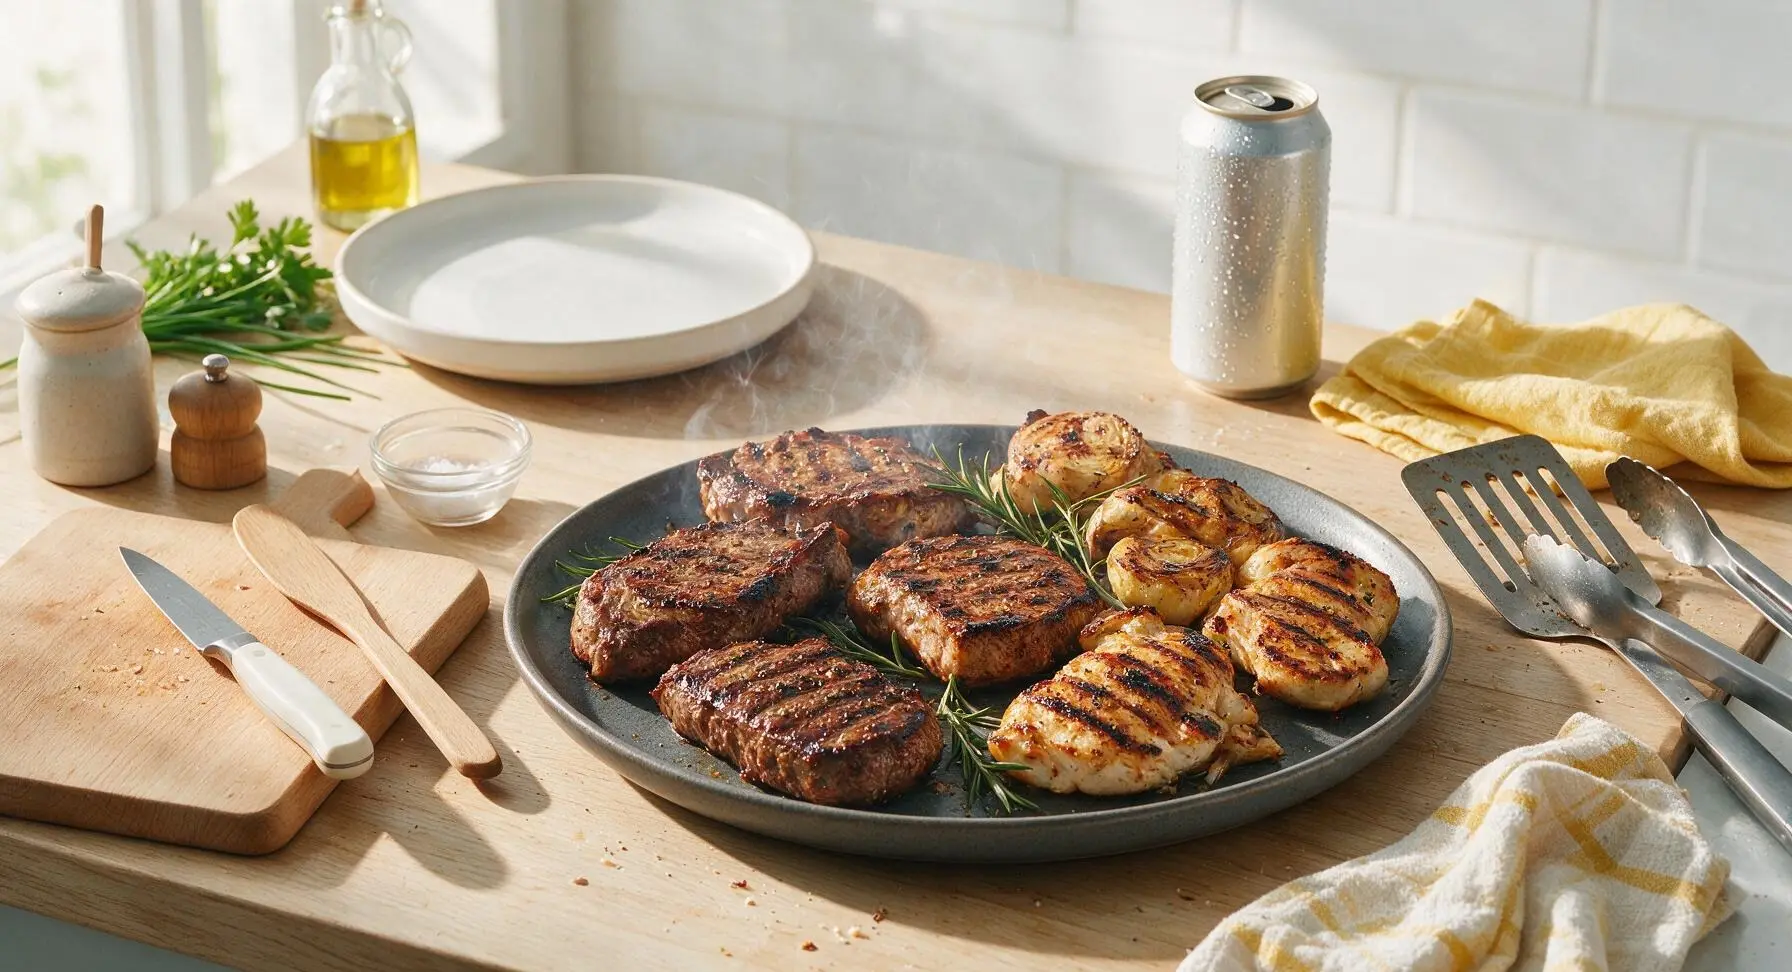
Step 7
step7:Rest Before Serving

Tips

1.Always oil your hot grill grates (not your food) before cooking: oiling food directly causes excess smoke and burnt, bitter oil flavor, while a thin layer of oil on hot grates creates a reliable non-stick surface without triggering large flare-ups.
2.Never press down on burger patties with your spatula while they cook: this squeezes out all the flavorful rendered fat and internal juice, leading to dry, bland burgers, and the dripping fat causes sudden, high flare-ups that burn the meat exterior.
3.Build a two-zone fire for every grilling session: the hot direct-heat zone builds deep char and crisp crust, while the cool indirect-heat zone lets you finish cooking thick items without burning the outside, and acts as a safe spot to move food if unexpected flare-ups occur.


✨ You May Also Like

BBQ & Grilling
🍜 United States

Tender, melt-in-your-mouth beef brisket with a crisp, spiced bark, slow-smoked to deep smoky perfection, the iconic centerpiece of Texas backyard barbecue.

⏱️ 12 hours BBQ & Grilling ★ 4.4
BBQ & Grilling
🍜 Korea

Tender, sweet-savory marinated beef short ribs, a beloved Korean BBQ staple with caramelized, slightly charred edges and deep umami flavor, perfect for outdoor summer gatherings.

⏱️ 4 hours 2BBQ & Grilling ★ 4.8
BBQ & Grilling
🍜 United States

Juicy grilled beef patties topped with smoky homemade chili, melted cheddar, and tangy pickles on toasted brioche buns for a hearty, flavor-packed handheld meal.

⏱️ 40 minuteBBQ & Grilling ★ 4.7
BBQ & Grilling
🍜 United States

A sweet, smoky, tangy BBQ sauce brightened with peak-season dark cherries, ideal for glazing grilled ribs, chicken, pork, or summer roasted veggies.

⏱️ 35 minuteBBQ & Grilling ★ 4.7
BBQ & Grilling
🍜 United States

Rich, smoky, slightly sweet homemade bourbon BBQ sauce with deep caramel notes, ideal for glazing grilled ribs, chicken, and burgers at cookouts.

⏱️ 25 minuteBBQ & Grilling ★ 4.7
BBQ & Grilling
🍜 United States

Iconic Alabama-style BBQ featuring tender hickory-smoked chicken slathered in tangy creamy white sauce, a beloved regional Southern cookout staple.

⏱️ 3 hoursBBQ & Grilling ★ 5

grilling tips:Frequently Asked Questions

1.Why do you recommend 80/20 ground beef for burgers instead of leaner blends? ▾
That 20% fat ratio is non-negotiable for juicy, flavorful burgers with a perfect charred crust! Leaner 90/10 blends shrink fast, turn tough, and dry out easily even if you don’t overcook them. Rendered fat bastes the patty from the inside out as it grills, and cuts down on sticking without extra oil—just don’t overwork the meat when forming patties.
2.How do I stop my pork bratwursts from splitting open while grilling? ▾
Split brats leak all their delicious, juicy fat and turn dry in minutes, so a little prep goes a long way. First, never put ice-cold brats straight on high heat—let them rest at room temp for 20 minutes first. Poke 2-3 tiny holes per brat to let steam escape, and cook over medium indirect heat, turning every 3 minutes, until they hit 160°F internal.
3.What’s the easiest way to prevent messy, food-burning flare-ups on the grill? ▾
Flare-ups happen when rendered fat drips straight onto hot coals or burner elements, so start by trimming any loose, excess fat from patty and brat edges. Keep a small spray bottle of plain water handy to spritz small flare-ups instead of dousing them, and reserve one side of your grill for indirect, flame-free heat to move food to if flames spike.
4.How thick should I cut zucchini and red onion so they don’t fall through grill grates? ▾
Skip paper-thin slices that slip right through grate gaps! Cut zucchini into ½-inch thick diagonal planks, and slice red onion into ¾-inch thick rounds, securing each round with a single horizontal toothpick if you’re worried about layers separating. Lightly coat veggies in oil right before grilling so they char nicely instead of sticking.
5.Is preheating the grill really necessary, or can I add food right after lighting it? ▾
Skipping preheat is the #1 cause of stuck food and uneven cooking! Preheat your grill with the lid closed for 10 to 15 minutes on high first, then scrape grates clean with a wire brush and adjust to your target temp. Hot grates sear food on contact, create iconic grill marks, and keep delicate veggies and patties from tearing when you flip them.
6.How do I keep soft hamburger buns from getting burnt or soggy on the grill? ▾
Soft buns turn to cardboard if left over direct heat too long, or soggy if toasted too early. Wait until the last 30 to 60 seconds of cook time, brush the cut sides lightly with melted butter or olive oil, and set them cut-side down on the cooler edge of the grill. Pull them as soon as you see light golden marks, then serve immediately.
7.How often should I flip burgers and brats while they cook? ▾
Resist the urge to poke, press, and flip your meat every 30 seconds! For burgers, flip just once halfway through cooking—about 3 to 4 minutes per side for medium doneness—to let a nice seared crust build properly. For brats, turn every 3 to 4 minutes for even char, and never press patties with a spatula, which squeezes out all the juicy fat.
8.What internal temperature should I cook each mixed grill item to for safety and best texture? ▾
An instant-read thermometer takes all the guesswork out! Ground beef burgers need to hit 160°F at their thickest point for food safety, and pork brats also need to reach 160°F. Veggies are done when crisp-tender with light char marks, which takes about 6 to 8 minutes total over medium heat—no thermometer needed for those.
9.Can I prep patties, brats, and veggies ahead of time to make cookout day less stressful? ▾
Totally—smart prep makes hosting way easier! Form burger patties and cut your veggies up to 24 hours ahead, storing them sealed in the fridge, and pull brats and patties out 20 minutes before grilling to take the chill off. Wait to oil and season veggies until right before grilling, so they don’t get soggy from released moisture.
10.Why do my burgers turn out dry even when I use 80/20 ground beef? ▾
The usual culprits are overworking the meat, overcooking, or pressing patties with your spatula! When you form patties, gently shape them just until they hold together—over-mixing makes them tough. Never press down while cooking, that squeezes out flavorful fat, and pull patties right when they hit temp, since they’ll keep cooking a minute or two from residual heat.
11.Should I oil my grill grates or the food itself to prevent sticking? ▾
Oil the food, not the grates! Spraying or pouring oil directly on hot grates causes excess smoke and burnt oil residue that actually makes food stick worse. Right before grilling, toss veggies in a light coating of neutral oil, and give patties and brats a very light brush of oil too. Hot grates will sear the food surface so it lifts easily once crust forms.
12.How do I get perfect, deep grill marks without burning the edges of my food? ▾
Great grill marks form when food sits undisturbed on hot, clean grates! First, pat food dry with paper towels before putting it down—surface moisture steams instead of searing. Set items down at a 45-degree angle to grates, don’t move them for half their side cook time, then rotate 90 degrees to get classic crosshatch marks before flipping.
13.How do I keep cooked food warm while I finish grilling without it getting soggy? ▾
Don’t stack hot food straight in a sealed plastic container, that traps steam and makes buns soggy and meat mushy. Set a disposable aluminum tray on the cool, indirect side of your grill, place cooked items in a single layer, and tent it loosely with foil. This keeps food at a safe 140°F+ without overcooking, and lets excess steam escape.
14.Do I need special seasonings for the grilled veggies to match the meat’s flavor? ▾
You don’t need fancy rubs, but don’t skip seasoning veggies entirely! A light sprinkle of kosher salt and black pepper right after oiling them brings out their natural sweetness, and you can add a pinch of garlic powder or smoked paprika for extra savoriness. Skip heavy sugar-based rubs on veggies, since those burn fast over high heat and leave a bitter aftertaste.
15.What’s the biggest mistake new grillers make when cooking a classic backyard mixed grill? ▾
Cooking every single item over screaming high heat the entire time! Burgers need medium-high heat for a good sear, brats do best with steady medium heat to cook through without splitting, and veggies cook perfectly over medium heat to char outside without turning mushy. Setting up a two-zone fire lets you adjust heat for each item without chaos.

Comments (19)

2 days ago

OMG these tips are a total game changer! I’ve been overcooking my brats every summer for our weekly backyard family dinners and the indirect heat tip? *Chef’s kiss* Made the full mixed grill last night for my wife and two teens, no charred hockey pucks this time. SO good, even my picky 14 year old asked for seconds!

yesterday

Same! I always burned the hot dogs before the burgers were even done before following these tips. My 4th of July potluck spread is gonna slap this year

yesterday

So stoked to hear that, Mike! The indirect heat trick works perfectly for mixed grills since all the different proteins cook at slightly different rates—no more rotating panics for you!

3 days ago

Wait the tip about oiling the grates instead of the food? Why did no one tell me this sooner?? I used to have half my chicken thighs stick and tear every time I grilled for Sunday meal prep. 15 minute cook time is no joke either, I had a full spread of burgers, veggies, and sausage done faster than my oven preheats.

2 days ago

That oiling trick is such a simple fix but it makes all the difference! So glad it cut down your meal prep time too—less time cooking, more time enjoying that summer sun.

1 week ago

Tried this for our block party last weekend and got so many compliments! The kebab trick of threading meat and veggies loosely so they cook evenly? Total lifesaver, no more raw onion next to burnt zucchini. Easy enough even for a guy who usually burns toast on the regular.

5 days ago

My kids loved it! I was stressing about hosting my son’s end-of-soccer-season cookout this weekend and these tips made everything so low-fuss. The timing guide for different proteins meant I didn’t have to hover over the grill the whole time, I actually got to hang out with the other parents instead of playing grill referee.

3 days ago

Right? I used to miss half the party because I was glued to the grill making sure nothing burned. Used these tips for my daughter’s graduation cookout and got to actually eat while the food was hot for once

2 days ago

That’s exactly what we love to hear! Grilling should be fun, not a chore—so glad you got to enjoy the party instead of stressing over the grates.

yesterday

Pro tip from someone who grills in 110 degree Arizona heat: these quick-cook tips are a GODSEND. Less time standing over a 500 degree grill in the sun? Worth every star. The mixed grill came out juicy, no dried out burgers even when I was rushing to get back inside to the AC.

2 weeks ago

I’ve been grilling for 20+ years and still picked up a couple new tricks here! The tip about letting the meat rest for 5 minutes after pulling it off the grill? I always skipped that step when I was in a hurry to serve, and wow, what a difference in juiciness. My steaks were next level this weekend.

1 week ago

So cool that even seasoned grillers can pick up new hacks here! That rest period is so underrated—all those delicious juices stay in the meat instead of running all over your plate.

3 days ago

Brought this mixed grill to our neighborhood potluck 2 days ago and people were asking for the recipe all night! The only thing I changed was swapping the regular brats for spicy chicken sausage to fit a couple dietary needs, and all the timing tips still worked perfectly. No sad, lukewarm food sitting on the platter!

2 days ago

Wait did the veggie skewers cook okay at the same temp? I’m making this for a group with a couple vegan friends and want to make sure I don’t mess it up

2 days ago

They absolutely do! Just make sure to cut your veggies into 1.5 inch chunks and place them on the cooler side of the grill for the first 10 minutes, they’ll come out perfectly tender without burning. Great call on the chicken sausage swap, by the way!

30 minutes ago

SO good. I was a little skeptical because “pro tips” usually feel super pretentious and require fancy equipment, but these are all totally doable with a basic cheap charcoal grill I got from the hardware store. No fancy gadgets needed, just common sense stuff I somehow never thought of.

5 minutes ago

Right?? So many grilling guides act like you need a $1000 pellet grill to make good food, but I use a $30 thrift store charcoal grill and these tips worked flawlessly for me last weekend

just now

That’s exactly what we’re going for! Great grilling doesn’t need fancy, expensive gear—just a few simple tricks to make the most of whatever grill you have. So glad it worked out for you!

1 week ago

As a Texas guy who takes his grilling pretty seriously, I gotta say these tips are solid. The zone cooking method is exactly how I do brisket, but I never thought to use it for a quick weeknight mixed grill. Cut my cook time down by almost 10 minutes, and everything was evenly cooked. No excuses for bad backyard grill food now, y’all.

5 days ago

Love that the zone method translates even for quick cooks! It’s such a versatile trick, works for everything from low-and-slow brisket to fast weeknight burgers. Thanks for the kind words!

2 hours ago

This is my first summer living in my own apartment with a tiny patio grill, and I was so nervous to invite friends over for a cookout. These tips made it so easy! I didn’t burn a single thing, all my friends thought I’d been grilling for years. The 15 minute cook time is no lie, we were eating way faster than I expected.

30 minutes ago

Same! I have that tiny 14 inch portable grill for my balcony and was sure these tips were for big fancy backyard grills, but they work perfectly on small setups too

yesterday

Made this for date night on the patio last night and my boyfriend was convinced I ordered takeout from that fancy BBQ place downtown lmao. The tip about adding a wood chip packet for a little smoky flavor without a smoker? *Chef’s kiss* So easy, no fancy equipment, just a foil packet of chips right on the gas grill. 10/10, will be making this all summer.

2 hours ago

Wait what kind of wood chips did you use? I have hickory but I’m worried it’ll be too strong for chicken and veggies

30 minutes ago

Such a good hack for gas grill owners! Hickory works great if you only use a small handful, but apple or cherry wood are a little milder and pair perfectly with chicken and veggies if you want a lighter smoke flavor.

1 week ago

Took this camping last weekend and cooked the whole mixed grill over the campfire grate using these zone tips, worked like a charm. No more burnt hot dogs on one side and raw potatoes on the other. Super easy to remember even when you’re a couple beers deep around the fire.

5 minutes ago

Wait the tip about not squishing the burgers with the spatula?? I’ve been doing that my whole life thinking I was getting a better sear, and my burgers were always dry as a bone. Tried not squishing them last night and they were so juicy, juice dripping down my wrist good. Total game changer.

just now

That’s one of the most common grilling mistakes we see! All that delicious fat and juice squeezes right out when you squish them, leaving you with dry, sad burgers. So glad you noticed the difference!

2 weeks ago

Made this for Father’s Day for my dad who is a total grill snob, and he even asked what I did differently. Win! The cook time was so fast I didn’t have to spend the whole holiday in the yard, I got to watch the game with everyone else. Will be using these tips every time I grill from now on.

2 days ago

Love that this is easy enough for a random Tuesday night dinner, not just big weekend parties. I threw together a mixed grill of shrimp, zucchini, and turkey burgers after work yesterday, it was done in 15 minutes exactly like the recipe says, minimal cleanup, maximum flavor. Perfect for busy weeknights when I don’t want to turn the oven on and heat up the whole house.

yesterday

Ooh shrimp on the grill sounds amazing! I never think to do quick seafood on weeknights, I always save that for weekends. Definitely trying that tomorrow after work

5 days ago

Made this after a long day hike last weekend with a group of friends, it was the perfect post-adventure meal. The tips for prepping all the food ahead so you can just throw it on the grill when you get home? Genius. We were all starved and didn’t have to wait forever to eat, everything was hot and juicy. Highly recommend for post-outing meals!

3 days ago

Did you pre-marinate the meat ahead too? I’m planning a big backpacking trip next month and want to prep as much as I can before we head out

2 days ago

Prepping ahead is such a time saver! You can absolutely marinate the meats and chop veggies the night before, just store them in sealed containers in the cooler until you’re ready to grill. Makes post-hike meals so low stress!

1 week ago

I’ve been using the same old grilling routine for years and decided to switch it up with these tips for our annual 4th of July party. The tip about keeping a spray bottle of water handy for flare ups? Saved my bacon (literally, I was cooking bacon-wrapped jalapeno poppers too) when a big flare up almost burned the whole batch. No more panicking with a plate trying to fan the flames!

5 days ago

That water spray bottle trick is so underrated for flare up control! It’s way gentler than dousing the flames and ruining your food, perfect for when you’re cooking fattier items like those bacon poppers (which sound delicious, by the way).

30 minutes ago

I mostly grill veggies and plant-based brats, and all these tips work perfectly for that too! I was worried this would be all red meat focused, but the zone cooking and grate oiling tips made my veggie skewers come out perfectly charred instead of mushy or stuck to the grates. Even my meat-eating roommate stole a couple skewers they looked so good.

yesterday

My kids loved it! I did a mix of mini burgers, hot dogs, and grilled pineapple for a fun kid-friendly spread, and the timing guide meant everything was done at the same time so I didn’t have kids complaining they were waiting for food. No cold hot dogs while the burgers finished, everything was hot and ready to go at the same time. Total win for busy summer nights with the family.

2 hours ago

Grilled pineapple is such an underrated summer grill staple! So glad the timing guide helped you get everything on the table at once for the kids—less wait time means more time playing outside before bedtime!



