
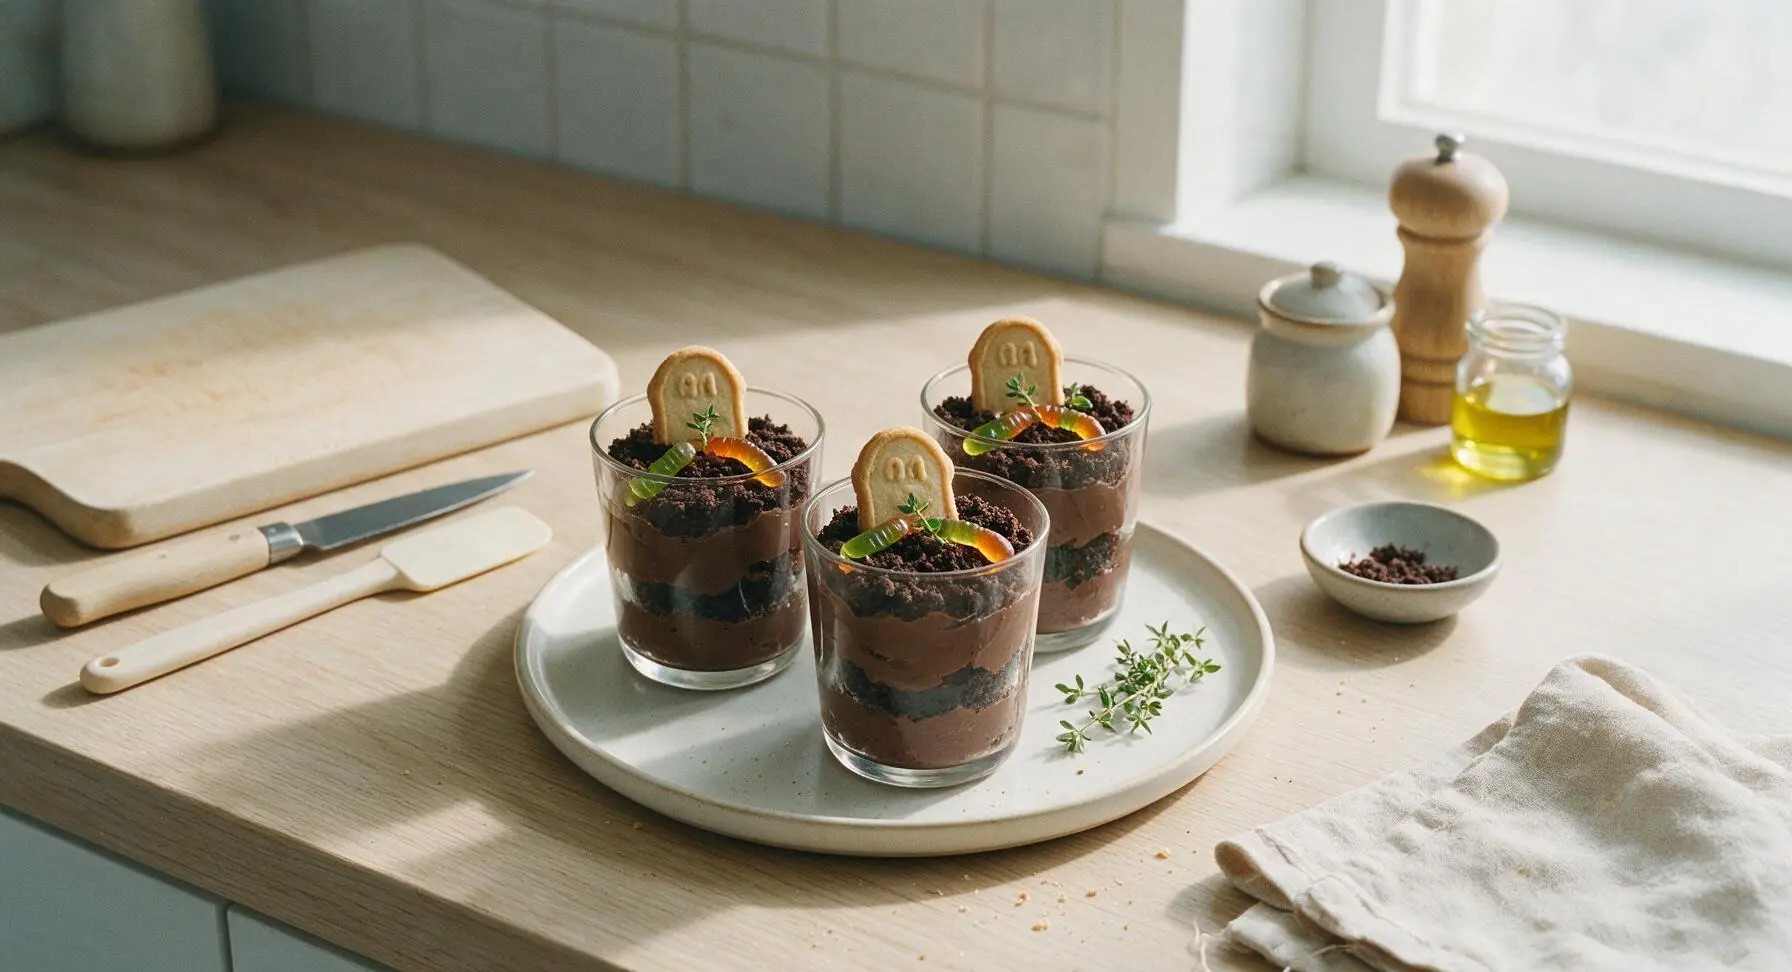
halloween dirt cups

title 1
halloween dirt cups
⏱️ cook time 0 minutes (2 hour chill time required)
🍽️ servings 8
⚡ Difficulty easy

intro

Creamy chocolate pudding layered with crushed cookie 'dirt', topped with edible tombstones and gummy worms for a playful, nostalgic no-bake Halloween treat loved by kids and adults alike.

Ingredients
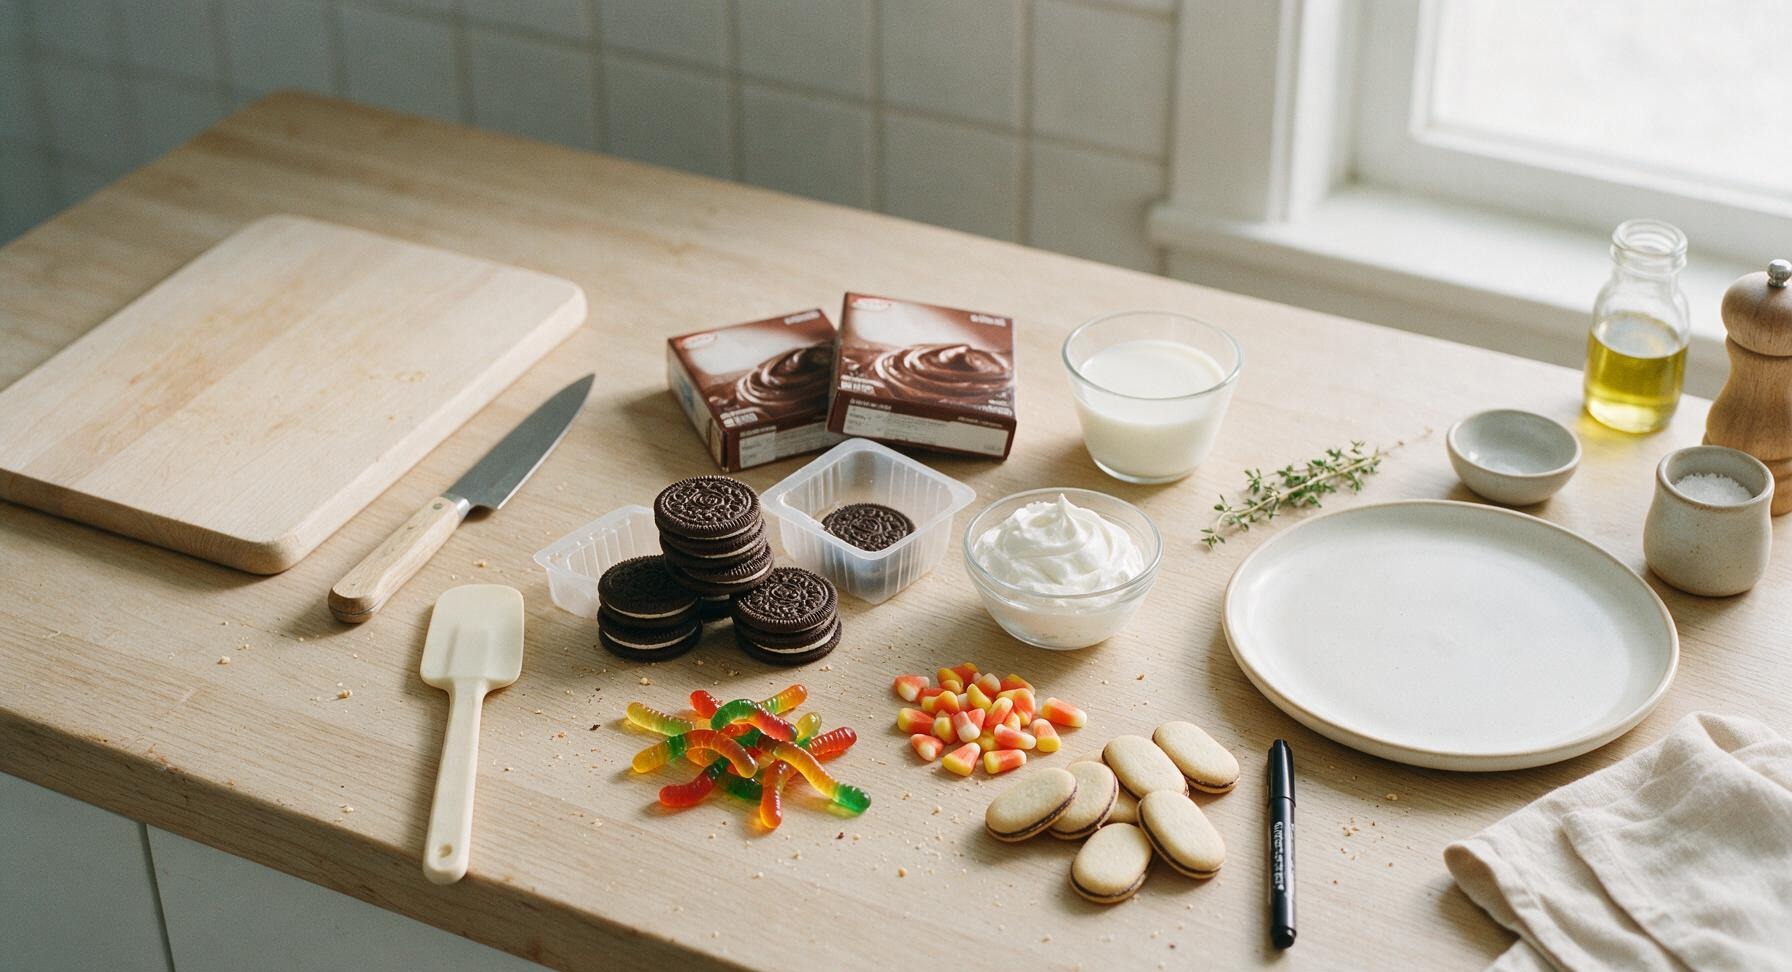
Instant chocolate pudding mix 2 (3.9oz) boxes
Cold whole milk 4 cups
Cream-filled chocolate sandwich cookies 24 (2 standard sleeves)
Frozen whipped topping, thawed 8oz
Assorted color gummy worms 16 pieces
Milano-style vanilla shortbread cookies 8 pieces
Black edible decorating marker 1
Candy corn (optional garnish) 1/4 cup

Steps

1

Crush Cookie Crumbs

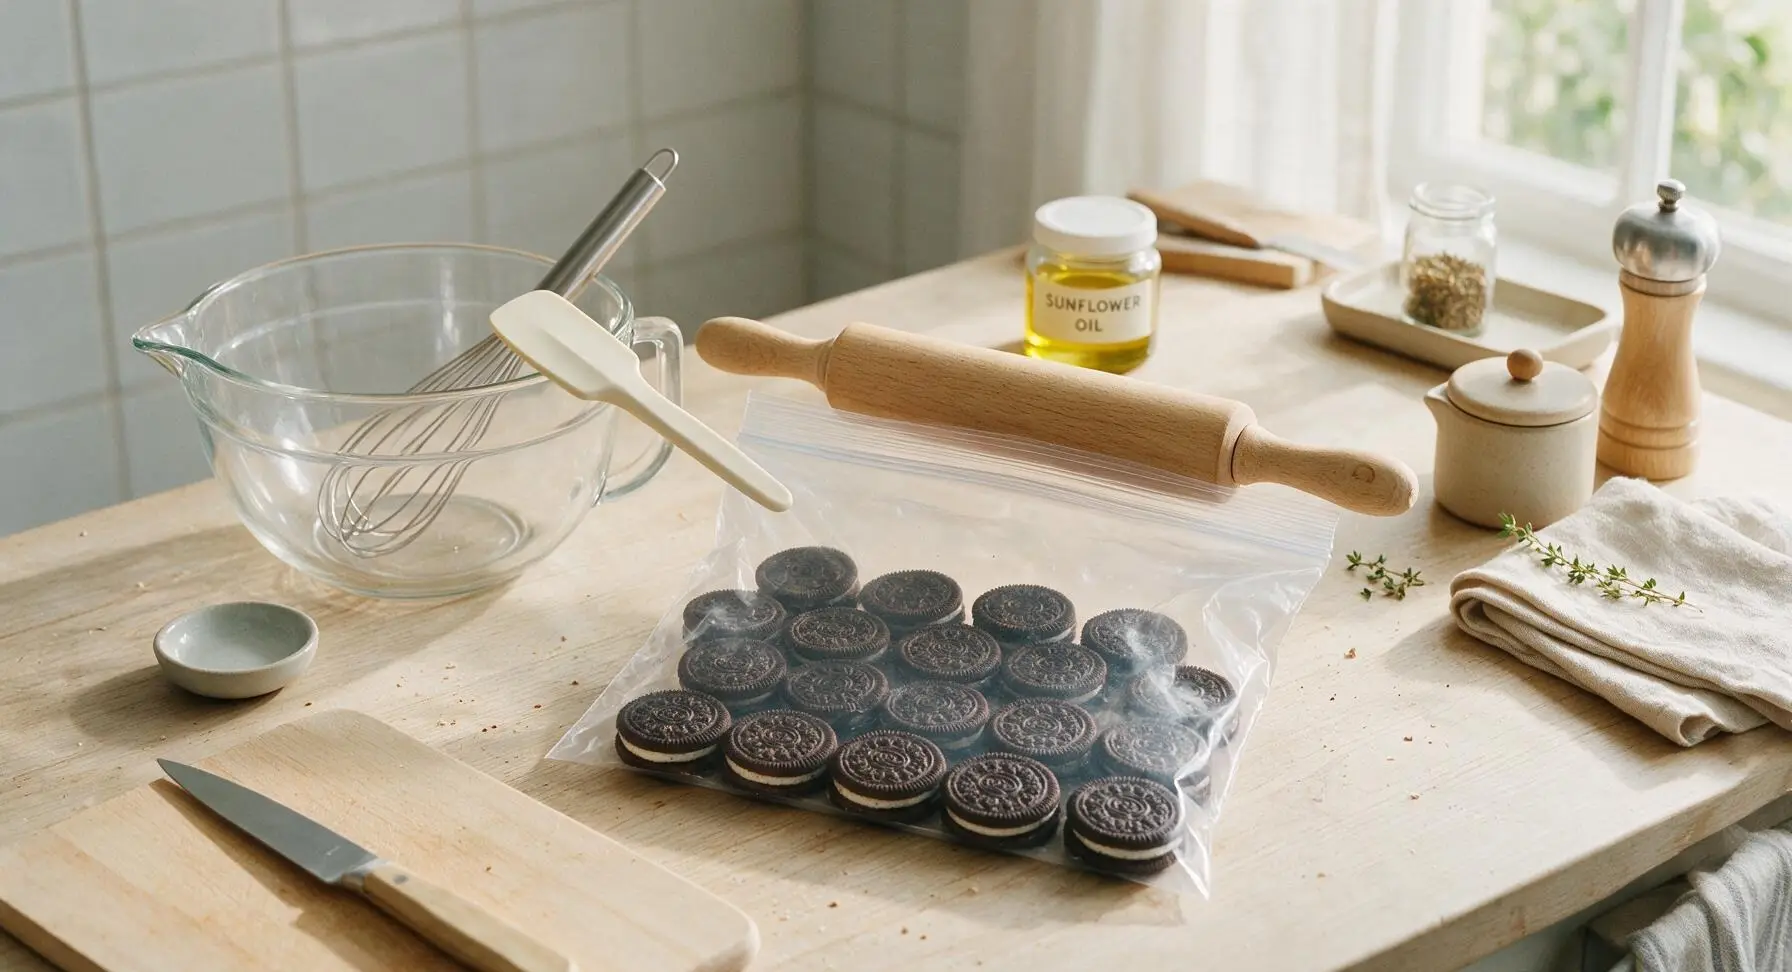
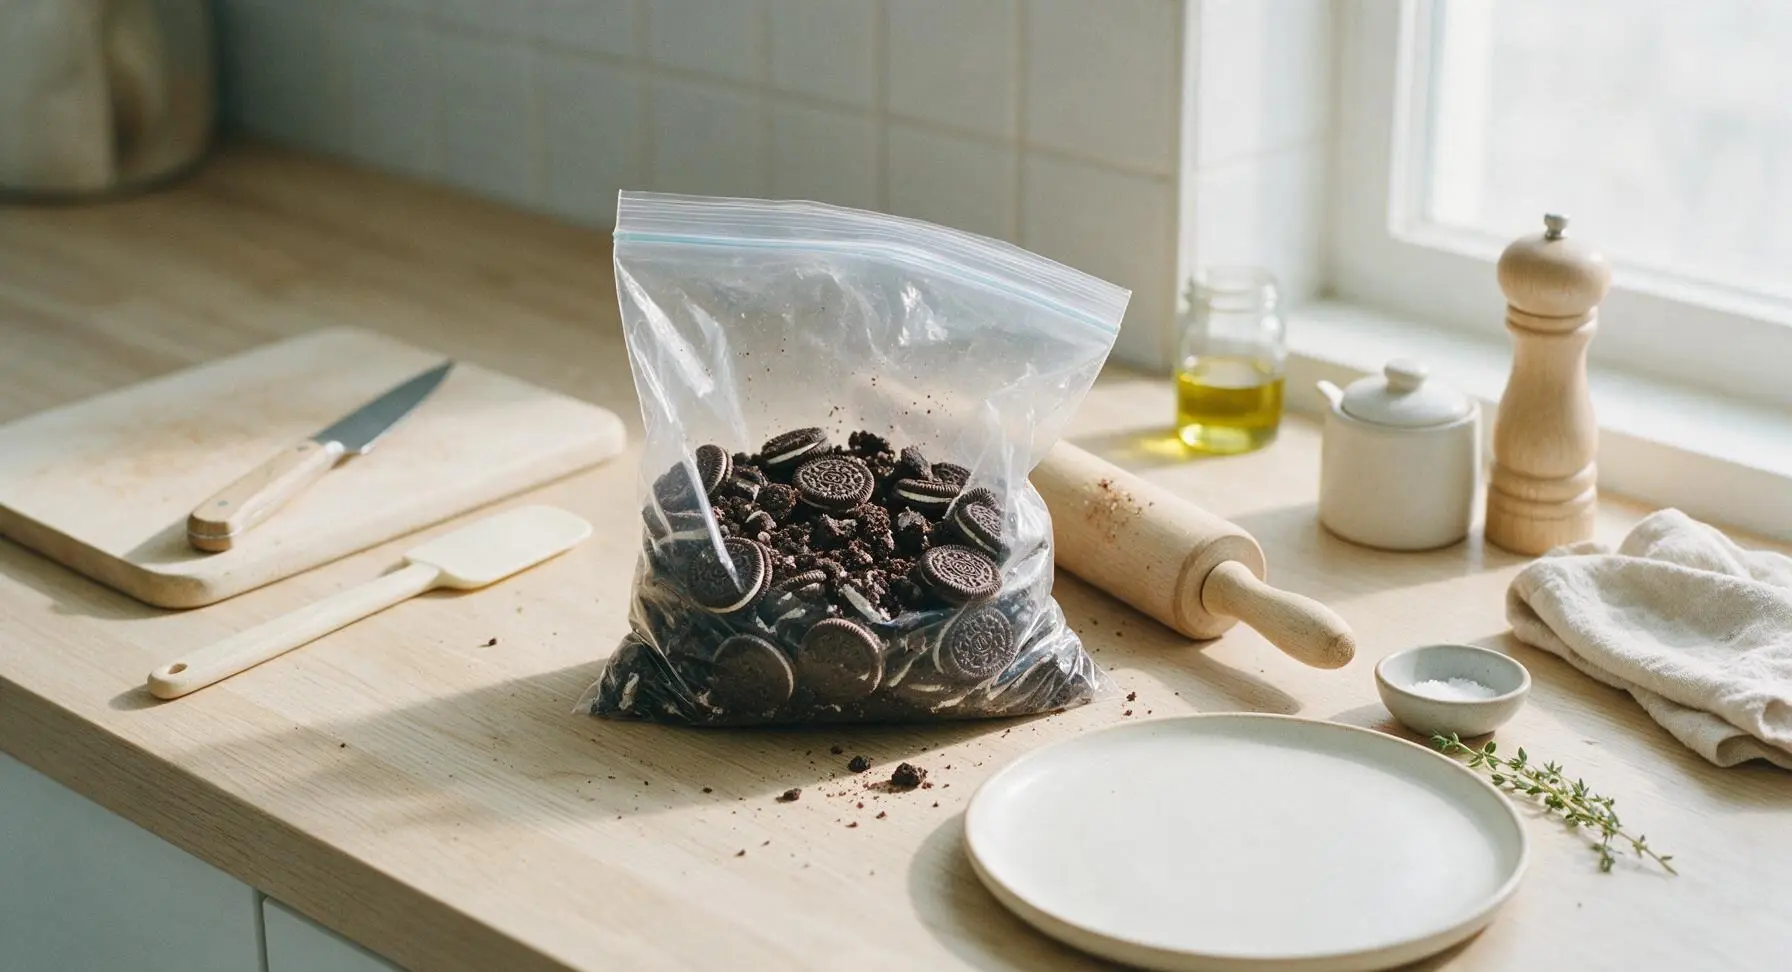
Place all 24 chocolate sandwich cookies (do not remove the white cream filling) into the clear 1-gallon zip-top bag, press out excess air, and seal tightly. Use the beech wood rolling pin to roll over the bag repeatedly, crushing the cookies into a mix of fine, dirt-like crumbs and small pea-sized chunks over about 2 minutes. Avoid crushing the cookies into a completely fine powder, as the larger chunks create a more realistic, textured dirt effect.
Step 1
step1:Crush Cookie Crumbs
Step 1
step1:Crush Cookie Crumbs
2

Whisk Pudding Base

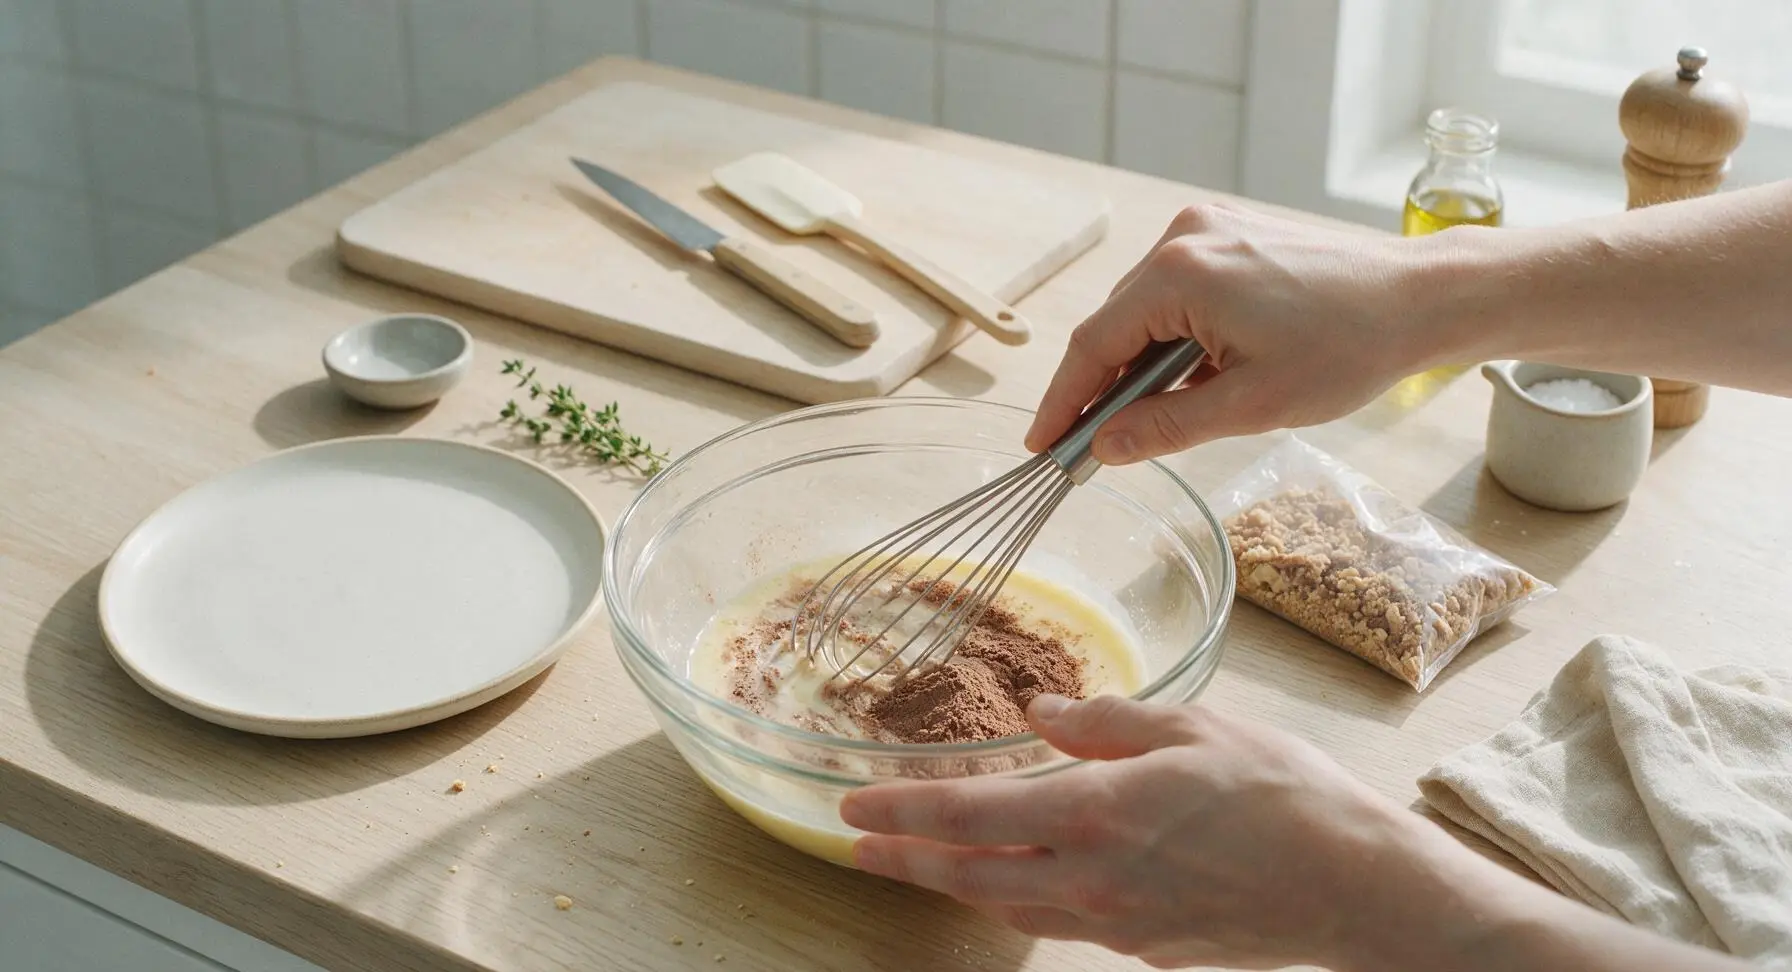
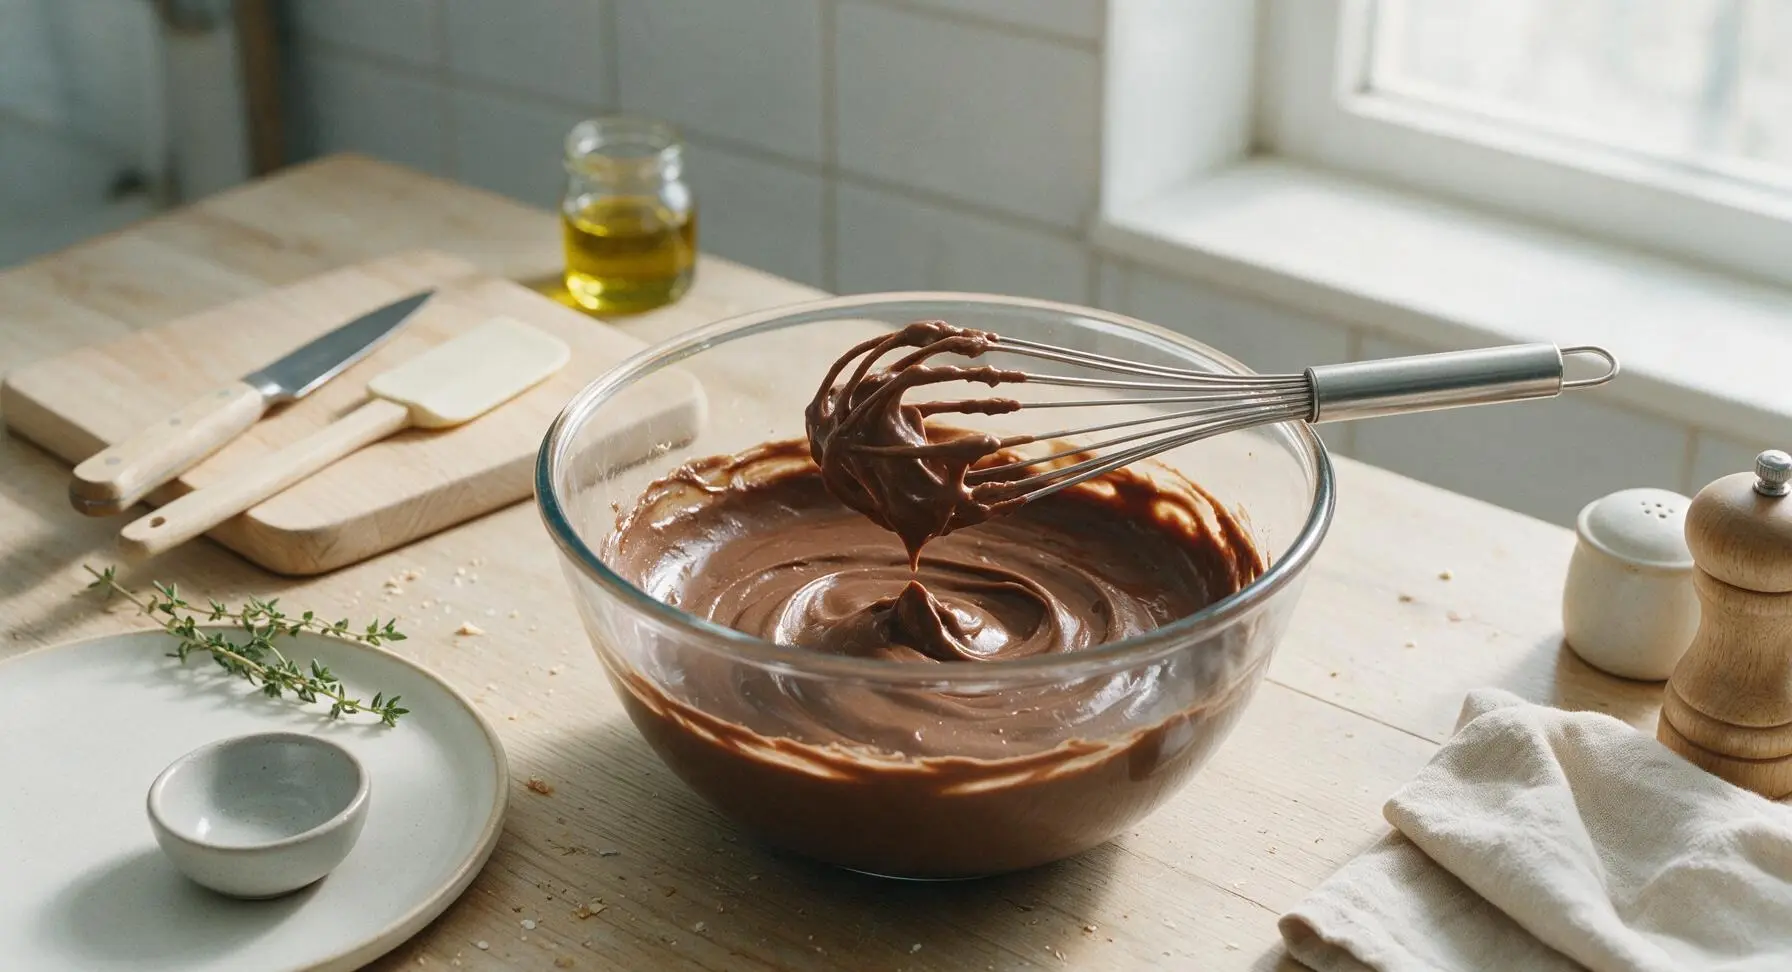
Pour 4 cups of cold whole milk into the clear glass mixing bowl. Add both packages of instant chocolate pudding mix, then use the stainless steel whisk to beat the mixture continuously for 2 full minutes, until no dry lumps of pudding powder remain. Let the mixture rest for 5 minutes at room temperature, until it thickens to a soft, spoonable consistency that coats the back of the whisk.
Step 2
step2:Whisk Pudding Base
Step 2
step2:Whisk Pudding Base
3

Fold in Whipped Topping

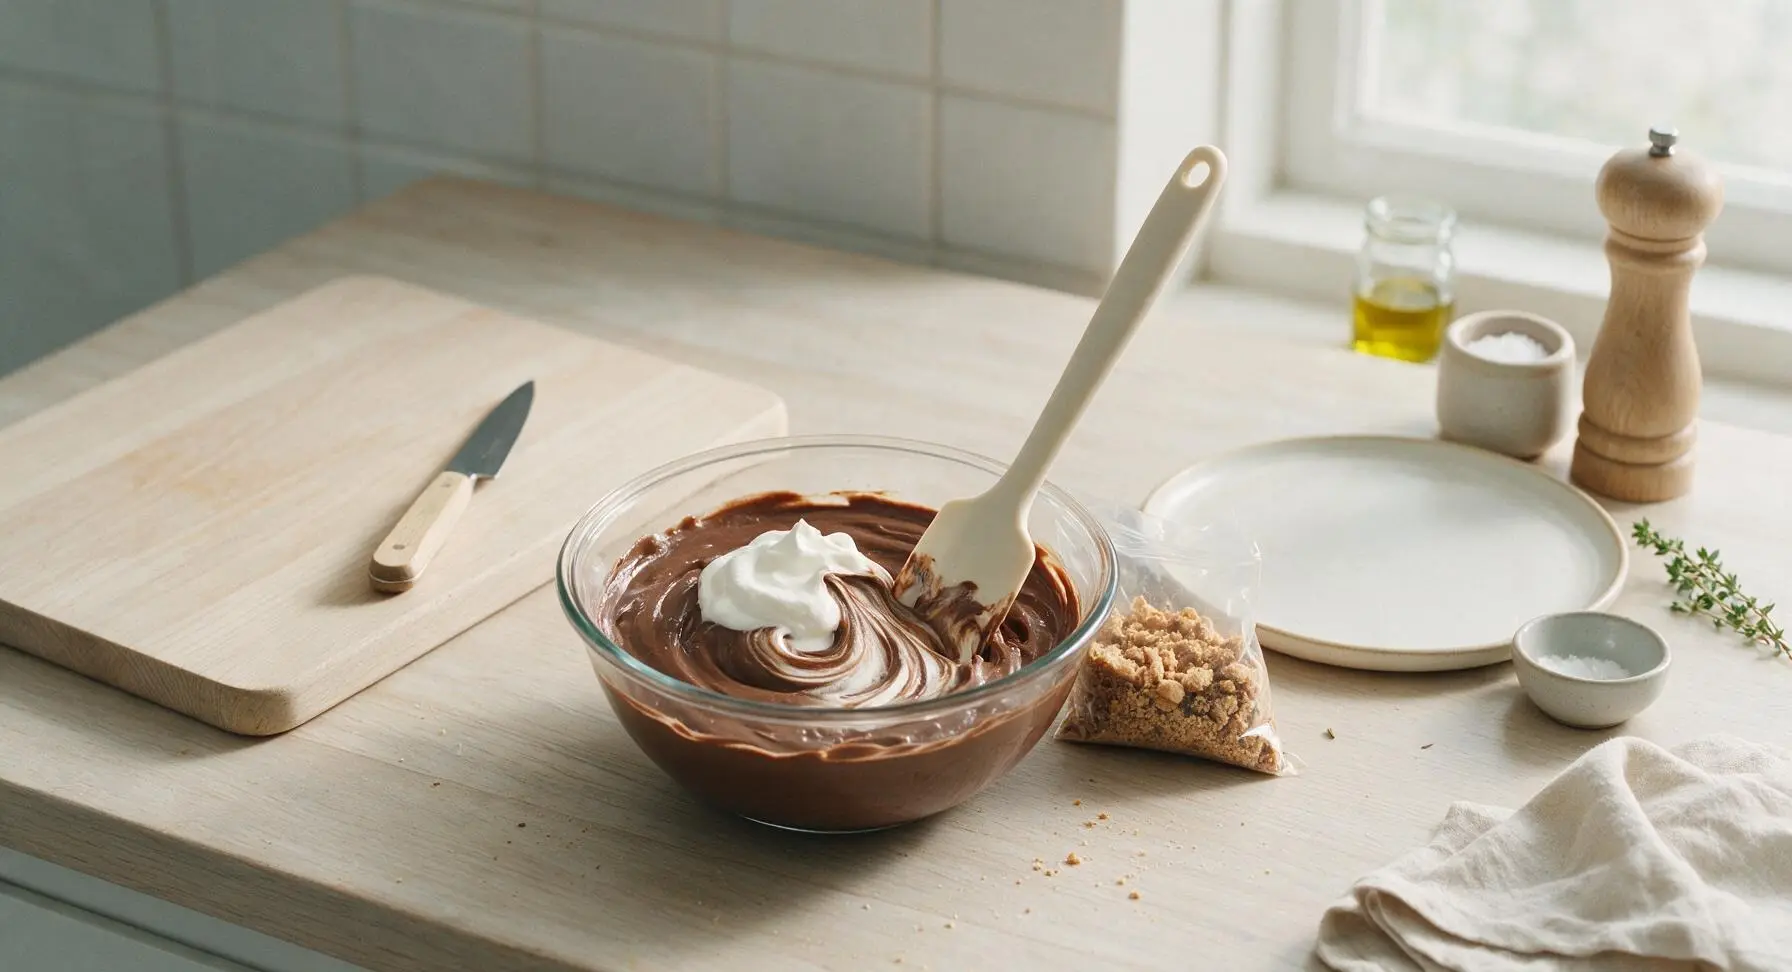
Scoop the entire 8oz of thawed frozen whipped topping into the thickened chocolate pudding. Use the white silicone spatula to gently fold the topping into the pudding in slow, scraping motions, reaching the bottom of the bowl with each turn, until the mixture is a uniform light milk chocolate color with no white streaks remaining. Do not stir vigorously or overmix, as this will deflate the whipped topping and make the pudding runny.
Step 3
step3:Fold in Whipped Topping
4

Decorate Tombstone Cookies

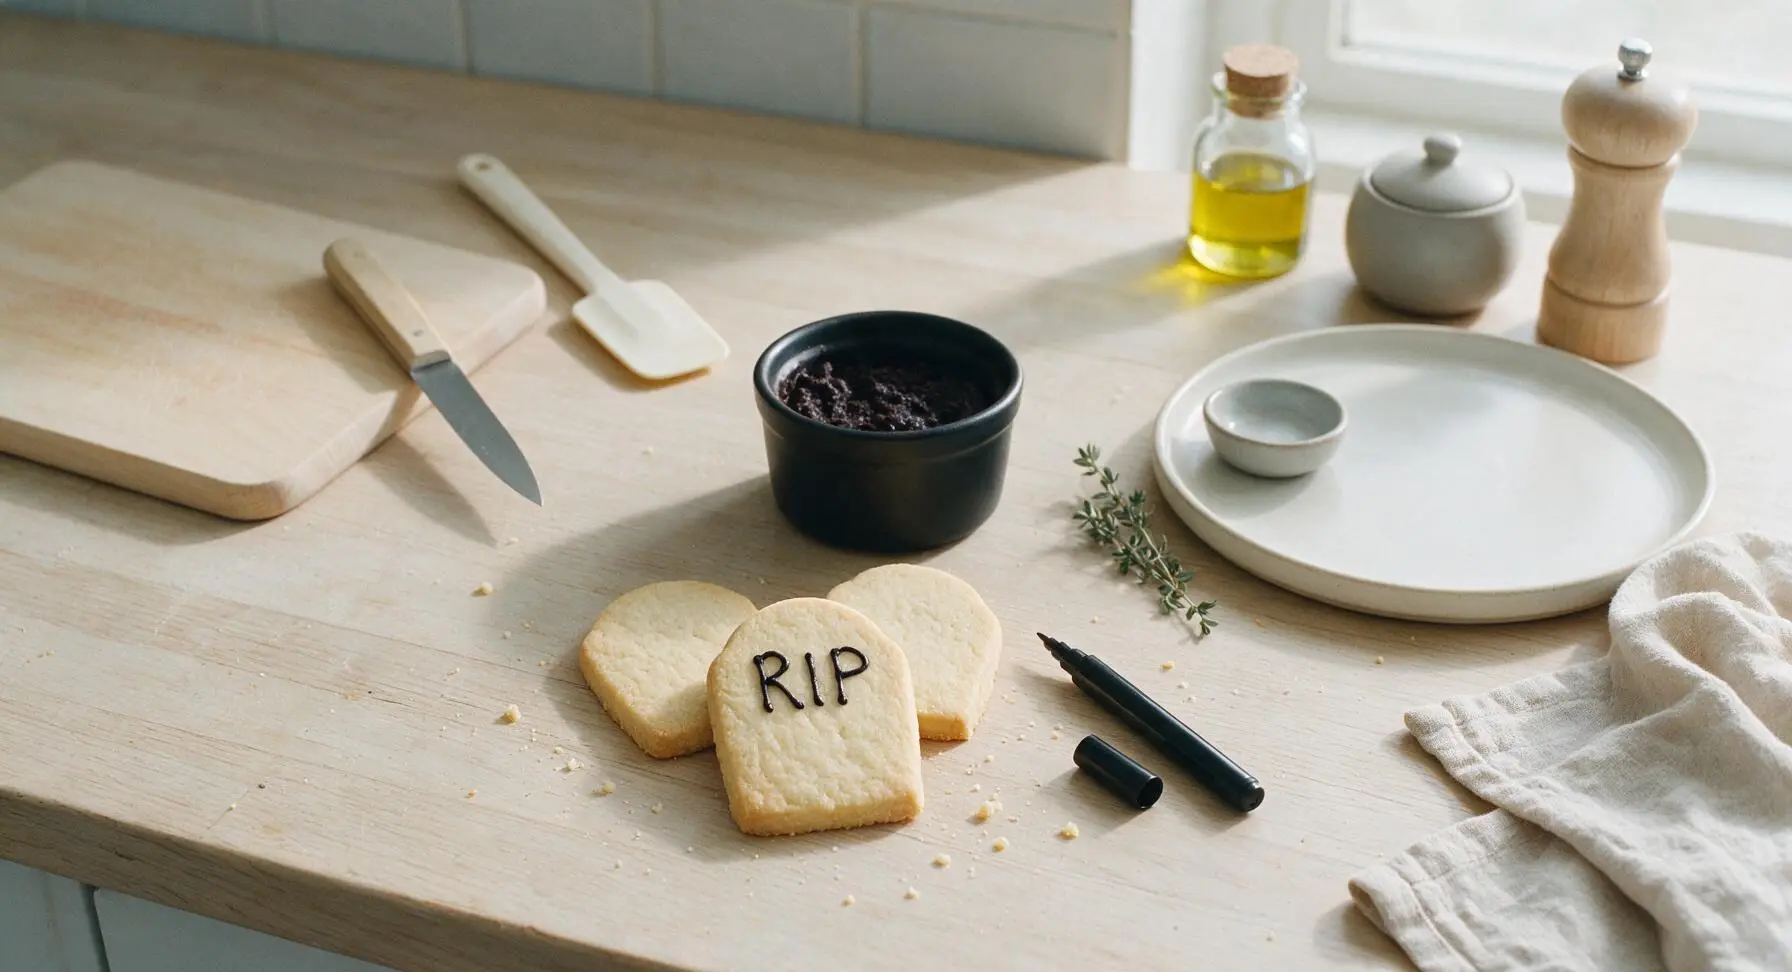
Use the black edible decorating marker to draw short, spooky designs on the flat side of each vanilla shortbread cookie: wobbly 'RIP' lettering, small cross marks, or simple ghost faces work perfectly. There is no need for neat, precise art — slightly messy, uneven lines look more whimsical and fitting for a playful Halloween graveyard theme. Set decorated cookies aside until ready to garnish.
Step 4
step4:Decorate Tombstone Cookies
5

Layer Cup Components

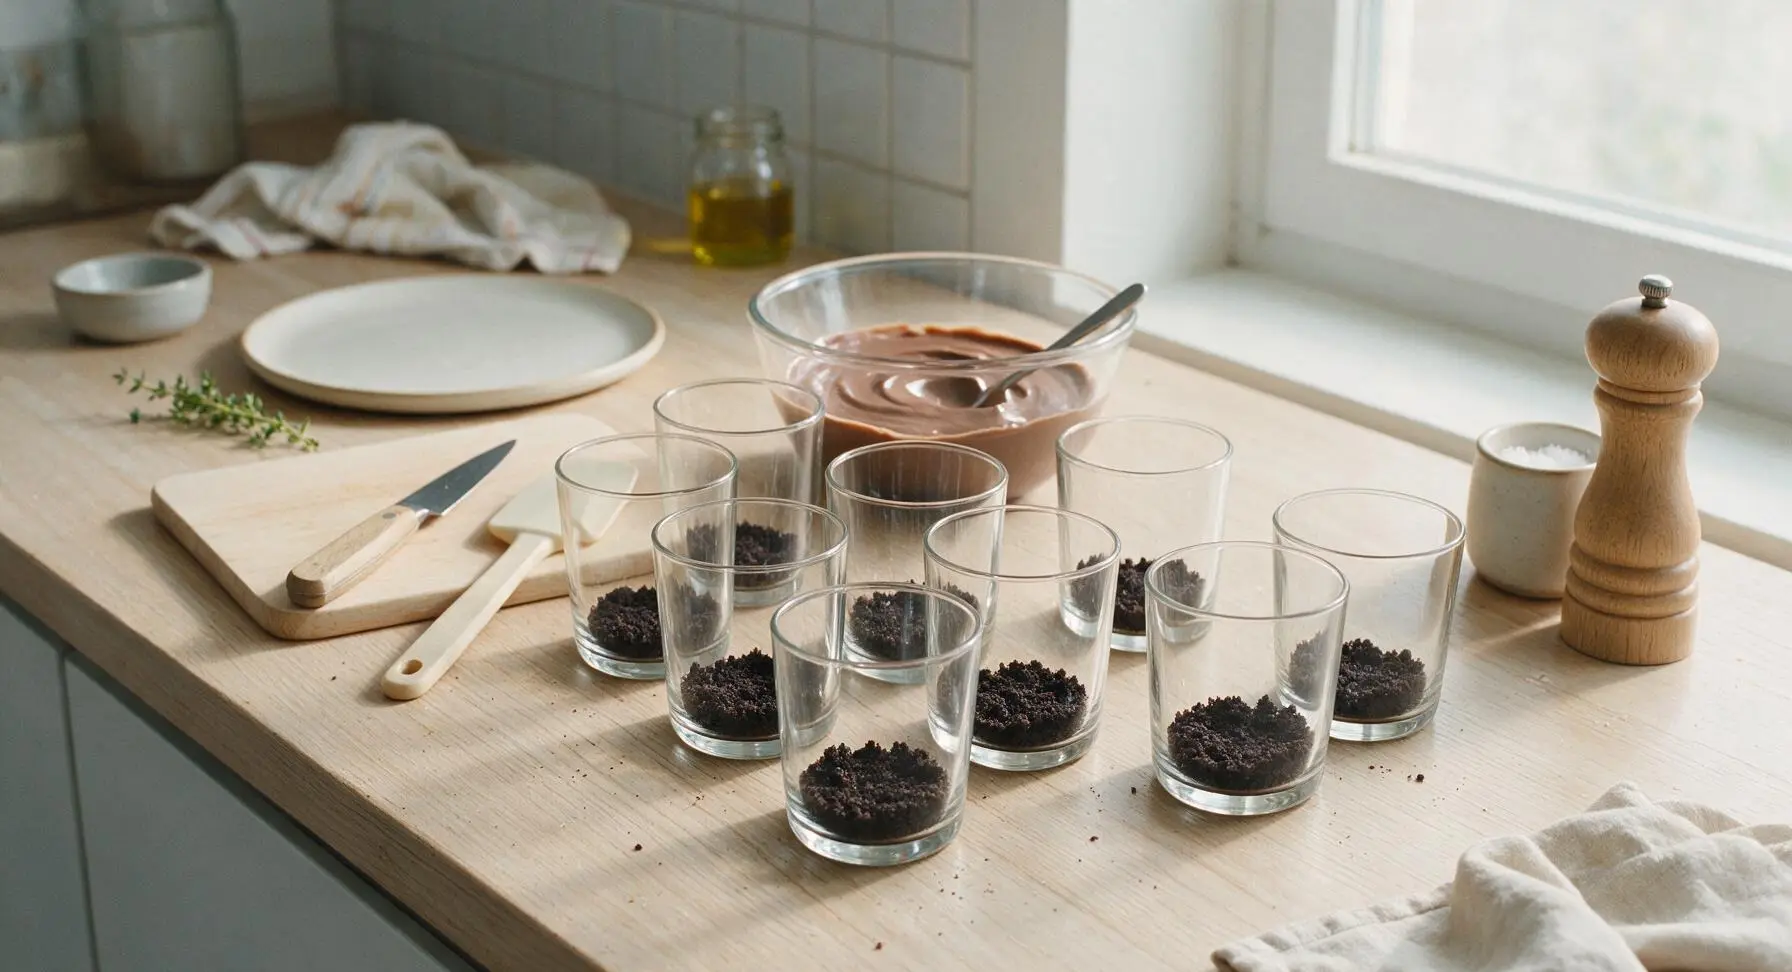
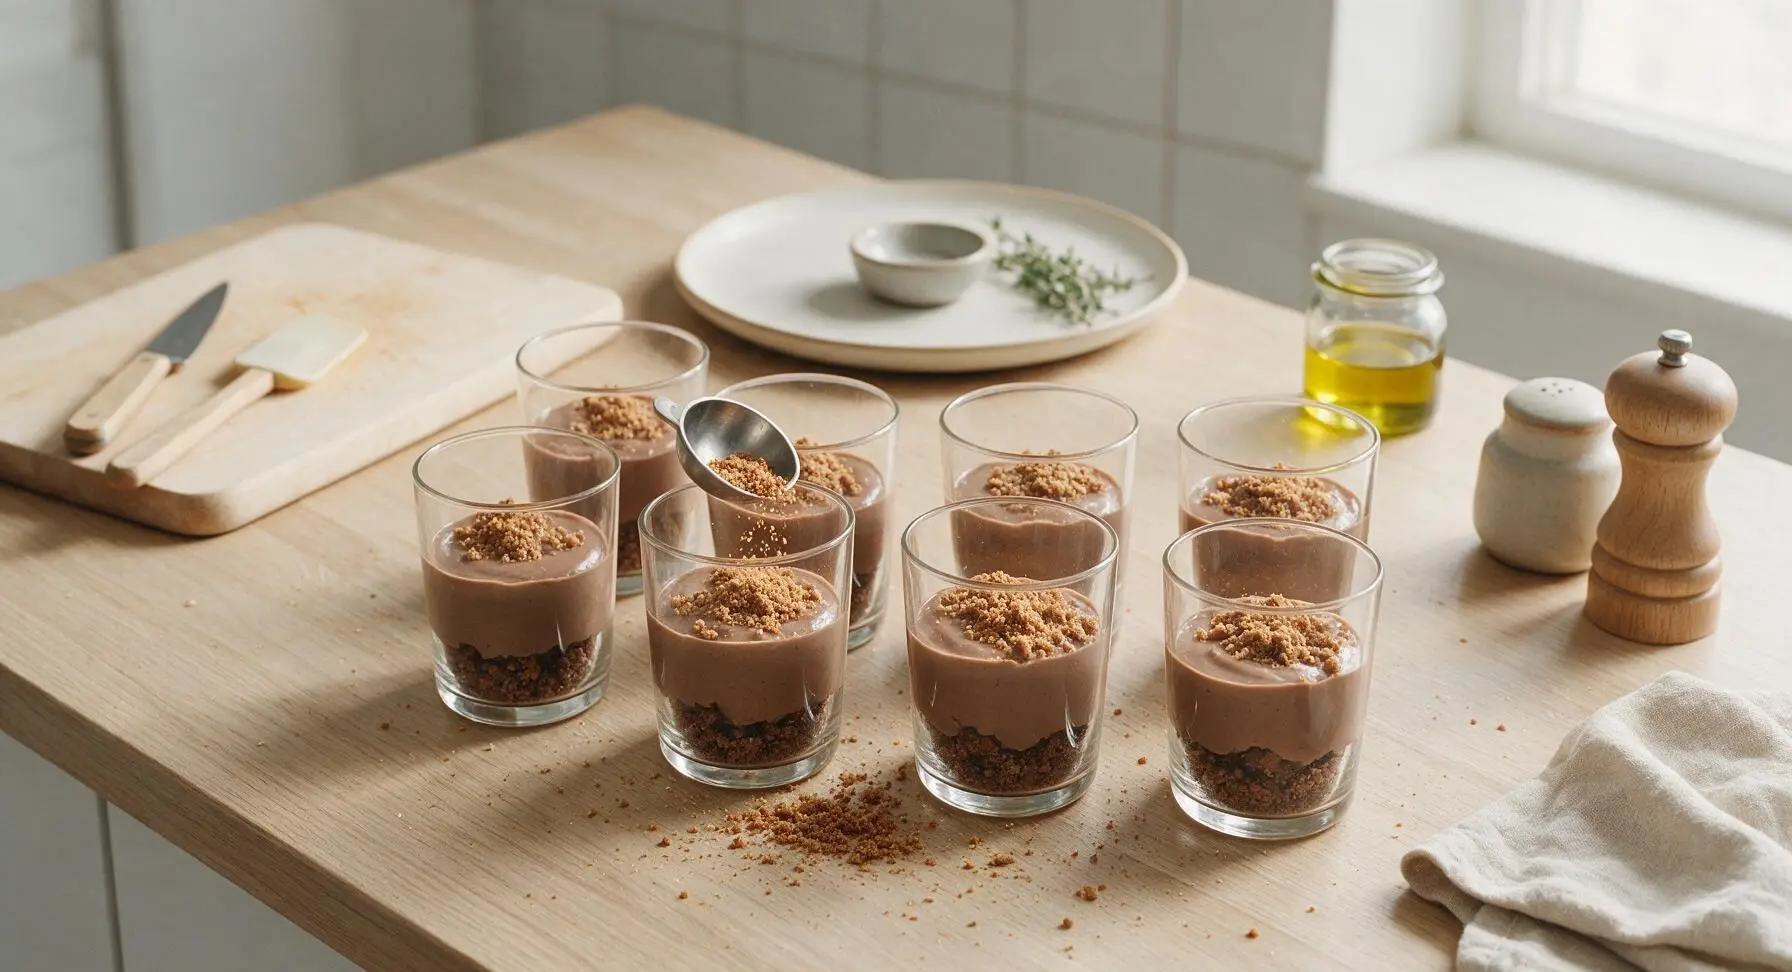
Arrange the 8 clear glass tumblers in a 2x4 grid at center front of the counter. Scoop 2 tablespoons of crushed cookie crumbs into the bottom of each tumbler to form the first dirt layer. Top the crumbs with 1/3 cup of the light chocolate pudding mixture, spreading it gently into an even layer with the small stainless steel spoon. Add a final 2-tablespoon layer of cookie crumbs over the pudding, pressing very lightly to create a flat, dirt-like surface, leaving 1/2 inch of headspace at the top of each cup for garnishes.
Step 5
step5:Layer Cup Components
Step 5
step5:Layer Cup Components
6

Chill to Set

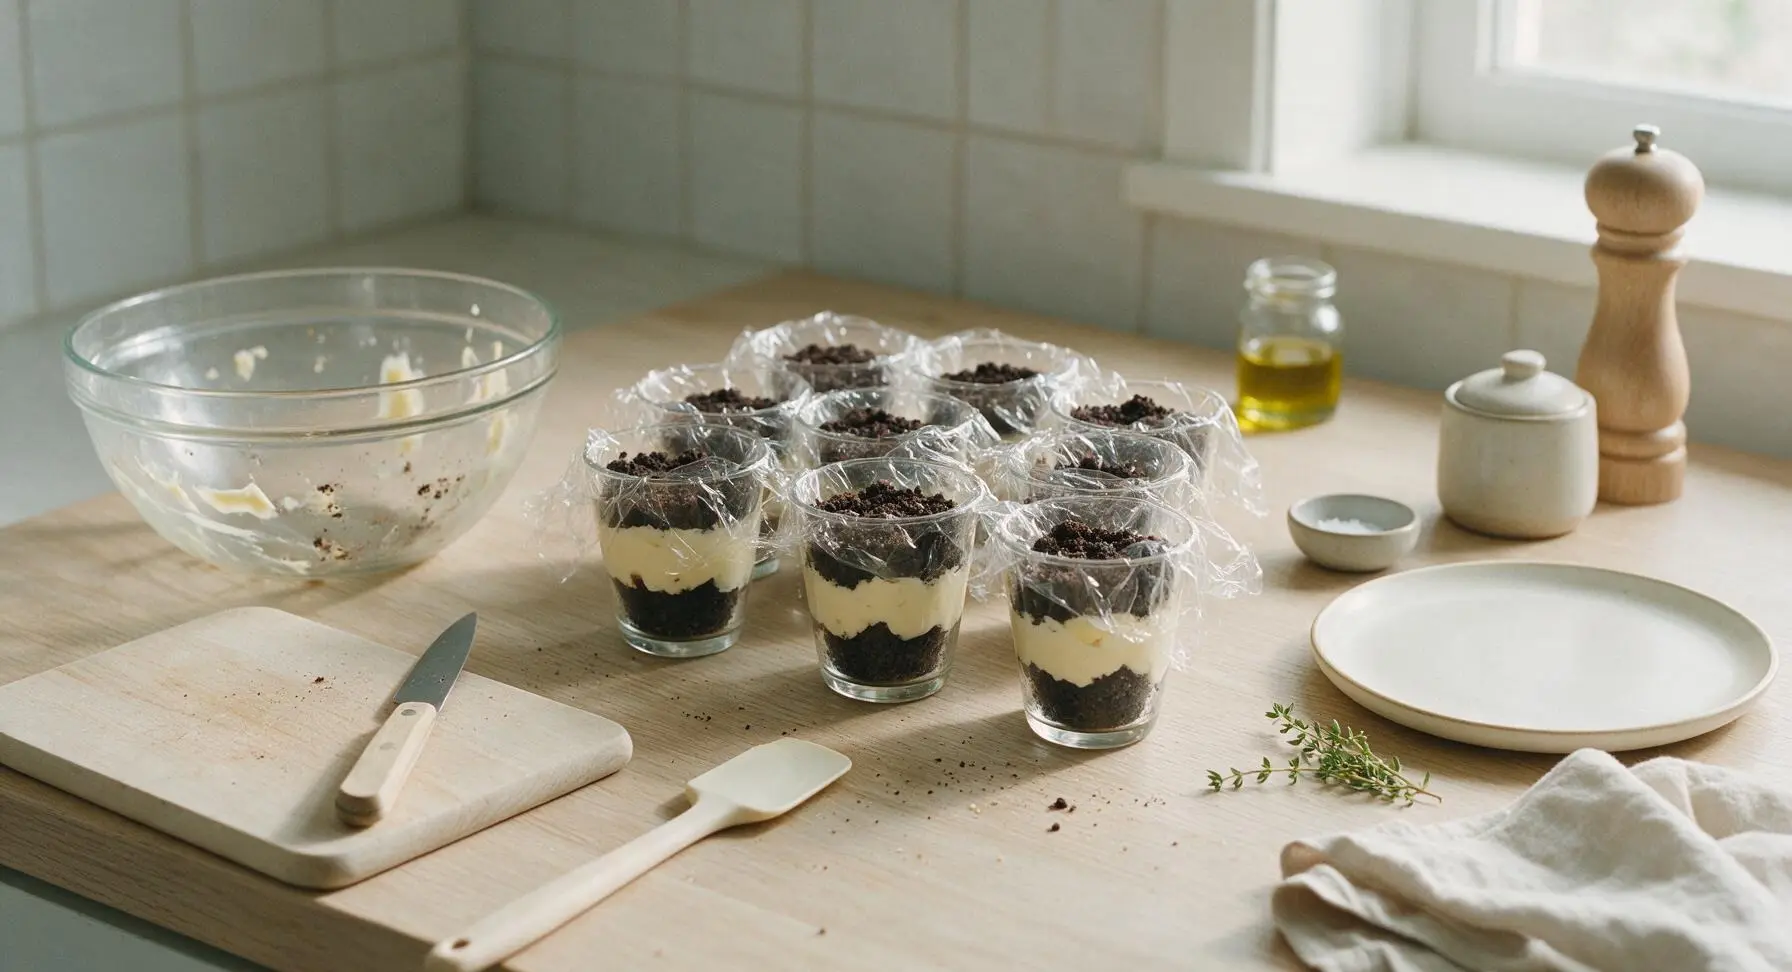
Loosely cover each layered cup with a small square of clear plastic wrap, then transfer the cups to the refrigerator to chill for a minimum of 2 hours (and up to 24 hours) to allow the pudding to set fully and the top crumb layer to soften slightly into a convincing moist dirt texture. Do not add cookie or candy garnishes before chilling, as condensation will make cookies soggy and gummy worms rubbery.
Step 6
step6:Chill to Set
7

Add Spooky Garnishes

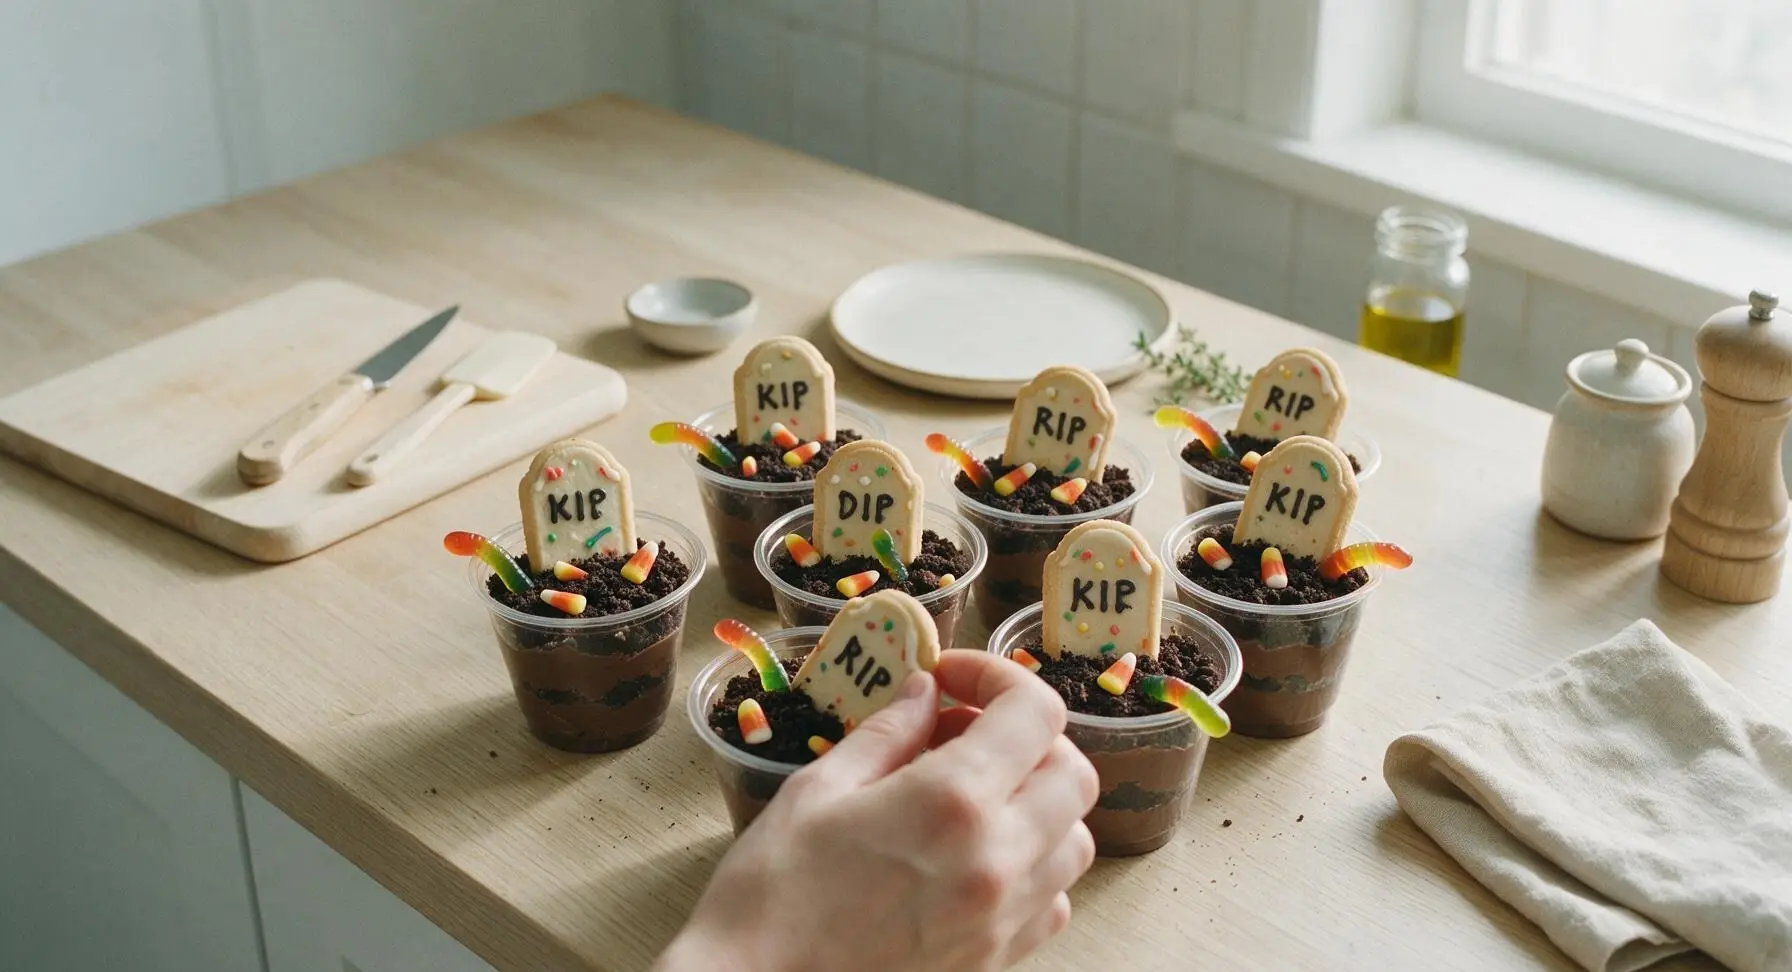
Remove the chilled cups from the refrigerator and discard the plastic wrap. Press one decorated shortbread tombstone into the top crumb layer of each cup, tilting it slightly for a crooked, old graveyard look. Tuck 2 gummy worms into the crumbs around each tombstone, leaving half of each worm exposed above the crumb surface to look like they are crawling out of the dirt. Scatter 3-4 candy corn pieces around the base of each tombstone if using, for a bright pop of festive Halloween color.
Step 7
step7:Add Spooky Garnishes

Tips

1.Keep the cream filling in the chocolate sandwich cookies when crushing: the cream mixes with the cookie crumbs to create a moist, clumpy texture that looks exactly like real garden dirt, rather than dry, powdery crumbs that fall off your spoon.
2.For extra playful presentation, freeze half the gummy worms for 30 minutes before garnishing: frozen worms stay stiff and stand up out of the crumbs instead of flopping over, making them look like they are actively crawling out of the 'grave'.
3.These cups can be prepped fully 24 hours in advance, but hold off on adding the shortbread tombstones and gummy worms until 30 minutes before serving: extended time in the fridge will make the cookies soggy and cause gummy worms to weep sugar and turn rubbery.


✨ You May Also Like

Desserts & Baking
🍜 Italy

Creamy, coffee-kissed classic Northern Italian no-bake dessert, with layers of rum-spiked mascarpone cream, soft ladyfingers, and a rich cocoa dusting.

⏱️ 4 hours 3Desserts & Baking ★ 4.7
Desserts & Baking
🍜 France

Flaky, shatteringly crisp, buttery French croissants with golden exteriors and soft, airy layered interiors, perfect for pairing with coffee for a special morning treat.

⏱️ 12 hours Desserts & Baking ★ 4.5
Desserts & Baking
🍜 United States

Warm, spiced baked apples topped with a fluffy golden biscuit crust, this cozy dessert pairs perfectly with vanilla ice cream for cool-weather comfort.

⏱️ 55 minuteDesserts & Baking ★ 4.6
Desserts & Baking
🍜 United States

A star-spangled classic American blueberry pie with buttery flaky crust and bright sweet-tart filling, perfect for summer patriotic gatherings.

⏱️ 1 hour 25Desserts & Baking ★ 4.7
Desserts & Baking
🍜 United States

A beloved no-bake regional Maine candy with a chewy coconut-potato center coated in rich dark chocolate, a New England holiday staple since the 1870s.

⏱️ 2 hours 3Desserts & Baking ★ 4.8
Desserts & Baking
🍜 France

Luxuriously creamy, floral frozen custard made with aromatic Tahitian vanilla beans, boasting a smooth, rich texture that melts slowly on the tongue.

⏱️ 3 hours 3Desserts & Baking ★ 4.5

halloween dirt cups:Frequently Asked Questions

1.Do I have to use whole milk when making the instant chocolate pudding for these dirt cups? ▾
Whole milk is highly recommended for the richest, sturdiest pudding set that won’t turn runny and sog out your cookie layers too fast. If you only have 2% or skim on hand, mix in 2 tablespoons of softened, room-temperature cream cheese to the prepared pudding to add thickness and a luxe, creamy texture that matches the whole milk result.
2.How far in advance can I make these Halloween dirt cups before a party? ▾
These hold up really well when prepped ahead! Assemble the layers of pudding and crushed cookies up to 24 hours in advance, cover tightly, and store in the fridge. Wait to add gummy worms and edible tombstone toppers until 1 to 2 hours before serving so they stay bright and don’t bleed color or get mushy from fridge moisture.
3.What’s the easiest, least messy way to crush the chocolate sandwich cookies into "dirt"? ▾
Skip the food processor for fast cleanup! This is a fully no-bake recipe, so you won’t need any oven time at all. Toss whole cream-filled cookies into a sealed zip-top bag, squeeze out air, and roll over them with a rolling pin or heavy canned good until you have a mix of fine crumbs and small chunks that look like real potting soil. Don’t over-crush—those bits add great texture.
4.Can I use homemade whipped cream instead of frozen thawed whipped topping? ▾
Absolutely! Homemade whipped cream works beautifully, just make sure you whip it to stiff peaks so it holds its shape when folded into the pudding. Note that homemade whipped cream will deflate a little faster than the stabilized frozen kind, so your cups will stay at their best texture for about 12 hours in the fridge instead of 24.
5.How do I keep the cookie "dirt" layers from getting soggy too quickly? ▾
The key is to make sure your pudding is fully set before you start layering—let it rest 5 minutes after mixing with cold milk so it firms up. Add a ¼-inch thick base layer of cookie crumbs at the bottom of each cup, alternate pudding and thinner cookie layers, and don’t press crumbs too tightly into the pudding to cut down on moisture transfer.
6.What can I use to make the edible tombstones mentioned in the recipe intro? ▾
You have super easy, no-fuss options! The most popular pick is Milano-style sandwich cookies, trimmed slightly at one end to look like a grave marker, with "R.I.P." written on the flat side using a black edible marker or tiny piped lines of melted dark chocolate. Rectangular chocolate graham crackers or cut brownie pieces work great too.
7.Can I make these dirt cups nut-free for a classroom Halloween party? ▾
Definitely! Just double-check that your instant chocolate pudding mix, chocolate sandwich cookies, whipped topping, and gummy worms are all labeled nut-free, as many major brands process these items on shared equipment lines. Skip any add-ins with nut ingredients, and you’ll have a classroom-safe treat that aligns with most school allergy policies.
8.Why did my instant chocolate pudding turn out lumpy when I mixed it? ▾
Lumps usually happen if you add all the cold milk too fast to the pudding mix, instead of incorporating it gradually. Fix this by adding a quarter of the cold milk first, whisking until you have a thick, smooth paste, then slowly stirring in the remaining milk a splash at a time, whisking constantly, until fully combined and lump-free.
9.Should I tuck the gummy worms into the layers or just set them on top? ▾
For the most playful, realistic look, do a mix! Tuck half of each gummy worm into the top pudding and dirt layer so it looks like they’re wiggling up out of the "soil," and nestle a couple partially between middle layers as a fun surprise for people when they dig in. Leave a small portion of each worm visible so guests know they’re there.
10.Can I make a vegan version of these Halloween dirt cups? ▾
You absolutely can! Swap the instant chocolate pudding for a vegan instant chocolate mix, use cold oat or soy milk (these set best with instant pudding), pick vegan cream-filled chocolate sandwich cookies, use plant-based frozen whipped topping, and choose pectin-based vegan gummy worms, since standard gummies often contain animal-derived gelatin.
11.What size cups work best for serving single-serve dirt cups? ▾
8 to 9-ounce clear plastic cups are ideal—they’re the perfect single-serve portion for kids and adults, and the clear sides show off the fun layered dirt and pudding look so well. If you want smaller portions for young kids, 5-ounce clear mini cups work too, just cut layer amounts in half to avoid messy overfills.
12.How long do assembled dirt cups stay fresh in the fridge? ▾
When stored covered tightly with plastic wrap or a fitted lid in the fridge, these dirt cups stay fresh and tasty for up to 3 days. Keep in mind the cookie layers will get softer the longer they sit, so the texture is best within the first 24 hours. After 3 days, the pudding can separate and gummy candies will turn overly chewy.
13.Do I have to fold the whipped topping into the pudding, or can I layer it separately? ▾
Folding thawed whipped topping into the set pudding gives that classic light, mousse-like dirt cup texture everyone remembers from childhood. That said, if you prefer distinct layers, you can absolutely add separate dollops of whipped topping between pudding and cookie layers—just don’t skip that fluffy element entirely, or the cups will feel too dense.
14.Can I add extra mix-ins to the layers for more Halloween fun? ▾
Of course! This recipe is totally customizable for extra spooky flair. Toss in mini chocolate chips, candy corn bits, crunchy chocolate cereal, or tiny edible candy eyeballs between layers for a fun surprise. Just avoid adding very wet mix-ins, like fruit packed in syrup, because they will make cookie crumbs soggy and thin out the pudding.
15.Do I need to scrape the cream filling out of the chocolate sandwich cookies for the dirt layers? ▾
Not at all! The cream filling from the chocolate sandwich cookies actually blends into the crumbs to create a more realistic, varied dirt texture that looks just like dark potting soil with small lighter flecks. Leaving the filling in also adds a little extra sweetness and creaminess that pairs perfectly with the rich chocolate pudding layers.
16.Can I make this recipe as a large shared dish instead of individual cups? ▾
Totally! This recipe scales perfectly for a 9-inch glass trifle dish. Just double or triple the ingredient amounts to fit your serving size, and layer the cookie crumbs and pudding-whipped topping mix the exact same way you would for individual cups. Add tombstone toppers and gummy worms across the top right before serving for a fun party centerpiece.

Comments (6)

3 days ago

OMG these were SUCH a hit at my son’s 2nd grade Halloween class party! I added extra gummy worms and those little candy eyeballs on top, and every single kid begged for seconds. So easy to throw together too, I didn’t even have to turn the oven on which is a total win when you’re running late for school events. 10/10 will make again next year!

2 days ago

Wait did you use the instant chocolate pudding or the cook-and-serve kind? I almost grabbed the wrong one at the grocery store yesterday!

2 days ago

So glad these were a hit for the class party! We recommend instant chocolate pudding for this recipe since there’s zero cook time — it sets up perfectly in the fridge during that 2 hour chill window. The candy eyeball addition sounds so fun!

1 week ago

Brought these to our neighborhood block party Halloween potluck and the platter was empty in 10 minutes flat. People loved the crushed Oreo “dirt” texture, and I hid a few sour spider candies in the middle of each cup for a spooky surprise. Game changer for low-effort holiday treats, no fancy skills required.

30 minutes ago

Wait quick question — can I make these a full day ahead? I’m hosting a Halloween movie night tomorrow and don’t want to be scrambling to put stuff together right before people show up. The last thing I need is another dessert disaster lmao

5 minutes ago

Great question! You can absolutely assemble these a full day in advance — just hold off on adding the gummy worms, candy decorations, and top layer of cookie crumbs until an hour or two before serving so the cookies don’t get soggy. Hope your movie night is a blast!

2 days ago

My picky 4 year old refused to eat every Halloween treat I made last year, but he DEVOURED two of these last night. He kept saying he was “eating worm dirt” and cackling the whole time. SO good, even I snuck a cup after he went to bed tbh

yesterday

LMAO that’s the exact reaction my niece had! She kept trying to feed the gummy worms to our cat like they were real. Total chaos, 10/10.

yesterday

That makes our day to hear! There’s nothing better than a silly, easy treat that gets even the pickiest eaters excited. Love that you snuck a cup too, we won’t tell 😉

2 weeks ago

Made these for my dorm Halloween pregame and they were perfect! No kitchen needed, I just mixed the pudding in a big plastic bowl in my mini fridge, crushed the Oreos in a ziplock bag with my textbook, and tossed in some gummy worms. Cheapest, easiest party snack I’ve ever made, everyone thought I bought them from the bakery down the street lmao

yesterday

Has anyone tried making these with gluten-free chocolate sandwich cookies? My youngest has a gluten sensitivity and I want to make these for our family Halloween dinner, but I don’t want the texture to be off.

2 hours ago

I made these last year with GF chocolate sandwich cookies and nobody could tell the difference! Just make sure you crush them up the same consistency as regular Oreos, and it works perfectly. My whole non-GF family loved them!



