
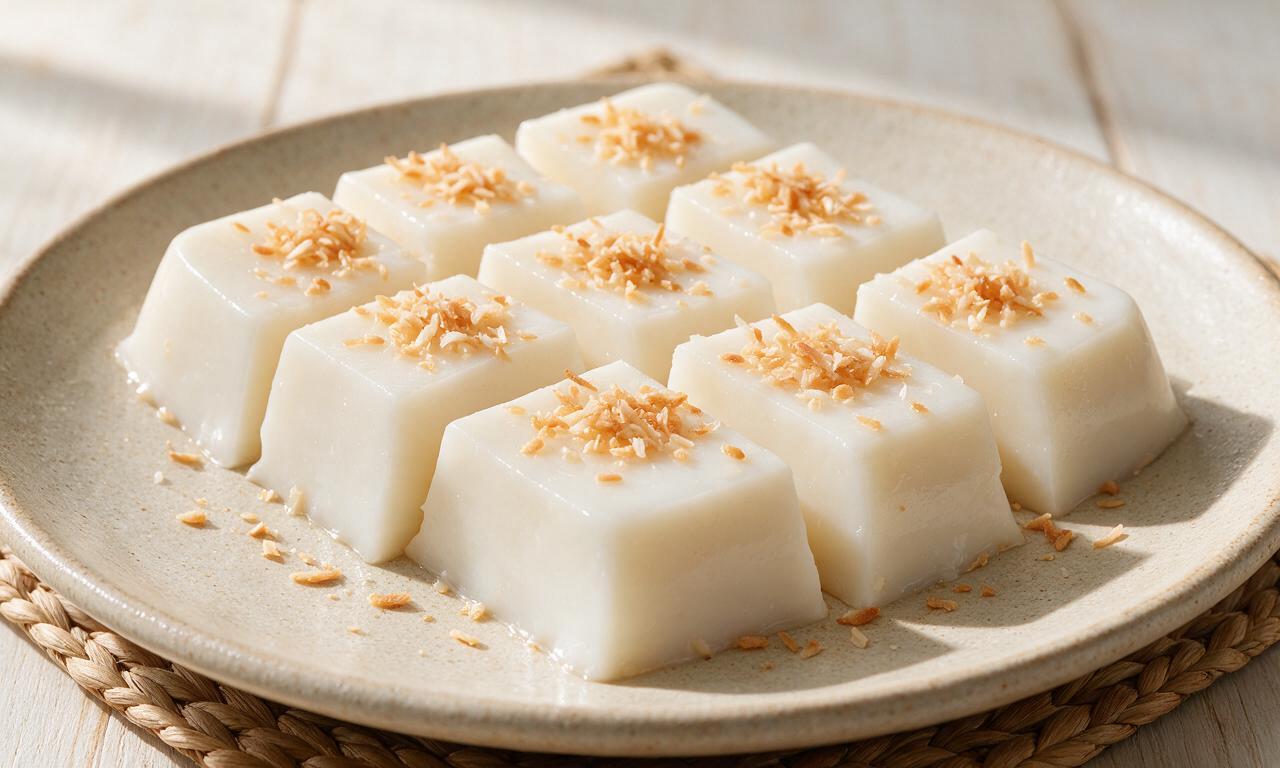
Haupia (Hawaii)

Haupia (Hawaii)
⏱️ cook time 2 hours 15 minutes
🍽️ servings 8
⚡ Difficulty easy

intro

Silky, jiggly traditional Hawaiian coconut pudding with a firm, sliceable texture, made dairy-free with simple pantry ingredients for bright, sweet coconut flavor.

Ingredients

Full-fat canned coconut milk 2 cups (480ml)
Cornstarch 1/2 cup (60g)
Granulated white sugar 1/3 cup (67g)
Cold water 1/2 cup (120ml)
Fine sea salt 1/4 teaspoon (1g)
Neutral cooking oil (coconut or canola) 1 teaspoon (5ml)

Steps

1

Prep the setting pan

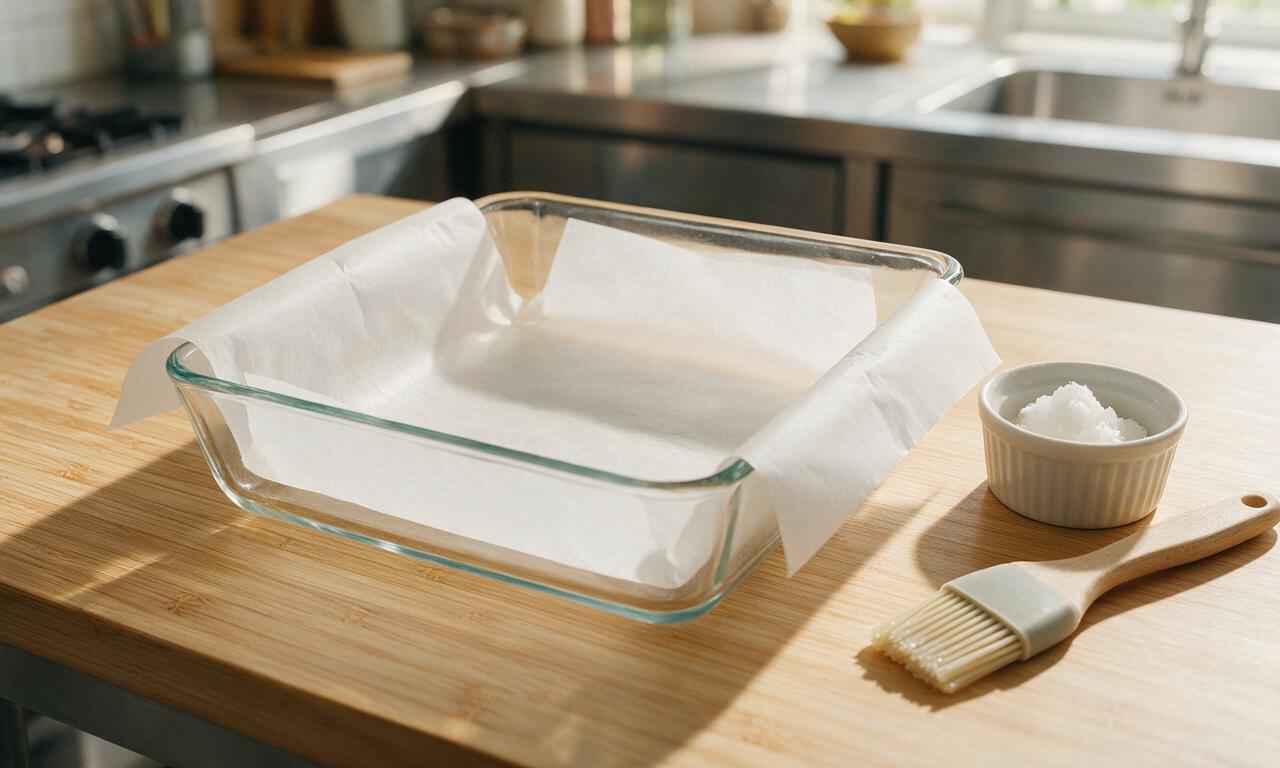
Lightly grease an 8x8 inch (20x20cm) square glass baking dish with 1 teaspoon (5ml) of neutral oil (refined coconut or canola oil), then line the bottom with a strip of parchment paper that overhangs two opposite sides by 2 inches to create easy-lift handles. Set the prepared dish aside at room temperature while you make the haupia base.
Step 1
step1:Prep the setting pan
2

Mix cornstarch slurry

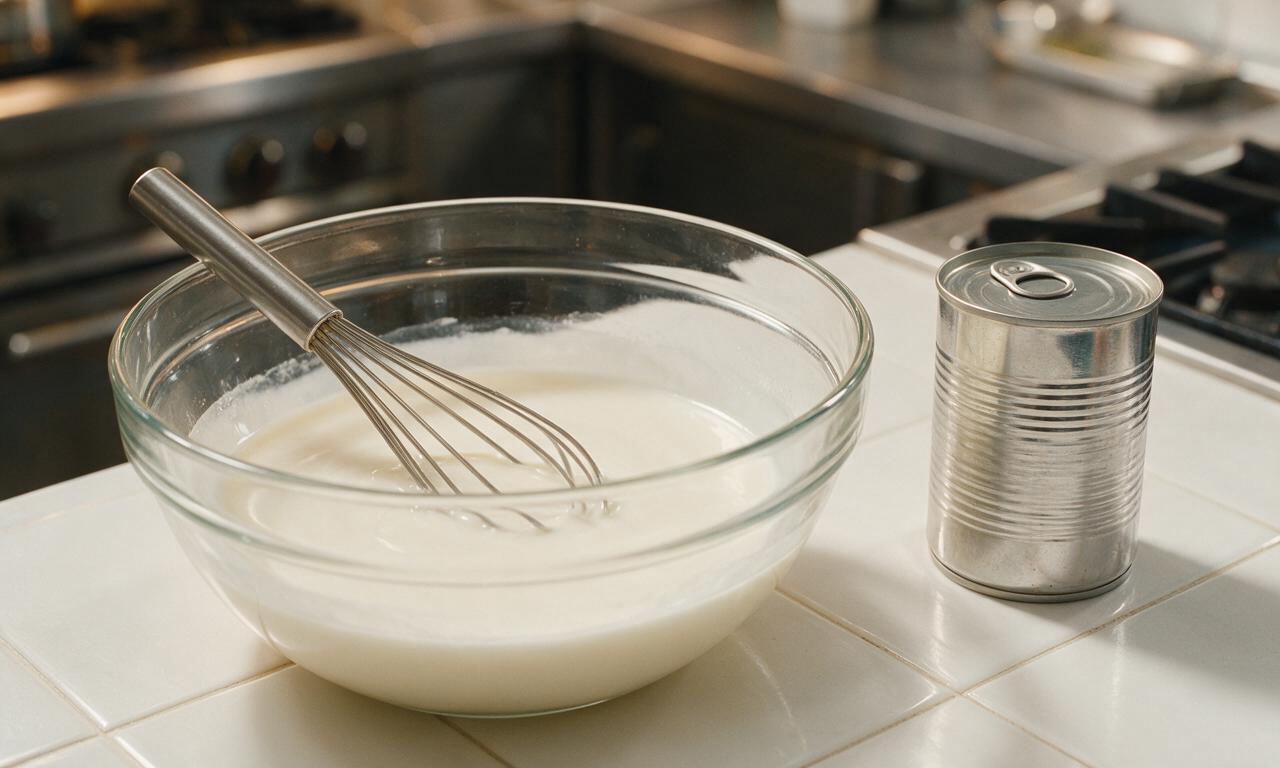
In a small 1-quart mixing bowl, combine the 1/2 cup (60g) cornstarch and 1/2 cup (120ml) cold water, whisking continuously for 30 to 45 seconds until no dry lumps remain and the mixture forms a smooth, opaque, runny white paste. Set the slurry within arm’s reach of the stovetop to avoid scrambling for it once the coconut base is hot.
Step 2
step2:Mix cornstarch slurry
3

Heat coconut base

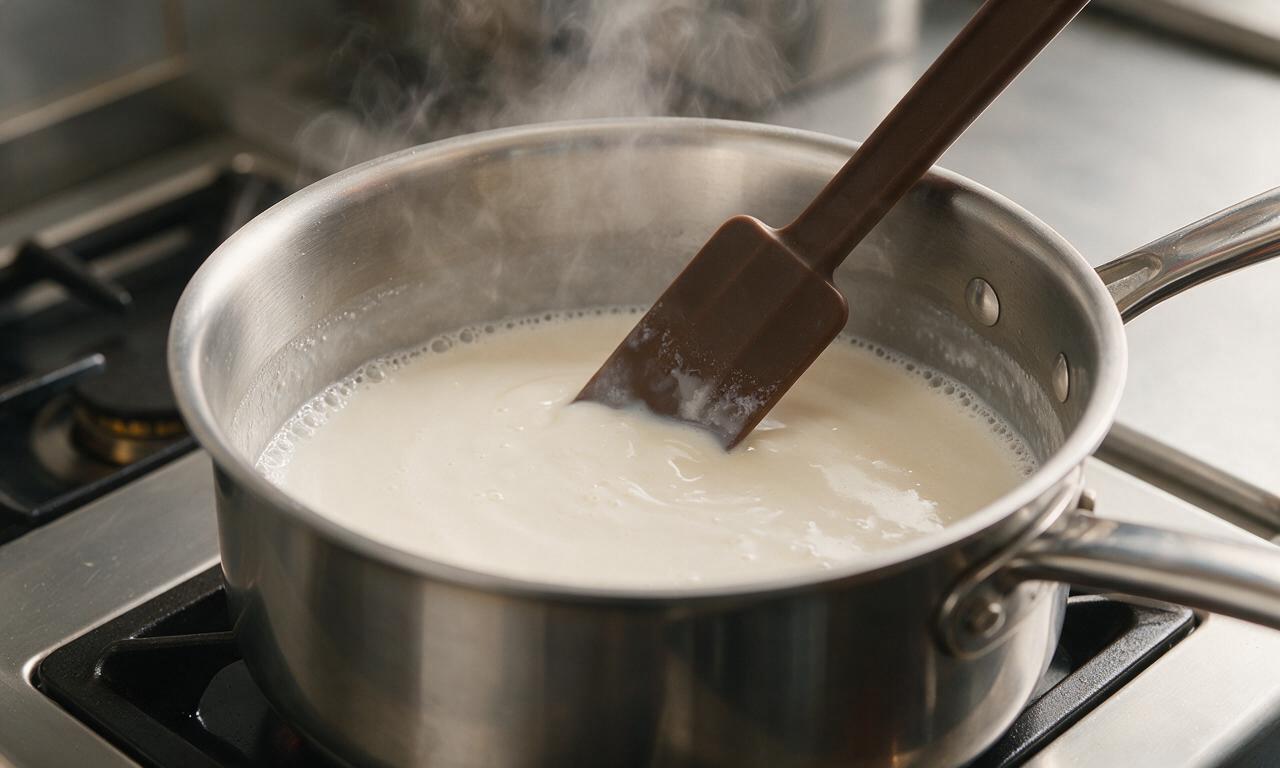
Pour the 2 cups (480ml) full-fat canned coconut milk, 1/3 cup (67g) granulated sugar, and 1/4 teaspoon (1g) fine sea salt into a 2-quart heavy-bottomed saucepan set over medium-low heat. Stir slowly with a heatproof silicone spatula for 3 to 4 minutes, until the sugar fully dissolves and the mixture reaches a gentle, low simmer (small bubbles breaking steadily at the pan edges, no rolling boil).
Step 3
step3:Heat coconut base
4

Thicken the pudding

Give the reserved cornstarch slurry a quick 10-second re-whisk to remix any starch that settled to the bottom of the bowl, then pour it slowly into the simmering coconut milk while stirring constantly in a figure-8 pattern. Keep the heat at medium-low and cook, stirring nonstop, for 2 to 3 minutes until the mixture thickens to a glossy, heavy pudding that coats the back of the spatula; a line drawn through the coating with your finger will hold its shape without running.
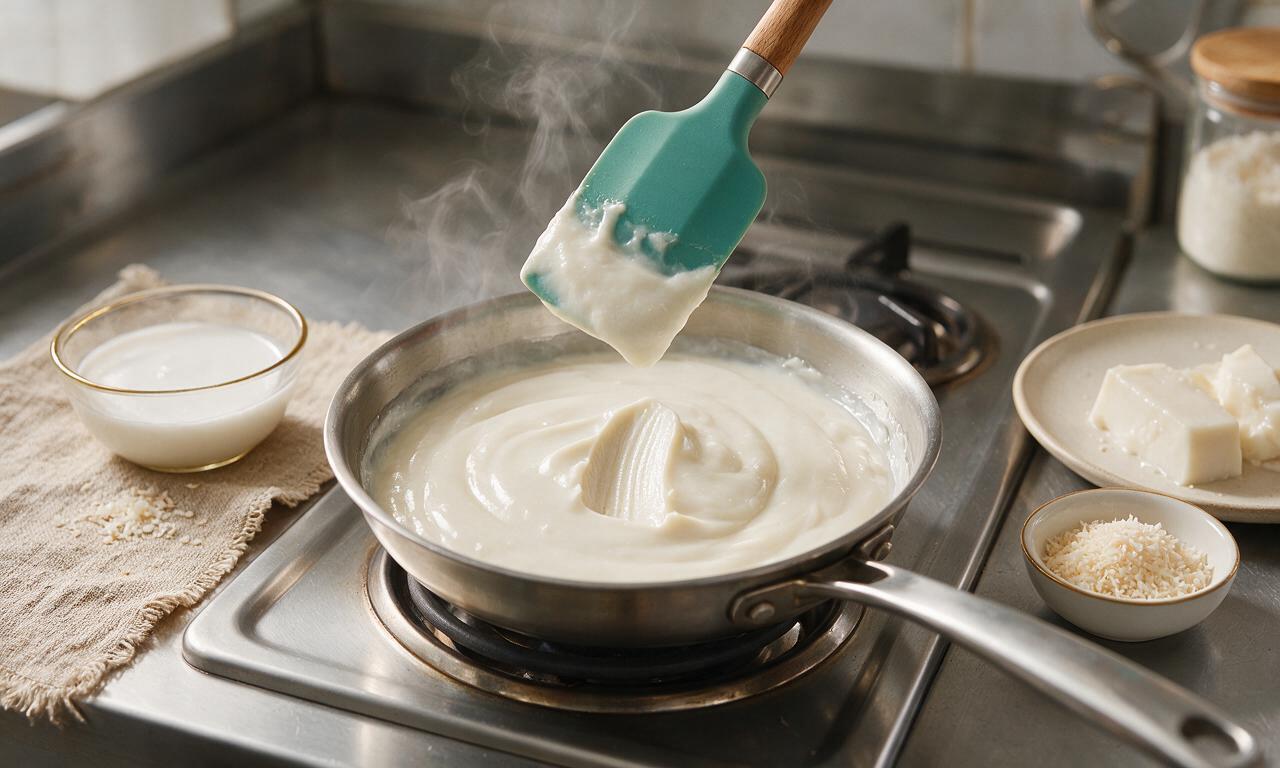
Step 4
step4:Thicken the pudding
5

Pour into prepared pan

Immediately remove the thickened haupia base from heat as soon as it reaches the correct thick consistency, and pour the entire batch directly into the parchment-lined 8x8 inch baking dish. Use a small offset spatula to spread the top into a perfectly smooth, even layer, then tap the dish firmly on the counter 3 to 4 times to release any trapped air bubbles that would leave holes in the set haupia.
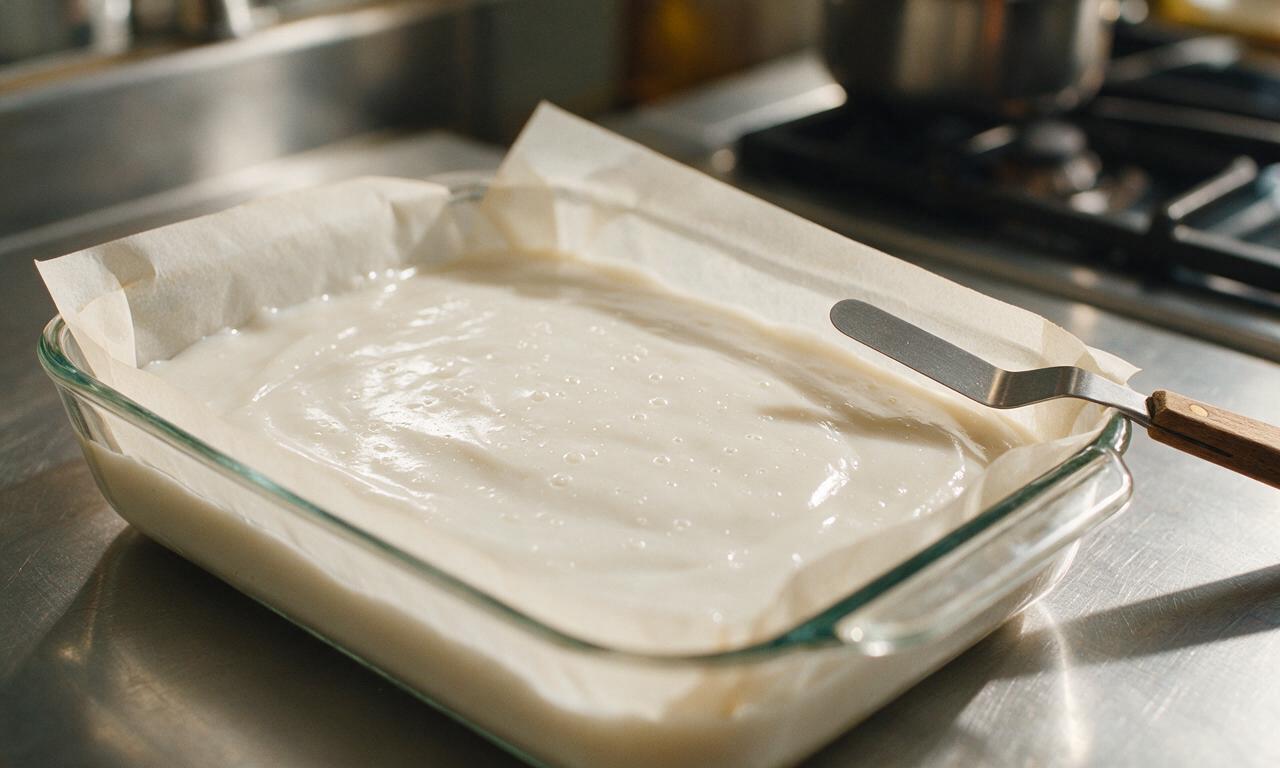
Step 5
step5:Pour into prepared pan
6

Chill to fully set

Let the haupia cool uncovered at room temperature for 15 minutes, then cover the dish tightly with a sheet of plastic wrap pressed directly against the surface of the pudding to prevent a tough skin from forming. Place the dish on a level middle shelf in the refrigerator, and chill undisturbed for 2 full hours until the haupia is firm to the touch and jiggles as one solid block when the pan is gently shaken.
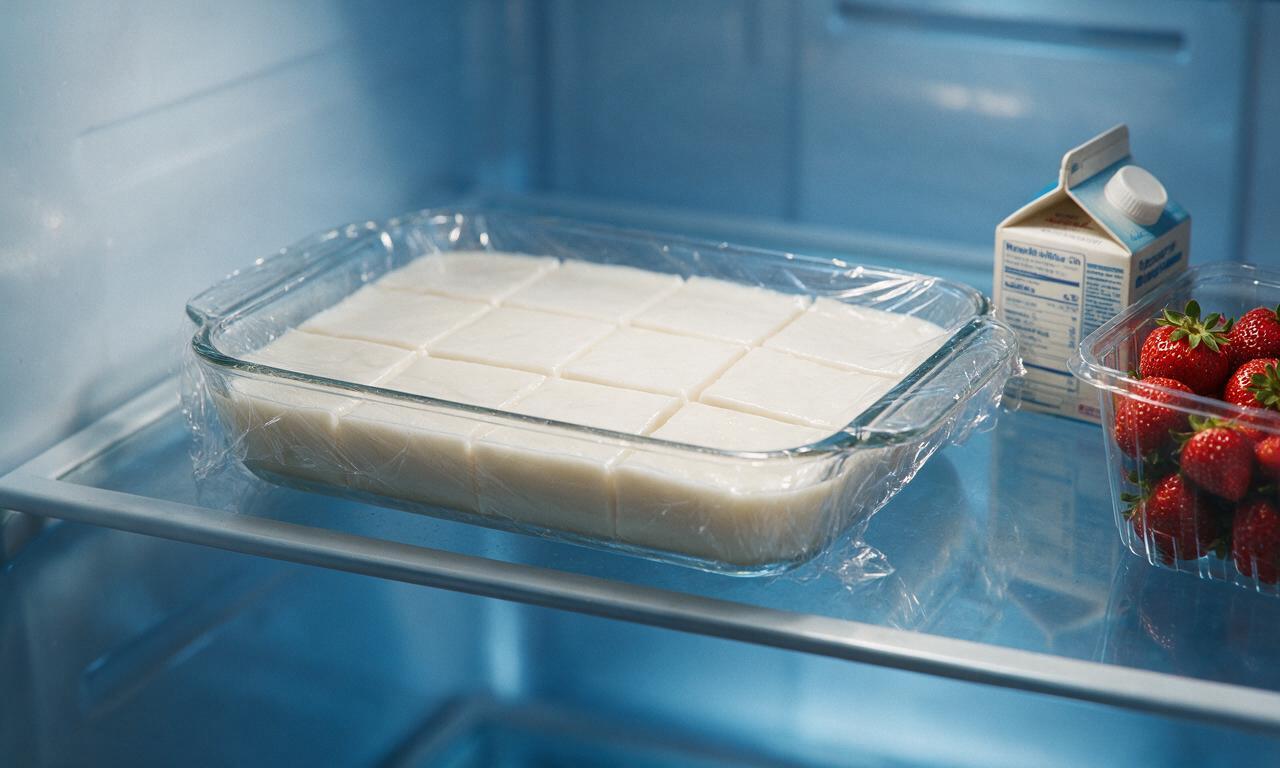
Step 6
step6:Chill to fully set
7

Slice and serve chilled

Once fully set, use the overhanging parchment paper handles to lift the entire block of haupia out of the dish and set it on a flat cutting board. Dip a sharp chef’s knife in hot water and wipe it dry between each cut to slice the haupia into 8 even 2x2 inch squares. Serve immediately while chilled, plain or topped with a pinch of toasted coconut flakes if desired.
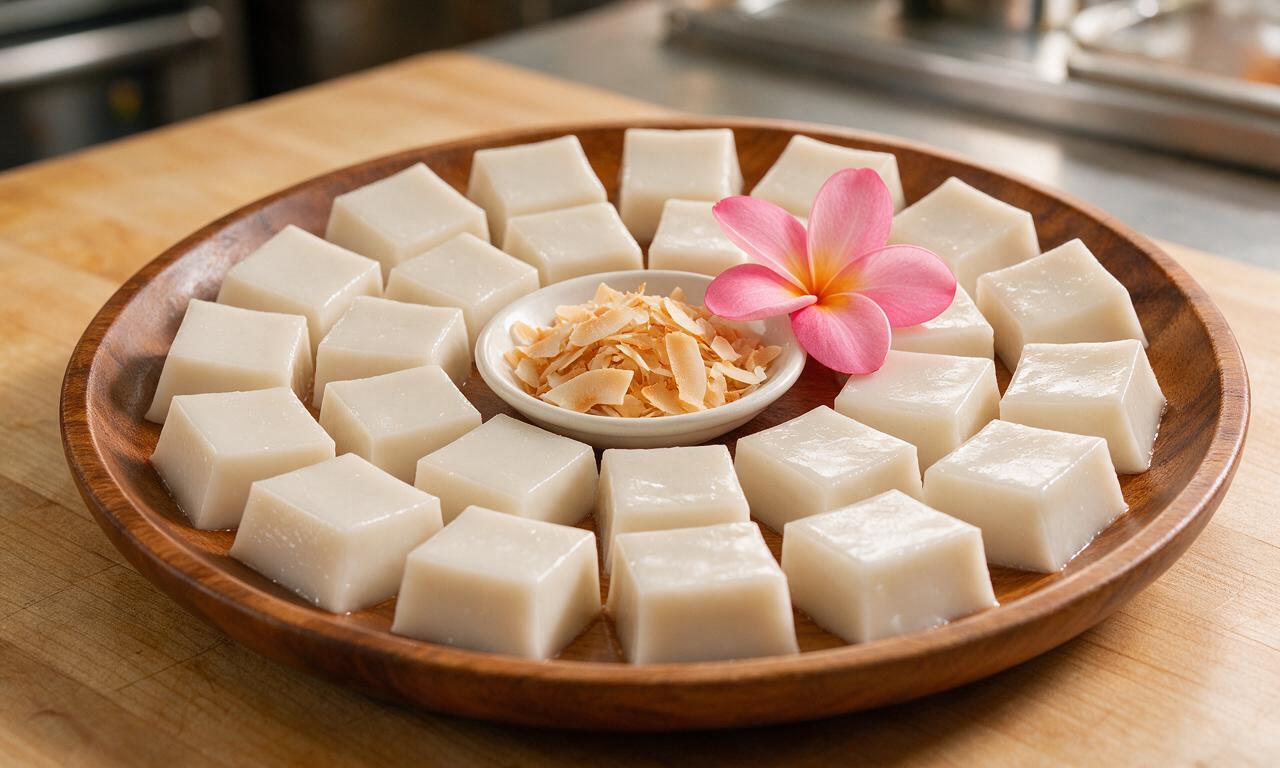
Step 7
step7:Slice and serve chilled

Tips

1.Avoid using light or reduced-fat canned coconut milk for this recipe: full-fat coconut milk delivers haupia’s signature rich, creamy texture and deep coconut flavor, while low-fat versions will produce a watery, bland, weakly set final pudding.
2.Never let the coconut milk mixture reach a hard, rolling boil during cooking: high heat can cause the coconut fat to separate from the liquid, leading to a grainy, oily texture in the finished haupia; keep heat steady at medium-low the entire cooking process.
3.For the most authentic traditional texture, replace the cornstarch with an equal weight (60g) of Polynesian arrowroot (pia) if you can source it; this is the original starch used in Hawaiian haupia, creating a slightly softer, silkier, less gummy set than cornstarch.


✨ You May Also Like

Desserts & Baking
🍜 Italy

Creamy, coffee-kissed classic Northern Italian no-bake dessert, with layers of rum-spiked mascarpone cream, soft ladyfingers, and a rich cocoa dusting.

⏱️ 4 hours 3Desserts & Baking ★ 4.8
Desserts & Baking
🍜 France

Flaky, shatteringly crisp, buttery French croissants with golden exteriors and soft, airy layered interiors, perfect for pairing with coffee for a special morning treat.

⏱️ 12 hours Desserts & Baking ★ 4.7
Desserts & Baking
🍜 United States

Warm, spiced baked apples topped with a fluffy golden biscuit crust, this cozy dessert pairs perfectly with vanilla ice cream for cool-weather comfort.

⏱️ 55 minuteDesserts & Baking ★ 4.7
Desserts & Baking
🍜 United States

A star-spangled classic American blueberry pie with buttery flaky crust and bright sweet-tart filling, perfect for summer patriotic gatherings.

⏱️ 1 hour 25Desserts & Baking ★ 4.8
Desserts & Baking
🍜 United States

A beloved no-bake regional Maine candy with a chewy coconut-potato center coated in rich dark chocolate, a New England holiday staple since the 1870s.

⏱️ 2 hours 3Desserts & Baking ★ 4.9
Desserts & Baking
🍜 France

Luxuriously creamy, floral frozen custard made with aromatic Tahitian vanilla beans, boasting a smooth, rich texture that melts slowly on the tongue.

⏱️ 3 hours 3Desserts & Baking ★ 4.6

Haupia (Hawaii):Frequently Asked Questions

1.Why didn’t my haupia set up firm enough to slice cleanly?
This almost always traces back to three common missteps: using low-fat coconut milk, measuring cornstarch inaccurately, or not cooking the starch long enough to activate. Stick to full-fat canned coconut milk, level your cornstarch measurements, simmer the mixture 1–2 full minutes after it thickens, and chill a full 4 hours before slicing for a perfect set.
2.Can I use light coconut milk instead of full-fat for this recipe?
I don’t recommend it if you want traditional texture. Full-fat canned coconut milk has the rich, dense coconut solids that give haupia its signature silky mouthfeel and firm, sliceable structure. Light coconut milk is heavily diluted with water, which will produce a watery, bland, soft pudding that won’t hold its shape when cut.
3.Is traditional haupia naturally dairy-free and vegan?
Yes! Authentic haupia is entirely dairy-free and vegan as written, with no eggs, dairy, or gelatin in the classic formula. It relies purely on coconut milk for richness, so it works beautifully for guests with dairy allergies or vegan diets, as long as you use standard plant-based cornstarch and granulated sugar.
4.How long do I need to chill haupia before it’s ready to serve?
For that iconic firm, jiggly, sliceable texture, plan to chill it for a minimum of 4 hours in the fridge—chilling overnight will give you the cleanest, most even cuts. Don’t rush the process by sticking it in the freezer, as that will create icy, grainy patches that ruin the perfectly smooth, silky mouthfeel.
5.Can I substitute another starch for cornstarch if I don’t have any?
Arrowroot starch works as an even 1:1 swap for cornstarch if you need a corn-free option, but skip tapioca or potato starch here. Tapioca will create a chewy, gummy texture, while potato starch leaves a subtle chalky aftertaste. Cornstarch will always give you the most authentic, neutral set that lets coconut flavor shine.
6.Why did my finished haupia turn out lumpy?
Lumps almost always form when your cornstarch isn’t fully dissolved in cold water first, or you add the slurry too fast without whisking. To prevent this, stir cornstarch and cold water until completely smooth, pour it in a slow steady stream while whisking nonstop, and strain the warm mixture through a fine sieve before chilling if you spot lumps.
7.How should I store leftover haupia, and how long will it stay fresh?
Store leftover haupia in a tightly sealed airtight container in the refrigerator for up to 3 days. Keep it well covered to prevent it from picking up off-flavors from other fridge items, and never leave it at room temperature for more than 2 hours, as coconut milk spoils quickly in warm conditions. Freezing is not recommended, as it ruins the silky texture.
8.Do I really need to add salt to this sweet dessert?
That tiny pinch of fine sea salt is absolutely worth adding! It won’t make your haupia taste salty at all—instead, it amplifies the bright, sweet coconut flavor and cuts through the richness of the coconut milk so the pudding doesn’t taste flat or cloying. You only need 1/8 teaspoon for a standard batch, for a huge flavor payoff.
9.What kind of pan works best for setting haupia for easy serving?
A standard 8x8 inch square glass or metal baking pan is ideal for a traditional batch. Lightly grease the pan with a tiny bit of neutral oil, or line it with parchment paper that overhangs two sides, so you can lift the entire set block of haupia out to cut clean, even squares without it sticking to the pan.
10.Can I mix in extra ingredients like fruit or chocolate?
Traditional haupia is served plain to highlight its pure, bright coconut flavor, but gentle mix-ins work well if you want a twist. Fold in small fresh mango cubes, toasted shredded coconut, or add a thin dark chocolate layer to the pan bottom first. Skip very juicy mix-ins, as their excess water will prevent the haupia from setting properly.
11.Why does my haupia have an unpleasant starchy aftertaste?
That starchy flavor happens when you don’t cook the cornstarch long enough after the mixture thickens. Cornstarch needs 1–2 minutes of gentle, constant-stir simmering to cook out that raw starch taste. If you pull the pan off the heat as soon as the mixture thickens, that raw starch note will mask the fresh coconut flavor.
12.Is haupia the same thing as regular Western coconut pudding?
No, they’re distinctly different desserts. Traditional haupia is firmer, sliceable, and lightly jiggly, with a clean, bright coconut flavor and no eggs, dairy, or gelatin. It has a lighter, brighter mouthfeel than rich, custardy Western coconut pudding, which is typically soft, spoonable, and made with dairy or eggs for a heavier, richer profile.

Comments (20)

2 days ago

OMG this haupia is EXACTLY what I remember from my family trip to Maui when I was 10! It’s perfectly creamy, not too sweet, and set up perfectly first try. Brought it to our neighborhood block party last weekend and people were begging for the recipe. 10/10 no notes.

1 week ago

I was so nervous to make haupia for my son’s Hawaiian themed birthday party because I’ve messed up coconut desserts before, but this recipe was SO easy! My kids gobbled up half the pan before the party even started. Only took a few minutes to prep then popped it in the fridge to set. Total game changer for busy weeknight event prep!

5 days ago

So happy this worked out for your son’s birthday party! Love that the kids loved it – pro tip: you can cut them into little squares and roll in shredded toasted coconut for a fun party bite if you want to dress them up next time!

3 days ago

Wait, hold up – do I *have* to use cornstarch? I only have arrowroot powder in my pantry right now and I don’t feel like running to the store. Has anyone tried swapping it? I don’t want to mess up the texture.

2 days ago

I used arrowroot last time I made this! Used the exact same amount and it turned out perfectly, just as jiggly and creamy as the original. No weird aftertaste at all, promise.

yesterday

Great question! Arrowroot powder works perfectly as a 1:1 swap for cornstarch here, just make sure you whisk it really well with the cold coconut milk first to avoid lumps. Hope you love it!

5 days ago

Made this in my dorm fridge with just a little hot plate to heat the ingredients and my roommates thought I was a professional chef. It’s so cheap to make too, way better than the weird jiggly jello shots we usually make for parties. Will be making this for every pre-game from now on.

2 weeks ago

This is my new go-to potluck dish! It’s gluten free, dairy free, so it works for basically every dietary restriction at our office potlucks, and it’s always the first empty dish on the table. People keep asking me when I’m going to bring it again. SO good.

1 week ago

Same! I brought this to our church potluck last month and three people asked for the recipe before we even finished serving the main course. Obsessed.

1 week ago

I was skeptical about a mainland haupia recipe, y’all. I lived on Oahu for 7 years and I’ve had so many bad versions that are either too rubbery or way too sweet. This one? Tastes exactly like the haupia I used to get from the little food truck outside my old apartment. Chef’s kiss.

5 days ago

Right?! I grew up going to luaus every summer with my ohana and I was fully prepared to be disappointed, but this is spot on. No weird added gelatin or anything, just the good stuff.

3 days ago

This makes my day! We worked really hard to nail the classic texture and sweetness level without cutting corners, so hearing it matches the version you loved in Hawaii is the best compliment we could get.

2 days ago

Made this for a post-hike snack last weekend and it was so refreshing after being out in the sun for 6 miles. I added a tiny splash of lime zest on top and it was chef’s kiss, cut the richness perfectly. Will definitely be making this all summer long for trail days and backyard BBQs.

yesterday

Love the lime zest addition! That sounds like the perfect bright, summery twist – I’m going to have to try that on my next batch too. So glad it was a hit post-hike!

yesterday

Wait why did I think haupia was hard to make? This came together in like 15 minutes of active time, then just chilled in the fridge while I made kalua pork and mac salad for our Hawaiian taco night. The whole meal felt like a vacation, no plane ticket needed.

2 weeks ago

I tested this recipe for a client’s Hawaiian themed wedding reception and it was a massive hit! We cut them into 1 inch squares, topped each with a tiny piece of pineapple and an orchid, and they looked so fancy for how low effort they were. Added them to my permanent catering menu.

1 week ago

Oh the pineapple and orchid idea is so cute! I’m stealing that for my daughter’s graduation luau next month, that’s going to look so pretty on the dessert table.

5 days ago

Quick question – is this actually vegan? I checked the ingredients and it looks like it, but I wanted to make sure I’m not missing something before I make it for my vegan friend’s birthday dinner. I don’t want to accidentally serve her something with dairy!

3 days ago

As long as you use full fat canned coconut milk that doesn’t have any added dairy (most don’t!) it’s 100% vegan! I made it for my vegan cousin last month and she loved it, no issues at all.

2 days ago

Great question! Traditional haupia is naturally vegan and dairy free as written – just double check your coconut milk label for any hidden milk derivatives (most brands are totally fine, but it never hurts to check!)

1 week ago

I’ve been making haupia for my family luaus for 40 years, and I have to say this recipe is exactly the one my mom taught me when I was a little girl growing up in Hilo. No frills, no fancy add-ins, just perfect creamy haupia every time. My grandkids beg me to make it every time they come over.

5 days ago

This means so much coming from someone who’s been making haupia for decades! It really is all about keeping it simple and using good quality coconut milk for that classic, nostalgic flavor. Sending aloha to you and your grandkids!

3 days ago

Made this for my watch party for the Ohio State game last weekend (we did a tailgate theme with lots of different global snacks) and even my pickiest football buddy went back for three pieces. He kept asking ‘what is that jiggly coconut stuff?!’ and refused to leave without the recipe. Total hit.

yesterday

Okay I messed this up the first time because I didn’t whisk the cornstarch enough and it got lumpy, but even the lumpy version was SO good. Second time I whisked it constantly over low heat and it came out perfectly smooth. Pro tip: don’t rush the heating step!

2 hours ago

Oh I did the exact same thing my first try! The lumps were totally edible but the smooth version is way better, totally worth the extra 2 minutes of whisking.

2 hours ago

I tried haupia for the first time at a Hawaiian pop-up in Brooklyn last month and was obsessed, so I was so excited to find an easy recipe to make at home. It turned out great! Only thing is mine was a little softer than the one I had at the pop-up – did I not cook it long enough?

30 minutes ago

I had that issue my first batch too! I let it cook for like 2 extra minutes until it started to thicken up a little more before pouring into the pan, and the next batch set perfectly firm. You got this!

5 minutes ago

Great catch! If your haupia is too soft, it’s usually because the cornstarch didn’t get a chance to fully activate – next time, cook it until it coats the back of a spoon thickly before pouring it into the dish to chill, and it’ll set up perfectly.

5 days ago

It’s 110 degrees out here in Phoenix right now and this is the perfect no-bake dessert! I don’t have to turn my oven on at all, which is a lifesaver in the summer heat. I kept a pan in the fridge all week to grab a little square after work and it was such a nice cool treat.

3 days ago

No-bake desserts are the only way to go when it’s that hot outside! So glad this hit the spot for you – we love keeping a pan in the fridge for quick sweet treats all summer too.

1 week ago

I’m usually a chocolate dessert only kind of guy, but my girlfriend made this for our date night Hawaiian theme and I ate half the pan. It’s light, not cloyingly sweet, and the coconut flavor is so rich without being heavy. I might even request this instead of birthday cake this year.

2 hours ago

How long does this keep in the fridge? I want to make it on Sunday for meal prep to have as little sweet treats throughout the week, but I don’t want it to go bad before I finish the pan.

30 minutes ago

I’ve kept mine in an airtight container for up to 5 days and it’s still perfect! It doesn’t get weird or soggy at all, just stays nice and creamy. Great for meal prep!

5 minutes ago

Stored in a sealed airtight container in the fridge, haupia will stay fresh for 4-5 days! Just make sure to keep it chilled, it doesn’t hold up super well at room temperature for long stretches.

2 weeks ago

Served this alongside smoked brisket and pineapple coleslaw at our last backyard BBQ and people were blown away by the flavor combo. The sweet creamy coconut pairs so well with smoky salty BBQ, who knew?! Will be a permanent summer BBQ staple from now on.

1 week ago

Wait that combo sounds insane! I’ve only ever had haupia with other Hawaiian food but I’m 100% making this for our next brisket night, that sounds like the perfect balance.

just now

My husband and I had haupia at our wedding in Maui 2 years ago, and I made this for our anniversary dinner last night. It tasted exactly like the dessert we had on our wedding day, and we both got a little teary eyed. Such a special, easy recipe that I know we’ll make for every anniversary from now on.

30 minutes ago

Help! I followed the recipe exactly but my haupia is super runny, even after being in the fridge for 2 hours. What did I do wrong? I really want this to turn out for my family dinner tonight!

5 minutes ago

Oh honey, did you let the mixture come to a gentle simmer when you were heating it? If you don’t cook it long enough the cornstarch won’t thicken, so it won’t set right. You can pour it back in the pot, heat it up a little more until it thickens, then pour it back in the pan and it should set up fine!

just now

Don’t panic! This is super common, and it’s almost always because the cornstarch didn’t fully cook and activate. Just pour the whole mixture back into a small pot, heat over medium low while whisking constantly until it’s thick enough to coat the back of a spoon, pour it back into your dish, and chill for another hour and it’ll turn out perfect for your family dinner!



