
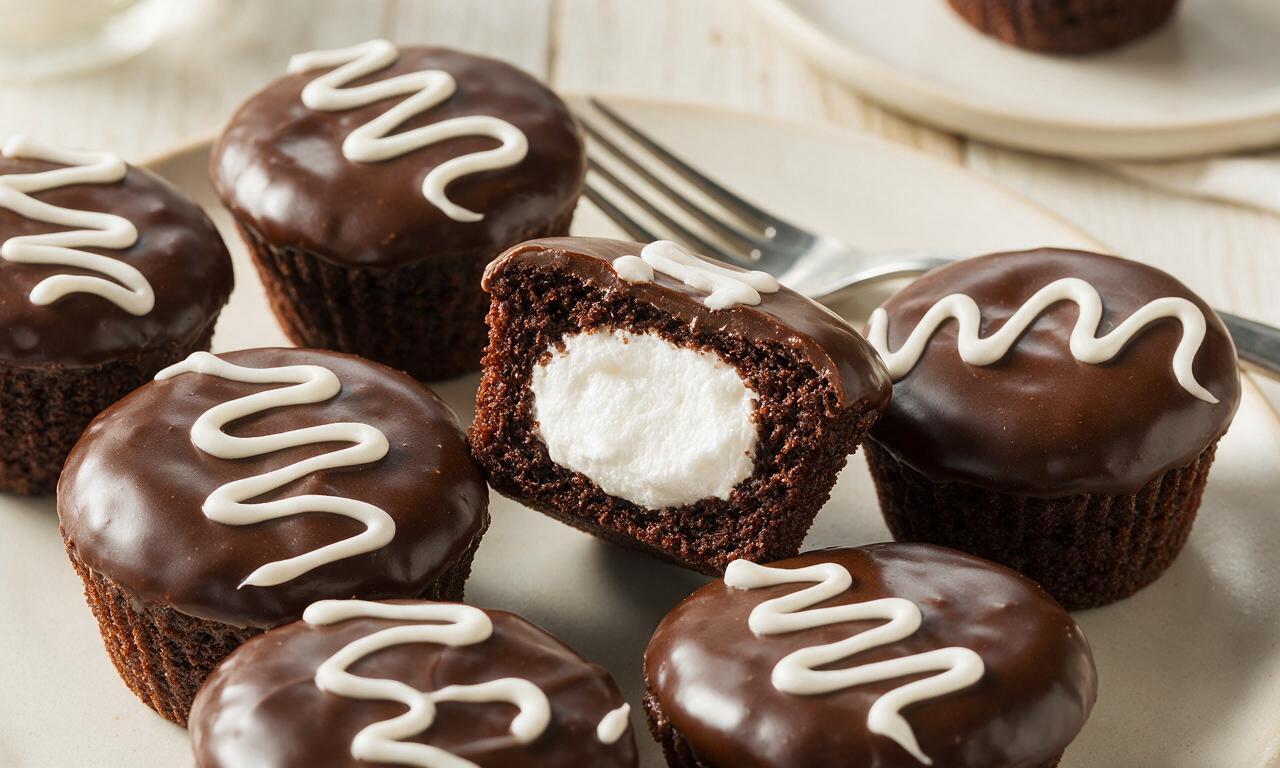
Hostess CupCake

Hostess CupCake
⏱️ cook time 1 hour 45 minutes
🍽️ servings 12
⚡ Difficulty medium

intro

Nostalgic homemade copycat of the iconic Hostess chocolate snack cake, with fluffy marshmallow filling, glossy chocolate glaze, and the signature white squiggle.

Ingredients

All-purpose flour 180g (1 ½ cups)
Unsweetened natural cocoa powder 50g (½ cup)
Granulated sugar 200g (1 cup)
Baking soda 1 teaspoon
Baking powder ½ teaspoon
Fine sea salt (for cake) ¼ teaspoon
Whole milk 180ml (¾ cup)
Vegetable oil 80ml (⅓ cup)
Large eggs 2, room temperature
Vanilla extract (for cake) 1 teaspoon
Boiling water 120ml (½ cup)
Unsalted butter (for filling) 56g (4 tablespoons, ¼ cup), softened
Powdered sugar 120g (1 cup), sifted
Marshmallow fluff 113g (½ cup)
Heavy cream 2 tablespoons
Vanilla extract (for filling) ½ teaspoon
Fine sea salt (for filling) 1 pinch
Semi-sweet chocolate chips 170g (1 cup)
Unsalted butter (for glaze) 28g (2 tablespoons)
Light corn syrup 1 tablespoon
White vanilla melting wafers 50g (¼ cup)

Steps

1

Bake chocolate cupcake bases

Preheat oven to 175°C (350°F), then line a 12-cup standard muffin tin with paper baking liners. In a large mixing bowl, whisk 180g all-purpose flour, 50g unsweetened cocoa powder, 200g granulated sugar, 1 teaspoon baking soda, ½ teaspoon baking powder, and ¼ teaspoon fine sea salt until fully combined. Add 180ml whole milk, 80ml vegetable oil, 2 room-temperature large eggs, and 1 teaspoon vanilla extract, then mix on low speed with an electric mixer for 2 minutes. Slowly stir in 120ml boiling water (the batter will be thin, this is normal). Divide batter evenly between liners, filling each ⅔ full, then bake for 18-20 minutes until a toothpick inserted in the center comes out with 1-2 moist crumbs. Let cupcakes cool in the tin for 10 minutes, then transfer to a wire rack to cool completely to room temperature (about 30 minutes) before filling.
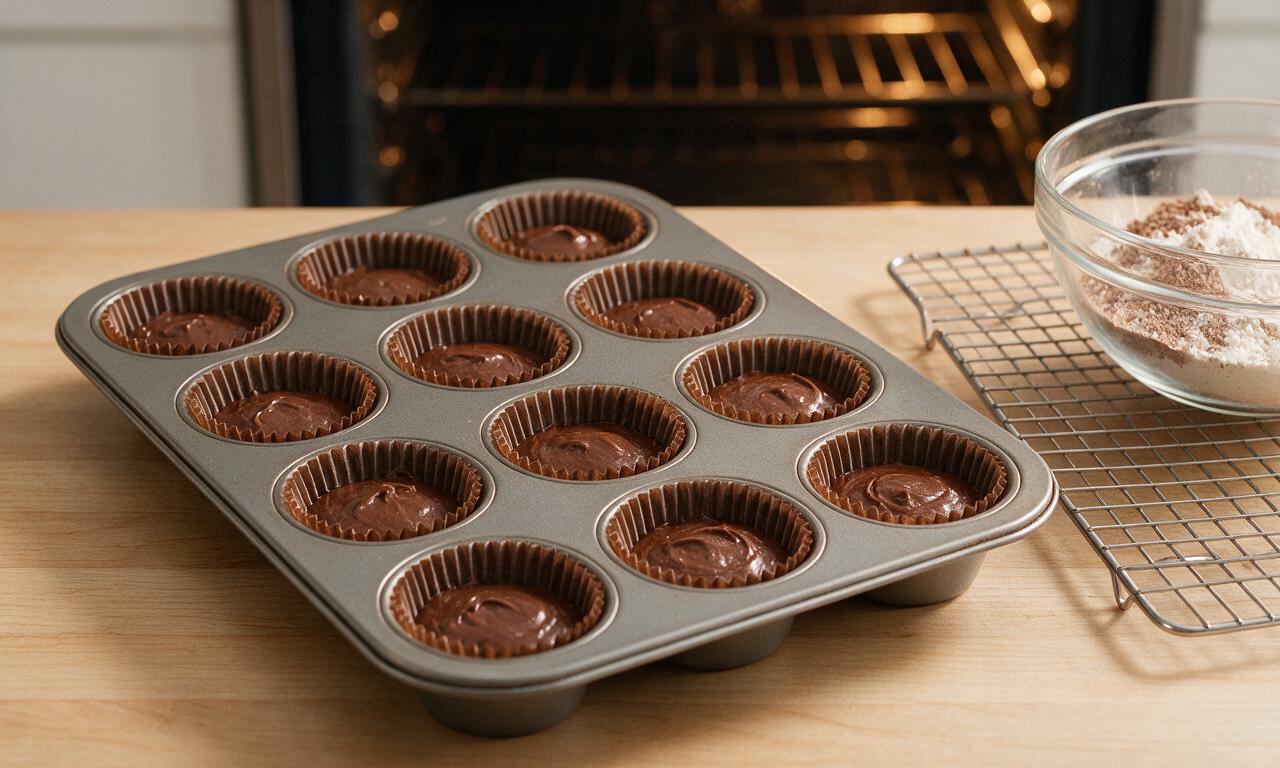
Step 1
step1:Bake chocolate cupcake bases
2

Whip signature creamy filling

In a medium mixing bowl, beat 56g softened unsalted butter on medium speed with an electric mixer for 2 minutes until pale and fluffy. Add 120g sifted powdered sugar, 113g marshmallow fluff, 2 tablespoons heavy cream, ½ teaspoon vanilla extract, and 1 pinch of fine sea salt. Mix on low speed for 1 minute to combine ingredients, then increase to medium-high speed and whip for 3 minutes until the filling is light, smooth, and holds a soft peak when the mixer is lifted. Transfer the finished filling to a piping bag fitted with a small round filling tip (Wilton #230 is recommended).
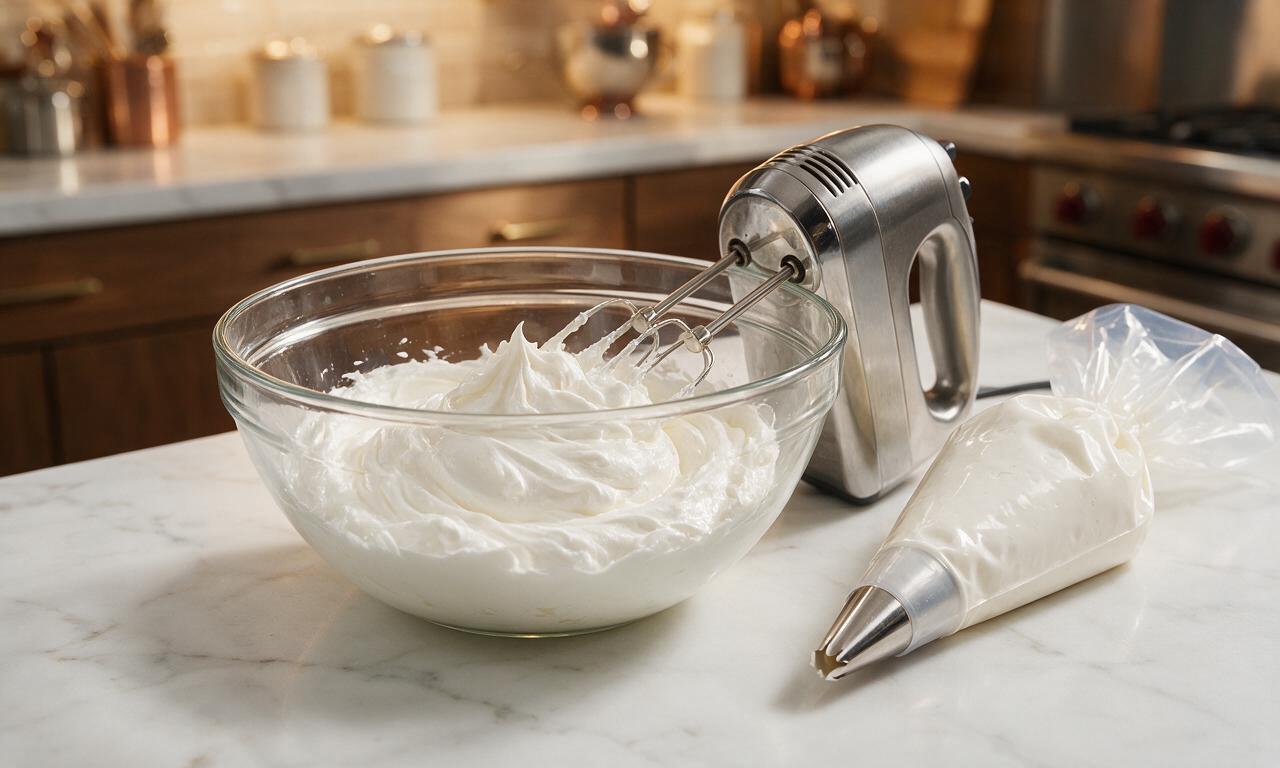
Step 2
step2:Whip signature creamy filling
3

Fill cooled cupcake centers

Take each fully cooled cupcake, insert the piping tip 2cm (¾ inch) deep into the top center of the cake. Squeeze the piping bag gently to pipe 1-2 teaspoons of filling into the center—stop squeezing as soon as you feel the cupcake expand slightly, then pull the tip straight out. Wipe any excess filling that oozes out with a small paper towel to keep the cupcake top smooth and ready for glazing.
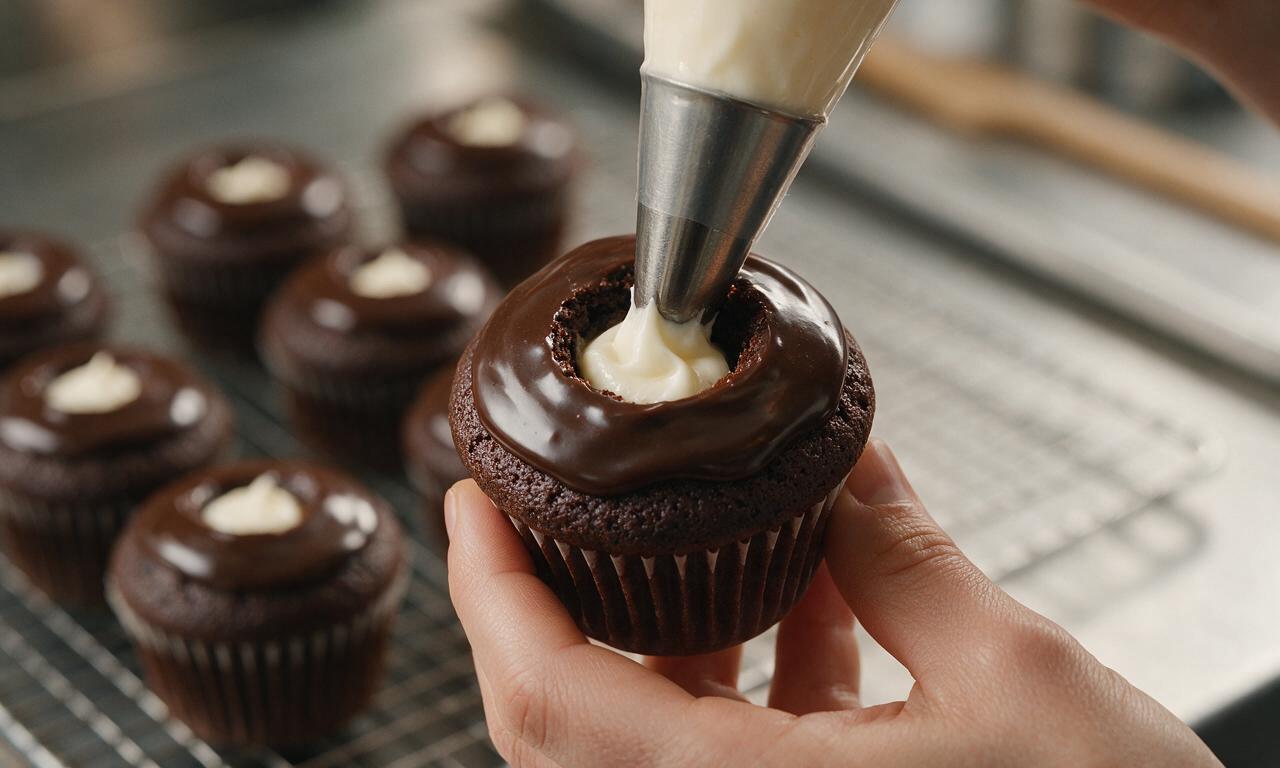
Step 3
step3:Fill cooled cupcake centers
4

Make shiny chocolate glaze

Combine 170g semi-sweet chocolate chips, 28g unsalted butter, and 1 tablespoon light corn syrup in a heatproof glass bowl set over a small pot of gently simmering water (double boiler setup, ensure the bowl does not touch the water). Stir constantly with a silicone spatula over medium-low heat for 3-4 minutes until the mixture is completely smooth, glossy, and free of lumps. Remove the bowl from heat and let the glaze cool for 5 minutes, until it is thick enough to coat the back of a spoon without running off quickly.
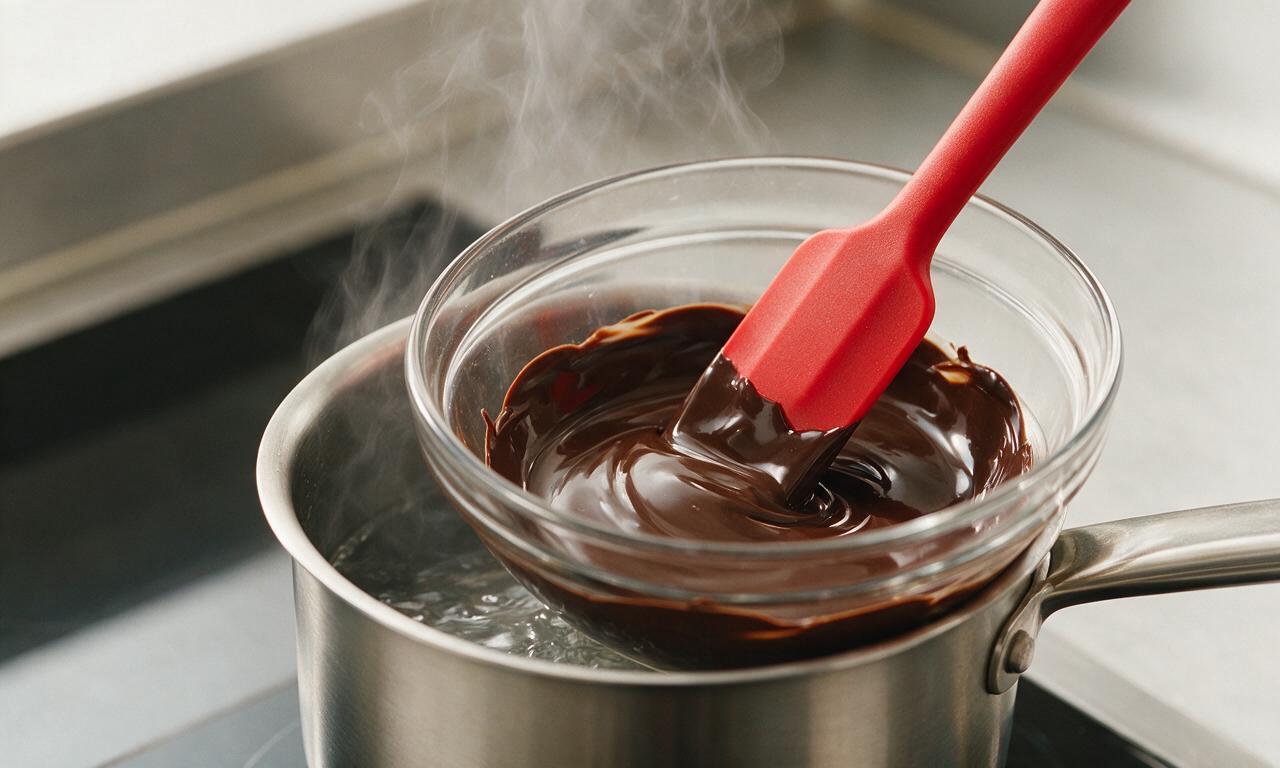
Step 4
step4:Make shiny chocolate glaze
5

Dip cupcakes in glaze

Hold each filled cupcake upside down, dip the top 1cm (½ inch) of the cake straight into the cooled chocolate glaze, twist slightly to ensure an even coating, then lift and let excess glaze drip off for 5 seconds. Turn the cupcake right-side up and place it back on the wire rack, set over a sheet of parchment paper to catch drips. Let the glaze set for 15 minutes at room temperature until it is firm to the touch and no longer sticky.
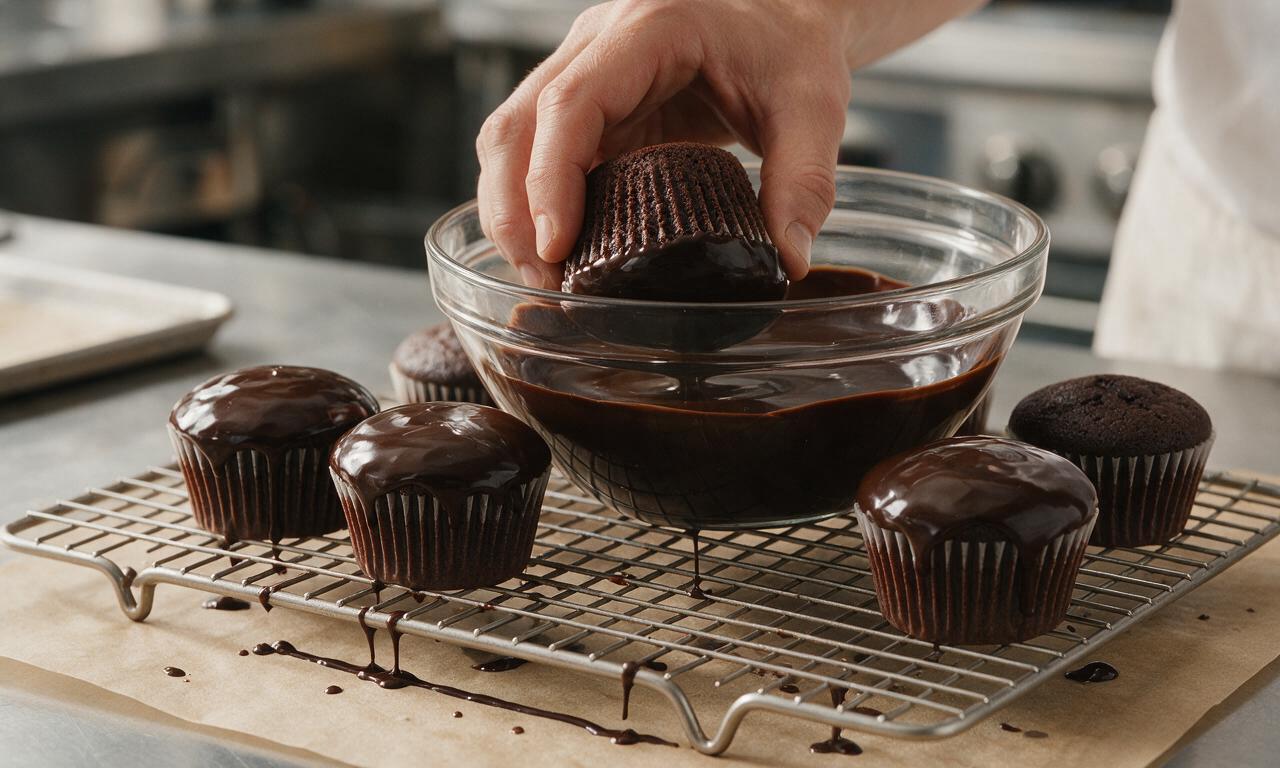
Step 5
step5:Dip cupcakes in glaze
6

Pipe classic white squiggle

Melt 50g white vanilla melting wafers in a small heatproof bowl in 30-second microwave bursts at 50% power, stirring between each burst, until completely smooth (about 1 minute total). Transfer the melted white candy to a small piping bag fitted with a tiny round tip (Wilton #2), or a small plastic sandwich bag with a 1mm corner snipped off. Pipe a continuous, wavy squiggle across the top of each set chocolate glaze, going from one edge of the cupcake top to the other. Let the white squiggle set for 10 minutes before serving.
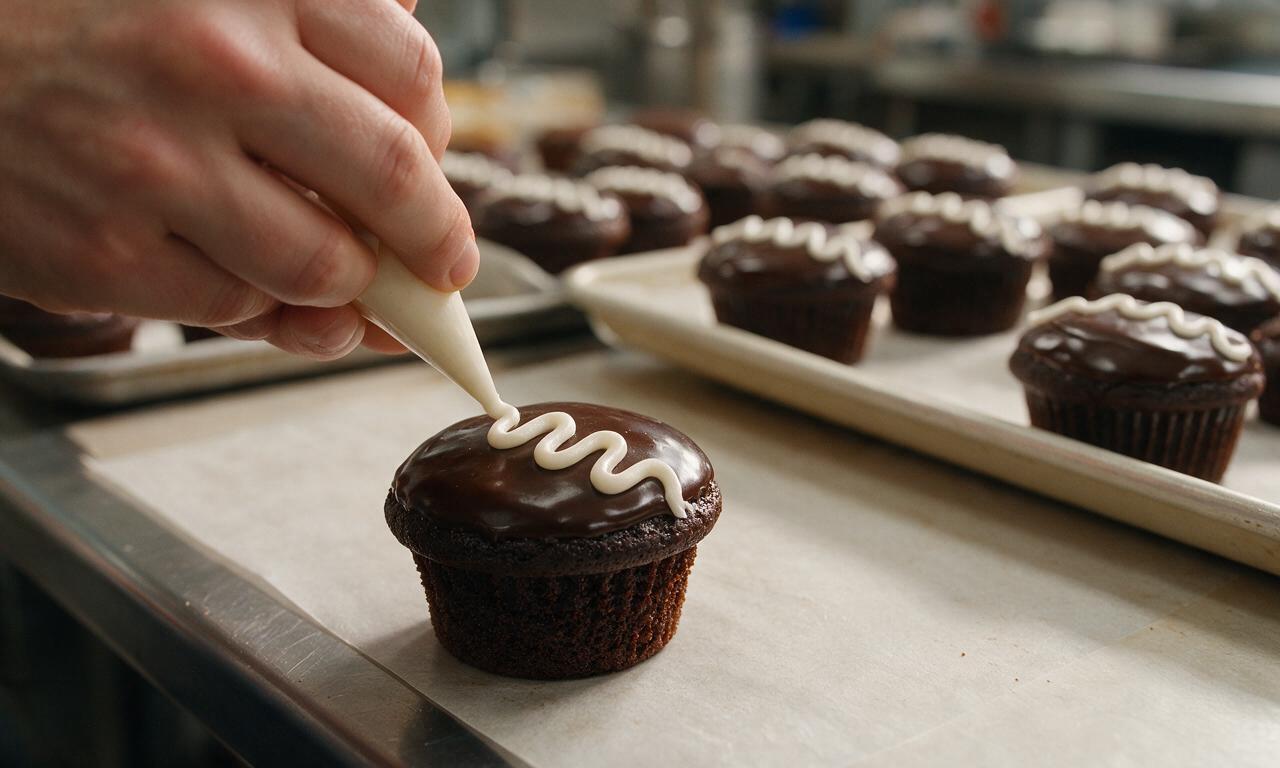
Step 6
step6:Pipe classic white squiggle

Tips

1.Never fill or glaze warm cupcakes, as residual heat will melt the marshmallow filling and cause the chocolate glaze to slide off cake tops.
2.Adjust glaze consistency as needed: cool runny glaze for 2-3 extra minutes, or reheat thickened glaze for 10 seconds over a double boiler to restore smooth dipping texture.
3.Use plain original marshmallow fluff for the filling, rather than flavored marshmallow creme or sweetened whipped cream, to match the classic Hostess flavor.


✨ You May Also Like

Desserts & Baking
🍜 Italy

Creamy, coffee-kissed classic Northern Italian no-bake dessert, with layers of rum-spiked mascarpone cream, soft ladyfingers, and a rich cocoa dusting.

⏱️ 4 hours 3Desserts & Baking ★ 4.8
Desserts & Baking
🍜 France

Flaky, shatteringly crisp, buttery French croissants with golden exteriors and soft, airy layered interiors, perfect for pairing with coffee for a special morning treat.

⏱️ 12 hours Desserts & Baking ★ 4.7
Desserts & Baking
🍜 United States

Warm, spiced baked apples topped with a fluffy golden biscuit crust, this cozy dessert pairs perfectly with vanilla ice cream for cool-weather comfort.

⏱️ 55 minuteDesserts & Baking ★ 4.7
Desserts & Baking
🍜 United States

A star-spangled classic American blueberry pie with buttery flaky crust and bright sweet-tart filling, perfect for summer patriotic gatherings.

⏱️ 1 hour 25Desserts & Baking ★ 4.8
Desserts & Baking
🍜 United States

A beloved no-bake regional Maine candy with a chewy coconut-potato center coated in rich dark chocolate, a New England holiday staple since the 1870s.

⏱️ 2 hours 3Desserts & Baking ★ 4.9
Desserts & Baking
🍜 France

Luxuriously creamy, floral frozen custard made with aromatic Tahitian vanilla beans, boasting a smooth, rich texture that melts slowly on the tongue.

⏱️ 3 hours 3Desserts & Baking ★ 4.6

Hostess CupCake:Frequently Asked Questions

1.Can I use Dutch-processed cocoa instead of the natural unsweetened cocoa called for in the cake?
Natural unsweetened cocoa works best here because its acidity reacts with baking soda to help the cake rise light and tender. If you only have Dutch-processed cocoa, add 1/8 teaspoon of cream of tartar per 3 tablespoons of cocoa to balance the pH, otherwise your cake may turn out dense and flat with a muted chocolate flavor.
2.Why do my cupcakes turn out dense instead of soft and fluffy like the original Hostess CupCakes?
The most common causes are overmixing the batter, expired leaveners, or overfilled liners. Mix wet and dry ingredients only until no dry flour streaks remain to avoid tough gluten development, confirm your baking soda and powder are less than 6 months old, and fill liners no more than 2/3 full for that springy, tender crumb.
3.Can I use a sugar substitute in place of granulated sugar for a lower-sugar version of these cupcakes?
Granulated sugar gives this cake its signature tender, moist crumb and balanced sweetness that matches the original, but you can swap in a cup-for-cup granulated baking sugar substitute for a lower-sugar take. Skip liquid sweeteners like honey or maple syrup, as those throw off the moisture balance and lead to a dense, gummy crumb.
4.How do I pipe the marshmallow filling into the center without it oozing out the sides?
Use a cupcake corer or the back of a large piping tip to cut a 1-inch deep, 3/4-inch wide plug out of the center of each fully cooled cupcake. Pipe filling just level with the top of the cored hole, then trim the removed cake plug to fit back as a cap before glazing to seal the filling in completely.
5.Can I make the marshmallow filling ahead of time, and how should I store it?
You absolutely can! The fluffy marshmallow filling stays good for up to 3 days when stored in an airtight container in the fridge. Right before you’re ready to pipe, give it a 30-second whip with a hand mixer on medium speed to restore its light, airy texture, as it firms up slightly when chilled.
6.My chocolate glaze turned dull and streaky instead of glossy—what went wrong?
Dull, streaky glaze usually happens if you overheat the chocolate, get even a tiny drop of water in the melting chocolate, or apply it to warm cupcakes. Melt chocolate over low, gentle heat, keep all tools completely dry, and wait until filled cupcakes are fully room temperature before dipping for that shiny, snappy finish.
7.What’s the easiest way to do the signature white squiggle on top without fancy piping tools?
You don’t need specialty equipment! Scoop your smooth white vanilla icing into a small zip-top bag, press out all excess air, seal it tightly, and snip a tiny 1/8-inch corner off the bottom. Hold the bag 1 inch above the set glaze, and pipe a continuous wavy line across the top in one steady motion for that classic look.
8.How long do these copycat cupcakes stay fresh, and what’s the best storage method?
Stored in an airtight container at cool room temperature (away from direct sun or heat sources), these cupcakes stay fresh for up to 4 days. If your kitchen is warmer than 75°F, pop the container in the fridge, but let cupcakes sit out 15 minutes before serving to bring back that soft, nostalgic snack-cake texture.
9.Can I swap the all-purpose flour for a gluten-free alternative?
Yes, use a 1:1 gluten-free all-purpose flour blend that contains xanthan gum for the closest texture match to the original cake. Skip blends made solely with almond or coconut flour, as those create a dense, crumbly texture. Measure the blend by spooning and leveling, just like regular all-purpose flour, to avoid overpacking.
10.Why do my cupcakes sink in the middle right after I take them out of the oven?
That frustrating mid-cupcake sink usually traces back to three issues: underbaking, too much leavener, or opening the oven door too early. Bake until a toothpick inserted in the center comes out with 2-3 moist crumbs, measure baking soda and powder level (not heaping), and avoid opening the oven for the first 12 minutes of baking to let the structure set.
11.Can I freeze these finished cupcakes for later snacking?
These freeze beautifully for up to 3 months! Wait until the chocolate glaze is fully set, then wrap each cupcake individually in plastic wrap and tuck them into a labeled freezer-safe bag. Thaw overnight in the fridge, then let them come to room temperature for 20 minutes before eating, and they’ll taste just as fresh as bake day.
12.My marshmallow filling is too runny to pipe neatly—how can I fix it?
If your filling is too loose, pop it in the fridge for 15 to 20 minutes to firm up, then give it a quick whip to reincorporate. If it’s still too soft, beat in an extra 1/4 cup of sifted powdered sugar, 1 tablespoon at a time, until it holds a soft, stable peak that doesn’t droop when you lift the mixer beater out.
13.Can I adapt this recipe to be dairy-free for guests with dietary restrictions?
This recipe is super easy to make dairy-free! Swap any butter in the cake and filling for equal amounts of vegan butter, use dairy-free chocolate for the glaze, and use unsweetened oat or almond milk in place of dairy milk. Most standard grocery store marshmallow cremes are already dairy-free, but double-check the label to be sure.

Comments (6)

2 days ago

OMG these taste EXACTLY like the Hostess cupcakes I begged my mom to pack in my lunch as a kid!!! I made these for my son’s 4th grade class potluck yesterday and every single kid came back asking for a second. The creamy filling is so spot on, I may have eaten a spoonful straight while I was piping it 😂 The only heads up is leave yourself enough time for the cupcakes to cool completely before you add the filling and glaze, I rushed the first batch and it was a melty mess! SO good, will be making these for every birthday from now on.

2 hours ago

Wait, is the filling supposed to be super runny? I followed the measurements exactly but mine was way too thin to pipe, it oozed right out the bottom of the cupcakes when I tried to inject it. I ended up sticking the whole batch in the fridge for an hour and it firmed up okay, but the texture was a little grainy? Flavor was great though, my roommate ate 3 in one sitting lmao.

30 minutes ago

Hi there! So sorry your filling turned out runny—this usually happens if the butter is too soft when you whip it, or if the marshmallow fluff isn’t fully incorporated before adding the powdered sugar. Next time, make sure your butter is room temp (not melted!) and add the powdered sugar 1/4 cup at a time, mixing on low between additions. Popping it in the fridge for 20 minutes if it feels soft while piping works great too! So glad the flavor still hit for you and your roommate 😊

1 week ago

Game changer!!! I’ve tried 3 different copycat Hostess cupcake recipes over the years and none of them come close to this. The chocolate ganache glaze sets perfectly with that little crack when you bite into it, just like the original! I brought these to my neighborhood block party this weekend and people were asking me for the recipe before they even finished their first bite. 10/10, no notes.

5 days ago

Did you use regular cocoa powder or Dutch processed for the cake? I only have Dutch processed in my pantry right now and don’t want to run to the store if I don’t have to!

3 days ago

I used regular unsweetened cocoa powder! I’ve made it with Dutch processed before too though, it just makes the chocolate a little deeper and nuttier, still totally delicious, no extra adjustments needed 😊

yesterday

Made these with my 7 year old daughter for our weekly Sunday bake day and we had a blast. She got to do the little white squiggles on top and was so proud of herself she showed every person who came to the door all week lmao. The cake is super moist, not too sweet, the filling is fluffy as hell, 10 out of 10. We already have a request to make a double batch for her soccer team snack next weekend. Pro tip: if you don’t have a piping bag for the filling, a plastic zip top bag with the corner cut off works perfectly, no fancy equipment needed!

5 minutes ago

Has anyone tried making these with a 1:1 gluten free flour blend? I’m gluten intolerant but have been craving these so bad ever since I saw the recipe pop up on my feed. I don’t want to waste ingredients if the texture is going to be all gummy or off!

just now

I made them last week with Bob’s Red Mill 1:1 gluten free blend and they came out perfect! No gummy texture at all, my husband who eats regular gluten didn’t even notice a difference. Just make sure you let the batter rest for 10 minutes before pouring into the cupcake liners so the flour can absorb the liquid, that’s the trick I use for all gluten free baked goods!

2 weeks ago

I cannot believe how spot on these are!!! I grew up eating Hostess cupcakes after soccer practice as a kid and these taste exactly like I remember, maybe even better because they don’t have that weird preservative aftertaste. The cook time is a little long but so worth it, I promise. My only tiny complaint is the white icing for the squiggle on top was a little hard to get thin enough to pipe neatly, but honestly the messy ones tasted just as good lmao.

1 week ago

So glad you loved the flavor! For the white squiggle icing, if it’s too thick to pipe smoothly, just add a tiny splash of milk (1/4 teaspoon at a time!) until it reaches a thin, pipeable consistency. It’s super easy to overdo it, so go slow! The messy squiggles just taste like extra love in my book 😂

5 days ago

Agreed about the messy ones! My squiggles looked like abstract art but my grandkids went crazy for them, said they were better than the store-bought ones they get after field trips. We added a tiny sprinkle of rainbow nonpareils on top too and it was chef’s kiss.



