
hotdog sandwich bread

title 1
hotdog sandwich bread
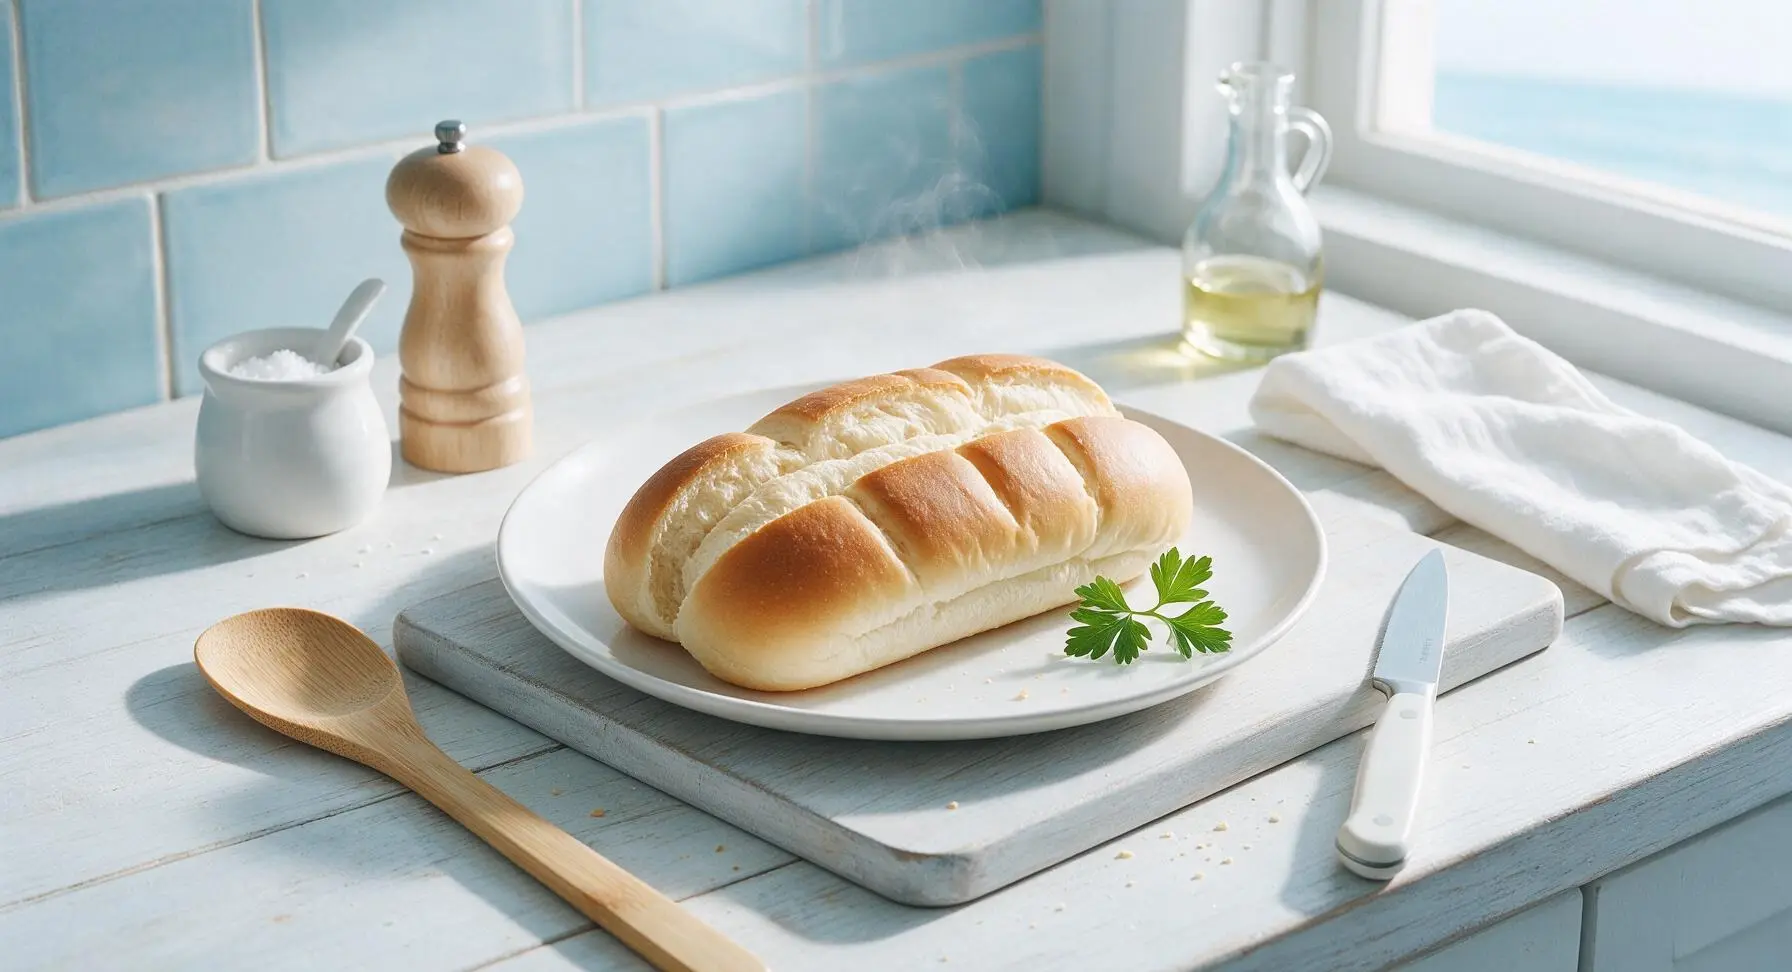
⏱️ cook time 18 minutes
🍽️ servings 8
⚡ Difficulty medium

intro

Soft, pillowy split-top hotdog buns with a delicate golden buttery crust, sturdy enough to hold loaded toppings without sogginess, light enough to melt in your mouth for perfect summer hotdogs.

Ingredients
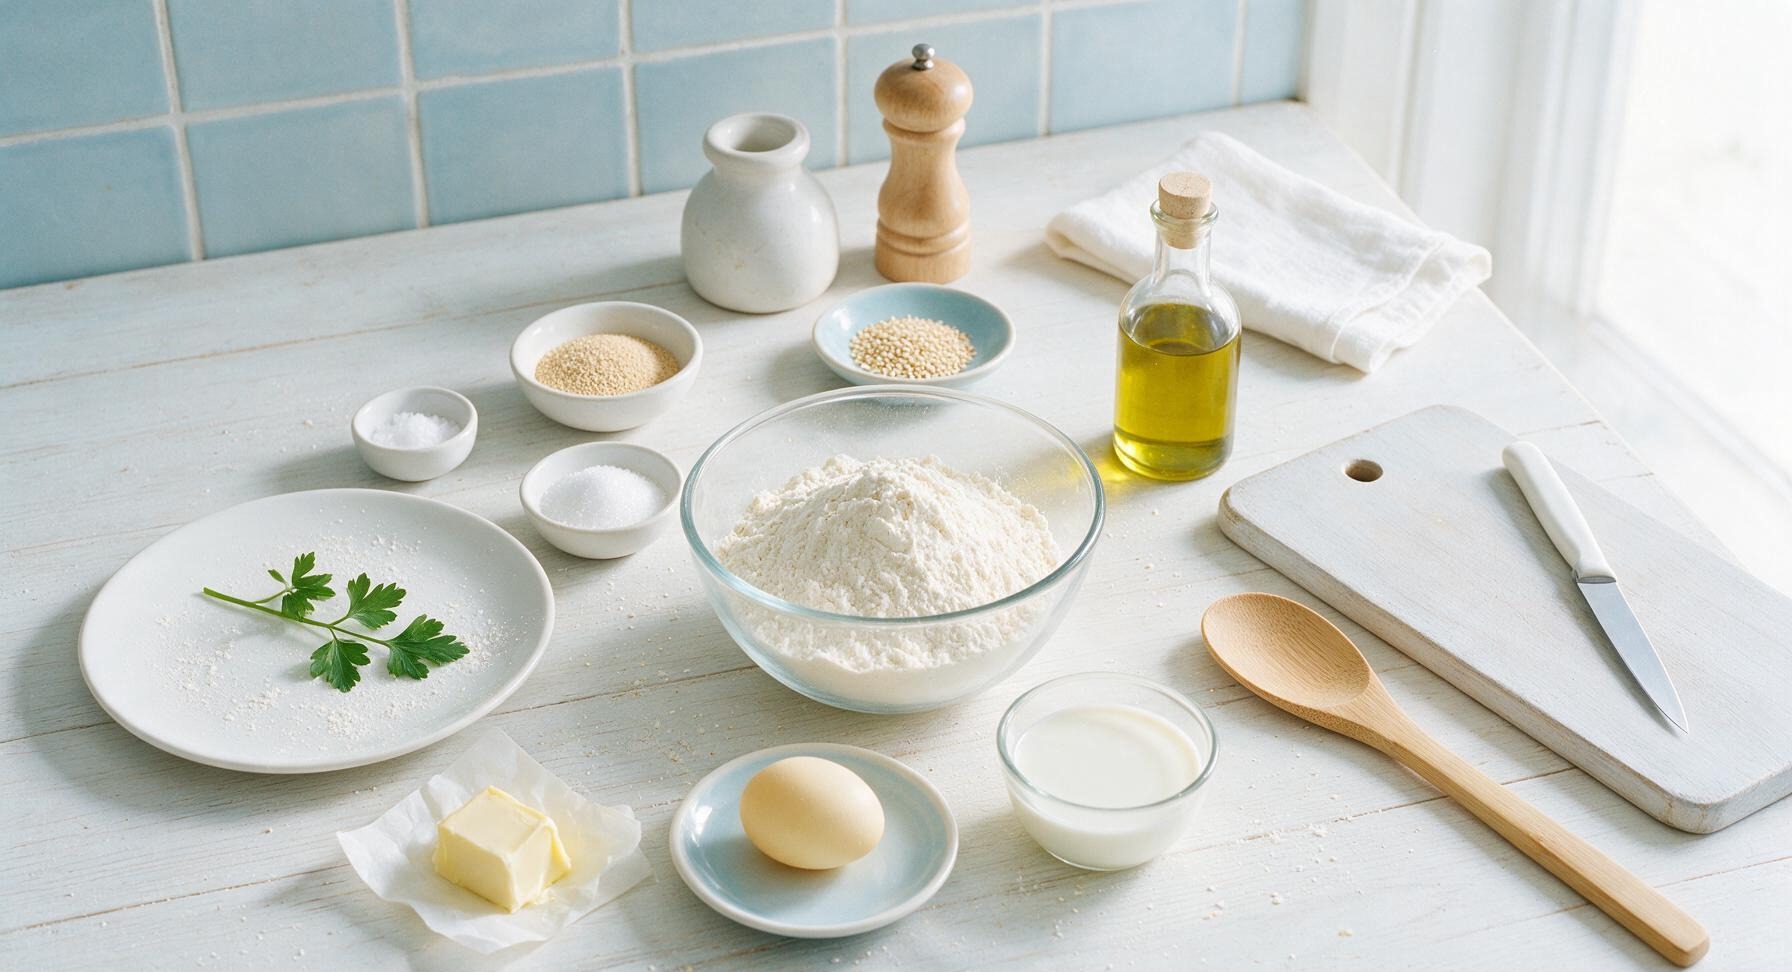
All-purpose flour 420g (3.5 cups)
Instant dry yeast 6g (2 tsp)
Fine sea salt 7g (1.25 tsp)
Granulated sugar 25g (2 tbsp)
Warm whole milk 180ml (3/4 cup, 35C/95F)
Large egg 1 (50g, room temperature)
Unsalted butter 28g (2 tbsp, softened, divided)
Toasted sesame seeds (optional) 10g (2 tsp)

Steps

1

Mix Yeast Starter Base

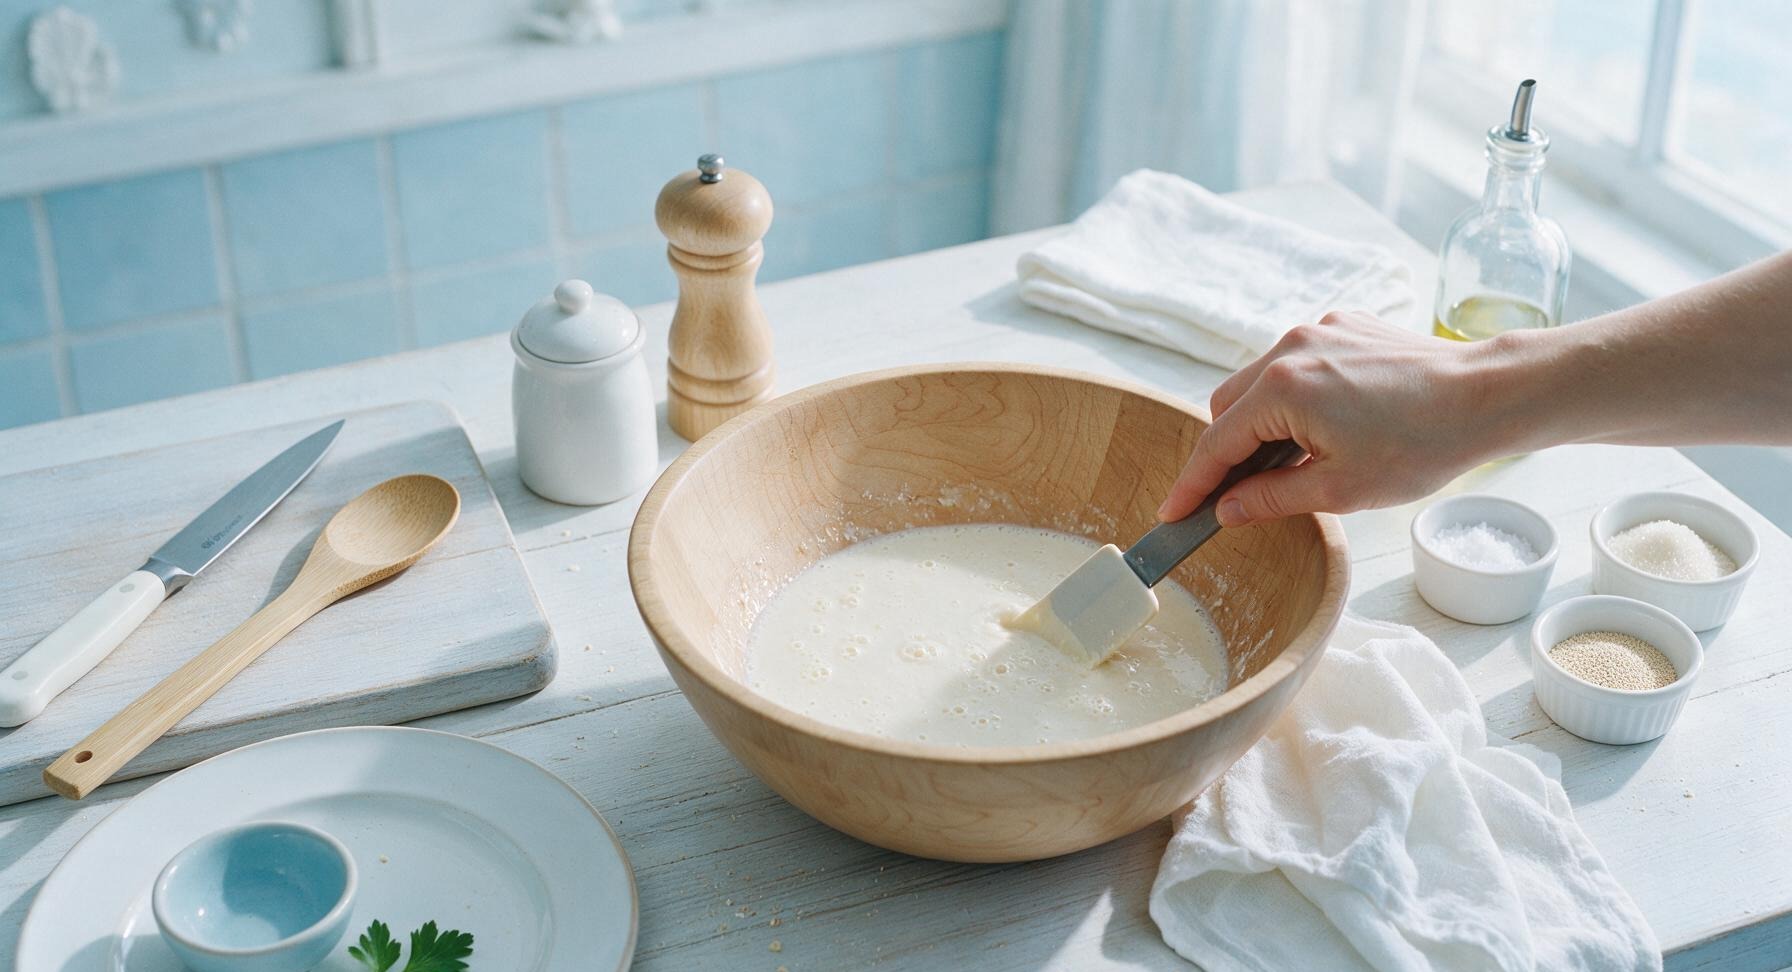
In the medium maple mixing bowl, combine 180ml warm whole milk (heated to 35C/95F, feels lukewarm to the touch, not hot to avoid killing yeast), 25g granulated sugar, and 6g instant dry yeast. Stir gently with the dough scraper to combine, then let rest 5 minutes until the surface develops a thin layer of light foam, confirming the yeast is active. Add the room-temperature large egg, 20g softened unsalted butter, and 7g fine sea salt, stirring until fully incorporated into the liquid.
Step 1
step1:Mix Yeast Starter Base
2

Knead Smooth Elastic Dough

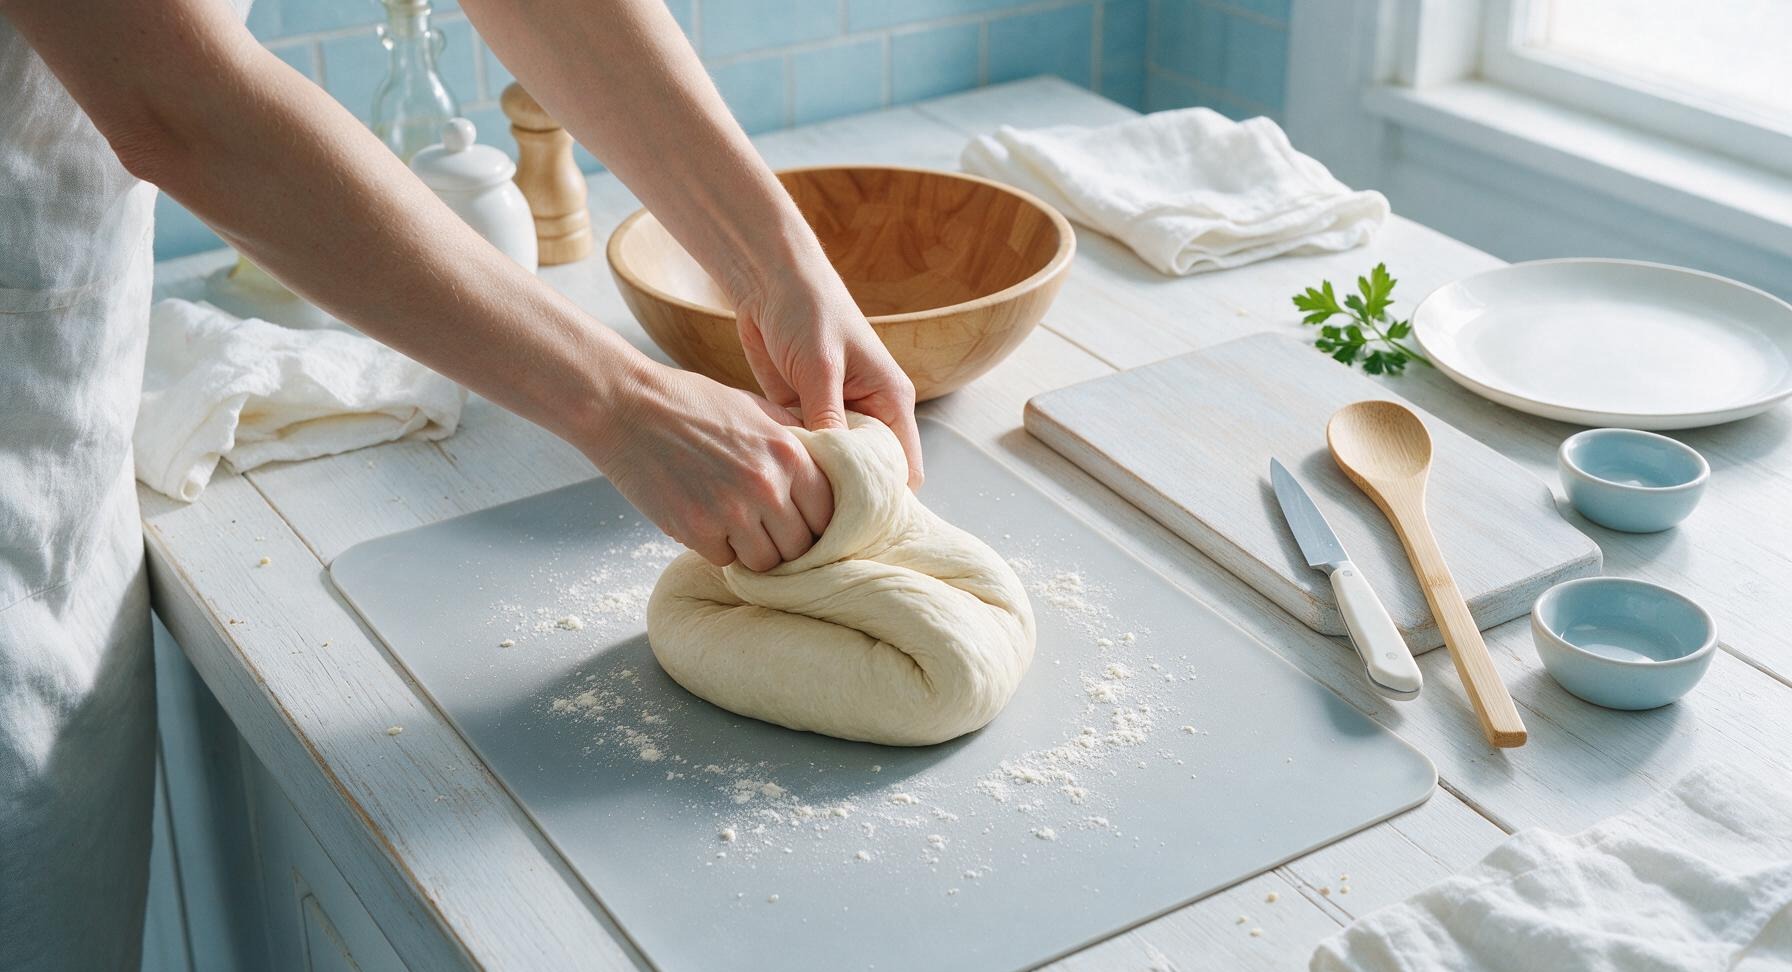
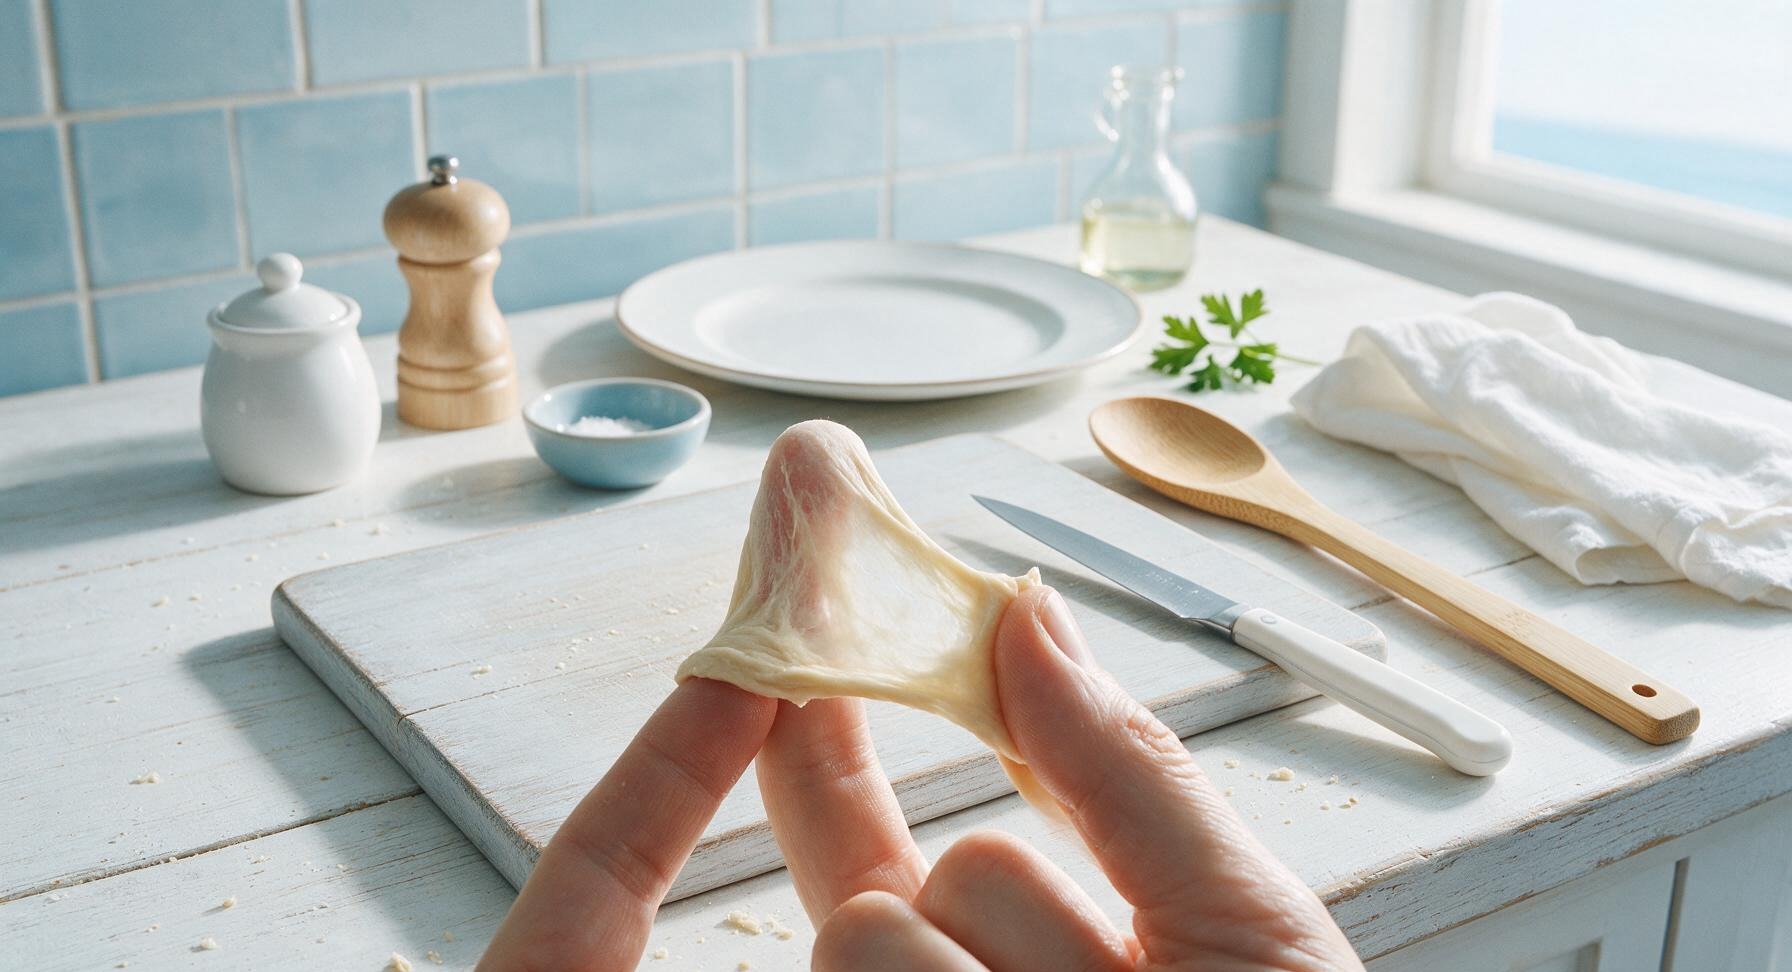
Add 420g all-purpose flour to the mixing bowl 120g (1 cup) at a time, stirring with the dough scraper until a shaggy, sticky dough mass forms with no dry flour pockets remaining. Unroll the light gray silicone baking mat at center counter, and turn the shaggy dough out onto its lightly floured surface. Knead by hand for 8-10 minutes, folding the dough over itself and pushing forward with the heel of your hand, until the dough is smooth, supple, and no longer sticks to clean hands. Test for doneness with the windowpane test: pinch a small piece of dough and stretch it thin enough to see light through without tearing.
Step 2
step2:Knead Smooth Elastic Dough
Step 2
step2:Knead Smooth Elastic Dough
3

Complete First Dough Rise

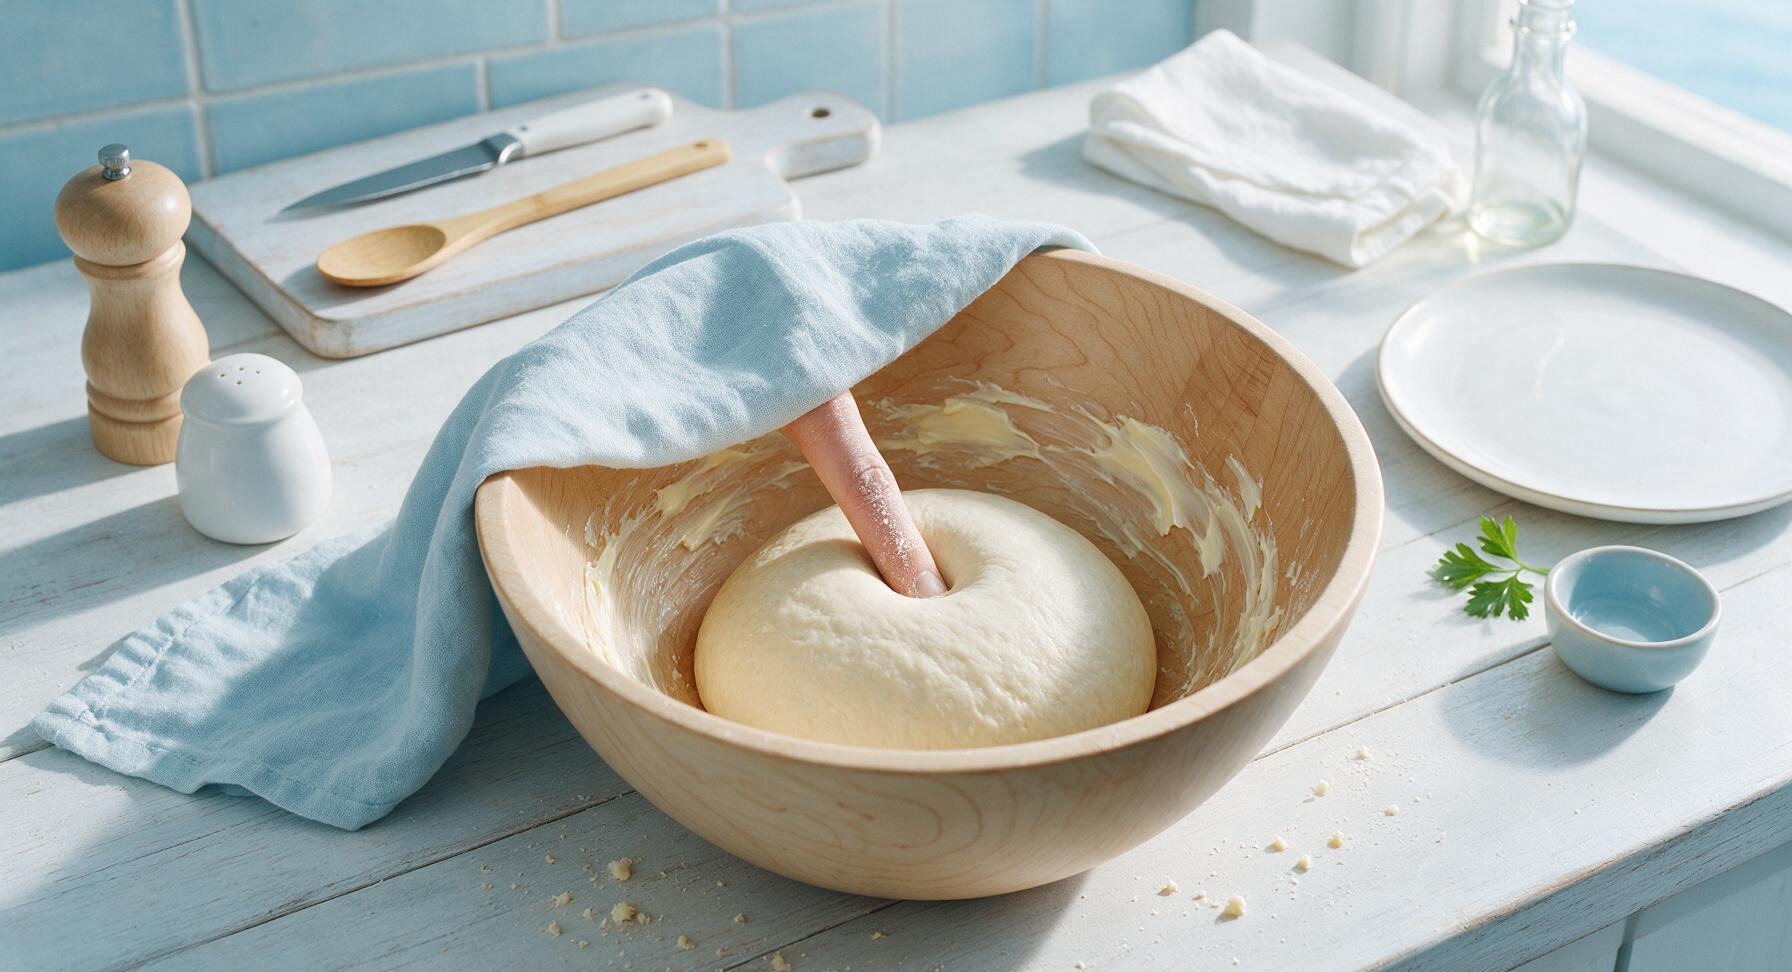
Form the kneaded dough into a tight, smooth ball, wiping the maple mixing bowl clean and coating its interior with a thin smear of leftover softened butter. Place the dough ball back into the bowl, turning once to coat the dough surface lightly in butter to prevent drying. Drape the corner of the pale blue linen towel (pulled gently from its fixed left edge) loosely over the bowl to cover it, and let rise in a warm, draft-free spot for 1 hour, until the dough doubles in volume. Test doneness by pressing a floured finger 1cm into the dough: the indentation should remain and not spring back.
Step 3
step3:Complete First Dough Rise
4

Divide and Shape Buns

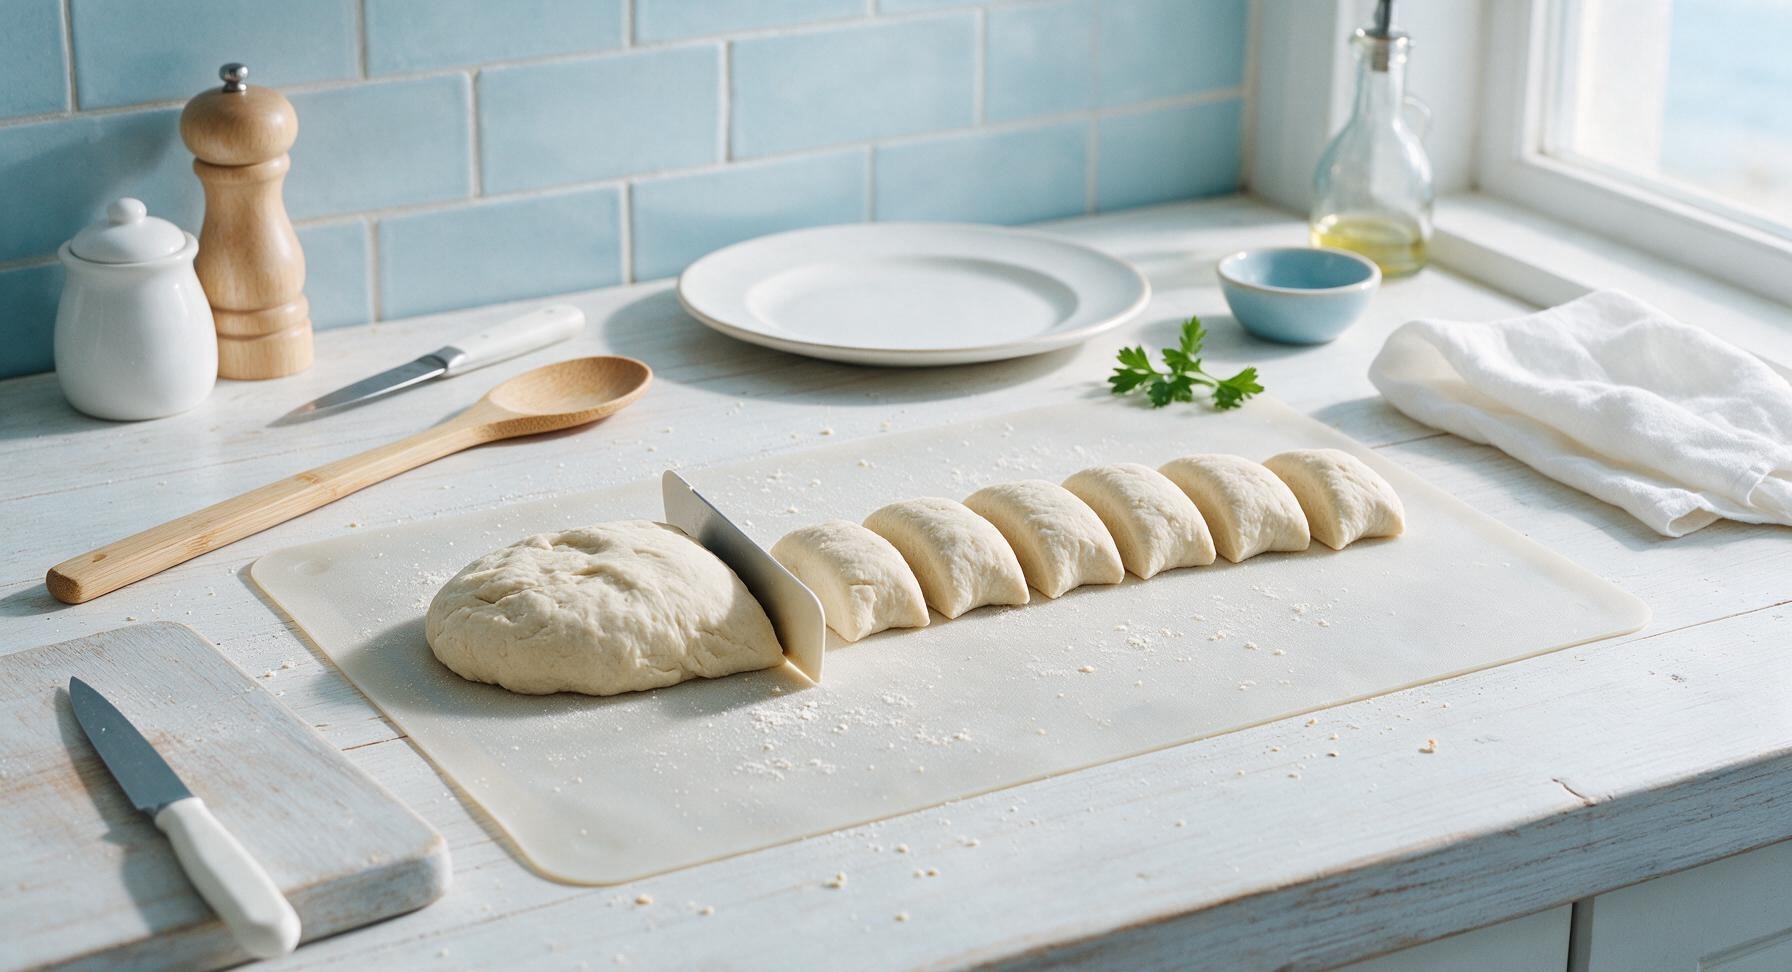
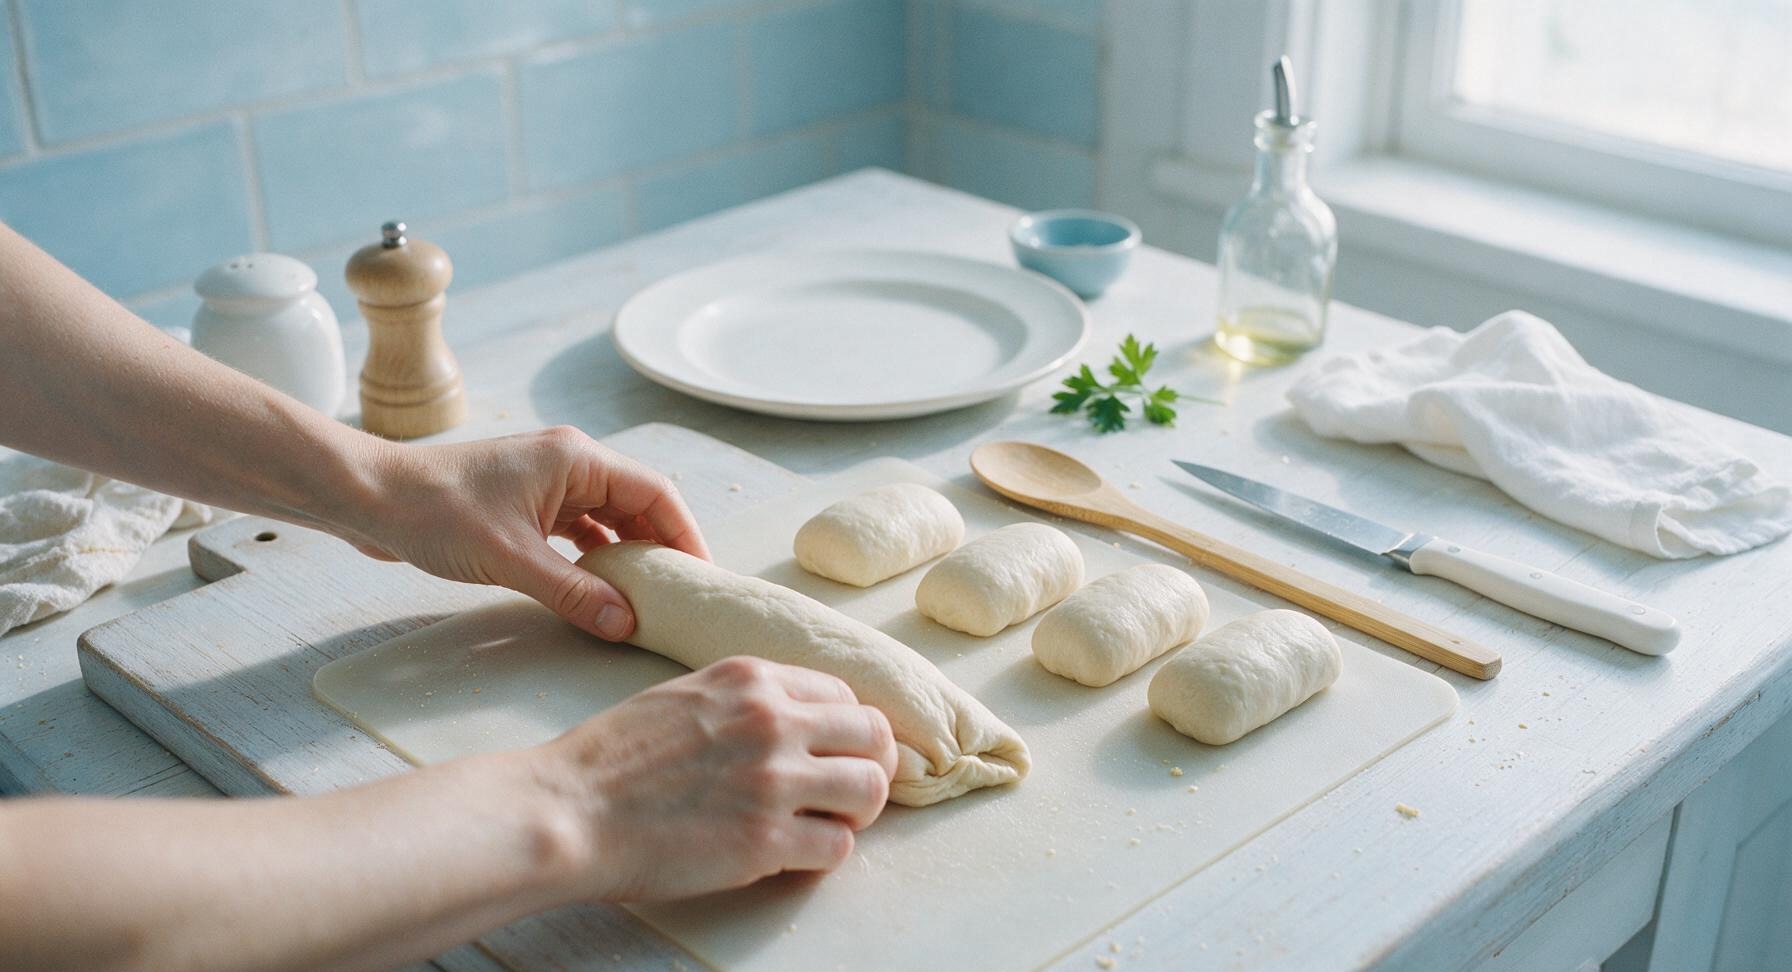
Punch the risen dough firmly in the center to release all trapped carbon dioxide, then turn it out onto the lightly floured silicone baking mat. Use the dough scraper to cut the dough into 8 equal pieces, each weighing ~85g (weighed on the digital scale for uniform size). Roll each piece into a tight 12cm (5 inch) long log, tapering the ends slightly to match the classic hotdog bun shape, pinching the long seam along the bottom tightly to seal and prevent splitting during baking.
Step 4
step4:Divide and Shape Buns
Step 4
step4:Divide and Shape Buns
5

Proof Shaped Dough Logs

Place the silicone baking mat with shaped dough logs inside the matte silver half-sheet baking pan, arranging the logs seam-side down with 5cm (2 inches) of space between each to allow for expansion. Brush the tops of the logs lightly with 3g melted butter using the pastry brush, then drape the linen towel loosely over the pan. Let the buns rise for a second 30 minutes, until they are puffy and press back slowly when gently poked with a finger. Preheat the oven to 190C (375F) during the last 10 minutes of proofing.
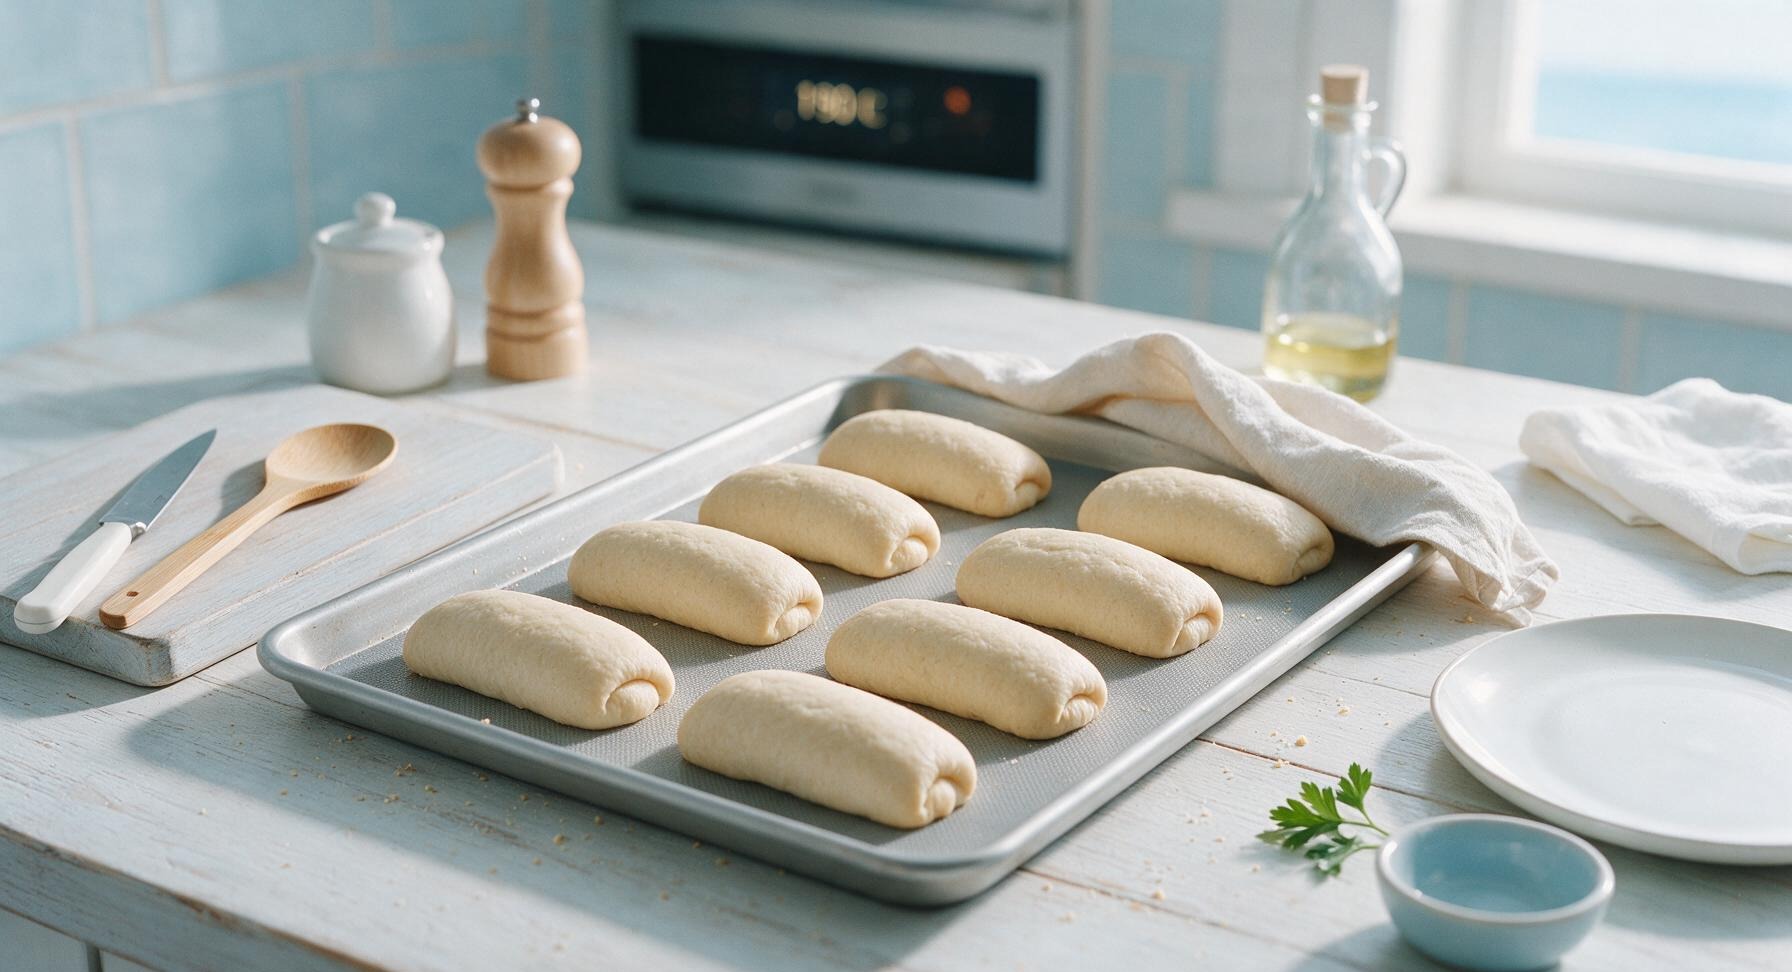
Step 5
step5:Proof Shaped Dough Logs
6

Bake to Golden Crust

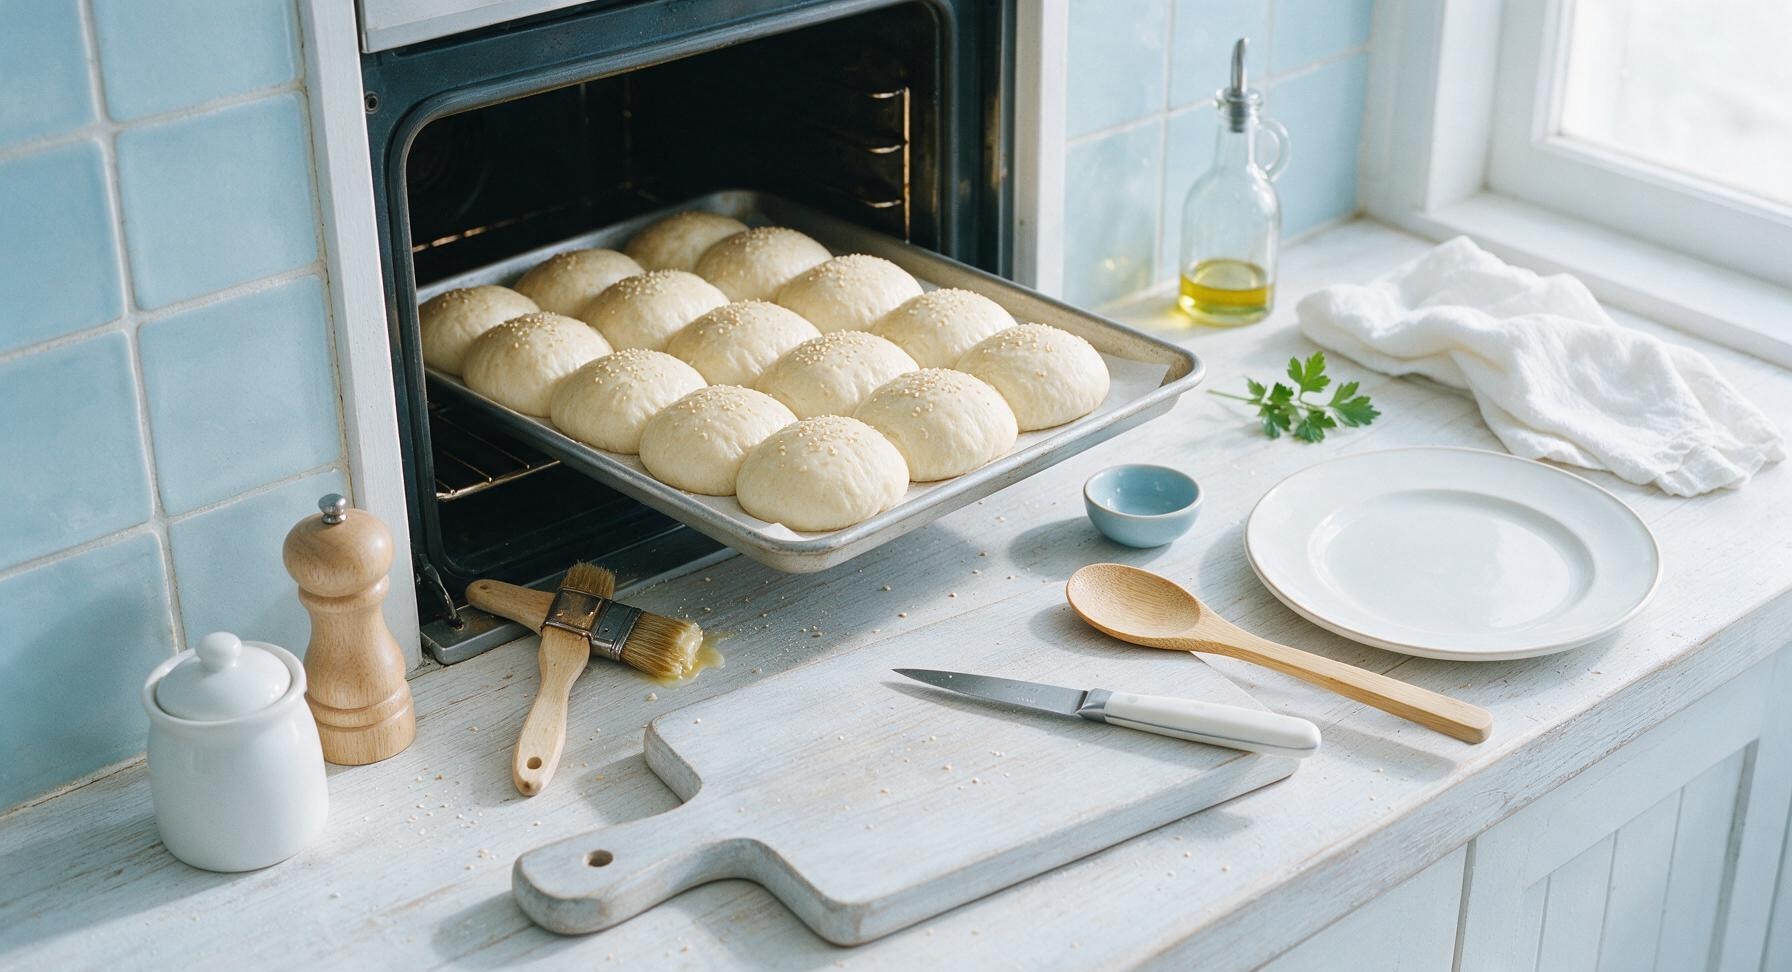
Remove the linen towel from the pan. Sprinkle the optional sesame seeds evenly over the tops of the fully proofed buns. Place the half-sheet pan on the middle rack of the preheated oven, and bake for 15-18 minutes, until the bun tops are an even deep golden brown, and the internal temperature of the center bun reaches 88C (190F) for doneness.
Step 6
step6:Bake to Golden Crust
7

Butter and Cool Buns

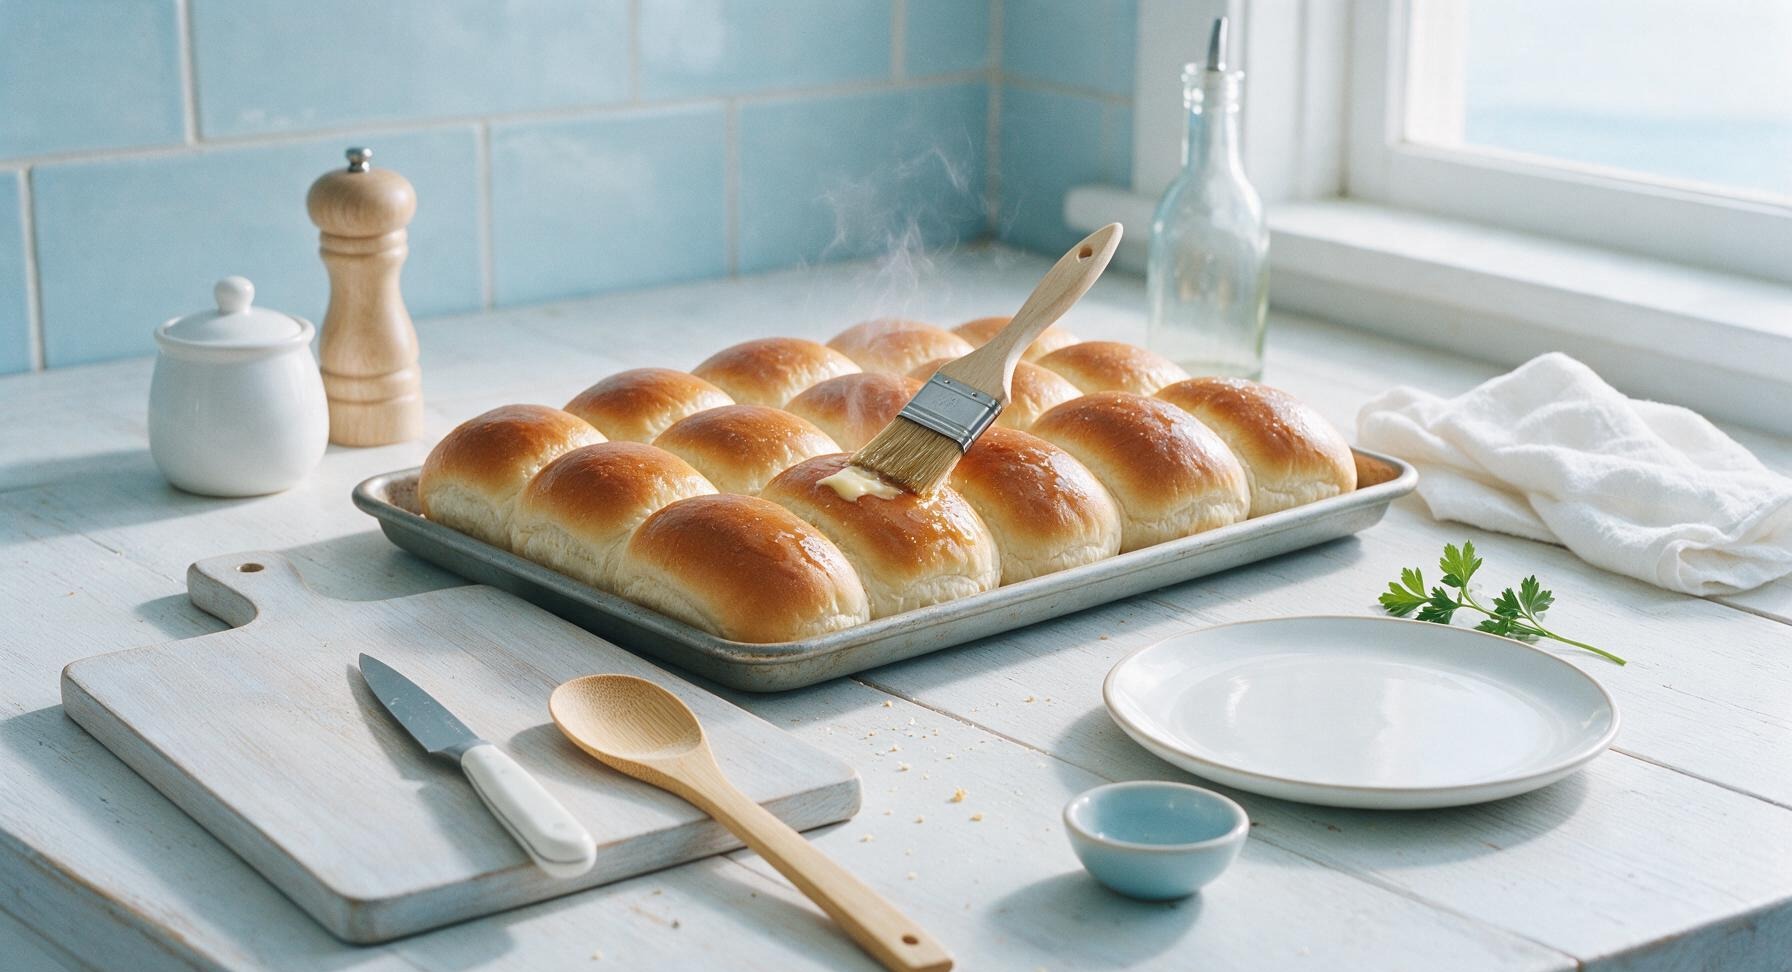
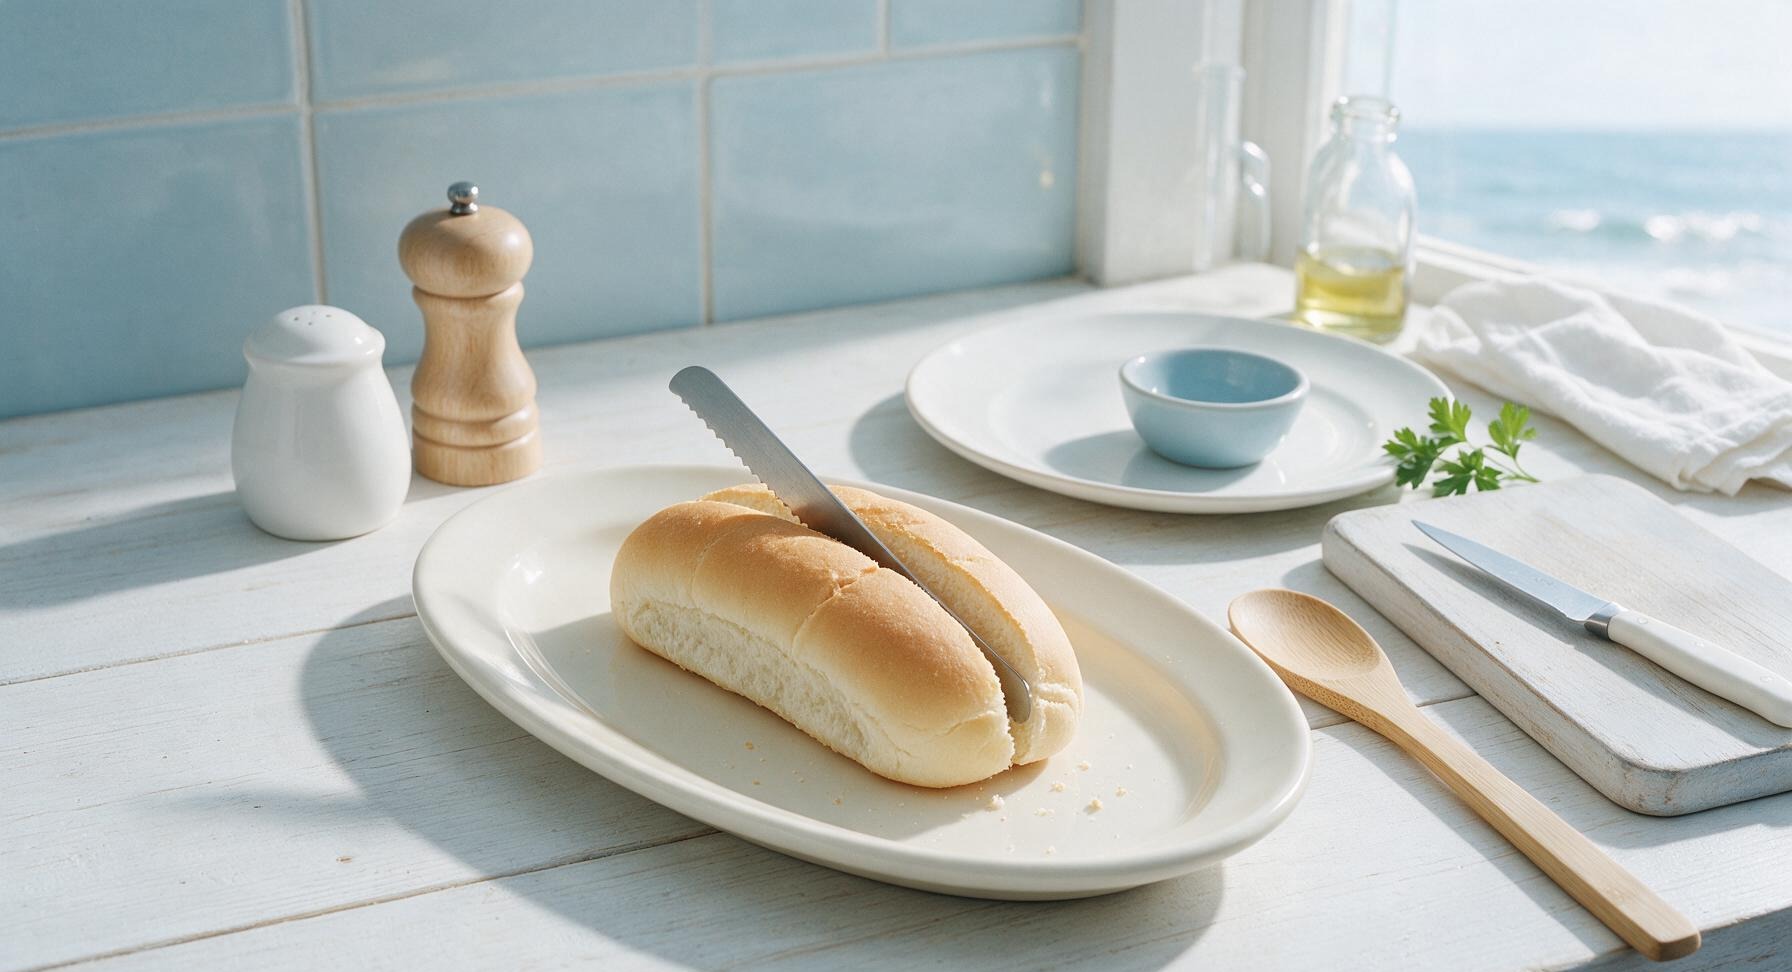
Remove the baked buns from the oven using oven mitts, and immediately brush the hot tops with the remaining 5g melted butter using the pastry brush, to create a soft, shiny, non-crusty top. Transfer the buns to the cream white ceramic oval platter, and let cool for 10 minutes at room temperature. Use the serrated bread knife to slice each bun lengthwise, leaving a 1cm connected hinge along one side (do not cut all the way through) to hold hotdog fillings securely.
Step 7
step7:Butter and Cool Buns
Step 7
step7:Butter and Cool Buns

Tips

1.Always use lukewarm (32-38C/90-100F) milk to activate yeast: liquid hotter than 40C/105F will kill the live yeast, leading to dense, flat buns that do not rise properly, while cold liquid will slow yeast activity and extend rise times significantly.
2.Pinch the bottom seam of each shaped dough log tightly before proofing: loose seams will split open as the dough expands in the oven, creating lopsided buns that cannot hold a hotdog and toppings evenly.
3.Wait the full 10 minutes for buns to cool before slicing: cutting hot bread straight from the oven compresses and tears the soft crumb, leading to squished, uneven pockets that squeeze condiments out when you add your hotdog.


✨ You May Also Like

Desserts & Baking
🍜 Italy

Creamy, coffee-kissed classic Northern Italian no-bake dessert, with layers of rum-spiked mascarpone cream, soft ladyfingers, and a rich cocoa dusting.

⏱️ 4 hours 3Desserts & Baking ★ 4.7
Desserts & Baking
🍜 France

Flaky, shatteringly crisp, buttery French croissants with golden exteriors and soft, airy layered interiors, perfect for pairing with coffee for a special morning treat.

⏱️ 12 hours Desserts & Baking ★ 4.5
Desserts & Baking
🍜 United States

Warm, spiced baked apples topped with a fluffy golden biscuit crust, this cozy dessert pairs perfectly with vanilla ice cream for cool-weather comfort.

⏱️ 55 minuteDesserts & Baking ★ 4.6
Desserts & Baking
🍜 United States

A star-spangled classic American blueberry pie with buttery flaky crust and bright sweet-tart filling, perfect for summer patriotic gatherings.

⏱️ 1 hour 25Desserts & Baking ★ 4.7
Desserts & Baking
🍜 United States

A beloved no-bake regional Maine candy with a chewy coconut-potato center coated in rich dark chocolate, a New England holiday staple since the 1870s.

⏱️ 2 hours 3Desserts & Baking ★ 4.8
Desserts & Baking
🍜 France

Luxuriously creamy, floral frozen custard made with aromatic Tahitian vanilla beans, boasting a smooth, rich texture that melts slowly on the tongue.

⏱️ 3 hours 3Desserts & Baking ★ 4.5

hotdog sandwich bread:Frequently Asked Questions

1.Can I use bread flour instead of all-purpose flour for these hotdog buns? ▾
Absolutely! Swap it 1:1 for all-purpose flour with no major base recipe adjustments. The higher protein content in bread flour creates a slightly chewier, sturdier bun that holds up extra well to loaded chili or cheese-topped hotdogs; just add 1 teaspoon of extra warm milk if your dough feels overly stiff during mixing.
2.How warm should the whole milk be to properly activate the instant yeast? ▾
Aim for milk between 105–110°F, which feels like comfortable warm bath water to the touch. Milk over 120°F will kill yeast and lead to flat, dense buns, while too-cold milk won’t wake yeast enough for a fluffy rise. You don’t need to pre-proof instant yeast, but hitting this temp guarantees consistent lift.
3.My dough isn’t rising at all—what went wrong? ▾
The most common culprits are expired yeast, milk that was too hot and killed the yeast, or a rising spot that’s too cold. Double-check your yeast expiration date first, then let your dough rest in a 75–80°F spot, like inside a turned-off oven with the light on, for the full recommended rise time.
4.Can I make these buns dairy-free? ▾
Definitely! Swap the whole milk for unsweetened oat milk, which has the closest creamy texture to cow’s milk for a soft, tender crumb, and replace any melted butter used for the crust with melted vegan butter or neutral canola oil. Rise times and baking instructions stay exactly the same for great results.
5.How do I get that perfect straight split on top of the buns? ▾
Wait until the buns finish their final proof, right before baking, then use a sharp, oiled lame or serrated paring knife to make a single ¼-inch deep straight cut down the center of each bun. Don’t press too hard or you’ll deflate the dough—light, steady pressure is all you need for a clean split that opens as it bakes.
6.Why do my buns turn out dense instead of soft and pillowy? ▾
Dense buns usually come from adding too much flour during kneading, under-kneading so gluten doesn’t fully develop, or cutting rise time short. Weigh your flour for accuracy (or spoon and level if using cups), knead until the dough passes the windowpane test, and never rush the two required rise steps.
7.Can I use active dry yeast instead of instant dry yeast? ▾
Yes, you’ll just need one small extra step. Use 25% more active dry yeast than the recipe calls for instant yeast, and dissolve it in the warm milk with a pinch of sugar for 5 minutes until it gets foamy before mixing into dry ingredients. All other rise and bake steps stay identical.
8.How do I keep the crust soft instead of crispy after baking? ▾
As soon as you pull the golden buns out of the oven, brush the tops generously with melted butter, then transfer them to a wire rack and cover loosely with a clean kitchen towel as they cool. The trapped steam and butter coating will keep the crust tender and buttery, not crunchy, for that classic hotdog bun texture.
9.Will these buns get soggy if I load them up with wet toppings like chili or sauerkraut? ▾
That’s exactly what this recipe is designed to avoid! The tight, soft crumb and thin buttery crust create a barrier that holds wet toppings for 20–30 minutes without getting mushy. For extra sogginess protection, toast the cut side of the split bun lightly on a griddle before piling on toppings.
10.How long do these homemade buns stay fresh? ▾
Stored in an airtight zip-top bag or sealed container at room temperature, they’ll stay soft and fresh for 3–4 days. Don’t store them in the fridge, as cold temperatures make the crumb go stale much faster. If they feel a little firm after a couple days, warm them for 10 seconds in the microwave before serving.
11.Can I freeze these buns for later use? ▾
Absolutely! Let the baked buns cool completely, then wrap each one individually in plastic wrap and tuck them into a freezer-safe bag for up to 3 months. Thaw them at room temperature for 30 minutes, or warm them in a 350°F oven for 5 minutes, and they’ll taste just as soft and fresh as bake day.
12.Do I need a stand mixer to make this dough, or can I knead it by hand? ▾
No stand mixer required! You can mix the dough in a regular bowl with a wooden spoon, then turn it out onto a lightly floured counter and knead by hand for 8–10 minutes until smooth and elastic. It’s a forgiving, soft dough, so it won’t take nearly as much arm work as sturdier artisanal bread doughs.
13.How big should I portion the dough pieces to make standard-sized hotdog buns? ▾
For standard grocery-store sized buns that fit regular franks perfectly, portion each dough piece to 3 ounces (about 85 grams) before shaping. Roll each piece into a 6-inch long log, set them 2 inches apart on the baking sheet, and they’ll puff up to the perfect size during proofing and baking.
14.Why do my buns spread out flat instead of puffing up tall during baking? ▾
That usually happens if the final proof went too long, so the dough over-expanded and lost its structure before hitting the oven, or if your baking sheet was too heavily greased so logs slid outward instead of rising up. Stick to the 30–45 minute room temp final proof and line sheets with parchment instead of over-greasing.
15.Can I add toppings like sesame seeds or poppy seeds to the bun tops? ▾
Of course! After you make the top split right before baking, brush the bun tops lightly with an egg wash (1 egg beaten with 1 tablespoon milk) then sprinkle on your seeds of choice. The egg wash helps seeds stick securely so they don’t fall off as you handle and eat the buns, and adds a pretty golden sheen.
16.Can I make this dough ahead of time to bake the next day? ▾
Yes, that’s a great time-saver for summer cookouts! After kneading the dough, put it in a greased bowl, cover tightly, and let it do its first rise slow in the fridge for 8–12 hours. Take it out, portion and shape buns, let them come to room temp for a 1-hour final proof, then bake as directed.
17.I don’t have granulated sugar—can I use a different sweetener? ▾
You can swap granulated sugar 1:1 for light brown sugar for a slightly richer, malty flavor, or use honey, just cut the milk amount by 1 teaspoon to account for the extra liquid. Don’t skip sweetener entirely—it doesn’t just add subtle sweetness, it feeds the yeast and helps keep the crumb soft longer.
18.How do I know when the buns are done baking so I don’t under or over-bake them? ▾
They’re done when the tops are a delicate light golden brown, and the internal temperature of the center bun hits 190°F on an instant-read thermometer. If you don’t have a thermometer, tap the bottom of a bun—if it sounds hollow, it’s fully baked. Start checking for doneness at the 12-minute mark at 375°F.
19.Why does the recipe call for fine sea salt instead of regular table salt? ▾
Fine sea salt mixes more evenly into the dough than coarser salt varieties, and it has a cleaner, less sharp salty flavor than iodized table salt that won’t overpower the soft, buttery taste of the buns. If you only have table salt, cut the amount by 25% to avoid over-salting, since table salt is much denser.

Comments (16)

2 days ago

OMG these buns are a total game changer for our summer cookouts! I’ve been buying store-bought hotdog buns for years and they always get soggy 2 minutes after putting a chili dog on them, but these stayed soft but held up perfectly through all our toppings last weekend. My kids went back for seconds before I even finished serving everyone! Only note is I let my dough rise a little longer than the recipe said because my kitchen is pretty cold right now.

1 day ago

Wait how much extra rise time did you give it? My kitchen is freezing too and I’m planning to make these for our block party next week!

1 day ago

Great question! If your kitchen is below 70°F, you can let the first rise go an extra 30-45 minutes until the dough doubles in size, it’ll still turn out perfectly soft!

3 days ago

Made these last night for our weekly family dinner with brats and sauerkraut, and WOW they are SO good. Way softer than any grocery store bun I’ve ever bought, and that split top design means no more toppings spilling out the back! I will say I almost overbaked mine at the 18 minute mark because my oven runs hot, so definitely keep an eye on them the last few minutes.

2 days ago

So glad you loved them! Great tip about watching the bake time for hot ovens – if yours runs 25°F+ hot, you can pull them at 16 minutes when they’re just golden on top to keep that extra soft texture.

1 week ago

I was nervous to try these because I’ve always found yeast breads intimidating, but the instructions were so straightforward! I did half regular hotdogs and half lobster rolls with these buns for my birthday dinner and everyone was asking for the recipe. 10/10, will be making these biweekly for meal prep from now on.

5 days ago

Taste was great, but I had a hard time getting the split to stay open when I baked them? Mine mostly closed up while they were in the oven so I ended up having to cut them like regular buns, which was a bummer. Any tips for that?

3 days ago

I had that problem my first batch too! You just have to press the split a little deeper before you let them do the final rise, and I brush a tiny bit of melted butter in the split right before baking to keep them from sealing shut. Worked like a charm on my second try!

1 week ago

Made these for my son’s end of season soccer team potluck and every single parent asked me where I bought the buns! They were so soft and pillowy, even the kids who usually only eat the hotdog and throw the bun away ate every bite. I added a little sprinkle of sesame seeds on top before baking and it was chef’s kiss.

5 days ago

Oh the sesame seed addition sounds genius! Did you use toasted ones or just regular raw sesame seeds?

4 days ago

Love the sesame seed twist! Those are such a fun, easy add-on that makes the buns feel extra special for gatherings. So stoked they were a hit at the potluck!

2 weeks ago

I swapped the dairy milk for oat milk and used vegan butter instead of regular, and these came out absolutely perfect! I’ve been looking for a soft vegan hotdog bun recipe forever and this one checks every box. My partner said they taste exactly like the soft buns we used to get at the county fair as kids.

30 minutes ago

First time ever making any kind of bread from scratch, and these actually turned out?! I was convinced I’d mess up the yeast part but the steps were super easy to follow even for a total newbie like me. I ate two straight out of the oven with just butter before I even put hotdogs in them lmao.

10 minutes ago

That’s what we love to hear! Nothing beats a warm fresh bun straight out of the oven, we won’t tell if you eat half the batch before you even add hotdogs 😂

5 days ago

I tried making these with a 1:1 gluten free flour blend because my daughter has celiac, and they came out way denser than the pictures look. Did I do something wrong? I followed all the other steps exactly.

4 days ago

Hi there! This recipe is formulated for regular all-purpose or bread flour, so 1:1 gluten free blends will usually come out denser because they don’t have the gluten structure to get that pillowy soft rise. We’re testing a gluten free version right now and will be posting it soon!

2 days ago

I had the same issue when I tried whole wheat flour for half the batch! The all white flour batch was perfect though, so I’d save the flour swaps for once you’ve made the original a couple times to get the feel for the dough.

2 weeks ago

These hold up so well in the freezer! I made a double batch on Sunday, pulled a few out last night for quick chili cheese dogs, and they tasted just as fresh as the day I baked them. Total meal prep win for busy school nights. No more running to the store last minute for buns!

2 hours ago

Took me two tries to get these right, but honestly that was my own fault for rushing the first rise! The second batch came out so soft and fluffy, they made the best pulled pork sandwiches over the weekend. I’m never buying store bought buns again.

1 hour ago

Agreed, rushing the rise is the easiest mistake to make with these! I let mine rise on top of my warm fridge and it cuts the rise time down by like 20 minutes without killing the texture.

1 week ago

Made these for our 4th of July potluck (yes I’m that person who plans recipes weeks in advance lmao) and they were the first thing gone off the table! I did a little everything bagel seasoning on half the batch and plain on the other half, both were massive hits. 10/10 will be a summer staple from now on.

5 days ago

Everything bagel seasoning on hotdog buns?! That is such a smart combo, I need to try that for our next brunch with breakfast dogs!

4 days ago

Everything bagel seasoning on these is such a chef’s kiss upgrade! We love that idea for brunch, that’d pair so well with egg and cheese breakfast sausages in the buns too.

3 days ago

These were perfect for our backcountry camping trip! I baked a batch before we left, packed them in an airtight bag, and they stayed soft for 3 full days on the trail. We loaded them up with grilled sausage and peppers our first night out, and it was way better than the squished store-bought buns we usually bring.

5 minutes ago

Quick question – can I make the dough the night before and let it rise in the fridge? I’m hosting a big BBQ next Saturday and I want to get as much prep done ahead of time as possible so I’m not stuck in the kitchen all day while guests are over.

1 minute ago

Absolutely! You can mix the dough, do the first knead, then cover it tightly and let it do a slow rise in the fridge for up to 12 hours. Just pull it out 30 minutes before you want to shape the buns to let it come up to temp a little, and it’ll turn out exactly the same!

yesterday

These taste EXACTLY like the soft split top buns they used to serve at the old malt shop I went to as a kid! I made them with classic grilled hotdogs, yellow mustard, and relish, and I swear I was transported back to 1987 sitting at the counter with a chocolate milkshake. So happy I found this recipe, it’s so nostalgic.

yesterday

That makes us so happy to hear! We developed this recipe specifically to copy that old-fashioned diner soft bun texture, so it means the world that it hit that nostalgic note for you.

20 hours ago

Oh I know exactly the buns you’re talking about! Store bought buns just don’t have that same melt-in-your-mouth softness anymore, I can’t wait to try this recipe to make them for my grandkids this weekend.

just now

Smoked some brisket dogs on the offset smoker this weekend and served ‘em on these buns, and my crew said it was the best meal I’ve made all summer. The soft, slightly sweet bread pairs perfectly with smoky meat and tangy BBQ sauce. I brushed the tops with a little bacon grease right when they came out of the oven and it sent them over the top.

2 days ago

I messed up and added a little too much salt to my first batch, but even then these were still way better than any bun I’ve ever bought. My roommate and I ate the whole batch in two days, so I’m already planning to make another one this weekend to go with the chili I’m making for the game.

1 day ago

LMAO I did the exact same thing my first try! I measured the salt wrong and it was a little salty but still so good, I’ve started measuring all my yeast bread ingredients into little bowls ahead of time so I don’t pull that move again.



