
Kimchi Mac and Cheese

title 1
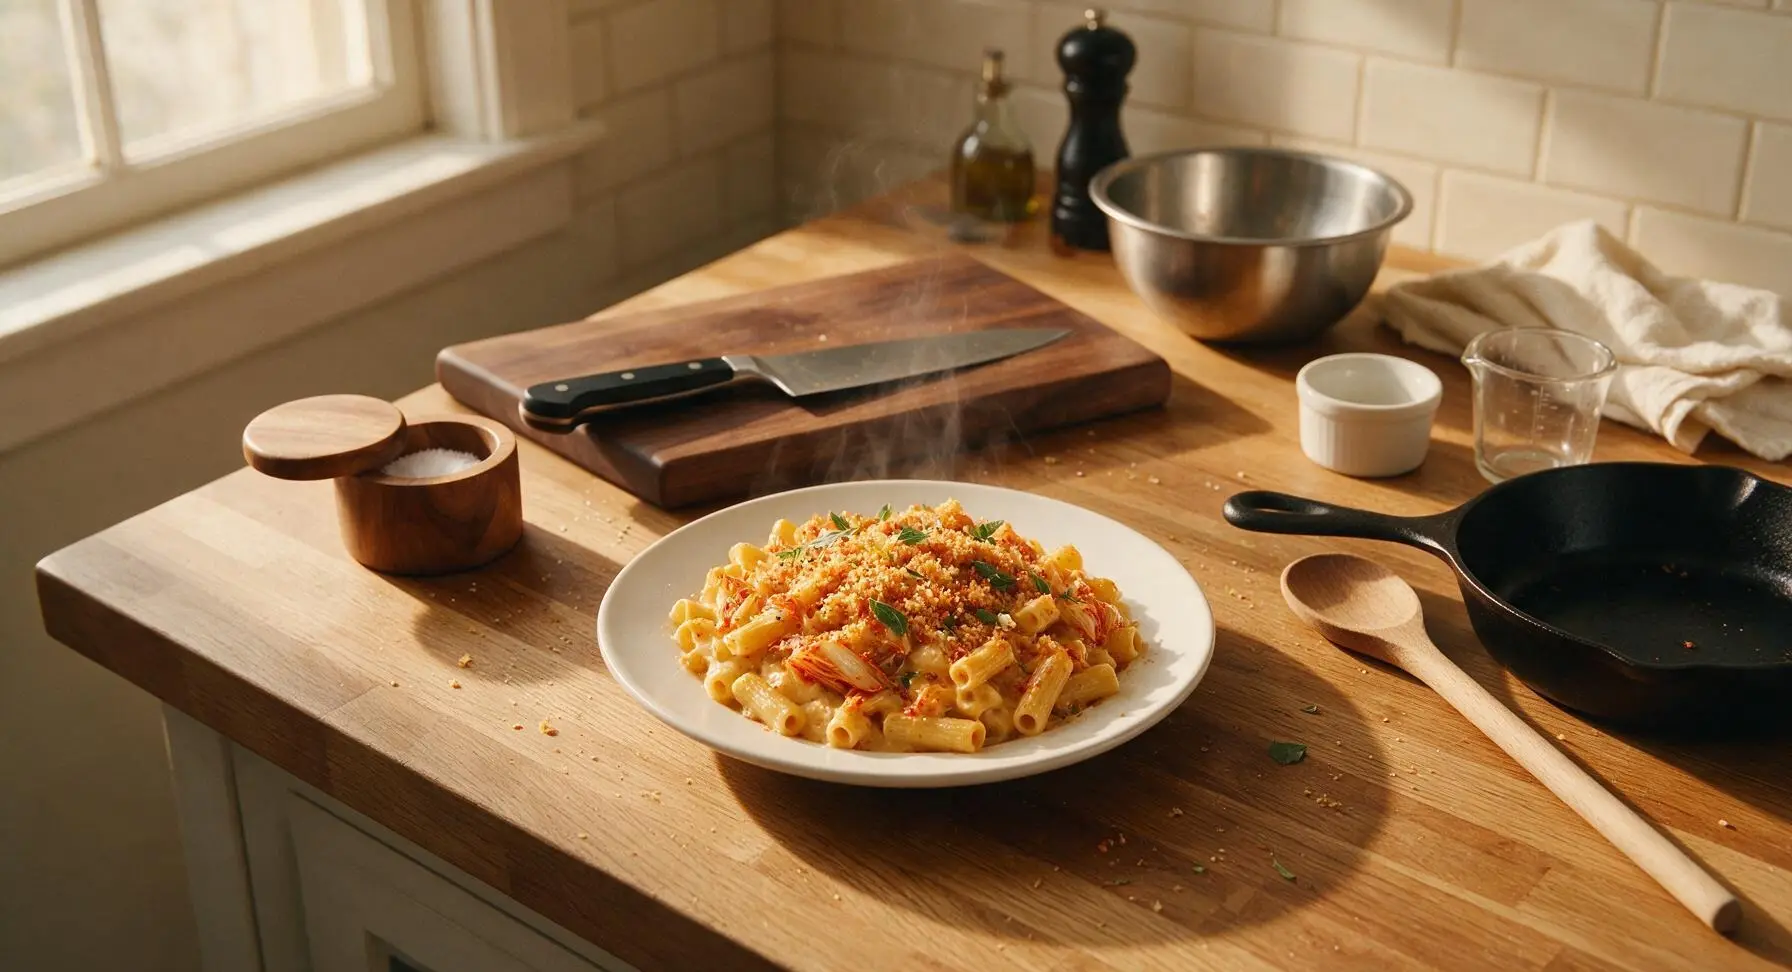
Kimchi Mac and Cheese
⏱️ cook time 25 minutes
🍽️ servings 4
⚡ Difficulty easy

intro

Creamy, tangy, umami-packed Korean-American fusion of classic mac and cheese and spicy fermented kimchi, finished with a crispy golden breadcrumb top.

Ingredients
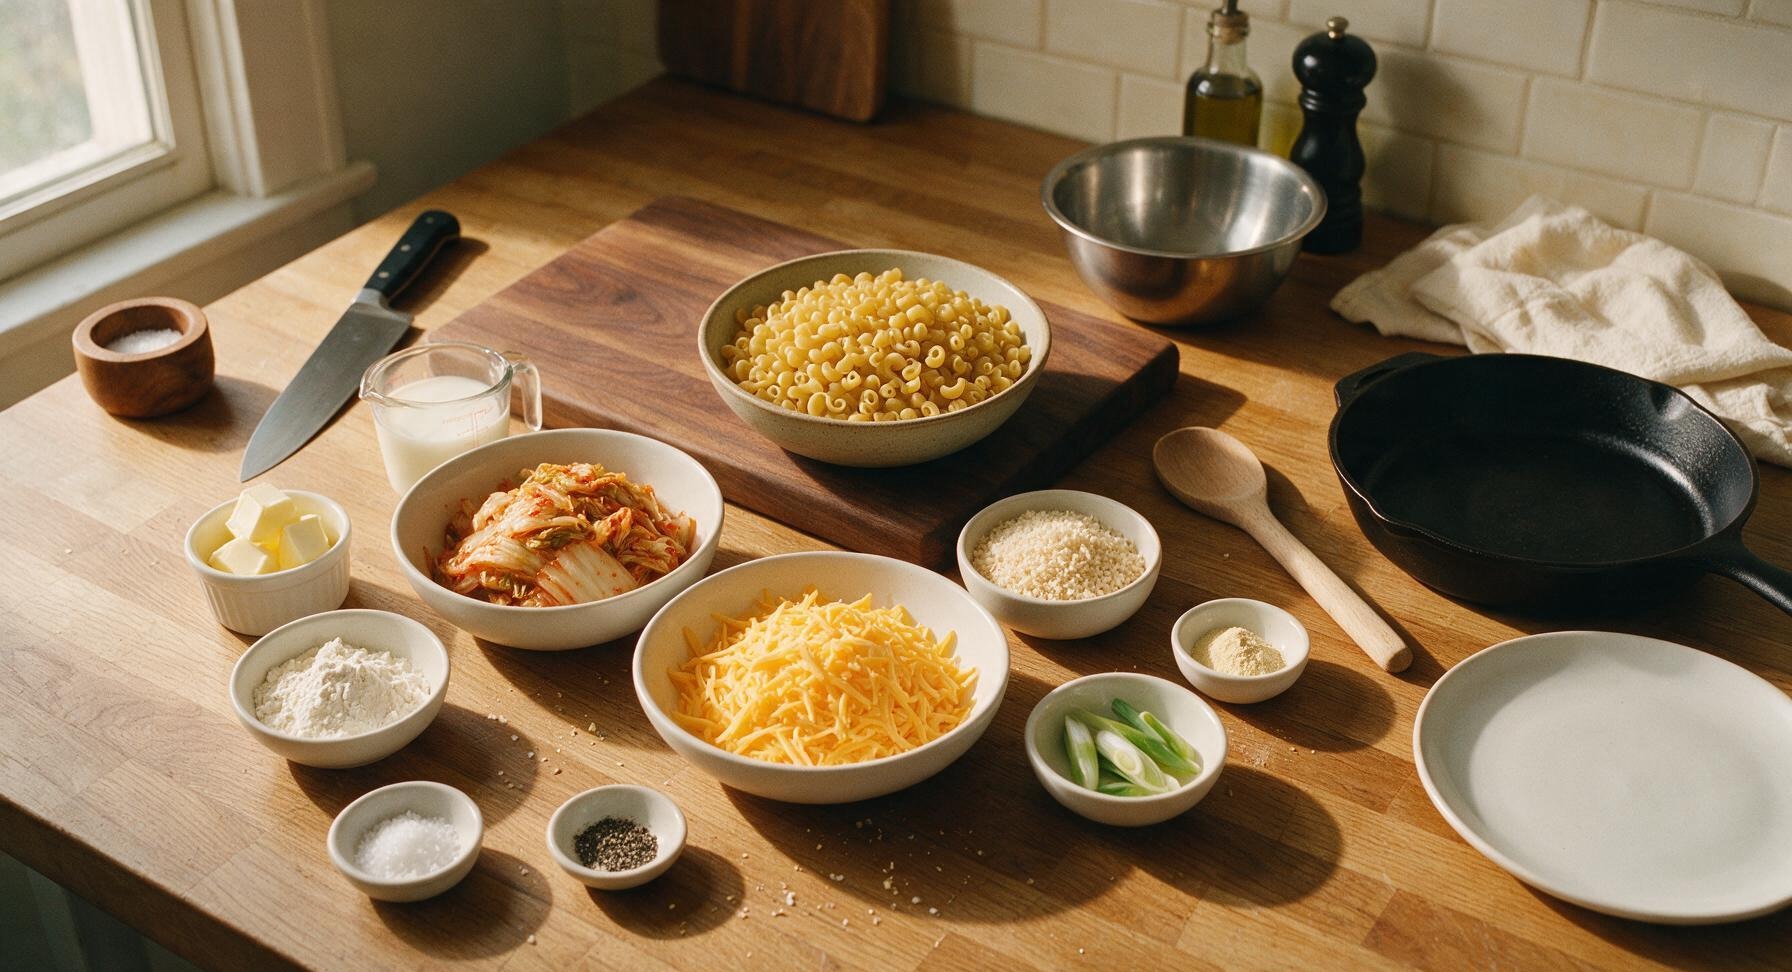
Elbow macaroni 225g (8oz)
Sharp cheddar cheese 225g (8oz), freshly grated
Fermented napa cabbage kimchi 1 cup (150g), drained
Unsalted butter 2 tbsp (28g)
All-purpose flour 2 tbsp (16g)
Whole milk 1.5 cups (360ml)
Panko breadcrumbs ¼ cup (15g)
Garlic powder 1 tsp (3g)
Scallions 3 pieces (30g), thinly sliced
Coarse sea salt 1 tsp (5g), divided
Black pepper ½ tsp (1g), freshly ground

Steps

1

Prep Kimchi and Cheese

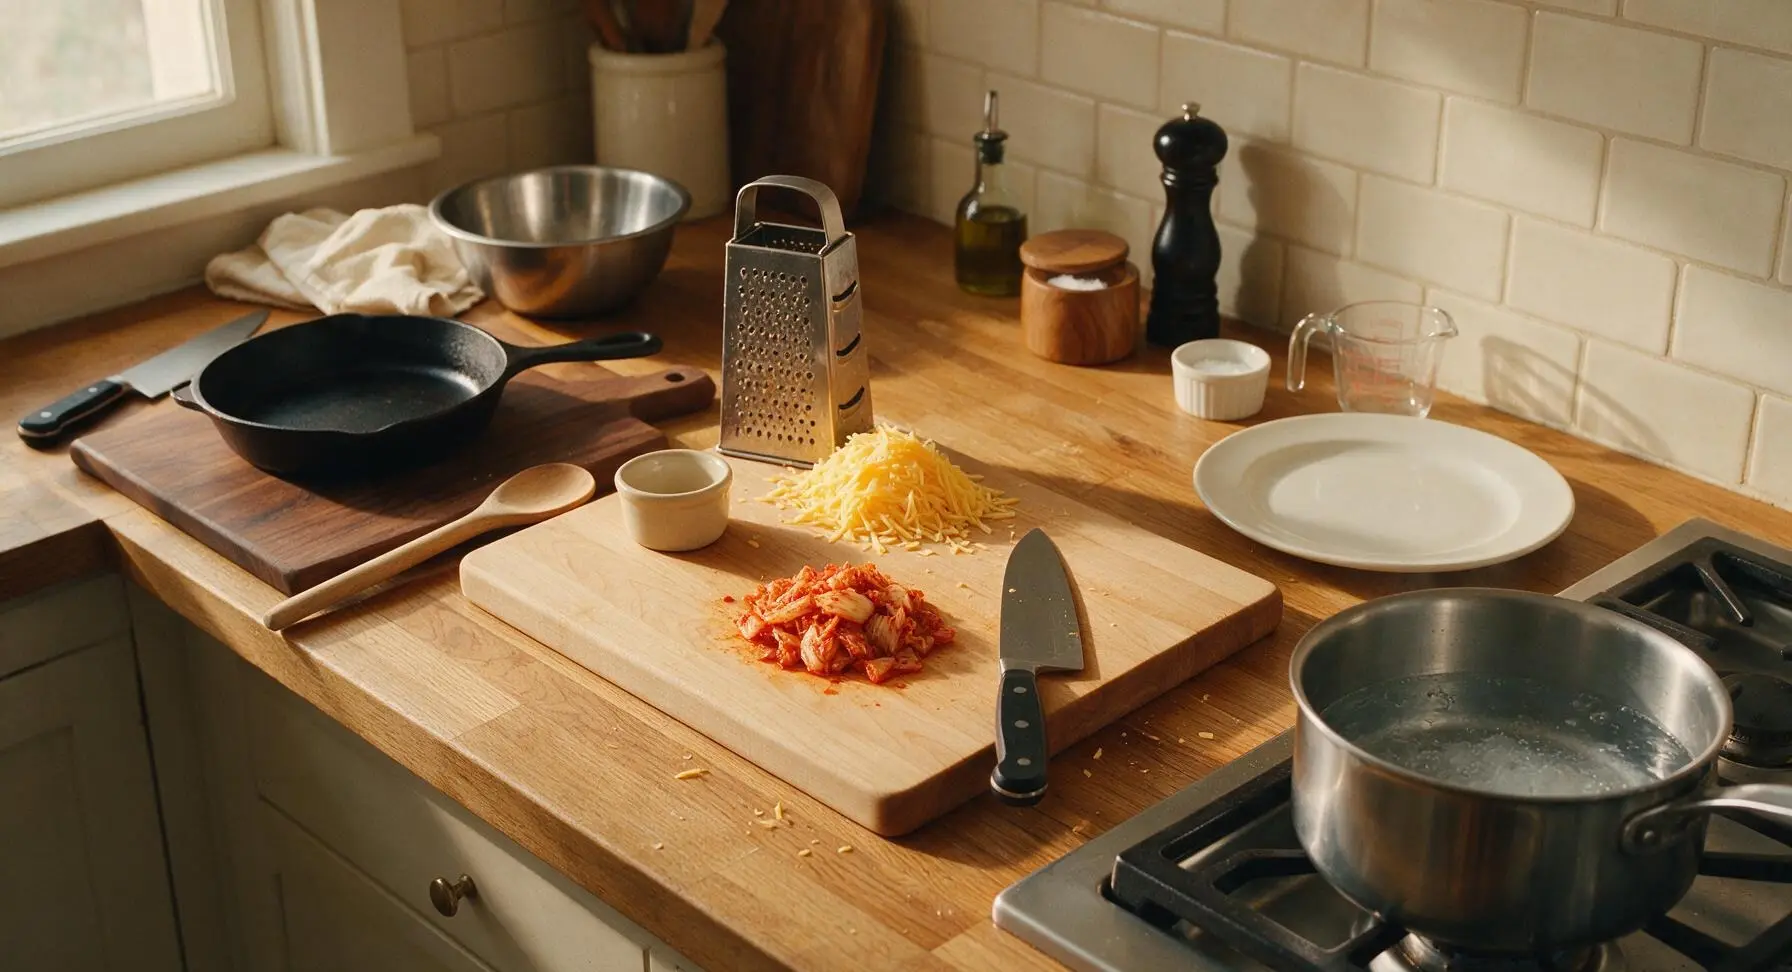
Place the honey maple cutting board in the center of the work surface. Use the 7-inch santoku knife to chop the drained kimchi into rough ½-inch pieces, transferring chopped kimchi to the small cream ceramic ramekin. Use the coarse side of the stainless steel box grater to shred all of the sharp cheddar, setting aside 2 tablespoons of shredded cheese to mix with the breadcrumb topping later. Fill the 3-quart stainless steel saucepan ⅔ full of water, add ½ teaspoon of coarse salt, and place on the induction stovetop over high heat to bring to a rolling boil.
Step 1
step1:Prep Kimchi and Cheese
2

Cook Elbow Pasta

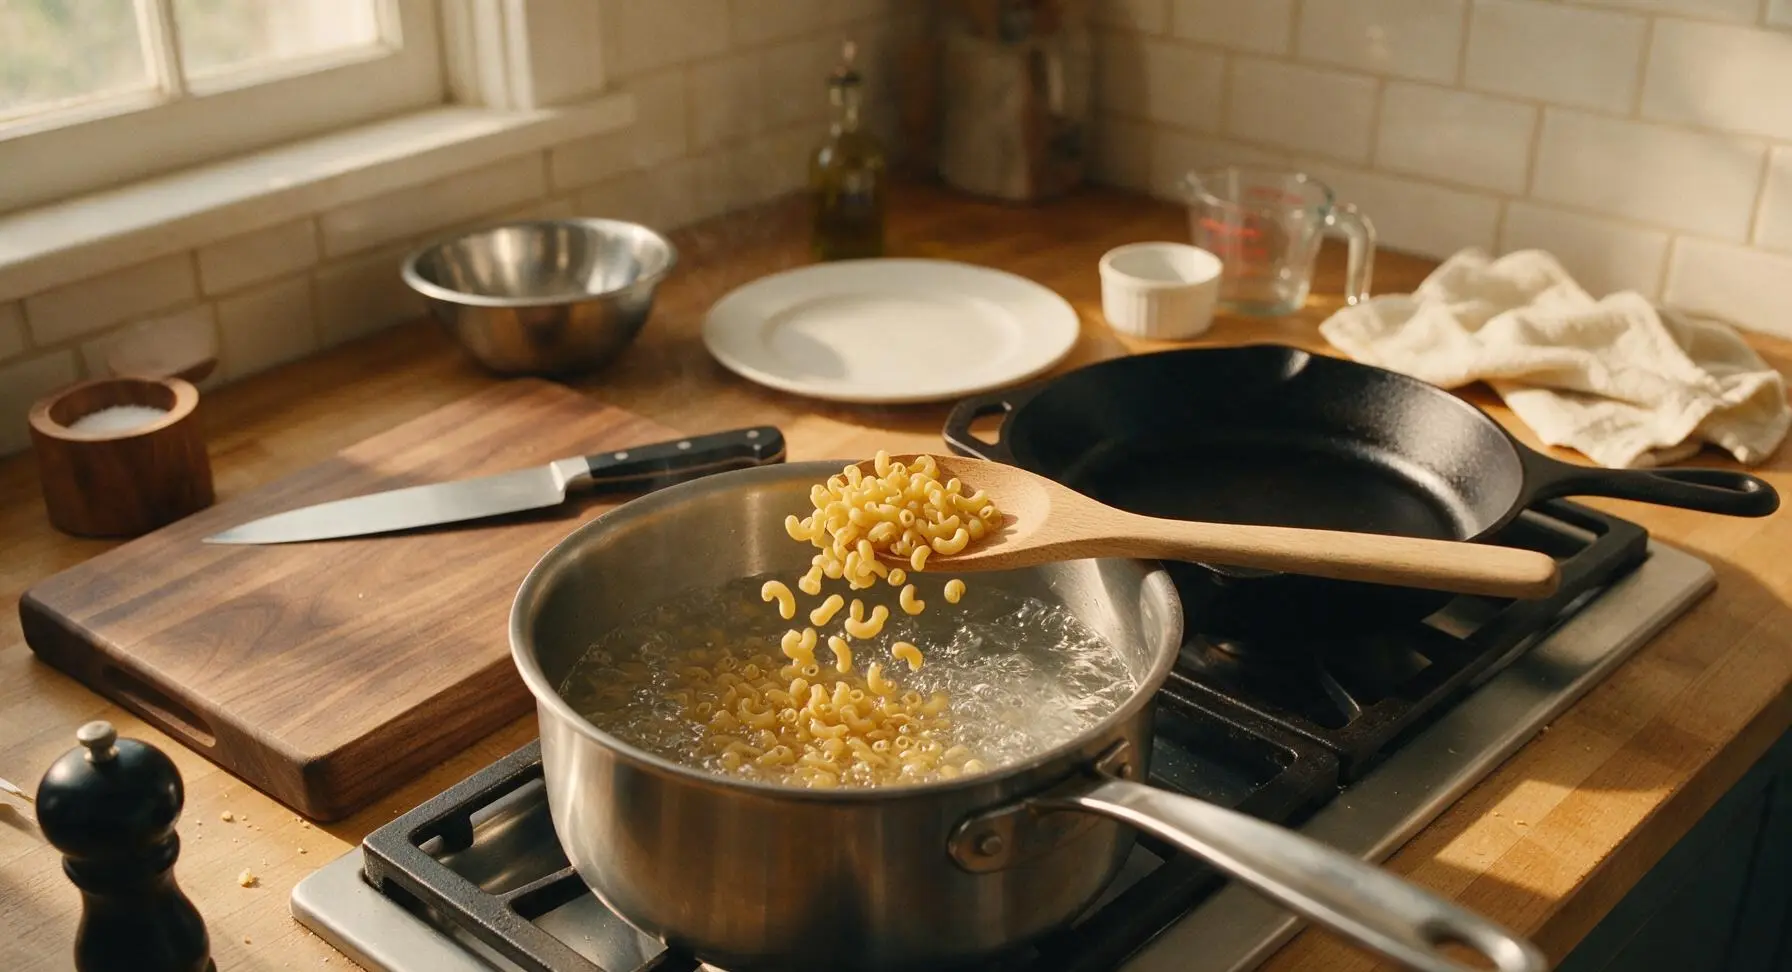
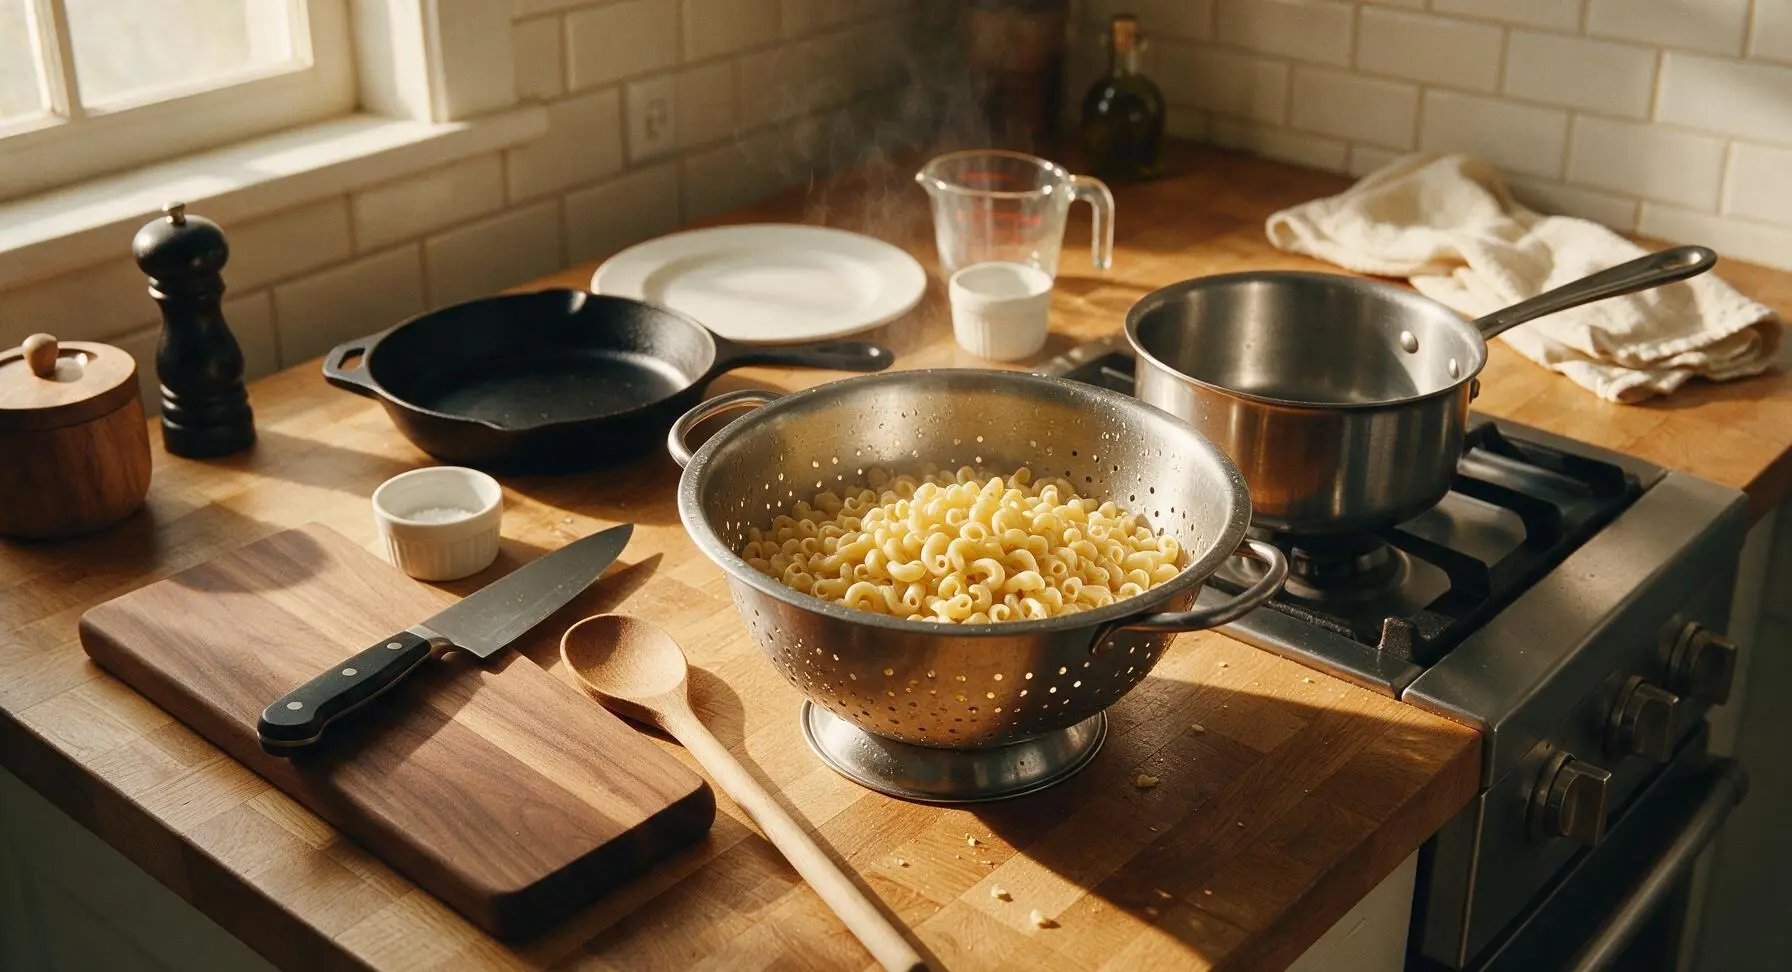
Once the water in the saucepan reaches a rolling boil, add the dry elbow macaroni, stirring once with the beech wood spoon to prevent sticking. Cook for 8 minutes, until the pasta is just al dente (firm to the bite, not mushy). Reserve ¼ cup of starchy pasta water before pouring the pasta and remaining water into the stainless steel colander to drain fully; do not rinse the pasta, as the surface starch helps the cheese sauce cling evenly to noodles.
Step 2
step2:Cook Elbow Pasta
Step 2
step2:Cook Elbow Pasta
3

Build Cheese Sauce Base

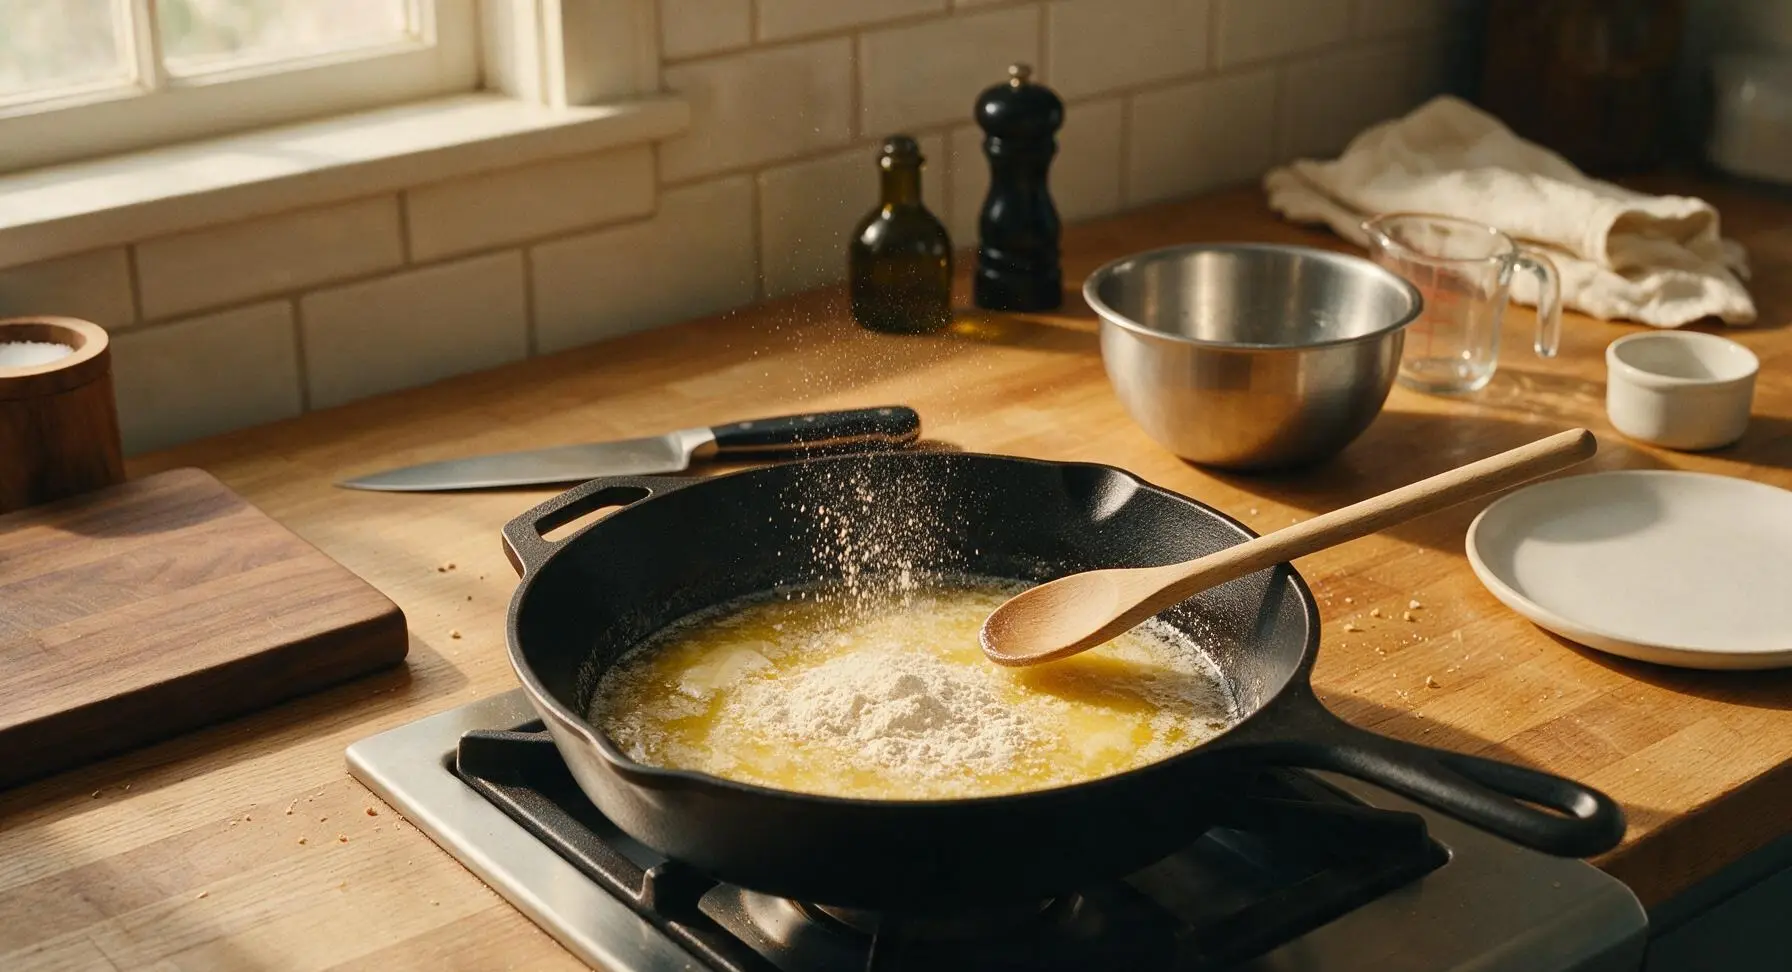
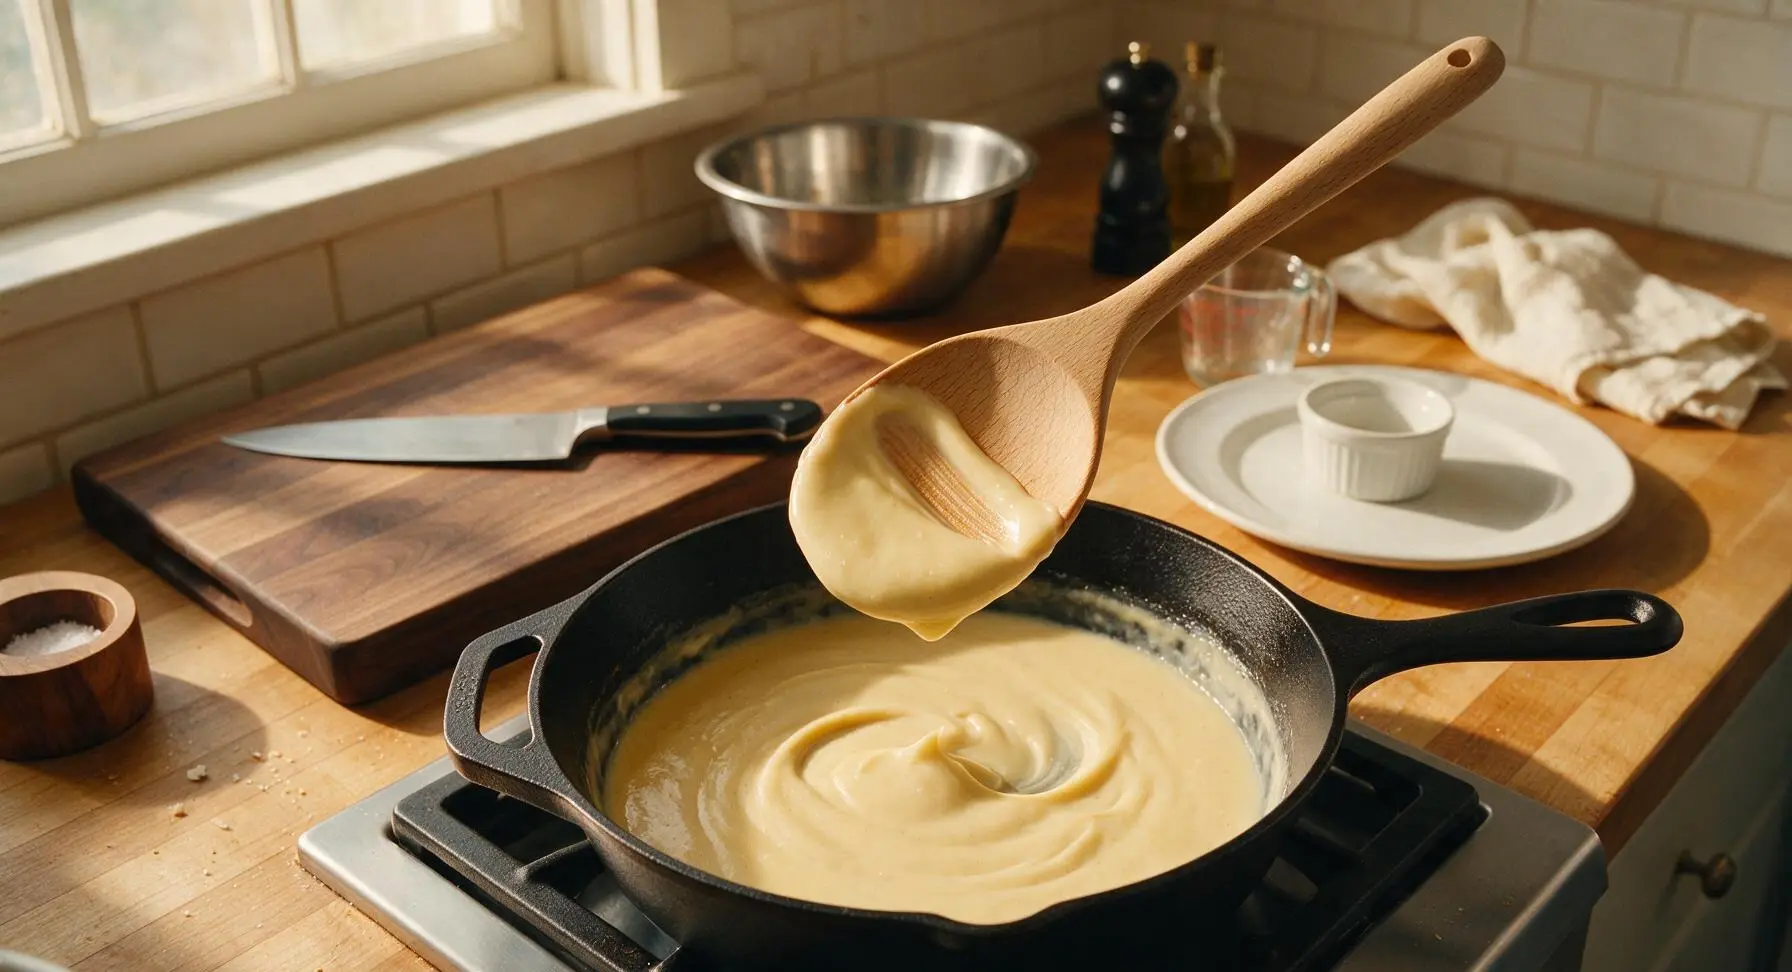
Place the 10-inch matte black enameled cast iron skillet on the stovetop over medium heat. Add the unsalted butter, swirling until fully melted and foamy (about 1 minute). Sprinkle in the all-purpose flour, stirring constantly with the beech wood spoon for 2 minutes, until the roux is a pale golden color and smells nutty, with no raw flour aroma remaining. Slowly pour in the whole milk while stirring constantly to avoid lumps, cooking for 3 more minutes until the sauce thickens enough to coat the back of the spoon (when you run a finger across the coated spoon, the line holds cleanly without running).
Step 3
step3:Build Cheese Sauce Base
Step 3
step3:Build Cheese Sauce Base
4

Combine Cheese and Kimchi

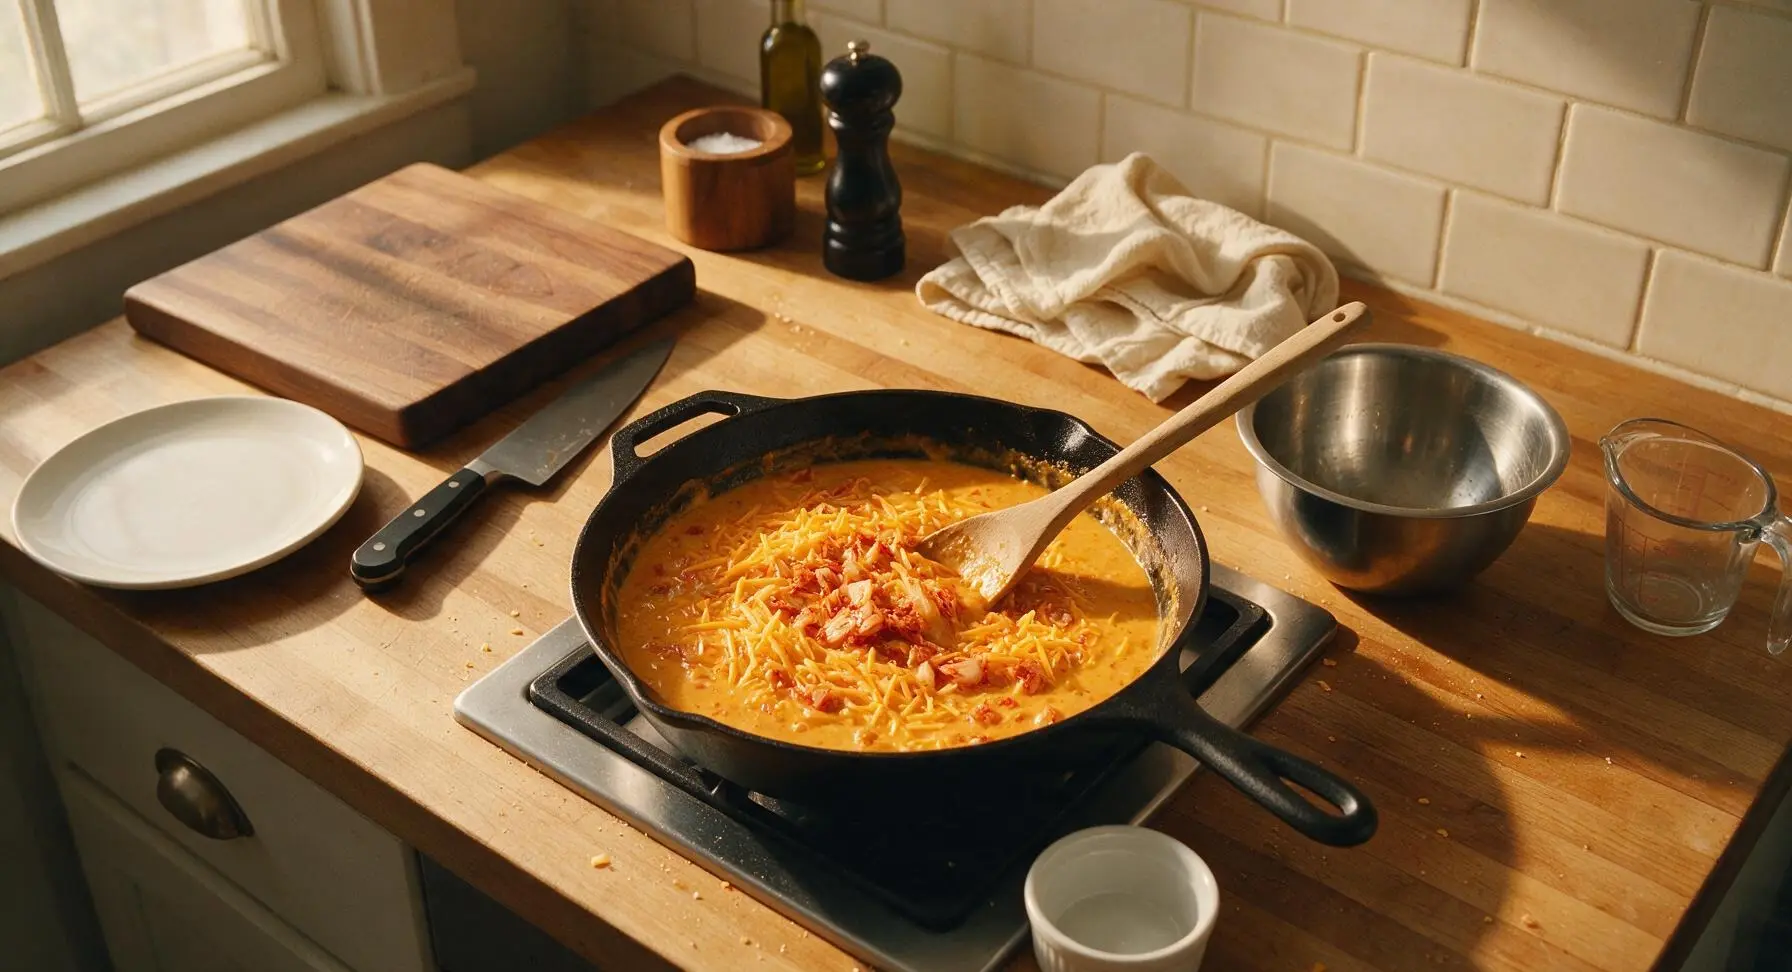
Reduce stovetop heat to medium-low. Add the remaining shredded cheddar (all except the reserved 2 tablespoons) to the thickened sauce, stirring constantly for 1 minute until the cheese is fully melted and the sauce is completely smooth with no lumps. Stir in the chopped kimchi, garlic powder, remaining ½ teaspoon salt, and black pepper, mixing until evenly distributed. If the sauce feels too thick, stir in 1-2 tablespoons of the reserved starchy pasta water to reach a smooth, pourable consistency.
Step 4
step4:Combine Cheese and Kimchi
5

Fold Pasta Into Sauce

Add the fully drained elbow macaroni to the skillet with the kimchi cheese sauce, stirring gently with the beech wood spoon for 1-2 minutes until every piece of pasta is evenly coated in sauce, taking care not to break or mash the macaroni pieces. Turn the oven broiler to high to preheat for 2 minutes while you prep the topping.
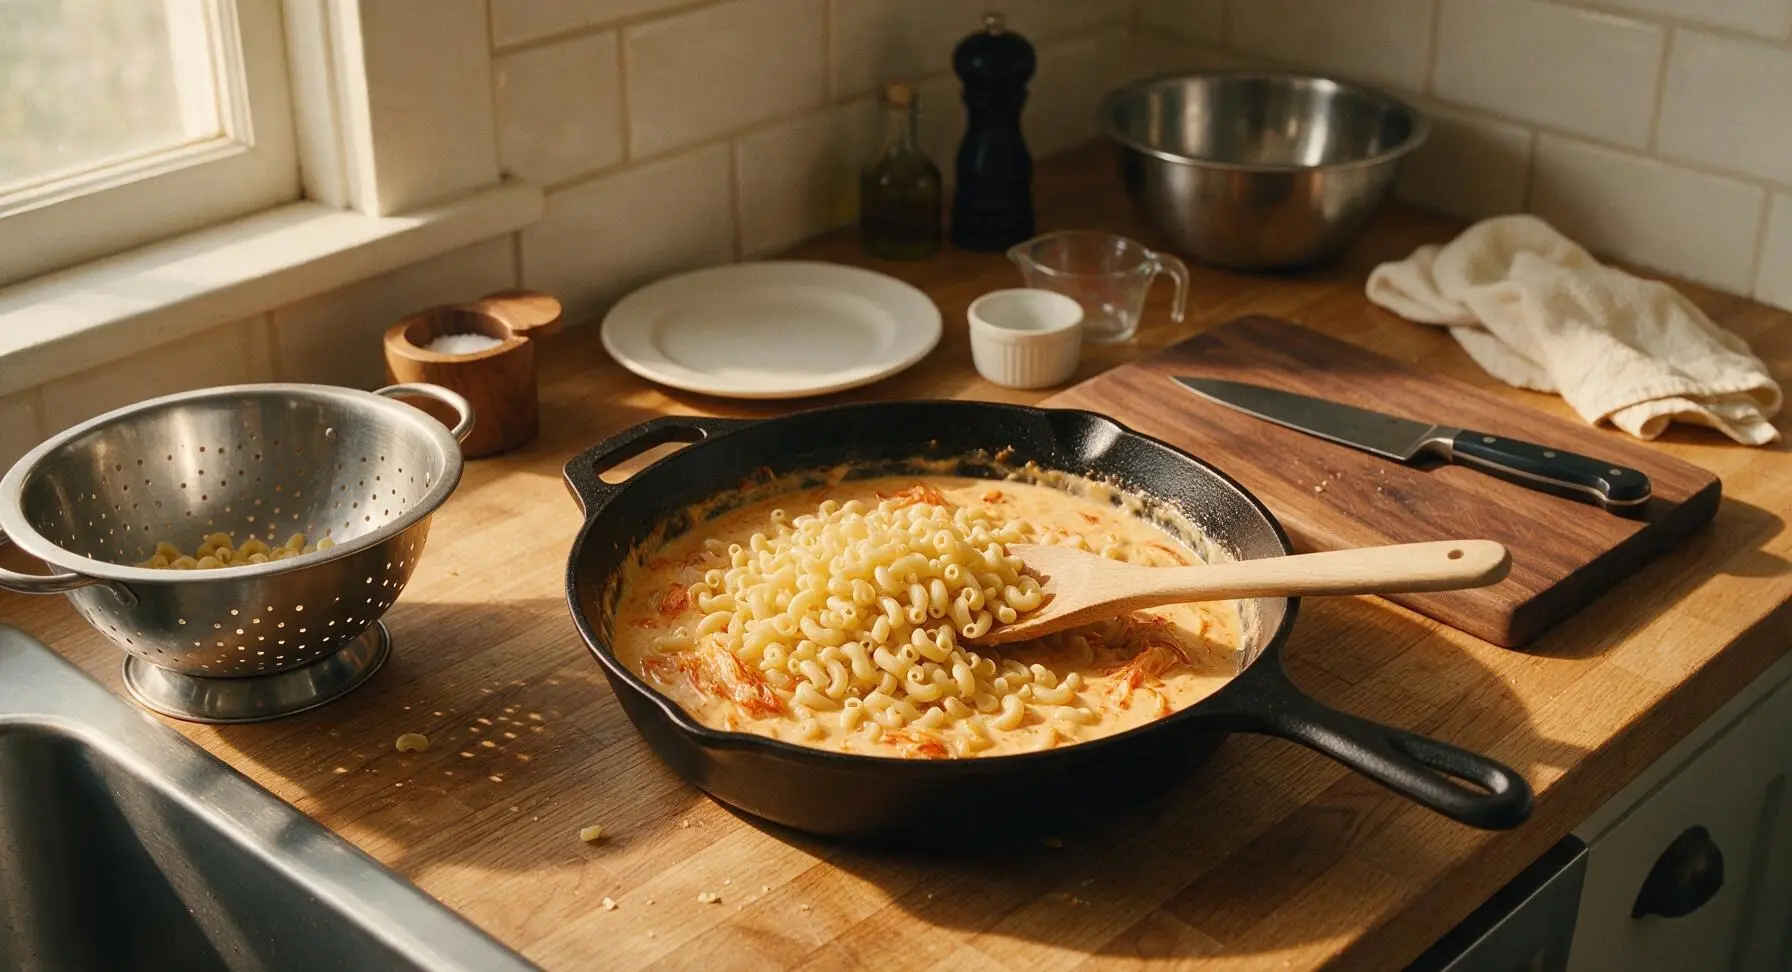
Step 5
step5:Fold Pasta Into Sauce
6

Add Crispy Breadcrumb Topping

In the small clear glass mixing bowl, combine the panko breadcrumbs, reserved 2 tablespoons of shredded cheddar, and 1 pinch of black pepper, mixing evenly. Sprinkle the breadcrumb mixture in a thin, even layer across the top of the mac and cheese in the skillet. Place the skillet 6 inches under the preheated high broiler for 2-3 minutes, watching closely, until the breadcrumbs are deep golden brown and crispy, and the cheese in the topping is fully melted. Do not walk away during broiling, as crumbs can burn very quickly.
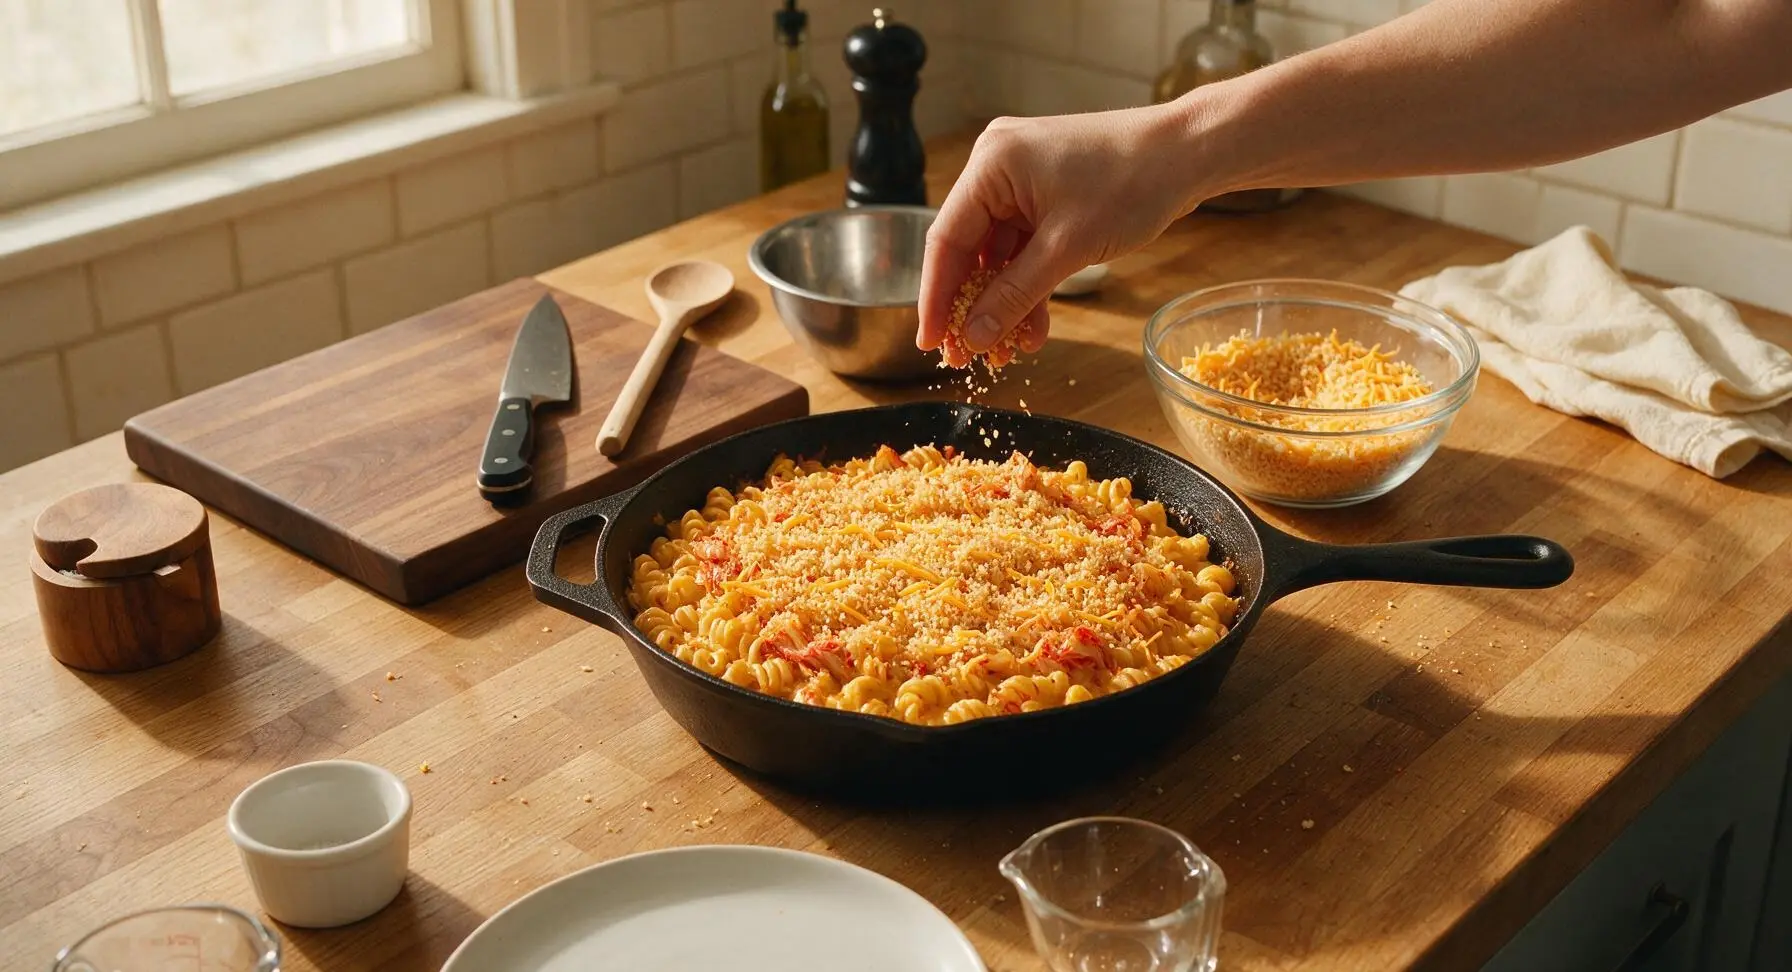
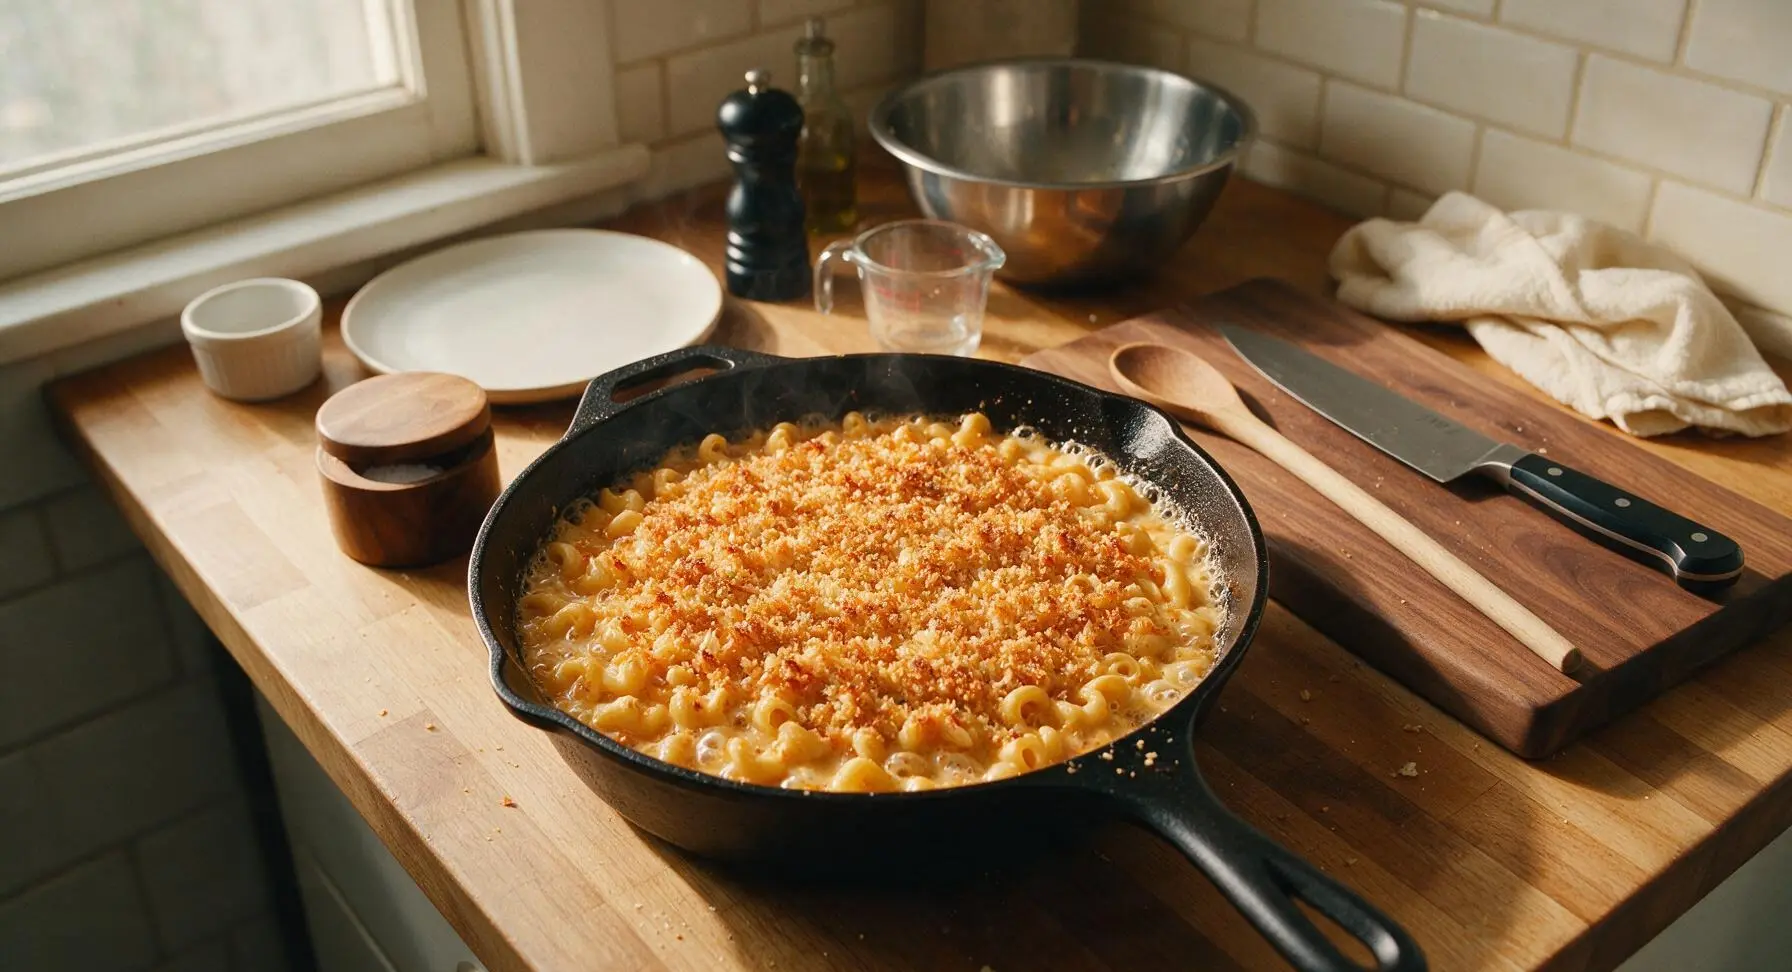
Step 6
step6:Add Crispy Breadcrumb Topping
Step 6
step6:Add Crispy Breadcrumb Topping
7

Plate and Garnish Dish

Remove the skillet from the broiler, letting it rest for 2 minutes to allow the sauce to set slightly (this prevents runny sauce when plating). Scoop a generous heaped serving onto the matte cream ceramic dinner plate, garnishing the top with thinly sliced fresh scallion greens. Serve immediately while the cheese is hot and gooey.
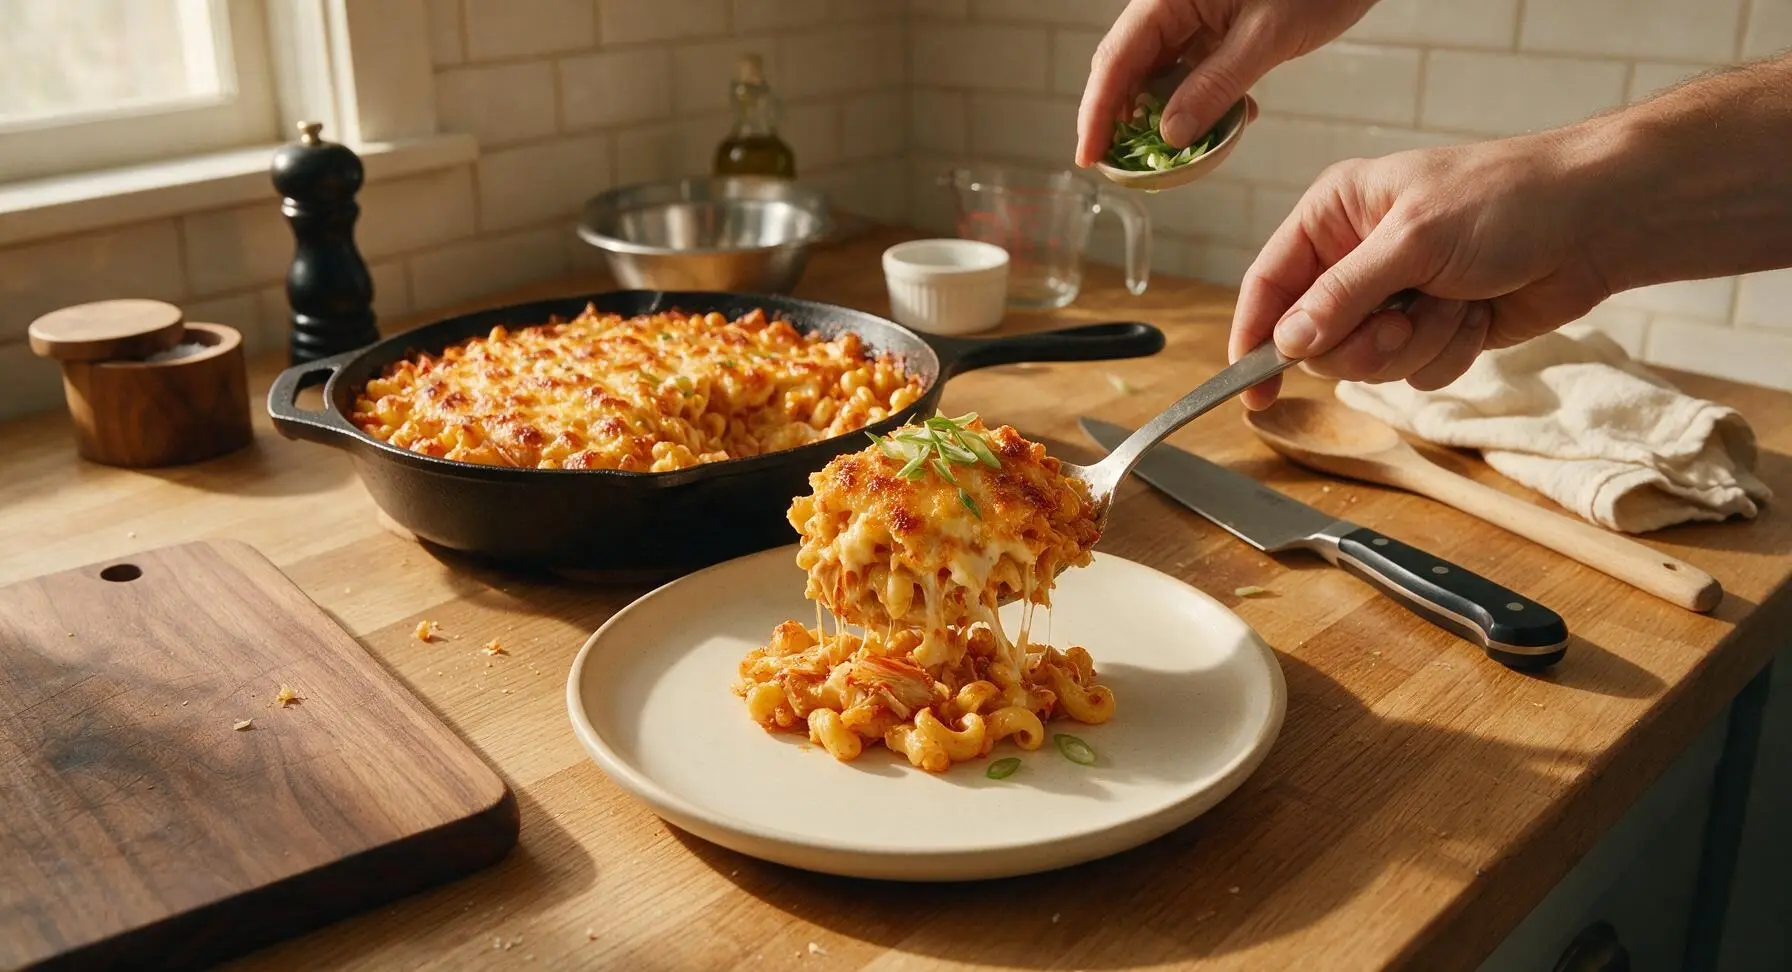
Step 7
step7:Plate and Garnish Dish

Tips

1.Use well-fermented, tangy kimchi (1-2 weeks old) for the best flavor: its bright sourness cuts through the rich, creamy cheese sauce, while freshly made, less fermented kimchi will taste flat and lack the signature umami kick. Be sure to drain excess brine before chopping to avoid thinning the cheese sauce.
2.Grate cheese fresh from a block instead of using pre-shredded packaged cheese: pre-shredded cheese is coated in potato starch and natamycin to prevent caking, which prevents it from melting into a silky smooth sauce and can leave a grainy texture.
3.Stay directly at the oven while broiling the breadcrumb topping: broilers produce extremely high, uneven direct heat, and panko crumbs can go from perfectly golden to charred black in as little as 20 seconds once hot. The topping is done as soon as it turns a deep, even golden brown.


✨ You May Also Like

Main Course
🍜 United Kingdom

A showstopping classic of tender seared beef, savory mushroom duxelles, and crisp prosciutto wrapped in flaky golden puff pastry, baked to juicy perfection.

⏱️ 2 hours 1Main Course ★ 4.7
Main Course
🍜 India

Tender charred marinated chicken simmered in a rich, spiced creamy tomato sauce, this iconic Anglo-Indian curry pairs perfectly with basmati rice or warm naan.

⏱️ 50 minuteMain Course ★ 4.6
Main Course
🍜 Thailand

Classic tangy, sweet, and savory Thai stir-fried rice noodles with shrimp, tofu, and crunchy garnishes, balancing all five core Thai flavor profiles.

⏱️ 30 minuteMain Course ★ 4.5
Main Course
🍜 United Kingdom

Crispy golden beer-battered cod and fluffy double-fried chips, served with tangy tartar sauce and malt vinegar: the timeless, beloved British pub comfort classic.

⏱️ 45 minuteMain Course ★ 4.7
Main Course
🍜 Mexico

Smoky, chile-marinated pork tacos with caramelized pineapple, fresh cilantro, and lime: a beloved classic Mexican street food perfect for casual summer gatherings.

⏱️ 1 hour 45Main Course ★ 4.8
Main Course
🍜 United States

Crunchy Fritos corn chips layered with savory beef chili and melted cheddar, topped with cool, zesty fixings for a beloved, cozy Tex-Mex comfort food.

⏱️ 35 minuteMain Course ★ 4.8

Kimchi Mac and Cheese:Frequently Asked Questions

1.Can I use pre-shredded sharp cheddar instead of shredding my own block cheese? ▾
You can in a pinch, but I always recommend shredding your own block sharp cheddar. Pre-shredded cheese is coated in anti-caking agents like potato starch that can make your cheese sauce grainy and less creamy. If you do use pre-shredded, stir in ¼ teaspoon of white vinegar to help smooth the sauce as it melts over low heat.
2.How spicy will this kimchi mac and cheese turn out? ▾
That’s totally adjustable based on the kimchi you pick! Mild, commercially made napa cabbage kimchi will give a gentle tang with barely noticeable heat, while extra-spicy aged kimchi will bring a noticeable kick. If you’re sensitive to spice, rinse the kimchi lightly under cold water and squeeze out excess brine before chopping to cut heat by about half.
3.Do I need to cook the kimchi before adding it to the cheese sauce? ▾
I recommend giving chopped kimchi a quick 2-minute sauté in a little butter over medium heat before stirring it into the sauce. This softens its crisp raw edge, mellows out any harsh fermented bite, and helps its tangy umami flavor blend evenly into the creamy cheese base instead of clumping. Skip this only if you love extra-crunchy, bright kimchi texture.
4.Can I use a different pasta shape instead of elbow macaroni? ▾
Absolutely! Elbows are classic because their ridges hold thick cheese sauce perfectly, but small, ridged shapes work just as well. Try cavatappi, rotini, small shells, or campanelle—all have nooks and crannies to catch the creamy kimchi cheese sauce. Avoid long, smooth pasta like spaghetti, which won’t hold the thick sauce well.
5.Why is my cheese sauce turning out grainy instead of smooth? ▾
Grainy sauce almost always comes from overheating your cheese, or adding it too fast. Make sure you turn the heat to low once your butter-flour roux is cooked, slowly whisk in your milk first, then remove the pan from heat before stirring in shredded cheddar a handful at a time. If it still gets grainy, a quick 10-second blast with an immersion blender will smooth it right out.
6.How do I get that perfectly crispy golden breadcrumb top? ▾
Melt 1 tablespoon of unsalted butter, toss it with panko or plain fine breadcrumbs and a tiny pinch of salt, then spread the mixture evenly over the top of your assembled mac before baking. Bake uncovered at 375°F for 15-18 minutes, and if the crumbs aren’t golden enough at the end, broil for 30-60 seconds, watching closely to avoid burning.
7.Can I make this recipe gluten-free? ▾
Definitely, it’s super easy to adapt. Swap regular elbow macaroni for your favorite gluten-free elbow pasta, replace the all-purpose flour in the roux with a 1:1 gluten-free all-purpose flour blend, and use gluten-free plain breadcrumbs for the topping. Double-check your kimchi label for hidden wheat-based additives, as some commercial brands include a small amount.
8.How long does this kimchi mac and cheese last in the fridge? ▾
Stored in a tightly sealed airtight container, it will stay fresh for 3 to 4 days in the refrigerator. Let it cool completely to room temperature (don’t leave it out for more than 2 hours for food safety) before sealing and popping it in the fridge. I don’t recommend freezing it, as the cheese sauce will separate and turn grainy when thawed.
9.What’s the best way to reheat leftovers without the sauce getting oily? ▾
Reheat individual portions in the microwave in 30-second bursts, stirring between each, and add a splash of whole milk or half-and-half as needed to loosen the sauce back to a creamy consistency. For whole pans, reheat covered in a 350°F oven for 15-20 minutes, stirring once halfway through, adding a splash of milk if the sauce feels thick.
10.Can I add extra protein to make this a more filling main dish? ▾
Of course! Crispy chopped bacon, pan-seared spam (a classic Korean-American pairing), shredded rotisserie chicken, or crumbled pan-fried tofu all work beautifully. Just cook your protein of choice first, drain any excess grease, and fold it into the mac and cheese right before you add the breadcrumb topping and bake for even distribution.
11.Should I use fresh or aged fermented kimchi for this recipe? ▾
Both work, but they give different results! Fresh, less-fermented kimchi is brighter, crunchier, and milder in tang, great if you’re serving kimchi newbies. Aged, more fermented kimchi (2+ weeks old) has deeper umami, tangier flavor, and softer texture that melds seamlessly into the cheese sauce for a more bold, balanced fusion bite.
12.Why do I need to make a roux with butter and flour for this recipe? ▾
The roux (equal parts melted unsalted butter and all-purpose flour, cooked for 1-2 minutes to remove raw flour taste) is the thickening base for your cheese sauce. It creates a stable, creamy sauce that won’t separate or turn greasy as it bakes, instead of a runny, oily cheese coating that slides right off the pasta. Don’t skip this step!
13.Can I make this as a stovetop-only dish without baking it? ▾
Absolutely! If you don’t want to wait for it to bake or don’t want a crispy top, make the cheese sauce on the stovetop, fold in cooked pasta and sautéed kimchi, and serve right away. If you still want a bit of crunch, toast your buttered breadcrumbs in a dry skillet over medium heat for 3-4 minutes until golden, then sprinkle over top.
14.What if I don’t have sharp cheddar? Can I use a different cheese? ▾
Sharp cheddar brings that bold, tangy flavor that stands up perfectly to kimchi, but you can swap in other melting cheeses if needed. Good options are pepper jack for extra heat, Gruyère for nuttiness, or Monterey Jack for extra creaminess. Avoid very soft, high-moisture cheeses like fresh mozzarella, which will make your sauce watery and stringy.
15.Do I need to squeeze excess liquid out of the kimchi before using it? ▾
Yes, this is a key small step! Kimchi holds a lot of briny liquid that can make your cheese sauce watery and dilute its creamy texture if you add it straight from the jar. After chopping, squeeze the kimchi firmly over a bowl to remove excess brine—save that brine to add a splash to salad dressings or Bloody Marys later to cut down on food waste.
16.Can I adapt this recipe to be vegan? ▾
You can easily make a vegan version! Dried elbow macaroni is almost always vegan, so swap the unsalted butter for plant-based butter, use high-melting vegan sharp cheddar shreds, pick a vegan kimchi made without fish sauce (widely available at most grocery stores now), and use vegan breadcrumbs for the crispy top. The flour roux works exactly the same with plant-based butter.
17.Why does my breadcrumb topping burn before the mac is heated through? ▾
This usually happens if your breadcrumb layer is too thick, or if your oven runs hotter than its dial reads. Make sure you spread the buttered crumbs in a thin, even layer across the top, and tent the pan with aluminum foil for the first 10 minutes of baking to let the mac heat through before exposing the crumbs to direct heat to crisp up. An oven thermometer helps eliminate guesswork.
18.Is this dish too strongly flavored for kids or people who don’t like kimchi? ▾
It doesn’t have to be! Start with mild, fresh kimchi, squeeze out all excess brine, chop it very fine, and use about half the recommended amount for a subtle tang that doesn’t overpower the classic creamy mac and cheese flavor. Most people won’t even pinpoint kimchi as an ingredient; they’ll just notice the cheese sauce has a nice, bright depth regular mac lacks.
19.What sides pair well with kimchi mac and cheese? ▾
Since it’s a rich, creamy fusion dish, light, crisp sides balance it perfectly. Try a simple green salad with a light vinaigrette, quick pickled cucumbers, roasted broccoli, or crispy pan-fried dumplings. It also works great as a side itself alongside grilled Korean short ribs, crispy fried chicken, or juicy burger patties for a fun, indulgent fusion meal.

Comments (11)

2 days ago

OMG y’all, this kimchi mac and cheese is an absolute GAME CHANGER. I was skeptical mixing fermented kimchi with creamy mac, but the tang cuts through the richness so perfectly? My kids even asked for seconds, which never happens when I try something “new” for weeknight dinner. Used extra sharp cheddar like the recipe said, *chef’s kiss*.

yesterday

Right?! I added a little extra gochugaru on top for heat and it was insane. Took this to my friend’s potluck last weekend and the whole pan was gone in 10 minutes

yesterday

So happy your family loved it, Mia! Love the idea of a gochugaru sprinkle for extra heat — that’s a pro move for spicy food fans

3 days ago

Super easy recipe, perfect for when I’m cramming for midterms and don’t want to spend an hour cooking. Only note: I used pre-shredded cheese because that’s all I had at the dorm, and it was still SO good. Definitely adding this to my weekly meal rotation.

2 days ago

Pro tip for next time: if you toss pre-shredded cheese in a tiny bit of cornstarch before adding it to the sauce, it melts even smoother! So glad this fits your busy school schedule

1 week ago

Brought this to our neighborhood block party last week and so many people asked for the recipe! The tangy kimchi adds such a fun twist on classic mac that no one saw coming. 10/10, will be making this for every potluck from now on.

5 days ago

Made a big batch of this on Sunday for meal prep, and it held up perfectly all week in the fridge! I was worried the kimchi would make the noodles soggy, but it stayed creamy and flavorful even after reheating. Perfect for busy work lunches.

3 days ago

Wait how did you reheat it? I tried meal prepping a different mac recipe last month and it got all grainy when I microwaved it at work

2 days ago

Great question! A quick splash of milk or half-and-half when reheating, plus a quick stir halfway through microwaving, keeps the sauce smooth every time. So glad this worked for your weekly prep, Kelly!

2 hours ago

Tried this last night and honestly? I think I like it better than regular mac and cheese? The umami from the kimchi is unreal. I did mix in a little mozzarella with the cheddar for extra stretch, no regrets.

30 minutes ago

The mozzarella add is genius! I did that last time too and the cheese pulls were insane, my roommate thought I ordered it from a fancy restaurant

2 weeks ago

Swapped the regular pasta for gluten-free chickpea pasta and it turned out amazing! The sauce is so flavorful you can’t even tell the pasta is GF. Finally a fun mac and cheese recipe that doesn’t feel like a boring compromise for my gluten allergy.

30 minutes ago

Wait, this only took me 22 minutes total to make? I was convinced I misread the cook time, but nope! It was so fast, perfect for when I get home late from the gym and don’t want to order takeout for the third night in a row. Only thing I’d change next time is chop the kimchi a little smaller so it distributes better.

5 minutes ago

Oh chopping the kimchi smaller is such a good call! I left mine in big chunks last time and some bites had no kimchi at all, total bummer

just now

So glad the quick cook time works for your busy schedule! The smaller kimchi chop is a great tip — we actually mention that in the pro tips section of the recipe, it makes such a big difference for even flavor in every bite

yesterday

I’m a diehard baked mac and cheese stan, so I was fully ready to hate this stovetop version with kimchi. Y’all. I ate two bowls straight from the pot. The tang cuts through all that rich cheese so you don’t feel weighed down after eating. 10/10, even this southern grandma approves.

2 hours ago

This means the world coming from a baked mac loyalist! We love a good stovetop version that can win over even the most dedicated traditionalists — so glad you gave it a shot

3 days ago

Added some sautéed spinach and a handful of crispy bacon bits on top, and it was chef’s kiss. The kimchi adds such a bright zing that pairs so well with the smoky bacon. My partner said this is top 3 meals I’ve ever made, so that’s a permanent spot in the dinner rotation!

5 minutes ago

This was the first real recipe I ever made by myself, and it turned out so good! I was super nervous I’d mess up the cheese sauce, but the instructions were so easy to follow. My roommates all thought I was a secret chef or something, lol.

just now

Yay, this makes us so happy to hear! We love when easy recipes help new cooks feel confident in the kitchen — can’t wait to hear what you make next

1 week ago

Made this last week with mild store-bought kimchi and it was incredible! Quick question: how spicy would it be if I use fully fermented, pretty tangy kimchi next time? I love super spicy food but my roommate has a pretty low spice tolerance, so I don’t want to make something they can’t eat. Would adding less kimchi make it too bland?

5 days ago

I made this with mild, less fermented kimchi for the same reason and it was perfect! Just a tiny tang, no real burn. If you use spicier kimchi, you can set aside a portion of the plain mac for your roommate before mixing in the kimchi for your share

3 days ago

Great question! The spice level totally depends on the kimchi you use — if you want a milder version, go for young, less fermented kimchi, or use half the amount and mix in a little extra cheese to mellow it out. The portioning trick from the comment above is also perfect for mixed spice tolerance households!



