
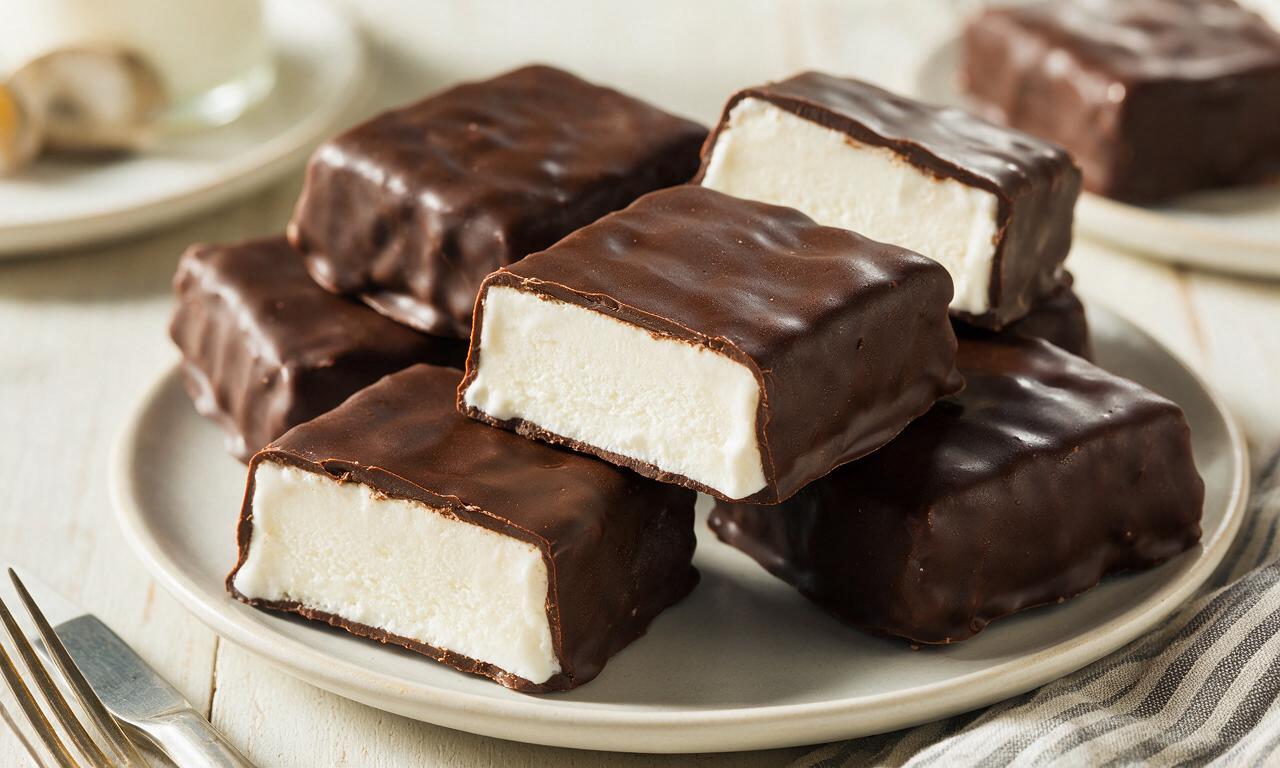
Klondike Bar

Klondike Bar
⏱️ cook time 5 hours (25 minutes active, mostly inactive freezing time)
🍽️ servings 8
⚡ Difficulty easy

intro

Nostalgic frozen treat: thick creamy vanilla ice cream squares coated in a snappy, rich dark chocolate shell, made easily at home.

Ingredients

Premium full-fat vanilla ice cream 1.5 L (6 cups)
70% cacao dark chocolate 450 g (2.5 cups, chopped)
Refined unscented coconut oil 60 g (1/4 cup)
Flaky sea salt 1 tsp

Steps

1

Prep ice cream block

Line a 20x20cm (8x8 inch) square baking pan with parchment paper, leaving a 5cm (2 inch) overhang on two opposite sides for easy lifting. Let the vanilla ice cream soften at room temperature for 10 minutes (do not let it fully melt; it should hold a soft, spreadable consistency). Spread the ice cream evenly in the pan to a 4cm (1.5 inch) thick layer, smoothing the top with an offset spatula. Cover tightly with plastic wrap and freeze for 4 hours at -18°C (0°F) until completely solid with no soft spots.
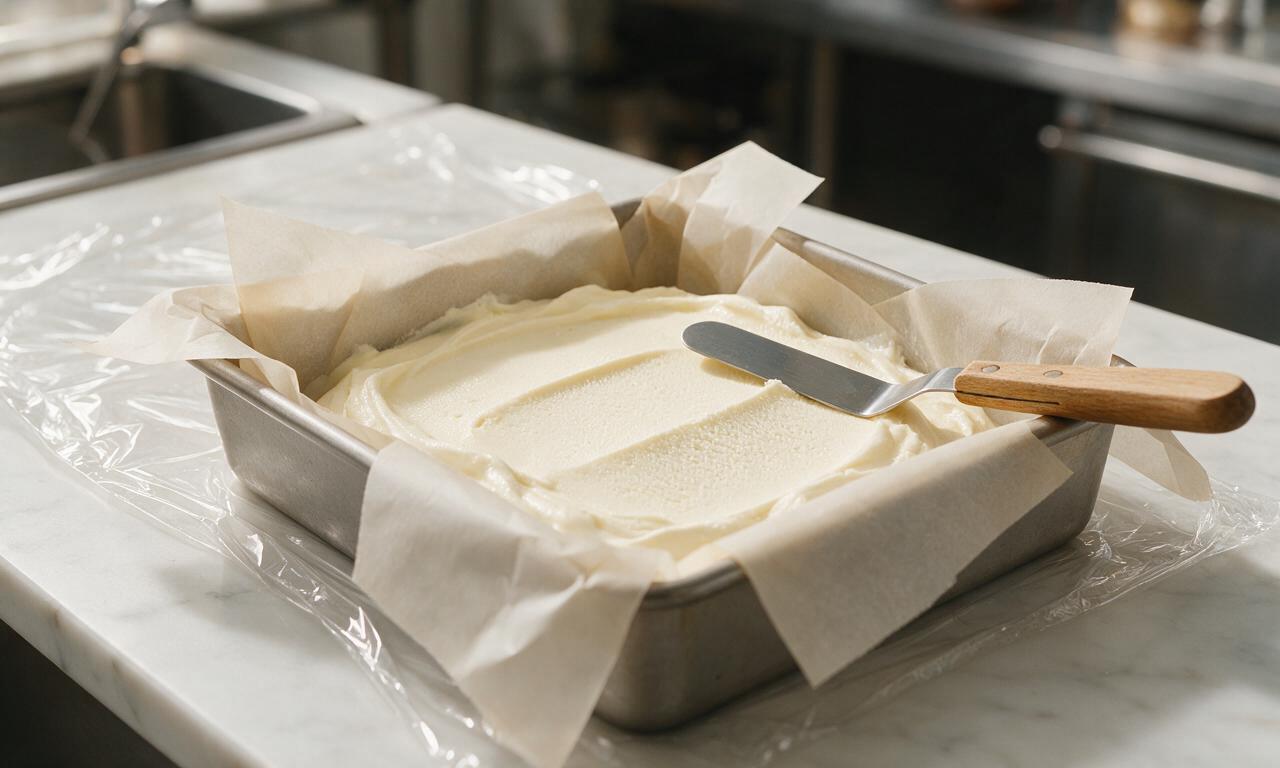
Step 1
step1:Prep ice cream block
2

Cut into bar shapes

Once the ice cream block is fully frozen, lift it from the pan using the parchment overhang and set it on a wooden cutting board. Warm a large sharp chef’s knife under hot running water, dry it thoroughly, and cut the block into 8 equal 5x10cm (2x4 inch) rectangular bars, re-warming and drying the knife between cuts for clean slices. Insert a small wooden popsicle stick 2.5cm (1 inch) into the short end of each bar if desired, then arrange bars on a parchment-lined baking sheet and return to the freezer for 30 minutes to re-harden completely.
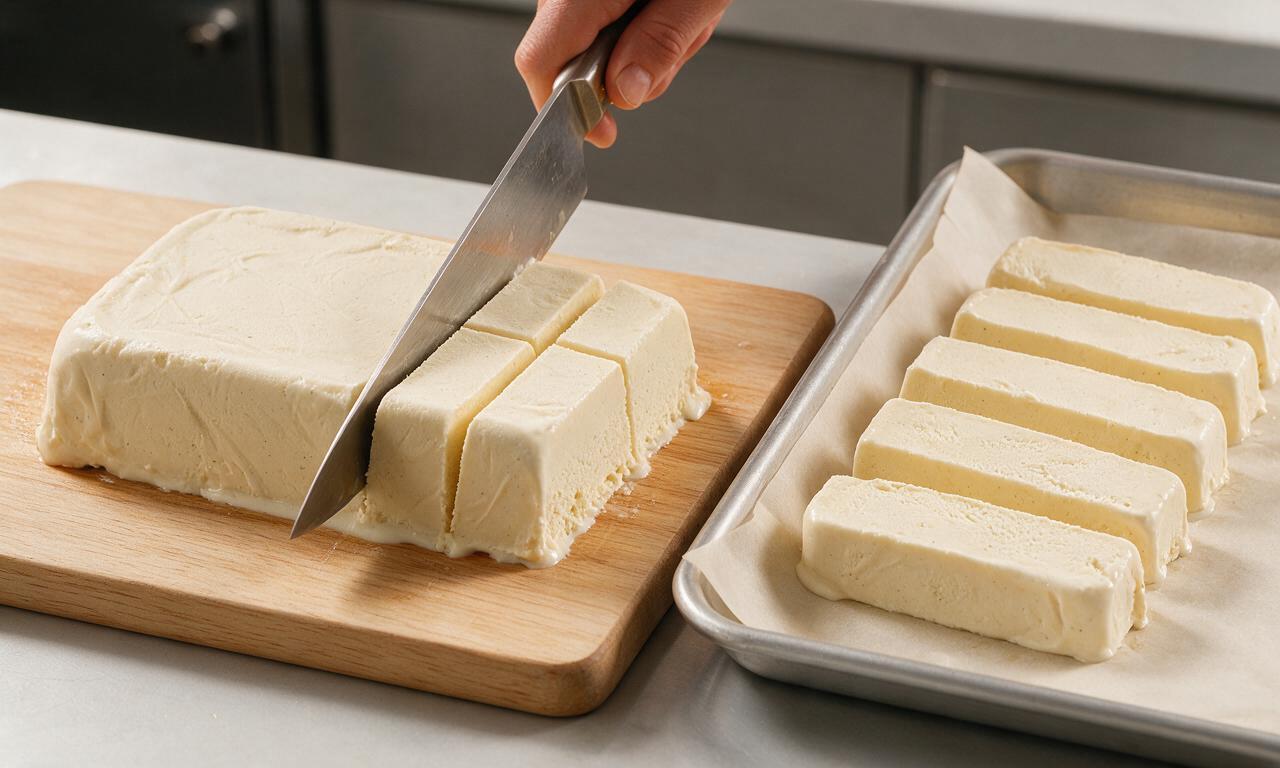
Step 2
step2:Cut into bar shapes
3

Melt chocolate coating

While the bars re-freeze, chop the dark chocolate into small, uniform pieces and place in a heatproof medium glass bowl with the refined coconut oil. Set the bowl over a small saucepan of gently simmering water (ensure the bowl bottom does not touch the water) and melt over low heat, stirring constantly with a silicone spatula for 3-4 minutes until completely smooth. Stir in 1/2 tsp of flaky sea salt, then remove the bowl from heat and let the chocolate cool to 32°C (90°F) — it should be fully liquid but lukewarm, not hot, to avoid melting the ice cream during dipping.
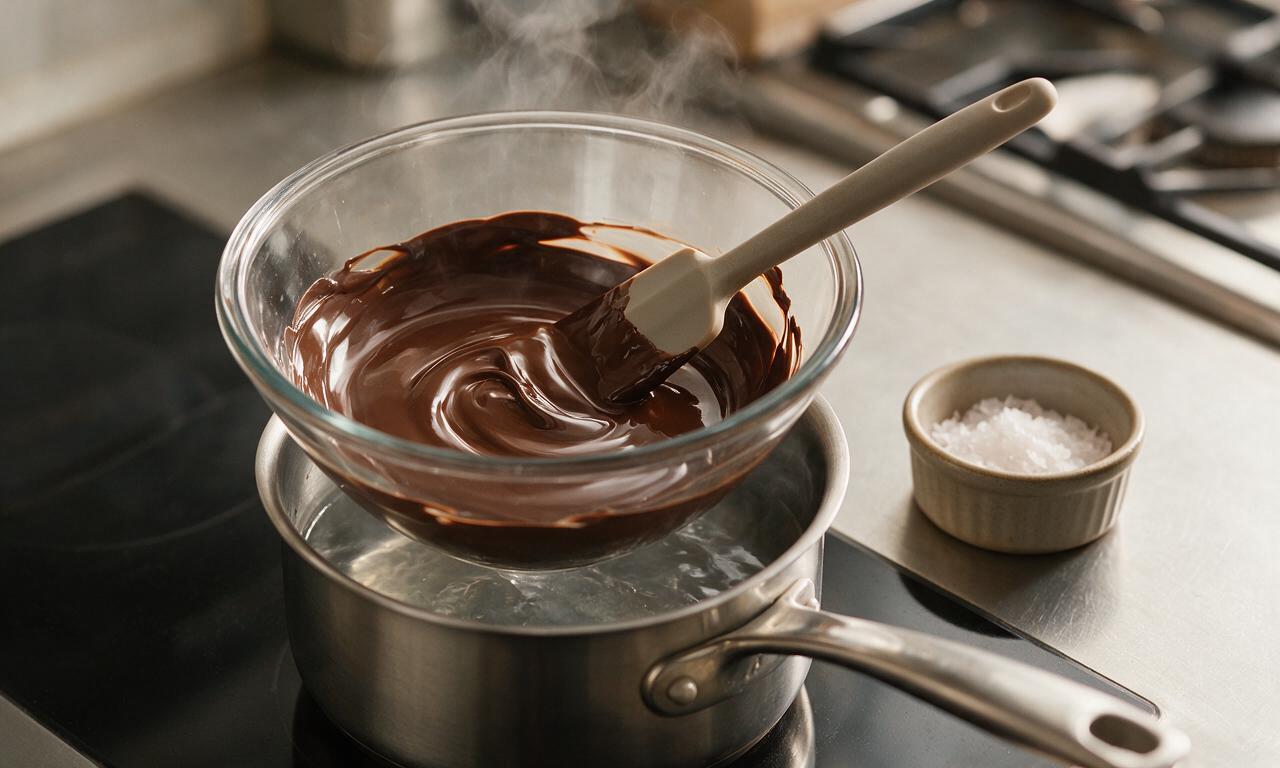
Step 3
step3:Melt chocolate coating
4

Dip bars in chocolate

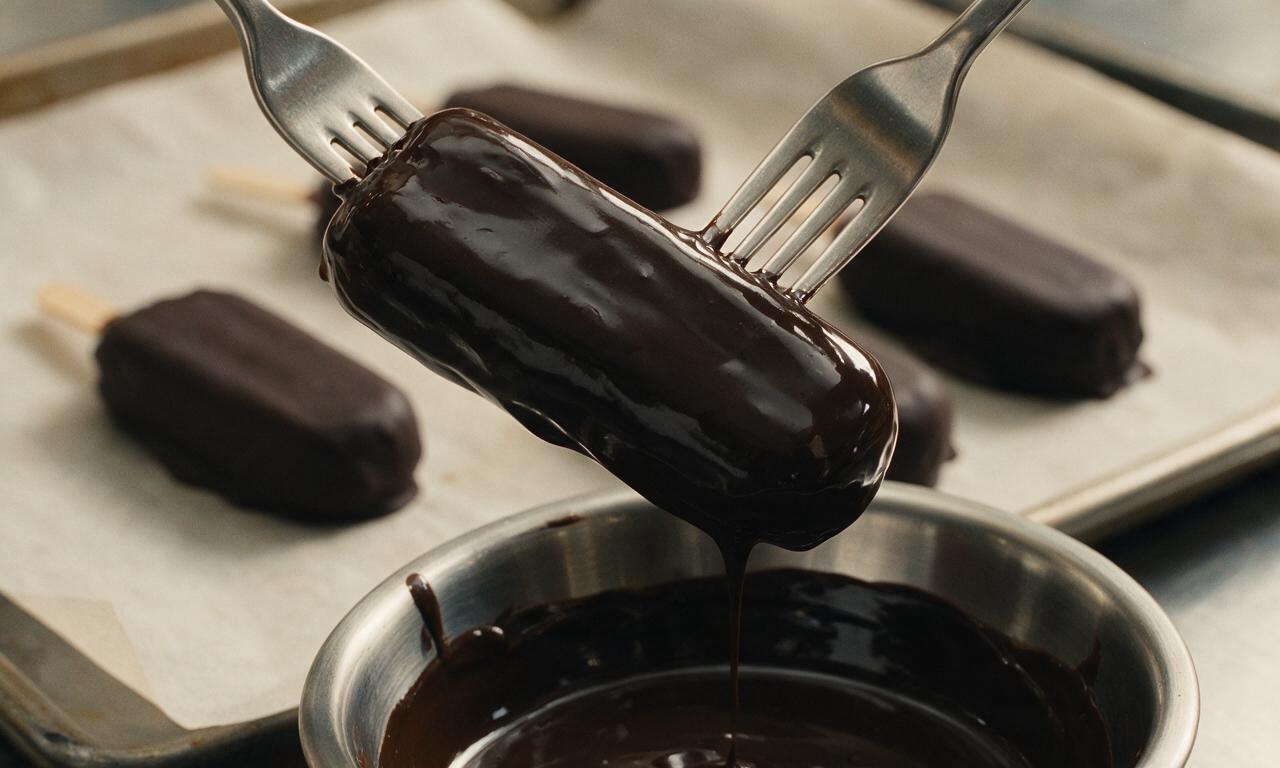
Remove only 2 ice cream bars from the freezer at a time (keep remaining bars frozen to prevent softening). Hold each bar by the stick (or use two forks for stick-free bars) and submerge it fully in the cooled melted chocolate. Lift the bar out, holding it over the bowl, and let excess chocolate drip off for 10 seconds; the cold ice cream will set the chocolate shell within seconds of contact.
Step 4
step4:Dip bars in chocolate
5

Season and set coating

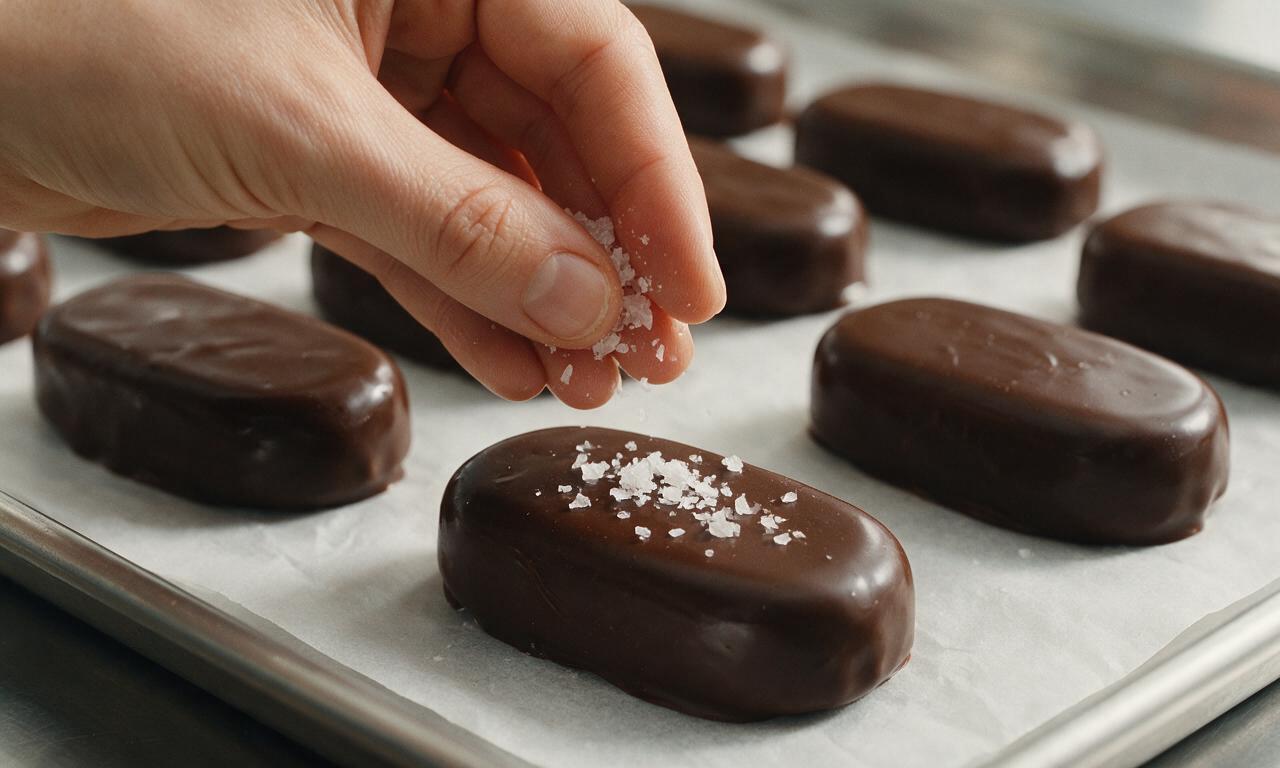
As you finish dipping each bar, place it back on the parchment-lined baking sheet, and immediately sprinkle the top with a pinch of the remaining 1/2 tsp flaky sea salt before the chocolate fully hardens. Once all bars are dipped and salted, return the entire baking sheet to the freezer for 20 minutes to let the chocolate shell fully set and the ice cream re-solidify.
Step 5
step5:Season and set coating
6

Serve or store bars

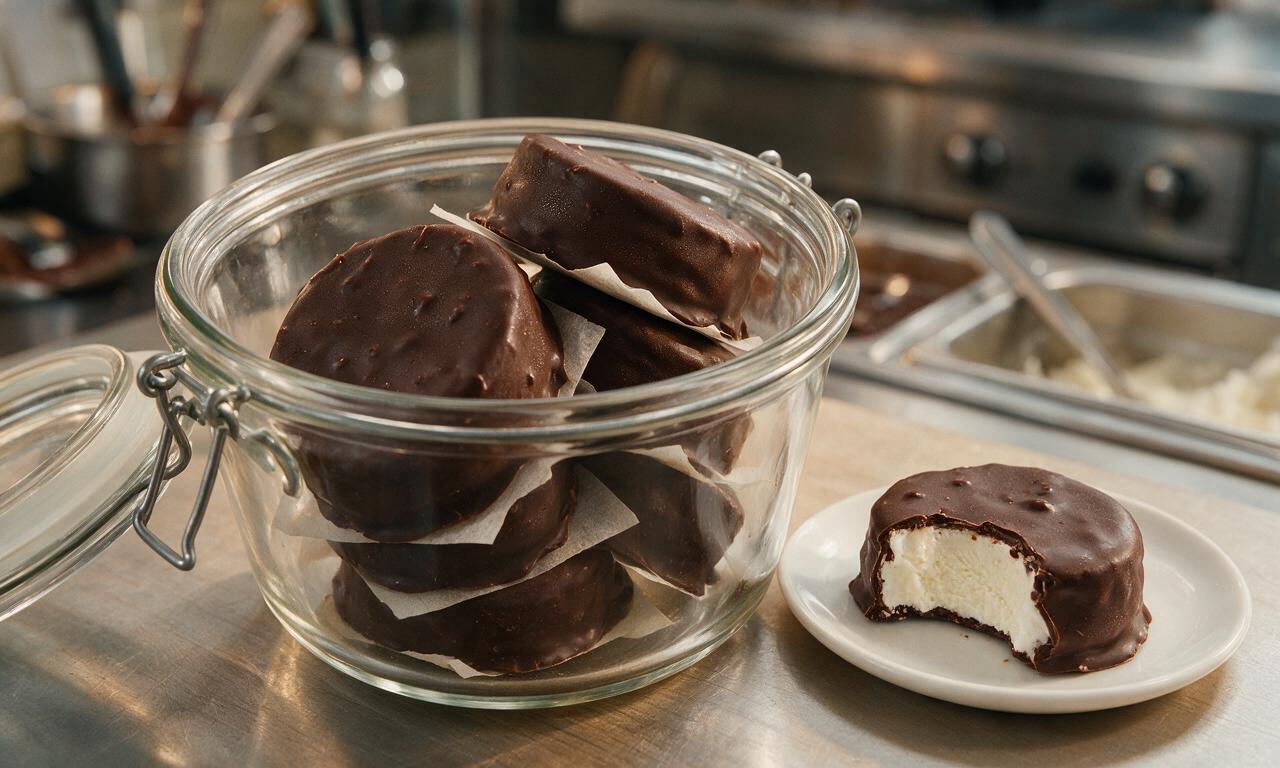
Once set, serve the Klondike bars immediately for the crispest shell and creamiest ice cream. For longer storage, transfer bars to an airtight freezer-safe container, placing a small sheet of parchment between each layer to prevent sticking, and store at -18°C (0°F) for up to 2 weeks.
Step 6
step6:Serve or store bars

Tips

1.Always work in small batches when dipping, keeping unused ice cream bars in the freezer—softened ice cream will slide off the stick and cause lumpy, uneven chocolate coating.
2.Use only refined, unscented coconut oil for the shell; unrefined coconut oil will add a strong coconut flavor that clashes with the classic vanilla and chocolate profile.
3.Do not skip cooling the melted chocolate to 32°C (90°F); hot chocolate will melt the ice cream on contact, creating a runny, messy coating that does not set to a crisp snap.


✨ You May Also Like

Desserts & Baking
🍜 Italy

Creamy, coffee-kissed classic Northern Italian no-bake dessert, with layers of rum-spiked mascarpone cream, soft ladyfingers, and a rich cocoa dusting.

⏱️ 4 hours 3Desserts & Baking ★ 4.8
Desserts & Baking
🍜 France

Flaky, shatteringly crisp, buttery French croissants with golden exteriors and soft, airy layered interiors, perfect for pairing with coffee for a special morning treat.

⏱️ 12 hours Desserts & Baking ★ 4.7
Desserts & Baking
🍜 United States

Warm, spiced baked apples topped with a fluffy golden biscuit crust, this cozy dessert pairs perfectly with vanilla ice cream for cool-weather comfort.

⏱️ 55 minuteDesserts & Baking ★ 4.7
Desserts & Baking
🍜 United States

A star-spangled classic American blueberry pie with buttery flaky crust and bright sweet-tart filling, perfect for summer patriotic gatherings.

⏱️ 1 hour 25Desserts & Baking ★ 4.8
Desserts & Baking
🍜 United States

A beloved no-bake regional Maine candy with a chewy coconut-potato center coated in rich dark chocolate, a New England holiday staple since the 1870s.

⏱️ 2 hours 3Desserts & Baking ★ 4.9
Desserts & Baking
🍜 France

Luxuriously creamy, floral frozen custard made with aromatic Tahitian vanilla beans, boasting a smooth, rich texture that melts slowly on the tongue.

⏱️ 3 hours 3Desserts & Baking ★ 4.6

Klondike Bar:Frequently Asked Questions

1.Do I need any special equipment to make homemade Klondike Bars?
You don’t need any fancy specialty gear! Grab a standard 8x8-inch square baking pan, parchment paper, a small offset spatula, a shallow wide container for dipping, and a wire rack. No ice cream maker is required here, since we start with high-quality storebought premium full-fat vanilla ice cream to cut down on prep time.
2.Why do you recommend full-fat premium vanilla ice cream instead of a low-fat or light version?
Low-fat or light ice creams have a much higher water content, which creates icy, crumbly bars instead of the thick, creamy, dense texture you remember from classic Klondike Bars. The extra fat in premium full-fat vanilla also helps squares hold their sharp shape when dipped in warm chocolate, so they don’t melt and slump mid-coat.
3.Can I use milk chocolate instead of 70% cacao dark chocolate for the shell?
You absolutely can swap it, but I stick with 70% cacao dark for that signature snappy, not-too-sweet contrast to sweet vanilla ice cream. If you prefer milk chocolate, pick a high-quality baking bar (not candy melts) and keep the coconut oil ratio the same to make sure the shell sets hard and crackly instead of soft and waxy.
4.Why do you call for refined unscented coconut oil instead of unrefined for the chocolate shell?
Unrefined coconut oil has a strong, distinct tropical coconut flavor that will overpower the subtle vanilla and rich dark chocolate notes in these bars. Refined unscented coconut oil thins melted chocolate perfectly to create a thin, even, snappy coating that doesn’t taste like coconut at all, just smooth, rich chocolate.
5.How do I get clean, sharp square ice cream centers without them melting while I work?
First, line your pan with parchment, spread softened (not melted!) ice cream evenly to a 1.5-inch thickness, and freeze it solid for a full 4 hours, preferably overnight. When ready to cut, work fast: dip a sharp knife in hot water, wipe dry, cut squares, and pop them back on a parchment-lined freezer tray for 30 minutes before dipping.
6.Why does my chocolate shell crack or slide off the ice cream when I dip it?
That almost always happens if your ice cream squares aren’t frozen rock solid, or if your melted chocolate is too hot when you dip. Make sure your chocolate and coconut oil mixture cools to 85–90°F (just slightly warm to the touch) before dipping, and work one square at a time, pulling it straight from the freezer right as you’re ready to coat.
7.Do I need to temper the chocolate for the shell?
Nope, no fancy tempering required here! The combination of high-quality 70% dark chocolate and refined coconut oil creates a perfectly snappy, stable shell when it hits frozen ice cream, no careful temperature cycling needed. Just melt the two together gently, let it cool slightly, and it will set up crisp every single time.
8.What’s the best way to get an even, thin chocolate coating on every bar?
Use a shallow, wide container that holds enough melted chocolate to fully submerge a square. Drop one frozen ice cream square into the chocolate, use two forks to flip it quickly to coat all sides, lift it out, tap the fork gently on the container edge to shake off excess, then set it on a cold parchment-lined tray to set.
9.When is the right time to add the flaky sea salt topping?
Sprinkle a tiny pinch of flaky sea salt on top of each bar immediately after you set it on the parchment tray post-dip, before the chocolate shell sets. If you wait even 30 seconds, the chocolate will harden too much and the salt won’t stick. Don’t overdo it—2–3 small flakes per bar is enough to cut sweetness and amp up chocolate flavor.
10.Can I add mix-ins to the ice cream layer, like cookie crumbs or caramel swirl?
Absolutely! Once you soften the premium vanilla ice cream to spreadable consistency, fold in crushed chocolate cookies, chopped nuts, or a thick fudge swirl before spreading it in the pan to freeze. Just skip very wet mix-ins like thin syrup, which create icy pockets that make bars fall apart when you dip them.
11.How long do these homemade Klondike Bars stay good in the freezer?
Stored properly in an airtight container with sheets of parchment between layers to prevent sticking, these bars will stay perfectly creamy and snappy for up to 3 weeks. Keep your freezer set to 0°F or colder, and store the container away from the freezer door to avoid temperature swings that cause icy texture or sticky shells.
12.My chocolate shell turned out thick and gummy instead of snappy—what did I do wrong?
That’s usually caused by one of three issues: you used chocolate chips instead of a high-quality baking bar (chips have stabilizers that make them melt thick), you added too much coconut oil, or your ice cream wasn’t cold enough when you dipped. Stick to a 4:1 chocolate to coconut oil ratio for that signature crisp snap.
13.Can I make these dairy-free for friends with dietary restrictions?
You can easily make a dairy-free version! Swap the premium full-fat dairy vanilla ice cream for a high-quality, full-fat coconut-based vanilla ice cream (skip watery low-fat dairy-free pints), use dairy-free 70% dark chocolate, and keep the refined coconut oil and flaky sea salt the same. The texture will be just as rich, creamy, and snappy as the original.
14.Do I need to double-dip the bars to get a thick enough chocolate shell?
You don’t need to double dip if your chocolate is thinned correctly with coconut oil! A single thin dip creates that perfect, crackly shell that’s thick enough to hold the ice cream but not so thick that it overwhelms the vanilla center. If you love extra chocolate, do a quick second dip 2 minutes after the first sets, popping bars back in the freezer between dips.
15.Why do my bars have frosty white spots on the chocolate after a few days in the freezer?
Those frosty spots are freezer burn, caused by trapped moisture getting under the chocolate shell or exposure to cold, dry freezer air. You can avoid this by making sure your chocolate coating is fully sealed with no bare ice cream spots, and storing fully set bars in an airtight, tight-lidded freezer-safe container, not loose on a tray.
16.Can I make these into mini bite-sized versions instead of full-sized bars?
Mini Klondike bites are perfect for parties! Instead of cutting 3x3-inch full-sized squares from the frozen ice cream slab, cut 1x1-inch bite-sized cubes, freeze them for an extra 30 minutes to get extra firm, then dip them the same way you would full bars. Top each with a pinch of flaky salt, and they’re ready to serve in half the time.

Comments (15)

2 days ago

OMG these are SO good!!! I made them for my kids’ after-school snack this week and they went absolutely feral for them. The 25 minutes of active time is no joke, I even roped my 7 year old into helping spread the ice cream and it was totally mess-manageable. Total game changer compared to buying the boxed ones at the grocery store, which taste so artificial now.

yesterday

Wait did you use regular vanilla ice cream or the no-churn version mentioned in the notes? I’m making these for a block party this weekend and don’t want to mess it up!

yesterday

So glad your family loved them! Regular store-bought vanilla works perfectly, but the no-churn option gives you extra control over sweetness if you prefer that. They’ll be a total hit at the block party!

1 week ago

Took these on a camping trip last weekend and they held up way better than I expected! I stored them in a hard sided cooler with dry ice and everyone in our camp group was begging for the recipe. Only note: make sure your chocolate coating is fully set before you stack them, I learned that the hard way with the first batch.

5 days ago

Great tip about letting the chocolate fully set! So stoked these worked out for your camping trip, that’s such a fun use for them. Next time you can toss a little crushed pretzel into the coating for a salty twist if you’re feeling fancy!

3 days ago

I was worried these would be too fussy for a beginner baker but the difficulty rating is spot on—super easy! I added a thin layer of peanut butter between the ice cream and chocolate shell and *chef’s kiss* 10/10 will make again all summer long.

30 minutes ago

Wait hold on, 5 hours total time? I thought this was a no-freeze recipe? I don’t know if I have that kind of foresight to plan that far ahead for a dessert lmao. Do they actually taste different enough from the store bought ones to be worth the wait?

5 minutes ago

Dude 90% of that time is just them sitting in the freezer! You don’t have to do anything during that part. I threw mine together before work, stuck them in the freezer, and they were ready when I got home. Total hands off!

just now

Mia is exactly right! Almost all of that cook time is inactive freezing, so you only spend about 25 minutes actually prepping. The flavor is way creamier and less chemical-tasting than store bought, I promise it’s worth the tiny bit of advance planning!

yesterday

Made these for our office potluck yesterday and they were the first thing gone! I cut them into smaller bite-sized squares instead of full bars so people could grab a quick sweet bite without feeling too full, and it worked perfectly. Will be adding these to my permanent potluck rotation for sure.

2 hours ago

Wait you were the person who brought those??? I ate three of them and was asking everyone who made them lmao. The crispy chocolate shell was insane, can you send me the recipe link??

2 weeks ago

I swapped in dairy-free vanilla ice cream and dairy-free dark chocolate for the coating to accommodate my dairy allergy, and they turned out perfect! Even my non-dairy-free roommate said they were better than the original Klondikes. So happy to have a copycat I can actually eat!

3 days ago

First batch came out a little melty when I dipped them, turns out I didn’t let the ice cream slabs freeze long enough before coating. Second batch I left them in the freezer for a full 2 hours after cutting and it was smooth sailing. Don’t rush that freeze step, folks!

2 days ago

That’s such an important callout! If the ice cream is even slightly soft when you dip it, it’ll slip right off into the chocolate. Tossing the cut slabs on a parchment-lined tray in the freezer until they’re rock solid makes the dipping process so much easier, great tip!

2 hours ago

My boys destroyed a whole batch of these in 24 hours flat. I thought I’d have enough for the whole week for dessert? Nope. I’m making a double batch tonight, lesson learned. Has anyone tried adding mint extract to the ice cream for a mint chocolate chip version?

30 minutes ago

I did that last week! Added 1/2 tsp of peppermint extract and a handful of mini chocolate chips to the ice cream before freezing, and it tasted exactly like the mint Klondike bars I loved as a kid. 10/10 recommend!

5 minutes ago

Love the mint idea! You can also roll the still-wet chocolate coating in crushed candy canes around the holidays for a super festive version, it’s a huge hit with kids.

2 hours ago

I’m not gonna lie, I ate two of these straight out of the freezer at 1am last night and zero regrets. The chocolate shell has that perfect crack when you bite into it, just like the real thing. I was worried the homemade version wouldn’t have that texture but it’s spot on.

30 minutes ago

Nothing hits like a late night frozen treat, right? That perfect chocolate crack is all thanks to adding a little coconut oil to the melted chocolate to thin it out just enough—it sets super thin and crispy every time.

5 days ago

These are perfect for meal prep! I wrap each bar individually in parchment paper and store them in a freezer bag, and they stay perfect for up to 2 weeks. They’re such an easy grab-and-go treat when I’m craving something sweet after dinner without all the weird additives from store bought bars.

just now

Okay I’ve never made any kind of frozen dessert before, how hard is the dipping part? I’m so clumsy I feel like I’m gonna make a huge mess with melted chocolate all over my kitchen.

just now

I’m the clumsiest person ever and I managed it! Just use a tall narrow glass for the melted chocolate, dip the bar straight down, pull it up, and let the excess drip off for a second before setting it on the tray. Way less messy than I thought it would be, promise!

1 week ago

I grew up eating Klondike bars every summer at my grandma’s house, and these taste exactly like I remember! I was worried they’d be a letdown because copycat recipes never hit right, but the flavor is so nostalgic. I even did the classic “what would you do for a Klondike bar” bit with my partner when I pulled them out of the freezer lmao.

5 days ago

Right?? I made them last month and my grandma said they tasted better than the ones she used to buy for us when we were kids. Total nostalgia bomb!

3 days ago

This makes me so happy to hear! There’s nothing better than a recipe that brings back good summer memories, that’s exactly why I wanted to create this copycat version.

2 days ago

Is there a way to make these without coconut oil? I have a coconut allergy and I don’t want the chocolate coating to turn out weird. Would vegetable shortening work instead?

yesterday

Great question! Vegetable shortening works as a 1:1 swap for the coconut oil in the chocolate coating, it’ll still give you that perfect thin, crispy shell when it sets. You can also use unsalted butter if that’s what you have on hand, just note it’ll have a slightly richer, less neutral flavor.

2 weeks ago

I swapped in low-sugar vanilla ice cream and 70% dark chocolate for the coating to lighten these up a little, and they were still absolutely delicious. Perfect when I’m craving something sweet after a workout without the massive sugar crash I get from regular candy bars. So glad I found this recipe!

3 days ago

Made these for our Fourth of July cookout to serve after burgers and hot dogs, and they were such a hit. Way less drippy than regular popsicles, which is a win when you’ve got a yard full of kids running around. I sprinkled flaky sea salt on the chocolate right after dipping and everyone said that salty-sweet kick put them over the top. 10/10, will be a cookout staple from now on.



