
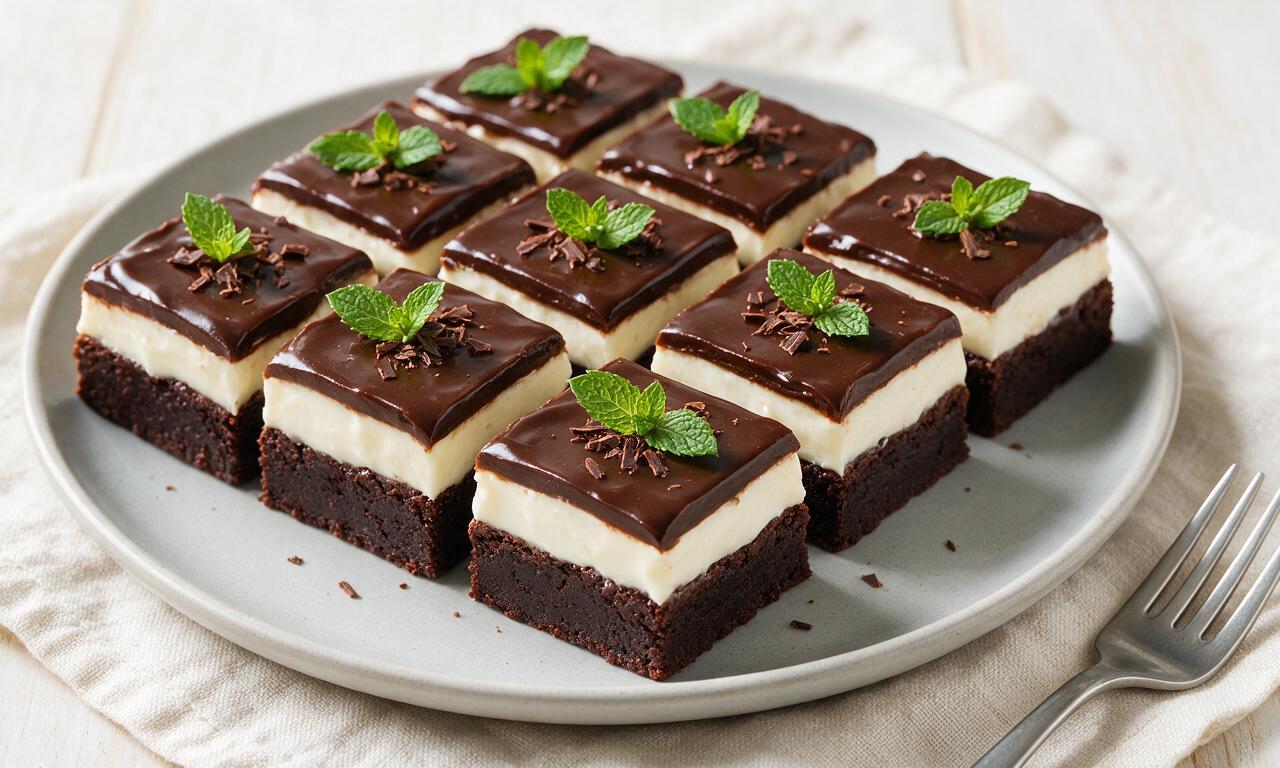
Mint Brownies

Mint Brownies
⏱️ cook time 2 hours (includes cooling and setting time)
🍽️ servings 12
⚡ Difficulty easy

intro

Rich, fudgy chocolate brownies layered with cool creamy mint and smooth ganache: a decadent, perfectly balanced treat for mint and chocolate lovers.

Ingredients

70% dark chocolate (chopped, for brownie base) 170 grams (3/4 cup)
Semi-sweet chocolate chips (for ganache top) 170 grams (1 cup)
Unsalted butter 170 grams (3/4 cup total: 113g for brownie, 57g softened for mint layer)
Granulated sugar 200 grams (1 cup, for brownie base)
Large eggs (room temperature) 3 units
All-purpose flour 65 grams (1/2 cup, for brownie base)
Unsweetened cocoa powder 10 grams (2 tablespoons, for brownie base)
Peppermint extract 7.5 ml (1.5 teaspoons, for mint layer)
Powdered sugar 240 grams (2 cups, for mint layer)
Heavy cream 110 ml (1/2 cup total: 30ml for mint layer, 80ml for ganache)
Vanilla extract 5 ml (1 teaspoon, for brownie base)
Fine table salt 1 gram (1/4 teaspoon, for brownie base)
Green gel food coloring (optional) 2 drops
Fresh mint leaves (optional garnish) 10 grams (1/4 cup loosely packed)

Steps

1

Prep oven and pan

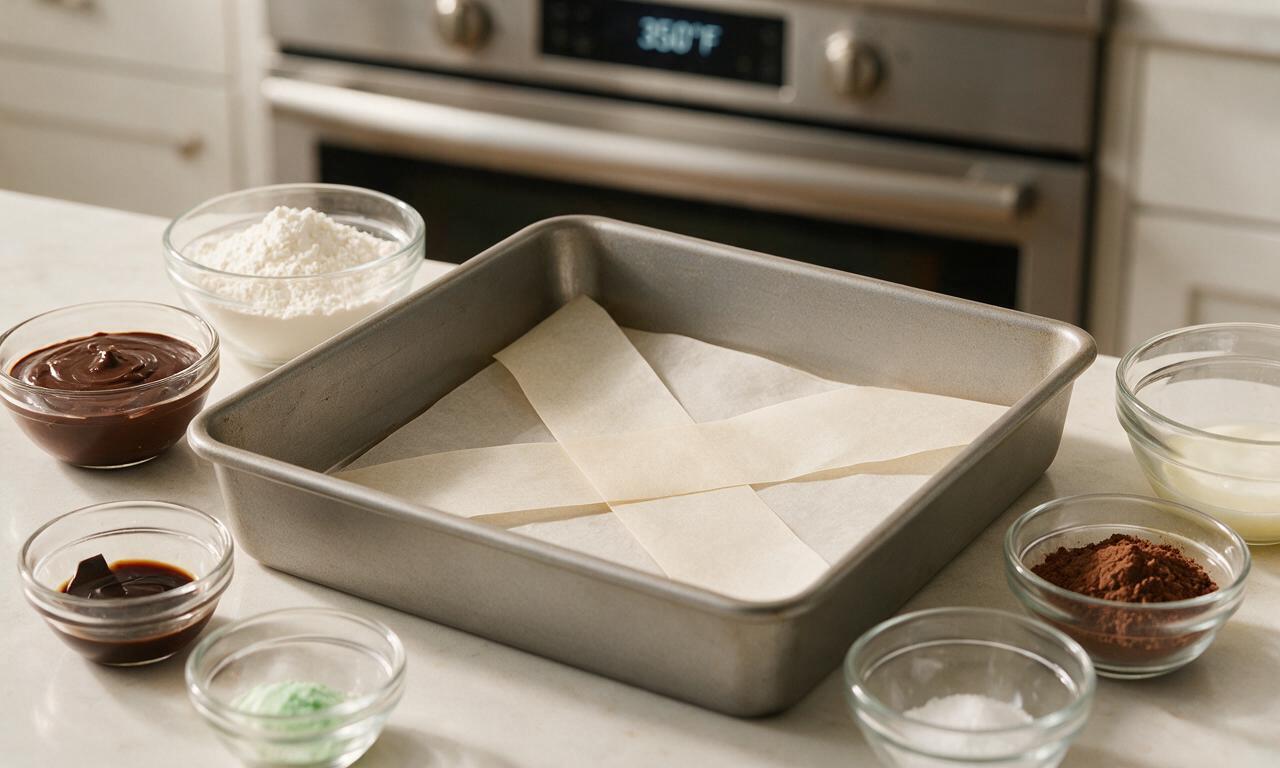
Preheat your oven to 175°C (350°F), and line a 20cm (8 inch) square baking pan with parchment paper, leaving 5cm (2 inch) overhang on two sides for easy lifting later. No extra pan grease is needed, as the brownie batter has a high butter content that prevents sticking.
Step 1
step1:Prep oven and pan
2

Bake fudgy brownie base

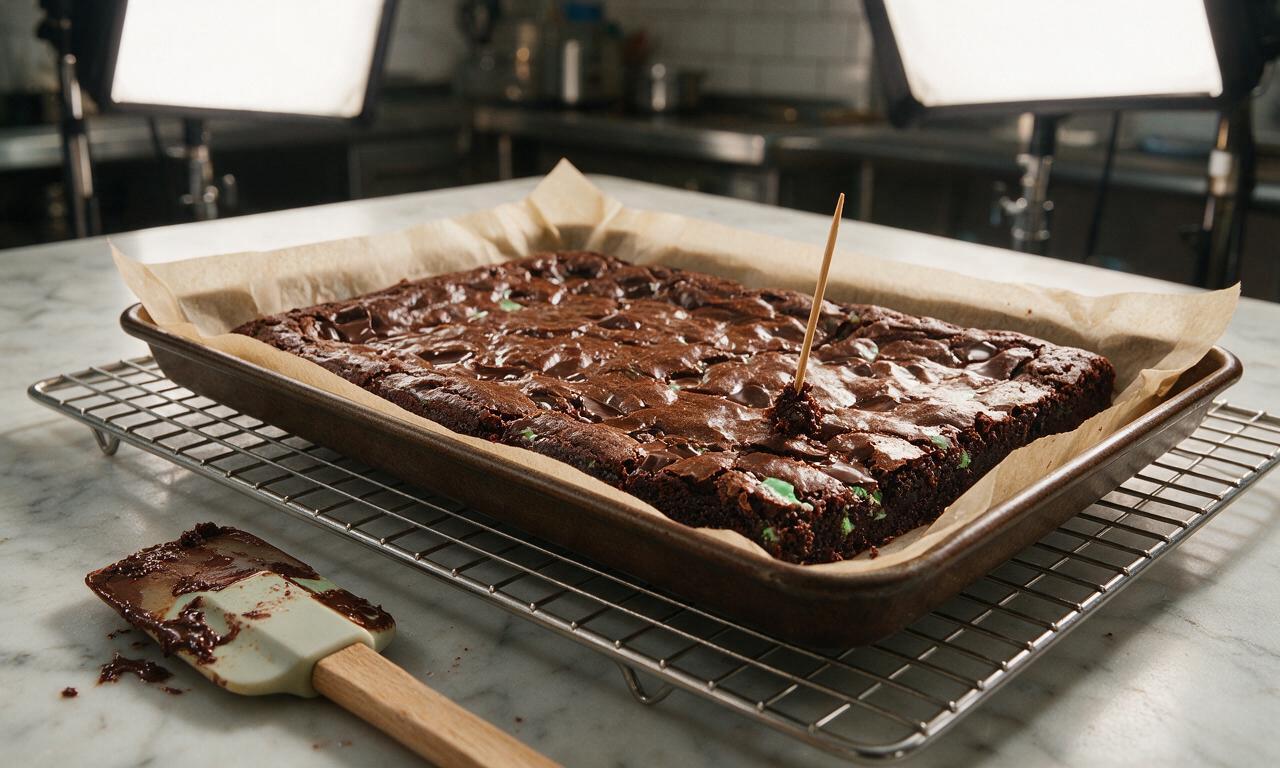
Melt 113g of the measured butter and all 170g chopped dark chocolate in a heatproof bowl set over a pan of gently simmering water (double boiler), stirring constantly until smooth, about 3 minutes. Remove the bowl from heat, stir in 200g granulated sugar, then beat in 3 room-temperature eggs one at a time, followed by 5ml vanilla extract. Fold in 65g all-purpose flour, 10g cocoa powder, and 1g fine salt until just combined (do not overmix). Pour batter into the prepared pan, spread evenly, and bake for 22-25 minutes until the top is set; a toothpick inserted 2cm from the pan edge should come out with moist, fudgy crumbs. Let the baked brownie cool completely to room temperature on a wire rack, about 40 minutes.
Step 2
step2:Bake fudgy brownie base
3

Whip mint filling

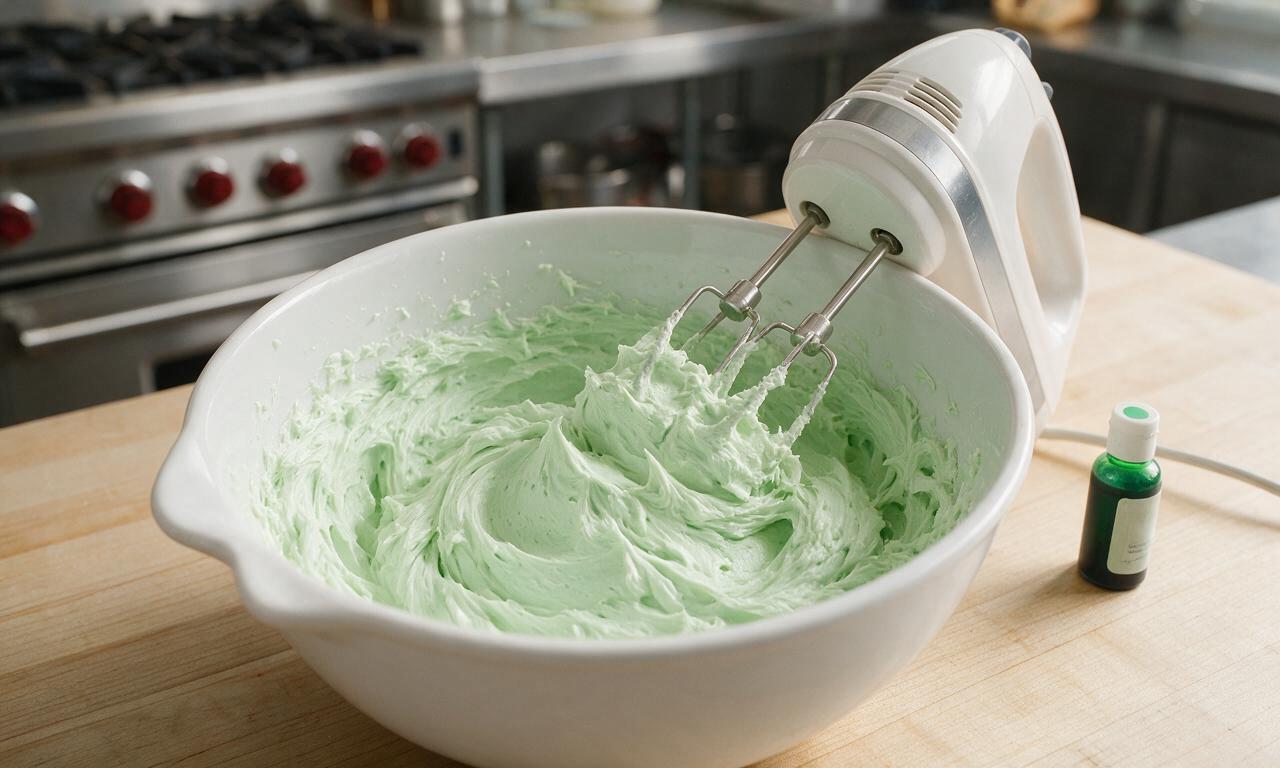
In a medium mixing bowl, beat the remaining 57g softened unsalted butter with an electric hand mixer on medium speed for 1 minute until pale and fluffy. Gradually add 240g powdered sugar, 30ml heavy cream, all 7.5ml peppermint extract, and 2 drops of green gel food coloring (if using), mixing on low speed to avoid sugar splatters then increasing to medium speed for 2 minutes, until the filling is smooth, spreadable, and evenly pale mint green. Add 1 extra teaspoon of heavy cream if the mixture is too thick to spread easily.
Step 3
step3:Whip mint filling
4

Layer mint on brownies

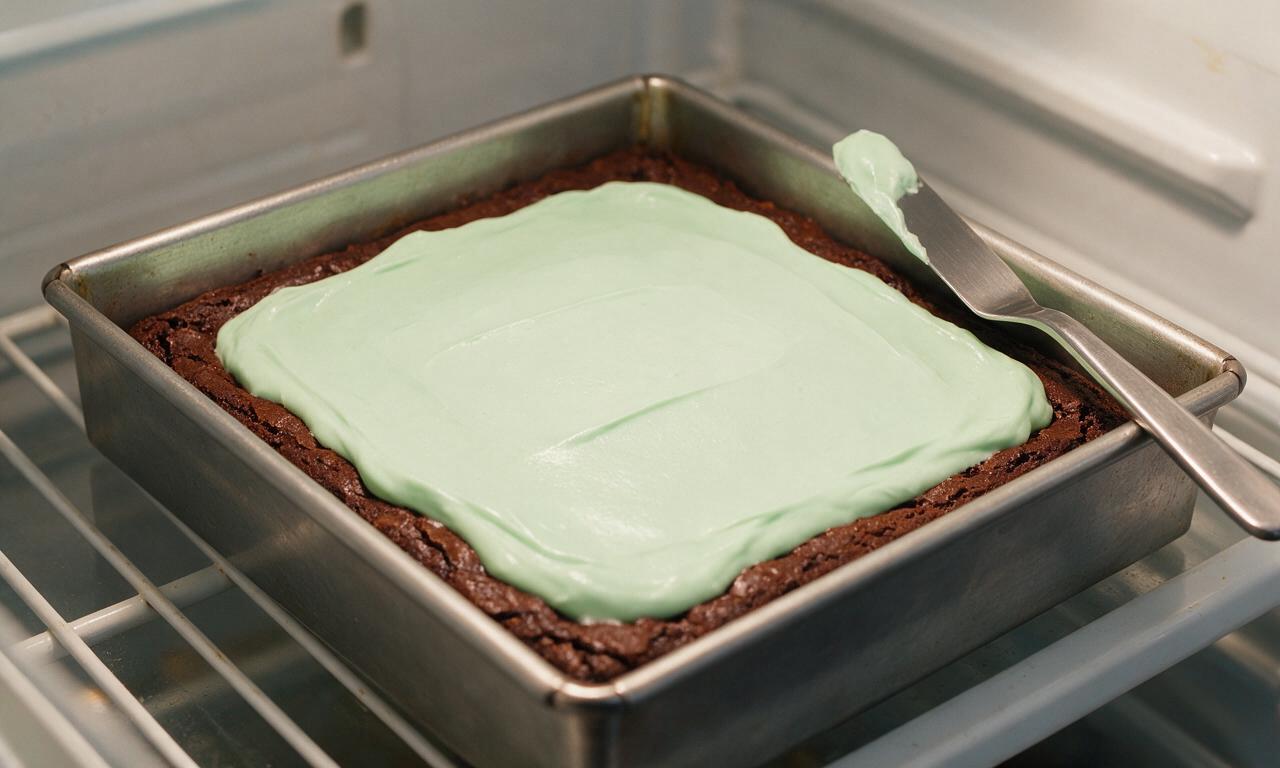
Once the brownie base is fully cooled to room temperature, scoop all of the mint filling onto the center of the brownie, and use an offset spatula to spread it into a smooth, even layer covering the entire brownie surface. Place the pan in the refrigerator to chill for 15 minutes, so the mint layer firms up enough to not melt when the warm ganache is added.
Step 4
step4:Layer mint on brownies
5

Make chocolate ganache

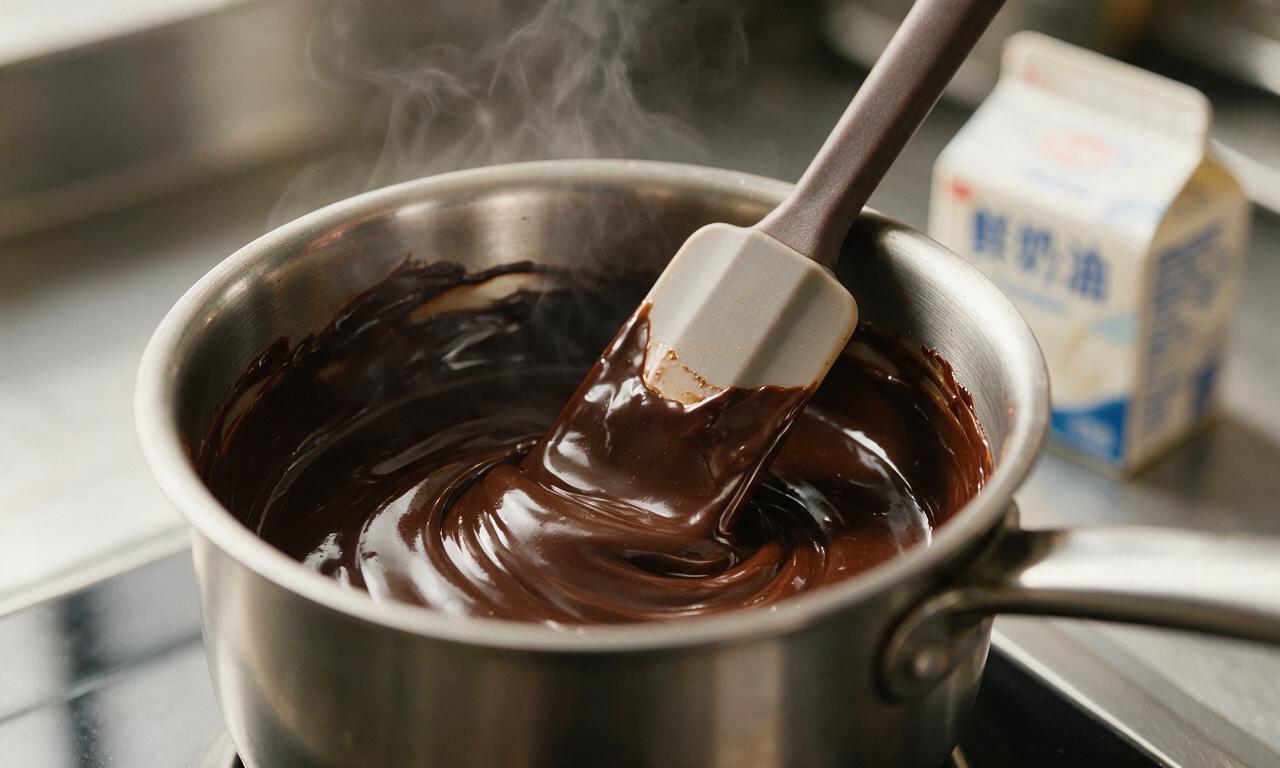
Heat the remaining 80ml heavy cream in a small saucepan over medium-low heat until it just starts to bubble gently around the edges (do not bring to a rolling boil, about 2 minutes). Remove the pan from heat, pour in all 170g semi-sweet chocolate chips, and let the mixture sit undisturbed for 3 minutes, then stir slowly with a silicone spatula until completely smooth and glossy.
Step 5
step5:Make chocolate ganache
6

Add ganache and chill

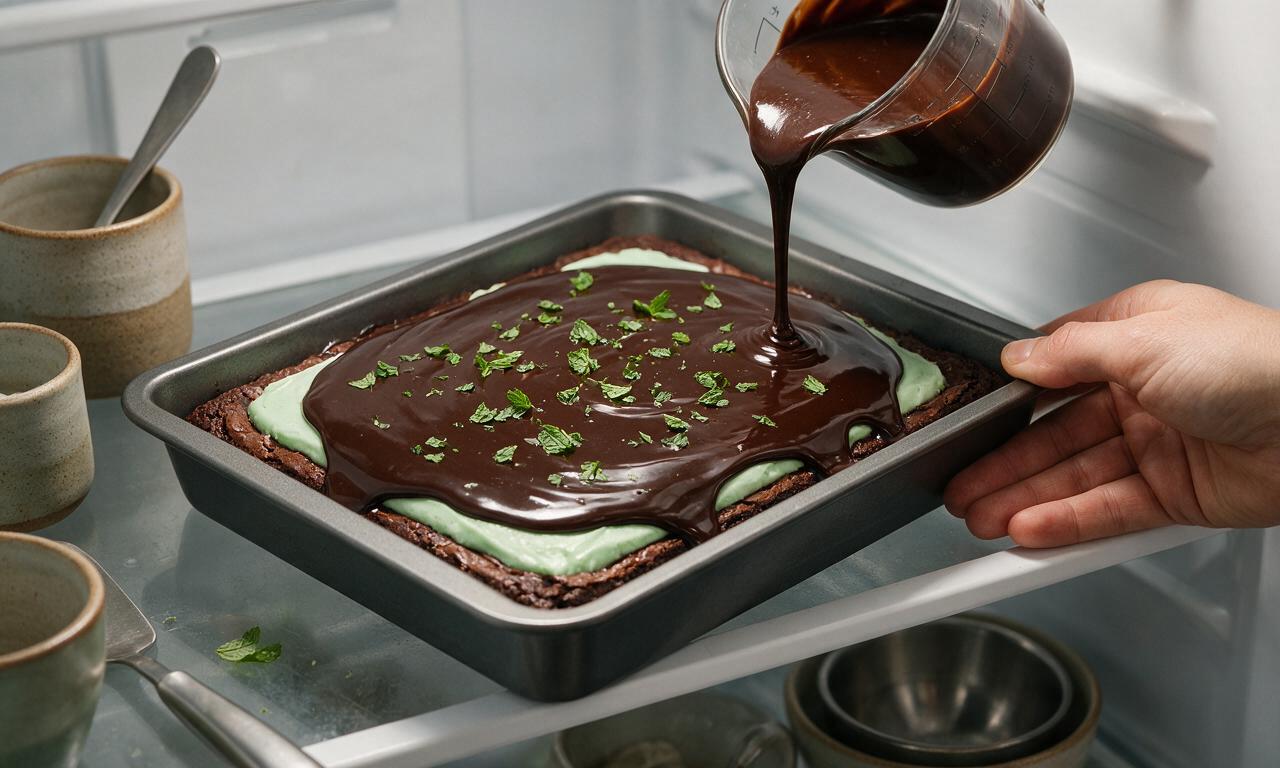
Remove the pan with the chilled mint layer from the refrigerator, pour the warm ganache over the mint layer, and tilt the pan gently in all directions to spread the ganache into a perfectly even, smooth top layer. Sprinkle with optional chopped fresh mint if desired, then return the pan to the refrigerator to chill for 30 minutes until the ganache is fully firm and set.
Step 6
step6:Add ganache and chill
7

Slice and serve

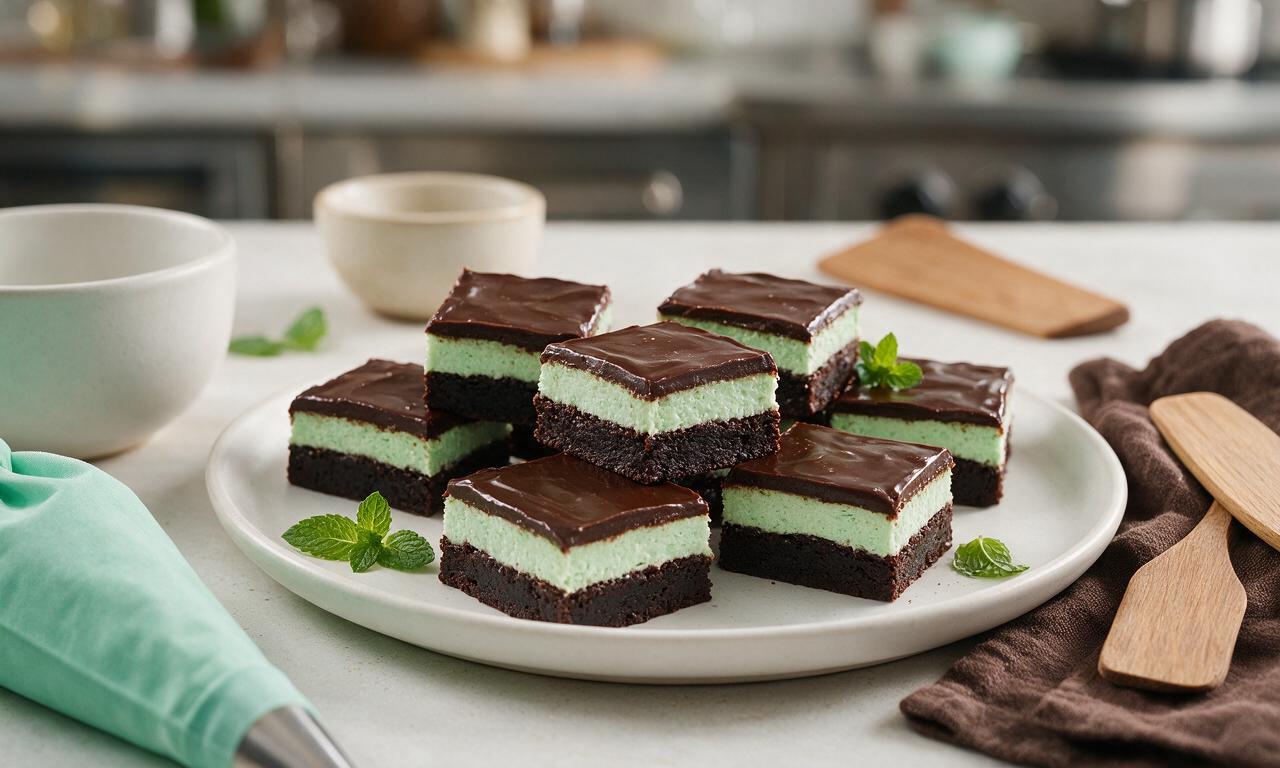
Once the ganache is fully set, use the parchment paper overhang to lift the entire uncut brownie block out of the pan and onto a wooden cutting board. Dip a sharp chef’s knife in hot water, wipe it dry, and cut the block into 12 equal 5cm (2 inch) squares, wiping the knife clean between each cut for sharp, neat edges. Serve chilled or at cool room temperature.
Step 7
step7:Slice and serve

Tips

1.Avoid overmixing the brownie batter after adding flour: overmixing develops gluten and will result in tough, cakey brownies instead of the desired dense, fudgy texture.
2.Never add the mint layer to a warm brownie base: residual heat will melt the butter-based mint filling, causing layers to slide and mix together instead of staying distinct.
3.For perfectly clean cuts without cracked ganache, dip your knife in hot water and wipe it completely dry between every slice; the warm blade glides through set chocolate smoothly.


✨ You May Also Like

Desserts & Baking
🍜 Italy

Creamy, coffee-kissed classic Northern Italian no-bake dessert, with layers of rum-spiked mascarpone cream, soft ladyfingers, and a rich cocoa dusting.

⏱️ 4 hours 3Desserts & Baking ★ 4.8
Desserts & Baking
🍜 France

Flaky, shatteringly crisp, buttery French croissants with golden exteriors and soft, airy layered interiors, perfect for pairing with coffee for a special morning treat.

⏱️ 12 hours Desserts & Baking ★ 4.7
Desserts & Baking
🍜 United States

Warm, spiced baked apples topped with a fluffy golden biscuit crust, this cozy dessert pairs perfectly with vanilla ice cream for cool-weather comfort.

⏱️ 55 minuteDesserts & Baking ★ 4.7
Desserts & Baking
🍜 United States

A star-spangled classic American blueberry pie with buttery flaky crust and bright sweet-tart filling, perfect for summer patriotic gatherings.

⏱️ 1 hour 25Desserts & Baking ★ 4.8
Desserts & Baking
🍜 United States

A beloved no-bake regional Maine candy with a chewy coconut-potato center coated in rich dark chocolate, a New England holiday staple since the 1870s.

⏱️ 2 hours 3Desserts & Baking ★ 4.9
Desserts & Baking
🍜 France

Luxuriously creamy, floral frozen custard made with aromatic Tahitian vanilla beans, boasting a smooth, rich texture that melts slowly on the tongue.

⏱️ 3 hours 3Desserts & Baking ★ 4.6

Mint Brownies:Frequently Asked Questions

1.Why do you recommend 70% dark chocolate for the brownie base instead of milk chocolate?
70% dark chocolate creates that rich, deep, not overly sweet chocolate backbone that balances the sweet, cool mint layer and smooth semi-sweet ganache. If you swap in milk chocolate for the base, the finished brownies will taste cloyingly sweet and lose that signature fudgy, sophisticated chocolate bite that pairs perfectly with bright mint.
2.Do my eggs really need to be at room temperature for the brownie batter?
Absolutely! Room-temperature eggs mix more evenly into the melted butter and chocolate, creating a smooth, emulsified batter that bakes into a dense, fudgy texture instead of a greasy, crumbly or cakey result. If you’re short on time, submerge cold eggs in a bowl of warm tap water for 5 minutes to bring them up to temp fast.
3.How do I keep the mint layer from mixing into the warm brownie base when I assemble?
The key is to let the baked brownie base cool completely to room temperature first—wait at least 1 full hour after pulling it from the oven, even chill it for 20 minutes if your kitchen is warm. Spread the mint filling slowly in an even layer with an offset spatula, pressing gently instead of swiping hard to avoid pulling up crumbs.
4.Can I make these brownies ahead of time for a party?
Definitely! These brownies actually taste better after the flavors meld for 12 to 24 hours. Once fully assembled and set, cover the pan tightly with plastic wrap and store them in the fridge for up to 4 days. Let them sit at room temp for 10 minutes before serving to let the fudgy texture soften a little.
5.What’s the best way to get clean, neat cuts when slicing these layered brownies?
Grab a sharp, thin-bladed chef’s knife, and run it under hot tap water for 10 seconds, then wipe it dry completely between every single cut. This melts through the firm ganache top cleanly without dragging the mint layer or pulling crumbs from the fudgy brownie base for perfect, bakery-worthy squares.
6.Can I use mint chocolate chips instead of making a separate mint layer?
You can, but you won’t get that distinct, cool, creamy layered texture the recipe is known for. Mint chips will melt into the warm brownie base as it bakes, creating a uniformly minty brownie instead of the clear three-layer contrast of fudgy chocolate, creamy mint, and smooth ganache that makes this treat feel special.
7.My ganache turned out grainy—what did I do wrong, and can I fix it?
Grainy ganache usually happens if the semi-sweet chocolate chips got too hot when you melted them, or if you stirred too vigorously too early. To fix it, stir in 1 teaspoon of warm heavy cream at a time, mixing gently with a silicone spatula over very low heat, until the texture smooths out completely.
8.Can I make these brownies gluten-free?
This recipe is super easy to adapt for gluten-free diets! Simply swap the standard all-purpose flour in the brownie base for a 1:1 gluten-free all-purpose baking blend that contains xanthan gum. The texture will stay just as fudgy, and no one will be able to tell the difference from the original version.
9.How fudgy should the brownie base be when I pull it out of the oven?
You want the edges to be fully set and slightly pulled away from the pan, but the center should still look slightly underbaked and have a tiny jiggle when you nudge the pan. If a toothpick comes out with wet batter, give it 2 more minutes, but moist, fudgy crumbs on the pick are exactly what you want.
10.Can I add mix-ins like nuts or crushed candy canes to these brownies?
Absolutely! Fold ½ cup of toasted, chopped walnuts or pecans into the brownie batter right before baking for extra crunch, or sprinkle 2 tablespoons of crushed candy canes over the still-warm ganache right after pouring it for a festive, extra minty, crunchy topping perfect for holiday gatherings.
11.Do I need to line my baking pan with parchment paper for this recipe?
I highly recommend it! Lining the pan with a parchment paper sling that overhangs the two long sides by 2 inches lets you lift the entire block of brownies straight out of the pan once set, making slicing way easier and eliminating the risk of scratching your pan or mangling the ganache top.
12.Can I use salted butter instead of unsalted butter for the recipe?
You can, just skip any added salt the brownie base calls for to keep the flavor balanced. Keep in mind that salted butter has variable salt content across brands, so unsalted butter gives you full control over seasoning to nail that perfect sweet-salty balance that makes chocolate and mint pop.
13.How long do I need to let the ganache set before slicing the brownies?
After pouring the warm ganache over the chilled mint layer, pop the whole pan back in the fridge for at least 1 hour to let the ganache firm up fully. If you’re in a rush, you can stick it in the freezer for 15 minutes, but don’t leave it longer or the brownie base will get too hard and lose its fudgy chew.
14.Why did my mint layer turn out runny instead of firm enough to layer?
A runny mint layer almost always comes from not adding enough sifted powdered sugar to the mint filling, or spreading it on a too-warm brownie base that melts the butter in the filling. If it’s runny pre-assembly, stir in 2 tablespoons of sifted powdered sugar at a time until it holds a soft, spreadable shape.
15.Can I freeze these layered mint brownies for later?
Yes! Once the brownies are fully set and sliced, wrap individual squares tightly in plastic wrap, then tuck them into a labeled freezer bag for up to 3 months. Thaw them in the fridge overnight, or let them sit at room temperature for 20 minutes before eating for that perfect fudgy, creamy texture.
16.Is there a non-dairy swap I can use to make these brownies vegan?
Absolutely! Swap the unsalted butter for vegan baking sticks, use dairy-free dark and semi-sweet chocolate (double-check labels for no milk additives), replace the large eggs with 3 flax eggs (1 tbsp ground flax + 3 tbsp water per egg, rested 5 minutes), and use full-fat coconut cream for the mint filling and ganache.
17.Will these brownies be too minty for people who only like mild mint flavor?
You can easily adjust the mint intensity to taste! The standard mint layer uses 1 to 1.5 teaspoons of pure peppermint extract, so start with ¾ teaspoon if you prefer a subtle, cool mint note, taste the filling, and add a tiny bit more only if you want a stronger kick. Skip artificial mint flavoring, which tastes harsh.
18.What size baking pan works best for these layered brownies?
A 9x9 inch square metal baking pan is ideal for this recipe—it creates brownies that are the perfect thickness, with evenly proportioned layers of brownie, mint, and ganache. If you use a 9x13 pan, your layers will be thinner, so reduce baking time by 5 to 7 minutes to keep the base from drying out.
19.Can I use natural cocoa powder instead of chopped 70% dark chocolate for the brownie base?
I don’t recommend it for this ultra-fudgy recipe. Chopped 70% dark chocolate melted with butter creates that dense, melt-in-your-mouth fudgy texture, while cocoa powder-based brownies tend to be more cakey and less rich. If you only have cocoa, use ¾ cup Dutch-process cocoa plus 3 tablespoons extra butter to mimic that richness.
20.Why do my brownies always turn out cakey instead of fudgy?
Cakey brownies almost always come from one of three common missteps: overmixing the batter after adding flour (which develops gluten), overbaking the base, or packing flour into your measuring cup (which adds too much). For perfect fudgy results, stir flour in just until dry streaks vanish, spoon and level your flour, and pull brownies out when the center is slightly underdone.

Comments (20)

3 days ago

OMG these are SO good! I brought them to my office potluck last week and every single last piece was gone before I even got a second slice. The fudgy base is perfectly rich, not too cakey, and the mint layer is just the right amount of cool sweetness without tasting like toothpaste. 10/10 will make again for our St. Patrick’s Day family dinner!

1 week ago

Super easy recipe, even for someone like me who burns boxed brownies half the time. I did use extra dark chocolate chips for the base because that’s what I had in the pantry, and it turned out chef’s kiss. My roommate ate half the pan in one sitting lmao.

2 days ago

Made these for my kid’s soccer team snack day and all the parents were asking for the recipe! The layers look so fancy but they came together so quick, I didn’t even have to stress about prep after work. The mint layer sets perfectly if you just pop it in the fridge while the brownies cool like the recipe says.

2 weeks ago

These are a game changer for my annual holiday cookie swap! I’ve been looking for a brownie recipe that holds up when cut into small squares and doesn’t turn into a goopy mess, and this is it. The mint cuts through the rich fudge so you don’t feel overwhelmed after one piece.

5 days ago

Pretty solid! I will say I wish I’d let the top ganache set a little longer before cutting, my slices were a bit messy the first go around. Flavor was on point though, definitely a mint chocolate lover’s dream. Will give it another shot when I have more time to let it chill properly.

yesterday

My grandkids went crazy for these! I added a tiny bit of green food coloring to the mint layer to make it more festive for our St. Paddy’s gathering, and they thought I was a professional baker. So easy to follow, no weird fancy ingredients I had to run to three stores for.

30 minutes ago

Wait, can I make these ahead of time and freeze them? I have a finals week study group coming up and I want to prep snacks this weekend so I don’t have to cook during exam cram.

5 minutes ago

Great question! These freeze really well for up to 3 months — just wrap individual slices tightly in plastic wrap and store in an airtight container. Thaw in the fridge for 30 minutes before serving, and they’ll taste just as fresh as the day you made them!

1 week ago

I made these for my neighborhood block party and I swear three people asked if I bought them from a fancy bakery! The fudgy texture is exactly what I want in a brownie, no dry crumbly garbage here. Only note is I used a little extra peppermint extract because I’m obsessed with super minty sweets.

5 days ago

Ooh how much extra peppermint did you add? I love super strong mint flavor too and I was worried about adding too much and making it taste weird!

2 days ago

Has anyone tried making these with a gluten free all purpose flour blend? I have celiac and I’ve been craving mint brownies so bad lately, I don’t want to mess up a whole pan if the texture comes out weird.

yesterday

I’ve tested this recipe with a 1:1 gluten free all purpose flour blend (the kind with xanthan gum included) and it works perfectly! No texture difference at all, just make sure you measure the flour correctly to avoid dense brownies.

3 days ago

Made these with my 8 year old daughter for her school bake sale and they sold out in 10 minutes! She had so much fun spreading the mint layer and sprinkling extra chocolate chips on top. Super easy for kids to help with, no super complicated steps.

2 days ago

That’s so sweet! I’m always looking for easy recipes to make with my 6 year old, I’m adding this to our weekend baking list for sure. Did you use the green food coloring for the mint layer?

5 days ago

Full transparency, I skipped the top ganache layer because I was running short on time and just added extra chocolate chips on top of the mint layer. Still slapped, 10/10. Will make the full version next time when I don’t have to run to my kid’s basketball practice mid-bake.

3 days ago

Love that hack! The ganache adds a nice rich finish, but the brownies are absolutely delicious even without it if you’re short on time. Thanks for sharing your quick variation!

2 hours ago

Wait, the total cook time says 2 hours but most of that is cooling and setting right? I don’t have to stand in the kitchen for 2 full hours stirring stuff, right? I’m a total beginner and I don’t want to mess this up for my boyfriend’s birthday.

30 minutes ago

Yep! Actual active prep/bake time is only like 25 minutes max, the rest is just waiting for the brownies to cool and the layers to set in the fridge. Super low effort, you’ve got this!

1 week ago

Curious if anyone has swapped the butter for coconut oil and used dairy free chocolate chips to make these vegan? My sister is dairy free and I want to make a treat she can eat at our family dinner next weekend.

5 days ago

I did that exact swap last month! Used refined coconut oil so it didn’t add a coconut flavor, and dairy free dark chocolate chips, and no one could tell the difference. Turned out perfectly fudgy!

2 weeks ago

I make treats for our whole office every Friday, and these brownies got the most positive feedback out of anything I’ve brought in all year. People kept coming back for seconds, even the folks who say they ‘don’t like sweets’. Will be in the regular rotation for sure!

1 week ago

That makes us so happy to hear! So glad they were a hit with your whole team, thanks for taking the time to leave such a nice review!

30 minutes ago

OMG these look insane! Do I need a special pan or anything to make the layers come out even? I tried a layered bar recipe last month and all the layers oozed together and it was a total disaster.

5 minutes ago

No special pan needed! Just make sure your brownie base is fully cooled before you spread the mint layer on top, and that the mint layer is chilled for 20 minutes before adding the warm ganache, and you’ll get perfect clean layers every time.

just now

I was worried about the same thing! I used a regular 9x9 metal baking pan, followed the cooling directions exactly, and my layers were totally crisp and separate. You’ve got this, just don’t rush the cooling steps!

2 hours ago

I made these last night for a girls’ night in and I think I messed up the mint layer? It’s a little runny even after being in the fridge for an hour. Did I add too much heavy cream? Any tips to fix it?

30 minutes ago

I did the same thing my first try! I popped it back in the fridge for another 45 minutes and it firmed right up, I think I just spread the mint layer when the butter was too warm. Still tasted amazing even if it was a little softer than intended.

5 minutes ago

So sorry the mint layer was runny! That usually happens if the butter is too soft when you mix the mint filling, or if you add a touch too much cream. Popping it back in the fridge like the commenter said will help it firm up, and next time you can let your butter come to room temp (not melted!) for the perfect texture.

5 days ago

These are going to be my go-to game day dessert this fall! Can I add a layer of chopped Andes mints on top of the ganache for extra crunch? I have a giant bag in my pantry I need to use up.

3 days ago

I did that last time I made these! Chopped up a whole bunch of Andes mints and sprinkled them on right after I poured the ganache, so they stuck perfectly. It was chef’s kiss, added that extra little minty crunch.

2 days ago

That sounds like an amazing addition! Adding chopped Andes mints on top is such a fun, tasty twist, we might even have to add that as a variation note in the recipe. Thanks for the great idea!

yesterday

I was so nervous to make these because I’ve never made layered bars before, but they turned out perfect!!! I brought them to my book club and everyone was raving. The only thing I did different was add a tiny pinch of flaky sea salt on top of the ganache, it cut the sweetness so well.

2 hours ago

Ooh the flaky sea salt addition sounds incredible! I always add sea salt to my chocolate baked goods, it makes such a huge difference. I can’t wait to try that when I make these this weekend.

30 minutes ago

Love the flaky sea salt hack! That sweet-salty combo is unbeatable with rich chocolate and mint. So glad your first layered bar attempt was a hit, that makes our day!

1 week ago

How long do these keep in the fridge? I want to make a pan on Sunday to pack in my kids’ lunch boxes all week, but I don’t want them to go bad before they get eaten.

5 days ago

These will stay fresh in an airtight container in the fridge for up to 5 days! The layers hold up really well, so they’re perfect for packing in lunch boxes or quick after-school snacks.

2 days ago

I did this exact thing last week! Stored them in a Tupperware with parchment paper between slices so they didn’t stick, and they were still perfectly fudgy on day 4. My kids begged for them every day, zero complaints.

2 days ago

I hosted a St. Patrick’s Day party over the weekend and made these as the signature dessert, and they were the star of the show! I added green sprinkles on top to make them extra festive, and even my cousin who ‘hates mint’ ate two pieces. So easy, so fudgy, total win.

yesterday

I’m hosting my own St. Paddy’s party next weekend and these are now on the menu! What kind of green sprinkles did you use? I have those little sugar pearl ones but I’m worried they’ll be too crunchy on the smooth ganache.

2 hours ago

I used the soft jimmie-style sprinkles! They don’t get crunchy at all on the ganache, and they add a fun pop of color without messing with the texture. Definitely make them, you won’t regret it!



