
No-Bake Chocolate Oatmeal Cookies

title 1
No-Bake Chocolate Oatmeal Cookies
⏱️ cook time 5 minutes
🍽️ servings 24
⚡ Difficulty easy

intro

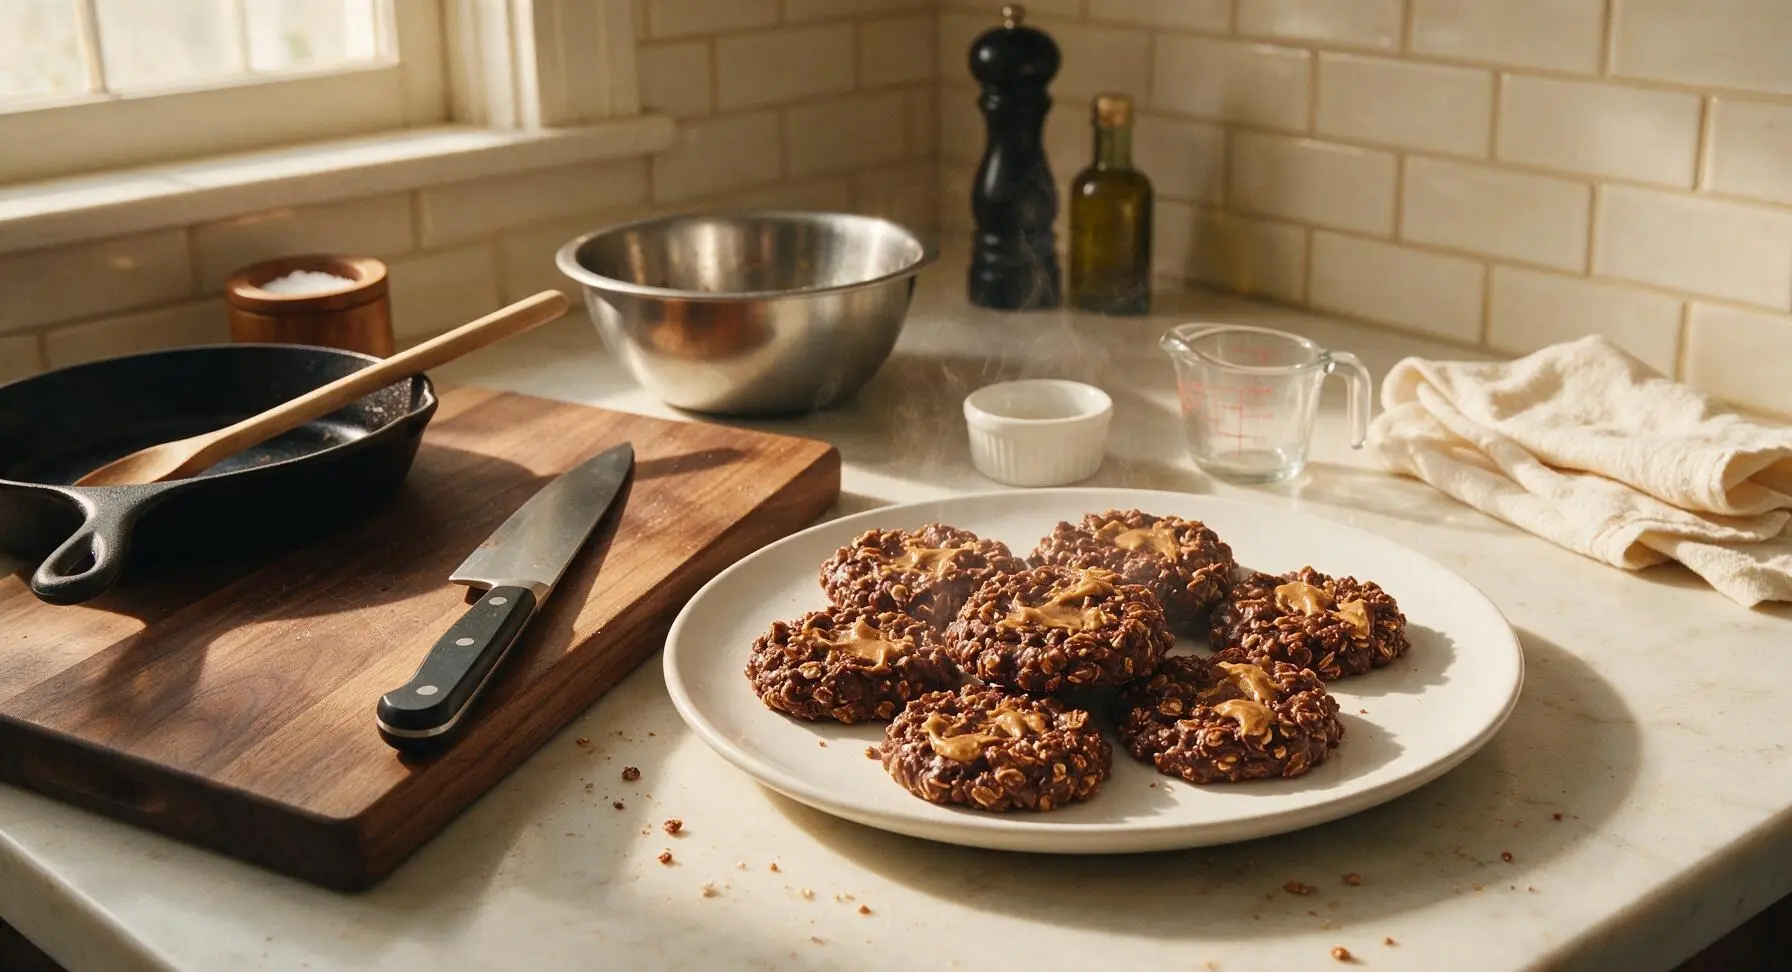
Chewy, fudgy no-bake chocolate oatmeal cookies loaded with peanut butter, ready in 20 minutes with zero oven time—ideal for quick, nostalgic summer sweet treats.

Ingredients
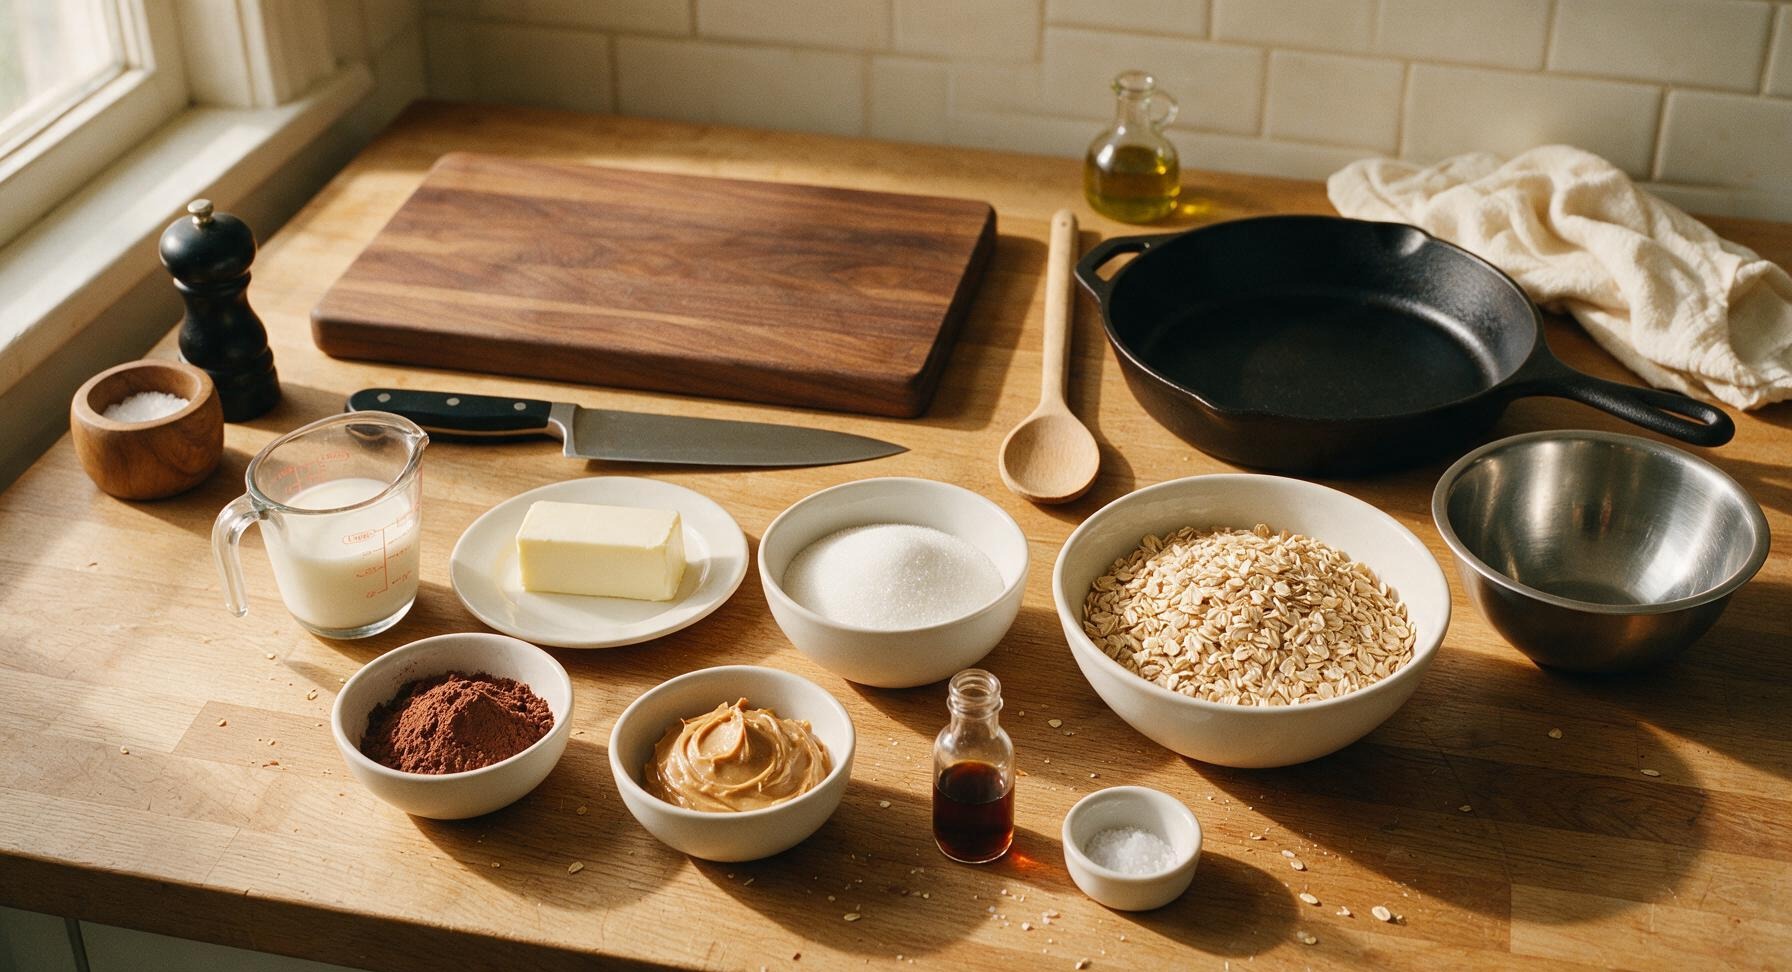
Unsalted butter 1/2 cup (1 stick)
Granulated white sugar 2 cups
Whole milk 1/2 cup
Unsweetened cocoa powder 1/3 cup
Creamy peanut butter 1/2 cup
Old-fashioned rolled oats 3 cups
Pure vanilla extract 1 tsp
Fine sea salt 1/2 tsp

Steps

1

Prep Work Station

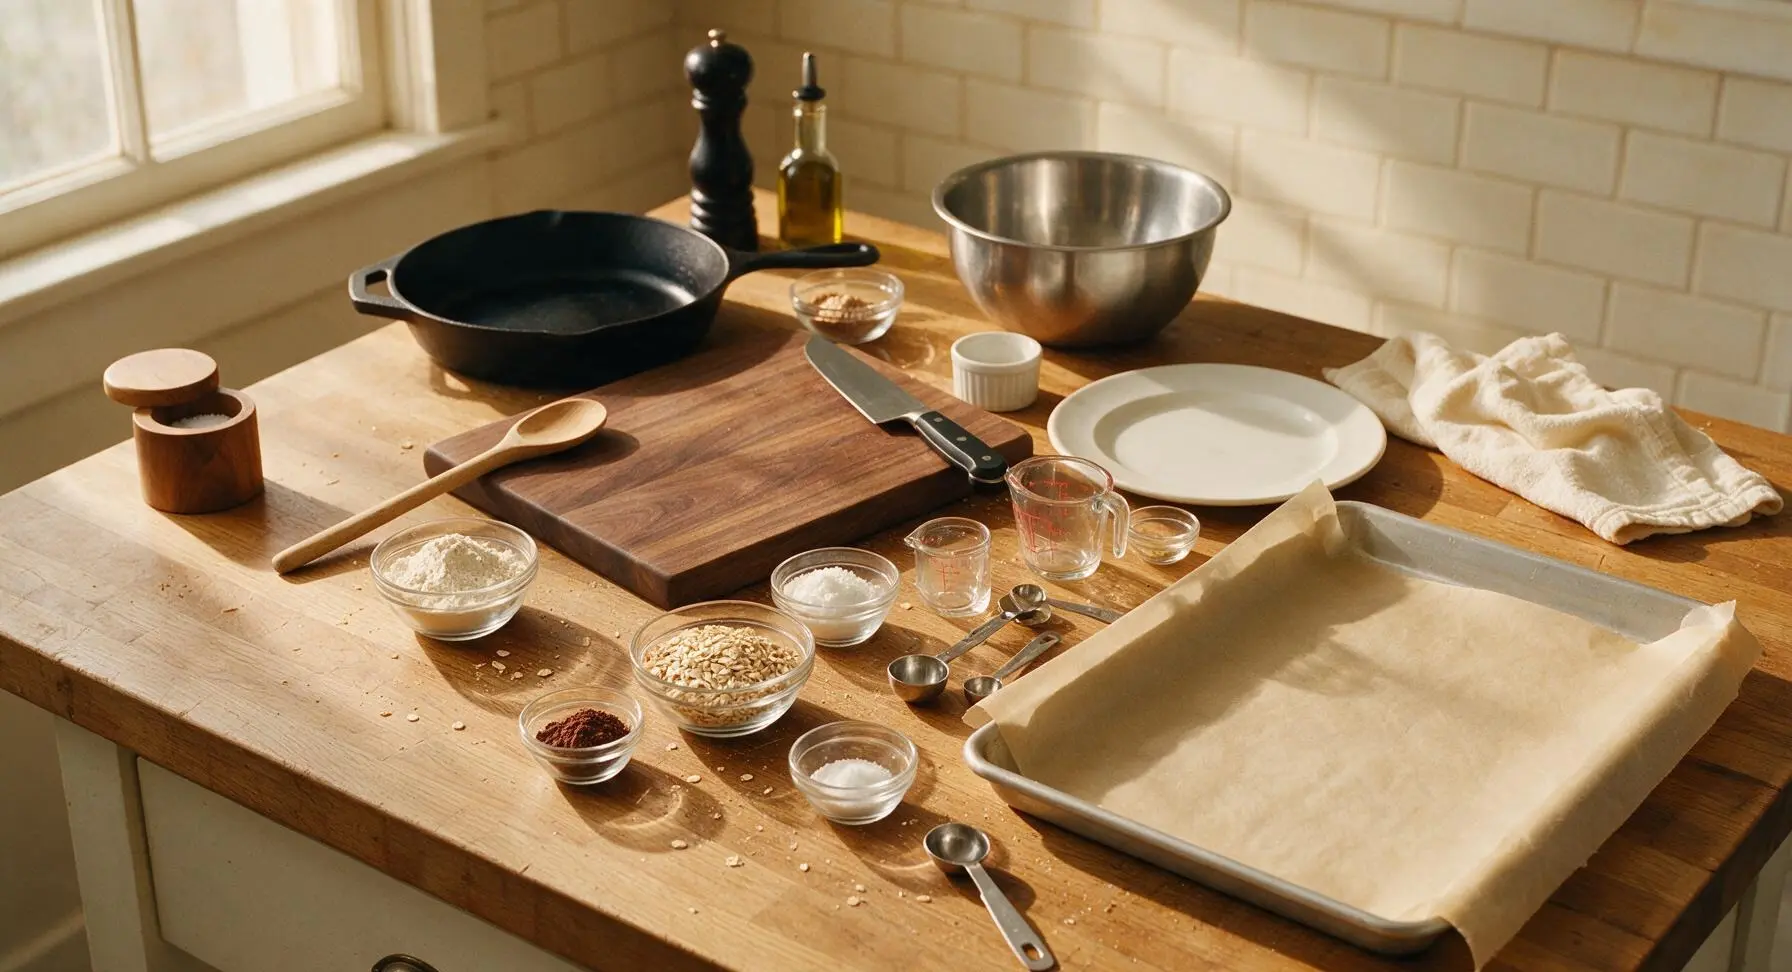
First, line the 18x13 inch matte silver aluminum baking sheet with a sheet of unbleached parchment paper torn from the fixed roll, leaving 1 inch of overhang on the long sides for easy cleanup, and set it on the right section of the maple counter. Confirm all pre-measured ingredients are arranged within easy reach, as the cookie mixture sets very quickly once removed from heat, leaving no time to grab missing ingredients mid-process.
Step 1
step1:Prep Work Station
2

Melt Chocolate Base

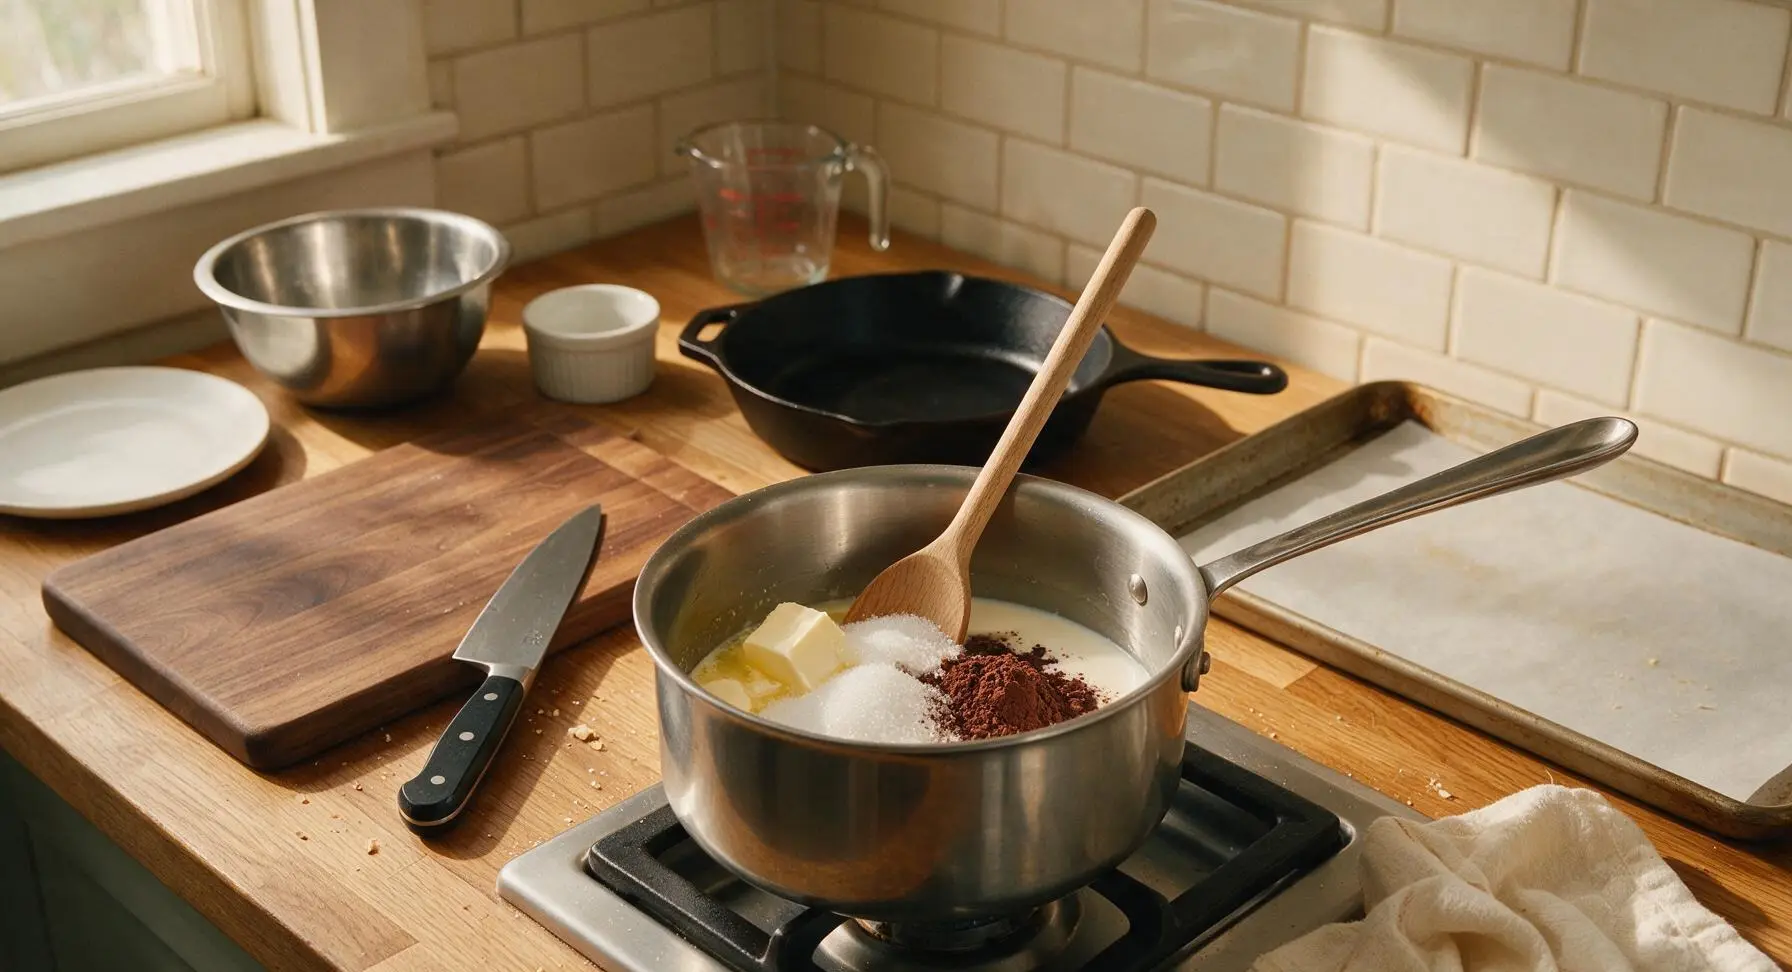
Place the 2-quart heavy-bottomed stainless steel saucepan in the central work area over medium heat. Add the measured unsalted butter, granulated sugar, whole milk, and unsweetened cocoa powder to the pan. Stir slowly and consistently with the long beech wood spoon as the butter melts, scraping the bottom and corners of the pan to prevent dry cocoa or sugar from scorching.
Step 2
step2:Melt Chocolate Base
3

Boil Sugar Mixture

Continue stirring the chocolate base as it heats, until it reaches a full, rolling boil that cannot be stirred down. Once the rolling boil starts, set a timer for exactly 1 minute—do not boil longer or shorter, as over-boiling leads to dry, crumbly cookies and under-boiling leads to runny, unset cookies. Stir constantly during this 1-minute boil to prevent burning.
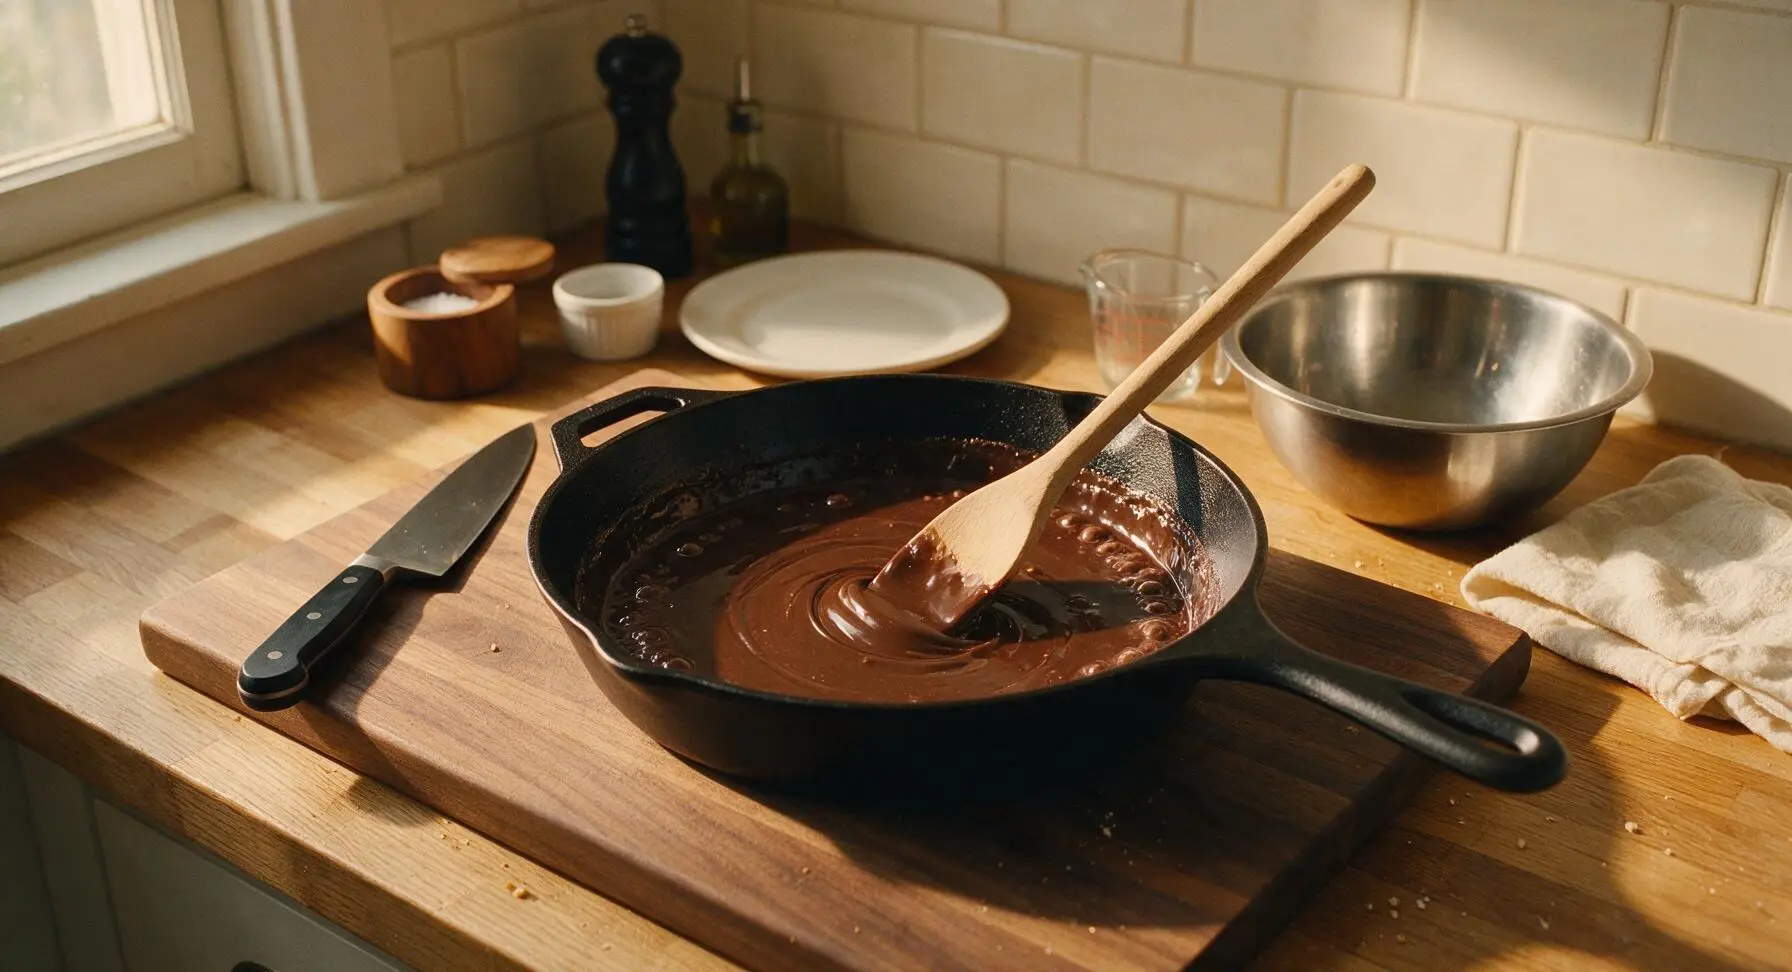
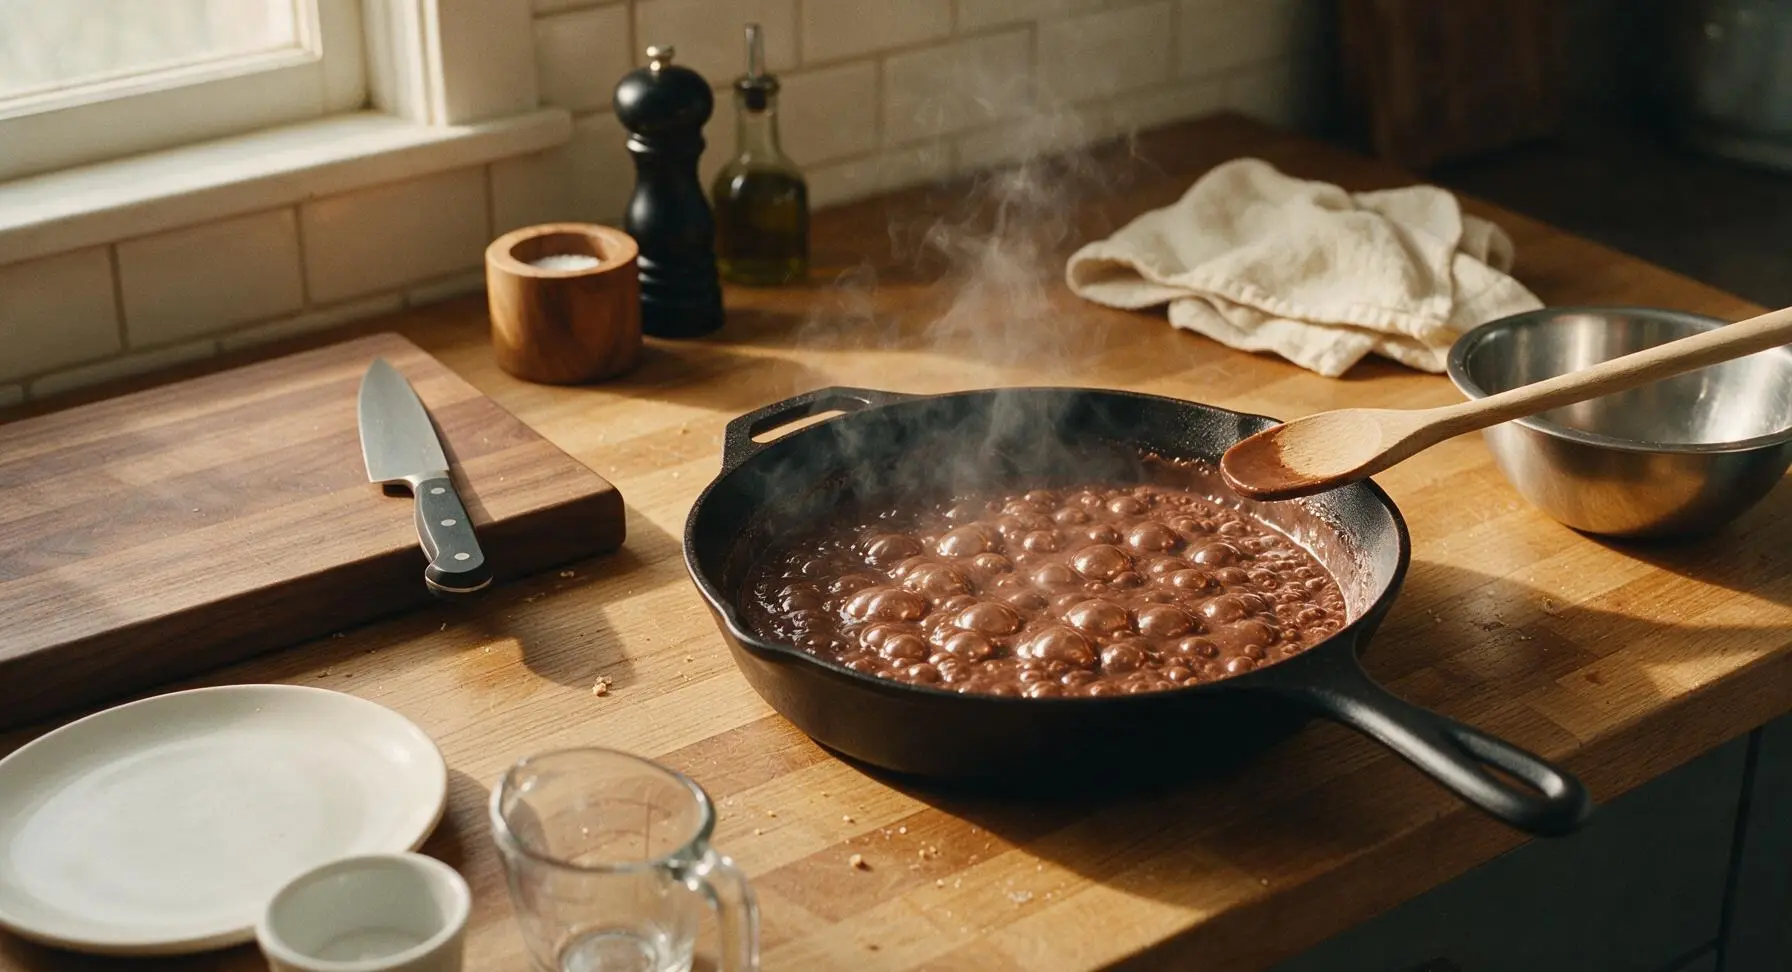
Step 3
step3:Boil Sugar Mixture
Step 3
step3:Boil Sugar Mixture
4

Remove From Heat

As soon as the 1-minute boil is complete, immediately lift the saucepan off the heat and set it back on the heat-resistant central section of the maple counter. Do not leave the pan on the hot burner, as residual heat will overcook the mixture. Add the 1/2 tsp fine sea salt and 1 tsp pure vanilla extract, stirring briefly to combine.
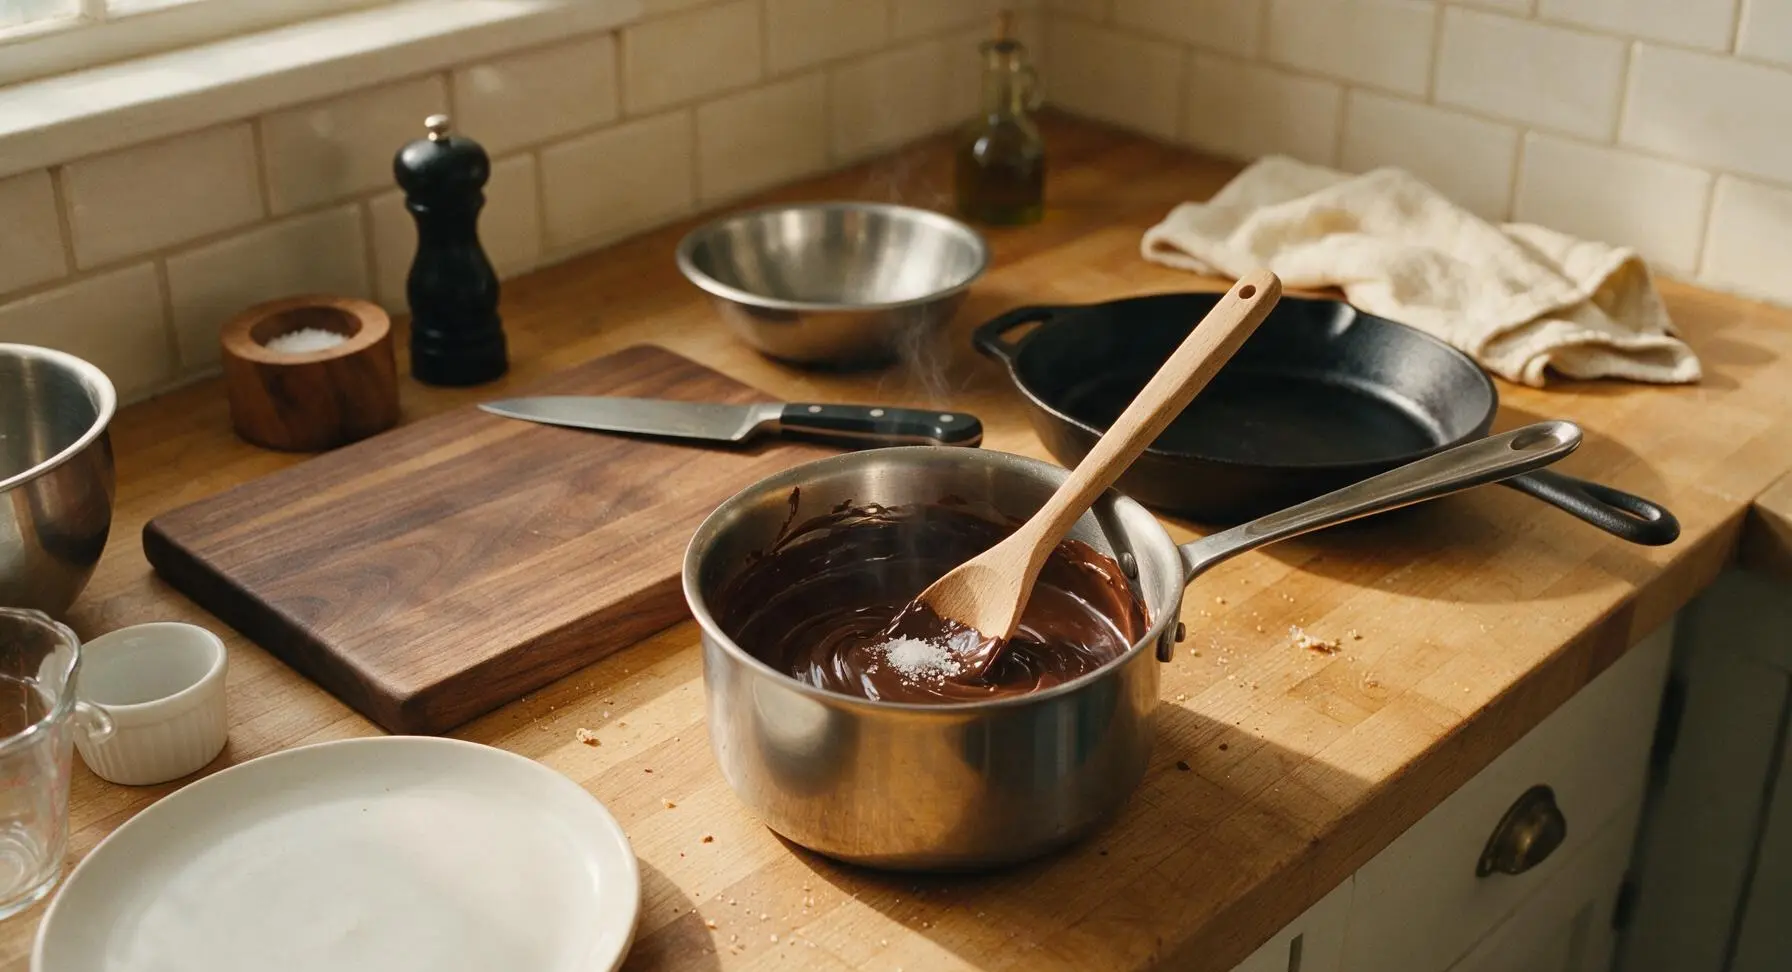
Step 4
step4:Remove From Heat
5

Stir in Peanut Butter

Add the measured 1/2 cup creamy peanut butter to the warm chocolate mixture, stirring vigorously with the beech wood spoon until the peanut butter is fully melted and completely incorporated, with no light tan streaks of peanut butter remaining in the dark chocolate base.
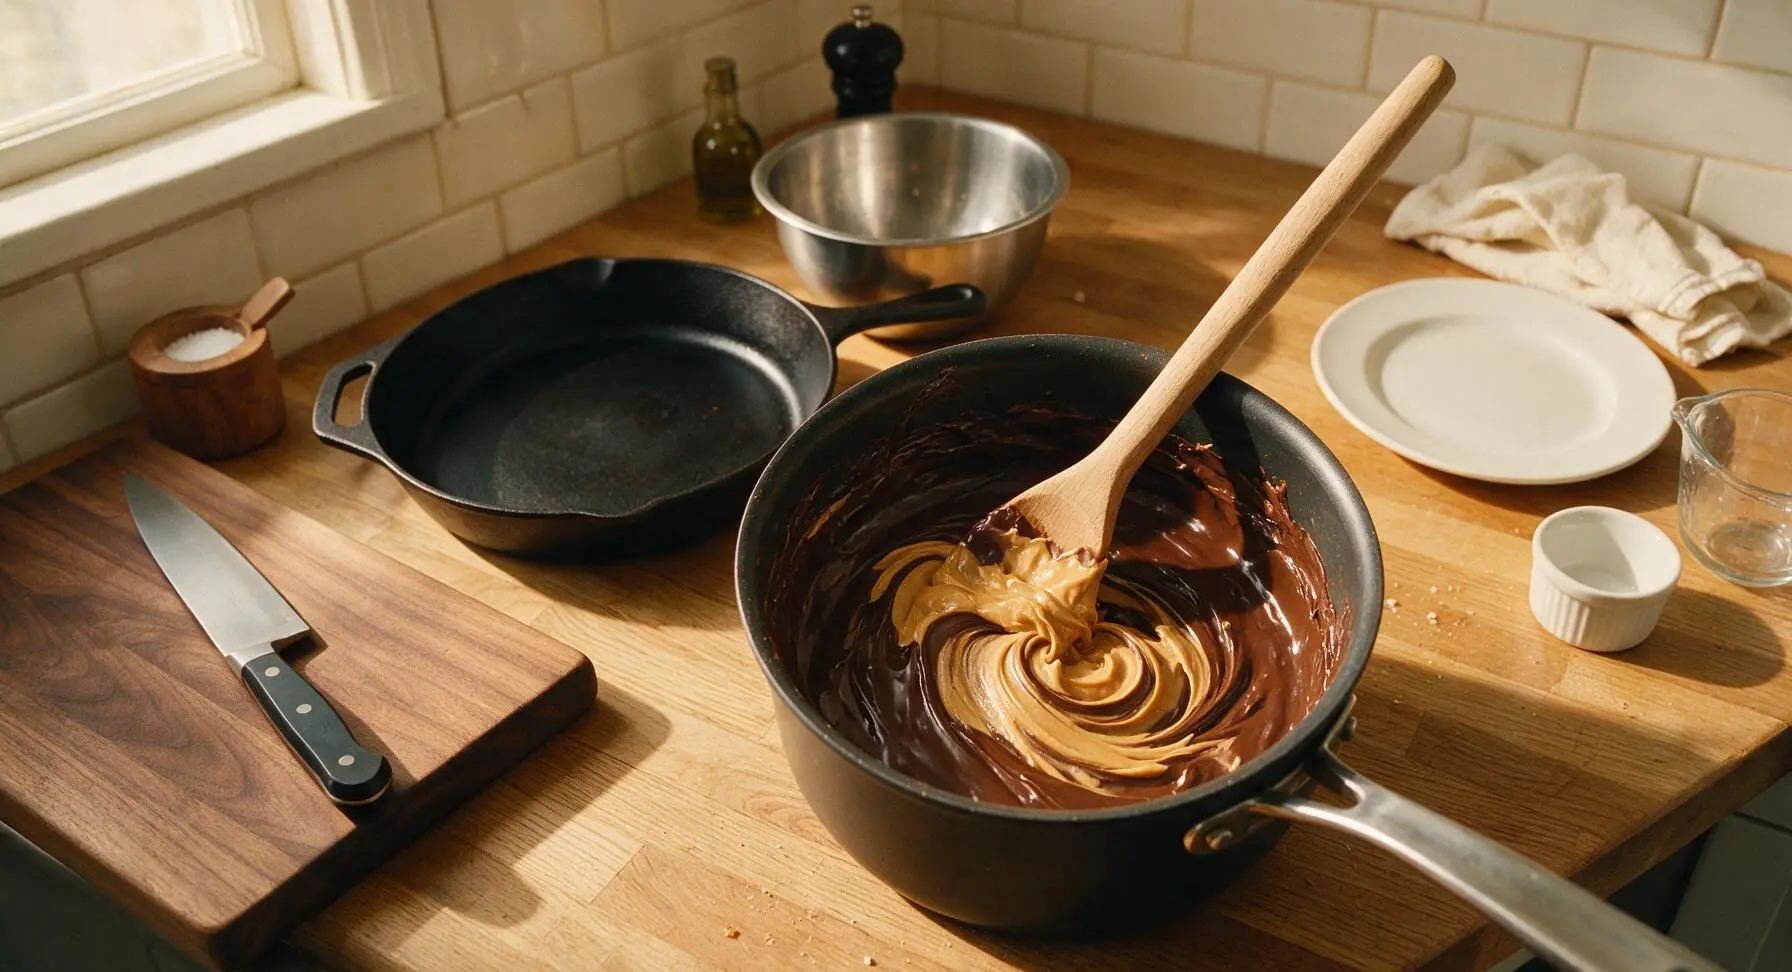
Step 5
step5:Stir in Peanut Butter
6

Fold in Rolled Oats

Add all 3 cups of old-fashioned rolled oats to the chocolate peanut butter mixture, stirring thoroughly with the beech wood spoon until every oat flake is fully coated in the glossy chocolate base, with no dry, powdery oat patches left at the bottom of the pan. Work quickly, as the mixture will start to thicken as it cools.
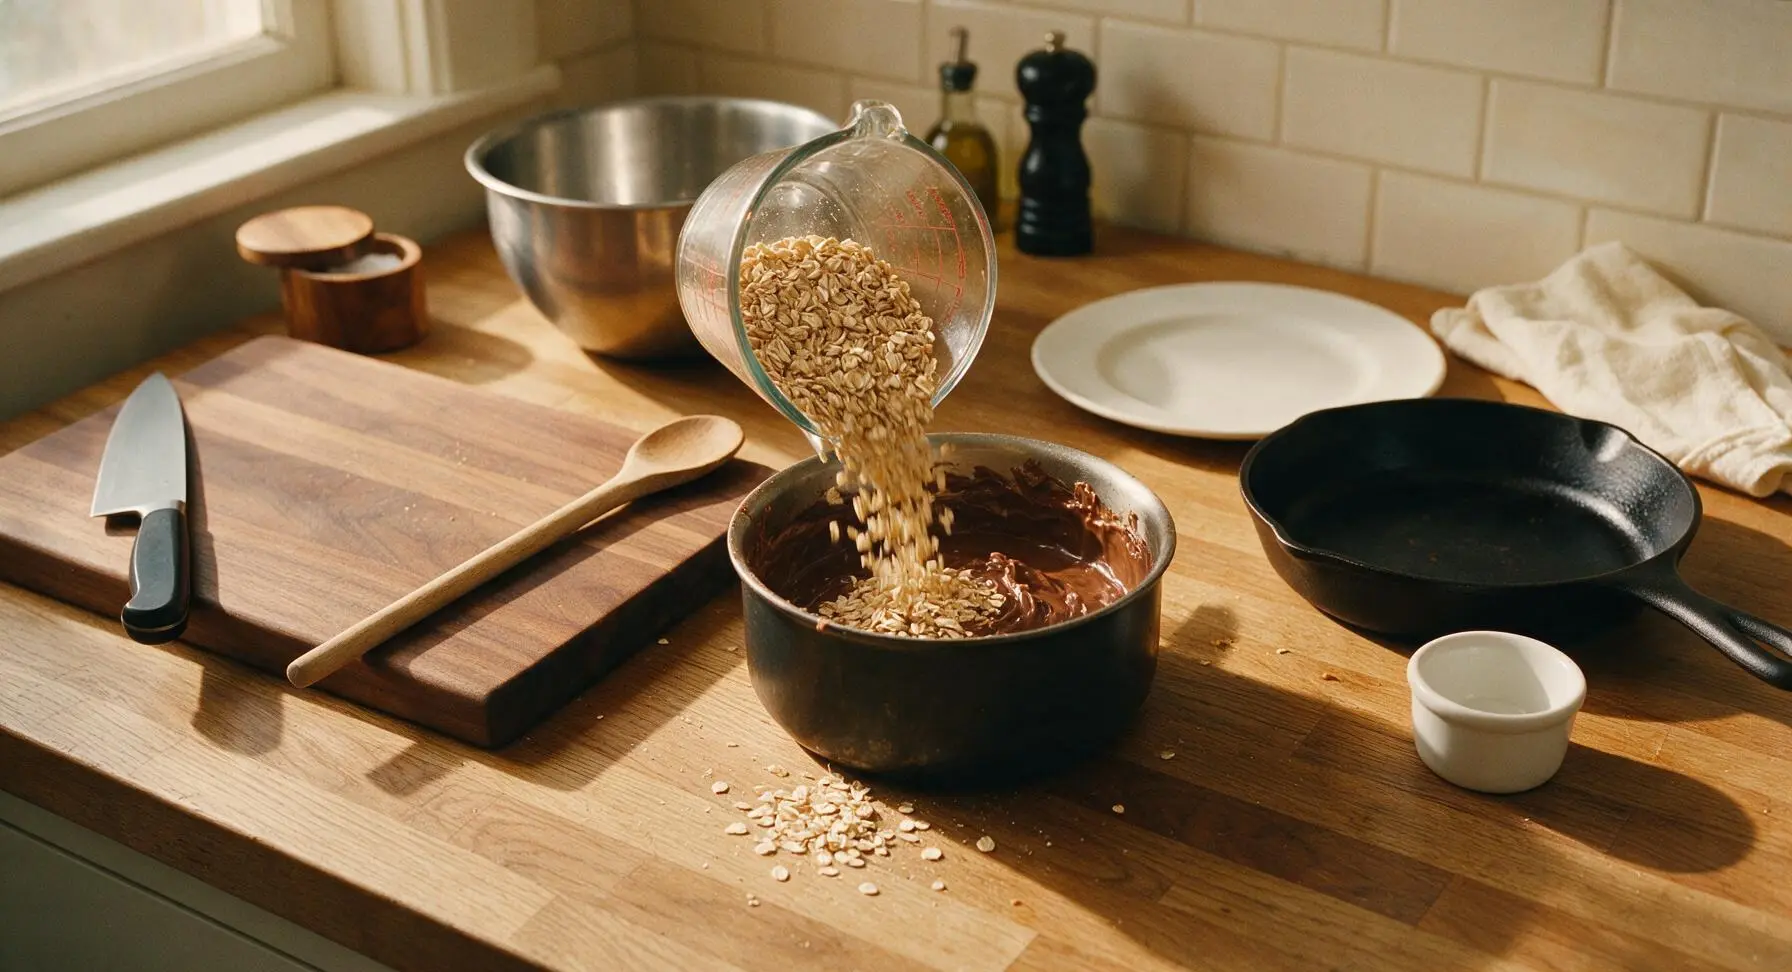
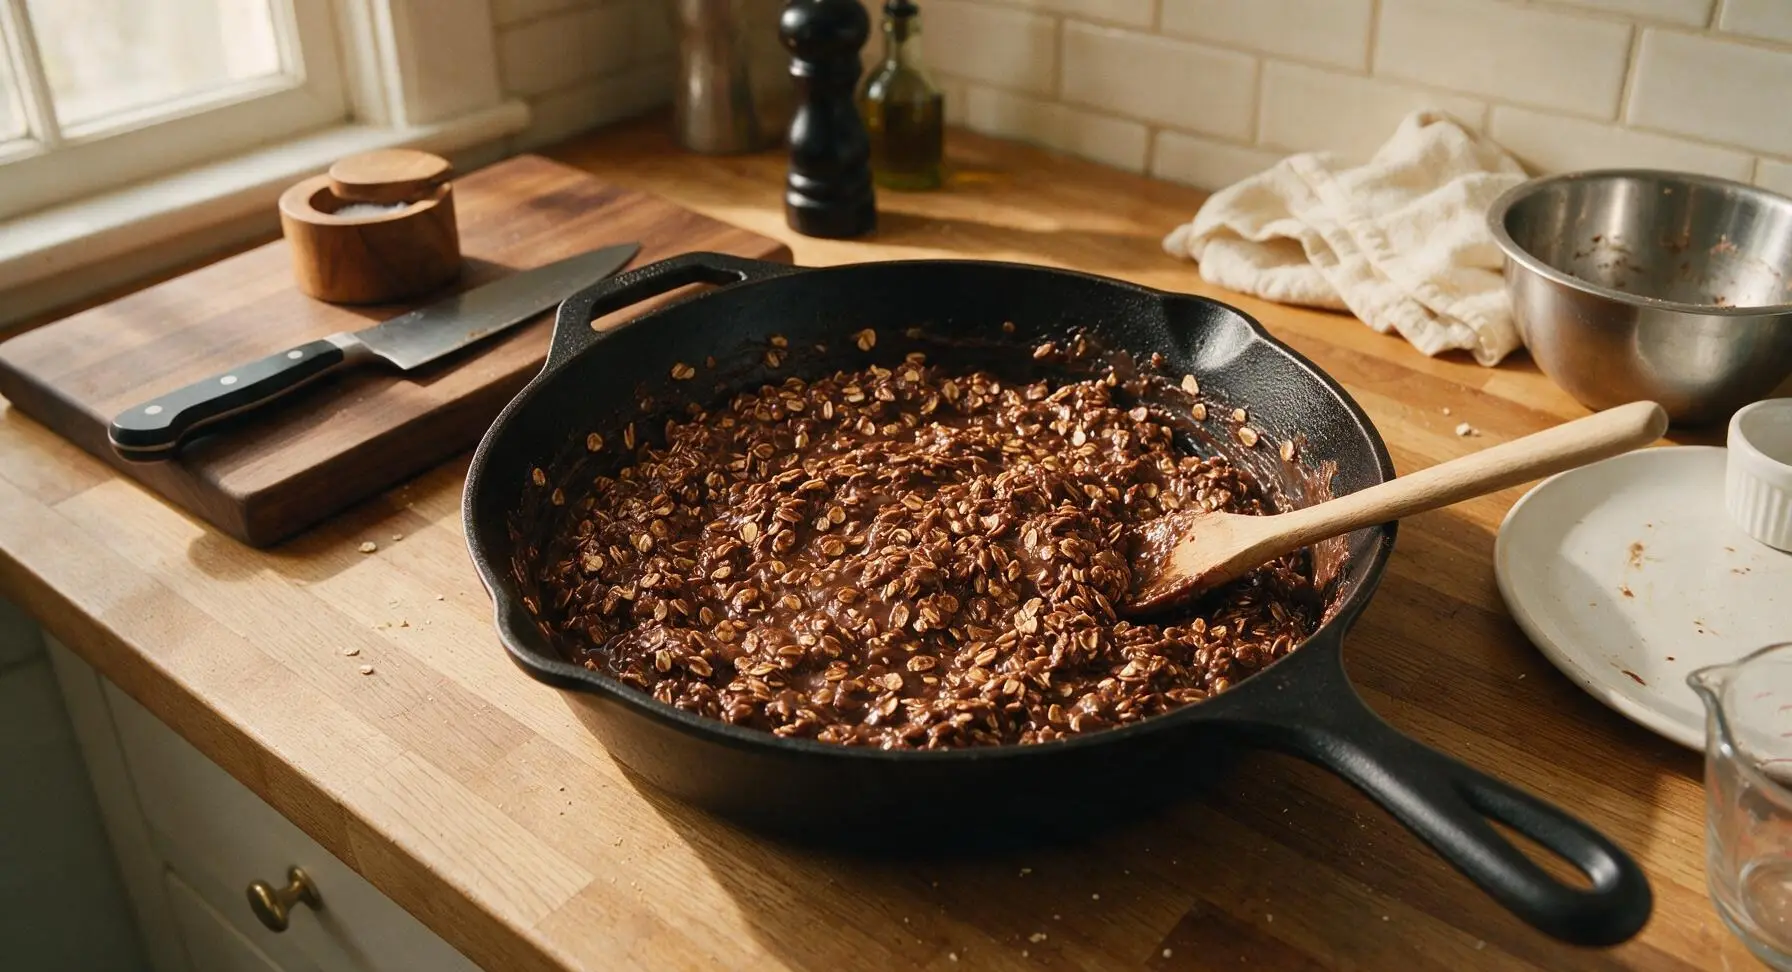
Step 6
step6:Fold in Rolled Oats
Step 6
step6:Fold in Rolled Oats
7

Scoop Cookie Mounds

Use the 2-tablespoon spring-loaded cookie scoop to drop rounded mounds of the warm chocolate oat mixture 2 inches apart onto the parchment-lined baking sheet. Do not press the mounds flat—they will spread slightly and settle into a natural cookie shape as they cool. Work quickly to scoop all the dough before it thickens too much to portion easily.
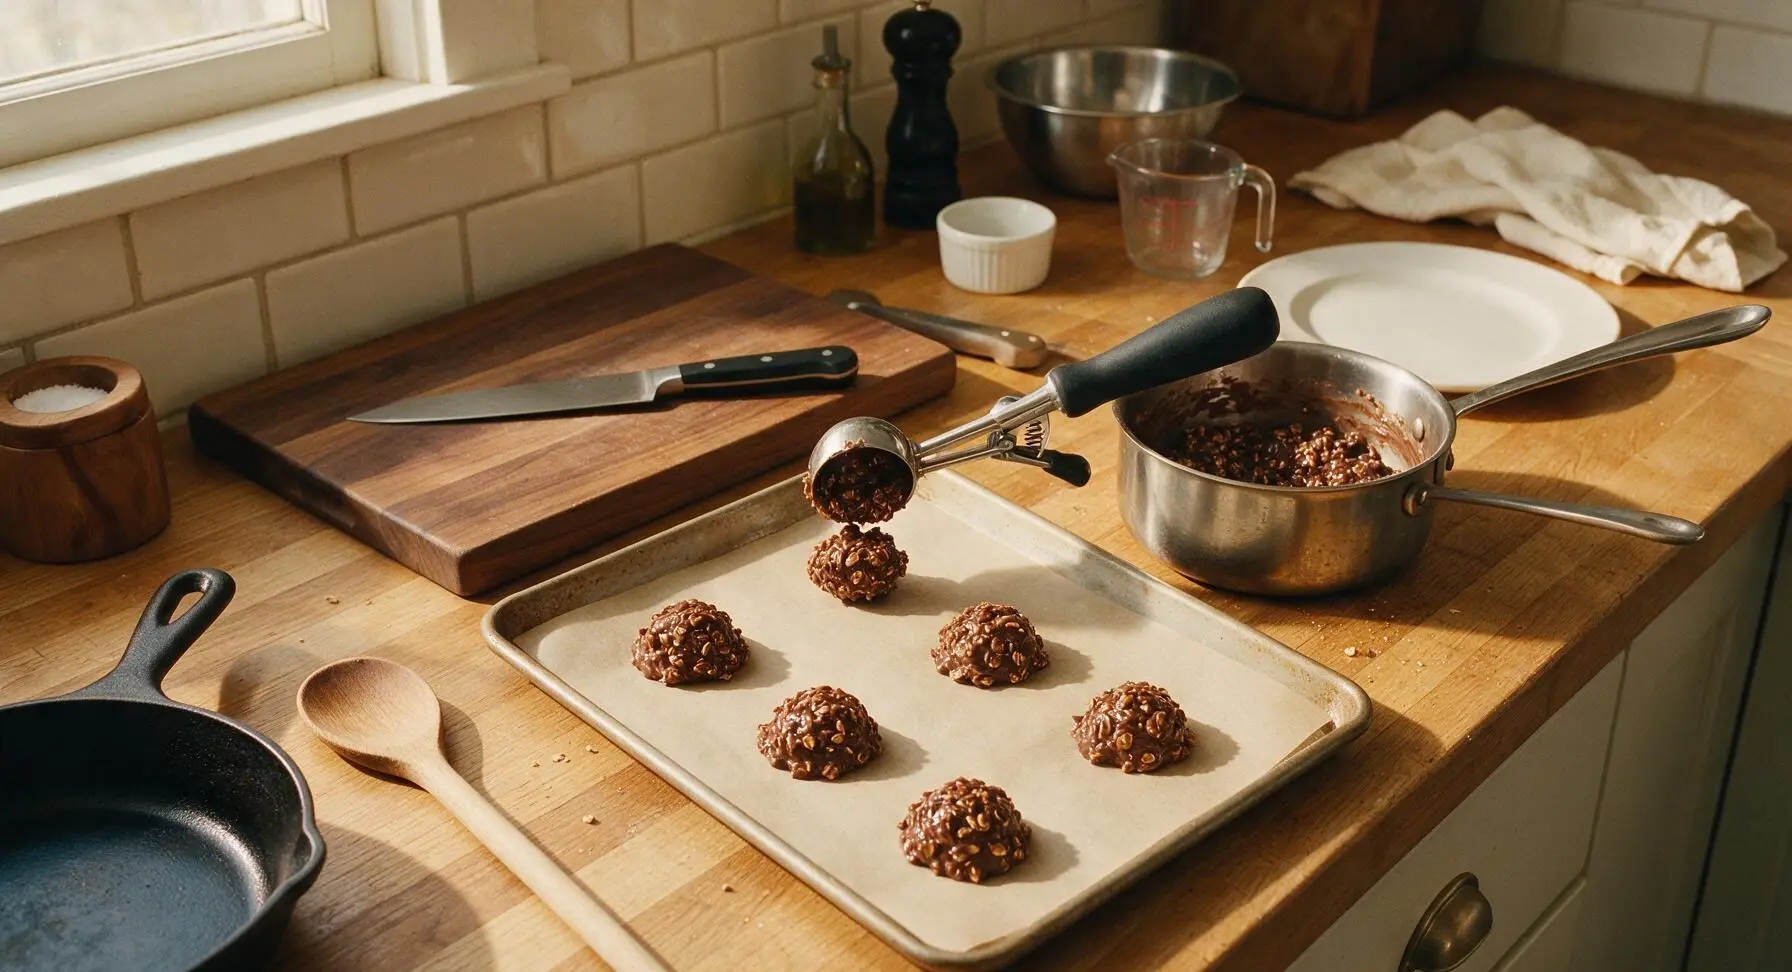
Step 7
step7:Scoop Cookie Mounds
8

Let Cookies Set

Leave the scooped cookies at cool room temperature for 20-25 minutes, until they are firm to the touch and no longer sticky on the surface. Do not refrigerate them to speed setting, as this can cause the chocolate to bloom and develop a dull, streaky surface. Once fully set, transfer 12 cookies to the matte cream ceramic serving platter for serving.
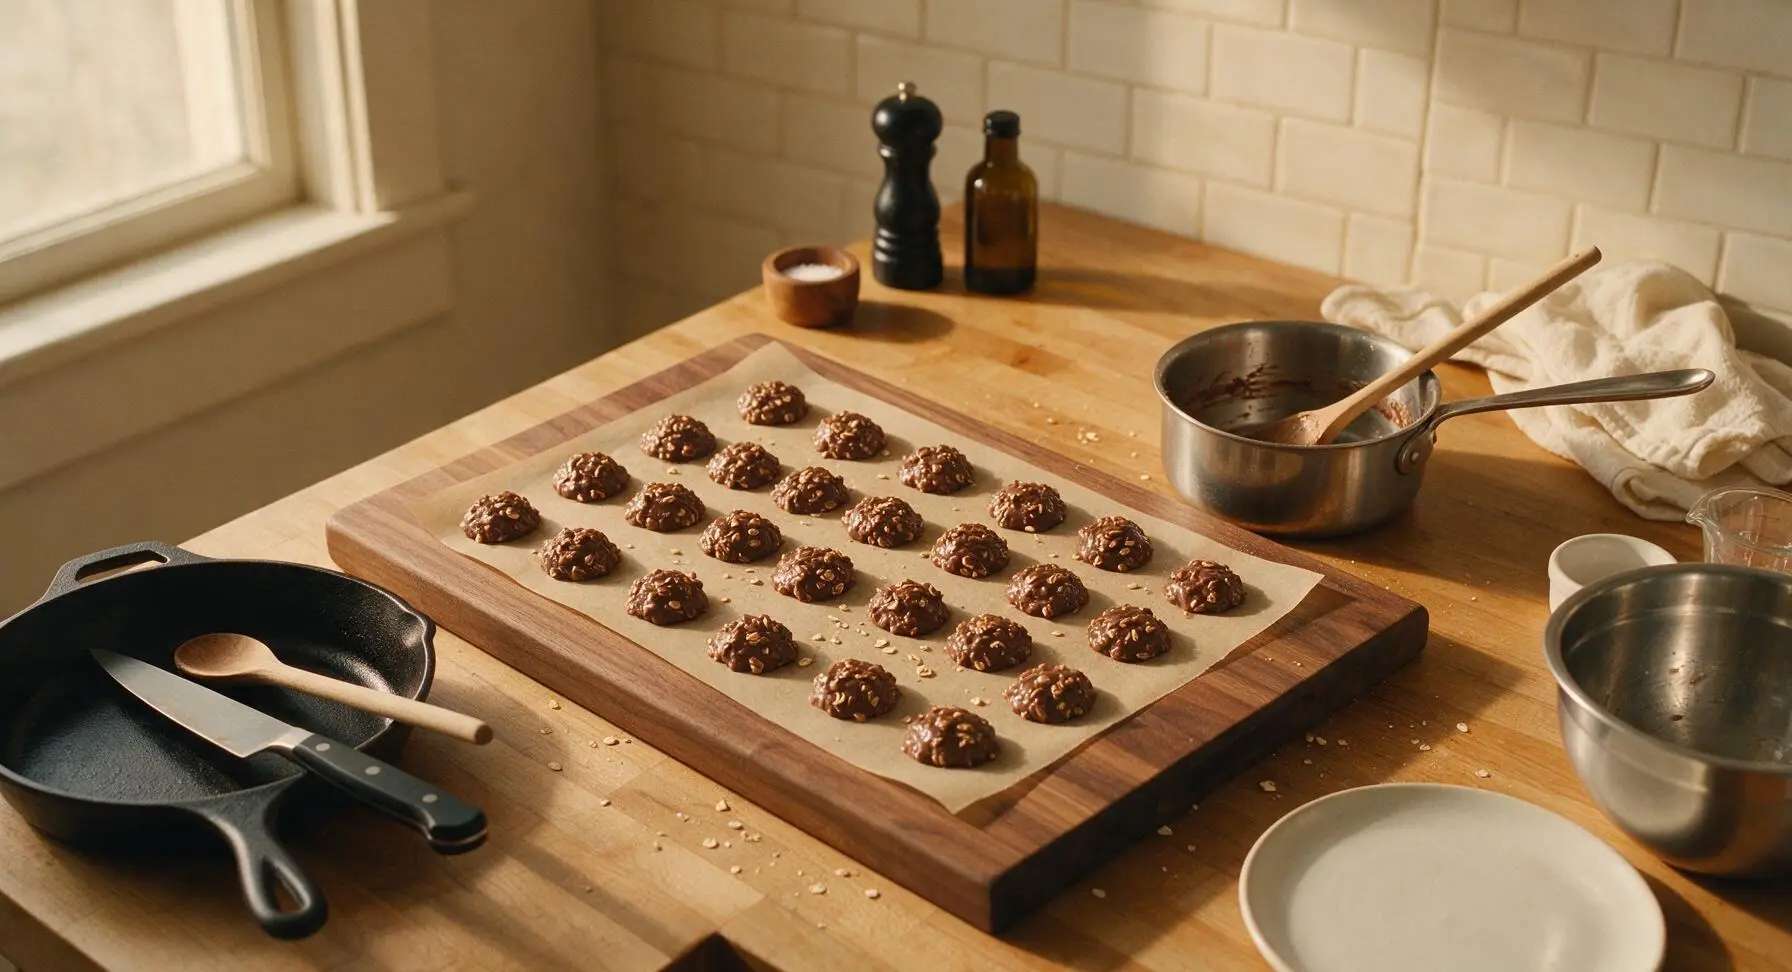
Step 8
step8:Let Cookies Set

Tips

1.Use old-fashioned rolled oats instead of instant oats: instant oats are cut too fine and will turn mushy in the warm chocolate base, leading to a pasty texture instead of the signature chewy, oaty bite.
2.Time the 1-minute rolling boil exactly: boiling for less than 1 minute means the sugar won’t reach the correct concentration to set, leaving you with flat, runny cookies that never firm up; boiling longer than 1 minute evaporates too much moisture, leading to dry, crumbly cookies that fall apart.
3.Let cookies set at room temperature instead of the fridge: rapid cooling in the refrigerator causes the cocoa butter in the chocolate to rise to the surface, creating a dull, white, streaky 'bloom' that affects appearance and smooth texture, even though the cookies will still taste fine.


✨ You May Also Like

Desserts & Baking
🍜 Italy

Creamy, coffee-kissed classic Northern Italian no-bake dessert, with layers of rum-spiked mascarpone cream, soft ladyfingers, and a rich cocoa dusting.

⏱️ 4 hours 3Desserts & Baking ★ 4.7
Desserts & Baking
🍜 France

Flaky, shatteringly crisp, buttery French croissants with golden exteriors and soft, airy layered interiors, perfect for pairing with coffee for a special morning treat.

⏱️ 12 hours Desserts & Baking ★ 4.5
Desserts & Baking
🍜 United States

Warm, spiced baked apples topped with a fluffy golden biscuit crust, this cozy dessert pairs perfectly with vanilla ice cream for cool-weather comfort.

⏱️ 55 minuteDesserts & Baking ★ 4.6
Desserts & Baking
🍜 United States

A star-spangled classic American blueberry pie with buttery flaky crust and bright sweet-tart filling, perfect for summer patriotic gatherings.

⏱️ 1 hour 25Desserts & Baking ★ 4.7
Desserts & Baking
🍜 United States

A beloved no-bake regional Maine candy with a chewy coconut-potato center coated in rich dark chocolate, a New England holiday staple since the 1870s.

⏱️ 2 hours 3Desserts & Baking ★ 4.8
Desserts & Baking
🍜 France

Luxuriously creamy, floral frozen custard made with aromatic Tahitian vanilla beans, boasting a smooth, rich texture that melts slowly on the tongue.

⏱️ 3 hours 3Desserts & Baking ★ 4.5

No-Bake Chocolate Oatmeal Cookies:Frequently Asked Questions

1.Why do my no-bake chocolate oatmeal cookies sometimes turn out dry and crumbly? ▾
That almost always happens if you boil the butter, sugar, milk, and cocoa mixture for too long, which evaporates too much moisture. Aim for a full, rolling boil you can’t stir down for exactly 60 seconds—any longer, and the sugar sets too firm, leading to crumbly, dry cookies instead of that soft, fudgy chew.
2.Can I use crunchy peanut butter instead of creamy for these cookies? ▾
Absolutely! Swapping creamy peanut butter for crunchy adds a nice, nutty textural contrast with bits of roasted peanut in every bite. Just make sure your peanut butter isn’t old and heavily separated, as that excess loose oil can make cookies set unevenly or feel greasy. Stir lightly separated jars fully before measuring.
3.How long do these no-bake cookies take to set after I scoop them? ▾
At cool room temperature, they’ll firm up to that perfect chewy texture in 20 to 30 minutes, which makes them ideal for quick summer treats. If you’re in a rush, pop the tray of scooped cookies in the fridge for 10 minutes, but don’t leave them there too long or they’ll get overly hard instead of fudgy.
4.Can I make these cookies without peanut butter for a nut-free version? ▾
Yes, you can swap the creamy peanut butter for an equal amount of no-stir sunflower seed butter, soy nut butter, or even speculoos cookie butter for a nut-free twist. Avoid runny, heavily separated natural seed butters—they have too much loose oil that will keep cookies from setting to that perfect chewy consistency.
5.Why won’t my cookies set, even after sitting out for an hour? ▾
Runny, unset cookies almost always trace back to not boiling the sugar-butter-milk-cocoa base long enough. If you don’t hold that rolling boil for a full 60 seconds, the sugar doesn’t reach the soft-ball stage needed to bind the oats and peanut butter. You can re-boil the mix for 30 seconds and re-scoop to fix it.
6.Do I need to use old-fashioned rolled oats, or will instant oats work? ▾
Old-fashioned rolled oats give the best chewy, hearty texture that holds up well to the fudgy chocolate base. Instant oats work in a pinch, but they break down much faster, leading to softer, mushier cookies that lack that classic nostalgic bite. Skip steel-cut oats entirely—they’re too tough and won’t soften enough without cooking.
7.How should I store these no-bake chocolate oatmeal cookies to keep them fresh? ▾
Store fully set cookies in an airtight container layered between sheets of parchment paper to prevent sticking. They’ll stay chewy and fresh for up to 1 week at cool room temperature, or up to 2 weeks in the fridge. In hot summer weather, keep them chilled so the peanut butter and chocolate don’t get soft and melty.
8.Can I use salted butter instead of unsalted butter in this recipe? ▾
You can, just skip any extra added salt you might otherwise stir in. Salted butter typically has about 1/4 teaspoon of salt per stick, so that small adjustment will keep cookies from tasting overly salty. That tiny hit of salt actually makes the chocolate and peanut butter flavors pop, so it’s a totally convenient swap.
9.Can I freeze these no-bake cookies for later? ▾
Definitely! Once cookies are fully set, place them in a freezer-safe airtight container between parchment layers, and they’ll keep for up to 3 months. Let them thaw on the counter for 10 to 15 minutes before eating—they’ll still have that perfect chewy, fudgy texture, just like the day you made them for quick snacks.
10.Is there a way to make these cookies lower in sugar? ▾
You can reduce the granulated sugar by up to 1/4 cup without ruining the set, but I don’t recommend cutting more than that—sugar is key to binding ingredients into that firm, chewy cookie shape. You can also swap 1/2 cup of white sugar for packed light brown sugar for a deeper, caramel-like flavor with no extra total sugar.
11.Can I use dairy-free milk and butter to make these vegan? ▾
Absolutely! Swap the whole milk for an equal amount of unsweetened plain oat, soy, or almond milk to avoid odd flavor notes, and replace unsalted butter with an equal measure of vegan baking butter. Stick to no-stir vegan peanut butter too, and you’ll get the same chewy, fudgy, totally dairy-free result.
12.Do I need any special equipment to make these cookies? ▾
Nope, that’s part of their summer-friendly appeal! All you need is a medium saucepan to heat the base, a stirring spoon, measuring cups, and a baking sheet lined with parchment or wax paper to scoop cookies onto. You don’t need an oven, mixer, or fancy tools—they’re perfect for beginner bakers and kids helping out.
13.Can I add mix-ins to these cookies for extra flavor? ▾
Of course! Popular mix-ins include 1/2 cup of mini marshmallows for a rocky road twist, chopped roasted peanuts, a sprinkle of flaky sea salt on top right after scooping, mini chocolate chips, or shredded coconut. Stir mix-ins right after adding oats and peanut butter so they distribute evenly through the fudgy base.
14.Do I really need to add vanilla extract, or can I skip it? ▾
Vanilla adds a warm, rounded depth that makes chocolate and peanut butter taste richer, but it’s not strictly required if you don’t have it on hand. If you do use it, stir it in right after you take the boiled sugar mixture off the heat—adding it while the mix boils will cook off the delicate vanilla flavor and waste it.
15.Can I use Dutch-processed cocoa powder instead of regular unsweetened cocoa? ▾
You can! Dutch-processed cocoa has a smoother, less bitter chocolate flavor than regular natural unsweetened cocoa, so it will make cookies taste a little more rich and mellow. No acidity adjustment is needed for this no-bake recipe, since we don’t use leavening, so the swap is totally 1:1 with no extra tweaks.
16.How big should I scoop the cookies for the best texture? ▾
I recommend using a 2-tablespoon cookie scoop to portion the mixture, which yields cookies about 2 inches wide once set. That size is thick enough to stay chewy and fudgy in the center without being so big that they take forever to set, or so small that they get overly firm and crisp as they cool.
17.My peanut butter is the natural, separated kind—can I still use it? ▾
You can, but you have to stir it extremely well until it’s completely smooth with no oil pooled at the top, and measure it after stirring. If you use partially separated natural peanut butter, the excess loose oil will make cookies greasy, and they may not set as firmly as they would with emulsified no-stir peanut butter.
18.Will these cookies melt if I bring them to a summer picnic or potluck? ▾
They hold up really well for 2 to 3 hours in a cooler out of direct sun, which makes them perfect for summer events. If they sit in direct, hot sun for over an hour, the peanut butter and cocoa butter will start to soften, so keep them shaded or pack a small ice pack under the container if temperatures are over 90°F.
19.Can I make these cookies gluten-free? ▾
Yes, as long as you use certified gluten-free rolled oats, since regular oats are often cross-contaminated with wheat during processing. All the other core ingredients—butter, sugar, milk, cocoa, and peanut butter—are naturally gluten-free as long as you pick versions without hidden gluten additives, like wheat-based thickeners in some flavored peanut butters.
20.What’s the trick to getting perfectly set, chewy cookies every single time? ▾
The biggest pro tip is to set a timer as soon as your butter-sugar-milk-cocoa mixture reaches a rolling boil that doesn’t disappear when you stir it. Boil for exactly 60 seconds, pull it off the heat immediately, stir in peanut butter until smooth, fold in oats, and scoop fast before the mix starts to set in the pot.

Comments (15)

2 hours ago

OMG these are a total game changer for after school snacks! 5 minute cook time? I didn’t even break a sweat throwing these together while the kids were unloading their backpacks. They gobbled up three each before I could even put the rest in the fridge. SO good, I’m already making a second batch for this weekend’s soccer snack table.

30 minutes ago

Wait did you add extra peanut butter? I’m always tweaking these for my kid’s team too, curious!

5 minutes ago

So happy your crew loved them! If you’re making them for a crowd, you can easily double the batch and they hold up great in a cooler for sports events — just give them an extra 10 minutes to set if it’s hot out!

yesterday

I’m absolutely terrible at baking and even I didn’t mess these up! No oven required is a huge win for my tiny apartment kitchen that doesn’t have great temperature control. Mine were a little crumbly at first but still tasted amazing, I’ll definitely be making these again.

2 hours ago

So proud you gave these a go! If they came out crumbly next time try letting the butter/sugar/cocoa mixture come to a full rolling boil for a full 60 seconds before stirring in the oats — that helps them set perfectly without crumbling!

3 days ago

I swapped the regular sugar for coconut sugar and used rolled oats instead of quick oats, and these turned out chef’s kiss! Great quick treat to meal prep for the week when I’m craving something chocolatey without a ton of work. Portioned out two per container and they keep perfectly in the fridge.

5 days ago

Dude. I made these in my dorm room with a microwave and a plastic bowl, no fancy equipment needed. My roommate stole half the batch before they even set. 10/10, way cheaper and better than the vending machine cookies I usually buy for late night study sessions.

3 days ago

Wait did you use the microwave to melt the butter and cocoa? I’ve been scared to try that instead of a stovetop!

2 days ago

Great hack making these in the dorm! You absolutely can melt the butter, cocoa, and sugar in the microwave in 30 second bursts, stirring between each, until it’s smooth and just starting to bubble. Just be careful not to overheat it!

1 week ago

I’ve been making a version of these cookies since my kids were little, and this recipe is spot on! I added a handful of shredded coconut to half the batch like I used to, and my grandkids said they’re better than the bakery cookies downtown. Brought them to our church potluck last Sunday and every last one was gone.

5 days ago

The coconut addition sounds incredible! I’m going to try that next time I make these for my book club, thank you for the idea!

2 weeks ago

Game. Changer. I brought these to our neighborhood block party and people were asking me for the recipe before I even finished setting up my table. The best part is I didn’t have to turn my oven on in 90 degree heat, which is basically a summer miracle in Phoenix.

1 week ago

So happy these worked out for your block party! No oven bakes are our go-to in the summer too — no heating up the whole house just for a sweet treat. Thanks for sharing!

30 minutes ago

Followed the recipe exactly and these came out way too gooey, like they never set even after 2 hours in the fridge. Flavor is good but texture is way off, pretty disappointed because I was really looking forward to these.

5 minutes ago

I’m sorry they didn’t set for you! This almost always happens if the sugar/butter/cocoa mixture doesn’t get to a full rolling boil for 60 full seconds — if it doesn’t get hot enough, the cookies won’t firm up. You can even pop them in the freezer for 15 minutes to help them set faster if you’re short on time!

just now

I had this exact same issue my first try! Turned out I was boiling it at too low of a temp, make sure it’s bubbling so much you can’t stir the bubbles away before you start timing. Second batch was perfect!

2 days ago

Swapped the butter for vegan butter and used maple syrup instead of dairy milk, and these worked perfectly! So many no-bake cookie recipes are hard to adapt for vegan diets but this one is super forgiving. My non-vegan roommates had no idea they were vegan, they asked for seconds immediately.

yesterday

Thank you for sharing this swap! I’ve been looking for a vegan version of these that doesn’t turn out weird, I’m trying this tonight!

yesterday

Made these with my 7 year old last night for his class treat day, and it was the perfect easy recipe to do together. No worrying about him burning himself on the oven, he got to stir in the oats and scoop the cookies onto the tray all by himself. The whole class loved them, he came home with a sticker for bringing the best snack.

2 hours ago

This makes my day! Cooking with kids is so fun when you don’t have to stress about hot ovens, and it’s so cool he got to help with every step. Way to go dad!

5 minutes ago

Added a pinch of flaky sea salt on top right after scooping and oh my GOD, that sweet-salty combo is unreal. If you haven’t tried that yet, do it immediately. It takes 2 extra seconds and makes these taste like they came from a fancy dessert shop.

1 week ago

Packed these for our day hike last weekend and they were the perfect trail snack! They held up great in my backpack even when it got warm out, gave us the perfect little chocolate pick-me-up halfway up the trail. Way better than the expensive energy bars I usually buy, so much cheaper to make at home.

5 days ago

Do these get super melty if they’re out in the sun for a couple hours? I’m prepping for a backpacking trip and looking for no-mess snacks.

3 days ago

They got a little soft but not melty enough to make a mess! I kept them in a small hard container instead of a baggie so they didn’t get squished, worked like a charm.

3 days ago

I’ve tried so many no-bake cookie recipes over the years and this is hands down the best one. Perfect balance of chocolate and peanut butter, not too sweet, the oats have the exact right chew. I’ll never use another recipe again, this is my new go-to for every family dinner.

2 days ago

Made a double batch for my team at work this week and they were gone by 10am. People kept stopping by my desk asking if I had more hidden in my drawer. Super easy to whip up the night before, no fuss, no mess, total crowd pleaser. Will be making these at least once a month from now on.

yesterday

Love hearing these are a hit with your team! Easy, shareable snacks that don’t require oven time are the absolute best for office treats, thanks for giving the recipe a go!

just now

Used certified gluten-free oats and these were totally safe for my gluten sensitivity! I was worried the texture would be off with GF oats but you can’t even tell the difference. Perfect quick treat when I’m craving something chocolatey and don’t want to make a whole big production out of baking.

5 days ago

I added an extra tablespoon of peanut butter because I’m obsessed, and it was chef’s kiss. These are so dangerous to have in the house because I keep walking by the fridge and grabbing one every 10 minutes. 10/10, no notes.



