
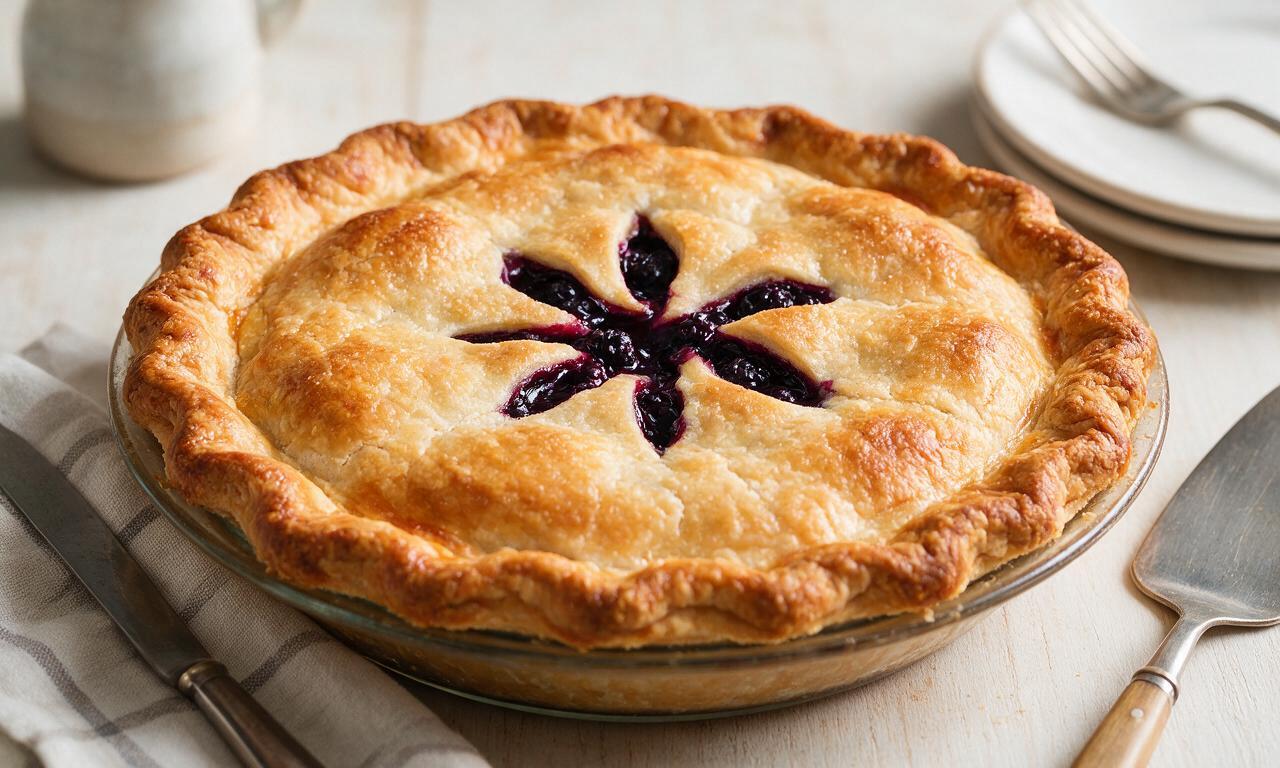
Olallieberry Pie

Olallieberry Pie
⏱️ cook time 1 hour 25 minutes
🍽️ servings 8
⚡ Difficulty medium

intro

Tart-sweet, juicy olallieberries baked in a buttery, flaky double crust, this iconic Pacific Northwest pie is bright, rich, and perfectly balanced.

Ingredients

Fresh olallieberries (rinsed, patted dry) 6 cups (900g)
All-purpose flour 3 3/4 cups (445g)
Cold unsalted butter (cubed into 1/2-inch pieces) 1 1/2 cups (3 sticks, 340g)
Granulated sugar 3/4 cup + 1 tbsp (162g)
Fine sea salt 1 tsp (5g)
Ice water 6-8 tbsp (90-120ml)
Fresh lemon juice 1 tbsp (15ml)
Lemon zest 1 tsp (2g)
Large egg (for egg wash) 1 unit (50g)

Steps

1

Prepare flaky pie crust

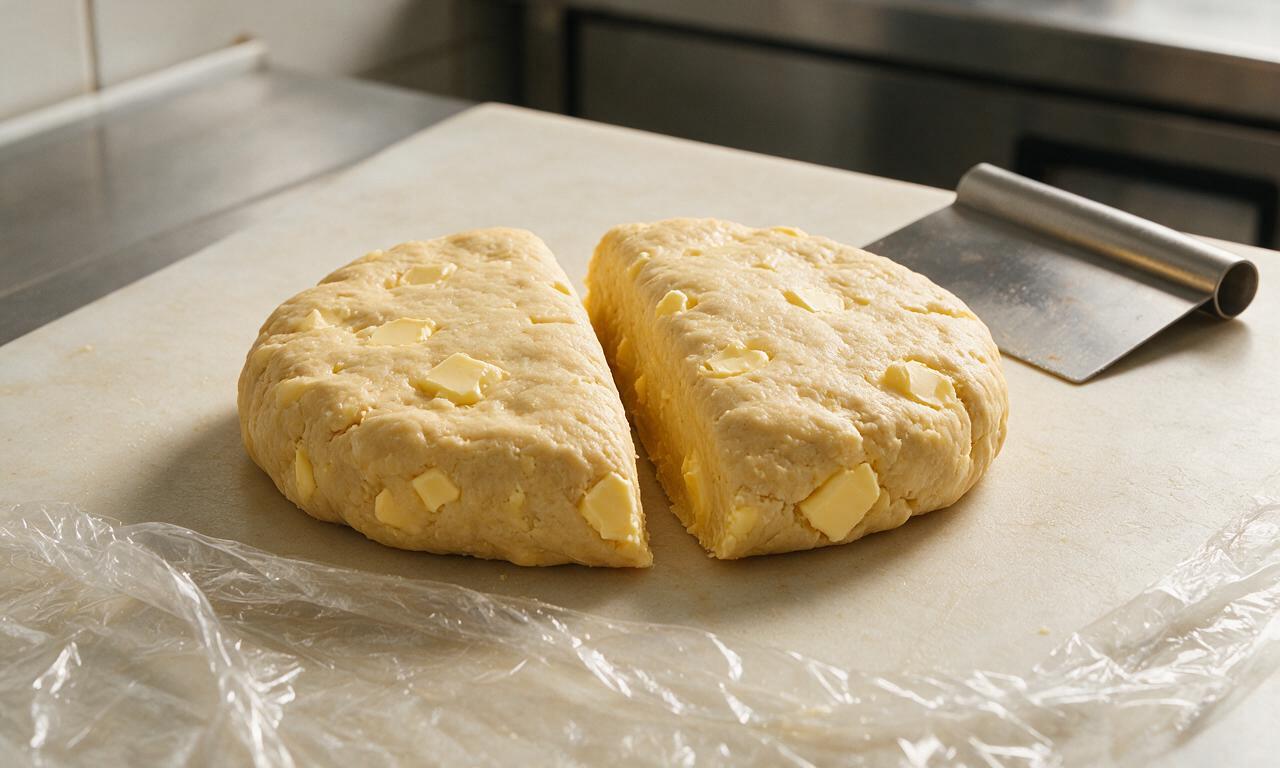
In a large bowl, mix 3 1/2 cups (420g) all-purpose flour and 1 tsp (5g) fine sea salt. Add 1 1/2 cups (340g) cold cubed unsalted butter, and use your fingertips or a pastry cutter to cut butter into flour until the mixture forms pea-sized crumbs with a few larger, almond-sized butter pieces remaining. Drizzle in 6-8 tbsp (90-120ml) ice water, 1 tbsp at a time, tossing gently with a fork, until dough just clumps together when squeezed. Split dough into two equal 280g discs, wrap tightly in plastic wrap, and chill in the refrigerator for 30 minutes.
Step 1
step1:Prepare flaky pie crust
2

Mix olallieberry filling

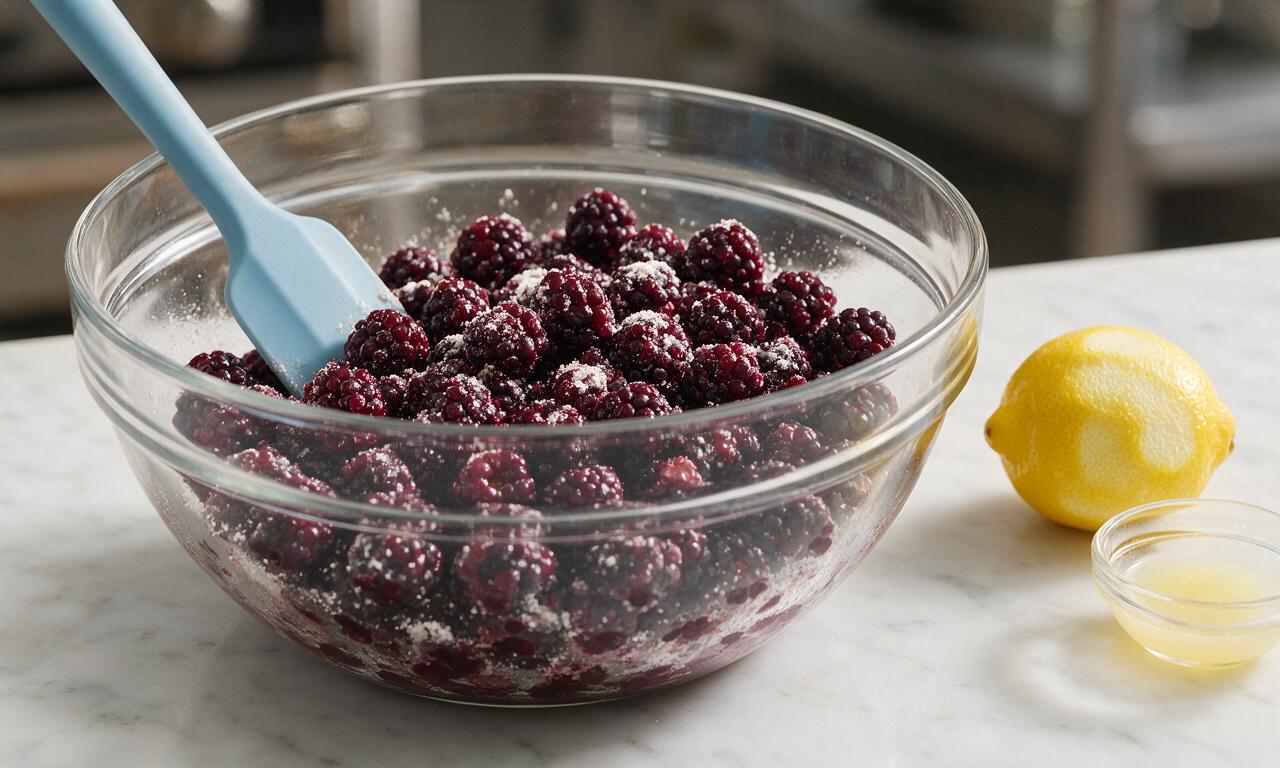
While the dough chills, combine 6 cups (900g) rinsed, patted-dry fresh olallieberries, 3/4 cup (150g) granulated sugar, 3 tbsp (25g) all-purpose flour, 1 tbsp (15ml) fresh lemon juice, and 1 tsp (2g) lemon zest in a large mixing bowl. Gently toss with a silicone spatula until all berries are evenly coated, taking care not to mash the delicate fruit. Let the mixture rest for 10 minutes at room temperature to allow natural juices to release, then stir once more to redistribute the flour thickener.
Step 2
step2:Mix olallieberry filling
3

Roll bottom crust layer

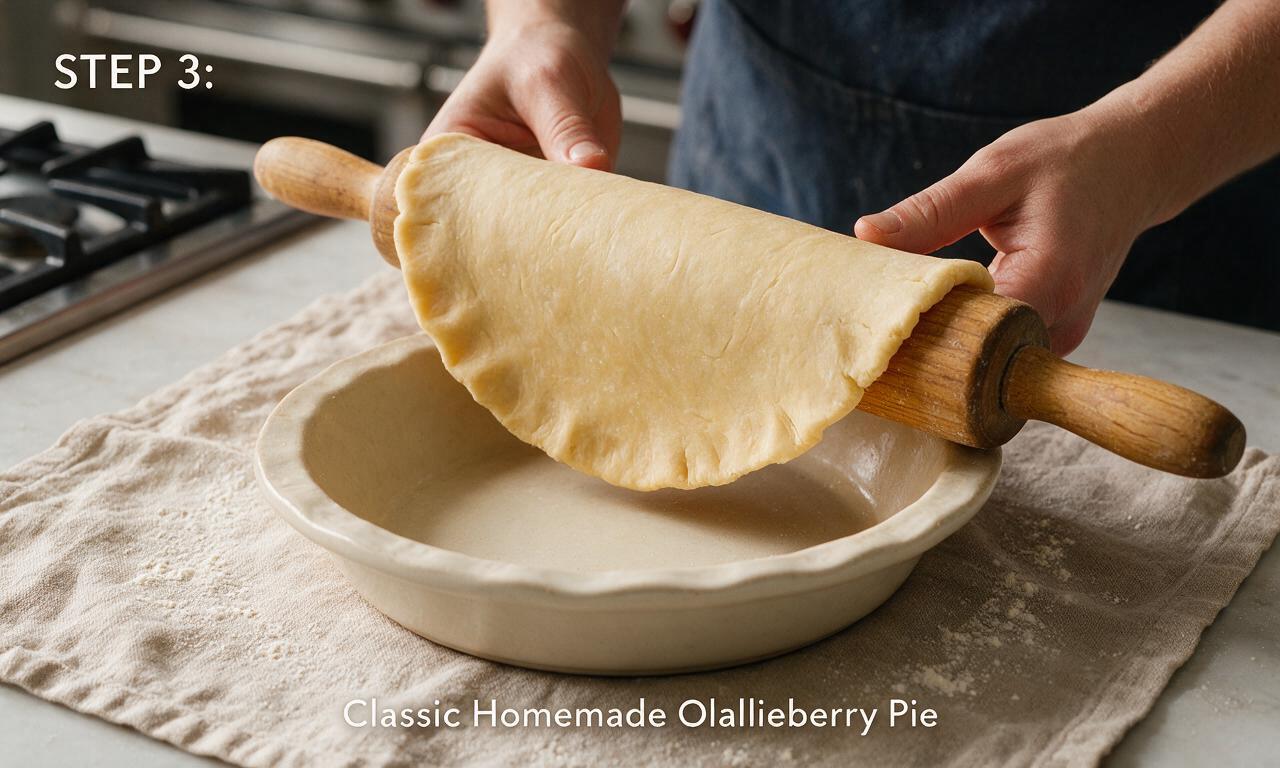
Preheat your oven to 400°F (200°C) and position a rack in the lower third of the oven. Remove one chilled dough disc from the fridge, and roll it on a lightly floured surface to a 12-inch (30cm) circle that is 1/8-inch (3mm) thick. Gently lift the rolled dough by draping it over your rolling pin, and lay it into a 9-inch (23cm) standard ceramic pie dish, pressing it firmly against the bottom and sides of the dish, leaving a 1-inch (2.5cm) overhang around the rim. Trim any excess overhang longer than 1 inch with kitchen shears.
Step 3
step3:Roll bottom crust layer
4

Assemble and seal pie

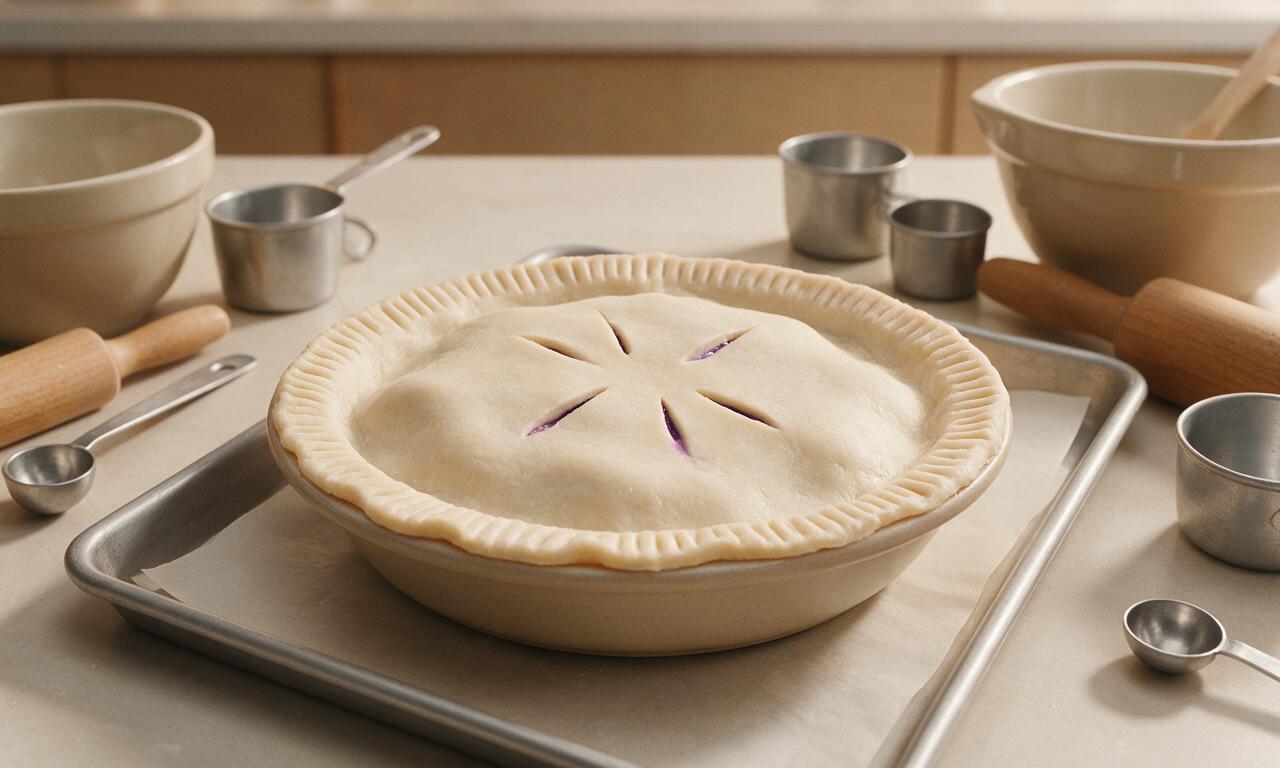
Pour the rested olallieberry filling and all its accumulated juices into the crust-lined pie dish, spreading it into a smooth, even layer. Roll the second chilled dough disc into an 11-inch (28cm) circle, 1/8-inch thick, and drape it evenly over the top of the filling. Press the top and bottom crust edges together firmly to create a tight seal, then crimp the edge decoratively with your thumb and forefinger or a fork. Cut 4 evenly spaced 2-inch slits in the top crust to allow steam to escape during baking.
Step 4
step4:Assemble and seal pie
5

Bake to golden perfection

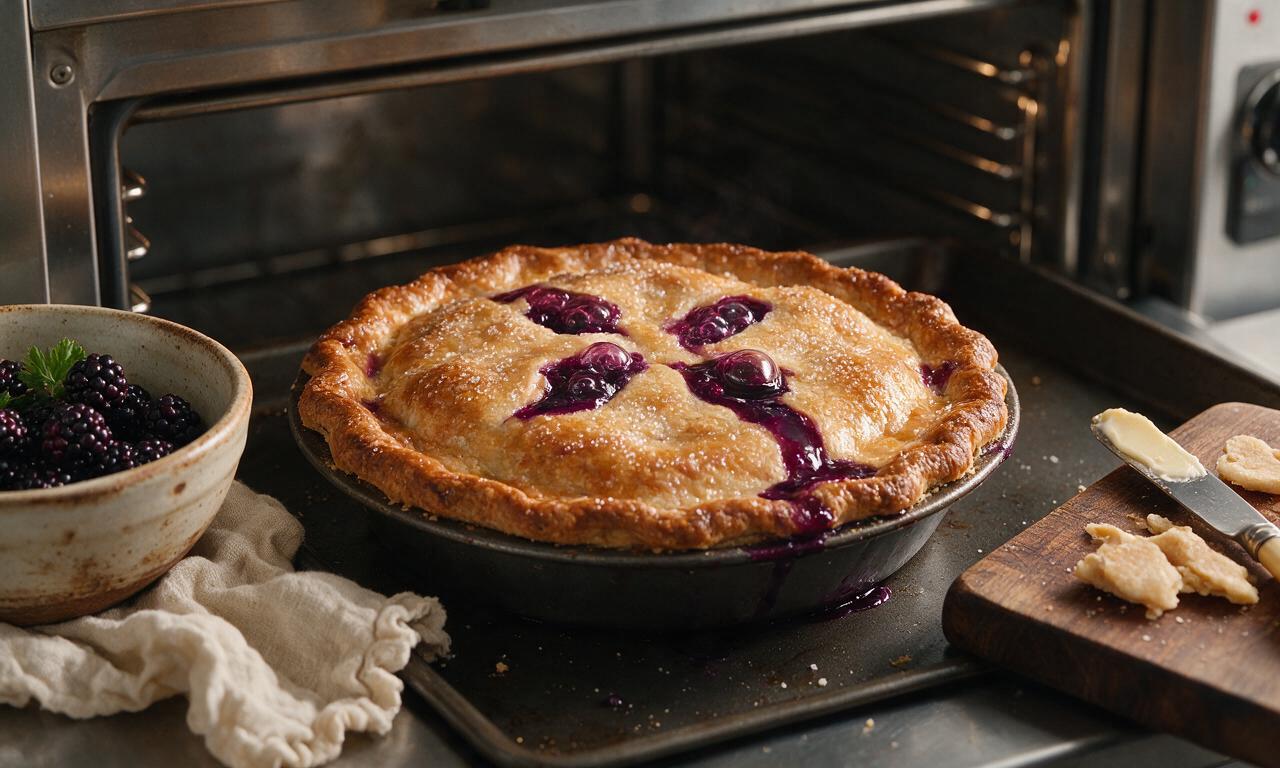
Beat 1 large egg with 1 tbsp (15ml) room-temperature water to make egg wash, then brush the entire top crust and crimped edge evenly with the wash. Sprinkle the remaining 1 tbsp (12g) granulated sugar over the brushed crust for a crisp, sweet top. Place the pie (on its parchment-lined baking sheet to catch bubbly drips) on the lower oven rack, and bake at 400°F (200°C) for 25 minutes. Reduce the oven temperature to 375°F (190°C) and bake for an additional 30-35 minutes, until the crust is deep golden brown and filling is actively bubbling through the top slits for at least 5 minutes.
Step 5
step5:Bake to golden perfection
6

Cool fully before slicing

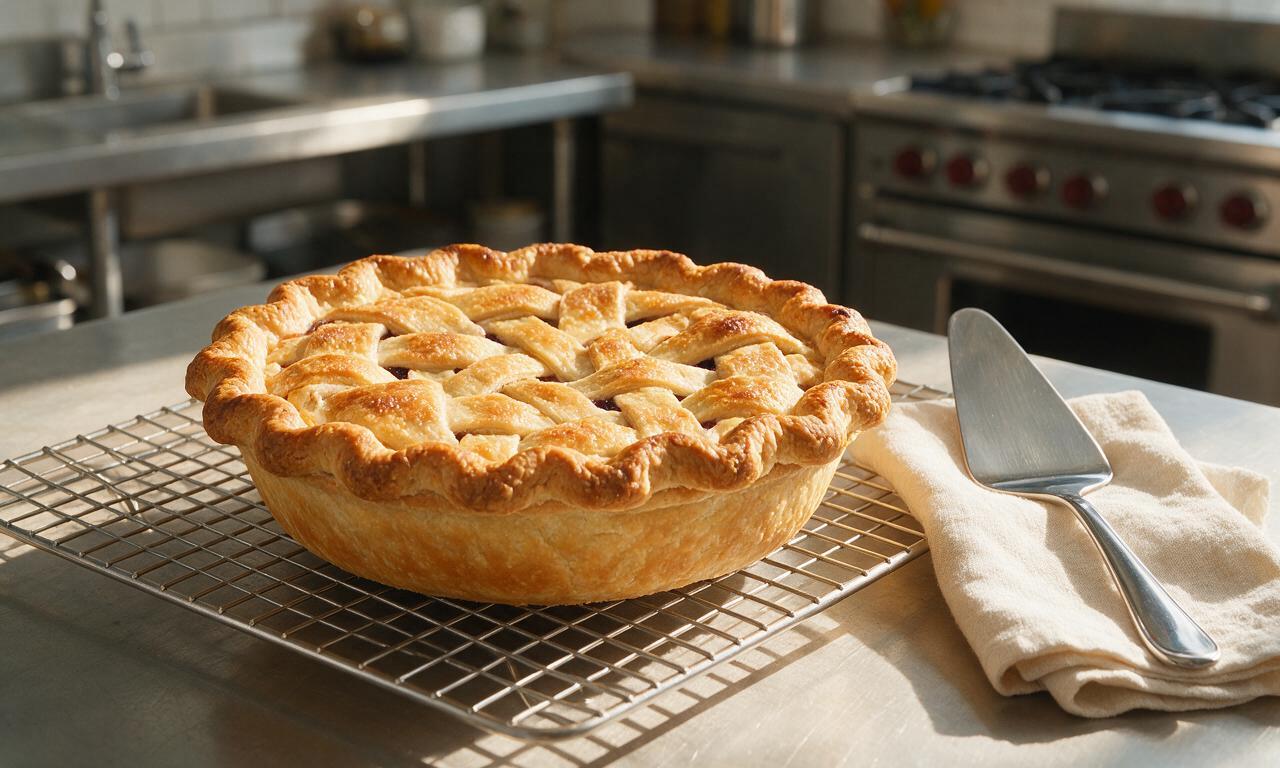
Remove the baked pie from the oven, transfer it to a wire cooling rack, and let it rest for a full 2 hours at room temperature before slicing. This cooling period allows the flour-thickened berry filling to set completely, so slices hold their neat shape instead of running onto the plate.
Step 6
step6:Cool fully before slicing

Tips

1.Keep all butter and water for the pie crust ice-cold; warm butter melts too quickly during baking and will result in a tough, dense crust instead of light, flaky layers.
2.If the crimped crust edges brown too quickly during baking, wrap them in a narrow strip of aluminum foil halfway through cook time to shield them from direct heat and prevent burning.
3.Resist the urge to slice the pie early; the full 2-hour cooling period is required for the berry filling to set fully and avoid runny, messy slices.


✨ You May Also Like

Desserts & Baking
🍜 Italy

Creamy, coffee-kissed classic Northern Italian no-bake dessert, with layers of rum-spiked mascarpone cream, soft ladyfingers, and a rich cocoa dusting.

⏱️ 4 hours 3Desserts & Baking ★ 4.8
Desserts & Baking
🍜 France

Flaky, shatteringly crisp, buttery French croissants with golden exteriors and soft, airy layered interiors, perfect for pairing with coffee for a special morning treat.

⏱️ 12 hours Desserts & Baking ★ 4.7
Desserts & Baking
🍜 United States

Warm, spiced baked apples topped with a fluffy golden biscuit crust, this cozy dessert pairs perfectly with vanilla ice cream for cool-weather comfort.

⏱️ 55 minuteDesserts & Baking ★ 4.7
Desserts & Baking
🍜 United States

A star-spangled classic American blueberry pie with buttery flaky crust and bright sweet-tart filling, perfect for summer patriotic gatherings.

⏱️ 1 hour 25Desserts & Baking ★ 4.8
Desserts & Baking
🍜 United States

A beloved no-bake regional Maine candy with a chewy coconut-potato center coated in rich dark chocolate, a New England holiday staple since the 1870s.

⏱️ 2 hours 3Desserts & Baking ★ 4.9
Desserts & Baking
🍜 France

Luxuriously creamy, floral frozen custard made with aromatic Tahitian vanilla beans, boasting a smooth, rich texture that melts slowly on the tongue.

⏱️ 3 hours 3Desserts & Baking ★ 4.6

Olallieberry Pie:Frequently Asked Questions

1.What are olallieberries, and what’s a good substitute if I can’t find them fresh?
Olallieberries are a juicy, tart-sweet blackberry-raspberry hybrid grown primarily in the Pacific Northwest, with a brighter, less earthy flavor than standard blackberries. If you can’t source fresh ones, use a 3:1 mix of fresh blackberries and raspberries, or fully thawed, well-drained frozen unsweetened olallieberries for the closest flavor match.
2.Why do I need to pat rinsed olallieberries completely dry before making the filling?
Excess surface water on rinsed berries will thin out your filling and lead to a runny, soupy pie instead of that perfectly set, juicy slice. After rinsing, spread berries on a paper towel-lined baking sheet and gently pat tops dry with a second towel to remove lingering moisture without mashing the delicate fruit.
3.My pie crust always turns out tough instead of flaky—what’s the key trick for this recipe?
The number one rule for flaky crust here is keeping your cubed unsalted butter ice-cold right up until it goes in the oven. Cold butter melts mid-bake to create steam pockets that form those light, flaky layers; if butter softens and mixes fully into the flour, you’ll end up with a dense, tough crust no matter how carefully you crimp.
4.How do I prevent a soggy bottom crust on my olallieberry pie?
Prevent soggy bottom by blind baking your bottom crust for 10 minutes at 400°F with pie weights before adding filling, and placing your pie dish on a preheated baking sheet in the oven. The hot sheet jumpstarts bottom crust browning, while blind baking sets the crust so it doesn’t absorb excess berry juice as it bakes.
5.Can I use frozen olallieberries instead of fresh for this pie?
Absolutely, as long as you prep them correctly to avoid runny filling. Thaw frozen berries completely first, drain off all excess collected juice in the bowl, and pat berries dry before tossing with granulated sugar and flour. You may need to add 1 extra tablespoon of flour to the filling to account for any remaining extra moisture.
6.How do I adjust the sugar amount if my olallieberries are extra tart or extra ripe?
Start with the base granulated sugar amount in the recipe, then taste a small handful of your prepped berries first. If they’re sharply tart, add 2 extra tablespoons of sugar; if they’re very ripe and extra sweet, cut the sugar by 1 to 2 tablespoons. The goal is balanced tart-sweet flavor that lets the berry taste shine.
7.Can I swap the double top crust for a crumb topping instead?
You absolutely can swap the top crust for a crumb topping if you prefer! Skip the top crust layer, mix ½ cup cold cubed butter, ¾ cup all-purpose flour, ½ cup brown sugar, and a pinch of fine sea salt into coarse crumbs, then sprinkle evenly over the berry filling before baking. Add 5 minutes of bake time if needed to get crumbs golden brown.
8.How do I know when my olallieberry pie is fully done baking?
Your pie is done when the crust is a deep, even golden brown all over, and you can see thick, bubbly berry juice actively bubbling up through the crust vents or around the edges for at least 5 full minutes. That steady bubbling means the flour in the filling has cooked enough to set, so you won’t get a runny slice once it cools.
9.Why do I need to let the pie cool so long after baking before slicing?
That cooling window is non-negotiable for a clean, intact slice! The berry filling is boiling hot and completely liquid when you pull the pie out of the oven, and it needs 2 to 3 hours at room temperature to set fully as it cools. Slice too early, and all that juicy filling will run right out onto your plate even if you baked it perfectly.
10.What’s the easiest way to crimp the edges of a double crust for this pie?
After trimming excess crust to a 1-inch overhang, fold the top and bottom crust edges together so they sit flush with the pie dish rim. Use the index finger of one hand to press a small indent into the crust edge from the outside, while pressing two fingers of your other hand against the crust from the inside to make a neat, even crimp all the way around.
11.Can I make this pie a full day ahead of when I plan to serve it?
Definitely! Bake the pie fully, let it cool completely to room temperature (about 3 hours), then loosely tent it with foil and store it at cool room temperature for up to 24 hours before serving. Don’t refrigerate it right away, as cold air will make your flaky crust go soggy and stale much faster.
12.My berry pie filling always turns out too runny—how much flour do I really need?
For 6 cups of prepped olallieberries, ¼ cup of all-purpose flour is the sweet spot for a perfectly juicy, not gummy, set, as long as you dried your berries well and baked until the filling bubbles steadily. If you know your berries are extra juicy, add 1 extra tablespoon of flour, but don’t add more or you’ll get a pasty, starchy filling.
13.Do I need to add lemon juice to the olallieberry filling?
It’s not required, but 1 teaspoon of fresh lemon juice is a great optional add-in if your berries are very ripe and sweet. The small hit of acid brightens the berry flavor, balances the granulated sugar, and amplifies that classic tart-sweet olallieberry profile without making the filling taste lemony at all. Skip it if your berries are already nicely tart.
14.How should I store leftover olallieberry pie, and how long will it keep?
Loosely cover leftover sliced pie with plastic wrap or foil, and store it in the refrigerator for up to 4 days. For the best texture, reheat individual slices in a 350°F oven for 5 to 7 minutes to crisp the crust back up before serving. Skip the microwave, as it will make the crust chewy and soggy.
15.Can I make the pie crust ahead of time to cut down on prep day work?
Absolutely! You can make the double crust dough, shape it into two flat discs, wrap tightly in plastic wrap, and refrigerate it for up to 3 days before baking, or freeze it for up to 3 months. Let chilled dough rest on the counter for 10 minutes before rolling so it doesn’t crack as you work.
16.Do I really need to cut vents in the top crust before baking?
Yes, those vents are non-negotiable! As the pie bakes, the berry filling releases hot steam that needs a clear way to escape; without vents, steam gets trapped under the top crust, leading to a soggy top layer, bubbled-over filling, and even crust blowouts where pressure builds. Cut 4 to 5 2-inch slits in a simple pattern before baking to let steam out evenly.

Comments (14)

2 days ago

OMG this olallieberry pie is SO good! I foraged a ton of olallieberries up near the coast last weekend and had no clue what to do with them, and this recipe popped up first. The crust was flaky as hell, the filling had the perfect balance of tart and sweet — not too runny either! Brought it to my neighbor’s BBQ and everyone asked for the recipe. Total game changer for summer berry season.

yesterday

So glad this was a hit at your BBQ! Great call using fresh foraged berries — that makes all the difference. If you have leftover berries, they freeze beautifully for pie all year round!

1 week ago

My kids loved it! I’ve tried a handful of olallieberry pie recipes over the years and this one is hands down the new family favorite. I did add a tiny extra tablespoon of cornstarch because our berries were super juicy after all the rain we got last week, and it set perfectly. Served it warm with vanilla bean ice cream after Sunday dinner and even my pickiest eater asked for a second slice.

5 days ago

Thanks for the tip about extra cornstarch! My berries are always so juicy here in western Washington and I end up with soup pie every time, can’t wait to try that adjustment.

3 days ago

Great call adjusting the cornstarch for extra juicy berries! That’s exactly the kind of small tweak that makes homemade pie turn out perfect every time. So happy your picky eater approved!

2 weeks ago

Made this for our Fourth of July potluck and it went faster than the brisket. Let that sink in. I was worried olallieberries would be too tart for our crew that’s used to super sweet pecan pie, but the sugar ratio was spot on. Crust held up even when we were serving it on paper plates outside in 90 degree heat. Will absolutely make again.

3 days ago

Solid recipe, medium difficulty is spot on — don’t attempt this if you’ve never made a lattice crust before, practice first! I messed up my first lattice top because the dough got too warm working with it on my counter, but after popping it back in the fridge for 10 minutes it worked like a charm. The flavor is unreal, tastes just like the pie my grandma used to make when we’d go berry picking as kids.

2 days ago

Great tip about chilling the dough if it gets too warm! Lattice crust can be tricky for new bakers, but a quick chill makes it so much easier to work with. So glad the flavor brought back good memories!

5 minutes ago

Wait, can I use frozen olallieberries for this? My grocery store only carries them frozen right now and I don’t feel like driving 45 minutes to the farm stand for fresh. Don’t want to mess up the texture!

just now

I used frozen last month! Just thaw them first and drain off about half the extra liquid that pools in the bag, then follow the recipe exactly. Turned out perfect, no one could tell it wasn’t fresh berries.

just now

Frozen olallieberries work perfectly here! As the commenter mentioned, just thaw and drain off excess liquid first to keep the filling from getting too runny. Hope you love it!

yesterday

Brought this to my office potluck yesterday and people were literally coming back to my desk asking for the recipe an hour after lunch ended. I did a crumb top instead of a full double crust because I was short on time, and it was chef’s kiss. 10/10, will be making this for every summer get together from now on.

30 minutes ago

The crumb top swap is genius! I hate rolling out a second crust for the top, I’m definitely stealing that for when I make this next weekend for my block party.

5 days ago

Made this with a 1:1 gluten free all purpose flour blend for the crust and it turned out amazing! I was worried the crust would be crumbly or have that weird GF aftertaste, but it was flaky and buttery just like regular crust. My whole family (none of whom are GF) devoured half the pie in one sitting. So happy I can enjoy olallieberry pie again!

1 week ago

First pie I’ve ever made from scratch, y’all. I was so nervous I’d mess it up for my wife’s birthday since olallieberry is her favorite, but the instructions were so easy to follow! The only mistake I made was not crimping the edges tight enough so a little filling bubbled out, but it still tasted incredible. She cried when she saw it, 10/10 recipe.

5 days ago

That is the sweetest thing! I made this for my husband’s birthday too, he’s been obsessed with olallieberries since we went to Santa Cruz on our honeymoon. The bubbly edges are just extra crispy snack bits, no shame!

3 days ago

This made our day! There’s nothing better than a homemade pie for a loved one’s birthday, bubbly edges and all. Happy birthday to your wife, so glad the recipe worked out for your first from-scratch pie!

2 weeks ago

I’ve been making olallieberry pie for 60 years, and I have to say this recipe is right up there with my own! The touch of lemon zest in the filling is the secret I’ve been using for decades, it really makes the berry flavor pop. I did use my own lard crust recipe, but the filling instructions were perfect. My grandkids ate three slices each after church on Sunday.

1 week ago

We’re so honored to get a stamp of approval from someone who’s been making this pie for 60 years! The lemon zest is such a small addition but it really does elevate the whole filling, couldn’t agree more.

3 days ago

Made this in my tiny dorm kitchen with a toaster oven! Had to cut the recipe in half to fit my tiny pie dish, and bake it for a little extra time because my toaster oven runs hot, but it worked! My roommates and I ate the whole thing while we were studying for finals. Way better than the dining hall dessert options lmao.

2 hours ago

Wait, how long do I let this cool before slicing? I know berry pies need to set, but I’m so impatient! I made it for a post-hike dinner with friends and I don’t want to serve it too early and have it run all over the plates.

30 minutes ago

Let it cool for a minimum of 3 hours! I know it’s torture smelling that warm pie, but if you cut it too early it’ll be total soup. I usually make mine the night before so it sets fully in the fridge overnight, it’s even better cold the next day imo.

just now

Great question! We recommend letting it cool a full 2-3 hours at room temperature for the filling to set completely. If you’re short on time, you can pop it in the fridge for an hour to speed up the process. Enjoy your post-hike meal!

2 days ago

I keep telling myself I’ll meal prep pie for the week, but it never lasts that long in my house! I baked this on Sunday and we were supposed to have slices after dinner all week, but we ate the whole thing by Tuesday. Oops. The crust was so buttery, the filling was perfectly tart, even my teen who hates all fruit desserts asked for seconds. No notes, this recipe is flawless.

yesterday

Same thing happens at my house! I tell myself I’m making it for the week and it’s gone in 48 hours max. Berry pie is just too good to resist, especially with that flaky crust.

1 week ago

Grew up eating olallieberry pie at the Santa Cruz boardwalk every summer, and this tastes exactly like I remember. The balance of tart berry, sweet filling, and salty buttery crust is perfect. I picked the berries myself at a local u-pick farm about 20 minutes from my house, and it made the whole pie taste even more special. Already planning to make another one next weekend when my parents come to visit.

5 days ago

Nothing beats u-pick berries for homemade pie! We’re so glad this tasted like the boardwalk pies you remember — that’s the exact vibe we were going for with this recipe. Hope your parents love it when they visit!

3 days ago

I was a little skeptical about olallieberry pie since I’m used to apple and cherry pie here in the midwest, but wow. My cousin shipped me a bunch of frozen olallieberries from her farm in Oregon and I decided to give this a go. It’s now my new favorite pie, I might even like it more than my famous sour cherry pie. Don’t tell my grandma I said that.



