
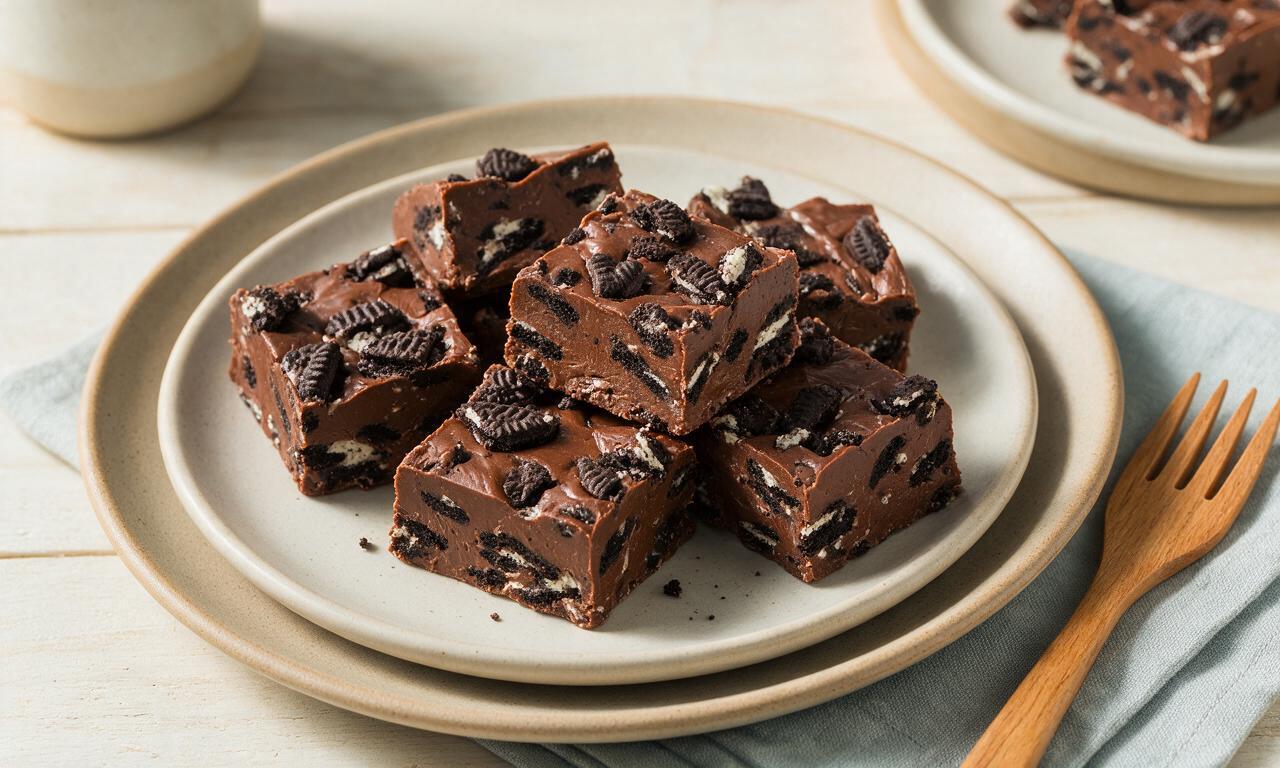
Oreo Fudge

Oreo Fudge
⏱️ cook time 2 hours 15 minutes (15 minutes active prep, 2 hours chill time)
🍽️ servings 16
⚡ Difficulty easy

intro

Creamy, rich no-bake chocolate fudge studded with crunchy Oreo pieces, made with minimal prep and simple pantry ingredients for a crowd-pleasing sweet treat.

Ingredients

Semi-sweet chocolate chips 340g (2 cups)
Sweetened condensed milk 397g (1 2/3 cups, 1 standard 14oz can)
Original Oreo cookies 220g (approx 20 whole cookies, 2 cups roughly chopped)
Unsalted butter 28g (2 tablespoons)
Pure vanilla extract 5ml (1 teaspoon)
Fine sea salt 1g (1/4 teaspoon)

Steps

1

Prep pan and cookies

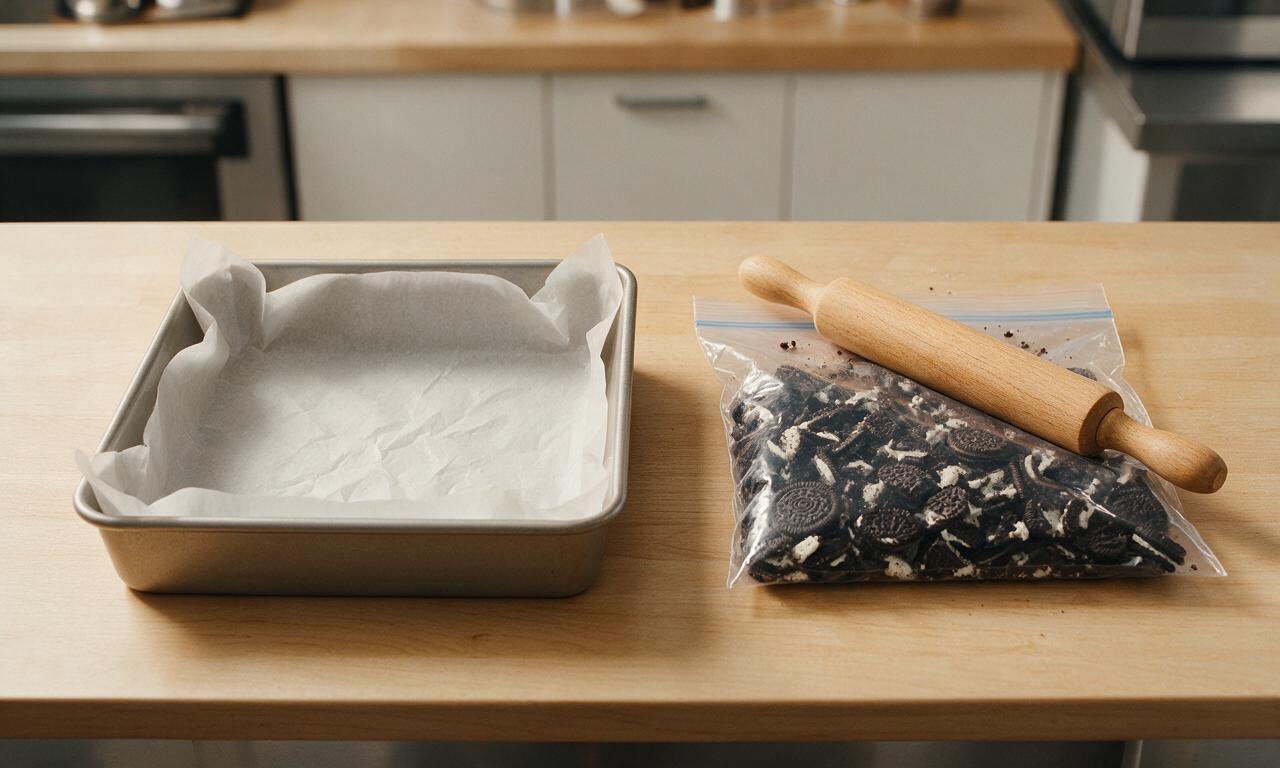
Line an 8x8 inch (20cm) square baking pan with parchment paper, leaving a 2-inch overhang on two opposite sides for easy removal later. Place 220g Oreo cookies in a large zip-top bag, seal, and crush into a mix of 1/2-inch chunks and fine crumbs using a rolling pin; set aside.
Step 1
step1:Prep pan and cookies
2

Melt fudge base

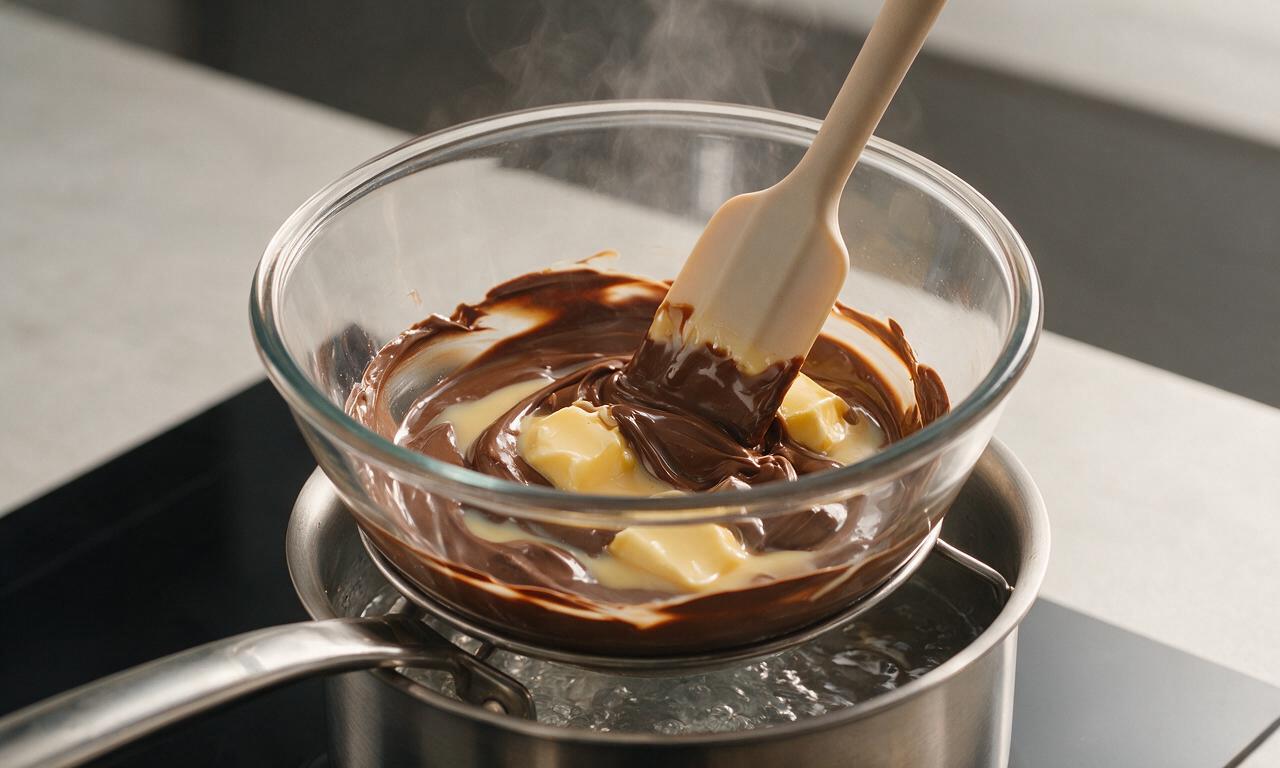
In a medium heatproof glass bowl set over a small pot of gently simmering water (double boiler setup, ensure the bowl bottom does not touch the water surface), combine 340g semi-sweet chocolate chips, 397g sweetened condensed milk, and 28g unsalted butter. Heat over medium-low heat, stirring constantly with a silicone spatula for 4-5 minutes, until all ingredients are fully melted and completely smooth with no visible lumps.
Step 2
step2:Melt fudge base
3

Stir in flavorings

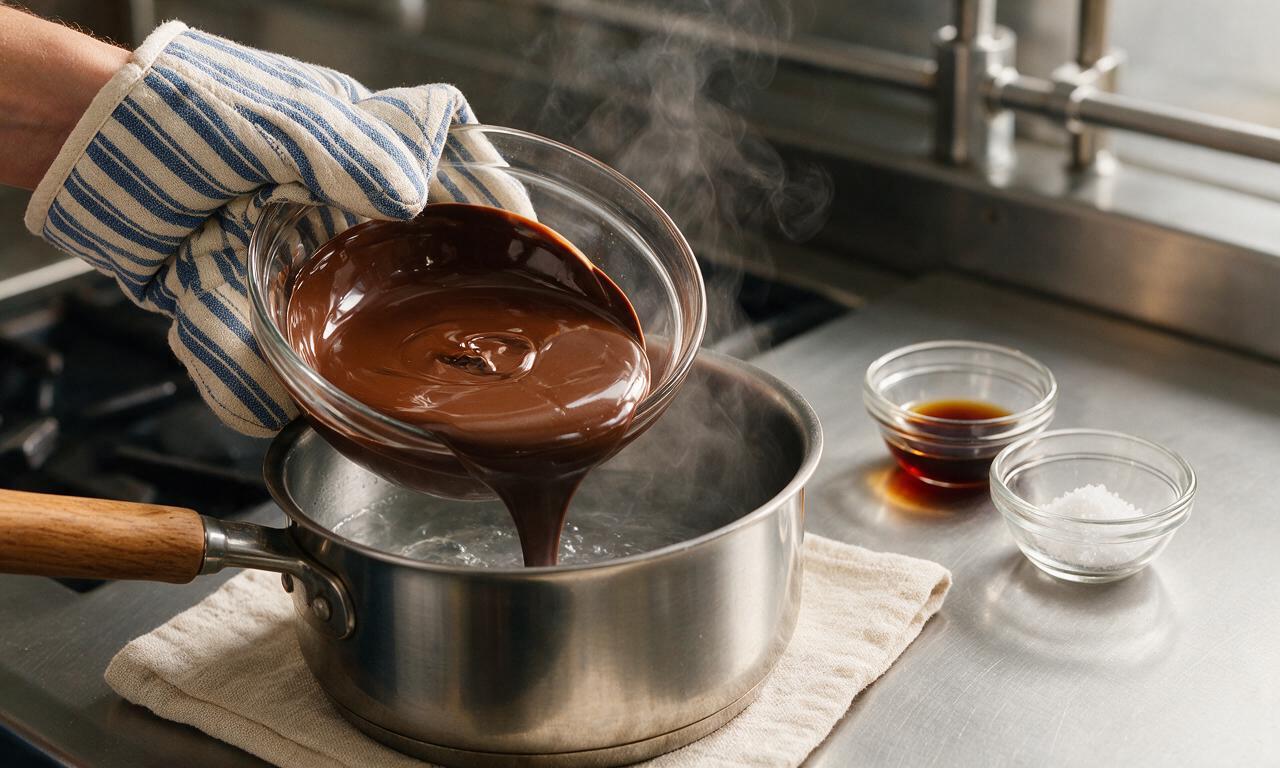
Carefully remove the bowl from the pot using oven mitts to avoid steam burns. Stir in 5ml (1 teaspoon) pure vanilla extract and 1g (1/4 teaspoon) fine sea salt, mixing consistently for 30 seconds until the flavorings are fully incorporated into the smooth chocolate base.
Step 3
step3:Stir in flavorings
4

Fold in Oreo pieces

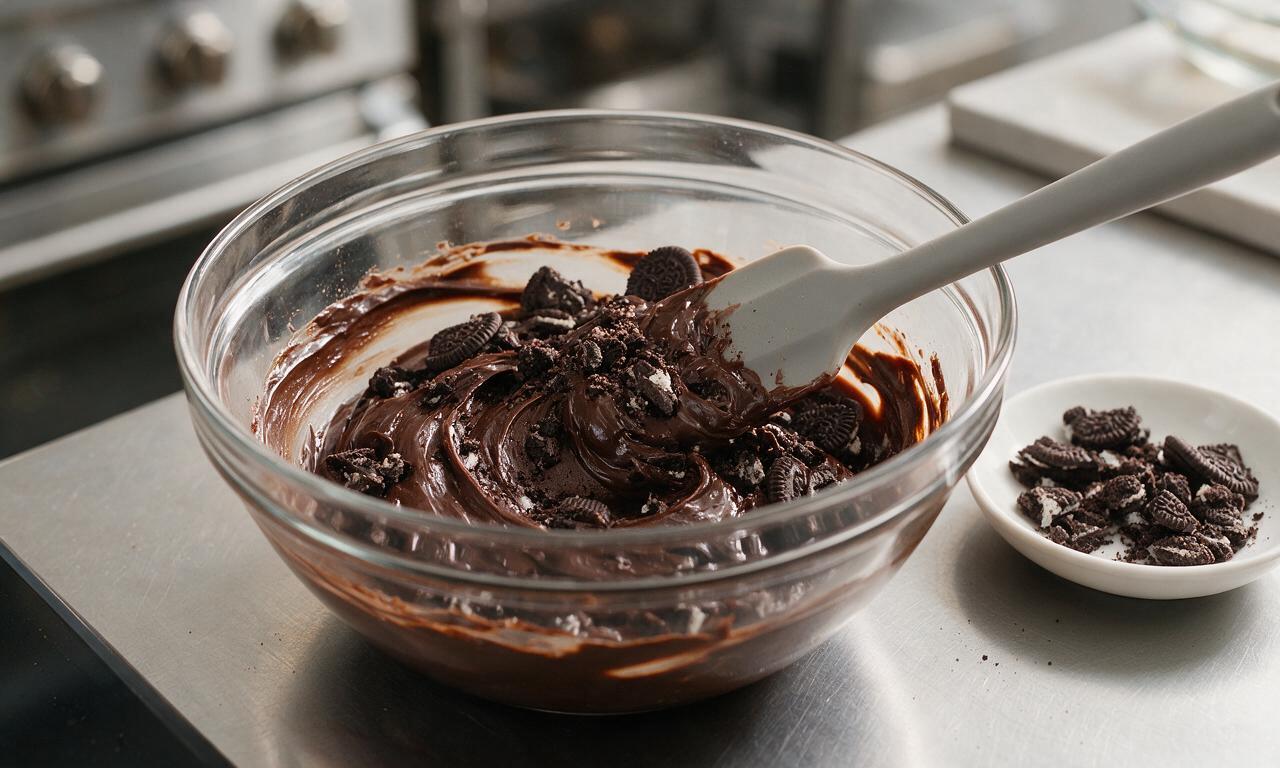
Set aside 30g (1/4 cup) of the crushed Oreo mix for topping. Add the remaining crushed Oreos to the warm chocolate fudge base, folding gently with the silicone spatula for 20-30 seconds until cookie pieces are evenly distributed throughout the mixture, taking care not to overmix which can turn the fudge a dull gray color.
Step 4
step4:Fold in Oreo pieces
5

Transfer and top fudge

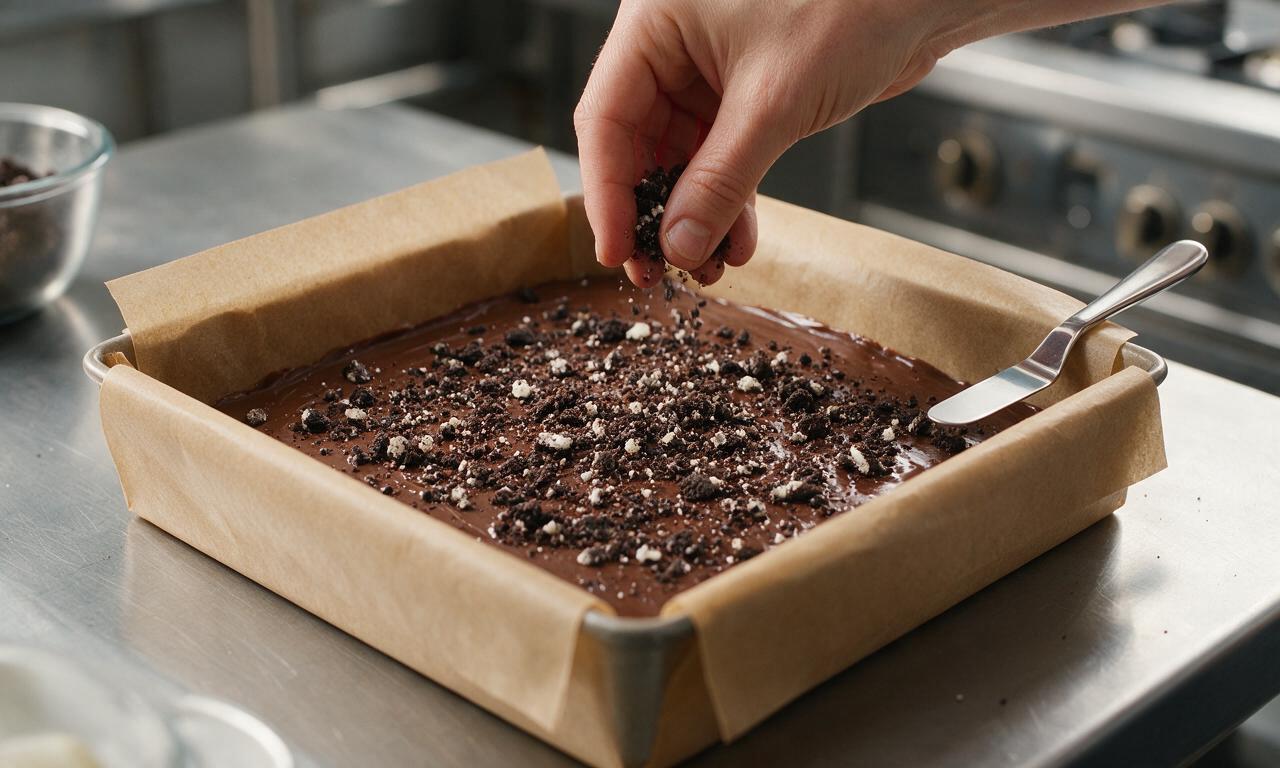
Pour the fudge mixture into the prepared parchment-lined 8x8 pan, spreading it into a flat, even layer with a small offset spatula. Sprinkle the reserved 30g (1/4 cup) Oreo crumbs evenly over the top of the fudge, pressing very gently with the flat of the spatula to help the crumbs adhere to the surface.
Step 5
step5:Transfer and top fudge
6

Chill fudge until firm

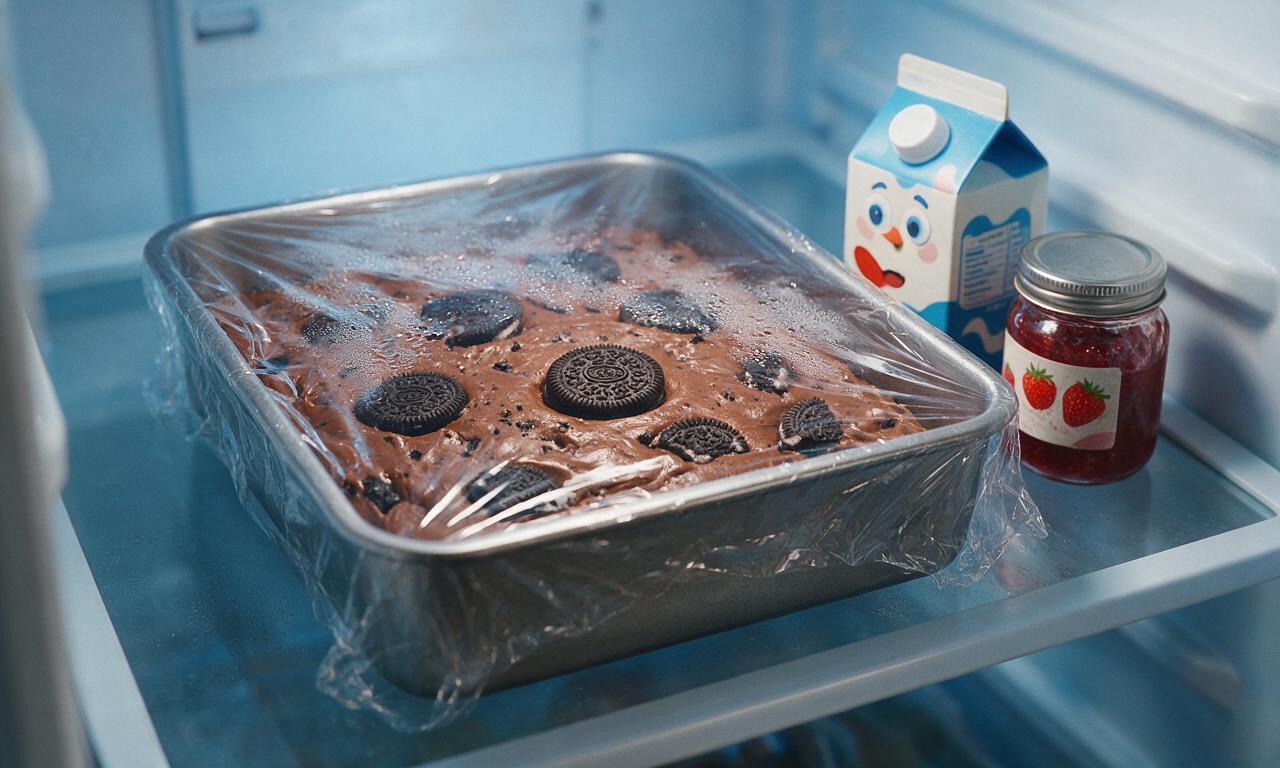
Cover the pan loosely with plastic wrap and place it on a level shelf in the refrigerator for a minimum of 2 hours, or until the fudge is completely firm to the touch and does not leave an indent when pressed lightly with a clean finger.
Step 6
step6:Chill fudge until firm
7

Slice and serve fudge

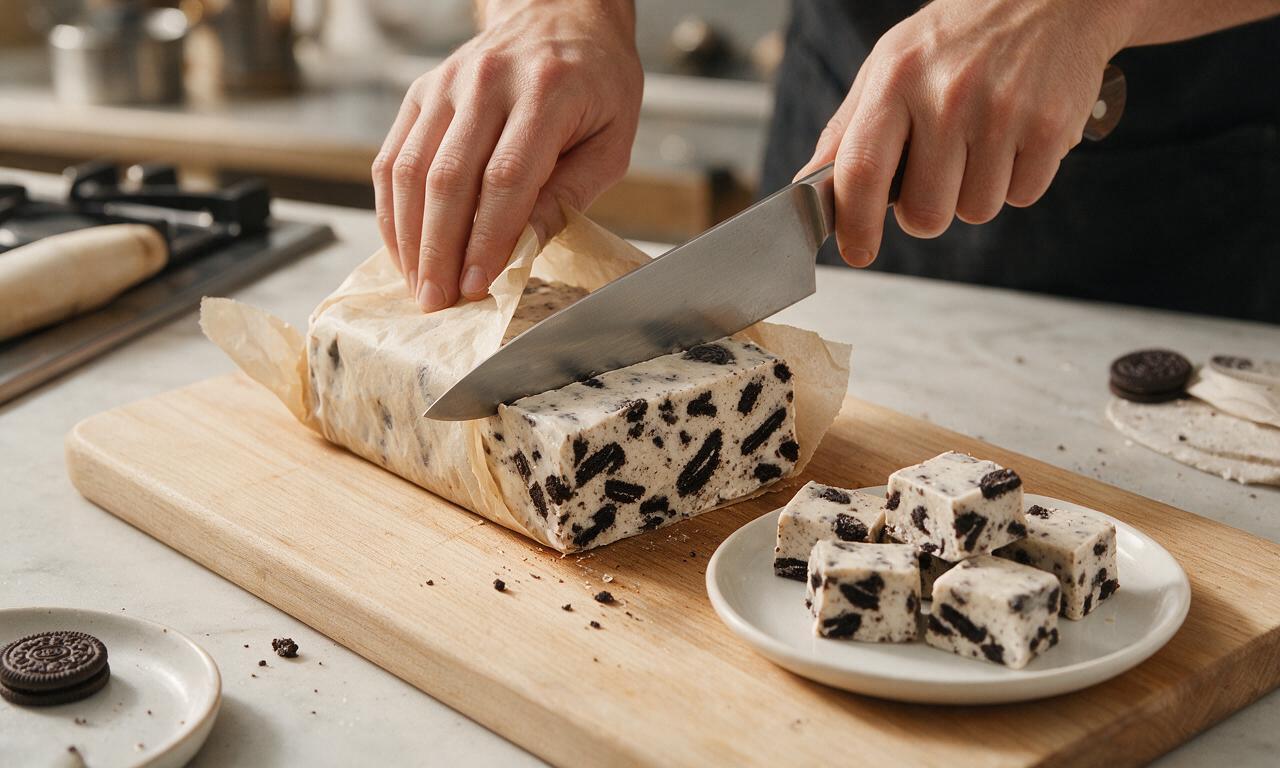
Use the parchment paper overhang to lift the fully set fudge block out of the pan and transfer it to a wooden cutting board. Peel away the parchment paper, then cut the fudge into 16 equal 2x2 inch squares using a sharp knife warmed under hot water (wipe the blade dry between cuts for clean, smooth edges).
Step 7
step7:Slice and serve fudge

Tips

1.Do not let any water or condensation drip into the melting chocolate mixture, as even a single drop can cause chocolate to seize and turn grainy, ruining the fudge's signature smooth texture.
2.For easy flavor variations, swap semi-sweet chocolate for white chocolate to make a cookies-and-cream style fudge, or add 1/4 teaspoon peppermint extract for a cool mint chocolate version.
3.Store cut fudge in an airtight container between layers of parchment paper in the refrigerator for up to 2 weeks, or freeze for up to 3 months for long-term storage.


✨ You May Also Like

Desserts & Baking
🍜 Italy

Creamy, coffee-kissed classic Northern Italian no-bake dessert, with layers of rum-spiked mascarpone cream, soft ladyfingers, and a rich cocoa dusting.

⏱️ 4 hours 3Desserts & Baking ★ 4.8
Desserts & Baking
🍜 France

Flaky, shatteringly crisp, buttery French croissants with golden exteriors and soft, airy layered interiors, perfect for pairing with coffee for a special morning treat.

⏱️ 12 hours Desserts & Baking ★ 4.7
Desserts & Baking
🍜 United States

Warm, spiced baked apples topped with a fluffy golden biscuit crust, this cozy dessert pairs perfectly with vanilla ice cream for cool-weather comfort.

⏱️ 55 minuteDesserts & Baking ★ 4.7
Desserts & Baking
🍜 United States

A star-spangled classic American blueberry pie with buttery flaky crust and bright sweet-tart filling, perfect for summer patriotic gatherings.

⏱️ 1 hour 25Desserts & Baking ★ 4.8
Desserts & Baking
🍜 United States

A beloved no-bake regional Maine candy with a chewy coconut-potato center coated in rich dark chocolate, a New England holiday staple since the 1870s.

⏱️ 2 hours 3Desserts & Baking ★ 4.9
Desserts & Baking
🍜 France

Luxuriously creamy, floral frozen custard made with aromatic Tahitian vanilla beans, boasting a smooth, rich texture that melts slowly on the tongue.

⏱️ 3 hours 3Desserts & Baking ★ 4.6

Oreo Fudge:Frequently Asked Questions

1.Can I use a different type of chocolate instead of semi-sweet chocolate chips for this fudge?
Absolutely! Semi-sweet chips deliver that classic balanced, rich fudge flavor, but you can swap in milk chocolate for a milder, sweeter bite, or 60-70% cacao dark chocolate for deeper, less sweet results. Skip unsweetened baking chocolate, though—it will make the fudge unpleasantly bitter even with the sweetened condensed milk.
2.How long does this no-bake fudge need to set, and can I speed up the process in the freezer?
Plan to chill it for at least 2 hours in the fridge to set firm enough for clean, even cuts. If you’re short on time, you can freeze it for 30-40 minutes to speed things up, but don’t leave it longer—extended freezing can make the Oreo pieces soggy as it thaws, and lead to a crumbly fudge texture.
3.Do I need to scrape the white creme filling out of the Oreos before adding them to the fudge?
Not at all! The original Oreo creme melts slightly into the warm fudge base for extra creaminess and that iconic cookies-and-cream flavor. I recommend reserving ½ cup of roughly crushed Oreos to press into the top right after pouring the fudge into the pan, for a pretty, extra-crunchy top layer.
4.Why did my fudge turn out grainy instead of smooth and creamy?
Grainy fudge almost always stems from overheating the chocolate and sweetened condensed milk mixture, or getting even a tiny drop of water in your melting bowl. Heat the mixture slowly over low heat, stirring constantly, just until the chocolate melts fully. Pull it off heat immediately to avoid seizing the chocolate, which causes that gritty texture.
5.How should I store leftover Oreo fudge, and how long will it stay fresh?
Store cut fudge pieces in an airtight container, layered between parchment paper sheets to prevent sticking, in the fridge for up to 2 weeks. It will keep at cool room temperature (below 70°F) for 3-4 days, but refrigeration helps it hold its firm texture best, especially in warm, humid weather.
6.Can I add extra mix-ins besides Oreos to customize this fudge?
Of course! This simple base is really versatile. Try stirring in ¼ cup mini marshmallows, crushed pretzels for a salty-sweet twist, a teaspoon of instant espresso powder for depth, or white chocolate chips. Just don’t add more than 1 cup total of extra mix-ins, or you’ll disrupt the fudge’s smooth, firm set texture.
7.What size pan works best for this fudge, and do I need to line it?
An 8x8-inch square baking pan is ideal, giving you thick, satisfying fudge pieces. Always line the pan with a 2-inch overhang of parchment paper or aluminum foil before pouring in the fudge—this creates handy 'handles' to lift the whole fudge block out for easy, clean cuts with zero sticking.
8.Can I melt the fudge base in the microwave instead of on the stovetop?
Definitely! Combine the chocolate chips, sweetened condensed milk, and unsalted butter in a microwave-safe bowl, and heat in 30-second bursts, stirring thoroughly between each, until fully smooth. This takes 1.5 to 2 minutes total; stir in the pure vanilla extract once you pull it from the microwave. Just don’t overheat, which can cause the chocolate to seize and turn grainy.

Comments (12)

2 weeks ago

SO good. I made this for my office holiday party last week and the entire pan was gone in 10 minutes flat. People kept coming back to ask who brought it, I felt like a total baking rockstar and I barely even had to do anything. Obsessed.

1 week ago

Wait did you make this for the downtown Chicago office party? I was there and I swear I had three pieces of that Oreo fudge, it was insane! I was just looking for the recipe to make it for my family’s Christmas dinner, no way that’s a coincidence 😂

1 week ago

Made this for my dorm floor hang last weekend and people were begging for the recipe 10 minutes in. I swapped regular Oreos for the golden ones on a whim and it slapped. Super cheap to make too, perfect for broke college kids who don’t have access to a full kitchen. 10/10.

1 week ago

This is my new go-to potluck recipe, no cap. I’ve made it three times in the last month: once for a neighborhood BBQ, once for my book club, and once for my sister’s baby shower. Every single time people ask for the recipe before they leave. The only thing I change is I add extra Oreo chunks on top for decoration, it makes it look way fancier than it is.

5 days ago

Wait how did you keep it from melting when you brought it to the neighborhood BBQ? It’s been so hot here in Seattle lately I’m worried all my no-bake treats will turn to goop if I leave them out for more than 20 minutes.

3 days ago

If you’re serving this in hot weather, I recommend keeping the pan in a cooler with ice packs until you’re ready to serve, and setting the serving platter on a small tray of ice if it’s going to be out for more than an hour. It holds up really well at room temp for short periods, but extended heat will make it soften up a bit!

5 days ago

I’m 72 and don’t mess with complicated recipes that require a million steps, and this was perfect for me. I added a tiny sprinkle of sea salt on top before chilling and it cut the sweetness just right. My grandkids said it tasted better than the fudge I used to make on the stovetop, which I’m choosing to take as a compliment 😂

5 days ago

Okay I’m normally TERRIBLE at fudge, like every stovetop fudge recipe I’ve ever tried turns into a grainy crumbly mess no matter how carefully I follow the directions. This recipe? It turned out perfectly smooth on the first try. I could cry. I added a handful of crushed mini marshmallows to mine for a cookies and cream rocky road vibe and it was unreal.

3 days ago

Oh my god I thought I was the only one who ruined every stovetop fudge recipe! I always mess up the candy thermometer temperature and end up with something that’s either rock hard or doesn’t set at all. This no-bake version sounds right up my alley, I’m trying it this weekend.

2 days ago

That rocky road twist sounds amazing, I love the mini marshmallow add-in! No candy thermometer required for this recipe, which is why it’s so forgiving for new bakers (or those of us who’ve had one too many fudge fails on the stovetop 😊)

3 days ago

Solid no-bake treat, came together exactly like the recipe said. I knocked off a star because I thought it was a touch too sweet for my taste, but my partner and her friends went crazy for it. Next time I’ll use the dark chocolate fudge base instead of milk chocolate to balance it out.

2 days ago

I did the dark chocolate swap last week and it was chef’s kiss! Cut the sweetness so much, I even added a handful of crushed mint Oreos to it and it tasted like those fancy truffles they sell at the mall. Highly recommend that tweak.

3 days ago

Pro tip: if you line your pan with parchment paper that hangs over the edges, you can lift the entire block of fudge out in one go to cut it instead of scraping it out of the pan and making a mess. Saved me so much time when I made this for my little sister’s birthday party last weekend. Also, pro tip #2: don’t eat half the Oreo crumbs while you’re prepping, you will be sad when you don’t have enough for the fudge (speaking from experience).

2 days ago

The parchment paper hack is so real! I forgot to line my pan the first time I made brownies last month and I was chiseling pieces out for 20 minutes, half the pan stuck to the bottom. Never making that mistake again, especially with this fudge.

yesterday

Love these tips! The parchment paper sling is 100% the easiest way to get clean, perfect fudge squares without any mess. And for what it’s worth, snacking on a few Oreo crumbs while prepping is basically a mandatory part of the recipe, just set aside a little extra to account for it 😉

2 days ago

OMG this is the easiest fudge I’ve ever made! Threw this together last night for my boys’ after-school snack and they devoured half the pan before I even cut it into neat squares. No fancy ingredients, no stovetop mess, total game changer for busy weeknights. Will 100% be bringing this to our next soccer team potluck!

2 days ago

I made the regular version of this for my book club last month and it was incredible, 10/10 taste, but I’m knocking a star because I can’t wait to make it for my son who is lactose intolerant! Has anyone tried making this with dairy-free ingredients? I’ve been hunting for a fudge recipe that doesn’t require a ton of fancy specialty ingredients that I can only find at the health food store across town. Would love to hear if anyone’s tested swaps!

yesterday

I made it last week with dairy-free condensed milk and vegan butter, plus the regular Oreos (fun fact: original Oreos are accidentally vegan!) and it turned out exactly the same as the regular version. No weird aftertaste at all, my whole family ate it and didn’t even notice it was dairy free.

2 hours ago

Great tip! You can absolutely swap in dairy-free sweetened condensed milk and your favorite dairy-free butter substitute for a lactose-free version, it sets up exactly the same as the original recipe. So glad you asked this, it’s a super common question!

yesterday

Made this with my 7 year old daughter for her class bake sale, and it was such a fun easy project to do together. No hot pans or complicated steps, so she could help crush the Oreos and stir the fudge base without me stressing about her getting burned. We sold every single piece! Already planning to make a mint Oreo version for St. Patrick’s Day.

2 hours ago

That mint version sounds chef’s kiss! My kid’s school does a bake sale every spring and I’ve been looking for kid-friendly recipes that don’t require a ton of work, I’m definitely saving this to try next month.

2 hours ago

I was worried the chill time would be too long for my impromptu movie night with friends, so I popped the pan in the freezer for 45 minutes instead of the fridge for 2 hours and it set perfectly! Didn’t get icy or weird at all, held its shape great when I cut it. Would recommend that hack if you’re crunched for time.

30 minutes ago

Thanks for sharing that time-saving hack! I’m glad it worked out for your movie night, that’s a great tip for folks who don’t want to wait the full two hours for the fudge to set. Just make sure to let it sit at room temp for 5 minutes after taking it out of the freezer for easiest cutting.

30 minutes ago

I made a test batch of this last weekend and it was so tasty, but I’m making a big batch for my friend’s baby shower this weekend! Quick question—can I use generic sandwich cookies instead of name brand Oreos? I’m on a super tight grocery budget this week and the store brand is half the price, but I don’t want to mess up the texture for the shower!

just now

Great question! Generic chocolate sandwich cookies work perfectly here, I’ve tested it both ways and you won’t notice a difference in taste or texture. Just make sure to crush them to the same coarse crumb size the recipe calls for, and you’ll be good to go!



