
pan frying boneless skinless chicken breast

title 1
pan frying boneless skinless chicken breast
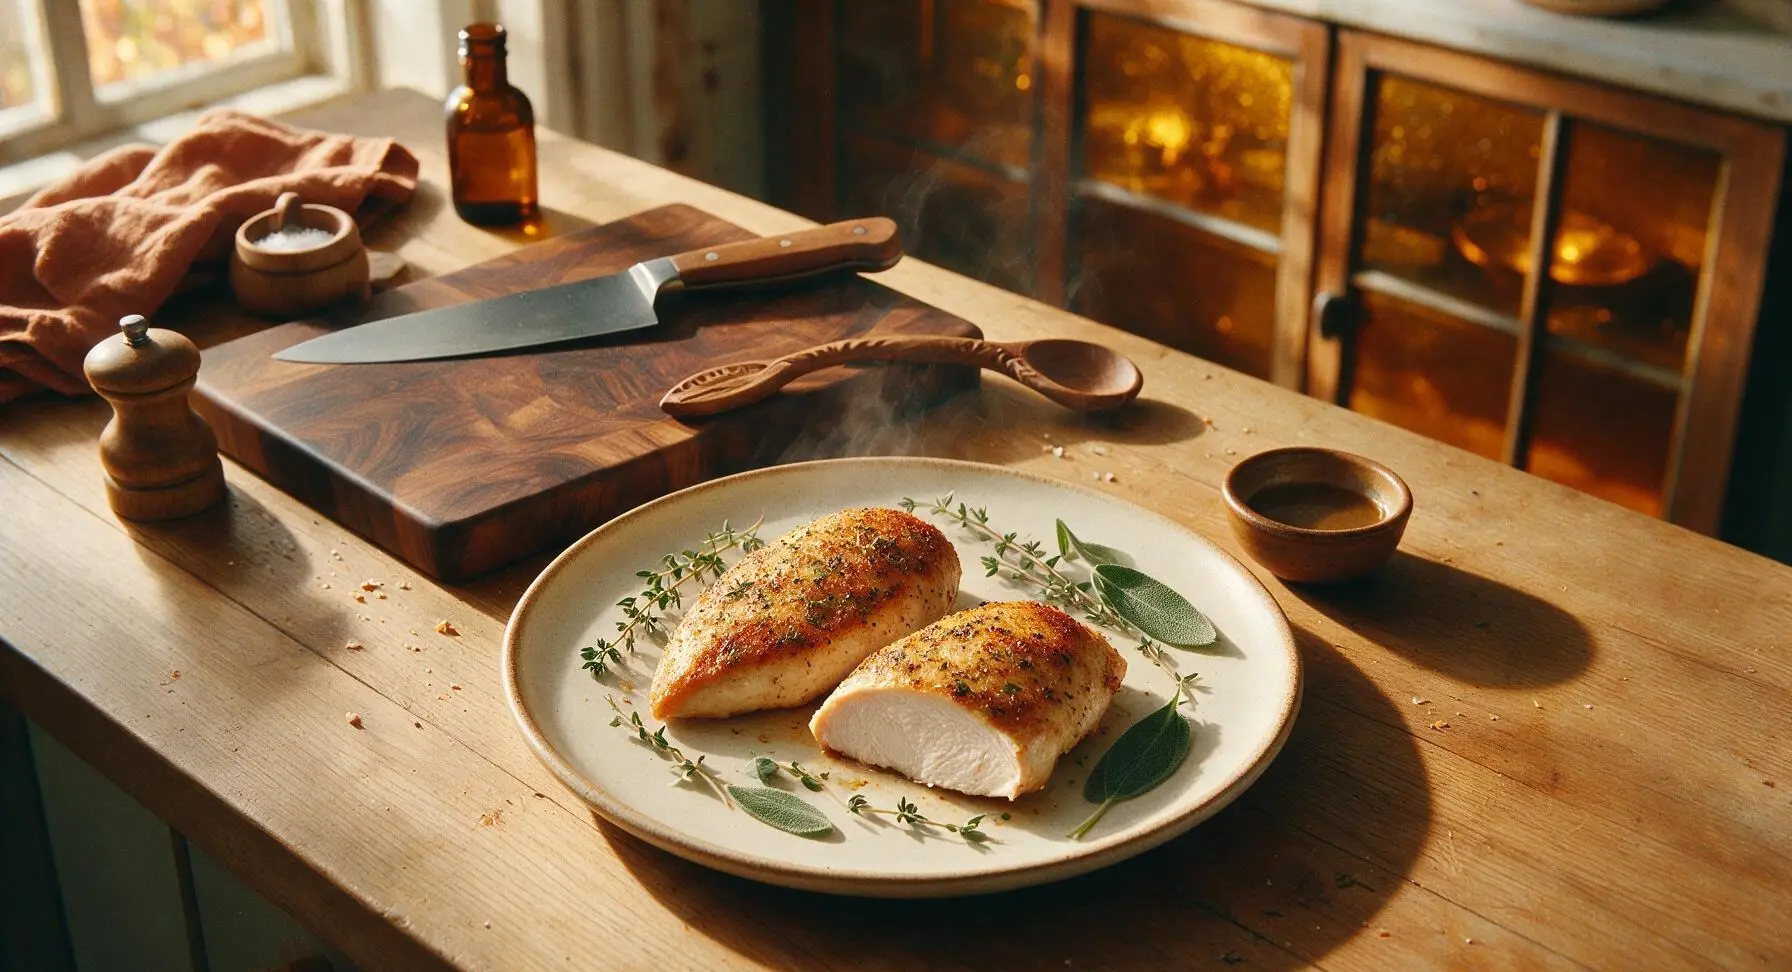
⏱️ cook time 15 minutes
🍽️ servings 4
⚡ Difficulty easy

intro

Crisp golden-crusted pan-fried boneless chicken breast with juicy, tender evenly cooked interior—simple, versatile, and perfect for fast, satisfying weeknight meals.

Ingredients
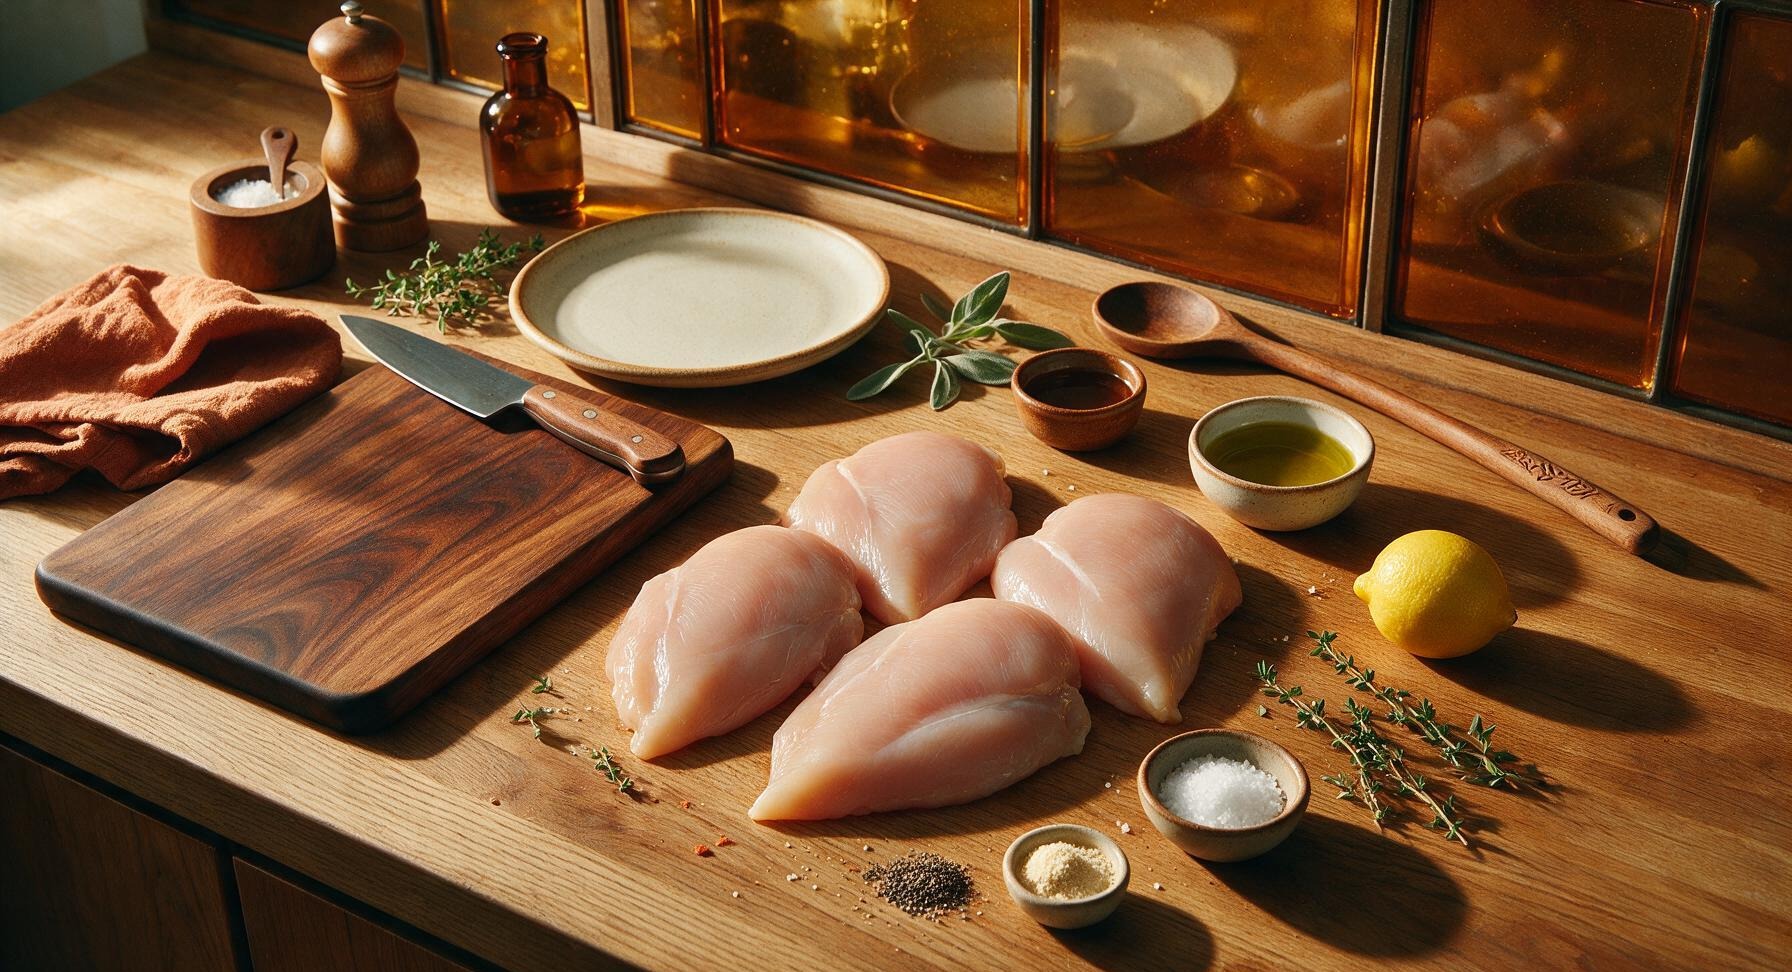
Boneless skinless chicken breasts 600g (4 x 150g pieces)
Extra-virgin olive oil 1 tablespoon
Kosher salt 1 teaspoon
Freshly ground black pepper ½ teaspoon
Garlic powder ½ teaspoon
Smoked paprika ¼ teaspoon
Fresh thyme sprigs 2 pieces
Small lemon 1 piece

Steps

1

Pound to Even Thickness

Working one at a time, place each raw chicken breast between two sheets of parchment paper on the maple wood cutting board. Using the stainless steel meat pounder, gently tap the thicker, tapered end of each breast until the entire piece reaches a uniform 2cm (¾ inch) thickness. This eliminates uneven cooking where the thin end dries out before the thick end finishes cooking. Discard the top sheet of parchment once all breasts are pounded.
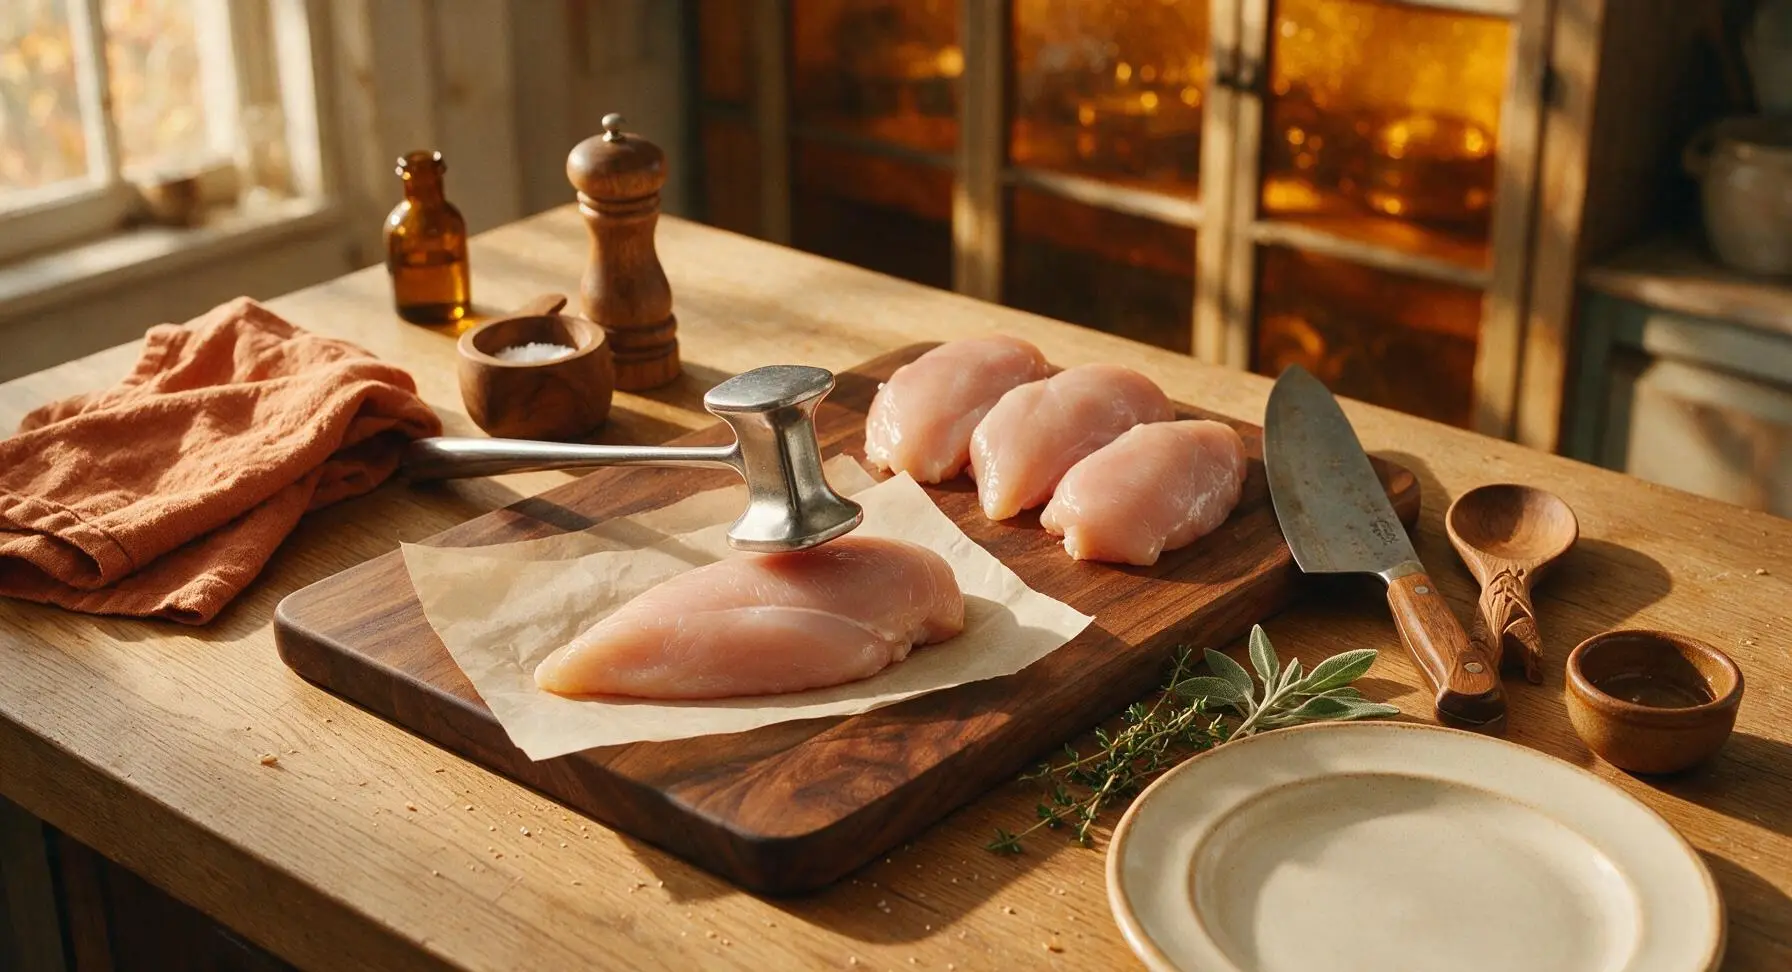
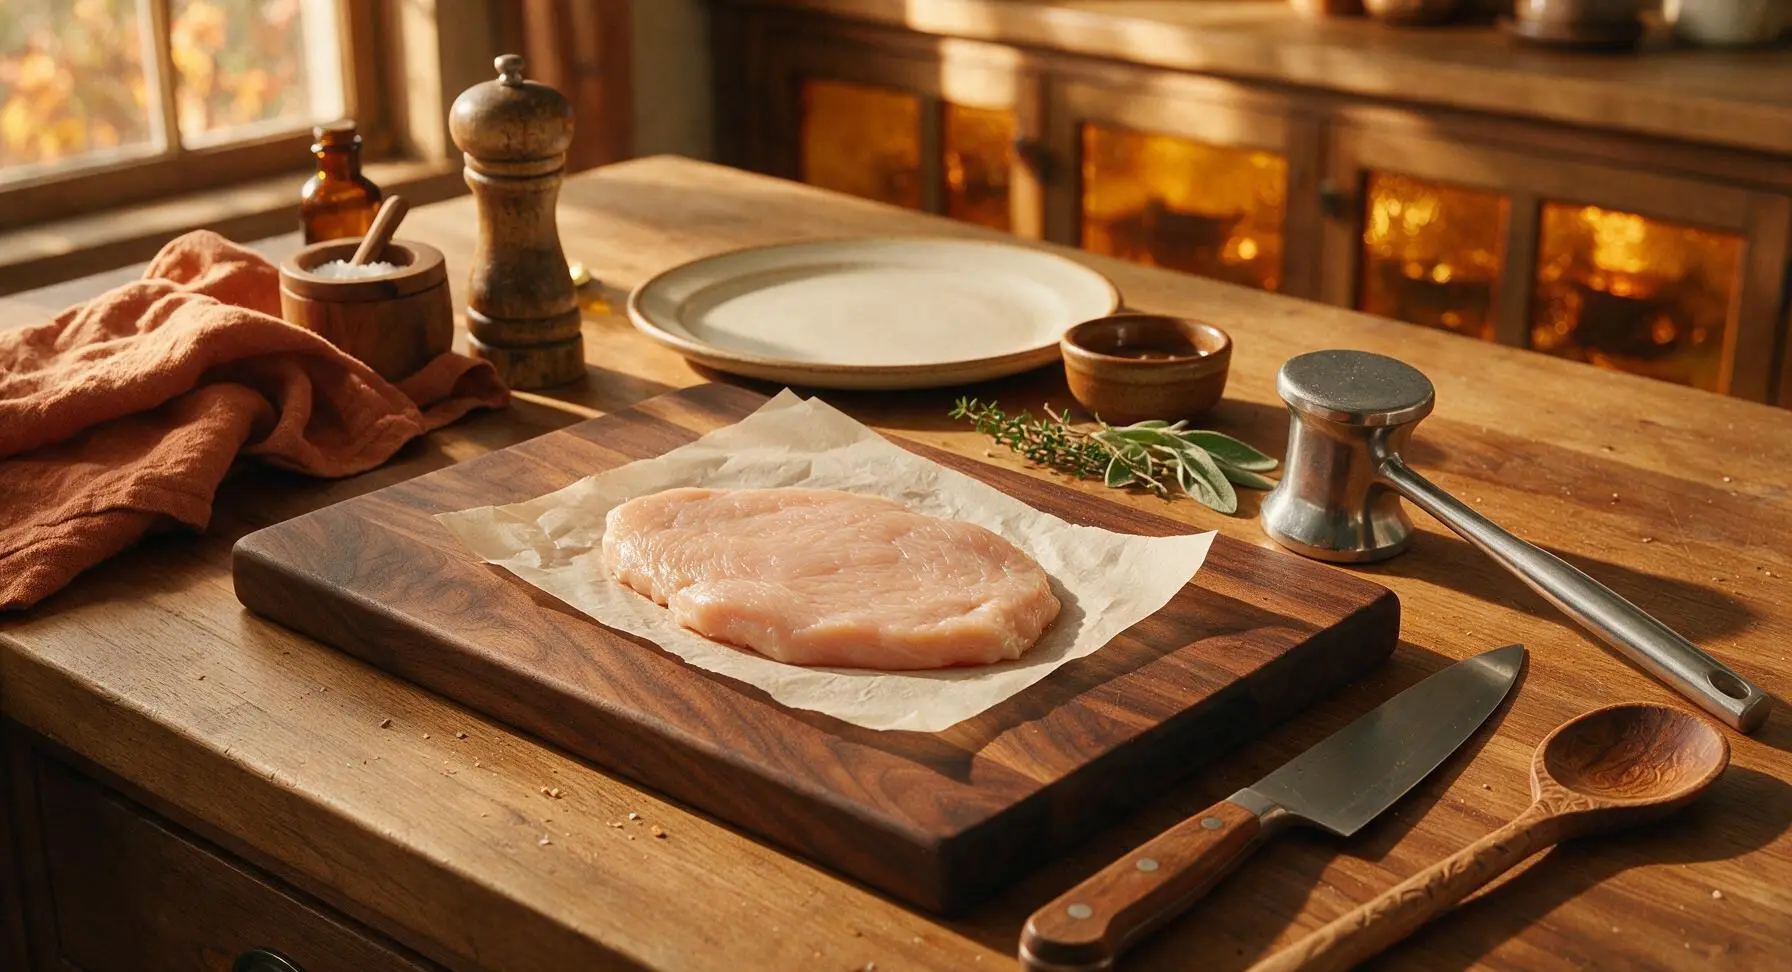
Step 1
step1:Pound to Even Thickness
Step 1
step1:Pound to Even Thickness
2

Pat Dry and Season

Pat all surfaces of the pounded chicken completely dry with paper towels—this is critical for developing a crisp, golden crust, as surface moisture creates steam that prevents browning. Mix the kosher salt, black pepper, garlic powder, and smoked paprika in one of the small glass ramekins until evenly combined. Sprinkle two-thirds of the spice mix evenly over one side of the chicken, pressing gently to help spices adhere, then flip each breast and season the second side with the remaining mix. Let seasoned chicken rest 5 minutes at room temperature to allow salt to penetrate the meat.
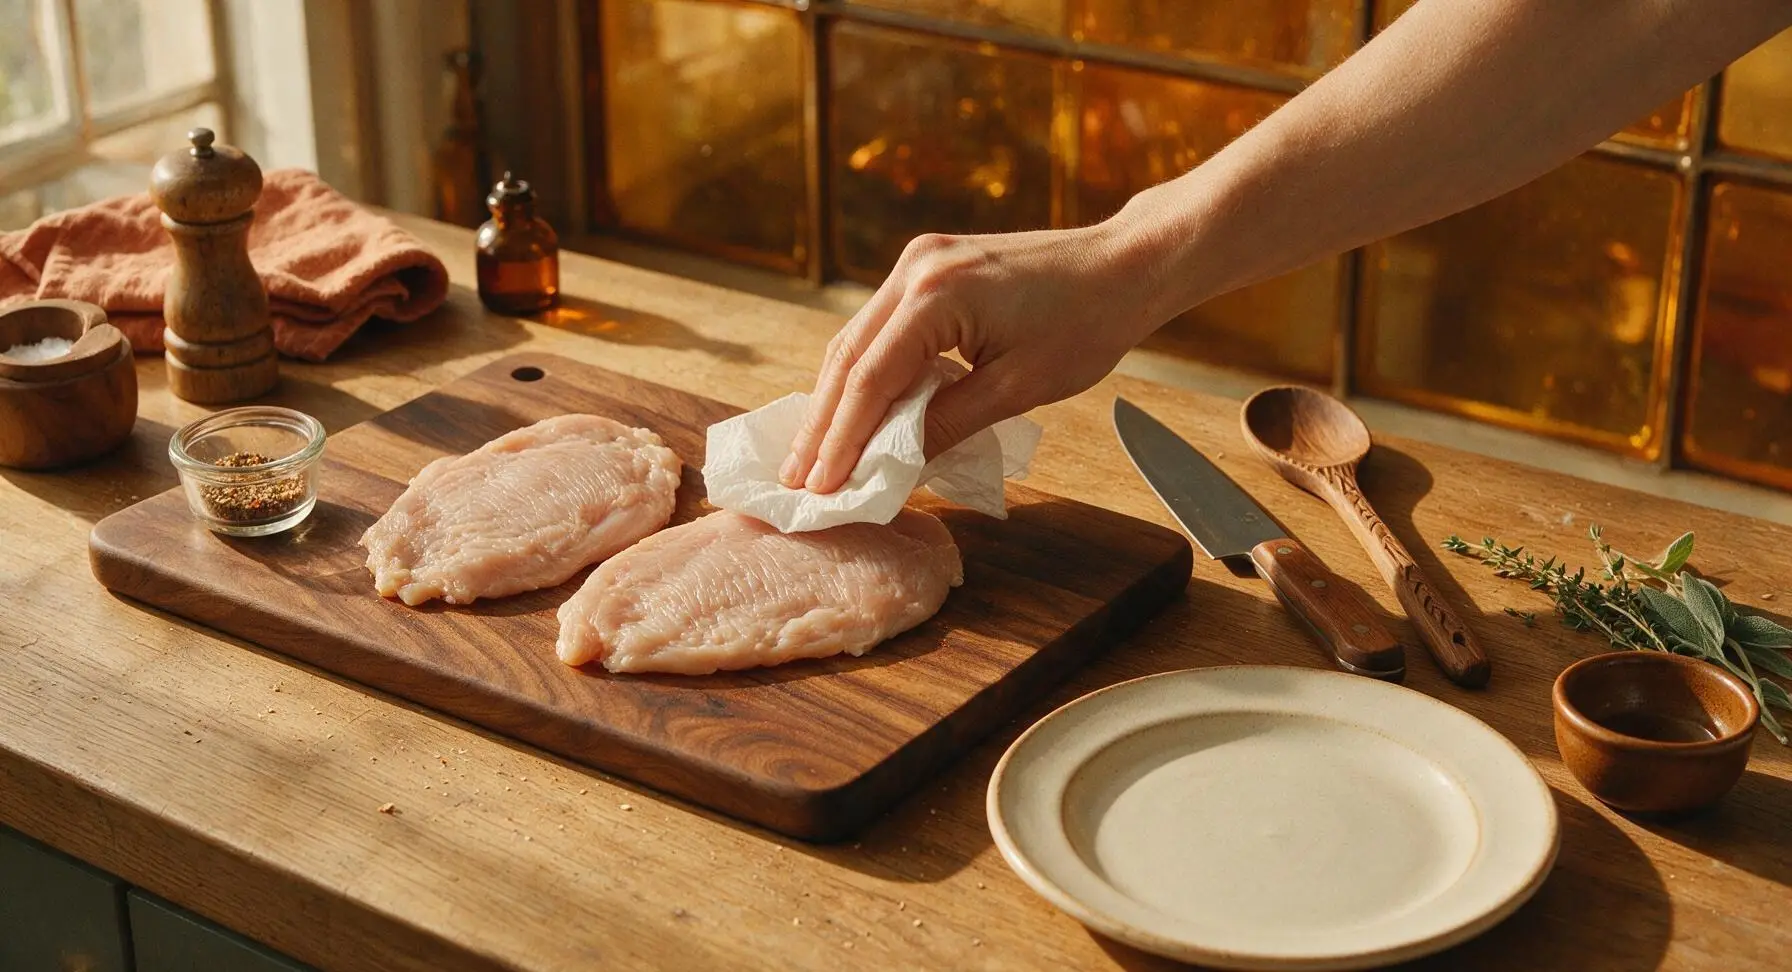
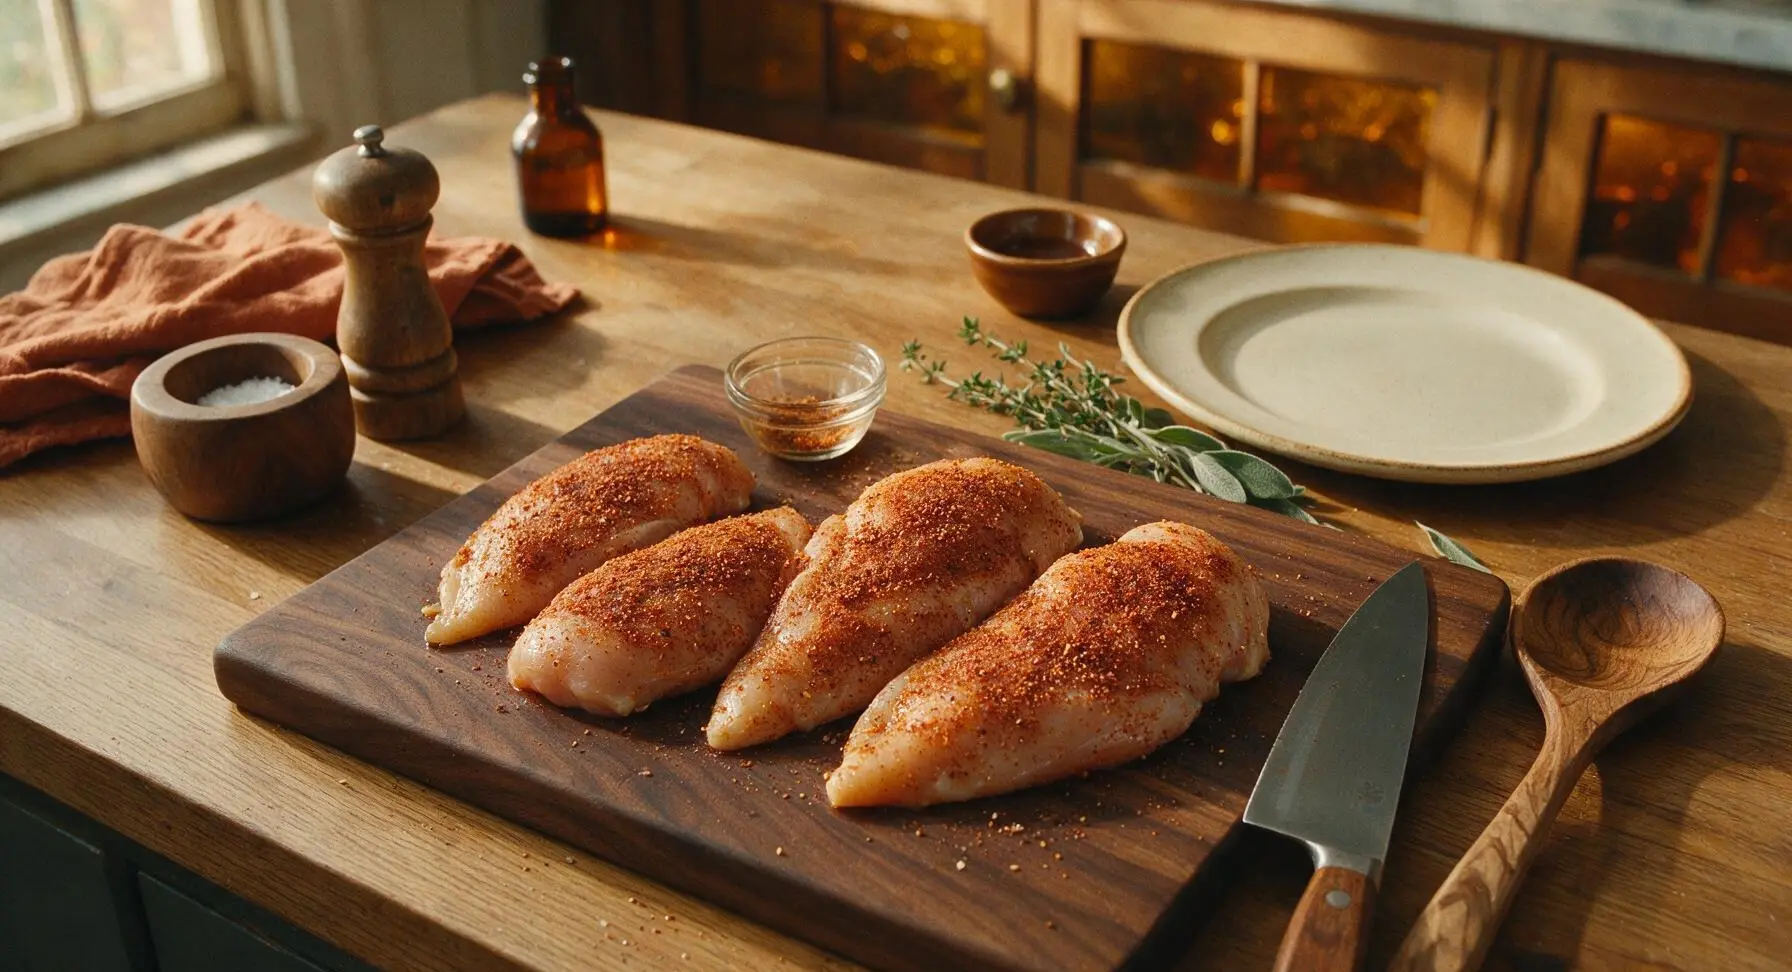
Step 2
step2:Pat Dry and Season
Step 2
step2:Pat Dry and Season
3

Preheat Pan and Oil

Turn the stovetop burner under the 12-inch stainless steel skillet to medium heat, bringing the pan surface to 375°F / 190°C. Add the 1 tablespoon of extra-virgin olive oil, and heat for 2-3 minutes until the oil shimmers across the pan bottom and sends up thin, faint wisps of heat haze. Do not add chicken before the oil is hot, as cold oil causes chicken to stick and prevents crust formation.
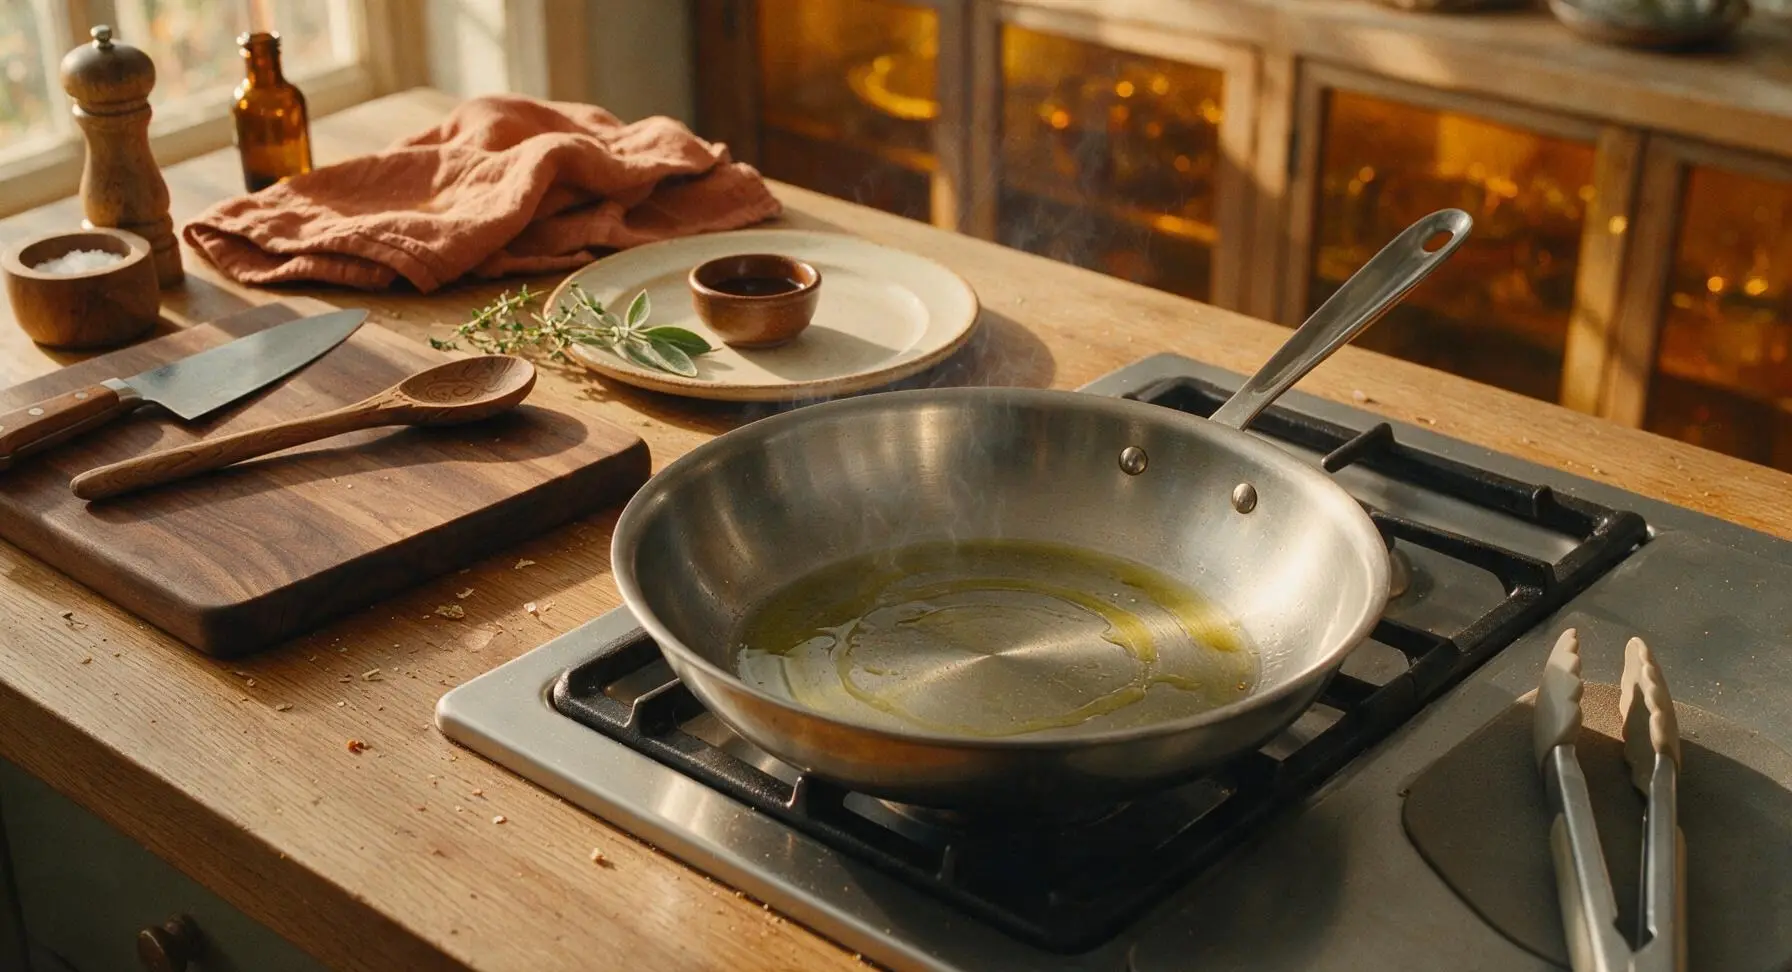
Step 3
step3:Preheat Pan and Oil
4

Sear First Side Undisturbed

Carefully lower each seasoned chicken breast into the hot oil using the silicone-tipped tongs, laying pieces away from your body to avoid hot oil splatter. Do not crowd the pan—cook in two batches if breasts touch when placed in the skillet. Let chicken cook completely undisturbed for 6 full minutes: do not lift, move, or press down on the chicken during this time, as this breaks the forming crust and releases flavorful juices. The first side will have a deep, even golden-brown crust when ready to flip.
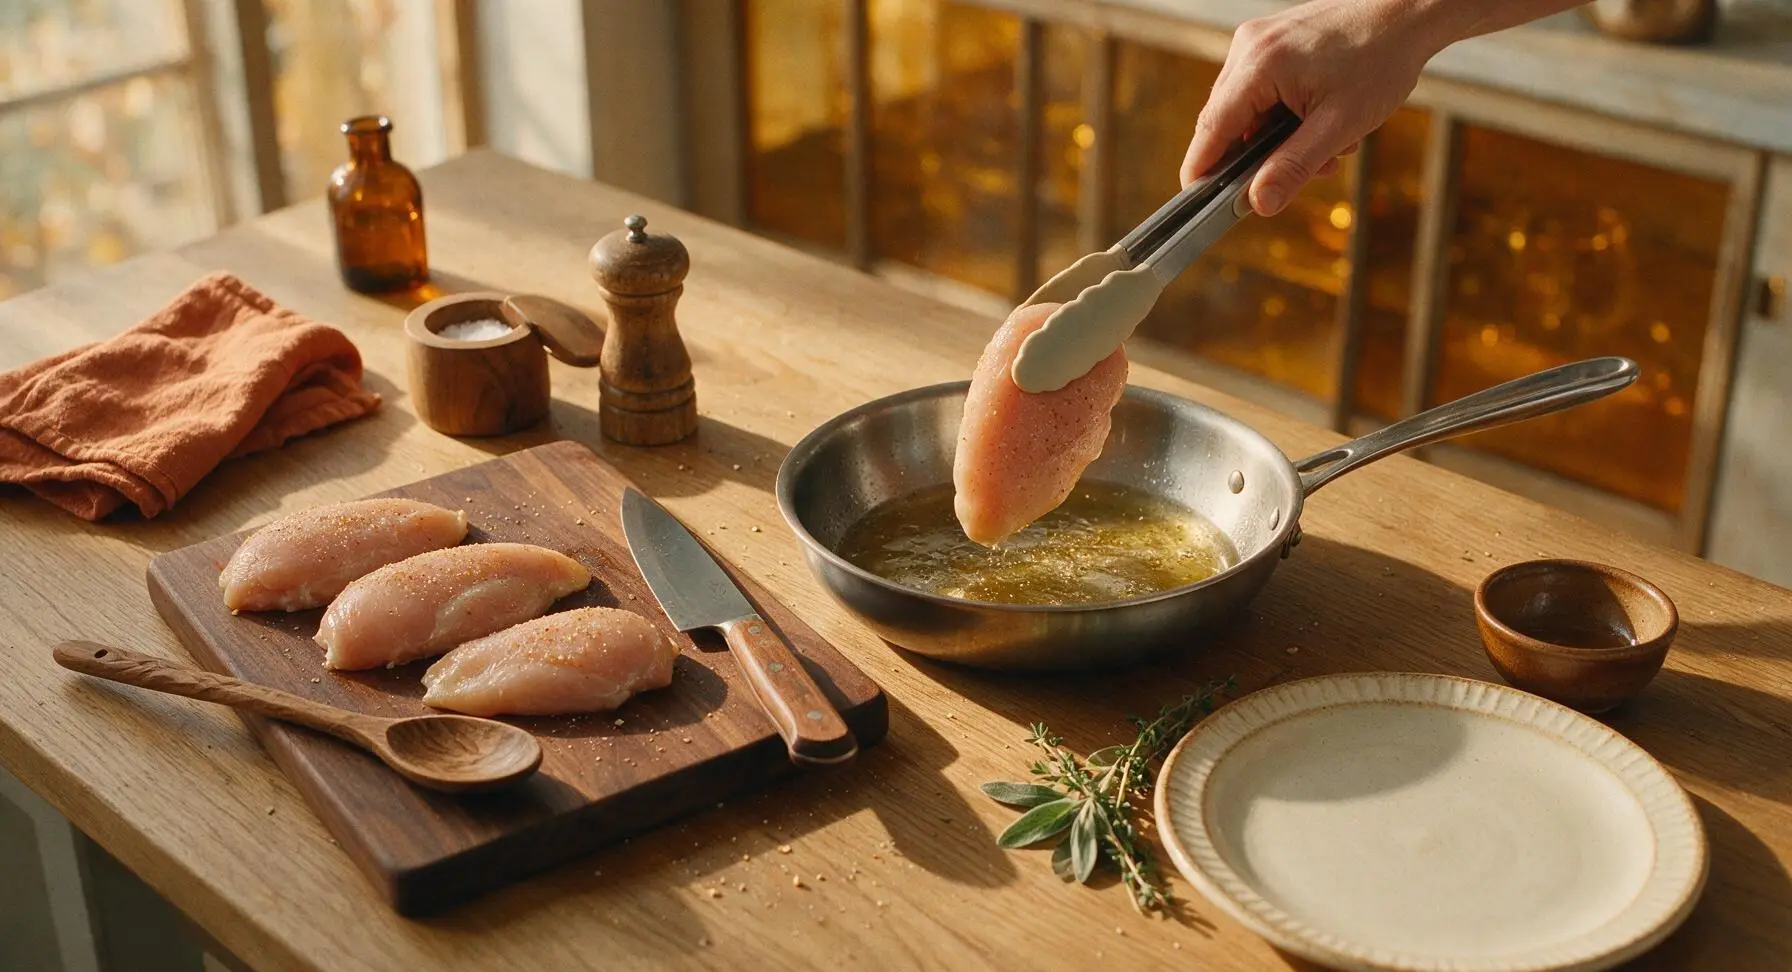
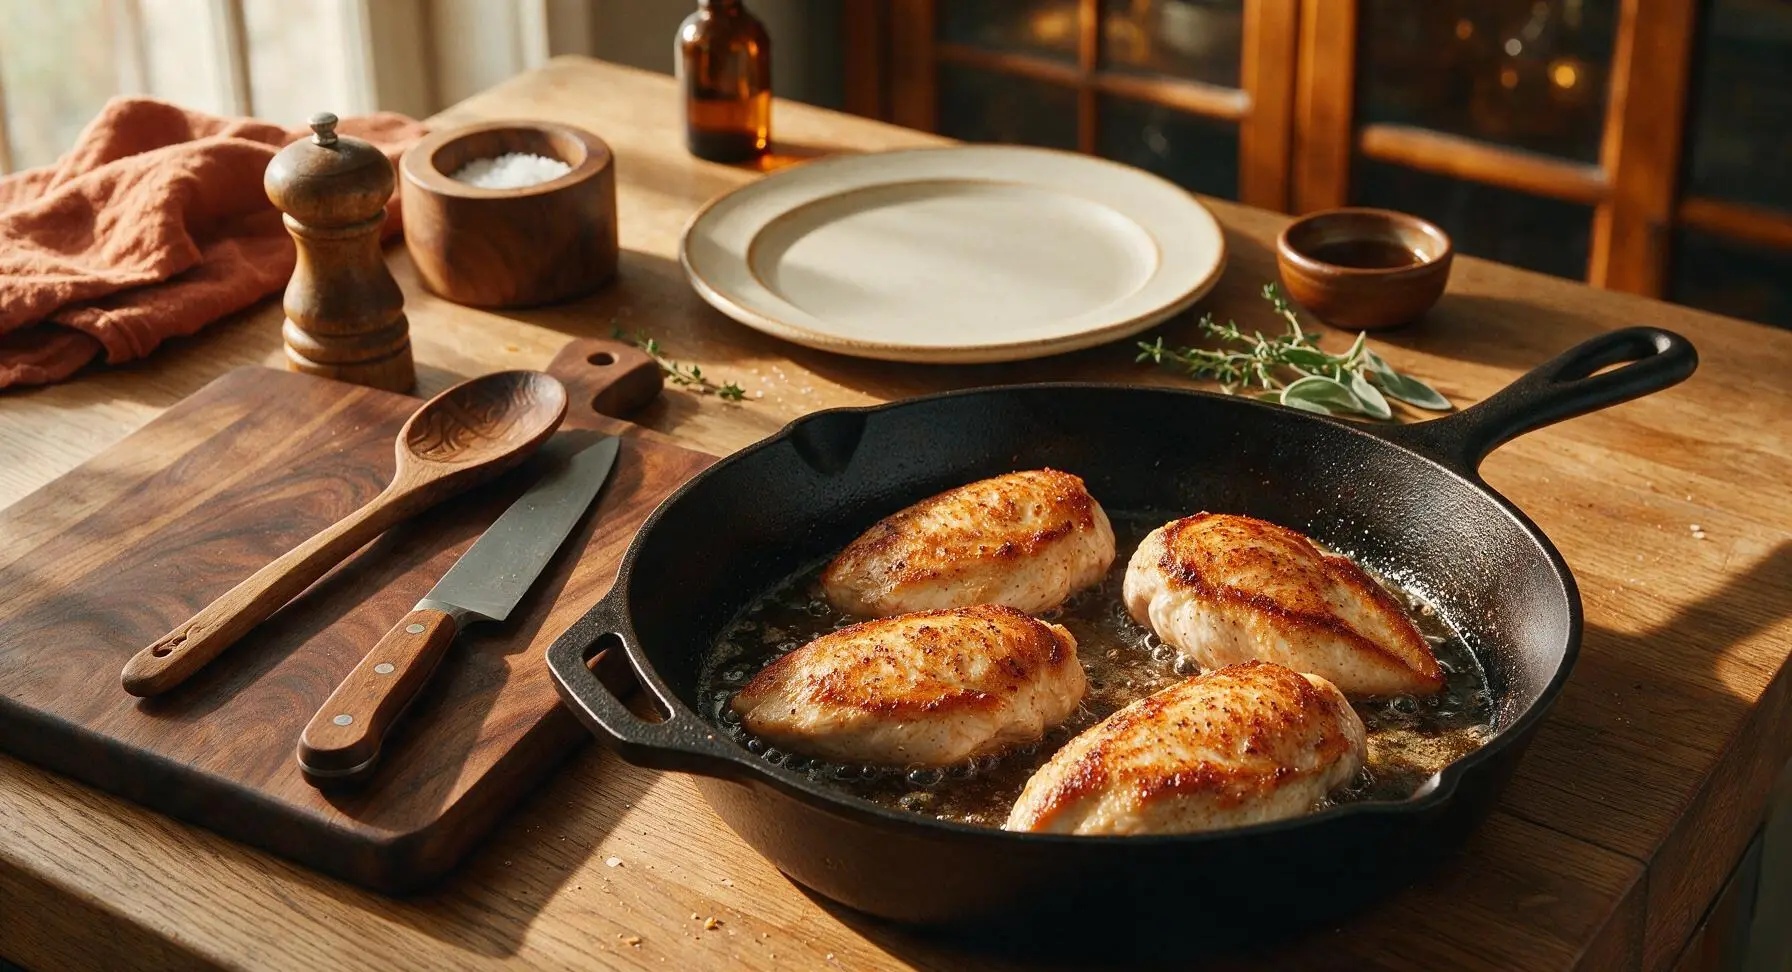
Step 4
step4:Sear First Side Undisturbed
Step 4
step4:Sear First Side Undisturbed
5

Flip and Cook Through

Use the silicone-tipped tongs to flip each chicken breast to its second side. Add the fresh thyme sprigs to the hot oil in the pan, tilting the pan slightly to let the hot, thyme-infused oil run over the base of the chicken for 10 seconds. Continue to cook the second side undisturbed for 5-6 minutes, until the instant-read thermometer inserted into the thickest part of the breast reads 160°F / 71°C. Carryover cooking will raise the internal temperature to the food-safe 165°F / 74°C as the chicken rests, preventing overcooked, dry meat.
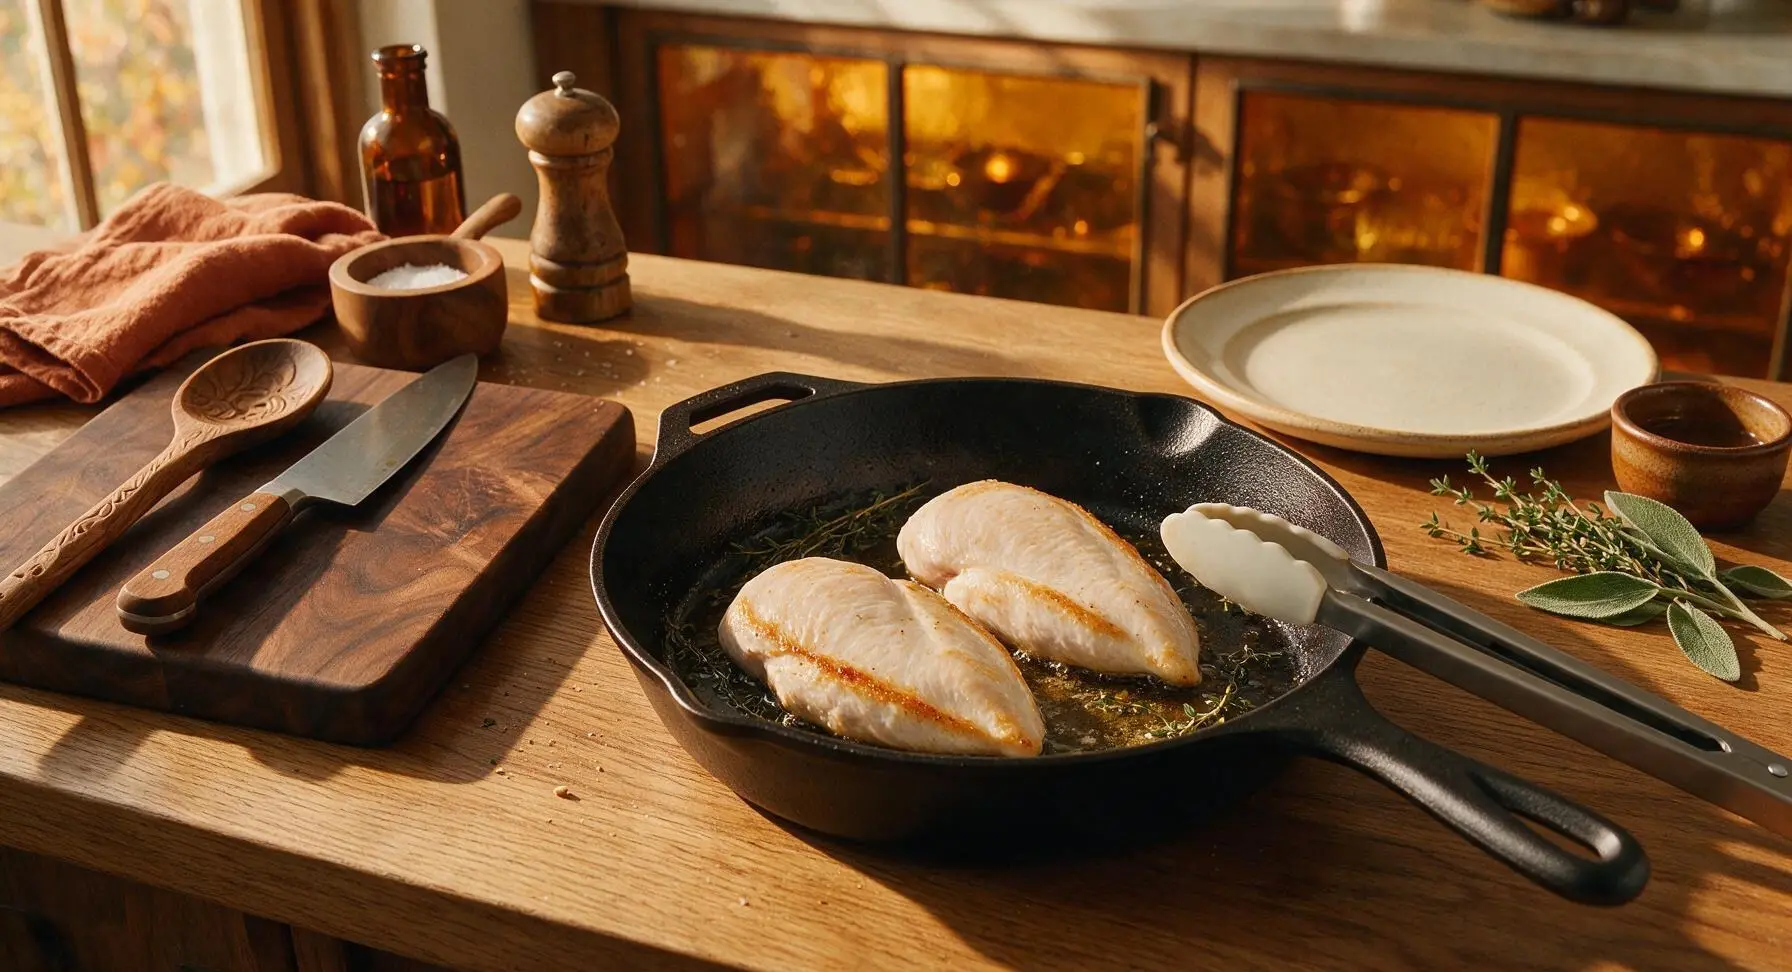
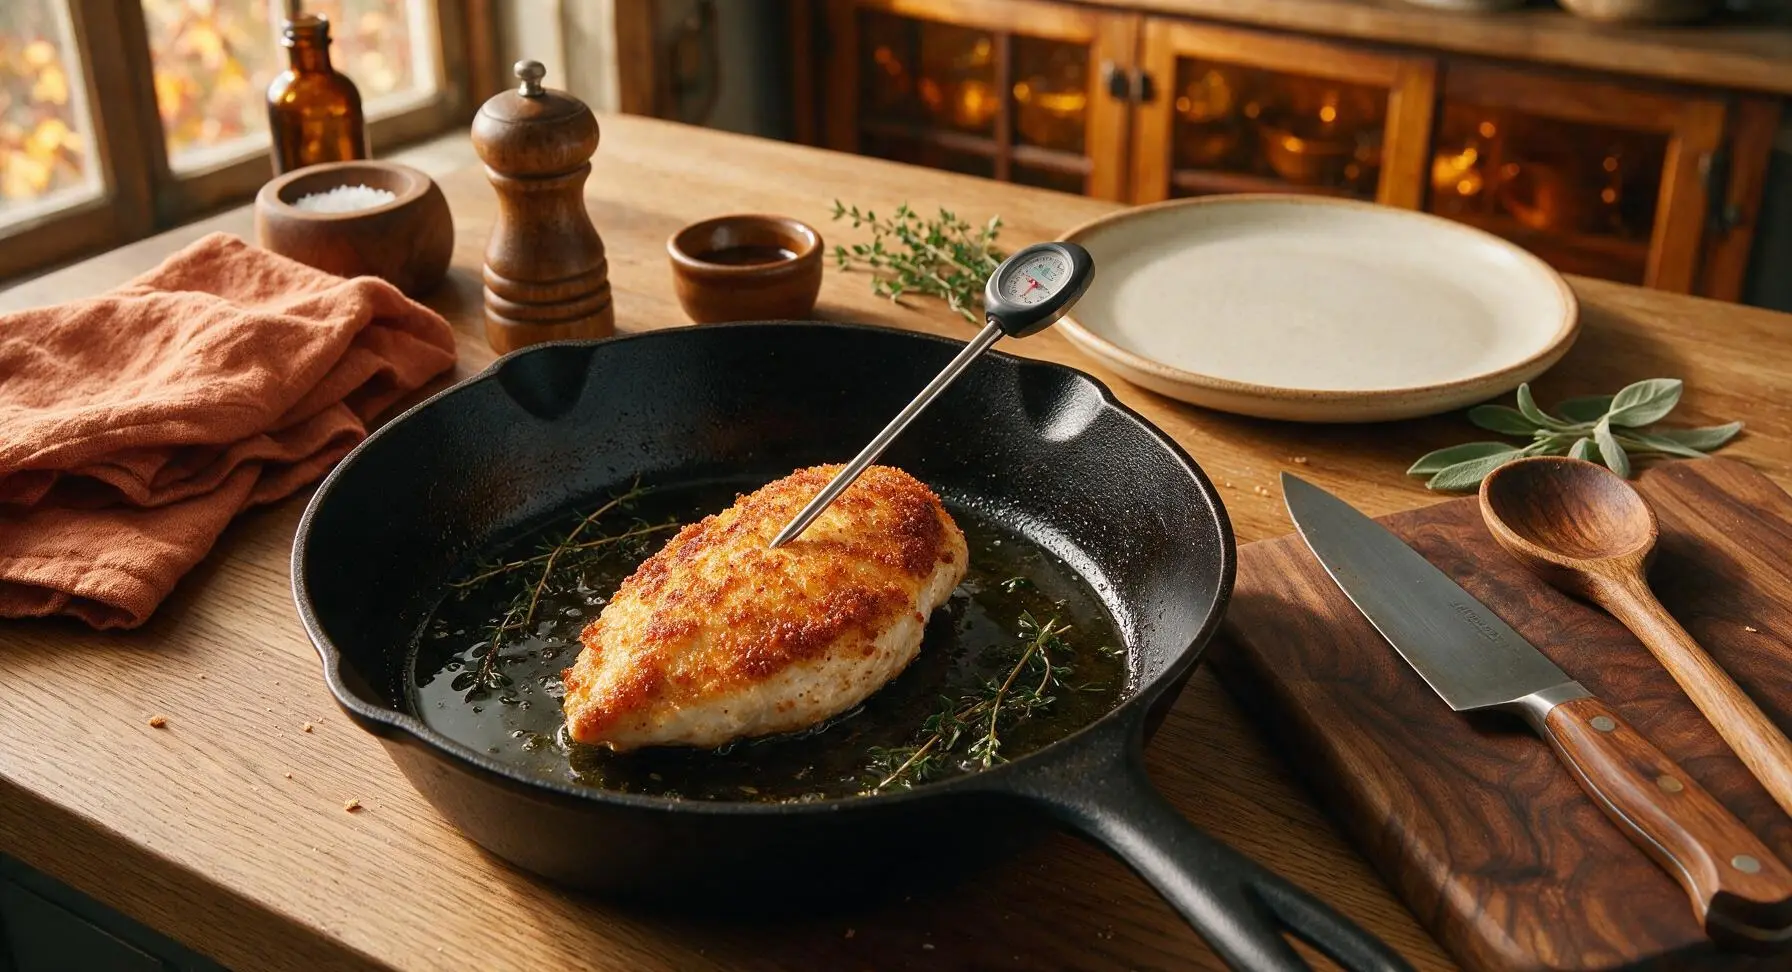
Step 5
step5:Flip and Cook Through
Step 5
step5:Flip and Cook Through
6

Rest Cooked Chicken

Use the silicone-tipped tongs to transfer all cooked chicken breasts from the skillet to the matte warm off-white ceramic dinner plate. Loosely tent the plate with a small sheet of aluminum foil, and let chicken rest for 5 full minutes. This rest period allows muscle fibers to relax and reabsorb trapped juices, ensuring every bite is juicy instead of juice running out onto the plate when sliced. Never skip this step.
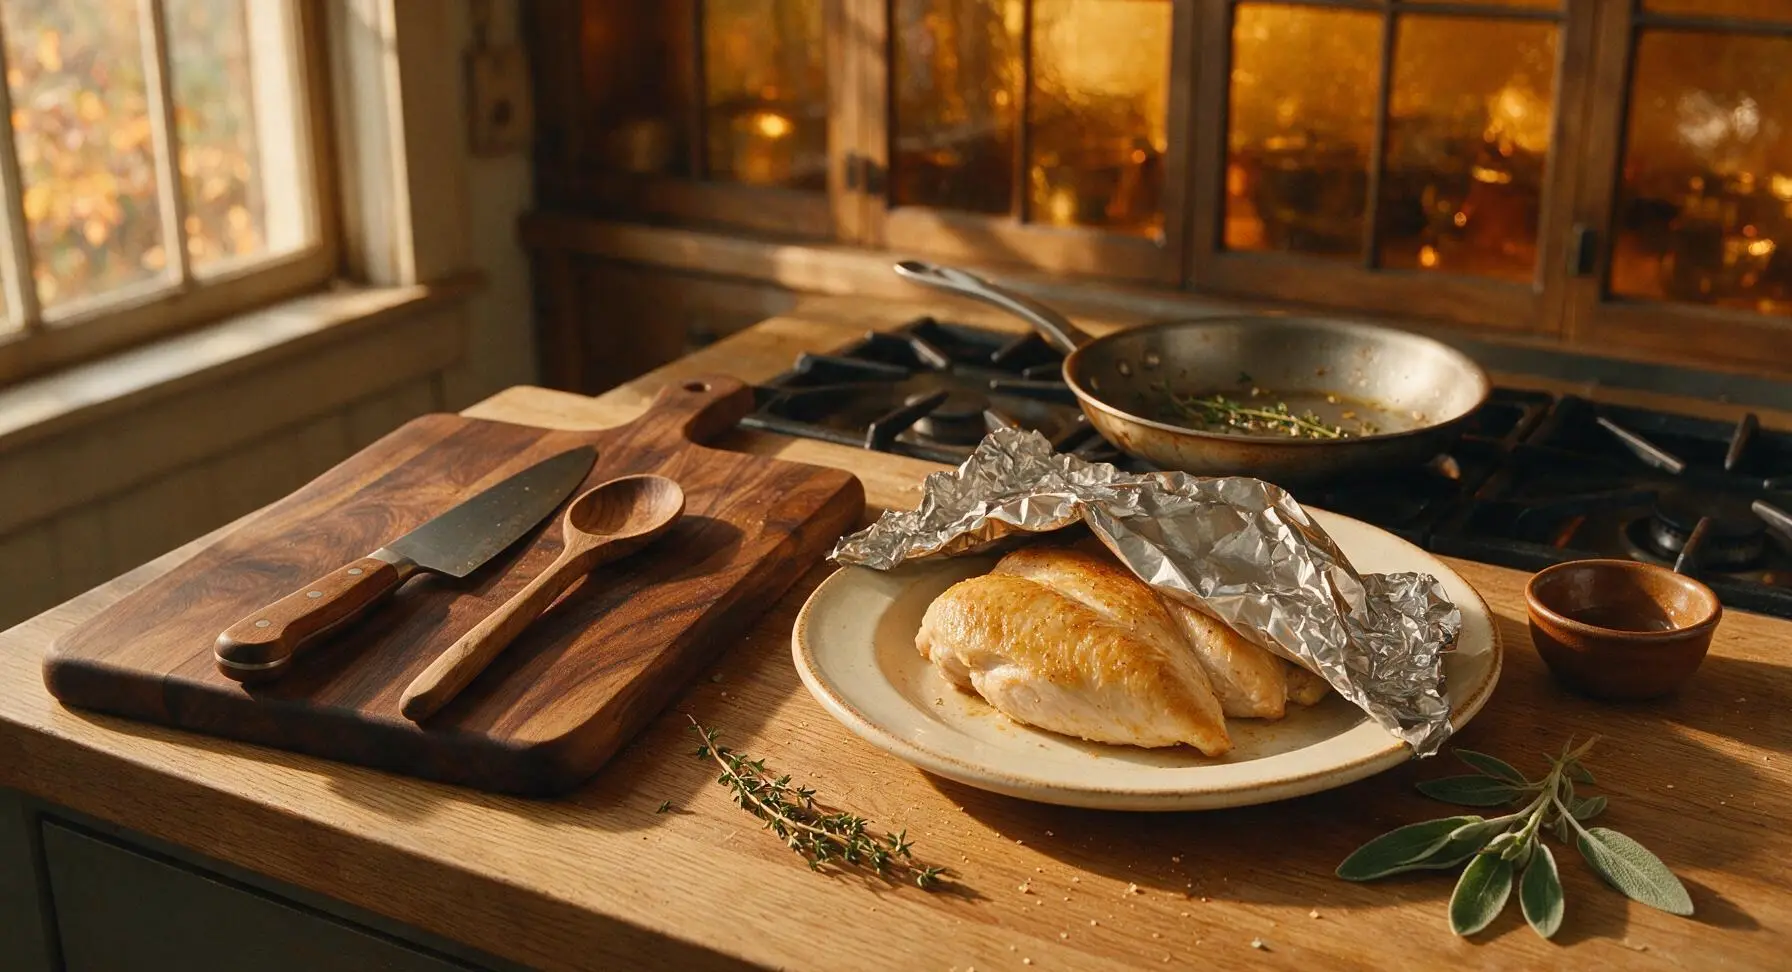
Step 6
step6:Rest Cooked Chicken
7

Slice and Plate

After the 5-minute rest, remove the aluminum foil tent. Transfer chicken breasts one at a time back to the maple wood cutting board, and use the walnut-handled chef knife to slice each breast against the grain into 1cm (½ inch) thick slices. Arrange sliced chicken back on the off-white dinner plate, squeeze a light drizzle of fresh lemon juice over the top, and garnish with a fresh thyme sprig to serve.
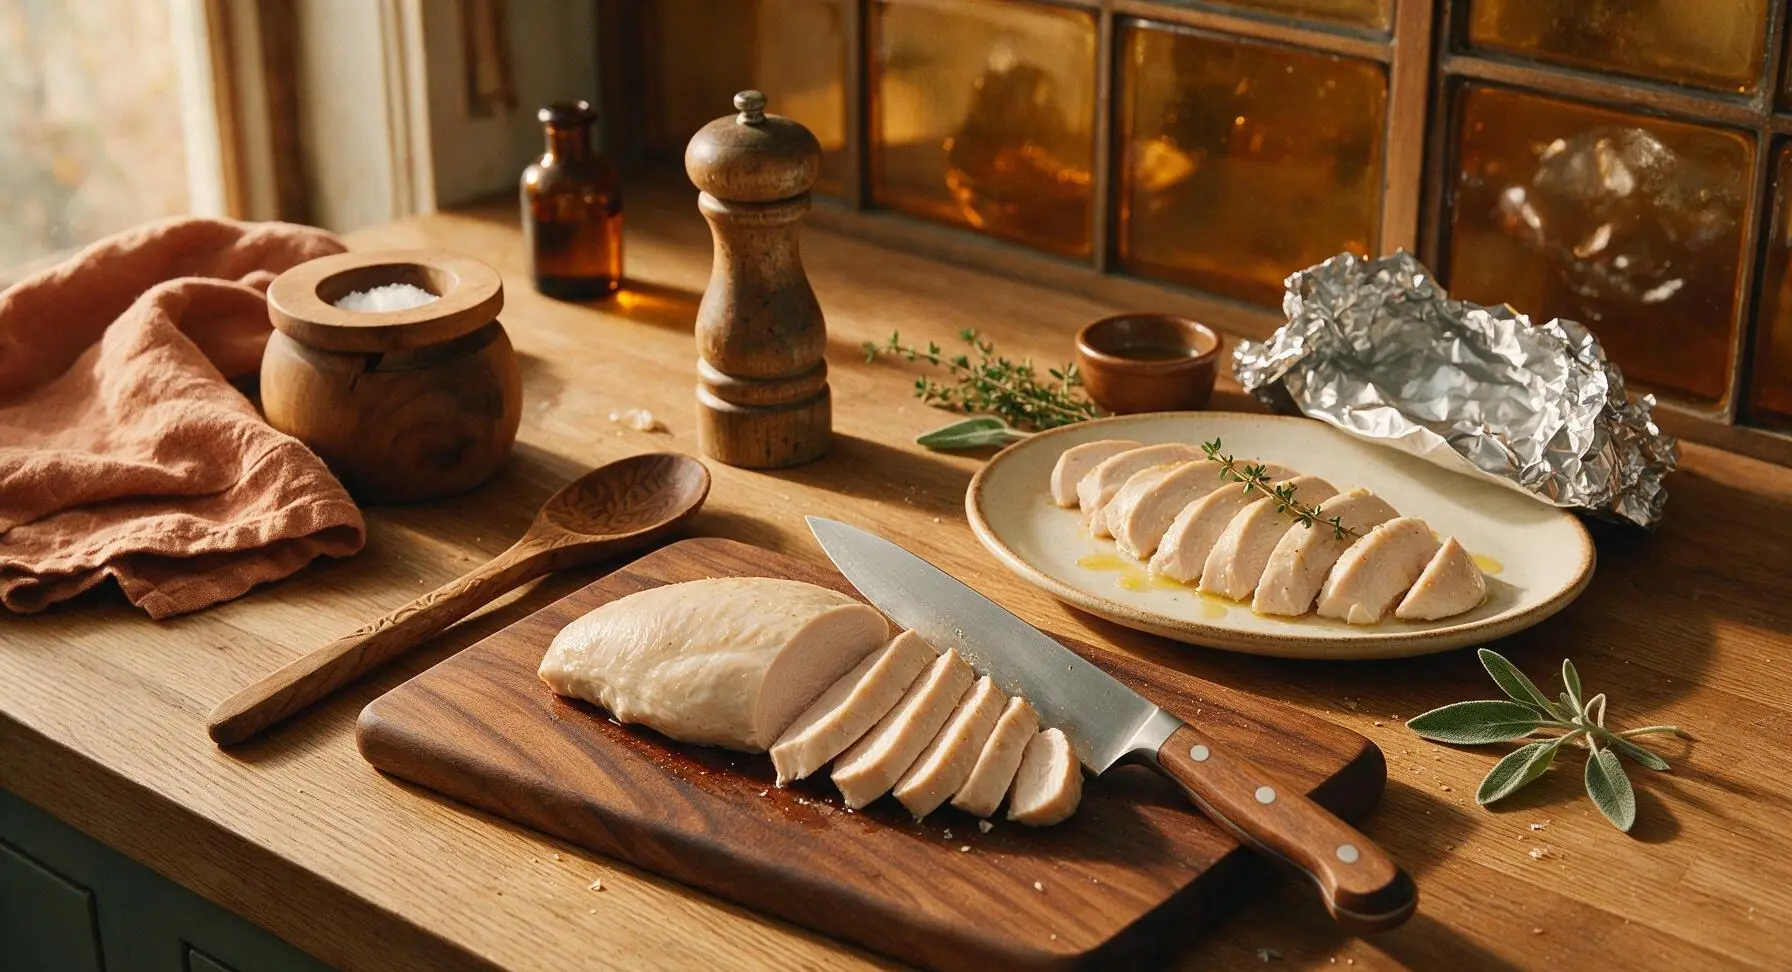
Step 7
step7:Slice and Plate

Tips

1.Always pat chicken completely dry with paper towels before seasoning. Any residual moisture on the meat surface will create steam in the hot pan, preventing the Maillard reaction that forms a crisp, flavorful golden crust and leading to pale, stuck chicken.
2.Resist the urge to lift, move, or press down on chicken while it sears. Moving the meat early breaks contact between the chicken and hot pan, interrupting crust formation, and pressing squeezes out the internal juices that keep chicken tender and moist.
3.Remove chicken from the pan when it reaches 160°F (71°C) internal temperature, not 165°F (74°C). Residual carryover cooking will raise the temperature 5 degrees during the rest period, and pulling the chicken early eliminates the dry, rubbery texture that gives pan-fried chicken breast a bad reputation.


✨ You May Also Like

Main Course
🍜 United Kingdom

A showstopping classic of tender seared beef, savory mushroom duxelles, and crisp prosciutto wrapped in flaky golden puff pastry, baked to juicy perfection.

⏱️ 2 hours 1Main Course ★ 4.7
Main Course
🍜 India

Tender charred marinated chicken simmered in a rich, spiced creamy tomato sauce, this iconic Anglo-Indian curry pairs perfectly with basmati rice or warm naan.

⏱️ 50 minuteMain Course ★ 4.6
Main Course
🍜 Thailand

Classic tangy, sweet, and savory Thai stir-fried rice noodles with shrimp, tofu, and crunchy garnishes, balancing all five core Thai flavor profiles.

⏱️ 30 minuteMain Course ★ 4.5
Main Course
🍜 United Kingdom

Crispy golden beer-battered cod and fluffy double-fried chips, served with tangy tartar sauce and malt vinegar: the timeless, beloved British pub comfort classic.

⏱️ 45 minuteMain Course ★ 4.7
Main Course
🍜 Mexico

Smoky, chile-marinated pork tacos with caramelized pineapple, fresh cilantro, and lime: a beloved classic Mexican street food perfect for casual summer gatherings.

⏱️ 1 hour 45Main Course ★ 4.8
Main Course
🍜 United States

Crunchy Fritos corn chips layered with savory beef chili and melted cheddar, topped with cool, zesty fixings for a beloved, cozy Tex-Mex comfort food.

⏱️ 35 minuteMain Course ★ 4.8

pan frying boneless skinless chicken breast:Frequently Asked Questions

1.Why does my pan-fried chicken breast always turn out dry instead of juicy? ▾
That almost always stems from two common mistakes: uneven breast thickness leading to overcooked thin edges, and cooking straight to 165°F in the pan. Pound breasts to a uniform 1-inch thickness first, pat them completely dry before seasoning, pull them at 160°F internal temp, then rest 5 minutes for carryover cooking to lock in every bit of juice.
2.Do I really need to pound chicken breasts before pan-frying them? ▾
Absolutely, if you want consistently even, tender results. Most raw breasts have a thick, bulbous end and a thin, tapered end—if you cook them as-is, the thin section will turn tough and dry long before the thick part cooks through. Pound to a consistent 1-inch thickness with a meat mallet or heavy-bottomed skillet for the best texture.
3.How hot should my pan be to get a crisp golden crust without burning the seasoning? ▾
Heat your skillet over medium-high first, then add olive oil and wait until it shimmers (but doesn’t smoke) before adding chicken. That heat is hot enough to trigger the Maillard browning reaction for a crisp crust, but not so hot that garlic powder and pepper burn before the chicken cooks through. Don’t move the chicken for the first 4 minutes to let the crust set.
4.Can I season the chicken ahead of time, or do I have to season right before cooking? ▾
You can absolutely season ahead, and it actually makes the chicken more flavorful! If you have 1 to 24 hours, season breasts with salt, pepper, and garlic powder, then store covered in the fridge. The salt will draw out moisture that reabsorbs to season meat all the way through; just pat dry again before frying for a crisp crust.
5.How do I tell when chicken is done without cutting into it and losing juices? ▾
Skip cutting into it—that lets all those delicious juices run out onto your cutting board. The most reliable method is to use an instant-read thermometer inserted into the thickest part of the breast: pull it from the pan when it hits 160°F. During the 5-minute rest, carryover cooking will bring it to the food-safe 165°F.
6.Is extra-virgin olive oil the best option here, or can I use a different cooking fat? ▾
Extra-virgin olive oil works great because we cook over medium-high, not ultra-high heat, so it won’t smoke before the chicken is done. If you don’t have it, swap in avocado oil, canola oil, or a mix of olive oil and 1 tablespoon unsalted butter for extra richness. Avoid strongly flavored oils like toasted sesame oil that will overpower the simple seasoning.
7.Why does my chicken stick to the pan even when I add enough oil? ▾
Sticking almost always happens for one of three reasons: your pan wasn’t hot enough when you added the chicken, you tried to flip too early before the crust formed, or you didn’t pat the chicken completely dry. Wait for oil to shimmer, lay chicken in the pan away from you, and don’t nudge it for 4 full minutes—it will release easily once the crust sets.
8.How long should I let cooked chicken rest, and why is that step necessary? ▾
Let cooked breasts rest on a clean plate or cutting board for 5 full minutes before slicing or serving. When chicken cooks, muscle fibers tighten and push juices toward the center; if you cut right in, those juices pour out onto your plate instead of staying in the meat. Resting lets fibers relax and reabsorb moisture for juicy bites.
9.What are easy, quick ways to switch up the flavor of this basic recipe? ▾
This simple base is incredibly versatile! Swap garlic powder for smoked paprika, Italian seasoning, or lemon zest for a fast twist, or add smashed garlic and a sprig of fresh thyme to the pan during the last 2 minutes, spooning infused oil over the chicken. A squeeze of fresh lemon right after cooking also brightens the flavor beautifully for weeknights.

Comments (6)

2 days ago

OMG this is SO good! I threw this together last minute after work when I realized I had nothing planned for dinner, and it turned out perfect. Seasoned simply with garlic powder, paprika, and a little salt and pepper like the recipe suggested, seared it up, and served it with roasted broccoli and rice. My husband said it’s better than the chicken we get at our local casual spot! Total win for a busy weeknight.

1 week ago

Was skeptical that pan-fried chicken breast could be this juicy without a marinade, but man, this method delivers. I pounded the breasts to even thickness like the tip said, and they cooked in exactly the 15 minutes listed, no raw spots, no dry chalky bits. Took a batch to a neighborhood potluck last weekend and people kept asking where I got the recipe. Will absolutely make again.

30 minutes ago

Quick question! I want to make a big batch of this for my weekly meal prep — how long does this stay good in the fridge for? I usually pack my lunches for 4 days at a time, would this hold up that long without getting weird?

5 minutes ago

Great question! This chicken stays fresh in an airtight container in the fridge for up to 4 days, so it’s perfect for your weekly meal prep! I recommend letting it cool completely before packing it up to keep it from getting soggy. Hope you love it!

yesterday

Tried this last night for taco night! Cut the cooked chicken up into little chunks, tossed it with a little taco seasoning, and it worked perfectly for soft tacos. So much faster than grilling, and my kids loved it — even my super picky 7 year old ate two whole tacos without complaining. Total game changer for busy school nights.

2 hours ago

Oh that’s such a good idea! I never thought to use this for taco night, I’ve just been serving it plain with roasted veggies. Gonna try that this week, thanks for the tip!

yesterday

Help! I tried this tonight and my chicken stuck really bad to the pan, and the outside got burnt before the inside was cooked all the way through. What did I do wrong? I was so excited for this, it looked so easy :(

2 hours ago

Oh girl I did the same thing my first try! You gotta make sure your pan is hot enough before you put the chicken down, and don’t move it around for the first 4-5 minutes. Also, make sure you pat the chicken totally dry with paper towels first — that’s the trick to no sticking and a nice crispy outside!

30 minutes ago

Great advice from @HomeCookKaren! The two most common missteps here are not drying the chicken surface fully and not letting the pan preheat for 2-3 minutes before adding oil and chicken. Also, double check that your chicken breasts are even thickness — if one end is super thick, it will take longer to cook through while the thin end burns. Give it another try, I bet it turns out perfect next time!

3 days ago

This is my new go-to chicken recipe! I’ve been tracking my protein intake for my gym routine, and this is so quick to make, no weird ingredients, and it comes out juicy every single time. I’ve made it three times in the last two weeks already. 10/10, no notes.

2 days ago

Same! I eat this almost every day for lunch post-workout, it’s way better than boiling chicken which tastes like straight cardboard. I add a little pinch of cayenne for a tiny kick, highly recommend that tweak!

yesterday

Love that cayenne add-in idea, Joe! So glad this recipe is fitting into your fitness routines — that’s exactly what we love to see. Thanks for coming back to leave such a nice note!



