
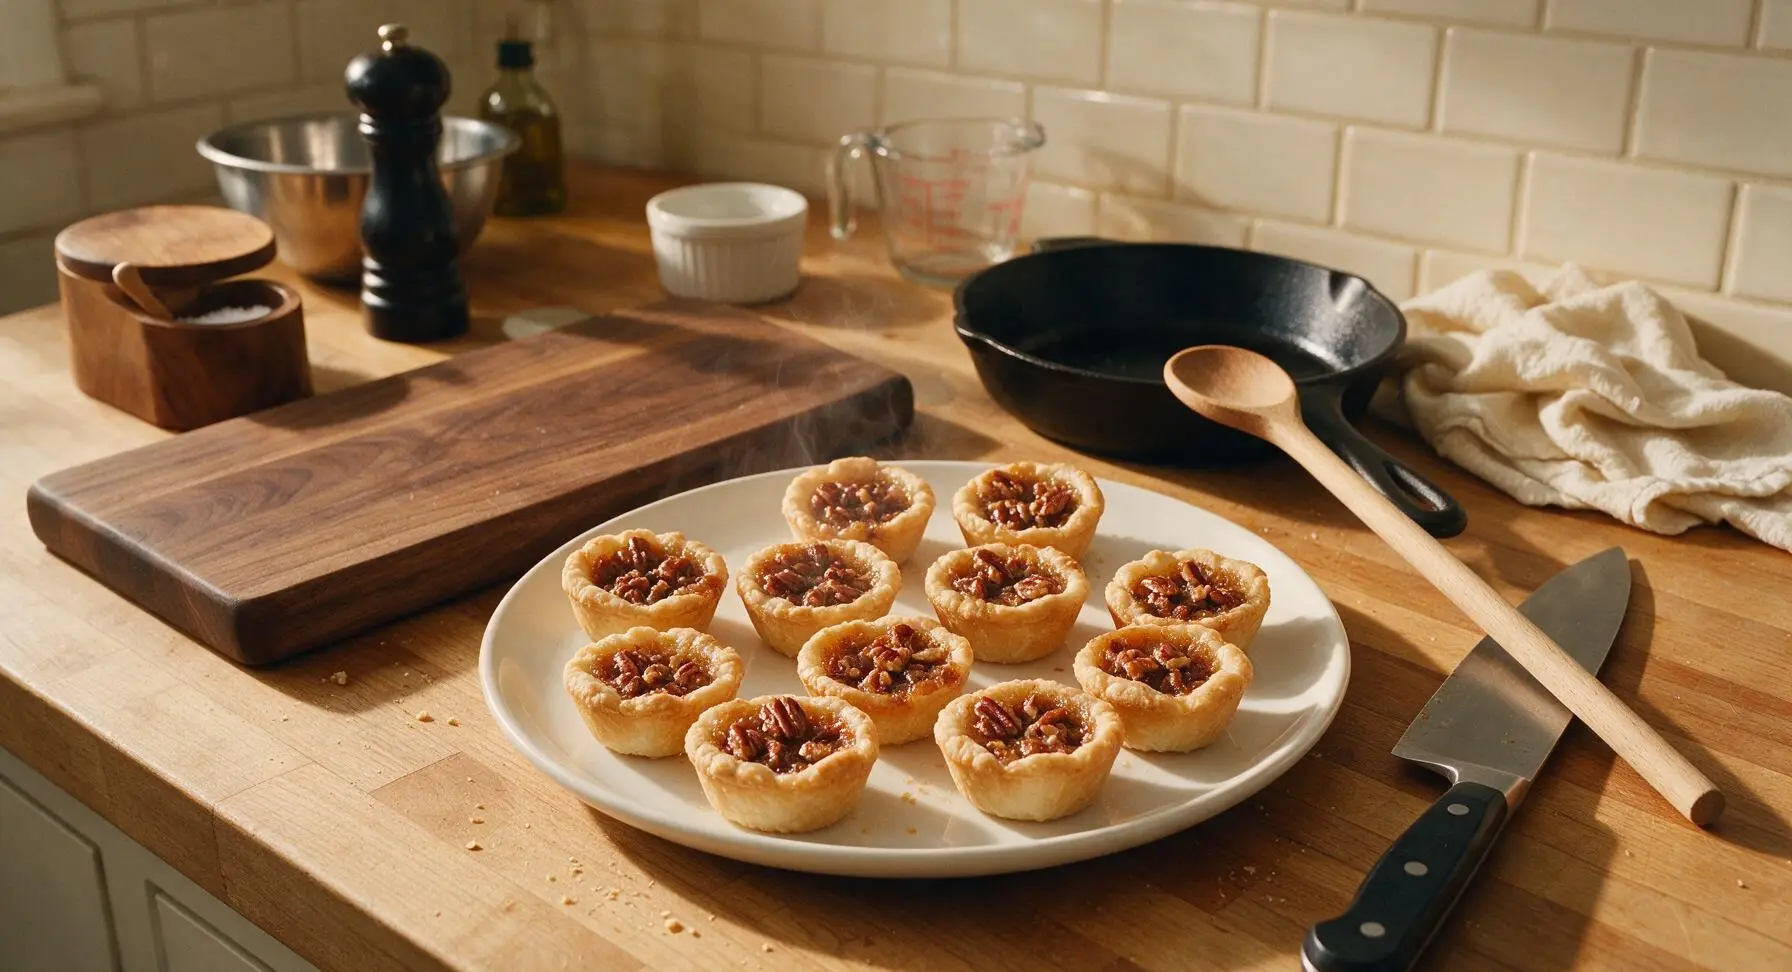
Pecan Tassies

title 1
Pecan Tassies
⏱️ cook time 20 minutes
🍽️ servings 12
⚡ Difficulty easy

intro

Buttery, melt-in-your-mouth cream cheese tart shells filled with gooey, caramelized pecan filling—these bite-sized mini tarts are a beloved holiday baking staple, perfect for cookie trays and small dessert bites.

Ingredients
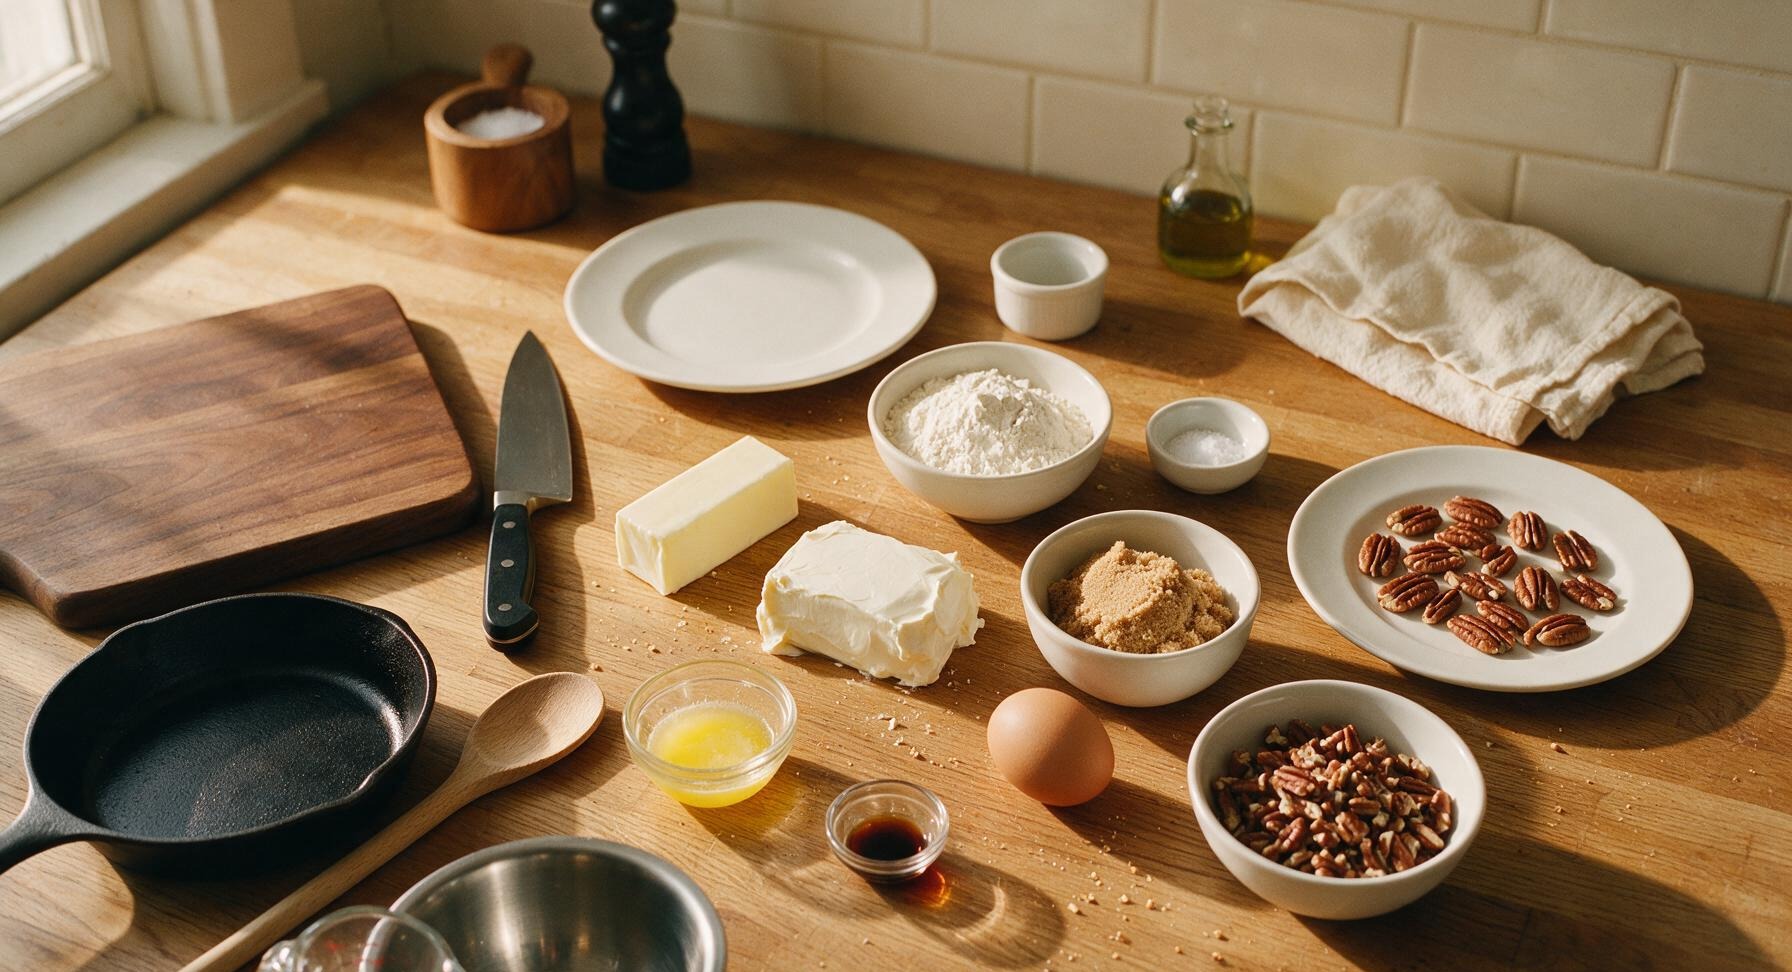
Full-fat block cream cheese 85g (3 oz), softened to room temperature
Unsalted butter (for crust) 113g (1/2 cup / 8 tbsp), softened to room temperature
All-purpose flour 125g (1 cup), spooned and leveled
Fine sea salt 1/4 tsp, divided
Light brown sugar 150g (3/4 cup), firmly packed
Large egg 1, room temperature
Unsalted butter (for filling) 28g (2 tbsp), melted and cooled slightly
Pure vanilla extract 1 tsp
Raw shelled pecans 120g (1 1/4 cups), roughly chopped, plus 24 whole pecan halves for garnish

Steps

1

Make Cream Cheese Crust

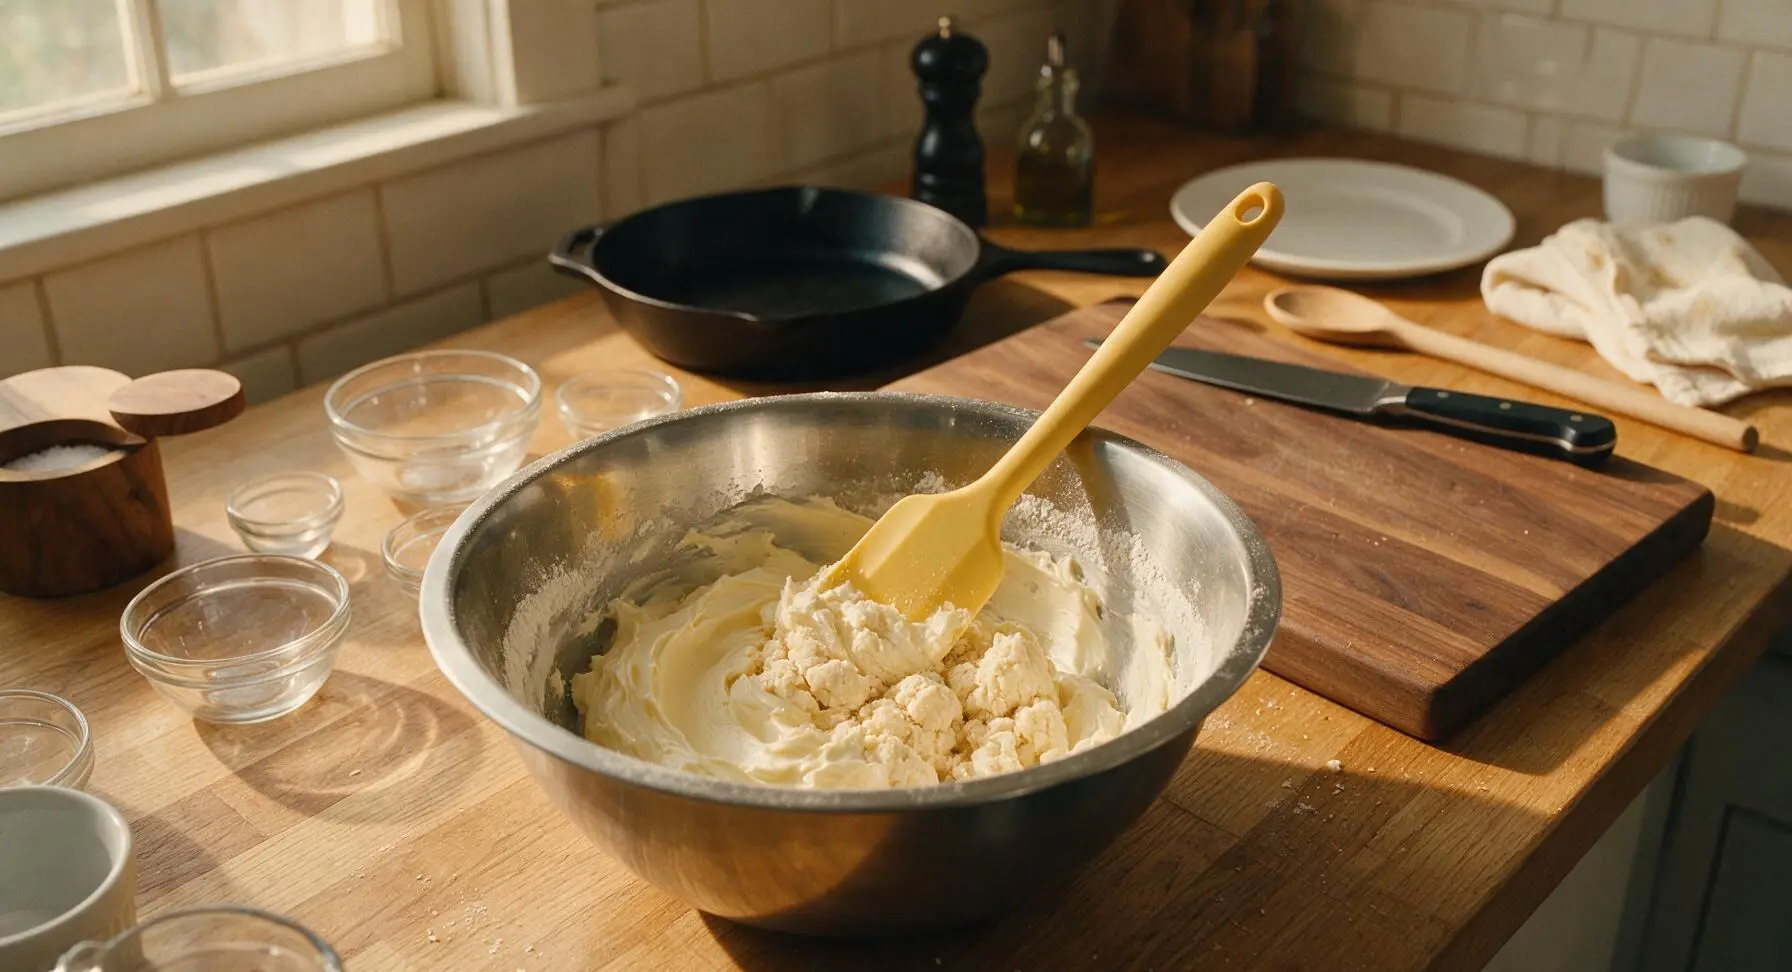
In the large beech wood mixing bowl, combine the 85g softened cream cheese and 113g softened crust butter with the silicone spatula, mixing until completely smooth and free of lumps, about 2 minutes. Add the 125g all-purpose flour and 1/8 tsp of the fine sea salt, stirring just until the dough comes together in a soft, uniform ball—do not overmix, as this will make the crust tough. The finished dough will be soft but not sticky to the touch.
Step 1
step1:Make Cream Cheese Crust
2

Chill Crust Dough

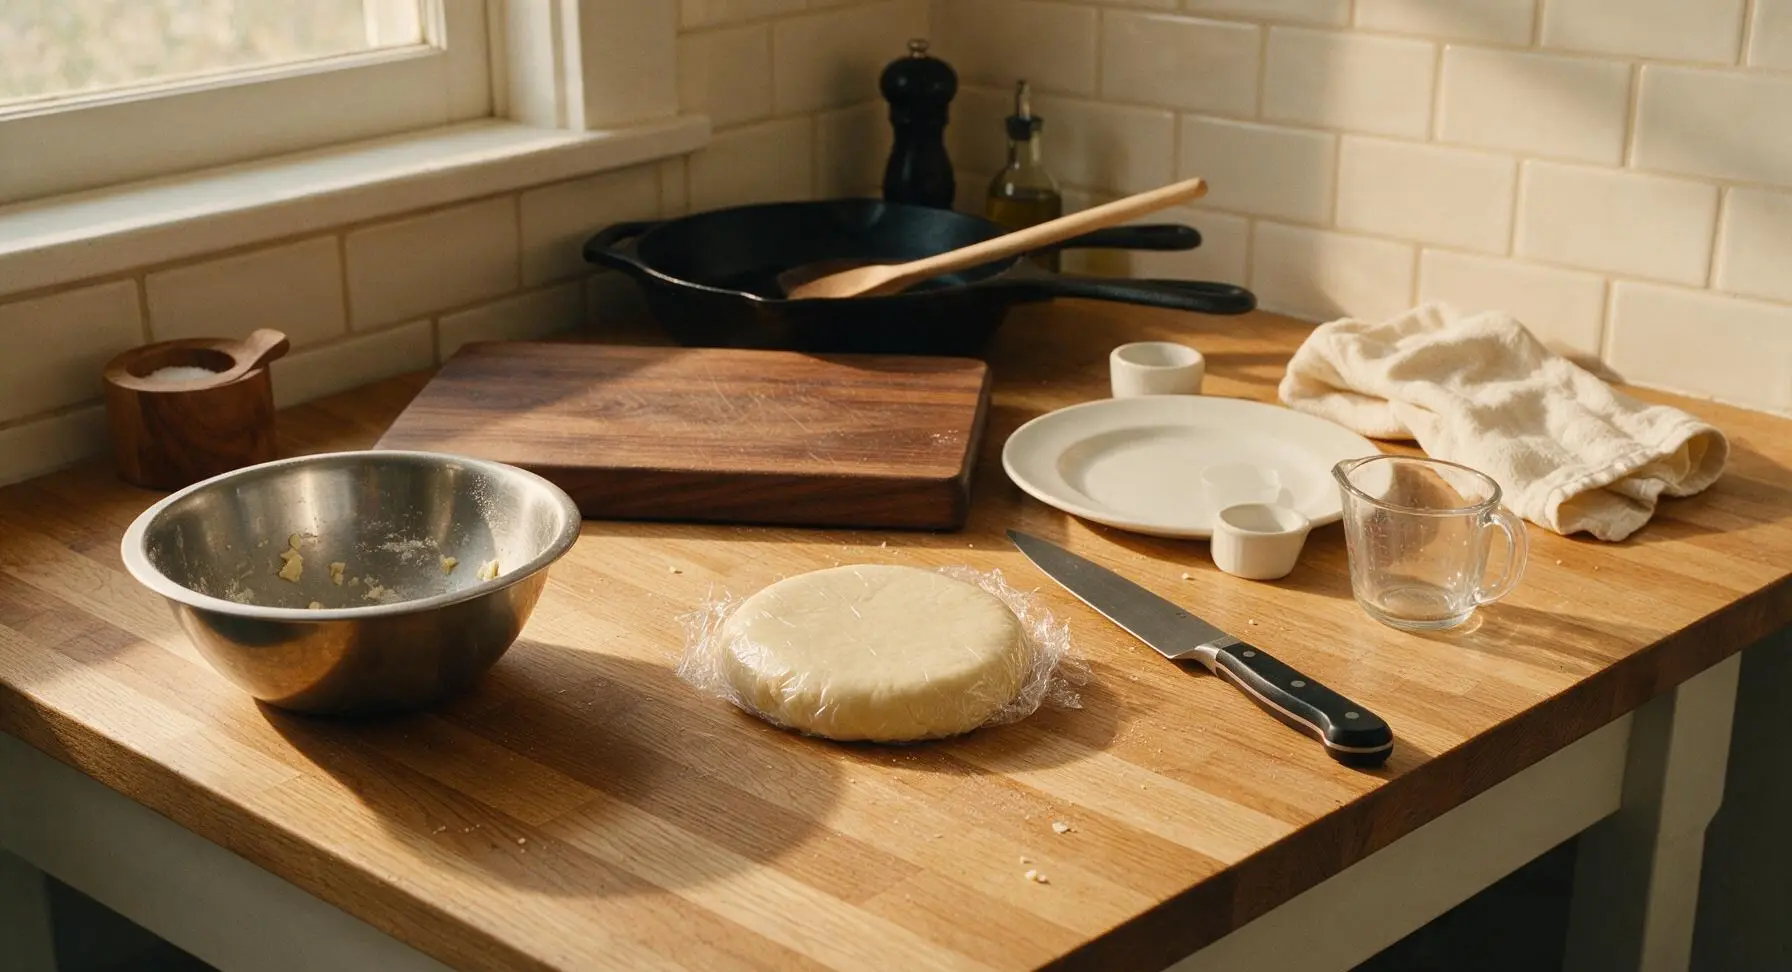
Turn the dough out onto a sheet of clear plastic wrap, shape into a 5cm thick flat disk, wrap tightly, and refrigerate for at least 1 hour (or up to 3 days) until firm enough to handle. Chilling prevents the crust from shrinking during baking and makes the dough much easier to press into the muffin tin cups.
Step 2
step2:Chill Crust Dough
3

Portion Dough Balls

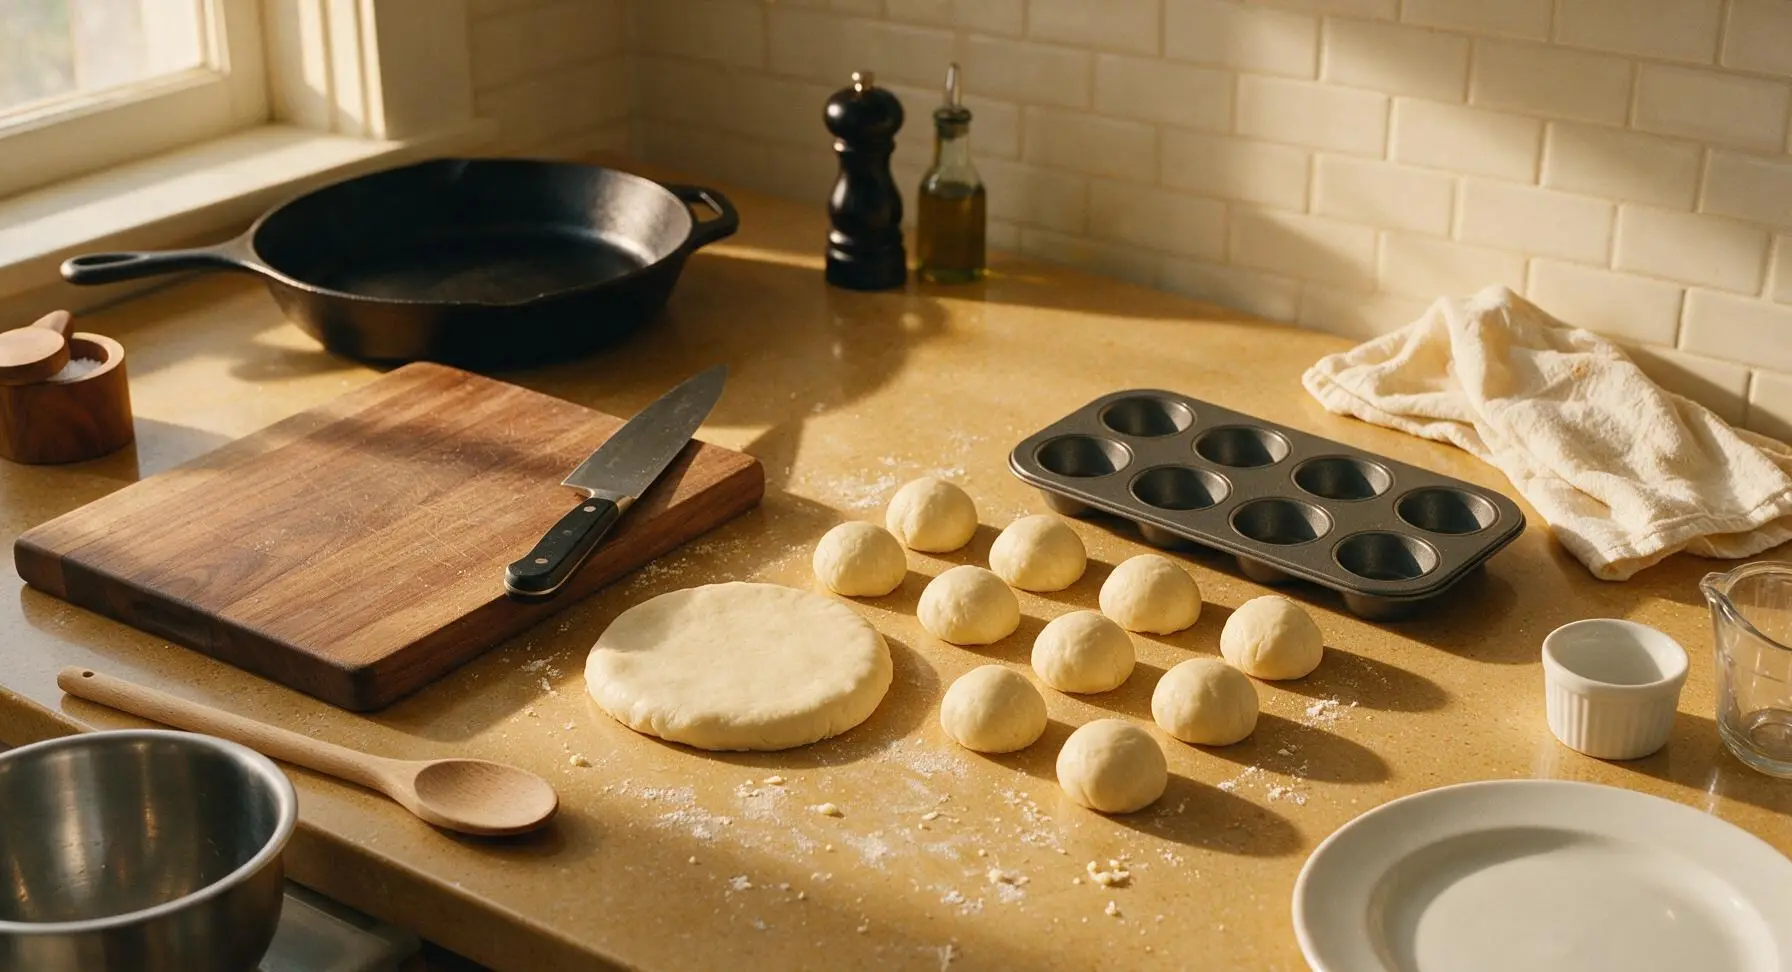
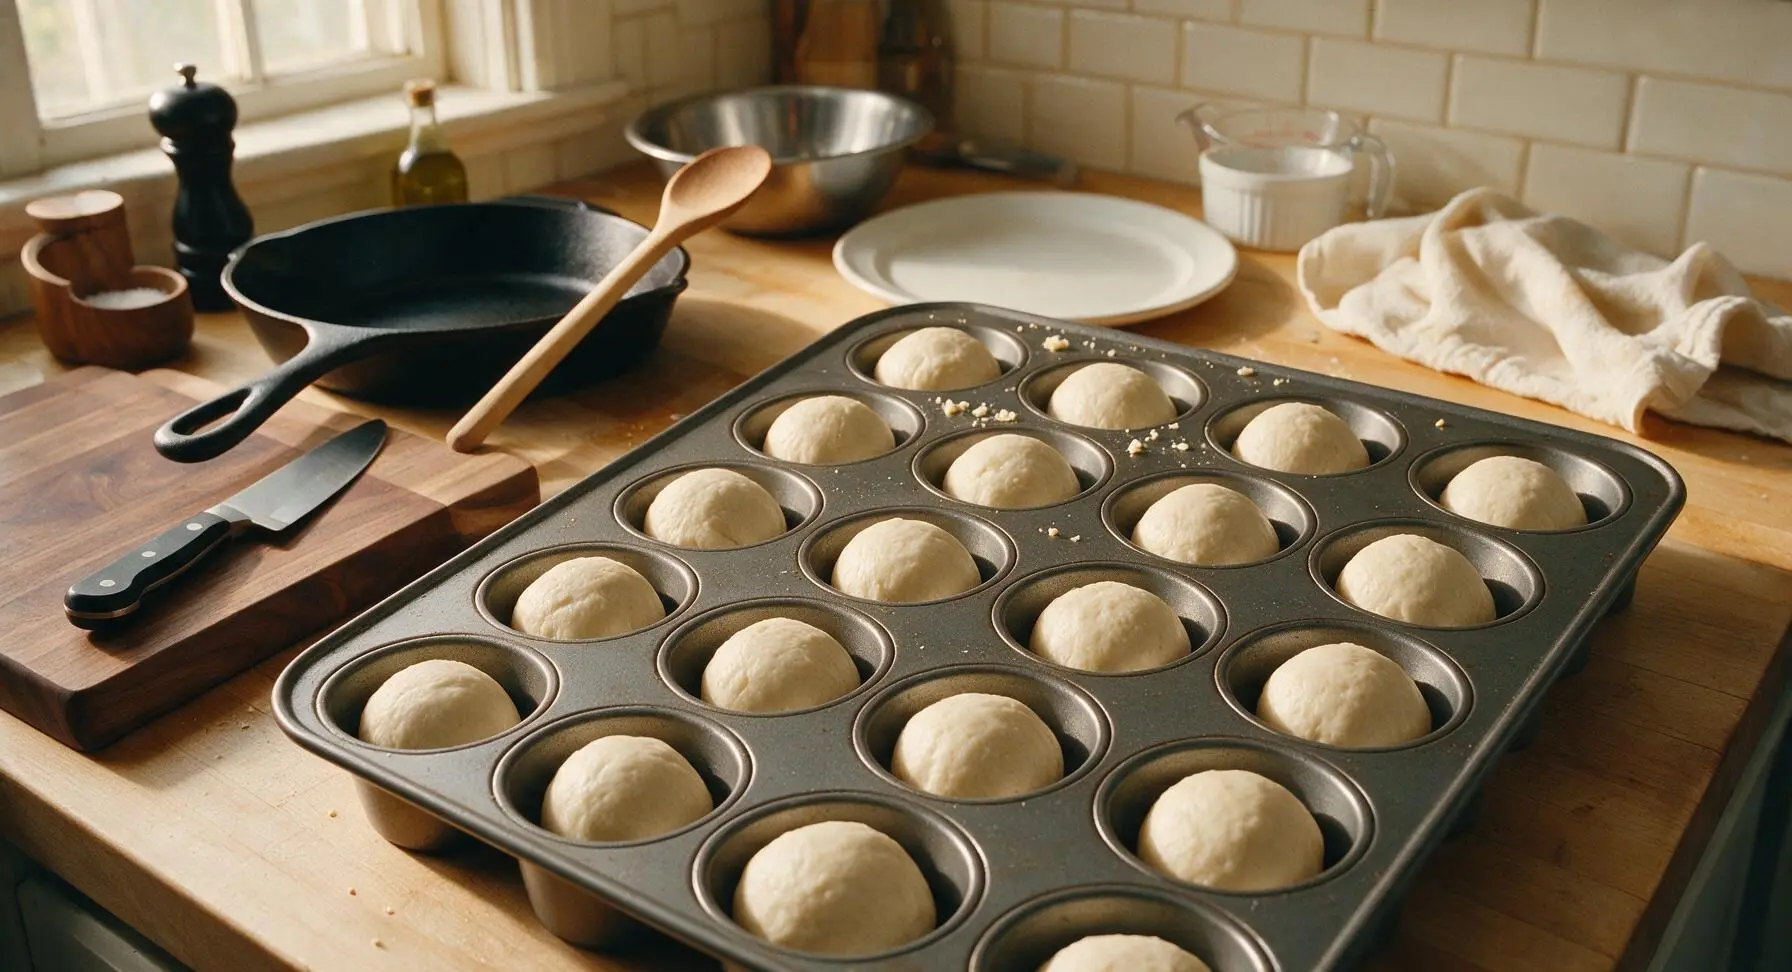
Once chilled, unwrap the dough and divide it into 24 equal 15g (roughly 1 tbsp) pieces. Roll each piece between your palms into a smooth 2.5cm ball. Place one dough ball into each cup of the dark gray mini muffin tin; no greasing is needed, as the buttery crust will release easily after baking.
Step 3
step3:Portion Dough Balls
Step 3
step3:Portion Dough Balls
4

Press Tart Shells

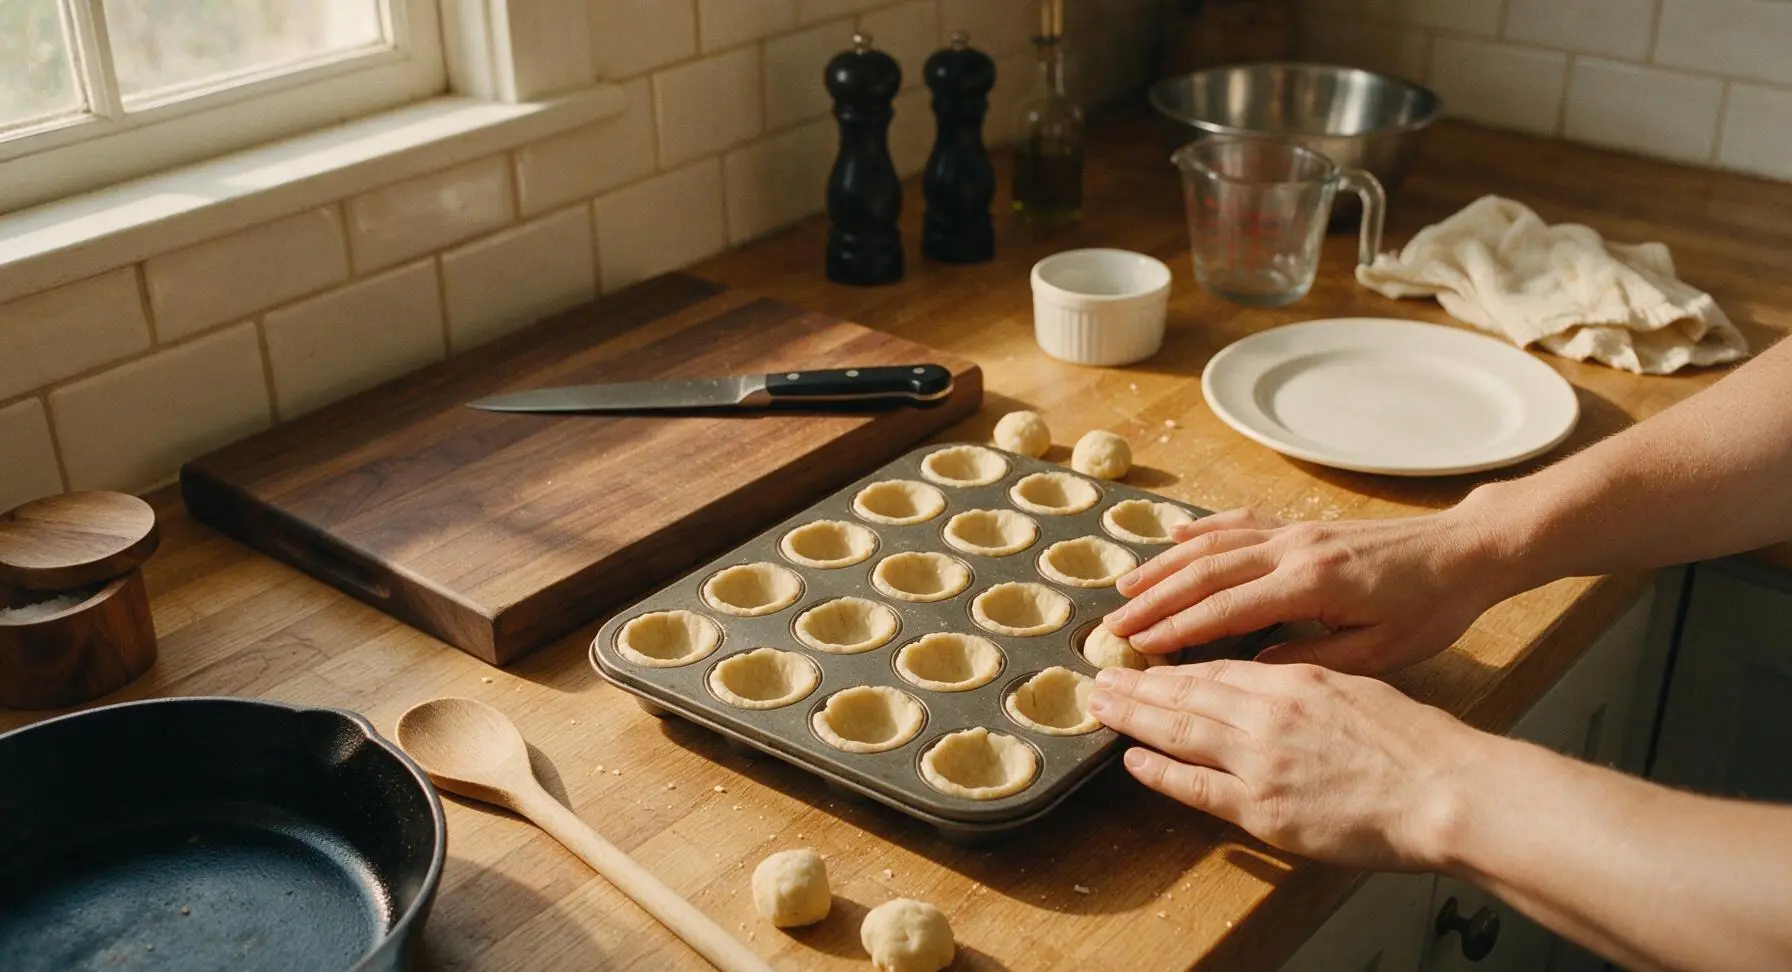
Using your thumb and index finger, press each dough ball evenly up the sides and across the bottom of each muffin cup, forming a 3mm thick shell that comes all the way up to the top edge of each cup. Ensure there are no thin spots or holes, as these will cause filling to leak during baking. The finished shells will look like tiny, even pastry cups.
Step 4
step4:Press Tart Shells
5

Mix Pecan Filling

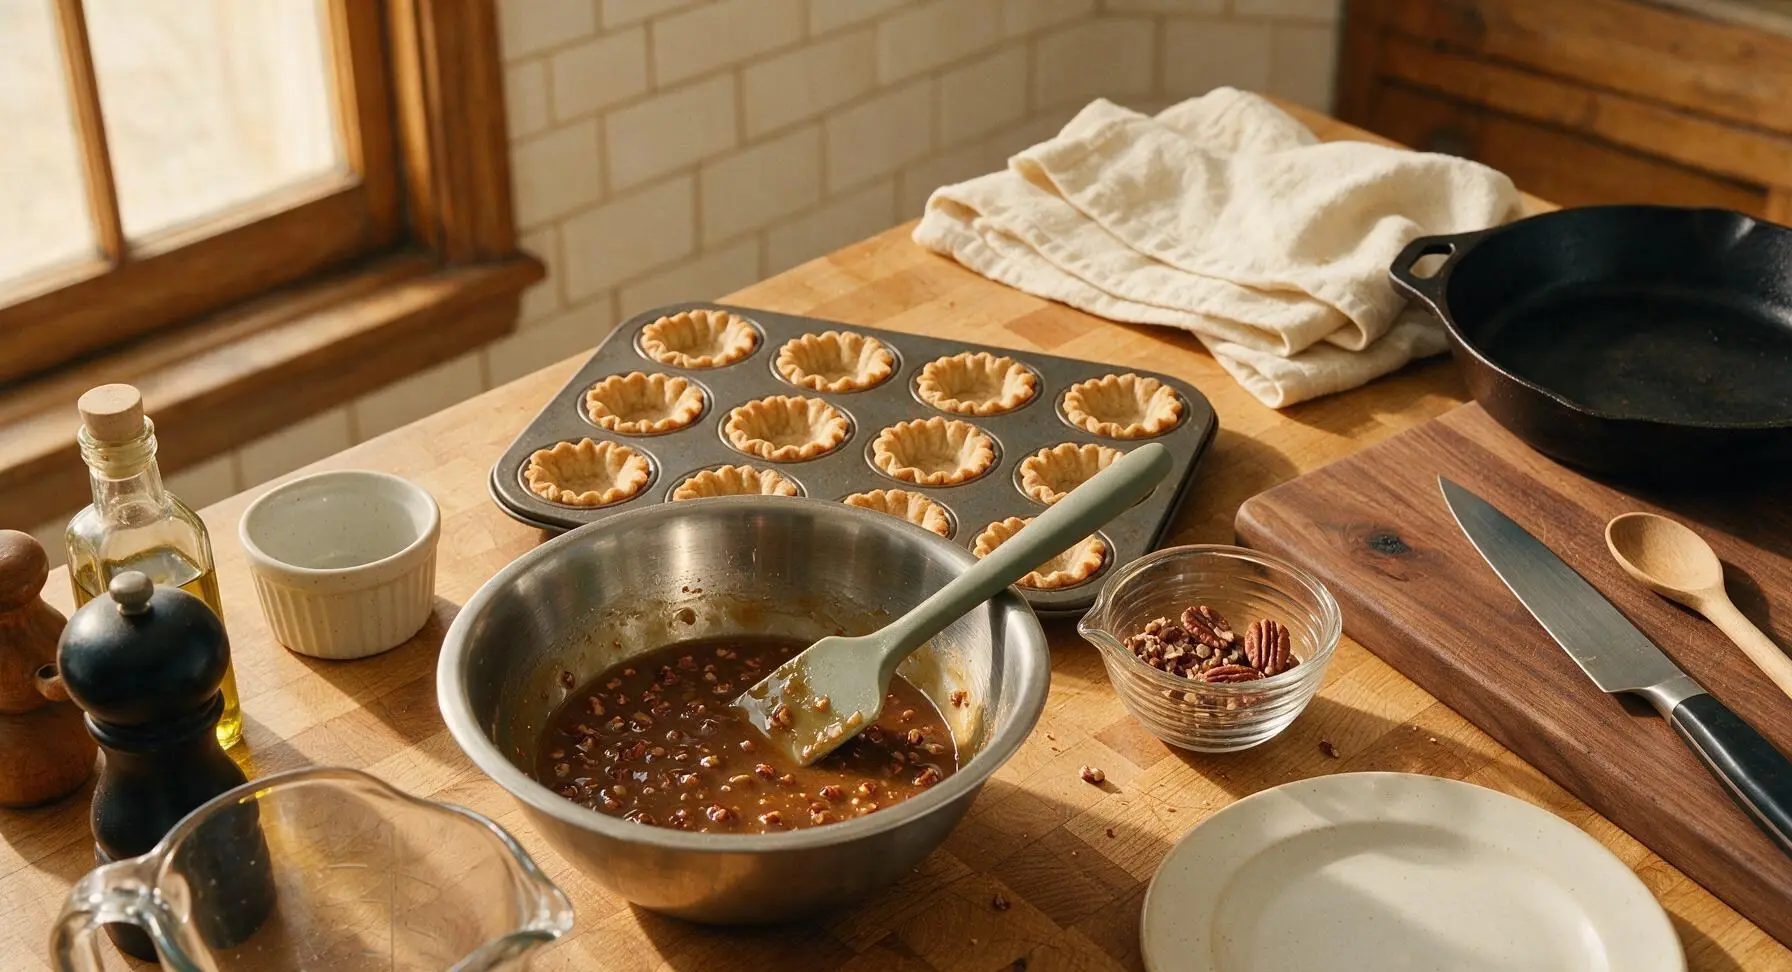
In the small brushed stainless steel mixing bowl, combine the 150g packed light brown sugar, room temperature egg, 28g melted cooled filling butter, remaining 1/8 tsp sea salt, and 1 tsp vanilla extract. Stir with the silicone spatula until completely smooth, with no lumps of brown sugar remaining. Fold in 1 cup of the chopped pecans, reserving the remaining 1/4 cup chopped pecans and whole pecan halves for topping.
Step 5
step5:Mix Pecan Filling
6

Fill Tart Shells

Spoon roughly 1 tsp of the pecan filling into each pressed dough shell, filling each no more than 2/3 full—overfilling will cause the filling to bubble over and stick to the tin during baking. Top each filled shell with a small sprinkle of reserved chopped pecans, or one whole pecan half for a decorative, polished look.
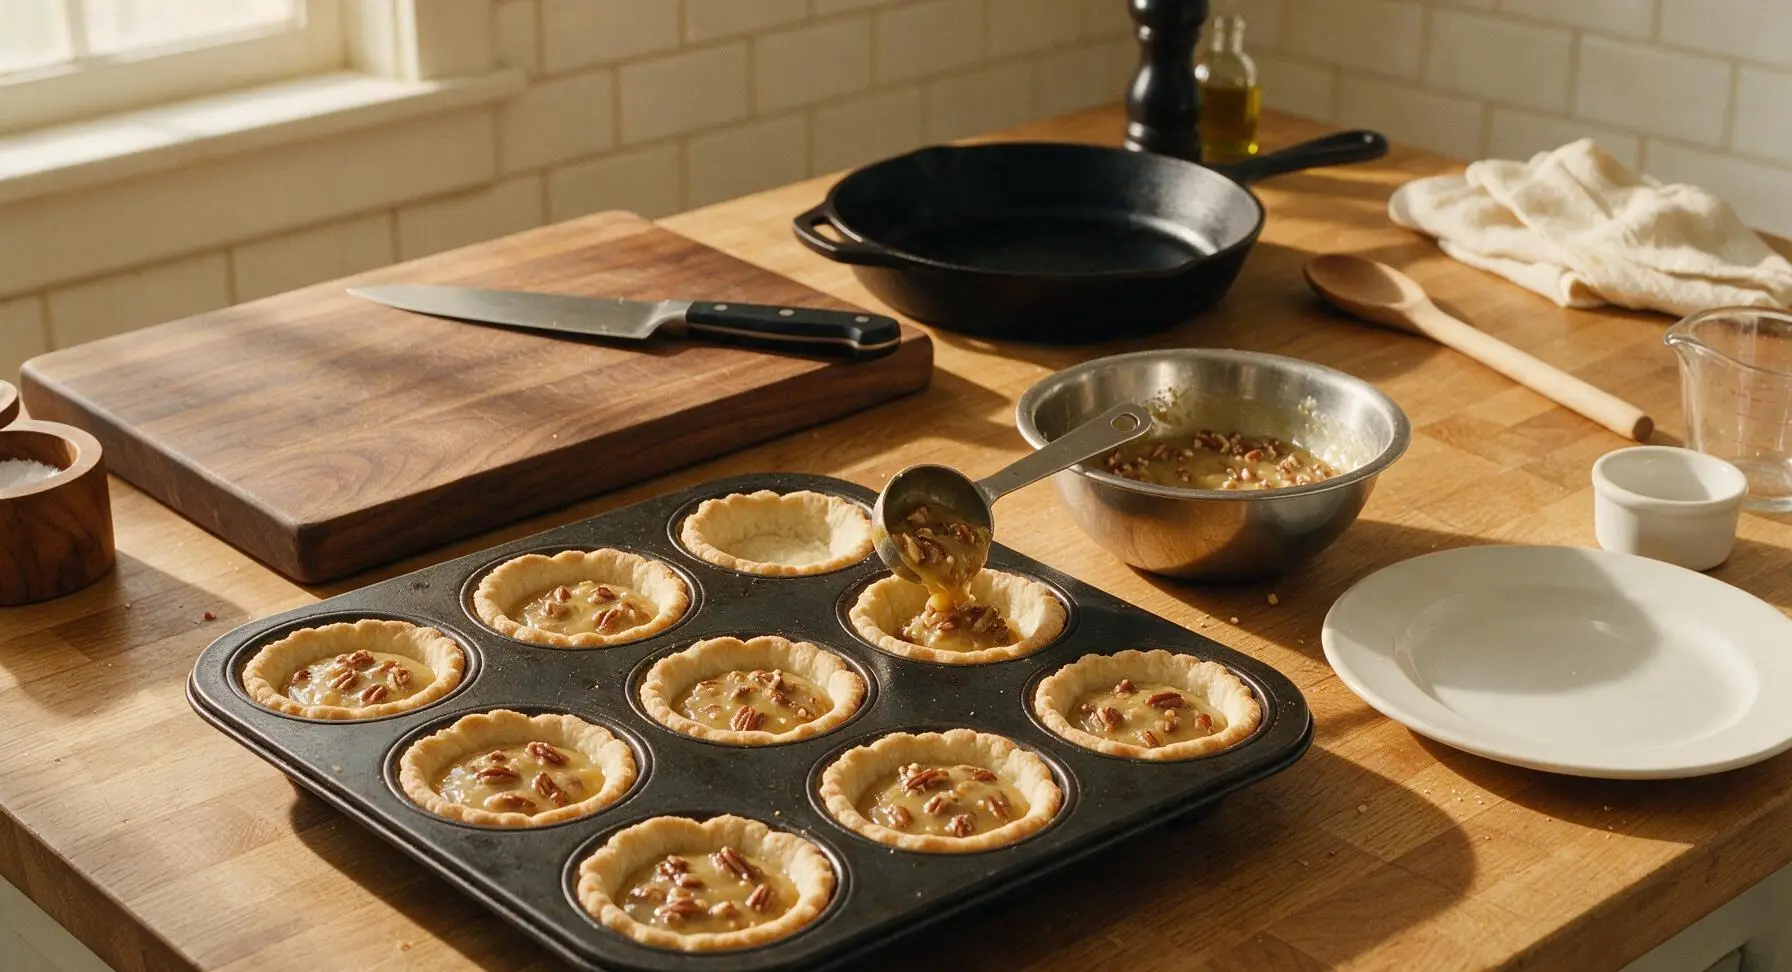
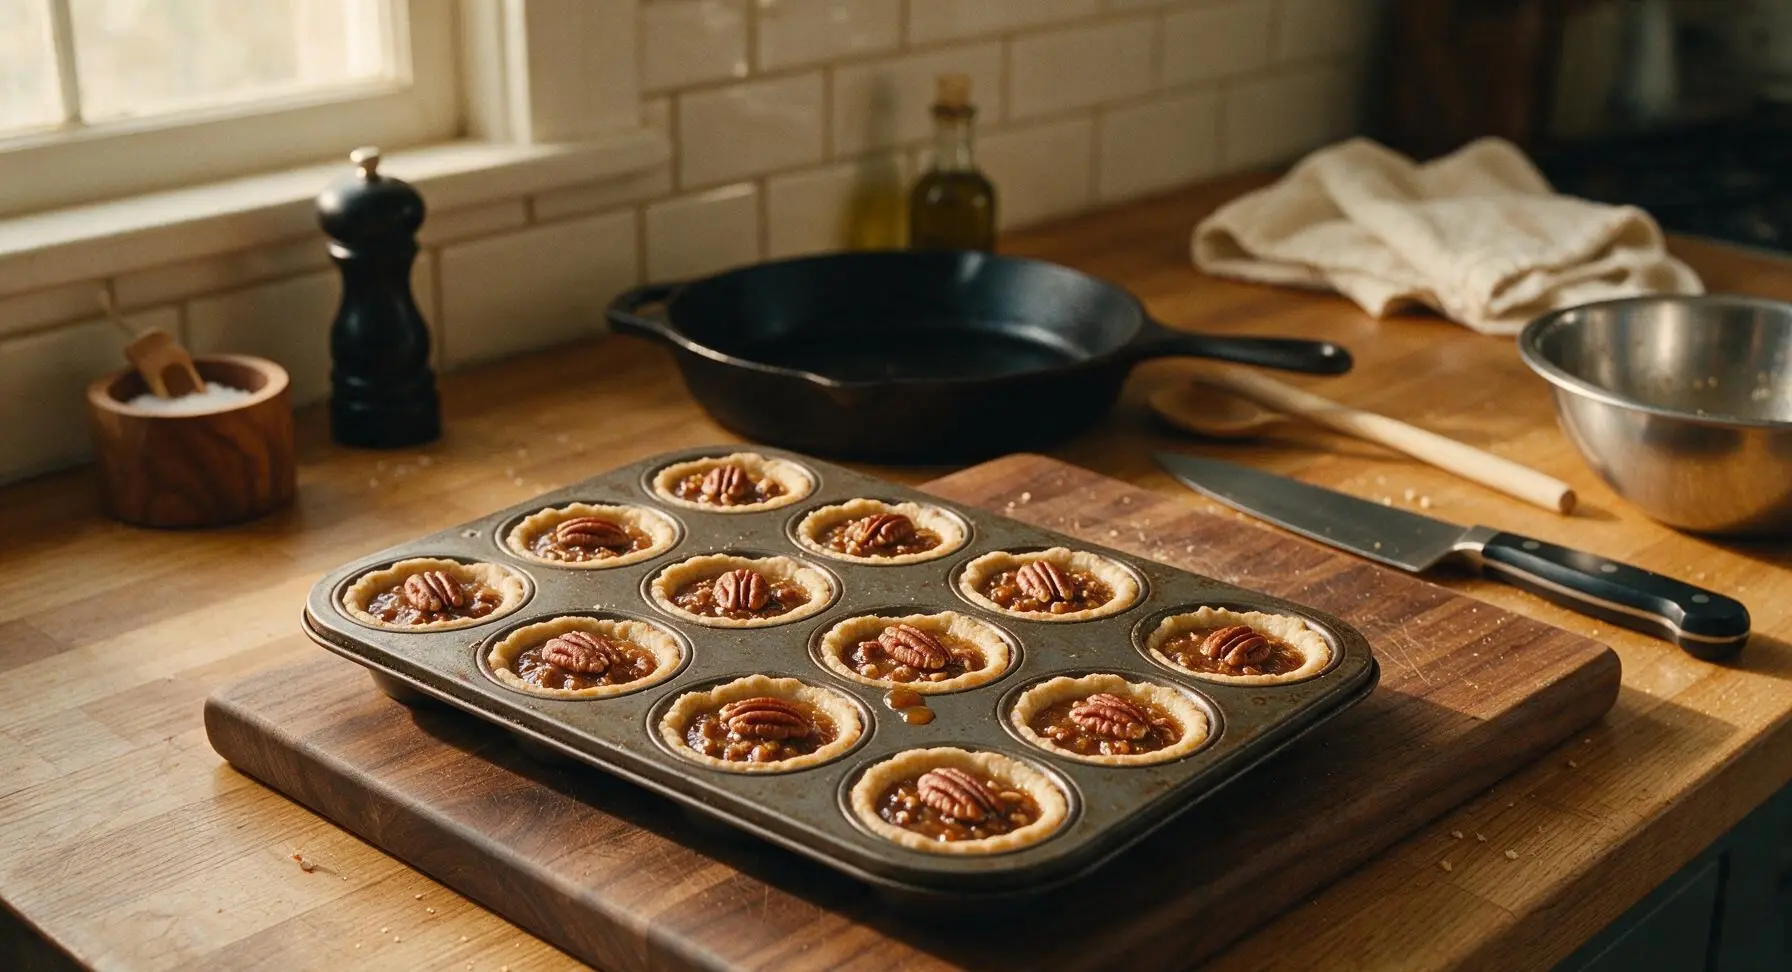
Step 6
step6:Fill Tart Shells
Step 6
step6:Fill Tart Shells
7

Bake Until Golden

Bake in a preheated 175C (350F) oven for 18-22 minutes, until the crust is pale golden brown around the edges and the filling is set and slightly puffed. Do not overbake, as the filling will become tough and the crust will burn. The filling will deflate slightly as it cools, which is completely normal.
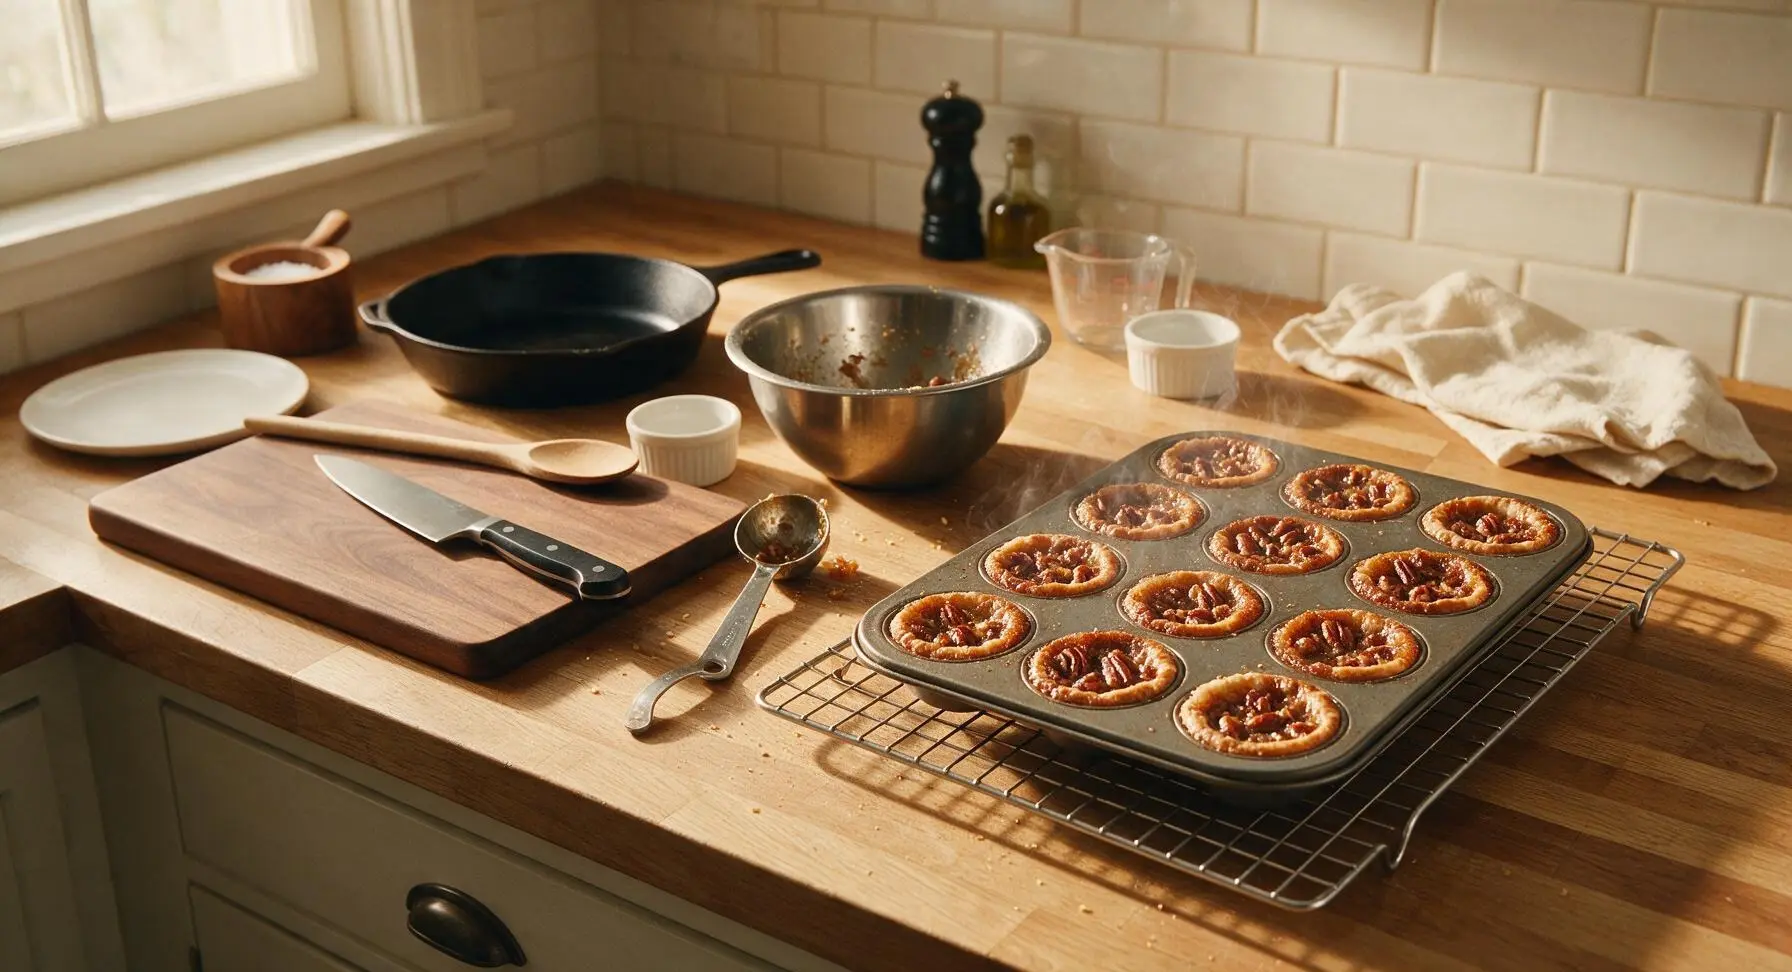
Step 7
step7:Bake Until Golden
8

Cool and Unmold

Let the tassies cool completely in the tin on the wire cooling rack for 20 minutes—this allows the filling to set fully, so they don’t break when removed. Run the small offset spatula around the edge of each tassie to loosen, then gently lift out and transfer to the matte cream stoneware serving platter.
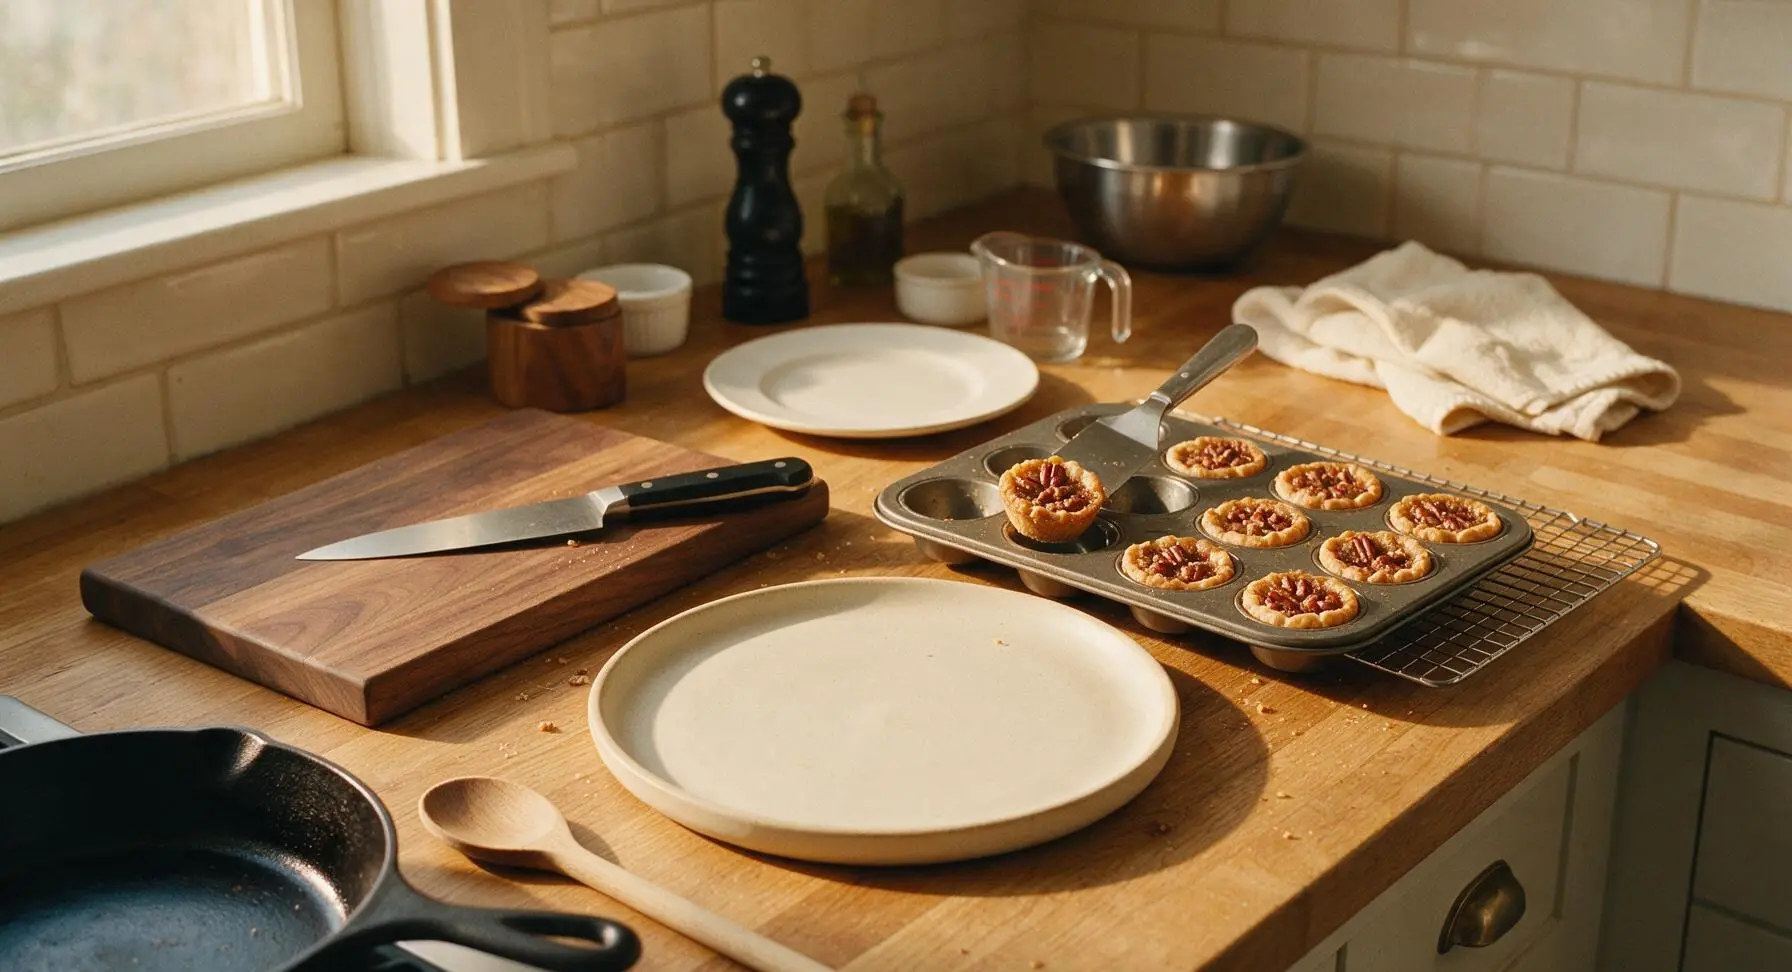
Step 8
step8:Cool and Unmold

Tips

1.Use block-style full-fat cream cheese for the crust, not whipped spreadable cream cheese. Whipped cream cheese has added air and extra moisture that will make the crust soft, difficult to press, and prone to shrinking during baking.
2.Never fill tart shells more than 2/3 full. The pecan filling bubbles and expands as it bakes, and any filling that spills over the crust edge will glue the tassie to the tin, even with a non-stick coating, leading to broken tarts when unmolding.
3.Let tassies cool completely in the tin for 20 minutes before removing. Hot pecan filling is thin and liquid straight out of the oven, and will run or cause the crust to break if you try to unmold too early; the rest time lets the filling set to its signature gooey, firm texture.


✨ You May Also Like

Desserts & Baking
🍜 Italy

Creamy, coffee-kissed classic Northern Italian no-bake dessert, with layers of rum-spiked mascarpone cream, soft ladyfingers, and a rich cocoa dusting.

⏱️ 4 hours 3Desserts & Baking ★ 4.7
Desserts & Baking
🍜 France

Flaky, shatteringly crisp, buttery French croissants with golden exteriors and soft, airy layered interiors, perfect for pairing with coffee for a special morning treat.

⏱️ 12 hours Desserts & Baking ★ 4.5
Desserts & Baking
🍜 United States

Warm, spiced baked apples topped with a fluffy golden biscuit crust, this cozy dessert pairs perfectly with vanilla ice cream for cool-weather comfort.

⏱️ 55 minuteDesserts & Baking ★ 4.6
Desserts & Baking
🍜 United States

A star-spangled classic American blueberry pie with buttery flaky crust and bright sweet-tart filling, perfect for summer patriotic gatherings.

⏱️ 1 hour 25Desserts & Baking ★ 4.7
Desserts & Baking
🍜 United States

A beloved no-bake regional Maine candy with a chewy coconut-potato center coated in rich dark chocolate, a New England holiday staple since the 1870s.

⏱️ 2 hours 3Desserts & Baking ★ 4.8
Desserts & Baking
🍜 France

Luxuriously creamy, floral frozen custard made with aromatic Tahitian vanilla beans, boasting a smooth, rich texture that melts slowly on the tongue.

⏱️ 3 hours 3Desserts & Baking ★ 4.5

Pecan Tassies:Frequently Asked Questions

1.What makes pecan tassies different from regular mini pecan pies? ▾
Great question! The biggest difference is the crust: tassies use a tender, melt-in-your-mouth cream cheese and butter crust instead of traditional flaky pie dough. They’re also perfectly bite-sized (1-2 bites each), with a slightly chewier, less runny pecan filling that holds its shape perfectly for holiday cookie trays and grab-and-go dessert spreads.
2.Can I use low-fat or whipped cream cheese for the crust? ▾
I strongly recommend sticking to full-fat block cream cheese for the best results. Whipped or low-fat cream cheese has added moisture and stabilizers that will make your crust tough, soggy, or prone to shrinking while baking. The full-fat block creates that rich, buttery, melt-in-your-mouth texture that makes these tassies so beloved.
3.Do I need to use unsalted butter for the crust? ▾
Yes, unsalted butter is the best pick here! It lets you control the exact amount of fine sea salt in the crust, so you don’t end up with overly salty tarts. If you only have salted butter on hand, cut the added fine sea salt in the crust by ½ teaspoon to balance the flavor, and take care not to overmix the dough.
4.Why is my pecan tassie crust tough instead of tender? ▾
Tough crust almost always traces back to two common mistakes: overworking the all-purpose flour dough, or using warm ingredients that make the dough bake up dense. Mix the crust just until the flour comes together into a soft ball, then chill it for at least an hour before pressing into tins to keep it light and tender.
5.Can I make the crust dough ahead of time? ▾
Absolutely! The cream cheese crust actually benefits from resting in the fridge. You can wrap tightly sealed dough for up to 3 days before baking, or freeze it for up to 3 months. Just let it thaw slightly in the fridge until it’s soft enough to press into tins—no need to bring it fully to room temperature, as cold dough bakes up more tender.
6.Do I need special mini tart pans to make pecan tassies? ▾
Nope! A standard 24-cup mini muffin tin works perfectly for these tassies. You don’t need any special tart molds or removable bottoms—once the tassies are fully cooled, you can pop them right out of the tin with the tip of a small offset spatula or butter knife, as long as you grease the tin lightly first.
7.How thin should I press the crust into the muffin cups? ▾
Aim for a roughly ⅛-inch thick layer of crust pressed evenly up the sides and across the bottom of each mini muffin cup. If the crust is too thick, it will be doughy and underbaked in the center; if it’s too thin, the pecan filling will leak through and stick to the pan as it bakes.
8.Can I use dark brown sugar instead of light brown sugar for the filling? ▾
You can, but it will change the flavor and color slightly! Light brown sugar gives the filling that classic, mild caramel sweetness with a soft golden hue. Dark brown sugar has a higher molasses content, so it will create a deeper, more robust flavor and darker filling—tasty, just not the traditional tassie profile.
9.Why is my pecan filling runny after baking? ▾
Runny filling usually means the tassies were underbaked, or you didn’t use enough egg to set the filling. The filling will be puffed and slightly jiggly right out of the oven, but it will set firmly as it cools. If it’s still soupy after 30 minutes of cooling, pop the tins back in for 3-4 extra minutes to finish setting.
10.Do I need to toast the pecans before adding them to the filling? ▾
Toasting pecans is totally optional, but it’s a quick step that makes a huge flavor difference! Just spread chopped pecans on a baking sheet and toast at 350°F for 5-7 minutes until fragrant, then let them cool before mixing into the filling. It amplifies their nutty, buttery flavor far better than using raw pecans straight from the bag.
11.How do I keep my tassie crusts from shrinking while they bake? ▾
The easiest fix for shrunken crusts is to chill the pressed crusts in the tin for 15-20 minutes before adding filling and baking. Warm dough shrinks as it hits the hot oven, so that quick chill helps the crust hold its shape. You also don’t need to blind bake crusts for this recipe, as the filling cooks at the same rate as the dough.
12.Can I add other mix-ins to the pecan filling? ▾
Of course! Traditional pecan tassies are simple, but you can stir in tiny semi-sweet chocolate chips, a pinch of ground cinnamon, a splash of bourbon, or small bits of candied ginger to switch up the flavor. Just keep mix-ins to no more than ½ cup total so you don’t throw off the filling’s set ratio.
13.How long do pecan tassies stay fresh after baking? ▾
Stored in an airtight container at room temperature, pecan tassies will stay fresh and delicious for 4-5 days. You can also refrigerate them for up to 1 week, but I recommend letting them come back to room temp for 15 minutes before serving to bring back that soft, gooey filling and tender crust texture.
14.Can I freeze baked pecan tassies? ▾
Definitely! These freeze incredibly well, which makes them perfect for prepping ahead for holiday parties. Let the tassies cool completely, then layer them between sheets of parchment paper in an airtight freezer-safe container, and freeze for up to 3 months. Thaw at room temp for 20-30 minutes before serving—no reheating needed.
15.Why do my tassies stick to the mini muffin tin? ▾
Sticking usually happens for one of three reasons: you didn’t grease the tin lightly before adding the crust, you tried to remove the tassies while they were still too warm, or filling leaked out through a thin spot in the crust and baked onto the tin. Let them cool 10 full minutes in the tin before popping them out to avoid sticking.
16.Do I need a food processor to make the crust? ▾
Not at all! You can cut the cold cream cheese and butter into the flour and salt with a pastry cutter, two forks, or even your fingertips if you work quickly to keep the ingredients cold. A food processor is just a time-saver—you’ll get the same tender, buttery crust mixing by hand as long as you don’t overwork the dough.
17.How many pecans should I put in each tassie? ▾
Aim for about 1 teaspoon of chopped pecans per tart, mixed right into the brown sugar filling, plus a tiny pecan half pressed on top for decoration if you want a polished, festive look. Don’t overpack the pecans, or you won’t have enough of that gooey caramel filling to hold them together in each bite.
18.Can I make these tassies gluten-free? ▾
Yes, you can swap the all-purpose flour for a 1:1 gluten-free all-purpose baking blend that contains xanthan gum for best results. Keep all other ingredients the same, and chill the dough a full 2 hours before pressing into tins, since gluten-free dough can be softer and more prone to spreading without that extra rest time.
19.Are pecan tassies supposed to be served warm or cold? ▾
They’re delicious either way, but the classic serving style is at room temperature! When fully cooled, the crust is perfectly buttery and melt-in-your-mouth, and the filling is chewy and caramelized without being runny. If you prefer a warmer treat, you can zap one in the microwave for 5 seconds to soften the filling slightly.

Comments (6)

2 days ago

OMG these pecan tassies are SO good! I made them for our neighborhood potluck last weekend and every single one was gone before I even got a second one. The crust is so buttery and the pecan filling is perfectly sweet, not cloying at all. 20 minute cook time is no joke either, I threw these together during my toddler’s nap time no problem. My kids loved them so much they asked for them in their school lunches this week. Total game changer for holiday cookie plates too!

yesterday

Wait did you make them in mini muffin tins? I’ve been looking for an excuse to pull mine out and these sound perfect!

30 minutes ago

So glad they were a hit at the potluck! Just a quick tip for the lunchbox versions—let them cool completely before packing so the crust stays nice and crisp, no sogginess!

just now

Super easy recipe, even for someone who burns slice-and-bake cookies half the time! I added a tiny pinch of sea salt on top of each before baking and it elevated the filling so much, cut the sweetness perfectly. Will 100% be adding these to my annual Christmas cookie spread.

3 days ago

Wait, can I make the dough ahead of time and freeze it? I’m prepping for Thanksgiving next week and trying to get as much done in advance as possible so I’m not running around like a crazy person the day of.

2 days ago

Absolutely! You can make the dough, portion it into the mini muffin tin cups, cover tightly, and freeze for up to 3 months. You can bake them straight from frozen—just add 3-5 minutes to the cook time, no thawing needed!

1 week ago

These taste exactly like the little pecan tassies my grandma used to make! I was worried they’d be complicated because hers always felt like such a special treat, but these came together so fast. I did swap the light corn syrup for dark because that’s what I had in the pantry, and it gave the filling that deeper, nuttier flavor I remember. 10/10, no notes.

5 days ago

Ooh dark corn syrup is such a good call! I’ve only ever used light, I’m definitely trying that next batch. Did you add a splash of vanilla too?

3 days ago

I did! A full teaspoon of good vanilla, plus that tiny pinch of flaky salt on top. Tasted exactly like grandma’s kitchen, I almost cried when I took the first bite.

2 hours ago

Tried these last night for a quick dessert after our family taco night and wow, even my super picky 7 year old ate two and asked for more. The recipe says easy and it actually means easy—no fancy equipment, no weird ingredients I had to run to three stores for. Only thing I will say is my batch took 22 minutes instead of 20, but my oven runs a little cool so that’s on me.

5 minutes ago

Wait serving these after taco night is genius! I usually do churros but these are way easier, I’m stealing that idea for next week.

2 weeks ago

Made a batch of these to bring on our fall day hike last weekend and they held up perfectly! Not too messy, not sticky, the pecan flavor is so cozy for cool weather. I even wrapped a few individually for trail snacks and they stayed fresh for three days in the cooler. Will be making these for all our outdoor adventures from now on.



