
Ramen Grilled Cheese

title 1
Ramen Grilled Cheese
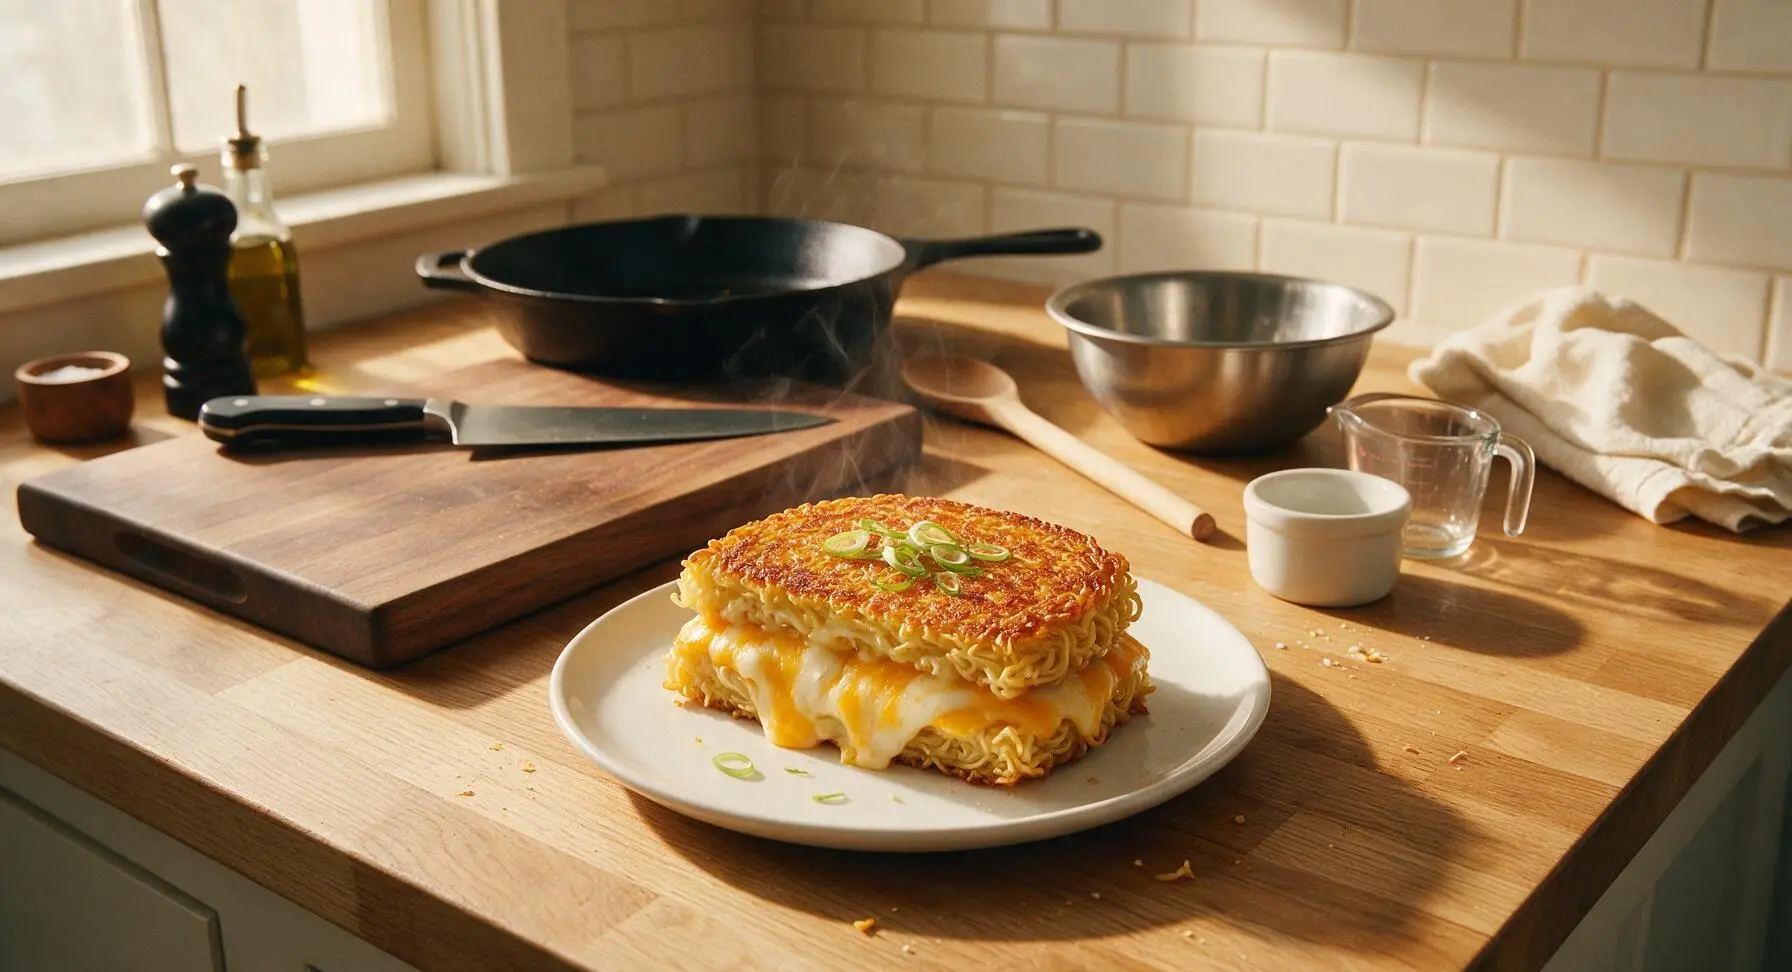
⏱️ cook time 12 minutes
🍽️ servings 2
⚡ Difficulty easy

intro

Crispy pan-fried ramen noodle "buns" sandwich gooey melted cheddar and mozzarella in this ultra-comforting fusion twist on classic grilled cheese, ready in under 25 minutes.

Ingredients
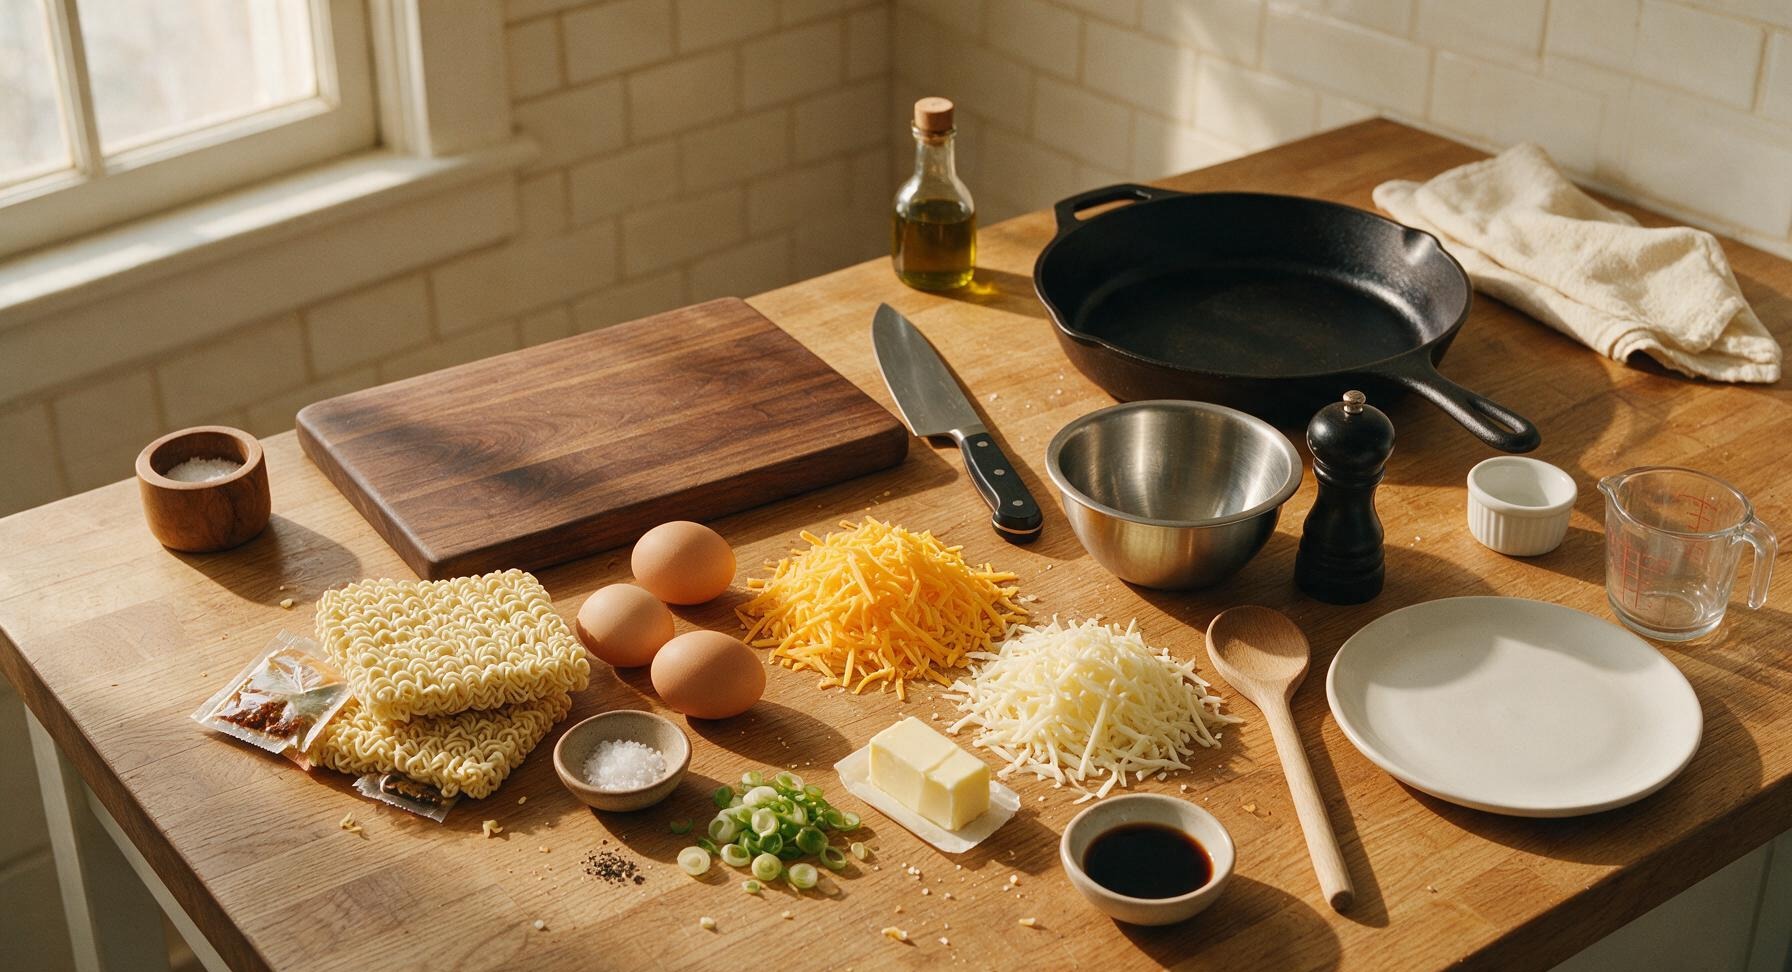
Instant ramen noodles (seasoning packets reserved for other use) 2 packs (170g total)
Large eggs 2
Sharp cheddar cheese, shredded 113g (1 cup)
Low-moisture mozzarella cheese, shredded 57g (1/2 cup)
Unsalted butter 28g (2 tbsp)
Scallions, thinly sliced 2 (20g)
Flaky sea salt 1/4 tsp
Freshly ground black pepper 1/8 tsp
Low-sodium soy sauce (optional, for dipping) 2 tbsp

Steps

1

Cook Ramen Noodles

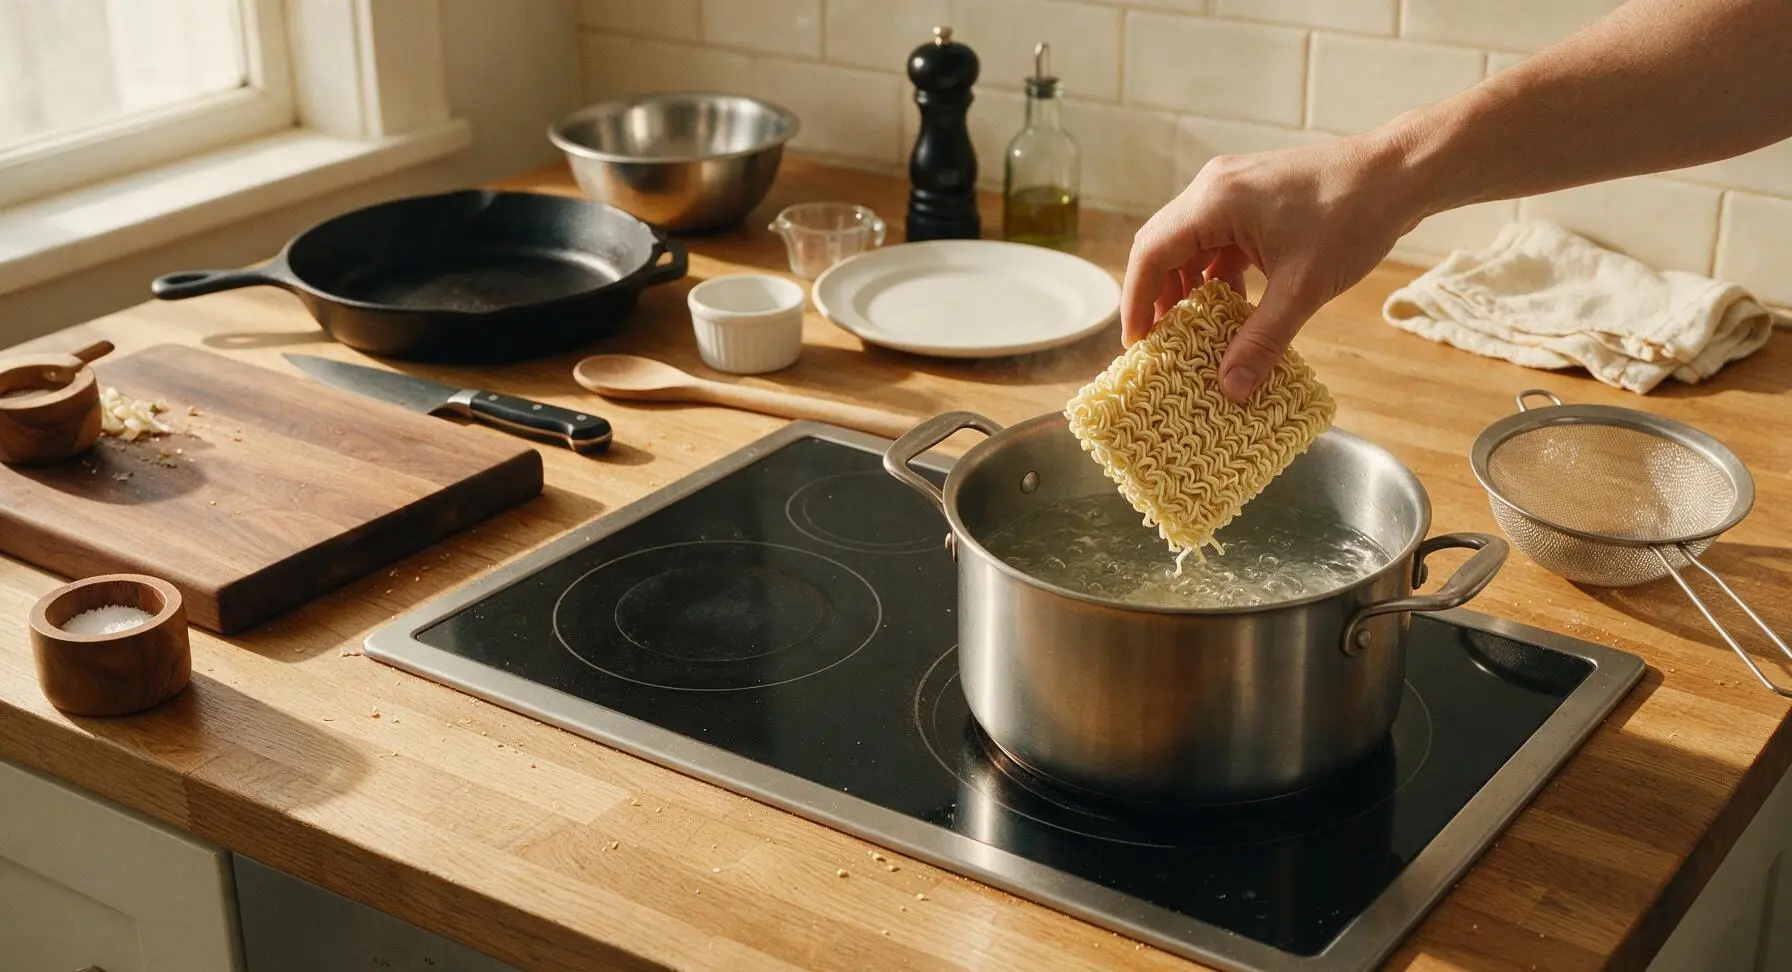
Fill the 3L brushed stainless steel pot with 1L of cold water, set on the right induction burner over high heat, and bring to a rolling boil. Add the dry instant ramen noodles (do not add included seasoning packets) and cook for exactly 2 minutes, stirring once to separate strands. Noodles are done when tender but still retain a slight firm bite – overcooked noodles will turn mushy and fail to hold their shape. Drain fully in the fine mesh stainless steel strainer, shaking vigorously for 10 seconds to remove all excess starchy water.
Step 1
step1:Cook Ramen Noodles
2

Mix Noodle Egg Binder

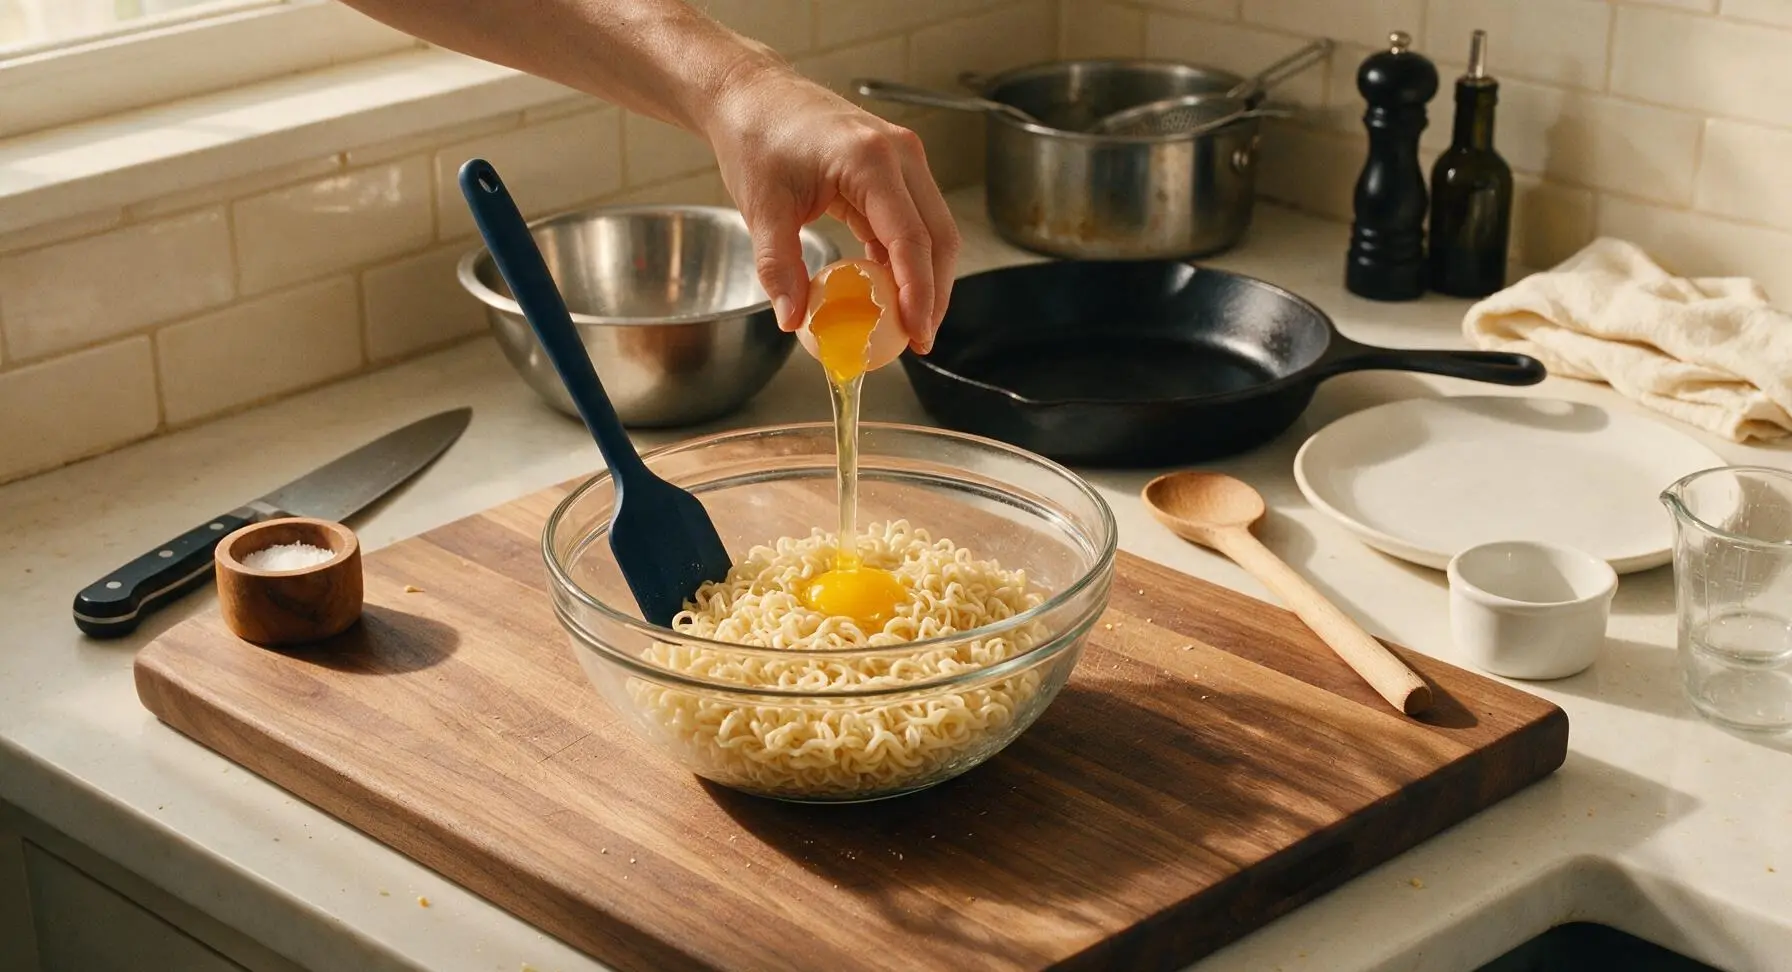
Let the drained ramen noodles cool for 2 minutes, then transfer them to the 1.5L clear glass mixing bowl set on the maple cutting board. Crack both large eggs into the bowl, add the 1/8 tsp freshly ground black pepper, and toss thoroughly with the matte navy blue silicone spatula until every individual noodle strand is evenly coated in thin egg wash. Stop mixing when there is no pooled egg left at the bottom of the bowl, and no dry noodle clumps remain.
Step 2
step2:Mix Noodle Egg Binder
3

Form Ramen Bun Discs

Place the 25cm matte charcoal non-stick skillet on the induction burner over medium heat (160C/325F). Add 1 tbsp of unsalted butter, and heat until butter is fully melted and foamy but not browned. Set the two 10cm brushed stainless steel ring molds in the center of the skillet. Divide the egg-coated noodle mixture into 4 equal portions, packing each portion firmly into the ring molds to create 1cm thick, even, compact discs – these will form the crispy "bread" layers for the sandwiches. Press the top of each noodle portion firmly with the silicone spatula to compact the strands so they hold together as they cook.
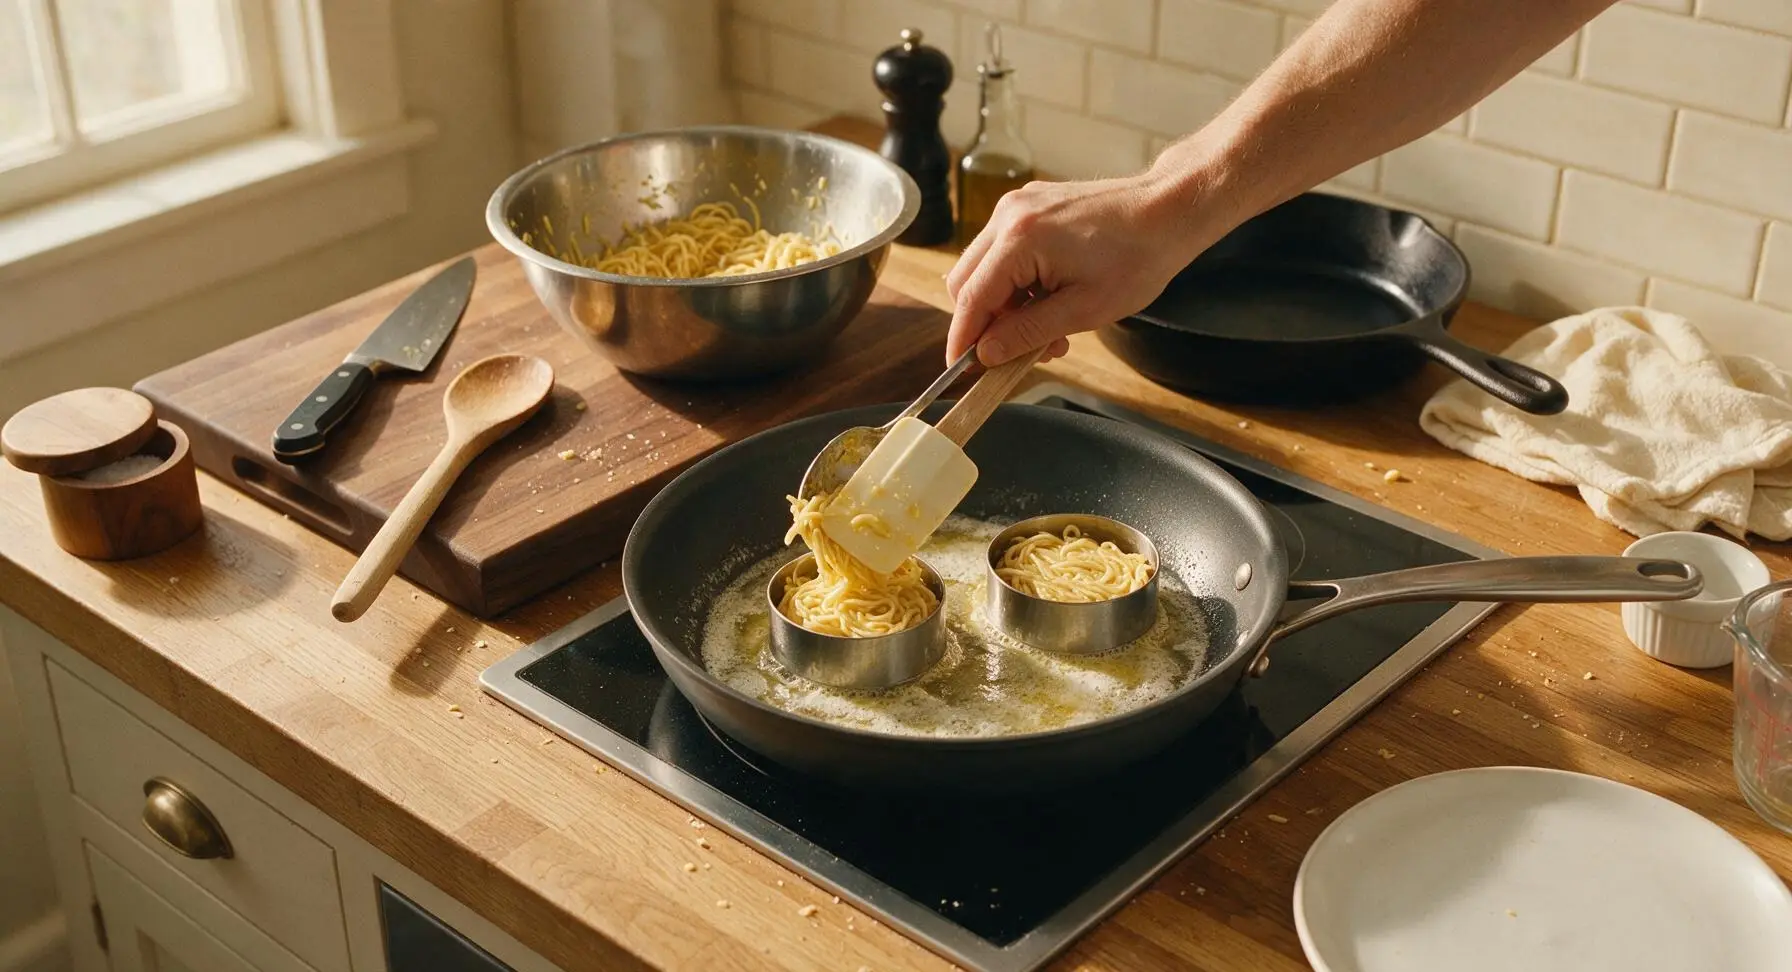
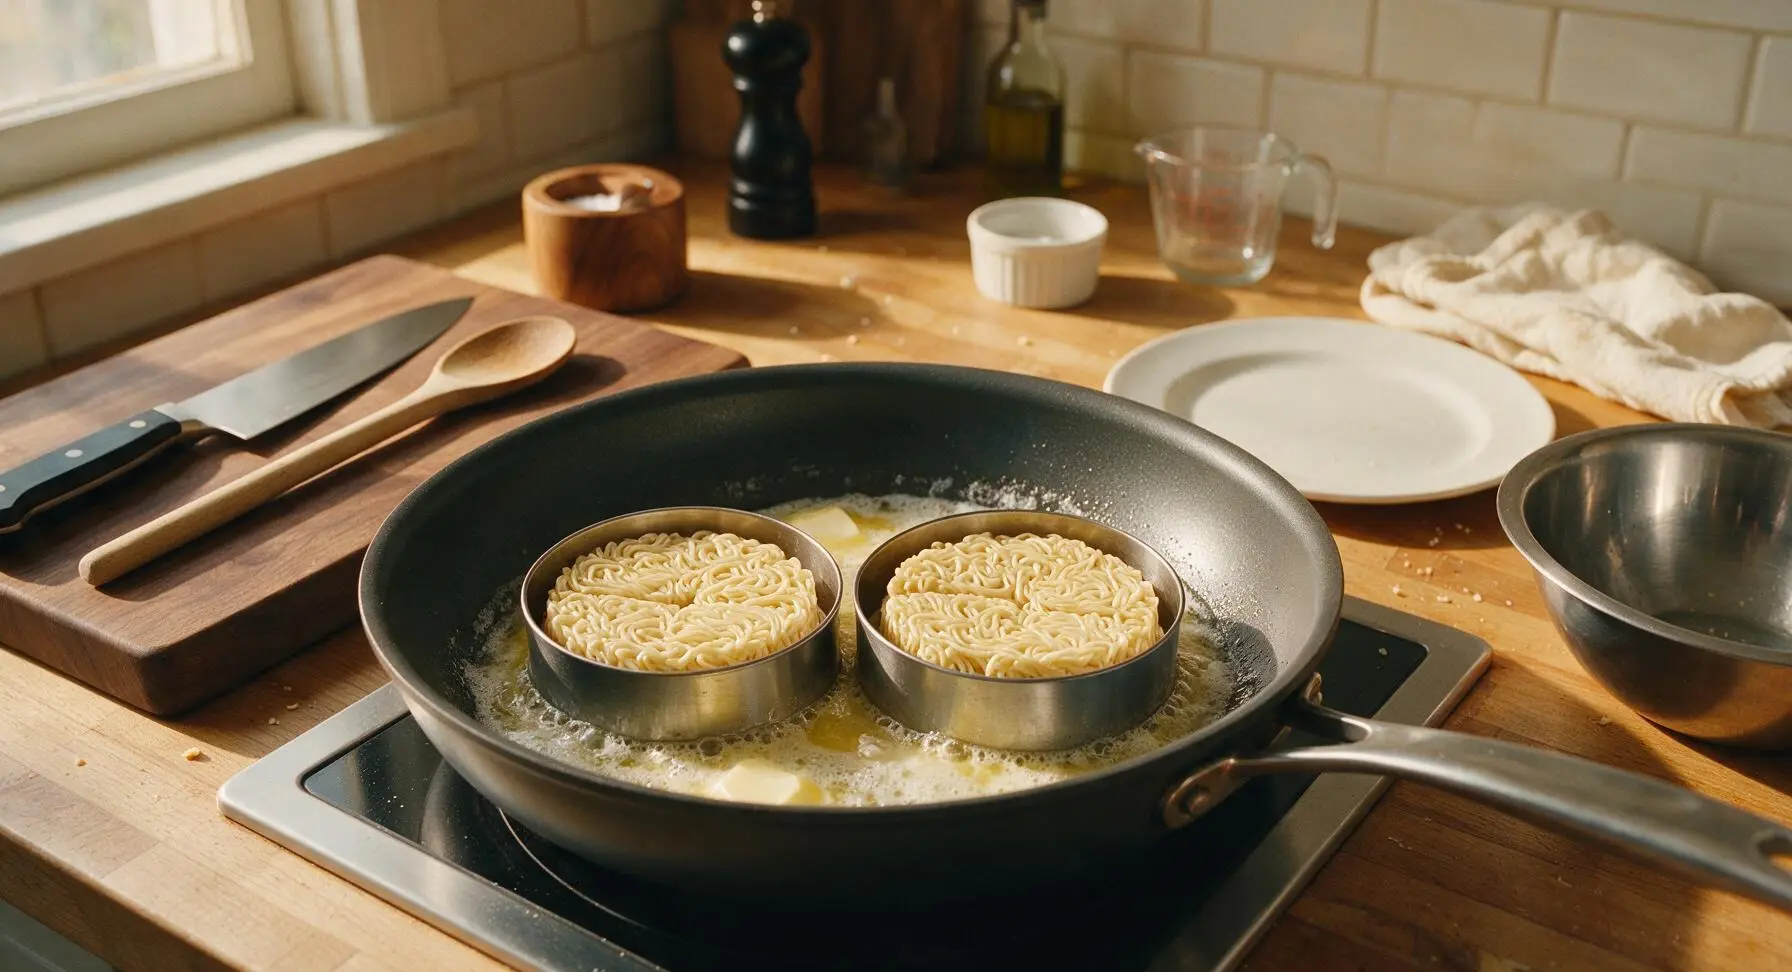
Step 3
step3:Form Ramen Bun Discs
Step 3
step3:Form Ramen Bun Discs
4

Fry Buns Until Crispy

Cook the noodle discs for 3 to 4 minutes on the first side, until the bottom is deep golden brown and the egg has fully set to bind the noodles into a solid disc. Carefully lift the hot ring molds off the discs (use a folded towel to hold the molds to avoid burns), then flip each disc with the stainless steel turner spatula. Cook the second side for an additional 2 to 3 minutes, until equally golden and crispy across the entire surface. Transfer the cooked buns to a clean section of the maple cutting board, and set aside.
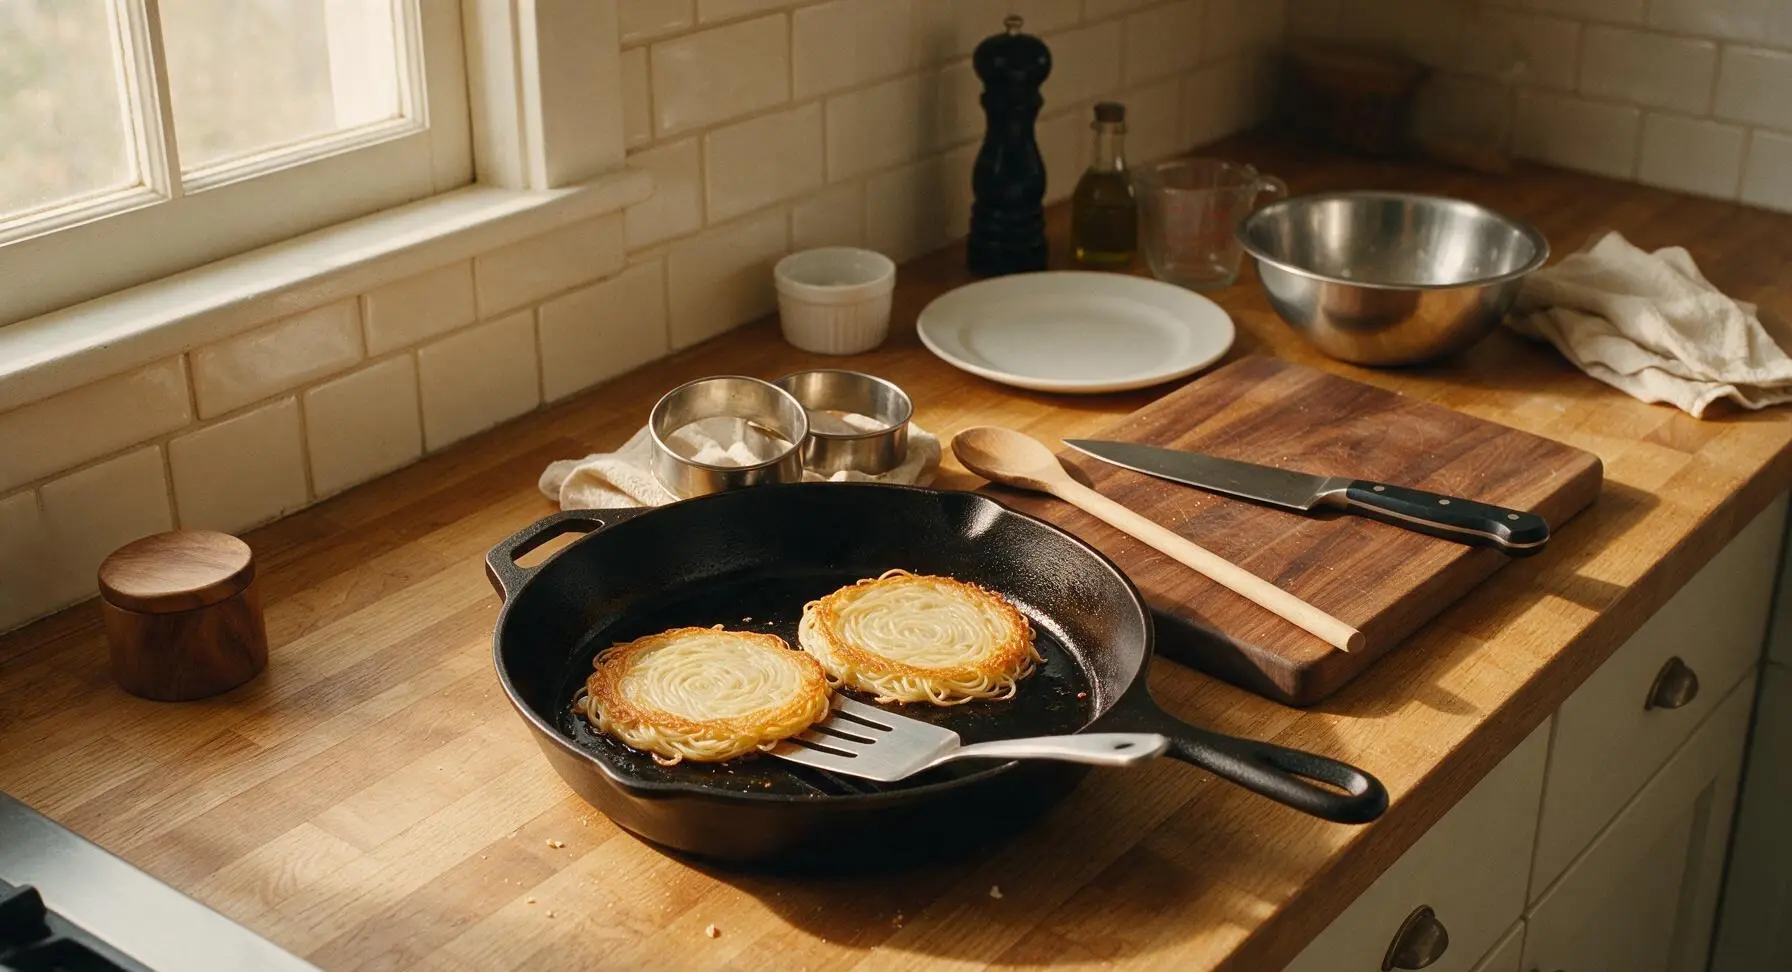
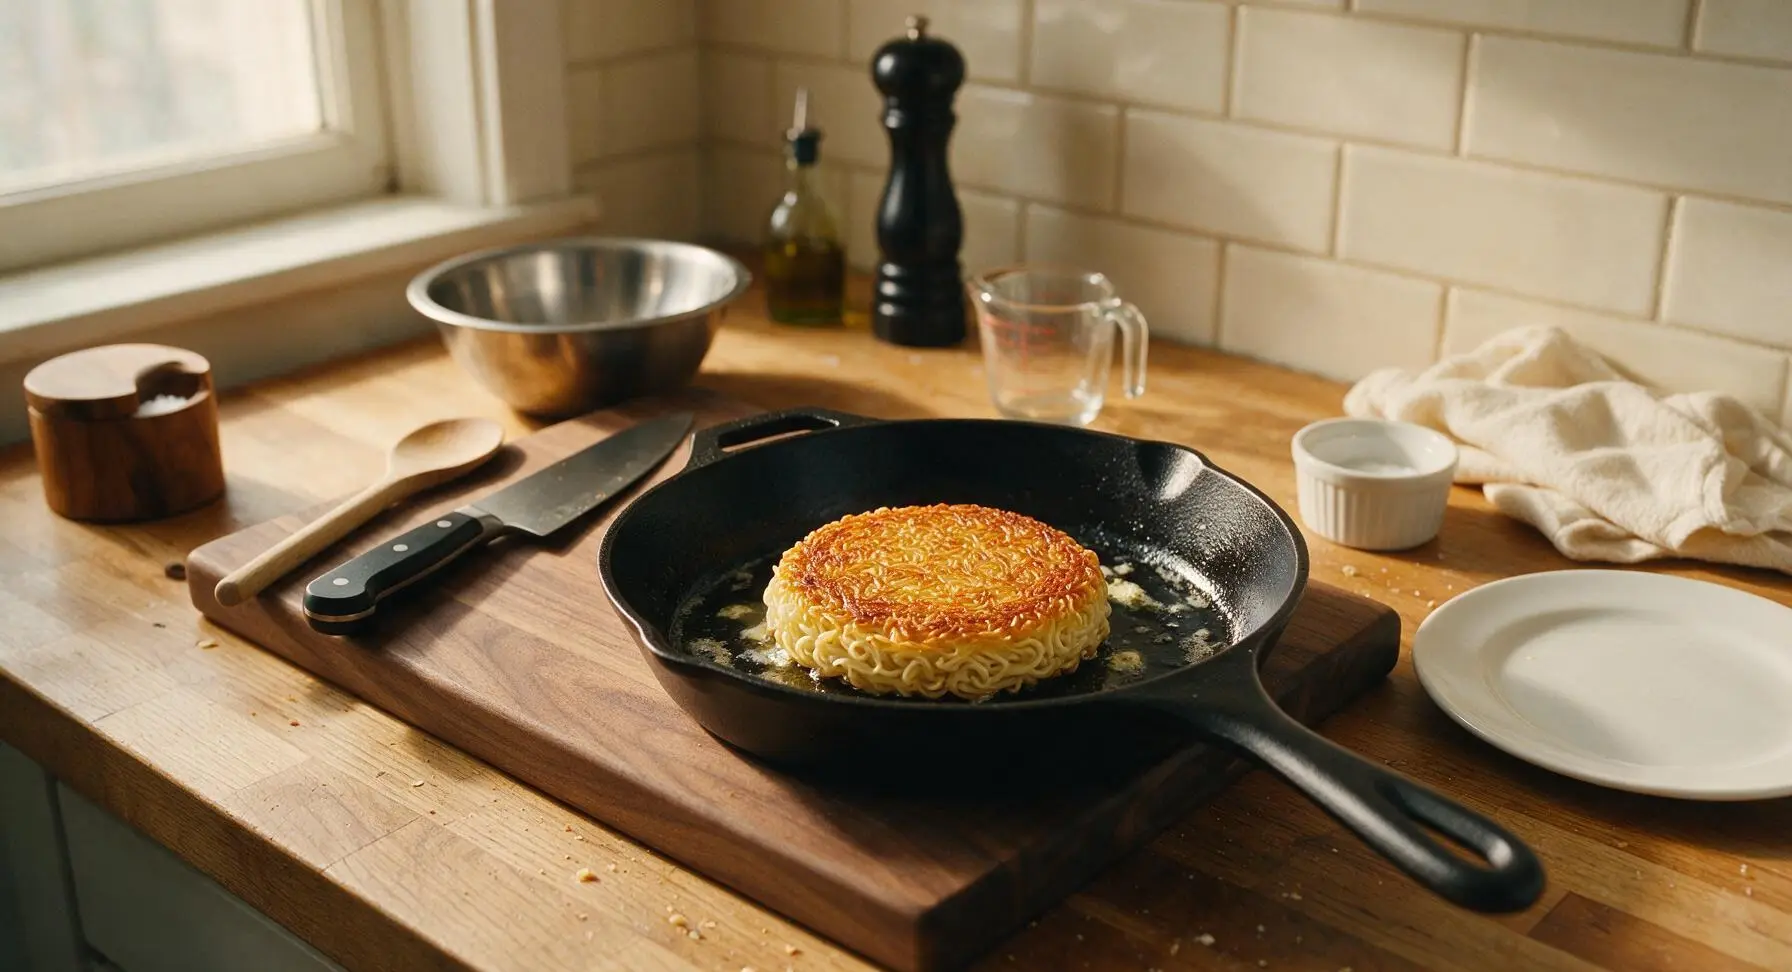
Step 4
step4:Fry Buns Until Crispy
Step 4
step4:Fry Buns Until Crispy
5

Layer Cheese Filling

Reduce the induction burner heat to medium-low (140C/285F). Place two of the crispy ramen buns back into the skillet, with the most golden, crispy side facing down. Toss the shredded cheddar and mozzarella together in a small pile, then divide the cheese mix evenly between the two buns, spreading it in an even layer all the way to 2mm from the edge (this prevents excess cheese from oozing out and burning as it melts). Sprinkle the thinly sliced scallions evenly over the cheese, then top each stack with a second ramen bun, crispy side facing out, to form two complete sandwiches.
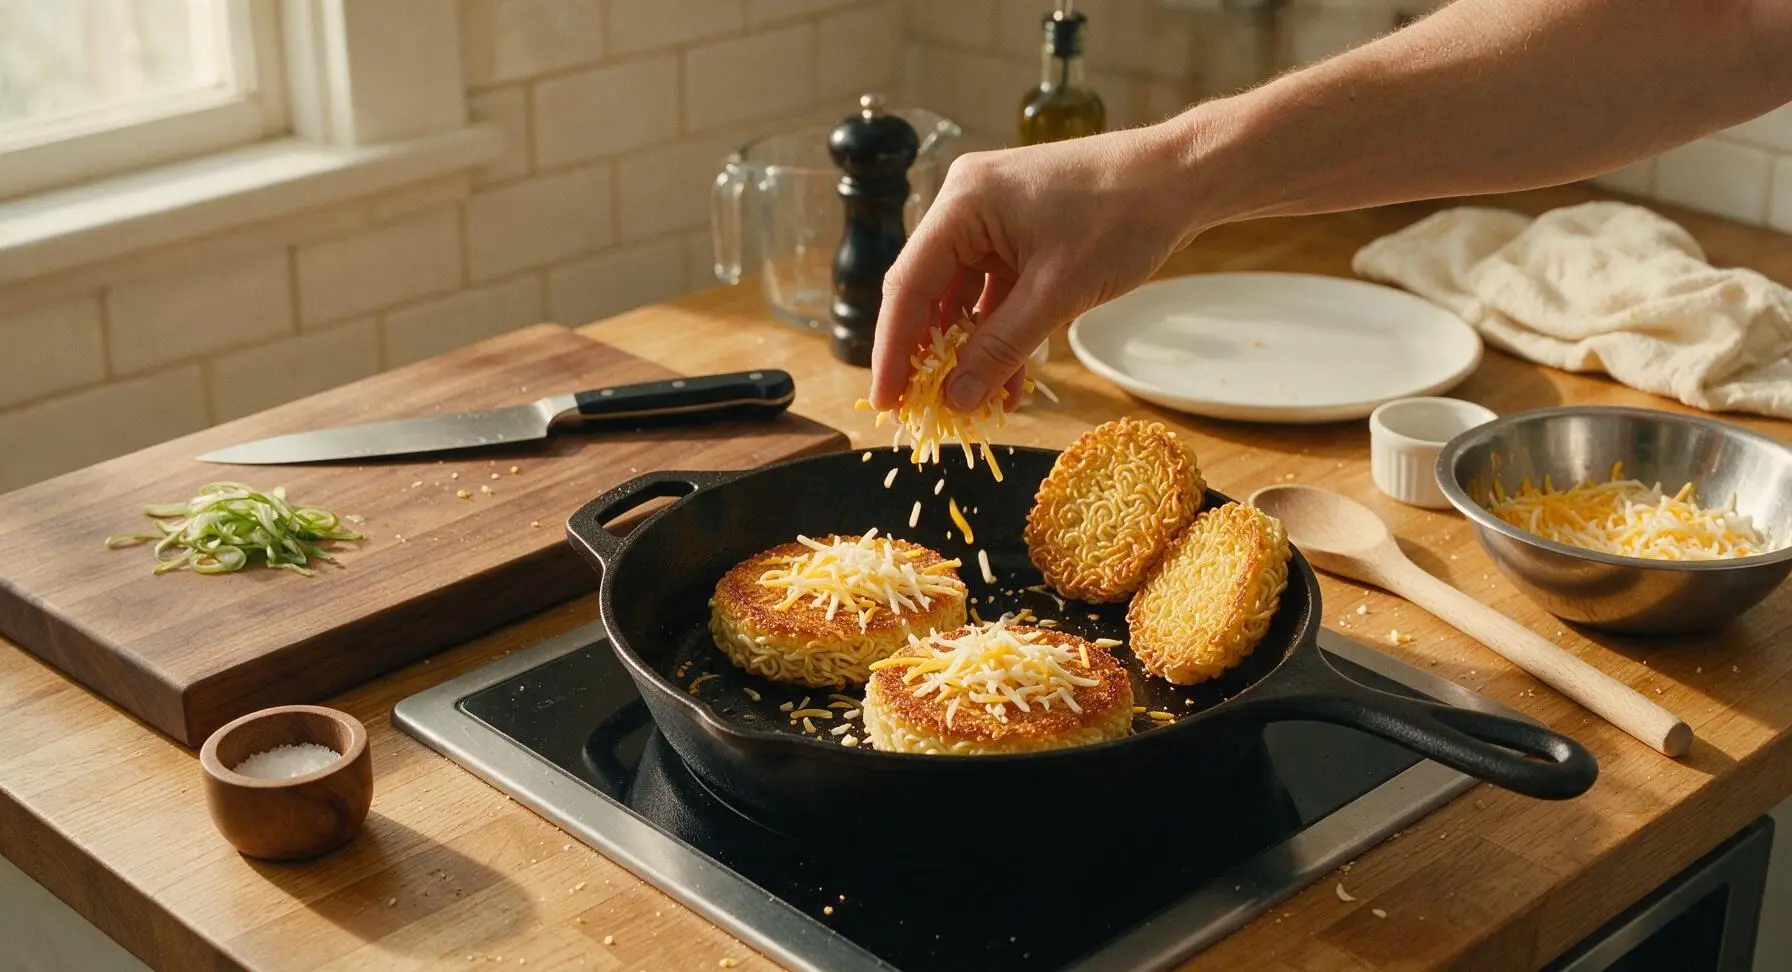
Step 5
step5:Layer Cheese Filling
6

Grill to Melt Cheese

Add the remaining 1 tbsp of unsalted butter to the skillet, letting it melt and flow around the base of the sandwiches. Cook for 3 minutes on the first side, pressing down gently on the top of each sandwich with the turner spatula every minute to help the layers adhere and encourage even cheese melting. Carefully flip each sandwich with the turner, and cook for a final 2 to 3 minutes on the second side, until the cheese is fully melted, stretchy, and oozing slightly at the edges, and both outer ramen layers are deep golden and extra crispy.
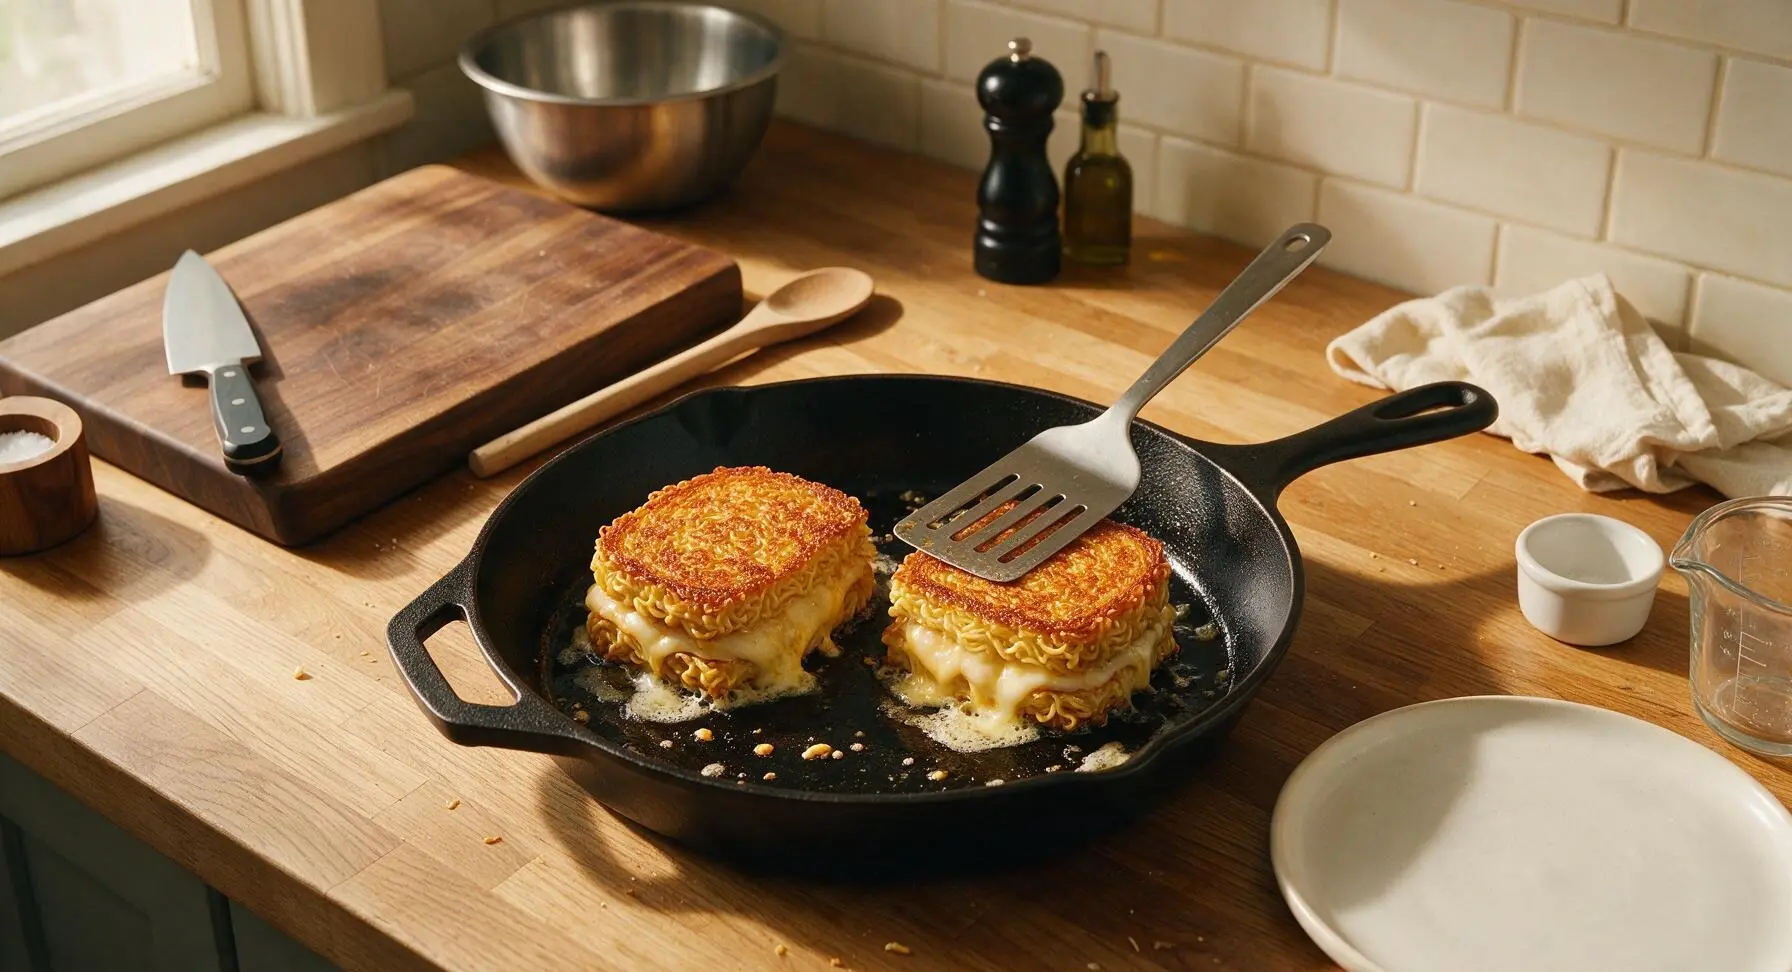
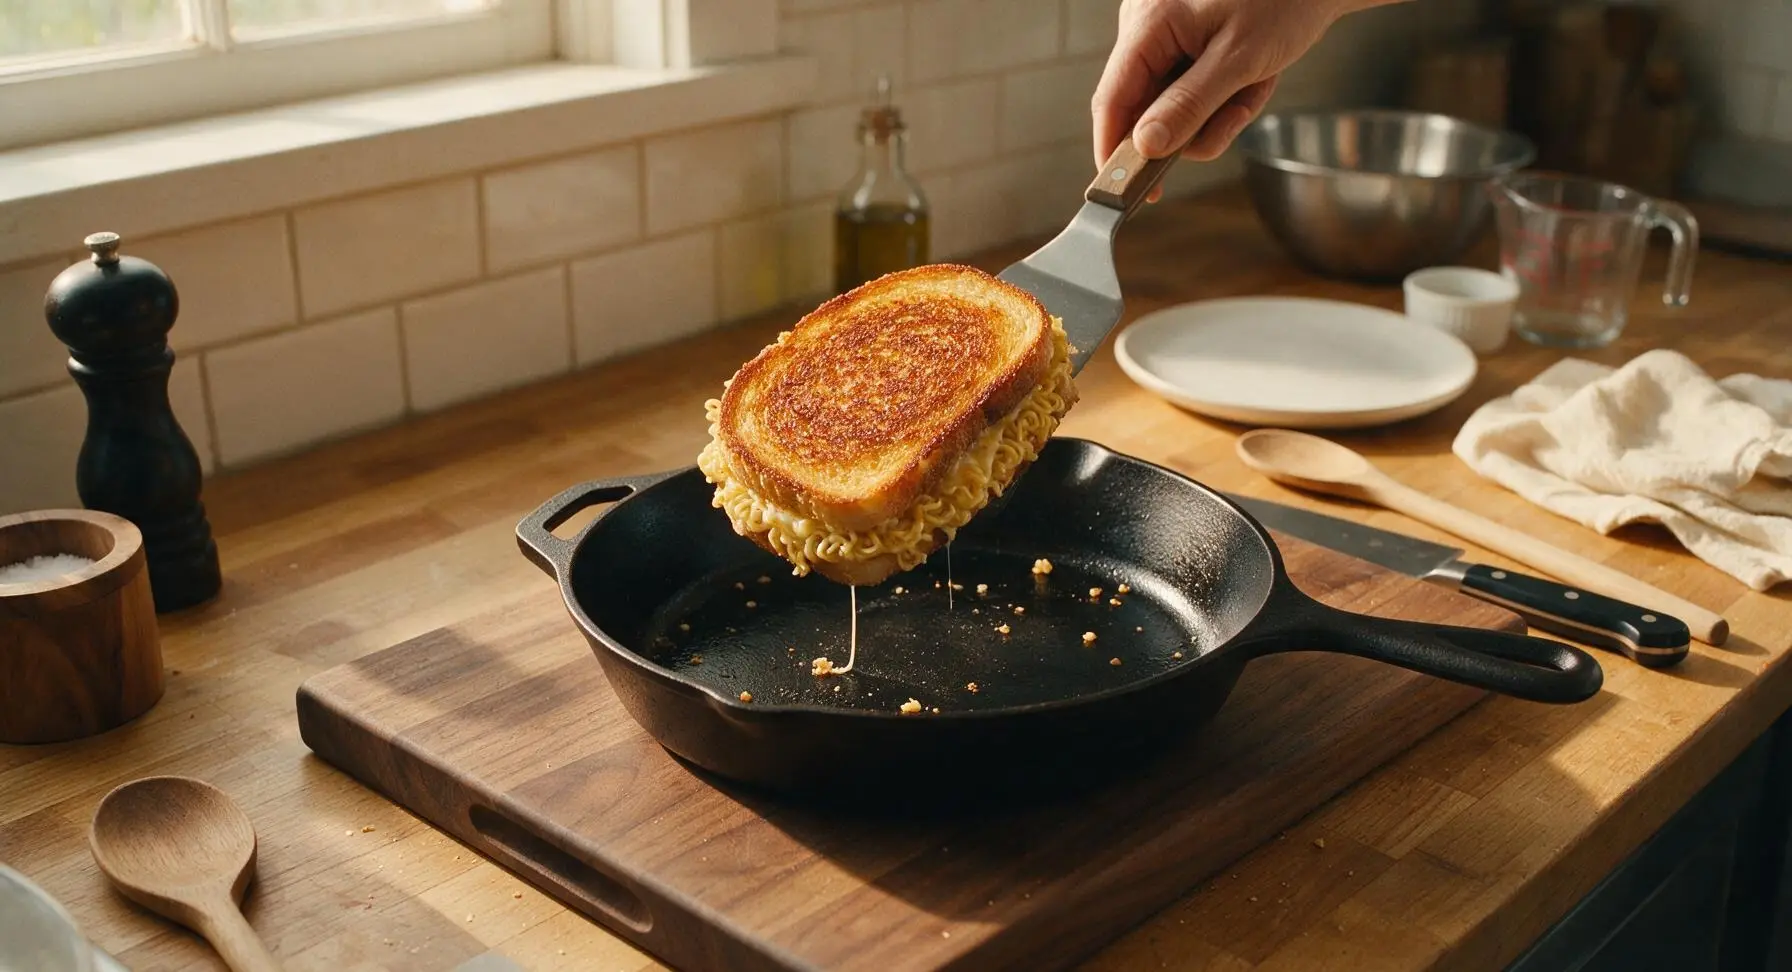
Step 6
step6:Grill to Melt Cheese
Step 6
step6:Grill to Melt Cheese
7

Plate and Garnish

Transfer the cooked sandwiches to the matte cream ceramic dinner plate. Let rest for 1 full minute to allow the cheese to set slightly (this prevents all the cheese from sliding out when cut). Cut each sandwich diagonally into two triangular halves, then sprinkle the tops with a pinch of flaky sea salt. Pour the optional low-sodium soy sauce into the small white ceramic ramekin for dipping, and rest the matte black chopsticks across the plate edge for serving.
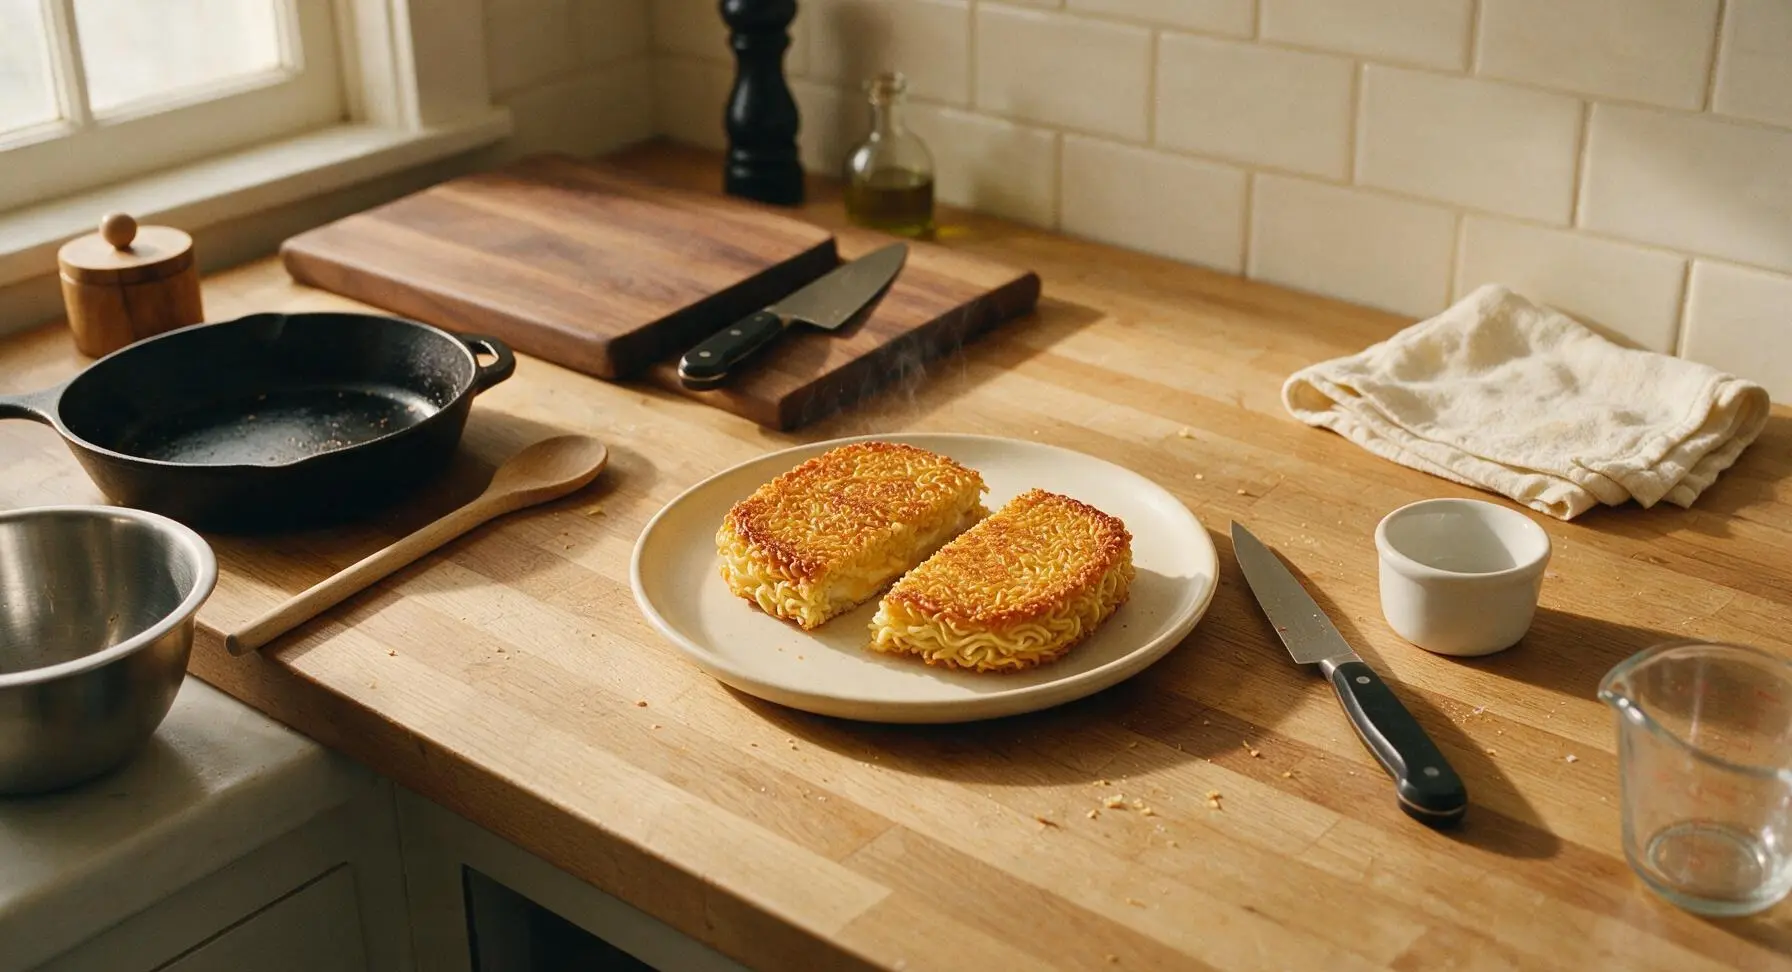
Step 7
step7:Plate and Garnish

Tips

1.Dry noodles thoroughly after boiling: Excess starchy water will make ramen buns soggy instead of crispy, so shake the strainer vigorously for 10 full seconds and let noodles drain for 1 minute before mixing with egg.
2.Use low-moisture mozzarella: Fresh mozzarella has high water content that leaks out during cooking and turns crispy buns soggy; low-moisture mozzarella melts into perfect stretchy cheese without excess moisture.
3.Cook over medium-low heat when grilling: High heat will burn the outer ramen layers before the cheese fully melts, while medium-low heat creates evenly crispy buns and smooth, fully melted cheese filling.


✨ You May Also Like

Main Course
🍜 United Kingdom

A showstopping classic of tender seared beef, savory mushroom duxelles, and crisp prosciutto wrapped in flaky golden puff pastry, baked to juicy perfection.

⏱️ 2 hours 1Main Course ★ 4.7
Main Course
🍜 India

Tender charred marinated chicken simmered in a rich, spiced creamy tomato sauce, this iconic Anglo-Indian curry pairs perfectly with basmati rice or warm naan.

⏱️ 50 minuteMain Course ★ 4.6
Main Course
🍜 Thailand

Classic tangy, sweet, and savory Thai stir-fried rice noodles with shrimp, tofu, and crunchy garnishes, balancing all five core Thai flavor profiles.

⏱️ 30 minuteMain Course ★ 4.5
Main Course
🍜 United Kingdom

Crispy golden beer-battered cod and fluffy double-fried chips, served with tangy tartar sauce and malt vinegar: the timeless, beloved British pub comfort classic.

⏱️ 45 minuteMain Course ★ 4.7
Main Course
🍜 Mexico

Smoky, chile-marinated pork tacos with caramelized pineapple, fresh cilantro, and lime: a beloved classic Mexican street food perfect for casual summer gatherings.

⏱️ 1 hour 45Main Course ★ 4.8
Main Course
🍜 United States

Crunchy Fritos corn chips layered with savory beef chili and melted cheddar, topped with cool, zesty fixings for a beloved, cozy Tex-Mex comfort food.

⏱️ 35 minuteMain Course ★ 4.8

Ramen Grilled Cheese:Frequently Asked Questions

1.Do I have to set aside the ramen seasoning packets, or can I mix them into the noodle buns? ▾
You can absolutely save those seasoning packets for other uses, but I don’t recommend mixing them straight into the noodle buns. The fine, salty seasoning draws out moisture from the noodles as they cook, leading to soggy instead of crispy buns, and can make the final sandwich overly salty. Tuck them away for quick broths, popcorn seasoning, or roasted veggie dust later to cut down on food waste.
2.Why does the recipe call for low-moisture mozzarella instead of fresh mozzarella? ▾
Fresh mozzarella has an extremely high water content that leaks out as it melts, which will turn your perfectly crispy ramen buns soggy before you finish cooking. Low-moisture mozzarella melts into that iconic stretchy, gooey texture without excess moisture, and pairs beautifully with the sharp, tangy bite of shredded cheddar for that classic grilled cheese feel.
3.How do I stop the ramen noodle buns from falling apart when I flip or cook the sandwich? ▾
The beaten eggs act as the critical binder for the buns, so make sure every cooked ramen noodle is lightly coated in egg before pressing them firmly into compact, even patties in your buttered pan. Let the patties cook undisturbed for 3 to 4 minutes per side to form a solid, crispy crust before you flip them or add cheese, and you won’t deal with crumbly, falling-apart buns.
4.Can I make ramen grilled cheese ahead of time for meal prep or quick weekday lunches? ▾
This sandwich tastes best eaten fresh right off the stove, when the buns are shatteringly crisp and the cheese is hot and stretchy. That said, you can pre-cook the ramen patty buns up to 3 days ahead, stored in an airtight container in the fridge. When you’re ready to eat, reheat the patties in a skillet, add your cheese, and assemble to bring back that crisp texture.
5.What type of instant ramen works best for this recipe—do I need a specific flavor or style? ▾
Any standard dried instant ramen block works perfectly here, no matter what flavor it comes in, since we aren’t using the included seasoning packets in the sandwich itself. Skip soft, fresh refrigerated ramen for this recipe, though—it’s too tender to crisp up into the sturdy, crunchy bun you need to hold all that melted cheese.
6.My cheese isn’t fully melted by the time the ramen buns get crispy—how do I fix that? ▾
This almost always means your pan heat is set too high. Once you add the cheese and top with the second ramen bun, turn the heat to medium-low, and cover the pan with a lid for 1 to 2 minutes. The trapped gentle steam will melt the cheddar and mozzarella fully into that perfect gooey consistency without burning the crispy ramen exterior.
7.What add-ins or dippers pair well with ramen grilled cheese? ▾
Stick to thin, low-moisture add-ins to avoid soggy buns: try thin slices of crispy cooked bacon, a light sprinkle of furikake, or a thin swipe of spicy sriracha mayo between the cheese layers. For dipping, classic creamy tomato soup, tangy ranch, or sweet chili sauce all complement the salty, crispy, cheesy profile of the sandwich perfectly.

Comments (7)

2 days ago

OMG y’all, this ramen grilled cheese was a total game changer for my middle schooler’s after school snack! I used spicy shin ramyun and extra sharp cheddar, he already asked me to make it for his friend group hang this weekend. Only took me like 10 minutes total too, way faster than driving to the fast food place down the street. 10/10 no notes.

yesterday

Wait did you crush the ramen up first before cooking it or leave the noodles whole? I tried a version of this once and the noodles kept sliding out when I bit into it lmao

2 hours ago

Great question! For less sliding, I recommend cooking the ramen noodles, draining them, then pressing them firmly into two tight square "buns" in the pan before adding cheese in between — that way they hold together way better when you take a bite!

1 week ago

Perfect easy lunch to prep for work! I made a batch on Sunday, wrapped them individually in foil, and they reheat so well in the office toaster oven. Way more fun than my usual sad turkey sandwich. I added a little sriracha mayo to the inside and *chef’s kiss*

yesterday

Brought these cut into bite sized squares to my neighborhood block party potluck last night and they were GONE in 10 minutes flat. People kept asking me for the recipe! I did a mix of plain and spicy ramen so folks with lower spice tolerance could enjoy them too. Only tiny hiccup was my first batch stuck to the pan a little, but I used more butter on the second round and it was perfect.

30 minutes ago

So happy these were a potluck hit, Patti! A quick pro tip for no sticking: make sure your pan is preheated to medium (not high!) before adding the butter and ramen buns, that keeps the noodles crisp without gluing to the surface.

30 minutes ago

Wait this is genius for dorm cooking??? I don’t even have a full stove, just a little electric hot plate, and this came together in 12 minutes exactly like the recipe said. Used cheap dollar store ramen and shredded mozzarella I had left from pizza night, SO good. Saved me $12 on takeout tonight lmao

5 minutes ago

Omg I’m making this tonight in my dorm too! Did you use the ramen seasoning packet in the noodles or leave it out? I don’t want it to be too salty

just now

Great call making this in a dorm! As for the seasoning packet, I recommend tossing just half of it with the cooked noodles to get that classic ramen flavor without going overboard on salt — you can always sprinkle a little extra on the outside of the crispy buns if you want more punch!

2 weeks ago

Tried this with buldak ramen and pepper jack cheese and I think I’ve found my new comfort food. The crispy noodle texture is insane compared to regular bread grilled cheese. Don’t sleep on dipping this in a little soy sauce or ranch, trust me.

3 days ago

Made these for my kids for dinner last night when I forgot to pick up bread from the grocery store. Told them it was “adventure grilled cheese” and they loved it, ate every single bite without complaining. Win for dad, no emergency grocery run needed. 10/10 will be making again on busy sports nights.

2 days ago

Oh my god I’m stealing that “adventure grilled cheese” line for my two picky eaters! I’ve been looking for something quick to make between practice and homework time, this sounds perfect.

5 days ago

Wait has anyone tried this with gluten free ramen? I’m obsessed with grilled cheese but have been celiac for 5 years, regular bread is hit or miss for me texture wise, and this sounds like such a fun alternative. Just don’t want it to turn mushy if I use GF noodles.

3 days ago

Great question! I’ve tested this with a few brands of gluten free millet and brown rice ramen, and it works perfectly as long as you cook the noodles 1 minute less than the package says (al dente!) and press them really well to squeeze out excess water before pan-frying. No mushy texture, promise!



