
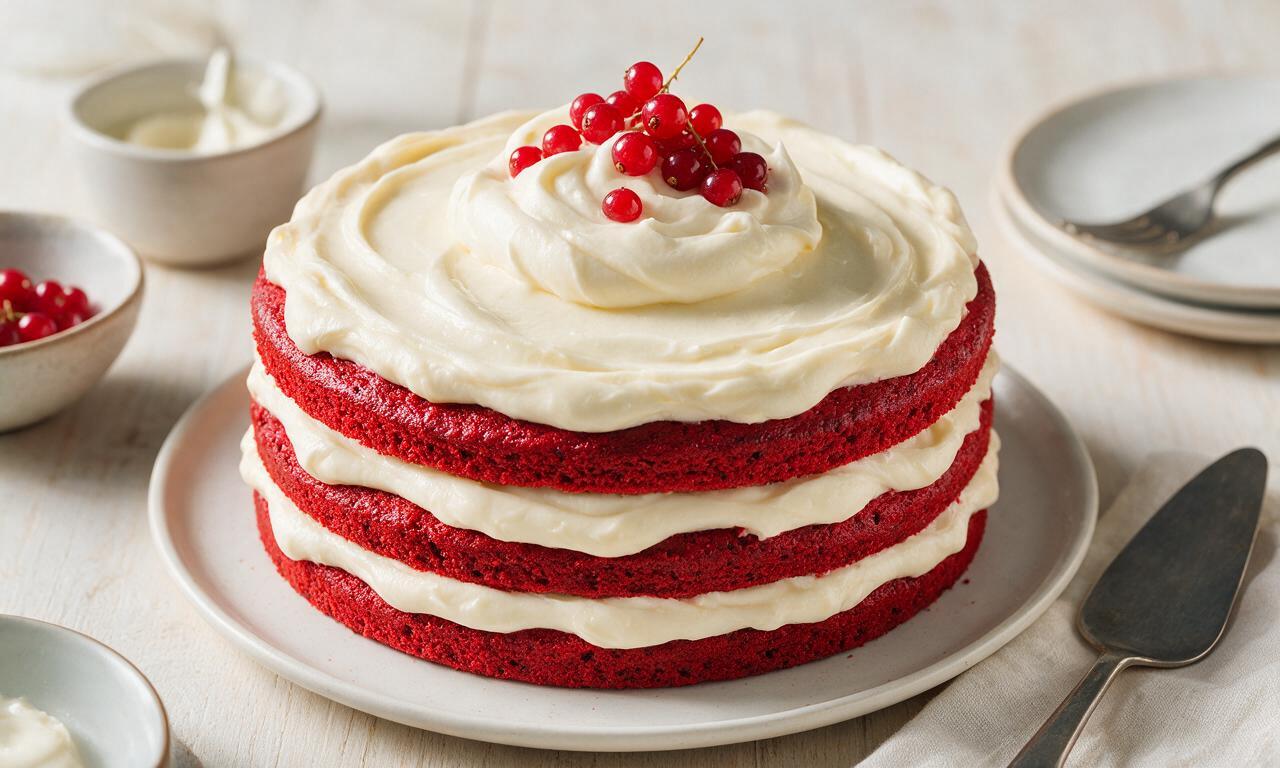
Red Velvet Cake

Red Velvet Cake
⏱️ cook time 2 hours (including 1 hour cake cooling time)
🍽️ servings 8
⚡ Difficulty medium

intro

Tender, cocoa-kissed bright red cake layers slathered in tangy, smooth cream cheese frosting, this timeless Southern dessert is a beloved, crowd-pleasing celebration treat.

Ingredients

All-purpose flour 315 grams (2.5 cups)
Unsweetened natural cocoa powder 2 tablespoons (10 grams)
Baking soda 1 teaspoon (5 grams)
Fine sea salt 1.25 teaspoons (6 grams, split between cake and frosting)
Unsalted butter, softened to room temperature 226 grams (1 cup, split evenly between cake and frosting)
Granulated sugar 400 grams (2 cups)
Vegetable oil 120 ml (1/2 cup)
Large eggs, room temperature 2 (100 grams total, out of shell)
Full-fat buttermilk, room temperature 240 ml (1 cup)
Red gel food coloring 1 tablespoon (15 ml)
Pure vanilla extract 2 teaspoons (10 ml, split between cake and frosting)
Distilled white vinegar 1 teaspoon (5 ml)
Full-fat block cream cheese, softened to room temperature 450 grams (16 oz / 2 standard blocks)
Powdered sugar, sifted 360 grams (3 cups)

Steps

1

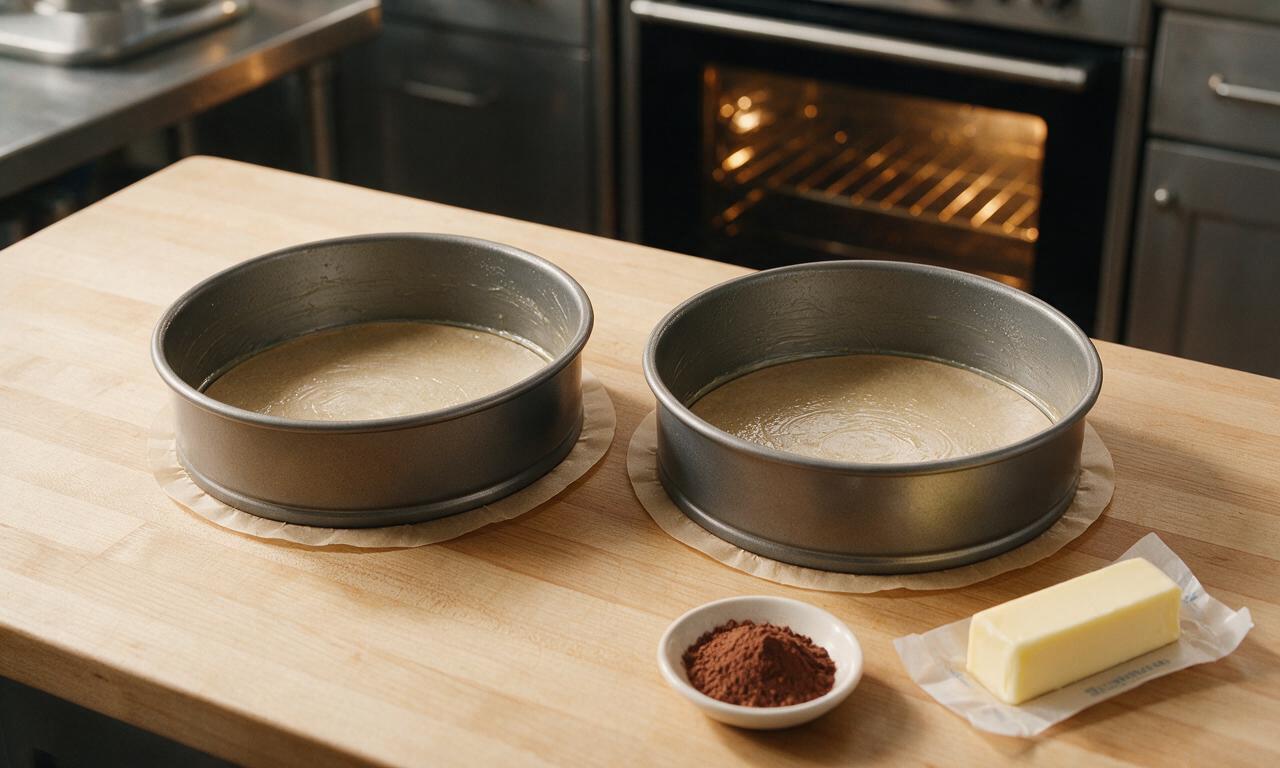
Prep oven and pans

Preheat your oven to 175°C (350°F) with racks positioned in the middle. Grease two 9-inch round cake pans with butter, line the bottom of each with a circle of parchment paper, and lightly dust the sides with cocoa powder (to avoid white flour residue on the red cake). Set prepared pans aside.
Step 1
step1:Prep oven and pans
2

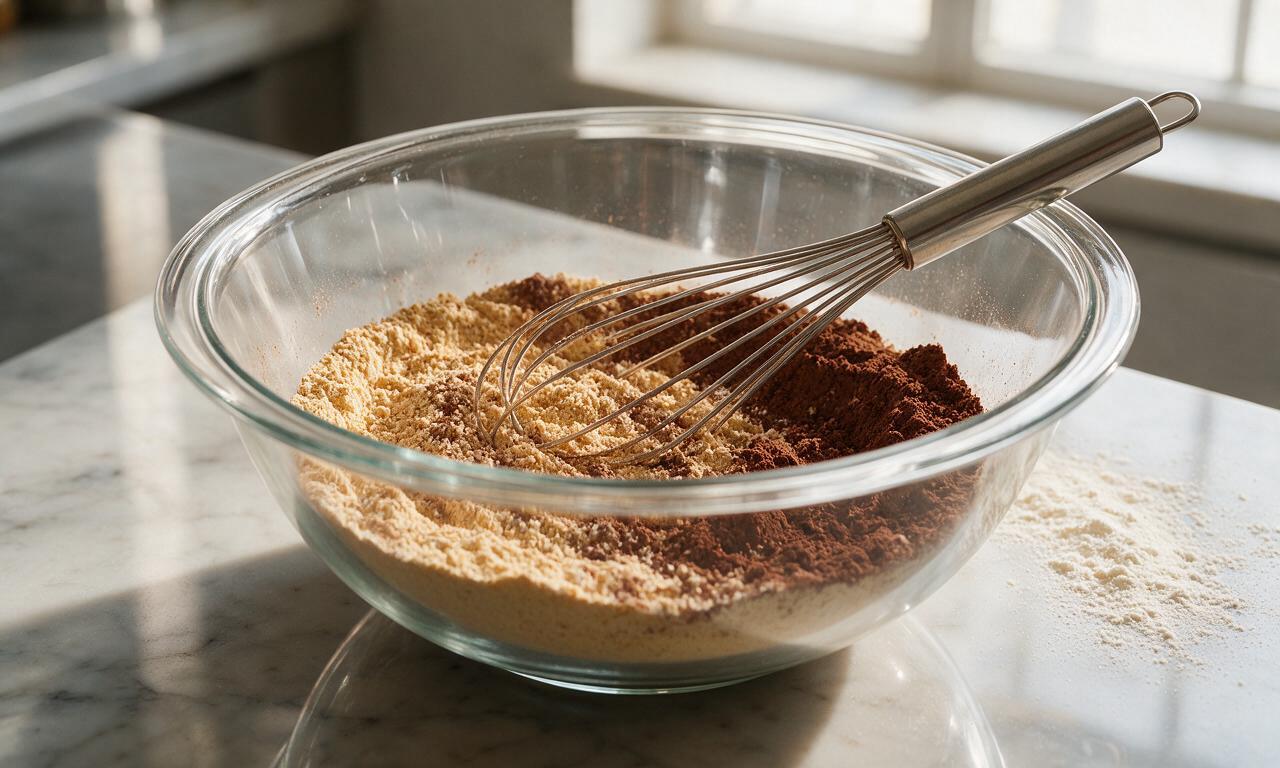
Whisk dry ingredients

In a medium glass mixing bowl, combine 315g all-purpose flour, 2 tbsp unsweetened cocoa powder, 1 tsp baking soda, and 1 tsp fine sea salt. Whisk vigorously for 30 seconds to evenly distribute leavening and cocoa, breaking up any small clumps, then set the dry mixture aside.
Step 2
step2:Whisk dry ingredients
3

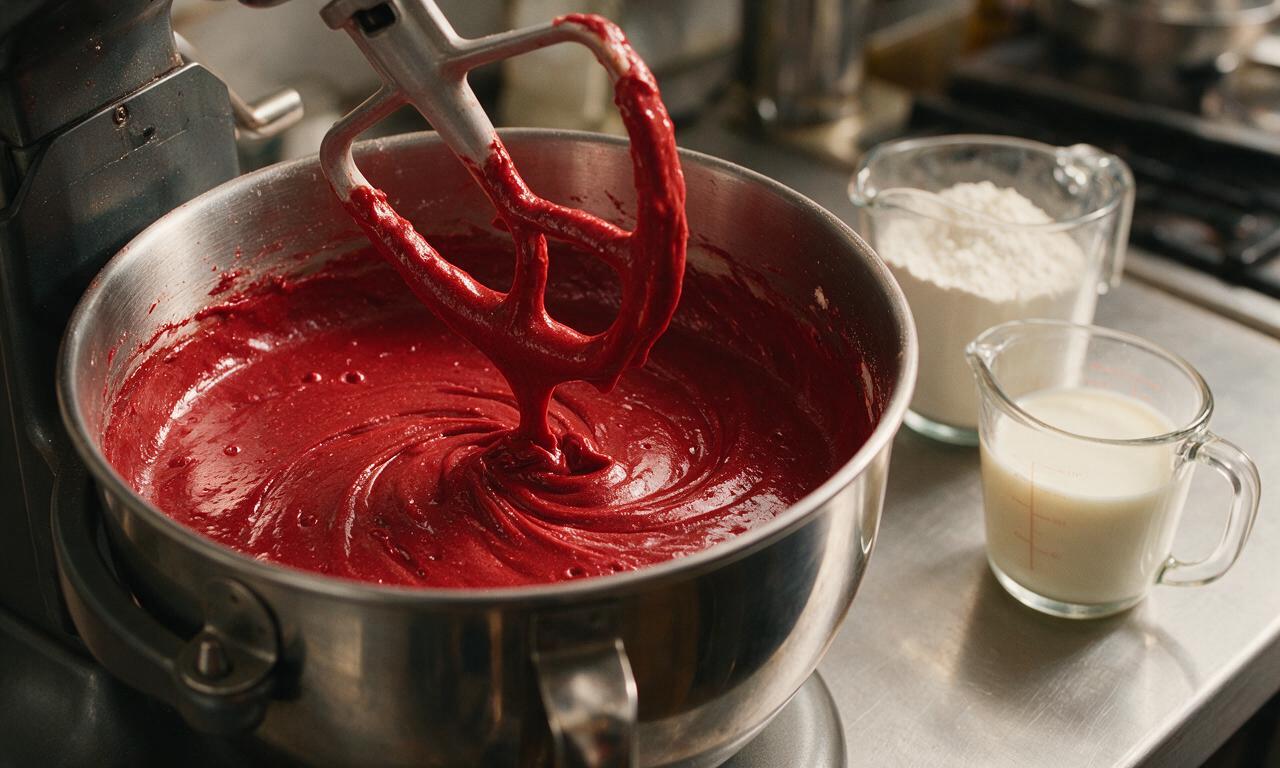
Mix cake batter

In a large stand mixer fitted with a paddle attachment, beat 113g softened unsalted butter and 400g granulated sugar on medium speed for 3 minutes until pale and fluffy. Slowly stream in 120ml vegetable oil, beating for 1 additional minute. Add eggs one at a time, beating on medium-low for 30 seconds after each addition, then stir in 1 tbsp red gel food coloring and 1 tsp vanilla extract. Alternate adding 1/3 of the dry mix and 1/2 of the room-temperature buttermilk, starting and ending with dry ingredients, mixing on low speed only until no dry streaks remain. Fold in 1 tsp white vinegar by hand with a spatula, taking care not to overmix the batter.
Step 3
step3:Mix cake batter
4

Bake cake layers

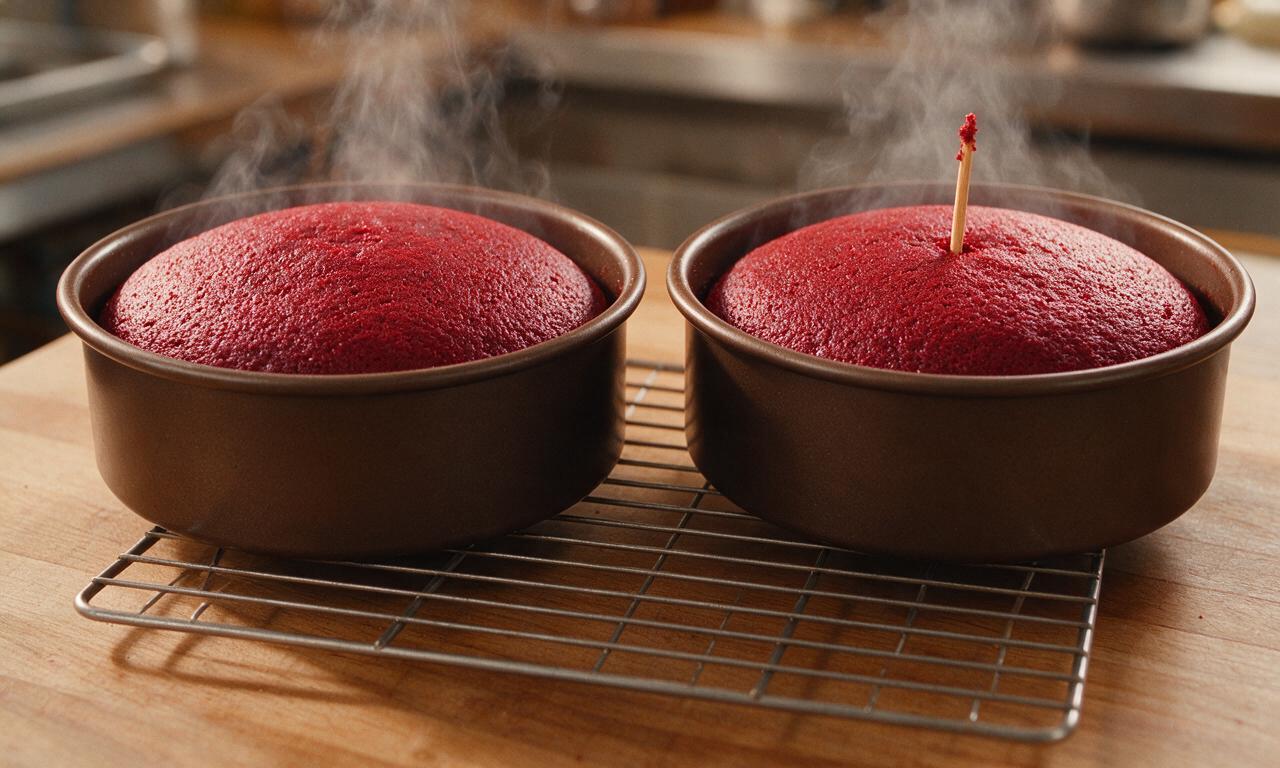
Divide the batter evenly between the two prepared pans, using an offset spatula to smooth the tops into a level surface. Bake for 28-32 minutes at 175°C (350°F), testing for doneness by inserting a toothpick into the center: it should come out with 2-3 small moist crumbs attached, not wet batter. Let cakes cool in their pans on a wire rack for 10 minutes, then turn out onto the rack to cool completely to room temperature (approximately 1 hour) before frosting.
Step 4
step4:Bake cake layers
5

Make cream cheese frosting

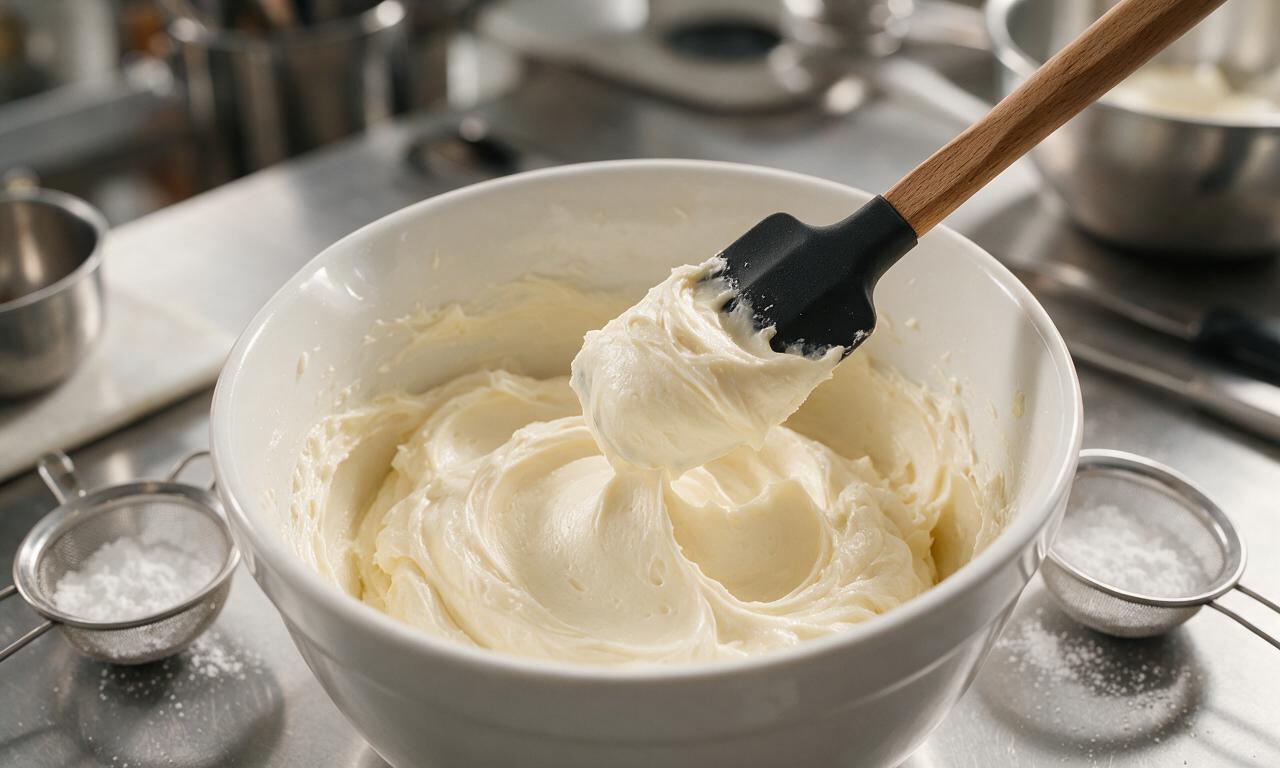
In a clean large mixing bowl, beat 450g softened full-fat block cream cheese and the remaining 113g softened unsalted butter on medium speed for 2 minutes until completely smooth with no visible lumps. Turn the mixer to low speed, slowly add 360g sifted powdered sugar, the remaining 1 tsp vanilla extract, and 1/4 tsp fine sea salt. Once the sugar is fully incorporated, increase speed to medium-high and beat for exactly 1 minute—do not overbeat, as this will create a runny, unstable frosting.
Step 5
step5:Make cream cheese frosting
6

Assemble and frost cake

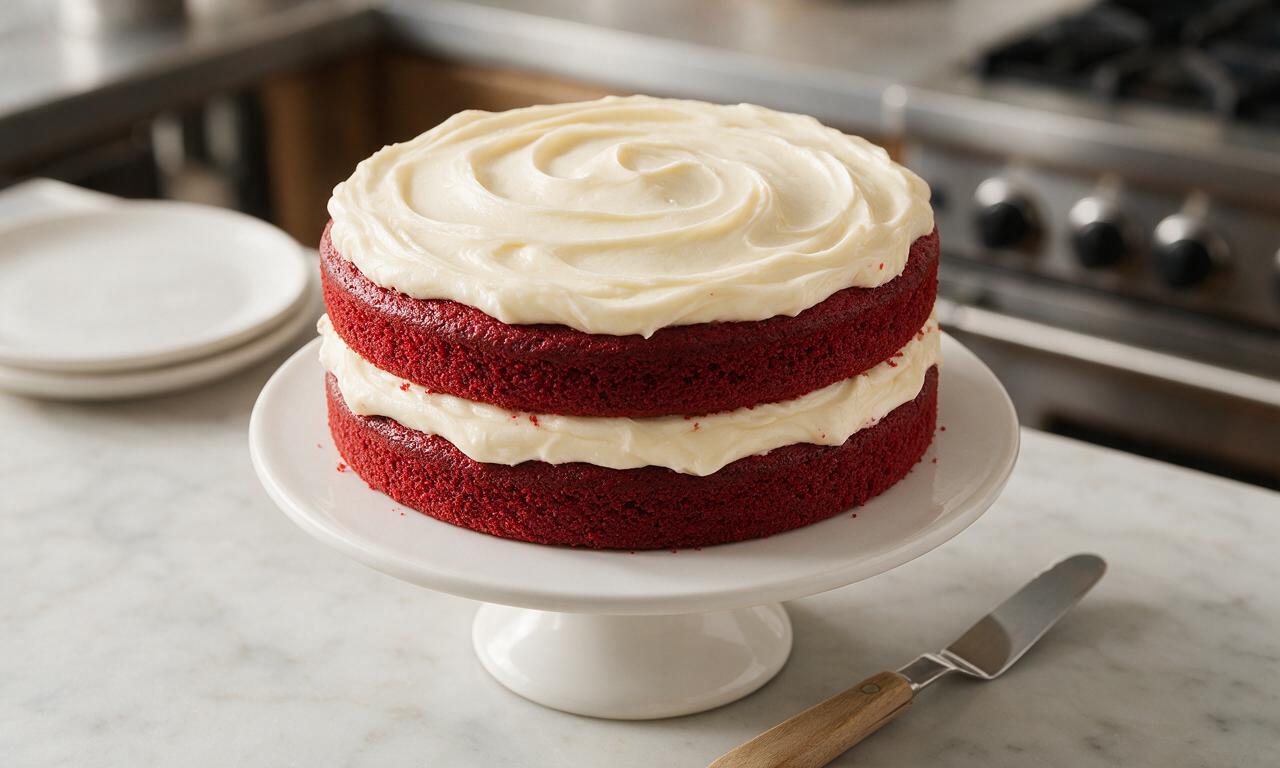
Set one fully cooled cake layer on a cake stand or serving plate. Spread 1 cup (approximately 220g) of the cream cheese frosting evenly across the top of the layer, leaving a 1/4-inch border from the edge to prevent oozing when the top layer is added. Place the second cake layer on top, flat side up for a level surface. Use the remaining frosting to cover the top and sides of the cake, creating a smooth finish or soft decorative swirls as preferred. Chill the assembled cake in the refrigerator for 20 minutes to set the frosting before slicing and serving.
Step 6
step6:Assemble and frost cake

Tips

1.Use gel food coloring instead of liquid food coloring to achieve a deep, rich red hue; liquid coloring thins batter and requires much larger volumes to get the same color, which can ruin the cake's tender texture.
2.Ensure cream cheese and butter for the frosting are softened to cool room temperature (not melted or warm) to avoid lumpy, separated, or runny frosting that slides off the cake.
3.Never frost warm cake layers: residual heat will melt the cream cheese frosting, causing it to slide off the sides and create a messy, unstable finish.


✨ You May Also Like

Desserts & Baking
🍜 Italy

Creamy, coffee-kissed classic Northern Italian no-bake dessert, with layers of rum-spiked mascarpone cream, soft ladyfingers, and a rich cocoa dusting.

⏱️ 4 hours 3Desserts & Baking ★ 4.8
Desserts & Baking
🍜 France

Flaky, shatteringly crisp, buttery French croissants with golden exteriors and soft, airy layered interiors, perfect for pairing with coffee for a special morning treat.

⏱️ 12 hours Desserts & Baking ★ 4.7
Desserts & Baking
🍜 United States

Warm, spiced baked apples topped with a fluffy golden biscuit crust, this cozy dessert pairs perfectly with vanilla ice cream for cool-weather comfort.

⏱️ 55 minuteDesserts & Baking ★ 4.7
Desserts & Baking
🍜 United States

A star-spangled classic American blueberry pie with buttery flaky crust and bright sweet-tart filling, perfect for summer patriotic gatherings.

⏱️ 1 hour 25Desserts & Baking ★ 4.8
Desserts & Baking
🍜 United States

A beloved no-bake regional Maine candy with a chewy coconut-potato center coated in rich dark chocolate, a New England holiday staple since the 1870s.

⏱️ 2 hours 3Desserts & Baking ★ 4.9
Desserts & Baking
🍜 France

Luxuriously creamy, floral frozen custard made with aromatic Tahitian vanilla beans, boasting a smooth, rich texture that melts slowly on the tongue.

⏱️ 3 hours 3Desserts & Baking ★ 4.6

Red Velvet Cake:Frequently Asked Questions

1.Why does my red velvet cake turn out dry instead of tender and moist?
Dry red velvet almost always stems from three common missteps: overpacking flour when measuring, overbaking the layers, or using cold ingredients that don’t emulsify smoothly. Always spoon flour into measuring cups and level with a knife, pull layers when a toothpick has 2-3 moist crumbs attached, and use room-temperature butter as the recipe directs.
2.Can I use Dutch-processed cocoa instead of natural unsweetened cocoa for this recipe?
I don’t recommend swapping in Dutch-processed cocoa here! This recipe relies on natural cocoa’s slight acidity to react with baking soda for a light, tender crumb and proper rise. Dutch-processed cocoa is alkalized to cut acidity, so it will throw off the leavening balance and leave you with denser, flatter cake layers.
3.Why do my cake layers have a bitter, soapy aftertaste?
That soapy, bitter flavor almost always comes from overmeasuring baking soda, or using stale baking soda past its prime. Double-check your measurement (level the spoon, don’t pack it!) and confirm your baking soda is less than 6 months old to avoid off-flavors and get the right light, tender crumb.
4.How soft does my unsalted butter need to be for the cake and frosting?
Your butter is ready when you can press a clean finger into it easily and leave a deep indent, but it’s not greasy or melted to the point of being translucent. This usually takes 30 to 60 minutes on a 68-70°F counter, and it ensures your batter and frosting whip up light and smooth, not lumpy or curdled.
5.Why isn’t my cake the bright, vibrant red I expect from classic red velvet?
If your cake looks dull brownish-red instead of bright, vivid red, you’re likely using too little gel food coloring, or relying on liquid coloring that dilutes the batter. Stick to 1 to 1.5 teaspoons of no-taste red gel coloring, which is concentrated so it won’t throw off the batter’s moisture balance, for that classic hue.
6.Can I make the cake layers ahead of time?
Absolutely! Once the baked layers cool completely to room temperature, wrap each tightly in two layers of plastic wrap and store them in the fridge for up to 3 days, or in the freezer for up to 1 month. Thaw frozen layers in the fridge overnight before frosting for the best, most moist texture.
7.Why is my cream cheese frosting runny and hard to spread neatly?
Runny cream cheese frosting usually happens if your cream cheese or butter is too warm when you mix it, or if you overwhip the frosting and break its smooth emulsion. If it’s too soft, pop the bowl in the fridge for 15 to 20 minutes, then stir gently to thicken it back up before assembling the cake.
8.Do I need to line my cake pans for this recipe?
I always recommend lining the bottom of each cake pan with a circle of parchment paper, even if you grease and flour the sides. This prevents the tender, moist cake layers from sticking to the pan bottom as they cool, so you get clean, intact layers every time without crumbly broken edges.
9.Can I use salted butter instead of unsalted butter for the cake and frosting?
You can swap in salted butter if that’s all you have, but you’ll need to cut the added fine sea salt in the recipe by half to avoid an overly salty cake or frosting. Unsalted butter lets you control the exact salt level, which balances sweetness and tang perfectly, so it’s my first choice.
10.How do I keep crumbs from getting mixed into my smooth cream cheese frosting?
The easiest trick is to apply a thin “crumb coat” of frosting first: spread a very thin layer over the entire stacked cake, then pop it in the fridge for 15 minutes to set. That thin layer locks all loose crumbs in place, so you can add your final thick, smooth coat without stray crumbs showing through.
11.Why didn’t my cake layers rise evenly as they baked?
Unevenly risen layers usually come from uneven oven temperature, overmixing the batter once you add the flour, or old baking soda that’s lost its leavening power. Use an oven thermometer to confirm correct temp, mix just until no dry flour streaks remain, and check that your baking soda is fresh.
12.Can I turn this layer cake recipe into red velvet cupcakes instead?
Definitely! This batter works beautifully for cupcakes. Line a standard muffin tin with paper liners, fill each liner ⅔ full of batter, and bake at the same oven temperature for 18 to 22 minutes, until a toothpick comes out with 2-3 moist crumbs attached. You’ll get about 24 cupcakes per batch.
13.How long will this frosted red velvet cake stay fresh to eat?
A fully frosted red velvet cake will stay fresh stored in an airtight cake carrier in the fridge for up to 5 days. Cream cheese frosting needs to stay chilled to stay food safe, so don’t leave it out at room temperature for more than 2 hours at a time, especially in warm kitchens or party spaces.
14.Do I really need to sift my dry ingredients for this recipe?
Sifting your flour, cocoa powder, baking soda, and salt together isn’t strictly mandatory, but it does two key things: it breaks up any clumps of cocoa so you don’t get dry, bitter pockets in the cake, and it evenly distributes leavening and salt for consistent texture and flavor in every bite.
15.Why does my red velvet cake taste just like regular chocolate cake?
Classic red velvet only has a small amount of cocoa powder for a subtle, cocoa-kissed flavor, not a strong chocolate taste. If yours tastes like straight chocolate cake, you likely added too much cocoa. Stick to the recipe’s measured amount of natural cocoa to get that signature mild, lightly chocolatey profile.
16.Can I reduce the amount of sugar in this recipe to make it less sweet?
Sugar does more than sweeten this cake—it helps keep layers moist, contributes to the tender crumb, and helps the cake brown properly as it bakes. You can cut the sugar by up to 25% without major texture changes, but cutting more will leave you with a drier, denser, less tender cake.
17.What’s the best way to get smooth, level cake layers for easy stacking?
Once your layers are fully cooled, use a long serrated knife to gently saw off the domed top of each layer to create a flat, even surface. Save those trimmed cake scraps to make cake pops or a trifle, if you’d like! Level layers stack evenly without sliding, so your finished cake looks neat and professional.
18.Can I freeze a fully frosted red velvet cake to serve later?
You can freeze a fully frosted red velvet cake, but you’ll want to set it uncovered in the freezer for 2 hours first until the frosting is rock solid, then wrap it tightly in two layers of plastic wrap and a layer of foil for up to 1 month. Thaw it in the fridge overnight before serving.
19.Is the tangy flavor of the cream cheese frosting normal, or did I make a mistake?
That bright, tangy flavor is exactly what classic cream cheese frosting is supposed to have! It perfectly balances the subtle cocoa and sweet notes of the red velvet cake for that iconic, well-rounded flavor. If your frosting tastes bland, double-check you used full-fat block cream cheese, not whipped tub-style spread.

Comments (20)

2 days ago

OMG I made this for my husband’s birthday dinner last night and every single guest asked for the recipe! The cake was so moist, not dry at all like every other red velvet I’ve tried, and that cream cheese frosting is *chef’s kiss* not too sweet, perfect tang. 10/10 will be making this for every potluck from now on!

yesterday

Wait did you use the two 9-inch pans the recipe calls for or split it into three thinner layers? I’m making this for my work potluck next week and want it to look extra impressive!

2 hours ago

Great question! Both work great! Two pans give you thicker, more indulgent layers, three pans make for a taller, more showstopping cake — just reduce bake time by 5-7 minutes if you go the three layer route so it doesn’t dry out!

1 week ago

Game changer, y’all. I’m usually a box mix guy, figured I’d try from scratch for my daughter’s soccer team end of season party. My kids loved it so much they asked for a second slice before they even finished their first! The crumb is so tender, the red color is perfect without that weird artificial aftertaste some red velvet has. Zero complaints from the team parents either.

5 days ago

Love to hear that! Nothing beats seeing kids light up over a homemade cake, so glad the team enjoyed it :)

30 minutes ago

Really solid recipe! I added a tiny extra splash of vanilla to the frosting because I’m a vanilla fiend, and it turned out amazing. Only reason it’s not 5 stars is I wish the recipe noted how much red food coloring to use if you’re using gel instead of liquid — I used a little too much at first and it was neon red oops. Still tasted incredible though!

5 days ago

Made this for our family Sunday dinner and it was a total hit! I was worried red velvet was too fussy for my skill level since the recipe says medium difficulty, but the steps were super easy to follow even for a casual baker like me. The cooling time is so worth it, no melted frosting mess when I spread it on!

3 days ago

Did you sift your dry ingredients? I always skip that step and wonder if that’s why my cakes come out dense lmao

2 days ago

So glad it worked out for you! @BakeNewbie22 sifting does help make a lighter crumb, but if you don’t have a sifter, just whisk your dry ingredients really well in a bowl for 30 seconds before adding the wet stuff — works just as well, no fancy tools needed!

yesterday

SO good. I’ve tried so many red velvet recipes over the years that come out dry or taste like plain chocolate cake with red dye, but this one actually has that subtle tang that makes red velvet special. The cream cheese frosting has the perfect ratio of butter to cream cheese, no gritty powdered sugar texture at all.

2 hours ago

Right?! I was so sick of recipes that taste like chocolate cake with food coloring, this one is the real deal. I added a handful of white chocolate chips to the batter last time I made it, chef’s kiss.

2 weeks ago

I’ve been making red velvet cake for 50 years, and this recipe is right up there with my own! I used buttermilk straight from my local dairy and it made the crumb so tender. My granddaughter said it’s better than the bakery cake we got for her graduation last year, that’s the highest compliment I can get.

1 week ago

Wow, that is such a huge compliment coming from someone with decades of baking experience! Using fresh local buttermilk is such a smart move, I bet it made it taste even better.

3 days ago

Great recipe for meal prep! I baked the cake layers Sunday night, wrapped them tight in plastic wrap, and frosted it Tuesday for my roommate’s birthday. It stayed perfectly moist the whole time, no stale texture at all. I did cut the sugar in the frosting by 2 tbsp because I prefer less sweet frostings, would recommend that tweak for anyone who doesn’t have a massive sweet tooth.

5 days ago

Taste was great, but I ran into a couple issues. My cake layers sank in the middle even though I followed the bake time exactly, and I had to make an extra half batch of frosting because there wasn’t enough to cover the sides and do the decorative swirls I wanted. Bummed because the flavor was on point.

3 days ago

Oh no! Did you check your oven temp with an oven thermometer? My oven runs 25 degrees cold and I had the same sinking issue until I figured that out!

2 days ago

Sorry to hear you had issues with the layers sinking! @ILoveCake99 is totally right — oven temp discrepancies are the #1 cause of sinking cakes. As for the frosting amount, it’s formulated for a thin, even coat if you’re doing a naked cake style, so if you love thick frosting or decorative piping, definitely 1.5x the frosting batch to have enough!

1 week ago

Brought this into the office today and it was gone in 10 minutes flat. People were literally scraping the last bits of frosting off the cake platter. My manager asked if I’d make it for the company holiday party next month, so I guess this is my new signature dish now? Worth every minute of the 2 hour total time, no regrets.

5 days ago

Office potluck legend status unlocked! Nothing beats a recipe that gets the whole team lining up for seconds, happy it was such a hit.

2 days ago

Made this as a post-hike celebration treat for my trail group and everyone was raving! I was worried the high altitude here would mess it up, so I added an extra tbsp of flour and baked it 3 minutes longer, and it turned out perfectly moist. The tangy cream cheese frosting was exactly what we needed after 8 miles of hiking.

yesterday

Thanks for the high altitude tip! I live at 7k feet and always struggle with scratch cakes, I’ll definitely be using that tweak when I make this this weekend.

5 minutes ago

Just pulled this out of the oven, did the toothpick test and it’s perfect! The house smells incredible, can’t wait to let it cool and slather on that frosting. Already snuck a tiny crumb from the edge and the flavor is chef’s kiss, will update once it’s fully assembled but so far so good!

2 weeks ago

I was supposed to make a red velvet grooms cake for my cousin’s wedding and panicked because my usual recipe flopped during a test run. I found this recipe 3 days before the wedding, tested a half batch, and it was so good I used it for the actual cake! Turned out perfectly, no one knew I switched recipes last minute.

1 week ago

Oh my god this is the exact scenario I’m in! I’m doing the grooms cake for my fiancé next month and my go-to recipe is suddenly coming out dry, this is such a sign to try this one.

5 days ago

That is such a high stakes win! So glad we could help you pull off the wedding cake without a hitch — huge congrats to your cousin and their spouse!

3 days ago

Super yummy! My only tiny note is I wish it had a little more cocoa flavor, so next time I make it I’ll add an extra 1/4 cup of unsweetened cocoa. Other than that, the texture is perfect, the frosting is amazing, and my twin toddlers devoured their slices without making too much of a mess (win for mom life).

2 days ago

Great tweak! If you love a richer chocolate note, that extra 1/4 cup cocoa is the perfect addition, so glad the twins loved it!

yesterday

Paired a slice of this with my morning latte today and I’m convinced there’s no better combo. I added a tiny bit of espresso powder to the cake batter to make the chocolate notes pop, and it complimented the tangy frosting so well. 10/10, will be making this once a month minimum.

2 hours ago

The espresso powder tip is genius! I always add that to chocolate baked goods but never thought to put it in red velvet, I’m definitely trying that next time.

30 minutes ago

Made this in my tiny dorm kitchen with a hand mixer I got for $10 at the dollar store and it still turned out amazing! Didn’t have any fancy equipment, just followed the steps exactly, and my roommates are convinced I’m a professional baker now. So worth skipping the dorm dining hall dessert for this.

1 week ago

Can we talk about how good the cream cheese frosting is on this?? I could eat it by the spoonful straight from the bowl. It’s so fluffy, not runny at all like other cream cheese frostings I’ve made that slide right off the cake. I made extra to put on my morning banana bread too, no shame.

5 days ago

Wait do you use full fat block cream cheese or the whipped kind in the tub? I made a cream cheese frosting last week that was so runny I’m still traumatized lmao

3 days ago

Yay for frosting that actually stays on the cake! @SweetToothSarah always use full fat block cream cheese, cold straight from the fridge, and make sure your butter is softened but not melted — that’s the secret to thick, fluffy, non-runny cream cheese frosting!

2 weeks ago

Took first place in my local neighborhood bake off with this cake! The judge said it was the most moist red velvet he’d ever tasted, and the frosting had the perfect balance of sweet and tangy. I topped mine with crushed pecans around the edges like my grandma used to do, and it gave the perfect little crunch.

1 week ago

Bake off champion! Adding crushed pecans around the edges is such a classic, delicious touch — huge congrats on the win!

2 days ago

I made this dairy free for my best friend who’s lactose intolerant by swapping the buttermilk for oat milk + a tbsp of vinegar, and using vegan cream cheese and butter for the frosting. It turned out so good even my non-dairy free boyfriend said it tasted just like the regular version! Great base recipe that’s super easy to adapt for dietary needs.

just now

First time ever baking a cake from scratch, didn’t burn it! It’s a little lopsided because I didn’t level the layers, but it tastes incredible. The directions were so straightforward I didn’t even have to google anything mid-bake, which is a win for someone who usually burns toast. Will definitely be practicing this one to get it perfect for my mom’s birthday next month.

5 days ago

Made this for our 4th of July backyard BBQ and it was the star of the whole spread! Everyone went back for seconds, even my brother-in-law who swears he ‘doesn’t like cake’. I served it with a side of fresh berries and it was the perfect light but indulgent summer dessert. The 1 hour cooling time is non-negotiable, I tried to rush it once before with another recipe and ended up with a melted frosting disaster, so I appreciated that the recipe emphasized that!

3 days ago

Wait your brother in law is the same as mine! He says he doesn’t like sweet stuff but I watched him eat three slices of this when I made it last month, it’s that good.

2 days ago

So glad it was the star of your BBQ! Rushing the cooling step is such a common mistake, so we always make sure to call that out — no melted frosting disasters on our watch 😊



