
red velvet pudding mix

title 1
red velvet pudding mix
⏱️ cook time 10 minutes
🍽️ servings 4
⚡ Difficulty easy

intro

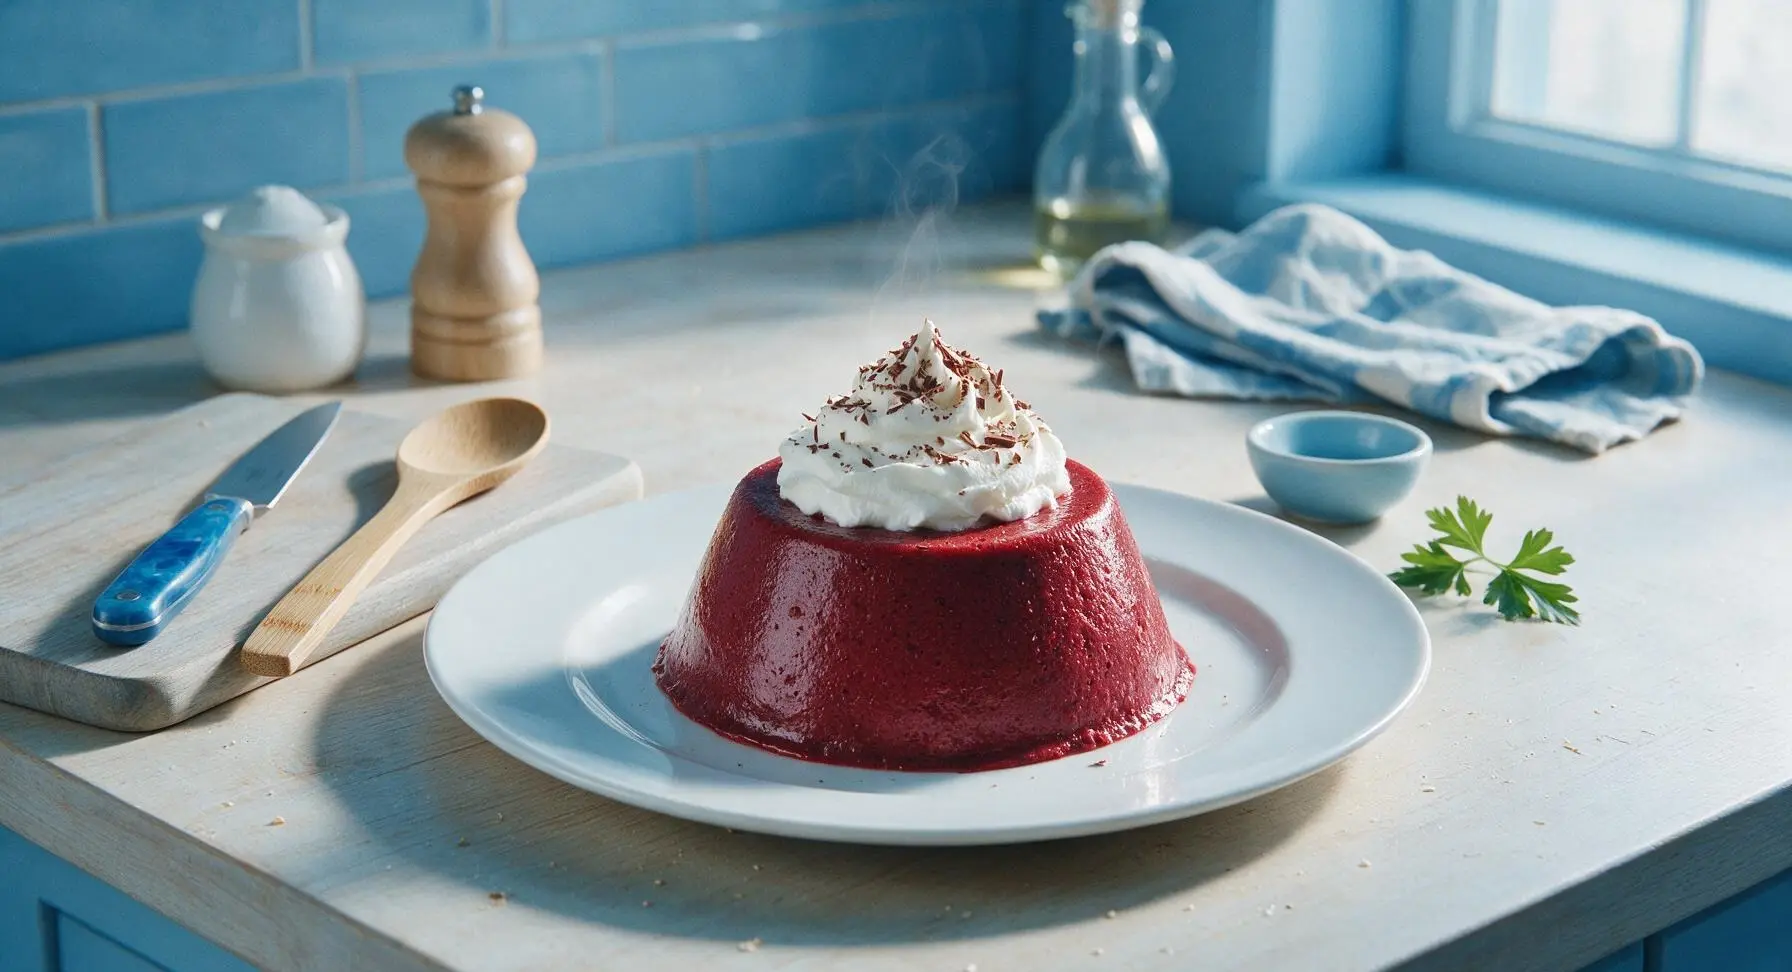
Silky, cocoa-kissed red velvet pudding made from a simple homemade shelf-stable mix, with a subtle classic tang, topped with fluffy whipped cream and chocolate shavings.

Ingredients
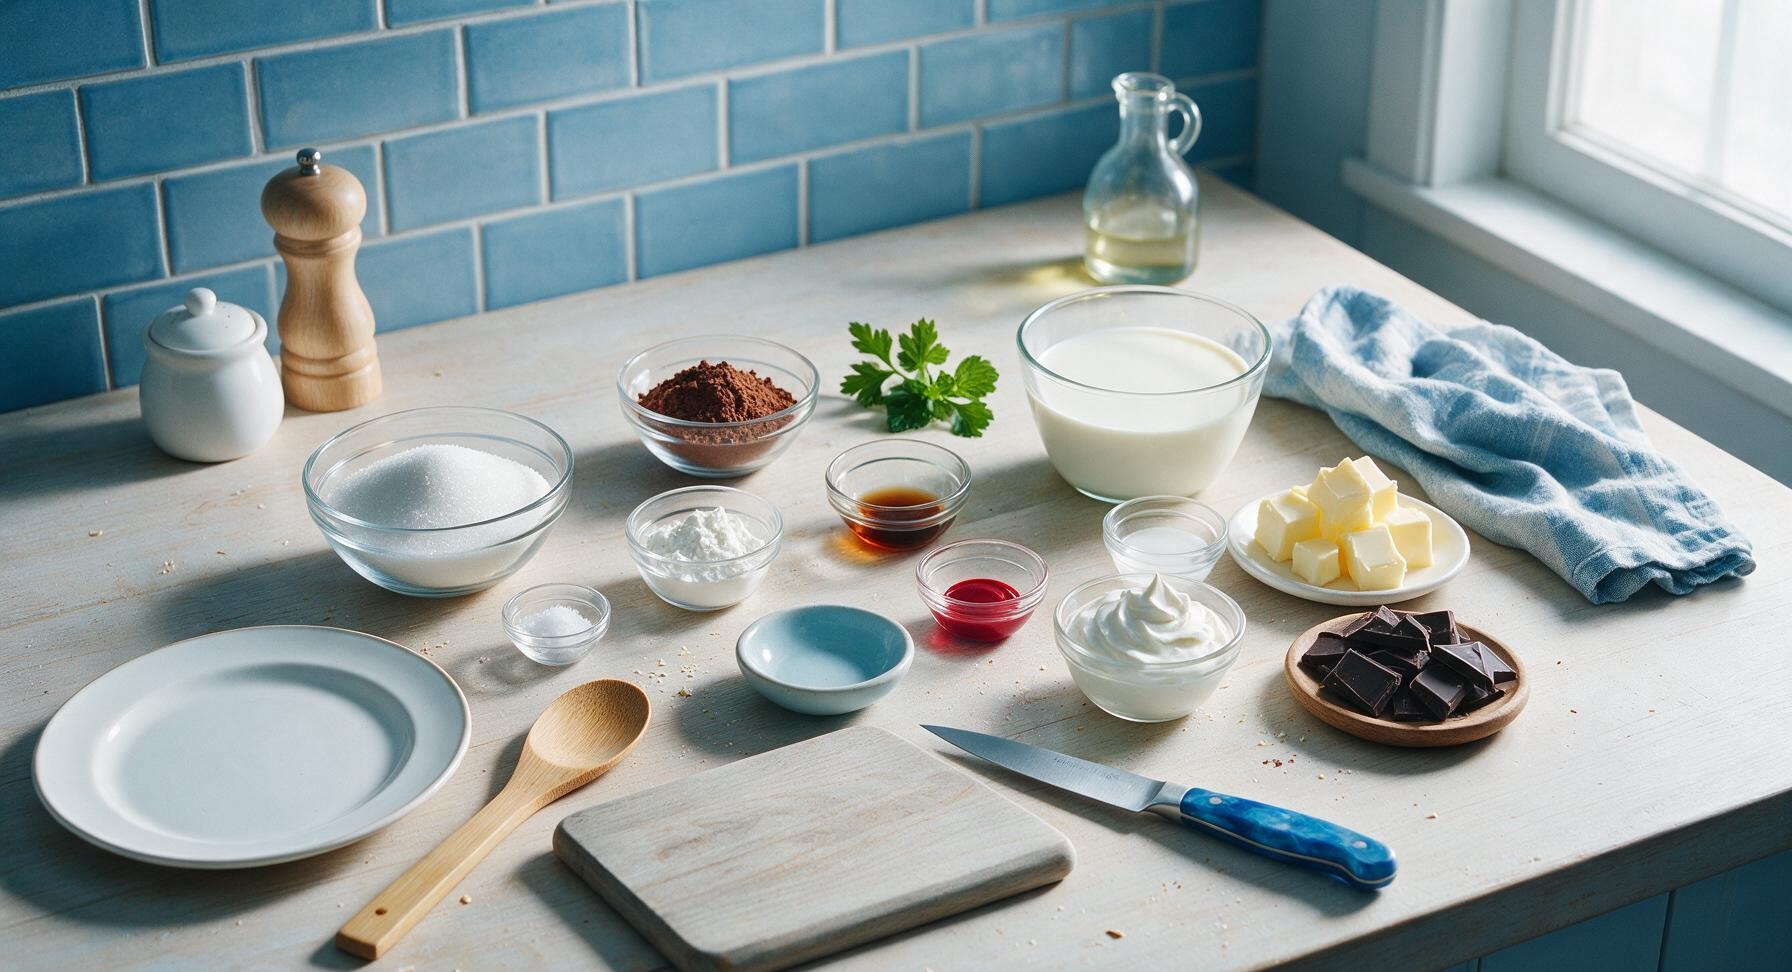
Granulated sugar 3/4 cup (150g)
Unsweetened cocoa powder 1/3 cup (30g)
Cornstarch 1/4 cup (30g)
Fine sea salt 1/4 tsp
Whole milk 3 cups (720ml)
Unsalted butter 2 tbsp (28g)
Pure vanilla extract 1 tsp
White vinegar 1 tsp
Red gel food coloring 1 tsp
Heavy whipping cream 1/2 cup (120ml, whipped)
70% dark chocolate 30g
Fresh mint sprigs 4 small

Steps

1

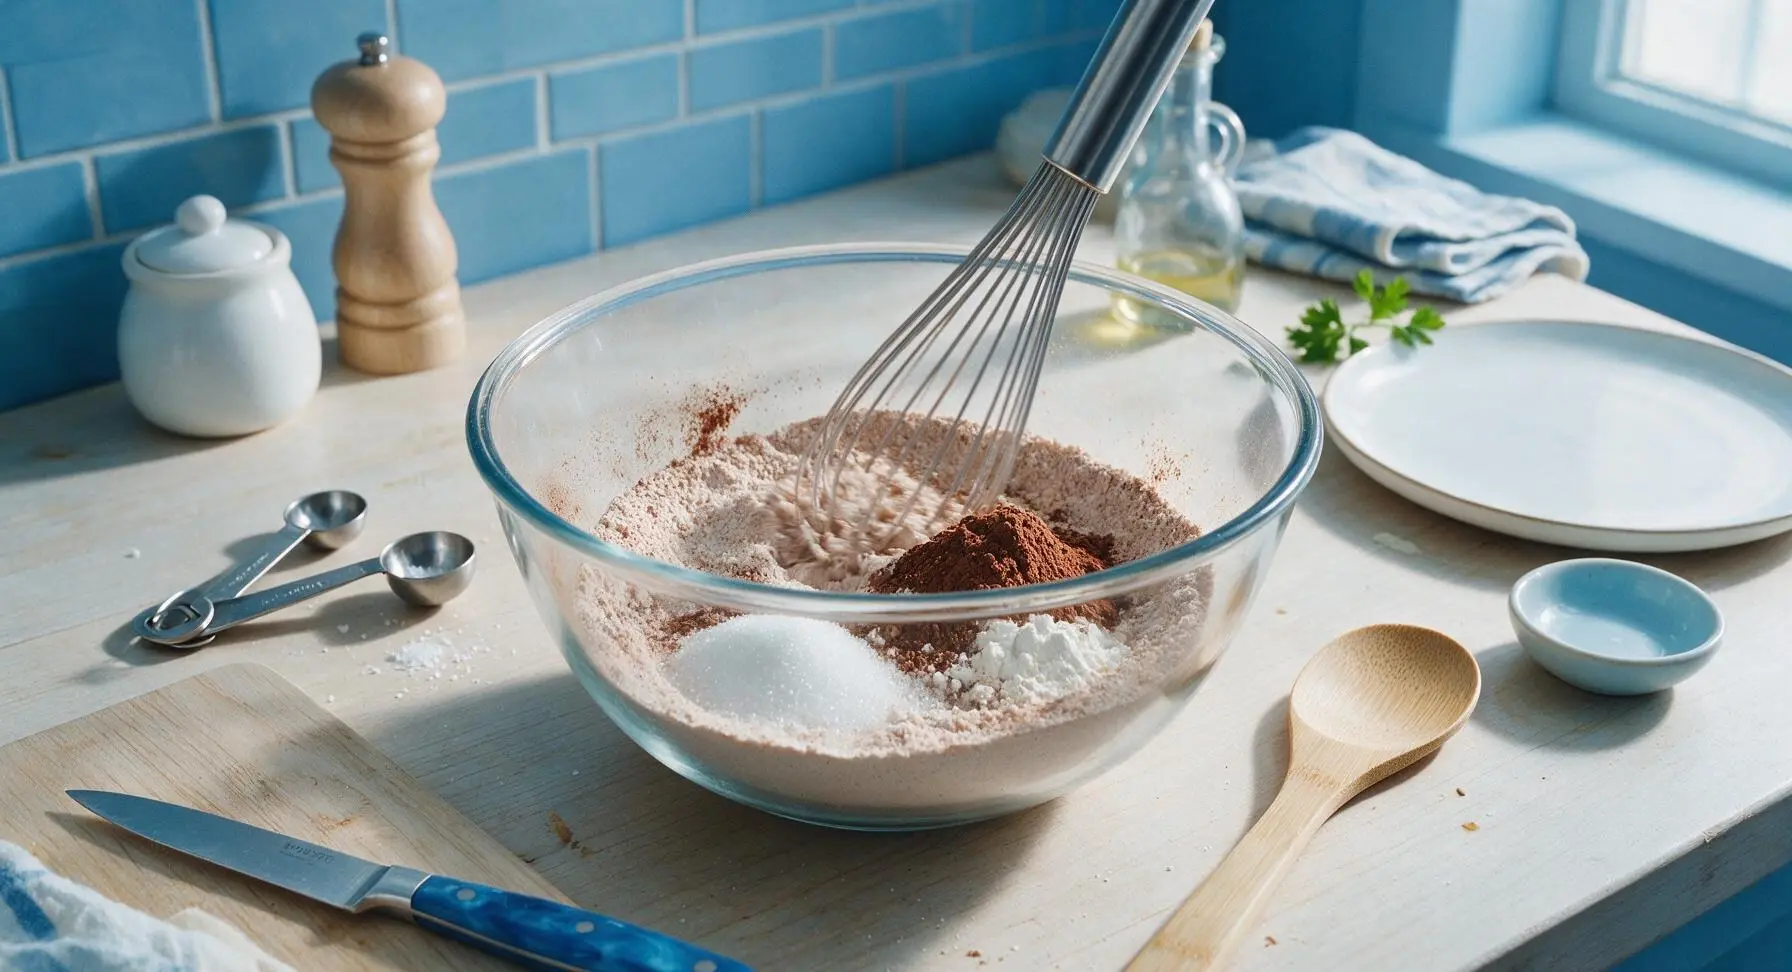
Whisk Dry Pudding Mix

Add 3/4 cup granulated sugar, 1/3 cup unsweetened cocoa powder, 1/4 cup cornstarch, and 1/4 tsp fine sea salt to the clear glass mixing bowl. Use the stainless steel whisk to stir the dry ingredients for 1 full minute, until completely evenly combined, with no clumps of cocoa or cornstarch visible. This forms the shelf-stable red velvet pudding mix base, which can be stored in an airtight jar for up to 3 months if not using immediately.
Step 1
step1:Whisk Dry Pudding Mix
2

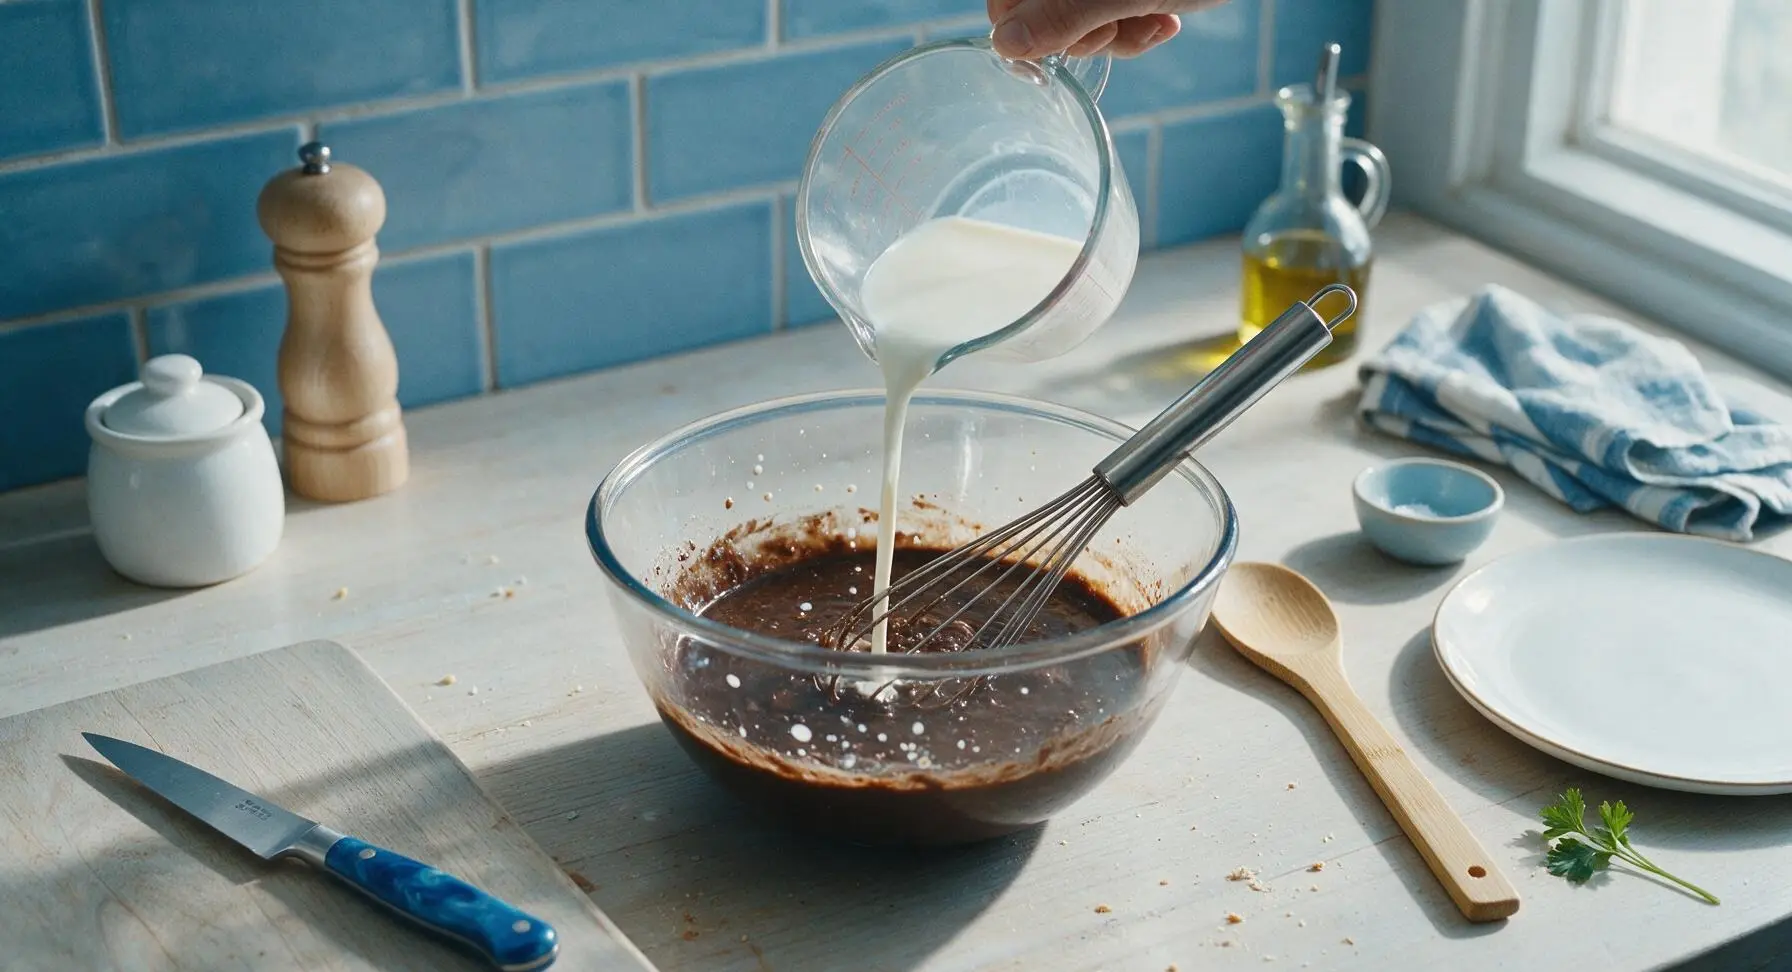
Whisk in Cold Milk

Slowly pour 1 cup of the cold whole milk into the dry mix in the mixing bowl, whisking constantly to form a completely smooth, lump-free slurry. Make sure to scrape the bottom and corners of the bowl to catch any hidden dry clumps; the slurry should be the consistency of thin chocolate milk, with no gritty texture when you rub a drop between your fingers.
Step 2
step2:Whisk in Cold Milk
3

Heat Remaining Milk

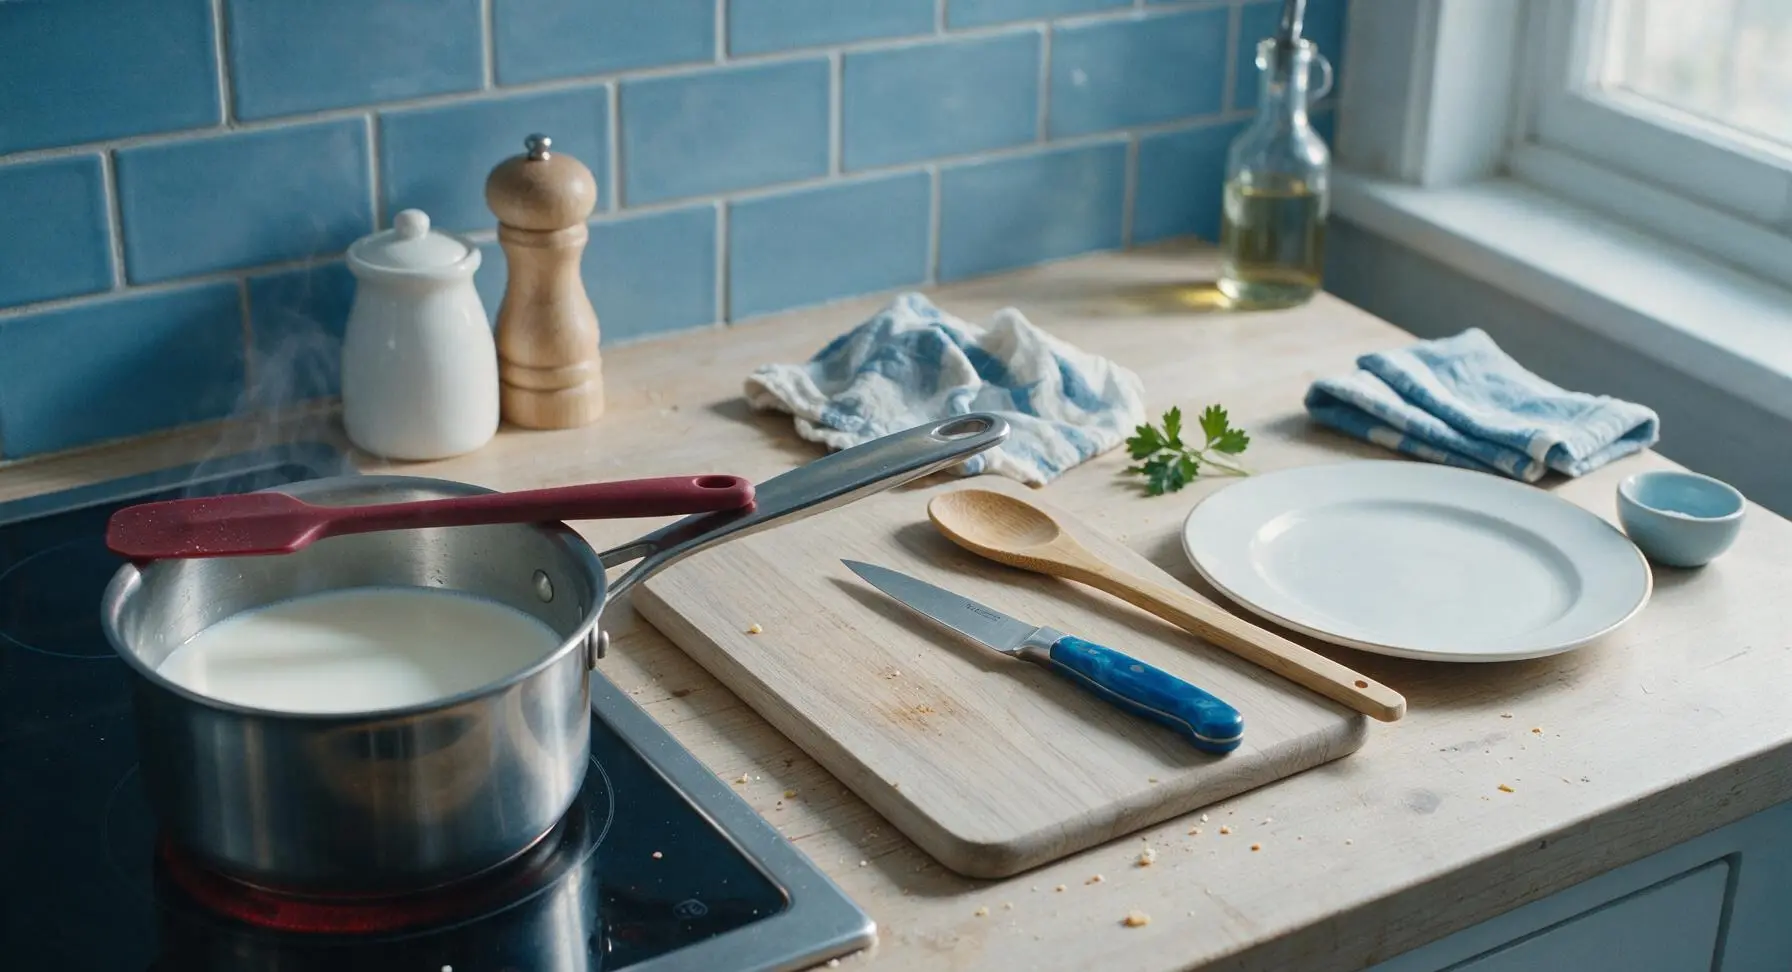
Pour the remaining 2 cups of whole milk into the stainless steel saucepan on the induction cooktop. Heat over medium-low (3/10 power) for 3-4 minutes, until the milk is just steaming (around 170°F / 77°C), with tiny bubbles forming around the edge of the pan. Do not bring the milk to a rolling boil, as this can scald the milk and create lumps in the pudding.
Step 3
step3:Heat Remaining Milk
4

Temper Slurry into Milk

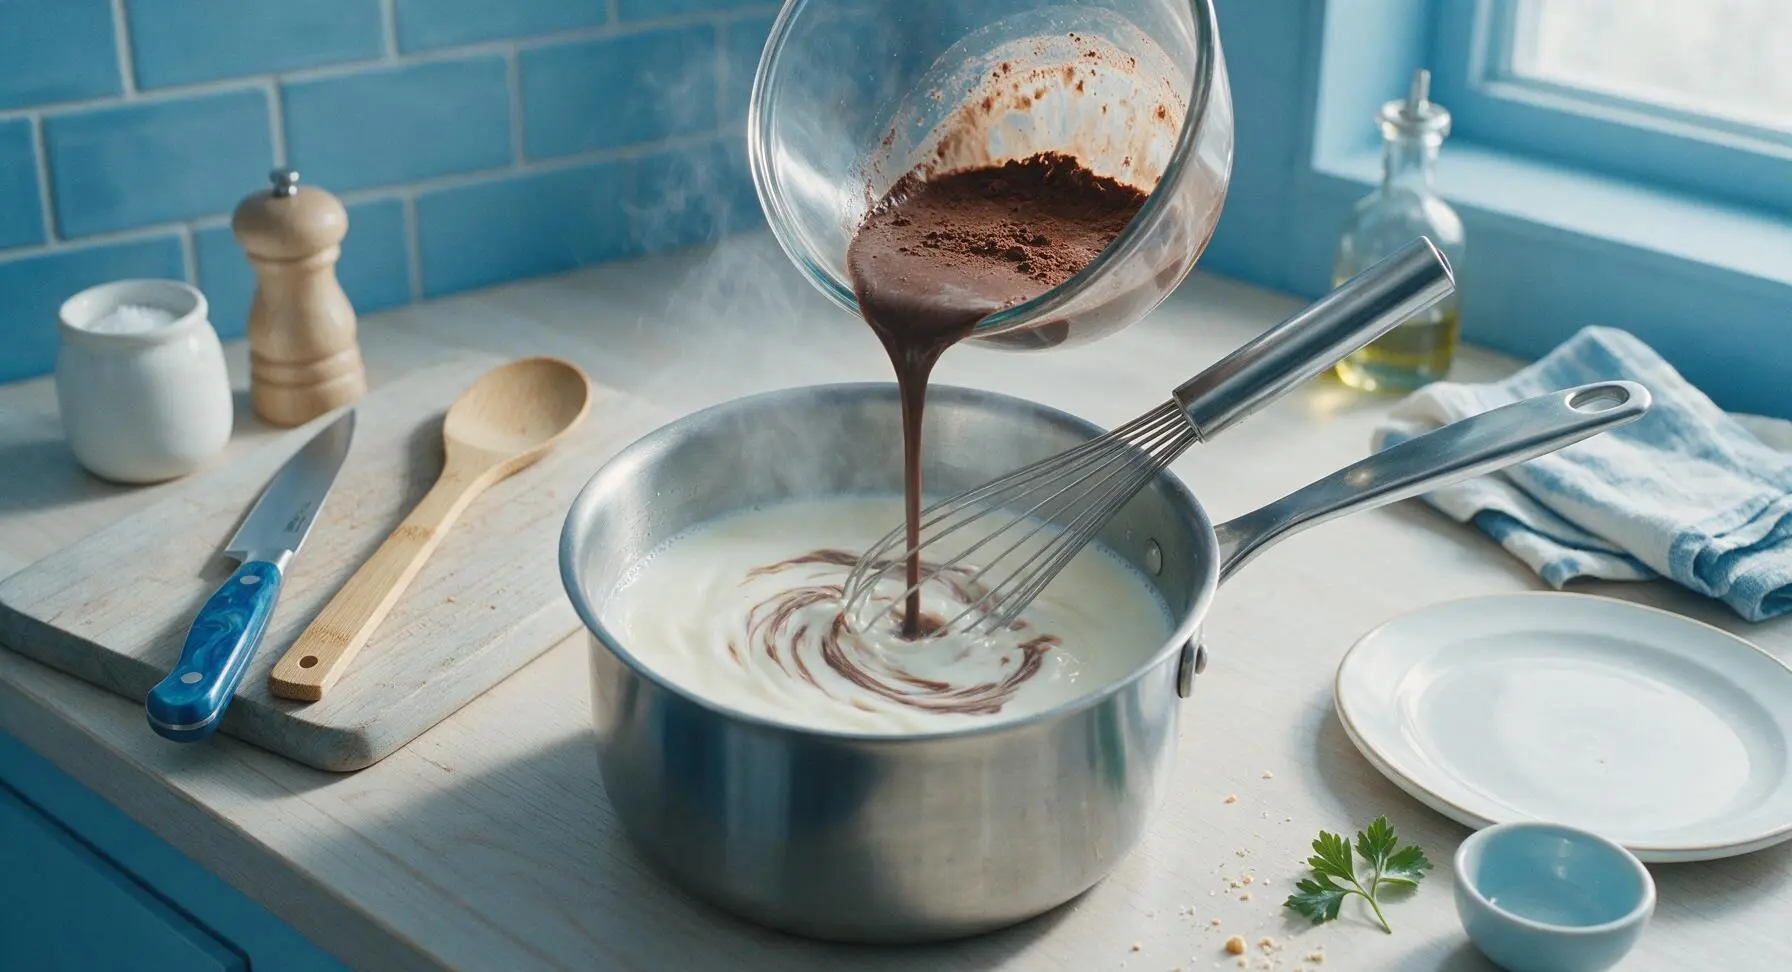
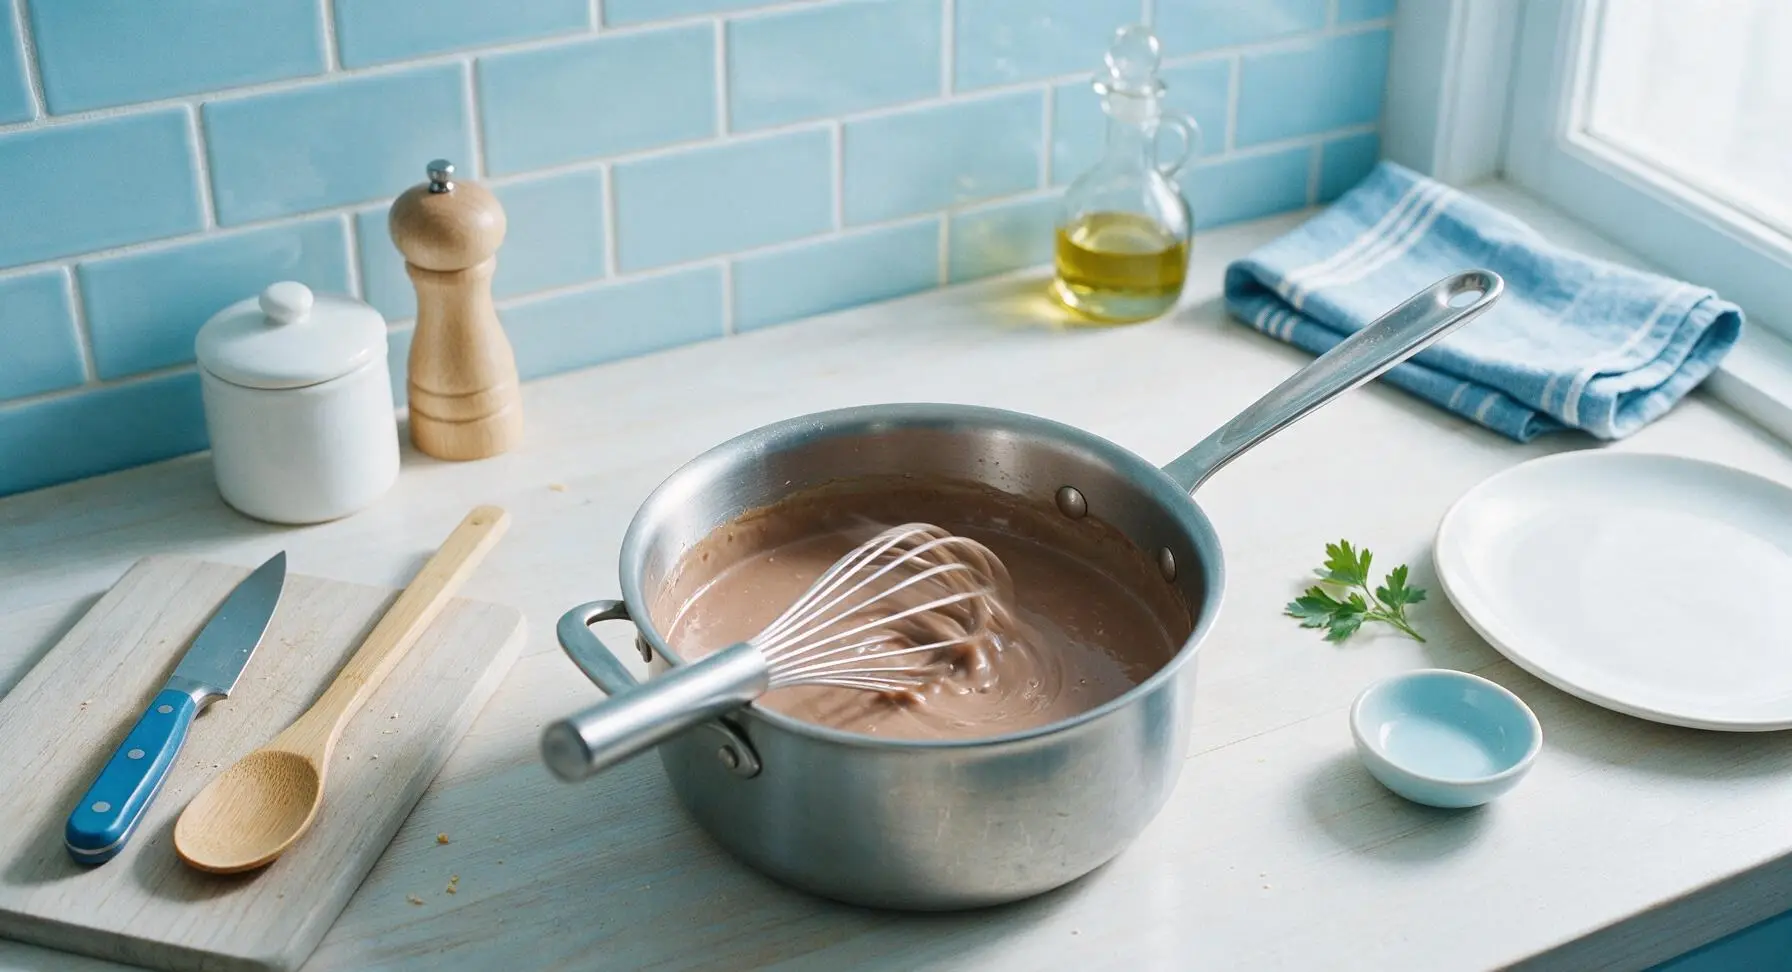
While whisking the hot milk in the saucepan constantly, slowly pour the cold cocoa slurry into the pan in a thin, steady stream. Continue whisking nonstop to prevent lumps from forming as the mixture heats. This tempering step ensures the cornstarch thickens evenly without seizing into clumps.
Step 4
step4:Temper Slurry into Milk
Step 4
step4:Temper Slurry into Milk
5

Cook to Pudding Consistency

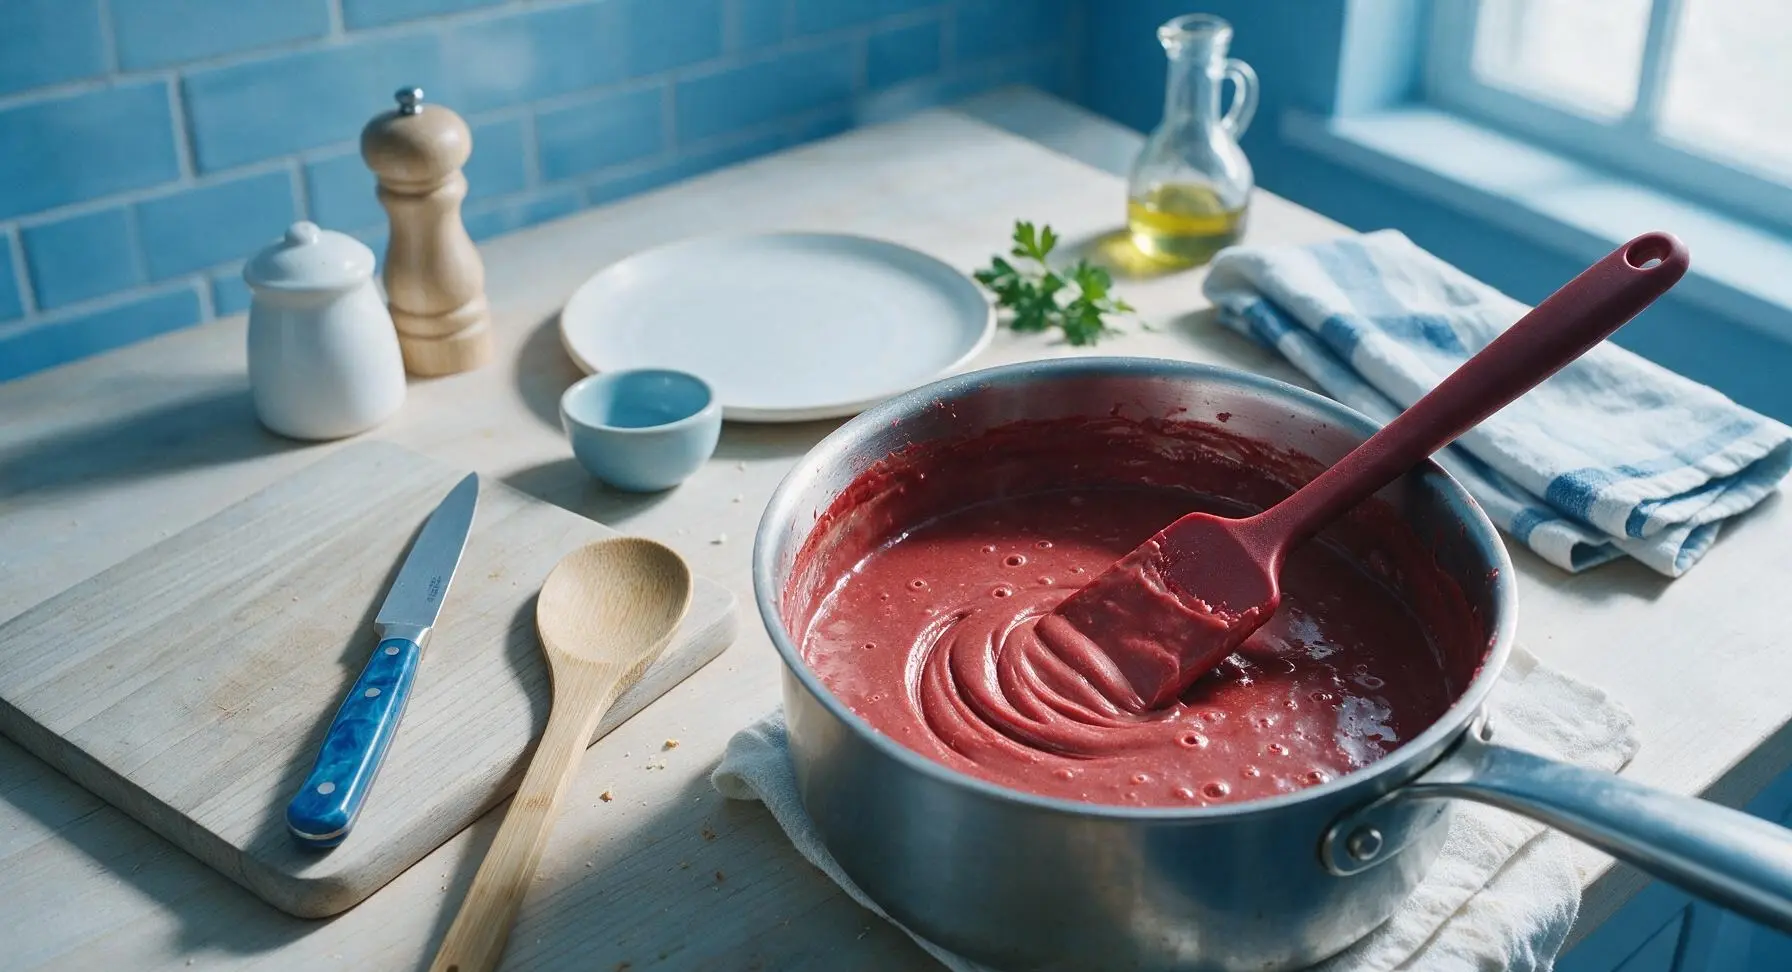
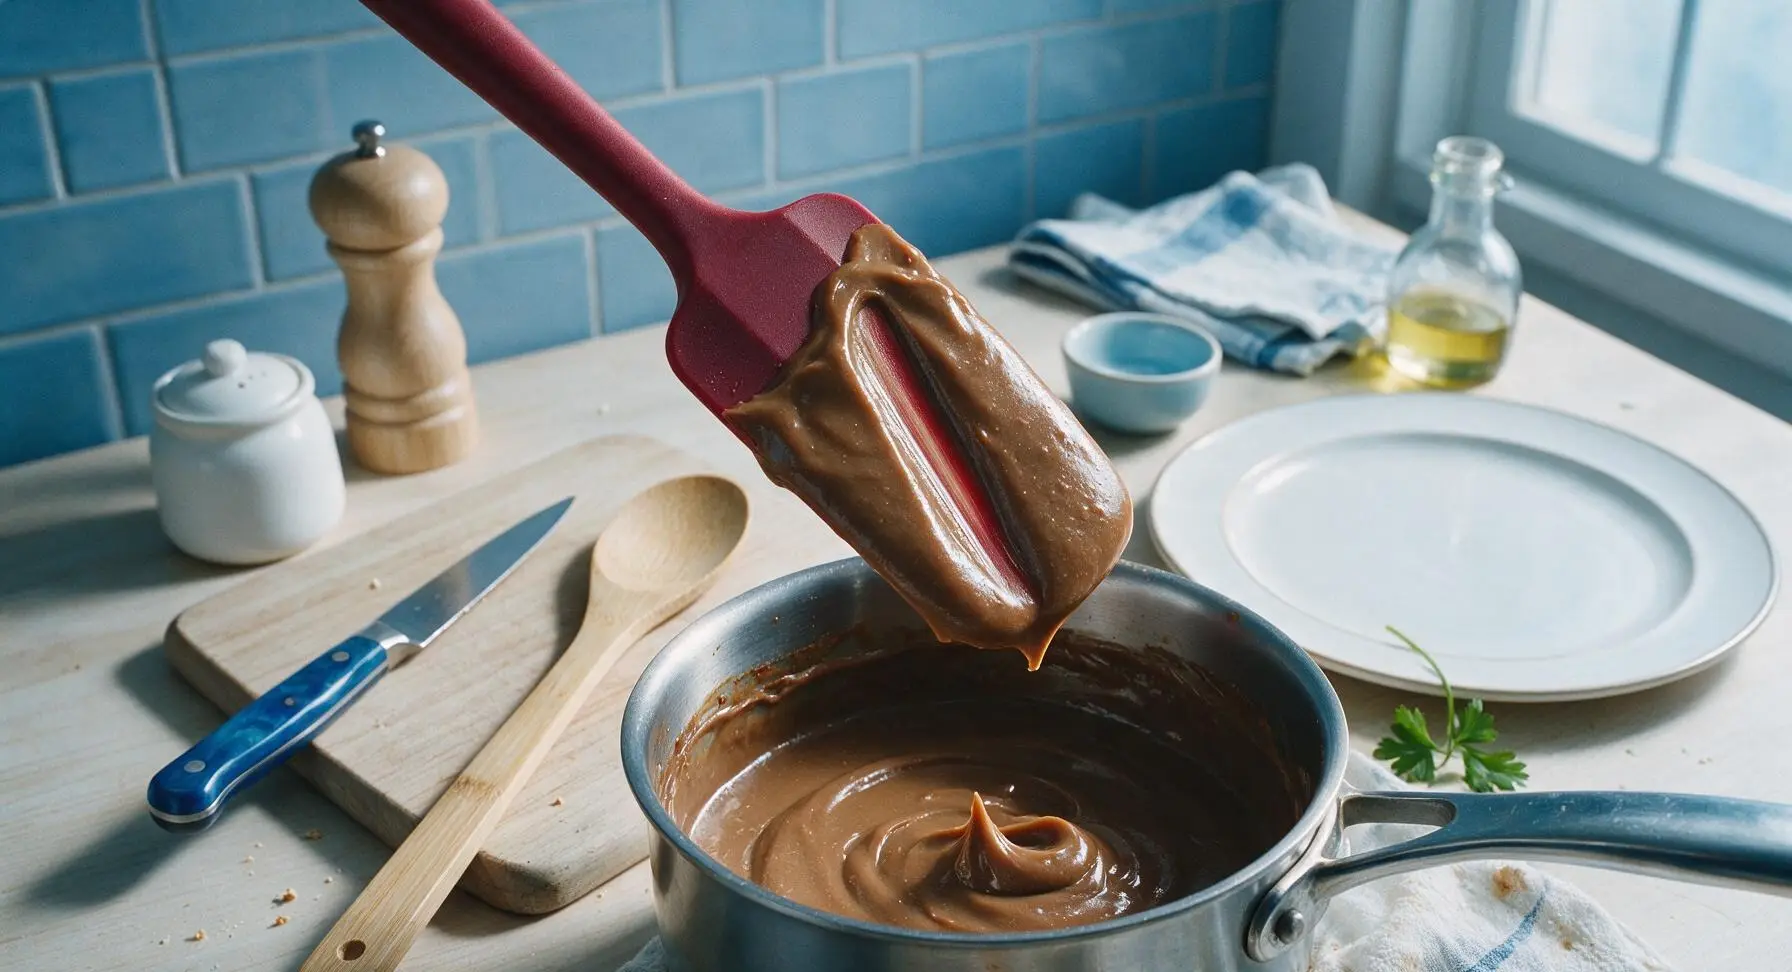
Continue cooking the mixture over medium-low heat, stirring constantly with the silicone spatula and scraping the bottom and sides of the pan, for 2-3 minutes. The pudding is done when it thickens to a rich, custard-like consistency that coats the back of the spatula, and a line drawn with your finger through the pudding on the spatula holds its shape without running. Remove the pan immediately from the heat to avoid over-thickening.
Step 5
step5:Cook to Pudding Consistency
Step 5
step5:Cook to Pudding Consistency
6

Stir in Flavor Components

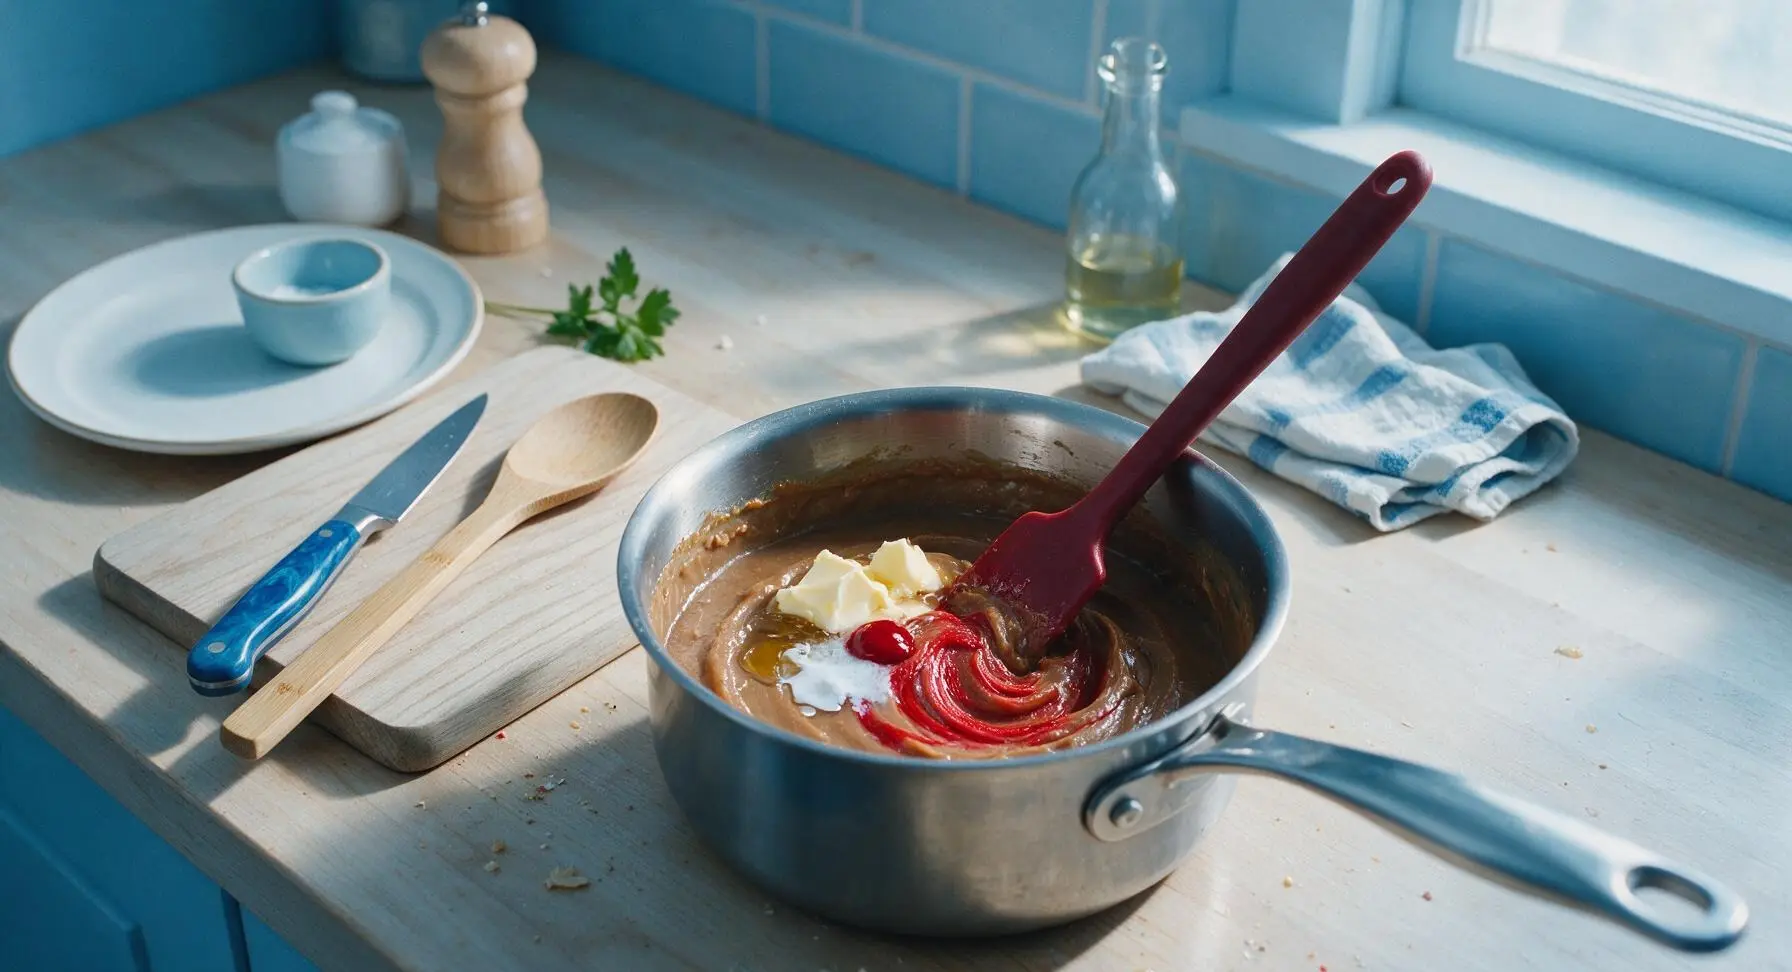
Add 2 tbsp unsalted butter, 1 tsp pure vanilla extract, 1 tsp white vinegar, and 1 tsp red gel food coloring to the hot pudding. Stir gently with the silicone spatula until the butter is fully melted, the food coloring is evenly distributed, and the pudding turns a rich, deep ruby red color, with no streaks of uncolored pudding visible. The vinegar adds the signature subtle tang that defines classic red velvet flavor.
Step 6
step6:Stir in Flavor Components
7

Portion and Chill Pudding

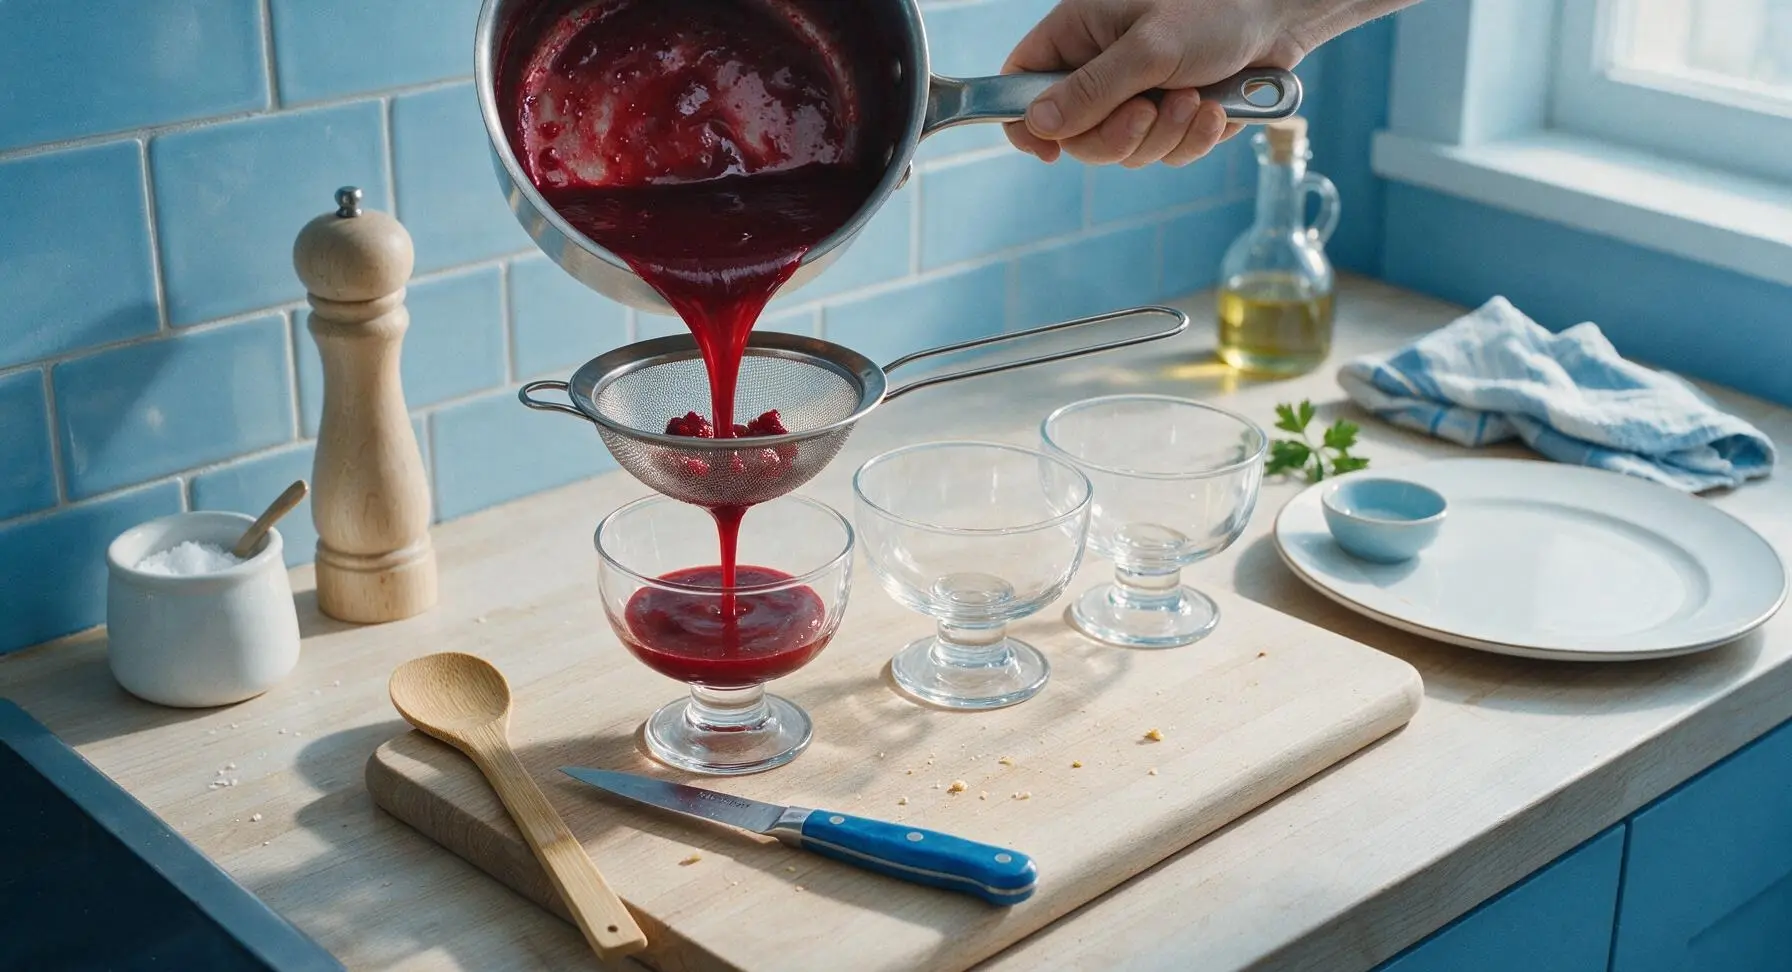
Set the fine-mesh stainless steel sieve over a clean bowl, then pour the hot pudding through the sieve to catch any small lumps for an ultra-silky texture. Divide the strained pudding evenly between the four footed clear glass dessert cups, filling each to 1cm below the rim. Let the pudding cool at room temperature for 15 minutes, then cover with plastic wrap (pressing the wrap directly against the pudding surface to prevent a thick skin from forming) and chill in the refrigerator for at least 2 hours, until fully set with a slight jiggle when tapped.
Step 7
step7:Portion and Chill Pudding
8

Garnish and Serve

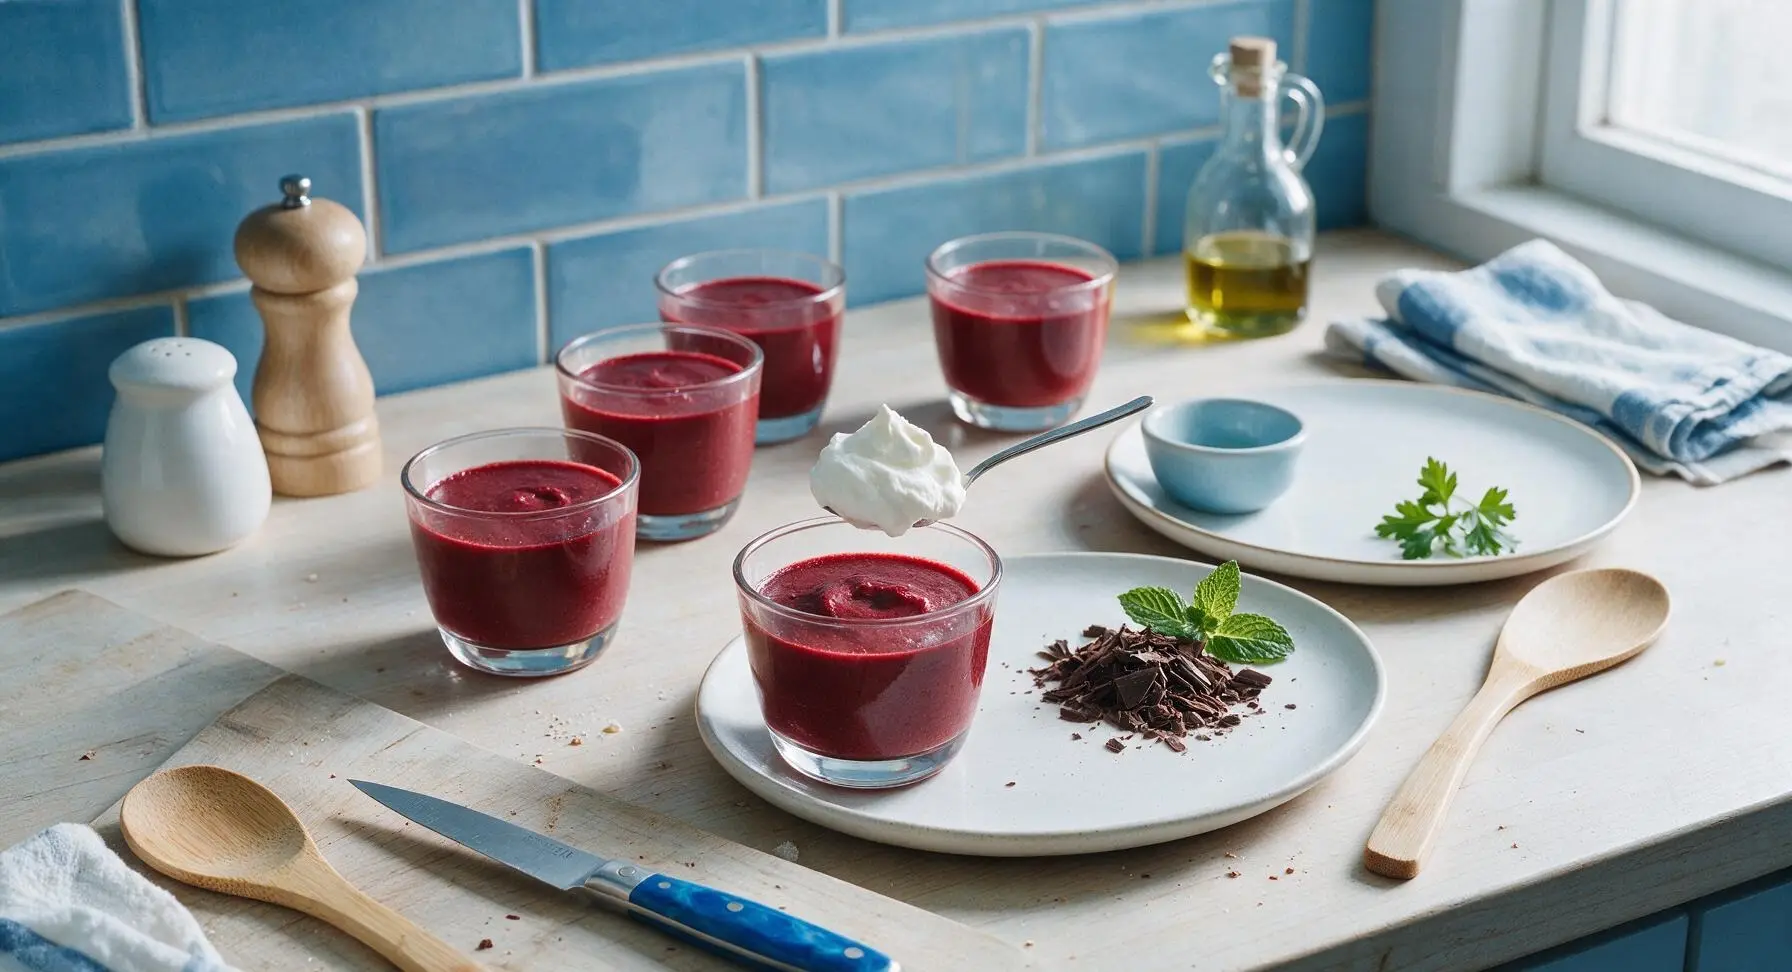
Once the pudding is fully chilled, remove the plastic wrap. Top each cup with a 2-tbsp dollop of softly whipped heavy cream, a sprinkle of dark chocolate shavings (shaved from the 70% cacao bar with a vegetable peeler), and one small fresh mint leaf for a bright pop of color. Serve immediately, or keep chilled for up to 3 days.
Step 8
step8:Garnish and Serve

Tips

1.Use gel red food coloring instead of liquid: Liquid coloring thins the pudding and creates a pale, pinkish red hue, while concentrated gel delivers a deep, classic ruby red with just 1 teaspoon, no change to pudding texture.
2.Press plastic wrap directly against the pudding surface when chilling: Air exposure causes a thick, rubbery skin to form on set pudding; laying wrap directly on the surface eliminates this for a perfectly smooth, even top.
3.Always stir constantly while the pudding thickens: Cornstarch settles quickly to the bottom of the pan and can burn or form lumps if left unstirred for even 10 seconds, so scrape the pan corners and bottom continuously for the silkiest result.


✨ You May Also Like

Desserts & Baking
🍜 Italy

Creamy, coffee-kissed classic Northern Italian no-bake dessert, with layers of rum-spiked mascarpone cream, soft ladyfingers, and a rich cocoa dusting.

⏱️ 4 hours 3Desserts & Baking ★ 4.7
Desserts & Baking
🍜 France

Flaky, shatteringly crisp, buttery French croissants with golden exteriors and soft, airy layered interiors, perfect for pairing with coffee for a special morning treat.

⏱️ 12 hours Desserts & Baking ★ 4.5
Desserts & Baking
🍜 United States

Warm, spiced baked apples topped with a fluffy golden biscuit crust, this cozy dessert pairs perfectly with vanilla ice cream for cool-weather comfort.

⏱️ 55 minuteDesserts & Baking ★ 4.6
Desserts & Baking
🍜 United States

A star-spangled classic American blueberry pie with buttery flaky crust and bright sweet-tart filling, perfect for summer patriotic gatherings.

⏱️ 1 hour 25Desserts & Baking ★ 4.7
Desserts & Baking
🍜 United States

A beloved no-bake regional Maine candy with a chewy coconut-potato center coated in rich dark chocolate, a New England holiday staple since the 1870s.

⏱️ 2 hours 3Desserts & Baking ★ 4.8
Desserts & Baking
🍜 France

Luxuriously creamy, floral frozen custard made with aromatic Tahitian vanilla beans, boasting a smooth, rich texture that melts slowly on the tongue.

⏱️ 3 hours 3Desserts & Baking ★ 4.5

red velvet pudding mix:Frequently Asked Questions

1.How long does the dry homemade red velvet pudding mix stay good in the pantry? ▾
When stored in a tightly sealed, completely dry airtight container in a cool, dark pantry away from stovetop heat or direct sun, this dry mix stays shelf-stable for up to 6 months. Never scoop mix with a wet spoon, as even small amounts of moisture will cause clumping and lead to premature spoilage.
2.What gives this red velvet pudding its classic subtle tang, since the dry mix doesn’t list buttermilk? ▾
The classic subtle red velvet tang comes in during pudding preparation, not the dry mix itself! Stir 1 teaspoon of plain white vinegar or fresh lemon juice into your cold whole milk right before cooking, and let it sit 2 minutes to curdle slightly. That mimics traditional buttermilk tang without requiring refrigerated mix-ins.
3.Can I use a milk alternative instead of whole milk to make the pudding from this mix? ▾
You can, but stick to barista-blend oat milk or full-fat canned coconut milk (shaken well) for the creamiest results. Skim milk, thin almond milk, or other low-fat non-dairy milks create a thinner, less silky pudding with a watery aftertaste, since they lack the fat content that builds that classic luxe mouthfeel.
4.Why do you include fine sea salt in the dry pudding mix? ▾
A small amount of fine sea salt does two key jobs here: it cuts the cloying sweetness of the granulated sugar to keep the pudding balanced, and it amplifies the deep, rich notes of the unsweetened cocoa so the chocolate flavor doesn’t taste flat or muted. You won’t taste the salt itself, just brighter, more well-rounded flavor overall.
5.How do I prevent lumps when cooking the pudding from this mix? ▾
First, whisk the dry mix very thoroughly into ¼ cup of cold milk to make a smooth, lump-free slurry before adding the rest of the milk. Cook over medium-low heat, whisking constantly, until the mixture thickens to a coat-the-back-of-a-spoon consistency. Never dump all the dry mix straight into hot milk, as that creates impossible-to-whisk-out cornstarch lumps.
6.Do I need to add red food coloring to get that classic red velvet color? ▾
The unsweetened cocoa gives the pudding a deep, warm reddish-brown base, but for that iconic bright red velvet hue, you can stir 1 to 2 teaspoons of gel red food coloring into the pudding right after you take it off the heat. Liquid food coloring works too, but you’ll need 1 to 2 tablespoons, which can thin the pudding slightly.
7.Can I make this mix to give as homemade food gifts? ▾
Absolutely! Layer the measured dry ingredients in a clear glass mason jar, tie on a handwritten tag with the cooking instructions (mix with 4 cups whole milk, cook until thick, chill 2 hours), and add a small bag of chocolate shavings as a bonus. It makes a thoughtful, budget-friendly gift for holidays, housewarmings, or neighbor drop-offs.
8.How much cornstarch is in the mix, and why is it necessary? ▾
The mix uses a calibrated ratio of ⅓ cup cornstarch per 1 cup of granulated sugar, designed to create a perfectly set, silky (not gummy or rubbery) pudding when cooked with 4 cups of whole milk. Cornstarch is the primary thickener here; without it, the mix would never set into that classic spoonable pudding texture.
9.Why does the recipe call for unsweetened cocoa powder instead of Dutch-processed cocoa? ▾
Unsweetened natural cocoa powder has a brighter, slightly tangy chocolate note that pairs perfectly with the classic red velvet flavor profile. Dutch-processed cocoa is treated to reduce acidity, which mutes the chocolate flavor and can slightly interfere with cornstarch thickening if you use the vinegar or lemon juice tang add-in.
10.How long does the prepared pudding last in the fridge after I make it from the mix? ▾
Once cooked, transfer the pudding to an airtight container, press a piece of plastic wrap directly on the surface to prevent a tough skin from forming, and refrigerate for up to 4 days. Give it a quick stir before serving to loosen it back to that silky consistency, as it will firm up quite a bit as it chills.
11.Can I use this mix to make pudding pops or other frozen treats? ▾
Definitely! Prepare the pudding as directed, let it cool completely to room temperature, then pour it into popsicle molds and freeze for 6 to 8 hours for creamy red velvet pudding pops. You can also swirl a layer of the prepared pudding into vanilla ice cream for a fun, custom red velvet swirl treat.
12.My pudding turned out runny even after cooking—what did I do wrong? ▾
Runny pudding almost always comes down to undercooking the cornstarch. Cornstarch needs to reach a full, gentle simmer (not just warm) and hold that temperature for 1 full minute to activate its thickening power. If you pulled it off too early, pop it back on medium-low heat, whisking constantly, until it simmers and thickens.
13.Do I need to add any extra ingredients to the dry mix to make the pudding, besides whole milk? ▾
The only required ingredient to make the base pudding is 4 cups of whole milk. For that classic red velvet tang, add 1 teaspoon of white vinegar or lemon juice to the milk, and stir in gel food coloring if you want a brighter red hue. All core sweetening, thickening, and chocolate flavor is already built into the dry mix.
14.Can I reduce the sugar in the mix to make a lower-sugar version? ▾
You can cut the granulated sugar by up to ¼ cup without ruining the texture, but any more than that will throw off the dry ingredient ratio and lead to a gummy, overly starchy pudding. For a zero-sugar swap, use a cup-for-cup baking granulated sugar substitute to keep ratios intact without extra sugar.
15.What are the best toppings to serve with this red velvet pudding? ▾
The classic pairing is fluffy freshly whipped cream and dark chocolate shavings, as noted, but you can also top it with crumbled shortbread cookies, a dollop of cream cheese frosting, fresh raspberries, or a drizzle of salted caramel. Avoid very wet toppings, as they can make the top of the pudding runny if left to sit too long.
16.Why is fine sea salt recommended instead of regular table salt for the mix? ▾
Fine sea salt dissolves completely into the dry mix and later into the cooked pudding, so you won’t get random salty bites. Table salt has a harsher, more metallic flavor and is much denser, so using the same measured amount of table salt will make the pudding taste overly salty instead of perfectly balanced.
17.Can I make the pudding ahead of time for a party or gathering? ▾
Absolutely! Cook the pudding up to 2 days before your event, transfer it to a serving dish, press plastic wrap directly on the surface to prevent a thick skin, and chill until 30 minutes before serving. Add toppings like whipped cream and chocolate shavings right before guests arrive so they stay fresh and fluffy instead of deflating or getting soggy.

Comments (18)

2 hours ago

OMG this is such a game changer! I’ve been buying the pre-made boxed red velvet pudding for years and this homemade version tastes 100x better. Took me literally 10 minutes to mix up a big batch for meal prep this week, can’t wait to toss it in parfaits for my kid’s after school snacks.

30 minutes ago

So glad you love it! The dry mix stays good in the pantry for up to 3 months too, perfect for quick snack prep all month long.

3 days ago

Made a batch of this to take to our church potluck last Sunday and people were begging for the recipe! I stirred in a handful of mini white chocolate chips when I cooked the pudding and served it with whipped cream, it was gone in 15 minutes flat. SO good, even my picky mother in law asked for seconds.

2 days ago

Wait the white chocolate chip addition sounds insane! I’m making this for our neighborhood block party next weekend, definitely stealing that tip.

2 days ago

White chocolate chips are such a perfect add-in! We love topping ours with crushed red velvet cookie crumbles too for extra crunch.

5 days ago

Super easy recipe, no fancy ingredients needed which I appreciate. My only tiny note is that I wish it had a little stronger cocoa flavor, but I just added an extra teaspoon of unsweetened cocoa when I made it and it was perfect. Will make again!

3 days ago

Great call adding extra cocoa! A lot of red velvet fans love that deeper chocolate punch, so that’s a fantastic easy tweak for anyone who prefers it too.

1 week ago

Meal prep win! I portioned the dry mix into little mason jars as gifts for my coworkers last week and everyone went crazy for them. Tied them with little red ribbons and a tag with the cooking instructions, such a cute cheap gift idea. 10/10

yesterday

My kids loved it!!! I was worried the red food coloring would be too much but I used the natural gel food coloring I had on hand and it turned out the perfect deep red. Served it after our family taco night last night and all three boys cleaned their bowls, even the one who swears he ‘hates all pudding’.

2 hours ago

Oh I feel you on the picky kid thing! My 7 year old turns his nose up at everything, I’m gonna test this on him tonight.

30 minutes ago

So happy it was a hit with the kids! Gel food coloring works perfectly here and avoids that weird artificial aftertaste some liquid colorings leave, great call.

30 minutes ago

Wait a second, is this mix naturally gluten free if I use cornstarch that’s certified GF? I’ve been looking for a easy red velvet dessert I can make for my sister’s birthday since she has celiac, and this looks perfect.

5 minutes ago

It absolutely is! As long as you use certified gluten free cocoa powder and cornstarch, the entire mix is totally GF with no swaps needed. Hope your sister loves it!

2 weeks ago

Game. Changer. I’ve been paying an arm and a leg for fancy gourmet pudding mixes at the specialty grocery store and this is way better for a fraction of the cost. Cooked up a batch last night to layer in a trifle for our family dinner this weekend, the flavor is spot on.

1 week ago

Wait layering it in a trifle? That’s genius! I was just gonna make plain pudding but now I’m adding layers of cream cheese frosting and pound cake, yum.

1 week ago

Right?! I calculated the cost per serving and it’s like 30 cents, can’t beat that. I’ll never buy the boxed stuff again.

2 days ago

As someone who can barely boil water without burning it, this was so easy to make! 10 minutes total, no complicated steps, and it came out tasting like it came from a fancy restaurant. My roommates thought I bought it from the dessert shop downtown lmao.

yesterday

Same! I made this in my dorm microwave last week and it turned out perfect, no fancy equipment needed at all. Pro tip: top with crushed Oreos for a little extra crunch.

1 week ago

Made this for our post-hike potluck last weekend and it held up so well even in the 90 degree heat! I kept it in a cooler until we were ready to serve and it was perfectly creamy, no weird separation or anything. Everyone asked for the recipe.

30 minutes ago

Wait, quick question—can I make this with oat milk instead of regular dairy milk when I cook the actual pudding? I’m lactose intolerant and don’t keep cow’s milk in the house, but I’ve been craving red velvet pudding so bad.

5 minutes ago

I made it with oat milk last week! It worked perfectly, just make sure you stir it constantly while it’s thickening so it doesn’t get lumpy.

just now

Oat milk works wonderfully here! Unsweetened plain oat milk gives the creamiest result, but any plant milk will work as an easy swap for dairy.

2 days ago

SO good! I added a tiny splash of vanilla extract and a pinch of sea salt on top when I served it, and it elevated the flavor so much. The perfect balance of sweet and that tiny hint of tang that makes red velvet so iconic.

yesterday

That pinch of flaky sea salt is chef’s kiss! It cuts through the sweetness so well and makes the chocolate and vanilla flavors pop even more.

5 days ago

I mixed up 4 batches of the dry mix to keep in my pantry for quick weeknight desserts. It’s so nice to have something homemade on hand that I can throw together in 10 minutes when the kids have friends over after school, no running to the store for boxed mix.

3 days ago

How long does the dry mix stay good in the pantry? I want to do the same but don’t want it to go bad before we use it!

2 days ago

Stored in an airtight container in a cool, dry pantry, the dry mix stays fresh for up to 3 months! It’s perfect for quick, last minute desserts.

1 week ago

I don’t know why I never thought to make my own pudding mix before! This tastes exactly like the red velvet pudding my grandma used to make when I was a kid, total nostalgia trip. Turned out perfectly silky, no lumps at all. Will be a staple in my house from now on.

yesterday

Brought this to our office potluck yesterday and it was the first dessert gone! I served it in little individual cups with a dollop of cream cheese whipped cream on top, and people were coming back for thirds. Super easy to transport too, no messy serving required.

2 hours ago

The individual cup idea is genius! I’m always looking for no-mess potluck dishes for our office, I’m definitely making this for our next team lunch.

3 days ago

Tried this last night and it was good, but I felt like it was missing that classic red velvet tang? I think next time I’ll add a tablespoon of buttermilk powder to the dry mix to give it that little zing. Still way better than store bought, though!

2 days ago

Oh the buttermilk powder idea is brilliant! I was thinking the same thing about the missing tang, I’m adding that to my next batch too.

2 days ago

Love that tweak! Adding buttermilk powder is a fantastic way to get that classic tangy red velvet flavor without having to keep fresh buttermilk on hand, great call.

2 weeks ago

Already planning to make big batches of this for Christmas goodie bags this year! It’s the perfect non-cookie treat to give out to neighbors, and I know everyone will love it. The red color is so festive, it’ll look so cute packed in little bags with a candy cane tied to the tag.

5 days ago

Wow, this is so much less sugary than the store bought pudding mixes! I’ve been cutting back on added sugars so I used a little less granulated sugar in the mix and it was still perfectly sweet, no weird aftertaste. Great base recipe to customize to your own taste.

3 days ago

So glad you were able to adjust the sugar to fit your preferences! The recipe is super flexible, so cutting back on sugar or swapping in a sugar alternative works really well here.

just now

Made this as a last minute dessert for my date night last night and my partner thought I spent hours making it from scratch! Little does he know it took me 10 minutes total. We ate it while watching movies and it was the perfect cozy sweet treat. 10/10, will make again.



