
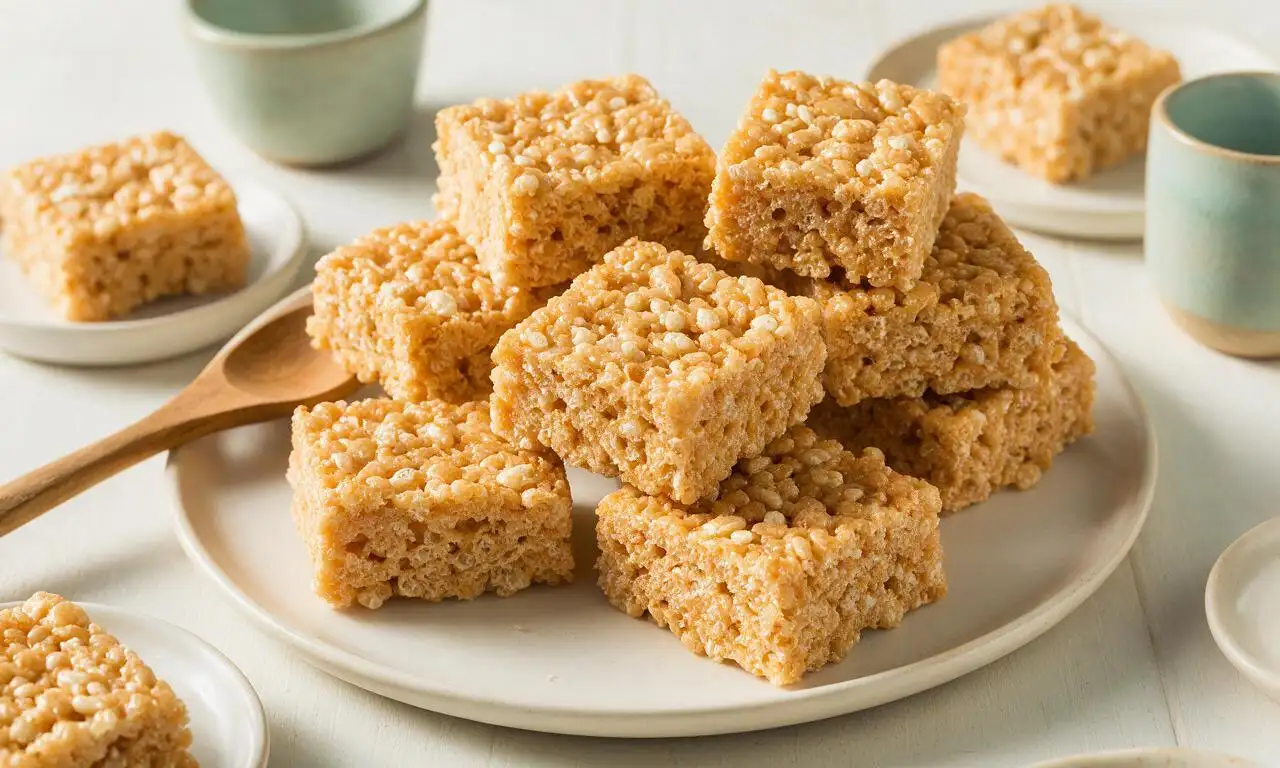
Rice Krispie Treats

title 1
Rice Krispie Treats
⏱️ cook time 25 minutes
🍽️ servings 12
⚡ Difficulty easy

intro

Chewy, gooey, crisp no-bake marshmallow cereal bars that come together in minutes, loved by kids and adults for their sweet, nostalgic flavor.

Ingredients

Toasted rice cereal (Rice Krispies) 6 cups (180g)
Unsalted butter 3 tablespoons (42g)
Mini marshmallows 5 cups (250g), divided
Fine sea salt 1/4 teaspoon
Nonstick cooking spray 1 second spray (for pan and tools)

Steps

1

Prep baking pan

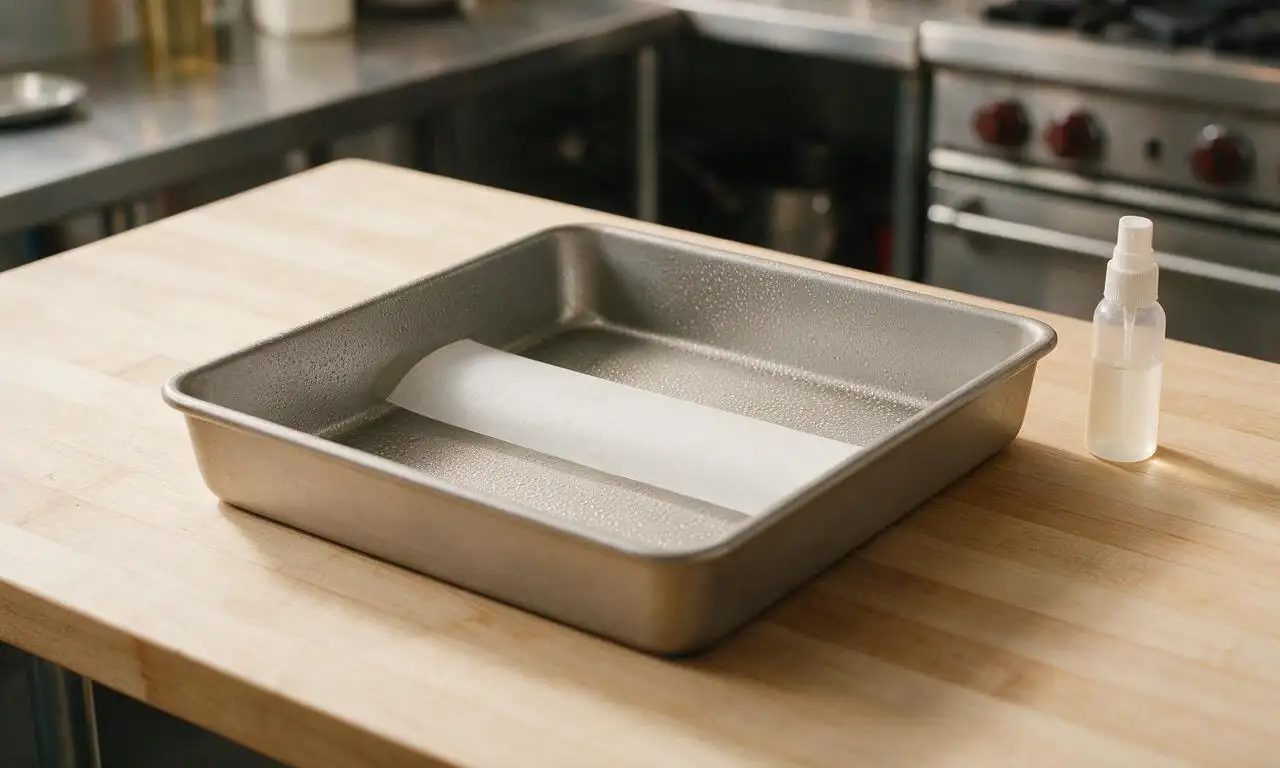
Spray a 9x9 inch (23x23cm) square baking pan evenly with nonstick cooking spray, then line it with a strip of parchment paper that overhangs two opposite sides by 2 inches (5cm) to make lifting treats out easy later. Set the pan aside at room temperature.
Step 1
step1:Prep baking pan
2

Melt butter and marshmallows

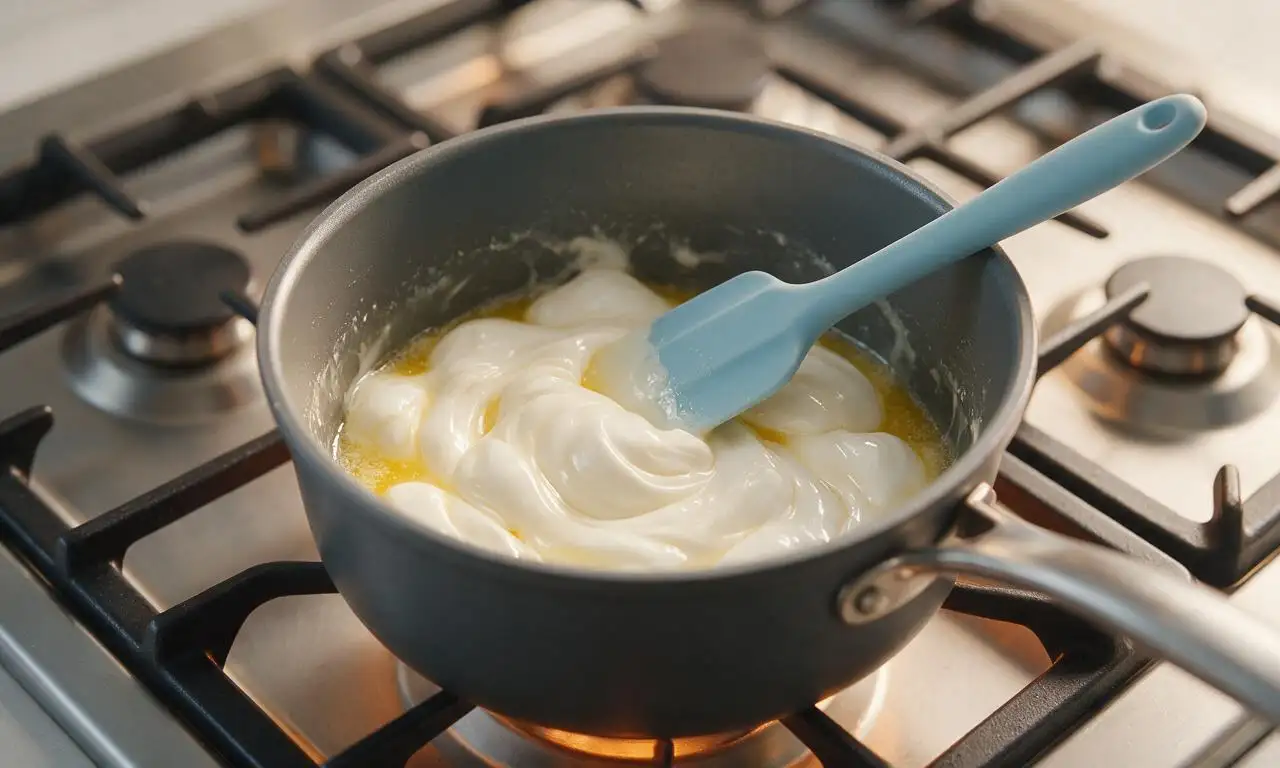
Place a large heavy-bottomed saucepan over low heat. Add the 3 tablespoons (42g) of unsalted butter and stir constantly with a silicone spatula until fully melted, about 1 minute. Add 4 cups (200g) of the mini marshmallows and 1/4 teaspoon fine sea salt, stirring continuously until the marshmallows are completely smooth and fully melted, 3 to 4 minutes—do not turn heat up to medium or higher, as this will make the treats hard instead of chewy.
Step 2
step2:Melt butter and marshmallows
3

Fold in rice cereal

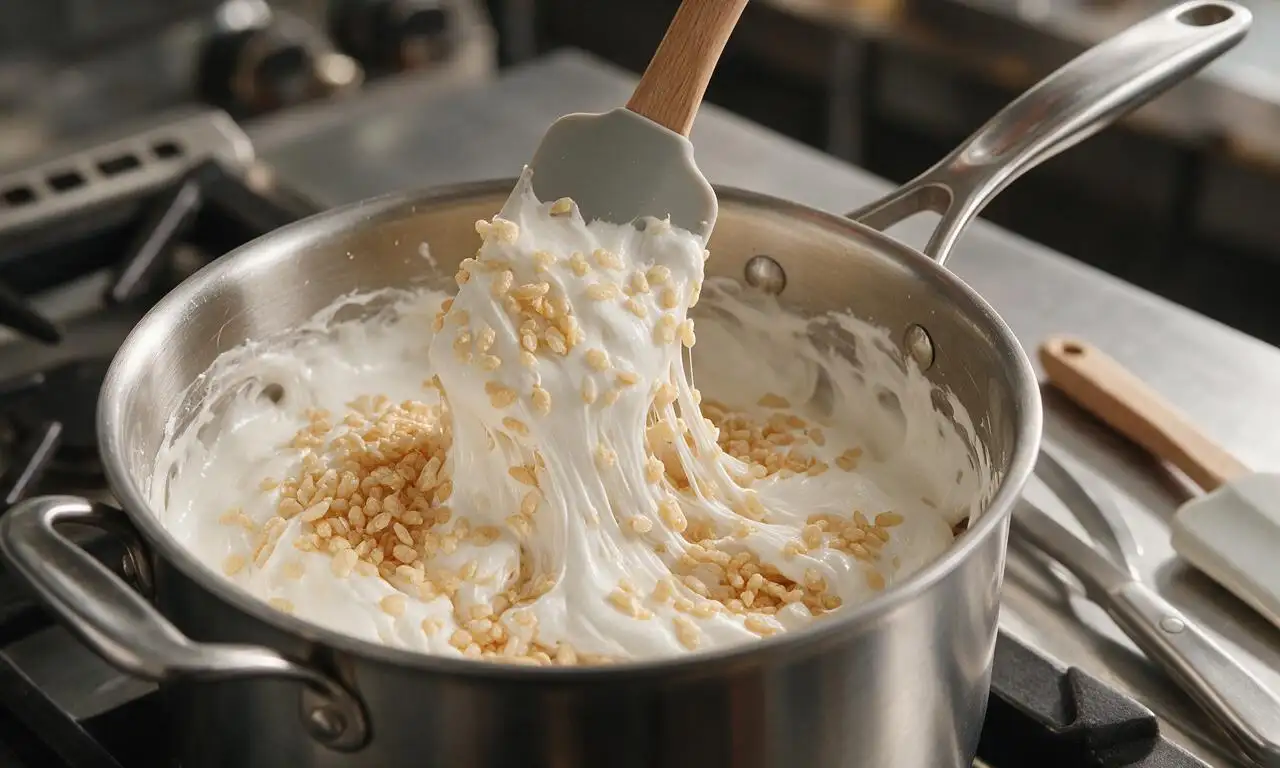
Remove the saucepan from heat immediately once the marshmallow base is smooth. Add all 6 cups (180g) of toasted rice cereal to the pan, folding gently with the silicone spatula until every piece of cereal is evenly coated in the melted marshmallow mixture, about 1 minute—avoid crushing the cereal by stirring too hard.
Step 3
step3:Fold in rice cereal
4

Stir in extra marshmallows

Add the remaining 1 cup (50g) of reserved mini marshmallows to the cereal mixture, folding only 2 to 3 times to distribute them evenly—these will stay partially melty and create extra gooey pockets in the finished treats, rather than fully melting into the base.
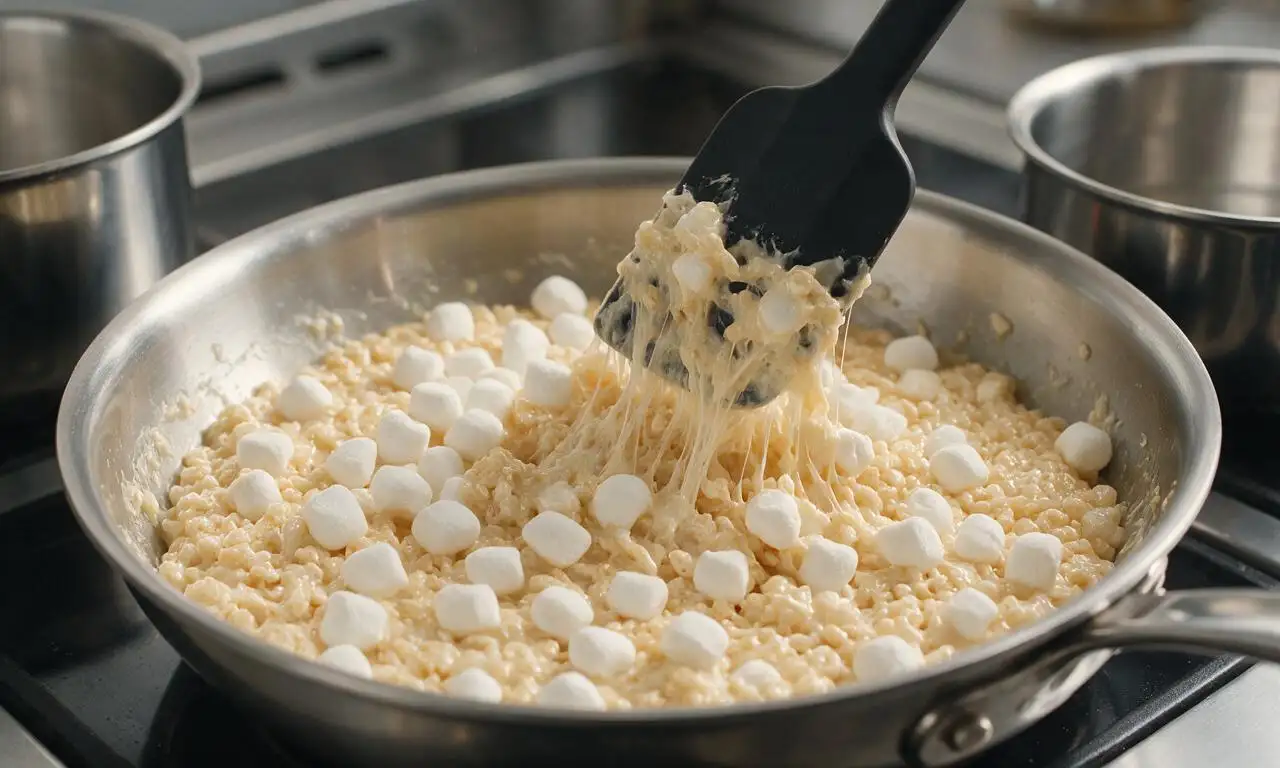
Step 4
step4:Stir in extra marshmallows
5

Press mixture into pan

Transfer the entire coated cereal mixture to your prepared 9x9 inch pan. Lightly coat your fingertips or the back of a dry measuring cup with nonstick spray, then press the mixture firmly and evenly into the pan to create a flat, uniform layer, about 30 seconds of gentle pressing—do not press extremely hard, as this will compress the cereal and make the treats dense instead of crisp-chewy.
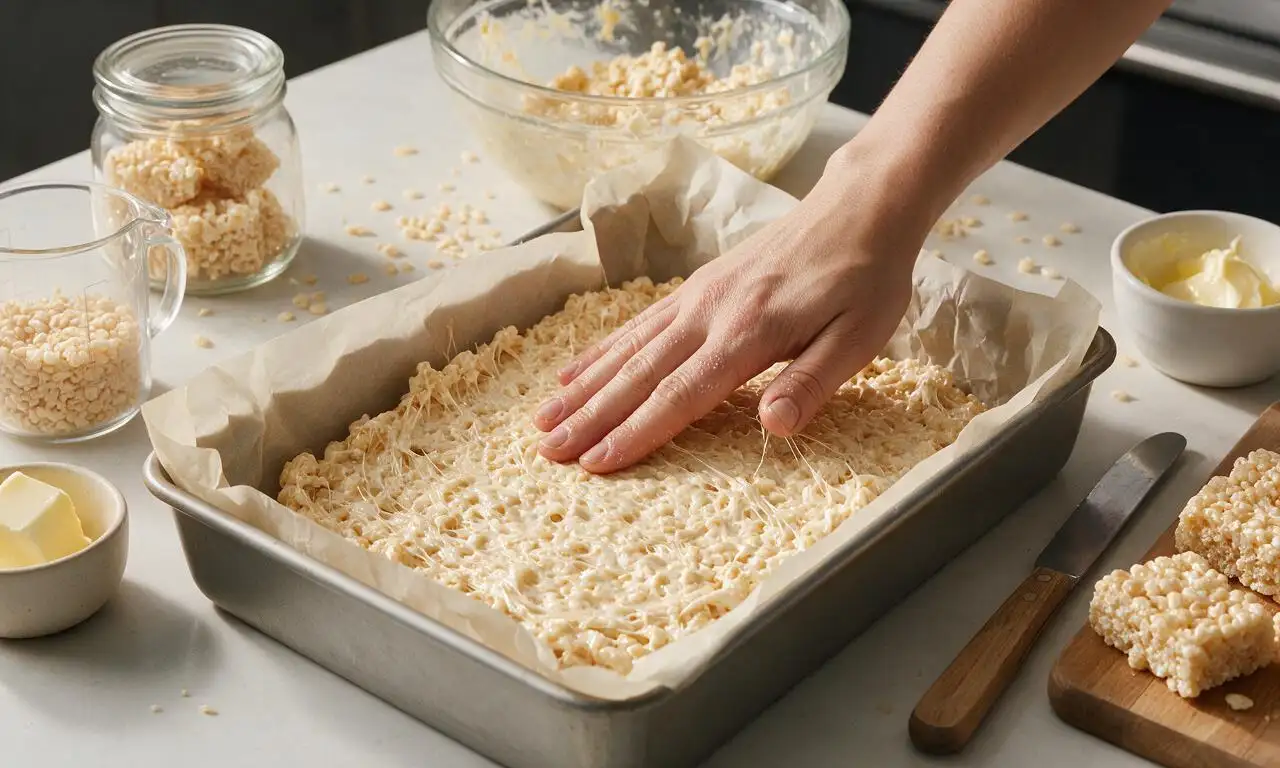
Step 5
step5:Press mixture into pan
6

Let treats set fully

Leave the pan of treats uncovered on your kitchen counter at room temperature for 15 minutes to set completely—do not refrigerate them, as this will make the cereal turn soggy and the marshmallow tough. Once set, lift the treats out of the pan using the overhanging parchment paper handles.
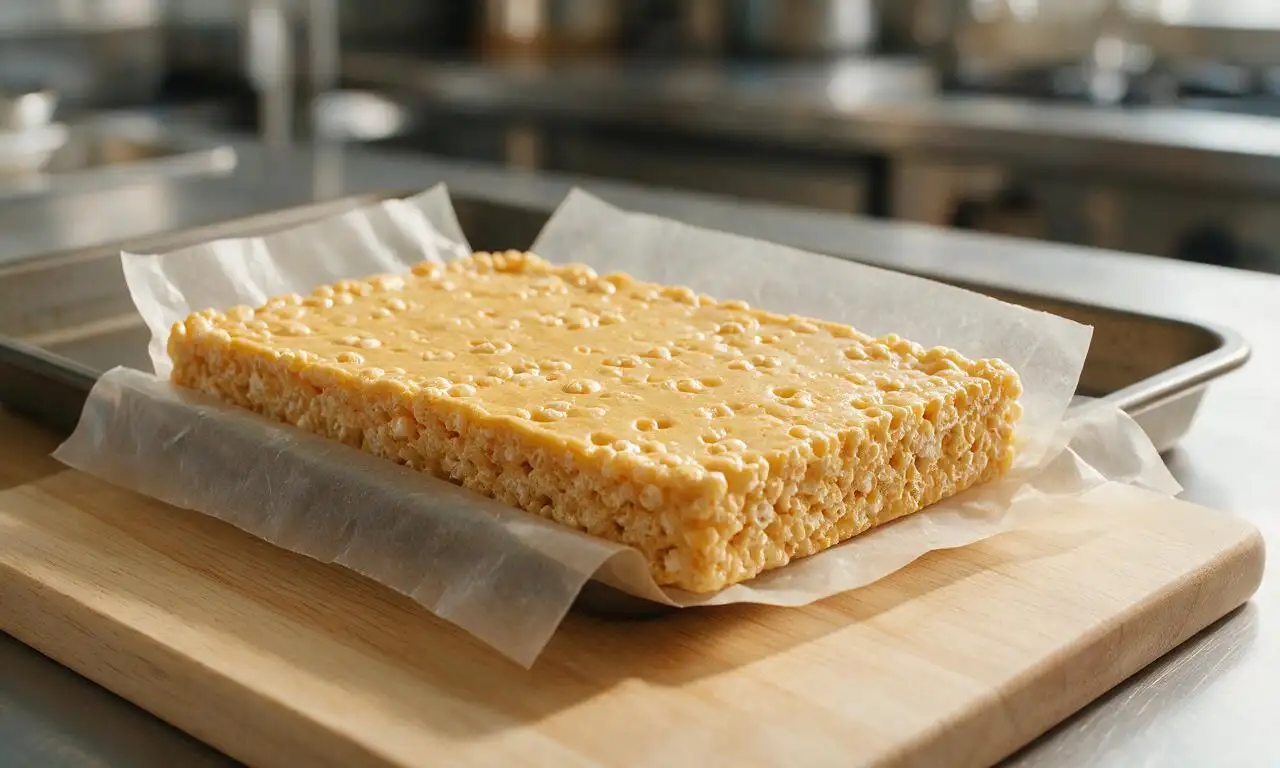
Step 6
step6:Let treats set fully
7

Cut into squares and serve

Use a sharp, lightly greased knife to cut the slab into 12 equal 2x3 inch (5x7.5cm) squares. Serve immediately, or store in an airtight container at room temperature for up to 3 days.
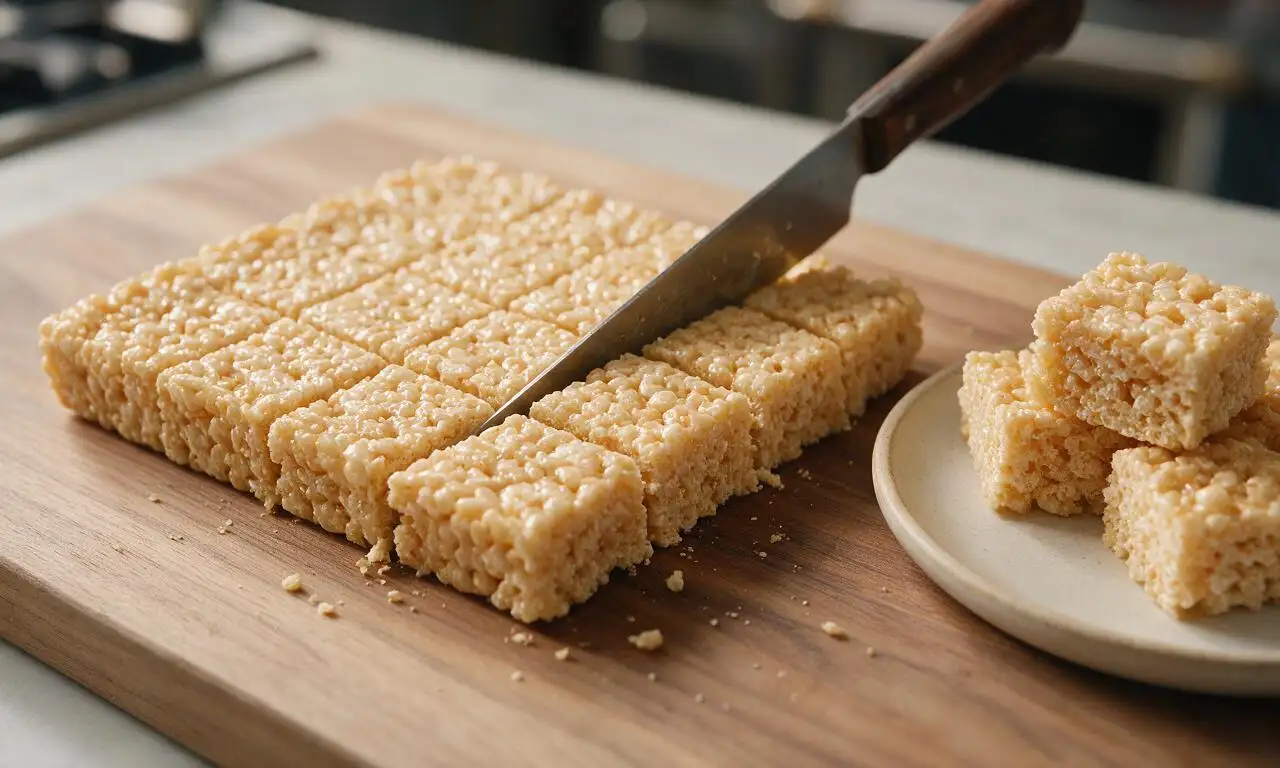
Step 7
step7:Cut into squares and serve

Tips

1.Never use high heat when melting marshmallows: high heat breaks down the gelatin in marshmallows, leading to hard, crunchy treats instead of soft, chewy ones.
2.Avoid using stale marshmallows or stale cereal for this recipe—both will result in tough, less crisp treats with a dry, stale texture.
3.If adding mix-ins like rainbow sprinkles, mini chocolate chips, or chopped peanut butter cups, stir them in with the reserved marshmallows at step 4 to keep them evenly distributed without melting completely.


✨ You May Also Like

Desserts & Baking
🍜 Italy

Creamy, coffee-kissed classic Northern Italian no-bake dessert, with layers of rum-spiked mascarpone cream, soft ladyfingers, and a rich cocoa dusting.

⏱️ 4 hours 3Desserts & Baking ★ 4.7
Desserts & Baking
🍜 France

Flaky, shatteringly crisp, buttery French croissants with golden exteriors and soft, airy layered interiors, perfect for pairing with coffee for a special morning treat.

⏱️ 12 hours Desserts & Baking ★ 4.5
Desserts & Baking
🍜 United States

Warm, spiced baked apples topped with a fluffy golden biscuit crust, this cozy dessert pairs perfectly with vanilla ice cream for cool-weather comfort.

⏱️ 55 minuteDesserts & Baking ★ 4.6
Desserts & Baking
🍜 United States

A star-spangled classic American blueberry pie with buttery flaky crust and bright sweet-tart filling, perfect for summer patriotic gatherings.

⏱️ 1 hour 25Desserts & Baking ★ 4.7
Desserts & Baking
🍜 United States

A beloved no-bake regional Maine candy with a chewy coconut-potato center coated in rich dark chocolate, a New England holiday staple since the 1870s.

⏱️ 2 hours 3Desserts & Baking ★ 4.8
Desserts & Baking
🍜 France

Luxuriously creamy, floral frozen custard made with aromatic Tahitian vanilla beans, boasting a smooth, rich texture that melts slowly on the tongue.

⏱️ 3 hours 3Desserts & Baking ★ 4.5

Rice Krispie Treats:Frequently Asked Questions

1.Why did my Rice Krispie Treats turn out hard and tough instead of soft and chewy? ▾
This almost always stems from one of three easy-to-fix missteps: overheating marshmallows (cook them just until fully melted over low heat, never boiling them), using too much cereal relative to your marshmallow and butter ratio, or pressing the mixture too firmly into the pan. Press lightly with a greased spatula to lock in that ideal soft, gooey chew.
2.Can I use regular-sized marshmallows instead of mini marshmallows for this recipe? ▾
Absolutely! Mini marshmallows melt faster and more evenly, but regular large marshmallows work as a direct swap if that’s what you have on hand. Use 10 large marshmallows to equal 1 cup of mini marshmallows, and add 30 to 60 seconds of extra stirring time over low heat to get a perfectly smooth, lump-free melted base.
3.Do I really need to add fine sea salt to these sweet treats? What purpose does it serve? ▾
That small pinch of fine sea salt is non-negotiable for balanced, nostalgic flavor, not an afterthought! It cuts through the cloying sweetness of marshmallows and butter, amplifies the subtle toasty note of the rice cereal, and keeps every bite from tasting flat. You only need ¼ teaspoon per 9x13 pan, so you won’t taste any obvious salty kick.
4.How do I keep the warm marshmallow mixture from sticking to my hands and spatula when pressing it into the pan? ▾
Warm marshmallow is incredibly sticky, so don’t attempt to press it with bare hands or an uncoated spatula. First, coat your pan, spatula, and the palms of your hands lightly with the nonstick cooking spray called for in the recipe. If you don’t have spray, a thin coating of softened butter on those surfaces works just as well without leaving greasy residue.
5.How long do these no-bake treats stay fresh, and what’s the best way to store them? ▾
Properly stored, these treats will stay chewy and crisp for up to 3 days at room temperature. Once fully set and cut into squares, stack them in an airtight container with sheets of parchment paper between layers to prevent sticking, and keep them in a cool, dry spot out of direct sunlight. Skip the refrigerator, as cold air will make the cereal turn soggy and stale faster.
6.How do I make my treats extra gooey, like the nostalgic cafeteria versions I had as a kid? ▾
For that iconic stretchy, pull-apart texture you remember from childhood, tweak the ratio slightly: reserve 1 cup of mini marshmallows to stir in at the very end, right after you mix the fully melted marshmallow base with the cereal. Those partially melted marshmallow pockets create perfect sweet, gooey bites without making the bars too soft to hold their shape.
7.Can I add mix-ins like chocolate chips or sprinkles without ruining the treat texture? ▾
You absolutely can add fun mix-ins, as long as you add them at the right time to avoid texture issues. Let the melted marshmallow and cereal mixture cool for 2 to 3 minutes before stirring in add-ins like chocolate chips, rainbow sprinkles, or chopped peanut butter cups—this keeps chocolate from melting into puddles, and keeps the cereal crisp. Stick to ½ to ¾ cup of mix-ins total so bars hold their shape.

Comments (20)

2 days ago

OMG these are SO good! I threw these together in 20 minutes before my oldest’s soccer practice snack time and every single kid on the team asked for seconds. Perfect chewy texture, not too sweet. Total game changer for busy weeknights!

1 week ago

Brought these to my office potluck last week and the pan was completely scraped clean in 10 minutes. I added a handful of mini M&Ms on top for a pop of color and everyone was raving. So easy even I can’t mess them up lmao

3 days ago

As someone who burns microwave popcorn on the regular, I was shocked these turned out first try! No oven required meant I didn’t heat up my tiny dorm room, which is a huge win in this August heat. 10/10 will make again for my floor mates

5 days ago

So happy this recipe works perfectly with gluten free Rice Krispies! I’ve tried so many copycat versions that come out rock hard, but this one stays soft for days. My niece with celiac was over the moon when she could have a treat with the rest of the family at Sunday dinner

2 weeks ago

Only reason I’m not giving 5 stars is I wish they were a little less sweet for my taste, but that’s just personal preference! Wrapped these up individually in parchment paper and tossed them in my backpack for a day hike last weekend. They held up perfectly, didn’t get melty even when it was 80 degrees out, and gave me the perfect little sugar boost halfway up the trail. Great portable snack!

yesterday

I’ve been making these since my kids were little, and this ratio of marshmallow to butter is exactly how my mom used to make them. Tastes like childhood in every bite. I made a pan for my grandkids when they visited last weekend and they left with the recipe scribbled on a napkin

30 minutes ago

Wait, quick question—if I want to make these a day ahead for my daughter’s birthday party, will they stay chewy if I keep them in an airtight container? I don’t want them to get crunchy before the party!

5 minutes ago

Great question! If stored in a tightly sealed airtight container at room temp, these will stay perfectly chewy for up to 3 days, so making them a day ahead works beautifully. Just avoid storing them in the fridge, that’ll make them hard!

2 hours ago

I accidentally used salted butter instead of unsalted when I made these last night and honestly? It slapped. The little extra salt cut the sweetness so well, I don’t think I’ll ever go back to unsalted for these

30 minutes ago

Omg I do the same thing! I even sprinkle a tiny pinch of flaky sea salt on top right after I press them into the pan, it’s chef’s kiss

1 week ago

These are a staple in my weekly meal prep! I cut them into 2 inch squares, stick them in snack baggies, and grab one on my way out the door for work or to drop the kids at school. Way cheaper and tastier than the granola bars I used to buy

5 days ago

That’s such a smart meal prep hack! So glad these are working out as an easy grab-and-go snack for your family.

yesterday

Made these with my 4 year old tonight and we had a blast! No hot oven meant I didn’t have to stress about him getting too close to a heat source, and he loved helping stir the marshmallows and press the cereal into the pan. Messy, but worth every sticky finger

yesterday

This is exactly why I love this recipe too! My 3 and 5 year old can help almost the whole time without me panicking about burns. Memories for days!

2 days ago

Tried adding a layer of melted peanut butter between the treats and a thin chocolate drizzle on top and oh my GOD. It’s like a fancy gourmet version of the classic but took barely any extra time. 10/10 would recommend the upgrade

2 days ago

That peanut butter and chocolate twist sounds incredible! We might have to test that variation for a future recipe share—thanks for the idea!

5 minutes ago

Help! I made these for my friend’s wedding welcome bags and I think I messed up the ratio? They’re super sticky and won’t hold their shape when I cut them. Did I add too many marshmallows?

just now

Oh no, sorry to hear that! Extra sticky, unshapely treats usually happen when the marshmallow mixture gets too hot (if you boiled it instead of just melting it low and slow) or if you added extra marshmallow without a little extra cereal. Next time, melt the butter and marshmallows on the lowest heat, stirring constantly, and you’ll get that perfect set every time!

3 days ago

Swapped the regular butter for vegan butter and used vegan marshmallows, and these came out exactly like the original! My non-vegan roomie ate half the pan without even noticing they were plant based. Win win

2 days ago

Thank you for sharing this swap! I’ve been looking for a vegan version that doesn’t taste weird, can’t wait to try this this weekend

1 week ago

Made these for my high school football team’s pre-game snack last Friday and the boys went wild. Way better than the store-bought granola bars we usually get, and it cost me like $8 to make enough for the whole team. Insane value

5 days ago

Totally agree! I make these for my kid’s rec league team all the time and they’re always the first snack gone. So budget friendly!

2 weeks ago

Wait, does anyone else press these into the pan with a buttered piece of parchment paper instead of their hands? I used to get so sticky every time until I saw that hack online, it’s a total game changer for less mess

1 week ago

Omg I need to try that! I always end up with marshmallow stuck under my nails for hours after making these, it’s so annoying

1 week ago

That’s such a great mess-free hack! We actually mention that in our pro tips section, but it’s worth repeating—no sticky fingers required when you use buttered parchment or a greased spatula to press the mixture down!

2 days ago

First time ever making any kind of treat from scratch and these came out perfect! I was so nervous I’d mess them up, but the steps were super straightforward and it only took like 20 minutes total. My roommate said they taste better than the ones we got at the school bake sale in high school lmao

yesterday

Same! I’m a total beginner and these were foolproof. I even added extra marshmallows because I love them extra gooey and it still worked

yesterday

That makes us so happy to hear! These are the perfect first recipe for new bakers because they’re so forgiving, even if you tweak the ratios a little to match your taste. Can’t wait to hear what you make next!

5 days ago

I make these for every holiday and just switch up the add-ins! Orange food coloring and candy corn for Halloween, red and green sprinkles for Christmas, pastel mini eggs for Easter. It’s the easiest themed treat ever and everyone always thinks I spent hours on them

3 days ago

This is such a smart idea! I’m hosting a Halloween party next weekend and I was stressing about easy desserts, this just went on the menu

2 days ago

I do the same! For my twins’ dinosaur birthday last year I added green food coloring and little plastic dinosaur toppers, the kids lost their minds

1 week ago

Why do my treats always turn out rock hard after a day? I follow the recipe exactly but they’re never soft and chewy like the ones my mom makes. Am I doing something wrong?

5 days ago

Hard treats almost always come from cooking the marshmallows too long! If you heat them past the fully melted point, the sugar starts to caramelize and set hard once cool. Stick to low heat, pull the pan off the stove as soon as the last marshmallow lumps are gone, and they’ll stay chewy for days

3 days ago

Also make sure you don’t pack them super tight into the pan! If you press down really hard to get them flat, they’ll compact into a hard brick. I just gently press them even with the pan and they stay perfect

2 hours ago

Made these at 1am when I got the munchies after a night out with friends and I’m not exaggerating when I say they’re the best thing I’ve ever made. We didn’t even wait for them to cool, we ate half the pan straight out of the baking dish with spoons lmao

30 minutes ago

LMAO I’ve done this exact thing. There’s no better late night snack than warm, gooey fresh Rice Krispie treats, zero judgment

5 minutes ago

We won’t tell if you don’t! Warm, straight-from-the-pan treats are a chef’s kiss late night pick-me-up, no cooling required if you don’t want to wait

yesterday

Made these for our neighborhood block party last weekend and I lost count of how many people asked for the recipe! I added a handful of butterscotch chips to the mix and it gave it such a warm, cozy flavor that was perfect for the first cool fall weekend of the year

yesterday

Butterscotch chips?! That sounds incredible, I’m definitely adding those when I make these for our bonfire next weekend. Do you add them when the marshmallow is still warm so they melt a little?

2 hours ago

The butterscotch addition sounds perfect for fall! If you add the chips right when you take the marshmallow mixture off the heat before stirring in the cereal, they’ll melt slightly into the mix for that perfect cozy flavor in every bite



