Rice Krispie Wreaths

Rice Krispie Wreaths
⏱️ cook time 10 minutes
🍽️ servings 12
⚡ Difficulty easy

intro

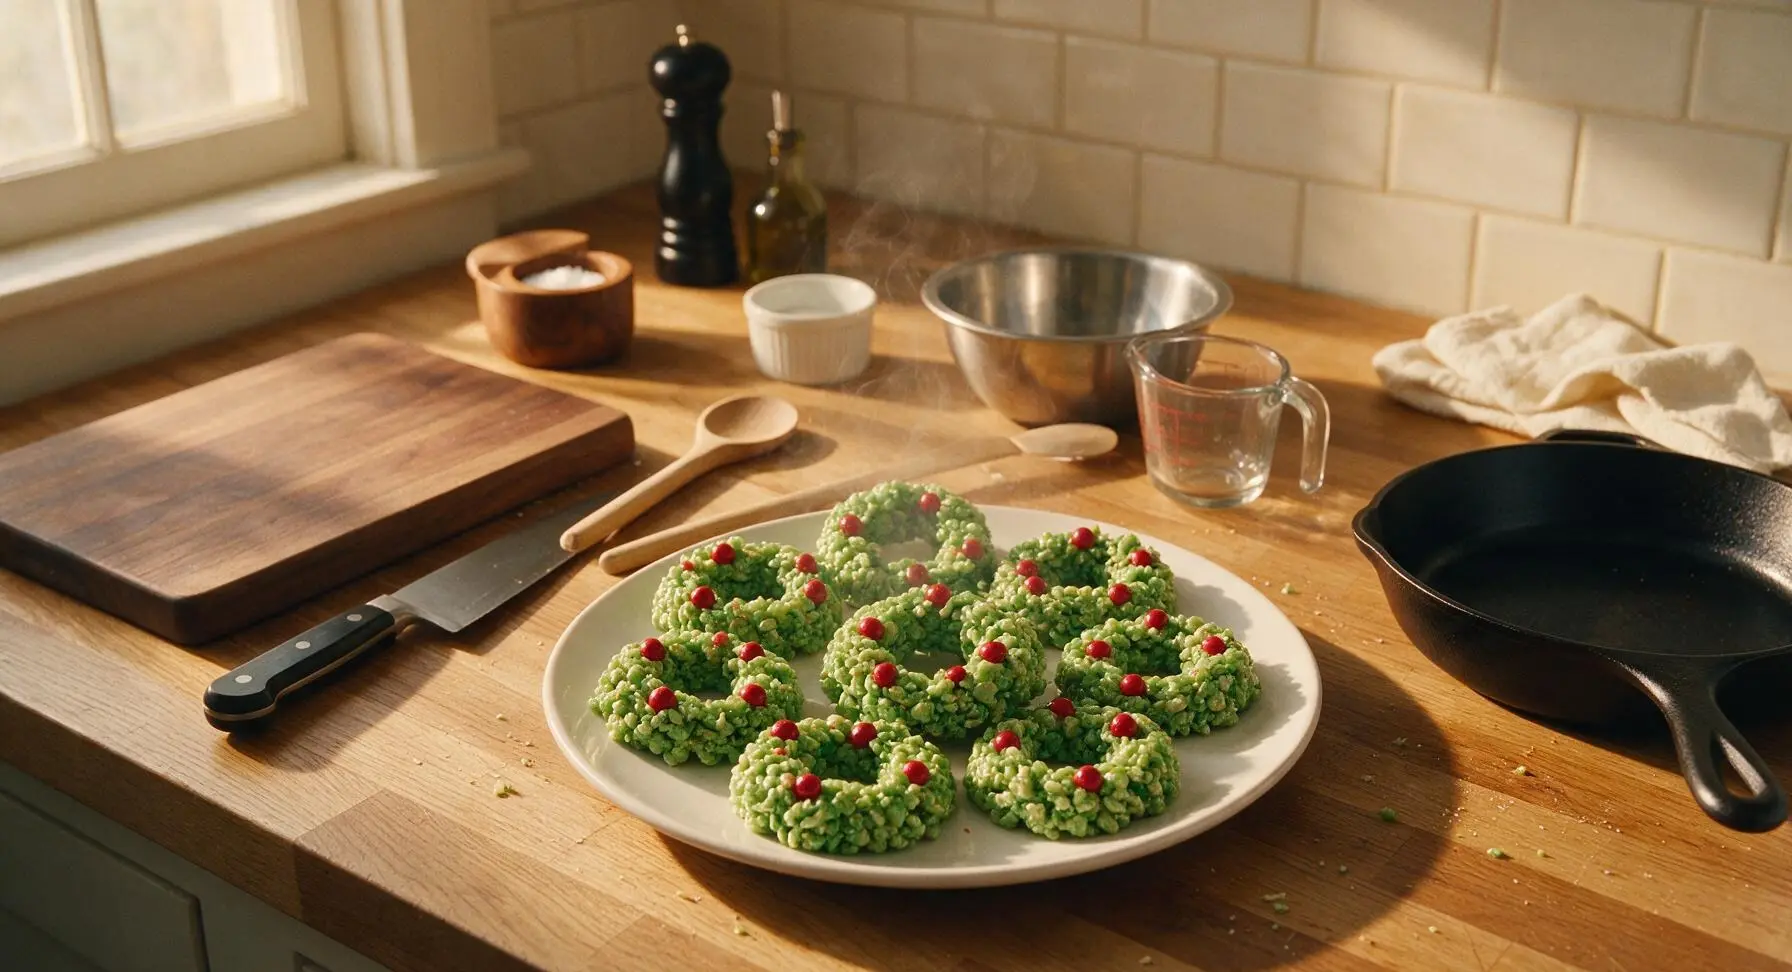
Chewy, festive no-bake holly-green cereal wreaths dotted with bright red candy berries, a classic kid-friendly Christmas treat perfect for holiday cookie plates.

Ingredients
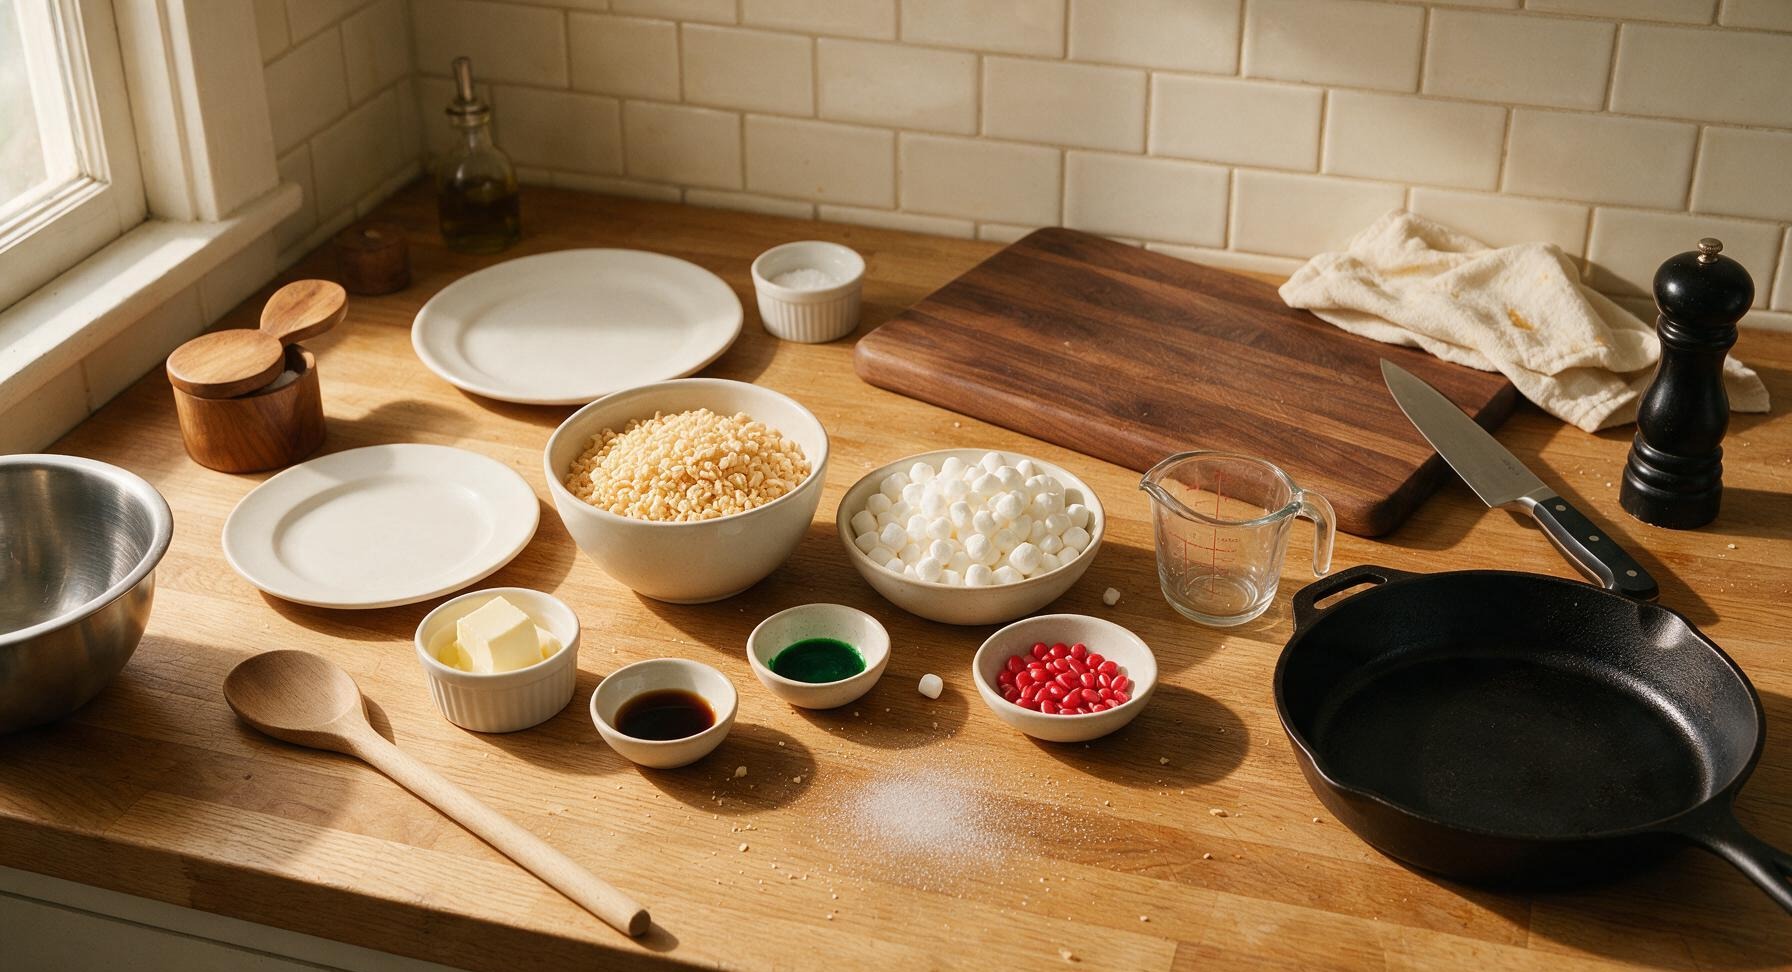
Rice Krispies cereal 6 cups (170g)
Mini marshmallows 4 cups (180g)
Unsalted butter 3 tablespoons (42g)
Pure vanilla extract 1 teaspoon
Green gel food coloring 1/4 teaspoon
Red cinnamon imperial candies 1/3 cup (60g)
Non-stick cooking spray 1 light coating

Steps

1

Grease Molds and Pan

First, pull a 30cm length of unbleached parchment paper from the fixed roll and lay it flat on the center of the counter. Arrange the 12 3-inch silver metal ring molds in neat 3x4 rows on the parchment. Lightly coat the inside of each ring mold, the head of the forest green silicone spatula, and the interior of the large stainless steel mixing bowl with non-stick cooking spray. This prevents sticky marshmallow from adhering to surfaces as you work. Set prepared items aside within easy reach.

Step 1
step1:Grease Molds and Pan
2

Melt Butter and Marshmallows

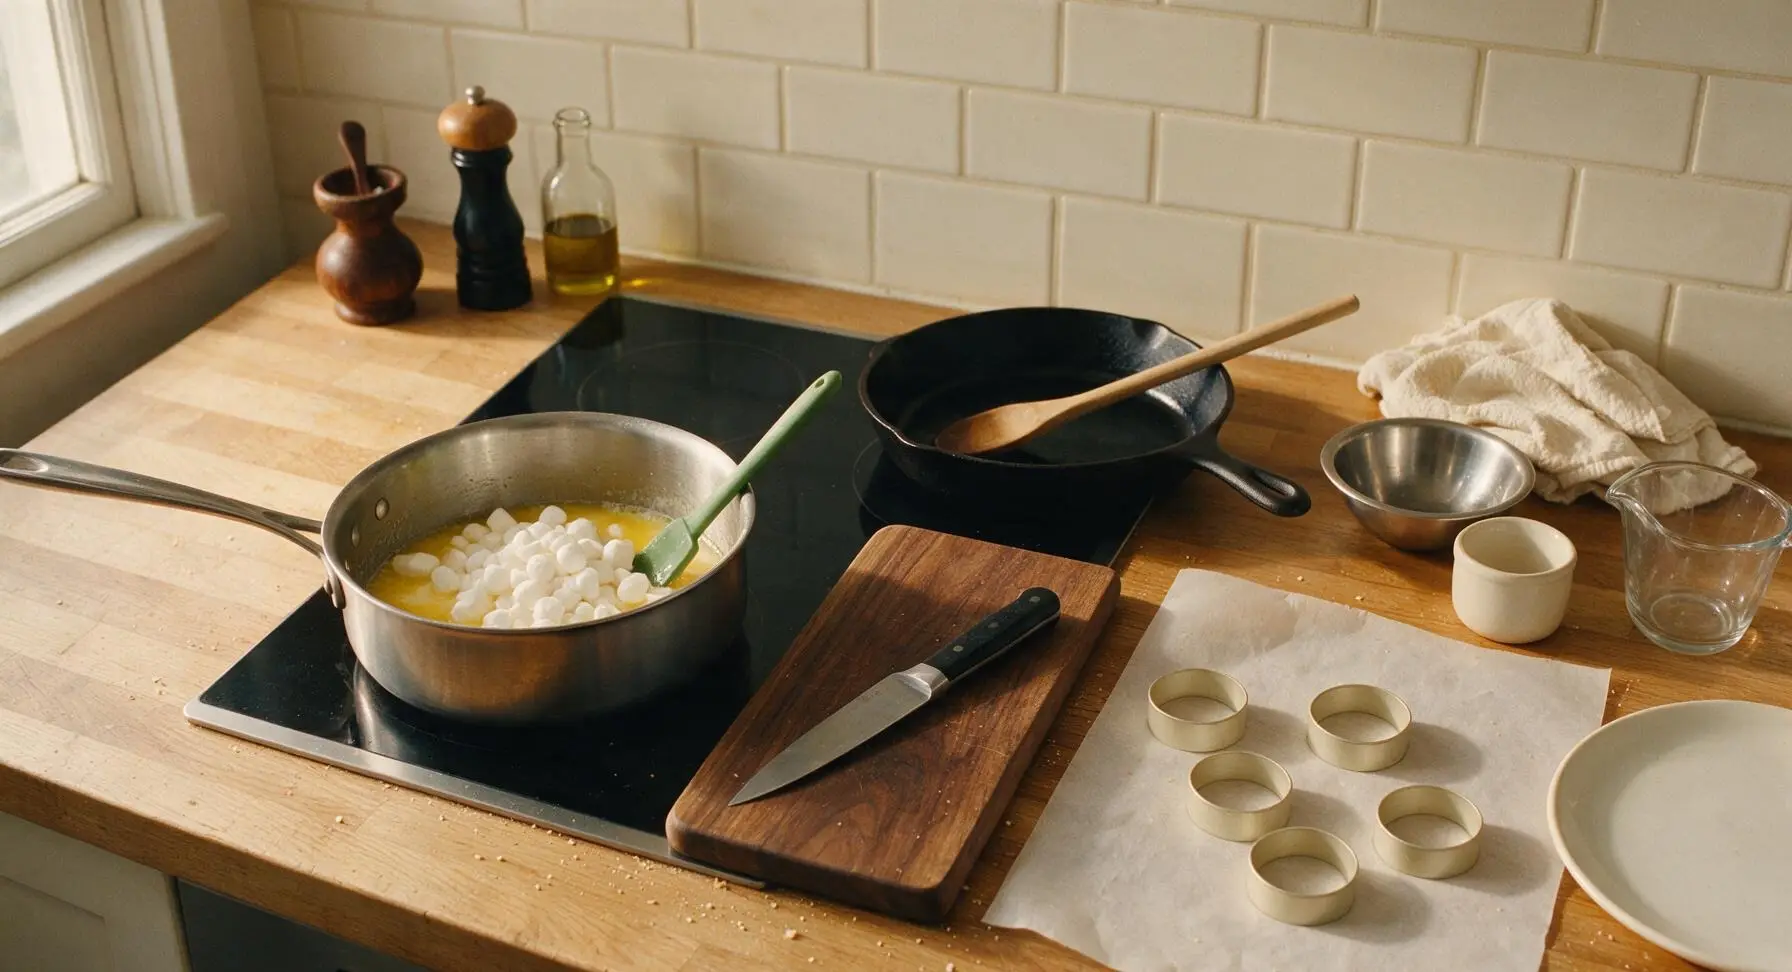
Place the 3-quart heavy-bottomed stainless steel saucepan on the left induction burner over low heat. Add the 3 tablespoons of unsalted butter, stirring occasionally with the silicone spatula until fully melted into a pale golden liquid, about 2 minutes. Add all 4 cups of mini marshmallows to the pan, stirring constantly until completely smooth and melted, 3-4 minutes. Do not turn heat above low, as high heat will break down marshmallow gelatin and lead to tough, hard set treats.
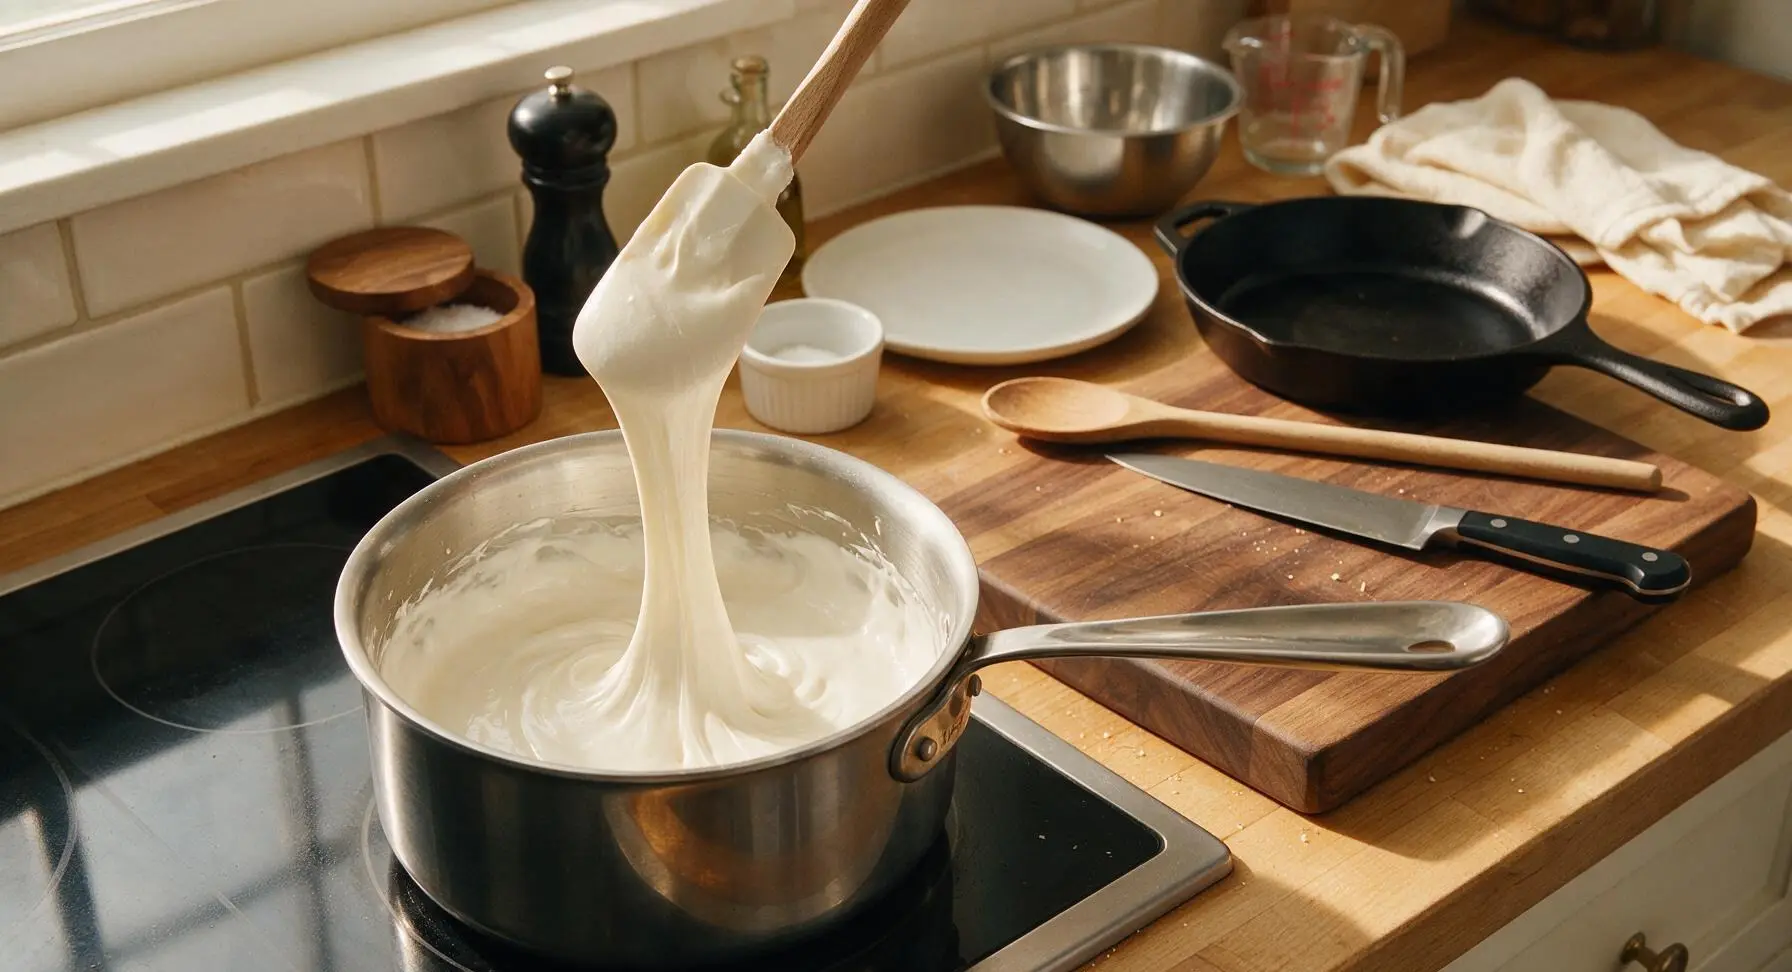
Step 2
step2:Melt Butter and Marshmallows
Step 2
step2:Melt Butter and Marshmallows
3

Tint Marshmallow Green

Remove the saucepan from heat immediately once marshmallows are fully melted. Stir in the 1 teaspoon of pure vanilla extract, then add the 1/4 teaspoon of green gel food coloring. Stir slowly and thoroughly with the silicone spatula until the color is completely even, with no streaks of white or darker green remaining. The mixture should be a soft, muted holly green, not neon bright—add 1 extra tiny drop of coloring if needed to reach the right shade.
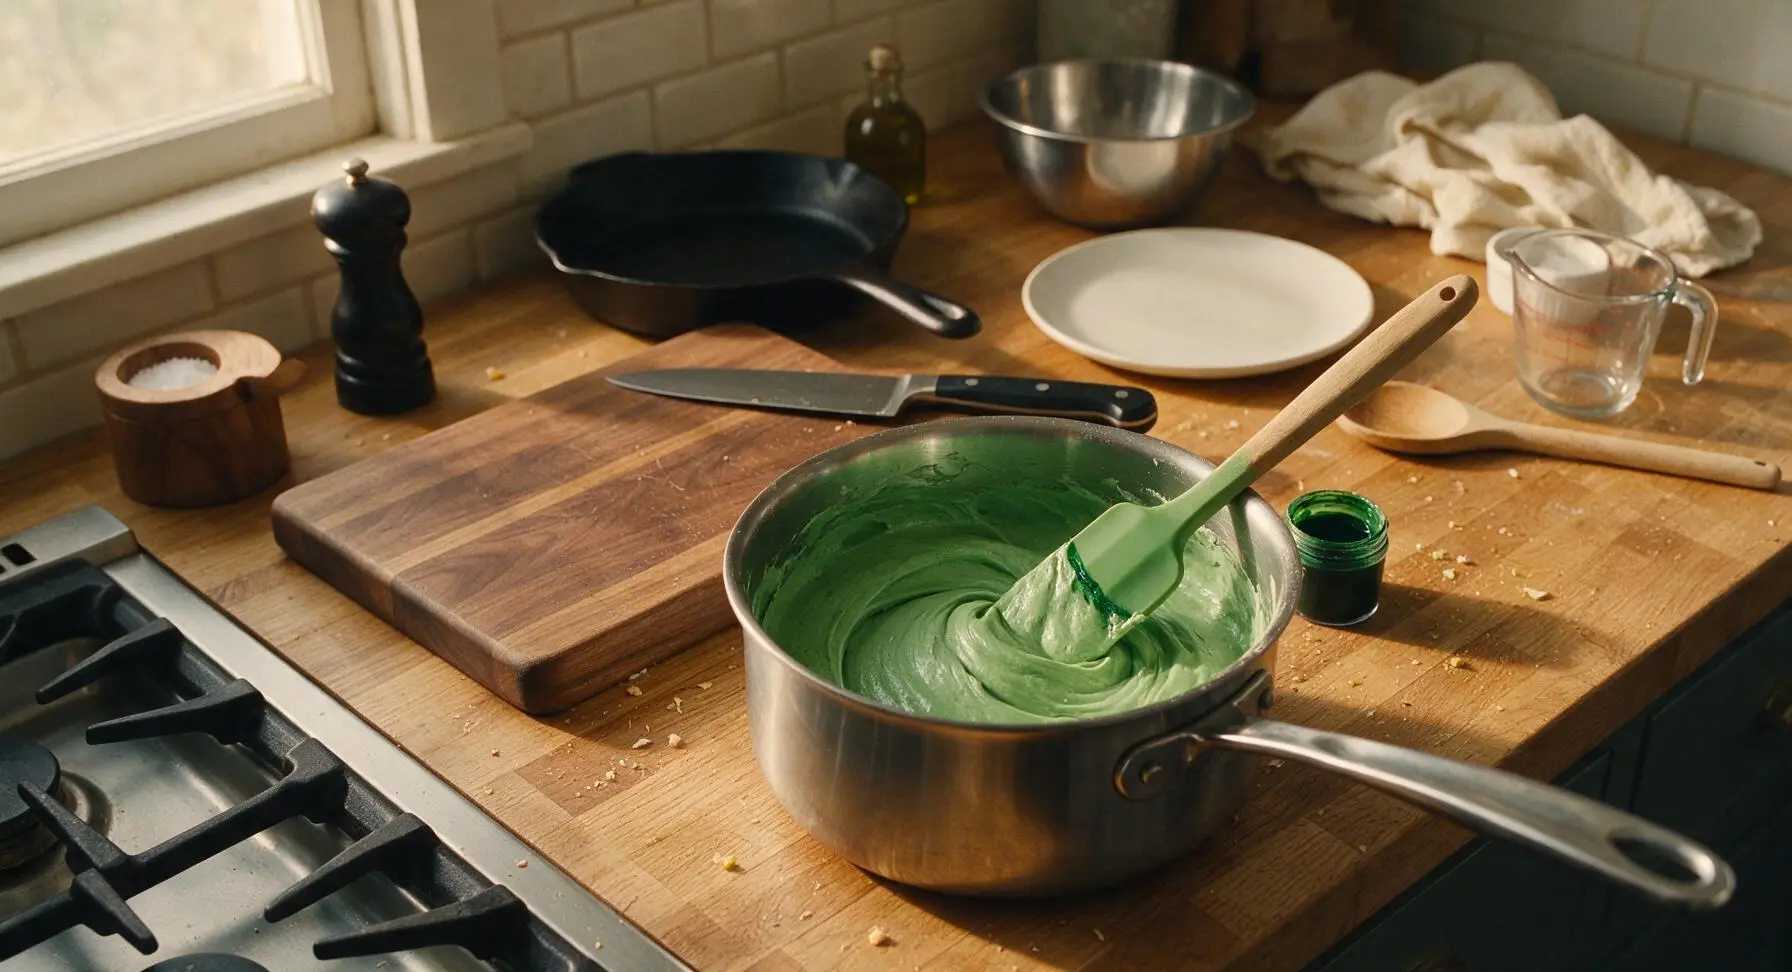
Step 3
step3:Tint Marshmallow Green
4

Fold in Rice Krispies

Transfer the green melted marshmallow mixture to the pre-greased large stainless steel mixing bowl. Add all 6 cups of Rice Krispies cereal to the bowl. Use the greased silicone spatula to fold the cereal gently into the marshmallow, scraping the bottom and sides of the bowl repeatedly, until every single cereal piece is evenly coated in the green marshmallow mixture. Do not stir too aggressively, as this will crush the cereal and lead to dense, tough wreaths. The mixture will be very sticky and stringy as you fold.
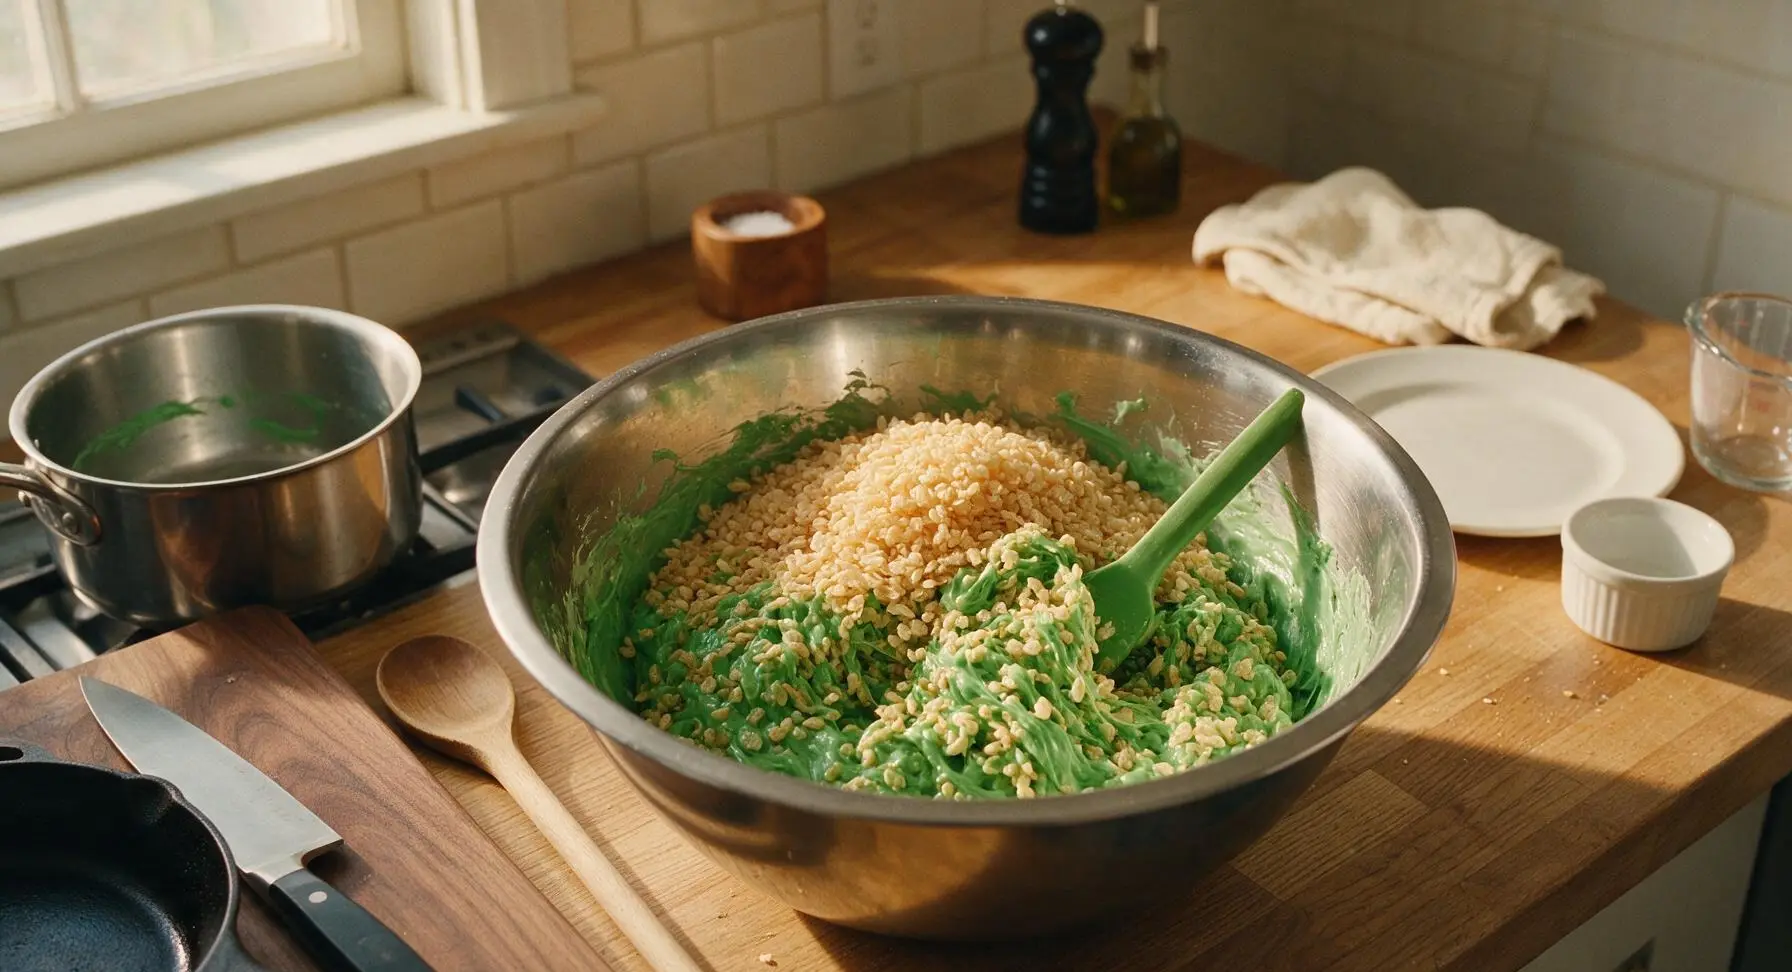
Step 4
step4:Fold in Rice Krispies
5

Shape Wreath Rings

Working quickly before the marshmallow sets (you have about 5 minutes of working time at room temperature), use the 2-cup clear glass measuring cup to scoop 1/2 cup portions of the coated cereal mixture into each greased ring mold on the parchment paper. Use the greased small offset metal spatula to press the mixture firmly into an even ring around the inner edge of each mold, leaving a 1-inch hollow center to create the classic wreath shape. Press firmly enough that the cereal sticks together, but not so hard that the pieces crush into fine crumbs. Let the wreaths rest in the molds for 10 minutes at room temperature to partially set.
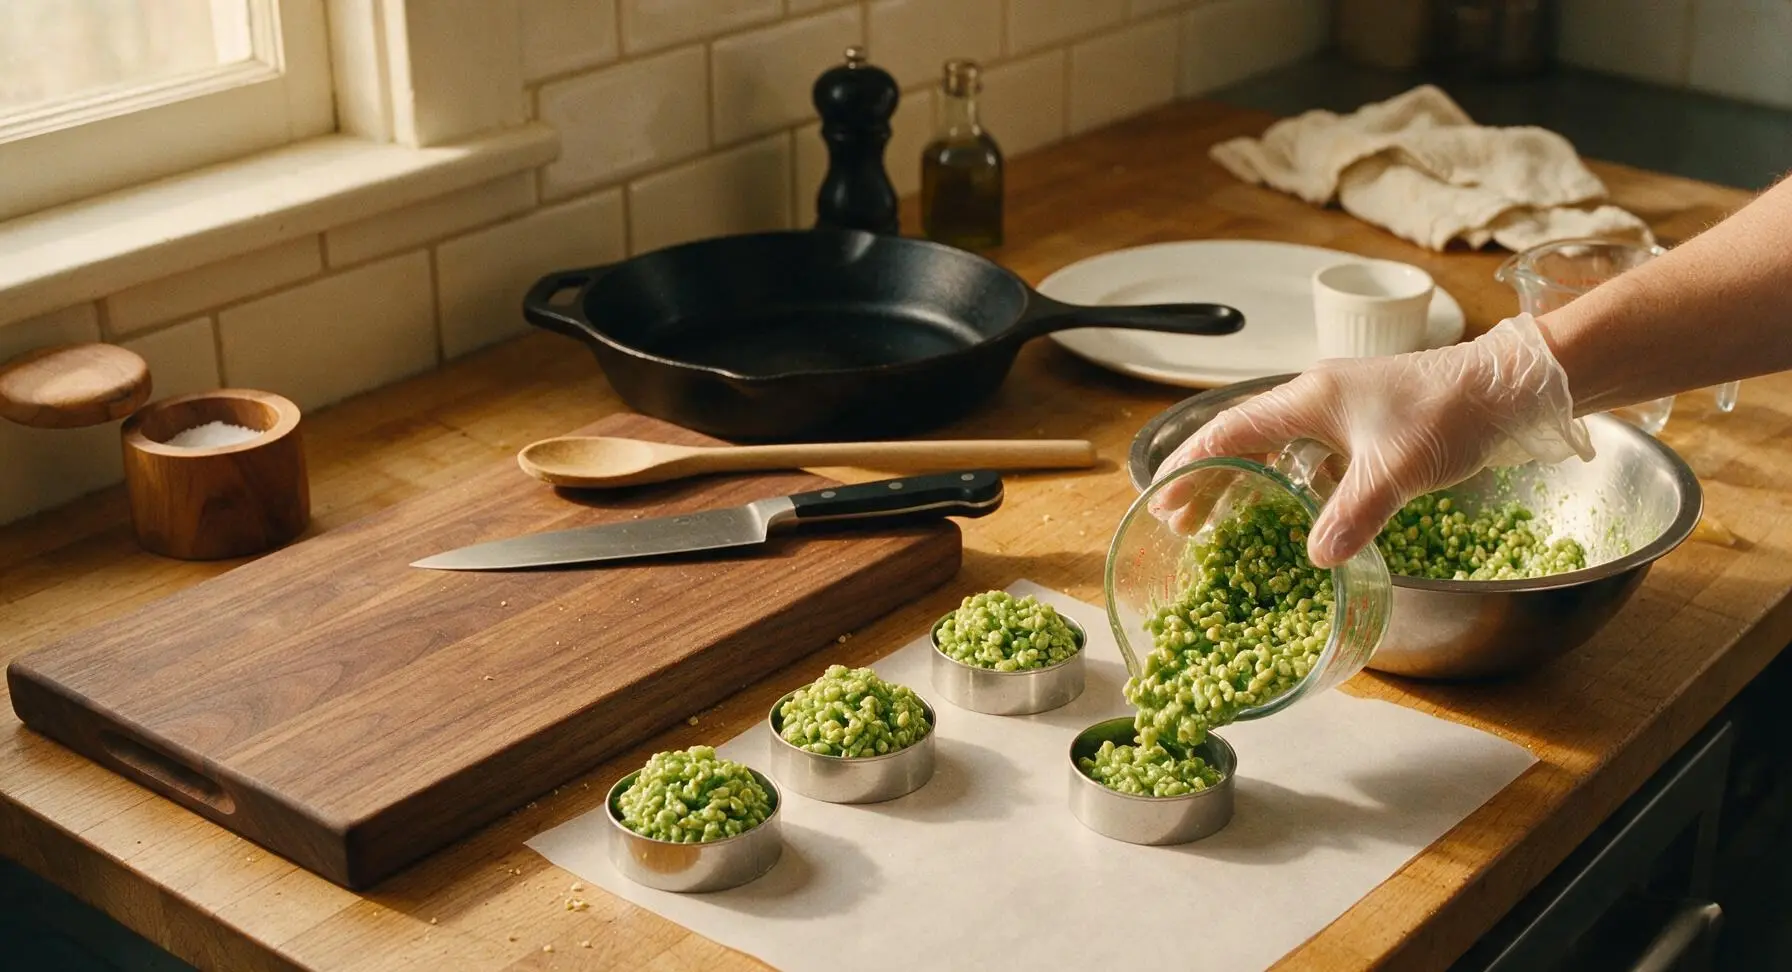
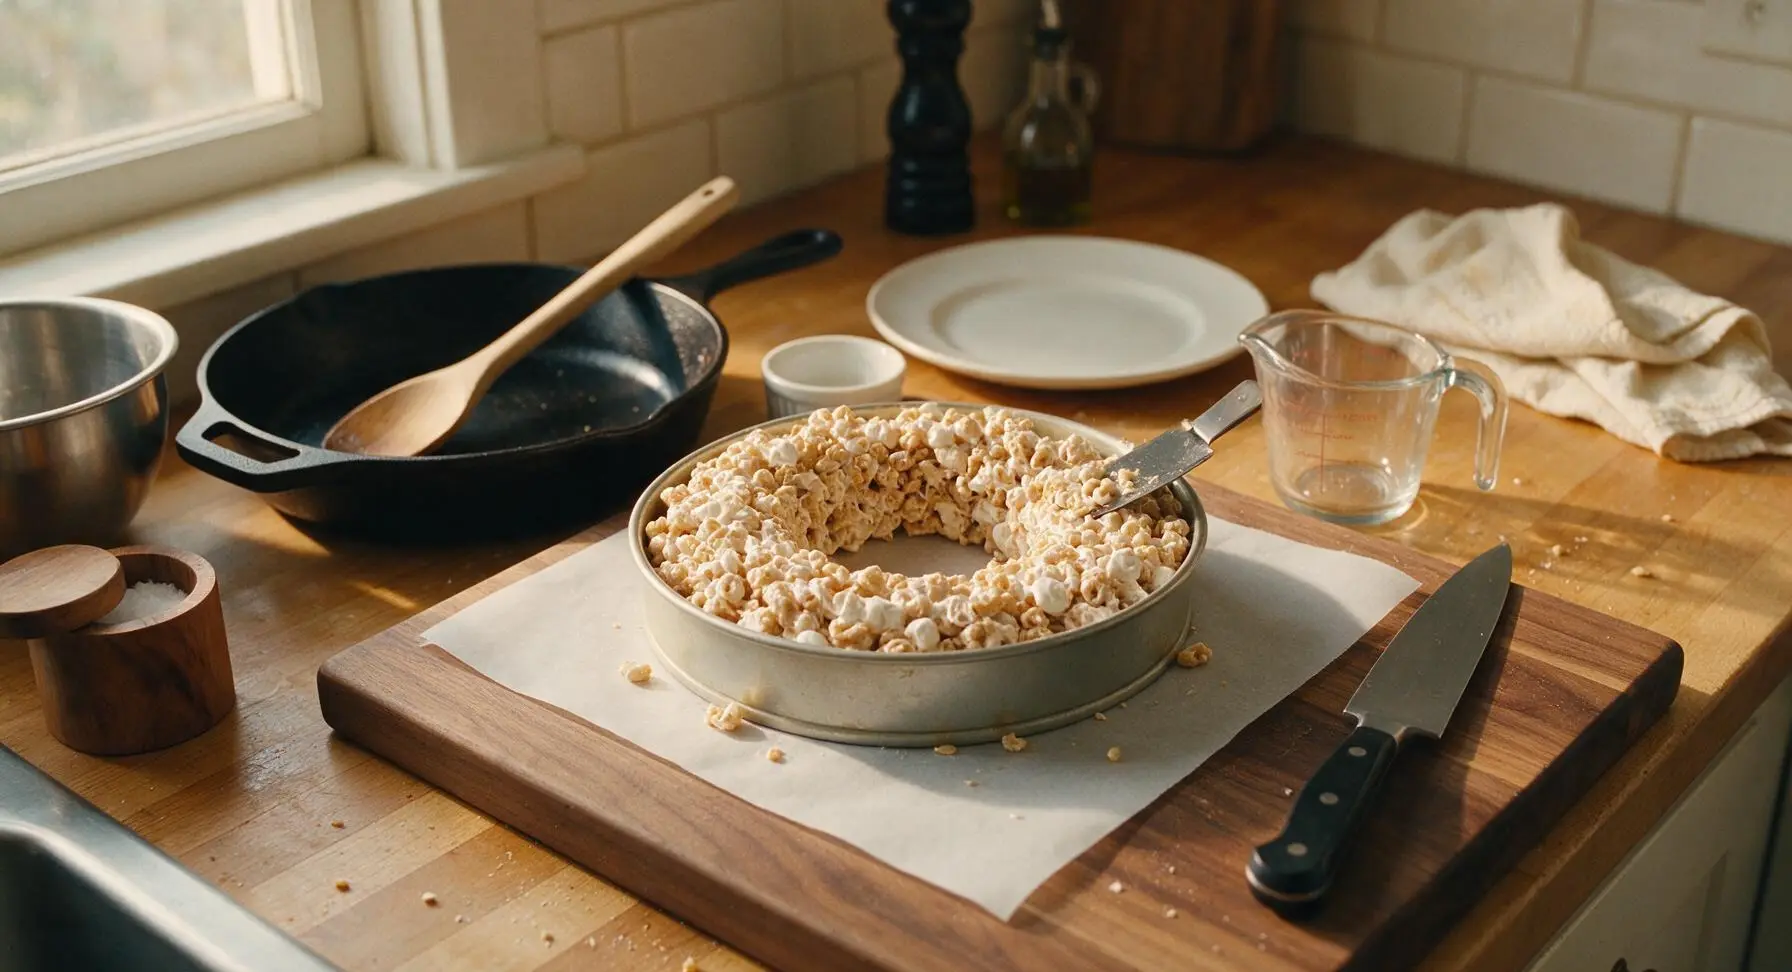
Step 5
step5:Shape Wreath Rings
Step 5
step5:Shape Wreath Rings
6

Add Holly Berry Accents

Once the wreaths have set for 5 minutes (still slightly tacky to the touch, not fully firm), lift the ring molds straight up off the parchment to release the partially set wreaths. Press 3-4 red cinnamon imperial candies into the outer edge of each wreath, grouping them in small clusters to mimic holly berries. If the candies do not stick, dab a tiny amount of leftover melted marshmallow from the mixing bowl on the back of each candy to adhere. Let wreaths set fully for 5 more minutes at room temperature.
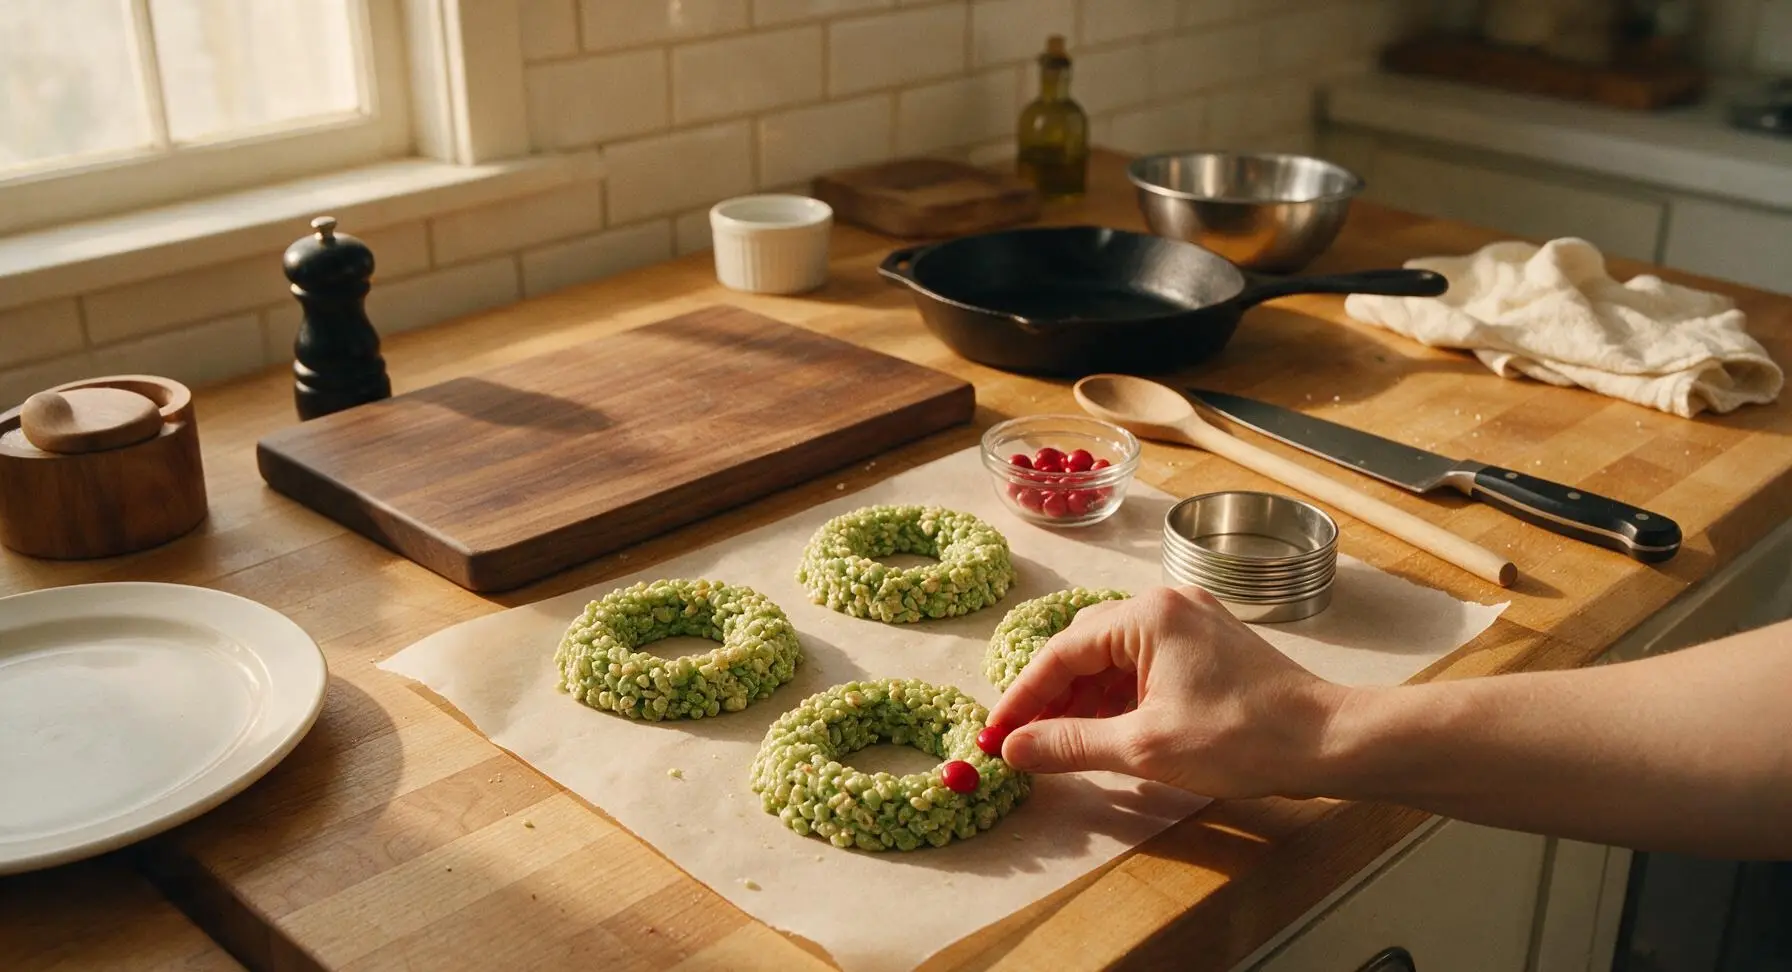
Step 6
step6:Add Holly Berry Accents
7

Plate Finished Wreaths

Once wreaths are fully set (firm to the touch, no sticky marshmallow transfer when you lift one from the parchment), carefully transfer them to the round matte white ceramic serving platter, arranging them in a loose overlapping circle. Add a light, optional dusting of white edible pearl sugar over the tops to mimic a light dusting of winter snow, if desired. Serve immediately, or store in an airtight container at room temperature for up to 3 days, separated by layers of parchment paper to prevent sticking.
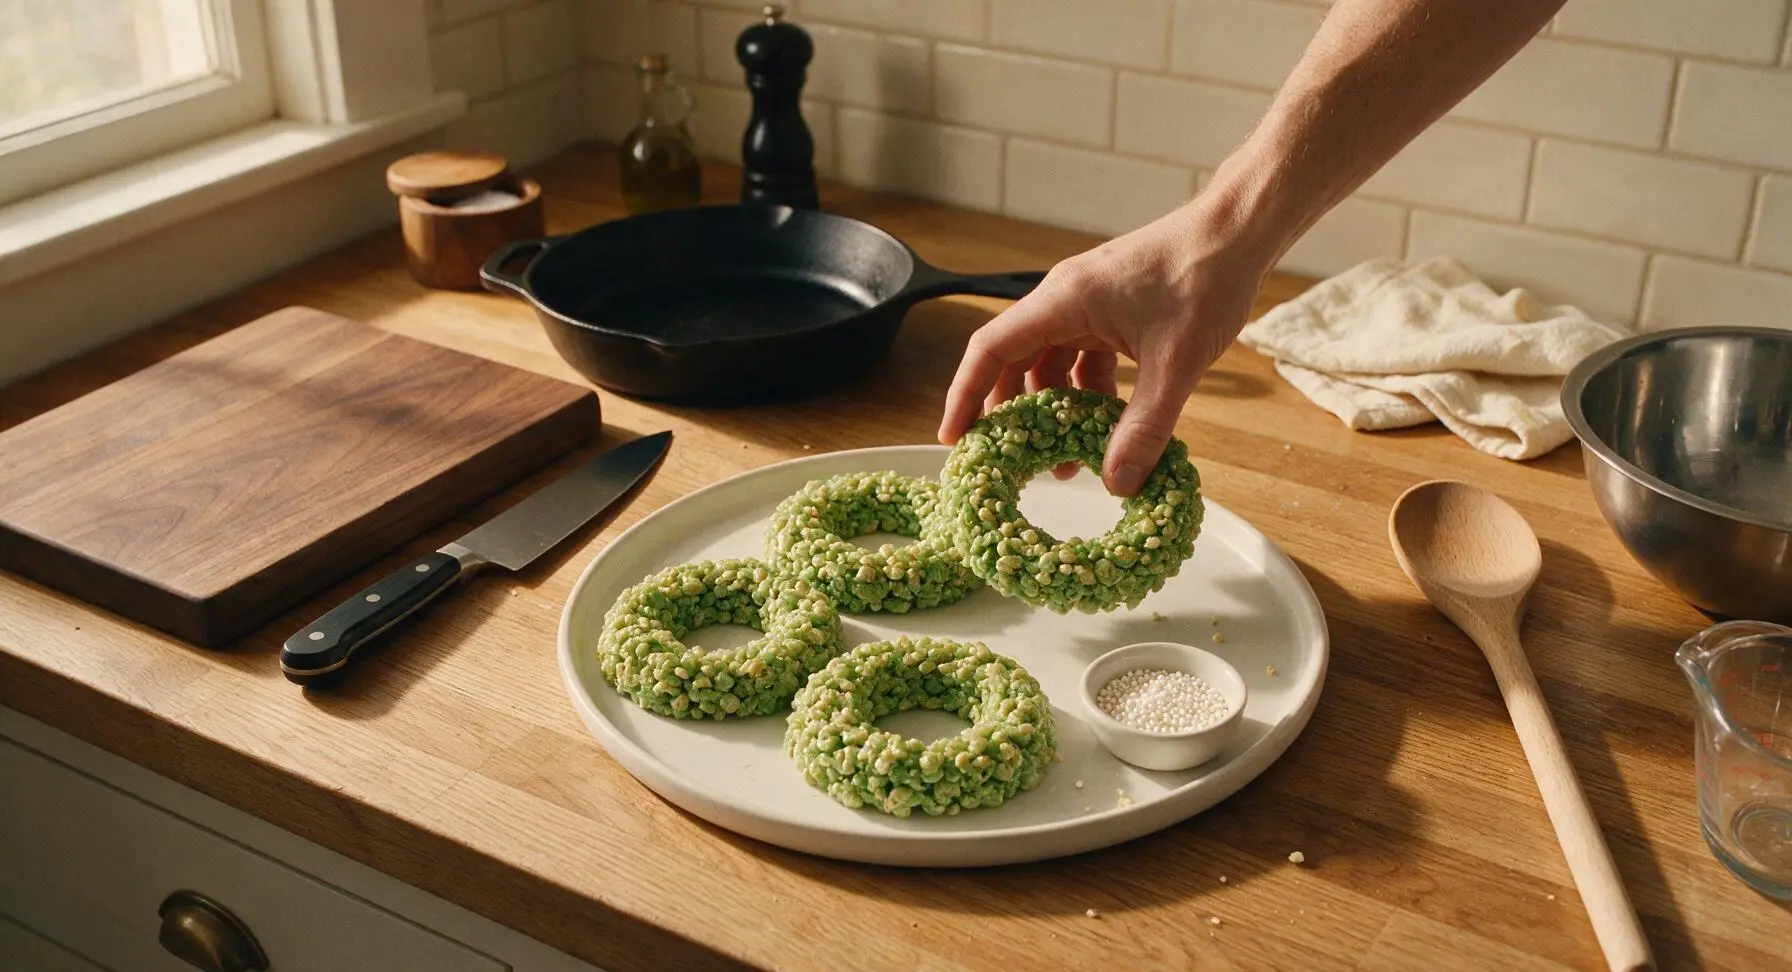
Step 7
step7:Plate Finished Wreaths

Tips

1.Use gel food coloring instead of liquid: liquid food coloring adds excess moisture to the melted marshmallow, which will make the final wreaths soggy and cause uneven color streaks, while concentrated gel delivers a rich, consistent holly green with just a tiny amount.
2.Pre-grease every tool and mold before you start melting marshmallows: the sticky cereal mixture starts to firm up in as little as 5 minutes at cool room temperature, so prepping ahead means you won’t fumble with stuck-on marshmallow mid-process and end up with misshapen wreaths.
3.Never melt marshmallows over heat higher than low: high heat breaks down the gelatin in marshmallows, which causes the treats to set into hard, rock-solid lumps instead of the ideal soft, chewy texture that pulls apart easily when bitten.

✨ You May Also Like

Desserts & Baking
🍜 Italy

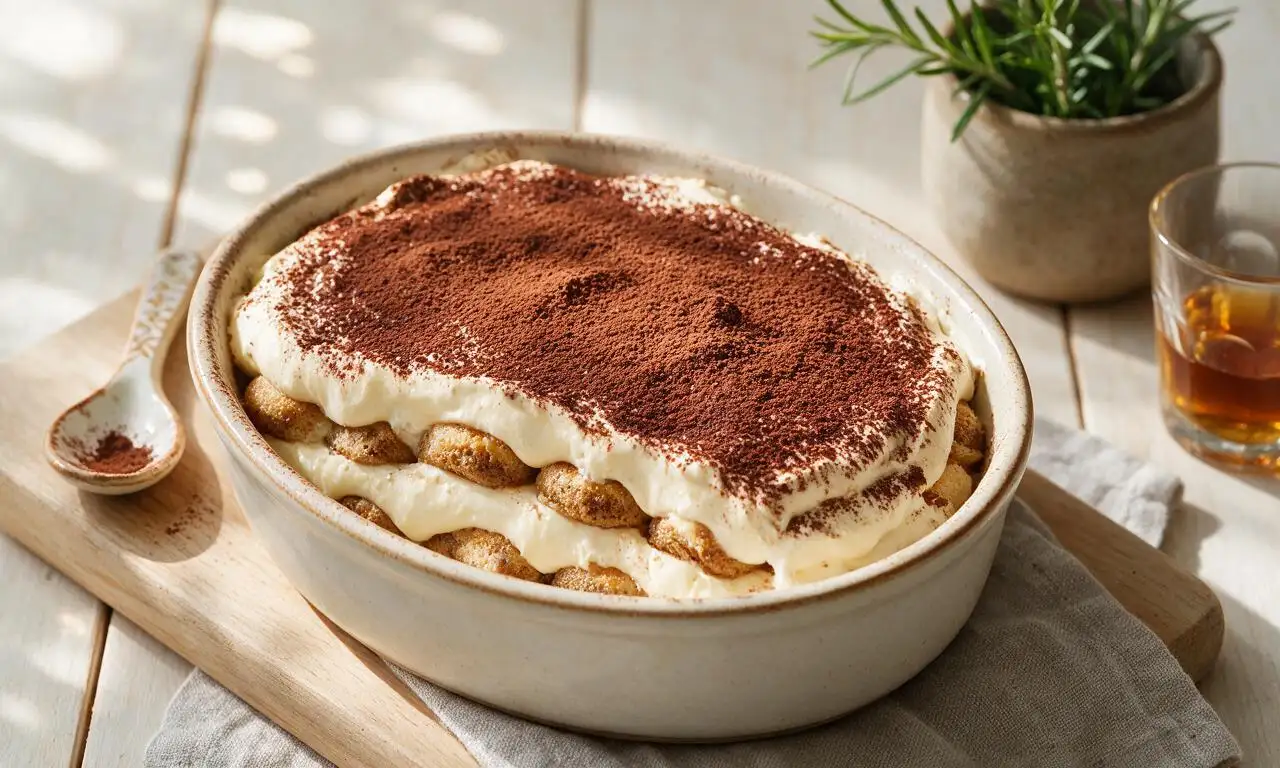
Creamy, coffee-kissed classic Northern Italian no-bake dessert, with layers of rum-spiked mascarpone cream, soft ladyfingers, and a rich cocoa dusting.

⏱️ 4 hours 3Desserts & Baking ★ 4.7
Desserts & Baking
🍜 France

Flaky, shatteringly crisp, buttery French croissants with golden exteriors and soft, airy layered interiors, perfect for pairing with coffee for a special morning treat.

⏱️ 12 hours Desserts & Baking ★ 4.5
Desserts & Baking
🍜 United States

Warm, spiced baked apples topped with a fluffy golden biscuit crust, this cozy dessert pairs perfectly with vanilla ice cream for cool-weather comfort.

⏱️ 55 minuteDesserts & Baking ★ 4.6
Desserts & Baking
🍜 United States

A star-spangled classic American blueberry pie with buttery flaky crust and bright sweet-tart filling, perfect for summer patriotic gatherings.

⏱️ 1 hour 25Desserts & Baking ★ 4.7
Desserts & Baking
🍜 United States

A beloved no-bake regional Maine candy with a chewy coconut-potato center coated in rich dark chocolate, a New England holiday staple since the 1870s.

⏱️ 2 hours 3Desserts & Baking ★ 4.8
Desserts & Baking
🍜 France

Luxuriously creamy, floral frozen custard made with aromatic Tahitian vanilla beans, boasting a smooth, rich texture that melts slowly on the tongue.

⏱️ 3 hours 3Desserts & Baking ★ 4.5

Rice Krispie Wreaths:Frequently Asked Questions

1.Why do I need to use gel food coloring instead of liquid for these wreaths? ▾
Liquid food coloring adds excess moisture that will make your marshmallow base runny and turn the cereal soggy instead of chewy. Gel coloring is highly concentrated, so you only need a tiny drop to get that vivid holly green without thinning the melted marshmallow mixture, keeping the perfect chewy, crisp texture.
2.Can I use regular-sized marshmallows instead of mini ones? ▾
Definitely! You’ll just need to adjust the quantity: 8 regular marshmallows equal roughly 1 cup of mini marshmallows. Chop larger marshmallows into smaller pieces first so they melt faster and more evenly, which prevents overcooking the marshmallow base and ending up with tough, hard wreaths.
3.My marshmallow mixture turned rock hard after I mixed in the cereal—what did I do wrong? ▾
That almost always happens when you cook the marshmallows and butter over too high heat, or heat them for too long after they fully melt. Melt butter and marshmallows over low heat, stirring constantly, and remove the pan from heat the second the mixture is smooth and lump-free to keep that soft, chewy texture.
4.What can I use for the red “berry” decorations if I don’t have red candies on hand? ▾
You have tons of easy, festive options! Red cinnamon imperials, halved red gumdrops, red M&Ms, Red Hots, or even small dollops of red royal icing all work perfectly. Just press your chosen berries into the wreaths right after shaping, before the marshmallow sets, so they stick securely without extra glue.
5.Do I need to grease my hands when shaping the wreaths? ▾
Absolutely—this is the best trick to avoid sticky, messy hands and misshapen wreaths. Lightly coat your palms with softened butter or nonstick cooking spray before pressing the warm cereal mixture into rings, and re-grease as needed every few wreaths. Don’t use too much grease, or you’ll leave a greasy residue on the finished treats.
6.Can I add extra mix-ins or upgrades to these wreaths for more flavor? ▾
Of course! Stir in ¼ teaspoon of peppermint extract for a cool, holiday twist, or fold in ½ cup of mini white chocolate chips, crushed candy canes, or chopped toasted pecans right after adding the cereal. For a fancy touch, dip set wreaths halfway in melted chocolate once cool. Skip very wet mix-ins like jam or fresh fruit, as they make cereal soggy quickly.
7.How do I get the perfect wreath shape without a special mold? ▾
You don’t need fancy equipment! Scoop ¼-cup mounds of the warm cereal mixture onto a parchment-lined baking sheet, then use your greased thumb to press a hole in the center of each mound, gently widening the hole to make a 3-inch ring. Smooth the edges as you go, and adjust the shape before the marshmallow sets in 10 to 15 minutes.
8.Can I make these gluten-free for holiday guests with dietary restrictions? ▾
Yes, this swap is super easy! Just use certified gluten-free crisp rice cereal, as standard Rice Krispies contain barley malt that is not gluten-free. Double check that your marshmallows and candy decorations are also labeled gluten-free to avoid cross-contamination, and the rest of the recipe works exactly the same.
9.Why are my finished wreaths soggy instead of crisp and chewy? ▾
Sogginess usually comes from one of two issues: either you used too much butter or marshmallow, or you stored the wreaths in a very humid environment without an airtight seal. Measure ingredients precisely, let the treats set fully at cool room temperature before storing, and tuck a small paper towel in the storage container to absorb excess moisture.
10.Can I use salted butter instead of the unsalted butter called for in the recipe? ▾
You can, but you’ll want to adjust the salt level to keep the flavor balanced. If using salted butter, skip any extra pinch of salt you might otherwise add, and taste the melted marshmallow mixture to make sure it doesn’t taste overly salty. Unsalted butter lets you control sodium for that perfect sweet, not-salty chewy base.
11.Can I use imitation vanilla instead of pure vanilla extract, or skip it entirely? ▾
Imitation vanilla works totally fine if that’s what you have on hand—you won’t notice a major flavor difference in these sweet, chewy treats. I don’t recommend skipping vanilla entirely, though; it cuts through the cloying sweetness of the marshmallows and adds a warm, rounded depth that makes the treats taste more balanced.
12.How long do these take to set before I can serve them? ▾
If you leave the shaped wreaths on a parchment-lined tray at cool room temperature (around 65 to 70°F), they will be fully set and ready to serve in 15 to 20 minutes. Don’t rush them in the freezer, as rapid temperature changes can cause condensation that makes the cereal soggy once you bring them back to room temp.
13.Can I make a vegan version of these wreaths for plant-based guests? ▾
Absolutely! Swap the dairy butter for an equal amount of vegan stick butter, and use vegan mini marshmallows—many mainstream brands now carry plant-based marshmallows that melt just like the original. Use vegan-friendly red candies for the berries, and the rest of the recipe works exactly as written for a chewy, festive treat.
14.Do these work as a fun cooking activity for kids? ▾
They’re ideal for kid chefs! Little kids can help stir in the cereal and food coloring (with adult supervision for the warm pan), press on the red candy berries, and help shape the wreaths with greased hands. Just make sure the marshmallow mixture cools for 2 to 3 minutes before kids handle it to avoid burns from warm sticky goop.
15.What’s the best way to pack these for a holiday cookie exchange? ▾
First, let the wreaths set fully so they don’t lose their shape. Line an airtight tin with parchment paper, then arrange wreaths in single layers separated by extra parchment to prevent sticking. Skip packing them with very moist cookies like frosted sugar cookies or jam thumbprints, as excess moisture will make the cereal soften.
16.Can I use other crisp cereals if I don’t have Rice Krispies on hand? ▾
Yes, you can swap in other plain crisp rice cereals, or even plain Corn Flakes for a slightly different texture. Skip heavily frosted cereals or cereals with lots of added sugary coating, as they will make the treats overly sweet and can throw off the texture of the melted marshmallow binder.
17.How much green gel food coloring do I need to get that classic holly shade? ▾
Start with 2 to 3 drops of leaf green gel coloring, stirred into the fully melted marshmallow and butter mixture right before you add the cereal. Add one extra drop at a time if you want a deeper green—remember, the color will look slightly lighter once you mix in the pale cereal, so don’t overdo it right off the bat.
18.Can I make these wreaths ahead of time for holiday parties? ▾
Absolutely! Store fully cooled, set wreaths in an airtight container between sheets of parchment paper at room temperature for up to 3 days. I don’t recommend freezing them, as the cereal will turn soggy once thawed, and the red candy berries may bleed color into the bright green cereal base.

Comments (20)

2 days ago

OMG these were the biggest hit at my neighborhood holiday potluck last weekend! So cute, chewy, and that little green food coloring plus red hots for berries? *Chef’s kiss* Took 10 minutes flat just like the recipe said, zero stress.

1 week ago

Game changer for last minute class party treats! I forgot I signed up to bring snacks until the night before, threw these together in no time. My son said all his friends asked for seconds. SO good.

3 days ago

Tweaked this a little by adding a dash of peppermint extract to the marshmallow mix and it was *chef’s kiss* perfect for our family Christmas movie night. Will make every year now!

2 weeks ago

I’m not much of a baker but even I couldn’t mess these up. My grandkids thought the wreath shape was the coolest thing ever. Pro tip: spray your cookie cutters with nonstick so the treats don’t stick when you press them.

just now

Made these for my dorm floor holiday hang and everyone went crazy. Super cheap to make, no fancy equipment needed, way better than the plain old Rice Krispie treats we usually make.

1 week ago

These hold up great for 3-4 days in an airtight container! I made a batch on Sunday for my kid’s lunchbox treats all week and they stayed perfectly chewy, no hard stale bits. Obsessed.

5 minutes ago

Wait, do I have to use regular marshmallows? I only have mini marshmallows in my pantry right now, will that mess up the ratio?

just now

Great question! Mini marshmallows work perfectly here — you’ll just need 4 cups of minis to equal the 40 regular marshmallows the recipe calls for. No other adjustments needed!

3 days ago

I used red licorice laces to make little bows on each wreath instead of just red hots and they looked so professional! People at my church bake sale thought I bought them from a bakery lol.

2 days ago

Oh that’s such a cute idea! I’m making these for my office party this weekend and I’m totally stealing that licorice bow hack, thank you!

2 hours ago

Uh oh, I cooked my marshmallows too long and they got super hard once the treats set. What did I do wrong? They still taste okay but they’re too crunchy.

1 hour ago

So sorry that happened! That usually occurs when the marshmallows are heated over too high heat or cooked for longer than 2-3 minutes. Make sure to melt them over low heat, stirring constantly, and remove from heat as soon as they’re fully smooth for that perfect chewy texture!

yesterday

These are now my official go-to neighbor gift! I wrapped each one in a little cellophane bag with a twist tie and handed them out last night, everyone texted me to say how much they loved them.

yesterday

I did the same! I added a tiny handwritten gift tag to each bag and it was such a cheap, thoughtful little gift. Way better than the random fudge I usually burn every year 😂

1 week ago

Quick heads up for other allergy parents: these are totally nut-free as long as you use plain Rice Krispies and regular marshmallows! Perfect for my kid’s nut-free classroom, I was so happy to find a festive treat I didn’t have to stress about.

6 days ago

We love that too! This recipe is so easy to adapt for different allergy needs — just be sure to double check your ingredient labels to make sure there’s no cross-contamination if you’re serving folks with severe allergies.

5 days ago

Tried to make these with generic crisp rice cereal instead of name brand Rice Krispies and they fell apart a little? Still tasted good but didn’t hold the wreath shape as well.

4 days ago

I had that same issue last year! I added an extra half cup of marshmallows when I used generic cereal and it helped bind everything together enough to hold the shape. Saved me from running to the grocery store for name brand!

2 weeks ago

I’ve been making these since my kids were little, and this recipe is exactly the one I used back in the 90s! So happy to see it’s still a hit with the younger generation. There’s nothing better than a classic no-fuss treat.

2 weeks ago

Love that! These retro treats never go out of style — there’s a reason they’ve been a holiday staple for decades. So glad the recipe matches the one you know and love!

2 days ago

Swapped the regular butter for vegan butter and used vegan marshmallows, and these turned out 10/10! My non-vegan roommates ate half the batch before I even got to take photos for my Instagram.

1 day ago

Thanks for the vegan swap note! I’ve been looking for a festive vegan treat to bring to my family’s Christmas dinner and this is perfect. Can’t wait to try it!

5 days ago

How far in advance can I make these? I’m hosting a Christmas party next Saturday and want to get as much prep done ahead of time as possible so I’m not running around the kitchen all day.

5 days ago

Great question! You can make these 2-3 days in advance as long as you store them in an airtight container at room temperature, separated by layers of parchment paper so they don’t stick together. I don’t recommend making them more than 3 days ahead because they’ll start to get a little stale!

3 days ago

I made these 4 days ahead last year and they were still totally fine! I just popped a piece of white bread in the container with them to keep them soft, old trick my mom taught me. Worked like a charm!

yesterday

My kids loved helping me make these! They had so much fun adding the red hot “berries” to each wreath, it was the perfect easy holiday activity to do on a rainy afternoon. Way less messy than decorating sugar cookies lol.

yesterday

Omg sugar cookies are such a mess with little kids! I’m always scrubbing frosting off my walls for days after. These sound way more low stakes, I’m adding the ingredients to my grocery list right now.

yesterday

We love kid-friendly recipes that double as an activity! Little hands are perfect for pressing the cereal mix into the wreath shapes and adding the candy decorations, plus there’s way less cleanup than cookie decorating. Hope your little ones have a blast making them!

1 week ago

I made these for our office holiday potluck and they were gone in literally 10 minutes. People were coming back for thirds! The only problem is now everyone is signing me up to bring them to every work event for the next year 😂

1 week ago

That’s the curse of bringing the best dish to the potluck! I brought loaded baked potato salad to our summer cookout and now people ask me for it every single time. Worth it though, right?

6 days ago

Wait was this at the Austin office? I swear I had one of those wreath treats last week and I’ve been thinking about it ever since! If that was you, thank you, they were incredible.

3 days ago

Wait, are Rice Krispies actually gluten free? I thought they had malt in them? I’d love to make these for my sister who has celiac but I don’t want to make her sick.

2 days ago

Regular Rice Krispies have barley malt which isn’t gluten free, but they make a GF version of Rice Krispies now! I’ve used it for these exact treats before and you can’t even tell the difference.

2 days ago

Great catch! Original Rice Krispies do contain barley malt, so they aren’t safe for folks with celiac disease or severe gluten sensitivities. The gluten free crisp rice cereal works perfectly as a 1:1 swap here so everyone can enjoy these treats!

2 hours ago

I’ve burned cookies, messed up boxed brownies, and even ruined microwave popcorn before, but I made these last night and they actually turned out perfect??? I’m so proud of myself lmao. 10 minute cook time is no joke, this is the only recipe I’m allowed to make from now on.

1 hour ago

Same! I’m the worst at baking, I once forgot to add sugar to a cake. These are foolproof, I’ve made them three times this month already and haven’t messed them up once.

30 minutes ago

That’s what we love to hear! This recipe is designed to be totally forgiving for new bakers or anyone who doesn’t have a ton of time to spend in the kitchen. Congrats on the perfect batch — you earned that baking win!

2 weeks ago

I added a little green sanding sugar on top of the wreaths right after I added the red hots and they looked so sparkly and festive! 10/10, will be making these every Christmas from now on.

1 week ago

Sanding sugar is such a good call! I did the same last year but used gold sanding sugar for a little extra fancy vibe, they looked like they came straight from a fancy bakery.

1 week ago

We love a little extra sparkle! Sanding sugar is such a fun, easy way to dress these up without adding a ton of extra work. So glad they turned out great for you!