
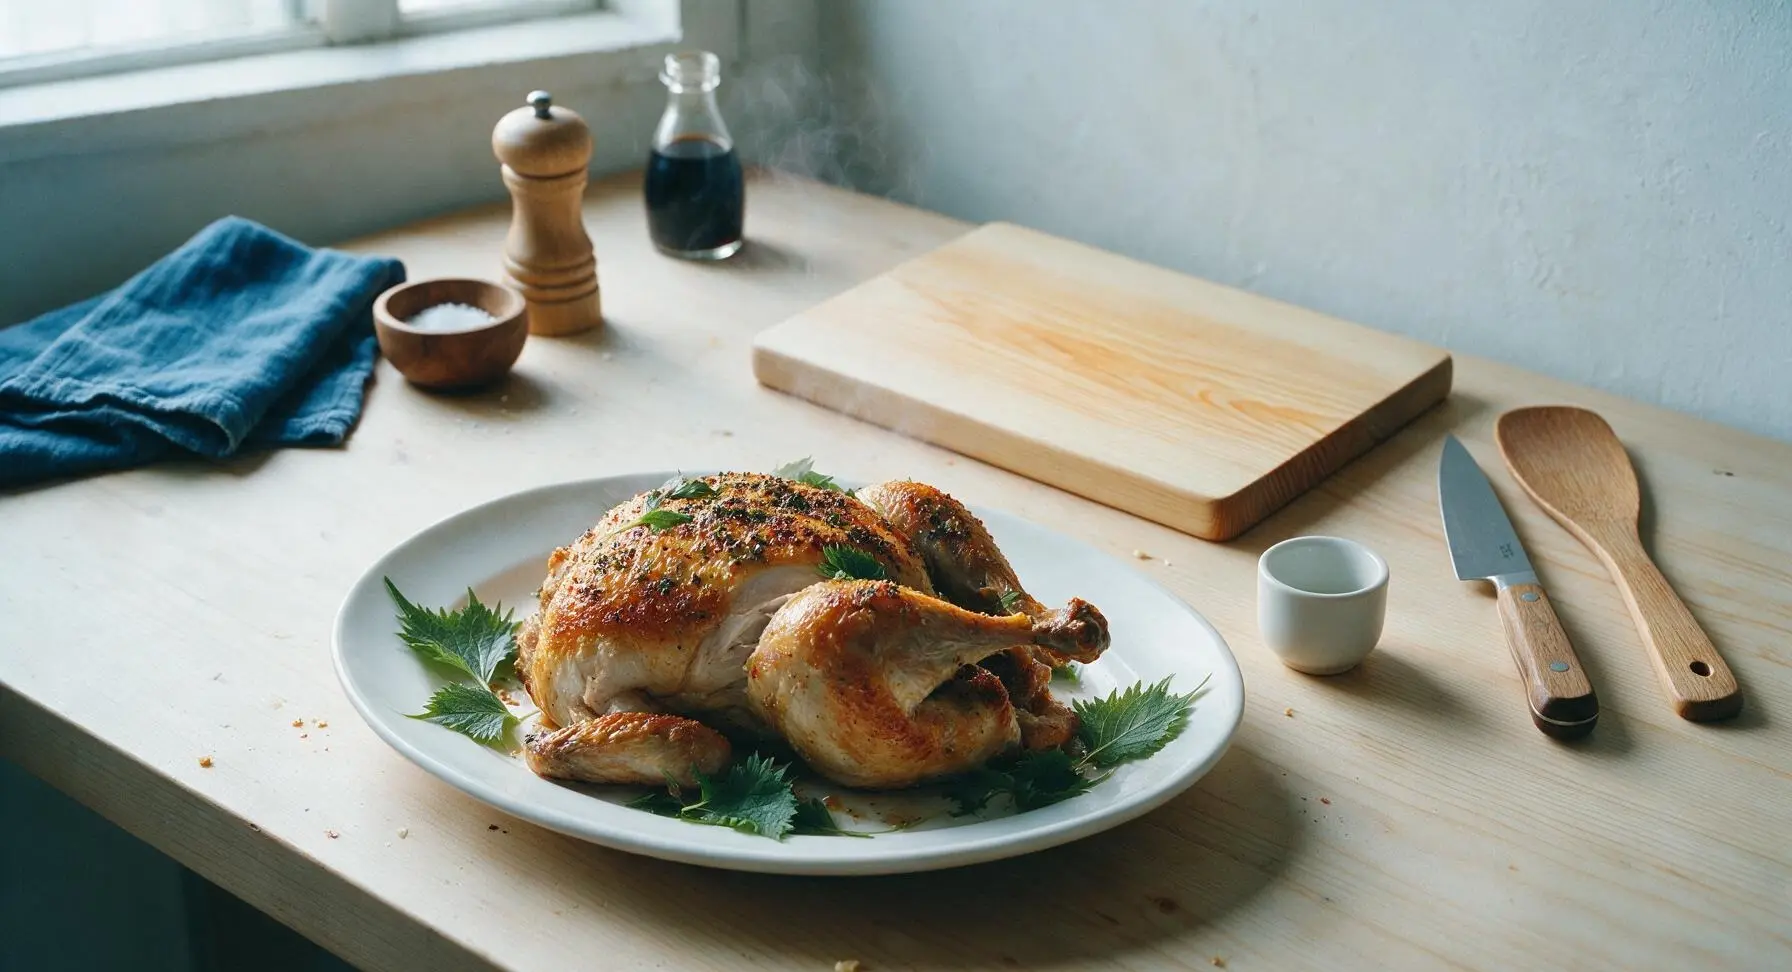
rotisserie

title 1
rotisserie
⏱️ cook time 1 hour 15 minutes
🍽️ servings 4
⚡ Difficulty medium

intro

Juicy, slow-rotated herb-crusted rotisserie chicken with shatteringly crisp golden skin, cooked over indirect grill heat for tender, smoky, evenly cooked meat. A summer cookout essential.

Ingredients
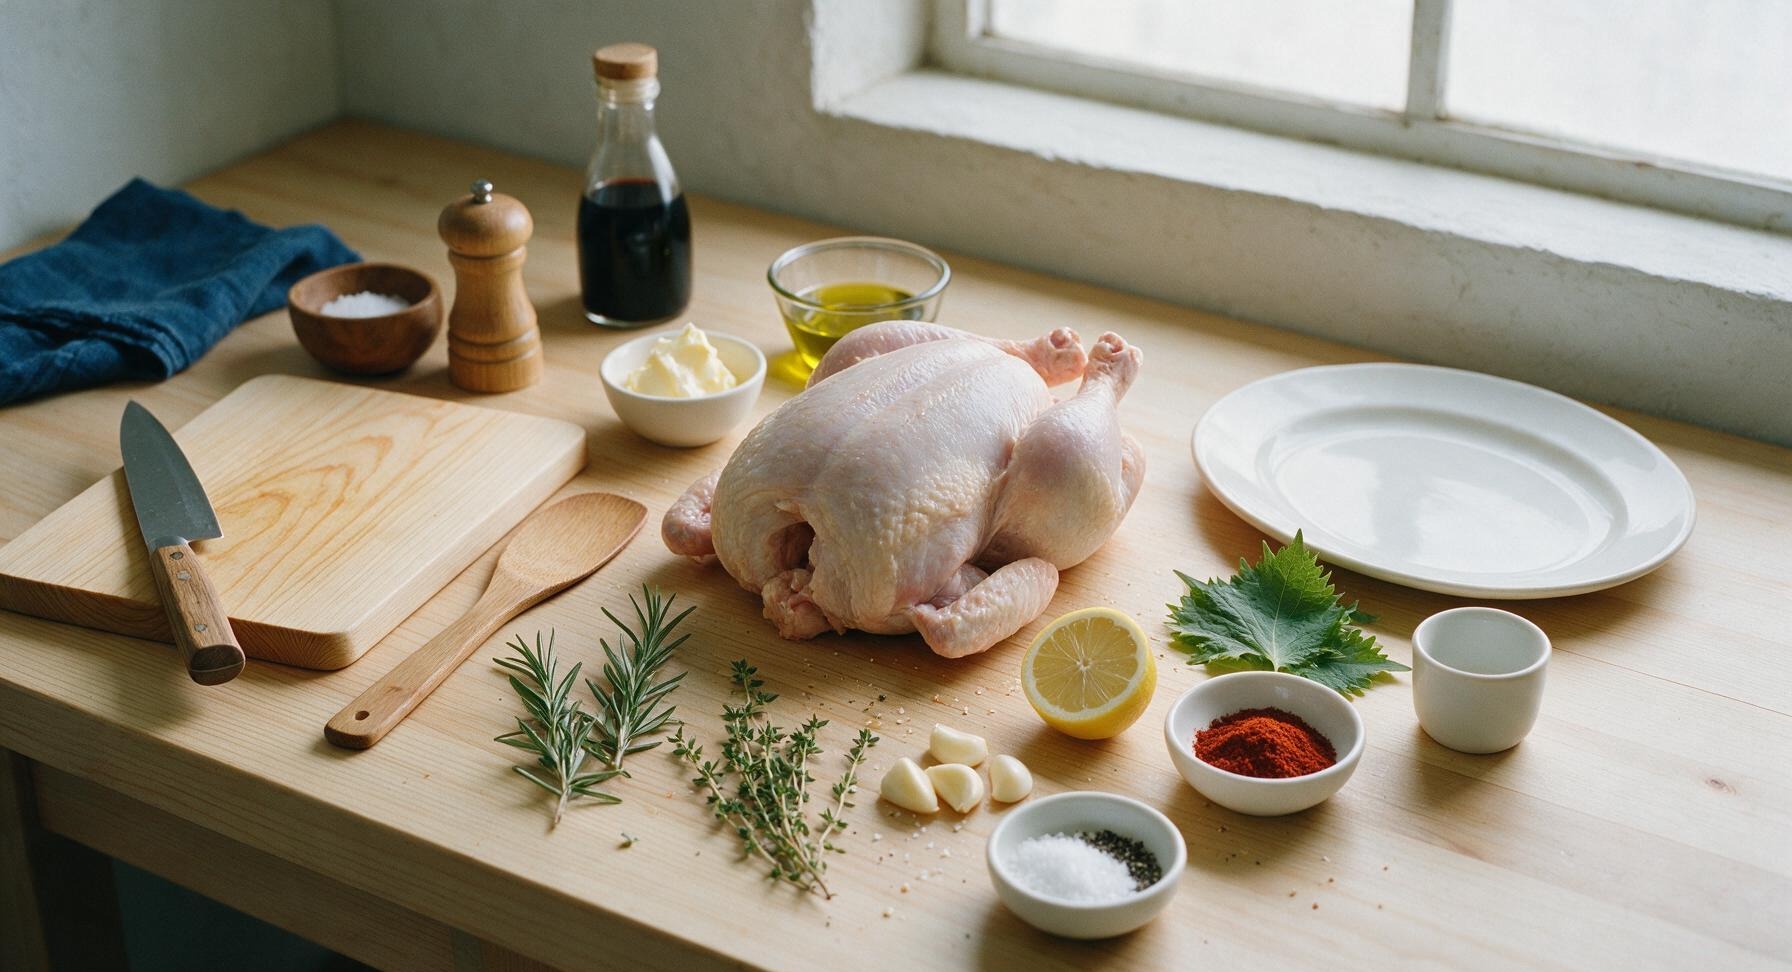
Whole roasting chicken (giblets removed) 4 lb (1.8 kg)
Unsalted butter, softened 4 tbsp (57 g)
Extra-virgin olive oil 1 tbsp (15 ml)
Fresh rosemary 3 sprigs (2 tbsp chopped, 1 whole for garnish)
Fresh thyme 5 sprigs (1 tbsp leaves picked, 3 whole for cavity/garnish)
Garlic cloves, minced 4 cloves
Medium lemon, halved 1 (approx 120g)
Kosher salt 1 tbsp
Freshly ground black pepper 1 tsp
Smoked paprika 1 tsp

Steps

1

Mix Herb Butter Rub

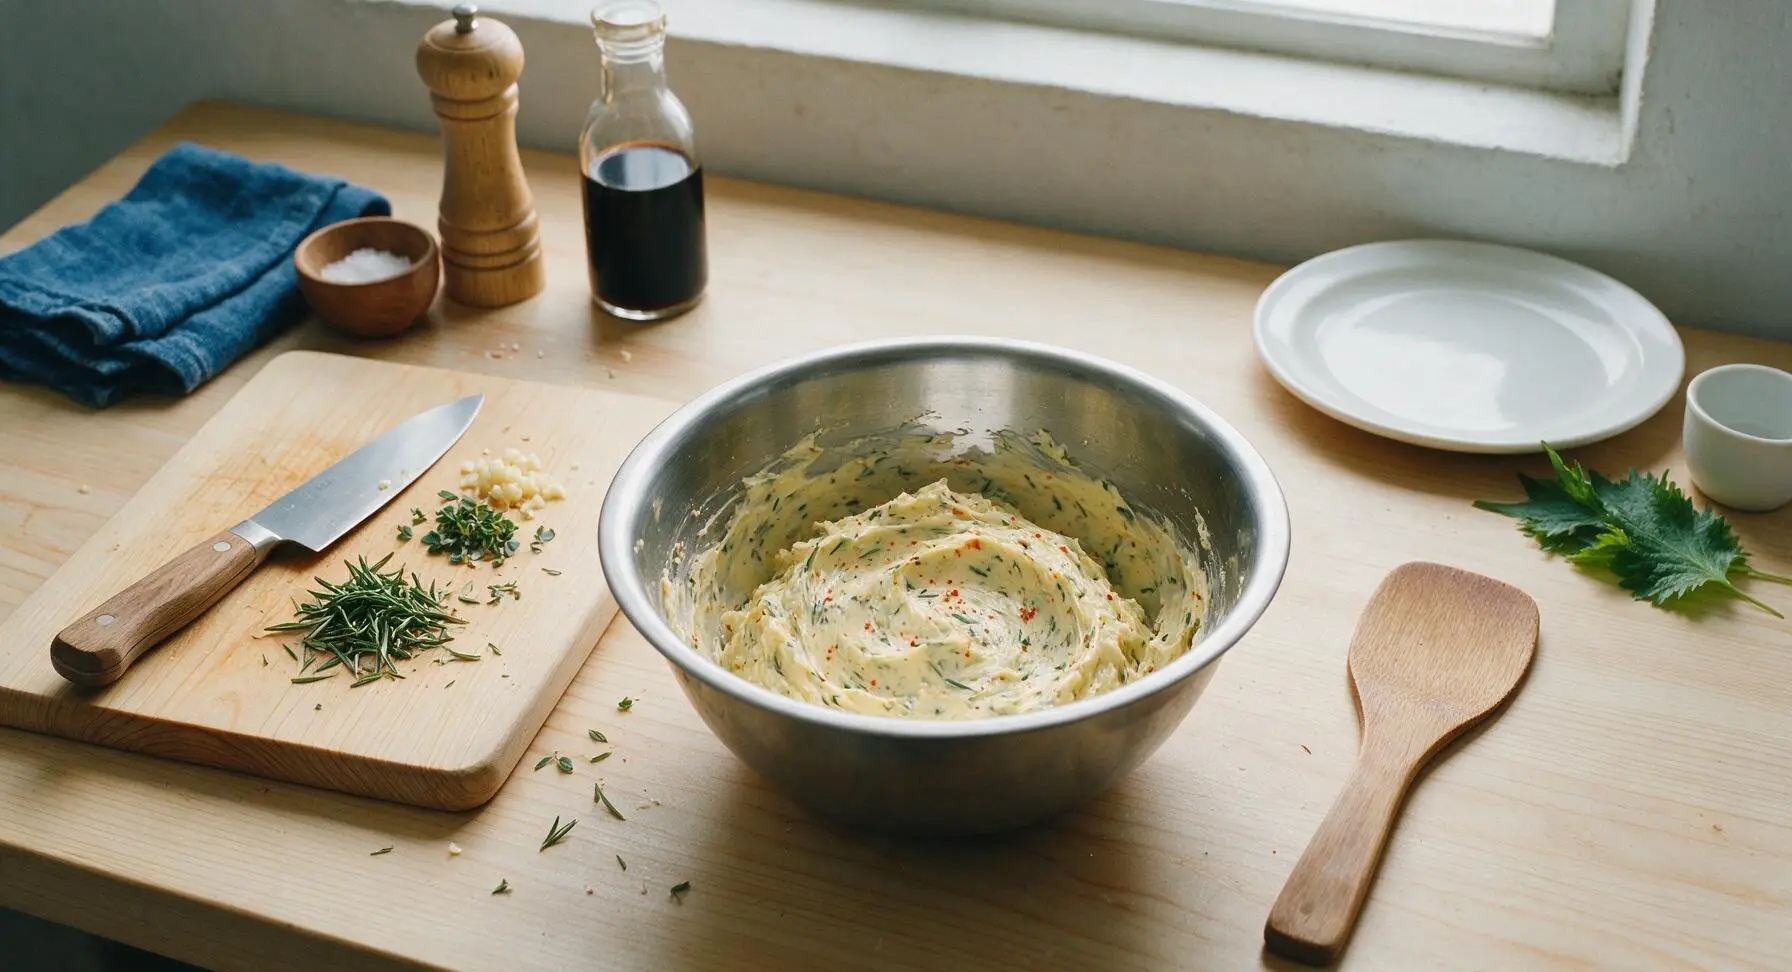
In the 3-quart stainless steel mixing bowl, combine 4 tbsp softened unsalted butter, 1 tbsp olive oil, 2 tbsp chopped fresh rosemary, 1 tbsp picked fresh thyme leaves, 4 minced garlic cloves, 1 tsp smoked paprika, 1 tbsp kosher salt, and 1 tsp black pepper. Stir with a spoon until fully combined into a smooth, fragrant paste, with even flecks of green herb and red paprika throughout.
Step 1
step1:Mix Herb Butter Rub
2

Prep Chicken Cavity

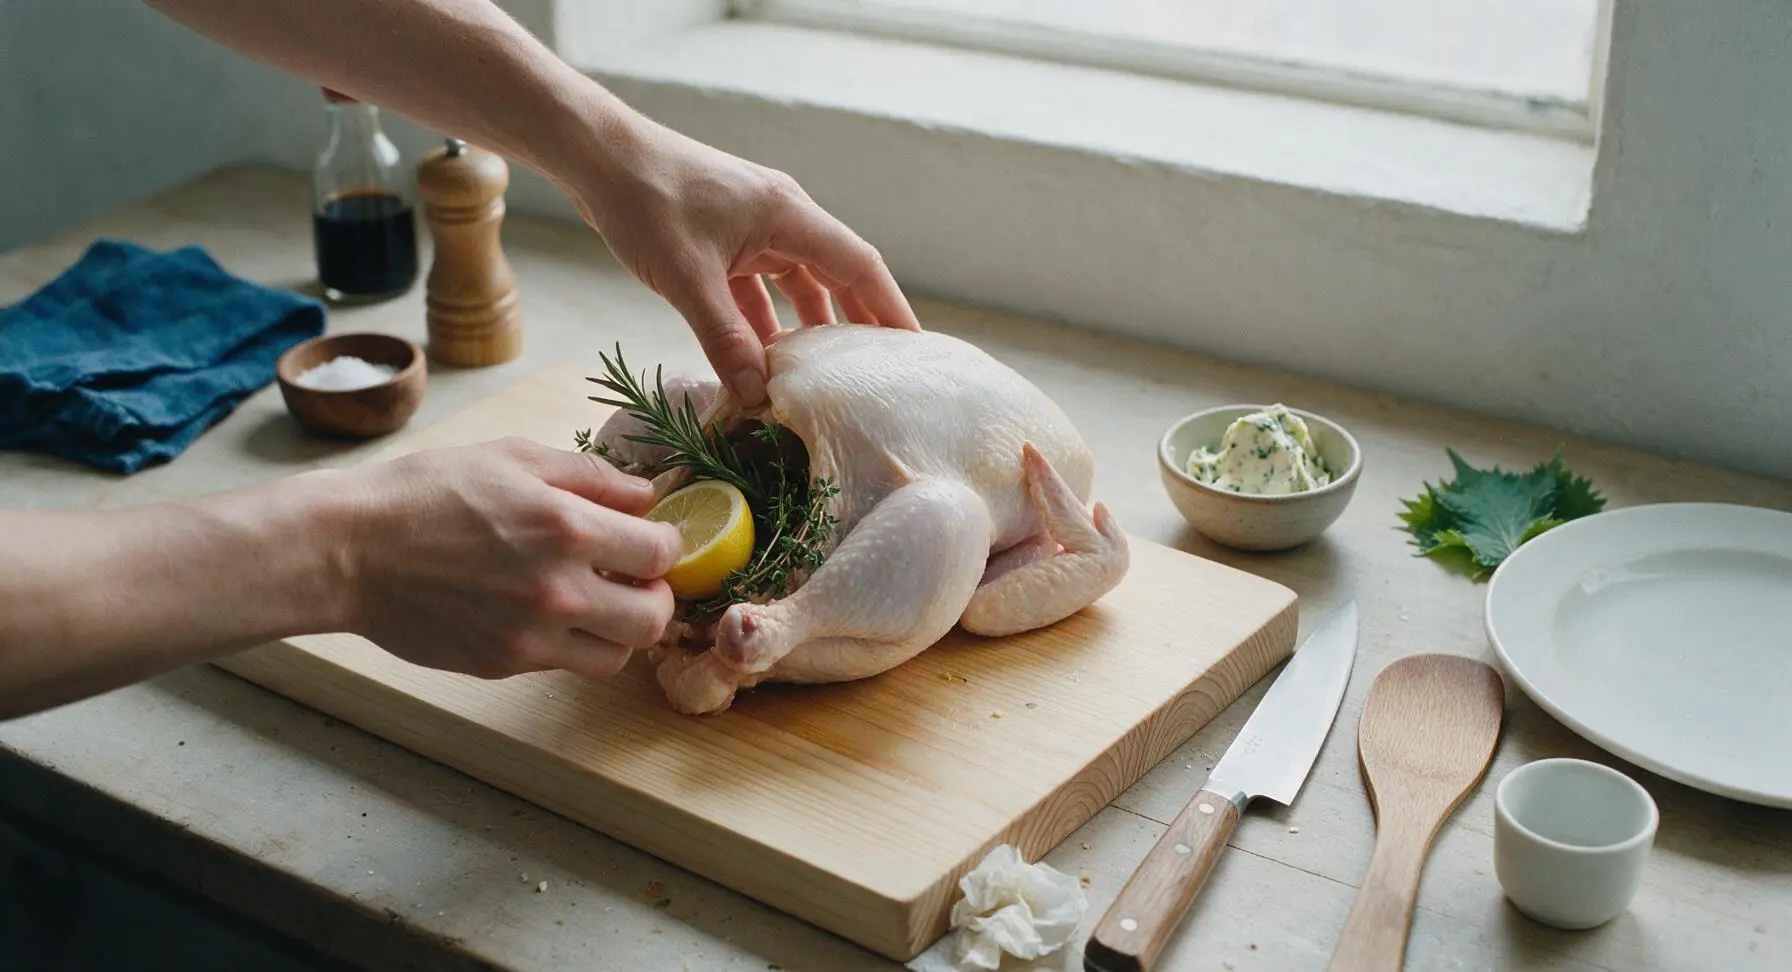
Place the 4lb whole chicken on the teak cutting board. Pat the entire surface thoroughly dry with paper towels to ensure crisp skin. Stuff the cavity with the halved lemon, 1 whole rosemary sprig, and 2 whole thyme sprigs. Tuck the wing tips behind the chicken’s back to prevent them from burning during cooking.
Step 2
step2:Prep Chicken Cavity
3

Truss Chicken Securely

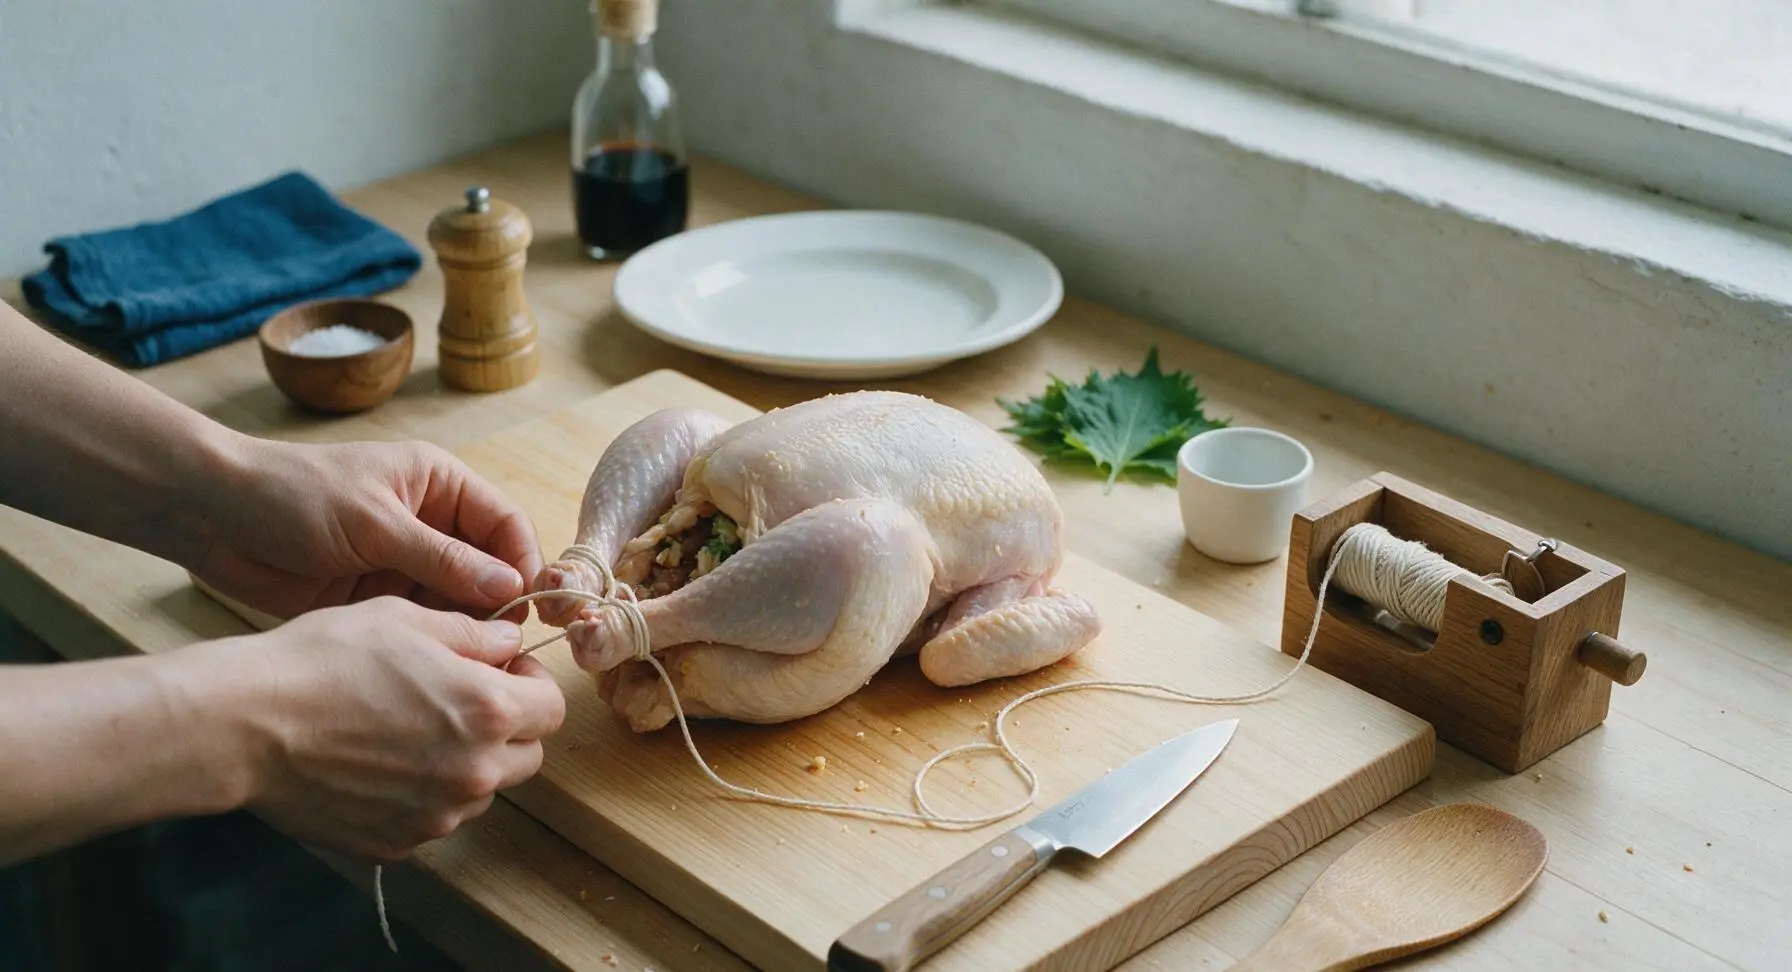
Cut 3 feet of butcher twine from the oak dispenser. Tie the chicken legs together tightly at the ankles, then wrap twine around the body to hold the cavity closed and secure the thighs against the breast. Trussing ensures the chicken rotates evenly on the spit without flopping, and cooks uniformly. Trim any excess twine with the chef knife.
Step 3
step3:Truss Chicken Securely
4

Slather Herb Butter

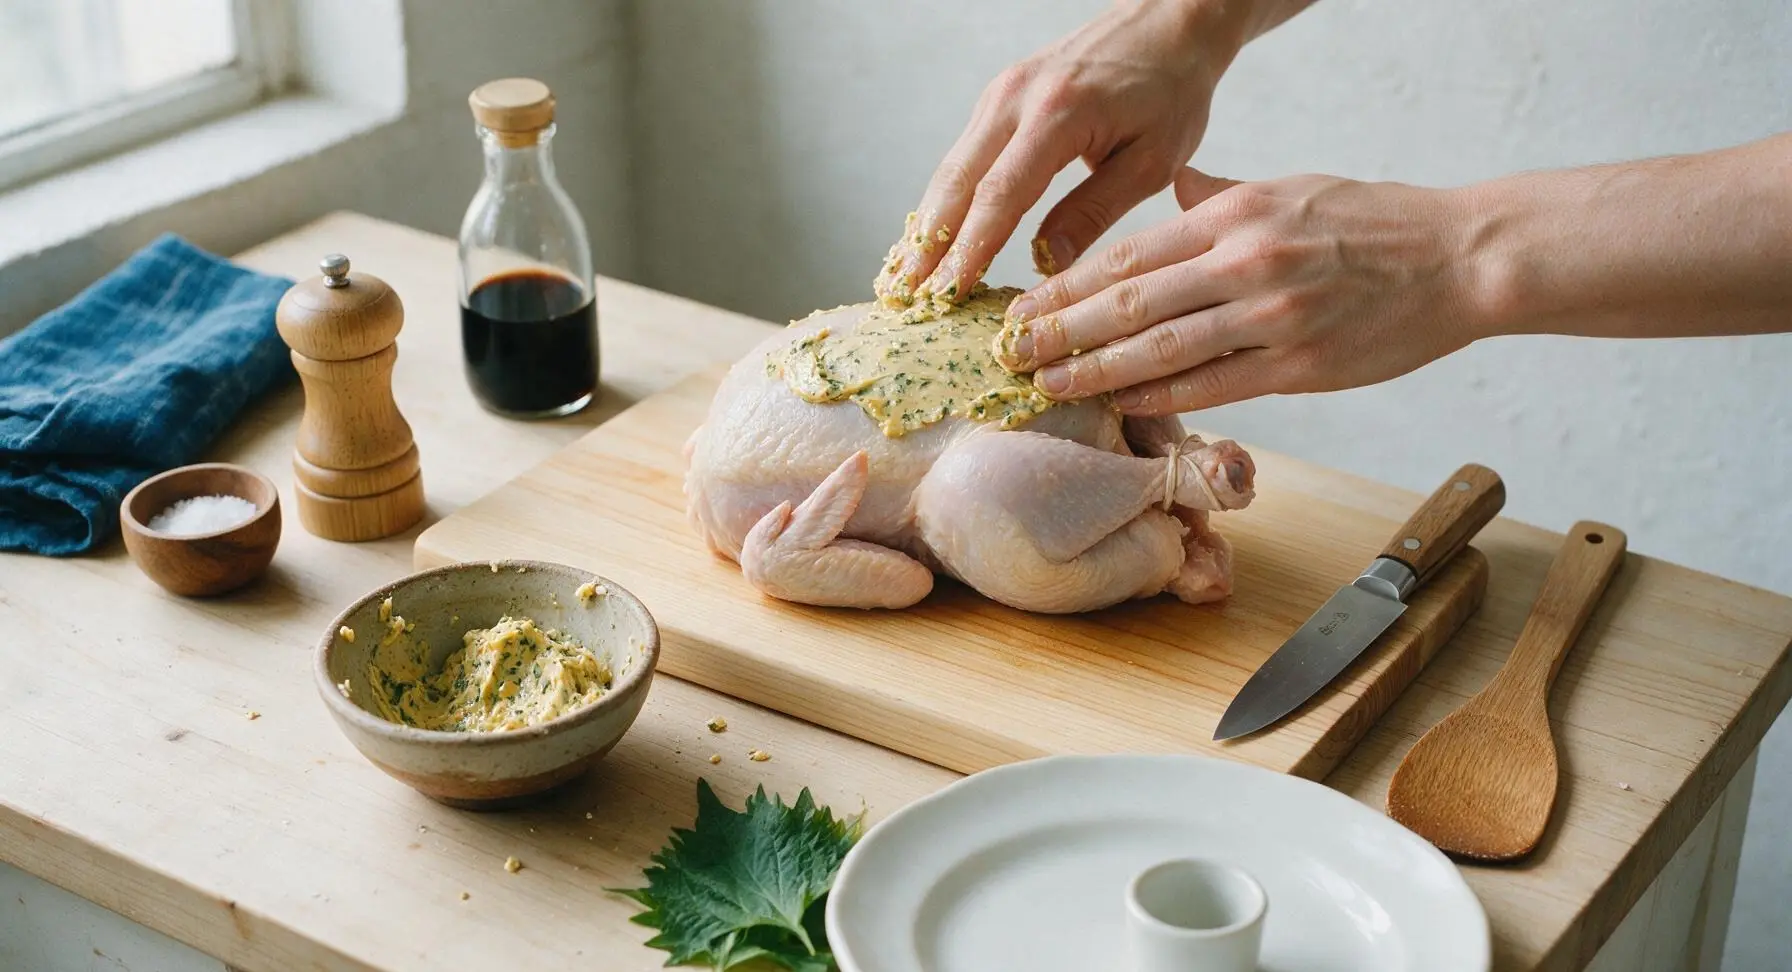
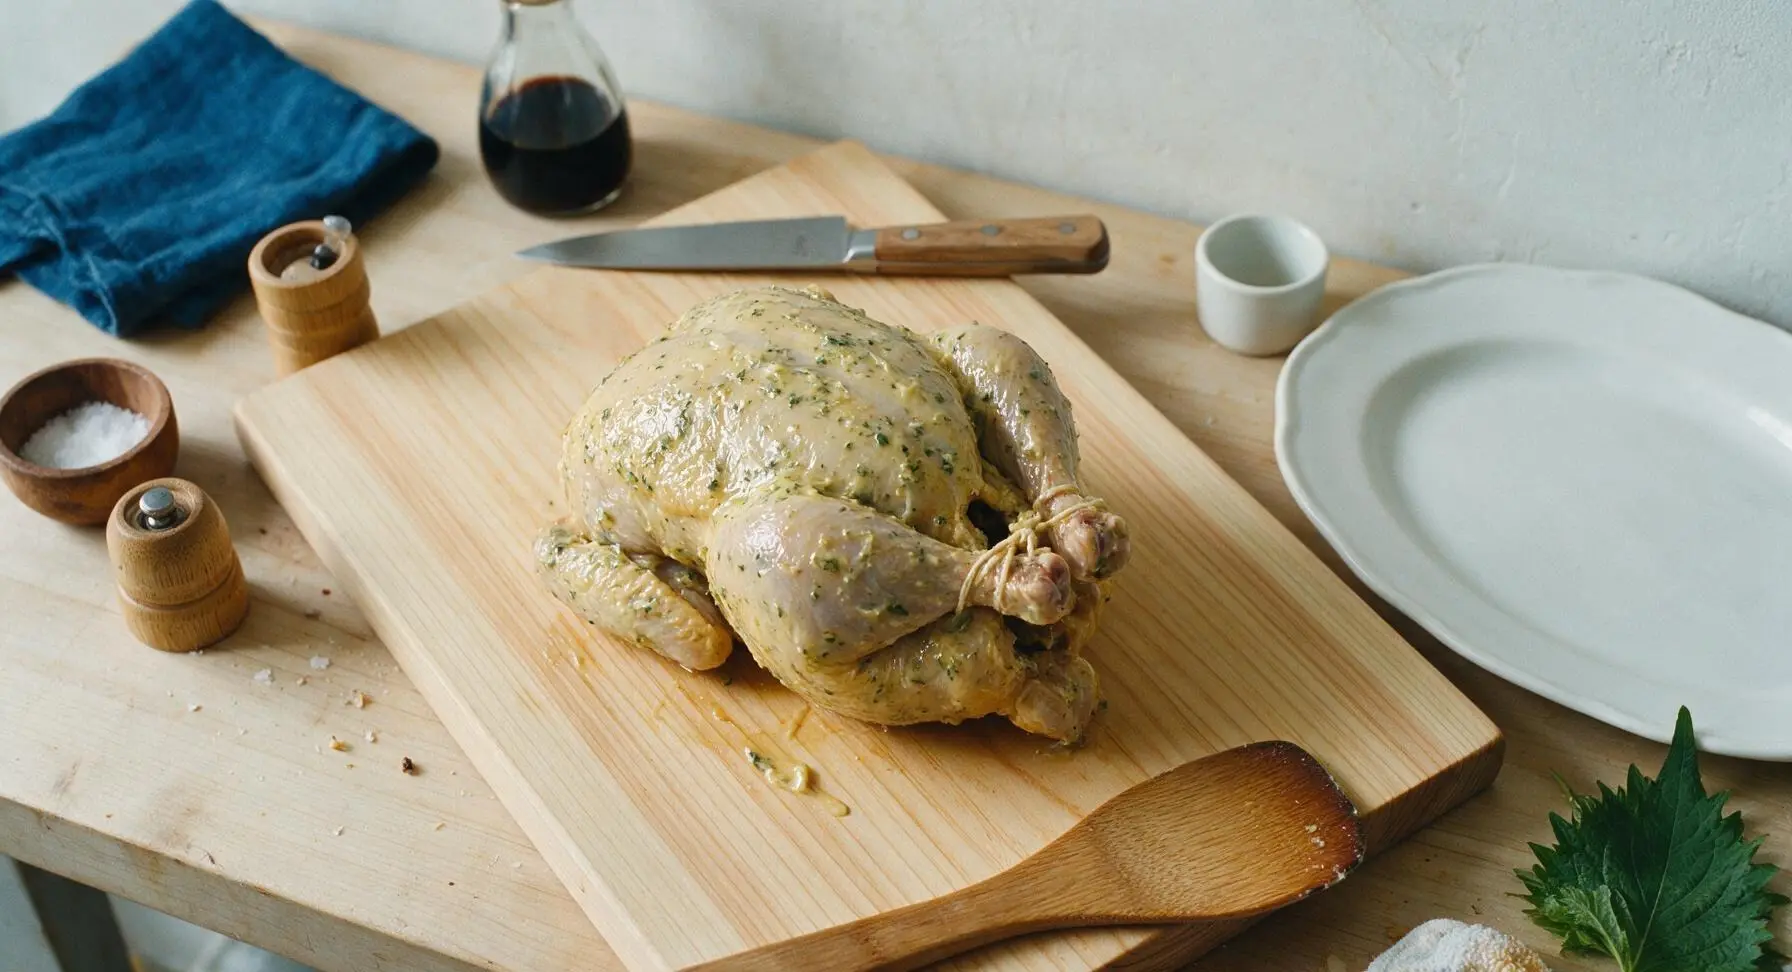
Use your hands to rub the entire herb butter mixture evenly over every surface of the trussed chicken, including under the skin on the breast and thighs (gently loosen skin from meat with your fingers first to get butter directly against the meat). Ensure a thin, even coat across all skin to promote browning and crispness; no dry patches of skin should remain.
Step 4
step4:Slather Herb Butter
Step 4
step4:Slather Herb Butter
5

Mount to Rotisserie Spit

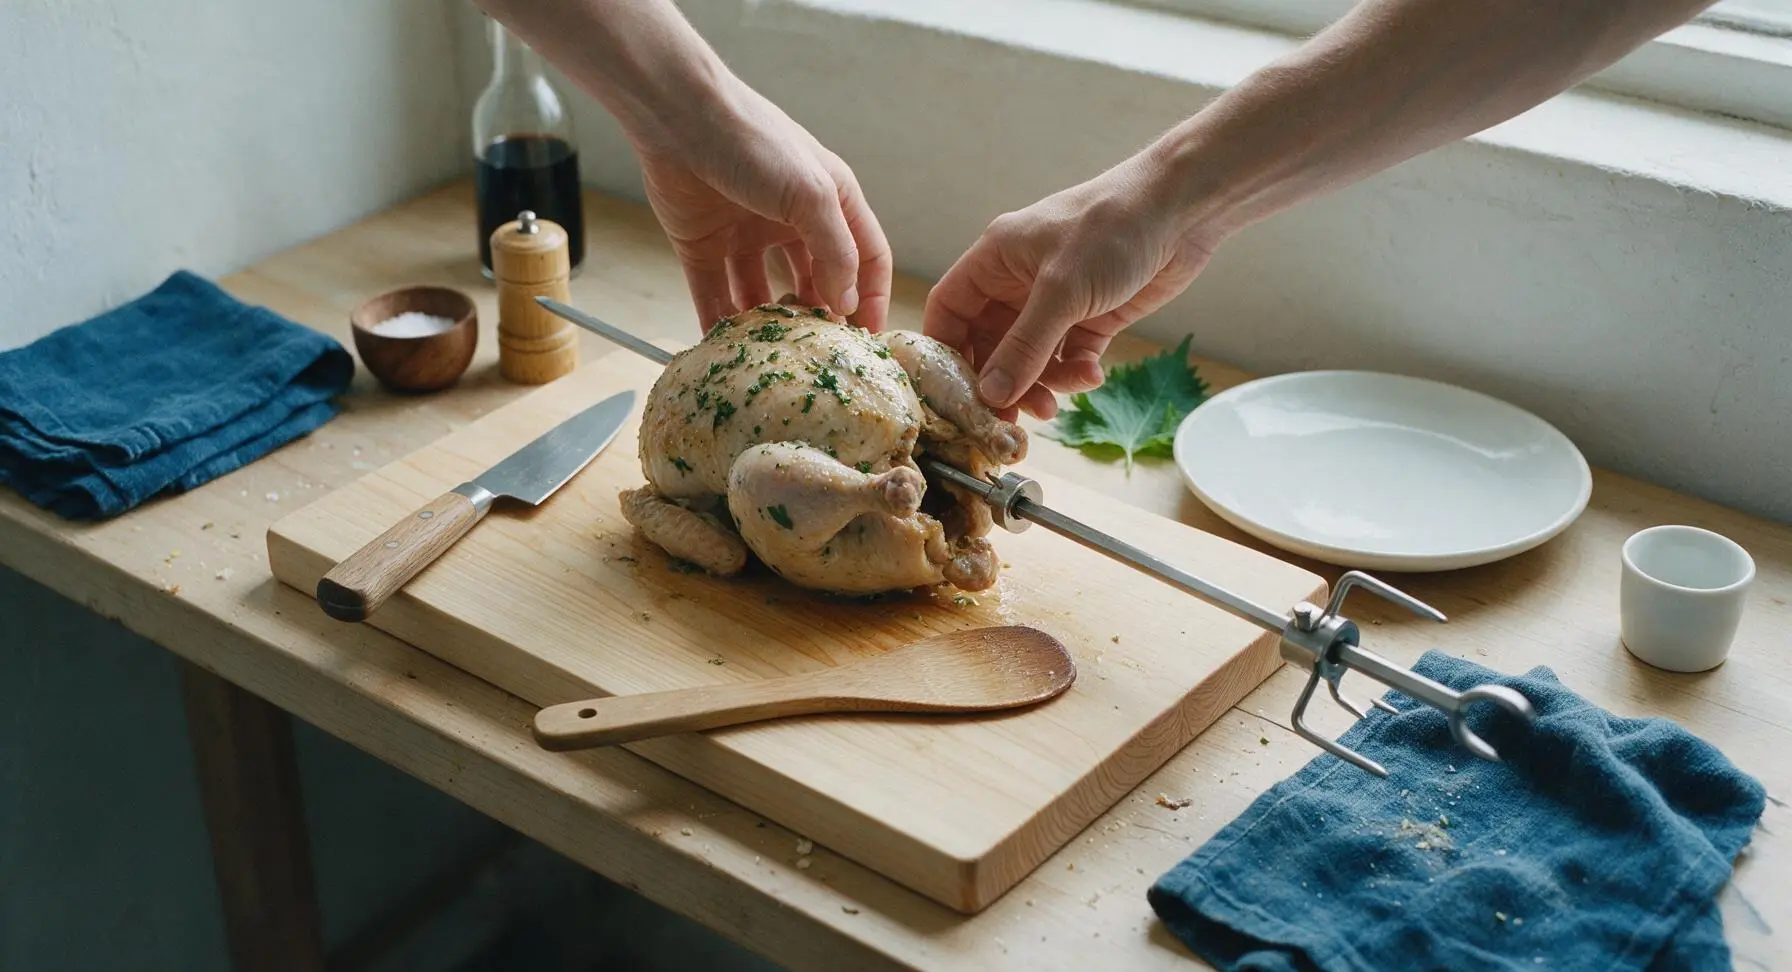
Slide one 4-prong meat fork onto the rotisserie spit rod, prongs facing inward. Push the spit rod straight through the center of the chicken, from the cavity opening up through the neck end. Slide the second 4-prong fork onto the opposite end of the rod, pressing prongs firmly into the chicken thighs to hold it centered. Tighten the fork set screws securely, then test balance by giving the spit a gentle spin: the chicken should rotate smoothly without tipping heavy to one side. Adjust fork position if needed to eliminate wobble.
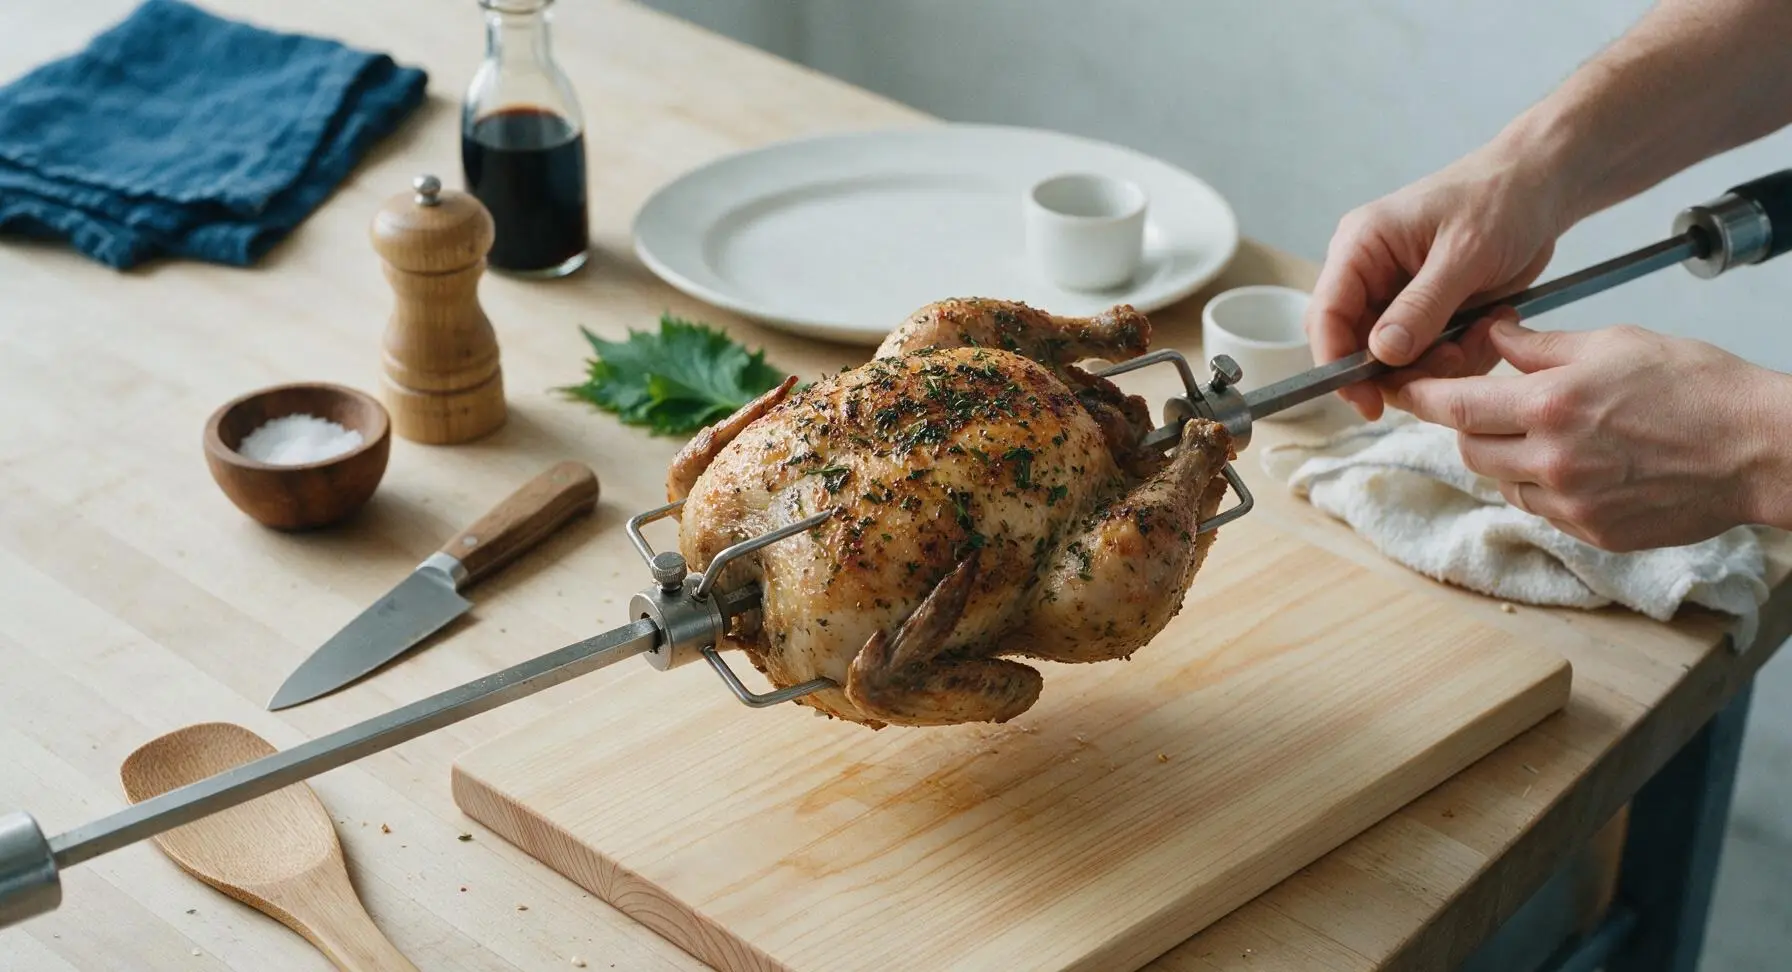
Step 5
step5:Mount to Rotisserie Spit
Step 5
step5:Mount to Rotisserie Spit
6

Prep Grill for Indirect Heat

Preheat the 3-burner gas grill to 350°F (175°C). Turn off the middle burner directly under where the chicken will rotate, leaving the left and right burners on medium to create indirect heat. Place a small aluminum drip pan under the rotisserie position to catch chicken drippings and prevent flare-ups. Insert the spit rod into the grill’s rotisserie motor socket, ensuring it is securely locked in place.
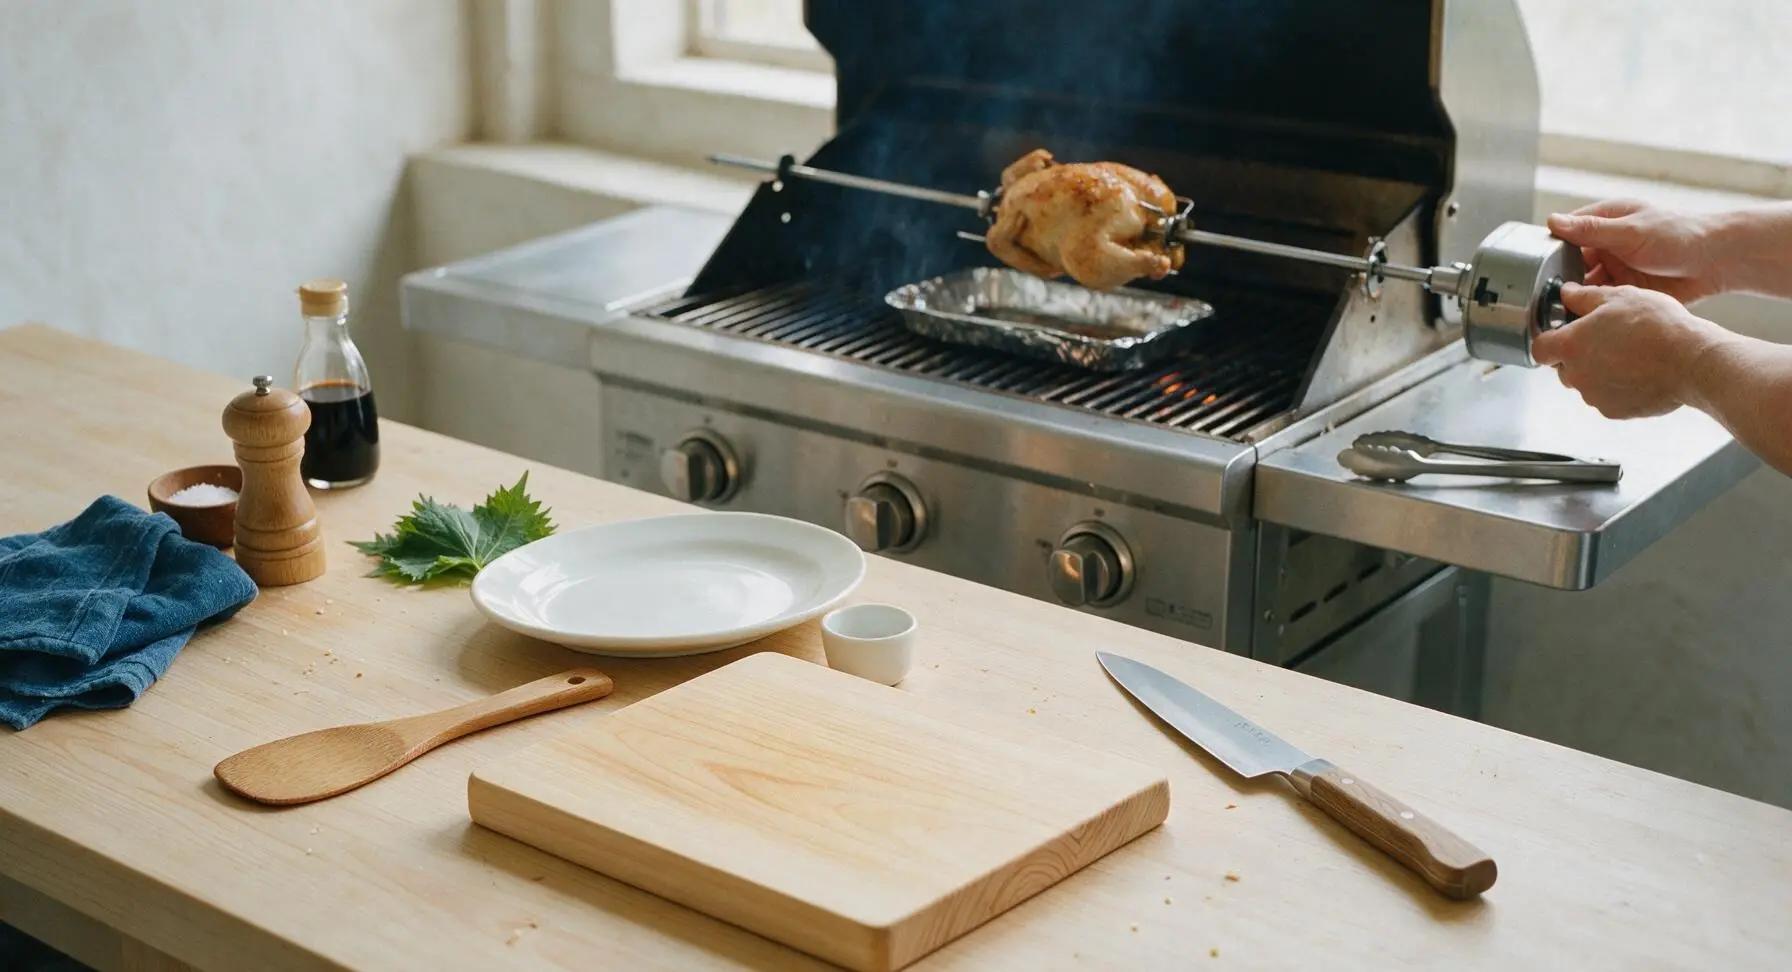
Step 6
step6:Prep Grill for Indirect Heat
7

Cook to Temperature

Turn on the rotisserie motor to start the chicken rotating slowly. Close the grill lid and cook for 1 hour to 1 hour 15 minutes, maintaining a consistent 350°F grill temperature. Avoid opening the lid unnecessarily to prevent heat loss. Check internal temperature after 1 hour: insert the instant-read thermometer into the thickest part of the thigh, not touching bone, until it reads 165°F (74°C). The skin should be deep golden brown and crisp when done.
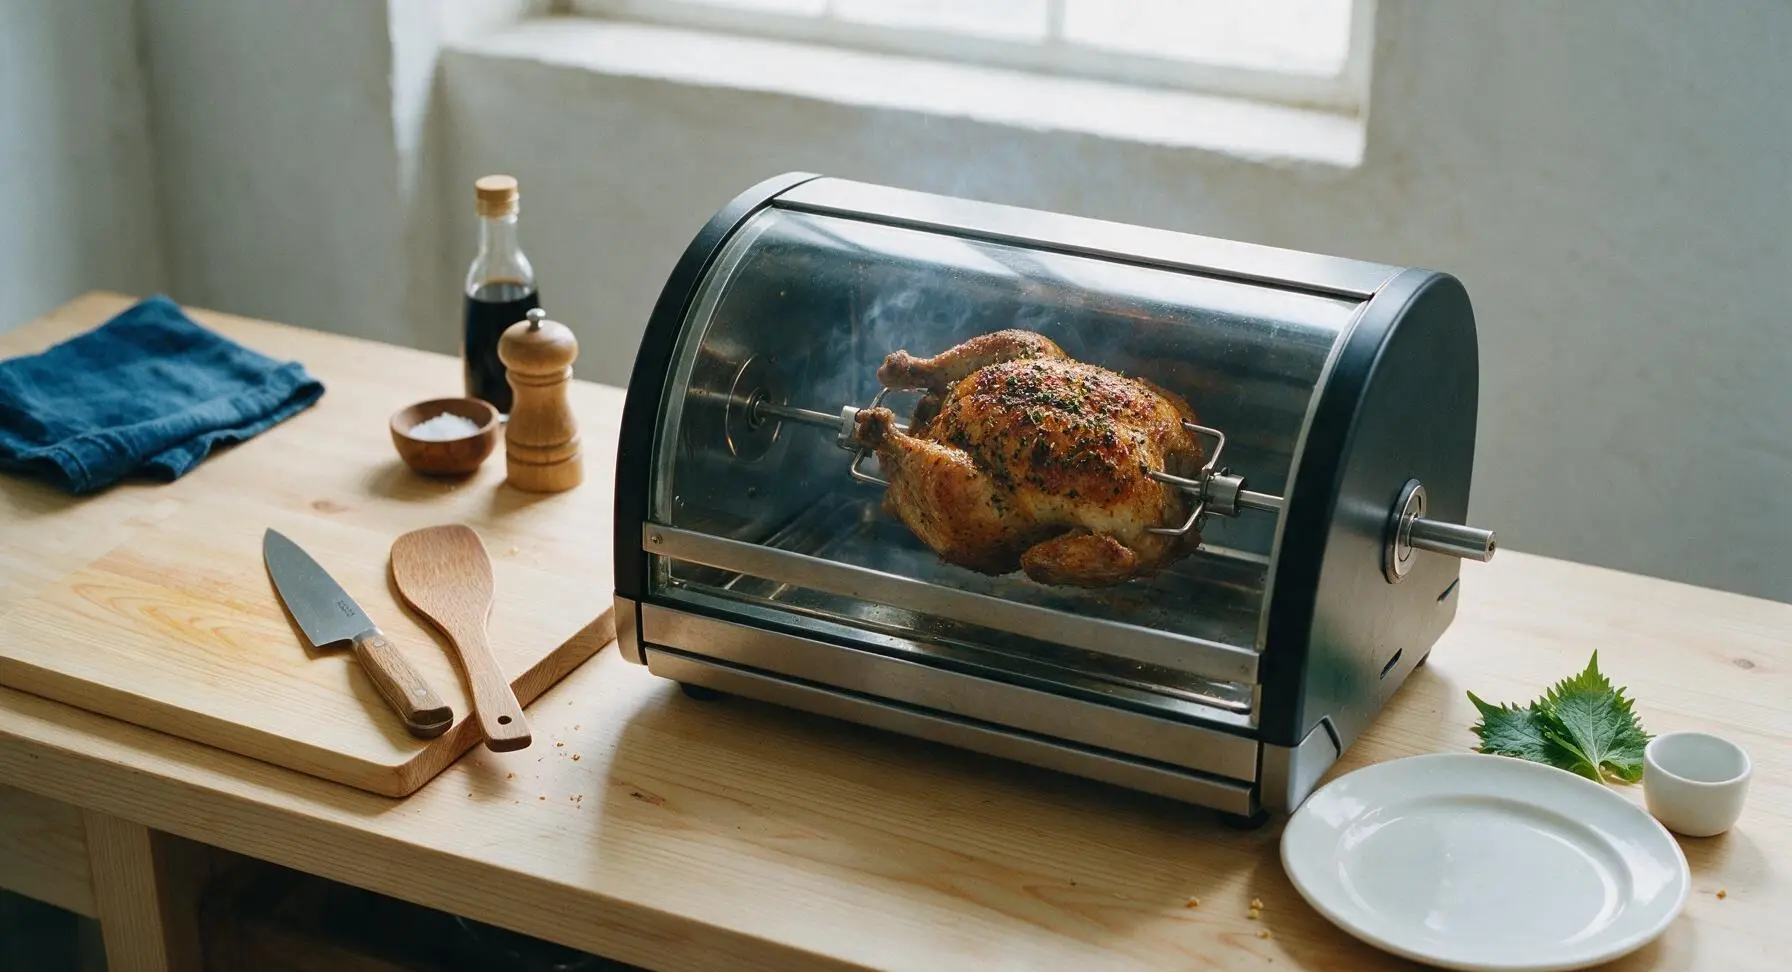
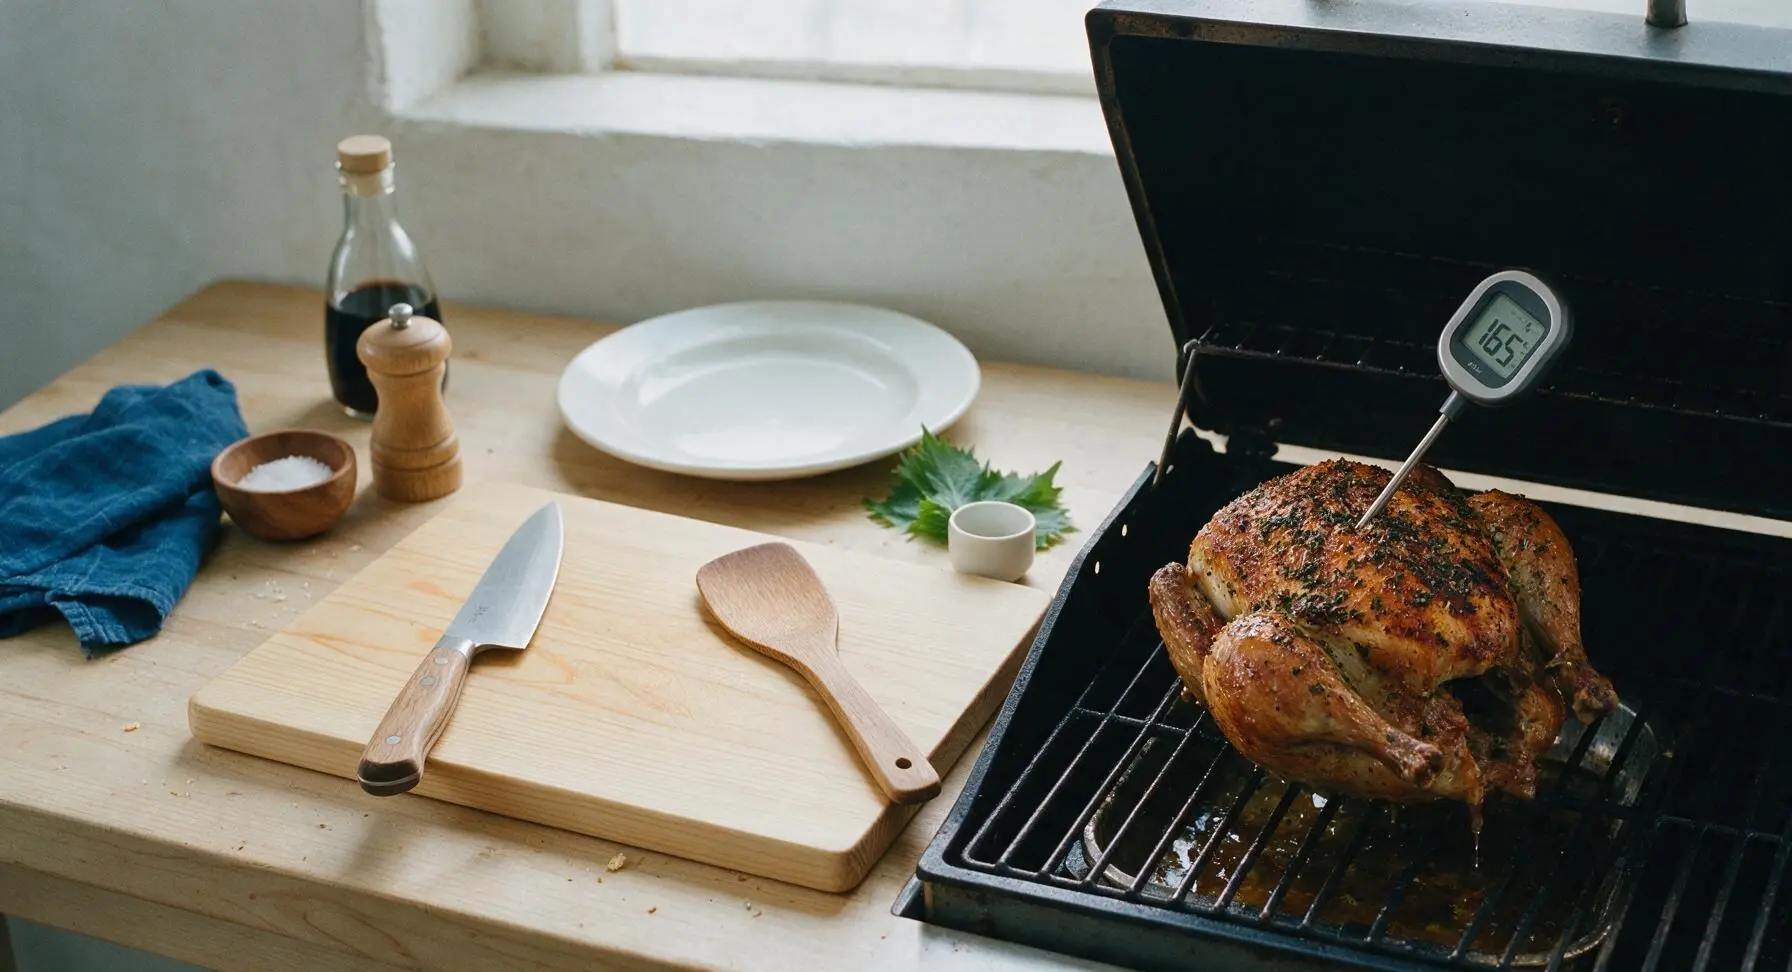
Step 7
step7:Cook to Temperature
Step 7
step7:Cook to Temperature
8

Rest Before Serving

Carefully remove the spit rod from the grill using oven mitts, then transfer the whole chicken to the matte cream stoneware serving platter. Loosely tent a piece of aluminum foil over the chicken and let it rest for 10 minutes to allow juices to redistribute through the meat. Remove the twine, garnish with remaining fresh rosemary and thyme sprigs before serving.
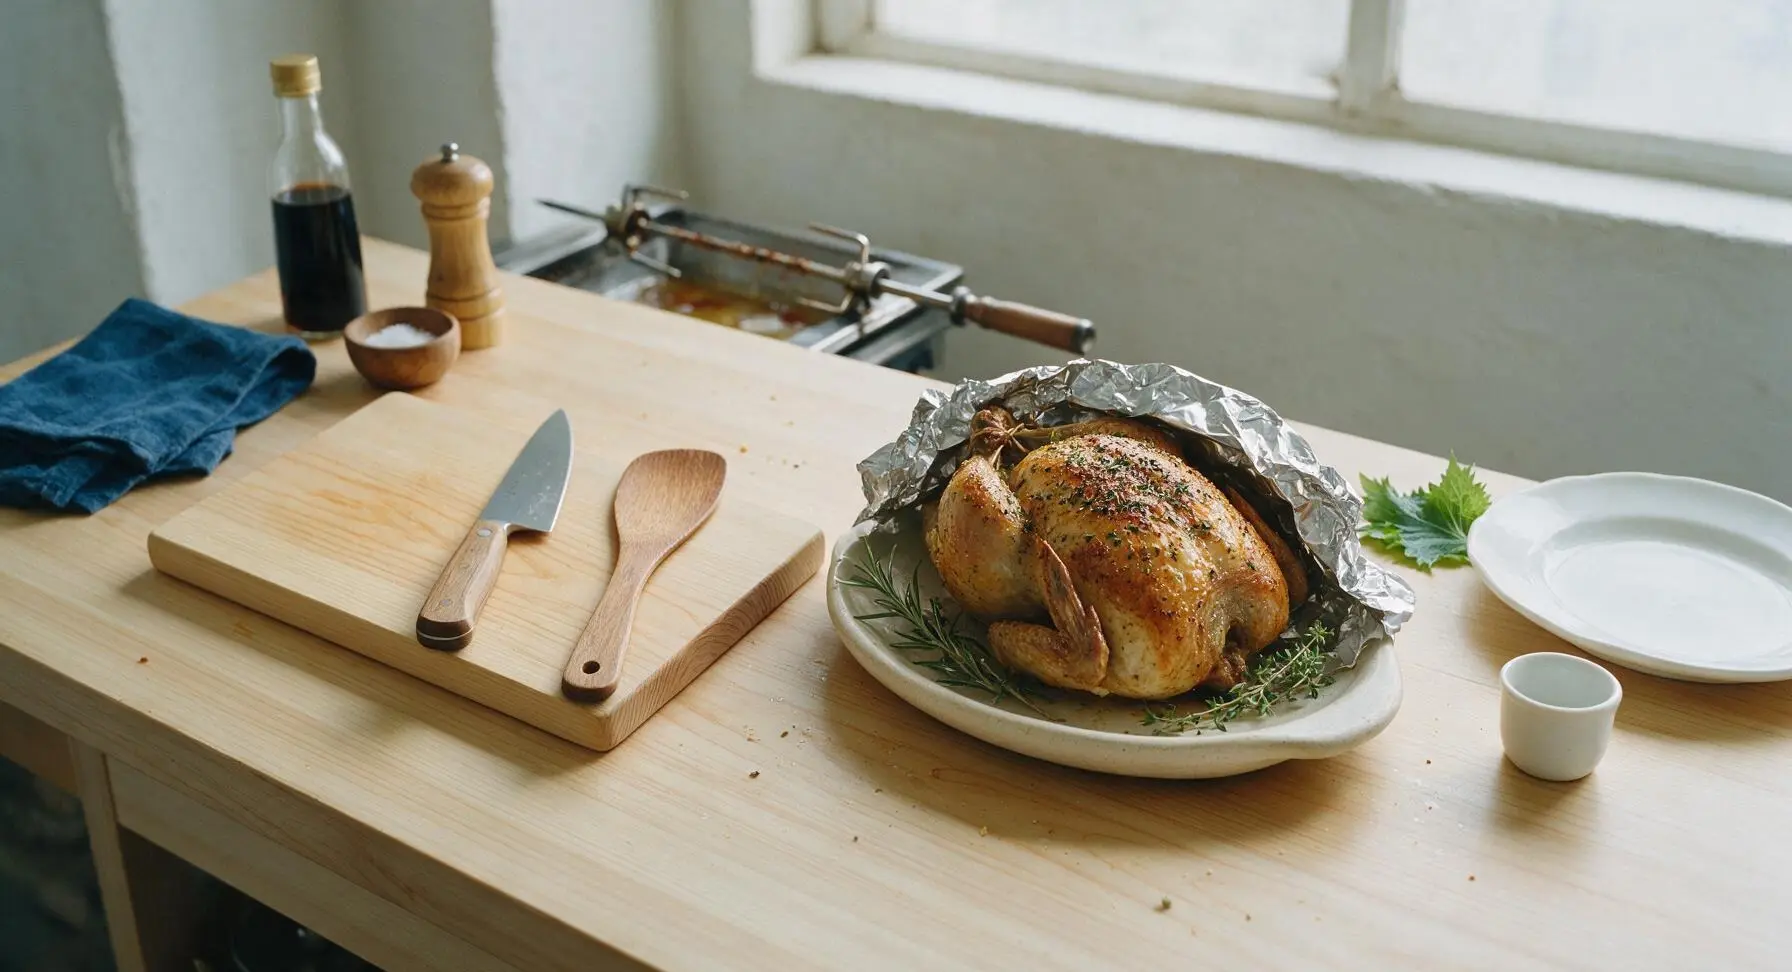
Step 8
step8:Rest Before Serving

Tips

1.Pat chicken completely dry with paper towels before applying any seasoning: residual surface moisture will steam during cooking, preventing the skin from crisping into the desired shatteringly golden crust, and will cause the herb rub to slide off instead of adhering.
2.Test spit balance carefully before starting the motor: an unbalanced chicken will put excess strain on the rotisserie motor, cause lopsided rotation, and lead to uneven cooking (dry breast meat on the fast-cooking side, undercooked thighs on the slow side). Adjust the fork positions until the spit spins smoothly without tipping.
3.Never skip the 10-minute rest period after cooking: as the chicken rests, muscle fibers relax and reabsorb hot, flavorful juices. Cutting into the chicken immediately will cause all juices to run out onto the platter, leaving the meat dry and less flavorful.


✨ You May Also Like

BBQ & Grilling
🍜 United States

Tender, melt-in-your-mouth beef brisket with a crisp, spiced bark, slow-smoked to deep smoky perfection, the iconic centerpiece of Texas backyard barbecue.

⏱️ 12 hours BBQ & Grilling ★ 4.4
BBQ & Grilling
🍜 Korea

Tender, sweet-savory marinated beef short ribs, a beloved Korean BBQ staple with caramelized, slightly charred edges and deep umami flavor, perfect for outdoor summer gatherings.

⏱️ 4 hours 2BBQ & Grilling ★ 4.8
BBQ & Grilling
🍜 United States

Juicy grilled beef patties topped with smoky homemade chili, melted cheddar, and tangy pickles on toasted brioche buns for a hearty, flavor-packed handheld meal.

⏱️ 40 minuteBBQ & Grilling ★ 4.7
BBQ & Grilling
🍜 United States

A sweet, smoky, tangy BBQ sauce brightened with peak-season dark cherries, ideal for glazing grilled ribs, chicken, pork, or summer roasted veggies.

⏱️ 35 minuteBBQ & Grilling ★ 4.7
BBQ & Grilling
🍜 United States

Rich, smoky, slightly sweet homemade bourbon BBQ sauce with deep caramel notes, ideal for glazing grilled ribs, chicken, and burgers at cookouts.

⏱️ 25 minuteBBQ & Grilling ★ 4.7
BBQ & Grilling
🍜 United States

Iconic Alabama-style BBQ featuring tender hickory-smoked chicken slathered in tangy creamy white sauce, a beloved regional Southern cookout staple.

⏱️ 3 hoursBBQ & Grilling ★ 5

rotisserie:Frequently Asked Questions

1.What size chicken works best for rotisserie cooking? ▾
Opt for a 3.5–4.5 pound whole roasting chicken for the best results. Birds over 5 pounds tend to be unbalanced on the rotisserie spit, cook unevenly, and often develop burnt skin before the thickest parts of the meat reach a safe temperature. Always remove giblets from the cavity first, and truss legs and wings tight to prevent flopping as it spins.
2.How do I get that shatteringly crisp herb crust instead of soggy skin? ▾
Start by patting the entire chicken completely dry with paper towels before applying any butter, oil, or herbs—moisture is the #1 enemy of crisp skin. Mix finely chopped rosemary and thyme into softened butter, rub a thin layer under and over the skin, then lightly drizzle with olive oil right before putting it on the spit. Hold off on salting until 15 minutes before cooking to avoid drawing out excess surface moisture.
3.Do I need a dedicated rotisserie burner, or can I use a standard outdoor grill? ▾
You don’t need a dedicated rotisserie burner to nail this recipe! For a standard gas grill, preheat to medium, then turn off the burners directly under where the chicken will sit, keeping side burners lit to hold a steady 325–350°F. For charcoal, pile lit coals on both sides of a drip pan so the chicken cooks over gentle indirect heat, not direct flame that burns the crust.
4.How long does the chicken take to cook, and what temperature means it’s done? ▾
A 3.5–4.5 pound chicken will take roughly 1 hour 15 minutes to 1 hour 45 minutes at 325–350°F, depending on your grill’s consistency. Always rely on a meat thermometer instead of time alone: pull the chicken when the thickest part of the thigh hits 165°F, with clear, non-pink juices. Avoid poking it too often, as that lets flavorful juices escape.
5.Can I use dried rosemary and thyme instead of fresh if that’s all I have? ▾
You can absolutely substitute dried herbs if fresh aren’t available, just adjust the ratio: use 1 teaspoon of dried rosemary and 1 teaspoon of dried thyme for every 1 tablespoon of chopped fresh herbs, since dried herbs are far more concentrated. Crush dried herbs between your fingers before mixing into the butter to release their aromatic oils so they stick to the crust instead of falling off as the chicken spins.
6.Why do I need to truss the chicken, and what’s the easiest way to do it? ▾
Trussing keeps loose wings and drumsticks from flopping around, catching on grill grates, or burning as the spit rotates, and it helps the chicken hold a compact shape for even cooking. The easiest method is to tie drumsticks tight together with kitchen twine, then tuck wing tips under the back of the bird so they don’t stick out—no fancy knot work required.
7.Should I put seasonings or aromatics inside the chicken cavity for extra flavor? ▾
You can tuck a few extra sprigs of rosemary and thyme, a halved lemon, or a couple crushed garlic cloves into the cavity for subtle extra flavor, but avoid packing it full of stuffing or dense vegetables. Those block airflow inside the bird, create uneven cooking, and can prevent inner meat from reaching a safe temperature before the herb crust burns.
8.How do I keep the chicken from sliding around on the rotisserie spit while it cooks? ▾
First, slide the first spit fork tight onto the rod before spearing the chicken, pushing the tines firmly into the breast meat to anchor it. Slide the second spit fork onto the other end, pushing it deep into the thigh area, then tighten both set screws as hard as you can by hand. Give the spit a gentle test spin before grilling to confirm the bird doesn’t shift or wobble.
9.Do I need to baste the chicken constantly while it’s rotating on the grill? ▾
You don’t need to baste constantly for this recipe, because the butter and oil in the herb rub will slowly render and baste the chicken as it spins, building that crisp golden crust. If you want extra flavor, you can brush on a quick mix of melted butter and lemon juice once during the last 15 minutes of cooking, but avoid opening the grill too often, as that drops temperature and extends cook time.
10.How long should I let the chicken rest after taking it off the rotisserie before carving? ▾
Let the chicken rest for 15–20 minutes tented loosely with aluminum foil after you pull it off the spit. This gives the hot, flowing juices inside the meat time to redistribute and settle back into the muscle fibers, so you don’t lose all that delicious moisture onto your cutting board when you carve. Skip the urge to cut into it right away, even if the crust smells irresistible.
11.Can I make this recipe on an indoor countertop rotisserie instead of an outdoor grill? ▾
Absolutely! This recipe works perfectly on indoor countertop rotisseries, as long as your bird fits the unit’s size guidelines (usually 4 pounds max for most home models). You won’t get the subtle smoky note from outdoor grill heat, but you’ll still get juicy, evenly cooked meat and crisp herb crust. Follow the same prep and temperature guidelines, using the unit’s recommended cook time as a starting point.

Comments (9)

2 days ago

OMG y’all, this chicken was the star of our Sunday family dinner! The herb crust was so crispy and flavorful, even my super picky 7 year old asked for seconds. I did swap dried thyme for fresh because that’s all I had, and it still turned out perfect. 10/10 will be making this for our next potluck too!

yesterday

Wait did you use a countertop rotisserie or the one on your grill? I’ve been trying to get the crust right on my Weber forever and it always comes out soggy

2 hours ago

So glad your family loved it! Dried thyme works totally fine as a 1:1 swap here—for GrillGuyJake, patting the chicken completely dry before rubbing the herb mix on is the #1 trick to get that shatteringly crisp crust, no matter what rotisserie setup you use!

1 week ago

Game changer for my weekly meal prep! I make this every Sunday now, shred the leftover chicken, and use it for salads, wraps, and soup all week. The herb flavor holds up so well even after 3-4 days in the fridge. Only note is I added a little extra garlic powder because we are garlic obsessed over here.

5 days ago

Love that meal prep hack! Extra garlic powder is always a welcome addition in my book—so glad this recipe is making your weeknight meals easier!

3 days ago

Took a stab at this for my first ever rotisserie chicken cook on my new grill. Was nervous since the difficulty says medium, but the instructions were super straightforward! The crust had that perfect mix of rosemary, oregano, and paprika, no bland bites anywhere. My roommate said it tasted better than the grocery store rotisserie we usually grab, which is high praise. Knocked one star off because I wish the recipe had a note about how much twine you need to truss it — I ran out mid-truss and had to run to the corner store mid-cook. Still turned out great, just a heads up for other new cooks!

5 days ago

Made this for our neighborhood block party last weekend and people were begging for the recipe! I was worried 1 hour 15 minutes wouldn’t be long enough for a 5lb bird, but it cooked perfectly all the way through, juicy breast and all. I did tie the legs a little tighter than the recipe said just to be safe, no regrets.

3 days ago

Oh perfect, I’m making this for my Florida Gators tailgate next weekend—did you stuff the cavity with lemon and onion like the recipe says? I always worry that adds too much moisture for the crisp crust

2 days ago

Great question! The lemon and onion in the cavity add amazing depth of flavor without making the crust soggy—just make sure you don’t overstuff it, and pat the skin dry like we mention in step 2 and you’ll be golden for that tailgate!

yesterday

SO good! I was worried I’d mess this up since I don’t have a fancy rotisserie attachment for my oven, so I used a roasting pan with a rack and rotated the chicken every 20 minutes like the hack mentioned. It came out just as good as the rotisserie ones I get at the deli down the street! My boyfriend ate half the chicken in one sitting oops.

2 hours ago

That rotisserie hack for regular ovens works like a charm! So glad you didn’t let not having a special attachment stop you—nothing beats that proud feeling when your homemade version beats the deli takeout!

2 weeks ago

Solid recipe, but I knocked a star off because the cook time was 10 minutes too long for my 4lb chicken, the edges of the thighs got a little more charred than I like. Next time I’ll check the temp a bit earlier. Flavor was still top tier though, the herb crust didn’t flake off like other recipes I’ve tried which was a nice win.

30 minutes ago

So happy this recipe is naturally gluten free! No weird breading or fillers, just herbs and chicken. I brought it to my sister’s gluten free dinner party and everyone, even the non-gluten free folks, said it was the best chicken they’d had in ages. The lemon zest in the herb rub is such a bright, nice touch, I never would have thought to add that!

5 minutes ago

I’ve been making rotisserie chicken for 40+ years, and this herb rub ratio is spot on. Not too heavy on the rosemary (a mistake I see so many new cooks make, it gets overpowering fast), just the right balance of savory and herby. I added a tiny pinch of cayenne for a subtle kick, and it was chef’s kiss.

just now

Wow, high praise coming from someone with your experience! That pinch of cayenne is such a smart addition, it adds depth without making it spicy at all—definitely going to mention that as a variation next time I update the recipe!

2 hours ago

Tried this last night for dinner and total mom win! The kids loved it so much they asked if we can have “crunchy herb chicken” every week. I did mess up a little and forgot to take the chicken out of the fridge 30 minutes before cooking like the recipe said, but it still turned out juicy, just took an extra 10 minutes to get up to temp. Will definitely be adding this to our regular rotation!

30 minutes ago

Oh thank goodness I’m not the only one who always forgets to pull meat out of the fridge ahead of time! Did you tent it with foil at all while it was resting? I always worry the crust will get soft if I do that

5 minutes ago

So glad the kids loved it! For MidwestMomMeg: tenting loosely with foil while resting won’t make the crust soggy, it just keeps the chicken warm while all those delicious juices redistribute. Just don’t wrap it tight and you’ll be all set!



