
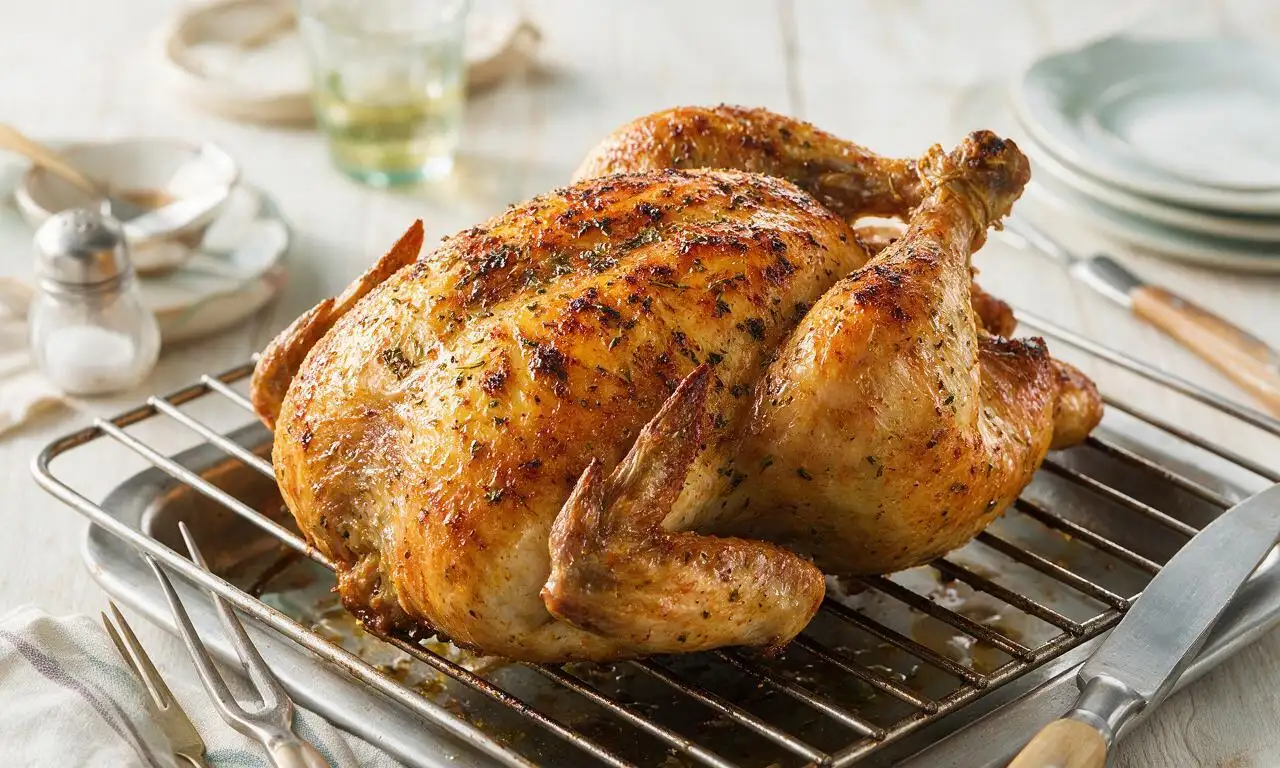
Rotisserie Chicken

title 1
Rotisserie Chicken
⏱️ cook time 1 hour 35 minutes
🍽️ servings 4
⚡ Difficulty medium

intro

Crispy herb-rubbed whole chicken slow-rotated over indirect grill heat for juicy, evenly cooked meat, perfect for casual outdoor summer gatherings.

Ingredients

Whole chicken (giblets removed, patted dry) 1.8 kg (4 lb)
Unsalted butter (melted) 57 g (4 tablespoons)
Kosher salt 18 g (1 tablespoon)
Freshly ground black pepper 2 g (1 teaspoon)
Smoked paprika 2 g (1 teaspoon)
Garlic powder 3 g (1 teaspoon)
Dried thyme 1 g (½ teaspoon)
Dried rosemary 1 g (½ teaspoon)
Yellow onion (quartered) 100 g (1 small)
Fresh lemon (halved) 120 g (1 medium)
Garlic cloves (crushed) 10 g (3 cloves)

Steps

1

Prep and season chicken

Pat the 1.8kg whole chicken completely dry inside and out with paper towels to ensure crispy skin. Mix 18g (1 tbsp) kosher salt, 2g (1 tsp) black pepper, 2g (1 tsp) smoked paprika, 3g (1 tsp) garlic powder, 1g (½ tsp) dried thyme, and 1g (½ tsp) dried rosemary in a small bowl. Brush the entire chicken exterior with 57g (4 tbsp) melted unsalted butter, then rub the spice mix evenly over all surfaces, including gently under the breast skin for deeper flavor.
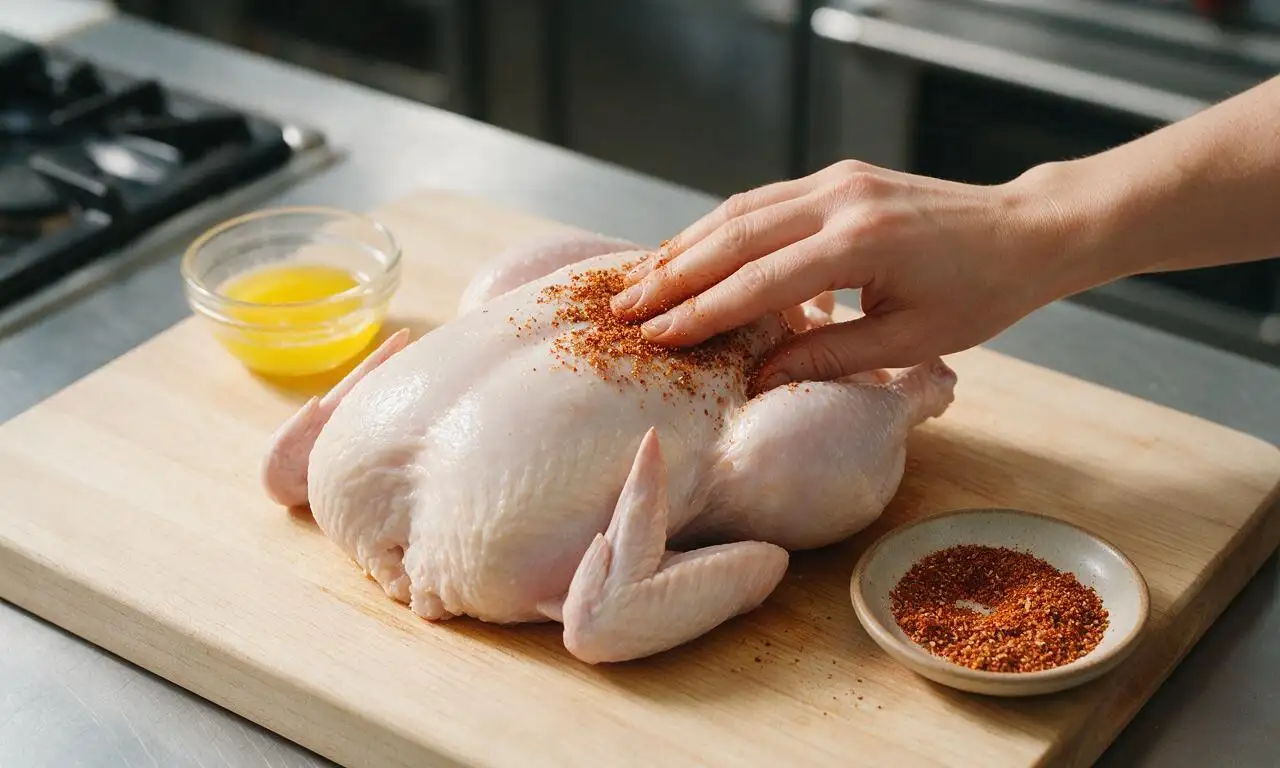
Step 1
step1:Prep and season chicken
2

Stuff chicken cavity

Stuff the chicken’s interior cavity with 100g (1 small, quartered) yellow onion, 120g (1 medium, halved) lemon, and 10g (3 crushed) garlic cloves. Do not overstuff the cavity, as this blocks even heat circulation during cooking. Tuck wing tips behind the chicken’s back to prevent burning, then tie drumsticks tightly together with cotton kitchen twine to keep the bird compact for even rotation.
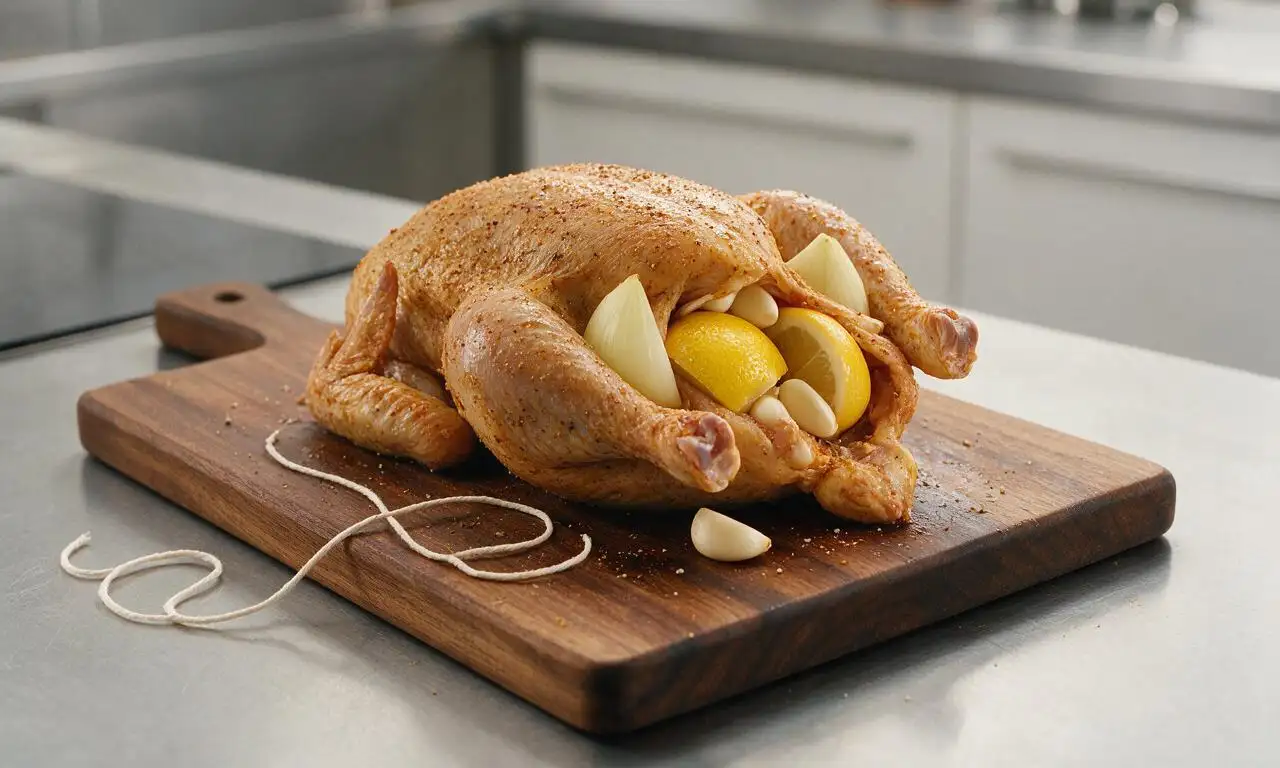
Step 2
step2:Stuff chicken cavity
3

Mount chicken on spit

Slide the rotisserie spit rod lengthwise through the center of the stuffed chicken, adjusting until the bird is perfectly balanced to avoid wobbling during rotation. Fasten the metal spit forks tightly on both ends to lock the chicken in place, double-checking that no loose sections can catch or drag as the spit turns. Let the chicken rest at room temperature for 20 minutes while preheating your grill to 180°C (350°F) with an indirect heat zone set up.
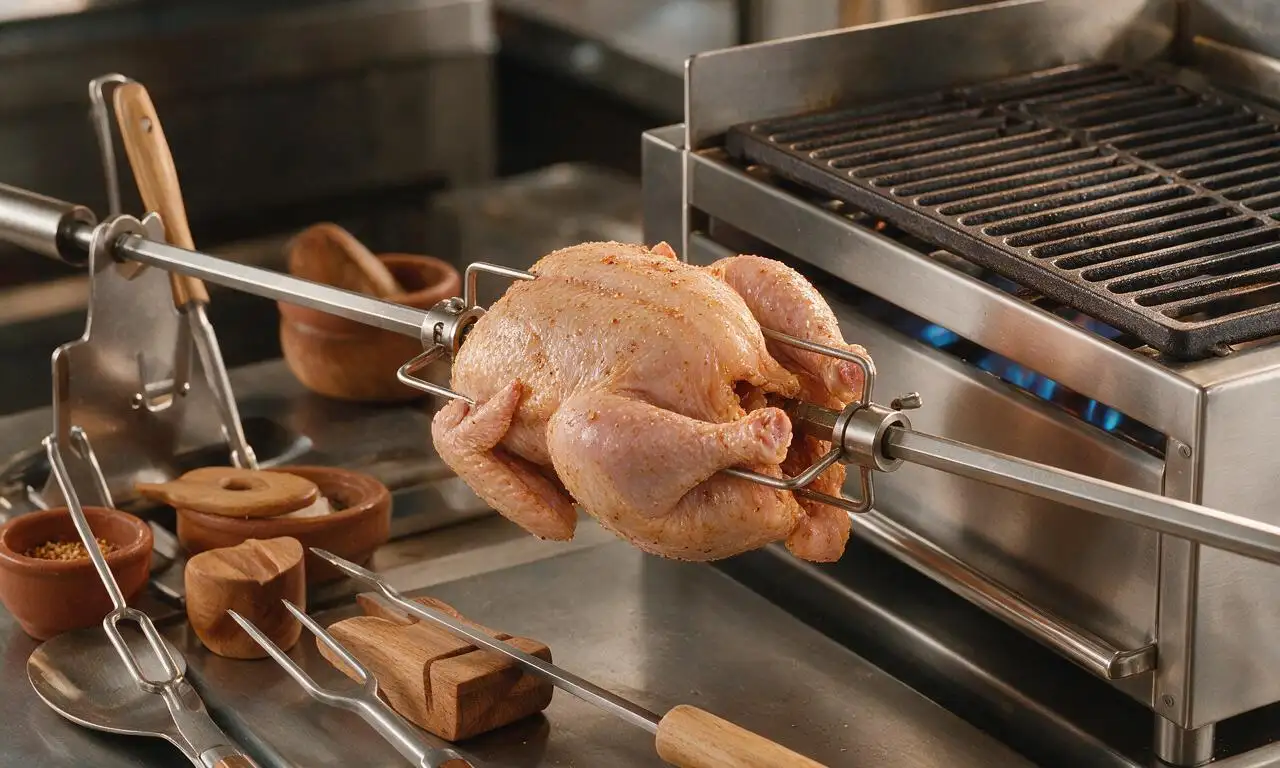
Step 3
step3:Mount chicken on spit
4

Rotisserie cook chicken

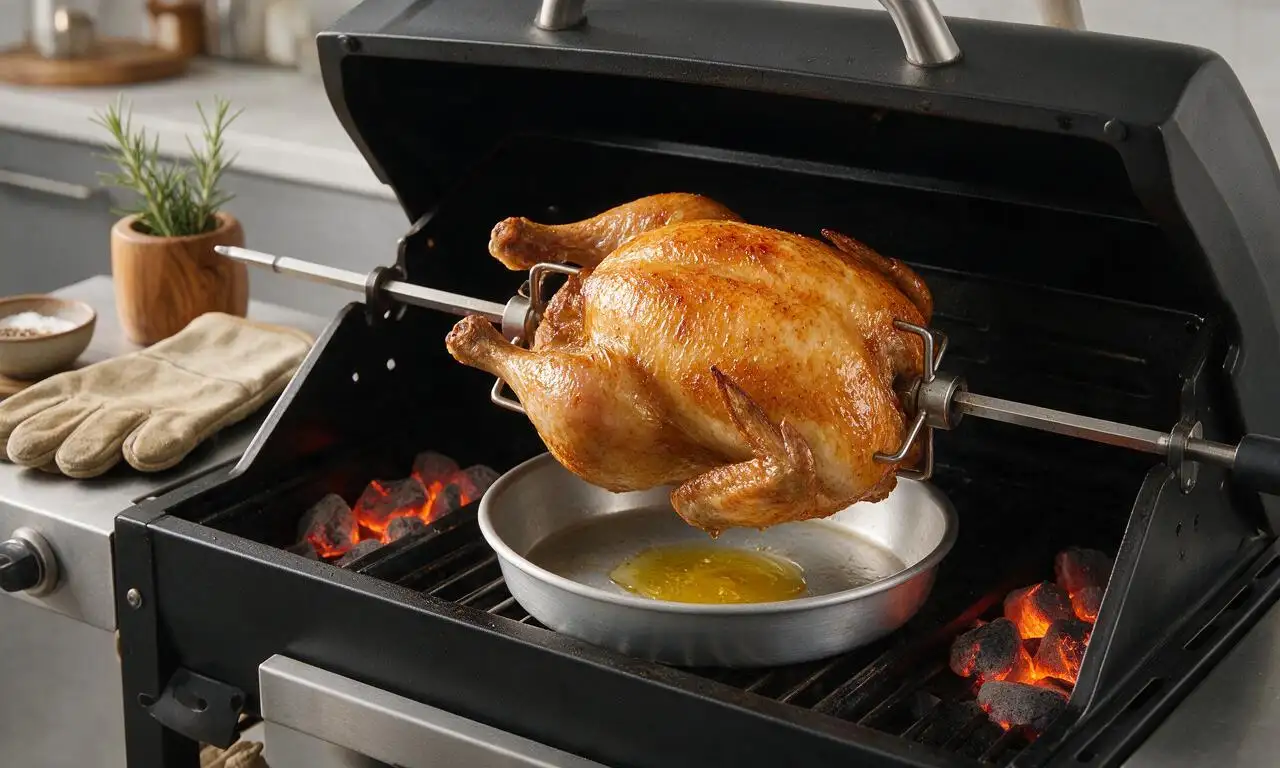
Set the loaded spit onto the rotisserie mechanism over the indirect heat zone, start the rotation motor, and close the grill lid. Place a shallow metal drip pan under the chicken to catch rendered fat and prevent flare-ups. Cook for 1 hour 20 minutes, maintaining a steady grill temperature of 180°C (350°F); avoid opening the lid for the first hour to prevent heat loss.
Step 4
step4:Rotisserie cook chicken
5

Check for doneness

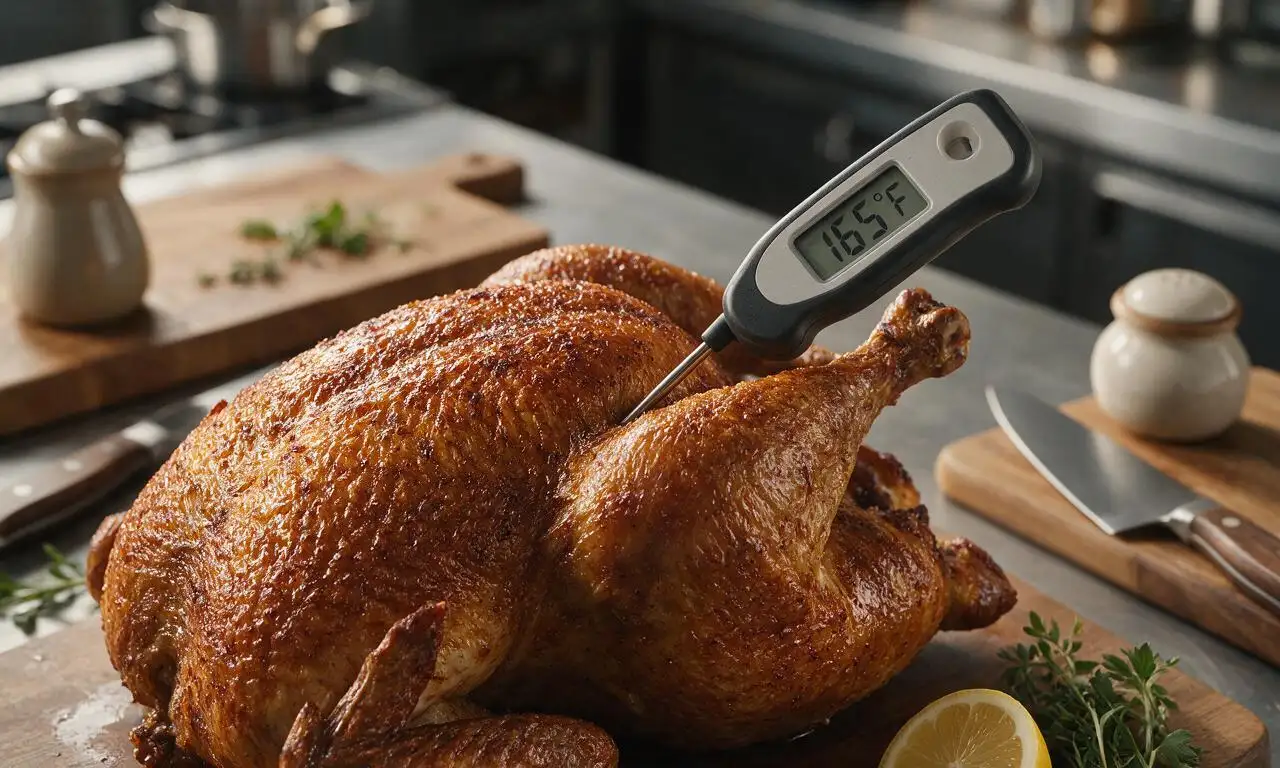
After 1 hour 20 minutes of cooking, insert an instant-read meat thermometer into the thickest part of the chicken thigh (avoiding contact with bone) to check for a safe internal temperature of 75°C (165°F). If the temperature is lower, continue cooking in 10-minute increments, rechecking each time, until the target is reached. Fully cooked chicken will have deep, crispy golden-brown skin all over.
Step 5
step5:Check for doneness
6

Rest and serve chicken

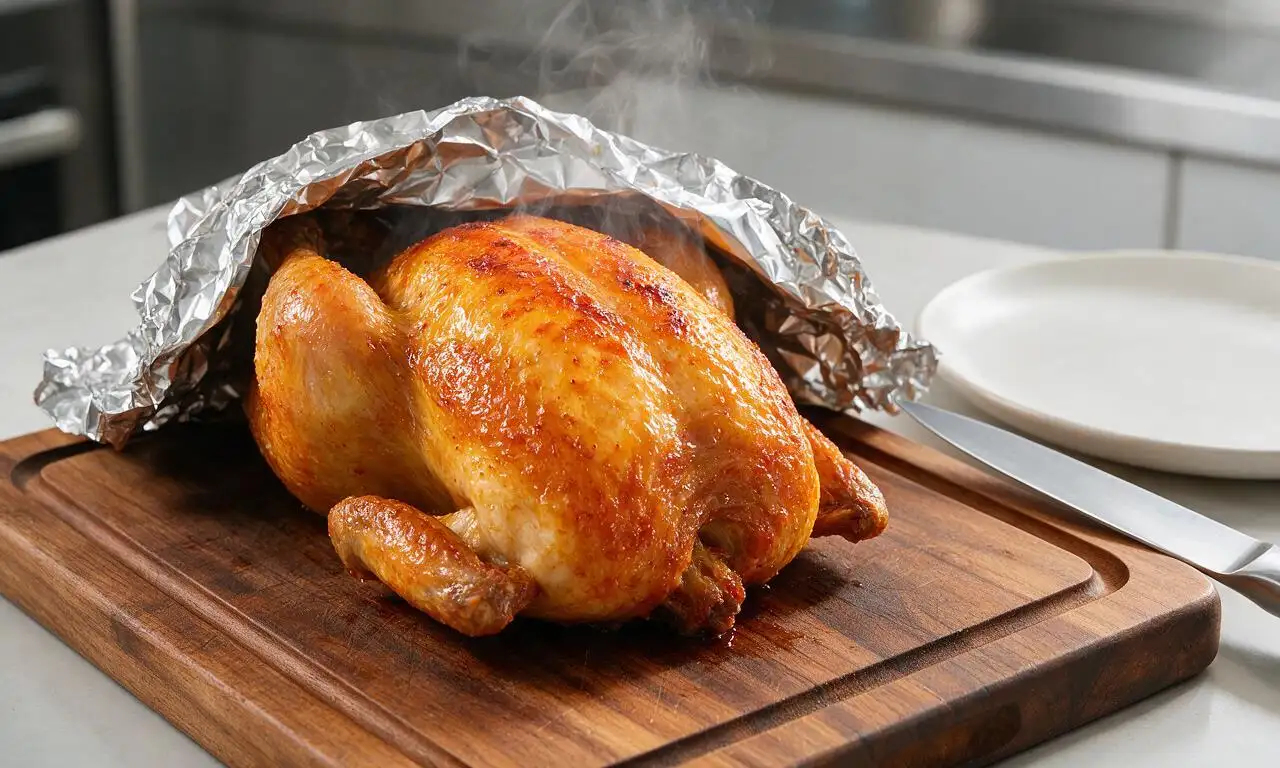
Carefully remove the hot spit from the grill, transfer the chicken to a clean grooved cutting board, and tent it loosely with aluminum foil. Let the chicken rest for 15 minutes to allow juices to redistribute through the meat, which prevents dry, juice-leaking slices. Remove the kitchen twine, discard the aromatic cavity stuffing, carve into pieces, and serve.
Step 6
step6:Rest and serve chicken

Tips

1.Never skip drying the chicken skin: any remaining moisture on the skin will steam during cooking instead of crisping, resulting in soft, rubbery skin instead of the desired crispy golden crust.
2.Test the spit balance before turning on the motor: give the rod a gentle manual spin to make sure the chicken turns smoothly without heavy wobbling, which can damage the rotisserie motor or cause uneven cooking.
3.Resist the urge to carve the chicken immediately after cooking: the 15-minute rest period allows muscle fibers to reabsorb juices, so every bite stays moist instead of letting all the flavorful liquid run onto the cutting board.


✨ You May Also Like

BBQ & Grilling
🍜 United States

Tender, melt-in-your-mouth beef brisket with a crisp, spiced bark, slow-smoked to deep smoky perfection, the iconic centerpiece of Texas backyard barbecue.

⏱️ 12 hours BBQ & Grilling ★ 4.4
BBQ & Grilling
🍜 Korea

Tender, sweet-savory marinated beef short ribs, a beloved Korean BBQ staple with caramelized, slightly charred edges and deep umami flavor, perfect for outdoor summer gatherings.

⏱️ 4 hours 2BBQ & Grilling ★ 4.8
BBQ & Grilling
🍜 United States

Juicy grilled beef patties topped with smoky homemade chili, melted cheddar, and tangy pickles on toasted brioche buns for a hearty, flavor-packed handheld meal.

⏱️ 40 minuteBBQ & Grilling ★ 4.7
BBQ & Grilling
🍜 United States

A sweet, smoky, tangy BBQ sauce brightened with peak-season dark cherries, ideal for glazing grilled ribs, chicken, pork, or summer roasted veggies.

⏱️ 35 minuteBBQ & Grilling ★ 4.7
BBQ & Grilling
🍜 United States

Rich, smoky, slightly sweet homemade bourbon BBQ sauce with deep caramel notes, ideal for glazing grilled ribs, chicken, and burgers at cookouts.

⏱️ 25 minuteBBQ & Grilling ★ 4.7
BBQ & Grilling
🍜 United States

Iconic Alabama-style BBQ featuring tender hickory-smoked chicken slathered in tangy creamy white sauce, a beloved regional Southern cookout staple.

⏱️ 3 hoursBBQ & Grilling ★ 5

Rotisserie Chicken:Frequently Asked Questions

1.What size whole chicken works best for this homemade rotisserie recipe? ▾
A 3.5 to 4.5 pound whole chicken works perfectly here. It cooks evenly in 1.25 to 1.75 hours over indirect grill heat, stays juicy from edge to bone, fits securely on most standard grill rotisserie spits, and develops perfectly crispy skin without outer meat drying out before the thighs cook through.
2.Why do I need to pat the chicken completely dry before adding the rub? ▾
Patting the chicken dry with paper towels (inside and out, after removing giblets) is non-negotiable for shatteringly crisp skin. Any residual surface moisture will steam instead of crisp as the chicken rotates, leaving you with soggy, rubbery skin instead of that golden, seasoned crispy exterior this recipe is known for.
3.Can I make this rotisserie chicken if my grill doesn’t have a dedicated rotisserie attachment? ▾
Absolutely! If you don’t have a rotisserie spit, set up your grill for two-zone indirect heat, place a drip pan under the empty cool zone, and set the chicken on a wire rack over the pan. Flip the chicken every 20 minutes to mimic even rotation, and you’ll still get juicy, evenly cooked meat with crispy skin.
4.What steady grill temperature gives the most consistent, juicy results? ▾
Keep your grill at a steady 350°F over indirect heat for this recipe. Too high, and outer meat will dry out and burn before the thickest thigh parts reach a safe temperature; too low, and skin won’t crisp properly, plus you’ll risk uneven cooking that lingers too long in the food safety danger zone.
5.Do I need to truss the chicken before putting it on the rotisserie spit? ▾
Yes, trussing is a quick, important step. Tie the legs together tightly with kitchen twine, and tuck wing tips under the back of the bird so they don’t flop, burn, or catch on grill grates as the spit rotates. This also helps the chicken hold a uniform shape for more even cooking across every part of the bird.
6.When should I brush the melted unsalted butter on the chicken during cooking? ▾
Wait until the chicken has cooked for the first 45 minutes before brushing on melted butter, which you can mix with your smoked paprika, salt, and freshly ground pepper for easy application. Brushing too early prevents skin from drying enough to crisp, and excess butter will drip off and cause unwanted flare-ups before the rub sets.
7.How do I know when the rotisserie chicken is fully cooked and safe to eat? ▾
Always use an instant-read meat thermometer to check doneness, no guessing. Stick the probe into the thickest part of the thigh, avoiding bone, and look for a reading of 165°F. Juices should run clear when you pierce the thigh, and legs will wiggle loosely in their sockets when given a gentle tug.
8.Why is indirect heat so critical for this rotisserie chicken recipe? ▾
Indirect heat means the chicken is never sitting directly over lit coals or active gas burners, so it cooks slowly and evenly from radiant heat as it rotates. Direct heat under the bird causes constant flare-ups from dripping fat, burns skin quickly, and leaves undercooked inner meat with dry, charred outer layers.
9.Can I brine the chicken ahead of time for extra juiciness? ▾
You absolutely can, and it’s a great pro move for extra juicy results. Do a simple dry brine by rubbing 1 teaspoon of kosher salt per pound of chicken all over the bird (and inside the cavity) 12 to 24 hours before cooking, letting it rest uncovered on a rack in the fridge. Pat dry again right before seasoning.
10.What should I put under the chicken to catch drips while it cooks? ▾
Set a shallow, heat-safe metal drip pan directly under the spot where the chicken will rotate, right on the unlit side of your two-zone grill. You can add a half-inch of water or sliced onion to the pan to prevent drippings from burning and smoking, but skip sugary additions that cause acrid smoke as they heat.
11.How long should I let the chicken rest after taking it off the rotisserie? ▾
Let the chicken rest for 10 to 15 minutes, tented loosely with a small piece of aluminum foil, before carving. This gives hot, circulating juices inside the meat time to redistribute and settle into muscle fibers, so every bite is juicy instead of having all flavorful juice run out onto your cutting board when you slice.
12.Can I add extra seasonings beyond the salt, pepper, and smoked paprika in the base recipe? ▾
Of course! The simple base rub is a perfect blank canvas. You can mix garlic powder, onion powder, dried thyme, or a pinch of cayenne into the melted butter for extra depth, just avoid adding large chunks of fresh herbs early on, as they will burn and turn bitter as the chicken rotates for over an hour.
13.Why does my rotisserie chicken sometimes come out dry even when I follow recommended cook times? ▾
The most common culprits are cooking at too high a grill temperature, skipping the dry pat step leading to steamed skin and longer cook times, or cutting into the chicken immediately without resting. It’s also easy to overcook if you skip a thermometer—pull the bird right when the thigh hits 165°F, as residual heat will bring it up to temp as it rests.
14.Do I need to leave the chicken uncovered in the fridge before cooking? ▾
If you have time, yes! After patting the chicken dry (or after dry brining), let it sit uncovered on a wire rack on a baking sheet in the fridge for 2 to 12 hours before cooking. This dries out the skin even more, leading to that ultra-crispy, golden, crackly exterior that rivals premium grocery store rotisserie chickens.
15.Can I use salted butter instead of unsalted butter for the rub? ▾
You can, but you’ll need to cut back on the amount of kosher salt you use in your spice rub to avoid over-salting the bird. As a general rule, salted butter has about 1/4 teaspoon of added salt per stick, so reduce your added kosher salt by that amount to keep seasoning balanced, and taste your rub before applying.
16.How do I keep the chicken from slipping on the rotisserie spit as it turns? ▾
First, slide the spit forks as tight as possible against both ends of the chicken, driving the tines deep into the breast and thigh meat to hold it secure. Trussing the bird tightly also prevents loose parts from shifting weight as it rotates, and give the spit a gentle manual turn before closing the grill to test for slippage.
17.What’s the best way to store leftover rotisserie chicken? ▾
Let leftover chicken cool to room temperature within 2 hours of cooking, then pull the meat off the bones or store carved pieces in an airtight container in the fridge for up to 4 days. You can also freeze shredded leftover chicken in sealed freezer bags for up to 3 months, perfect for quick meals like salads, sandwiches, or soups.

Comments (18)

2 hours ago

OMG this was a total game changer for our Sunday family dinner! I’ve tried so many rotisserie chicken recipes that come out dry no matter what I do, but this one was perfectly juicy all the way through, even the breast meat! My kids fought over the crispy skin. 10/10 will make every week for meal prep too.

30 minutes ago

Same! I shredded the leftovers for chicken salad and tacos all week, held up way better than the grocery store rotisserie chicken that gets slimy after 2 days.

5 minutes ago

So happy it was a hit with the family, Jess! Pro tip: save the leftover bones to make a quick homemade stock, it’s unbeatable.

30 minutes ago

Wait, do I have to truss the chicken for this to work? I don’t have any kitchen twine at home and really want to make this tonight for my roommate’s birthday dinner.

5 minutes ago

I didn’t truss mine last week and it turned out totally fine! Just tuck the wing tips under so they don’t burn, that’s the main thing.

just now

Hannah’s spot! Trussing helps it cook more evenly, but if you don’t have twine, tucking the wings and tying the legs together loosely with a strip of aluminum foil works as a quick hack.

yesterday

Flavor was great, but my chicken took almost 30 minutes longer to cook than the recipe said, and the skin on the bottom got a little soggy. Did I do something wrong? I used a 5lb bird like recommended.

yesterday

Oh I had that too! Turned out I had my oven rack too low, moved it up to the middle position next time and the skin was crispy all over. Also make sure you’re not using a super deep roasting pan that traps steam.

2 hours ago

Sorry to hear the cook time was off and the skin was soggy! Oven calibration varies a ton, so I always recommend using a meat thermometer to hit 165°F in the thickest part of the thigh instead of going by time alone. Elevating the chicken on a wire rack inside your roasting pan also lets air circulate to keep skin crispy all around, that’s my go-to trick!

3 days ago

Brought this to our neighborhood block party potluck last weekend and people were asking me for the recipe before I even set the platter down! The seasoning blend is perfect, not too salty, has just the right amount of paprika and garlic. SO good.

2 days ago

I was at that potluck!!! Can confirm this chicken was insane, I went back for two pieces no shame. Gonna make it for my kid’s soccer team snack next week.

2 days ago

Nothing makes us happier than hearing a recipe steals the show at a potluck! So fun that a fellow party goer found their way to the recipe too, enjoy making it for the soccer team!

5 days ago

I added a little smoked paprika and a pinch of cayenne to the dry rub and wow, that extra kick was chef’s kiss. Brined the chicken for 4 hours first too, juice was literally running down my wrists when I took a bite. 100% making this again for our next camping trip prep.

3 days ago

The brine hack is genius! I always forget to brine poultry and end up with dry breast, gonna try that next time for sure. How much salt did you use for your brine?

2 days ago

I did 1/4 cup kosher salt per 4 cups of cold water, plus a couple tablespoons of brown sugar and some peppercorns! Let it sit in the fridge the whole time, no more than 6 hours for a 5lb bird so it doesn’t get too salty.

1 week ago

This has become my Sunday meal prep staple! I make one every week, shred it up, and use it for salads, wraps, pasta, and soup for the kids’ school lunches all week. Saves me so much money compared to buying pre-cooked chicken from the store, and it tastes way better.

5 days ago

Wait how long does the shredded chicken stay good in the fridge for? I waste so much meal prep food because I’m paranoid about it going bad.

3 days ago

So glad it’s making your weekly prep easier, Liz! Shredded chicken stored in an airtight container will stay good in the fridge for 3-4 days, or you can freeze it for up to 3 months for quick meals later.

5 minutes ago

I’ve literally never roasted a whole chicken in my life, I was so intimidated! The step-by-step instructions were so easy to follow, and my chicken came out perfect on the first try. My girlfriend thought I ordered takeout lmao.

just now

That’s what we love to hear! There’s no better feeling than nailing a whole chicken on the first try, great job.

2 days ago

Okay, I doubled the garlic in the rub (no such thing as too much garlic in my house) and stuffed the cavity with extra lemon and thyme. My whole house smelled amazing for hours, I need to make this for my parents when they visit next month.

yesterday

Stuffing the cavity with lemon is such a game changer! I did that last time and the subtle citrus flavor that steams into the meat is unreal.

2 weeks ago

Wondering if anyone has tried this with a low-sodium seasoning blend? I have to watch my salt intake for blood pressure, but I’m dying to make this, the photos look incredible.

2 weeks ago

Great question! You can absolutely swap the regular salt for a low-sodium salt alternative, or just cut the salt amount in half and amp up the other herbs and spices (extra garlic powder, paprika, dried thyme, and black pepper add tons of flavor without extra sodium).

yesterday

Made this for our Sunday football watch party yesterday, served it with some roasted veggies and mac and cheese. The whole crew devoured it in 15 minutes flat, there wasn’t even a leftover scrap. Will be a regular on game day from now on.

2 hours ago

Saving this for our next tailgate! I’ve been looking for a make-ahead main that doesn’t require me to man the grill the whole time, this looks perfect.

1 week ago

Used this rub recipe on my outdoor grill’s rotisserie attachment instead of the oven, turned out absolutely perfect. Got that nice smoky char on the skin without drying out the meat, 10/10.

5 days ago

Love that outdoor rotisserie hack! That smoky flavor from the grill sounds incredible, we might have to add that variation to the recipe notes soon, thanks for sharing!

3 days ago

Tasted amazing, but my smoke alarm went off twice from the fat dripping onto the bottom of my oven 😂 Next time I’ll put a baking sheet on the lower rack to catch the drips like my roommate suggested. Still worth it though, the chicken was so juicy.

2 days ago

Oh my god I did the exact same thing my first time! My cat ran under the couch and wouldn’t come out for an hour after the alarm went off. The baking sheet trick works perfectly, no more smoke.

5 days ago

I only cook for me and my partner, is it possible to cut this recipe in half with a smaller 3lb chicken? I don’t want a ton of leftovers going to waste, but I’m worried about messing up the cook time.

3 days ago

Absolutely! A 3lb chicken will work perfectly with the same seasoning blend, just cut the cook time down to about 1 hour total, and always use a meat thermometer to check for 165°F in the thickest part of the thigh to make sure it’s done.

2 hours ago

This is way better than the $10 rotisserie chicken from the grocery store, I can’t believe I waited so long to try making it at home. The meat is so much juicier, and I can control exactly what goes in the seasoning, no weird preservatives. Win win.

yesterday

Made this for a date night in yesterday, and my date literally asked if I had gone to culinary school lmao. Served it with roasted garlic mashed potatoes and roasted broccoli, total restaurant quality meal for a fraction of the price. 10/10.

1 week ago

Tastes incredible, don’t get me wrong, but this was a little more hands-on than I expected for a weeknight meal. Definitely worth making on a weekend when I have more time, though, the flavor and juiciness are unbeatable.

2 weeks ago

I’ve been making rotisserie-style chicken for 40 years, and this seasoning blend is even better than my old go-to recipe! My grandson said it’s the best chicken he’s ever eaten, which is saying a lot because he’s a super picky eater. Added a little old bay to the rub for that extra zing, perfection.

30 minutes ago

Game changer for my bulk meal prep! Each chicken gives me like 6 servings of high protein, no weird added sugars or fillers, and it’s way cheaper than buying chicken breast every week. The dark meat stays juicy even after I reheat it in the microwave for work lunches, which never happens with plain baked chicken.



