
Sourdough Sandwich Rolls

title 1
Sourdough Sandwich Rolls
⏱️ cook time 25 minutes
🍽️ servings 8
⚡ Difficulty medium

intro

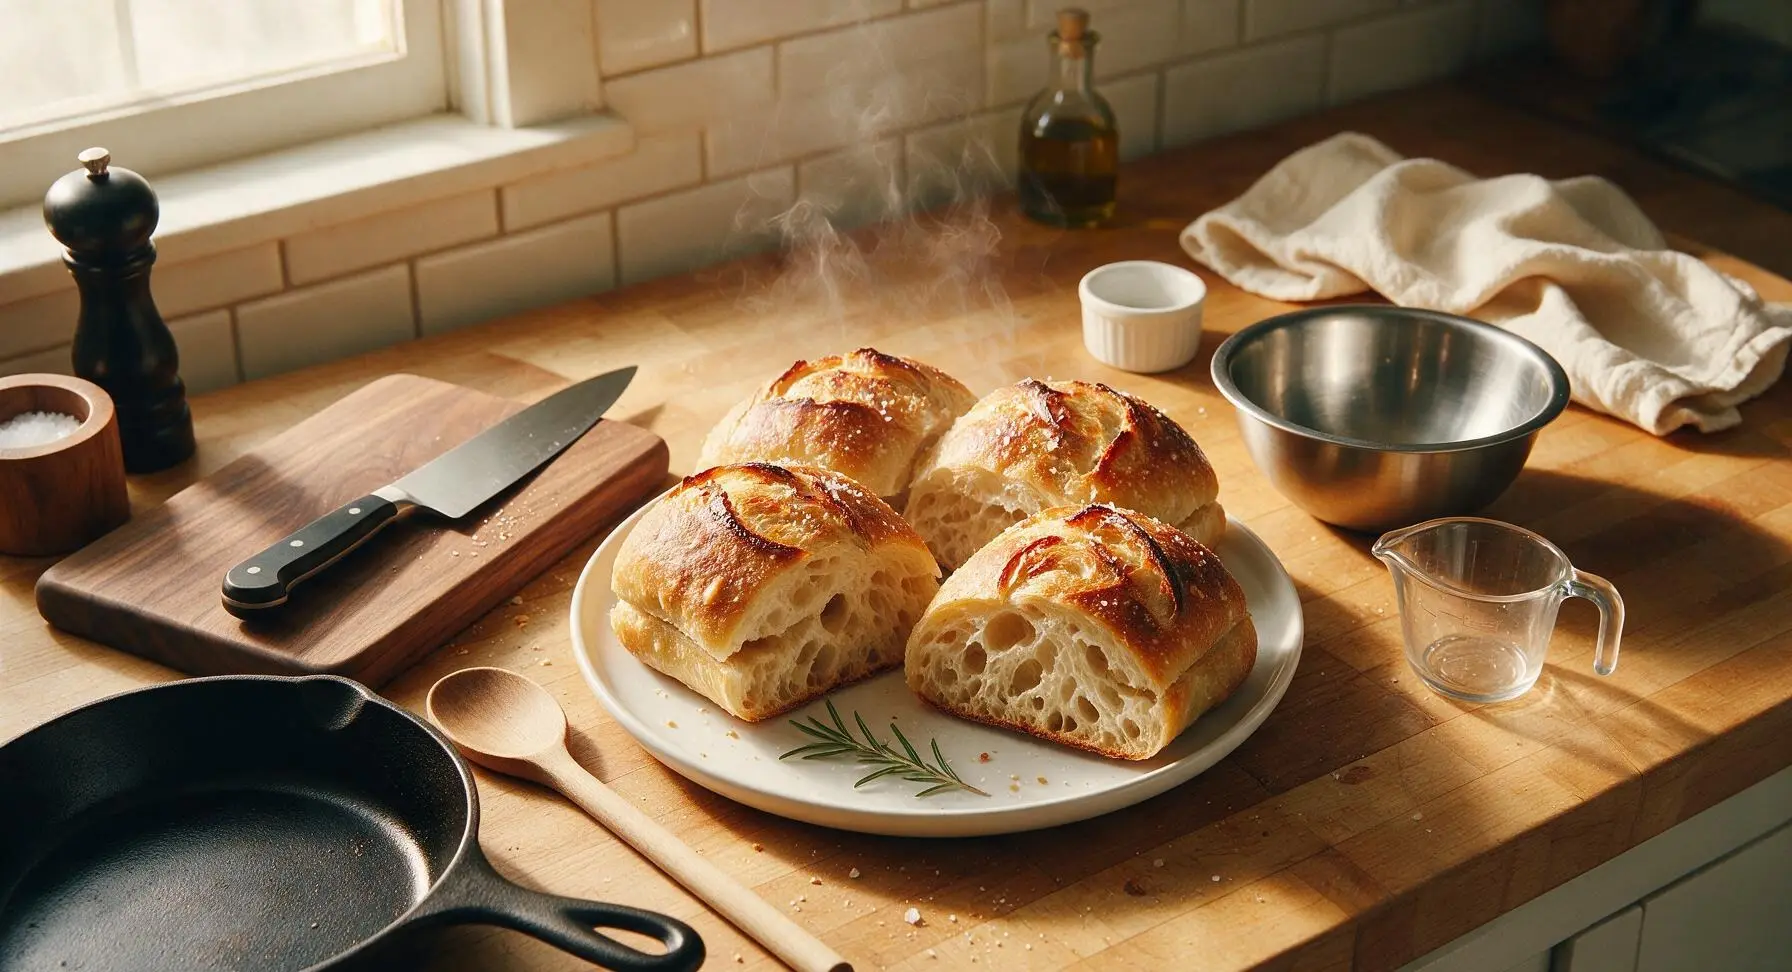
Soft, chewy sourdough sandwich rolls with a crisp blistered crust and tangy, airy crumb—sturdy enough for stacked picnic fillings, burgers, or deli sandwiches.

Ingredients
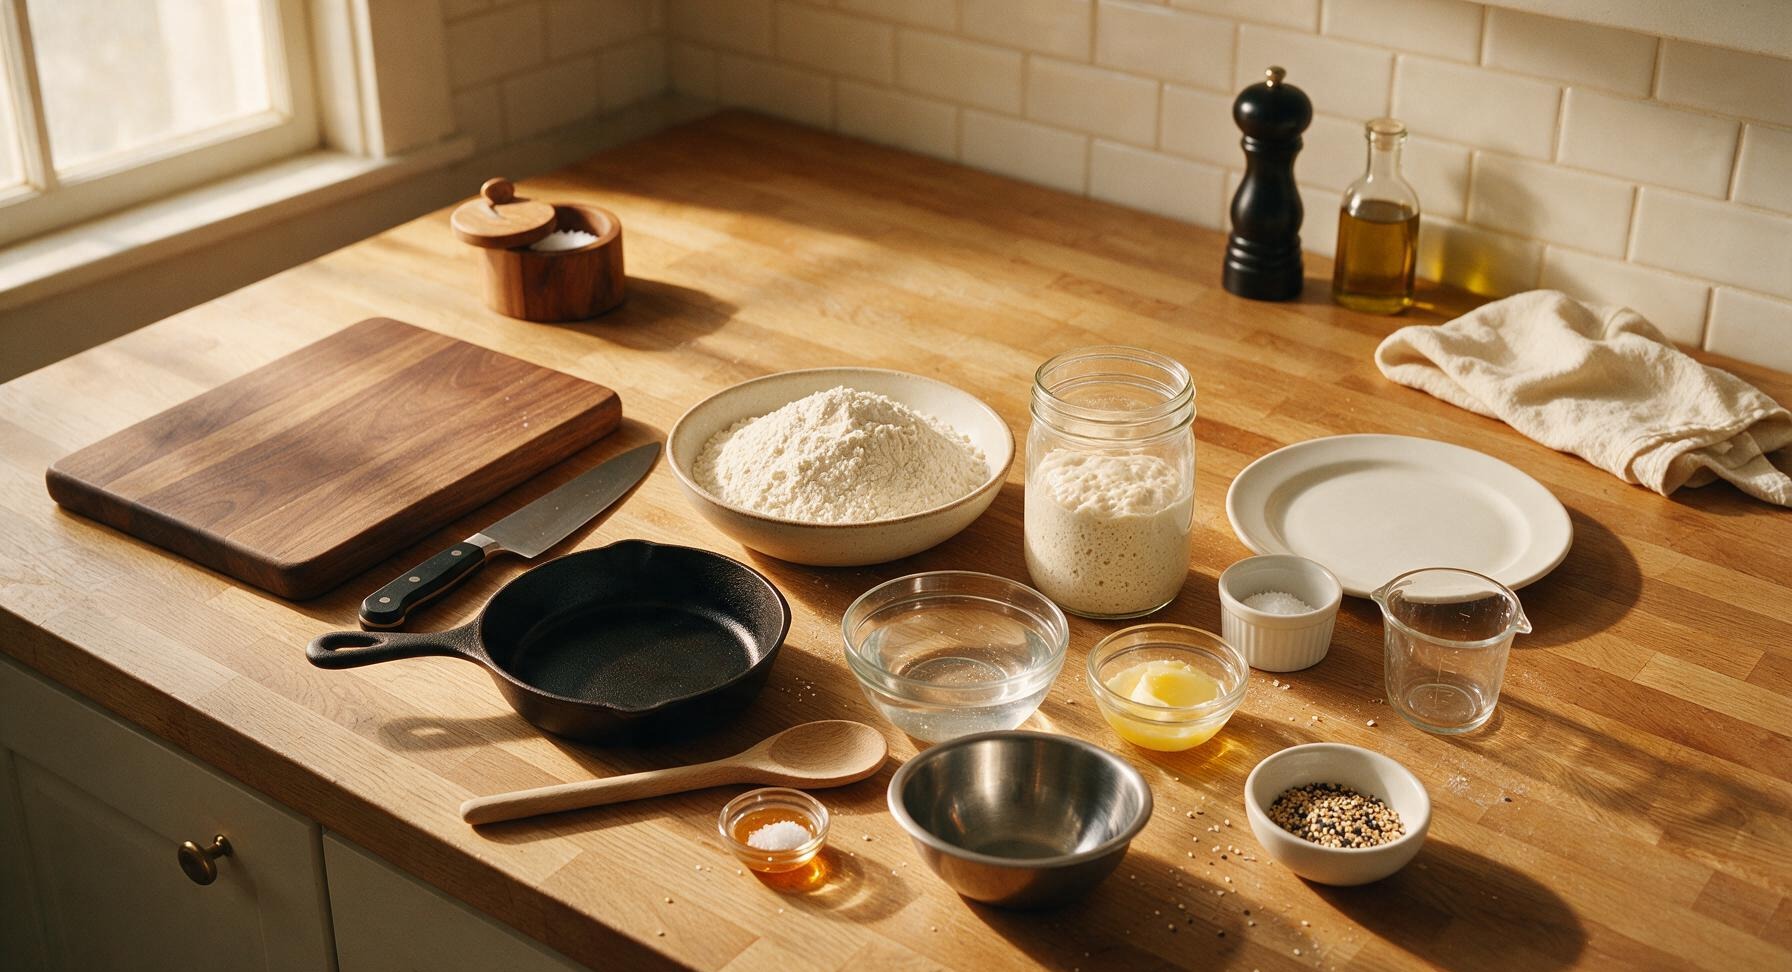
Unbleached bread flour (12-14% protein) 400g
Active 100% hydration sourdough starter (ripe, doubled in size) 150g
Lukewarm filtered water (90°F/32°C) 250g
Fine sea salt 8g
Unsalted butter, melted and cooled 30g (25g for dough, 5g for topping)
Raw honey 10g
Mixed sesame and poppy seeds (optional) 1 tbsp

Steps

1

Mix Shaggy Dough Base

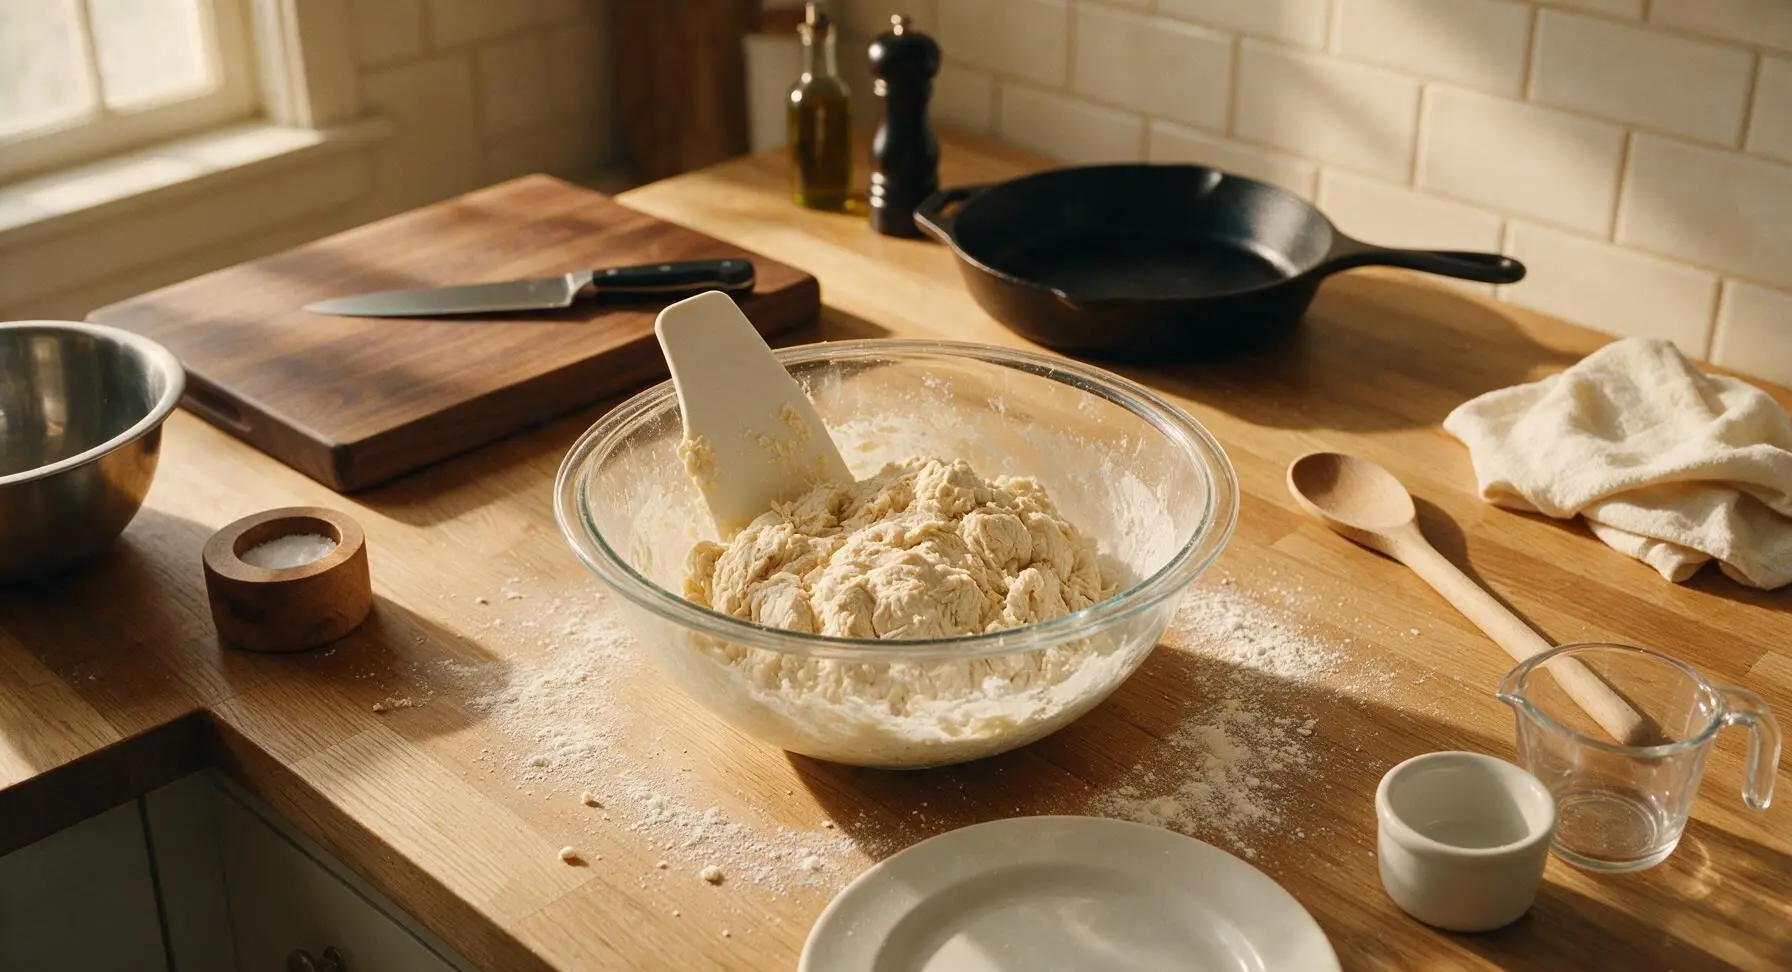
Set the large clear glass mixing bowl on the digital scale in its permanent back left position, taring to zero between additions. Add 400g unbleached bread flour, 150g ripe active sourdough starter, 250g lukewarm (90°F/32°C) filtered water, and 10g raw honey to the bowl. Use the flexible matte white silicone dough scraper to stir until every trace of dry flour is incorporated, forming a rough, shaggy, very sticky dough mass. Let the dough rest uncovered for 30 minutes (autolyse) to allow flour to hydrate and gluten to begin developing.
Step 1
step1:Mix Shaggy Dough Base
2

Incorporate Salt and Butter

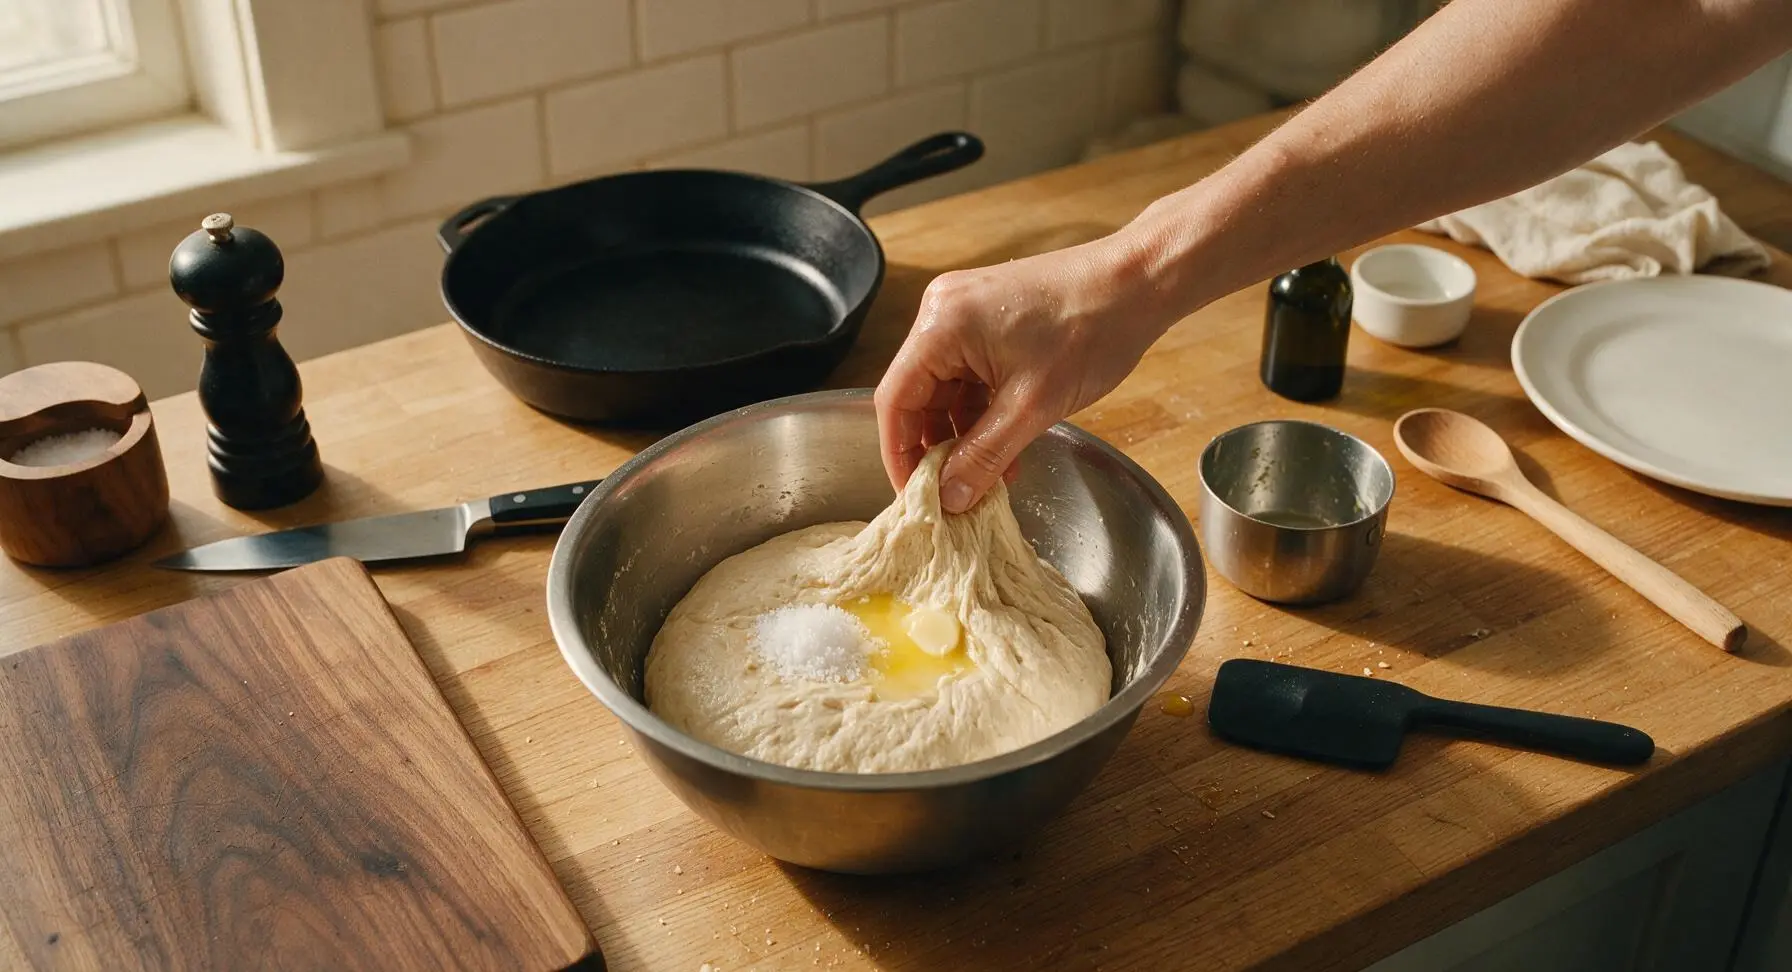
After the 30-minute autolyse, add 8g fine sea salt and 25g cooled melted unsalted butter (poured from the small brushed stainless steel measuring cup) to the top of the rested dough. Use pinching motions with clean, damp hands to work the salt and butter fully into the dough, folding the dough over itself repeatedly until no greasy streaks remain and the dough feels smoother, about 2 minutes. Return the bowl to the central work zone for bulk fermentation.
Step 2
step2:Incorporate Salt and Butter
3

Stretch and Fold Dough

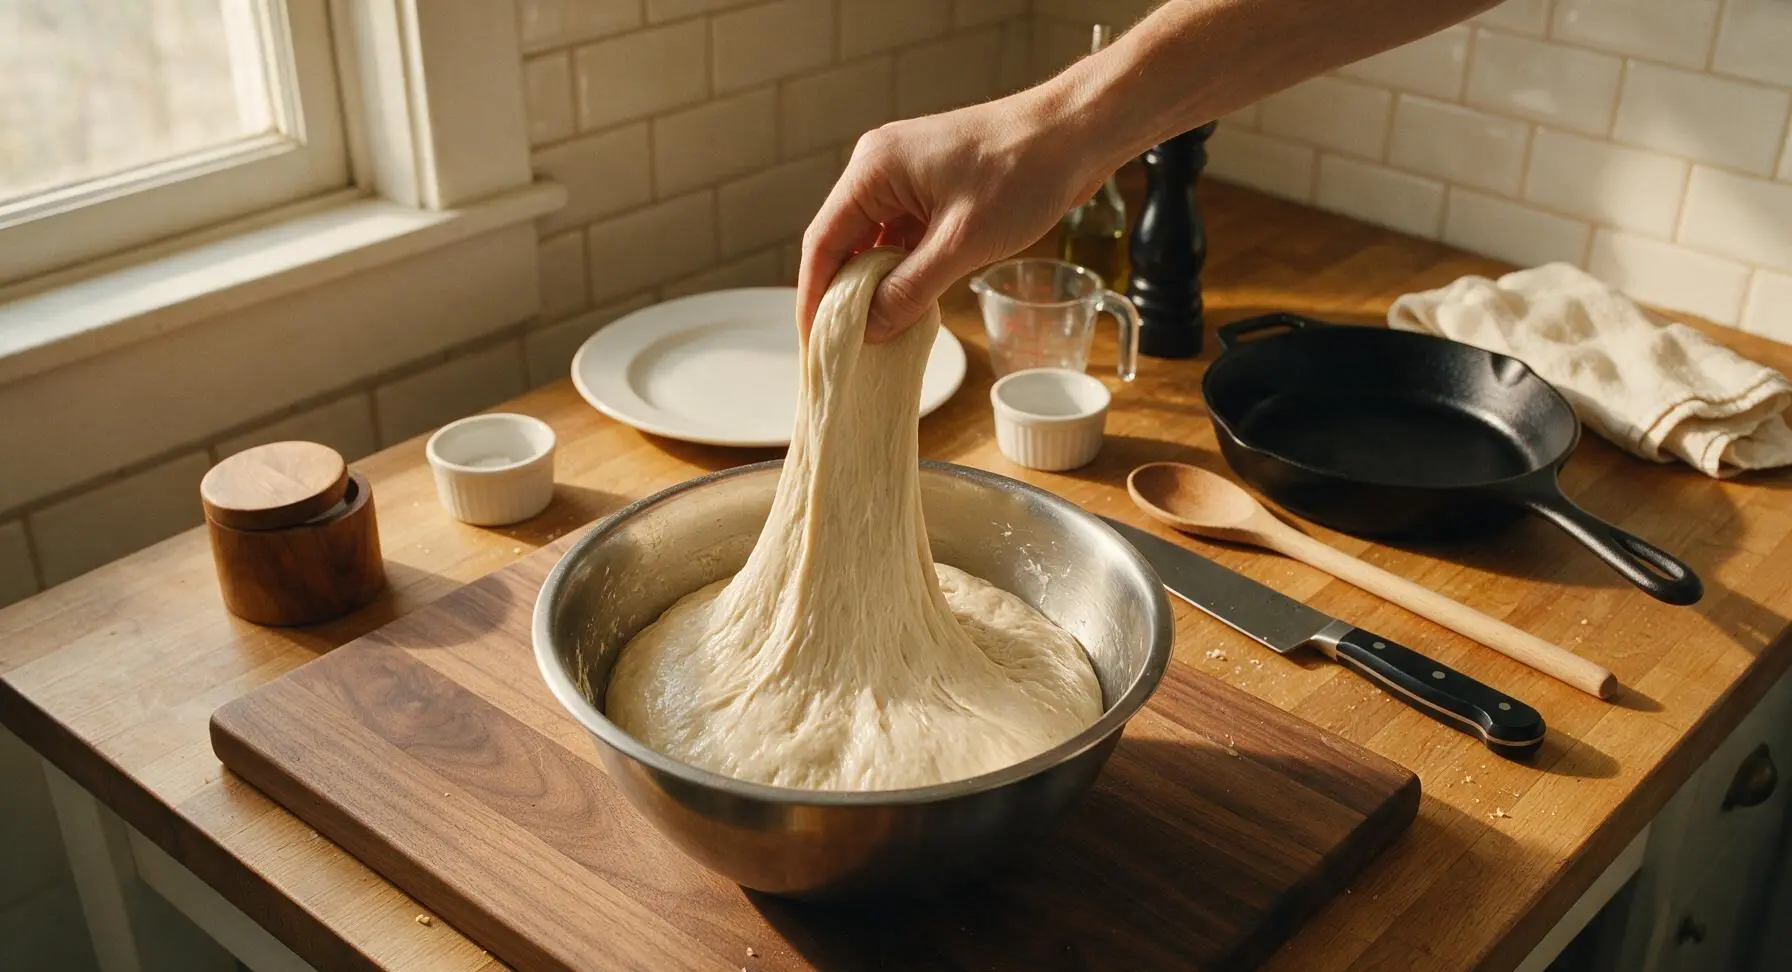
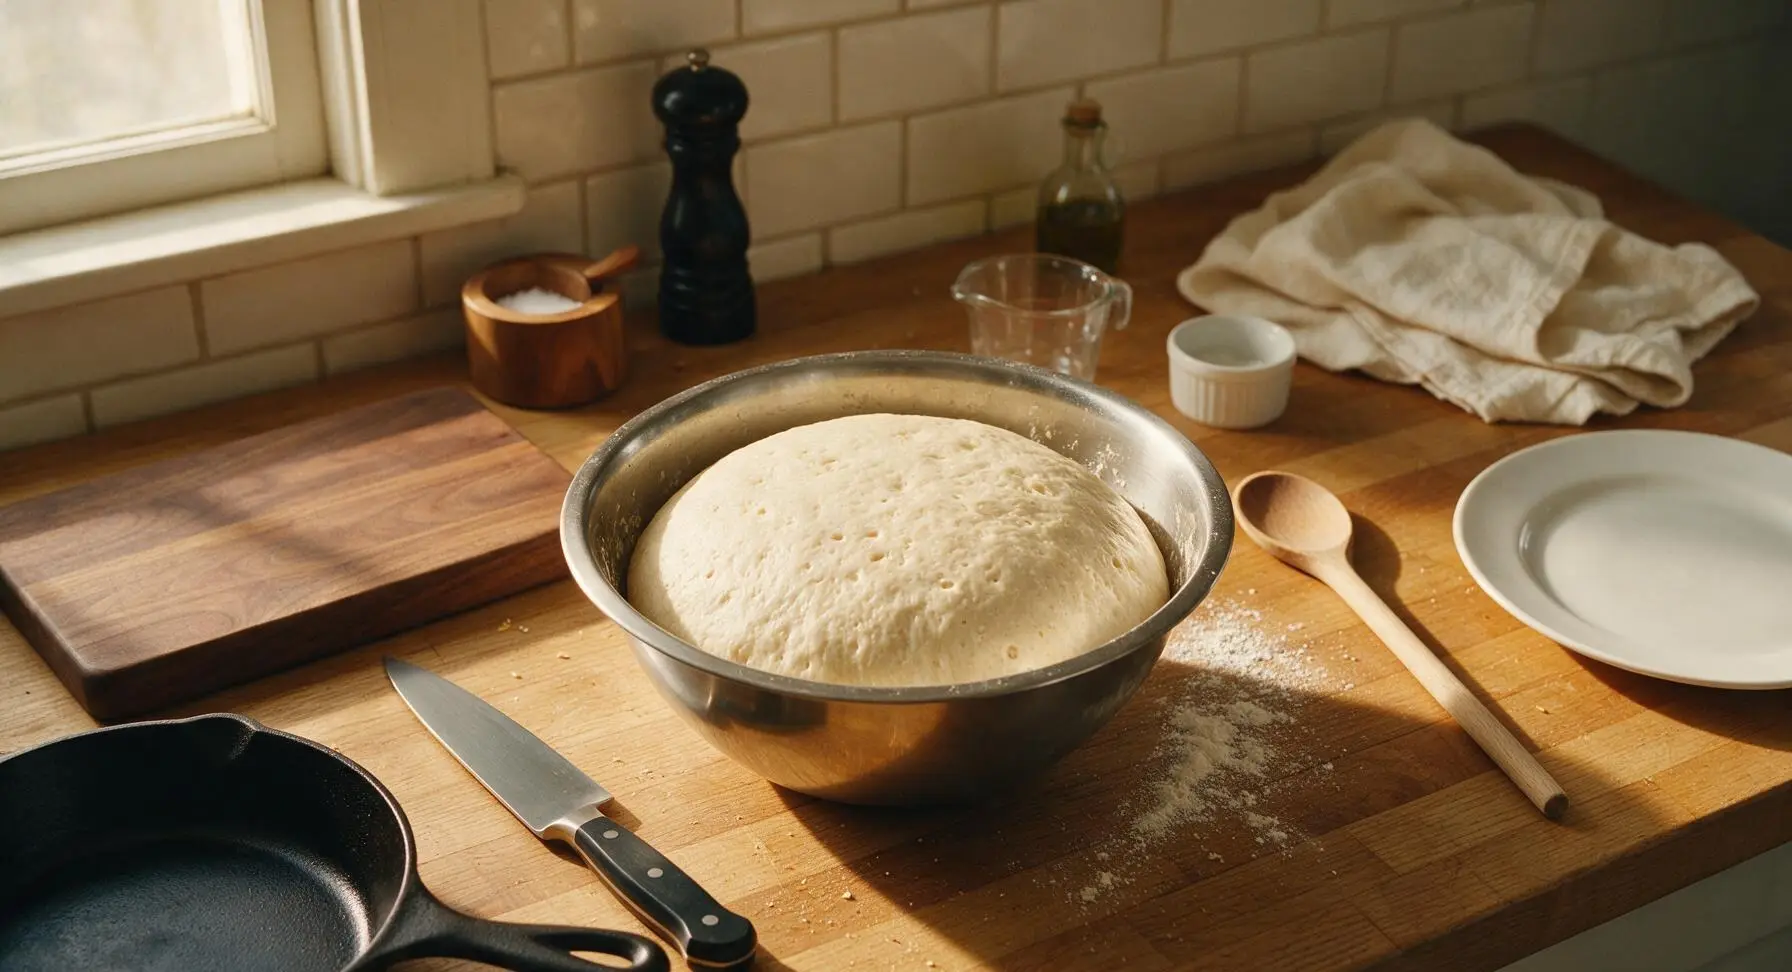
Over the next 2.5 hours, perform 4 sets of stretch and folds, one every 30 minutes: with damp hands, grab one edge of the dough, pull it up gently until it resists, then fold it over the top of the dough mass. Rotate the bowl a quarter turn and repeat 3 more times per set, covering the bowl loosely with a clean damp cloth (stored under the counter when not in use) between sets. After the final set, the dough will be smooth, elastic, and risen by roughly 50%, with visible bubbles on the surface and along the sides of the bowl.
Step 3
step3:Stretch and Fold Dough
Step 3
step3:Stretch and Fold Dough
4

Divide and Shape Rolls

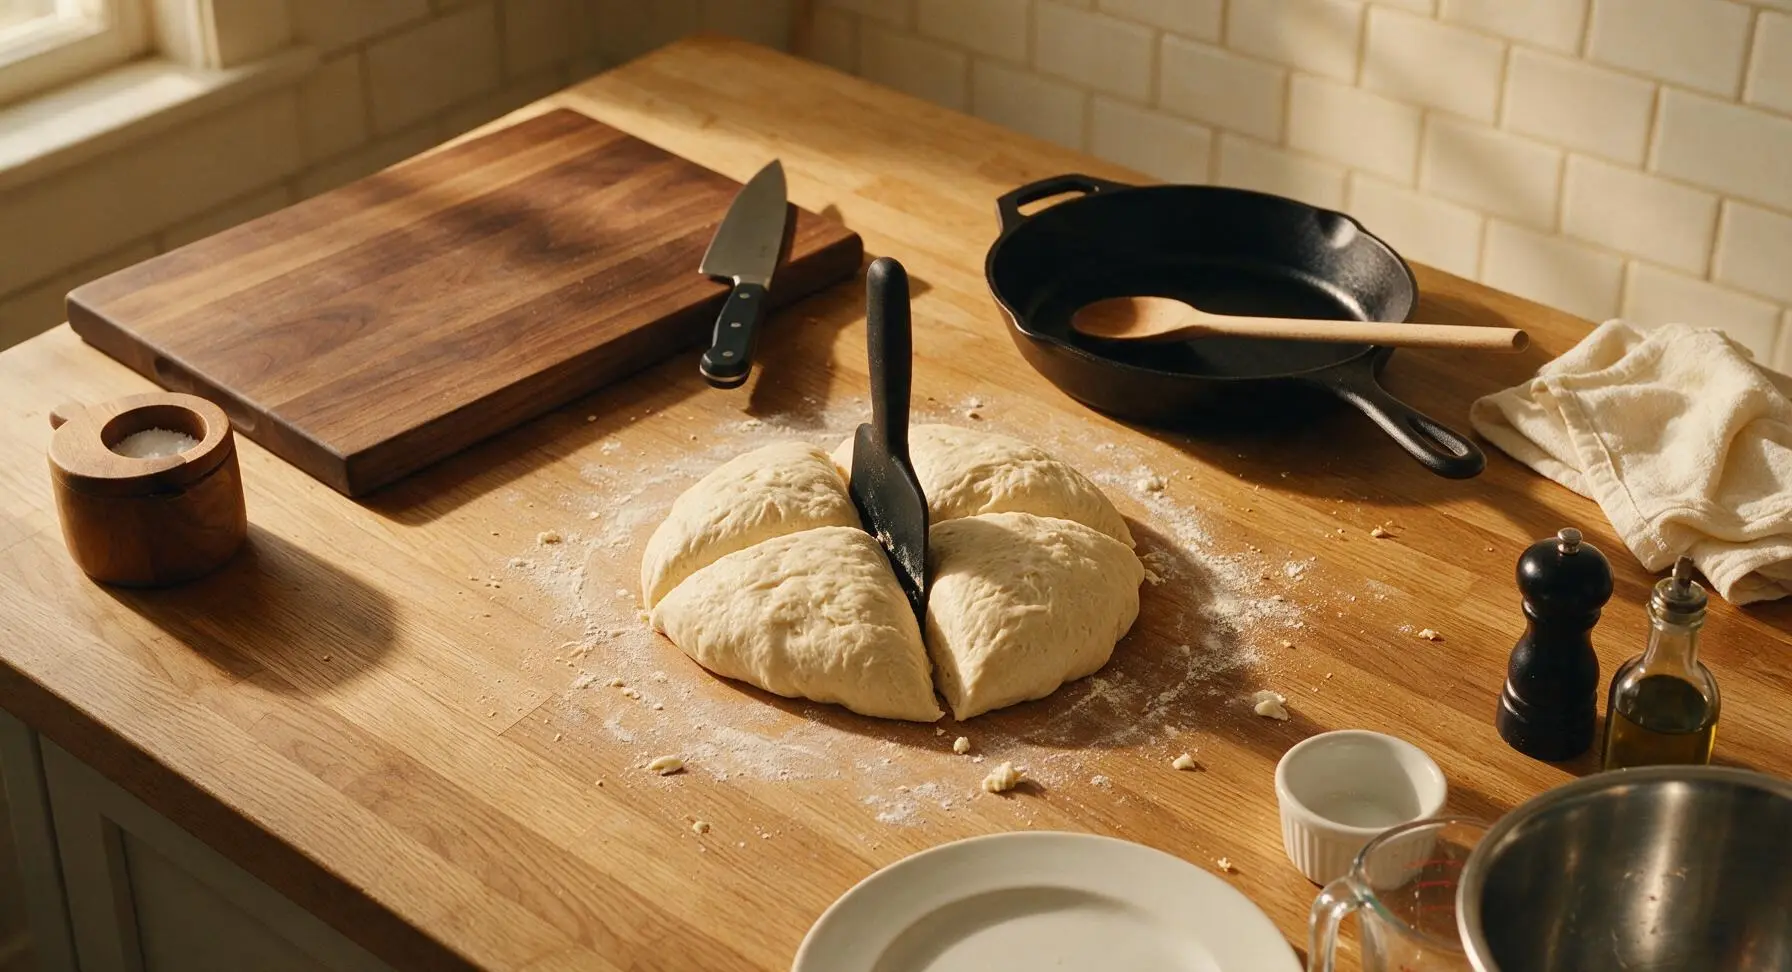
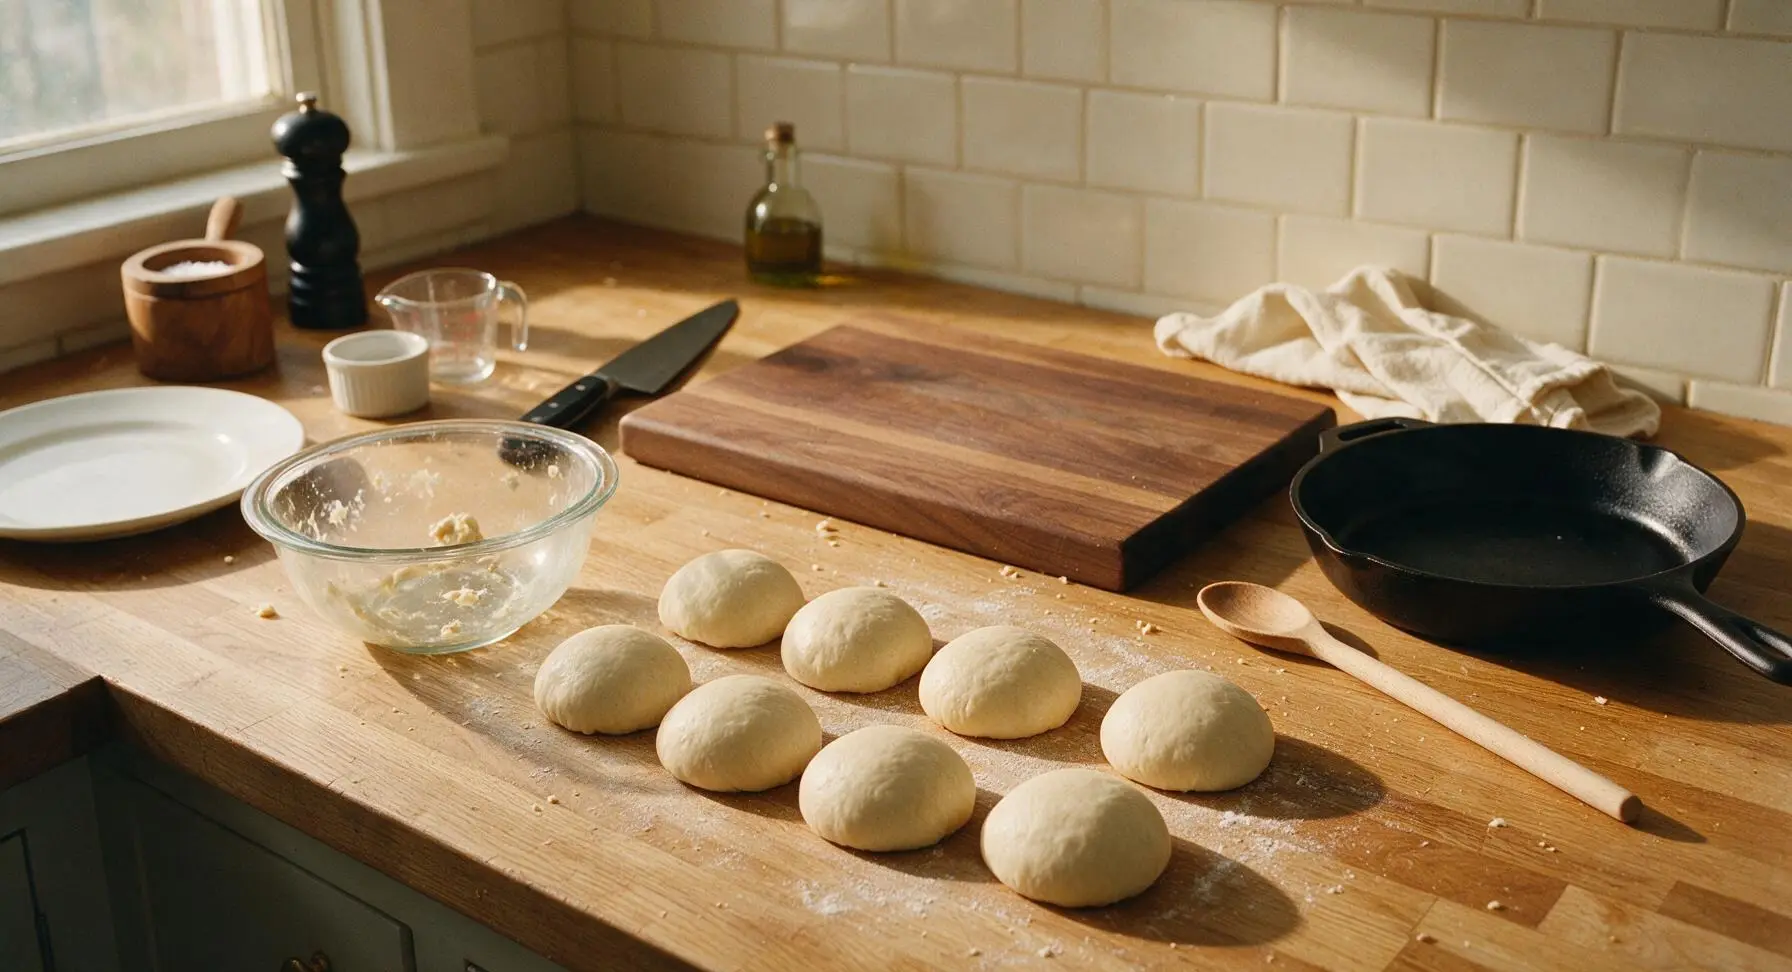
Lightly flour a small section of the central counter work zone. Tip the risen dough out of the bowl using the silicone scraper, taking care not to deflate it too much. Use the scraper to divide the dough evenly into 8 equal pieces, each roughly 105g. To shape each roll: pull the edges of each dough piece down and under to form a tight, smooth top surface, pinching the seam closed at the bottom. Roll each piece gently on the unfloured section of counter to seal the seam, creating a tight round ball.
Step 4
step4:Divide and Shape Rolls
Step 4
step4:Divide and Shape Rolls
5

Proof Shaped Rolls

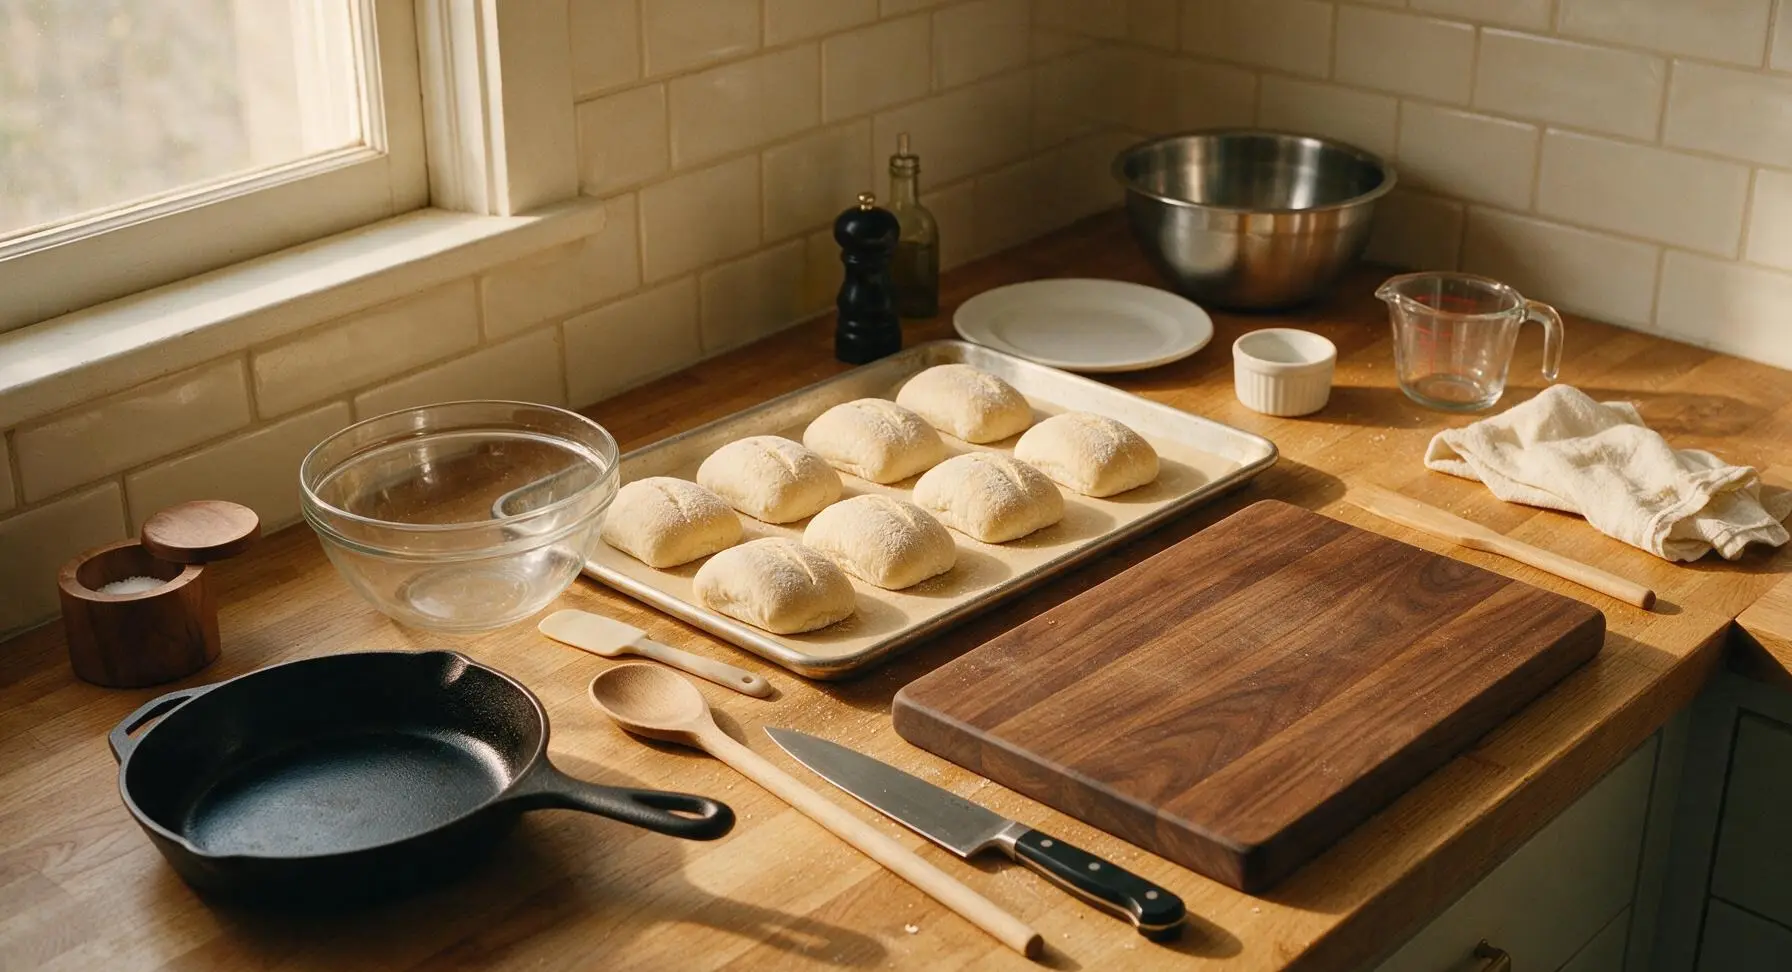
Line the rimmed natural aluminum baking sheet with the cut unbleached parchment paper. Arrange the shaped dough balls seam-side down on the parchment, leaving 5cm of space between each to allow for rising. Lightly dust the tops of the rolls with a thin layer of flour, then cover loosely with a damp cloth and let them proof at room temperature for 1.5 to 2 hours, until the rolls have doubled in size, and a gentle poke with a floured finger leaves an indent that slowly springs back halfway.
Step 5
step5:Proof Shaped Rolls
6

Score and Top Rolls

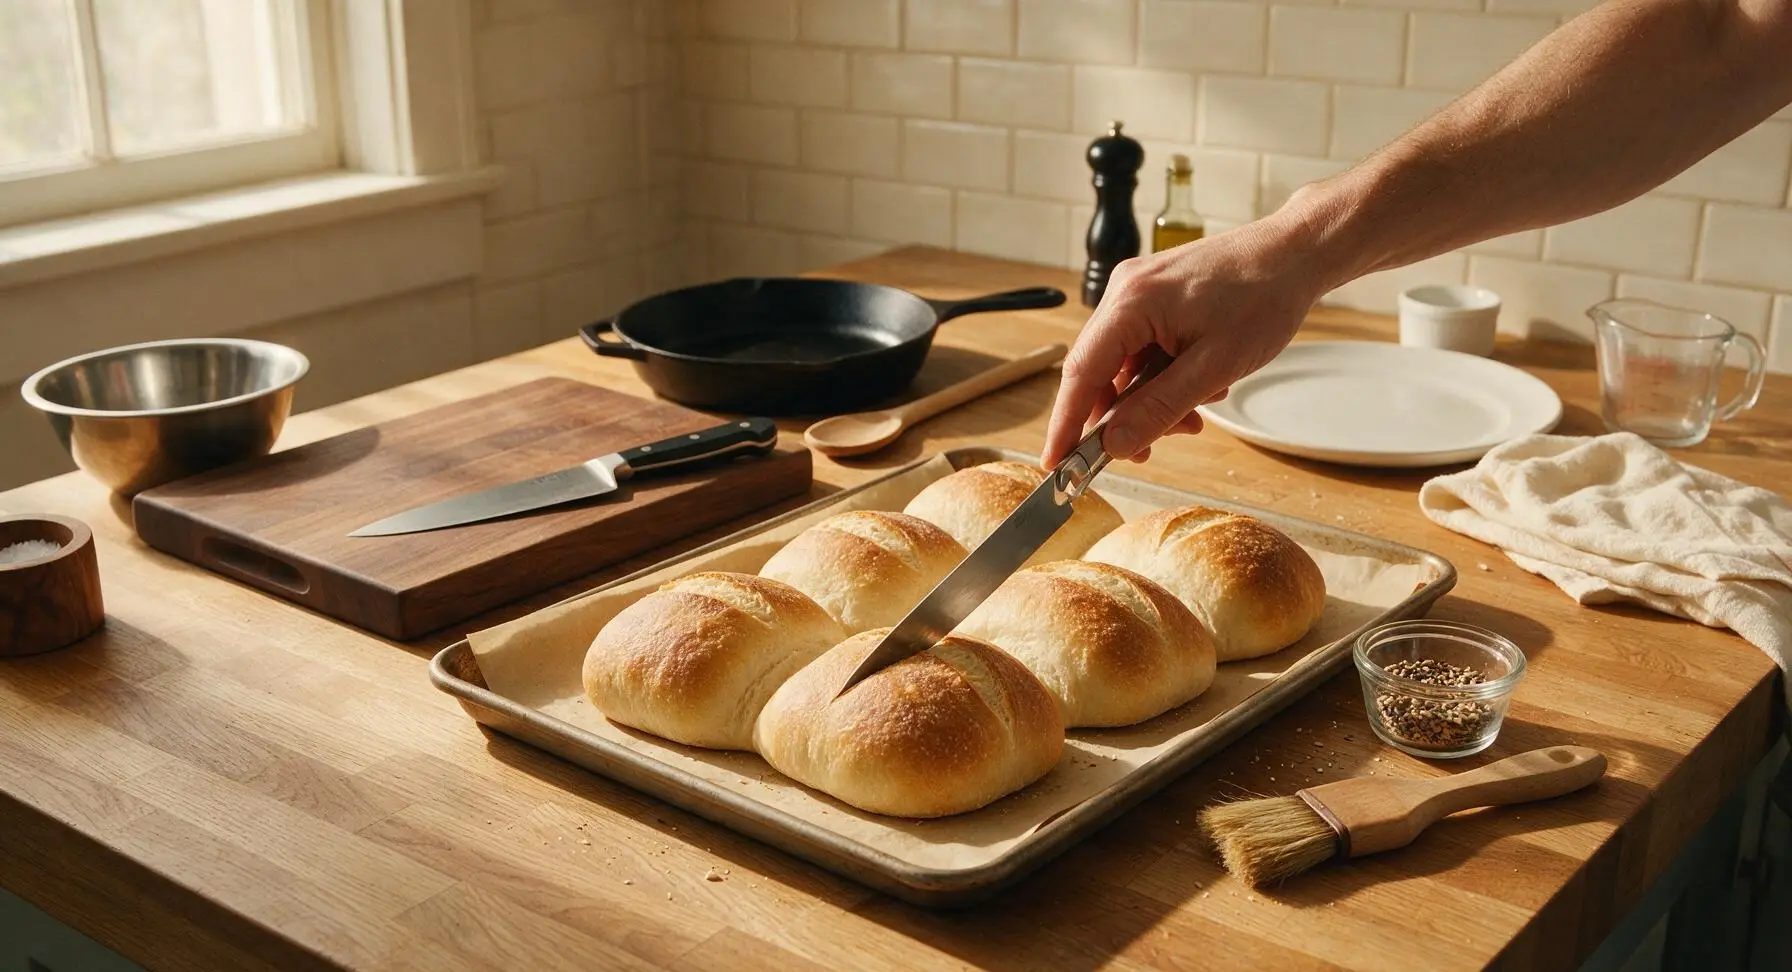
When rolls are fully proofed, place a rack in the center of the oven and preheat to 400°F (200°C). Use the stainless steel bread lame to make a single 5mm deep, 5cm long diagonal slash across the top of each roll. If using sesame and poppy seeds, lightly brush the top of each roll with a tiny bit of water using the boar bristle pastry brush, then sprinkle seeds evenly over the slashes. The small clear glass ramekin holds the mixed seed topping.
Step 6
step6:Score and Top Rolls
7

Bake Rolls Until Golden

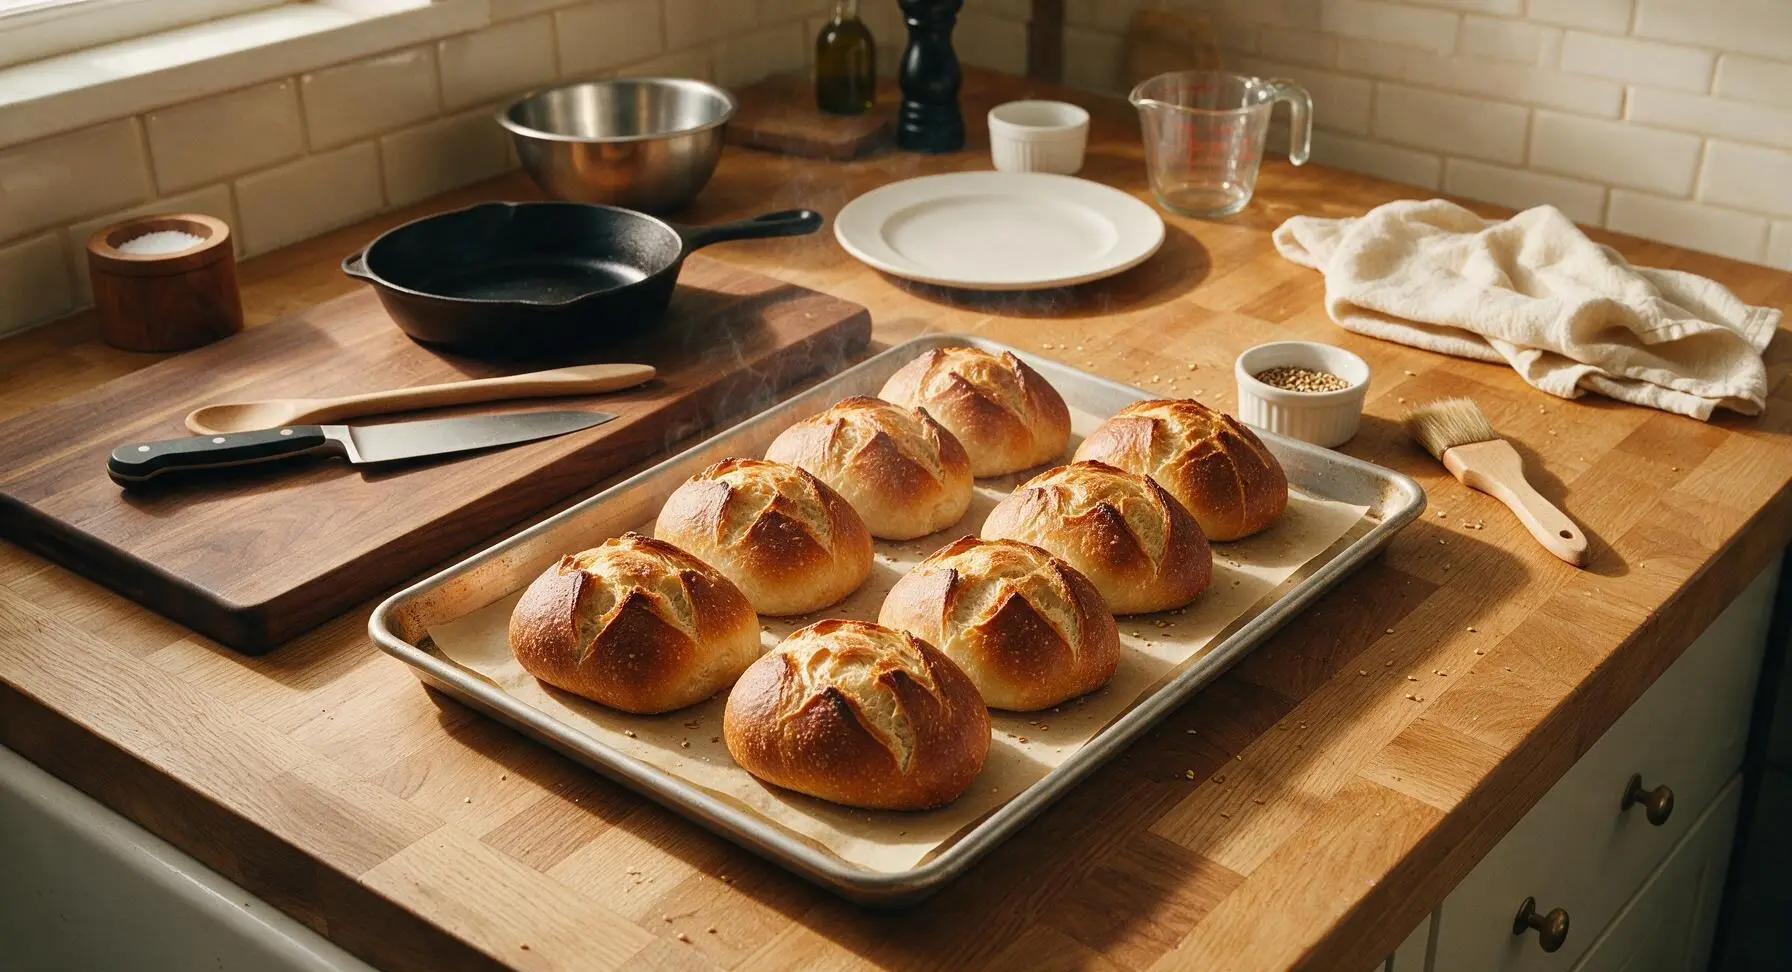
Place the baking sheet on the center oven rack, and bake for 22 to 25 minutes, rotating the sheet halfway through baking, until the rolls are deep golden brown on top, with an internal temperature of 200°F (93°C) measured at the center of a roll. The slashes will have opened up into soft, golden cracks, and the crust will sound hollow when tapped on the bottom.
Step 7
step7:Bake Rolls Until Golden
8

Cool and Serve Rolls

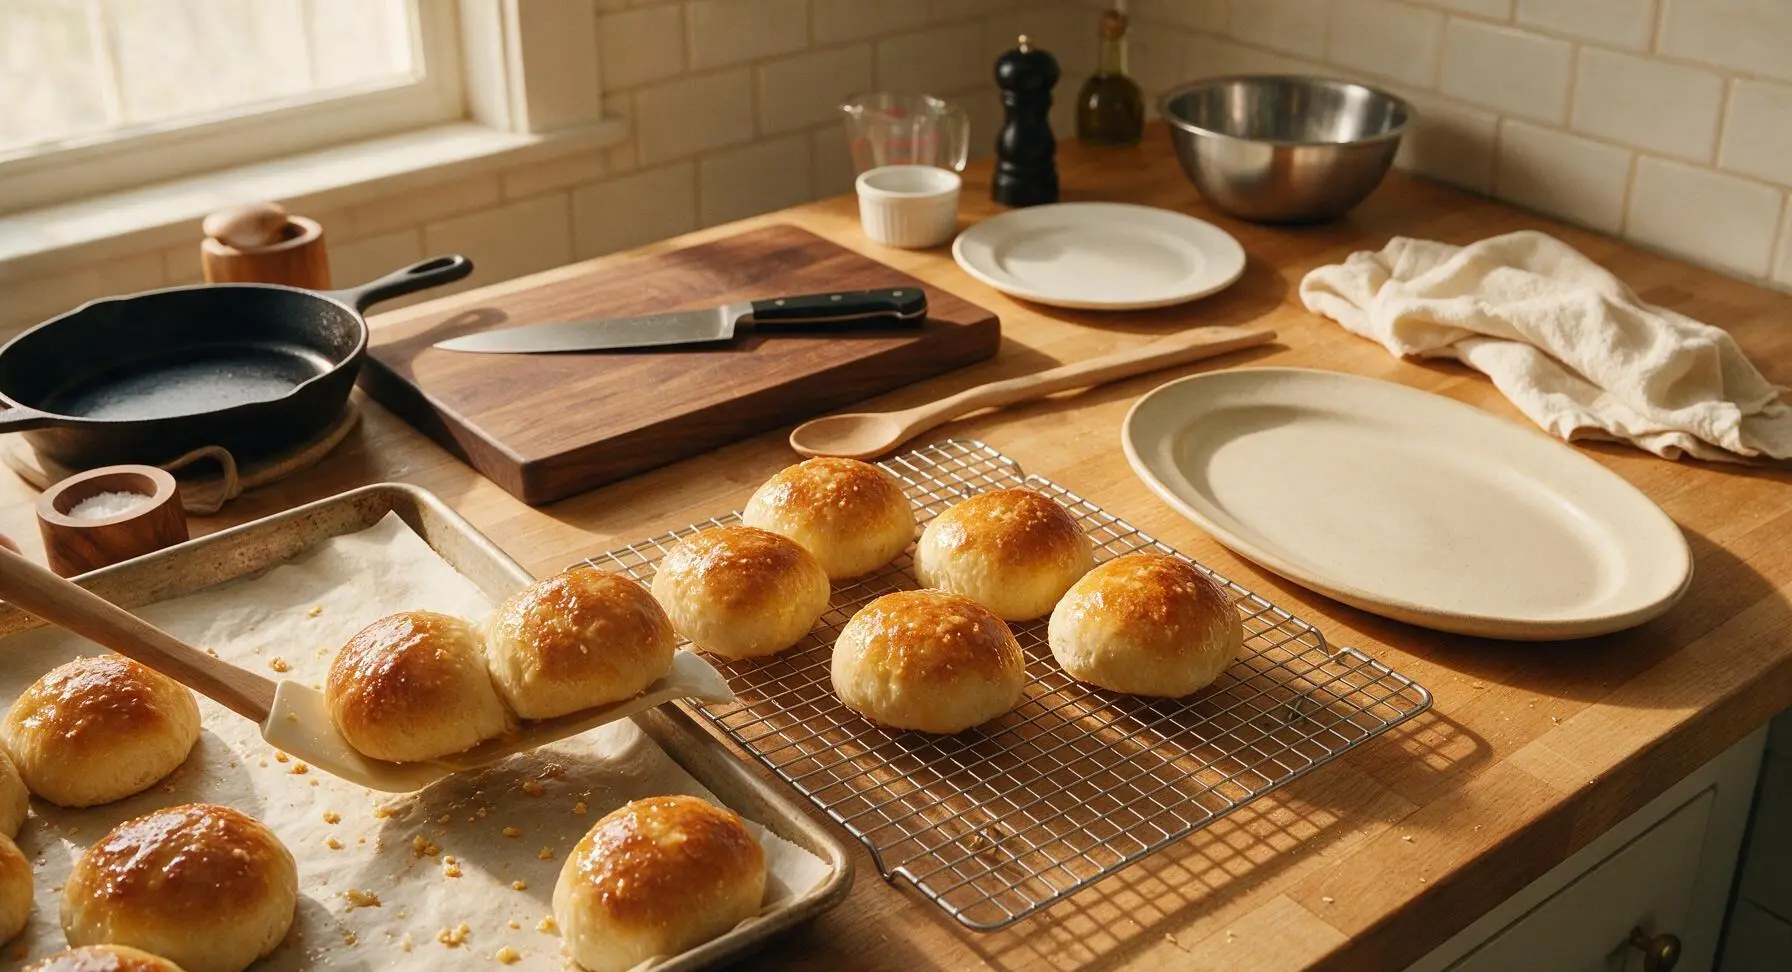
Immediately after removing the rolls from the oven, use the pastry brush to brush the tops with the remaining 5g of melted butter for a soft, glossy crust. Transfer the rolls to the matte chrome wire cooling rack to cool for at least 20 minutes before slicing, to allow the crumb to set. Once cooled, arrange rolls on the hand-thrown matte cream ceramic oval platter for serving.
Step 8
step8:Cool and Serve Rolls

Tips

1.Test your sourdough starter for ripeness before mixing: drop a small spoonful into a glass of water—if it floats, it is active enough to leaven the rolls; if it sinks, wait 30-60 minutes and test again to avoid dense, slow-rising rolls with weak tangy flavor.
2.Keep your hands lightly damp when handling the high-hydration dough, instead of adding extra flour: too much extra flour during folding and shaping will result in tough, dense rolls instead of soft, airy ones.
3.Let rolls cool fully for 20 minutes before slicing: cutting into hot rolls causes the soft, gelatinized crumb to compress and turn gummy, as the internal moisture has not had time to set evenly.


✨ You May Also Like

Desserts & Baking
🍜 Italy

Creamy, coffee-kissed classic Northern Italian no-bake dessert, with layers of rum-spiked mascarpone cream, soft ladyfingers, and a rich cocoa dusting.

⏱️ 4 hours 3Desserts & Baking ★ 4.7
Desserts & Baking
🍜 France

Flaky, shatteringly crisp, buttery French croissants with golden exteriors and soft, airy layered interiors, perfect for pairing with coffee for a special morning treat.

⏱️ 12 hours Desserts & Baking ★ 4.5
Desserts & Baking
🍜 United States

Warm, spiced baked apples topped with a fluffy golden biscuit crust, this cozy dessert pairs perfectly with vanilla ice cream for cool-weather comfort.

⏱️ 55 minuteDesserts & Baking ★ 4.6
Desserts & Baking
🍜 United States

A star-spangled classic American blueberry pie with buttery flaky crust and bright sweet-tart filling, perfect for summer patriotic gatherings.

⏱️ 1 hour 25Desserts & Baking ★ 4.7
Desserts & Baking
🍜 United States

A beloved no-bake regional Maine candy with a chewy coconut-potato center coated in rich dark chocolate, a New England holiday staple since the 1870s.

⏱️ 2 hours 3Desserts & Baking ★ 4.8
Desserts & Baking
🍜 France

Luxuriously creamy, floral frozen custard made with aromatic Tahitian vanilla beans, boasting a smooth, rich texture that melts slowly on the tongue.

⏱️ 3 hours 3Desserts & Baking ★ 4.5

Sourdough Sandwich Rolls:Frequently Asked Questions

1.Can I use regular all-purpose flour instead of the 12-14% protein unbleached bread flour called for? ▾
For that signature chewy, sturdy crumb that holds stacked burgers, deli meats, or picnic fillings, 12-14% protein unbleached bread flour is ideal. If you only have all-purpose, add 2 tablespoons of vital wheat gluten per 3 cups of AP to boost protein, but expect a slightly softer crumb that may squish under heavy, juicy fillings.
2.How do I know my 100% hydration sourdough starter is ready to use for these rolls? ▾
Your starter is ready when it has doubled in volume 4-6 hours after its last feeding, is bubbly across the top and throughout, and passes the float test: a small spoonful dropped in room-temperature water will bob on the surface. Under-risen starter makes dense, flat rolls, while overripe starter produces weak, off-flavored crumb.
3.Why is the water specified as 90°F/32°C, and what happens if it’s too hot or cold? ▾
Lukewarm 90°F water creates the ideal environment for your sourdough culture to ferment steadily without shocking it. Water hotter than 110°F will kill the wild yeast in your starter, leading to zero rise, while water colder than 80°F will slow fermentation dramatically, adding hours to proof time and reducing that classic sourdough tang.
4.The recipe says these rolls are sturdy for sandwiches—will they be tough instead of soft inside? ▾
Absolutely not! The melted, cooled unsalted butter in the dough tenderizes the crumb to keep it soft and pillowy inside, while high-protein bread flour builds just enough structure to prevent sogginess or squishing. You’ll get a crisp blistered crust and light, tangy, airy crumb that holds fillings without feeling tough or dense.
5.Can I proof these rolls in the fridge instead of at room temperature for deeper flavor? ▾
Definitely. After shaping, you can do a 12-18 hour cold proof in the fridge for a richer, nuttier sourdough tang and more flexible scheduling. When you’re ready to bake, let the rolls rest at room temperature for 20 minutes to take the chill off, then bake as directed for the same light, chewy, blistered-crust result.
6.How do I get that crisp, blistered crust described in the recipe every time? ▾
That signature blistered crust comes from well-fermented active dough and steam during the first 10 minutes of baking. Spritz the tops of rolls lightly with filtered water right before baking, or set a small pan of hot water on the lower oven rack to create steam, which sets the crust and lets those bubbly blisters form as the rolls spring.
7.Can I swap table salt or kosher salt for the fine sea salt in the recipe? ▾
Fine sea salt distributes evenly through dough to regulate yeast, boost tang, and strengthen gluten, but you can swap it with simple adjustments. If using table salt, cut the amount by 25% since it is denser; if using coarse kosher salt, increase the amount by 20% and dissolve it in your lukewarm water first to avoid gritty spots.
8.What’s the best way to store these rolls to keep them fresh and soft? ▾
Let rolls cool completely to room temperature for 1 full hour after baking, then store them in a sealed paper bag tucked inside a loose plastic bag at cool room temperature for up to 4 days. For longer storage, wrap individual rolls tightly and freeze for up to 3 months, reheating in a 350°F oven for 5 minutes to refresh the crust and soft crumb.
9.My rolls turned out dense instead of light and airy—what went wrong? ▾
Dense rolls almost always trace back to one of three common issues: your sourdough starter wasn’t fully ripe and active when mixed, you under-kneaded the dough so it didn’t build enough gluten to trap fermentation gas, or you cut proof time short before the rolls were fully puffed and held a soft indent when poked.

Comments (20)

2 days ago

OMG these sourdough sandwich rolls are a total game changer! I made them for our family Sunday pulled pork dinner and everyone went back for seconds. The crust was perfectly chewy, the inside soft and fluffy enough to hold all the toppings without getting soggy. Already added this to my weekly meal prep rotation!

yesterday

So glad these were a hit with your family, Jessica! They really do hold up perfectly to hearty fillings like pulled pork—great call serving them that way!

3 days ago

First time ever working with sourdough and I was so nervous these would flop! Followed the directions exactly, let my starter get nice and bubbly like the note said, and they turned out SO good. My roommate thought I bought them from the fancy bakery down the street lmao

2 days ago

Right?! I was also shocked how non-intimidating this recipe is for new sourdough bakers. I messed up my first two loaf attempts before nailing these rolls!

2 days ago

Love hearing this from new sourdough bakers! The key is definitely that active, bubbly starter—so proud of you for nailing it on the first try!

1 week ago

Made these for our neighborhood block party potluck last weekend and they were gone in 10 minutes flat. People kept asking where I bought them, couldn’t believe I baked ‘em at home. Perfect size for burger patties too, fyi

5 days ago

These hold up so well in the freezer! I baked a double batch on Sunday, sliced them, and froze individual portions for quick workweek lunches. Toast ‘em for 2 minutes and they taste fresh baked. 10/10

3 days ago

Oh thanks for the freezer tip! I’ve been hesitant to bake a full batch since it’s just me and my partner, this is perfect

2 weeks ago

Tried these for my son’s high school graduation cookout and they were chef’s kiss. Only issue I had was my rolls spread a little more than I expected on the baking sheet, so they were a touch flatter than the photos. Still tasted incredible, though!

2 weeks ago

So happy they tasted great for the graduation cookout—congrats to your son! If your rolls spread too much next time, try chilling the shaped dough in the fridge for 30 minutes before baking, that helps them hold their tall shape!

1 week ago

I had the same exact issue my first batch! The fridge chill trick totally fixed it for me, my second round looked just like the recipe photos

30 minutes ago

I’ve tried 3 different sourdough roll recipes online and this is by far the best one. The crumb is light but sturdy, the sourdough flavor is present but not overpowering at all. Didn’t change a single thing about the recipe, wouldn’t dare

5 minutes ago

Wait, do I *have* to use a Dutch oven for these? I live in a tiny dorm and don’t have access to one, would a regular baking sheet with a steam pan work?

just now

Great question! You don’t need a Dutch oven for these rolls. A regular baking sheet works perfectly—just add a few ice cubes to a preheated pan on the lower rack when you put the rolls in to create that steam for a nice crispy crust. Happy baking!

yesterday

Made these to go with my famous tomato soup for our church potluck and everyone raved. The slight tang of the sourdough pairs so perfectly with creamy soup, I’m never buying store bought sandwich rolls again

2 hours ago

Ugh, I think I messed these up? My rolls turned out really dense, didn’t rise much during the second proof. Did I probably use starter that wasn’t active enough? I’ve been struggling to keep my starter consistent lately

30 minutes ago

It sounds like underactive starter is the most likely culprit! Your starter should double in size 4-6 hours after feeding before you use it for this recipe. If your kitchen is on the colder side, you might also need to extend the bulk ferment time by an hour or two to let the dough rise properly.

5 minutes ago

I had this happen last winter when my apartment was 62 degrees! Moved my proofing dough to the top of the fridge where it’s warmer and they puffed right up. Don’t give up, this recipe is worth it!

1 week ago

My kids are obsessed with these! I made mini sliders with them for my daughter’s soccer team snack after practice and every single kid asked for seconds. Even the pickiest eater on the team ate two, that’s a win in my book

5 days ago

That makes my day to hear! There’s no better seal of approval than a team of hungry soccer players. Mini sliders on these rolls are such a fun idea, I’ll have to try that for my next game day get-together!

3 days ago

Swapped the honey for maple syrup and used melted vegan butter instead of dairy butter, and these still turned out incredible! Perfect for my vegan meal prep, they make amazing tempeh sandwich buns

yesterday

25 minute cook time is no joke! I was worried it would take all afternoon to bake these, but it was so quick once the proofing was done. Used them for French dip sandwiches last night and they soaked up the au jus perfectly without falling apart

2 days ago

These are exactly what I’ve been looking for! Store bought sourdough rolls are always too hard or too gummy, but these have the perfect texture. Brushed them with garlic butter right when they came out of the oven and *chef’s kiss*

yesterday

Garlic butter is such a good call! I did that too when I made them last week, made the whole house smell amazing for hours

1 week ago

I made these for my husband’s first work potluck since we got married and he said all his coworkers were begging for the recipe. Win for the new wife! Only thing I’ll do different next time is add a little everything bagel seasoning on top before baking

5 days ago

Everything bagel seasoning on these is LIFE. I’ve done sesame seeds and poppy seeds too, but everything blend hits different

3 days ago

That’s such a fun win for you, congratulations! Everything bagel seasoning on top is such a smart hack, I love that customization idea. I’ll have to add that as a variation note on the recipe!

2 hours ago

Quick question for anyone who’s baked these at altitude! I’m at 6,000 feet in Colorado, do I need to adjust the flour amount or proof time at all? I’ve had so many bread recipes flop up here because I forgot to adjust

30 minutes ago

Great question for high altitude bakers! At 6,000 feet, add an extra 2 tablespoons of flour to the dough, and cut your final proof time by about 15 minutes to keep the rolls from over-rising and collapsing while baking. Hope that helps!

5 days ago

Had these with turkey and avocado for lunch three days in a row after baking them and they didn’t get stale at all! Way better than the cheap grocery store rolls that go rock hard after a day. Will be making these bi-weekly for sure

2 weeks ago

These rolls are perfect for my Sunday meal prep clients! I make a big batch every other week, portion them out, and they hold up for 5 days in the fridge no problem. The sourdough tang makes even basic turkey and cheese sandwiches feel fancy

1 week ago

That’s such a good point! I never thought about how much nicer these make boring weekday lunches. Way better than plain sliced bread

3 days ago

Hosting my first ever Friendsgiving this year and planning a sandwich bar for the main event. Would these rolls hold up to sliced turkey, cranberry sauce, gravy, and all the messy sides? I don’t want people having sandwich structural failures mid-meal lmao

2 days ago

These rolls were literally made for hearty sandwich fillings like that! They’re sturdy enough to hold up to gravy and cranberry sauce without getting soggy, especially if you give them a light toast first. Your Friendsgiving sandwich bar is going to be a hit!

yesterday

I used these for my Friendsgiving sandwich bar last year! Zero sogginess, zero structural failures, everyone raved. You’re gonna love ‘em

yesterday

Can I use discard for these rolls? I have a ton of extra sourdough discard in my fridge I need to use up before I feed my starter again this weekend, would that work here?

2 hours ago

This recipe works best with active, fed starter rather than straight discard, but you can use 1 cup of discard and add 1/4 tsp of instant yeast to the dough to help it rise properly. It will have a slightly milder sourdough flavor, but still taste delicious!

2 hours ago

Wait has anyone tried making these into breakfast sandwiches? I’m thinking egg, cheese, and crispy bacon on a toasted roll, would that work? I feel like the sourdough tang would pair so good with salty bacon

30 minutes ago

I did that last weekend! Toasted the roll, added a runny egg, cheddar, bacon, and a little hot honey. Best breakfast sandwich I’ve ever made at home, no cap

5 minutes ago

That sounds absolutely incredible! Breakfast sandwiches are one of our favorite ways to use these rolls—the chewy crust holds up perfectly to runny egg yolk without getting soggy. I’m adding that to my weekend menu for sure!



