
St. Louis Style Pizza Burnt Ends

title 1
St. Louis Style Pizza Burnt Ends
⏱️ cook time 35 minutes
🍽️ servings 6
⚡ Difficulty easy

intro

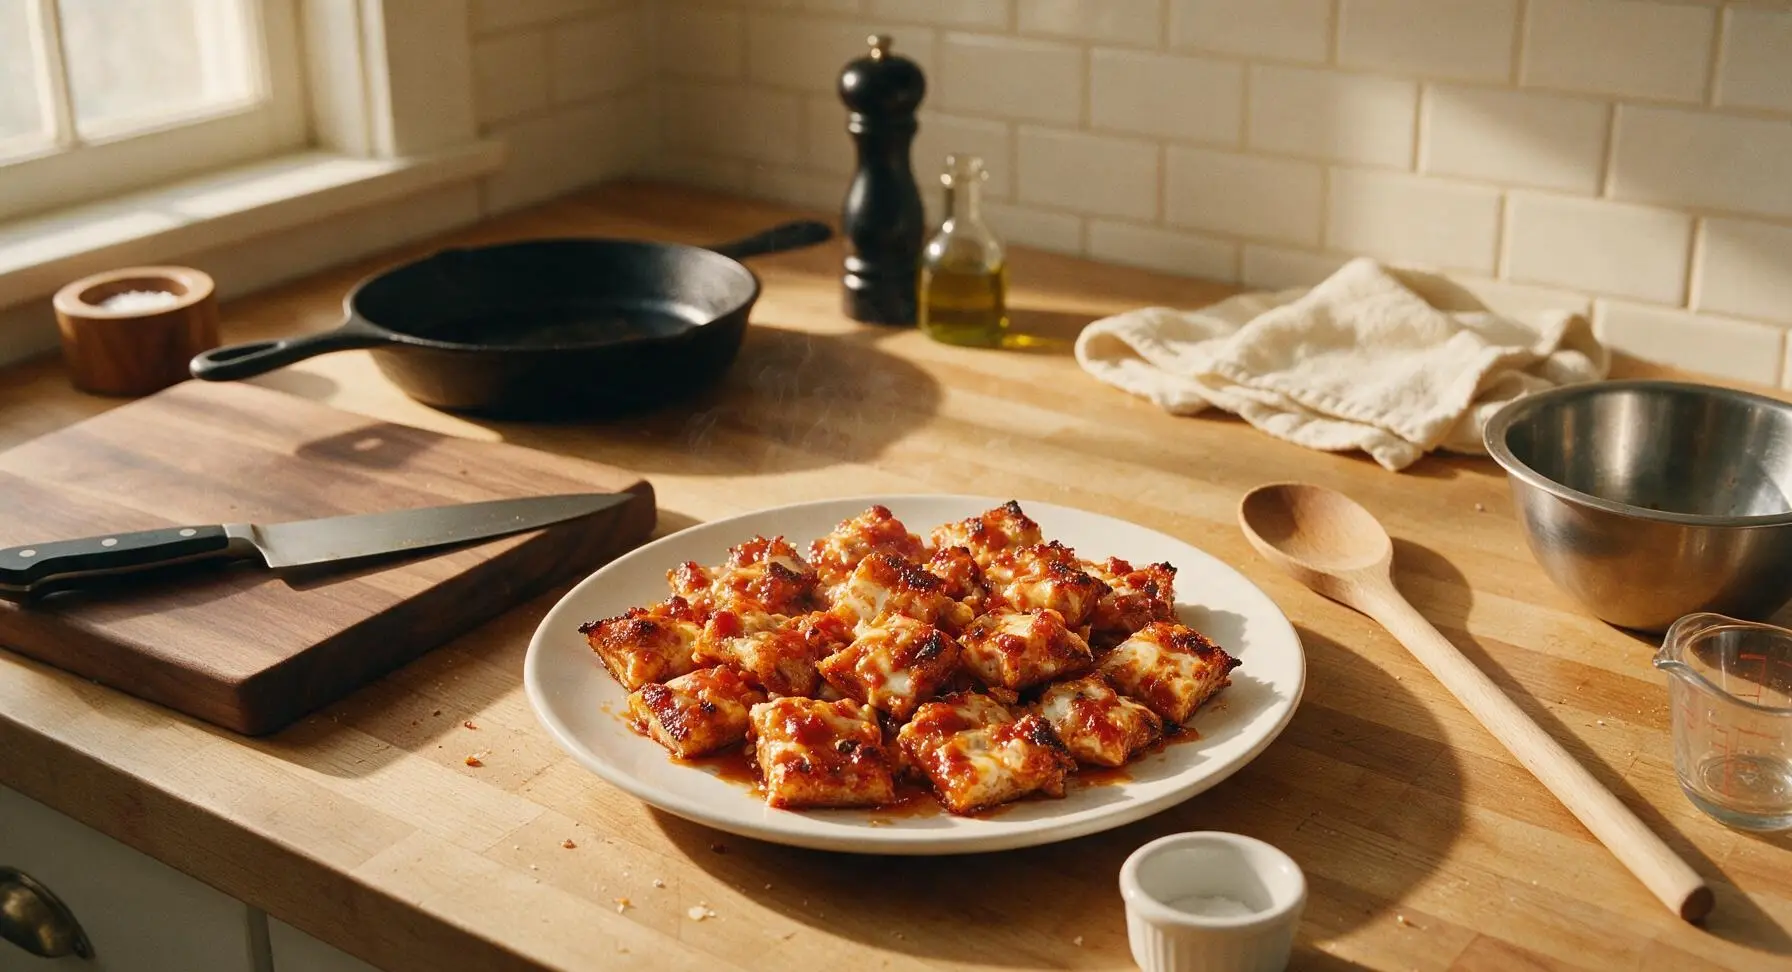
Crispy, cheese-crusted 1-inch pizza cubes tossed in tangy tomato-butter glaze, caramelized to sticky burnt end perfection, loaded with signature St. Louis provel cheese and savory toppings.

Ingredients
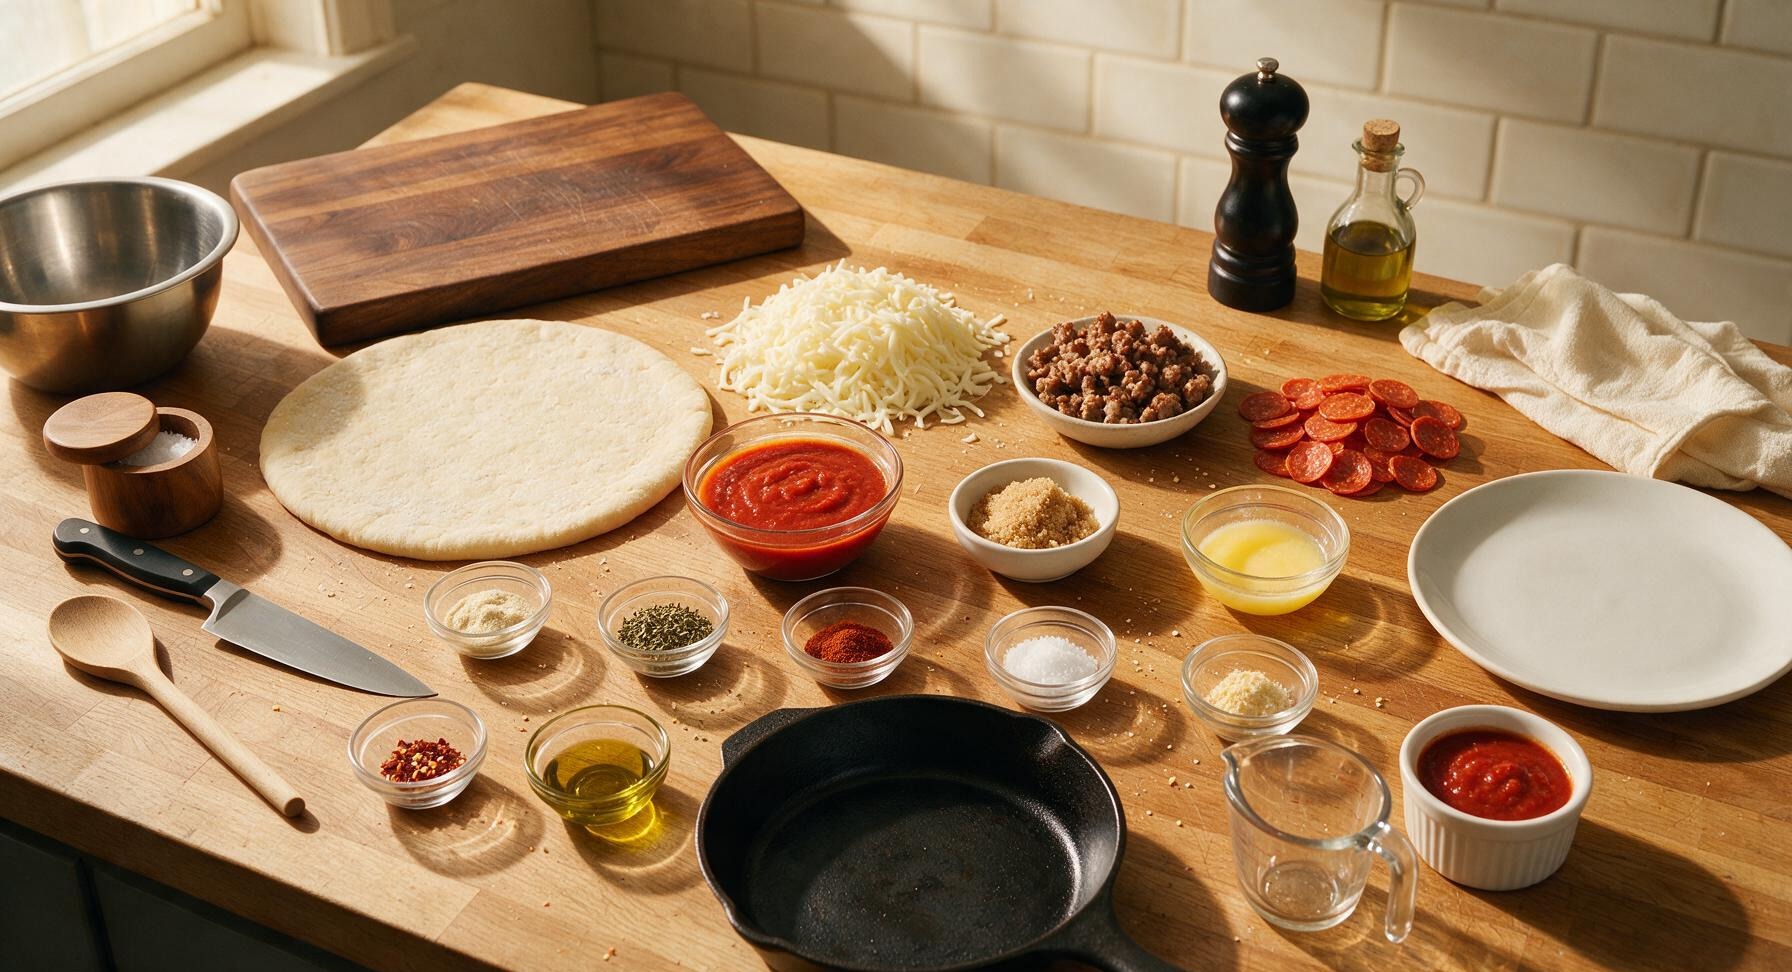
St. Louis-style thin pizza dough 450g (1lb)
Provel cheese 225g (8oz), shredded
Hot Italian sausage 115g (4oz), crumbled, cooked and drained
Mini pepperoni slices 60g (1/2 cup)
Pizza sauce 180ml (3/4 cup)
Light brown sugar 2 tbsp
Unsalted butter 2 tbsp, melted
Garlic powder 1 tsp
Dried oregano 1 tsp
Smoked paprika 1/2 tsp
Kosher salt 1/2 tsp
Extra-virgin olive oil 1 tbsp
Red pepper flakes (optional) 1/4 tsp

Steps

1

Prep Pan and Oven

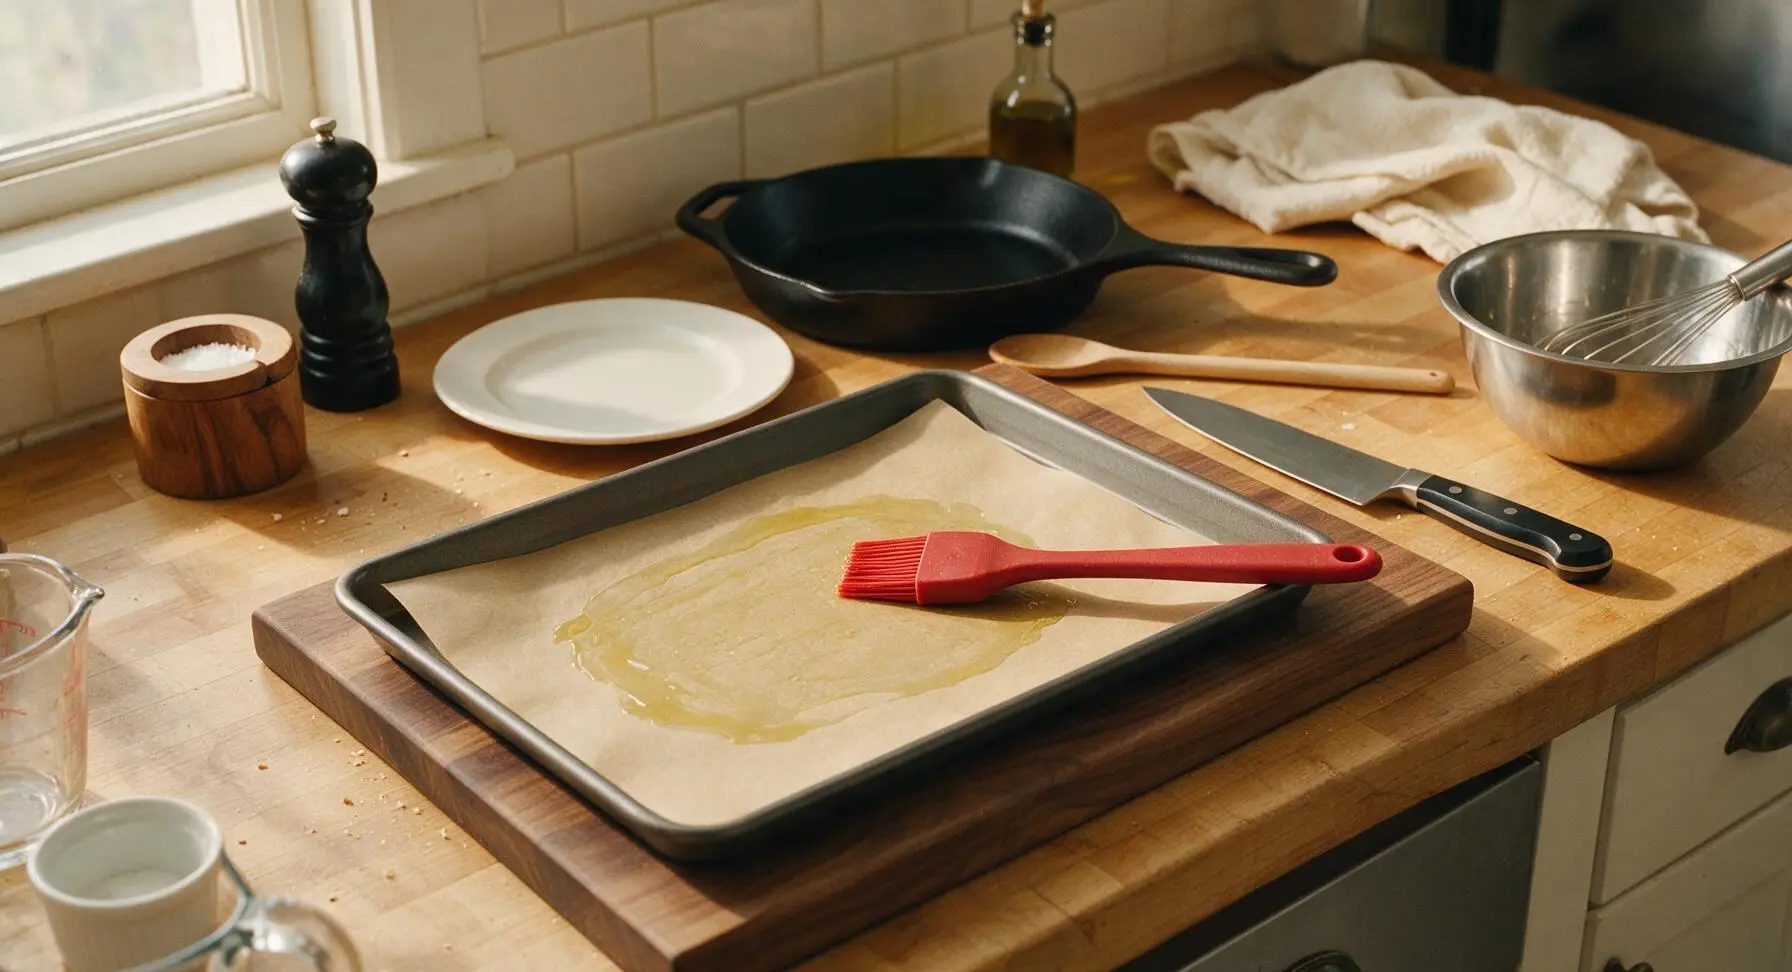
Preheat oven to 230°C (450°F). Place the dark gray rimmed baking sheet on the acacia wood cutting board, then line it with a sheet of unbleached tan parchment paper, smoothing out wrinkles to lay flat. Drizzle 1 tablespoon of extra-virgin olive oil across the parchment, then use the silicone basting brush to spread the oil into a thin, even coat across the entire parchment surface to prevent the thin crust from sticking during baking.
Step 1
step1:Prep Pan and Oven
2

Par-Bake Thin Crust

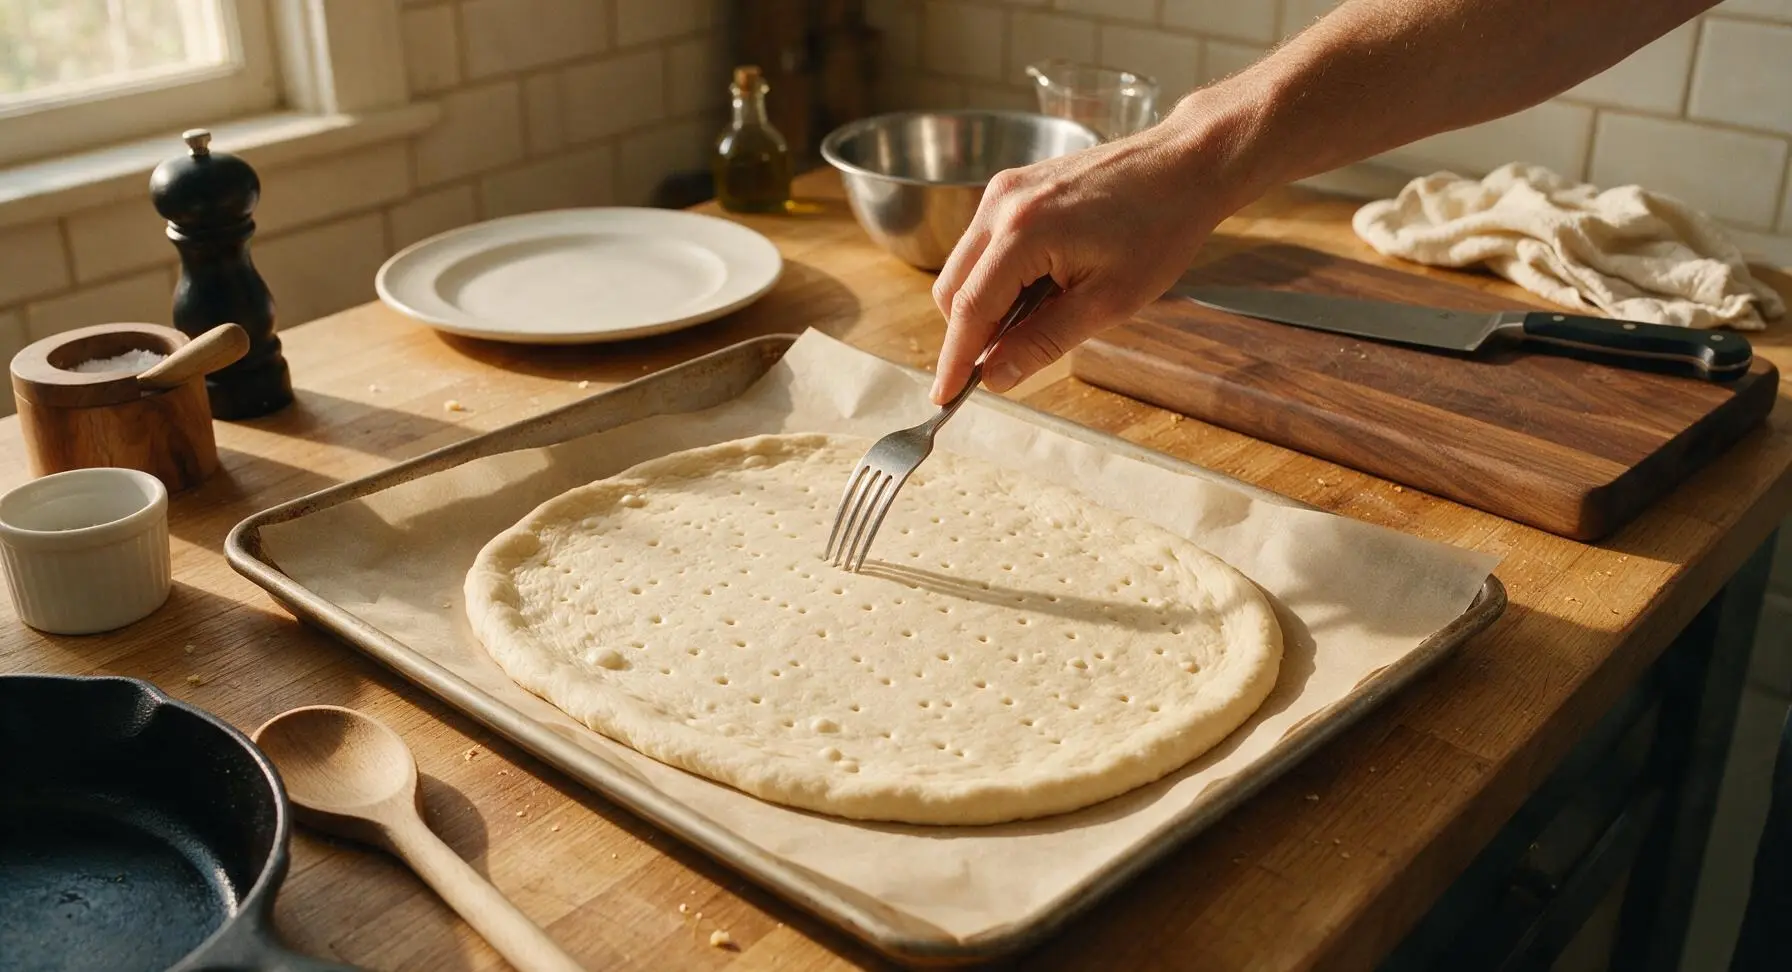
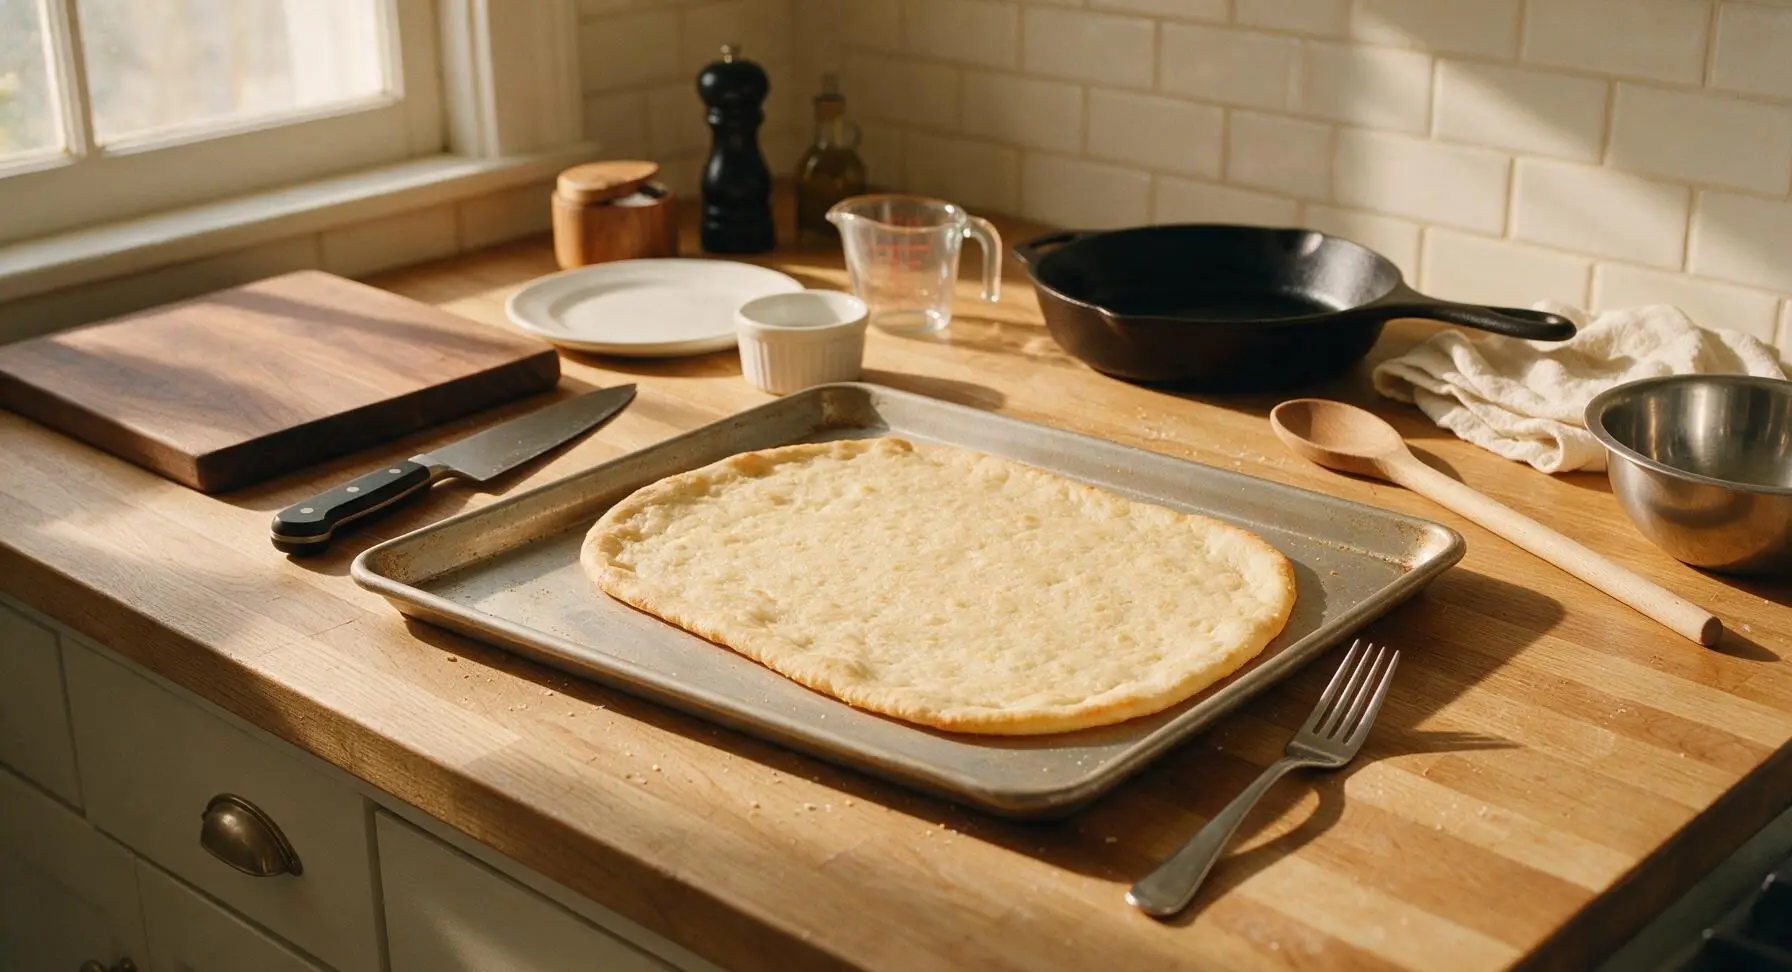
Unroll the pizza dough directly onto the oiled parchment, pressing it evenly to the pan edges to form a flat, 1cm-thick crust with no raised rim (traditional for St. Louis-style pizza). Use the stainless steel dinner fork to prick the entire dough surface every 2cm to dock it, preventing large air bubbles from forming as it bakes. Bake for 8 minutes, until the crust is pale golden and just set, with no raw dough spots. Remove from oven and let cool 5 minutes on the pan.
Step 2
step2:Par-Bake Thin Crust
Step 2
step2:Par-Bake Thin Crust
3

Top with Cheese and Meats

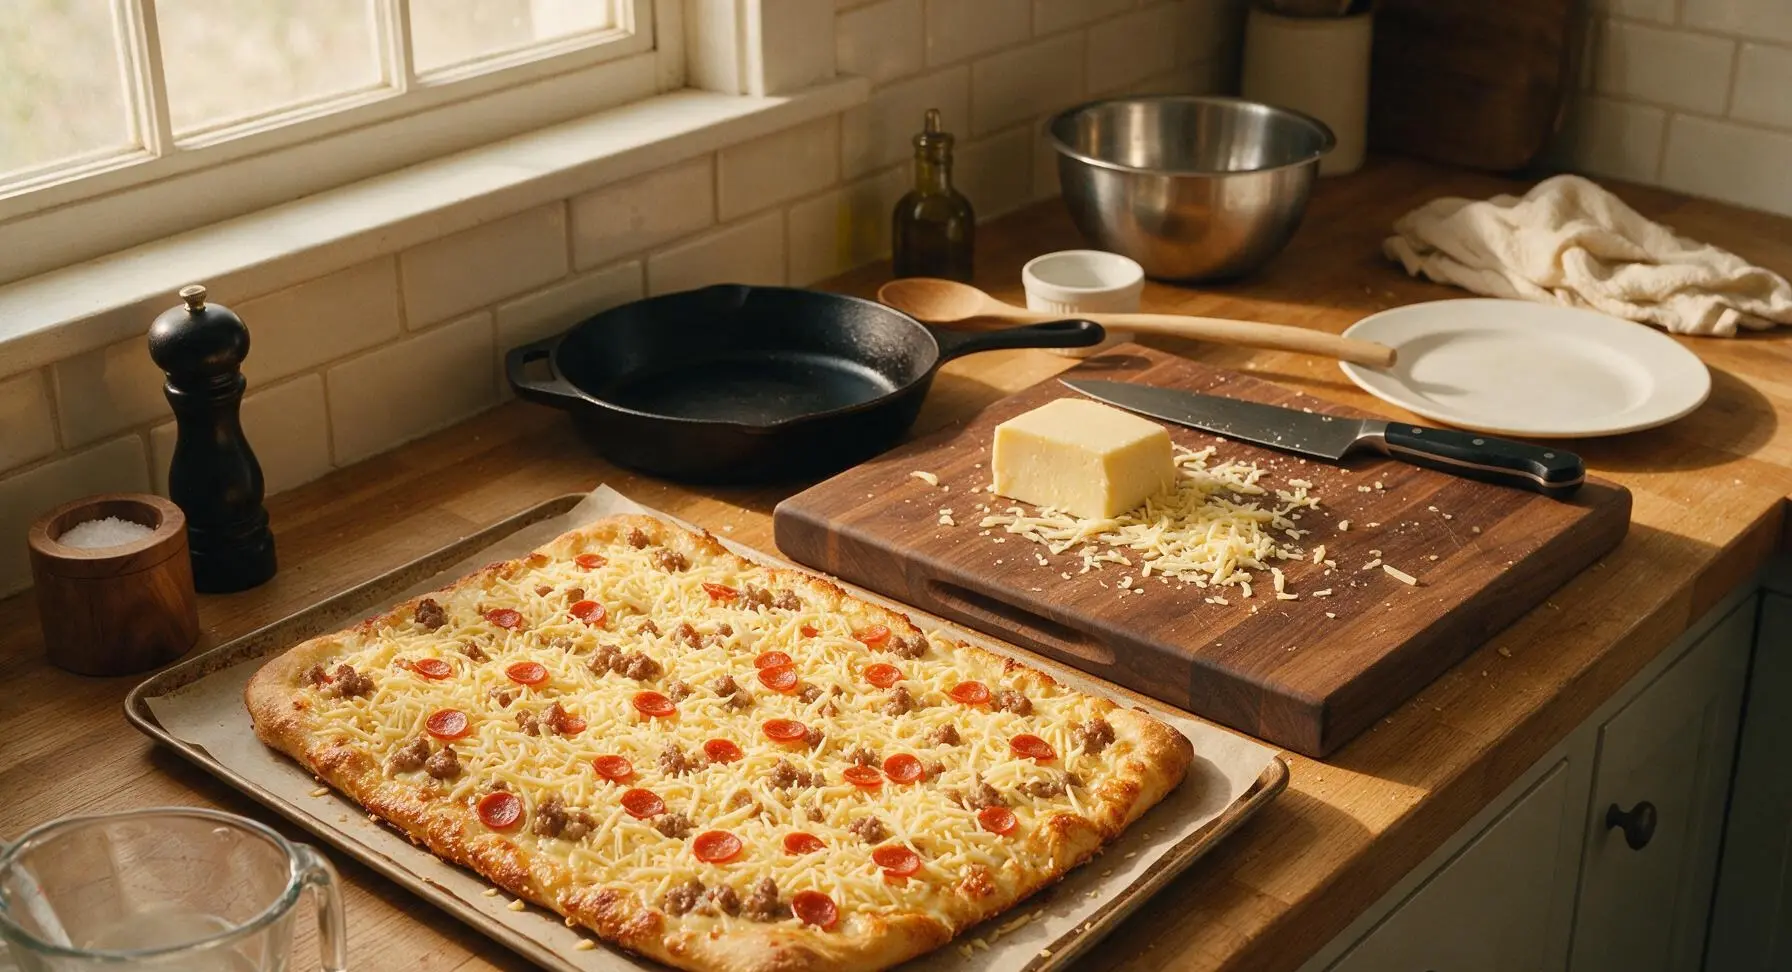
Sprinkle two-thirds of the shredded provel cheese evenly across the cooled par-baked crust, leaving no bare gaps. Scatter the drained crumbled Italian sausage and mini pepperoni slices evenly over the cheese layer, then top with the remaining one-third of provel cheese to lock toppings in place. Do not add pizza sauce at this stage, as wet sauce will soak into the thin crust and make it soggy.
Step 3
step3:Top with Cheese and Meats
4

Bake Until Cheese Crisps

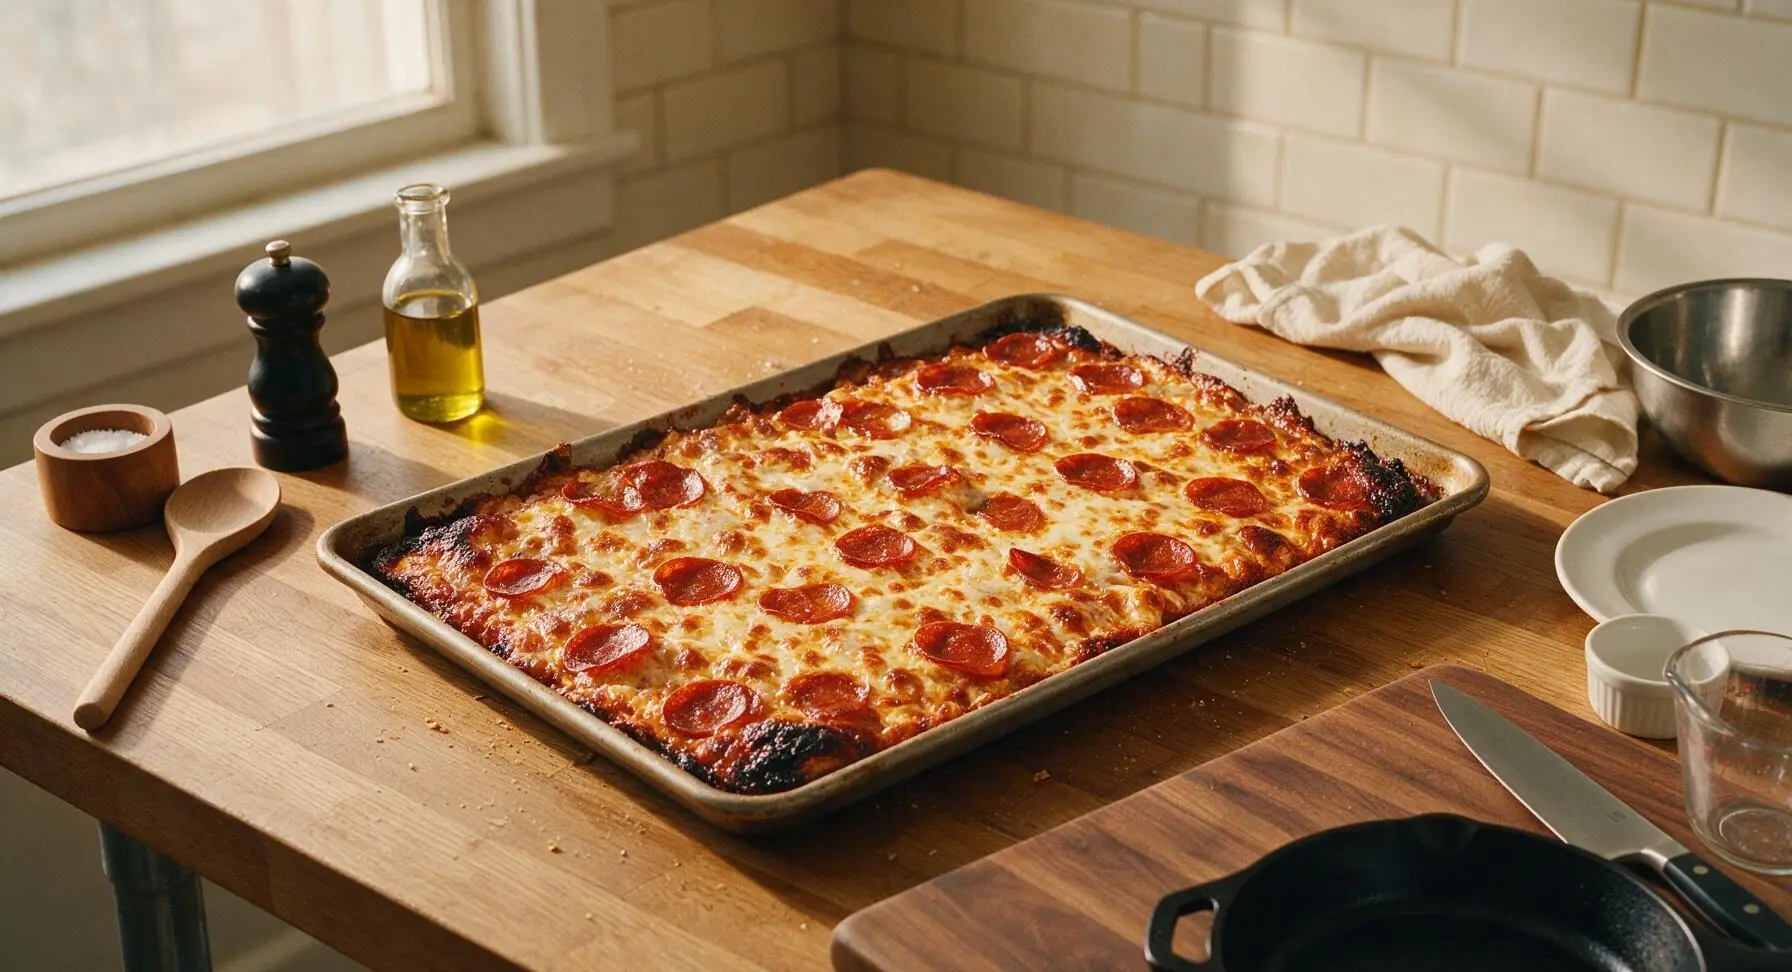
Return the topped crust to the 230°C (450°F) oven and bake for 12 minutes, until the cheese is fully melted and bubbly, with deep golden crispy edges around the pan perimeter, and pepperoni slices are curled and crisp at the edges. Remove from oven and let cool 10 minutes, until the cheese is set enough to cut without oozing excessively.
Step 4
step4:Bake Until Cheese Crisps
5

Cut Pizza into Cubes

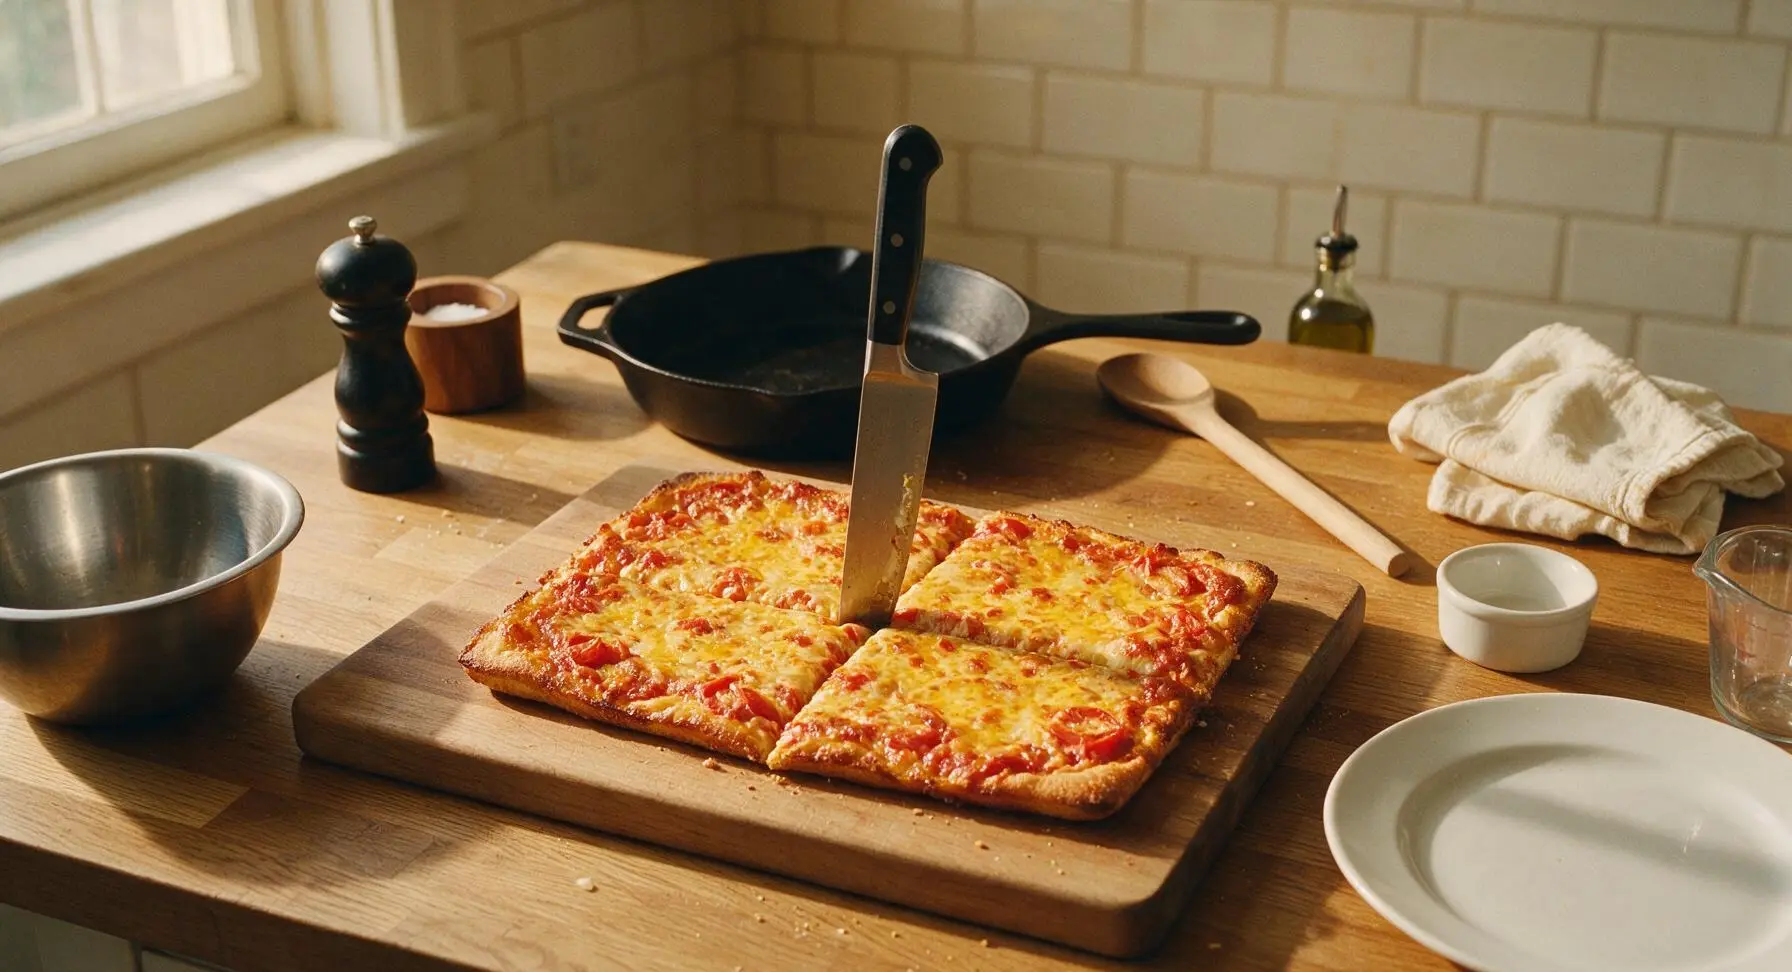
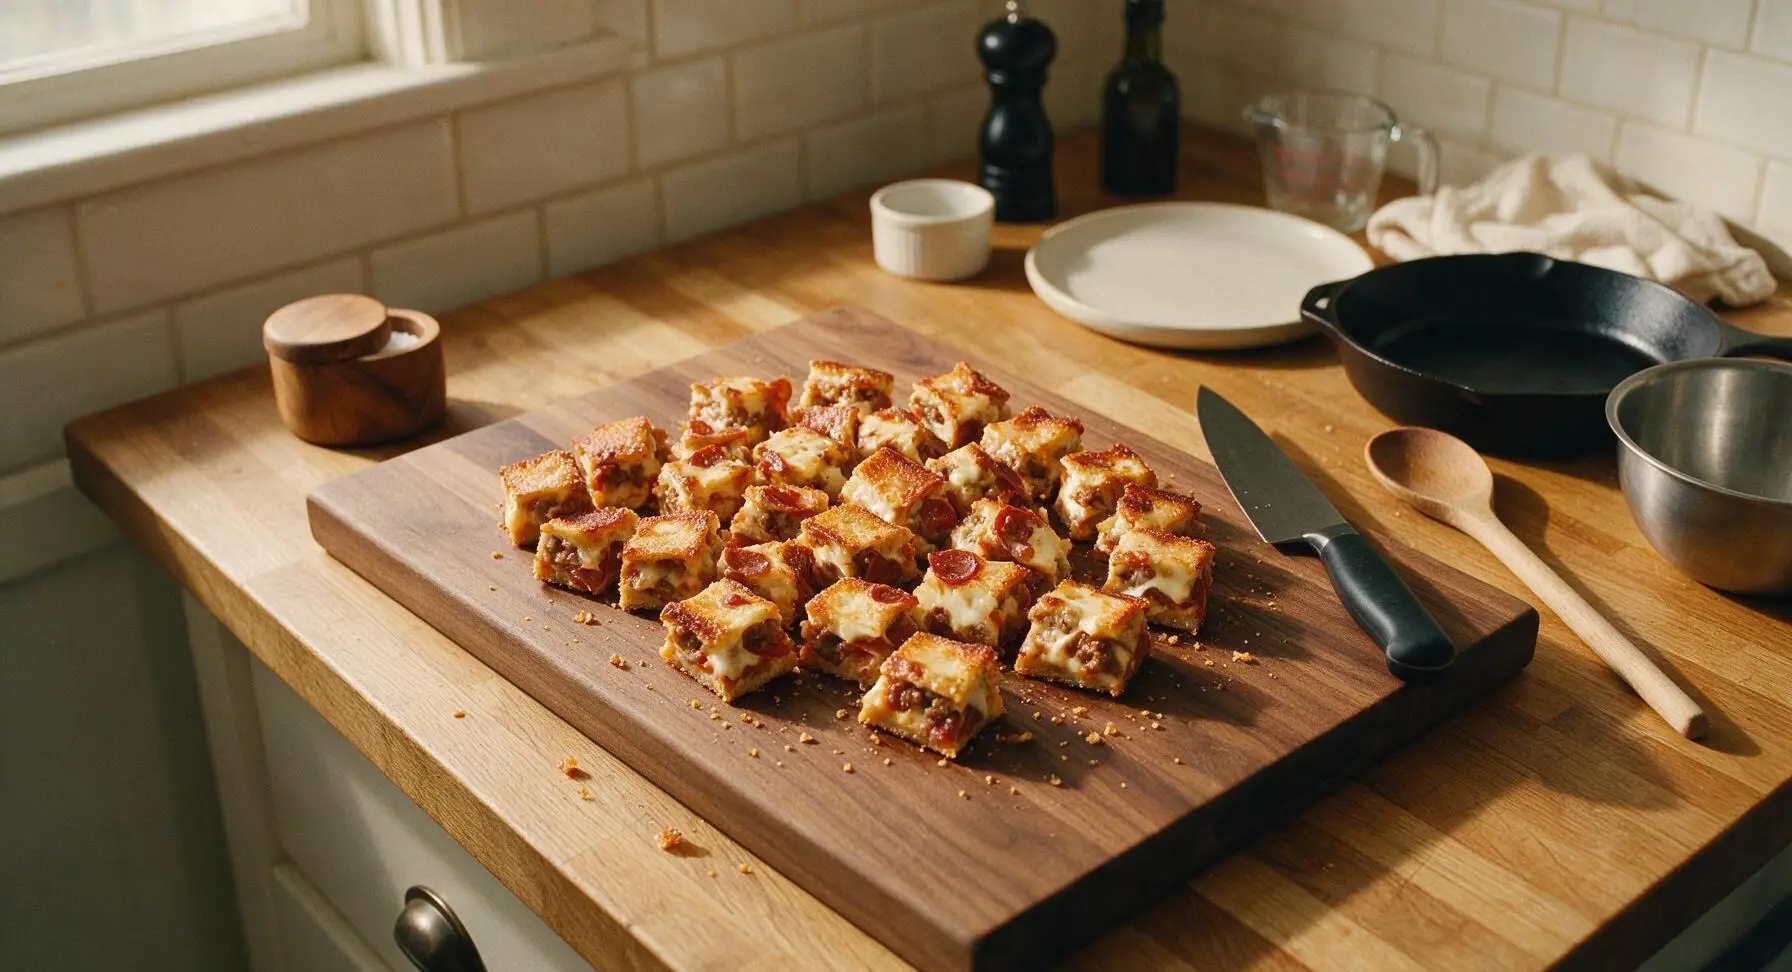
Slide the cooled baked pizza off the baking sheet onto the acacia wood cutting board. Use the 8-inch chef knife to cut the entire pizza into uniform 2.5cm (1-inch) cubes, wiping the knife blade on the indigo kitchen towel between cuts if melted cheese sticks. Ensure every cube has a portion of crispy crust, melted cheese, and topping for consistent texture.
Step 5
step5:Cut Pizza into Cubes
Step 5
step5:Cut Pizza into Cubes
6

Mix Sticky Pizza Glaze

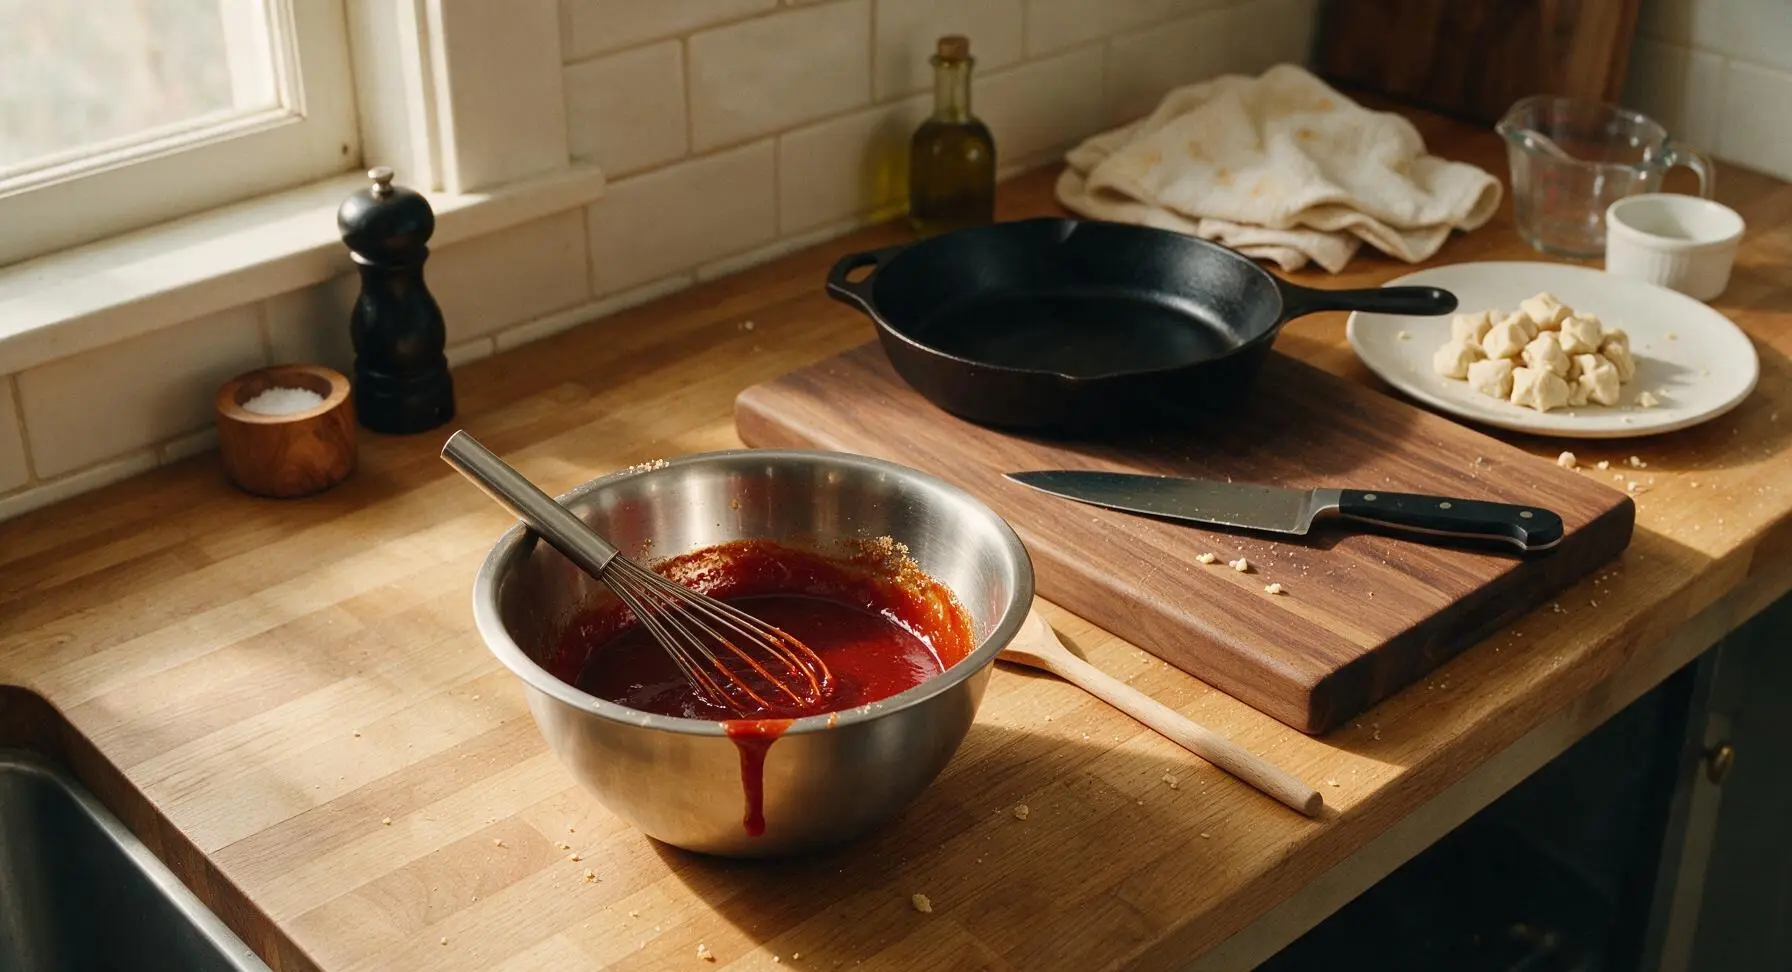
In the medium stainless steel mixing bowl, combine the pizza sauce, light brown sugar, melted unsalted butter, garlic powder, dried oregano, smoked paprika, and kosher salt. Use the small stainless steel whisk to mix until completely smooth, with no visible lumps of brown sugar remaining. The finished glaze should be thick but pourable, with a deep, rich red color.
Step 6
step6:Mix Sticky Pizza Glaze
7

Toss Cubes in Glaze

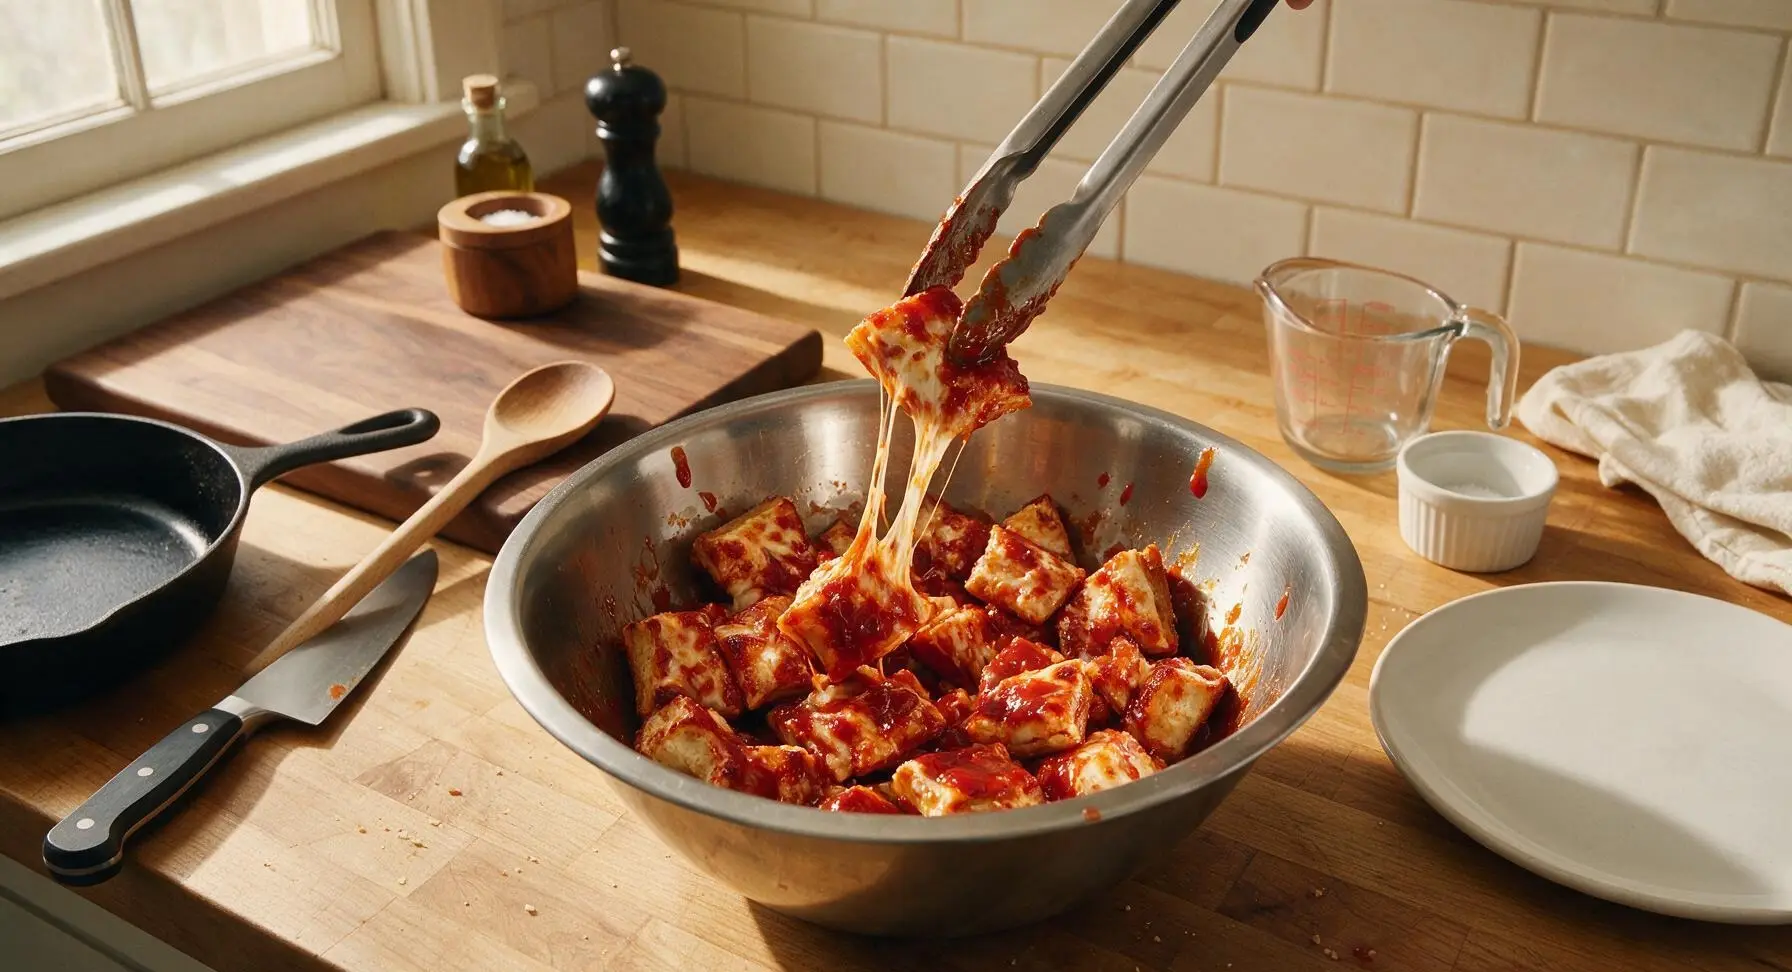
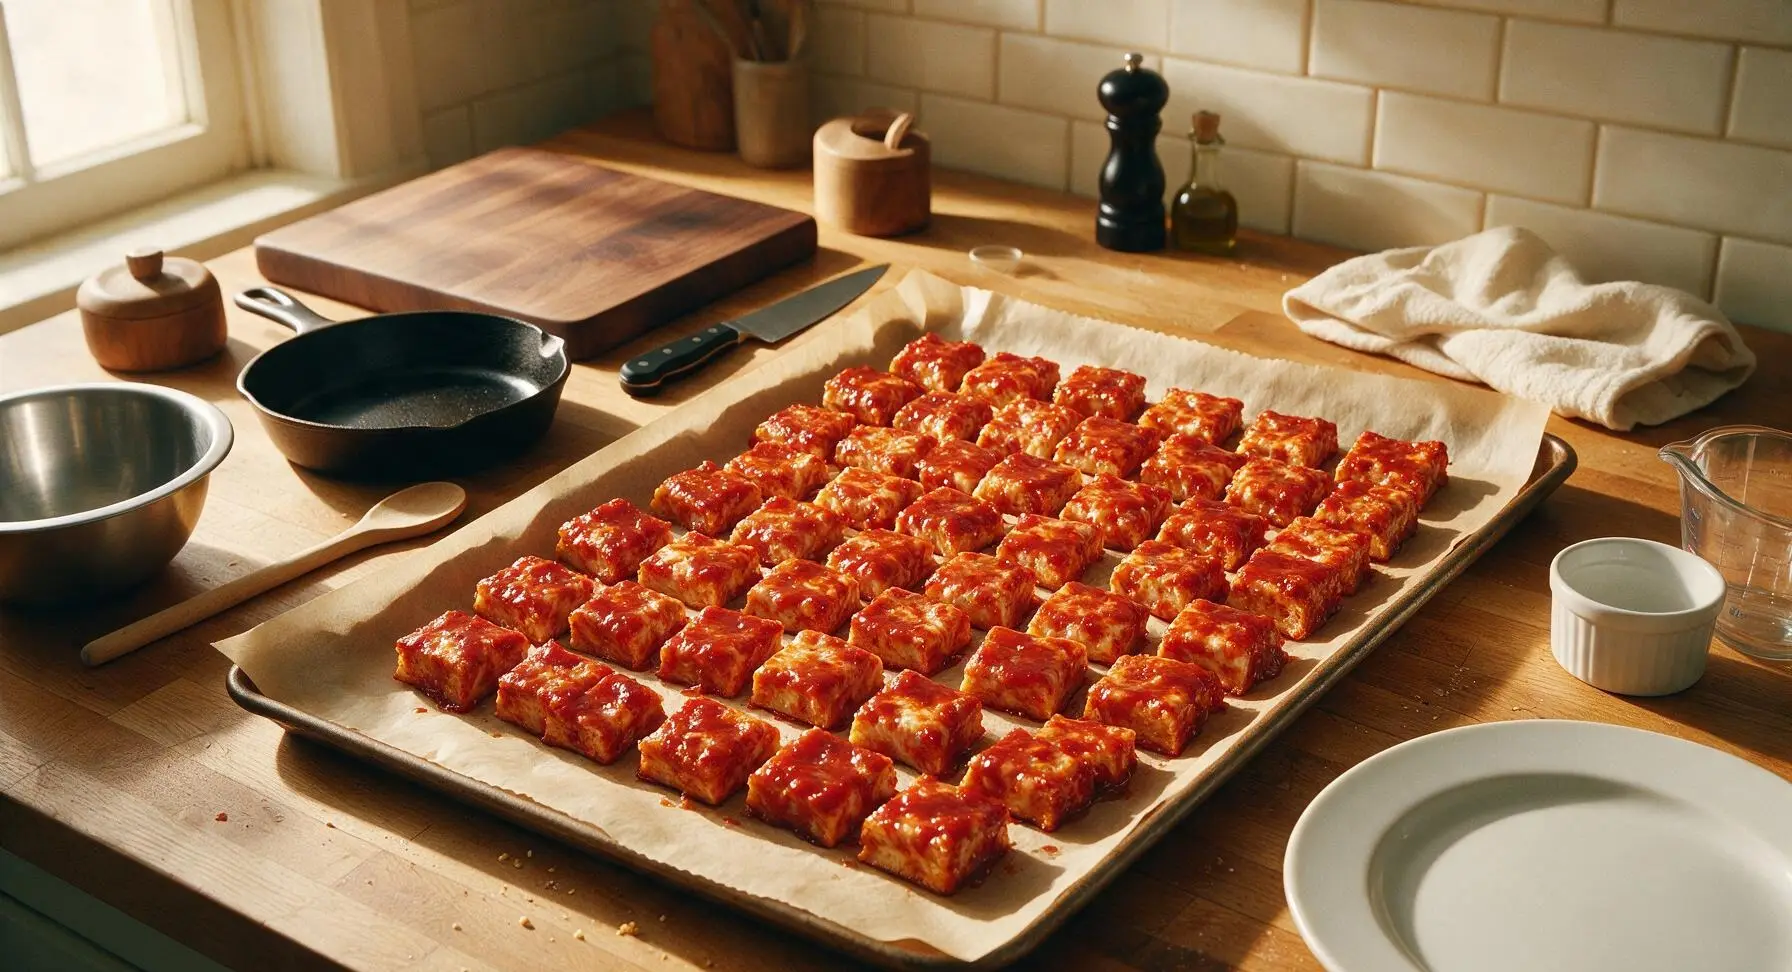
Add all cut pizza cubes to the mixing bowl with the glaze. Use the stainless steel kitchen tongs to gently toss the cubes until every piece is evenly coated in glossy red glaze, taking care not to break apart the soft crust and cheese cubes. Line the same baking sheet with a fresh sheet of parchment paper, then spread the glazed cubes in a single even layer across the sheet, leaving 1cm gaps between each cube for air flow.
Step 7
step7:Toss Cubes in Glaze
Step 7
step7:Toss Cubes in Glaze
8

Caramelize Burnt Ends

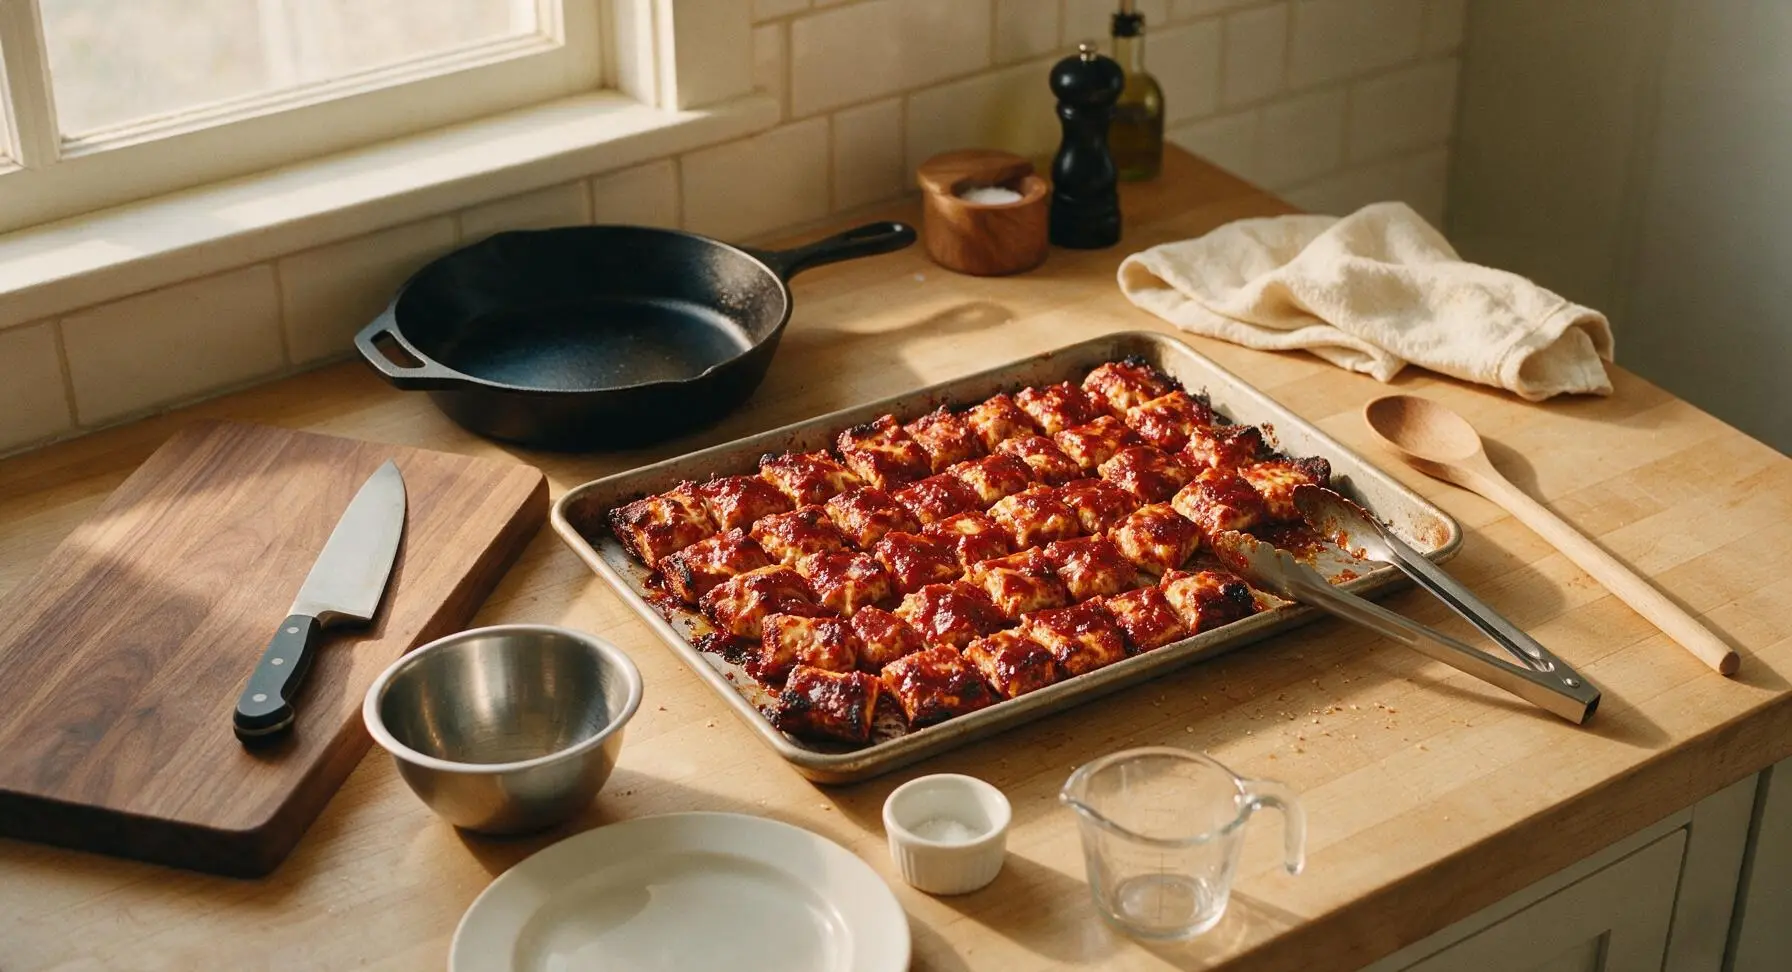
Return the baking sheet of glazed cubes to the 230°C (450°F) oven and bake for 15 minutes, using the kitchen tongs to flip every cube at the 7-minute mark to ensure even caramelization. Bake until the glaze is sticky and set, cube edges are deep golden with small dark charred spots (the signature 'burnt end' texture), and cheese is crispy at the corners. Remove from oven and let rest 3 minutes before transferring to the serving platter.
Step 8
step8:Caramelize Burnt Ends

Tips

1.Seek out authentic provel cheese for the most traditional St. Louis flavor: this processed cheese blend melts smoother, has a tangier, saltier profile than low-moisture mozzarella, and crisps perfectly without turning rubbery. If provel is unavailable, mix 2 parts low-moisture mozzarella, 1 part provolone, and 1 part mild white cheddar for a close substitute.
2.Skip adding sauce directly to the pizza before the first bake: wet sauce will soak into the ultra-thin St. Louis crust, turning it soggy instead of crisp. Saving all the sauce for the sticky glaze ensures every cube stays crunchy on the outside with a glossy, sticky coating, no mushy centers.
3.Don’t overcrowd the baking sheet during the final caramelization step: if cubes are touching, they will steam instead of developing the signature slightly charred, crispy 'burnt end' edges. Use a second baking sheet if needed to keep cubes in a single layer with small gaps between them.


✨ You May Also Like

BBQ & Grilling
🍜 United States

Tender, melt-in-your-mouth beef brisket with a crisp, spiced bark, slow-smoked to deep smoky perfection, the iconic centerpiece of Texas backyard barbecue.

⏱️ 12 hours BBQ & Grilling ★ 4.4
BBQ & Grilling
🍜 Korea

Tender, sweet-savory marinated beef short ribs, a beloved Korean BBQ staple with caramelized, slightly charred edges and deep umami flavor, perfect for outdoor summer gatherings.

⏱️ 4 hours 2BBQ & Grilling ★ 4.8
BBQ & Grilling
🍜 United States

Juicy grilled beef patties topped with smoky homemade chili, melted cheddar, and tangy pickles on toasted brioche buns for a hearty, flavor-packed handheld meal.

⏱️ 40 minuteBBQ & Grilling ★ 4.7
BBQ & Grilling
🍜 United States

A sweet, smoky, tangy BBQ sauce brightened with peak-season dark cherries, ideal for glazing grilled ribs, chicken, pork, or summer roasted veggies.

⏱️ 35 minuteBBQ & Grilling ★ 4.7
BBQ & Grilling
🍜 United States

Rich, smoky, slightly sweet homemade bourbon BBQ sauce with deep caramel notes, ideal for glazing grilled ribs, chicken, and burgers at cookouts.

⏱️ 25 minuteBBQ & Grilling ★ 4.7
BBQ & Grilling
🍜 United States

Iconic Alabama-style BBQ featuring tender hickory-smoked chicken slathered in tangy creamy white sauce, a beloved regional Southern cookout staple.

⏱️ 3 hoursBBQ & Grilling ★ 5

St. Louis Style Pizza Burnt Ends:Frequently Asked Questions

1.What makes these pizza burnt ends St. Louis-style instead of regular pizza bites? ▾
Great question! The core St. Louis markers here are ultra-thin, cracker-crisp crust, melty Provel cheese (the city’s iconic blended cheese) instead of standard mozzarella, and bright, tangy tomato flavor. We cut the baked pizza into 1-inch cubes, toss them in glaze, and caramelize them for that signature sticky burnt end texture, no puffy chewy crust allowed.
2.I can’t find Provel cheese locally—what’s a good substitute? ▾
Provel is a creamy, low-moisture blend of provolone, Swiss, and white cheddar with a super smooth, string-free melt. Mix 4 parts low-moisture mozzarella, 3 parts white cheddar, 2 parts provolone, and 1 part soft Swiss to nail that same rich, tangy, salty flavor and perfect melt that defines classic St. Louis pizza.
3.Can I use regular thick pizza dough for this recipe instead of St. Louis-style thin dough? ▾
I don’t recommend it—thick, chewy pizza dough will turn soggy when tossed in the tomato-butter glaze, and won’t crisp up to that shattery, crunchy exterior these burnt ends are known for. If you only have regular dough, roll it as thin as possible (1/8-inch thick) before par-baking to mimic that classic St. Louis crust texture.
4.How big should I cut my pizza cubes to get the perfect burnt end texture? ▾
Stick to a strict 1-inch cube, measured after you par-bake the base pizza. Any larger, and the centers won’t heat through evenly while the edges caramelize; any smaller, and the cubes will burn too quickly or fall apart when you toss them in the tangy tomato-butter glaze before the final caramelization step.
5.Do I need to cook the hot Italian sausage before adding it to the pizza base? ▾
Absolutely—raw sausage will leach excess grease as it cooks, making your crust soggy and leaving you with undercooked, gritty meat bits. Crumble the sausage into small pieces, pan-fry until fully browned and crispy, then drain off all excess grease on paper towels before scattering it across your par-baked crust with the pepperoni.
6.What’s in the tangy tomato-butter glaze, and can I make it ahead? ▾
The glaze is a simple, rich mix of pizza sauce, melted unsalted butter, a pinch of sugar to boost caramelization, and a tiny splash of red wine vinegar for that signature bright tang. You can make it up to 3 days ahead, store it in an airtight container in the fridge, and gently rewarm it before tossing with your par-baked pizza cubes.
7.Why do my burnt ends come out soggy instead of crispy and caramelized? ▾
Sogginess almost always traces back to three common mistakes: using too thick of a crust, not draining grease from cooked sausage or pepperoni, or crowding the cubes on your baking sheet during the final caramelization step. Leave ¼-inch of space between cubes, and bake at 425°F to get that crispy, cheese-crusted exterior.
8.Can I make these burnt ends in an air fryer instead of the oven? ▾
You sure can! After cutting your par-baked pizza into 1-inch cubes and tossing in glaze, air fry in a single layer at 400°F for 6 to 8 minutes, shaking the basket halfway through. You’ll get extra crispy edges fast—just don’t overstuff the basket, or you’ll end up with steamed, soggy cubes instead of caramelized burnt ends.
9.Are mini pepperoni required, or can I use regular sized pepperoni slices? ▾
Mini pepperoni are ideal because they distribute evenly across every bite, and crisp up into tiny, salty, cupped pepperoni bits without weighing down the thin crust. If you only have regular pepperoni, stack slices and cut them into ¼-inch pieces before adding them, so you don’t get large, floppy chunks throwing off the cube texture.
10.How long do I par-bake the thin pizza crust before adding toppings and cutting into cubes? ▾
Par-bake your rolled-out thin crust at 450°F for 5 to 7 minutes, just until it’s set and very lightly golden around the edges, with no raw dough spots. This pre-cook step prevents the crust from getting soggy once you add sauce, cheese, and toppings, and ensures the cubes hold their shape during the final caramelization bake.
11.Can I add extra toppings like veggies to these pizza burnt ends? ▾
You can, but stick to low-moisture, pre-cooked veggies to avoid sogginess. Sautéed mushrooms, diced roasted bell peppers, caramelized onions, or sliced black olives work great—just pat them fully dry with paper towels before adding, and skip high-moisture toppings like fresh tomato that will release water as they bake.
12.What’s the best way to serve these St. Louis pizza burnt ends? ▾
Serve them hot, right off the baking sheet, with extra warm pizza sauce on the side for dipping, plus a sprinkle of grated Parmesan and red pepper flakes if you like a little heat. They’re perfect for game day spreads, casual party appetizers, or a fun twist on pizza night, and pair great with cold beer or lemon-lime soda.
13.Can I prep these burnt ends ahead of time for a party? ▾
You can do most of the work 1 day ahead: par-bake the crust, add toppings, fully bake the base pizza, let it cool, cut it into 1-inch cubes, and store covered in the fridge. When you’re ready to serve, toss the cubes in the warm tomato-butter glaze and bake for 10 to 12 minutes until caramelized and sticky.
14.Why is Provel cheese used instead of regular mozzarella for this recipe? ▾
Provel has a lower moisture content and a super smooth, creamy melt that doesn’t turn stringy like mozzarella, which is perfect for burnt ends—it forms a crisp, golden cheese crust on the outside of each cube as it caramelizes, instead of stretching and pulling away when you pick up a bite. It also has that iconic tangy, salty St. Louis flavor.
15.How do I get that sticky, caramelized 'burnt end' coating without actually burning the cubes? ▾
The key is tossing the par-baked cubes evenly in the tomato-butter glaze, which has a small amount of sugar to encourage browning, then baking at 425°F to caramelize the sugars and cheese edges fast. Stir the cubes every 4 minutes during the final bake, and pull them as soon as the edges are deep golden and sticky.
16.How should I store leftover pizza burnt ends, and how do I reheat them? ▾
Store cooled leftovers in an airtight container in the fridge for up to 3 days. Don’t reheat them in the microwave, which will make the crust soggy—instead, spread them on a baking sheet and reheat at 400°F for 5 to 7 minutes, or pop them in the air fryer at 375°F for 3 to 4 minutes, until crispy and heated through.
17.My cheese keeps sliding off the cubes when I toss them in glaze—what am I doing wrong? ▾
That usually happens if you don’t let the baked base pizza cool for 10 minutes before cutting it into cubes. When the cheese is still fully melted and hot, it hasn’t set to the crust, so it slides off easily. Letting it rest lets the cheese firm up and adhere to the crust, so every cube stays fully loaded through the glaze toss and final bake.
18.Can I make a vegetarian version of these pizza burnt ends? ▾
Absolutely! Swap the hot Italian sausage for crumbled, cooked plant-based Italian sausage, or skip it entirely and load up on vegetarian mini pepperoni plus your favorite low-moisture veggie toppings. Stick to the same thin crust, Provel (or our earlier Provel substitute) and tangy tomato-butter glaze to keep that classic St. Louis flavor and crispy texture.

Comments (3)

2 hours ago

OMG these St. Louis pizza burnt ends are a total game changer for our Friday family movie night! I’ve made regular burnt ends a dozen times but never thought to pair that crispy, cheesy St. Louis crust with the pepperoni and pizza sauce filling. My kids devoured half the pan before I even set the table, and my husband asked if we can add these to our weekly rotation. So easy to throw together too, perfect for when I don’t feel like a super complicated dinner after work. 10/10 no notes!

30 minutes ago

Wait did you use the provel cheese like traditional St. Louis pizza? I’ve been trying to find a good use for the block I picked up last month and this sounds perfect!

5 minutes ago

So glad your family loved these, Mia! Provel cheese is absolutely the classic pick here (great question!) — if you can’t find it, a mix of provolone, Swiss, and white cheddar works really well as a substitute too. Hope you give them a try!

3 days ago

Brought these to our neighborhood potluck last weekend and people would NOT stop asking me for the recipe! The crispy edges are *chef’s kiss* and the little bite-sized pieces make them perfect for grabbing without a plate. I did add a little extra Italian seasoning and a sprinkle of parmesan on top before broiling, which gave them an extra little flavor kick. Only thing I will say is make sure you line your baking sheet really well because the cheese gets super melty and sticky if it drips. Total crowd pleaser!

2 days ago

Thanks so much for the tip about lining the baking sheet, that’s such a good reminder for folks! The extra Italian seasoning addition sounds delicious, I love when people put their own little spin on the recipe. So happy they were a hit at the potluck!

1 week ago

SO good! I prepped a batch of these for my work lunches this week and they reheat way better than I expected. I was worried the crust would get soggy in the fridge, but if you crisp them up for 2 minutes in the air fryer when you reheat, they taste just as fresh as the day you make them. Super easy recipe, short cook time, way less fussy than making a whole pizza from scratch. Only reason I’m not giving 5 stars is I wish the recipe noted how much the cheese can bubble over if you overfill the cubes, I had a little mess in my oven on the first go! Will definitely be making these on repeat for quick meals now that I know to fill them a little less.



