
Sweet Milk Dinner Rolls

title 1
Sweet Milk Dinner Rolls
⏱️ cook time 20 minutes
🍽️ servings 12
⚡ Difficulty medium

intro

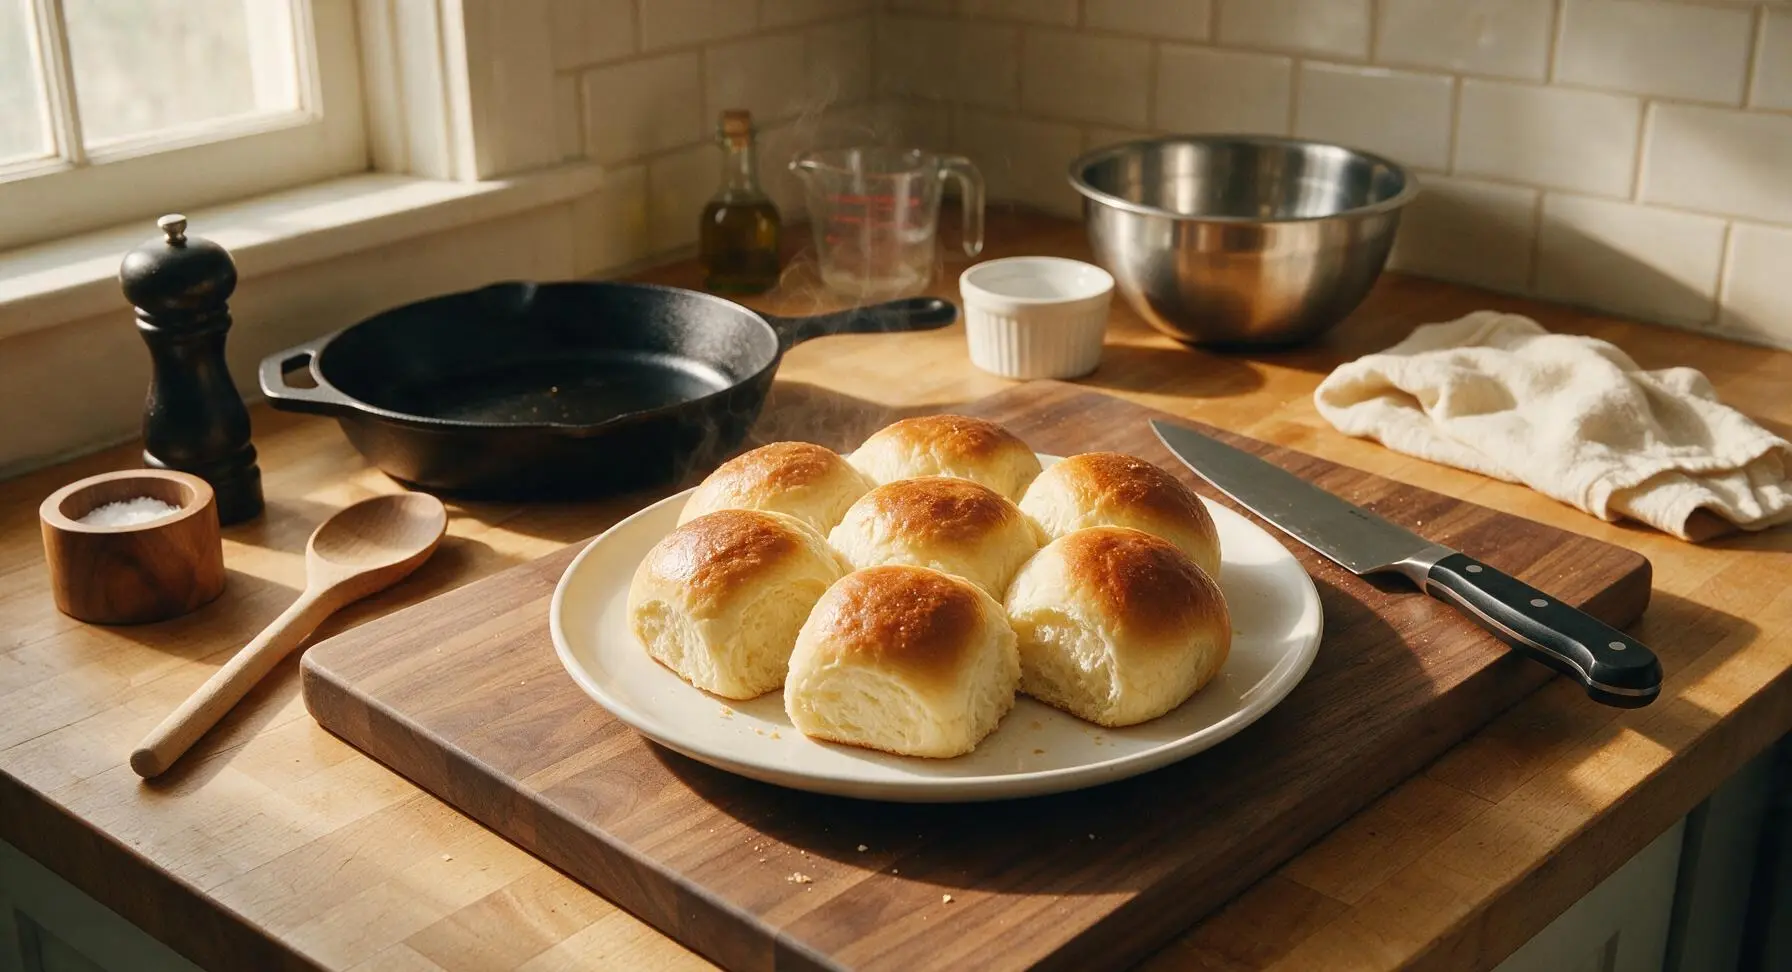
Soft, pillowy sweet milk dinner rolls with a golden buttery crust, fluffy tender crumb, and gentle milky sweetness—perfect for pulling apart and slathering with butter at shared meals.

Ingredients
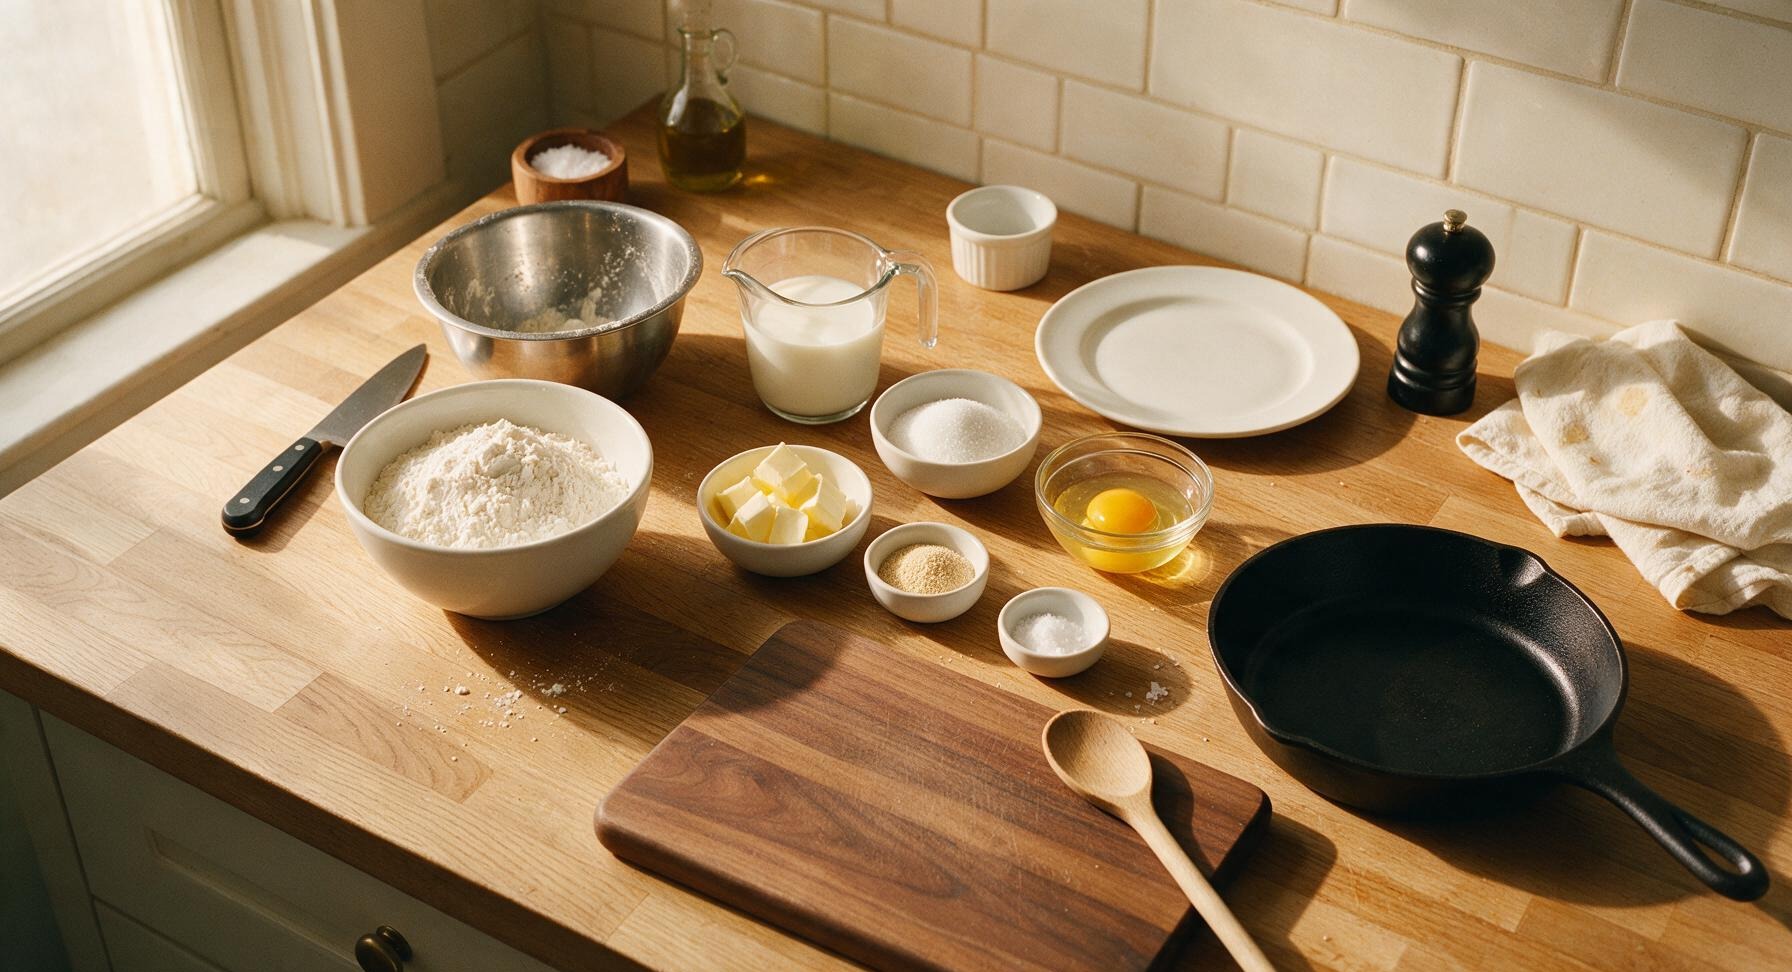
All-purpose flour 3 ½ cups (440g)
Whole milk 1 cup (240ml)
Unsalted butter 6 tablespoons (85g), divided
Granulated sugar 3 tablespoons (38g)
Active dry yeast 2 ¼ teaspoons (7g, 1 standard packet)
Large egg 1, room temperature
Fine sea salt 1 teaspoon
Flaky sea salt ¼ teaspoon (for topping)

Steps

1

Warm Milk and Butter

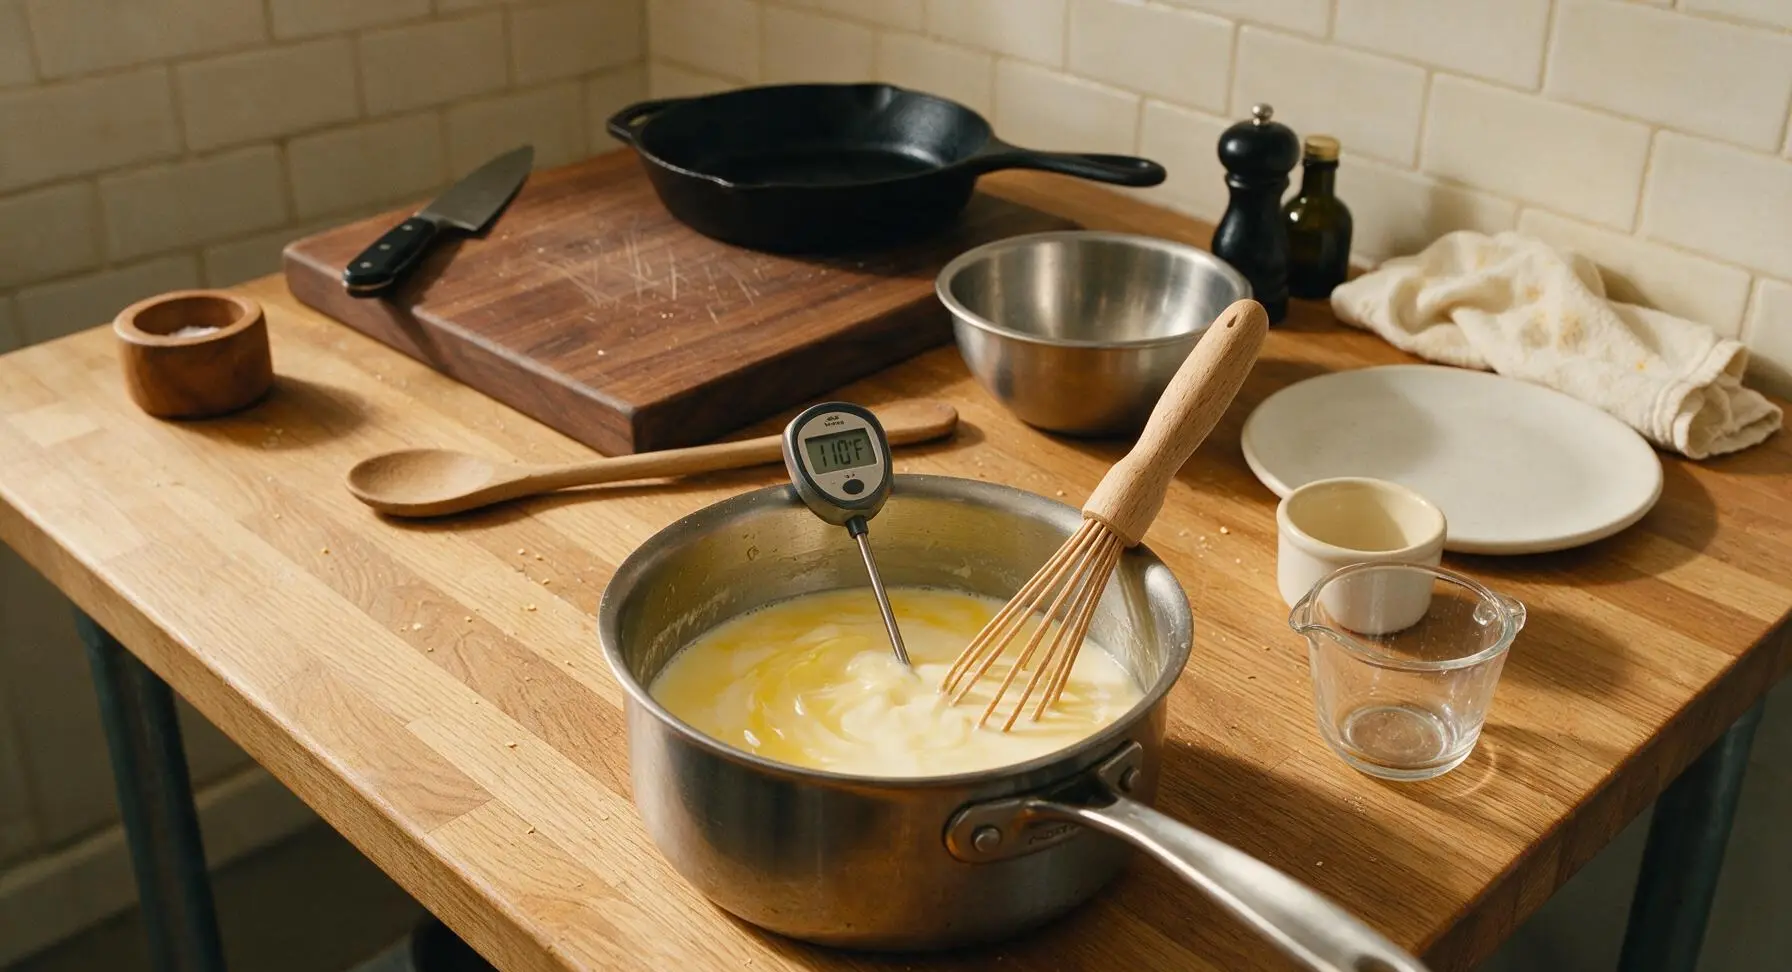
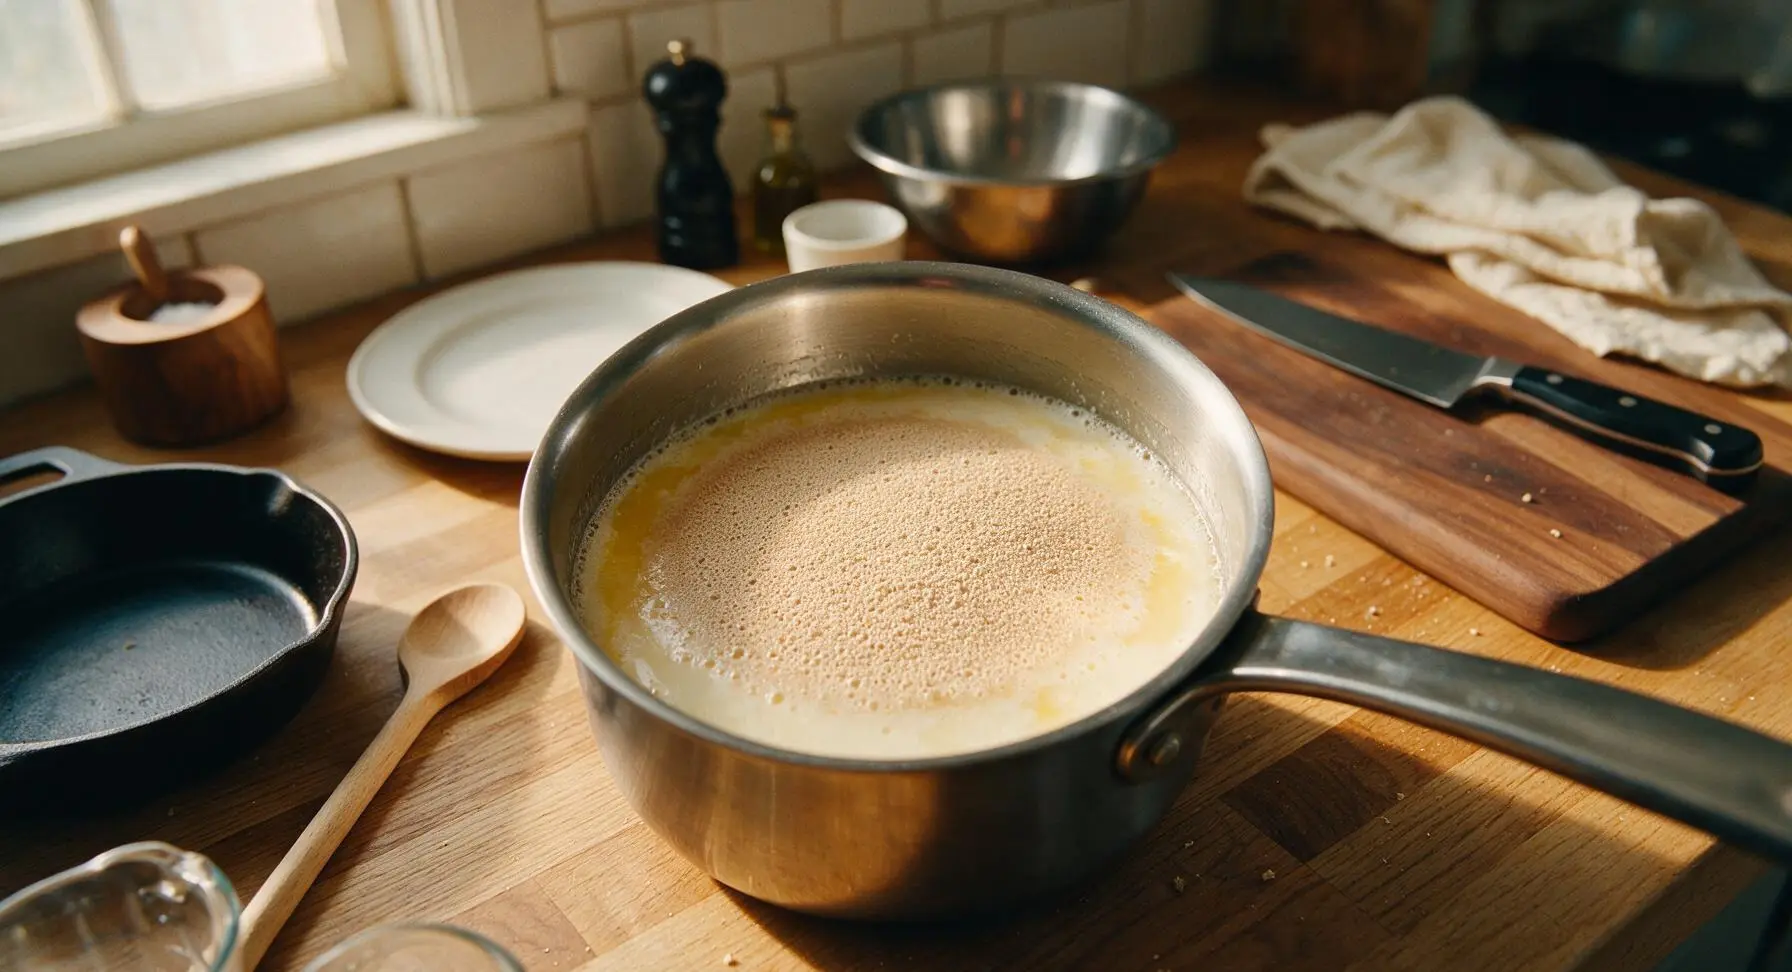
Place 4 tablespoons of the unsalted butter and whole milk in the small stainless steel saucepan over low heat. Warm, stirring occasionally, until butter is fully melted and the mixture reaches 110°F (43°C) – it should feel lukewarm, not hot, to the touch (liquid hotter than 120°F will kill active yeast). Remove from heat, stir in 1 tablespoon of the granulated sugar until dissolved, then sprinkle the active dry yeast evenly over the surface. Let rest 5 minutes until the mixture develops a foamy, tan layer on top, confirming the yeast is active and ready to use.
Step 1
step1:Warm Milk and Butter
Step 1
step1:Warm Milk and Butter
2

Mix Dough Base

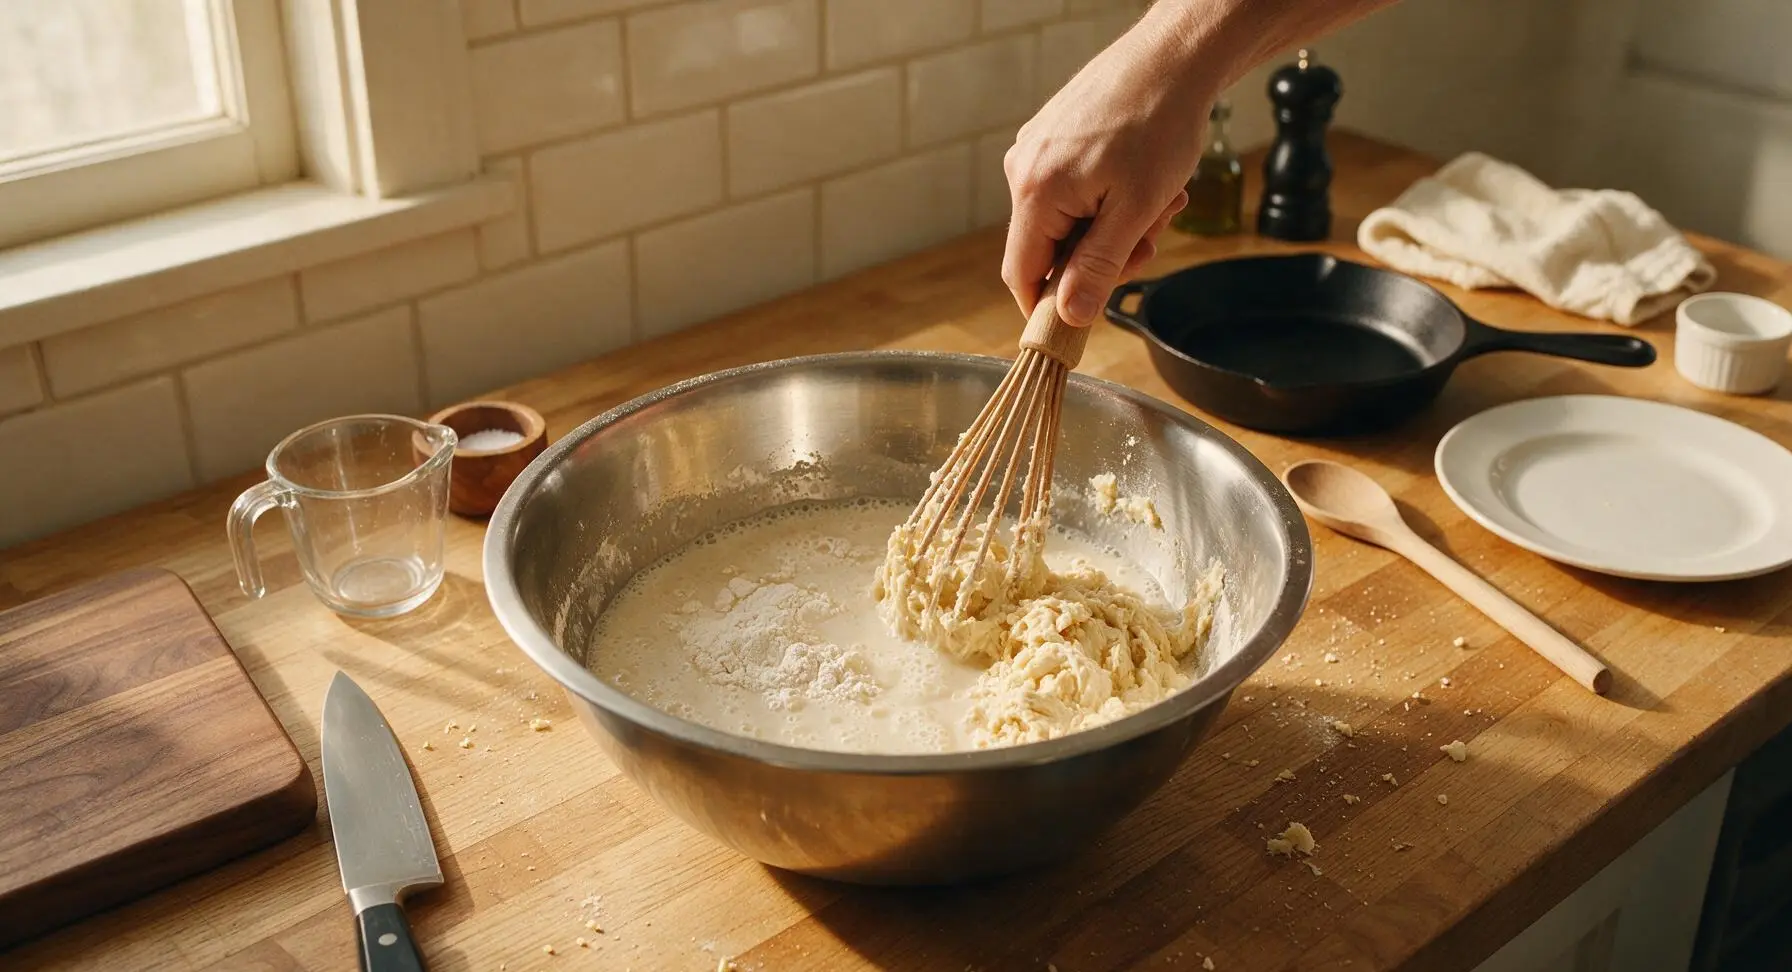
Pour the foamy yeast-milk mixture into the large stainless steel mixing bowl. Add the remaining 2 tablespoons granulated sugar, room temperature large egg, and fine sea salt, stirring with the wooden dough whisk until fully combined. Gradually add the all-purpose flour 1 cup at a time, stirring thoroughly after each addition, until a shaggy, sticky dough forms that pulls slightly away from the sides of the bowl.
Step 2
step2:Mix Dough Base
3

Knead the Dough

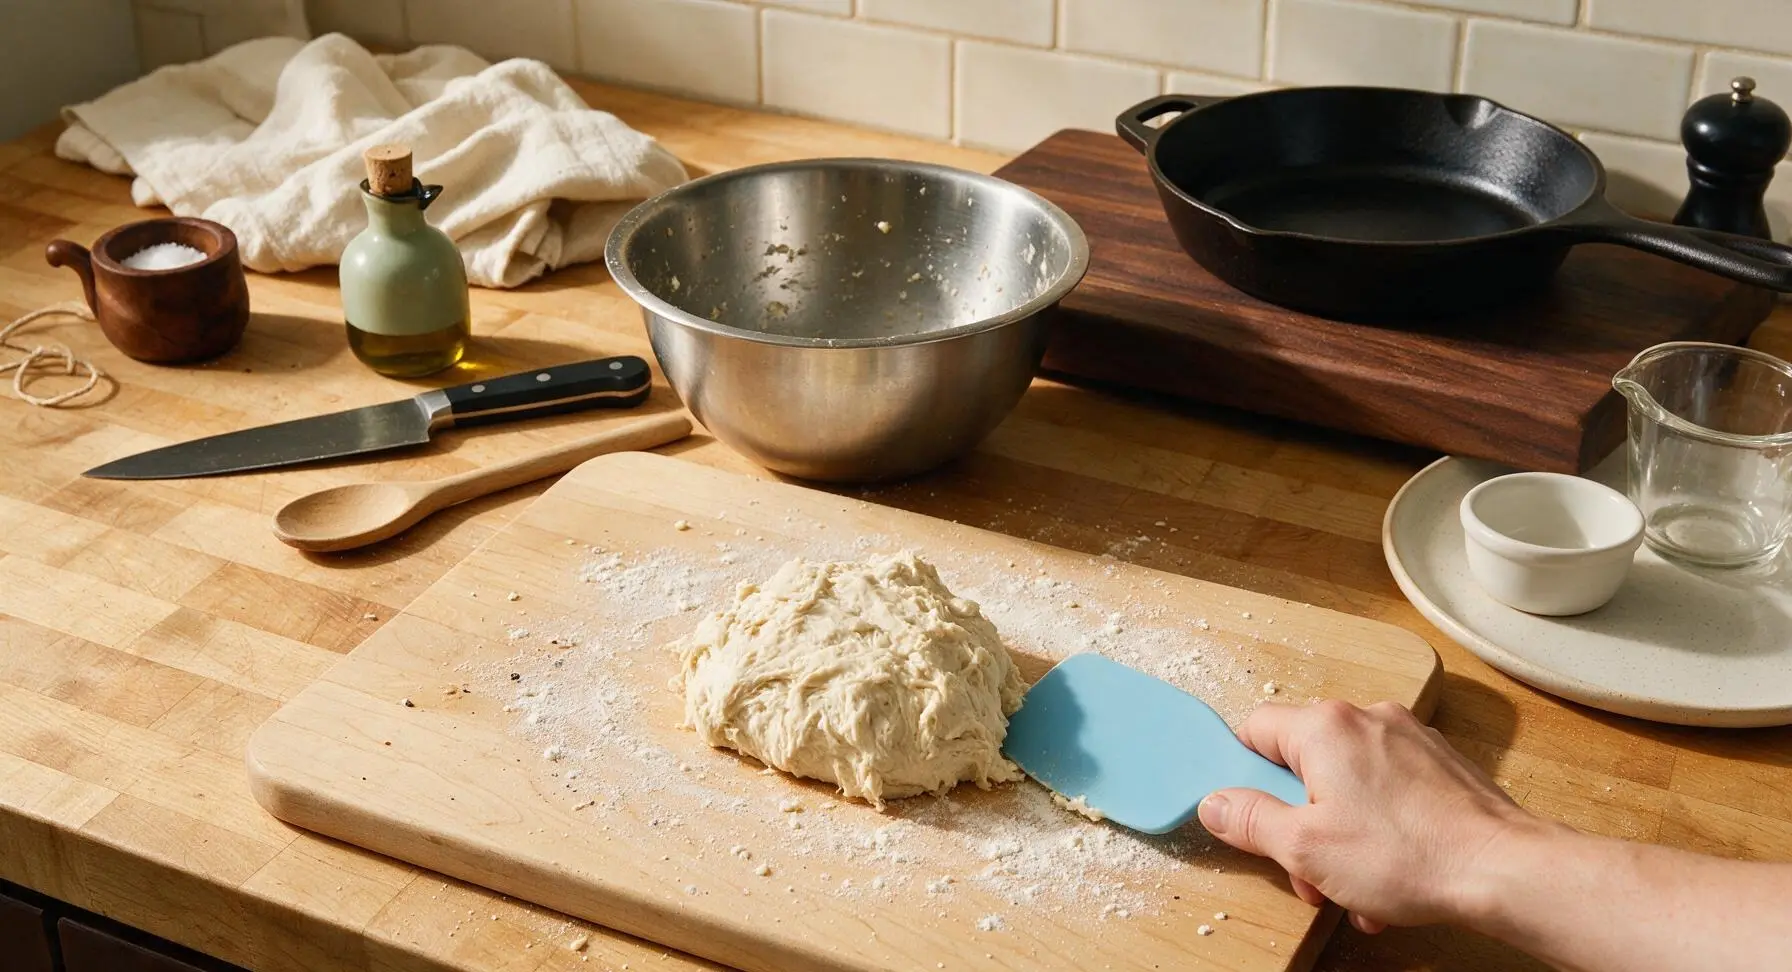
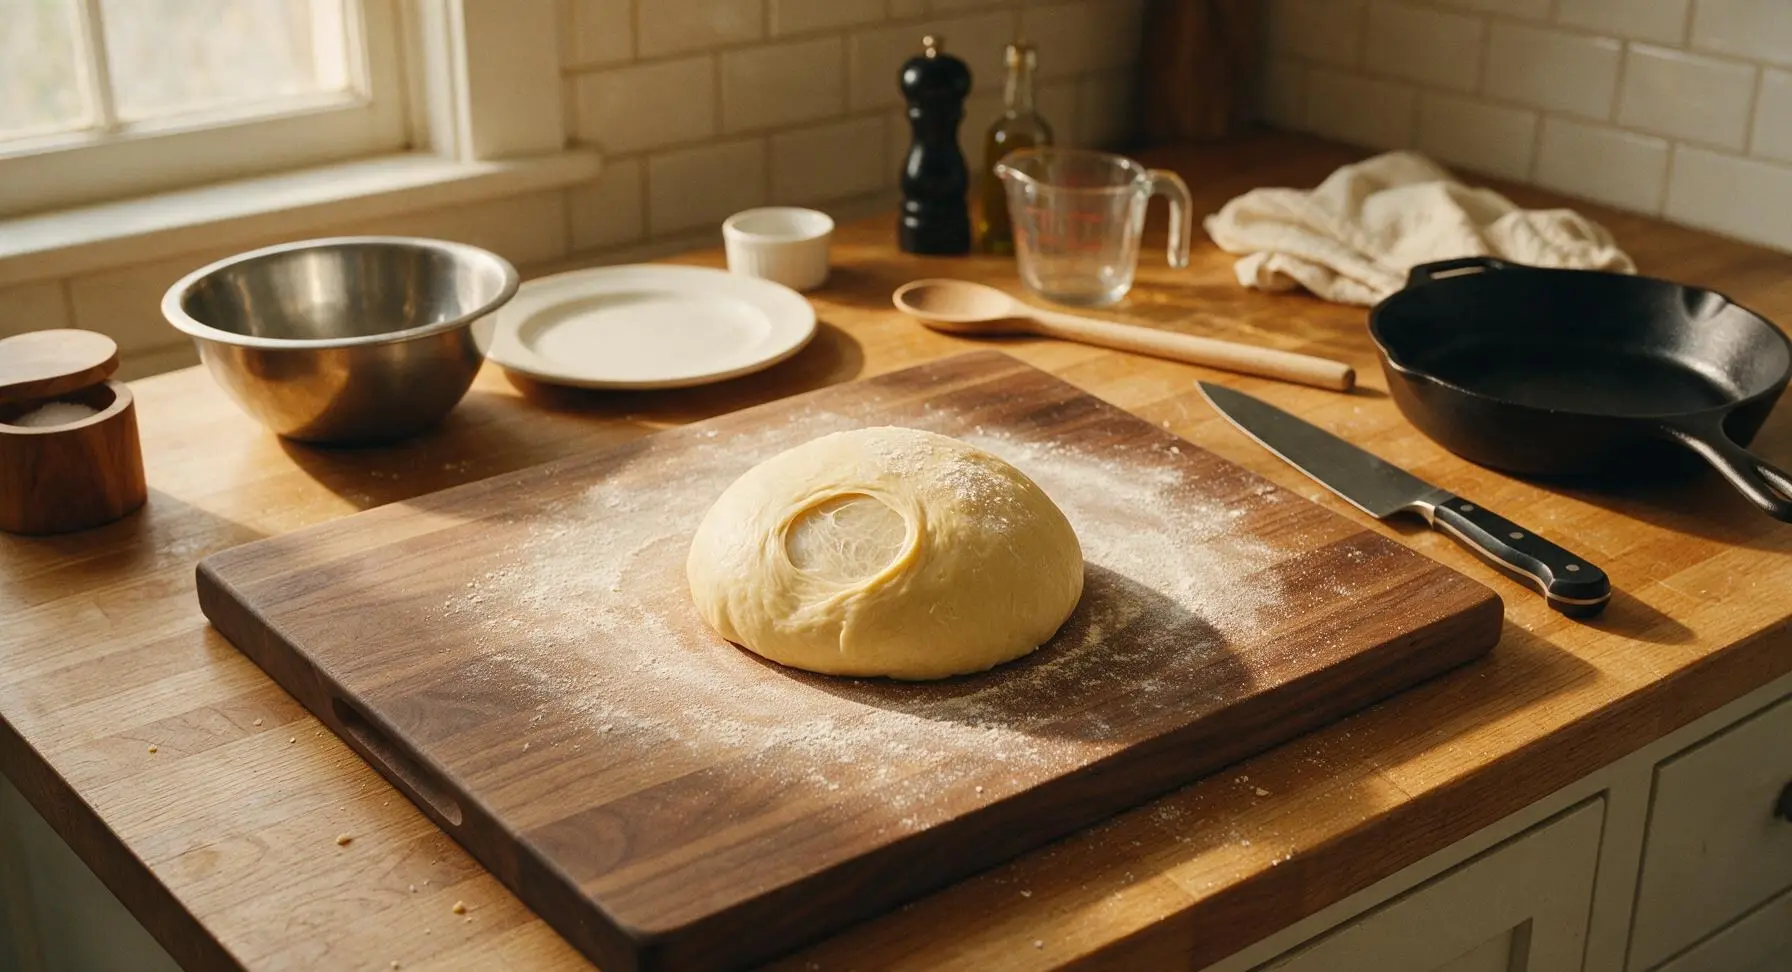
Sprinkle a light, even layer of flour on the honey maple pastry board, then turn the shaggy dough out onto the board using the sky blue silicone dough scraper. Knead by hand for 8-10 minutes, folding the dough over itself and pushing forward with the heel of your hand, until the dough becomes smooth, elastic, and no longer sticky to the touch. When ready, a small piece of dough pulled thin will form a translucent 'windowpane' without tearing, indicating sufficient gluten development.
Step 3
step3:Knead the Dough
Step 3
step3:Knead the Dough
4

First Dough Rise

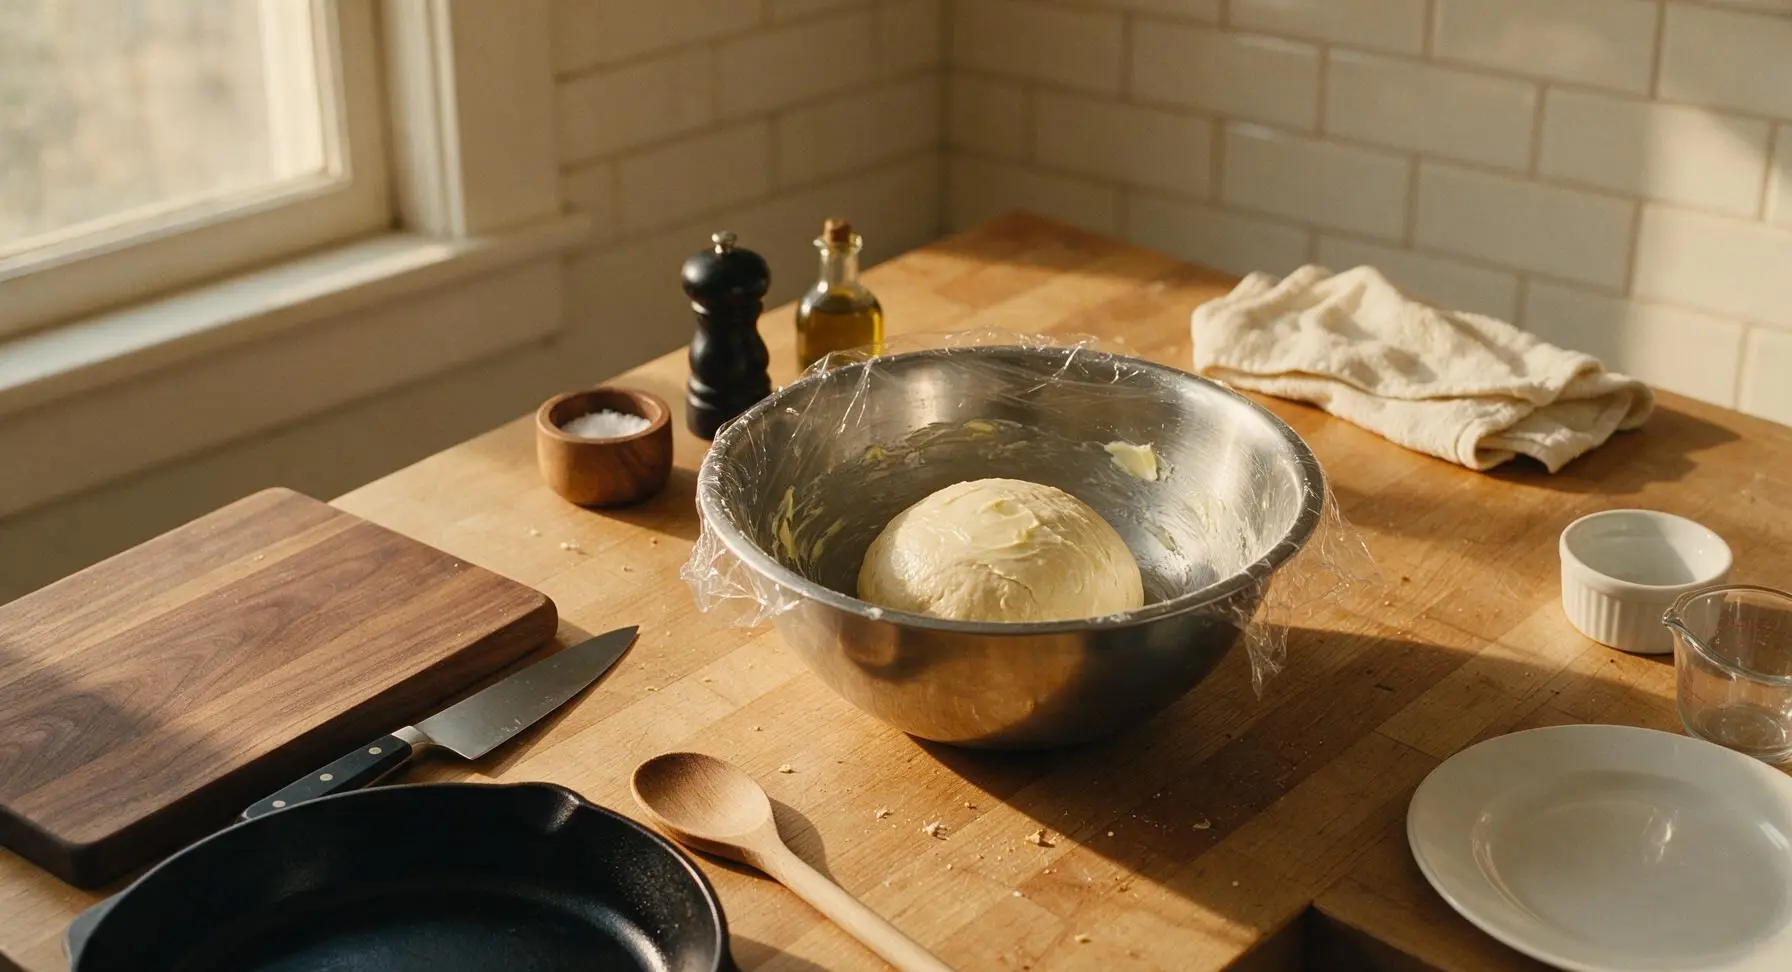
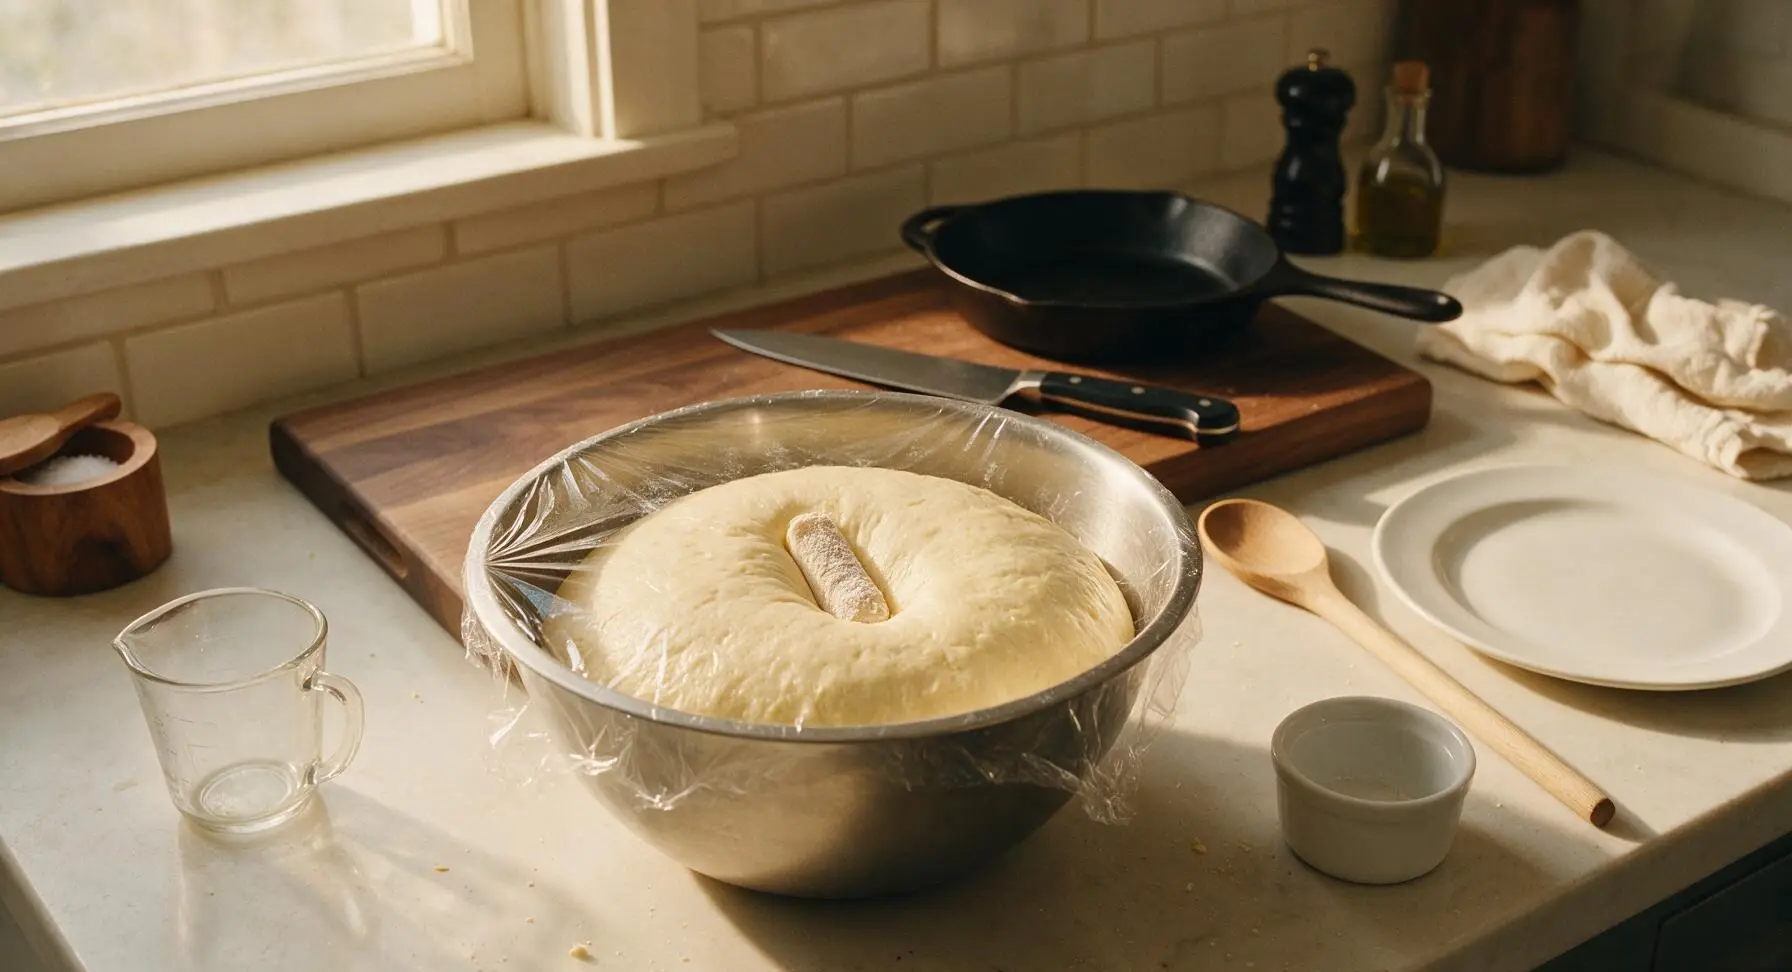
Wipe the large stainless steel mixing bowl lightly with a thin coating of butter, place the kneaded dough ball back inside, and turn once to coat the dough surface in butter to prevent sticking. Cover the bowl tightly with the flexible clear plastic bowl cover, then set it in a warm, draft-free spot on the counter. Let rise for 1 to 1 ½ hours, until the dough has doubled in size, and an indentation pressed into the center with a floured finger stays imprinted without bouncing back.
Step 4
step4:First Dough Rise
Step 4
step4:First Dough Rise
5

Shape Roll Portions

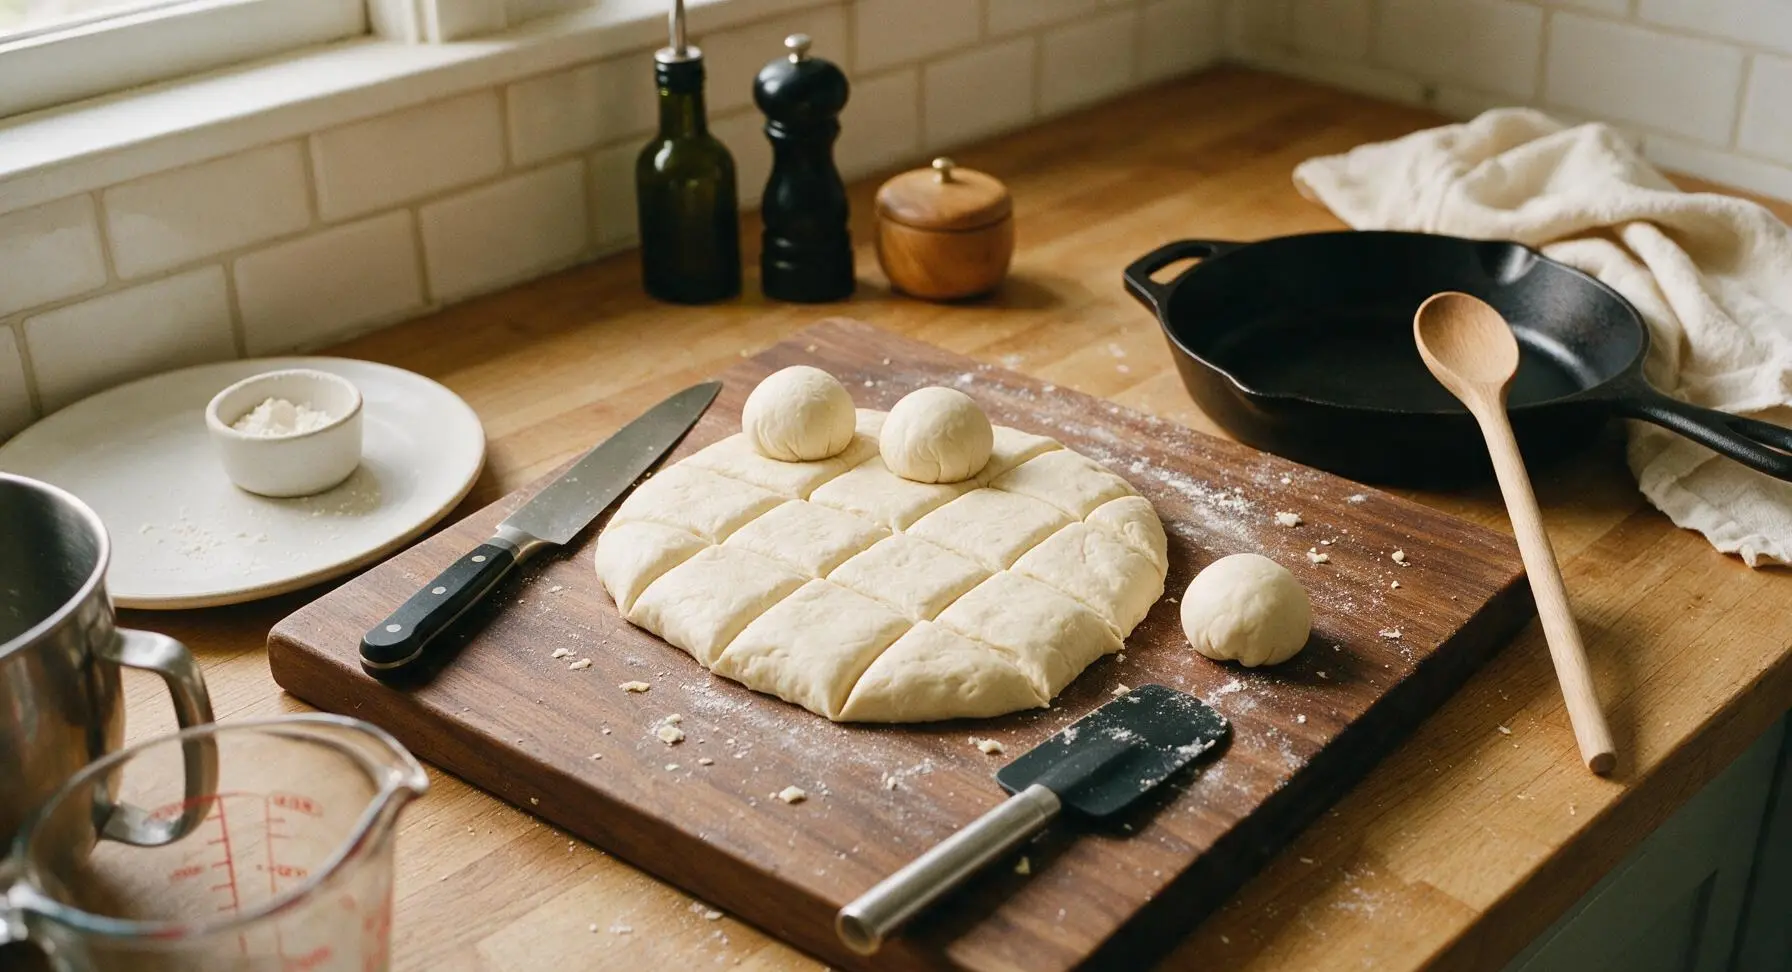
Once doubled, punch the dough down firmly in the center to release all trapped air, then turn it out onto the lightly floured maple pastry board. Use the silicone dough scraper to divide the dough evenly into 12 equal portions (each ~55g, for uniform baking and rise). Roll each portion into a tight, smooth ball by cupping your hand over the dough and rolling it in small circles on the unfloured section of the board, pulling the dough seams tight to the bottom of each ball for a smooth top.
Step 5
step5:Shape Roll Portions
6

Second Pan Rise

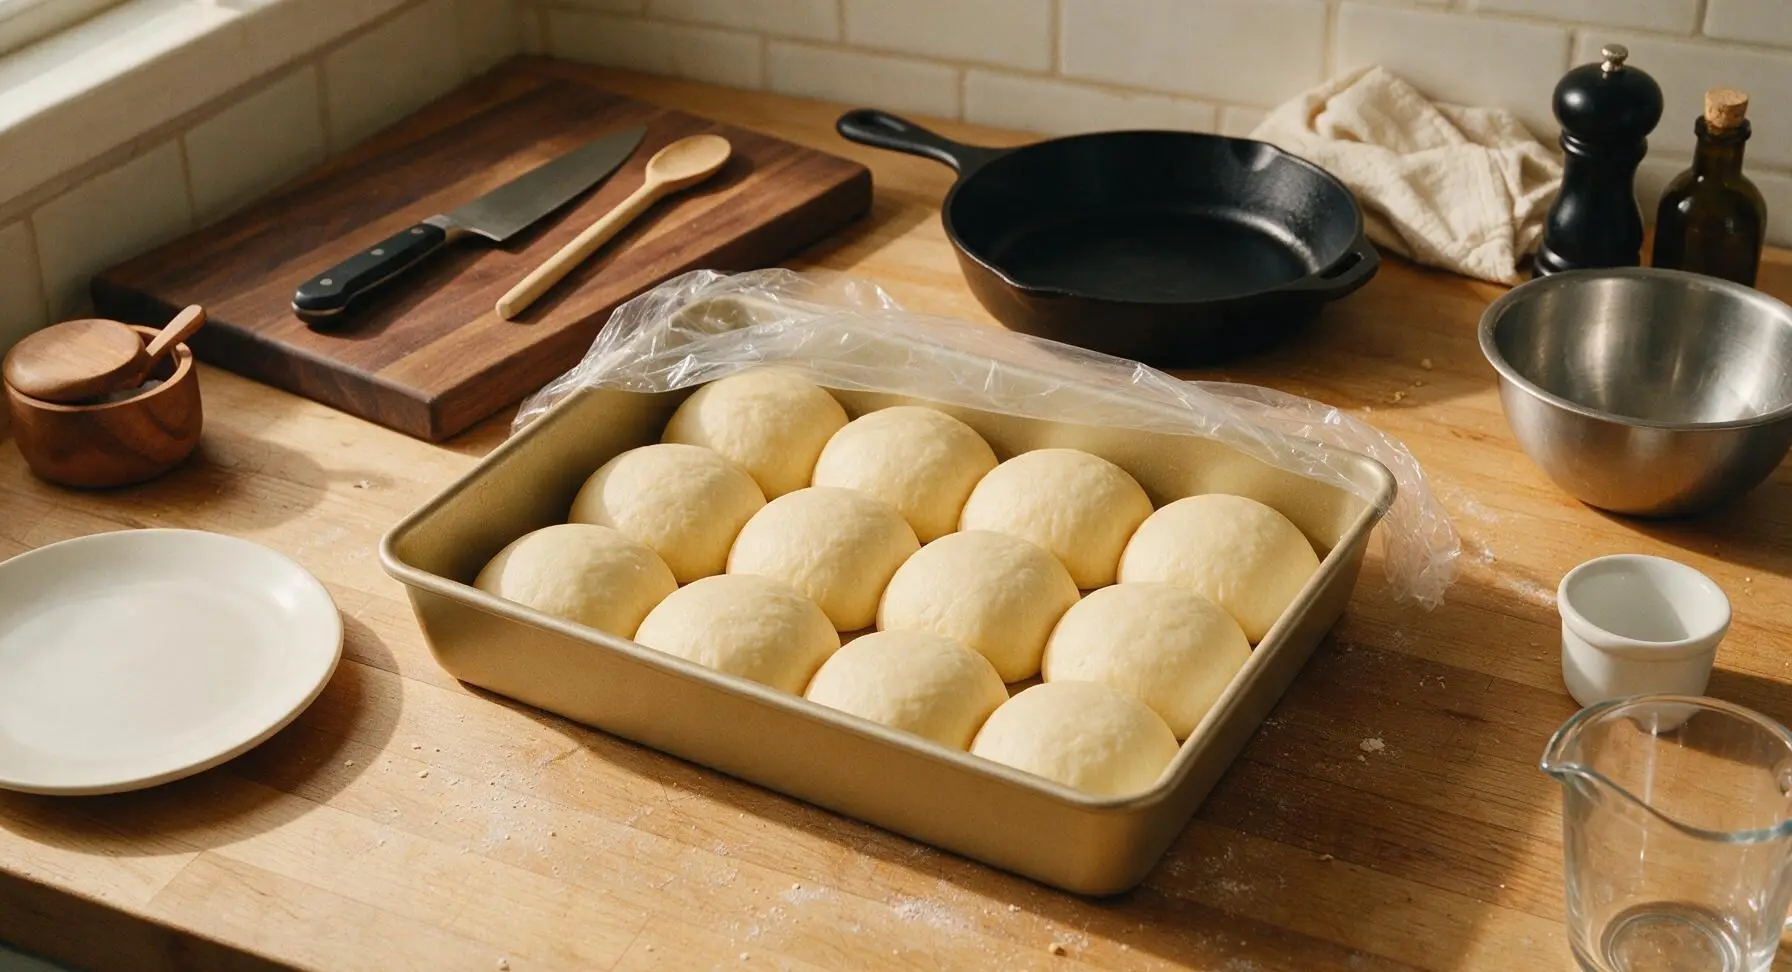
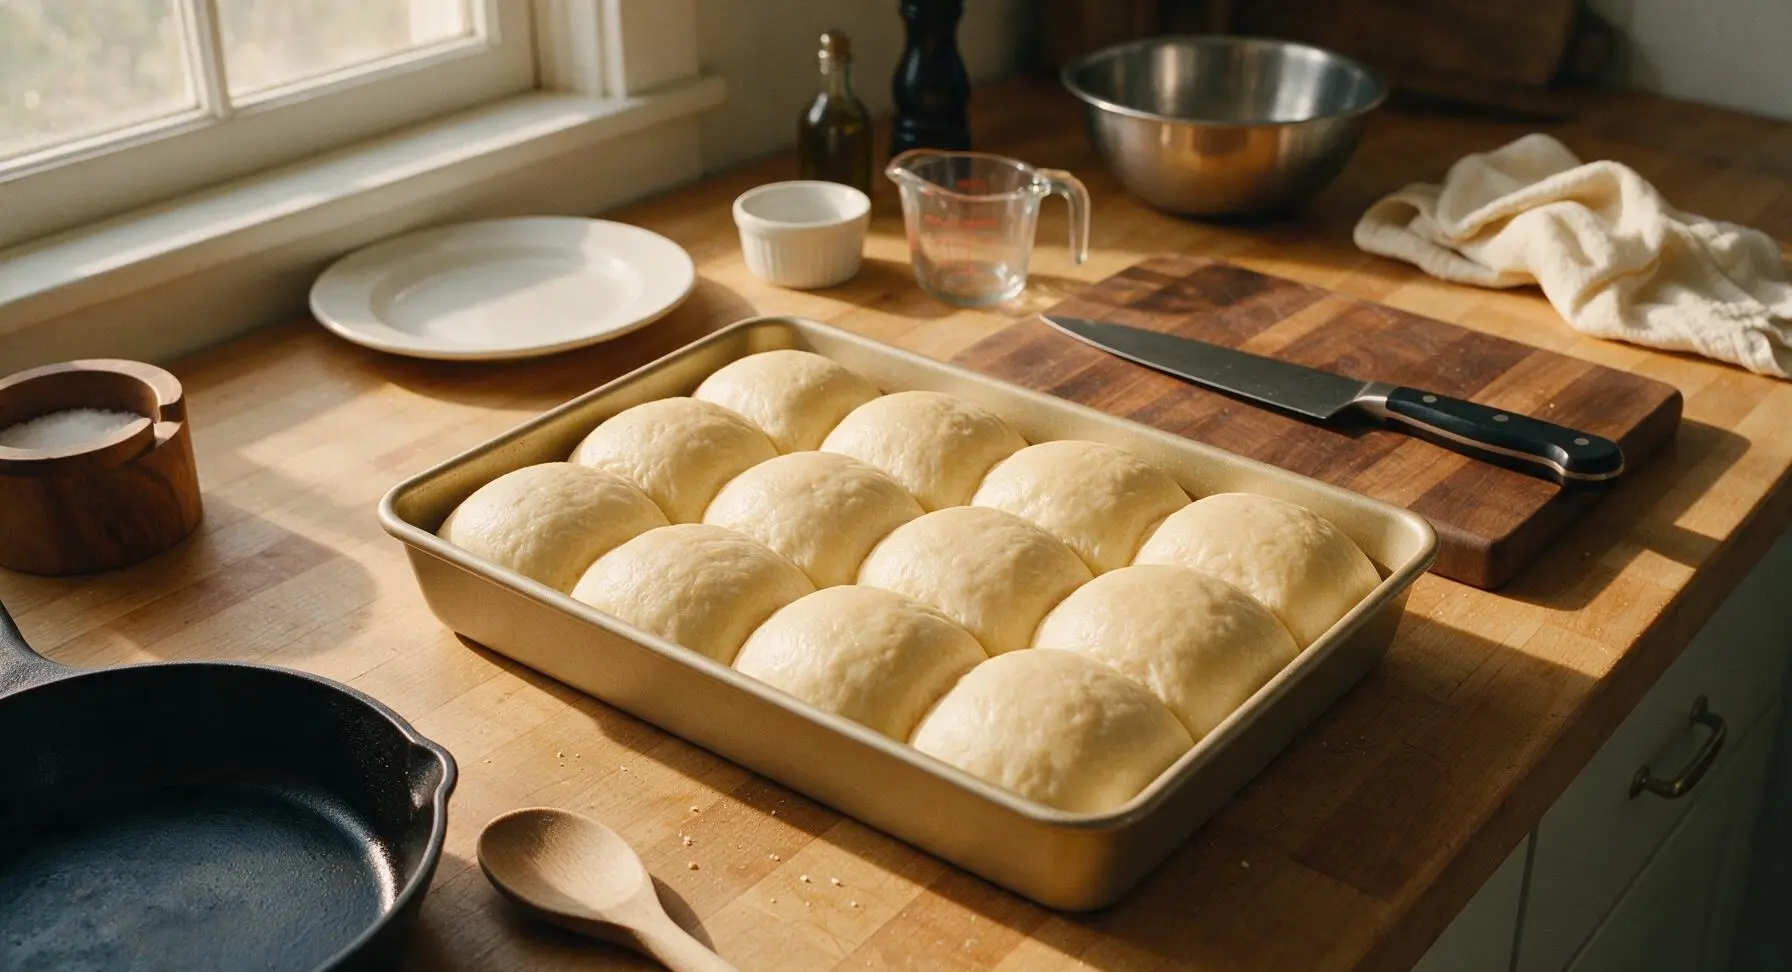
Grease the 9x13 inch light gold aluminized steel baking pan lightly with butter. Arrange the shaped dough balls evenly in the pan, spaced 1cm apart in 3 rows of 4. Cover the pan loosely with the clear plastic bowl cover, and let rise for a second time, 30-45 minutes, until the rolls have puffed up and are touching each other, filling the pan nearly to the top of the sides.
Step 6
step6:Second Pan Rise
Step 6
step6:Second Pan Rise
7

Bake Until Golden

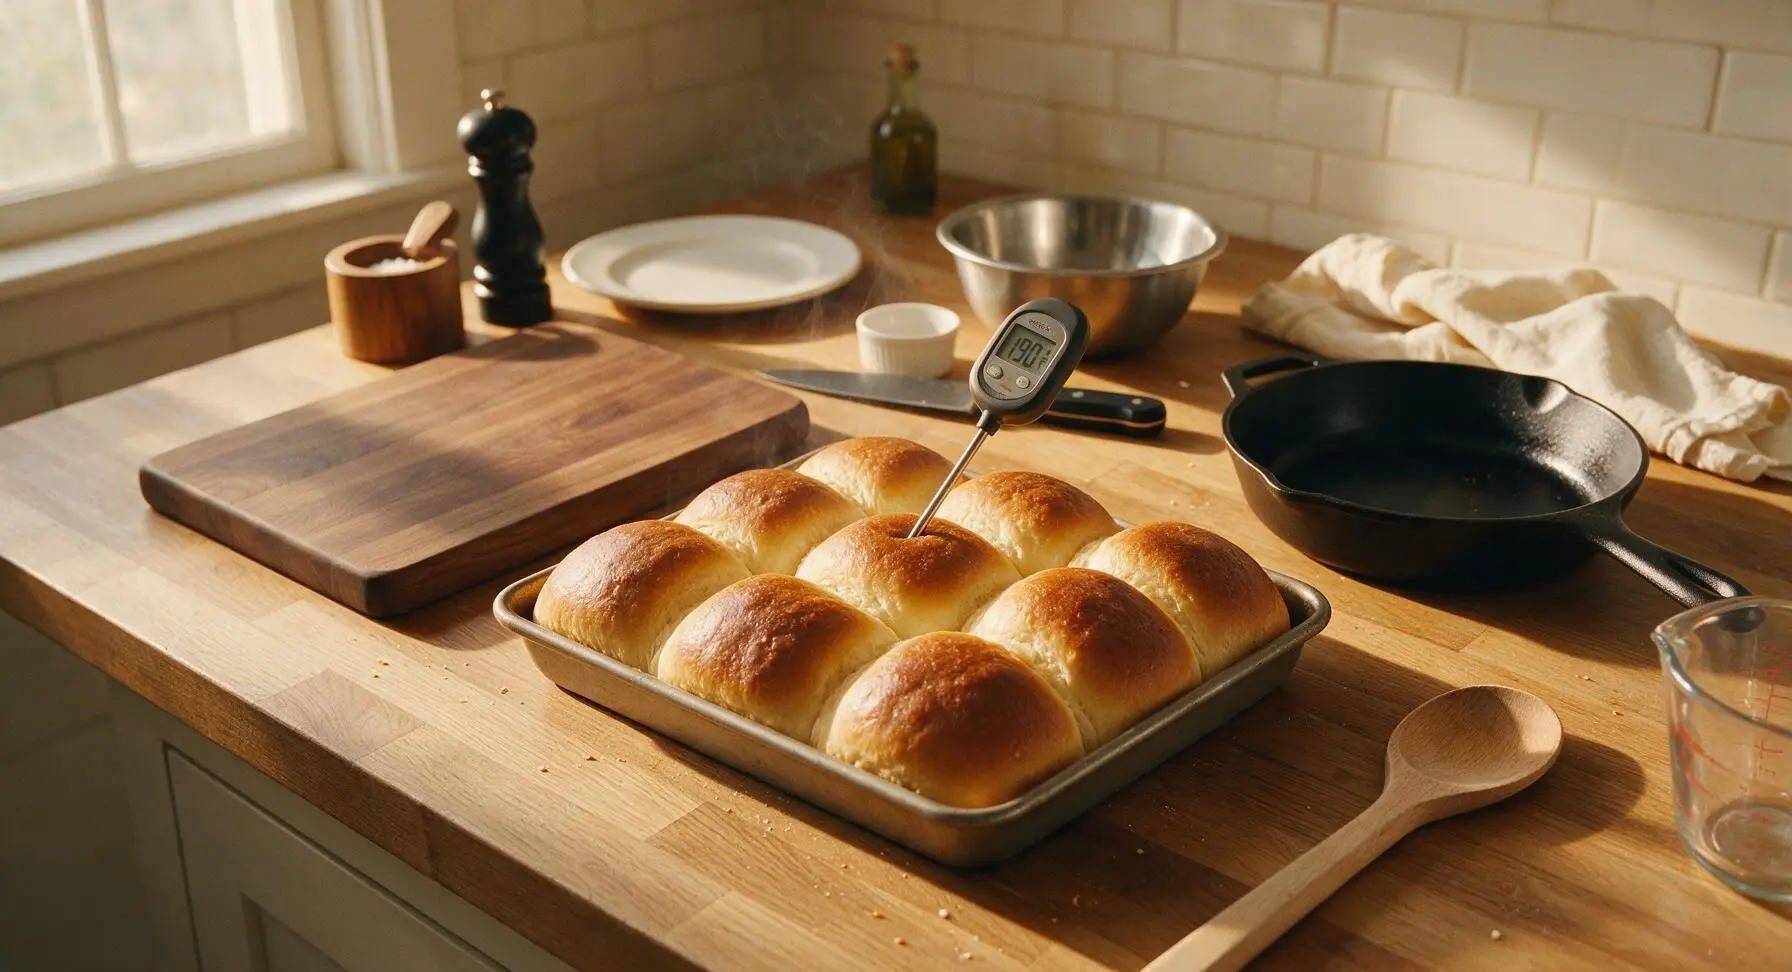
While the rolls finish their second rise, preheat oven to 375°F (190°C). Once rolls are fully puffed, remove the plastic cover, and bake on the middle oven rack for 18-22 minutes, until the tops are a deep even golden brown, and the internal temperature of the center roll reads 190°F (88°C) on the instant-read thermometer.
Step 7
step7:Bake Until Golden
8

Butter and Serve

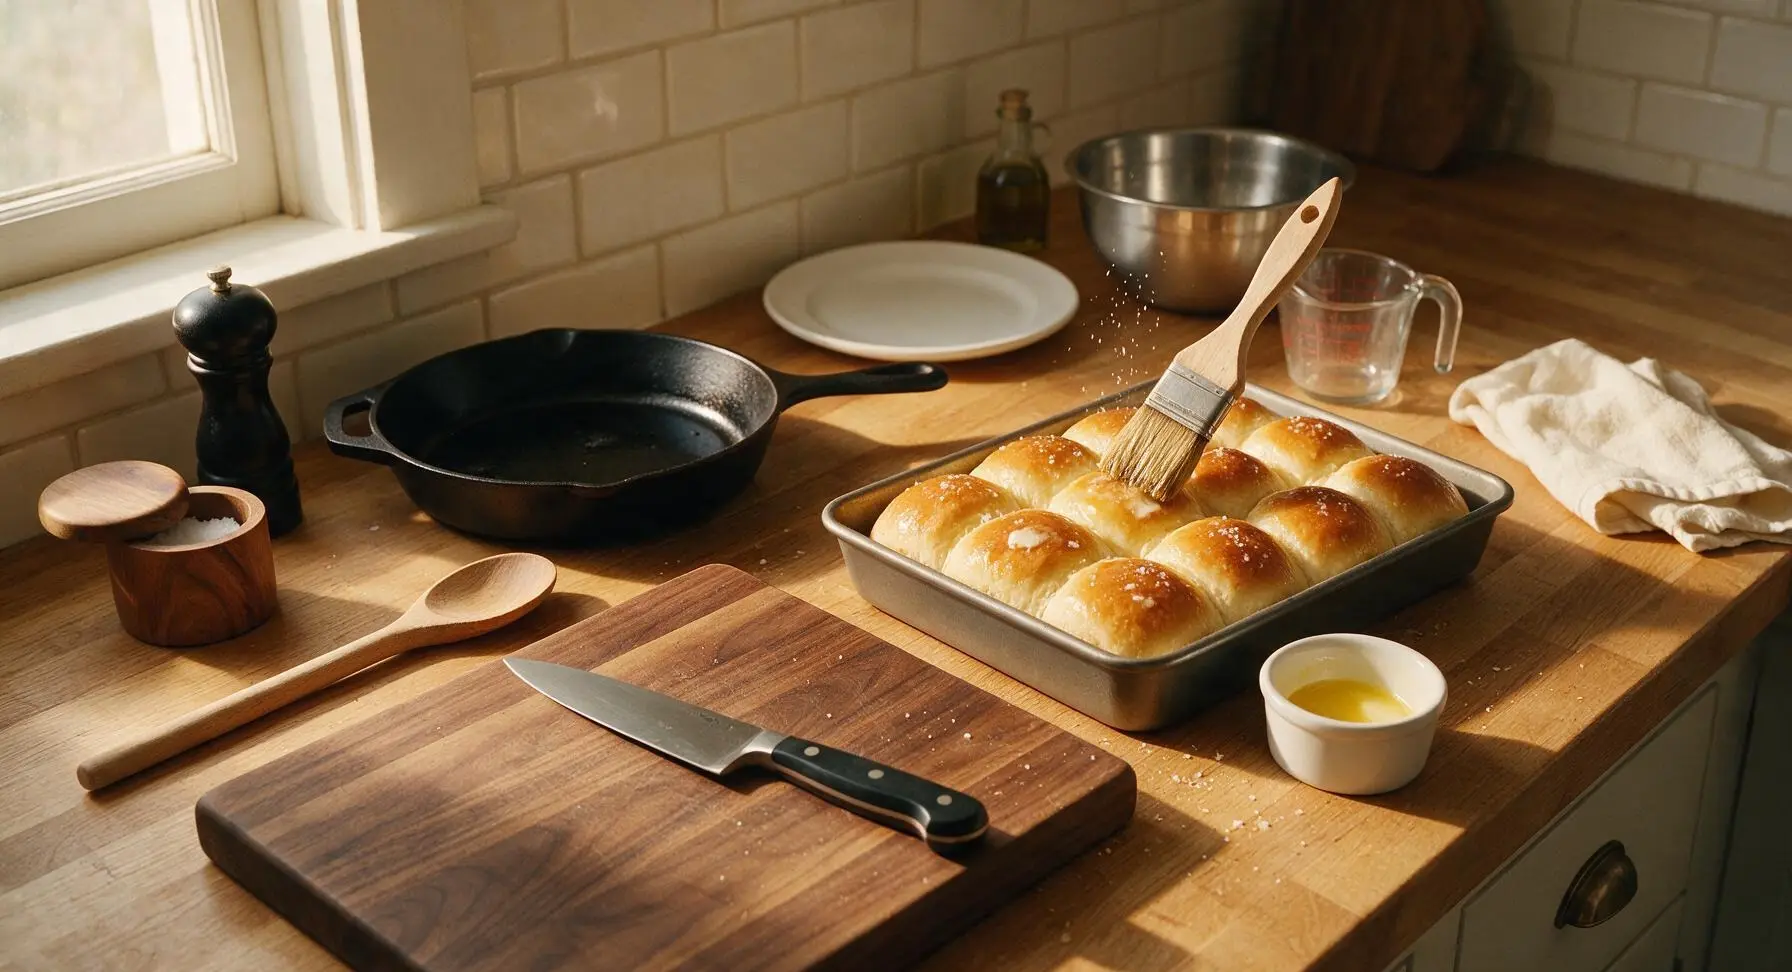
Melt the remaining 2 tablespoons of unsalted butter, then use the natural bristle pastry brush to brush the entire surface of the hot rolls generously with melted butter immediately after removing from the oven. Sprinkle lightly with flaky sea salt, then let the rolls cool in the pan for 5 minutes before transferring to the wire cooling rack for 10 minutes, or piling onto the cream ceramic serving platter to serve warm.
Step 8
step8:Butter and Serve

Tips

1.Ensure your milk is between 105–110°F before adding yeast: liquid hotter than 120°F will kill live yeast and prevent rolls from rising, while liquid too cold will fail to activate yeast, leading to dense, heavy rolls.
2.Brush roll tops with melted butter immediately after pulling them from the oven: the hot crust absorbs the butter, adding rich flavor and trapping moisture to keep the crust soft, rather than turning hard and dry as rolls cool.
3.For make-ahead convenience, shaped unbaked rolls can be covered and refrigerated for up to 16 hours: let them come to room temperature and finish their second rise (about 1 hour) before baking, for fresh warm rolls with no last-minute kneading work.


✨ You May Also Like

Desserts & Baking
🍜 Italy

Creamy, coffee-kissed classic Northern Italian no-bake dessert, with layers of rum-spiked mascarpone cream, soft ladyfingers, and a rich cocoa dusting.

⏱️ 4 hours 3Desserts & Baking ★ 4.7
Desserts & Baking
🍜 France

Flaky, shatteringly crisp, buttery French croissants with golden exteriors and soft, airy layered interiors, perfect for pairing with coffee for a special morning treat.

⏱️ 12 hours Desserts & Baking ★ 4.5
Desserts & Baking
🍜 United States

Warm, spiced baked apples topped with a fluffy golden biscuit crust, this cozy dessert pairs perfectly with vanilla ice cream for cool-weather comfort.

⏱️ 55 minuteDesserts & Baking ★ 4.6
Desserts & Baking
🍜 United States

A star-spangled classic American blueberry pie with buttery flaky crust and bright sweet-tart filling, perfect for summer patriotic gatherings.

⏱️ 1 hour 25Desserts & Baking ★ 4.7
Desserts & Baking
🍜 United States

A beloved no-bake regional Maine candy with a chewy coconut-potato center coated in rich dark chocolate, a New England holiday staple since the 1870s.

⏱️ 2 hours 3Desserts & Baking ★ 4.8
Desserts & Baking
🍜 France

Luxuriously creamy, floral frozen custard made with aromatic Tahitian vanilla beans, boasting a smooth, rich texture that melts slowly on the tongue.

⏱️ 3 hours 3Desserts & Baking ★ 4.5

Sweet Milk Dinner Rolls:Frequently Asked Questions

1.Can I use instant yeast instead of active dry yeast for these rolls? ▾
Yes, you absolutely can! Swap 1 ¾ teaspoons of instant yeast for every standard 2 ¼ teaspoon packet of active dry yeast the recipe calls for. You can skip the initial proofing step in warm milk, mix the yeast straight in with your dry ingredients, and cut down prep time without losing that soft, fluffy rise.
2.Do I have to use whole milk, or can I substitute lower-fat milk? ▾
Whole milk delivers the rich, tender crumb and subtle milky sweetness these rolls are known for, but 2% milk works as a last-minute swap. Skip skim milk entirely—it lacks the milk fat that keeps rolls soft, and will produce drier, blander, denser rolls that don’t have that classic pillowy texture.
3.How do I know when I’ve kneaded the dough long enough? ▾
Properly kneaded dough is smooth, elastic, and pulls away cleanly from the sides of your mixing bowl. Test it with the windowpane test: pinch a small piece and stretch it thin. If it forms a translucent, tear-resistant membrane that lets light through without ripping, it’s ready for its first rise.
4.Why do my rolls turn out dense instead of light and pillowy? ▾
Dense rolls almost always trace back to expired yeast, under-kneading, or under-proofing. Test your yeast by proofing it in 105–110°F milk with a pinch of sugar first to confirm it’s active, and make sure your dough fully doubles in size during both the first rise and final pan rise before baking.
5.Can I make these rolls ahead of time for a holiday or potluck? ▾
Absolutely! For easiest prep, shape the rolls, place them in your baking pan, cover tightly, and refrigerate for 8–12 hours for a slow cold rise. You can also bake rolls fully, cool completely, wrap tightly in plastic and foil, and freeze for up to 1 month, reheating at 350°F for 5–7 minutes before serving.
6.What temperature should my milk be to properly activate active dry yeast? ▾
Aim for milk between 105°F and 110°F—it will feel just warm to the touch, not hot. Milk hotter than 115°F will kill yeast and lead to no rise, while too-cold milk won’t wake yeast enough to create that light crumb. A quick-read thermometer takes all the guesswork out of this step.
7.Can I use bread flour instead of all-purpose flour for these rolls? ▾
You can, but expect a slightly chewier, more structured crumb instead of the ultra-tender, pillowy texture all-purpose flour creates. If you swap, hold back 2 tablespoons of milk at first, since bread flour absorbs more liquid than AP flour, and add it back only if your dough feels too stiff to come together smoothly.
8.How do I get that perfect golden, buttery top crust? ▾
Use a double-butter method for the best results: right before baking, gently brush the tops of fully proofed rolls with melted unsalted butter. As soon as you pull the baked rolls out of the oven, brush them with a second coat of melted butter to create that glossy, rich, golden crust everyone loves.
9.Why do my rolls spread out instead of rising up when baking? ▾
Spreading usually happens if your dough is too wet, you skipped the full second rise after shaping, or your pan is too large. Make sure shaped dough holds its form, let rolls rise until they’re puffy and touching each other in the pan, and use a standard 9x13 inch pan for 12 evenly sized rolls.
10.How long do these dinner rolls stay fresh after baking? ▾
Stored in an airtight container or tightly wrapped in plastic at room temperature, these rolls stay soft and fresh for 2–3 days. Skip storing them in the fridge, as cold, dry air makes them go stale much faster. For longer storage, wrap individual rolls tightly and freeze for up to 3 months.
11.Can I add mix-ins like raisins, cinnamon, or cheese to the dough? ▾
These mild, sweet rolls are super versatile! For a sweet twist, fold in ½ cup raisins and 1 teaspoon of cinnamon during the final knead, or add ½ cup shredded sharp cheddar for a savory spin. Just don’t add more than 1 cup total of mix-ins, or you’ll weigh the dough down and prevent a good rise.
12.Do I need a stand mixer to make these rolls, or can I make them by hand? ▾
You don’t need any special equipment at all! Mix the dough in a large bowl with a wooden spoon, then turn it out onto a lightly floured counter to knead by hand for 8–10 minutes until smooth and elastic. Hand-kneaded rolls turn out just as fluffy as mixer-made ones, it just takes a little extra elbow grease.
13.What size should I portion dough pieces to get evenly baked rolls? ▾
For uniform, perfectly cooked pull-apart rolls, portion each dough piece to 2–2.5 ounces, which makes about 12 rolls per standard 9x13 inch pan. If you don’t have a kitchen scale, pinch off pieces roughly the size of a golf ball, then roll them into tight, smooth balls before placing them in the pan to rise.
14.Why does my dough shrink back when I try to shape the rolls? ▾
Shrinking dough means the gluten is tight and overworked from kneading, and it needs a short rest. If your dough springs back immediately when you try to roll it into balls, cover the portioned pieces with a clean kitchen towel and let them rest 5–10 minutes for the gluten to relax, then shaping will be easy.
15.Can I use salted butter instead of unsalted butter in this recipe? ▾
You can, but know salted butter adds a variable amount of salt that can throw off the rolls’ gentle, sweet milky flavor. If you do swap, skip any small pinch of salt you might add to the dough to keep flavor balanced, and note the crust will have a slightly saltier, less sweet cream taste than the original recipe.

Comments (11)

yesterday

OMG these are SO good! I made them for our Sunday family dinner last night and my picky 7 year old ate THREE before the main course even hit the table. The sweet milk flavor is so perfectly subtle, not cloying at all. Cook time was exactly 20 mins like the recipe said too, total game changer for weeknight sides honestly.

2 hours ago

Wait did you do anything special for the rise? My kitchen is always freezing this time of year and I’m nervous my dough won’t puff right!

30 minutes ago

So glad your family loved them! If your kitchen is cool, try sticking the covered dough bowl in your turned-off oven with the light on — it creates the perfect warm 75ish degree spot for a consistent rise every time!

3 days ago

Brought these to my office potluck on Friday and people were begging for the recipe before I even set the platter down! I brushed the tops with a little melted honey butter right when they came out of the oven and *chef’s kiss*. Only note is that they’re a little more work than your basic canned roll, but 100% worth the effort for special occasions.

1 week ago

Has anyone tried freezing these after baking? I do big Sunday meal prep sessions for the week and would love to stash a batch in the freezer for quick sides with soup and chili this fall.

5 days ago

Great question! These freeze beautifully for up to 3 months — just let them cool completely, wrap tightly in plastic wrap then foil, and thaw at room temp when you’re ready to eat. A quick 30 second zap in the microwave makes them taste fresh out of the oven!

2 days ago

Okay full transparency I was intimidated because the difficulty says medium, but these came out perfect on my first try! I was worried I’d mess up the yeast step but the instructions were so clear. My only tiny mishap was I almost burned them at 18 minutes, so definitely keep an eye on them the last couple minutes if your oven runs hot!

yesterday

Ugh my oven runs 25 degrees hot too, I always have to set a timer 3 mins early for every baked good! Good call out, that would’ve saved me my first sad batch of rolls last month lmao

2 hours ago

Way to nail your first batch! So glad the instructions were easy to follow — you’re totally right, oven temps vary a lot, so that early check is such a smart tip for anyone else with a finicky oven.

2 weeks ago

These are my new go-to dinner roll! The sweet milk taste pairs so well with salty holiday ham, I already know I’m making two batches for Thanksgiving this year. They’re soft, pillowy, and have that perfect slightly crispy top that I look for in a good roll. 10/10, no notes.

5 days ago

Wait has anyone tried making these with gluten free all purpose flour? I have a family member with celiac and would love to adapt this so they can enjoy rolls at our next family dinner!

3 days ago

I made them with a 1:1 GF baking flour last week and they turned out great! I added an extra tablespoon of milk to make the dough a little softer, just make sure you let the rise go an extra 15 minutes since GF dough takes a bit longer to puff.

1 week ago

Game changer alert. I’ve been making the same old plain dinner rolls for 10 years and I’m never going back after trying these. The hint of sweetness from the milk makes them taste like the fancy rolls you get at a nice steakhouse, but for a fraction of the cost. My wife said they’re better than the ones her grandma used to make — don’t tell grandma lmao.

5 days ago

LMAO don’t let grandma see that comment! But fr these do taste restaurant quality, I served them with prime rib last weekend and felt like a total pro chef

3 days ago

That’s the highest compliment! So stoked these made it into your regular Sunday supper rotation — grandma’s recipe has nothing on a good homemade roll that the whole family raves about 😊

3 days ago

How long do these stay fresh after baking? I want to make them the night before my kid’s school bake sale so I don’t have to wake up at 5am to bake the day of.

2 days ago

Great question! They stay fresh for 2-3 days stored in an airtight container at room temp. If you make them the night before, just give them a quick warm up in the oven at 300 degrees for 5 minutes before serving and they’ll taste just as good as the day you baked them.

1 week ago

Made these slathered with garlic butter for our college football tailgate last weekend and they were gone in 10 minutes flat. People were using them to soak up chili, make little slider sandwiches with pulled pork, you name it. The sweet + savory combo is unbeatable. Will absolutely be making these for every game day this season.

5 days ago

Full disclosure I’ve killed so many yeast packets in my life I almost didn’t try this, but I’m so glad I did! The tip about warming the milk to exactly 110 degrees saved me, I usually make it way too hot and kill the yeast. These came out so soft and fluffy, my roommate thought I bought them from the fancy bakery down the street lmao.

3 days ago

Oh my god I am the same way! I always overheat my milk and end up with sad flat dough, I need to actually get a candy thermometer to check the temp like the recipe says instead of guessing

2 days ago

That’s our favorite tip for new bakers! Yeast is so finicky about temp, that quick check with a thermometer takes all the guesswork out. So stoked you got fluffy, bakery-worthy rolls — your roommate is lucky!

30 minutes ago

Quick question — has anyone swapped the dairy milk for oat milk and used vegan butter to make these plant based? I’m hosting a dinner party next month with a few vegan friends and want to make sure the recipe works before I test it out.

5 minutes ago

Great question! We’ve tested this with unsweetened oat milk and vegan butter and it works beautifully — just make sure your oat milk is warmed to the same 110 degree temp as dairy milk to activate the yeast properly, and you’ll get the same soft, fluffy results!



