
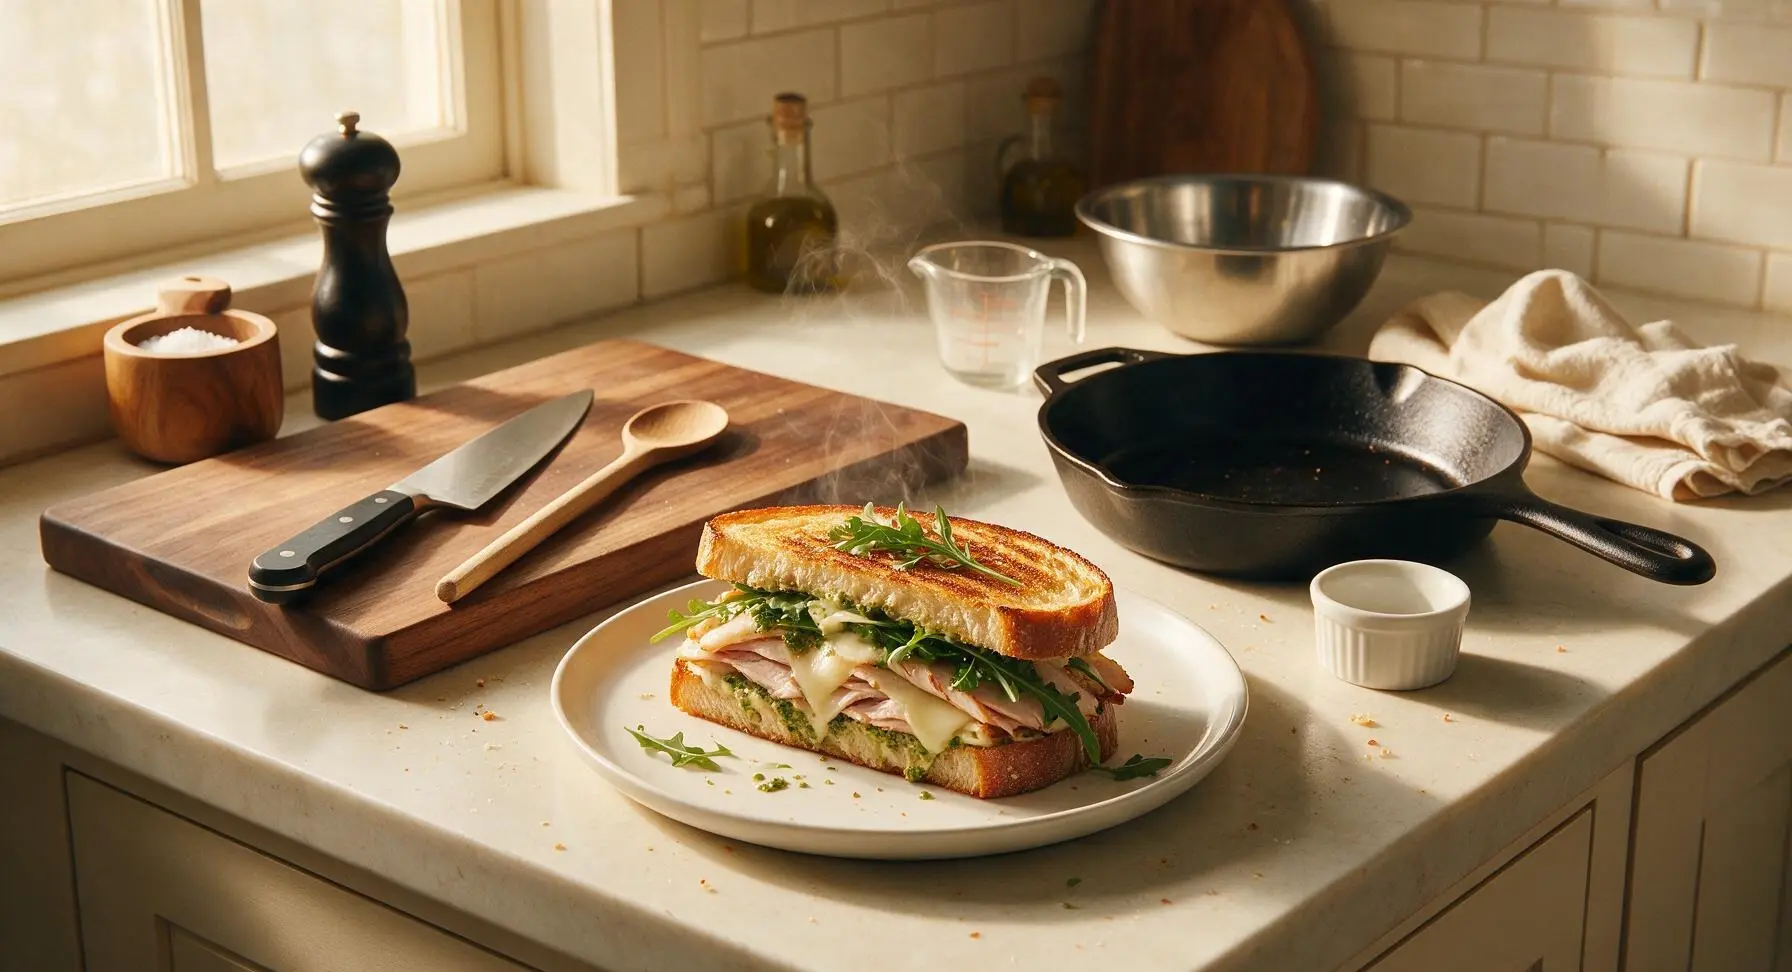
Turkey Panini

title 1
Turkey Panini
⏱️ cook time 8 minutes
🍽️ servings 4
⚡ Difficulty easy

intro

Crispy golden pressed sourdough loaded with tender smoked turkey, melted provolone, peppery arugula, and zesty pesto mayo—this hearty panini is a fast, satisfying crowd-pleaser.

Ingredients
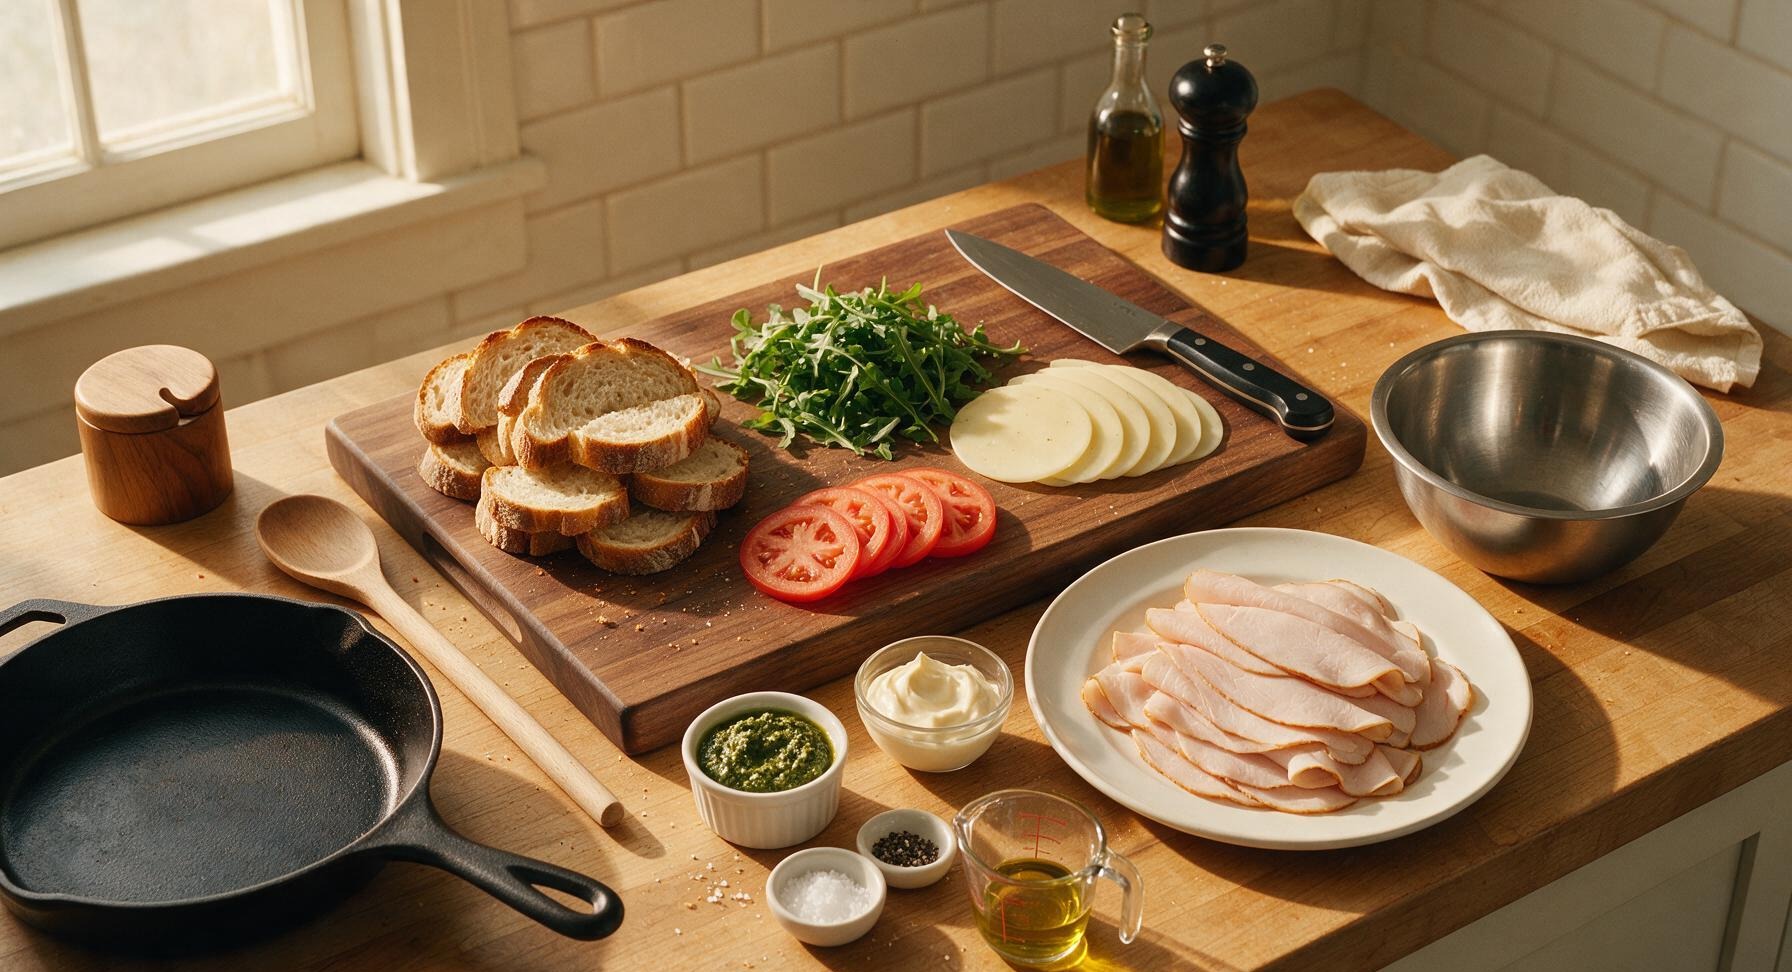
Thick-cut sourdough bread 8 slices (500g total)
Thinly sliced smoked deli turkey 450g
Sliced provolone cheese 8 thin slices (170g total)
Fresh arugula 1 cup (30g)
Roma tomato 1 medium (120g), sliced into 8 thin rounds
Prepared basil pesto 1/4 cup (60g)
Full-fat mayonnaise 1/4 cup (55g)
Extra virgin olive oil 1 tablespoon (15ml)
Flaky sea salt 1/4 teaspoon
Cracked black pepper 1/4 teaspoon

Steps

1

Mix Pesto Mayo Spread

Place the 1/4 cup mayonnaise and 1/4 cup basil pesto into the small stainless steel mixing bowl. Use the matte gray silicone spatula to stir until fully combined into a smooth, pale green spread, with no streaks of separate mayo or pesto remaining. Season with a tiny pinch of cracked black pepper, stir once more to incorporate.
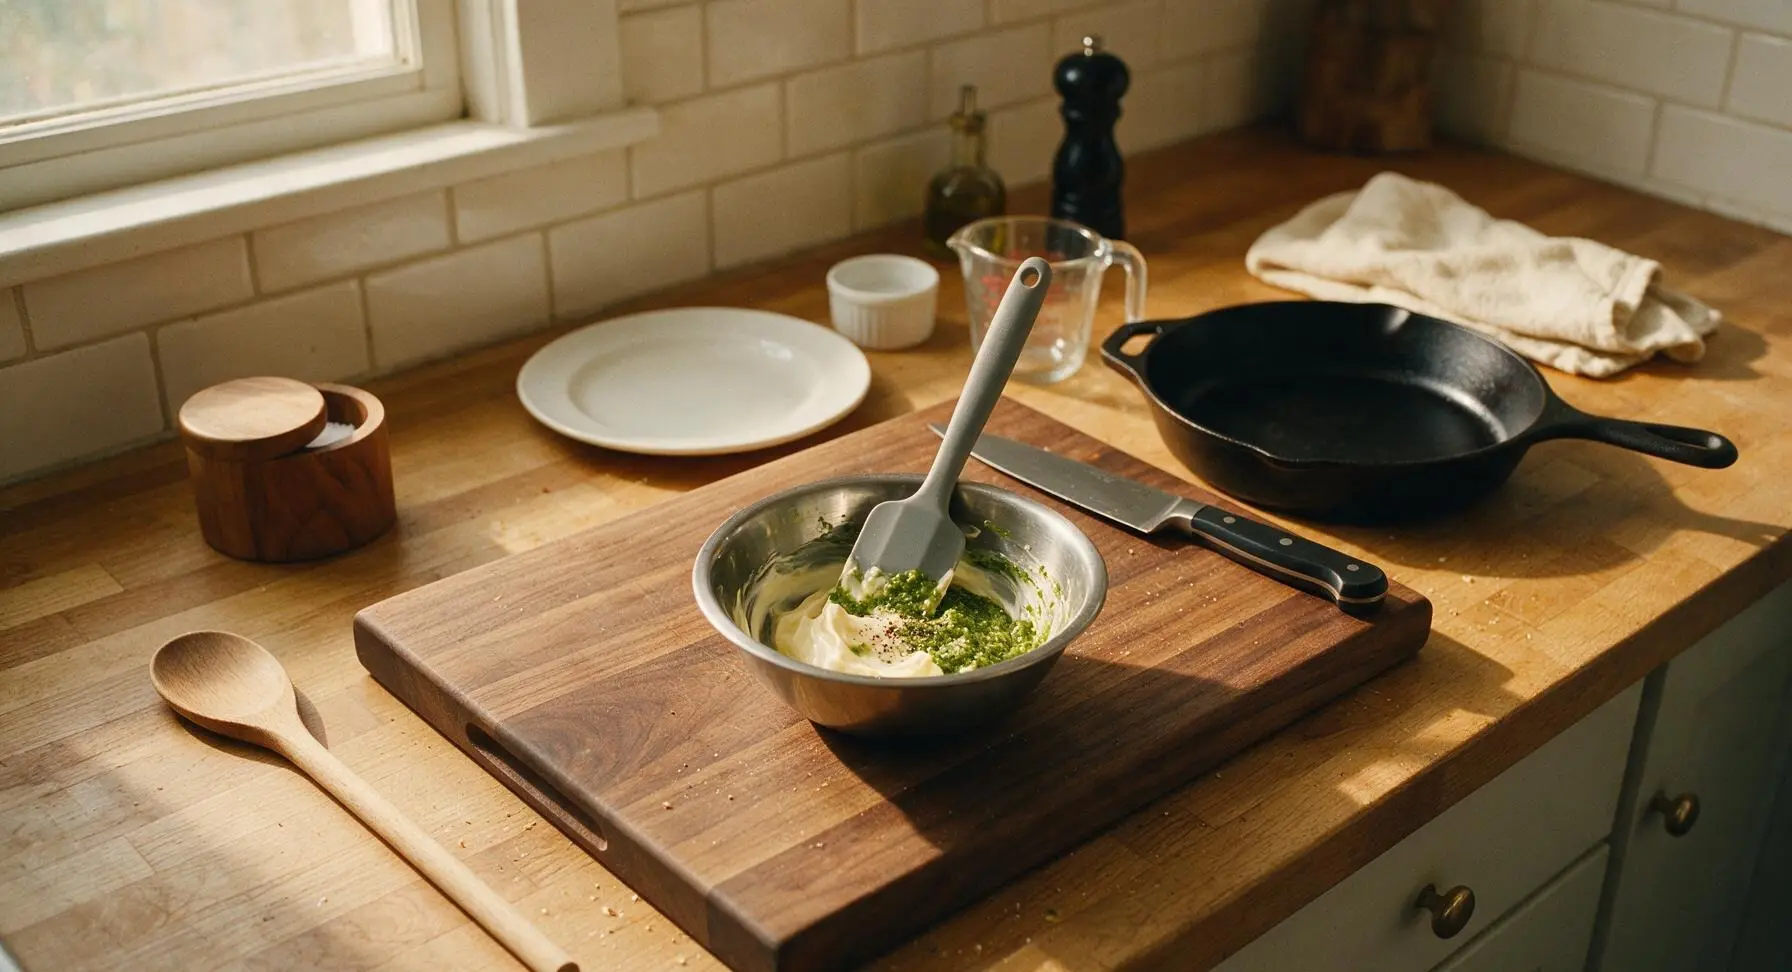
Step 1
step1:Mix Pesto Mayo Spread
2

Prep Bread and Tomato

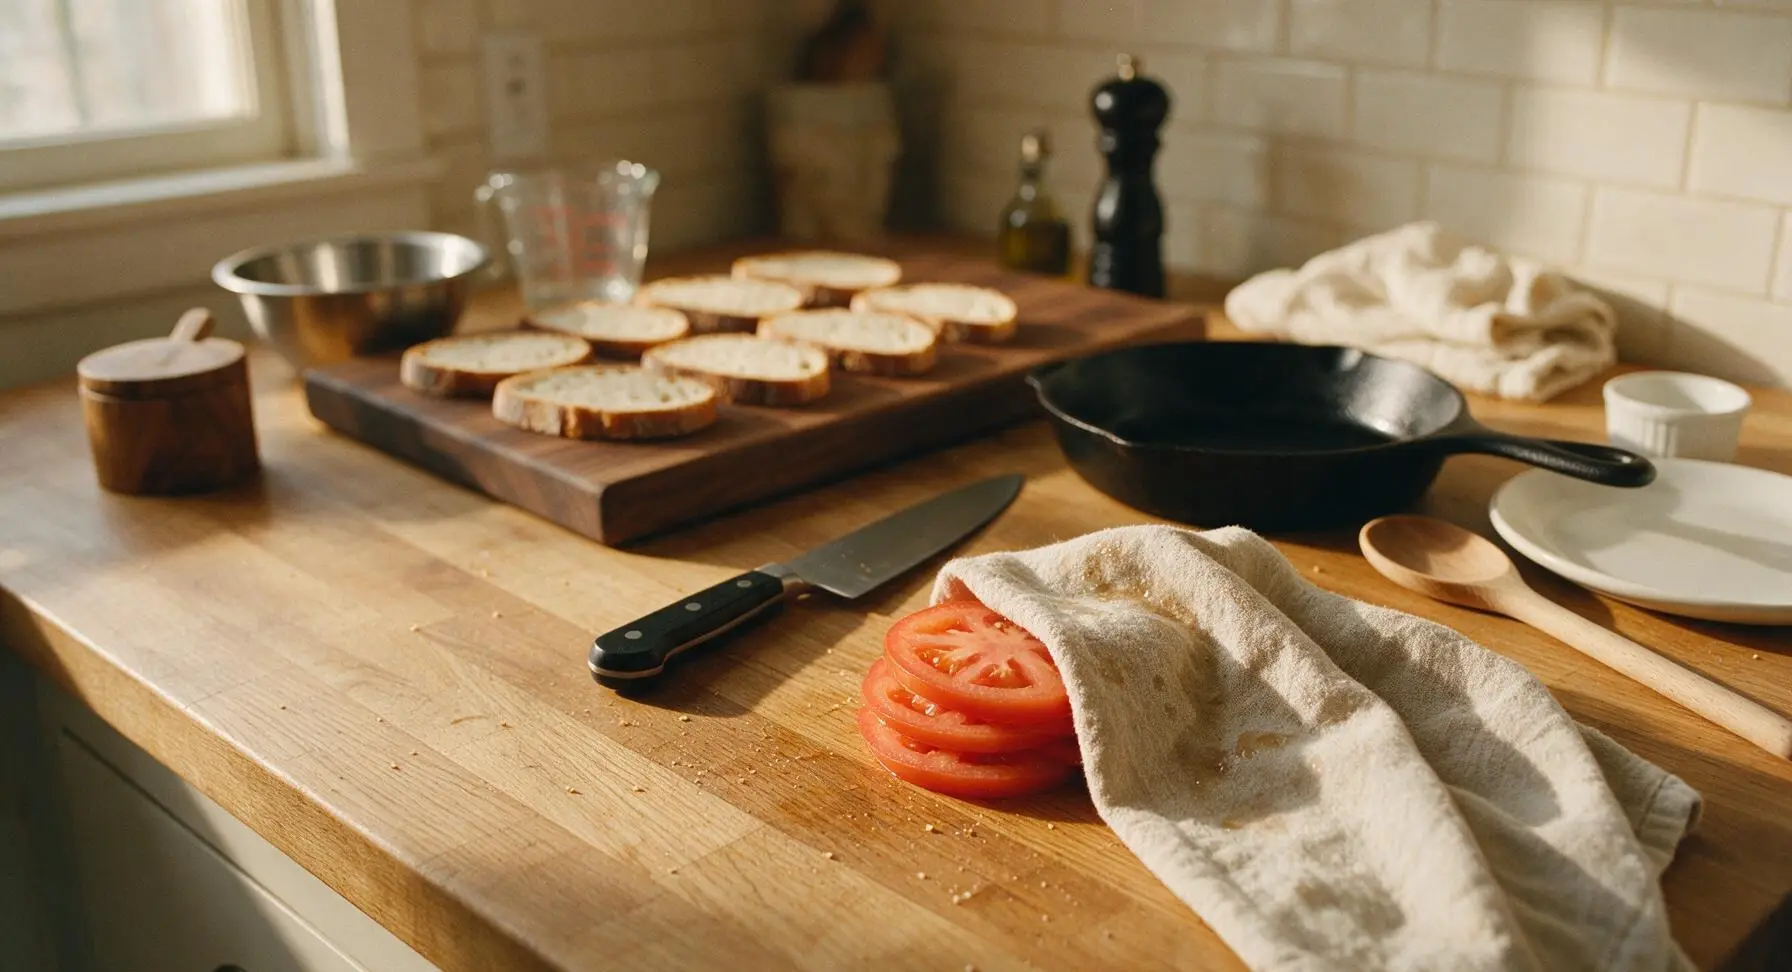
Lay all 8 sourdough slices flat on the maple cutting board. Use the chef knife to slice the Roma tomato into 8 even 1/4-inch thick rounds, discarding the tough stem end. Pat the tomato slices lightly with a loose corner of the fixed oatmeal linen towel to remove excess juice and seeds, which will prevent the sandwich from getting soggy during pressing.
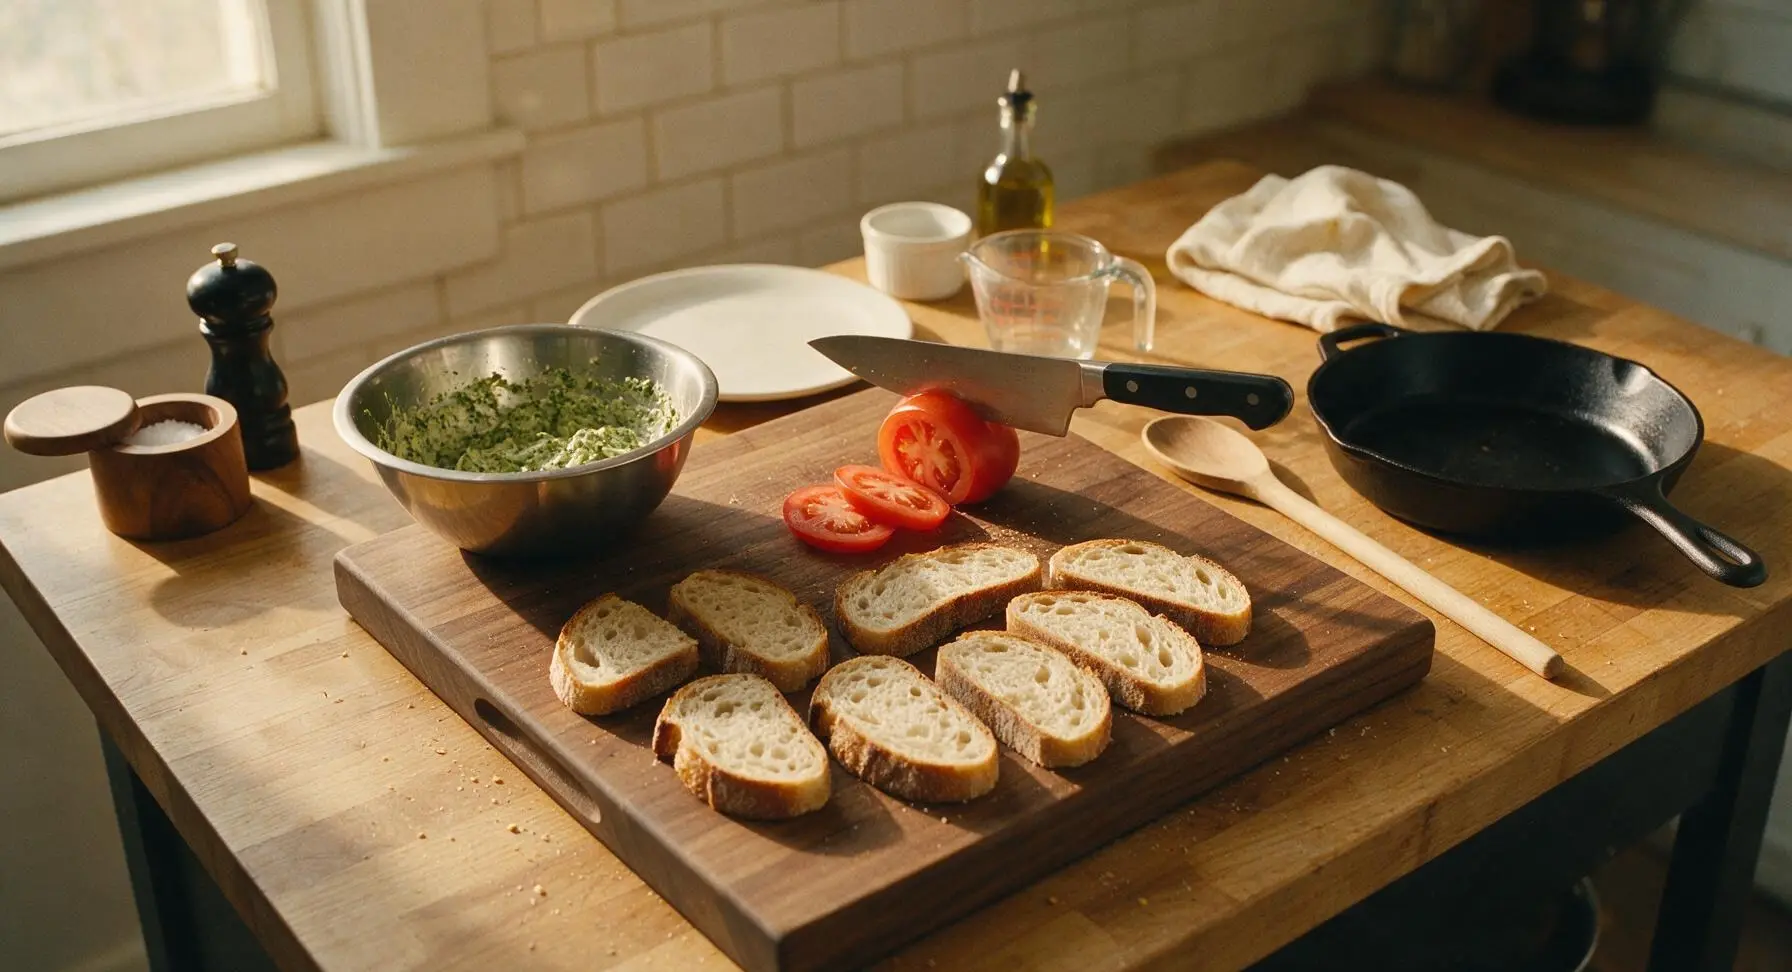
Step 2
step2:Prep Bread and Tomato
Step 2
step2:Prep Bread and Tomato
3

Assemble Sandwich Layers

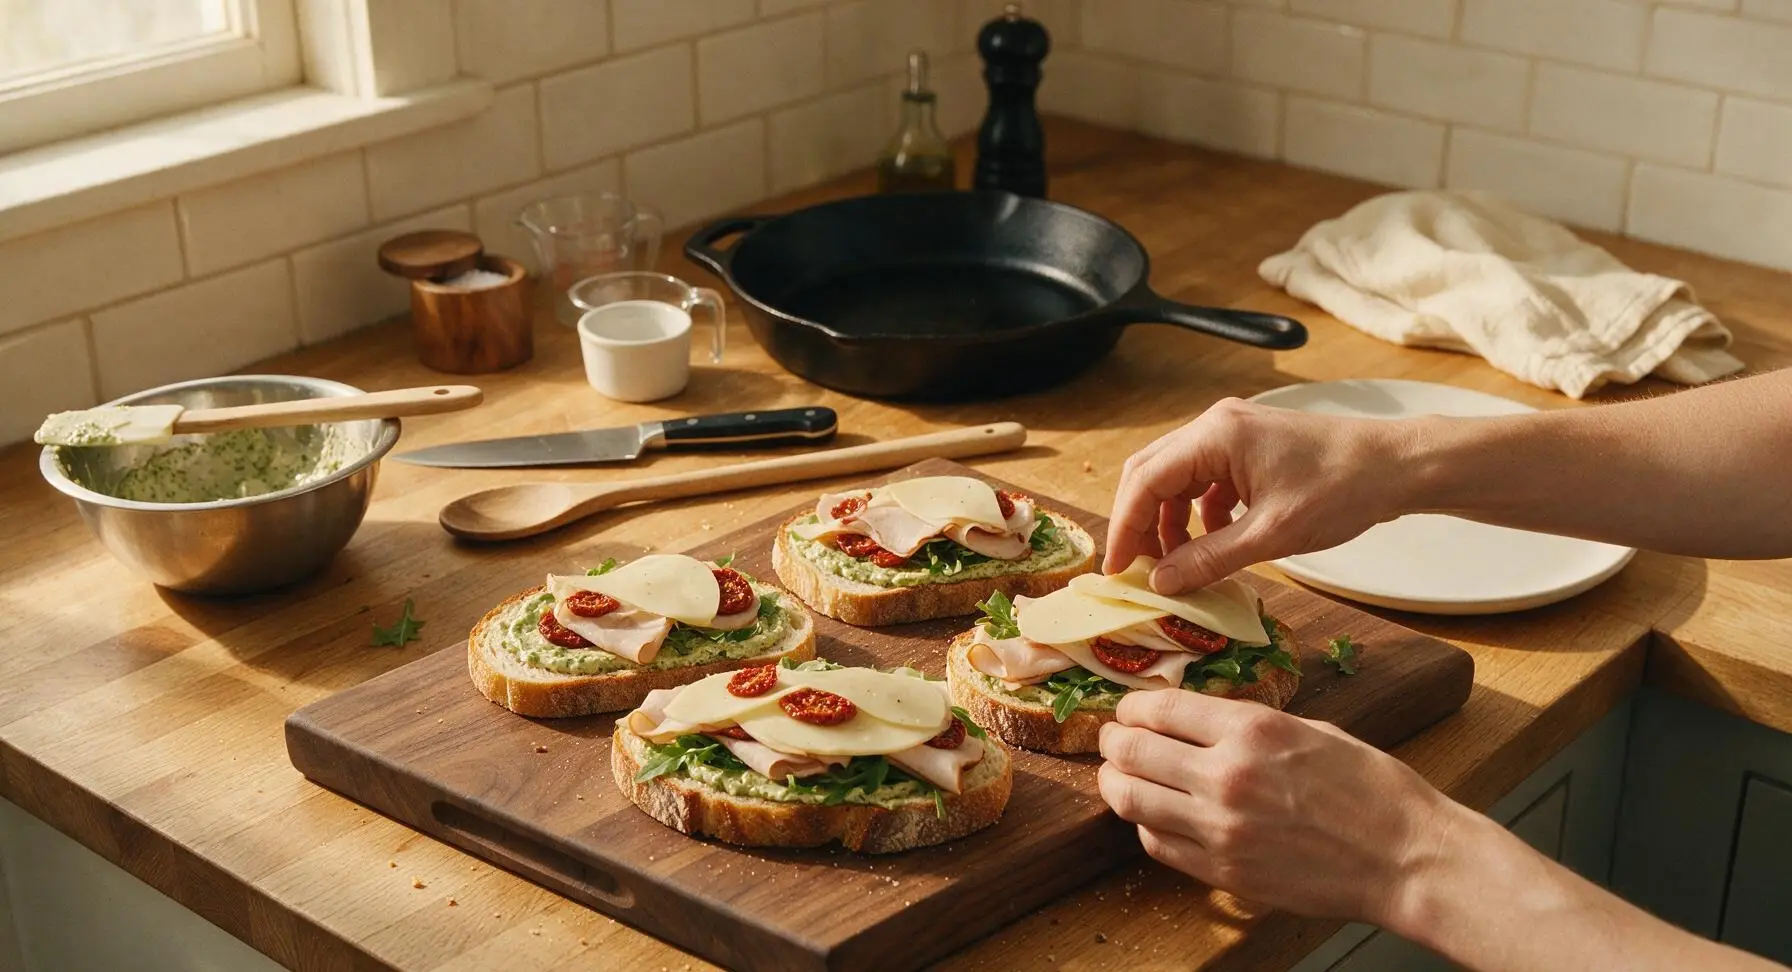
Spread 1 tablespoon of the pesto mayo evenly across one side of every bread slice, using the silicone spatula to spread it all the way to the crusts for full flavor in every bite. For each sandwich, layer 2 slices of provolone (one on each bread half to act as a moisture barrier against wet fillings), 110g of thinly sliced smoked turkey, 2 patted-dry tomato slices, and a 1/4 cup loose pile of arugula. Sprinkle a tiny pinch of flaky sea salt over the arugula, then close the sandwich to make 4 total assembled paninis, pressing gently to adhere the layers.
Step 3
step3:Assemble Sandwich Layers
4

Preheat Grill Pan

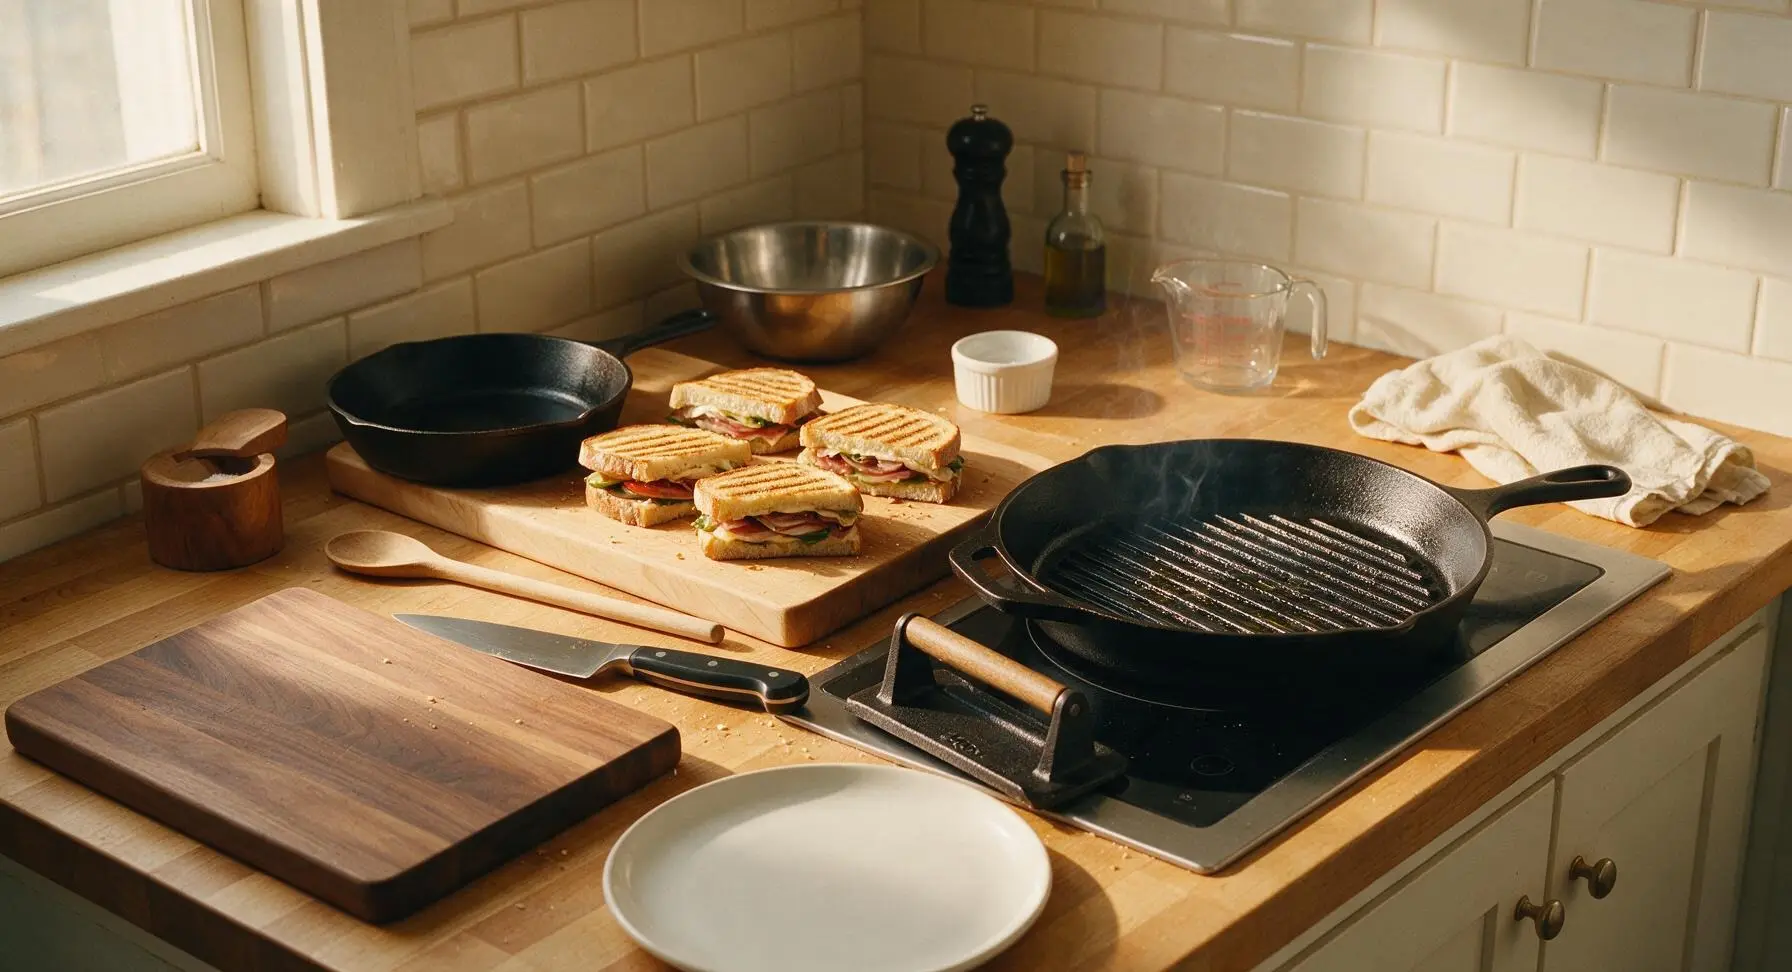
Place the 12-inch matte black cast iron grill pan on the flush induction burner on the right side of the counter, set to medium heat. Allow the pan to preheat for 3 minutes, until it is hot enough that a drop of water sizzles and evaporates within 2 seconds of hitting the surface. Brush the raised grill ridges lightly with 1 tablespoon of extra virgin olive oil, using a corner of the linen towel to spread the oil evenly and prevent sticking. Set the cast iron panini press weight next to the pan to warm slightly.
Step 4
step4:Preheat Grill Pan
5

Press and Cook Panini

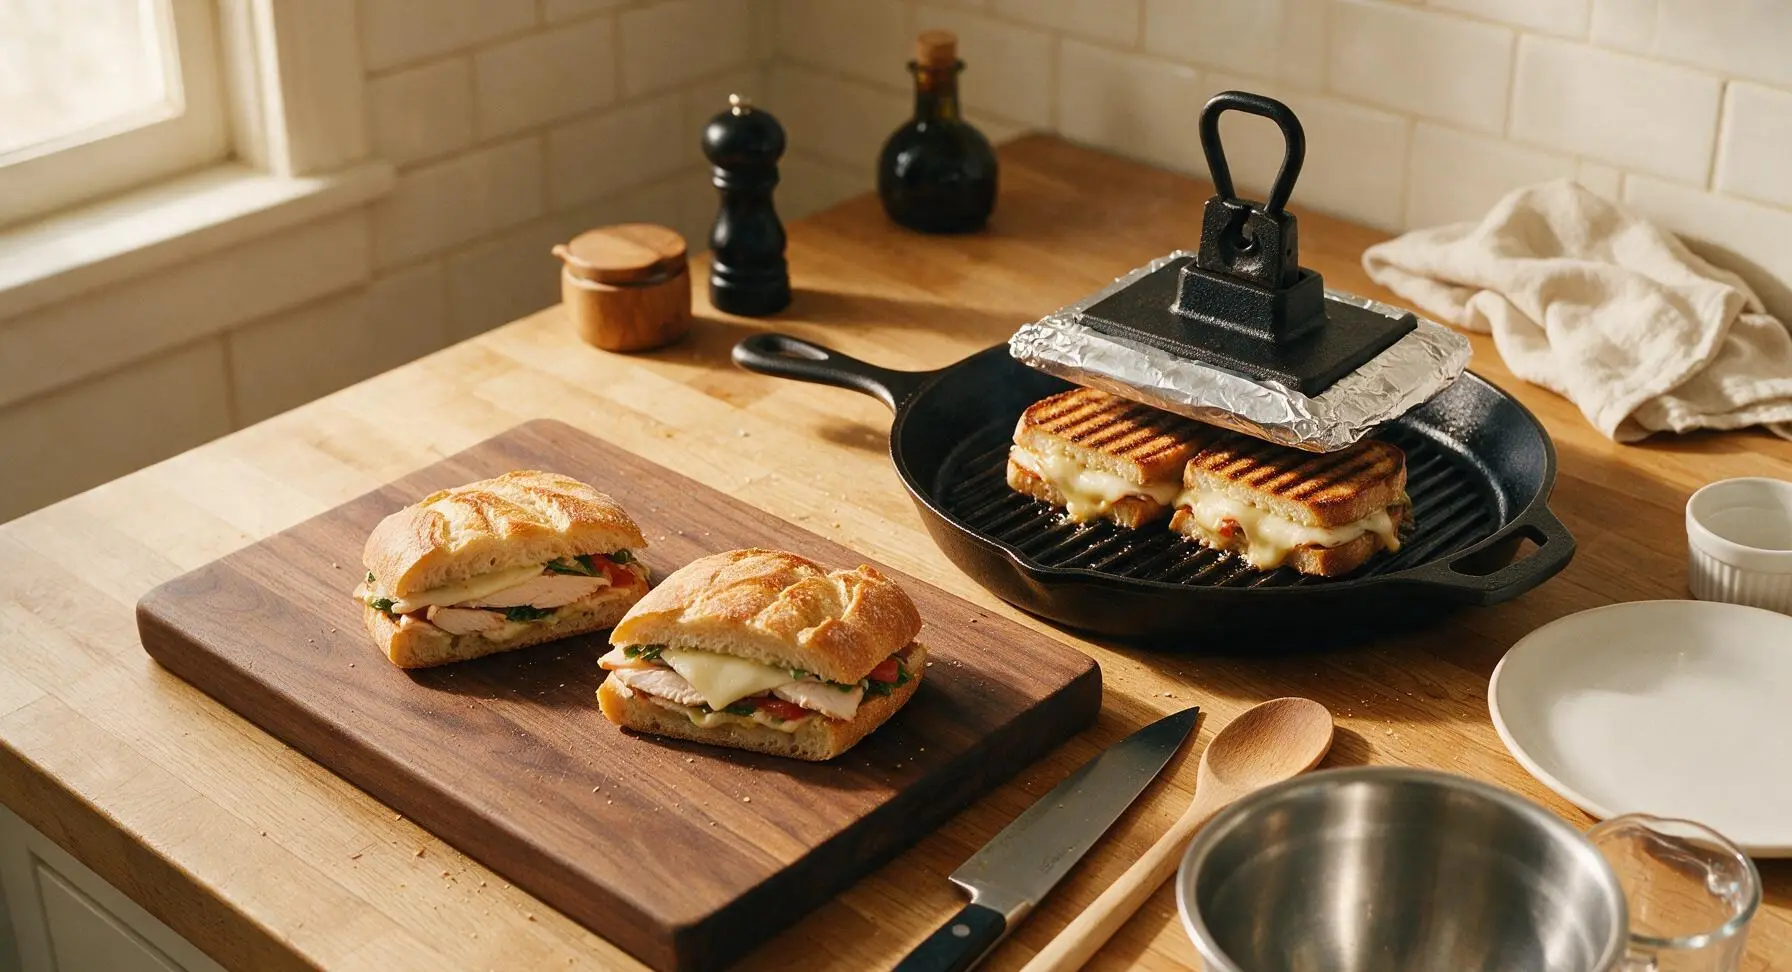
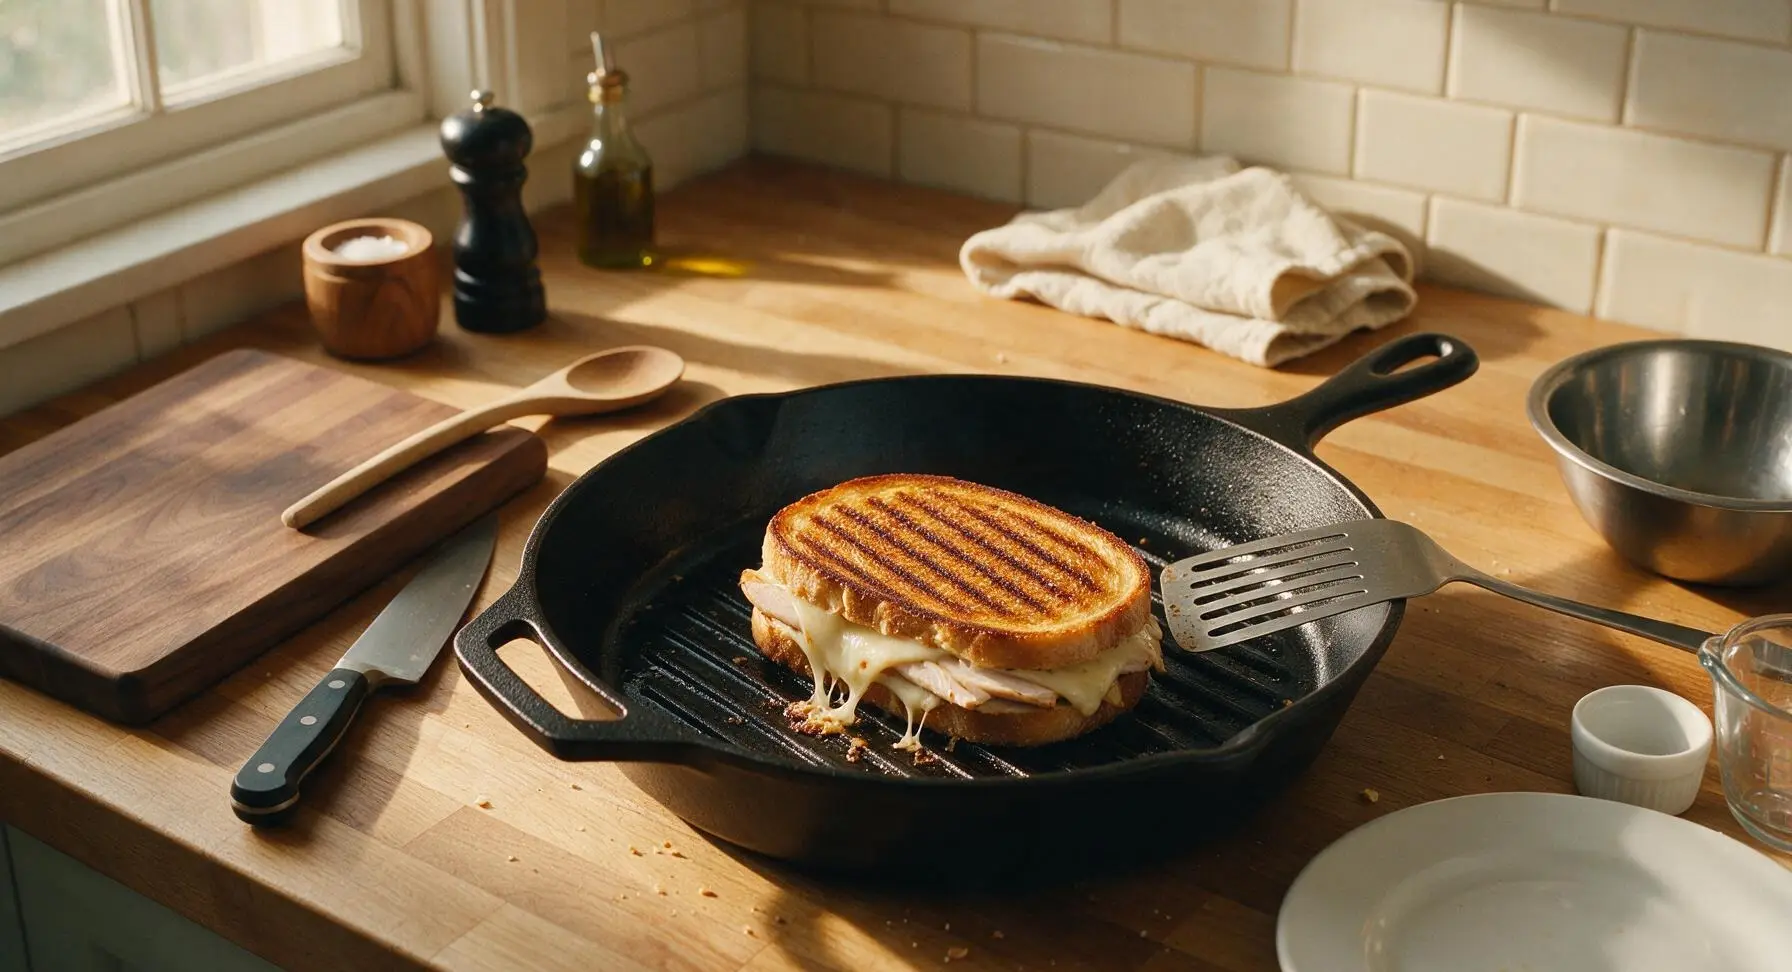
Working in batches of 2 to avoid crowding the pan, place assembled paninis onto the preheated oiled grill pan. Place the foil-wrapped cast iron panini press weight directly on top of the sandwiches to apply even pressure, compressing them to about 2/3 of their original thickness. Cook for 3 to 4 minutes on the first side, until the bottom bread is deep golden brown with distinct dark grill marks and the bottom provolone layer is fully melted. Use the slotted stainless steel turner to carefully flip each panini, replace the press weight, and cook for an additional 2 to 3 minutes on the second side, until crispy and golden with grill marks, cheese oozes slightly from the edges, and the turkey is warmed through. Transfer cooked paninis to a clean corner of the cutting board while cooking the remaining batch.
Step 5
step5:Press and Cook Panini
Step 5
step5:Press and Cook Panini
6

Rest and Slice Panini

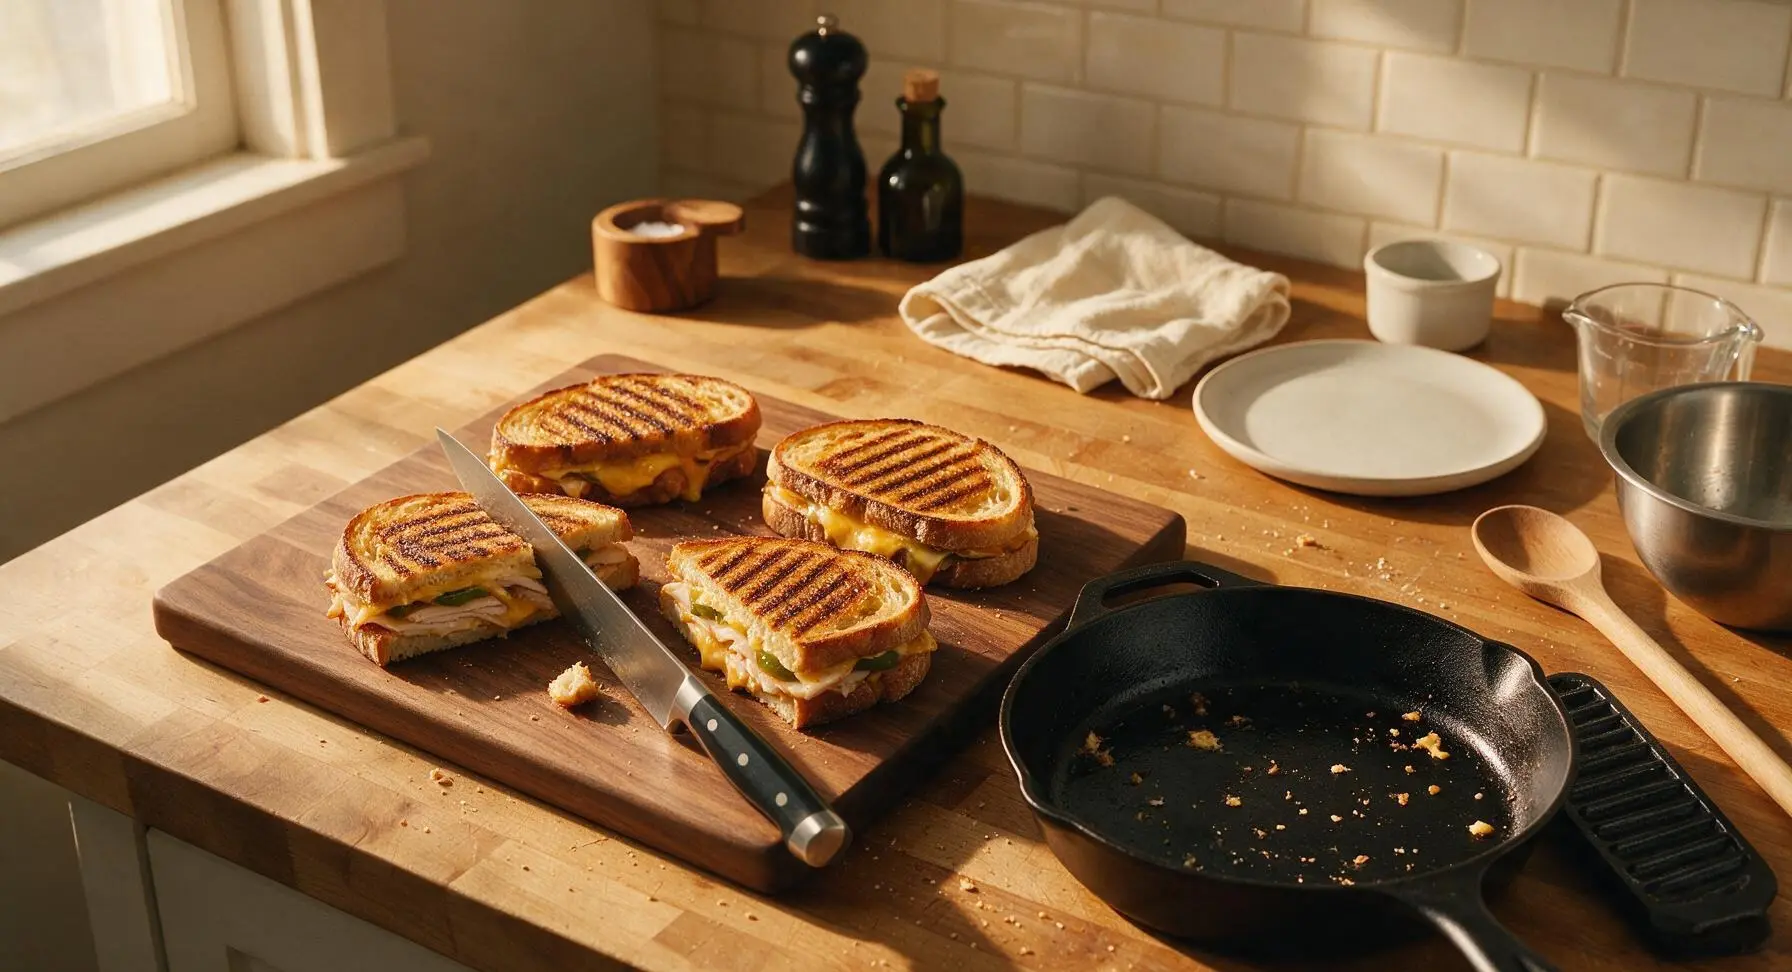
Once all paninis are cooked, transfer them back to the maple cutting board. Allow them to rest for 1 minute to let the cheese set slightly, which prevents filling from sliding out when cut. Use the chef knife to slice each panini diagonally across the middle, creating two triangular halves with clean cut edges that showcase the layered filling.
Step 6
step6:Rest and Slice Panini
7

Plate and Serve

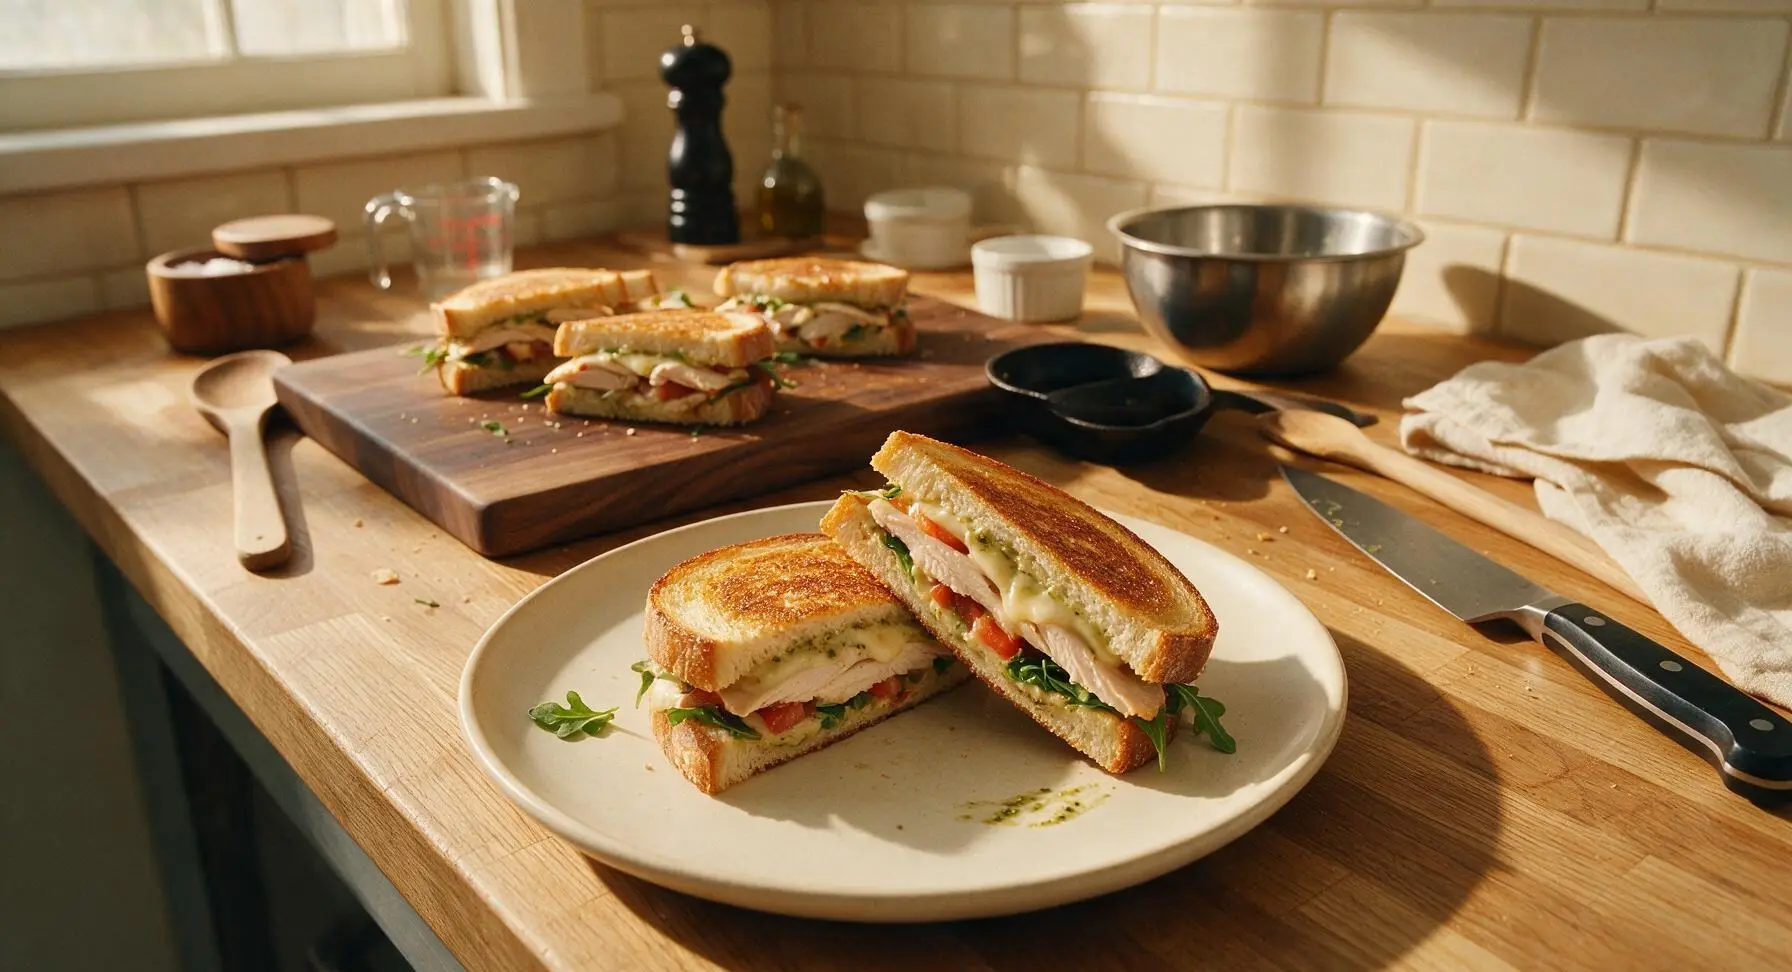
Arrange two diagonal panini halves per serving on the matte cream ceramic dinner plate, stacking them slightly offset to show the layered cross-section of crispy bread, melted cheese, turkey, tomato, and arugula. Serve immediately while the bread is crisp and the cheese is warm and stretchy.
Step 7
step7:Plate and Serve

Tips

1.Pat tomato slices thoroughly dry before assembling sandwiches: excess tomato juice and seeds will soak through the bread even with a cheese barrier, turning your crispy panini soggy before you finish eating it.
2.Always use a heavy weight when pressing panini: even, firm pressure creates uniform, crisp grill marks across the entire bread surface, melts cheese evenly, and compacts layers so fillings don’t fall out with every bite.
3.Let cooked paninis rest for 1 full minute before slicing: this short pause lets melted cheese set just enough that it won’t gush out the sides when you cut, keeping layers neat and ensuring every bite has the perfect ratio of bread, filling, and cheese.


✨ You May Also Like

Lunch
🍜 United States

Creamy, salty, tangy nostalgic Midwestern sandwich pairing rich peanut butter with crisp briny dill pickles for a fast, satisfying no-cook meal.

⏱️ 5 minutesLunch ★ 4.6
Lunch
🍜 United States

Crispy, melty pressed sandwich layered with savory roast pork, ham, Swiss cheese, pickles, and tangy mustard: a beloved Cuban-American comfort classic.

⏱️ 25 minuteLunch ★ 4.9
Lunch
🍜 United States

Hearty, briny New Orleans pressed sandwich stacked with cured Italian meats, provolone, and zesty olive salad, served cold for bold, portable flavor.

⏱️ 1 hour 20Lunch ★ 4.7
Lunch
🍜 United States

A tangy, creamy Southern American staple, this no-cook cheesy sandwich is packed with sharp cheddar and sweet pimentos for a satisfying, portable bite.

⏱️ 1 hour 15Lunch ★ 4.8
Lunch
🍜 United States

Crispy Cajun-spiced fried shrimp piled on crusty French bread with tangy remoulade and fresh toppings, the iconic Louisiana street food sandwich.

⏱️ 35 minuteLunch ★ 4.4
Lunch
🍜 United States

Stacked, savory deli-style corned beef sandwich with melted Swiss, tangy mustard, and crisp griddled rye— a fast, hearty, satisfying classic.

⏱️ 15 minuteLunch ★ 4.9

Turkey Panini:Frequently Asked Questions

1.Do I need a dedicated panini press to make this turkey panini? ▾
Nope, no special gear required! If you don’t have a press, heat a cast iron or nonstick skillet over medium heat, set your assembled sandwich in the pan, then top it with a second heavy, preheated skillet (weigh it down with a canned good if needed) and cook 3-4 minutes per side until golden and melty.
2.How do I keep my panini from getting soggy? ▾
Sogginess is totally avoidable with a few quick tricks! First, spread your pesto mayo all the way to the edges of the bread to create a moisture barrier, pat tomato slices dry with a paper towel before adding, don’t overstuff the sandwich, and cook on medium heat to crisp bread fast instead of steaming fillings.
3.Can I use regular sliced sandwich bread instead of thick-cut sourdough? ▾
You can, but thick-cut sourdough is ideal here for a reason! Its sturdy, chewy crumb holds up to pressing and moist fillings without falling apart, and its tangy flavor cuts through rich cheese and creamy pesto mayo. If you swap, use the thickest cut of bread you can find to avoid a squishy, thin final sandwich.
4.What’s the best way to assemble the sandwich to get evenly melted cheese? ▾
Layer provolone directly against both inner sides of the bread first! That way, when heat hits the bread from both sides during pressing, the cheese melts fast to create a seal around fillings, and every bite gets that gooey, stretchy cheese pull instead of clumps of unmelted cheese tucked in the center.
5.Can I make these paninis ahead for a party or weekly meal prep? ▾
You can prep all components 2-3 days ahead for fast assembly! Mix your pesto mayo, pat tomato slices dry, and portion turkey and cheese in airtight fridge containers. Wait to assemble and press sandwiches right before serving, though, to keep the sourdough crispy instead of soggy from sitting against wet fillings.
6.Can I swap the provolone cheese for a different variety? ▾
Absolutely! Provolone is perfect for its mild, creamy melt and subtle smoky note that pairs with smoked turkey, but you can swap it for low-moisture mozzarella for extra stretch, smoked gouda for deeper smoky flavor, or white cheddar for a sharper bite. Just avoid high-moisture soft cheeses that make bread soggy.
7.Do I need to cook the Roma tomatoes before adding them to the panini? ▾
No, you don’t need to pre-cook them! The key is to slice Roma tomatoes ¼-inch thick, then pat both sides really well with paper towels to soak up excess seedy juice before tucking them into the sandwich. The quick press time will warm tomatoes through just enough without turning them mushy or watery.
8.Why do you use arugula instead of regular iceberg or romaine lettuce? ▾
Arugula is the perfect green here because its bright, peppery bite cuts through rich melted cheese and creamy pesto mayo, and its sturdy leaves hold up to heat and pressure way better than delicate iceberg or romaine, which would wilt into a mushy, flavorless mess during pressing.
9.Can I use leftover roasted Thanksgiving turkey instead of deli smoked turkey? ▾
Definitely! Thinly slice leftover roasted or smoked turkey breast against the grain so it’s tender, not stringy, and aim for slices about the same thickness as deli turkey so it heats through evenly during pressing. If your leftover turkey is a little dry, toss it with a tiny extra smear of pesto mayo for moisture.
10.What’s in the zesty pesto mayo mentioned for this recipe? ▾
It’s a super simple, fast spread that takes 2 minutes to stir together! Mix ¼ cup full-fat mayonnaise with 2 tablespoons of prepared basil pesto, a tiny squeeze of fresh lemon juice, and a pinch of cracked black pepper. It adds bright, herby, tangy flavor that pairs perfectly with smoked turkey and melted provolone.
11.How long do I press the panini to get that perfect crispy golden crust? ▾
If you’re using a panini press set to medium-high heat, 3 to 4 minutes is just right—you want deep golden, crispy marks on both sides, and provolone fully melted around the edges. If you’re using the stovetop weighted skillet method, cook 3 to 4 minutes per side for that same even crisp and melt.
12.Can I adjust this recipe to make a vegetarian panini? ▾
Absolutely! Swap the smoked deli turkey for thin slices of roasted red pepper, marinated artichoke hearts, or grilled zucchini (all patted very dry to avoid sogginess) for a hearty vegetarian version. Keep the provolone, arugula, tomato, and pesto mayo, and press exactly as you would the original.
13.How should I store leftover cooked panini, and what’s the best way to reheat it? ▾
Store leftover fully cooked panini in an airtight container in the fridge for up to 2 days. For the best texture when reheating, skip the microwave—it will make the bread soggy. Instead, re-press it in a panini press or skillet over medium-low heat for 2 to 3 minutes per side until crisp and melty again.
14.What are easy add-ins to customize this turkey panini? ▾
There are tons of delicious, easy customizations! Try adding thin slices of patted-dry avocado, crispy cooked bacon, roasted red peppers, a sprinkle of red pepper flakes for heat, or a thin spread of Dijon under the pesto mayo for extra tang. Just don’t overstuff, or the sandwich will fall apart when pressed.
15.Should I butter the outside of the bread before pressing the panini? ▾
It’s not required, but a thin spread of softened salted butter (or a light brush of olive oil) on the outer sides of the sourdough will help you get that extra crispy, golden, evenly browned crust instead of dry, pale bread. Skip heavy slathers of butter, though, which can make the sandwich greasy instead of crisp.
16.Can I make this turkey panini gluten-free? ▾
Yes! Swap the thick-cut sourdough for a sturdy, thick-cut gluten-free sourdough or artisan gluten-free bread that holds up to pressing. Avoid thin, soft gluten-free sandwich breads, which will get mushy or fall apart when pressed. Double-check that your pesto and deli turkey have no hidden gluten additives before using.
17.What sides pair best with this turkey panini for a full meal? ▾
This hearty, flavorful panini pairs perfectly with light, crisp sides to balance its rich, melty texture. Try a simple side salad dressed with lemon vinaigrette, a cup of creamy tomato soup, crispy dill pickle spears, baked sweet potato fries, or tangy coleslaw. Keep sides light so the panini stays the star of the meal.

Comments (20)

2 hours ago

OMG this is the easiest weeknight lunch ever! Threw this together in literally 10 minutes total (including prep!) and my two picky toddlers devoured it. No complaints about ‘slimy turkey’ for once, win! 10/10 will be adding to our weekly rotation.

1 hour ago

So glad this was a hit with your toddlers, Liz! It’s such a great quick pick for busy school day lunches too—we love adding a little sliced apple for extra crunch if your kids like sweet/savory combos!

3 days ago

Game changer for work from home lunches! I used sourdough instead of white bread, added a little pepper jack, and pressed it on my cast iron grill pan since I don’t have a panini press. Turned out SO crispy and flavorful, way better than the $12 paninis from the café down the street.

2 days ago

Ooh the sourdough swap is genius! I’ve been using whole wheat but sourdough would add that perfect tang. Did you butter the outside of the bread or use mayo?

2 days ago

Love the cast iron hack, Jake! You don’t need a fancy panini press to get that perfect crispy crust—just weigh the sandwich down with a heavy canned good while it cooks if you don’t have a grill press. The sourdough swap sounds incredible!

5 minutes ago

Made this in my dorm room sandwich press last night between study sessions! Super cheap to make with deli turkey from the campus market, didn’t even need fancy ingredients. Cooked exactly 8 minutes like the recipe said, no burnt edges. Saved me from ordering takeout again!

1 week ago

Perfect for Sunday meal prep! I made four of these on Sunday, wrapped them tight, and popped them in the fridge for work lunches all week. They reheat great in the office toaster oven—no soggy bread at all if you let them cool a minute before wrapping.

5 days ago

Wait do you reheat them straight from the fridge? I tried meal prepping paninis before and they got all mushy, would love any tips!

2 weeks ago

Brought a platter of mini versions of these to our neighborhood block party potluck last weekend and they were gone in 10 minutes! People kept asking for the recipe, I can’t believe how simple they are to make for a crowd.

1 week ago

Oh the mini version is such a good idea! Did you cut them into quarters after pressing? I’m making apps for my book club next week and these would be perfect.

1 week ago

Thrilled these were a potluck hit, Patty! The mini size is such a fun party hack—we recommend slicing them into 2-3 bite pieces right after pressing so the cheese holds everything together. They stay great at room temp for a couple hours too!

yesterday

Solid quick high-protein lunch option! I swapped the regular cheese for low-moisture mozz, added a handful of spinach, and used whole grain bread to bump up the fiber. Cook time was spot on, no sogginess at all.

yesterday

Great swaps for a higher fiber, higher protein pick, Ryan! The spinach addition is one of our go-to mix-ins too—just make sure to pat it dry a little first so it doesn’t add extra moisture to the sandwich.

30 minutes ago

Added a little leftover cranberry sauce from last week’s dinner to mine and oh my gosh it was the best combo. Sweet, salty, crispy, exactly what I was craving. Will be making this year round even when I don’t have random cranberry sauce in the fridge.

2 days ago

Uh, help? I tried making this tonight and my bread got all soggy? I followed the cook time exactly but it was all mushy in the middle. Did I do something wrong? Flavor was good but texture was off.

2 days ago

I had that problem the first time too! Turns out I was piling on too much wet condiment directly on the bread. Put a slice of cheese against both sides of the bread before adding fillings, it acts as a barrier!

yesterday

Sorry to hear the texture was off, Sam! The soggy bread usually comes from too much moisture in the fillings—like too much mayo, watery tomato slices, or wet deli turkey. Patting your turkey dry with a paper towel before adding it and using the cheese barrier trick @HomeCookHero mentioned will fix that right up next time!

5 days ago

Made these for a casual brunch with my roommates and we all agreed it’s better than the brunch spot down the road! Served with a side of tomato soup for dipping, chef’s kiss. So easy even my roommate who burns toast could make it.

3 days ago

Tomato soup dip for paninis is elite! I do that with grilled cheese too, can’t believe I never thought to pair it with turkey paninis before. Trying that this weekend!

1 week ago

Made these for my teen son and his friends after their football practice and they ate 6 of them between the four of them. Said it’s ‘better than the sandwich shop’ which is the highest praise possible from a 16 year old, tbh.

5 days ago

I need to make these for my son’s soccer team snack next week! Did you add any extra fillings or stick straight to the recipe?

3 days ago

Nothing beats a teen approval rating! This recipe is totally customizable for big appetites—add extra turkey, a slice of bacon, or some avocado to make it extra filling for hungry athletes. A lot of parents like to add a little ranch drizzle too for kid-friendly flavor!

just now

Added roasted red peppers and a little pesto to mine and it was insane. So easy to tweak to whatever you have in the fridge. Love that the base recipe is so simple, it’s basically a blank canvas for whatever you’re craving.

30 minutes ago

Wait, can I make this without a panini press? I only have a regular frying pan, no fancy equipment. Don’t want to buy a whole new appliance just for sandwiches.

15 minutes ago

Absolutely you can! Just heat your sandwich in a regular skillet over medium heat, place a heavy pan (like a cast iron skillet, or even a regular pot with a couple cans inside for weight) on top of the sandwich to press it down, flip halfway through cooking. It’ll get that same crispy, pressed texture in the same 8 minute cook time, no special press needed!

2 weeks ago

Used leftover roasted turkey from Sunday dinner for this and it was the best leftover meal I’ve ever made. No dry, sad turkey sandwiches here! The melty cheese and crispy bread totally elevates plain leftover turkey.

1 week ago

Ugh I always end up throwing out so much leftover turkey after family dinners because I get bored of plain sandwiches. This is such a better use for it, definitely trying this next week!

1 week ago

Add a little brie and cranberry sauce with that leftover turkey, trust me. It tastes like a fancy restaurant sandwich for zero effort.

3 days ago

Made this with gluten free sourdough and it worked perfectly! I was worried the GF bread would fall apart when I pressed it, but it held up great and got just as crispy as regular bread. Cook time was exactly right too.

2 days ago

So glad this worked with gluten free bread for you, Gabe! We recommend toasting GF bread for 30 seconds first before adding fillings to help it hold up even better during pressing, but it sounds like you nailed it!

2 days ago

Made this at 2am after getting home from the bar with my friends and it was the best thing I’ve ever eaten. So simple even half-asleep me could follow the directions. 10/10 drunk food, 10/10 sober food too.

5 days ago

This is the first recipe I’ve ever made that didn’t turn out burnt or weird! I’m 22 and just moved into my first apartment, so I’m still learning to cook, and this was so straightforward. Cooked 4 minutes per side like the recipe said, perfect melty cheese, no mess. I feel like a real chef now lmao.

4 days ago

Welcome to cooking! This was one of my first go-to recipes too when I moved out, it’s totally foolproof. Next try adding a little crispy bacon, it’s a game changer.

3 days ago

This makes us so happy to hear! There’s no better feeling than nailing a homemade meal, especially when you’re just starting out. So proud of you—can’t wait to hear what other recipes you try next!

2 hours ago

Added a couple slices of pickled jalapeño and a drizzle of hot honey to my panini and wow, the flavor is unreal. Sweet, spicy, salty, crispy—all my favorite things in one 8 minute sandwich. Why have I been eating plain turkey sandwiches for years?

1 hour ago

Wait hot honey on a savory sandwich? I’ve never tried that, does it make the whole thing too sweet? I’m super sensitive to sweet stuff on my lunch food.

1 week ago

I’ve been making turkey sandwiches for my grandkids for 30 years and never thought to press them! My granddaughter asked for paninis last visit so I used this recipe, and now they request them every time they come over. Such a simple upgrade that makes a regular sandwich feel special.

yesterday

I used to grab an $8 turkey panini from the gas station on my way to work every day, now I make this at home for like $2 a sandwich. Tastes way better, saves me so much money in the long run. No more gas station sad sandwiches for me!

yesterday

We love a budget-friendly win! Making these at home is not only cheaper, but you can totally customize them to exactly how you like them, no sad gas station wilted lettuce required.

5 minutes ago

Pro tip: if you have an air fryer with a grill plate, you can make this in there too! 375 degrees for 8 minutes, flip halfway, comes out perfectly crispy. No stovetop required, super easy to clean up after.



