
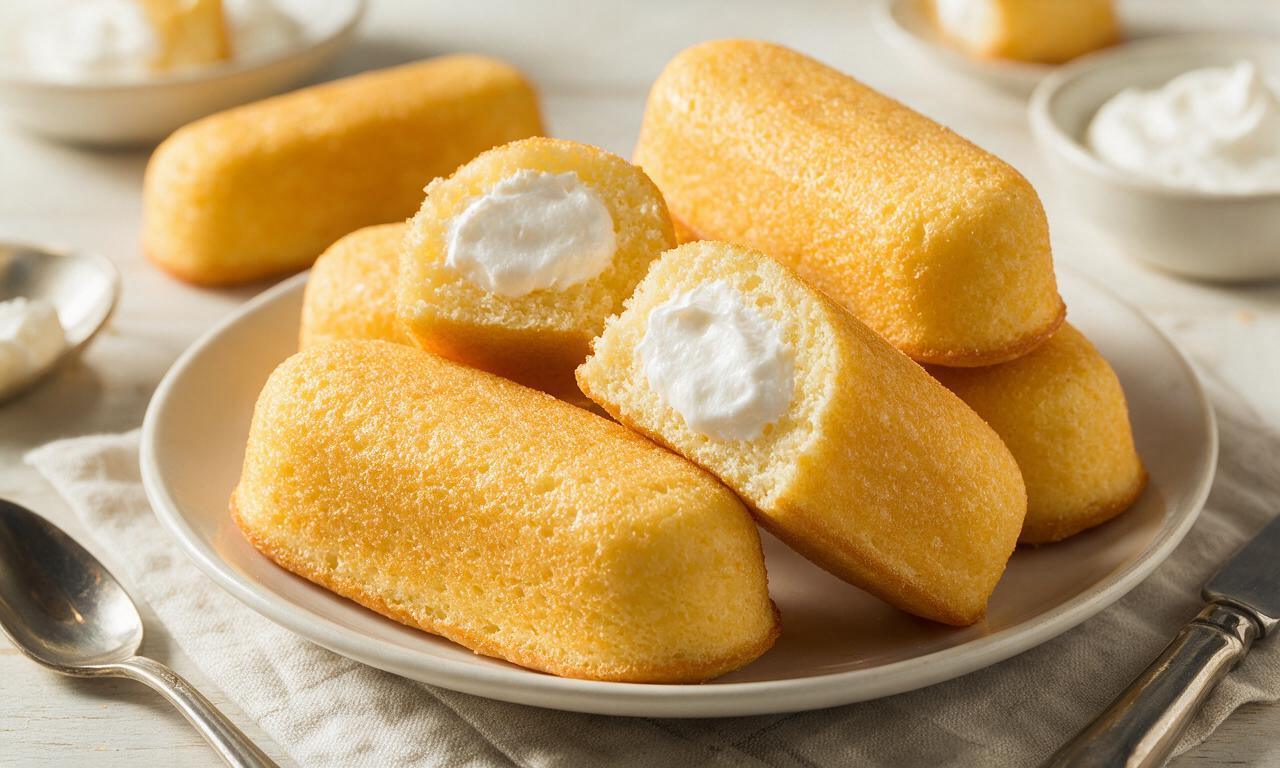
Twinkie

Twinkie
⏱️ cook time 1 hour 20 minutes (includes 30 minute cooling time)
🍽️ servings 12
⚡ Difficulty medium

intro

Light, fluffy golden sponge cakes stuffed with smooth, sweet vanilla marshmallow filling—the iconic nostalgic American snack cake made fresh from scratch.

Ingredients

Cake flour (sifted) 120 g (1 cup)
Large eggs (separated, room temperature) 4 (200 g total)
Granulated sugar 150 g (3/4 cup)
Unsalted butter (melted, cooled, for cake) 57 g (4 tbsp / 1/4 cup)
Whole milk (room temperature, for cake) 60 ml (1/4 cup)
Baking powder 4 g (1 tsp)
Fine table salt 1 g (1/4 tsp)
Pure vanilla extract (for cake) 10 ml (2 tsp)
Cream of tartar 1 g (1/4 tsp)
Marshmallow fluff 213 g (1 standard 7.5-oz jar)
Unsalted butter (softened, for filling) 113 g (1/2 cup / 1 stick, room temperature)
Powdered sugar (sifted, for filling) 120 g (1 cup)
Pure vanilla extract (for filling) 5 ml (1 tsp)
Heavy whipping cream (for filling) 30 ml (2 tbsp)

Steps

1

Prep oven and pans

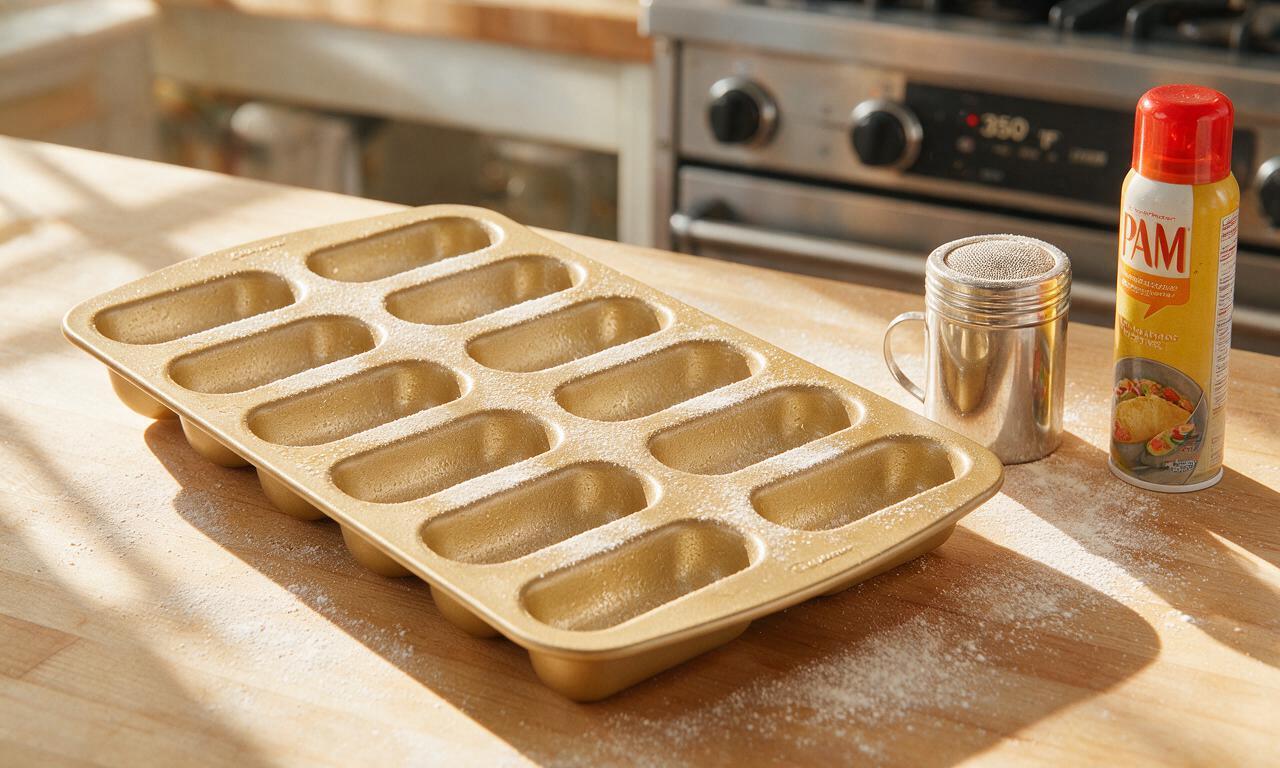
Preheat your oven to 175°C (350°F) with the oven rack positioned in the center. Generously grease all 12 cavities of a log-shaped Twinkie baking pan with nonstick cooking spray, then lightly dust with all-purpose flour, tapping out excess to ensure cakes release cleanly. Skip paper liners, as traditional Twinkies have a smooth, unlined exterior.
Step 1
step1:Prep oven and pans
2

Mix sponge base

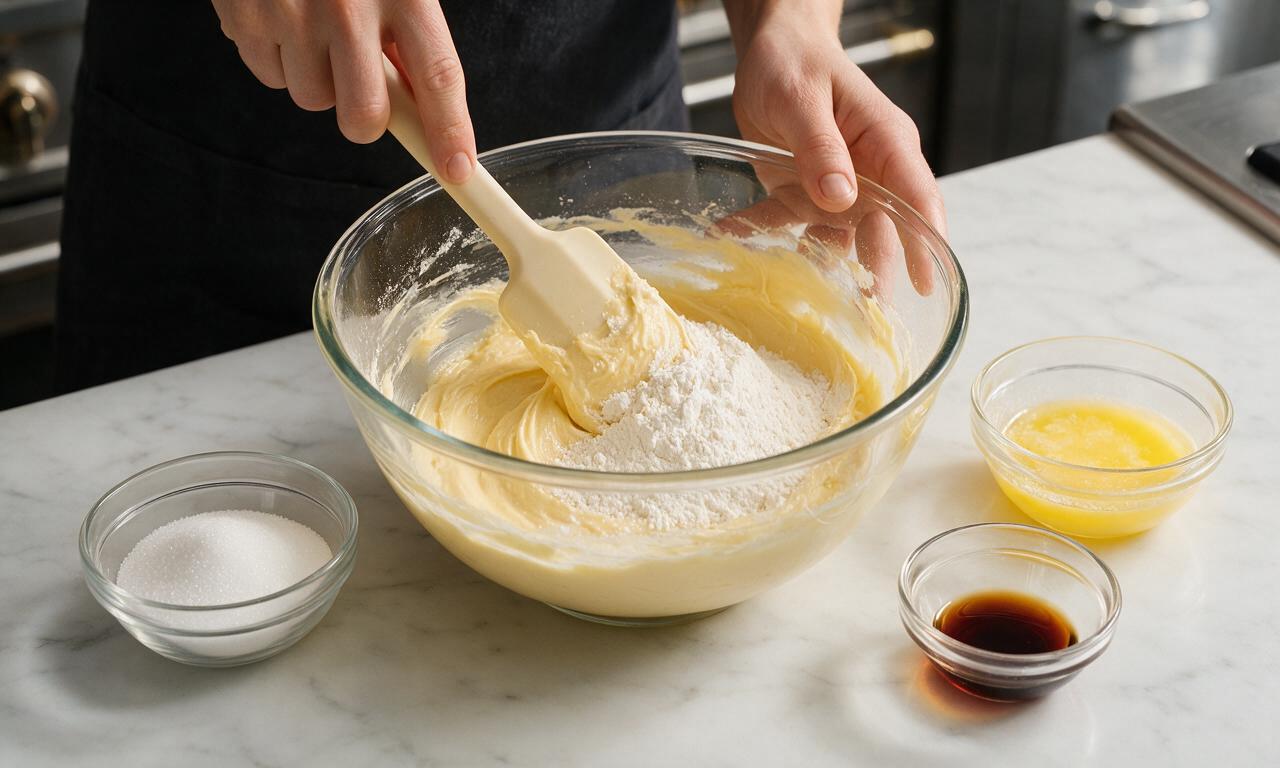
In a medium mixing bowl, whisk together sifted cake flour, baking powder, and 1g (1/4 tsp) fine salt until evenly combined. In a separate large bowl, beat egg yolks with 75g (6 tbsp) granulated sugar on medium-high mixer speed for 3 minutes, until the mixture is pale yellow, thick, and leaves a ribbon trail when the beater is lifted. Stir in cooled melted butter, 60ml (1/4 cup) room-temperature whole milk, and 10ml (2 tsp) vanilla extract, then fold in the dry flour mixture in two equal batches until just combined, with no visible dry lumps.
Step 2
step2:Mix sponge base
3

Whip meringue peaks

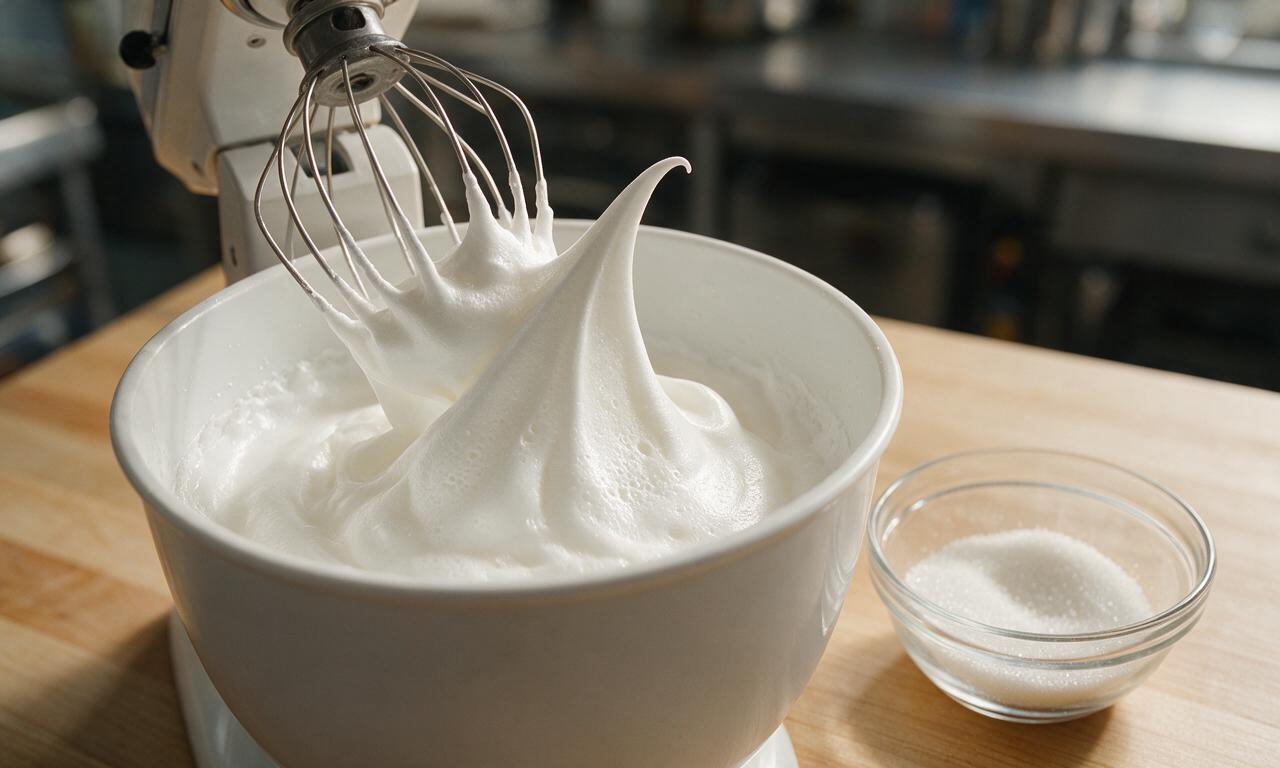
In a completely clean, grease-free glass or metal bowl, beat 4 room-temperature egg whites and 1g (1/4 tsp) cream of tartar on medium mixer speed for 1 minute until frothy with large bubbles. Gradually add the remaining 75g (6 tbsp) granulated sugar, 1 tablespoon at a time, then increase mixer speed to high and beat for 2-3 minutes until stiff, glossy peaks form that hold their shape straight up when the whisk attachment is lifted.
Step 3
step3:Whip meringue peaks
4

Bake golden sponges

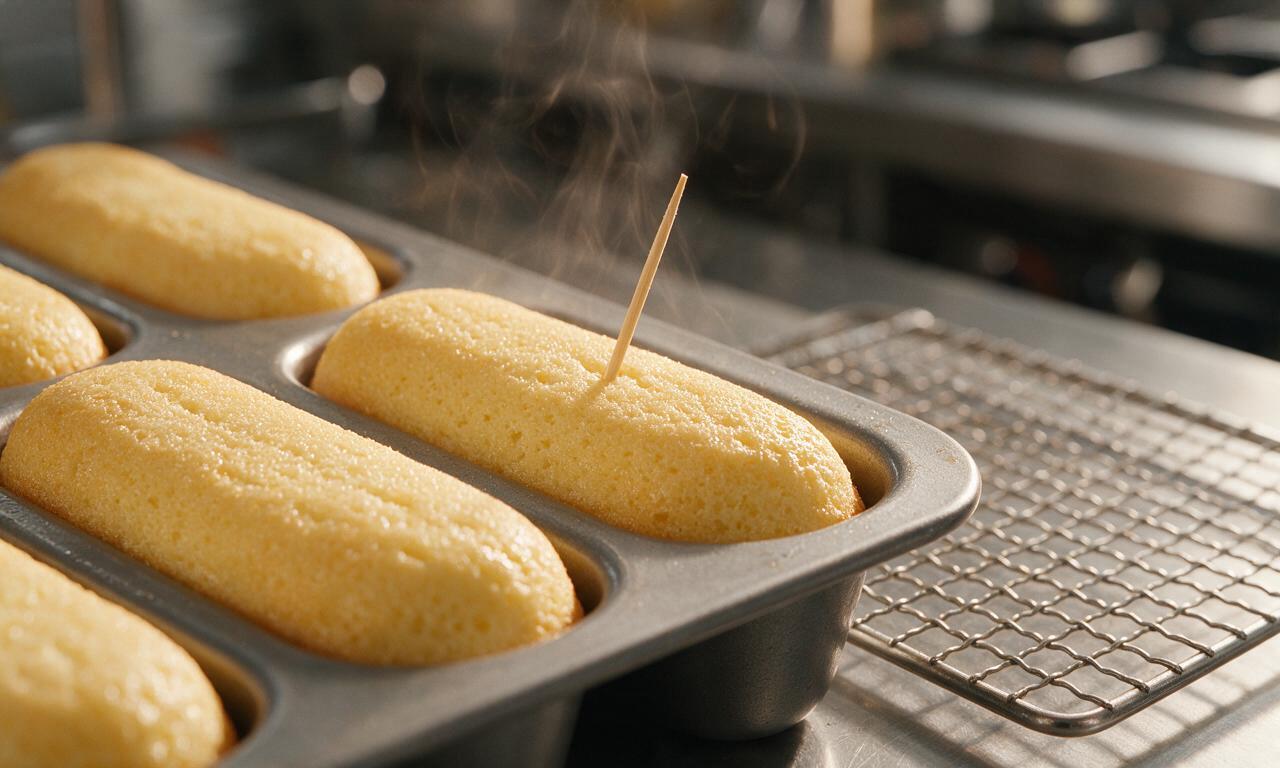
Gently fold 1/3 of the whipped meringue into the cake batter to lighten its dense texture, then carefully fold in the remaining meringue in two batches, using slow, sweeping motions to avoid deflating air bubbles. Divide batter evenly between the prepared pan cavities, filling each 2/3 full (approximately 30g of batter per cavity). Bake for 11-12 minutes at 175°C (350°F) until the cake tops are light golden brown and a wooden toothpick inserted into the center of a cake comes out clean with no wet batter attached. Let cakes rest in the pan for 5 minutes, then transfer to a wire rack to cool completely to room temperature, about 30 minutes.
Step 4
step4:Bake golden sponges
5

Make vanilla filling

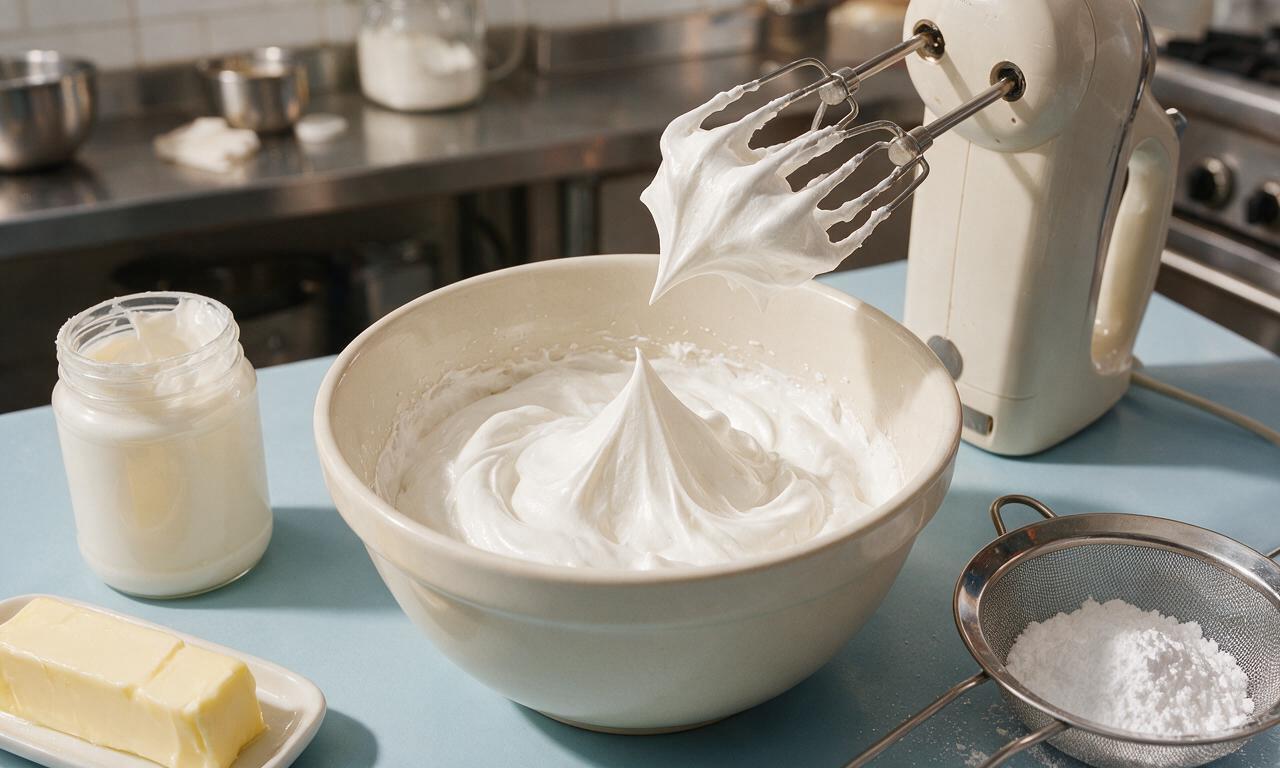
While cakes cool, prepare the classic marshmallow filling: beat 113g (1/2 cup) softened room-temperature unsalted butter in a medium bowl on medium speed for 2 minutes until completely smooth and pale, with no lumps. Add 213g marshmallow fluff, 120g sifted powdered sugar, 5ml (1 tsp) vanilla extract, and 30ml (2 tbsp) heavy whipping cream. Mix on low speed for 1 minute to combine ingredients without creating a sugar dust cloud, then increase speed to medium-high and beat for 2 additional minutes until the filling is light, fluffy, and perfectly smooth.
Step 5
step5:Make vanilla filling
6

Fill cooled Twinkies

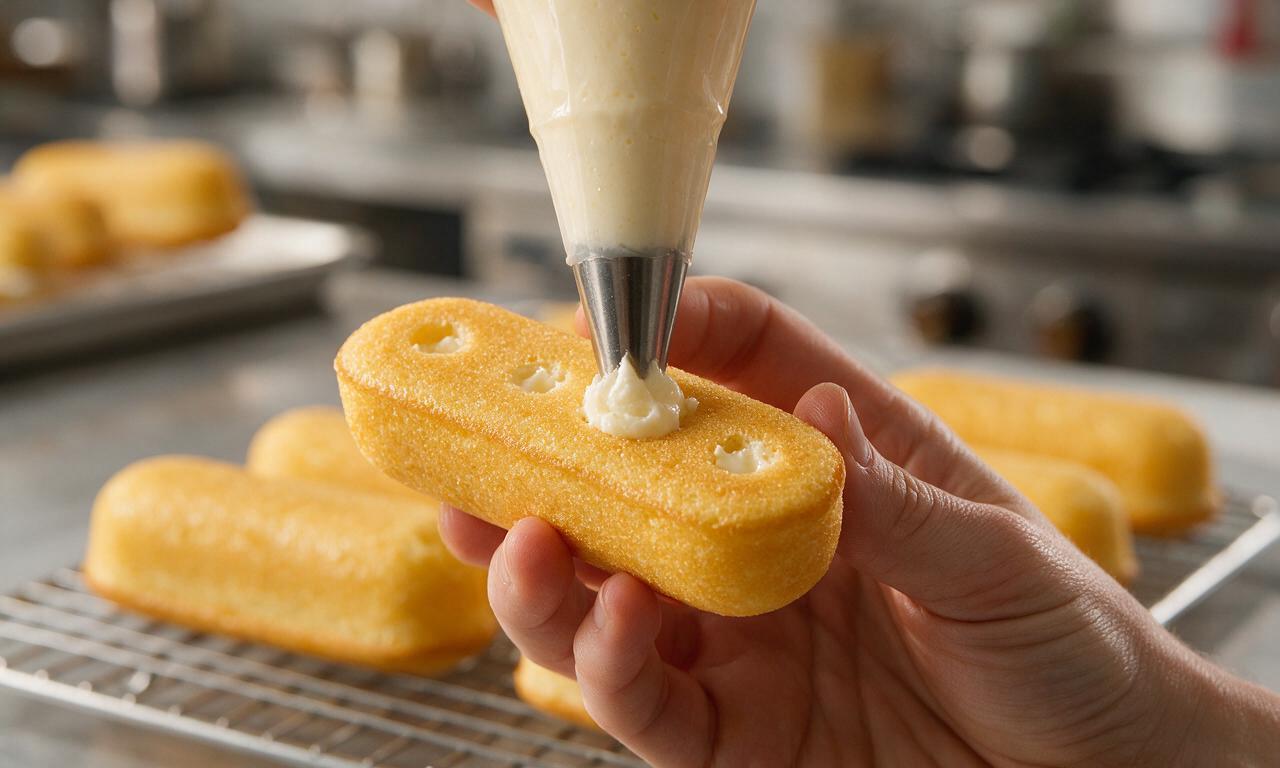
Scoop the finished filling into a piping bag fitted with a small round long Bismarck (filling) tip. Flip each cooled sponge cake so its flat bottom side faces up, and poke 3 evenly spaced holes into the cake, inserting the piping tip 2cm deep into each hole. Pipe 10-12g of filling into each hole, stopping just before filling begins to ooze out, to ensure the center is evenly filled without overflow. Wipe any small smudges of excess filling from the cake surface before serving.
Step 6
step6:Fill cooled Twinkies

Tips

1.Ensure your egg white mixing bowl and whisk are completely free of grease, oil, or stray egg yolk—any fat will prevent egg whites from whipping to stiff peaks, resulting in dense, flat cakes that do not rise properly.
2.Do not overmix the batter once you fold in the whipped meringue; overmixing pops the delicate air bubbles that give the cake its light, fluffy texture, leading to tough, dense sponges.
3.Wait until cakes are fully cooled to room temperature before adding filling; warm cakes will melt the marshmallow butter filling, causing it to run out of the holes and create a soggy cake texture.


✨ You May Also Like

Desserts & Baking
🍜 Italy

Creamy, coffee-kissed classic Northern Italian no-bake dessert, with layers of rum-spiked mascarpone cream, soft ladyfingers, and a rich cocoa dusting.

⏱️ 4 hours 3Desserts & Baking ★ 4.8
Desserts & Baking
🍜 France

Flaky, shatteringly crisp, buttery French croissants with golden exteriors and soft, airy layered interiors, perfect for pairing with coffee for a special morning treat.

⏱️ 12 hours Desserts & Baking ★ 4.7
Desserts & Baking
🍜 United States

Warm, spiced baked apples topped with a fluffy golden biscuit crust, this cozy dessert pairs perfectly with vanilla ice cream for cool-weather comfort.

⏱️ 55 minuteDesserts & Baking ★ 4.7
Desserts & Baking
🍜 United States

A star-spangled classic American blueberry pie with buttery flaky crust and bright sweet-tart filling, perfect for summer patriotic gatherings.

⏱️ 1 hour 25Desserts & Baking ★ 4.8
Desserts & Baking
🍜 United States

A beloved no-bake regional Maine candy with a chewy coconut-potato center coated in rich dark chocolate, a New England holiday staple since the 1870s.

⏱️ 2 hours 3Desserts & Baking ★ 4.9
Desserts & Baking
🍜 France

Luxuriously creamy, floral frozen custard made with aromatic Tahitian vanilla beans, boasting a smooth, rich texture that melts slowly on the tongue.

⏱️ 3 hours 3Desserts & Baking ★ 4.6

Twinkie:Frequently Asked Questions

1.Do I really need to use cake flour instead of all-purpose flour for the sponge?
Yes, cake flour is critical for that signature light, tender Twinkie crumb. It has a lower 7-8% protein content than all-purpose, so it won’t form tough gluten as you mix. If you’re in a pinch, swap 1 cup AP flour for 2 tablespoons cornstarch plus enough AP flour to hit 1 cup, sifted twice to mimic cake flour’s fine, soft texture.
2.Why do the eggs need to be separated and brought to room temperature for the cake?
Room temperature egg whites whip to much higher, stiffer, more stable peaks than cold ones, which creates the sponge’s signature fluffy, airy lift when combined with granulated sugar. Separating whites cleanly (no stray yolk traces!) ensures no fat breaks down the foam, leading to an even, light rise instead of a flat, dense final cake.
3.Can I skip sifting the cake flour? It feels like an unnecessary extra step.
Don’t skip sifting! It breaks up tiny clumps in cake flour and incorporates air that contributes to the sponge’s delicate, melt-in-your-mouth texture. Unsifted flour leads to lumpy batter and dense, unevenly baked spots in your Twinkies. For best results, sift the flour twice before folding it into your egg foam base.
4.Why does the melted butter for the cake need to cool down before I add it to batter?
Hot melted butter will cook the delicate egg foam in your batter if added straight off the stove, deflating all the air you worked to whip in and leading to a tough, flat cake. Let it cool 5-7 minutes until just slightly warm to the touch, then drizzle it slowly down the bowl side as you fold gently to preserve bubbles.
5.Do I need a special branded Twinkie pan to make these at home?
You don’t need a branded Twinkie pan! A standard 12-cavity canoe-shaped snack cake pan works perfectly for that classic oblong shape, but if you don’t have one, bake batter in a 9x13 pan and cut cooled cake into 3x1 inch rectangles, or use a whoopie pie pan for round sandwich-style versions.
6.How do I keep the sponge from deflating right after I pull it out of the oven?
The most common cause of deflation is overmixing the batter, which pops the delicate air bubbles in the egg foam. As soon as you remove baked cakes from the oven, let them cool 10 minutes in the pan on a wire rack before turning them out—don’t jostle the hot pan, as that can make the tender structure collapse.
7.Why does the whole milk for the cake need to be at room temperature?
Cold milk will shock and partially solidify the cooled melted butter in your batter, creating lumpy texture and deflating some of the whipped egg foam. Room temperature milk mixes smoothly without temperature shocks, leading to an even, consistent crumb. If short on time, warm cold milk 5 seconds in the microwave instead of waiting for it to sit out.
8.What’s the easiest way to fill Twinkies without splitting the cake or making a mess?
Use a piping bag fitted with a long, narrow Bismarck filling tip for clean, easy filling. Poke three evenly spaced holes in the flat bottom of each cooled cake, insert the tip ¾ of the way into each hole, and squeeze gently until you feel the cake expand slightly. Wipe off oozed excess filling for a polished, classic look.
9.My vanilla marshmallow filling is too runny—how can I fix it?
Runny filling usually happens if your marshmallow fluff was cold, or you added too much liquid vanilla extract. Pop the filling in the fridge for 15-20 minutes to firm up, and if it’s still too loose, beat in 2 tablespoons of sifted powdered sugar a little at a time until it holds a soft, smooth peak that doesn’t drip.
10.How long do homemade Twinkies stay fresh, and what’s the best way to store them?
Stored in an airtight container at room temperature away from direct sunlight, homemade Twinkies stay fresh and fluffy for 3-4 days. Skip refrigeration, as cold air dries out the delicate sponge and makes the filling stiff. You can freeze tightly wrapped Twinkies for up to 2 months, thawing at room temp for 30 minutes before eating.
11.Can I adjust this recipe to make dairy-free Twinkies for friends with allergies?
Absolutely! Swap the unsalted melted butter for an equal amount of cooled, melted vegan butter, and replace the whole milk with an equal amount of unsweetened oat or soy milk, both of which have a neutral flavor that won’t overpower the classic vanilla taste. Just make sure your marshmallow filling uses dairy-free ingredients too.
12.Why did my Twinkies turn out with a tough, chewy crumb instead of light and fluffy?
Tough, chewy crumb almost always comes from overmixing the batter after adding flour, which develops too much gluten, or from not whipping egg whites to stiff enough peaks to support the cake structure. Fold flour in gently just until no dry streaks remain, and stop immediately to avoid overworking the batter.
13.How do I get that classic pale golden cake color without artificial food coloring?
The natural color from room temperature egg yolks and melted unsalted butter will give you that iconic pale golden hue if you bake the cakes just until set—don’t overbake, which turns the crust dark brown. If you want a slightly brighter yellow tone, add ⅛ teaspoon ground turmeric to sifted flour; it adds no noticeable flavor at that small amount.
14.Can I add mix-ins to the cake or filling for fun twists on the classic recipe?
Of course! For the cake, fold 2 tablespoons of finely crushed freeze-dried strawberries or mini chocolate chips into the batter right before baking. For the filling, mix in a teaspoon of lemon zest, a tablespoon of smooth peanut butter, or a dash of cocoa powder for chocolate Twinkies—just skip heavy mix-ins that deflate the sponge.
15.Why do my cakes stick to the pan even when I grease it before baking?
The light, delicate sponge is prone to sticking if you only grease the pan lightly. For easy release, grease every cavity thoroughly with softened butter, then dust with a light coating of sifted cake flour, tapping out excess. You can also line the bottom of each cavity with a thin parchment strip for extra insurance, especially with older pans without a nonstick coating.

Comments (5)

2 days ago

OMG, these taste EXACTLY like the Twinkies I grew up eating! I was worried the creamy filling would be too runny but it set perfectly after chilling for a bit. My kids devoured half the batch within 10 minutes of me pulling them out — total game changer for after school snacks! Took me a little longer than the stated cook time because my oven runs hot, but so worth it.

yesterday

So glad your family loved them! Pro tip for next time: if your oven runs hot, drop the temp by 25 degrees and start checking for doneness 5 minutes early to get that perfect soft golden crust!

yesterday

Wait, did you use the special Twinkie pan or just a regular loaf pan cut into pieces? I don’t have the shaped pan and wanna make these this weekend!

1 week ago

Medium difficulty is no joke, y’all — I messed up the sponge cake on my first try because I overfolded the egg whites and it came out dense. Second go around was perfect though! The vanilla filling is so fluffy and not cloyingly sweet like the store bought version. Brought these to a neighborhood potluck and everyone asked for the recipe.

5 days ago

Folding egg whites can be so tricky! The key is to cut through the batter gently with a spatula and stop as soon as you no longer see white streaks to keep that light, airy texture. So stoked they were a hit at the potluck!

3 days ago

SO good! I added a tiny splash of almond extract to the filling and it gave it such a nice warm depth of flavor. These held up great for 3 days in an airtight container on my counter, which made meal prep for the week’s snacks so easy. Will absolutely be making these again for my kid’s next soccer team snack day.

5 days ago

Has anyone tried making these with a 1:1 gluten free flour blend? I’m dying to make them for my partner who has celiac but I don’t wanna waste ingredients if the texture comes out weird!

3 days ago

I did! Used the Bob’s Red Mill 1:1 blend and added an extra 1/4 tsp of xanthan gum, they came out almost identical to the regular version! Just make sure you let them cool completely before filling so they don’t fall apart.

yesterday

I’ve been chasing that classic lunchbox Twinkie taste for years and this recipe NAILED it. The sponge is so soft and pillowy, the filling doesn’t ooze out everywhere when you take a bite, and it doesn’t have that weird chemical aftertaste the store bought ones have. Only note: make sure you give yourself enough time for the cooling step! I tried rushing it and the filling melted a little when I piped it in.

2 hours ago

Oh no, I almost skipped the cooling step too! Glad I saw your comment — how long did you end up waiting for the cakes to cool before filling?

30 minutes ago

Great call out! The cooling step is non-negotiable here — the cakes need to be fully room temp (about 30 minutes as noted in the recipe) so the butter-based filling doesn’t melt when you pipe it. If you’re in a hurry, you can pop the baked cakes in the fridge for 10 minutes to speed things up!



