
Twinkies

Twinkies
⏱️ cook time 1 hour 40 minutes
🍽️ servings 12
⚡ Difficulty medium

intro

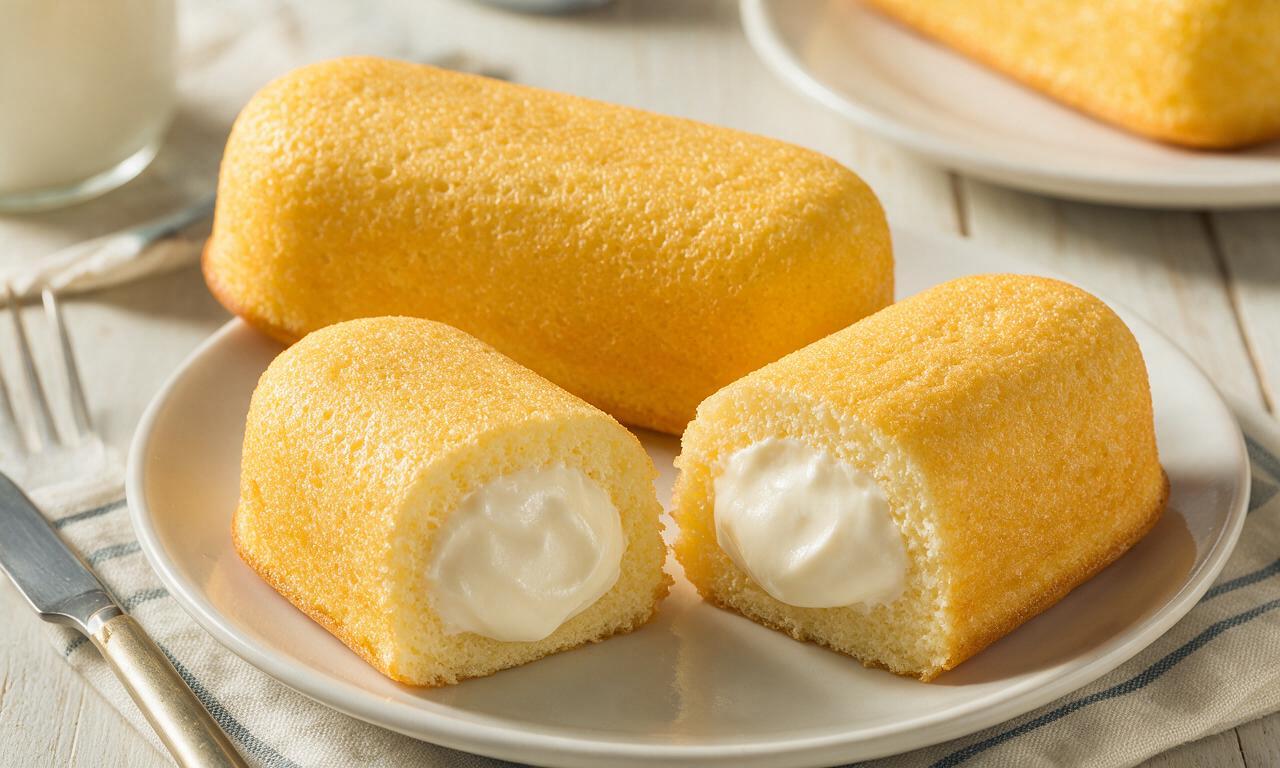
Fluffy golden sponge cakes filled with smooth, sweet vanilla cream, the iconic nostalgic American snack cake made fresh from simple pantry ingredients.

Ingredients

Cake flour 183g (1.5 cups + 1 teaspoon)
Granulated sugar 200g (1 cup)
Baking powder 4g (1 teaspoon)
Fine table salt 1g (1/4 teaspoon)
Large eggs (room temperature, separated) 4 units (≈200g total)
Whole milk (room temperature) 120ml (0.5 cup)
Unsalted butter (for sponge, melted and cooled) 57g (4 tablespoons)
Vanilla extract (for sponge) 5ml (1 teaspoon)
Nonstick cooking spray 15ml (1 tablespoon)
Marshmallow fluff 213g (1 7.5-oz jar)
Unsalted butter (for filling, softened) 113g (8 tablespoons)
Confectioners' sugar (sifted) 130g (1 cup)
Vanilla extract (for filling) 5ml (1 teaspoon)

Steps

1

Prep oven and pan

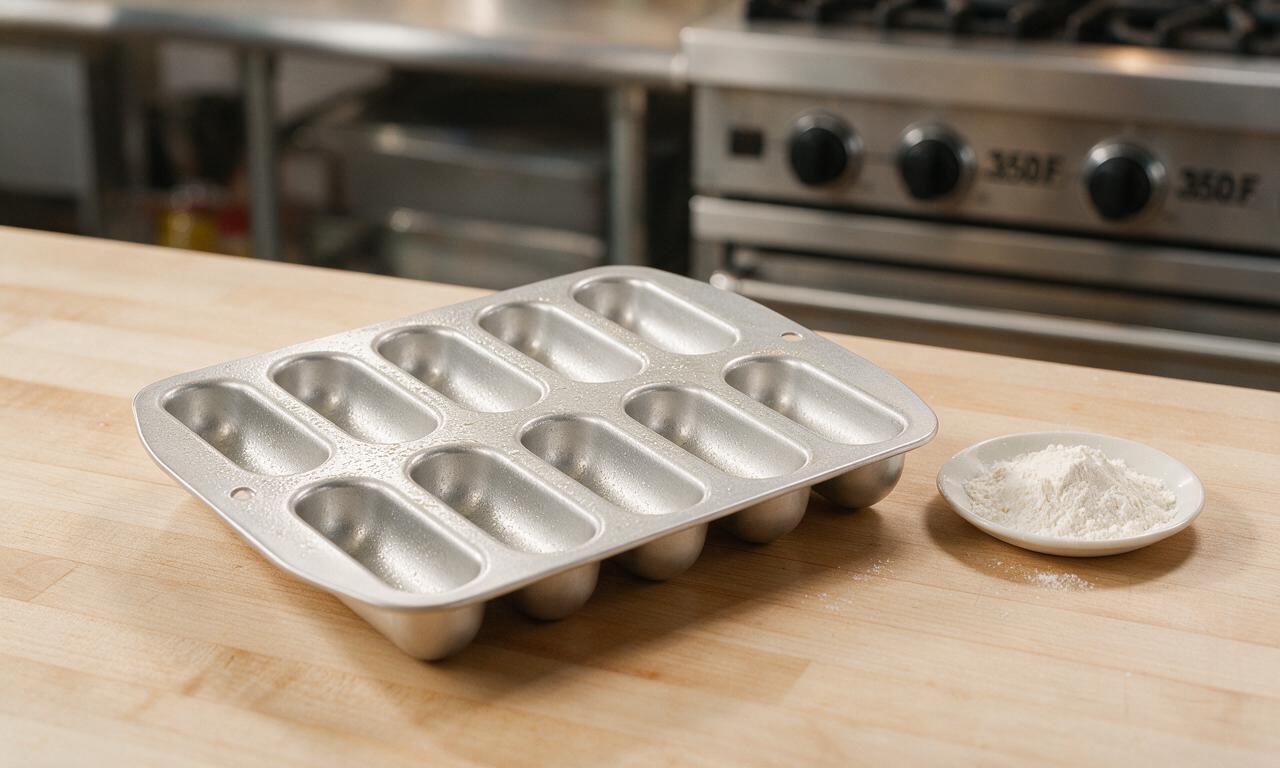
Preheat your oven to 175°C (350°F). Generously coat a 12-cavity canoe-shaped Twinkie pan with 15ml (1 tablespoon) nonstick cooking spray, then use the reserved 1 teaspoon (3g) of cake flour to lightly dust the pan, tapping out all excess to prevent cakes from sticking during baking.
Step 1
step1:Prep oven and pan
2

Mix dry sponge ingredients

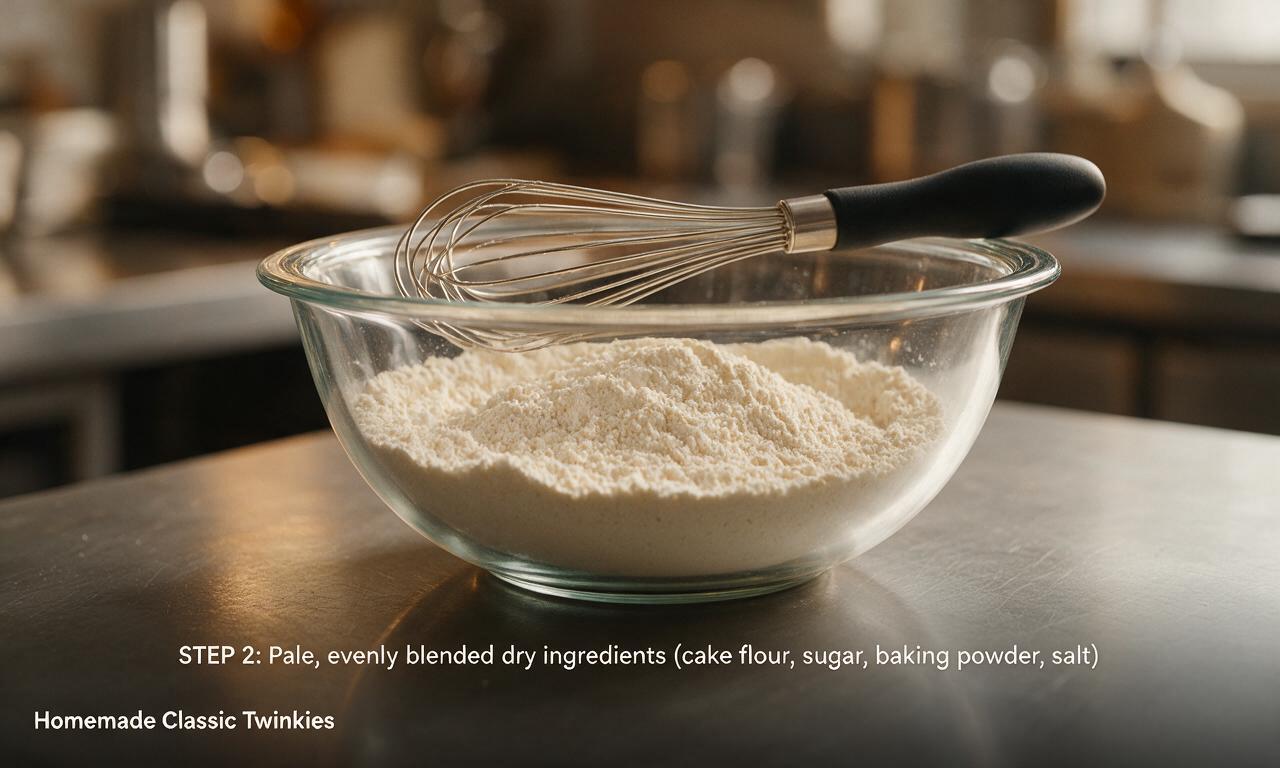
In a medium glass mixing bowl, combine the remaining 180g cake flour, 200g granulated sugar, 4g baking powder, and 1g fine table salt. Whisk steadily for 30 seconds until the dry ingredients are fully blended, with no clumps of baking powder or flour visible.
Step 2
step2:Mix dry sponge ingredients
3

Combine wet base batter

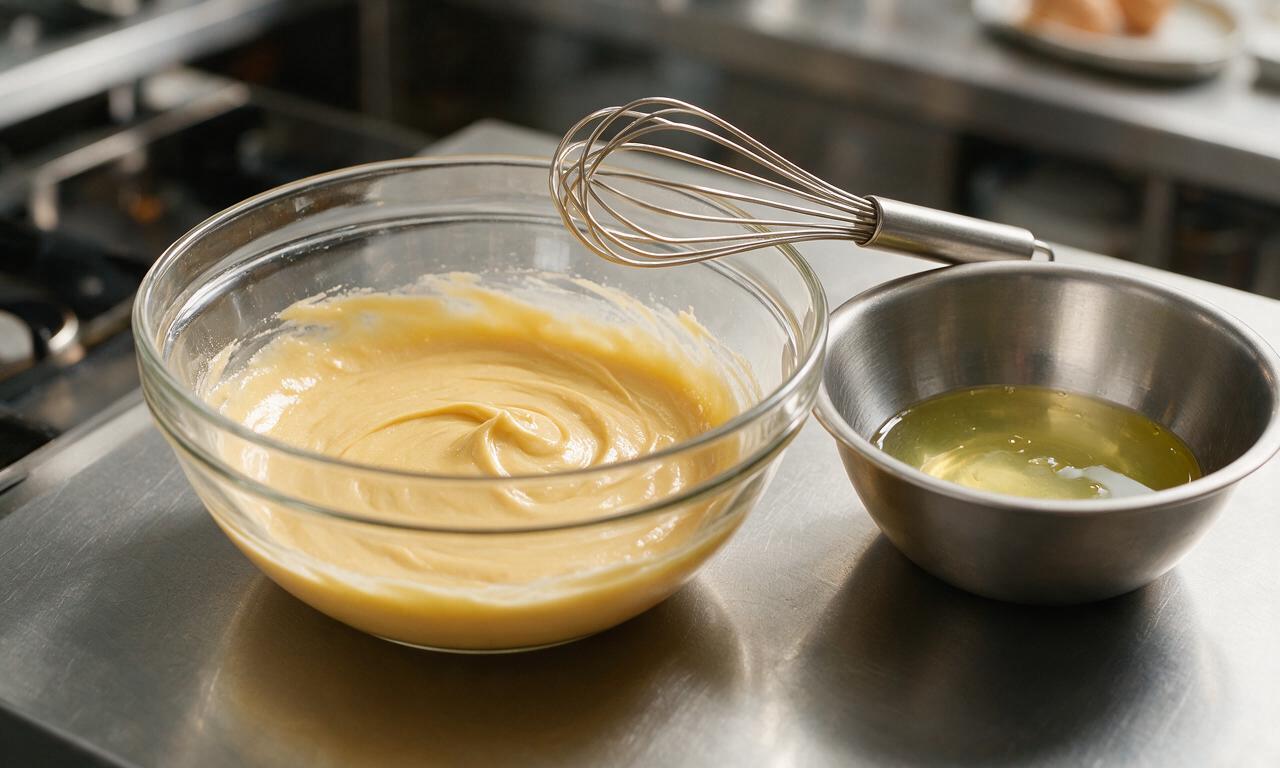
Add the 4 separated egg yolks directly to the dry ingredient bowl, placing the whites into a completely clean, grease-free stainless steel bowl. Add 120ml room-temperature whole milk, 57g cooled melted butter, and 5ml vanilla extract to the dry ingredients and yolks. Whisk on low speed for 1 minute until the batter is completely smooth, with no streaks of flour remaining; do not overmix to avoid a tough sponge.
Step 3
step3:Combine wet base batter
4

Whip and fold egg whites

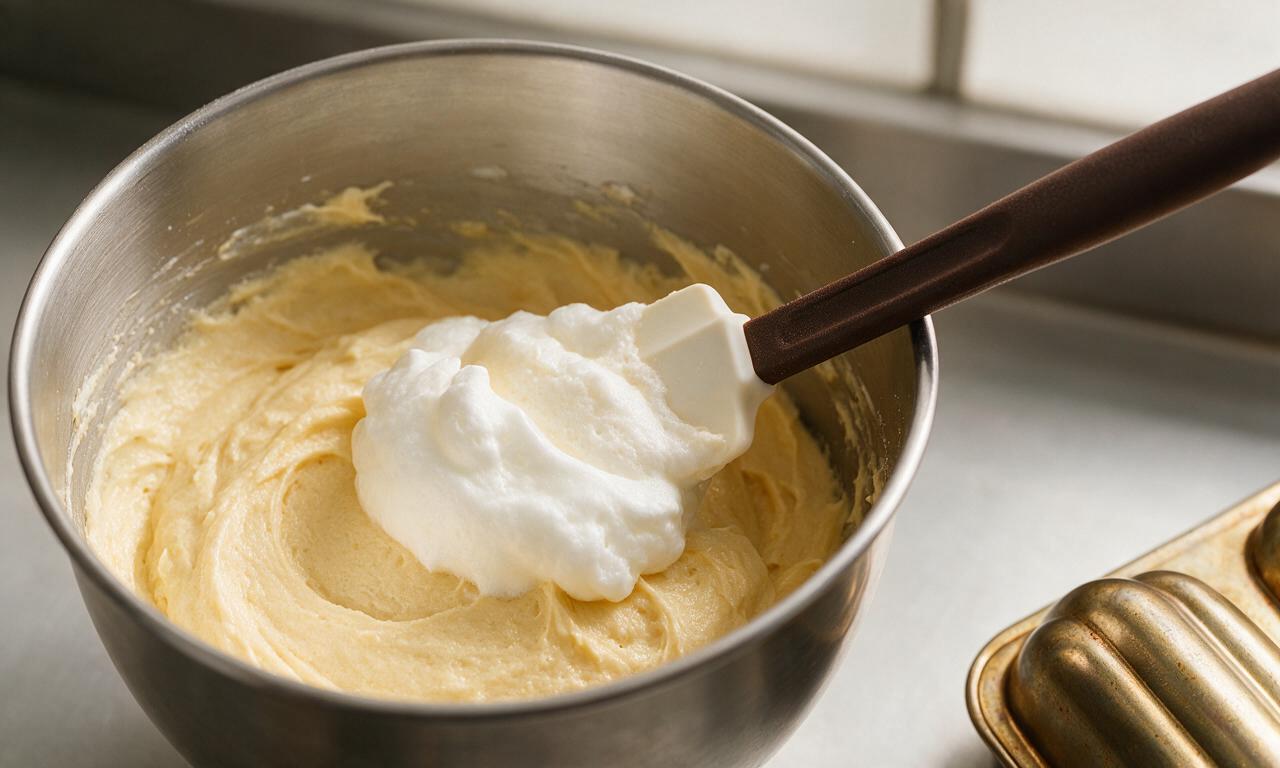
Use an electric mixer on medium-high speed to beat the reserved egg whites for 2–3 minutes, until they form stiff, glossy peaks that hold their shape straight up when the mixer beater is lifted. Gently fold 1/3 of the beaten whites into the base batter to lighten its texture, then fold in the remaining whites in two equal additions, mixing only just until no white streaks remain to preserve the batter’s airy lift.
Step 4
step4:Whip and fold egg whites
5

Bake the sponge cakes

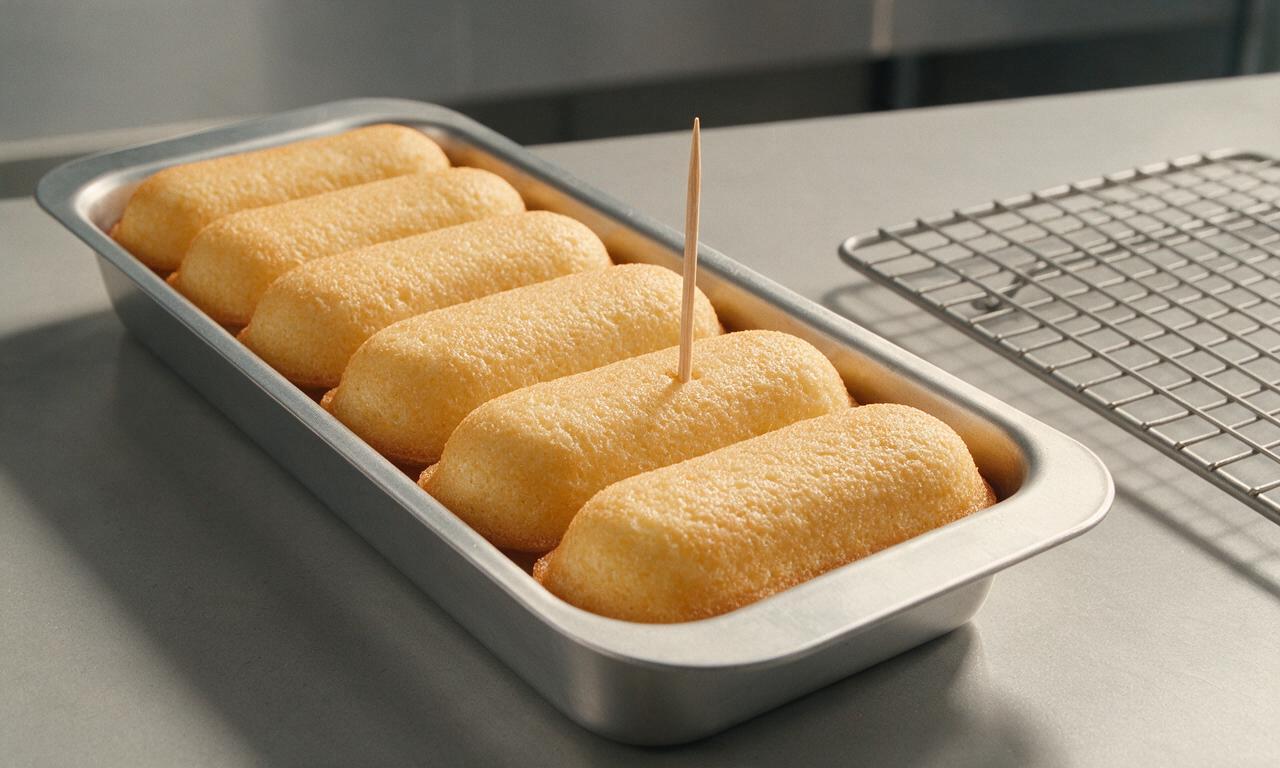
Scoop the batter evenly into the prepared pan cavities, filling each to 2/3 capacity (approximately 3 tablespoons of batter per cavity). Bake for 14–16 minutes at 175°C (350°F) until the cake tops are pale golden and a wooden toothpick inserted into the center of a cake comes out clean with no wet batter attached. Let cakes cool in the pan for 10 minutes, then transfer to a wire rack to cool completely for 30 minutes before filling.
Step 5
step5:Bake the sponge cakes
6

Make vanilla cream filling

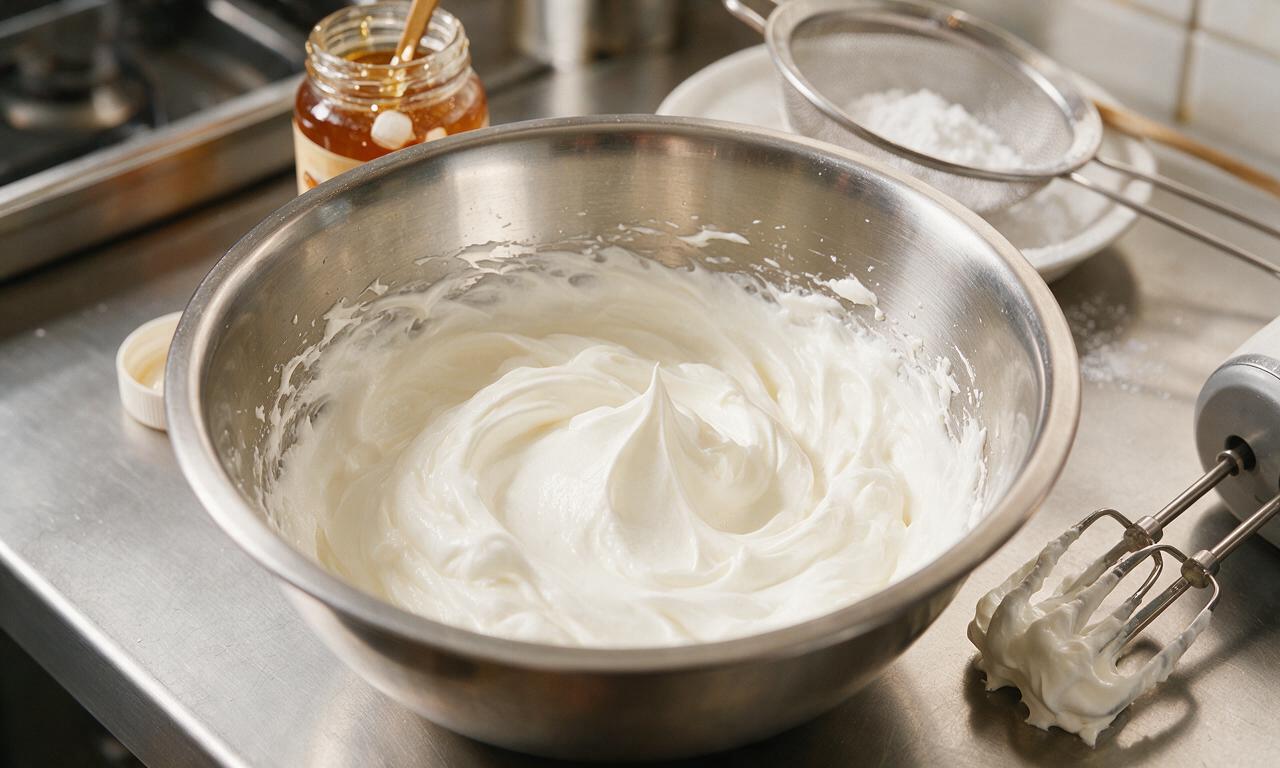
While the cakes cool, prepare the filling: use an electric mixer on medium speed to beat 113g softened unsalted butter for 2 minutes until it is pale, light, and fluffy. Add 213g marshmallow fluff, 130g sifted confectioners’ sugar, and 5ml vanilla extract, then beat on medium-low speed for 2 additional minutes until the filling is completely smooth, creamy, and free of sugar lumps.
Step 6
step6:Make vanilla cream filling
7

Fill and finish Twinkies

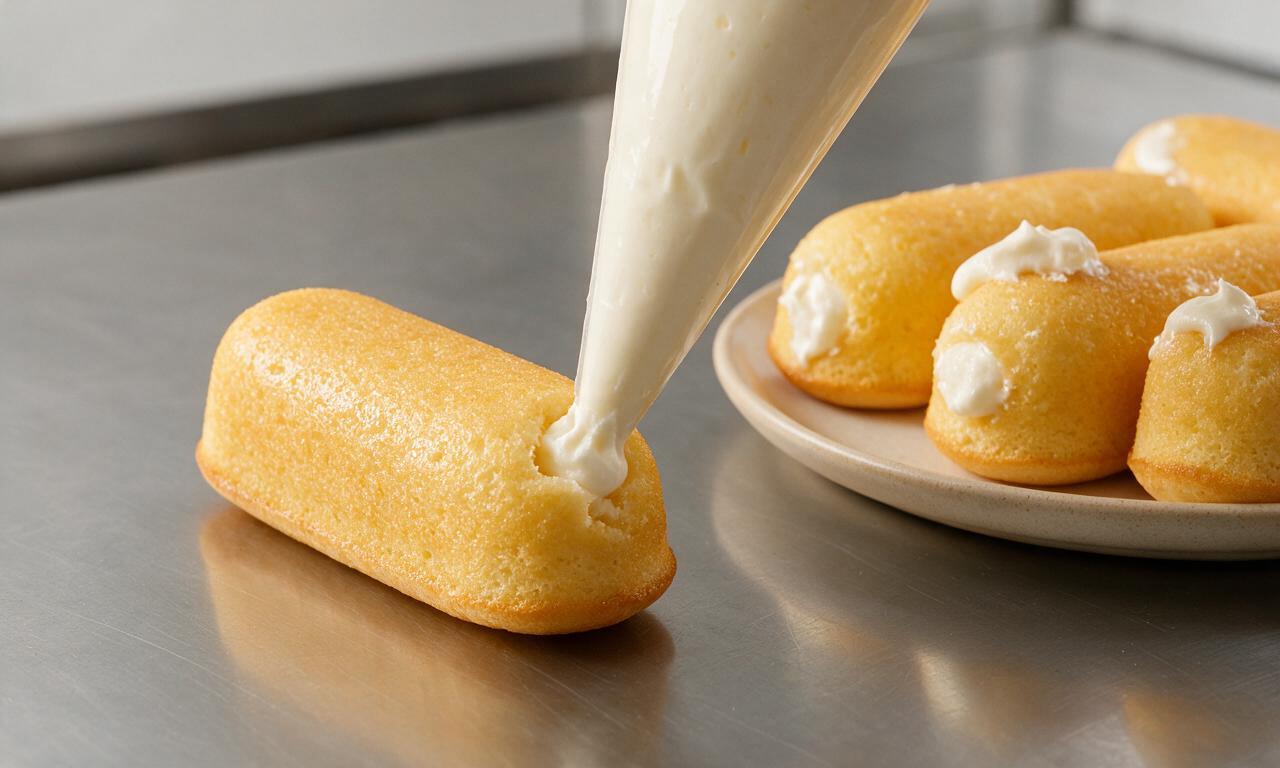
Transfer the finished cream filling to a piping bag fitted with a small 6mm round piping tip. Poke 3 evenly spaced, 2cm-deep holes into the flat bottom side of each fully cooled cake. Pipe roughly 1.5 tablespoons of filling into each hole, stopping when the cake feels slightly heavy and a tiny amount of cream peeks out from the holes. Flip cakes right-side up before serving.
Step 7
step7:Fill and finish Twinkies

Tips

1.Ensure the bowl and beaters used for whipping egg whites are completely free of grease or egg yolk residue—even a tiny amount of fat will prevent whites from forming stiff peaks, resulting in dense, flat sponge cakes.
2.Never fill warm or partially cooled cakes, as residual heat will melt the marshmallow cream filling, causing it to run out of the fill holes and create soggy cakes.
3.Store homemade Twinkies in an airtight container at room temperature for up to 3 days; for longer storage, refrigerate for up to 1 week, and let sit at room temperature for 10 minutes before serving to restore the soft, fluffy texture.


✨ You May Also Like

Desserts & Baking
🍜 Italy

Creamy, coffee-kissed classic Northern Italian no-bake dessert, with layers of rum-spiked mascarpone cream, soft ladyfingers, and a rich cocoa dusting.

⏱️ 4 hours 3Desserts & Baking ★ 4.8
Desserts & Baking
🍜 France

Flaky, shatteringly crisp, buttery French croissants with golden exteriors and soft, airy layered interiors, perfect for pairing with coffee for a special morning treat.

⏱️ 12 hours Desserts & Baking ★ 4.7
Desserts & Baking
🍜 United States

Warm, spiced baked apples topped with a fluffy golden biscuit crust, this cozy dessert pairs perfectly with vanilla ice cream for cool-weather comfort.

⏱️ 55 minuteDesserts & Baking ★ 4.7
Desserts & Baking
🍜 United States

A star-spangled classic American blueberry pie with buttery flaky crust and bright sweet-tart filling, perfect for summer patriotic gatherings.

⏱️ 1 hour 25Desserts & Baking ★ 4.8
Desserts & Baking
🍜 United States

A beloved no-bake regional Maine candy with a chewy coconut-potato center coated in rich dark chocolate, a New England holiday staple since the 1870s.

⏱️ 2 hours 3Desserts & Baking ★ 4.9
Desserts & Baking
🍜 France

Luxuriously creamy, floral frozen custard made with aromatic Tahitian vanilla beans, boasting a smooth, rich texture that melts slowly on the tongue.

⏱️ 3 hours 3Desserts & Baking ★ 4.6

Twinkies:Frequently Asked Questions

1.Do I really need to use cake flour instead of all-purpose flour for the sponge?
Yes, cake flour is critical for that light, melt-in-your-mouth golden crumb classic Twinkies are known for—its low 7-8% protein content prevents the tough, dense bakes you’d get with higher-protein all-purpose. If you’re in a pinch, swap 2 tablespoons of all-purpose flour per cup with cornstarch, sifted twice, to mimic the texture.
2.Why do the eggs need to be room temperature and separated for the recipe?
Room temperature egg whites whip to higher, more stable volumes with less effort, creating the fluffy lift for the sponge without uneven leavener gaps. Separating whites and yolks lets you build a light foam base first, then fold in rich yolks without deflating the air bubbles that give Twinkies their iconic airy texture.
3.Can I use a regular muffin tin if I don’t have a specialty Twinkie pan?
Absolutely! You don’t need a branded Twinkie mold to make great homemade versions. Grease a standard 12-cup muffin tin, or shape 3-oz foil loaf liners into the classic oblong shape by pinching the ends, and fill each cavity ⅔ full. Bake time will be 1-2 minutes shorter, so test doneness with a toothpick early.
4.How do I keep the sponge cakes from deflating after baking?
The biggest culprits for deflated sponge are overmixing the batter once you add dry ingredients, or underwhipping the egg whites. As soon as you pull them from the oven, let cakes cool in the pan for 5 minutes, then transfer to a wire rack to cool fully—trapping them in a hot pan creates condensation that can sink the delicate crumb.
5.What’s the easiest, least messy way to fill the Twinkies with cream?
The simplest no-mess method uses a piping bag fitted with a small round tip (like a Wilton #12). Poke 3 evenly spaced holes in the flat bottom of each fully cooled cake, pipe vanilla cream in short, steady bursts until the cake feels slightly heavy, then wipe any excess cream off the holes with a paper towel.
6.Can I make the vanilla cream filling without marshmallow fluff?
You absolutely can, and it will taste closer to the original nostalgic filling! Whip ½ cup softened unsalted butter, 2 cups powdered sugar, 1 teaspoon pure vanilla extract, 2 tablespoons heavy cream, and a pinch of fine table salt until light and fluffy for that smooth, non-sticky classic cream center.
7.How long do homemade Twinkies stay fresh, and how should I store them?
Stored in an airtight container at room temperature, away from direct sunlight, homemade Twinkies will stay fresh and fluffy for 3-4 days. Avoid storing them in the fridge, as cold air dries out the delicate sponge quickly and makes the cream filling firm up instead of staying smooth and creamy.
8.Why does my baked sponge have a weird bitter aftertaste?
That bitter off-flavor almost always comes from using too much baking powder, or using old, expired baking powder that has chemically broken down. Measure baking powder precisely with level spoons (don’t pack it!) and check the expiration date before mixing—too much leavener leaves a metallic taste and causes collapsed cake.
9.Can I freeze homemade Twinkies to enjoy later?
Yes, they freeze beautifully for up to 3 months! Wrap each individual Twinkie tightly in plastic wrap, then place them in a labeled freezer bag to prevent freezer burn. Thaw them at room temperature for 30 minutes before eating—no reheating needed, as they’ll taste just as fresh once fully thawed.
10.Do I need to grease and flour my pan even if it’s non-stick?
Yes, even non-stick pans need a light coating to keep these delicate sponges from sticking, since the batter has very little fat. Use a light layer of non-stick baking spray, or brush with softened butter and dust with a thin layer of cake flour, tapping out excess, to ensure cakes pop out cleanly without tearing.
11.Can I add mix-ins like chocolate chips or banana to the sponge?
You can absolutely customize them, but add mix-ins carefully to avoid weighing down the light sponge. Toss mini chocolate chips or finely diced, well-drained banana in a pinch of cake flour before folding into the finished batter—this keeps them from sinking to the pan bottom and won’t deflate the airy egg white foam.
12.How do I tell when the sponge cakes are fully done baking?
Perfectly baked Twinkie sponge will be pale golden on top (that color comes from the granulated sugar caramelizing slightly as it bakes), spring back lightly when you press the center with a fingertip, and a toothpick inserted into the thickest part will come out with 1-2 tiny moist crumbs attached, not wet batter. Skip overbaking, as that leads to dry, crumbly cake instead of the signature soft, pillowy texture.
13.Why won’t my egg whites whip up to stiff peaks for the sponge?
Egg whites fail to whip properly for three common reasons: there’s even a tiny bit of egg yolk (a fat) in the bowl, your mixing bowl or whisk had leftover grease or soap residue, or the eggs were still cold. Use a completely clean glass or metal bowl, separate eggs carefully, and let whites come to room temp for full, stable peaks.
14.Can I adapt this recipe to make gluten-free Twinkies?
Yes, you can easily adapt this recipe for gluten-free eaters! Swap the regular cake flour for a 1:1 gluten-free cake flour blend that contains xanthan gum, and confirm your baking powder is labeled gluten-free to avoid cross-contamination. The final result will have nearly the same light crumb and sweet vanilla flavor as the classic version.

Comments (15)

3 days ago

OMG I made these for my kid’s soccer team potluck last weekend and they were gone in 10 minutes flat! I was worried the vanilla cream filling would be too runny but it set perfectly, and everyone kept asking if I snuck store-bought Twinkies lmao. Only note: make sure you give the cake enough time to cool completely before piping the filling, I rushed the first batch and oozed everywhere 😂

2 days ago

Wait did you use a special Twinkie pan or just a regular loaf pan cut into shapes? I’ve been wanting to try these but don’t want to buy a random one-use pan!

2 days ago

Great question! You can absolutely use a mini loaf pan or even a whoopie pie pan if you don’t have a dedicated Twinkie mold — just adjust the bake time by 2-3 minutes and keep an eye on the golden brown edges. So glad the team loved them!

1 week ago

Okay as someone who burns boxed brownies half the time, I was shocked these turned out as good as they did! The recipe says medium difficulty and I was intimidated by the 1hr40min cook/prep time, but the steps were super straightforward. The cake is so much fluffier than the store-bought version, I’ll never buy a pack again.

6 days ago

That’s such a win to hear! Don’t let the medium difficulty tag scare you — as long as you follow the temperature tips for the filling, even beginner bakers can nail these. So proud of you!

2 weeks ago

Made these for a trailhead snack share last week and they held up way better than I thought they would in my pack. Not too sweet, perfect portable size, held up to being jostled around for 4 miles. 10/10 will make again for our next group hike.

5 days ago

Game. Changer. I’ve been chasing that classic childhood Twinkie taste for years since they changed the recipe a while back, and this is EXACTLY it. The cream filling has that perfect light, not-too-buttery taste I remember, and the sponge cake has that soft, springy texture. Only complaint is I ate 3 straight out of the pan and gave myself a sugar rush oops.

4 days ago

Wait did you use cake flour like the recipe says? I tried a different copycat recipe once with all purpose and it was way too dense!

4 days ago

I did! I almost skipped it because I didn’t have any on hand but ran to the store last minute, totally worth the extra trip. Don’t sub it, trust me!

yesterday

Brought these to my office potluck yesterday and half my coworkers asked for the recipe before I even left the break room. I did a little twist and added a tiny bit of banana extract to the filling to make those old banana-flavored Twinkies I loved as a kid, and it slapped. Heads up: these do take almost the full listed time so don’t start them an hour before you need to leave like I almost did lmao.

yesterday

That banana twist sounds incredible — I’m going to have to test that variation myself for the site! Thanks for the great tip about planning ahead for the cook time, that’s a reminder I think all of us bakers need sometimes 😅

2 days ago

Tried making these gluten free by swapping in a 1:1 GF baking flour and they still came out pretty great! The texture was a tiny bit more crumbly than regular but the flavor was spot on. Super happy I can enjoy a homemade Twinkie without the gluten bloat.

1 week ago

My kids went absolutely feral for these. I’ve been trying to make more homemade snack staples instead of buying processed stuff for their lunch boxes, and these are going into the regular rotation. The only issue I had was my piping tip was too small so the filling didn’t get all the way to the ends of the cakes, so the first couple bites were just plain cake. Still a hit though!

6 days ago

How long do these stay fresh for? I want to make a batch on Sunday for the whole week of lunches but don’t want them to get stale!

6 days ago

If you store them in an airtight container at room temp, they’ll stay fresh for 3-4 days! I recommend waiting to pipe the filling until the day before you pack them if you’re making them ahead for meal prep, that keeps the sponge from getting soggy. Great hack for school lunches!

30 minutes ago

I really wanted to love these but I messed up the meringue part of the cake I think? My sponge came out really flat and dense, not light and fluffy like the pictures. The filling was amazing though, so I know I did that part right at least. Any tips for getting the cake to rise properly?

5 minutes ago

Oh no, sorry to hear the cake didn’t rise for you! The most common culprit here is not whipping the egg whites to stiff enough peaks, or folding them into the batter too roughly which deflates all that air. Next time, make sure your mixing bowl is totally grease-free (even a little leftover soap or oil can keep egg whites from whipping up!) and fold gently with a silicone spatula until just combined. You’ve got this!

2 hours ago

SO good. I know these are a dessert but I ate two alongside my brisket sandwich last night and zero regrets. The sweet vanilla cream pairs weirdly well with smoky BBQ, don’t knock it till you try it.

1 week ago

I made these for my grandma’s 80th birthday party since she used to pack Twinkies in my dad’s school lunches back in the 70s, and she teared up when she tried them! Said it tasted exactly like the ones she bought at the corner store when my dad was little. Total hit across every generation at the party, from my 8 year old niece to my 92 year old grandpa.

6 days ago

This is so sweet! Did you dust them with a little powdered sugar like the photo shows? I’m making these for my parent’s anniversary party next month and want them to look extra nice.

5 days ago

I did! I also wrapped a few of them in the classic clear Twinkie wrappers I found on Amazon as a little joke, everyone thought that was such a fun touch. Highly recommend for a party!

2 days ago

Pro tip: add a teaspoon of instant espresso powder to the cake batter! It doesn’t make it taste like coffee, it just makes the vanilla flavor taste so much richer and deeper. I did this on a whim with my second batch and my roommate said they were better than any gas station snack cake he’s ever had.

1 day ago

Oh that’s genius! I always add espresso to my chocolate baked goods but never thought to add it to vanilla stuff. Gonna try that this weekend!

1 day ago

What a fantastic hack! Espresso powder is such an underrated secret ingredient for vanilla bakes — it amplifies the sweetness and depth without adding a coffee flavor. I’ll be adding that tip to the recipe notes, thank you!

5 days ago

I was worried this would be too fussy for a casual weekend bake, but it was actually really fun! The piping part felt fancy even though it was super easy once I got the hang of it. My only heads up is the filling makes a little more than you need, so save the extra to dip fruit in or spread on toast, it’s chef’s kiss.

4 days ago

Wait you can put the extra filling on toast? That’s a game changer, I threw out my leftover filling last time I made these and now I’m kicking myself!

3 days ago

These were SO good, but I wish the recipe noted how long you need to let the filling chill before piping! I mixed it up and tried to pipe it right away and it was super runny, made a huge mess all over my counter. Once I stuck it in the fridge for 20 minutes it was perfect, though. My kids ate 2 each after school and didn’t even complain that they weren’t the store-bought kind.

2 days ago

That’s such a great note, thank you for pointing that out! I just updated the recipe card to highlight that the filling needs 15-20 minutes of chill time to firm up before piping, so no one else ends up with a runny filling mess. So glad the kids still loved them!

just now

Made these for my dorm floor snack night and everyone thought I ordered them from a fancy bakery! I don’t have a stand mixer so I used a cheap hand mixer and it still worked fine, just took a little extra arm muscle to whip the egg whites. 10/10, way cheaper than buying snack cakes for the whole floor.

just now

Wait did you bake these in a dorm oven? My dorm only has a tiny toaster oven, do you think that would work for these?

1 week ago

Made these for my neighborhood block party last weekend and they were a total hit! I added a little dusting of cocoa powder on half the batch for a chocolate twist, and both versions were gone before the burgers even came off the grill. Will absolutely be adding these to my go-to summer party recipe list.



