
Vietnamese Fried Chicken

title 1
Vietnamese Fried Chicken
⏱️ cook time 20 minutes
🍽️ servings 4
⚡ Difficulty medium

intro

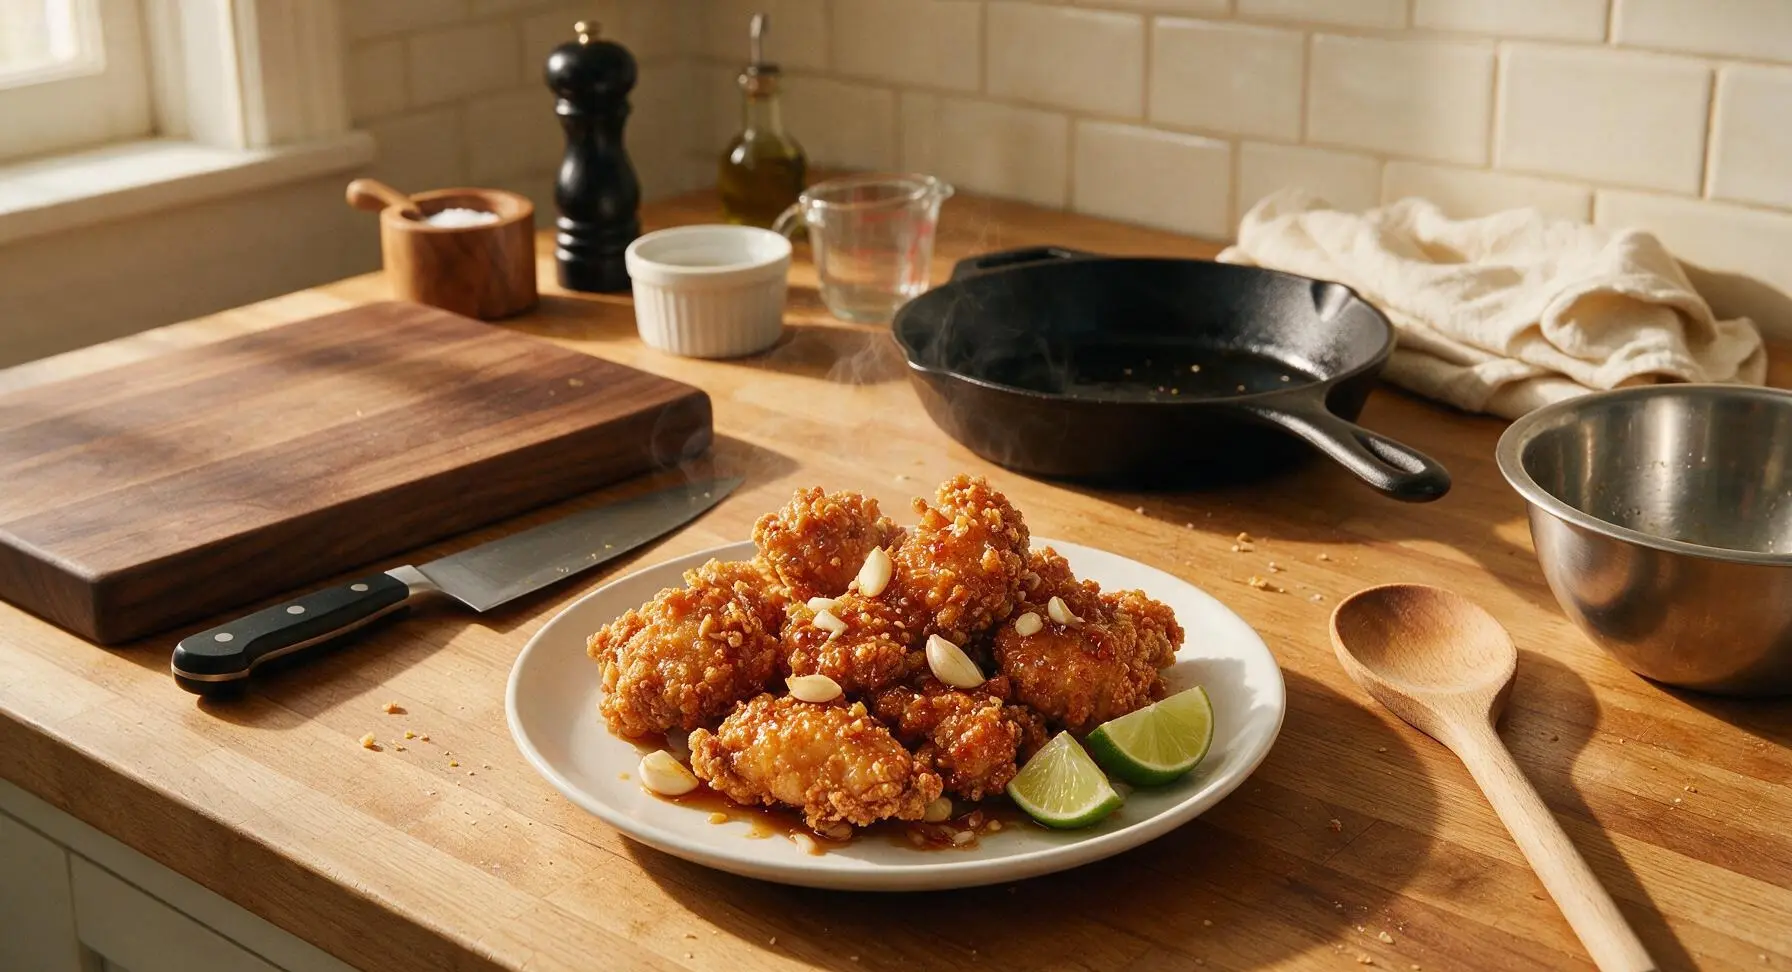
Shatteringly crisp golden chicken coated in sticky, tangy-savory fish sauce caramel, bright with garlic and lime, a beloved Southern Vietnamese family favorite.

Ingredients
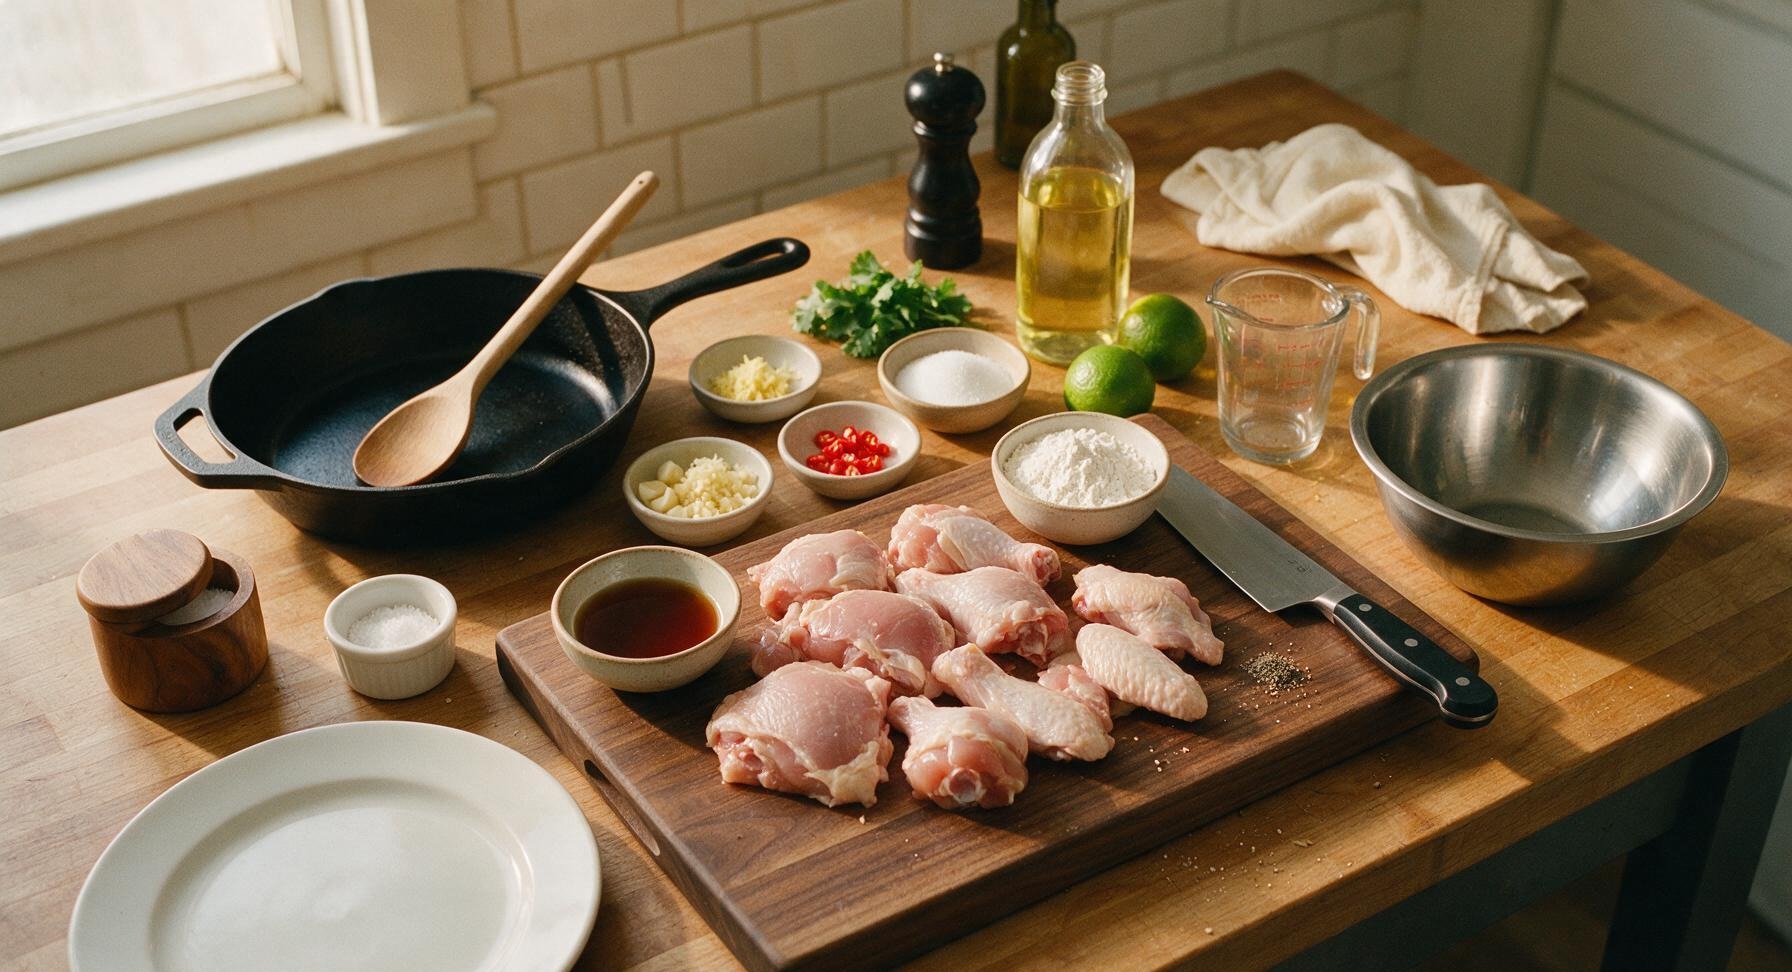
Bone-in, skin-on chicken pieces (thighs, drumettes, wing flats) 800g
Premium Vietnamese fish sauce 6 tbsp
White rice flour ½ cup (60g)
Granulated white sugar 4 tbsp
Fresh garlic, minced 5 cloves (2 tbsp)
Fresh ginger, grated 1 tbsp
Red Thai chilies, finely chopped 2 pieces
Fresh limes 2 whole
Neutral cooking oil (peanut or canola) 1L
Fresh cilantro 1 small bunch (10g)
Kosher salt 1 tsp
Ground black pepper 1 tsp

Steps

1

Prep and Marinate Chicken

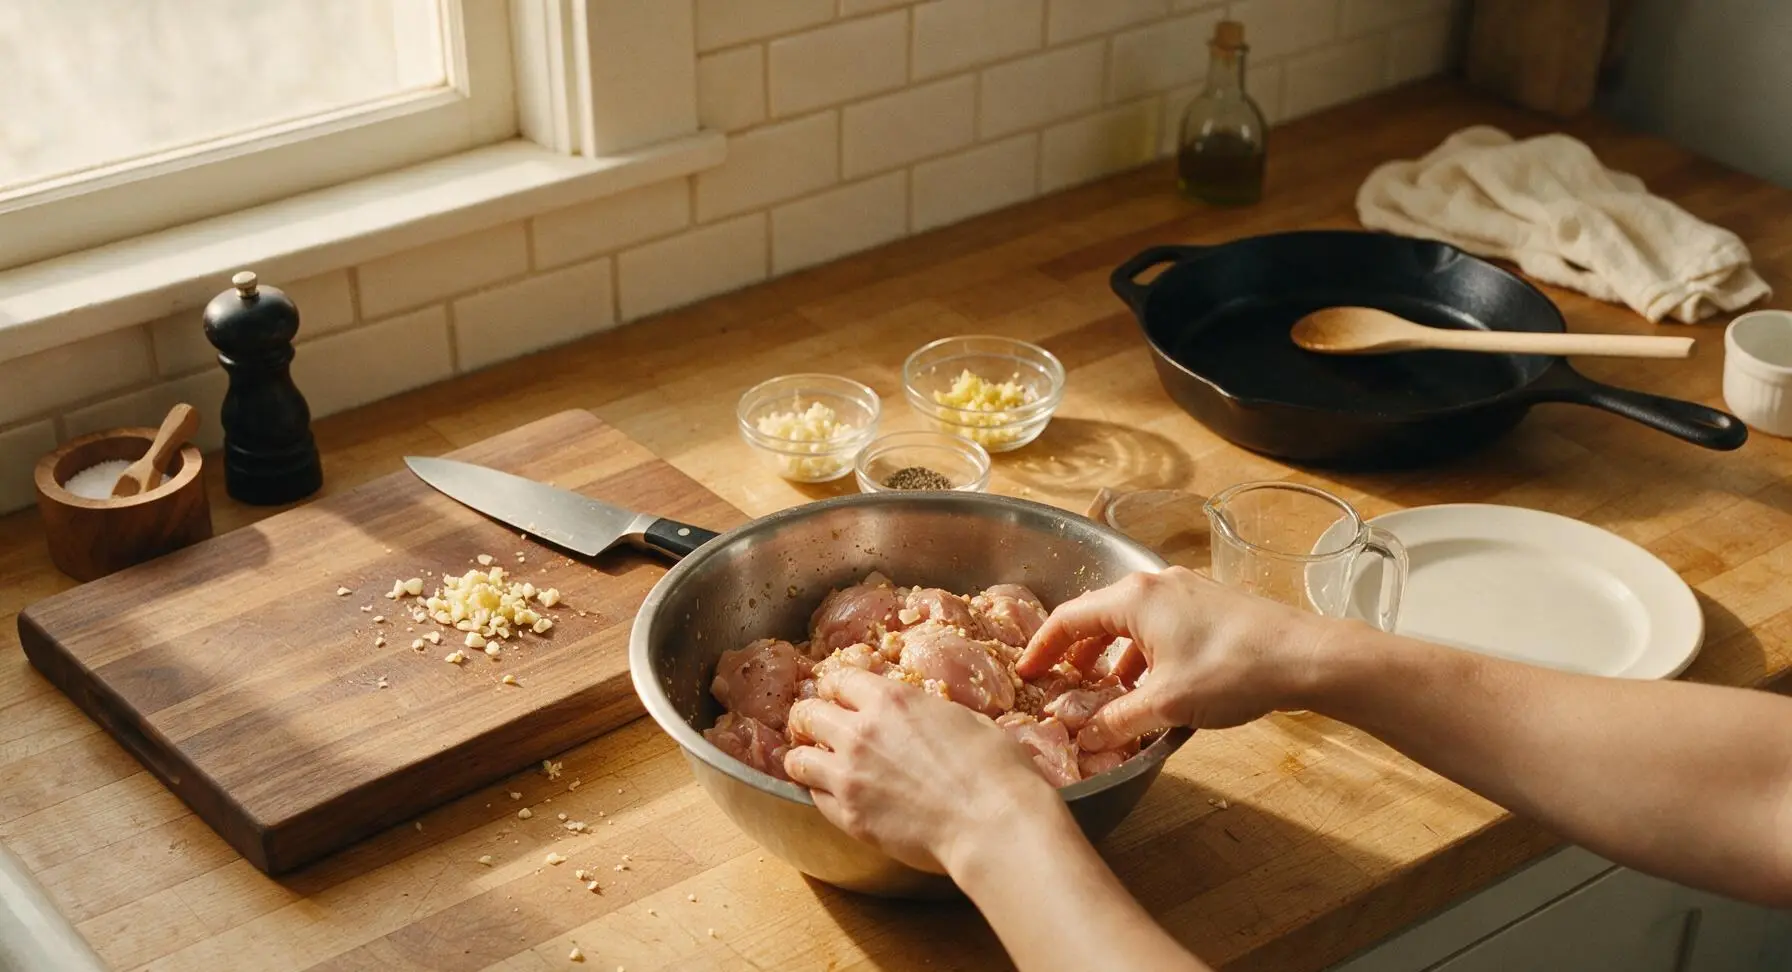
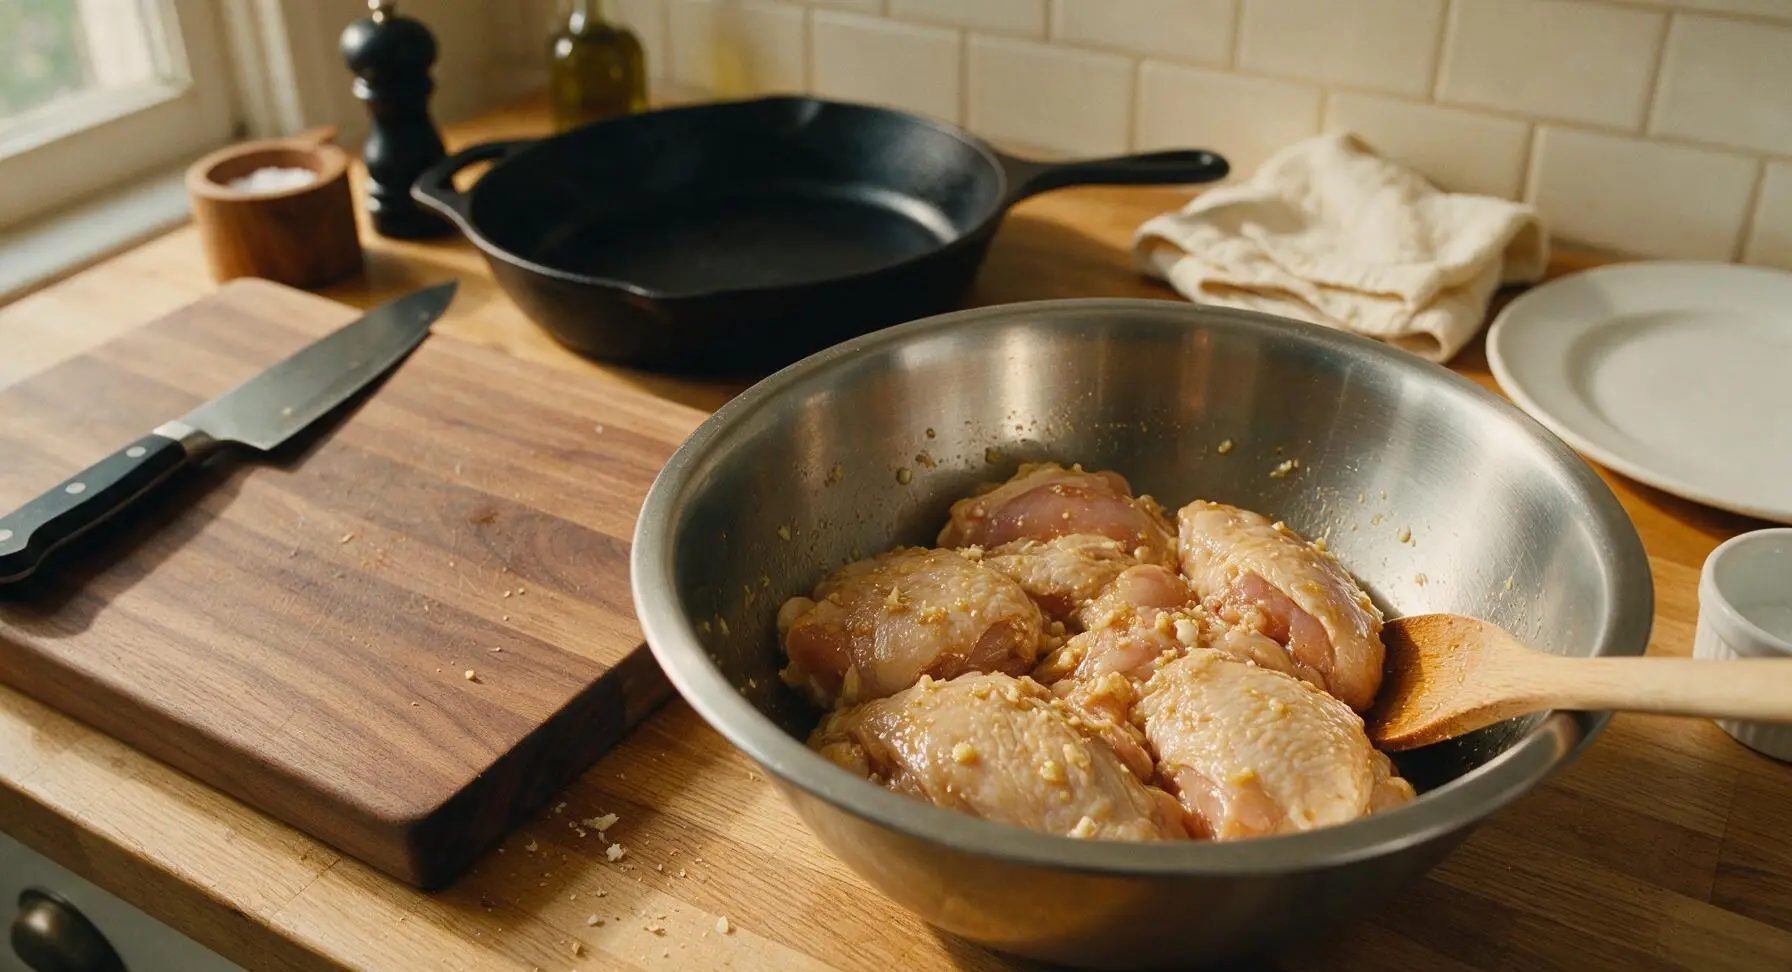
Pat all chicken pieces completely dry with paper towels, then place them in the medium brushed stainless steel mixing bowl. Add 3 tbsp fish sauce, 1 tbsp minced garlic, 1 tbsp grated ginger, 1 tsp ground black pepper, and 1 tsp kosher salt to the bowl. Toss thoroughly to coat every piece evenly, then let the chicken marinate at room temperature for 20 minutes (or up to 2 hours covered in the refrigerator) to allow flavors to penetrate the meat.
Step 1
step1:Prep and Marinate Chicken
Step 1
step1:Prep and Marinate Chicken
2

Coat with Rice Flour

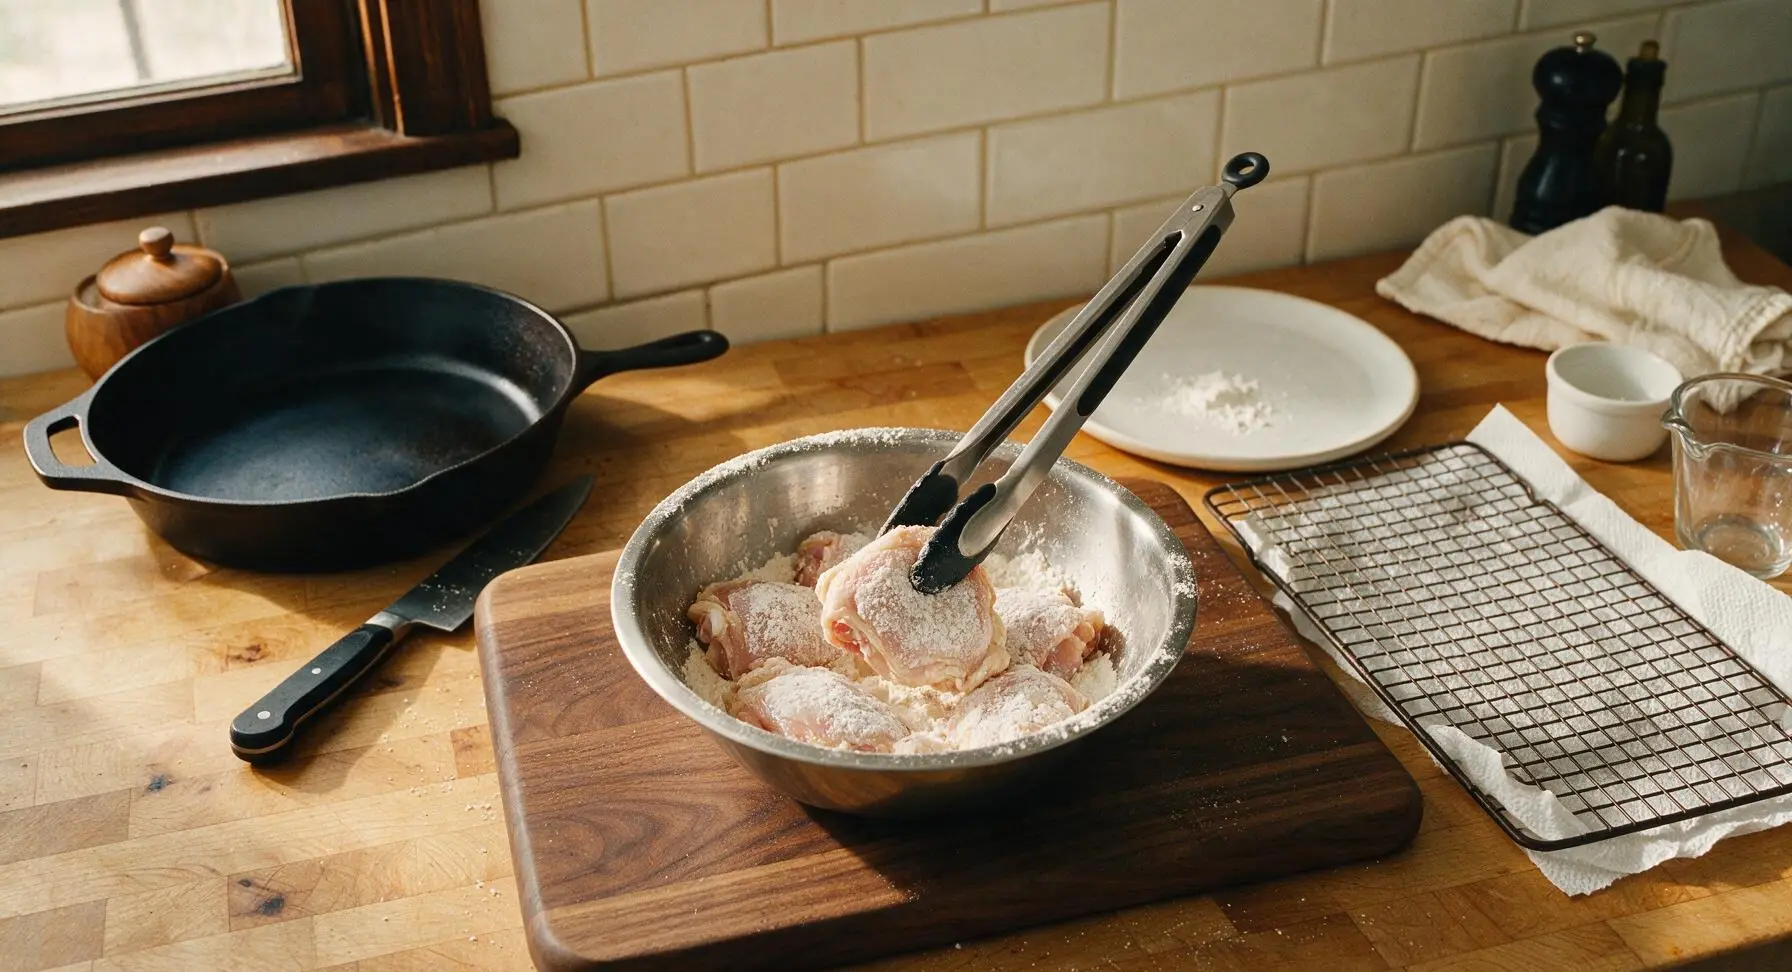
After marinating, add ½ cup white rice flour to the mixing bowl with the chicken. Toss each piece thoroughly until every surface is covered in a thin, even, powdery layer of flour; shake off any excess to avoid thick, clumpy patches that will turn doughy when fried. Let the coated chicken rest for 5 minutes to allow the flour to adhere fully to the skin.
Step 2
step2:Coat with Rice Flour
3

Heat Frying Oil

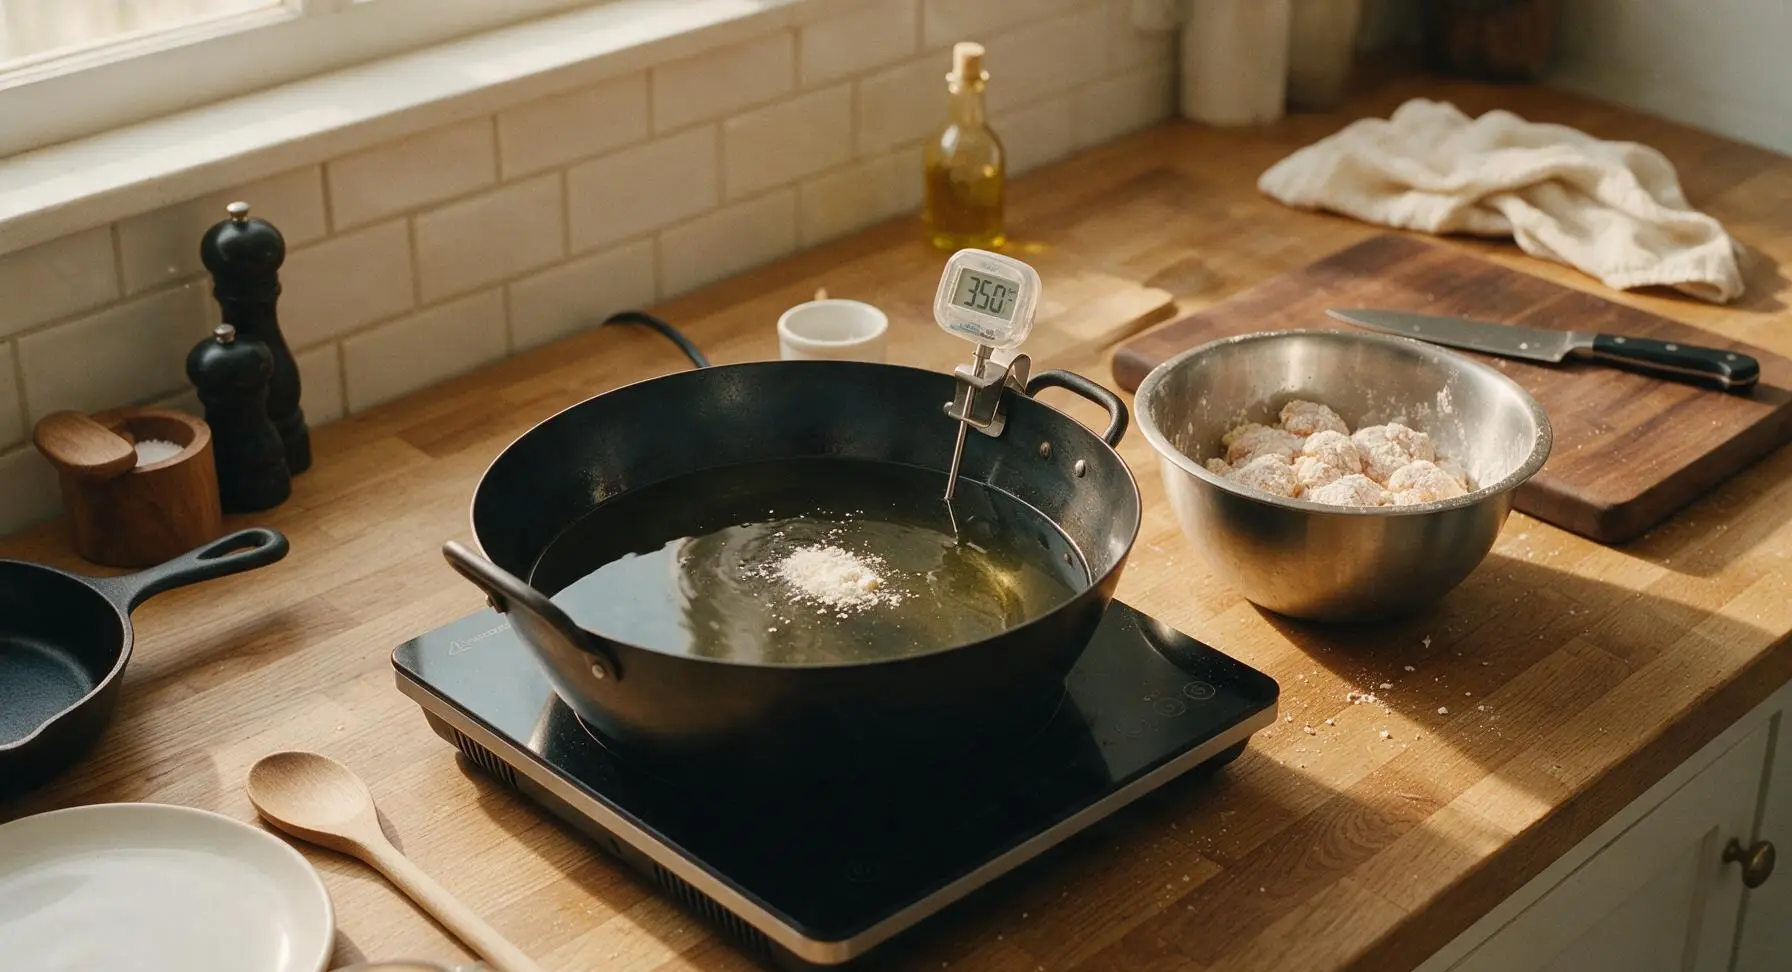
Pour 1L neutral cooking oil into the 5L carbon steel deep frying pan, set the pan on the left-side matte black induction burner over medium-high heat. Clip the digital deep fry thermometer to the pan edge, and heat the oil until it reaches a steady 350°F (175°C). Test the oil temperature by dropping a pinch of rice flour into the oil: the flour should sizzle immediately and rise to the surface without turning brown instantly, confirming correct temperature.
Step 3
step3:Heat Frying Oil
4

First Fry Chicken Pieces

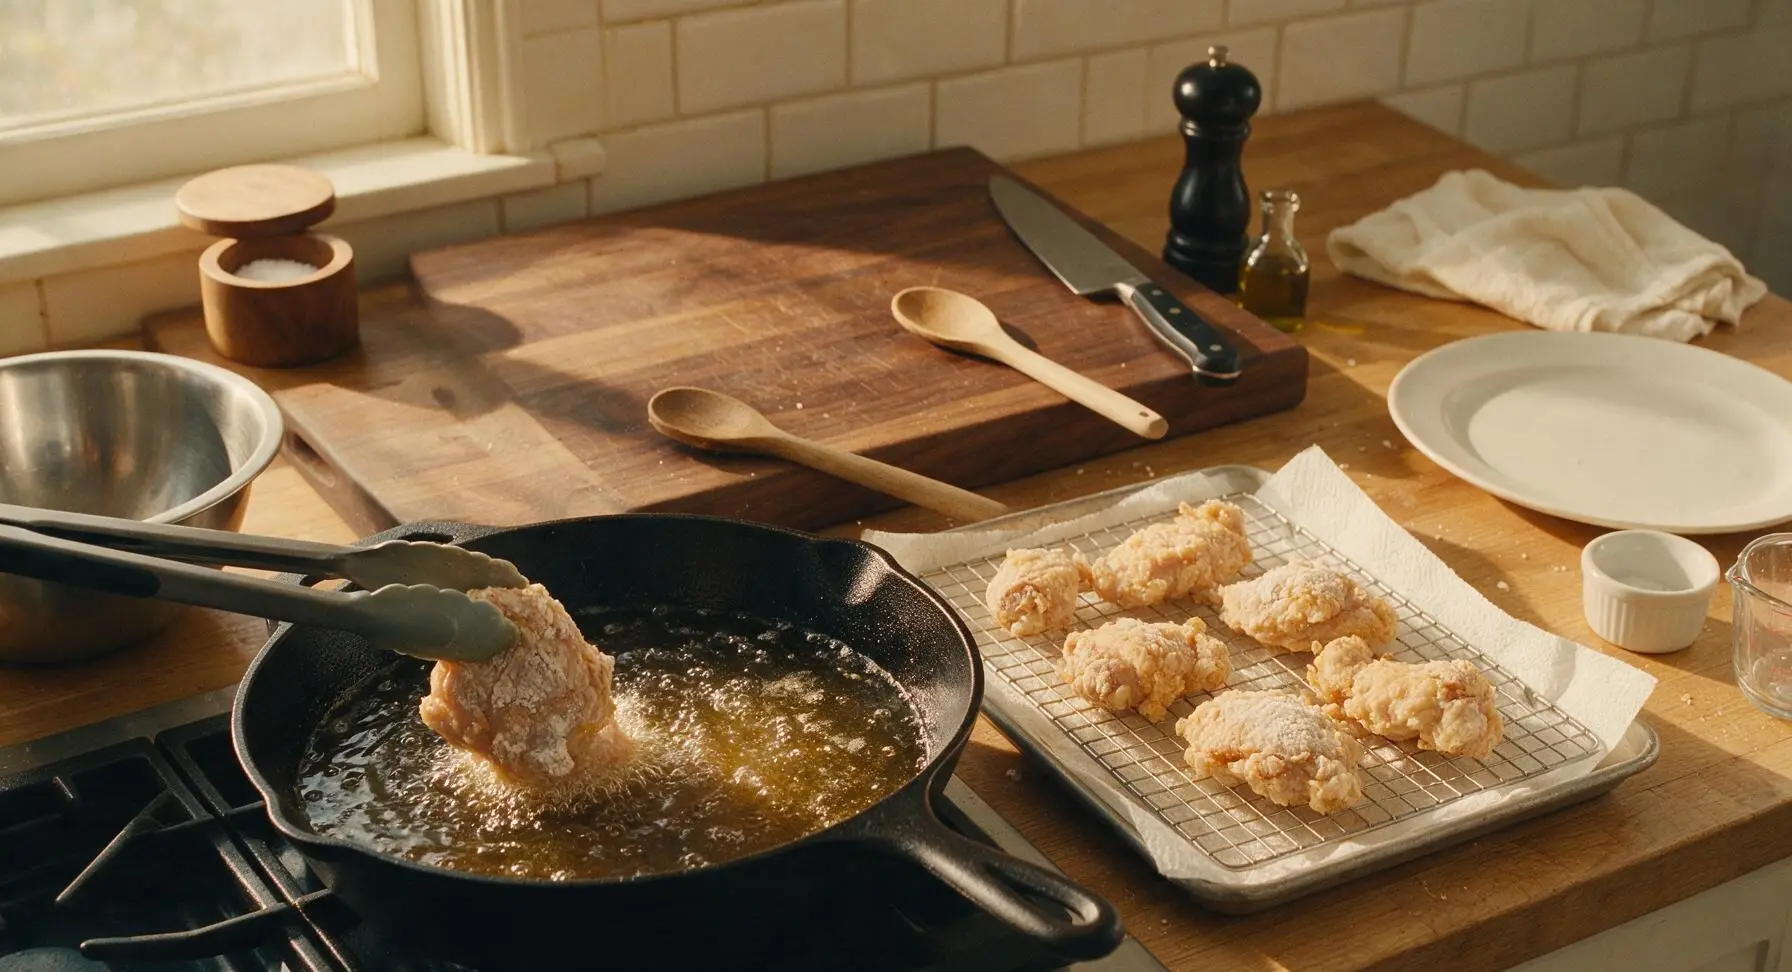
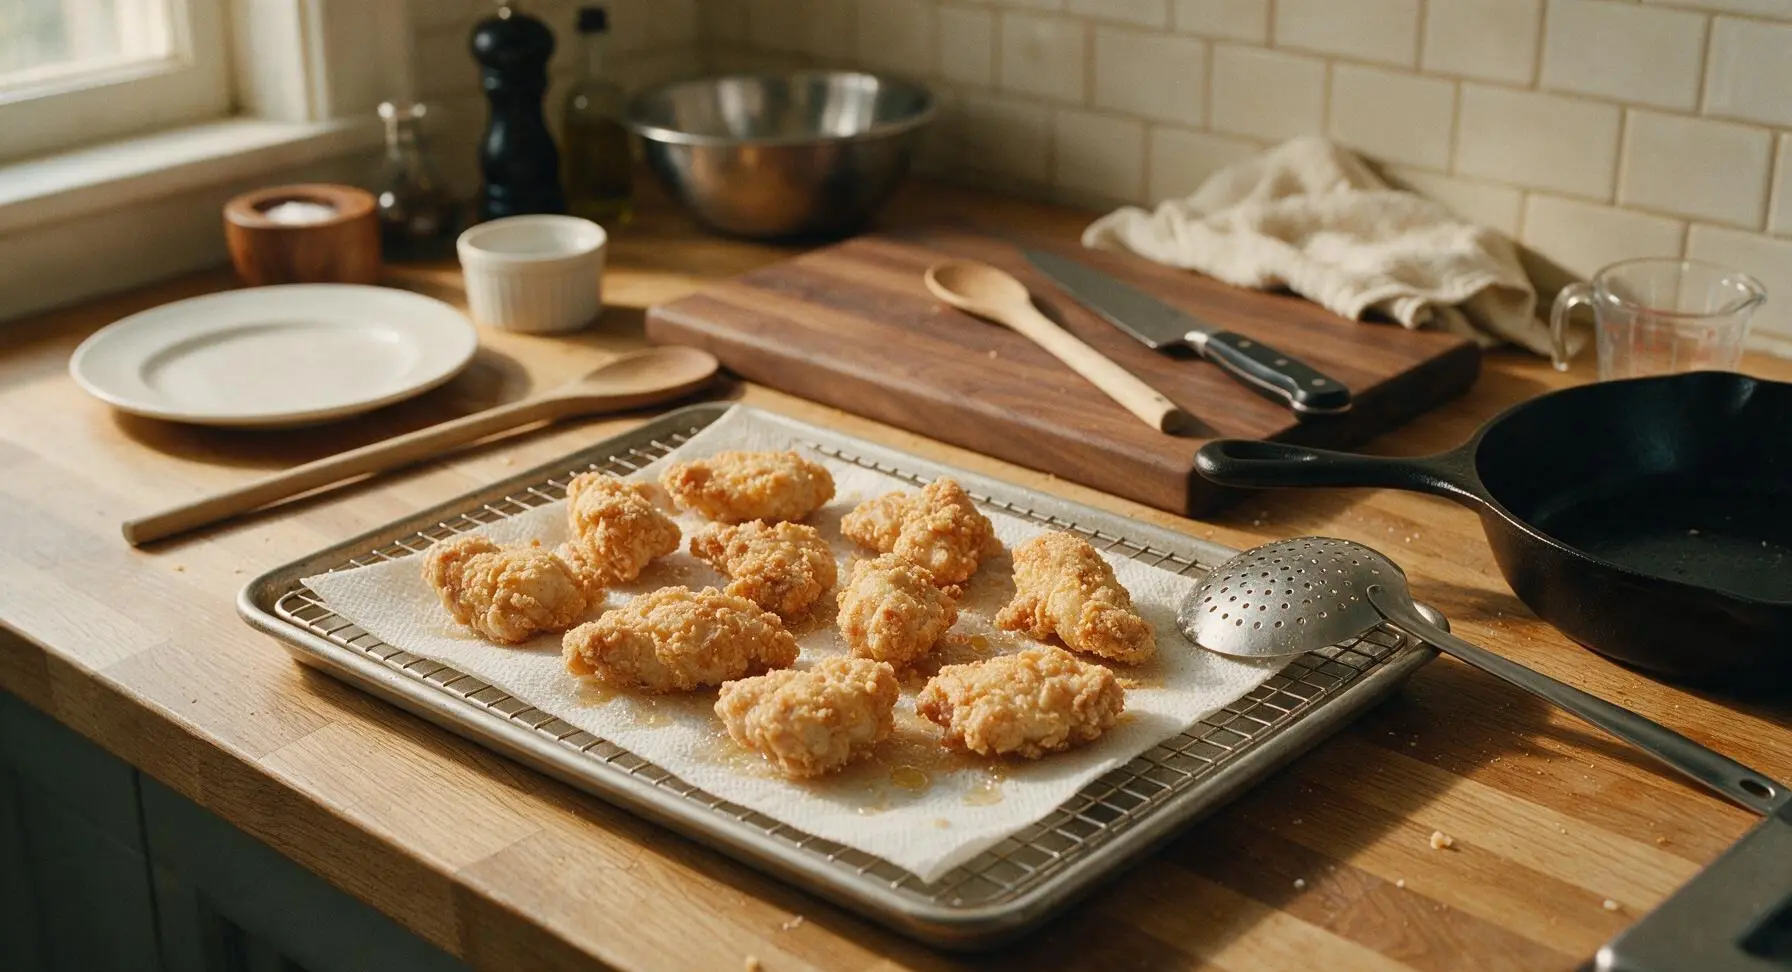
Working in 2 equal batches to avoid overcrowding the pan (which drops oil temperature and causes soggy, greasy chicken), use the silicone-tipped tongs to lower coated chicken pieces gently into the hot oil. Fry for 7 minutes per batch, until the coating is pale golden and fully set, but not deeply browned. Use the stainless steel slotted skimmer to lift partially cooked chicken from the oil, and transfer pieces to the paper-towel lined wire rack to drain for 5 minutes between batches.
Step 4
step4:First Fry Chicken Pieces
Step 4
step4:First Fry Chicken Pieces
5

Second Fry for Crispness

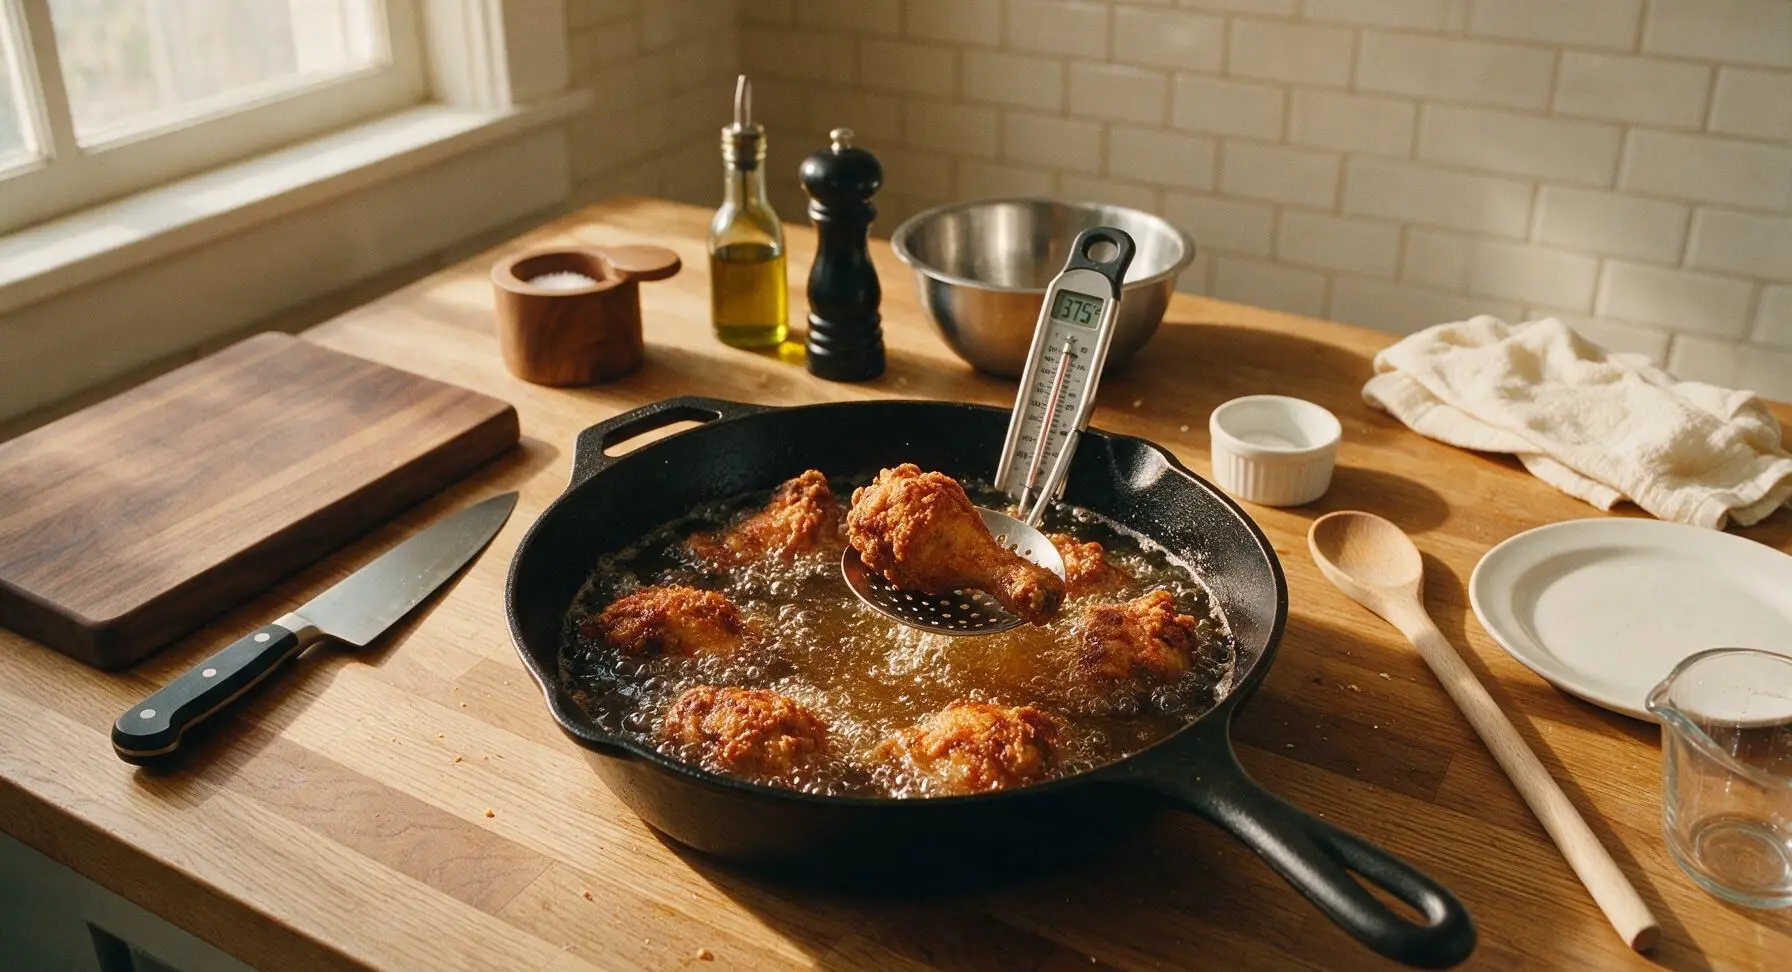
Increase the burner heat to bring the oil temperature up to 375°F (190°C). Return all partially fried chicken pieces to the hot oil in a single batch (the initial par-cook means the chicken will not drop oil temperature drastically). Fry for 4-5 minutes, until the chicken is deep golden brown, shatteringly crisp, and reaches an internal temperature of 165°F (74°C) at the thickest part, away from bone. Use the slotted skimmer to remove all chicken from the oil, and return to the wire rack to drain excess oil for 1 minute.
Step 5
step5:Second Fry for Crispness
6

Make Fish Sauce Caramel

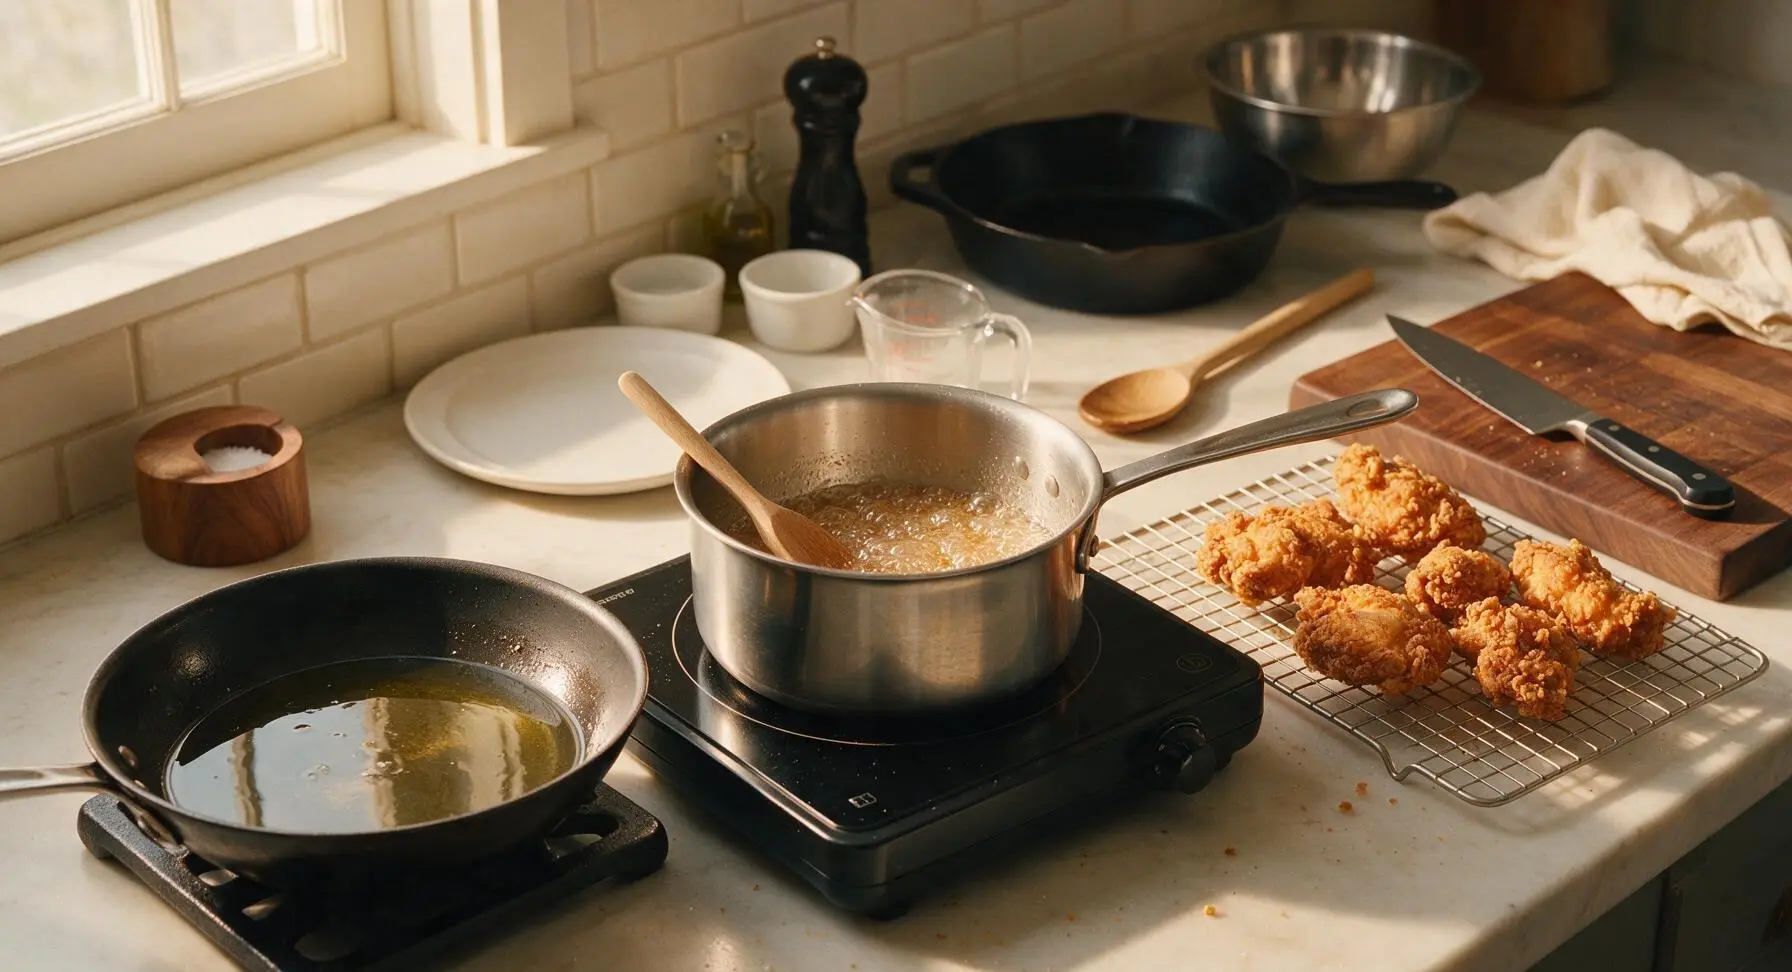
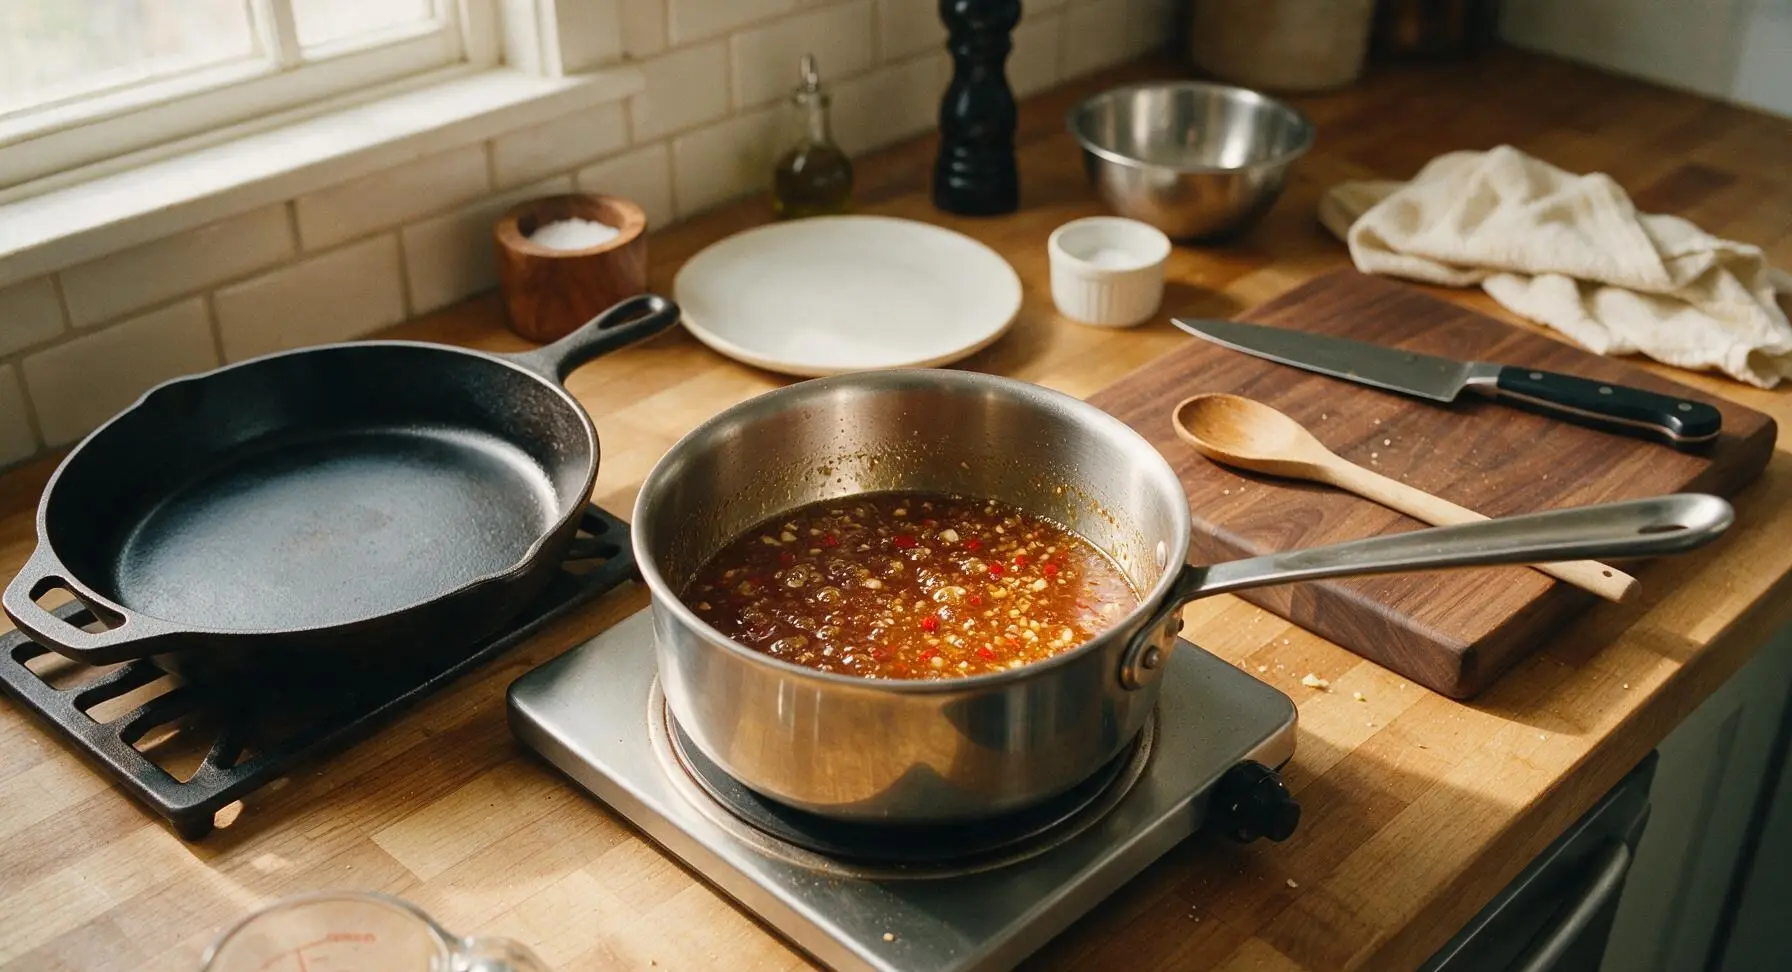
While the chicken drains after the second fry, set the small 18cm stainless steel saucepan on the induction burner, moving the frying pan to the cast iron trivet to the left of the burner temporarily, over medium heat. Add 4 tbsp granulated sugar and 1 tbsp water to the pan, stirring gently with the small beech wood spoon until the sugar melts and turns a light amber color (about 3 minutes, do not let it turn dark brown as it will turn bitter). Carefully stir in the remaining 3 tbsp fish sauce, 1 tbsp minced garlic, and chopped Thai chilies, simmer for 1 minute until the glaze is slightly thickened and syrupy, then remove from heat.
Step 6
step6:Make Fish Sauce Caramel
Step 6
step6:Make Fish Sauce Caramel
7

Toss Chicken in Glaze

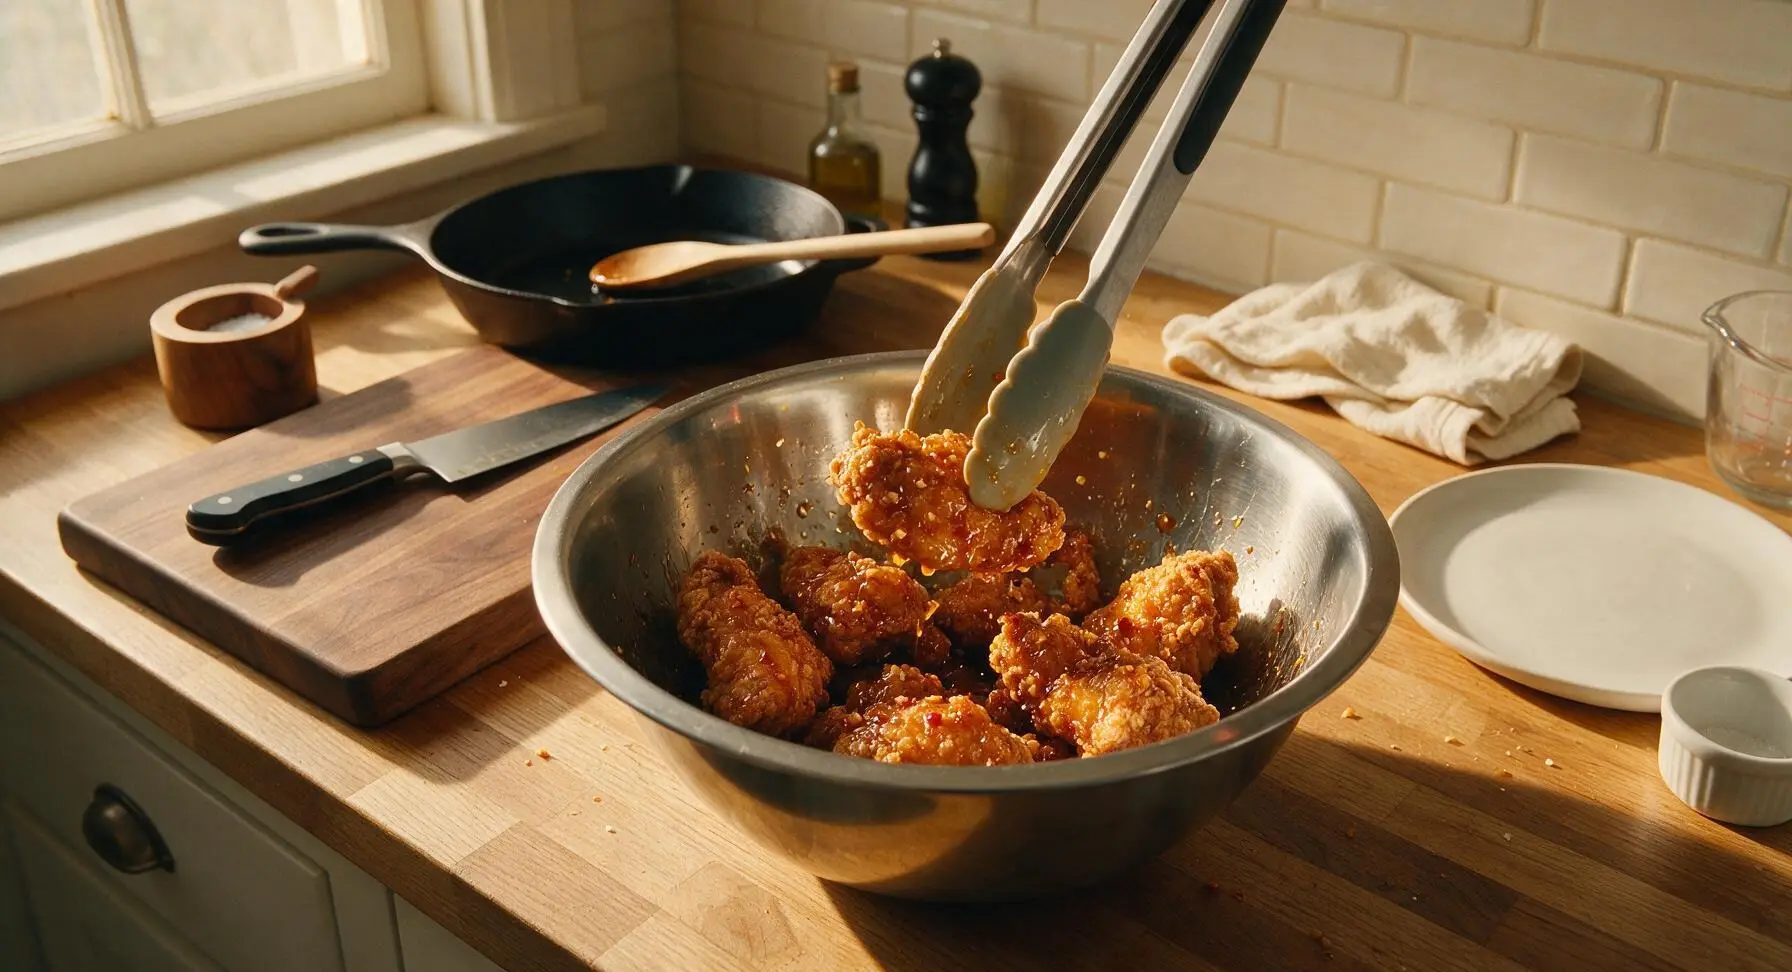
Wipe any leftover rice flour residue out of the stainless steel mixing bowl, then transfer all the hot, crisp fried chicken to the clean bowl. Pour the warm fish sauce caramel glaze over the chicken, toss quickly and thoroughly with the tongs for 30 seconds, so every piece is evenly coated in the glossy glaze. Do not toss for longer than 1 minute, as extended contact with the wet glaze will soften the crisp crust.
Step 7
step7:Toss Chicken in Glaze
8

Plate and Garnish

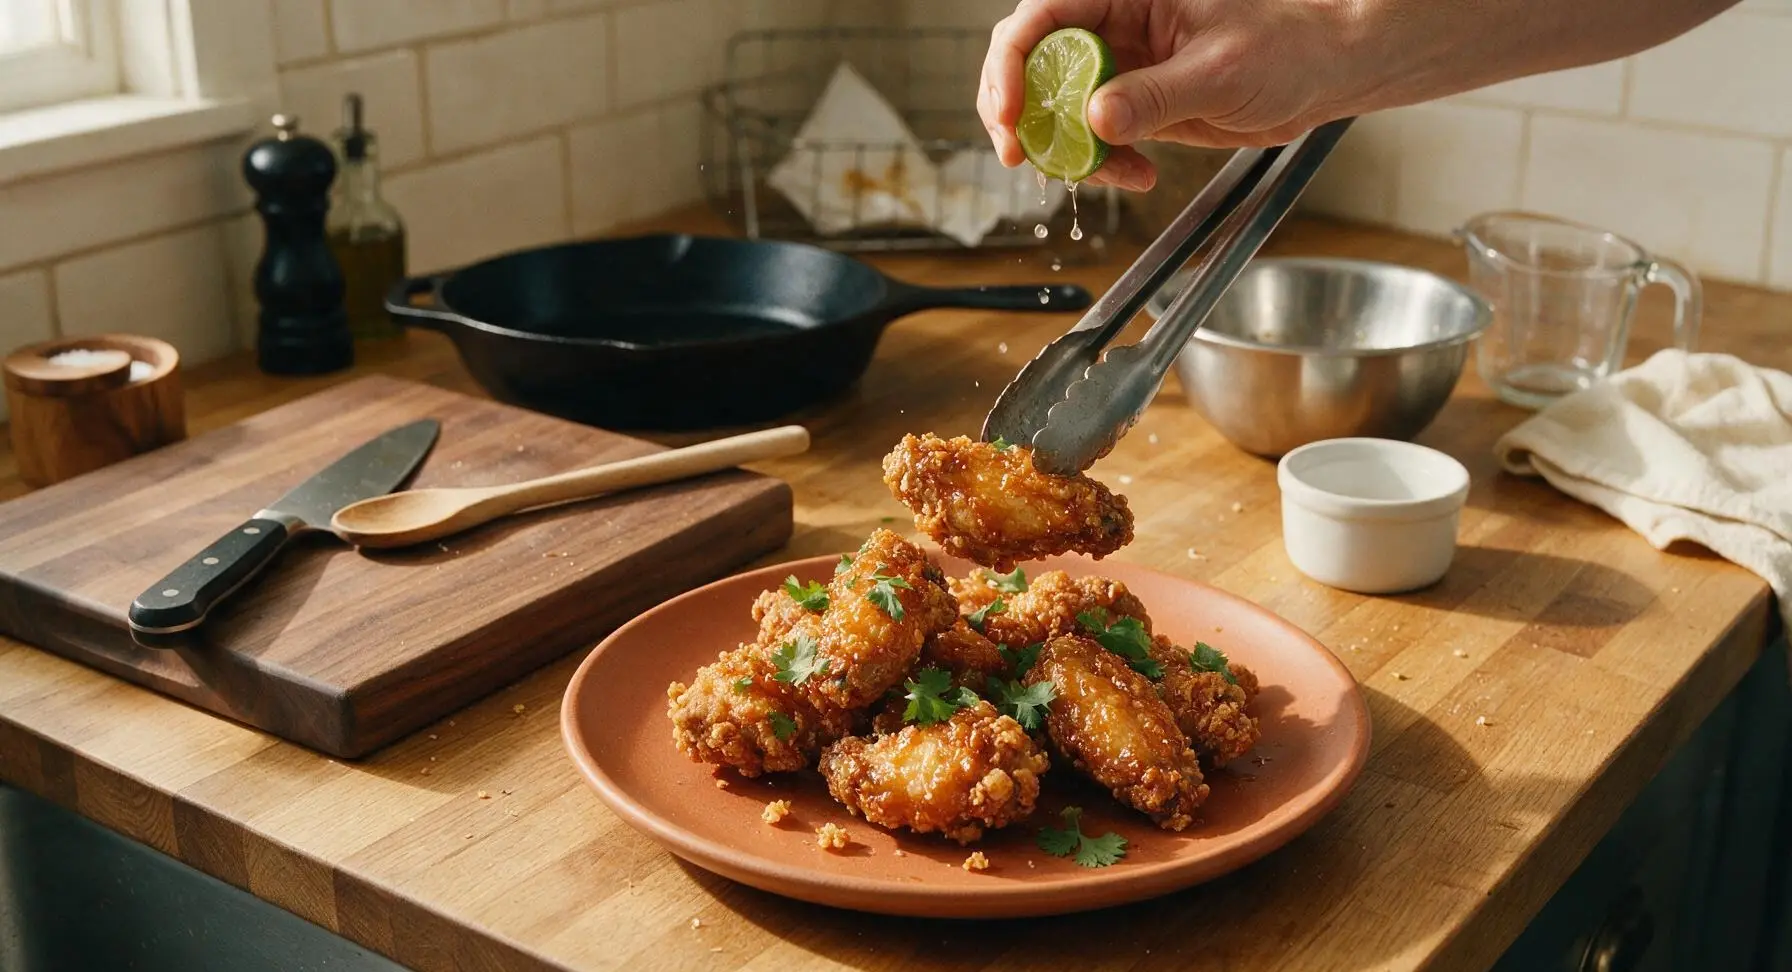
Arrange the glazed chicken pieces on the muted terracotta dinner plate, piling them casually for a relaxed, home-style look. Squeeze 1 tbsp fresh lime juice over the top, scatter a few fresh cilantro leaves across the chicken, and serve immediately with extra lime wedges on the side.
Step 8
step8:Plate and Garnish

Tips

1.Pat chicken completely dry with paper towels before marinating: excess surface moisture will make the rice flour coating clump and slide off during frying, preventing a shatteringly crisp crust.
2.Stick to the two-temperature double fry method: the 350°F first fry cooks the chicken through and sets the coating, while the 375°F second fry creates a deep golden, non-greasy crust that holds up to the sticky glaze. Overcrowding the pan drops oil temperature sharply, leading to soggy, oil-soaked chicken.
3.Toss chicken in the warm glaze immediately before serving: the sugar in the fish sauce caramel will soften the crisp crust if left to sit for more than 5 minutes, so plate and serve right after tossing for the best contrast of crunchy and sticky.


✨ You May Also Like

Main Course
🍜 United Kingdom

A showstopping classic of tender seared beef, savory mushroom duxelles, and crisp prosciutto wrapped in flaky golden puff pastry, baked to juicy perfection.

⏱️ 2 hours 1Main Course ★ 4.7
Main Course
🍜 India

Tender charred marinated chicken simmered in a rich, spiced creamy tomato sauce, this iconic Anglo-Indian curry pairs perfectly with basmati rice or warm naan.

⏱️ 50 minuteMain Course ★ 4.6
Main Course
🍜 Thailand

Classic tangy, sweet, and savory Thai stir-fried rice noodles with shrimp, tofu, and crunchy garnishes, balancing all five core Thai flavor profiles.

⏱️ 30 minuteMain Course ★ 4.5
Main Course
🍜 United Kingdom

Crispy golden beer-battered cod and fluffy double-fried chips, served with tangy tartar sauce and malt vinegar: the timeless, beloved British pub comfort classic.

⏱️ 45 minuteMain Course ★ 4.7
Main Course
🍜 Mexico

Smoky, chile-marinated pork tacos with caramelized pineapple, fresh cilantro, and lime: a beloved classic Mexican street food perfect for casual summer gatherings.

⏱️ 1 hour 45Main Course ★ 4.8
Main Course
🍜 United States

Crunchy Fritos corn chips layered with savory beef chili and melted cheddar, topped with cool, zesty fixings for a beloved, cozy Tex-Mex comfort food.

⏱️ 35 minuteMain Course ★ 4.8

Vietnamese Fried Chicken:Frequently Asked Questions

1.Can I use boneless, skinless chicken for this recipe instead of the recommended bone-in, skin-on cuts? ▾
You can, but bone-in, skin-on cuts are highly recommended for the most authentic, juicy result. The skin renders as it fries to create that signature shattery crunch that grips the sticky fish sauce glaze, while the bone keeps meat tender through frying. If using boneless, skinless chicken, cut it into 1.5-inch chunks and reduce fry time by 3-4 minutes to avoid dryness.
2.Why does the recipe call for white rice flour instead of regular all-purpose flour for the coating? ▾
White rice flour creates that light, ultra-crispy, non-greasy crunch that stays crisp even after tossing in the sticky glaze, unlike all-purpose flour which can turn soft or doughy quickly. It also has a neutral flavor that doesn’t compete with the bright fish sauce, garlic, and lime notes. Be sure to use regular white rice flour, not sweet glutinous rice flour, for the best texture.
3.How do I keep the chicken crispy instead of turning soggy after tossing it in the fish sauce glaze? ▾
Two key tricks prevent sogginess: First, make sure your fried chicken is fully crisp and drained well on a wire rack (not paper towels) before tossing. Second, toss the chicken in warm, not boiling hot, glaze off heat right before serving—don’t let it sit in the glaze for more than a minute before eating, as sauce moisture will soften the crust over time.
4.How do I pick a good quality Vietnamese fish sauce for this dish? ▾
Look for premium Vietnamese fish sauce (often labeled nước mắm nhĩ) with only two to three ingredients listed: anchovies, salt, and sometimes a small amount of sugar. Avoid brands with added preservatives, MSG, or artificial caramel coloring, as these will make the glaze taste harsh or overly salty. Good fish sauce is clear, deep amber with a briny, not aggressively fishy, aroma.
5.Do I need a dedicated deep fryer to make this, or can I pan-fry the chicken at home? ▾
You don’t need a dedicated deep fryer at all! You can easily pan-fry the chicken in a heavy-bottomed skillet or Dutch oven with 1.5 inches of neutral oil (like canola or avocado oil) heated to 350°F. Flip the chicken halfway through cooking to crisp all sides evenly, and work in small batches so you don’t drop oil temperature and make chicken greasy.
6.My fish sauce glaze came out too salty—what went wrong, and how can I fix it? ▾
Overly salty glaze almost always comes from two issues: using a lower-quality, high-sodium fish sauce, or not balancing it with enough sugar and lime. If your glaze is too salty while cooking, stir in an extra 1-2 teaspoons of sugar and a squeeze of fresh lime juice to taste, and thin with a tiny splash of water if it gets too thick. The glaze should taste tangy, salty, and sweet, not just briny.
7.Can I make this chicken ahead of time for a party, or does it have to be served immediately? ▾
For the best shatteringly crisp texture, this chicken is best tossed in glaze and served within 10 minutes of cooking. If prepping for a party, you can fry the chicken 1 hour ahead, keep it crisp on a wire rack set over a baking sheet in a 200°F oven, then toss it in warm glaze right before guests arrive. Never glaze it early, as the crust will turn soggy as it sits.
8.Why is the rice flour coating falling off my chicken when I fry it? ▾
Coating falloff usually happens for three reasons: your chicken was too wet when you dredged it in rice flour, your oil wasn’t hot enough when you added the chicken, or you flipped the chicken too early after adding it to the oil. Pat chicken completely dry before dredging, wait for oil to hit a steady 350°F, and let the first side cook 4 minutes before flipping to let the crust set firmly.
9.Do I need to marinate the chicken for a long time before dredging and frying it? ▾
You don’t need a long, wet marinade for this recipe! For the best crisp crust, simply pat the chicken completely dry, toss it in a light, even coating of white rice flour, and fry immediately. A quick 15-minute toss with a pinch of salt and a teaspoon of minced garlic before dredging adds extra depth, but skip wet marinades, as they will make the coating soggy and prevent crisping.

Comments (5)

3 days ago

Made this last night for my partner and I, and WOW — SO good! I used chicken thighs like the recipe suggested and the skin got so crispy, even when I tossed it in the fish sauce glaze. Only thing I messed up was I added a little too much chili flake at first, but a squeeze of extra lime balanced it right out. 10/10, will make again for our friend’s game night this weekend.

2 days ago

Wait how much chili flake did you end up using? I’m a total wimp when it comes to spice but still want a little kick!

yesterday

Great question! For a mild kick, start with 1/4 tsp of red pepper flake in the glaze, you can always add more after tasting if you want more heat. So glad you loved the recipe, Jess!

1 week ago

Wait the recipe says medium difficulty but I thought it was super straightforward even for a guy who usually burns frozen pizza! The 20 minute cook time is no joke too, I got home from work, threw this together, and had dinner on the table before my kid finished his homework. My kids loved it, by the way — they were fighting over the last piece! Only note: make sure you pat the chicken completely dry before frying, that’s the secret to getting that shatteringly crisp crust. I skipped the extra garlic because my wife hates it, and it was still amazing.

5 days ago

So happy to hear this worked out for your weeknight family dinner, Mike! You’re 100% right about patting the chicken dry — that step makes all the difference for crispiness, even if you skip the extra garlic. Great tip for folks with garlic aversions!

5 days ago

Really solid meal prep win! I made a big batch on Sunday for the week, and the chicken stayed crisp for almost 3 days in the fridge when I reheated it in the air fryer for a couple minutes at 375F. My only gripe is I wish the recipe had a note about how long to fry the chicken if you’re using breast meat instead of thighs, since I always have breast on hand. Ended up frying it for 8 minutes total and it came out juicy, but I was stressing about undercooking it the whole time. Still, will make again!

3 days ago

Thanks for the 8 minute tip! I only ever have chicken breast in the fridge too, I was worried I’d have to run to the store for thighs to make this.

2 days ago

Thanks so much for the feedback, Tina! We’ll add a note to the recipe about cook times for chicken breast — 6-8 minutes depending on thickness, with an internal temp of 165F, is perfect for juicy breast meat. So glad it worked out for your meal prep!

yesterday

OMG this was a total game changer for my office potluck yesterday! People were literally hovering over the platter asking who made it! Multiple coworkers asked for the recipe before I even left, which is always the sign of a winner. I doubled the glaze recipe because I made 3 lbs of wings instead of thigh pieces, and it was the perfect amount. 10/10, no notes.

2 hours ago

Wait I was at that potluck!!! This was the chicken that everyone was raving about, I had 3 pieces no shame. Saved the recipe immediately, making it for my Super Bowl watch party next month.

just now

Just finished making this for dinner and wow, so crispy! I didn’t have rice flour on hand so I used regular all-purpose, and it still turned out way crunchier than I expected. The fish sauce glaze is perfectly balanced, not too salty or sweet, just like the version I get at my go-to Vietnamese takeout spot. Next time I’ll grab rice flour to make it even crispier, but this was a total hit for a first try!



