

waffle cone batter

title 1
waffle cone batter
⏱️ cook time 16 minutes (2 minutes per cone for 8 cones)
🍽️ servings 8
⚡ Difficulty easy

intro

Crisp, buttery, golden waffle cone batter that bakes into snappy, sweet cones perfect for holding summer ice cream scoops—fresher and more flavorful than stale store-bought cones.

Ingredients
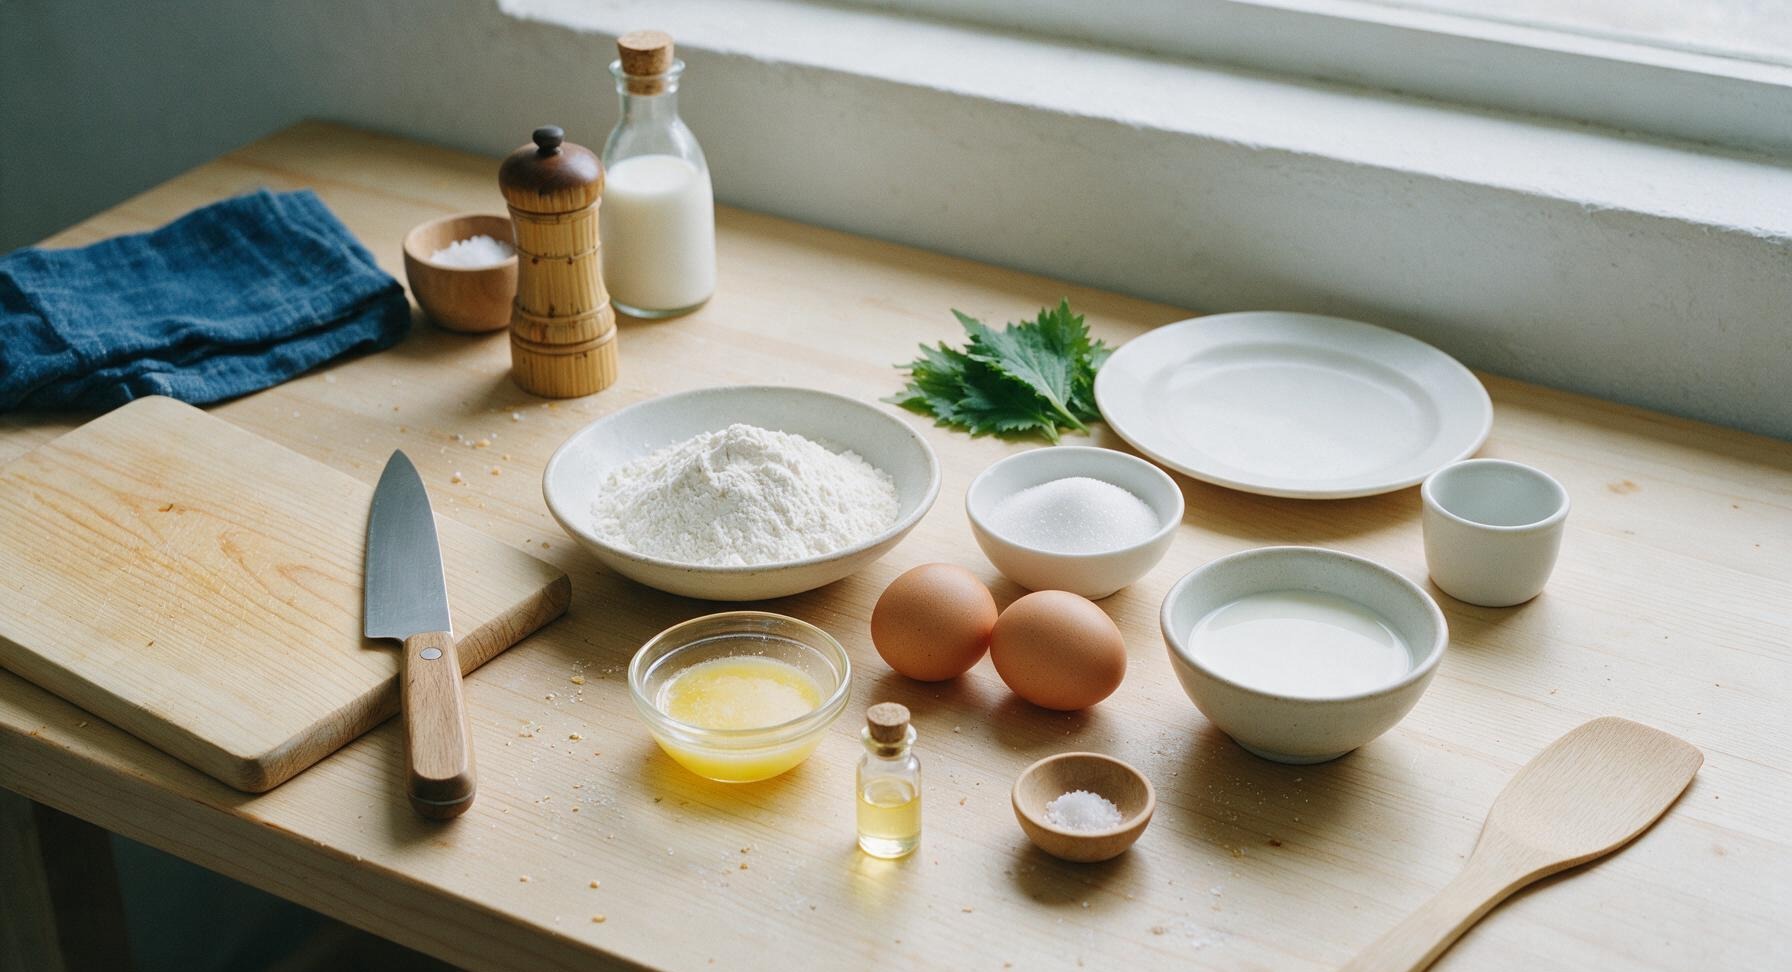
All-purpose flour 1 cup (120g), sifted
Granulated sugar 1/2 cup (100g)
Large eggs 2, room temperature
Unsalted butter 1/4 cup (57g), melted and cooled
Whole milk 1/3 cup (80ml), room temperature
Pure vanilla extract 1 teaspoon
Fine sea salt 1/4 teaspoon

Steps

1

Whisk Eggs and Sugar

Add the 2 room-temperature large eggs and 1/2 cup (100g) granulated sugar to the medium stainless steel mixing bowl. Use the stainless steel whisk to beat the mixture for 45 seconds until it turns pale lemon yellow, the sugar is mostly dissolved, and it leaves a thin, slow ribbon when the whisk is lifted 2 inches above the bowl.

Step 1
step1:Whisk Eggs and Sugar
2

Add Melted Butter

Slowly pour the cooled, melted unsalted butter into the egg-sugar mixture while whisking constantly, to avoid cooking the eggs from the residual warmth of the butter. Whisk for 20 seconds until the butter is fully incorporated, with no oily streaks visible on the surface of the mixture.

Step 2
step2:Add Melted Butter
3

Stir in Milk and Vanilla

Add the room temperature whole milk and 1 teaspoon pure vanilla extract to the bowl, whisking gently to combine. The mixture will be thin, pale golden, and fully uniform with no separated layers after 15 seconds of stirring.

Step 3
step3:Stir in Milk and Vanilla
4

Sift in Flour and Salt

Gradually sift the all-purpose flour and fine sea salt into the wet mixture, whisking in slow, wide circles as you add the dry ingredients to prevent lumps from forming. Stop whisking as soon as no dry flour streaks remain, to avoid overdeveloping gluten which will make tough, chewy cones instead of light, crisp ones.


Step 4
step4:Sift in Flour and Salt
Step 4
step4:Sift in Flour and Salt
5

Rest Batter Briefly

Let the batter rest at room temperature for 5 minutes to allow any air bubbles from whisking to rise to the surface and pop, and to let the flour hydrate fully. Skim any large visible bubbles off the top with the silicone spatula, as trapped bubbles will cause small holes in the finished waffle cones.

Step 5
step5:Rest Batter Briefly
6

Check Batter Consistency

Stir the batter gently once after resting. It should pour in a thin, unbroken stream, similar to the consistency of crepe batter. If it is too thick, stir in 1 teaspoon of additional whole milk at a time until it reaches the correct thin, pourable consistency; if too thin, add 1 teaspoon sifted flour at a time.
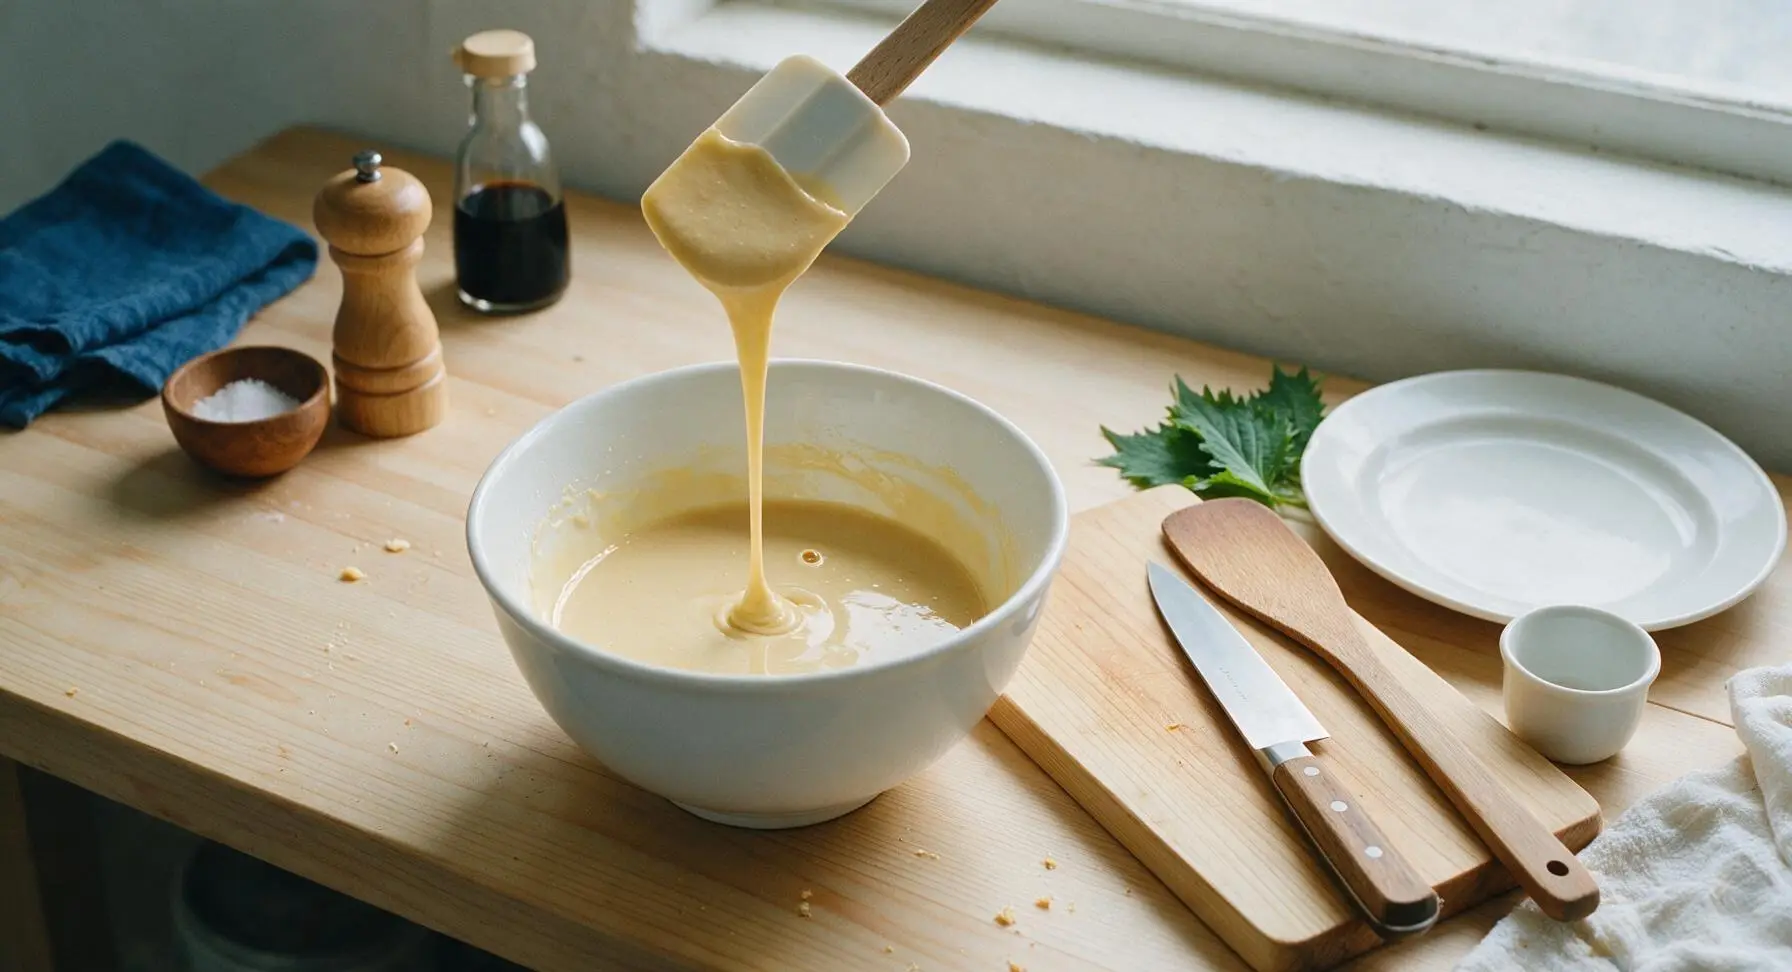
Step 6
step6:Check Batter Consistency
7

Transfer Batter for Cooking

Pour the fully mixed, rested batter into the clear glass batter pitcher for clean, easy pouring onto your preheated waffle cone iron. The batter is now ready to use: cook 2 tablespoons of batter per cone on a waffle cone iron preheated to 350°F (175°C) for 60-90 seconds until deep golden brown, then shape immediately around a cone form while hot to set into a crisp cone.


Step 7
step7:Transfer Batter for Cooking
Step 7
step7:Transfer Batter for Cooking

Tips

1.Use room temperature eggs and milk: Cold ingredients cause melted butter to solidify into small clumps, leading to uneven batter and greasy spots on finished cones, while room temperature ingredients blend into a perfectly smooth, uniform mixture without clots.
2.Never overmix the batter after adding flour: Over-whisking develops gluten in the flour, which results in chewy, tough cones instead of the light, snappy, crisp texture classic to old-fashioned waffle cones. Stop mixing as soon as no dry flour streaks remain.
3.Don’t skip the 5-minute rest: This short pause allows air bubbles from whisking to dissipate (preventing unsightly small holes in cooked cones) and lets flour granules fully absorb liquid, leading to a more even, consistent bake with no raw flour pockets.


✨ You May Also Like

Desserts & Baking
🍜 Italy

Creamy, coffee-kissed classic Northern Italian no-bake dessert, with layers of rum-spiked mascarpone cream, soft ladyfingers, and a rich cocoa dusting.

⏱️ 4 hours 3Desserts & Baking ★ 4.7
Desserts & Baking
🍜 France

Flaky, shatteringly crisp, buttery French croissants with golden exteriors and soft, airy layered interiors, perfect for pairing with coffee for a special morning treat.

⏱️ 12 hours Desserts & Baking ★ 4.5
Desserts & Baking
🍜 United States

Warm, spiced baked apples topped with a fluffy golden biscuit crust, this cozy dessert pairs perfectly with vanilla ice cream for cool-weather comfort.

⏱️ 55 minuteDesserts & Baking ★ 4.6
Desserts & Baking
🍜 United States

A star-spangled classic American blueberry pie with buttery flaky crust and bright sweet-tart filling, perfect for summer patriotic gatherings.

⏱️ 1 hour 25Desserts & Baking ★ 4.7
Desserts & Baking
🍜 United States

A beloved no-bake regional Maine candy with a chewy coconut-potato center coated in rich dark chocolate, a New England holiday staple since the 1870s.

⏱️ 2 hours 3Desserts & Baking ★ 4.8
Desserts & Baking
🍜 France

Luxuriously creamy, floral frozen custard made with aromatic Tahitian vanilla beans, boasting a smooth, rich texture that melts slowly on the tongue.

⏱️ 3 hours 3Desserts & Baking ★ 4.5

waffle cone batter:Frequently Asked Questions

1.Why do my baked cones turn out soft and chewy instead of snappy and crisp? ▾
Soft, chewy cones almost always trace back to underbaking or overmixed batter. Overstirring develops gluten in the all-purpose flour, leading to tough, bendy results, so mix just until ingredients (including the granulated sugar and eggs) combine. Cook each portion 10-15 seconds longer than you think to caramelize sugar and evaporate moisture, then shape immediately while hot—they crisp as they cool.
2.Can I mix up this batter ahead of time, or does it have to be used immediately? ▾
You can absolutely prep this batter 2 to 3 days in advance! Store it in a sealed airtight container in the fridge, and give it a slow, gentle stir before using—don’t whip it, as extra air leads to uneven, bubbly cones. Cold batter will need 5 to 10 extra seconds of cook time on your preheated cone maker to reach that perfect golden, crisp finish.
3.Do I need a special waffle cone maker to use this batter, or will a regular waffle iron work? ▾
A dedicated waffle cone maker with thin, shallow grid plates delivers the thinnest, snappiest results, but you can use a regular thin-grid waffle iron in a pinch. Pour a smaller portion of batter, spread it slightly, and cook until deep golden. Note that regular waffle irons will produce slightly thicker, less uniformly crisp cones than a cone-specific model.
4.How do I store finished cones so they stay crisp instead of going soggy? ▾
First, let freshly shaped cones cool fully on a wire rack—trapping warm, steamy air in a storage container will make them go soft in hours. Once completely cool, tuck them into an airtight container at room temperature for up to 5 days, and add a small paper towel inside to absorb stray ambient humidity that would ruin their snappy texture.
5.Can I substitute low-fat or plant-based ingredients for the whole milk and unsalted butter? ▾
Whole milk and unsalted butter create that rich, buttery snap and balanced sweet flavor, but 2% milk works in a pinch—skip skim, as it leads to bland, less crisp cones. For plant-based batches, use melted vegan butter and unsweetened oat milk for the closest texture; thin almond milk tends to make watery, fragile cones that break easily.
6.Why does my batter spread unevenly and leave holey gaps when I pour it on the iron? ▾
Holey, uneven spread usually stems from two easy-to-fix issues: your batter is too cold, or separated butter hasn’t been mixed back in. Let refrigerated batter sit 5 minutes at room temp before using, and give it a slow stir to reincorporate any melted butter that rose to the top, so it spreads into a smooth, even circle without gaps.
7.How much batter should I use per cone to avoid thick, cakey, non-crisp results? ▾
For a standard-sized waffle cone maker, use 2 to 2.5 tablespoons of batter per cone—roughly the volume of a golf ball. Pour it directly in the center of the fully preheated iron, close the lid immediately, and let the iron’s pressure spread the batter thin; using too much batter will create thick, chewy cones that won’t hold their rolled shape.

Comments (11)

2 days ago

OMG this batter is so easy to throw together! Made these for my sons’ after-school ice cream bar yesterday and they went crazy for them. Stayed crisp even when loaded up with mint chocolate chip and sprinkles. 10/10 will make again!

1 week ago

Super straightforward recipe, no weird fancy ingredients needed. My only tiny note is I cooked mine 10 seconds longer than 2 minutes because my waffle cone maker runs a little cool, but they turned out perfectly crisp. Way better than the stale store-bought cones I usually grab.

3 days ago

As someone who burns literally every baked good I try, I was shocked these turned out first try! So crispy, not too sweet, perfect size when I rolled them. Made 8 exactly like the recipe says, no waste. Game changer for summer movie nights!

2 hours ago

Wait, can I make this batter the night before and keep it in the fridge? I’m hosting a big ice cream social this weekend and want to prep as much as I can ahead of time.

30 minutes ago

Great question! You can absolutely make this batter 12-24 hours ahead and store it in an airtight container in the fridge. Just give it a quick stir before pouring, and you’re good to go! Hope your social is a hit.

1 week ago

Brought these to our neighborhood potluck last weekend and people were begging for the recipe! I even dipped the tops in melted chocolate and crushed peanuts for a little extra flair. So good, everyone thought I bought them from a fancy creamery!

5 days ago

Oh the chocolate dip idea is genius! I’m making these for my daughter’s birthday party next week and definitely stealing that trick. Did you let the chocolate set before serving?

yesterday

Taste is great, but my first two cones cracked when I tried to roll them. Did I wait too long to shape them after pulling them off the iron?

2 hours ago

Oh no, sorry to hear the first few cracked! The key is to roll them immediately (like within 10 seconds of pulling them off the iron) while they’re still hot and pliable — once they start to cool, they harden fast and will crack. You can also pop a cooled, cracked piece back on the iron for 5 seconds to soften it up if needed!

2 weeks ago

Made these in my dorm with my tiny countertop waffle cone maker and they SLAP. Way cheaper than buying cones from the campus ice cream shop, and I can customize them with cinnamon or a little cocoa powder when I’m feeling fancy.

1 week ago

The cocoa powder add-in sounds insane! How much do you usually add per batch? I’ve been wanting to make chocolate cones forever.

2 weeks ago

I’ve been making waffle cones for my grandkids for 40 years, and this recipe is hands down the best one I’ve ever tried. Crispy, not overly sweet, holds up to scoops of hard ice cream without getting soggy for ages. My grandbabies begged for seconds (and thirds!)

1 week ago

That is such high praise coming from someone who’s been making these for decades! I’ve been searching for a no-soggy cone recipe forever, can’t wait to try this this weekend.

5 days ago

Wow, that means the world coming from you, Peggy! So glad this recipe earned a spot in your grandkid treat rotation — nothing beats homemade cones with the family.

5 days ago

Has anyone tried making this with a 1:1 gluten free flour blend? I’m gluten intolerant but miss homemade waffle cones so bad, and this recipe looks too good to pass up!

3 days ago

I made these last week with Bob’s Red Mill 1:1 GF flour and they turned out perfect! No weird texture, just as crisp as the regular version. I added a tiny extra splash of vanilla to cover any faint GF flour aftertaste.

2 days ago

Thanks for sharing that tip! We’ve tested it with 1:1 GF blends too and it works beautifully, just make sure your blend has xanthan gum in it to help the cones hold their shape when rolling.

3 days ago

Wait a second… has anyone tried making savory versions of these? Like, add a little parmesan and black pepper and use them as a cone for chicken salad or pimento cheese at a party? I feel like that would slap.

2 days ago

OH MY GOD that is the most genius idea I’ve heard all month. I’m hosting a girls’ night next week and I’m 100% doing this with pimento cheese and bacon bits. Will report back how it goes!

yesterday

That’s such a fun savory hack! We’ve tested parmesan herb cones before to hold chilled shrimp cocktail, and they’re a total crowd pleaser. Just cut the sugar in half to make them work for savory fillings!

30 minutes ago

Made these for our 4th of July BBQ and paired them with homemade vanilla ice cream and berry compote. Total home run! Cook time was exactly 2 minutes per cone for me, 8 cones total in 16 minutes just like the recipe says. No mess, no fuss.

5 minutes ago

The berry compote pairing sounds like absolute summer heaven! Did you put the compote inside the cone or drizzle it on top?

just now

That sounds like the perfect 4th of July spread! So glad the cook time worked out perfectly for you — nothing beats fast, easy treats when you’re hosting a crowd.



