
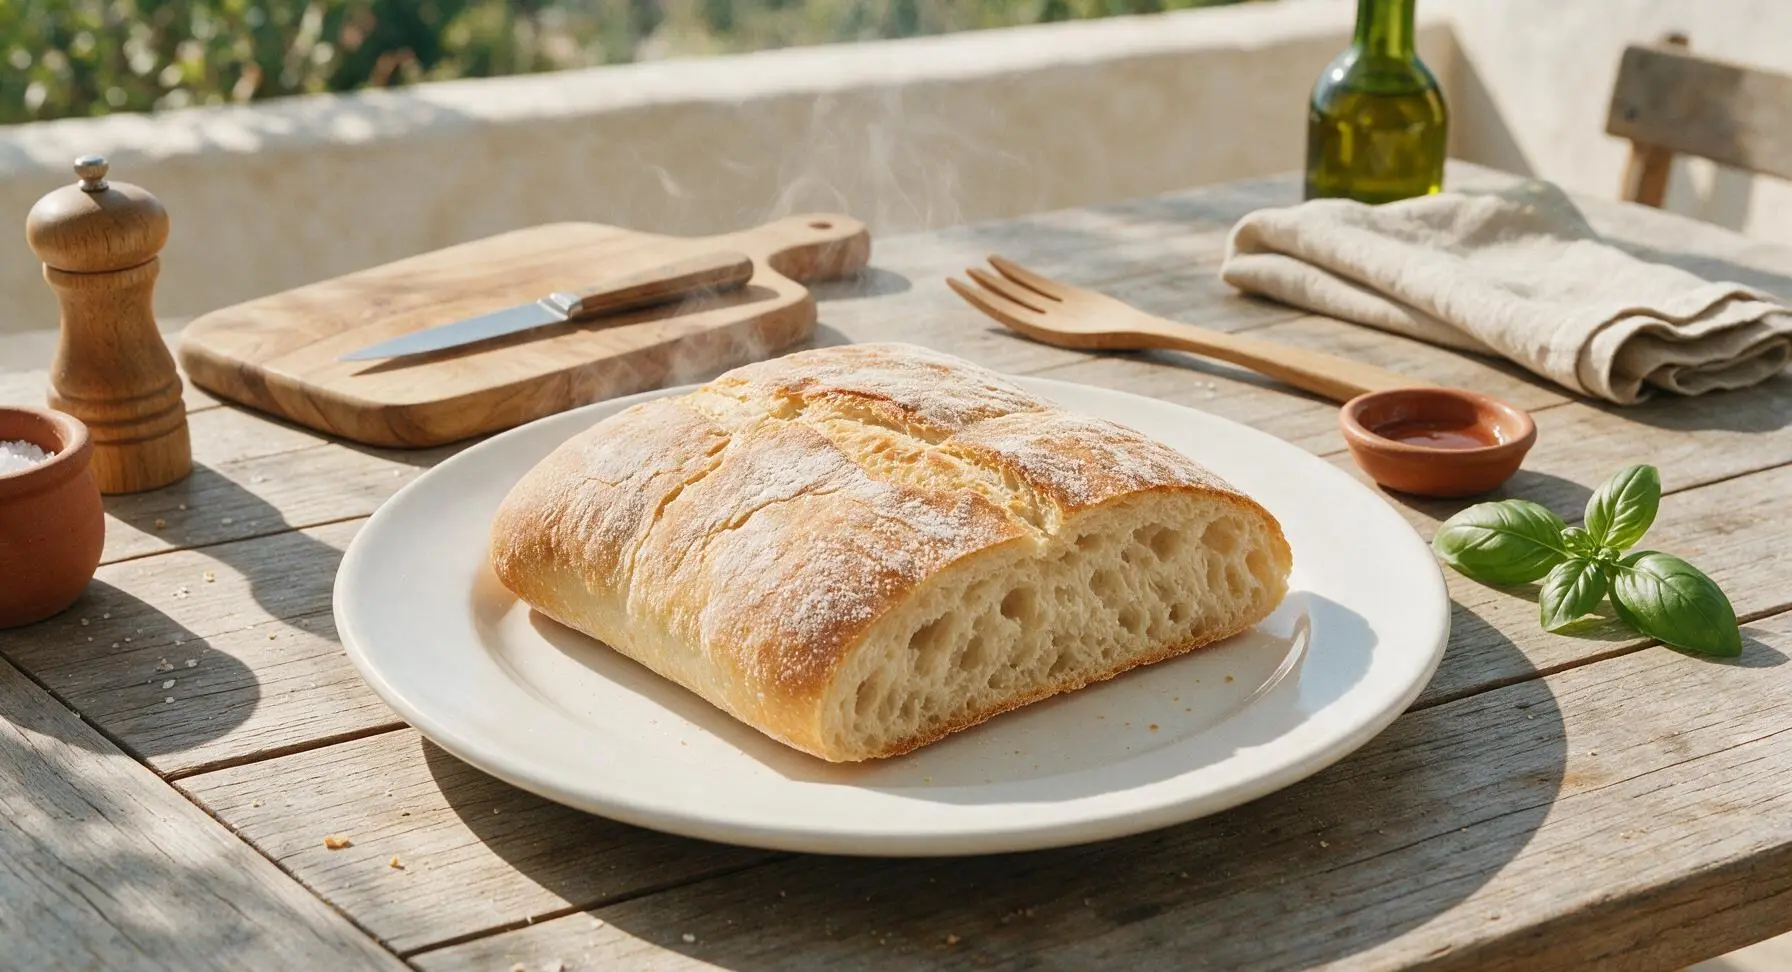
bread for panini

title 1
bread for panini
⏱️ cook time 2 hours 10 minutes
🍽️ servings 8
⚡ Difficulty medium

intro

Sturdy, crisp-crusted, soft open-crumbed Italian panini bread, formulated to hold pressed fillings without sogginess, with a subtle olive oil and wheat flavor perfect for grilled sandwiches.

Ingredients
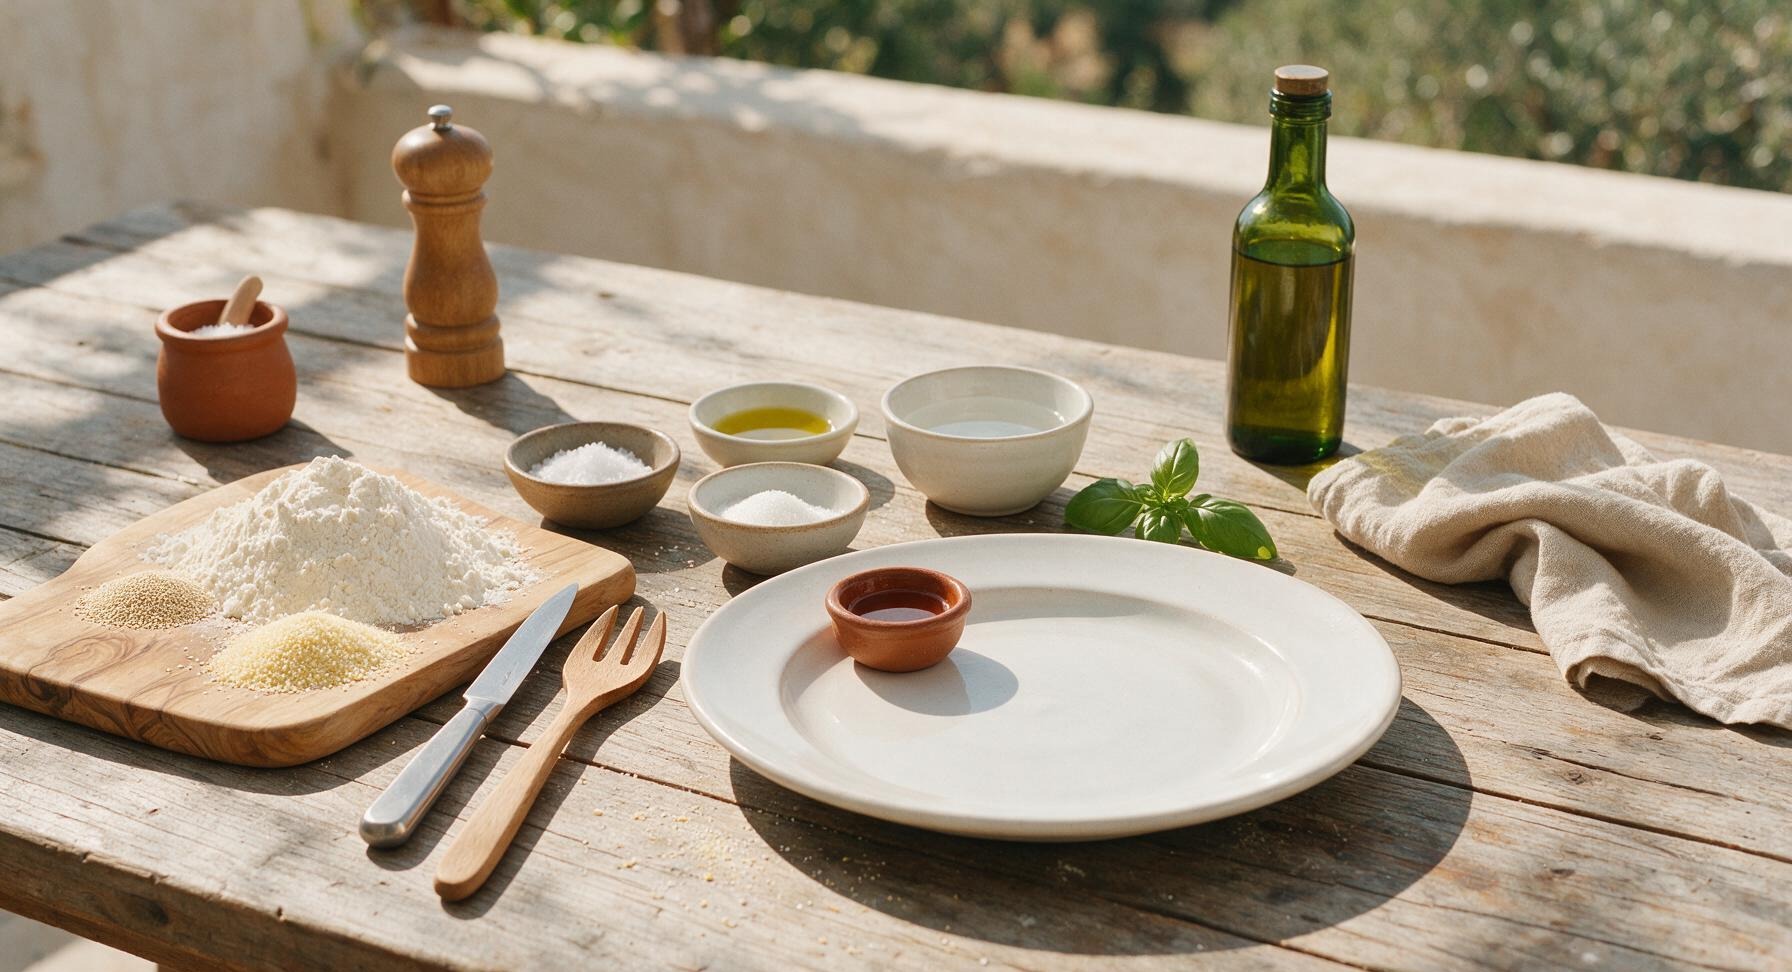
Bread flour 500g (4 cups)
Instant dry yeast 7g (2 1/4 tsp)
Fine sea salt 10g (2 tsp)
Granulated sugar 5g (1 tsp)
Extra-virgin olive oil 30ml (2 tbsp)
Warm water 320ml (1 1/3 cups, 38C/100F)
Coarse semolina flour 2 tbsp

Steps

1

Combine Dry Ingredients

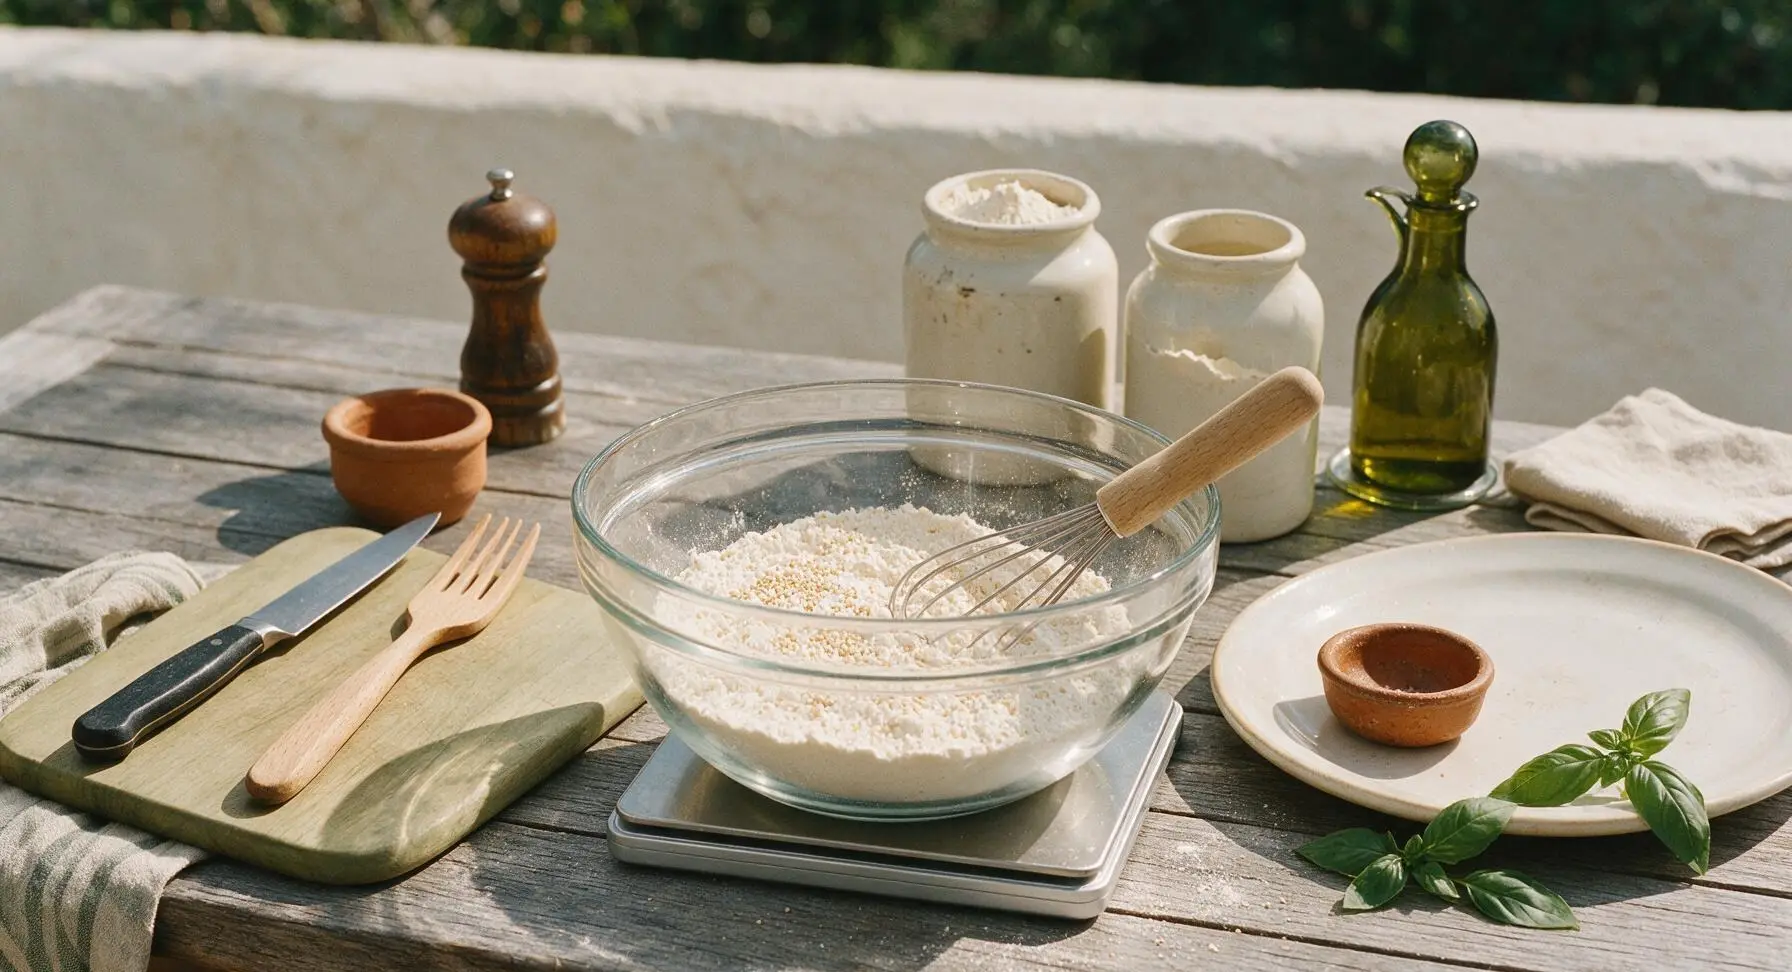
Set the thick-walled clear glass mixing bowl on the matte silver digital kitchen scale, tare to zero, and add 500g bread flour, 7g instant yeast, 10g fine sea salt, and 5g granulated sugar. Use the stainless steel and beech wood dough whisk to stir the dry mixture for 30 seconds until fully evenly combined, with no visible clumps of yeast or salt.
Step 1
step1:Combine Dry Ingredients
2

Mix Wet Ingredients

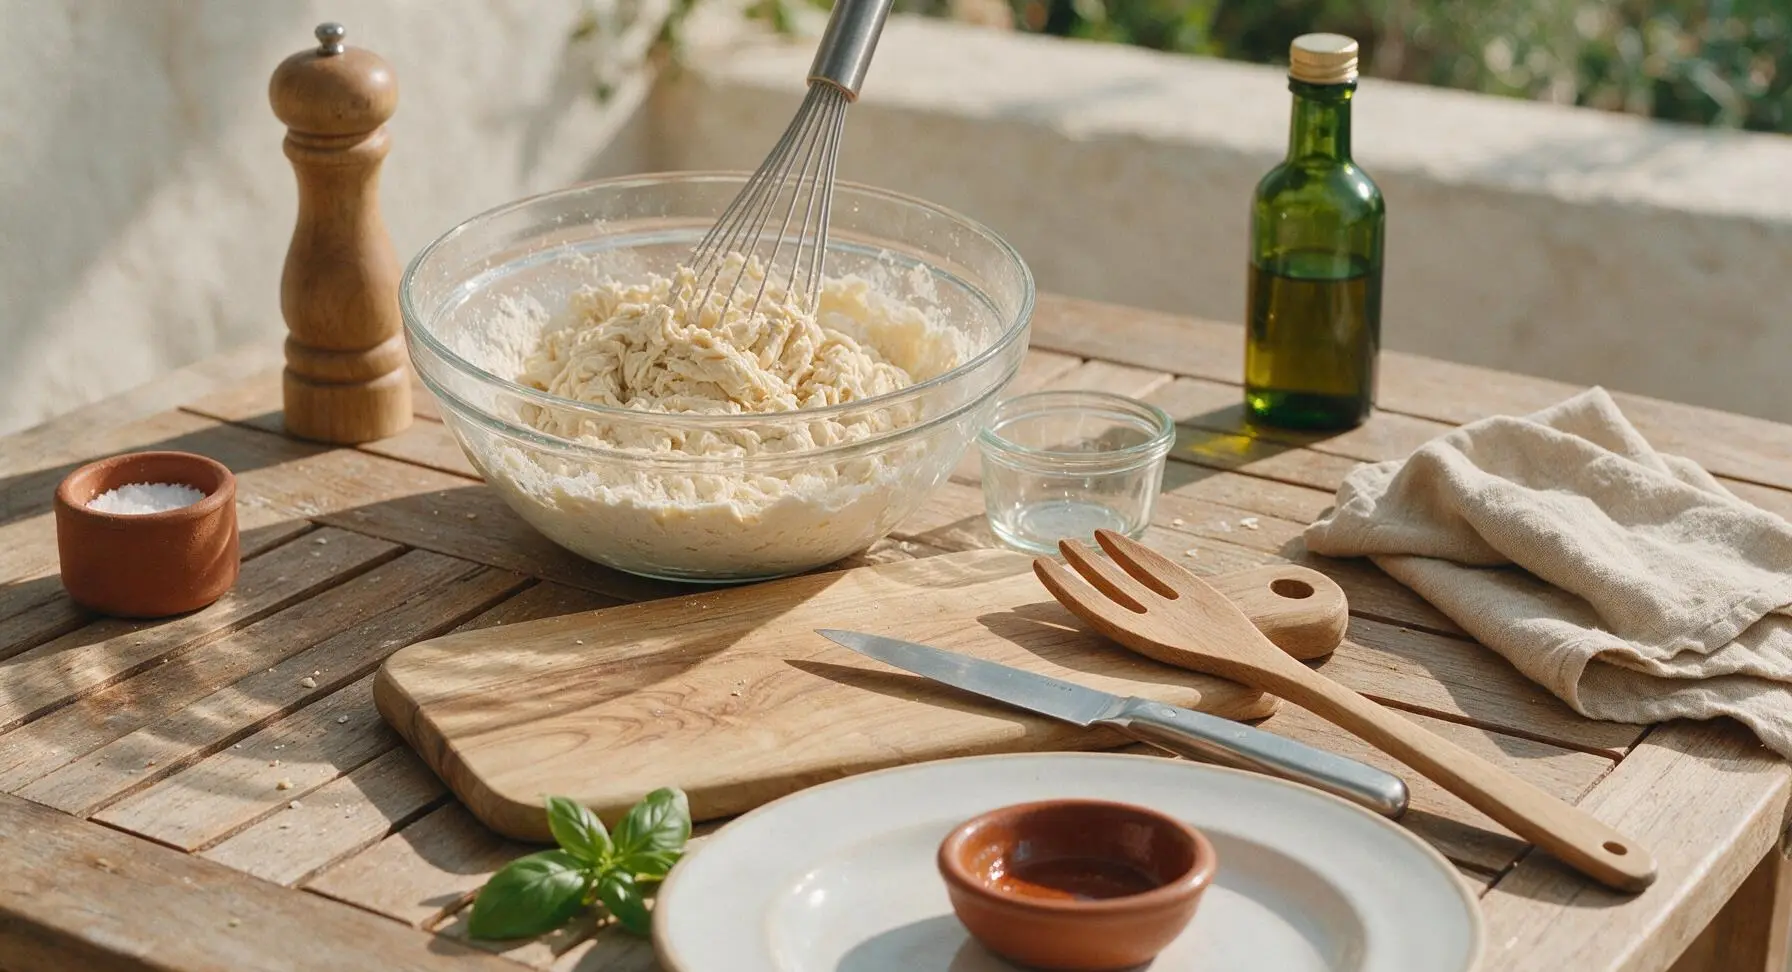
Pour 30ml extra-virgin olive oil from the dark green glass bottle and 320ml warm (38C/100F, feels like neutral bath water, not hot to the touch) water into the dry ingredient mixture. Use the dough whisk to stir in broad circular motions for 1-2 minutes, until no dry flour remains and a shaggy, sticky mass of dough forms that pulls away from the sides of the bowl.
Step 2
step2:Mix Wet Ingredients
3

Knead Smooth Dough

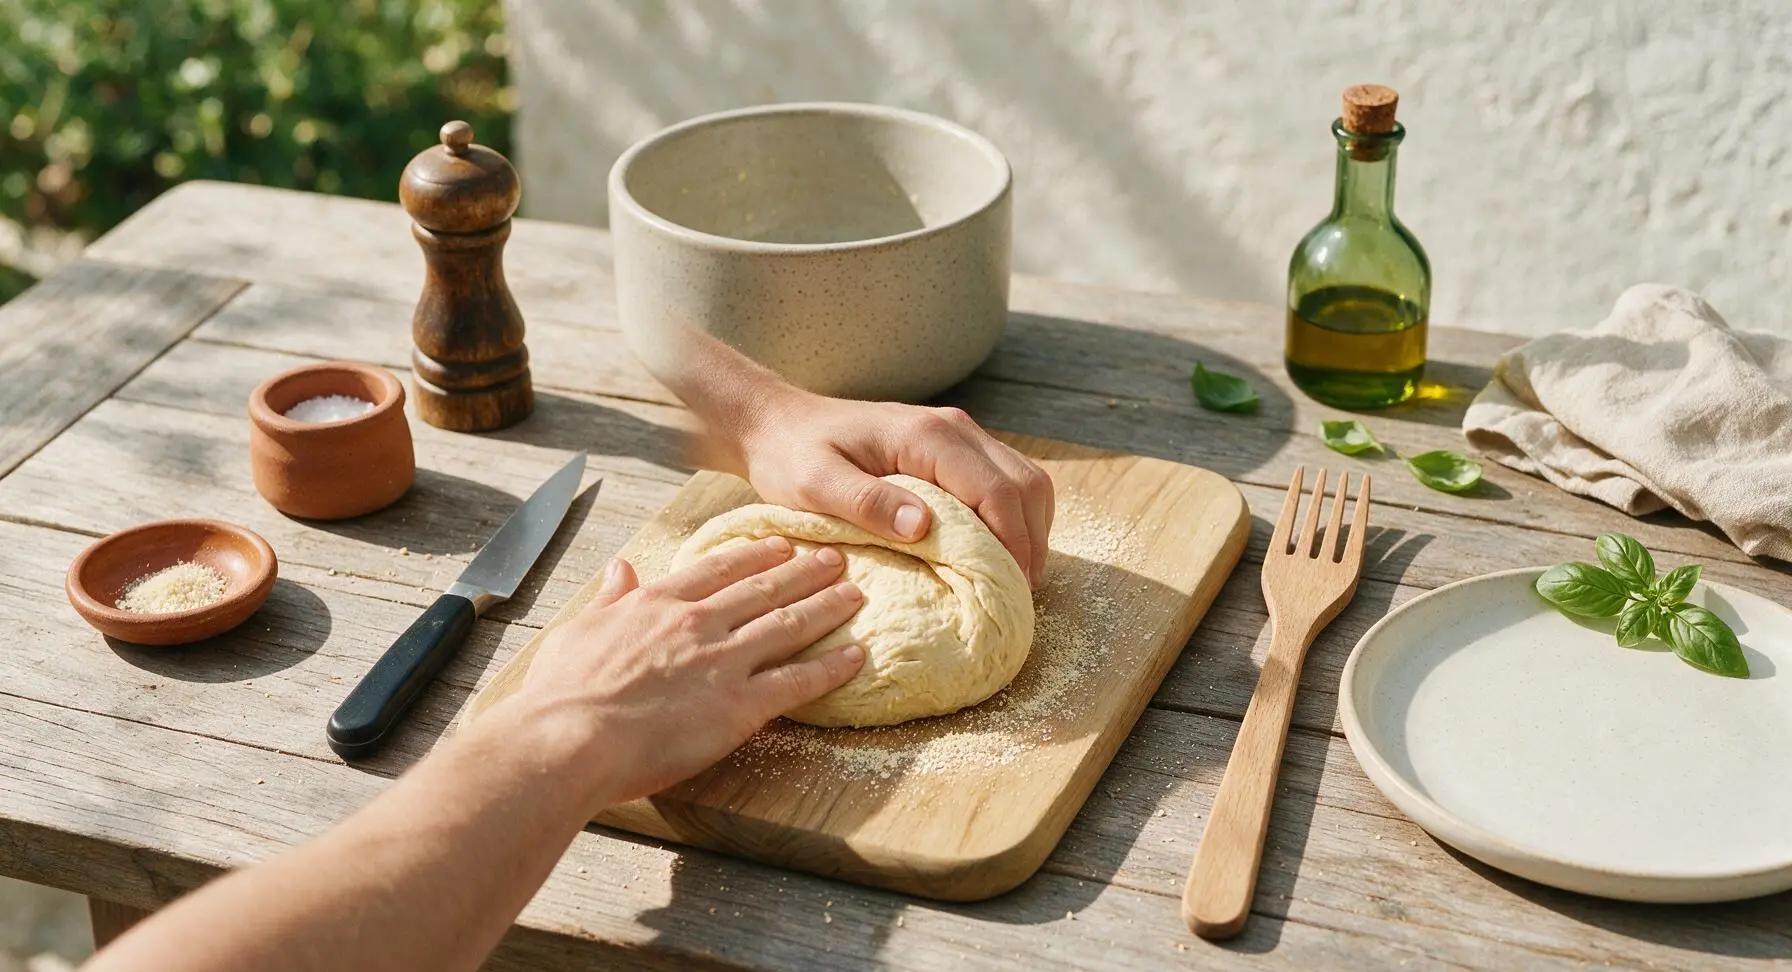
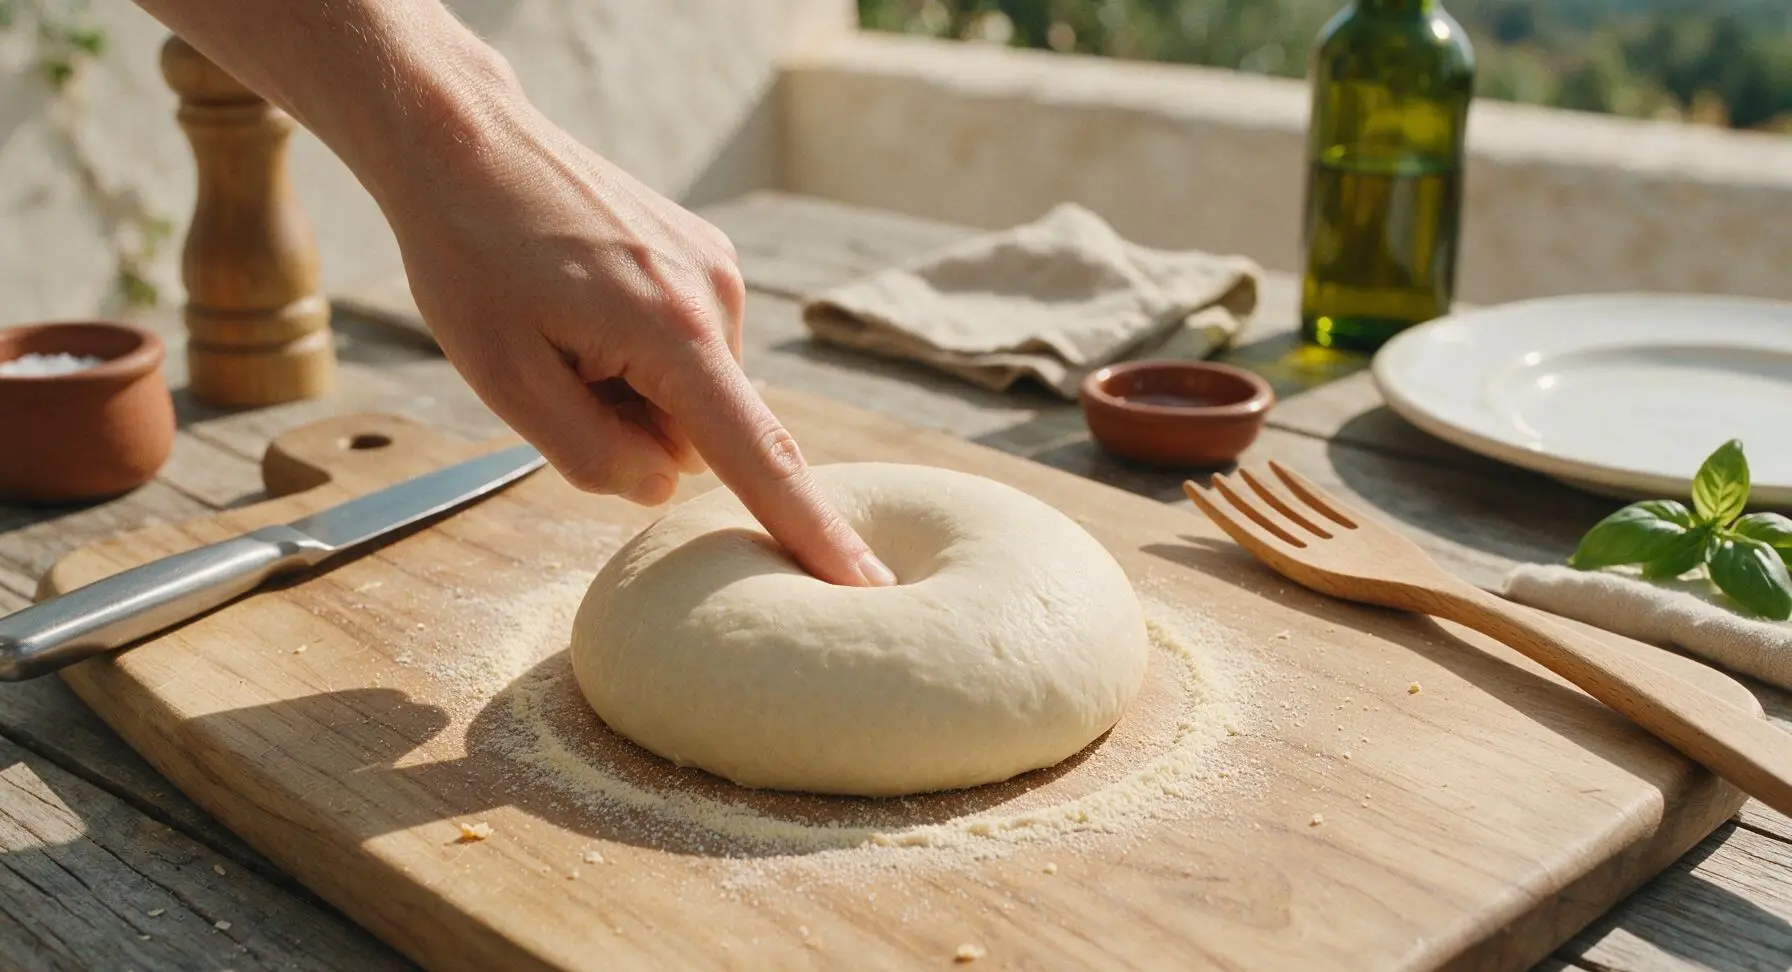
Lightly dust the central maple cutting board with a pinch of coarse semolina from the terracotta pinch dish, then turn the shaggy dough out onto the board. Knead by hand for 8-10 minutes, folding the dough over itself and pushing forward with the heel of your hand, rotating a quarter turn after each fold. The dough is ready when it is smooth, elastic, and springs back slowly when poked with a finger, no longer sticking excessively to the board surface.
Step 3
step3:Knead Smooth Dough
Step 3
step3:Knead Smooth Dough
4

First Dough Proof

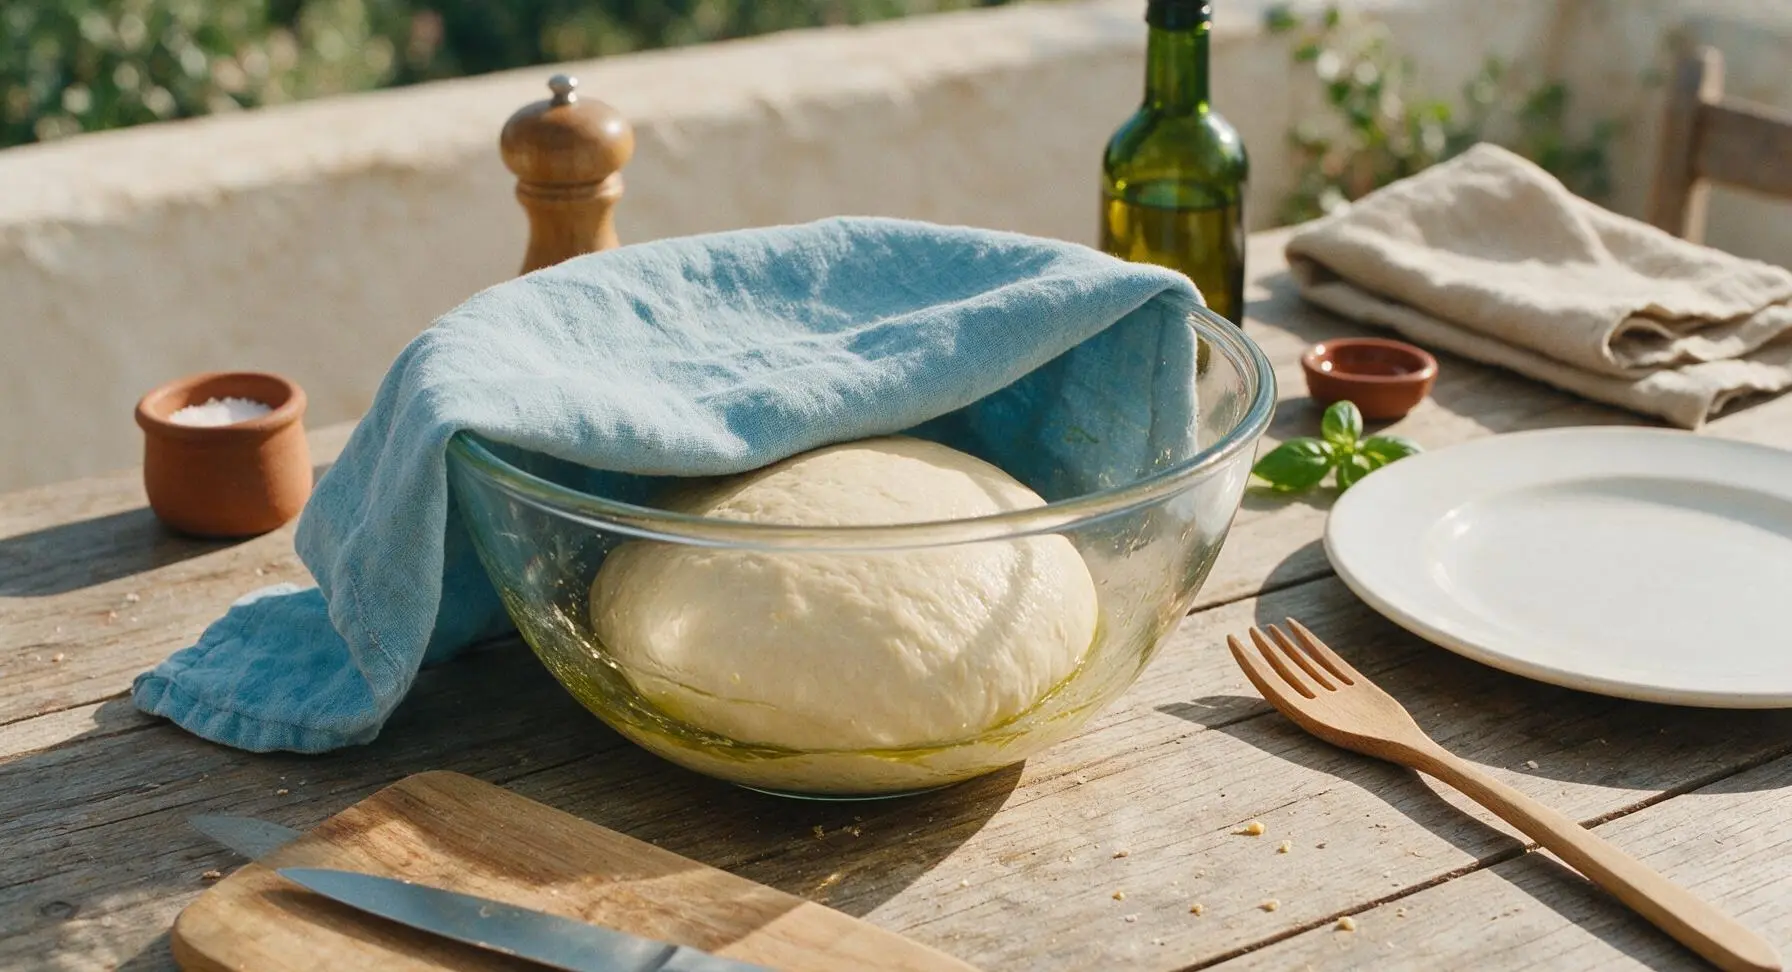
Wipe the glass mixing bowl clean, coat the inside with a thin swipe of olive oil, and place the smooth dough ball back into the bowl. Pull the folded sky-blue linen towel from its top-left counter position to drape tightly over the bowl opening, and let the dough rest in a warm, draft-free spot for 1 hour, until it doubles in size and leaves a persistent indentation when poked that does not spring back.
Step 4
step4:First Dough Proof
5

Shape Loaves Evenly

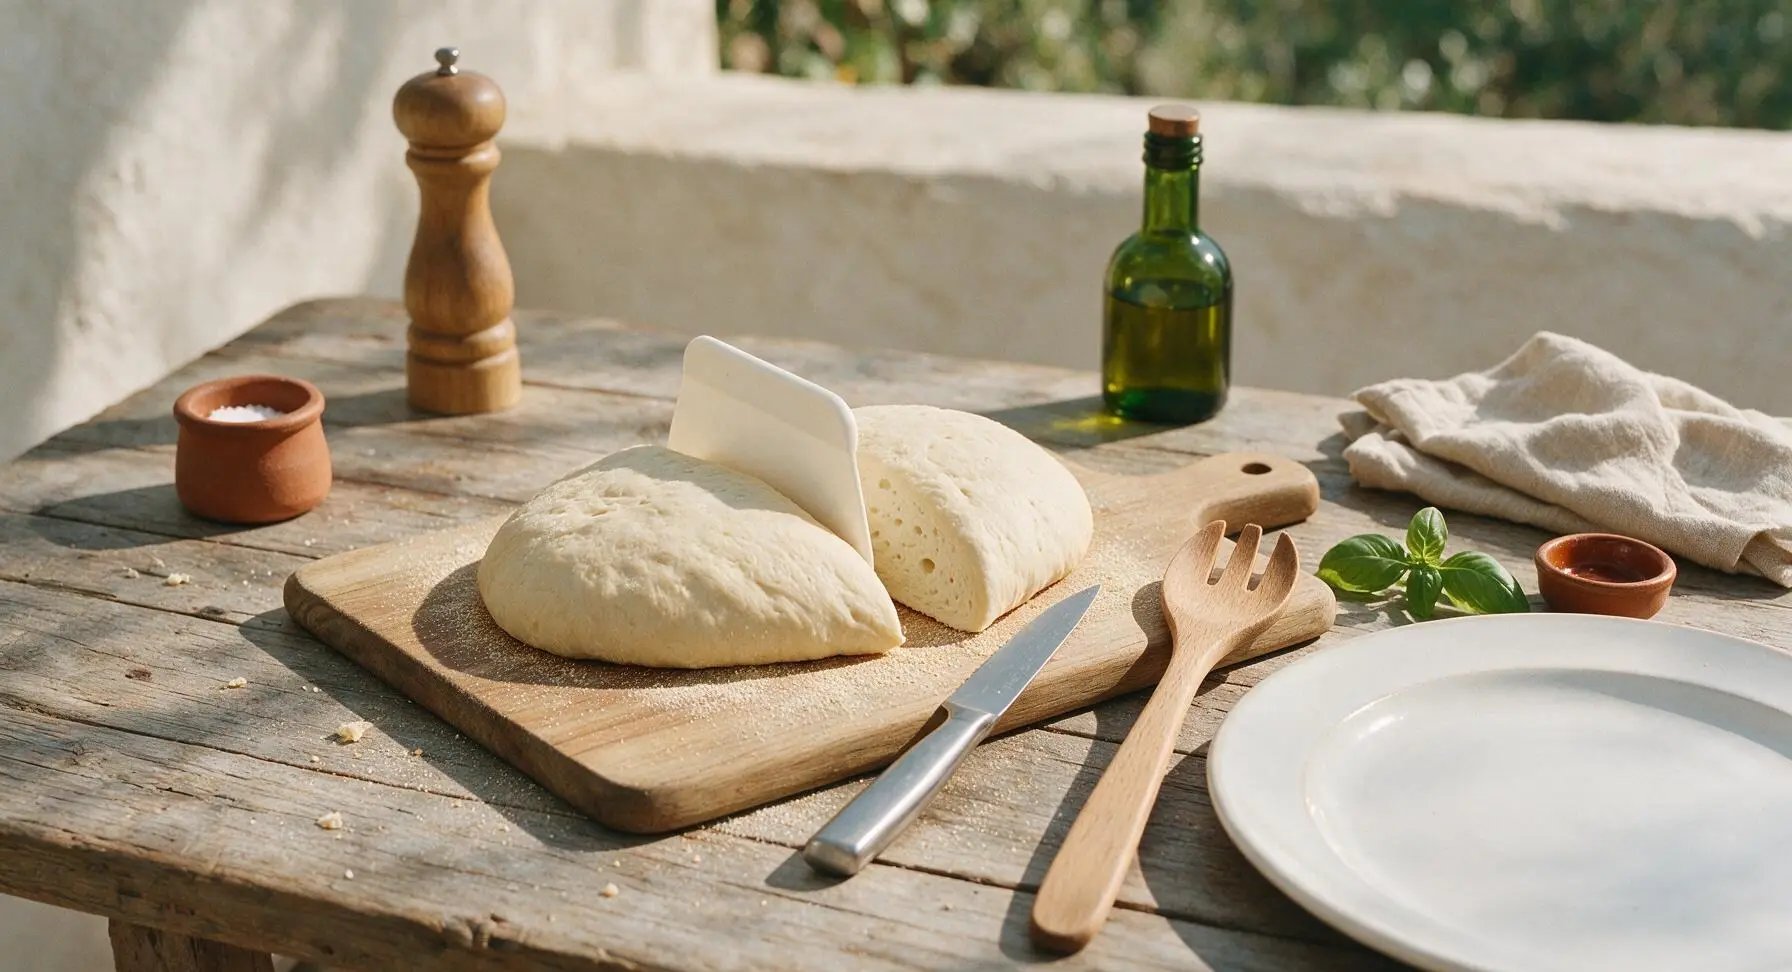
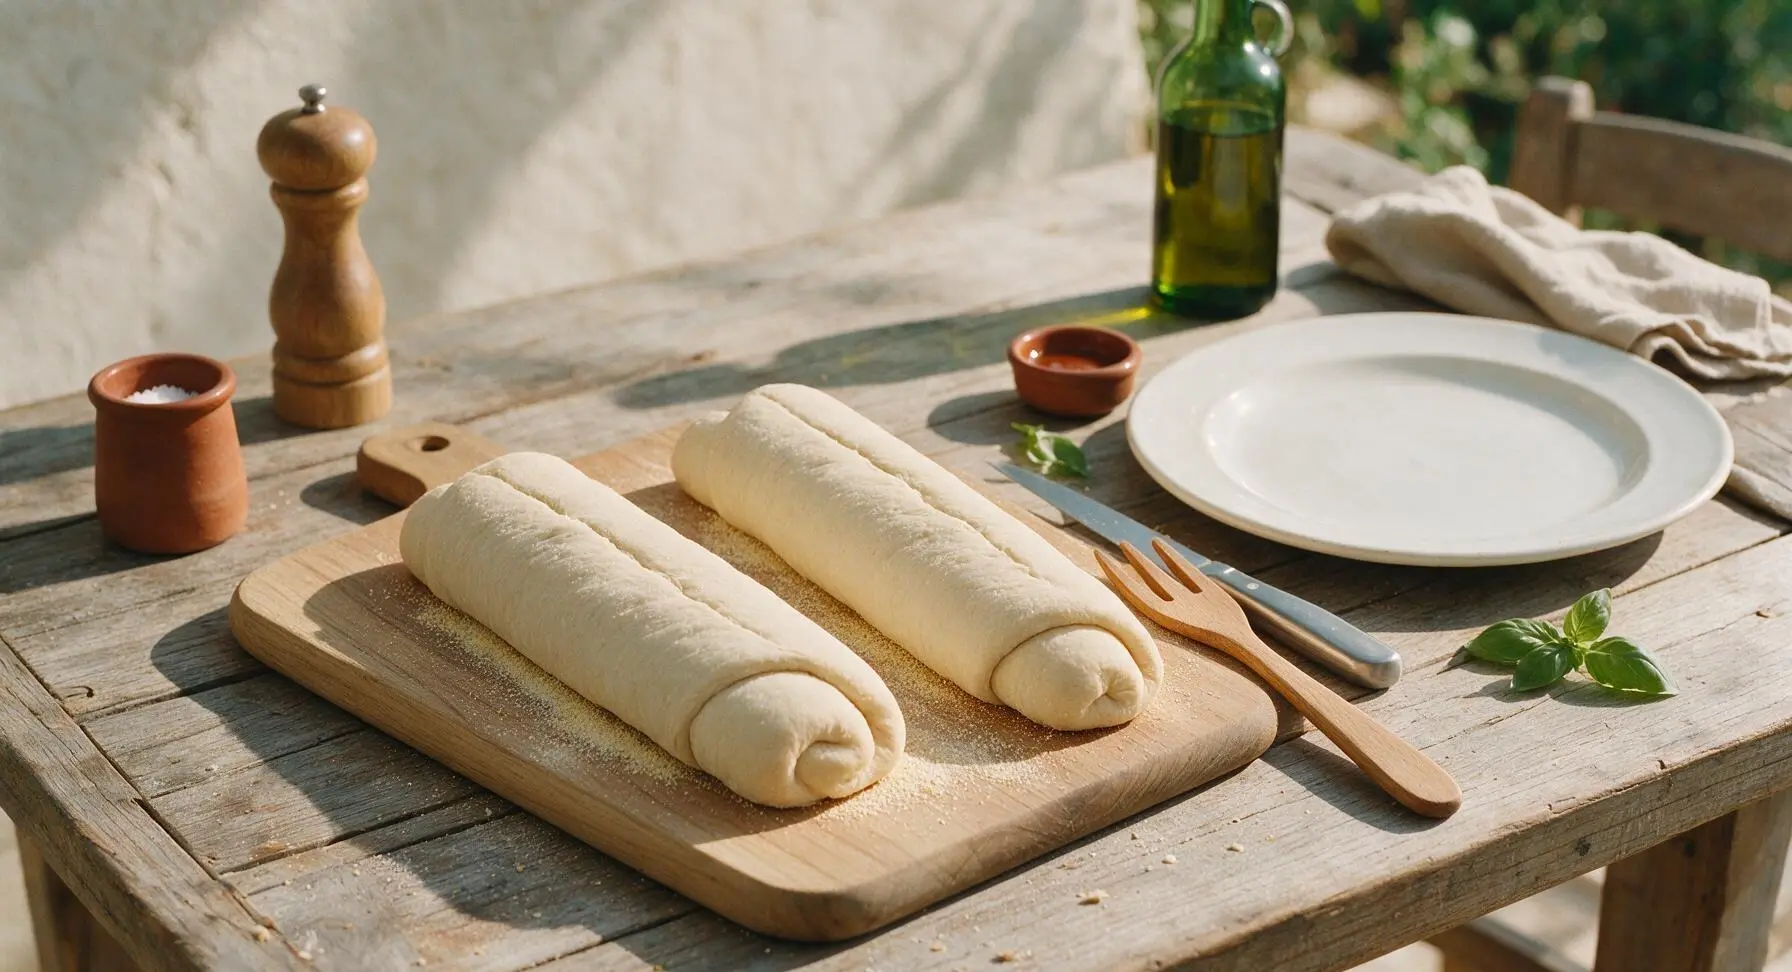
Once doubled, turn the risen dough out onto the lightly semolina-dusted cutting board. Use the flexible white plastic dough scraper to divide the dough exactly in half (two ~430g equal portions). Press each portion into a 10x20cm (4x8 inch) flat rectangle, then roll tightly from the short end into a compact log, pinching the long seam closed with your fingers. Taper the ends slightly to form two classic oblong panini loaves.
Step 5
step5:Shape Loaves Evenly
Step 5
step5:Shape Loaves Evenly
6

Final Loaf Proof

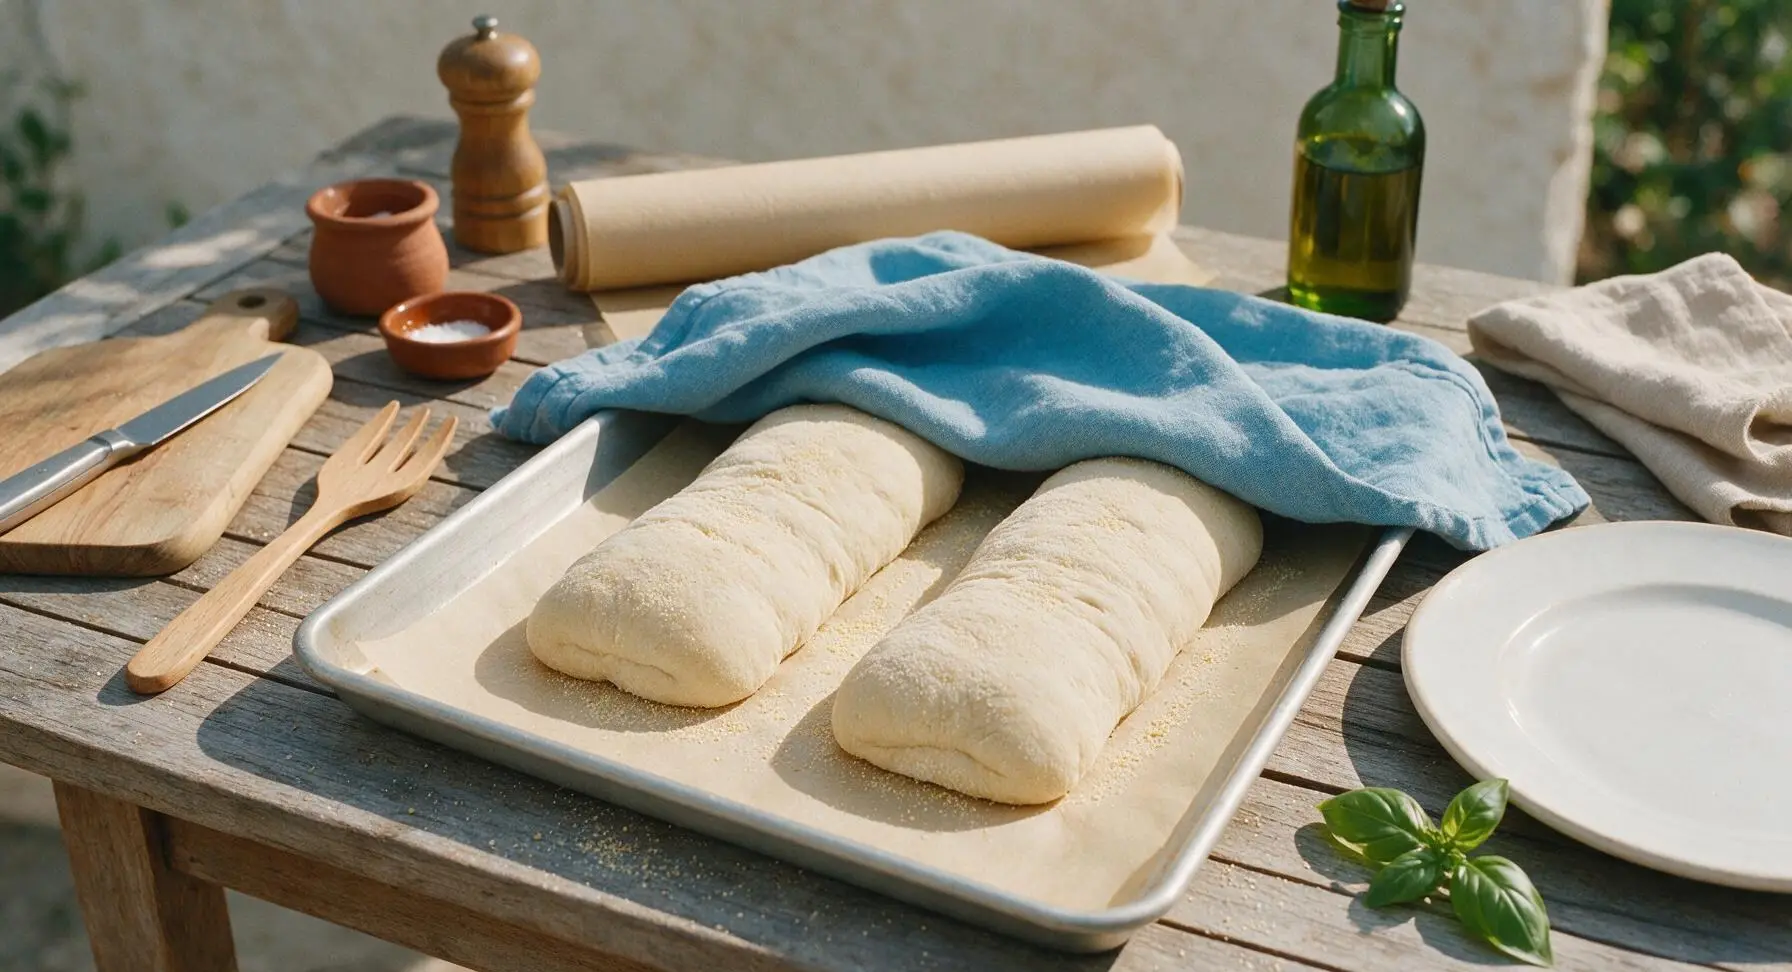
Tear a sheet of unbleached parchment paper from the fixed roll to line the 12x17 inch matte aluminum half-sheet pan, then sprinkle the parchment lightly with remaining semolina flour. Place the two shaped loaves seam-side down on the parchment, leaving 5cm of space between them to allow for spread during rising and baking. Drape the linen towel back over the loaves, and let them rest for 45 minutes, until they puff to 1.5x their original size and hold a faint indent when poked gently.
Step 6
step6:Final Loaf Proof
7

Score and Bake Bread

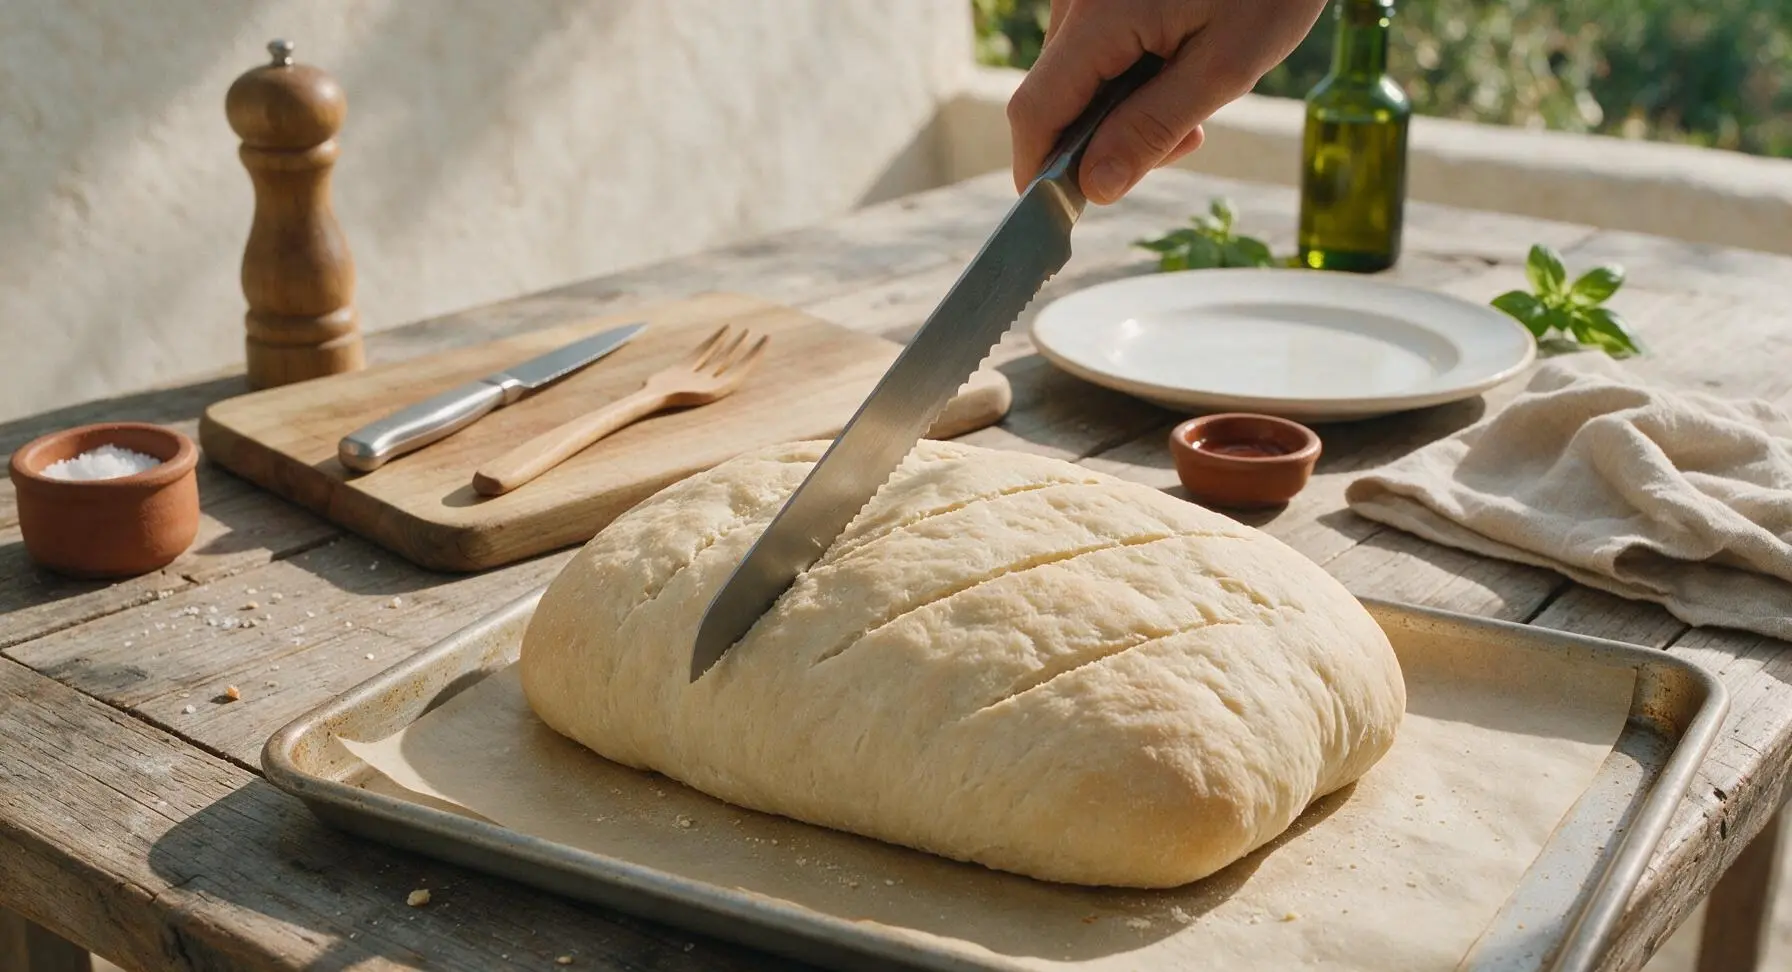
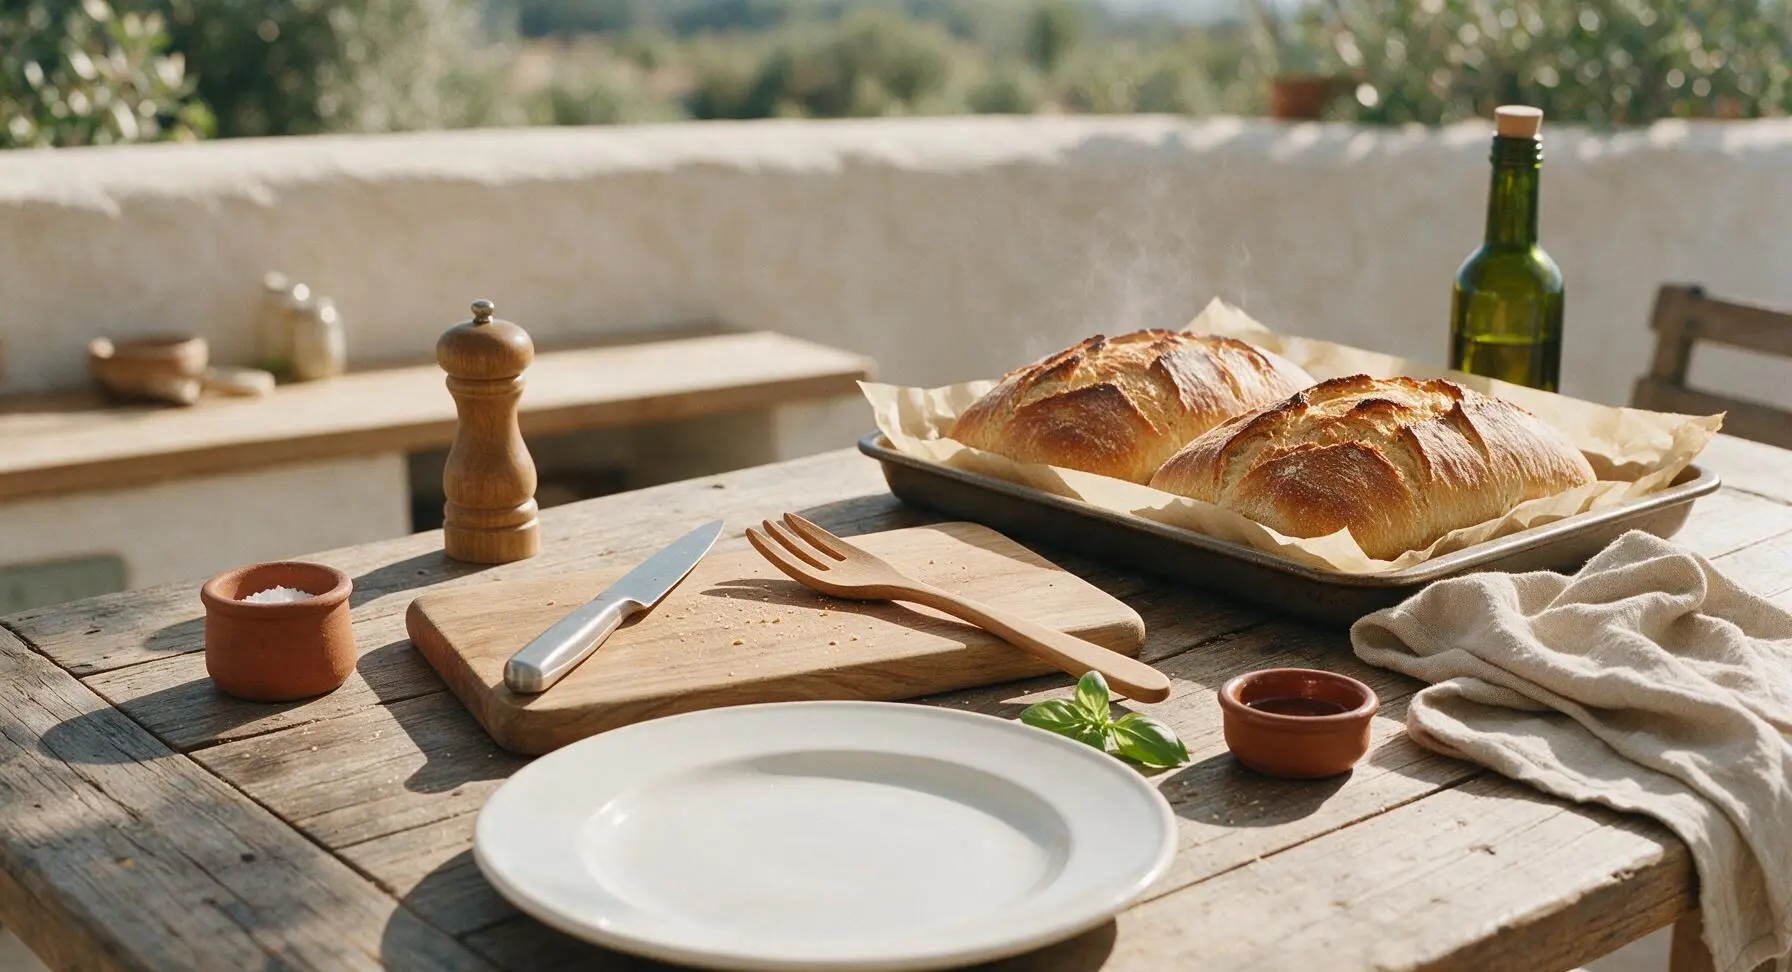
While the loaves finish their final proof, preheat the oven to 220C (425F). Once loaves are fully proofed, remove the towel, use the serrated bread knife resting on the walnut knife rest to make three shallow diagonal scores (5mm deep) across the top of each loaf. Place the pan on the middle oven rack, bake for 22-25 minutes, until the loaves are deep golden brown all over, sound hollow when tapped on the bottom, and reach an internal temperature of 95C (205F).
Step 7
step7:Score and Bake Bread
Step 7
step7:Score and Bake Bread
8

Cool Loaves Completely

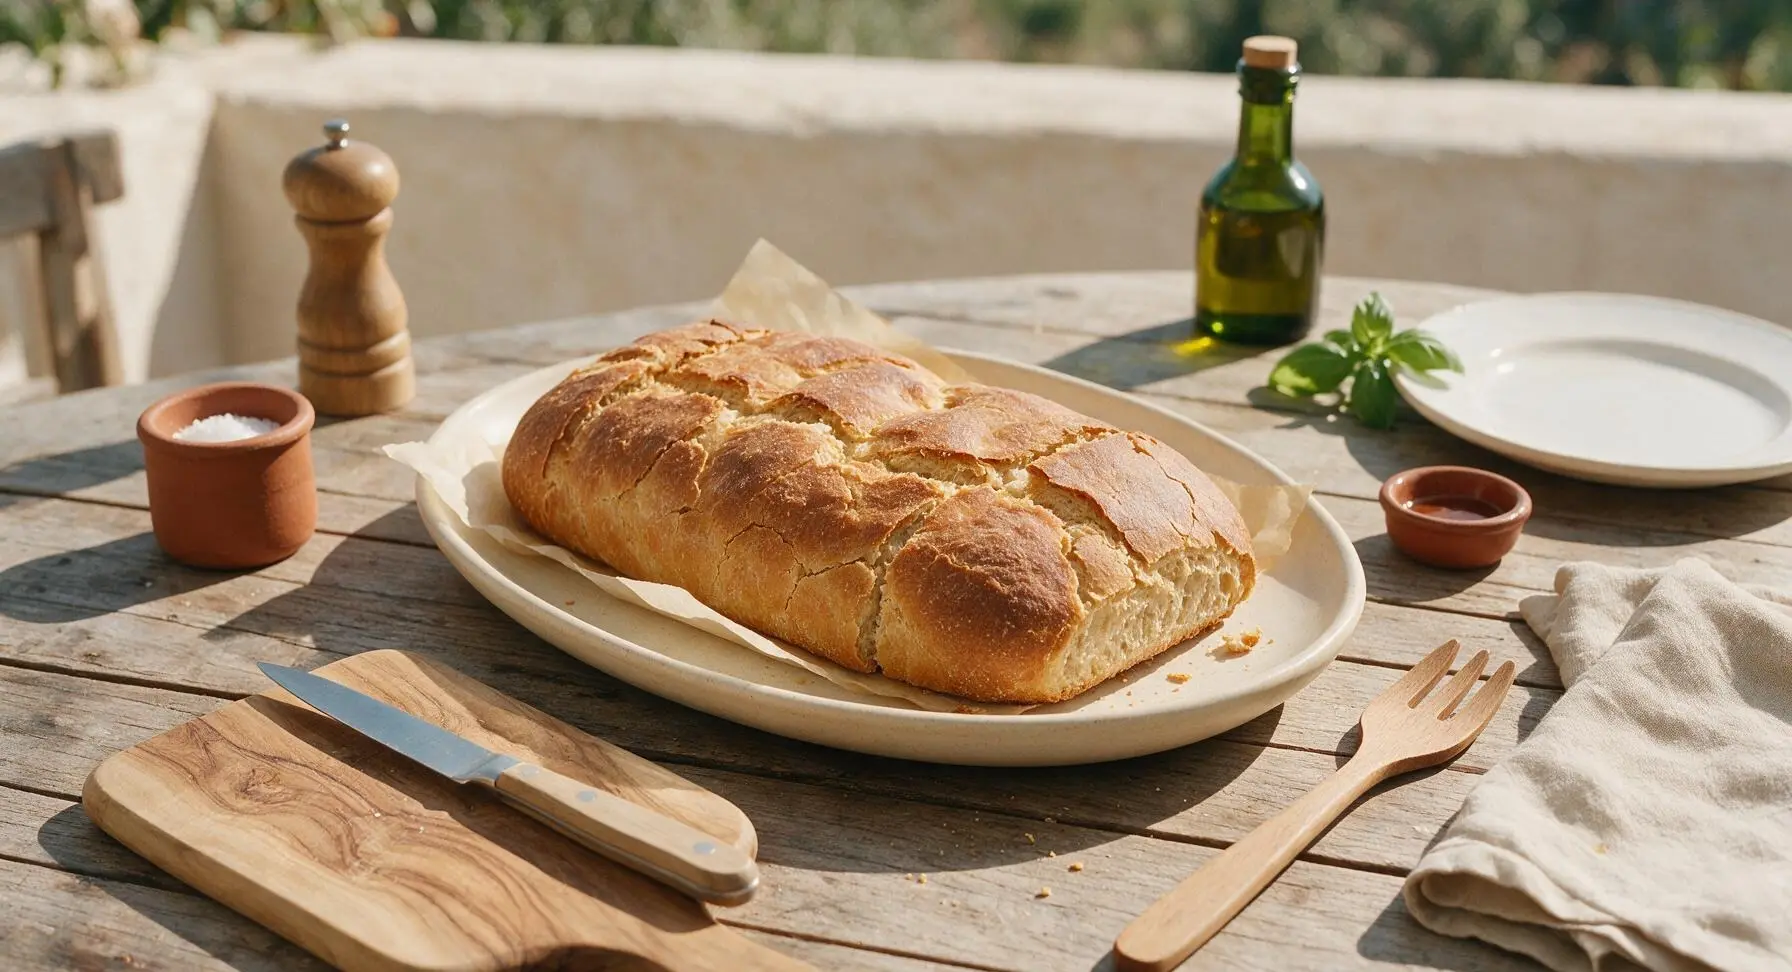
Lift the baked loaves off the baking pan using the parchment paper edges, transfer them to the matte cream oval ceramic serving platter, and let them cool completely for 30 minutes before slicing. Slicing warm bread will result in a gummy, compressed crumb that will not hold up to panini pressing and wet fillings.
Step 8
step8:Cool Loaves Completely

Tips

1.Avoid using water warmer than 40C/105F when mixing dough: water that is too hot will kill the instant yeast, leading to dense, unrisen bread that is too heavy to hold panini fillings and will not develop a crisp crust when pressed.
2.Wait until bread is fully cooled before slicing for panini: warm bread has an unset, soft crumb that will turn soggy and compress completely under a panini press, rather than holding a crisp outer layer and sturdy structure for fillings.
3.For an extra shatteringly crisp crust, toss 3 ice cubes directly onto the hot oven floor right before closing the oven door to bake: the quick burst of steam creates a shiny, crisp outer crust that resists sogginess from wet fillings like melted cheese, sliced tomato, and sauce.


✨ You May Also Like

Desserts & Baking
🍜 Italy

Creamy, coffee-kissed classic Northern Italian no-bake dessert, with layers of rum-spiked mascarpone cream, soft ladyfingers, and a rich cocoa dusting.

⏱️ 4 hours 3Desserts & Baking ★ 4.7
Desserts & Baking
🍜 France

Flaky, shatteringly crisp, buttery French croissants with golden exteriors and soft, airy layered interiors, perfect for pairing with coffee for a special morning treat.

⏱️ 12 hours Desserts & Baking ★ 4.5
Desserts & Baking
🍜 United States

Warm, spiced baked apples topped with a fluffy golden biscuit crust, this cozy dessert pairs perfectly with vanilla ice cream for cool-weather comfort.

⏱️ 55 minuteDesserts & Baking ★ 4.6
Desserts & Baking
🍜 United States

A star-spangled classic American blueberry pie with buttery flaky crust and bright sweet-tart filling, perfect for summer patriotic gatherings.

⏱️ 1 hour 25Desserts & Baking ★ 4.7
Desserts & Baking
🍜 United States

A beloved no-bake regional Maine candy with a chewy coconut-potato center coated in rich dark chocolate, a New England holiday staple since the 1870s.

⏱️ 2 hours 3Desserts & Baking ★ 4.8
Desserts & Baking
🍜 France

Luxuriously creamy, floral frozen custard made with aromatic Tahitian vanilla beans, boasting a smooth, rich texture that melts slowly on the tongue.

⏱️ 3 hours 3Desserts & Baking ★ 4.5

bread for panini:Frequently Asked Questions

1.Why do you recommend bread flour instead of all-purpose flour for this panini bread? ▾
Bread flour has a 12-14% protein content, compared to all-purpose flour’s 10-11%, which builds the strong, elastic gluten network this recipe relies on. That structure creates the perfect soft open crumb and crisp, sturdy crust that won’t turn soggy or fall apart when loaded with juicy fillings and pressed in a panini grill. All-purpose flour will produce a denser, more fragile loaf that doesn’t hold up to grilling.
2.Can I swap the instant dry yeast for active dry yeast in this recipe? ▾
Absolutely! You’ll just need to adjust prep slightly: use 25% more active dry yeast than the instant amount called for, and dissolve it in the recipe’s warm (105–110°F) water with a pinch of the sugar for 5–7 minutes until foamy before mixing. No rise time changes are needed, as long as you wait for the dough to hit the specified doubled size at each proof stage.
3.Why is there granulated sugar in this savory panini bread recipe? ▾
The small amount of granulated sugar isn’t there to make the bread sweet—it serves two key practical purposes: it feeds the instant yeast to kickstart a reliable, even rise, and it helps the crust develop that perfect golden, crisp bite when loaves are baked and later pressed on the panini grill. You won’t detect any sweet flavor in the finished bread.
4.Can I use regular table salt instead of fine sea salt for this panini bread? ▾
You can, but you’ll need to adjust the amount to avoid over-salting your loaves. Fine sea salt has a less dense grain than table salt, so use 25% less table salt than the fine sea salt measurement called for. Salt controls yeast activity, strengthens gluten, and boosts the bread’s subtle wheat flavor, so don’t skip it entirely.
5.What role does extra-virgin olive oil play in this panini bread? ▾
The extra-virgin olive oil adds that subtle, fruity, savory depth that pairs perfectly with classic panini fillings, but it also serves a functional role: it tenderizes the crumb to keep it soft (not tough like a plain rustic loaf) while helping the crust crisp up beautifully during baking and on the panini press. Don’t swap it for neutral oil if you want that authentic Italian flavor.
6.How do I keep my panini sandwiches from getting soggy when using this bread? ▾
First, don’t cut bake time short—you want a fully set, dry, crisp crust rather than a soft, underbaked loaf. Let loaves cool completely to room temperature before slicing, as cutting warm bread traps excess internal moisture that leads to sogginess. When building sandwiches, tuck wet ingredients like tomatoes between cheese or meat layers instead of directly against the bread.
7.How long should I proof the dough to get that perfect soft open crumb? ▾
For that light, soft open crumb, plan for two proof stages. First, let the kneaded dough rise in a covered, lightly oiled bowl at room temperature for 1–1.5 hours, until doubled in size and slow to spring back when poked. After shaping loaves, let them proof a second time for 30–45 minutes, until puffy and slightly jiggly when tapped, before baking.
8.Can I freeze baked panini bread to use later for quick sandwiches? ▾
Absolutely! Once loaves are fully cooled, wrap them tightly first in plastic wrap, then in a layer of aluminum foil, and freeze for up to 3 months. When you’re ready to use it, thaw the loaf completely at room temperature still wrapped, then give slices a quick 1-minute toast on the panini press before adding fillings to refresh the crisp crust and soft crumb.
9.How thick should I slice this bread for the best pressed panini results? ▾
Slice fully cooled loaves into ½-inch to ¾-inch thick slices for ideal panini performance. Slices thinner than ½ inch will get overly crisp and crack under the weight of pressed fillings, while slices thicker than ¾ inch won’t press evenly, leaving you with too much bread relative to filling and no signature evenly crisp, grilled outer edge.

Comments (8)

2 days ago

OMG this panini bread is a total game changer! I’ve been buying stale grocery store loaves for panini night for years and this was so much better. My kids devoured the turkey pesto paninis I made with it last night, even my super picky 8 year old asked for seconds. I was worried the 2+ hour rise time would be a pain but it was totally hands off while I did meal prep for the week. Only thing I did wrong was I forgot to score the top before baking so it split a little weird, oops. Still tasted amazing though!

yesterday

Wait I did the exact same thing with the scoring! Still turned out chewy and perfect for pressing, right? I’ve made this three times now and only remembered to score last batch, lol.

2 hours ago

So glad your whole family loved it, Liz! The split top from missing the score is totally harmless, just gives it a little extra rustic charm. If you want extra crisp crust next time, try tossing a couple ice cubes in the oven right when you put the loaf in – game changer for that artisanal crunch!

2 hours ago

Solid recipe, came out with a perfect chewy crumb that holds up to loaded panini fillings without getting soggy. I added a little dried rosemary and garlic powder to the dough for extra flavor and it paired so good with roast beef and caramelized onions. Took this on a day hike last weekend and made trail paninis over the camp stove, 10/10 would make again.

30 minutes ago

Uh, help? I’ve tried this twice now and my dough comes out super sticky no matter how much flour I add, and it doesn’t rise nearly as much as the photos show. I followed the measurements exactly but I’m wondering if my kitchen is too cold? It’s usually around 65 degrees in here this time of year. Ended up with a pretty dense loaf both times, bummer because the flavor was great when I tested a bite.

just now

Hi there! So sorry you’re running into sticky dough and rise issues – 65 degrees is definitely on the cooler side for yeast activation! Try letting your dough rise inside your turned-off oven with the light on, which usually holds a steady 75-80 degrees perfect for proofing. For sticky dough, resist adding too much extra flour (that will make your loaf dense!) – instead, oil your hands lightly when handling it and it will be much easier to work with. Give it another shot, you’ve got this!

3 days ago

Brought this bread sliced and pressed into caprese panini bites for our neighborhood block party potluck last weekend and people were begging me for the recipe! It’s sturdy enough that it didn’t get soggy even with the tomato and balsamic glaze, and the crust had that perfect crispy bite when I pressed it. 10/10, already planning to make a double batch for our next tailgate.

2 days ago

Wait tailgate paninis? That’s genius, I’ve been bringing boring burgers to our game days. Does this hold up if you bake the bread a day ahead and then press it at the tailgate?

yesterday

Great question! This bread actually stays fresh for 2-3 days stored in an airtight container at room temp, so it’s perfect for making ahead for tailgates or potlucks. Just hold off on adding super wet fillings until right before you press to avoid sogginess!

yesterday

This was my first time making any kind of artisanal bread and I was so intimidated by the medium difficulty rating, but it was way easier than I thought! The crumb was soft inside, crusty outside, and it made the best ham and cheese panini I’ve ever had. My roommate said it tasted like it came from the fancy sandwich shop downtown that charges $15 a sandwich. Total win. Knocked a star off only because I wish the recipe noted how long to let it rest after baking before slicing – I cut into it way too early the first time and a bunch of the soft inside squished out.

2 hours ago

Oh I feel that! I always have to set a timer for 45 minutes rest time for any homemade loaf or I’m slicing into it immediately too, the smell is just too good. This recipe is so forgiving for new bakers, right?

5 days ago

SO good, but does anyone have tips for making this in a stand mixer? I tried kneading by hand like the recipe says and my arms were sore for two days after, lol. Still turned out amazing, used it for chicken bacon ranch paninis for dinner last night and my partner said it’s better than the panini bread from our favorite Italian spot.

3 days ago

I make this all the time with my KitchenAid! Use the dough hook on speed 2 for about 7 minutes, it comes together perfectly without all the hand kneading. Just stop it once or twice to scrape down the sides so all the flour gets incorporated.

2 days ago

Great tip from Mia! If you’re using a stand mixer, just keep a close eye on the dough consistency – you want it to pull away from the sides of the bowl but still be soft and slightly tacky to the touch, not stiff. So glad you and your partner enjoyed it!

1 week ago

This bread is now a weekly meal prep staple for me! I bake a loaf every Sunday, slice it up, and keep half in the fridge and half in the freezer for quick paninis all week. It toasts up perfectly straight from the freezer in the panini press, no thawing needed. Saved me so much money on takeout lunches this month!

5 days ago

Wait you freeze it sliced? That’s the hack I needed! I’ve been throwing out half loaves because we can never finish them before they go stale, can’t wait to try that next batch.

2 weeks ago

I’ve been making bread for 40+ years and I have to say, this recipe is spot on. The hydration level is perfect for a panini loaf – not too high that it gets gummy when pressed, not too low that it’s dry and crumbly. I added a sprinkle of sea salt on top right before baking and it gave the crust the perfect little salty kick. Great recipe, will be adding this to my regular rotation.



