
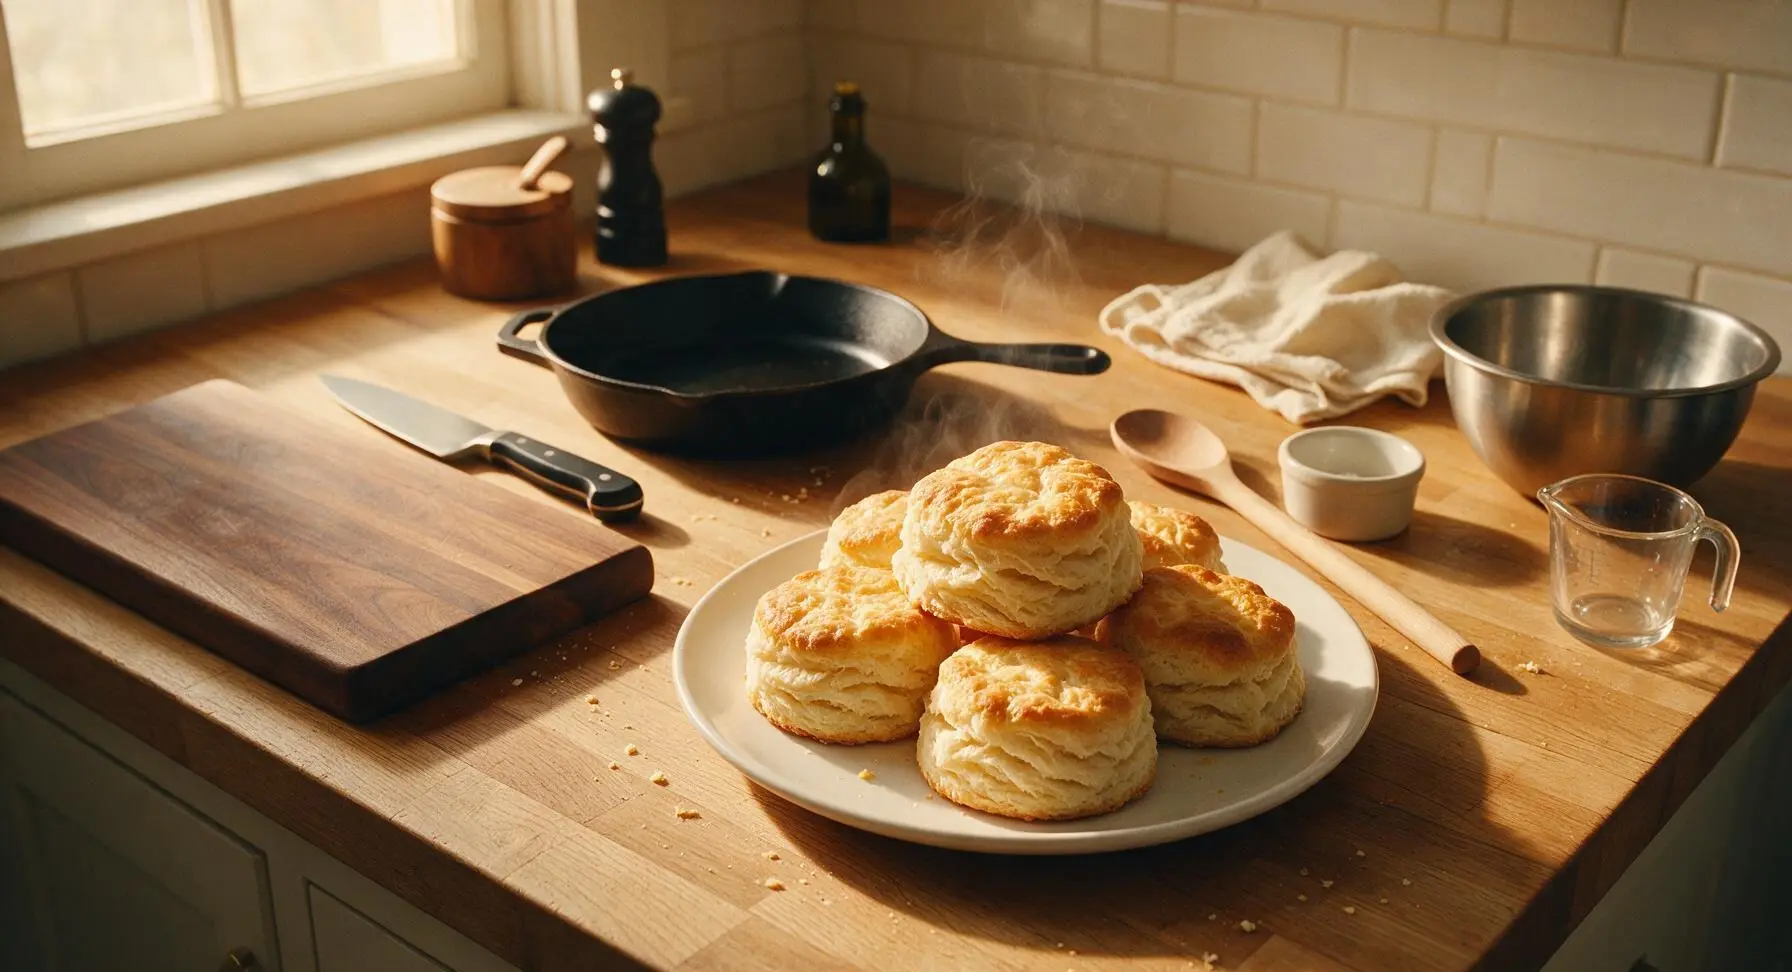
Buttermilk Biscuits

title 1
Buttermilk Biscuits
⏱️ cook time 15 minutes
🍽️ servings 8
⚡ Difficulty easy

intro

Tender, flaky Southern-style buttermilk biscuits with crisp golden crusts and pillowy pull-apart layers, perfect for sopping up gravy, spreading with honey butter, or pairing with cozy fall dinner favorites.

Ingredients
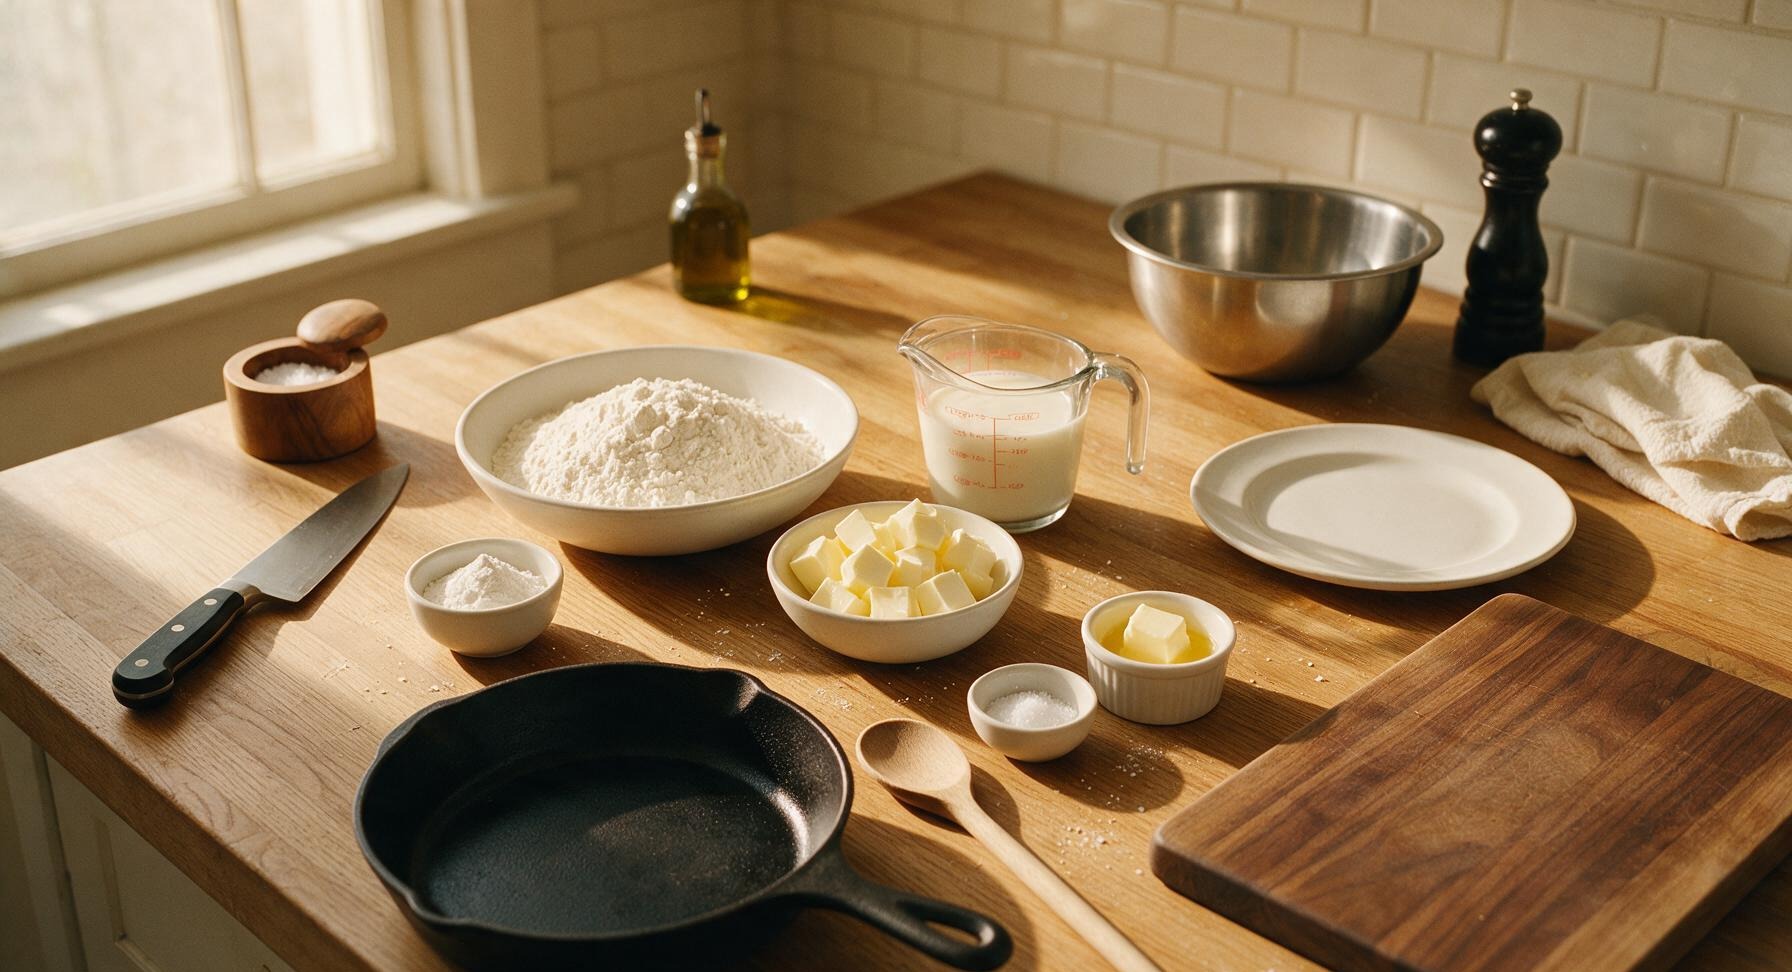
All-purpose flour 2 cups (240g)
Frozen unsalted butter 1/2 cup (1 stick, 113g)
Cold full-fat buttermilk 3/4 cup (180ml)
Baking powder 1 tablespoon (12g)
Baking soda 1/4 teaspoon (1g)
Fine sea salt 1 teaspoon (5g)
Melted unsalted butter (for topping) 2 tablespoons (28g)

Steps

1

Whisk Dry Ingredients

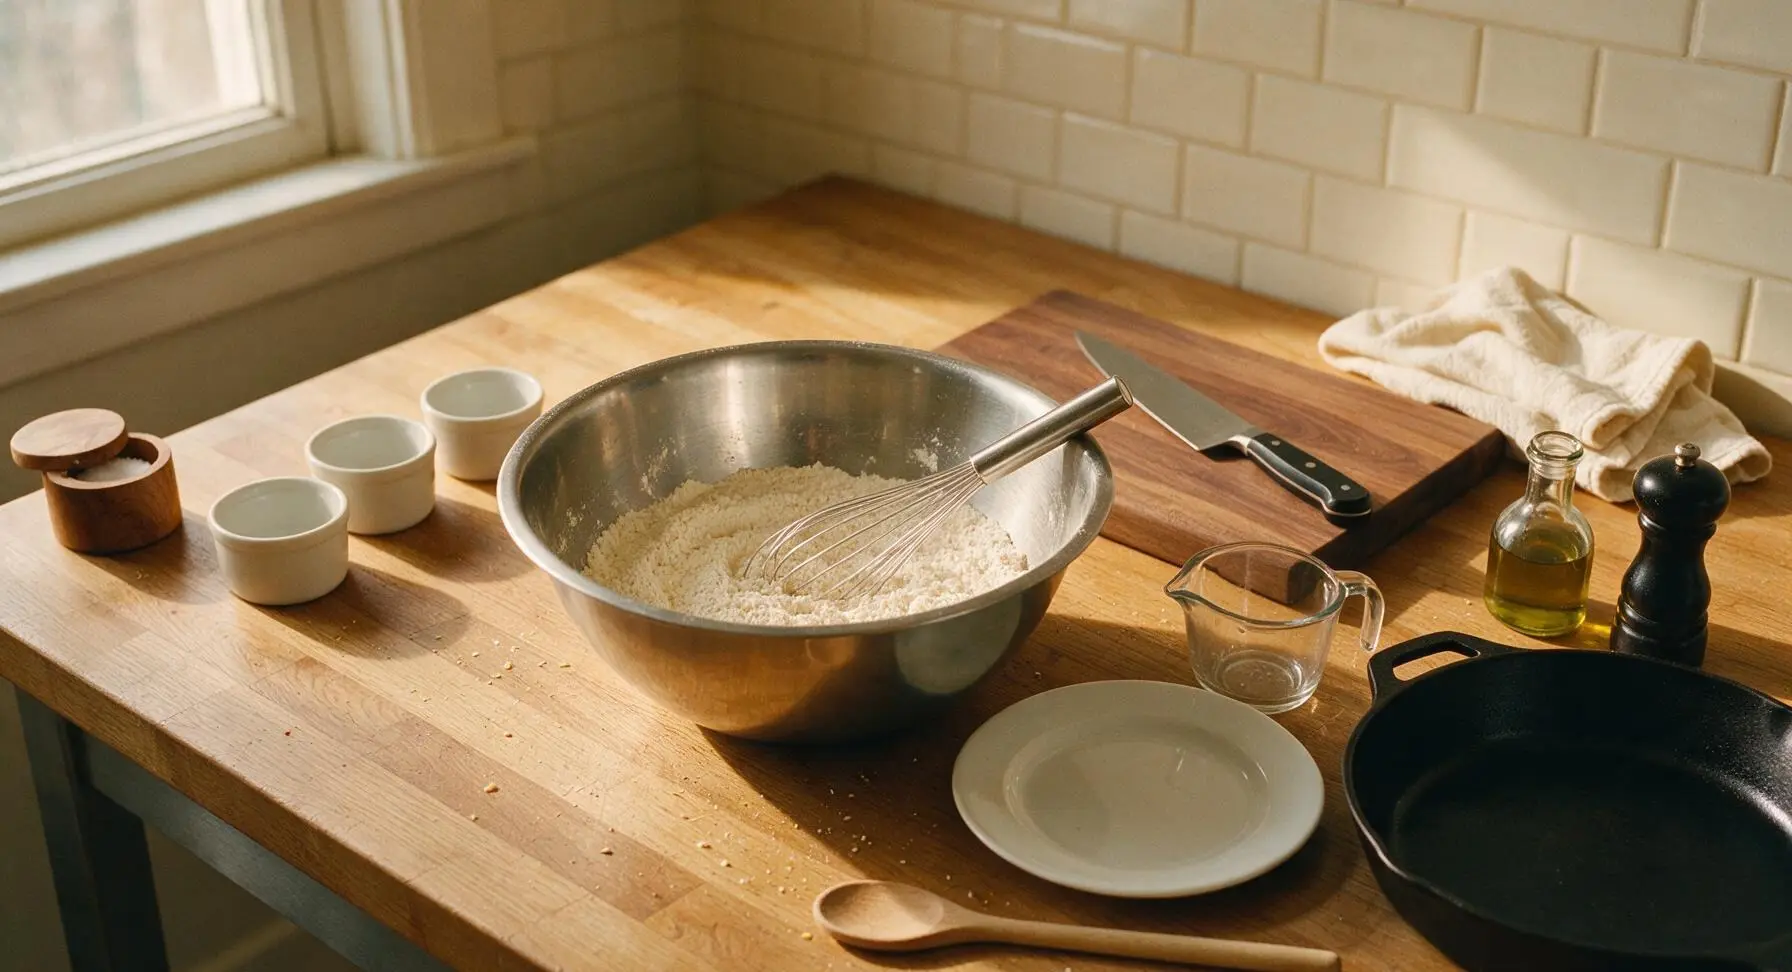
Preheat oven to 425°F (220°C) with a rack positioned in the middle. In the large stainless steel mixing bowl, combine 2 cups (240g) all-purpose flour, 1 tablespoon baking powder, 1/4 teaspoon baking soda, and 1 teaspoon fine sea salt. Use the stainless steel wire whisk to stir the mixture for 30 seconds, ensuring leavenings are evenly distributed so no clumps of baking powder create bitter spots in the finished biscuits.
Step 1
step1:Whisk Dry Ingredients
2

Grate Frozen Butter

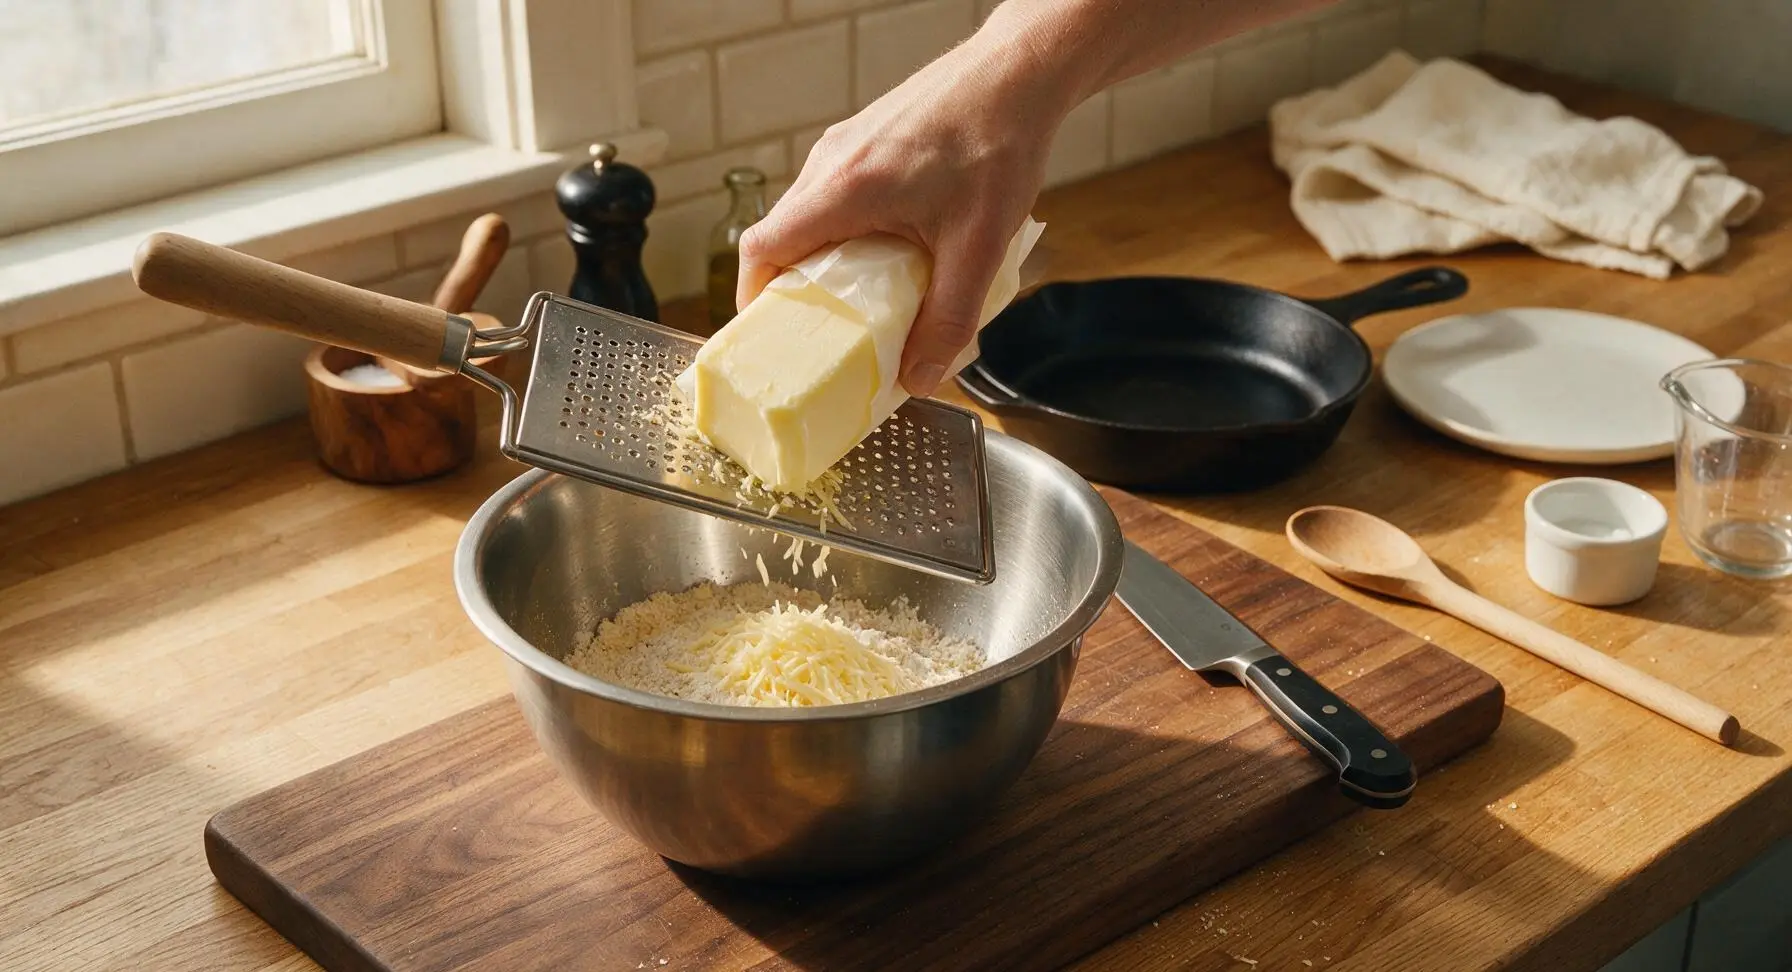
Hold the fully frozen stick of unsalted butter against the coarse side of the stainless steel box grater, grating all butter directly into the bowl of dry ingredients. Toss the thin butter shreds gently with your fingertips to coat every piece in flour, working quickly to prevent the butter from warming and melting. The finished mixture should look like coarse crumbs with visible thin shreds of yellow butter distributed evenly.
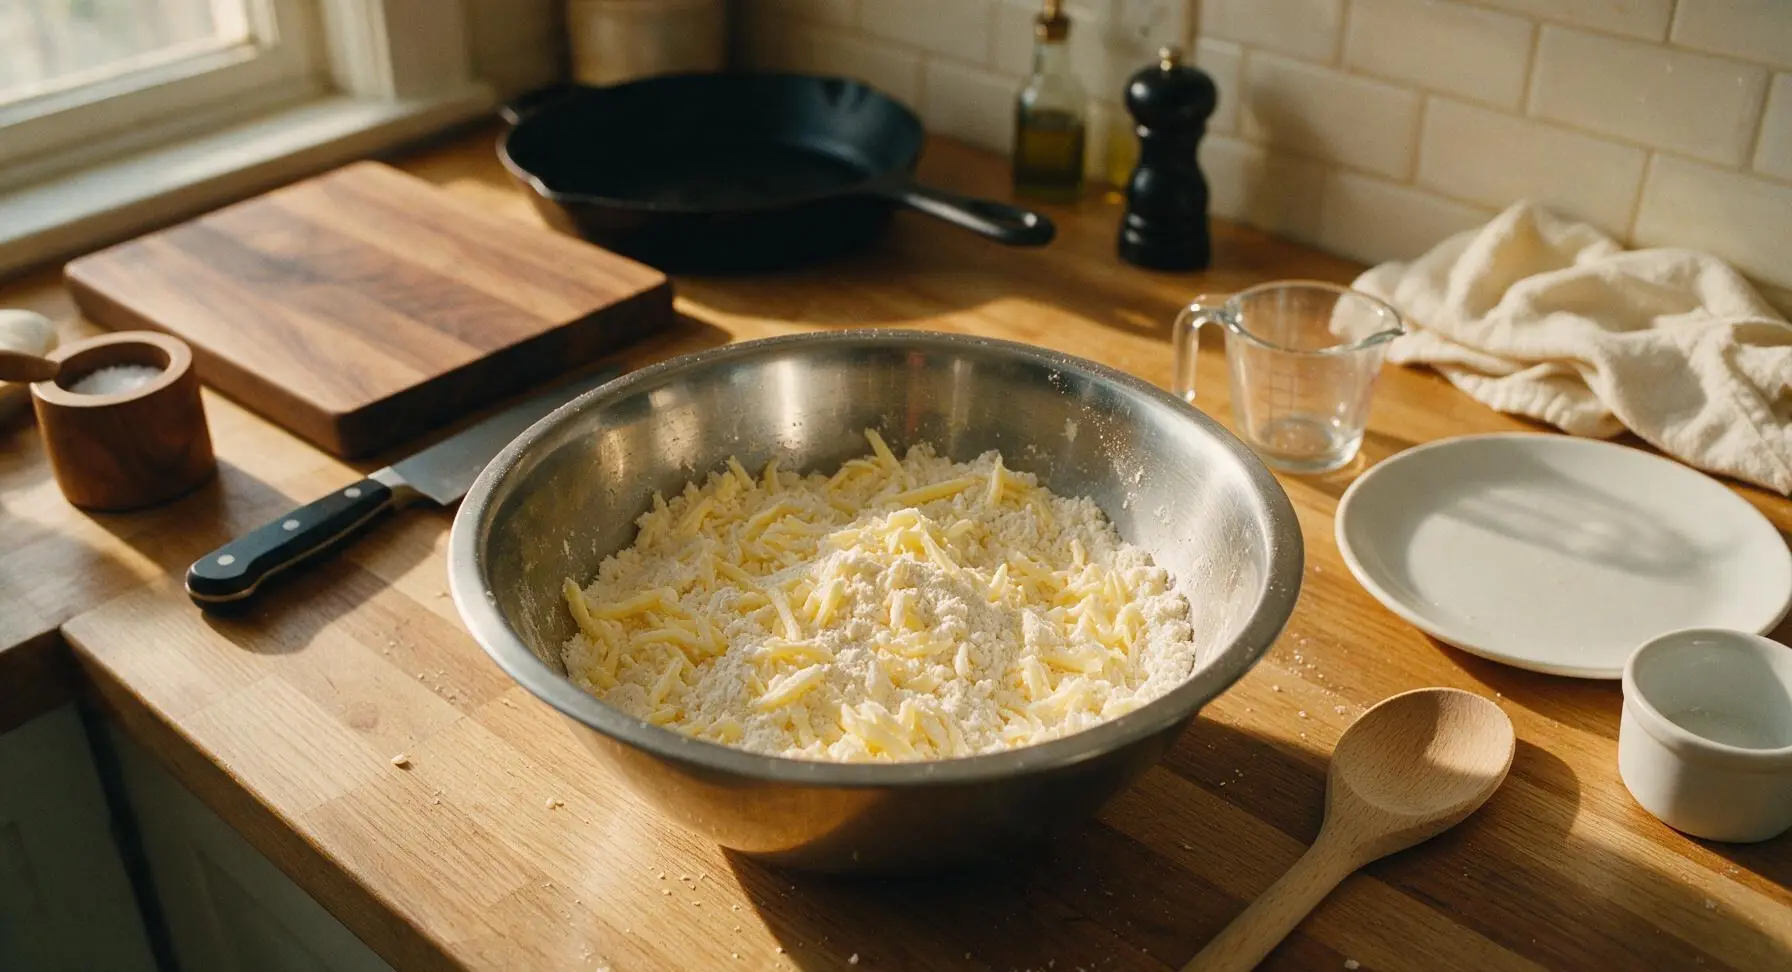
Step 2
step2:Grate Frozen Butter
Step 2
step2:Grate Frozen Butter
3

Fold in Cold Buttermilk

Pour 3/4 cup (180ml) ice-cold full-fat buttermilk into the flour and butter mixture. Use the matte sky blue silicone spatula to gently fold the ingredients together, stirring only just until no dry flour remains at the bottom of the bowl. The dough will be shaggy, lumpy, and slightly sticky—do not overmix, as this will develop gluten and create tough biscuits.
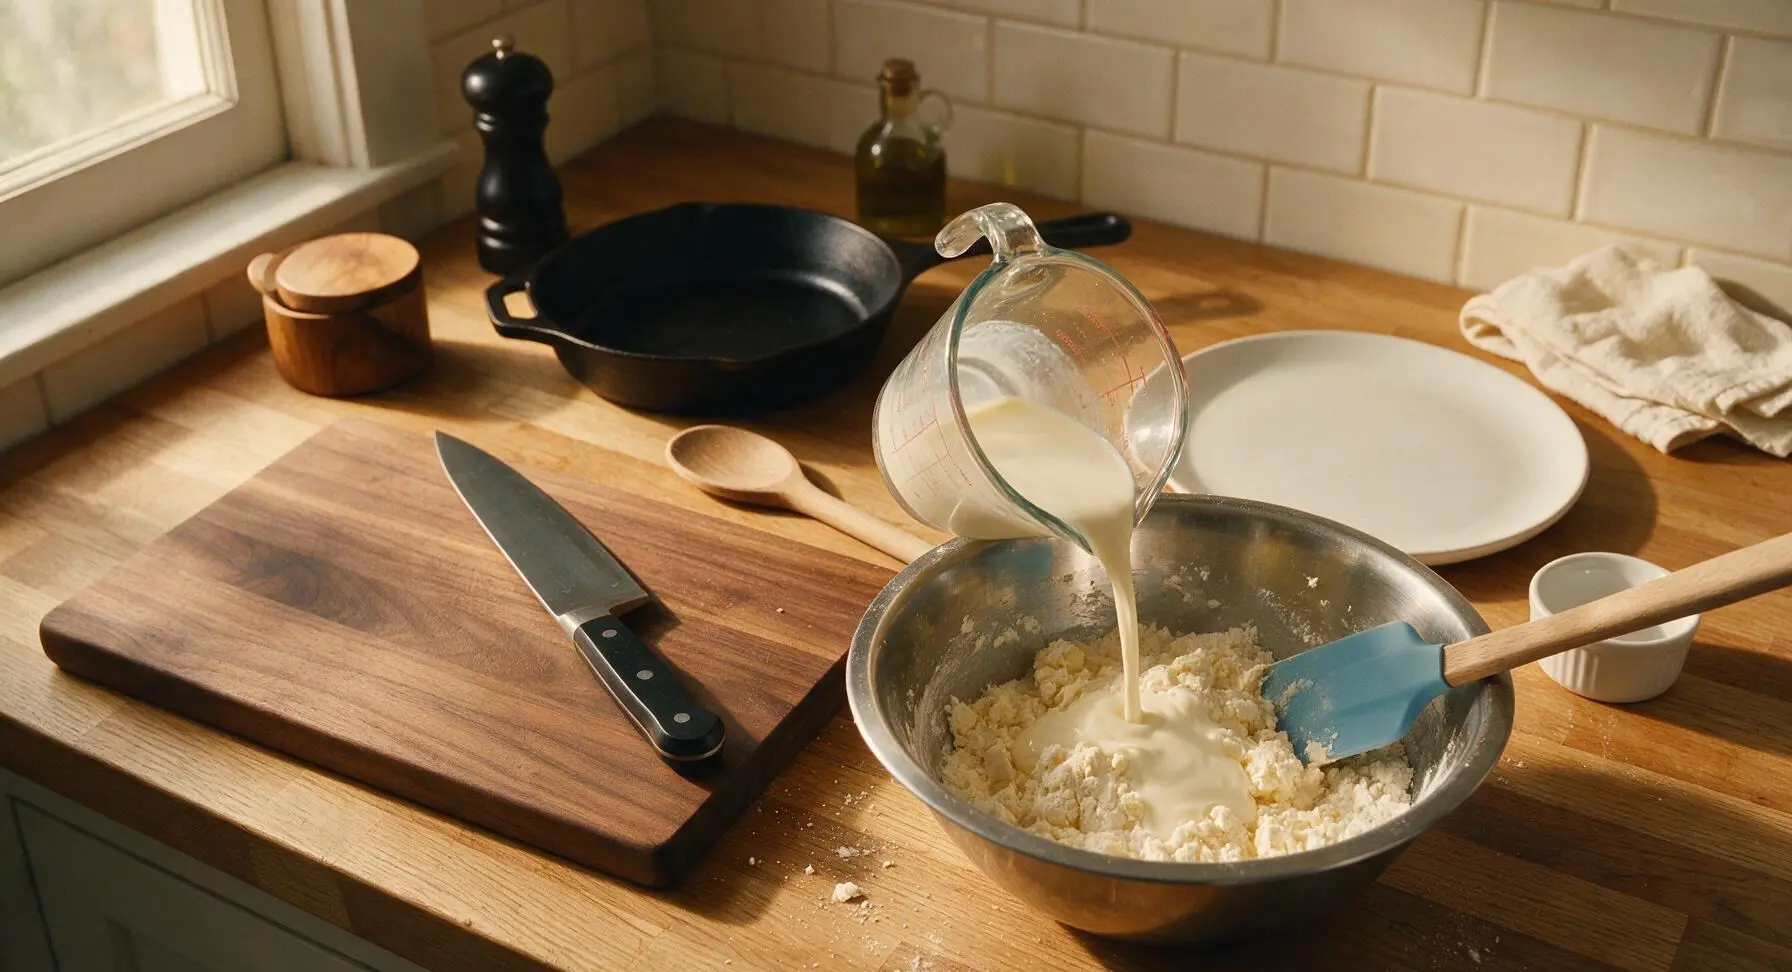
Step 3
step3:Fold in Cold Buttermilk
4

Fold Dough for Layers

Lay the frosted clear silicone baking mat on the counter and dust lightly with flour. Tip the shaggy dough out of the mixing bowl onto the mat. Lightly flour your fingertips, then pat the dough into a rough 1-inch thick rectangle. Fold the dough in thirds like a letter, then pat it back out to 1-inch thickness, repeating this fold two more times to create distinct, flaky layers without kneading.
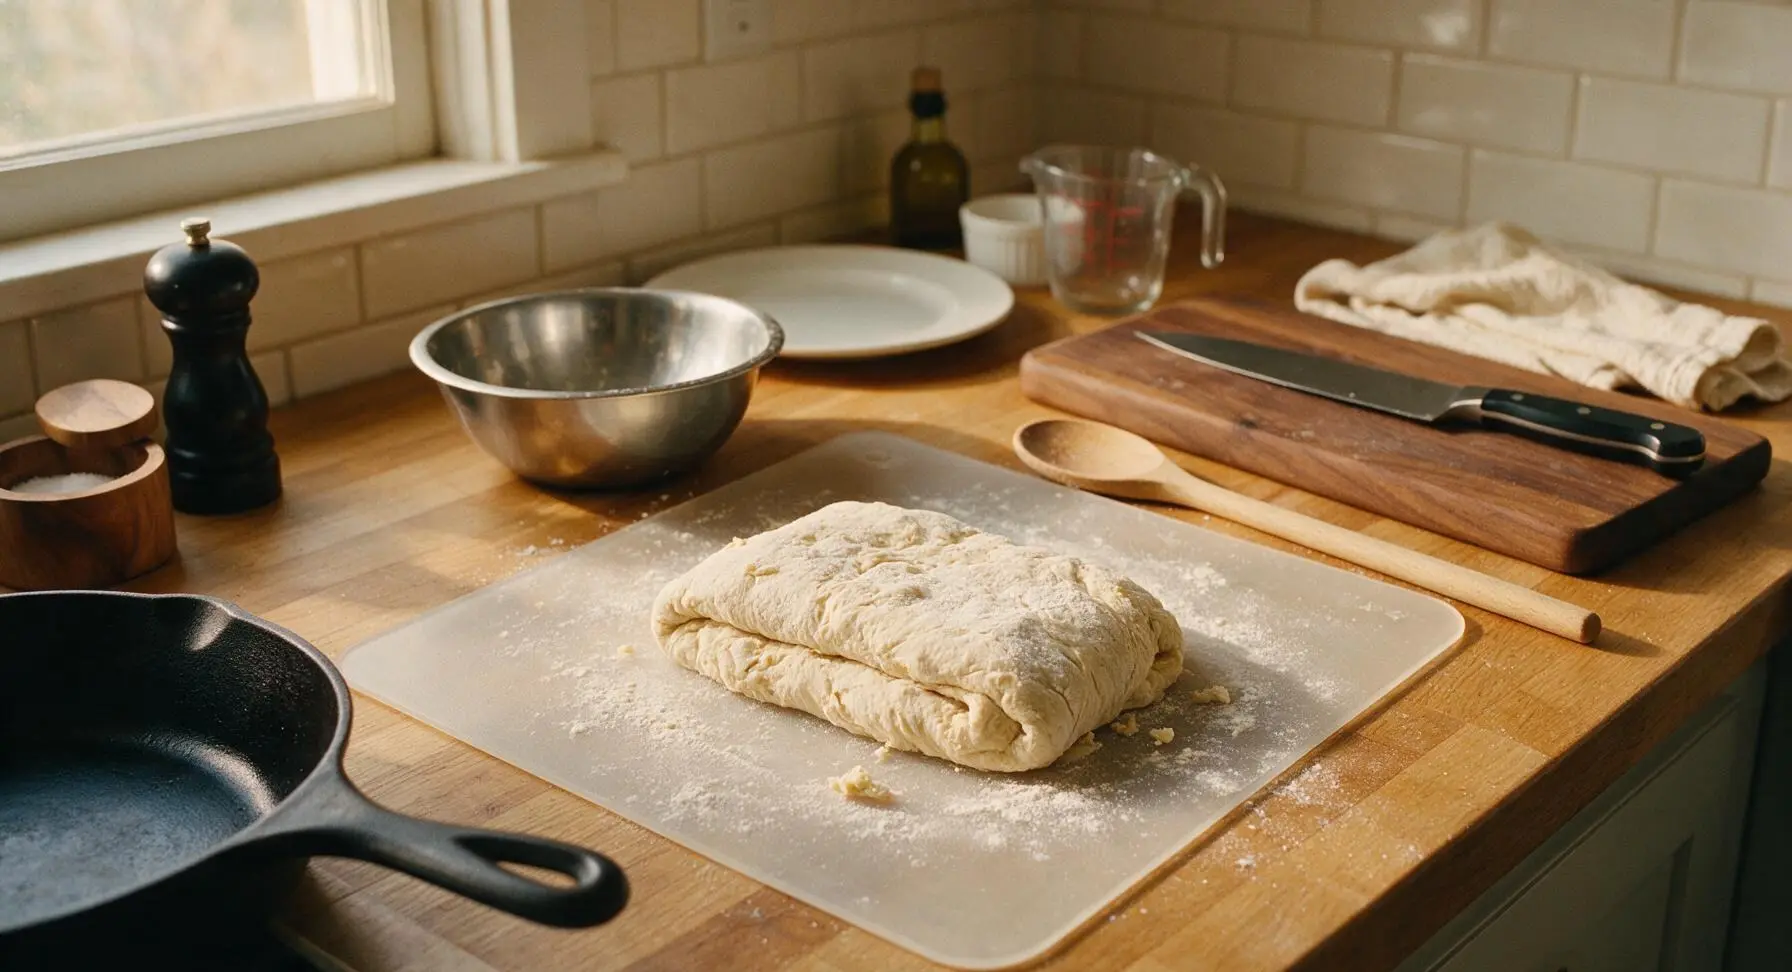
Step 4
step4:Fold Dough for Layers
5

Cut Biscuit Rounds

Use the solid hard maple rolling pin to gently roll the folded dough out to a uniform 3/4-inch thickness, keeping edges as even as possible. Press the sharp 6cm stainless steel biscuit cutter straight down through the dough without twisting—twisting seals the dough edges and prevents high rise. Cut 8 total rounds, pressing scraps together only once to cut the final biscuits to avoid overworking the dough.
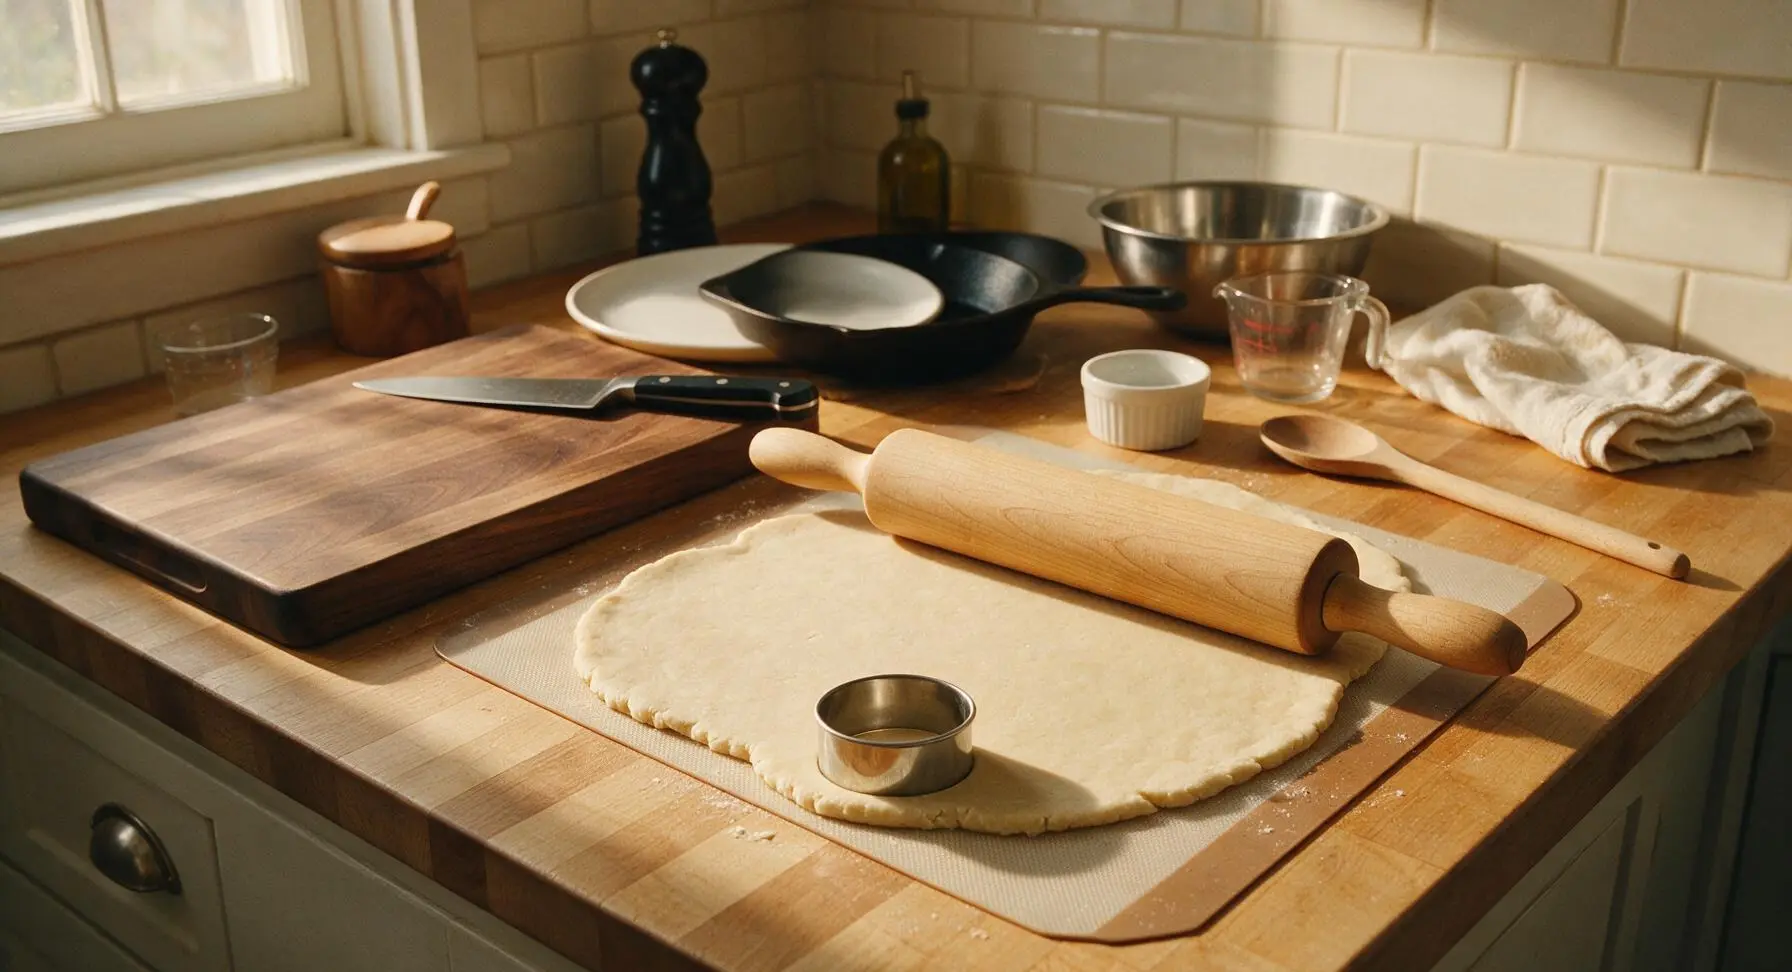
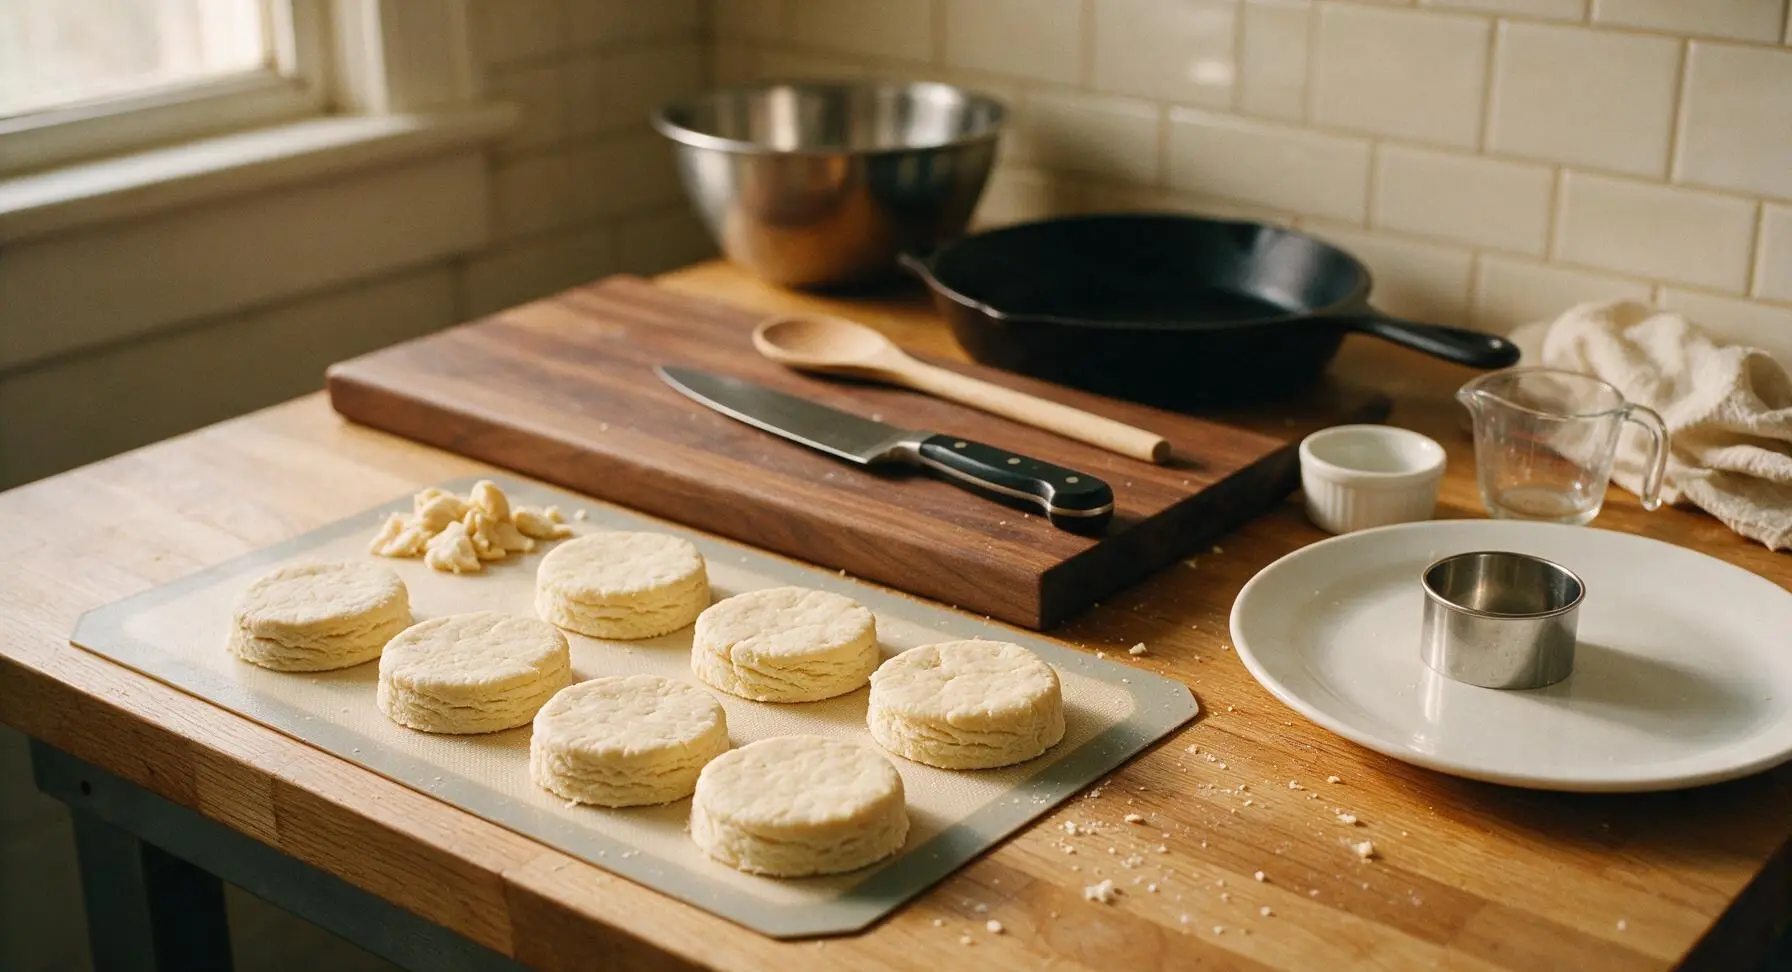
Step 5
step5:Cut Biscuit Rounds
Step 5
step5:Cut Biscuit Rounds
6

Arrange on Baking Sheet

Transfer the cut biscuit rounds to the rimmed aluminum baking sheet, positioning them so their sides just touch one another. Biscuits baked with touching edges rise taller and more evenly than those spaced apart, as they support each other as they puff.
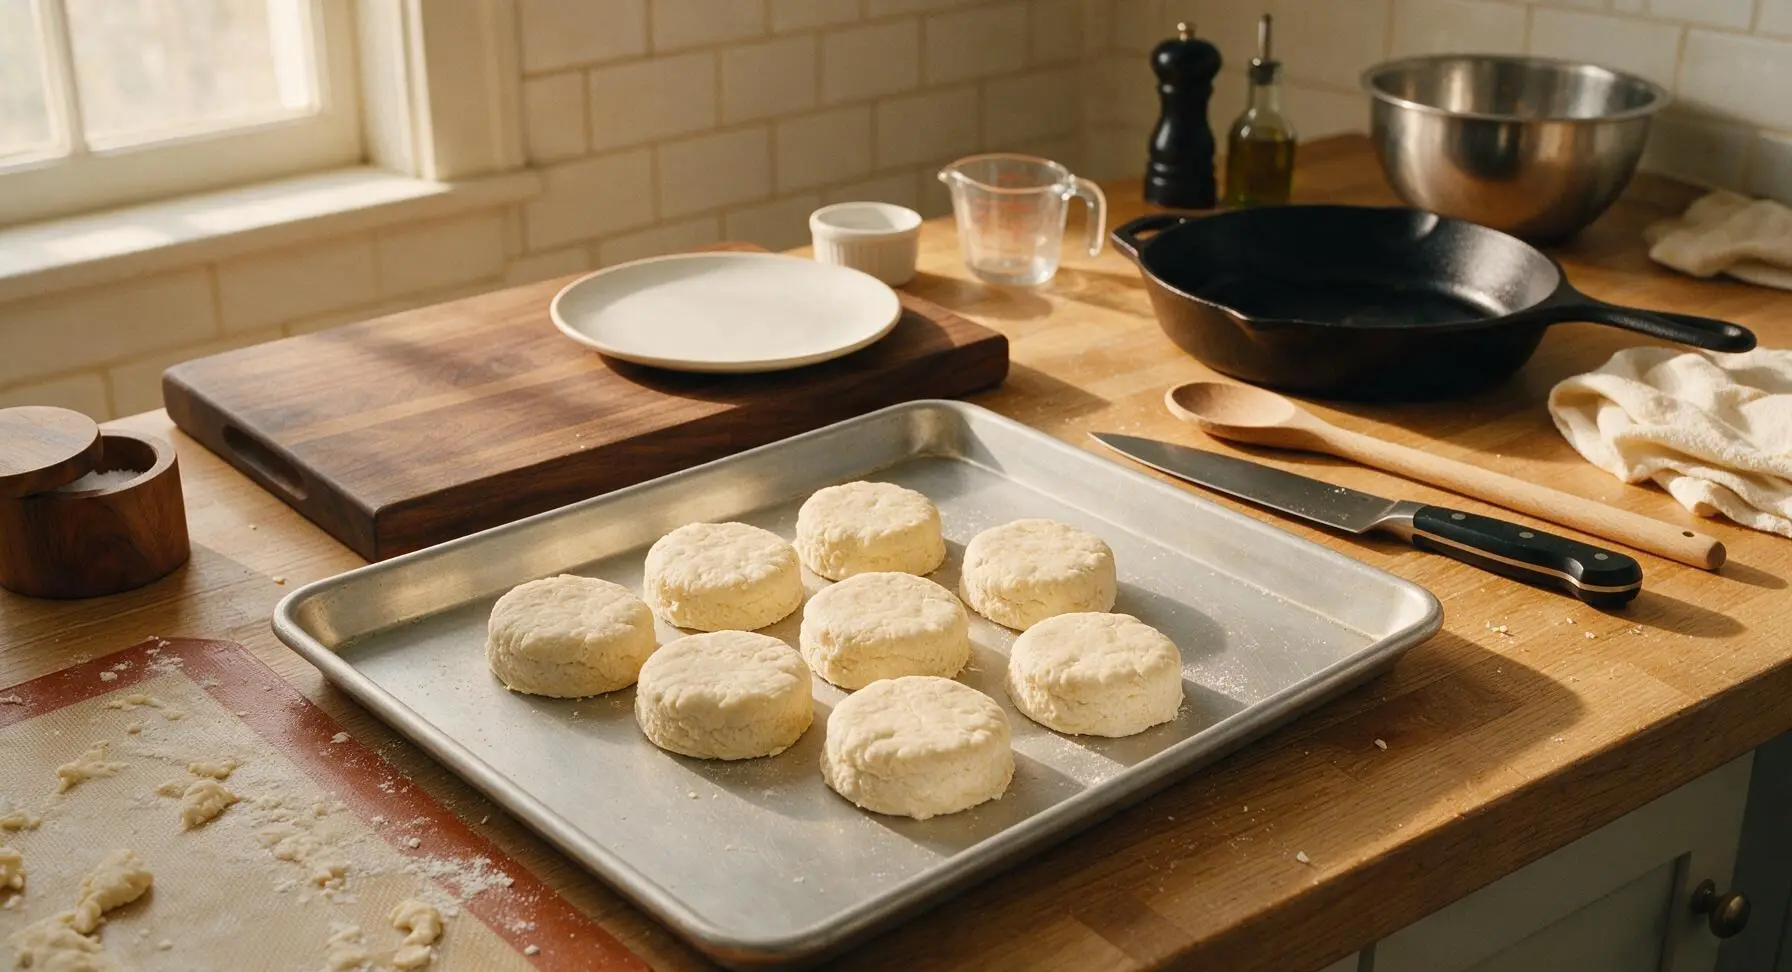
Step 6
step6:Arrange on Baking Sheet
7

Bake Until Golden

Place the baking sheet on the middle rack of the preheated 425°F oven. Bake for 12-15 minutes, rotating the sheet 180 degrees halfway through cooking, until the biscuit tops are deep golden brown and edges are crisp, with no pale dough visible at the seams between biscuits.
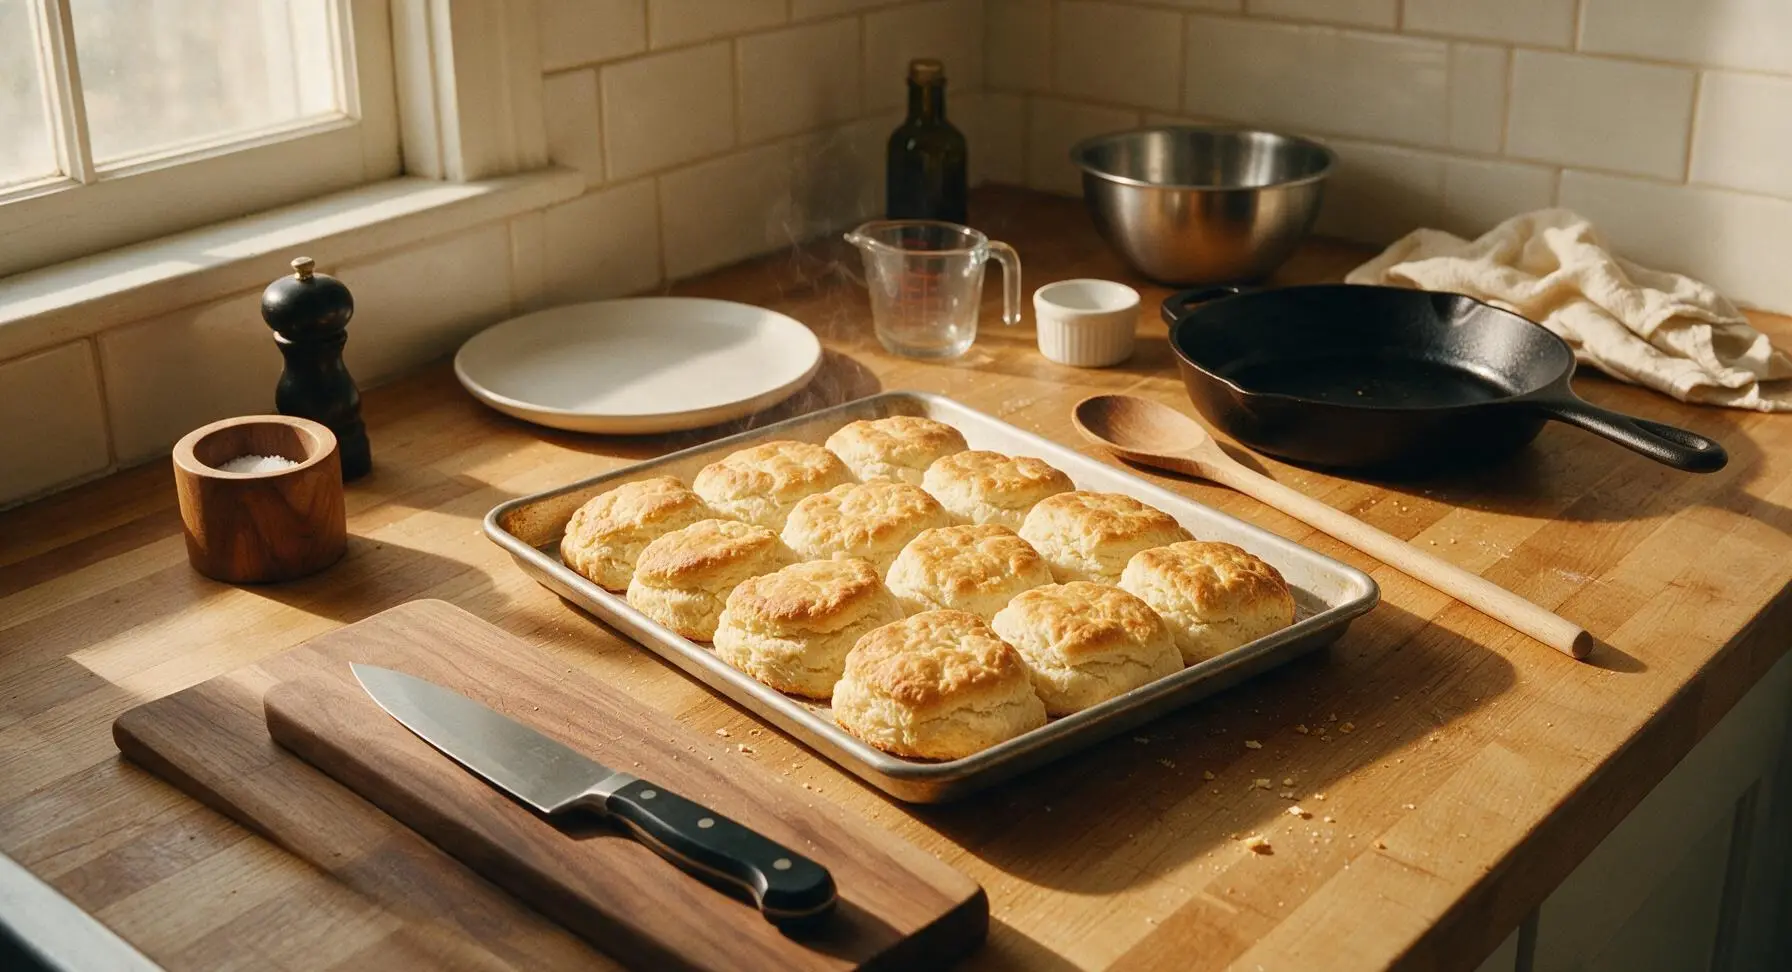
Step 7
step7:Bake Until Golden
8

Butter Tops and Serve

Immediately after removing the baking sheet from the oven, use the natural boar bristle pastry brush to brush the tops of the hot biscuits with 2 tablespoons melted unsalted butter, letting the butter soak into the warm crust. Let biscuits rest for 2 minutes on the sheet, then transfer to the cream white ceramic serving platter.
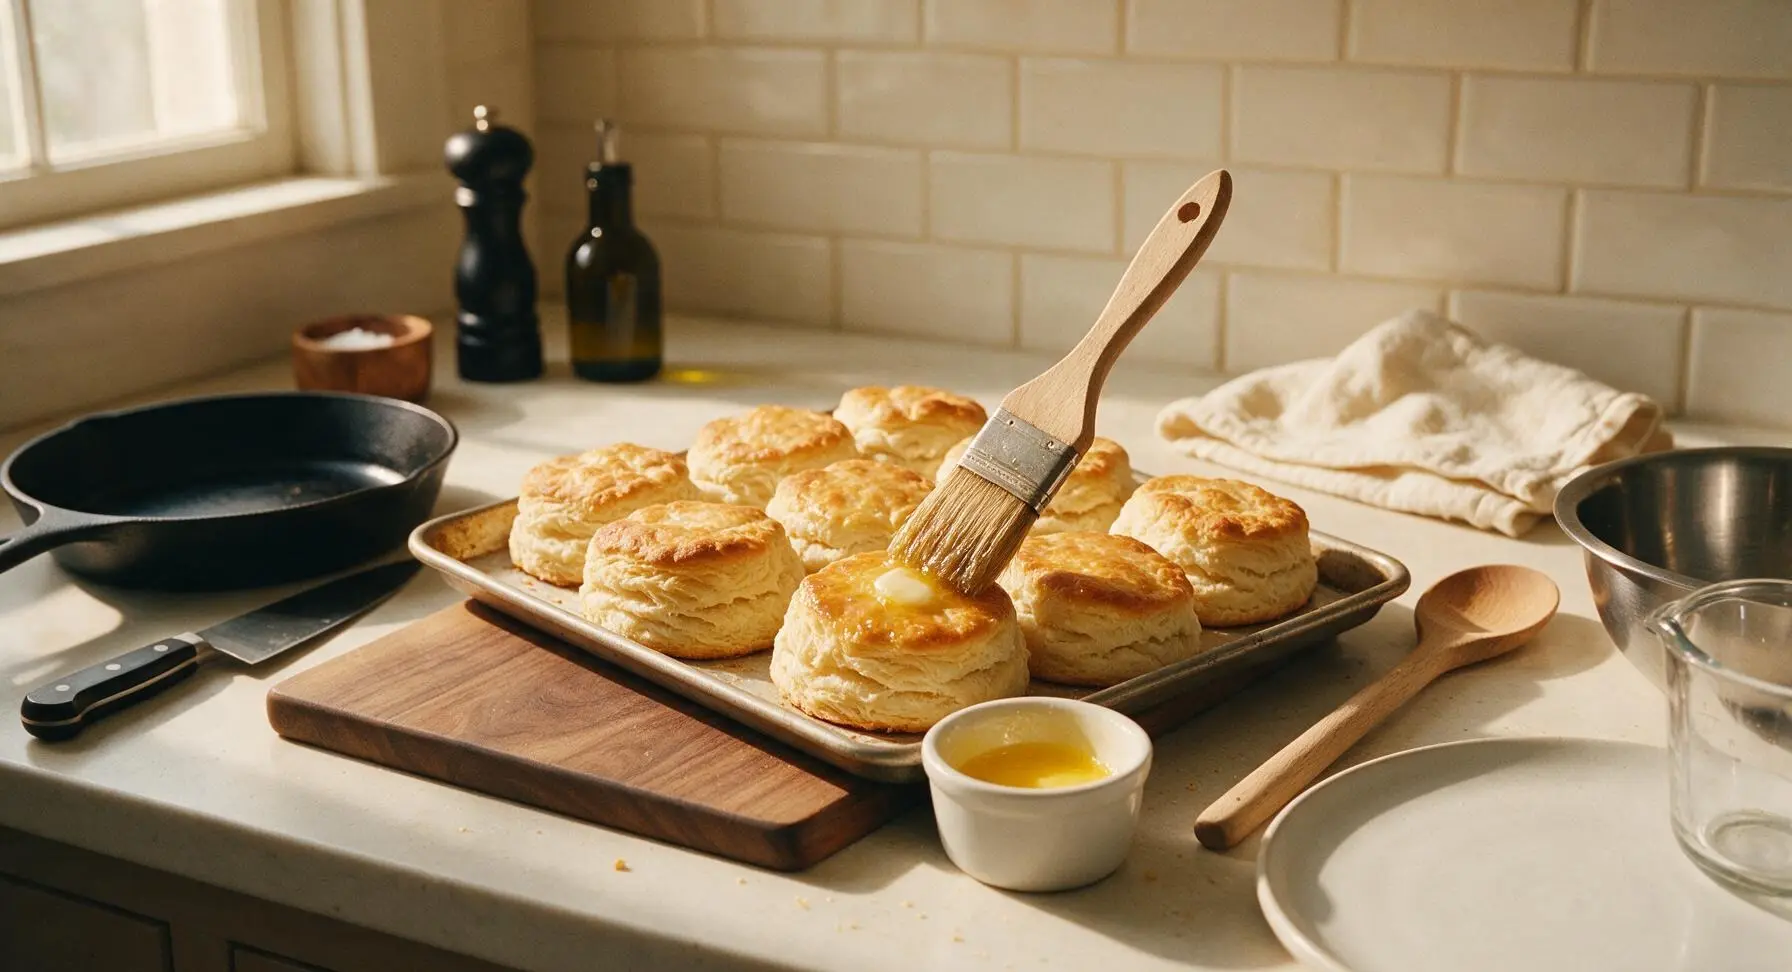
Step 8
step8:Butter Tops and Serve

Tips

1.Freeze butter for 30 minutes before grating: Ice-cold butter melts slowly in the hot oven, creating steam pockets that form tall, flaky layers. Soft or room-temperature butter melts into the dough before it can create pockets, resulting in dense, flat biscuits.
2.Never twist the biscuit cutter when pressing down: Twisting pinches the cut edges of the dough shut, sealing the layers and preventing the biscuits from rising to their full height. Press straight down firmly, then lift the cutter straight up for clean, even cuts that rise tall.
3.Handle dough as little as possible: Over-mixing, kneading, or re-rolling scraps multiple times develops gluten in the flour, which creates tough, chewy biscuits instead of tender, crumbly ones. Stop folding as soon as layers form, and only re-roll scraps one time.


✨ You May Also Like

Side Dishes
🍜 India

Velvety, aromatic all-purpose curry sauce perfect for tossing with roasted veggies, grilled protein, or rice for fast, cozy, flavorful meals.

⏱️ 25 minuteSide Dishes ★ 4.8
Side Dishes
🍜 Spain

Tender, starchy boiled yuca tossed in bright, garlicky citrus mojo sauce—an iconic, zesty side that pairs beautifully with roasted pork, grilled meats, and rice and beans.

⏱️ 40 minuteSide Dishes ★ 5
Side Dishes
🍜 United States

Tender, paper-thin potato flatbread, a beloved Norwegian-American Minnesota Christmas staple, griddled until softly spotted and served warm with butter.

⏱️ 1 hour 30Side Dishes ★ 4.6
Side Dishes
🍜 United States

Rich, deeply savory cured salt pork, a long-lasting kitchen staple perfect for frying crispy as a side or adding umami to stews, beans, and chowders.

⏱️ 7 days (2Side Dishes ★ 4.9
Side Dishes
🍜 United States

Crispy, tangy classic Southern fried green tomatoes with a crunchy cornmeal crust, served hot for a nostalgic, comforting summery bite.

⏱️ 25 minuteSide Dishes ★ 4.9
Side Dishes
🍜 United States

Moist, golden-crusted savory muffins with sweet corn, zesty jalapeño, and melted cheddar, perfect for pairing with smoky summer grilled fare.

⏱️ 30 minuteSide Dishes ★ 4.9

Buttermilk Biscuits:Frequently Asked Questions

1.Why does this recipe call for frozen unsalted butter instead of just cold butter? ▾
Frozen butter is the secret to those tall, signature flaky layers! When you grate frozen butter into the dry mix, it stays in solid, tiny, evenly distributed pieces longer as you handle the dough. As the biscuits bake, that cold butter melts slowly, releasing steam that separates the dough into light, pull-apart layers instead of soaking into flour and creating a dense crumb.
2.Can I use low-fat or non-fat buttermilk instead of cold full-fat buttermilk? ▾
I don’t recommend it! Full-fat cold buttermilk adds rich, tangy flavor and keeps the dough temperature low so your butter doesn’t soften prematurely. Low-fat or non-fat versions have higher water content that can make biscuits spread instead of rise, and they lack the creamy fat that gives these biscuits their tender, melt-in-your-mouth crumb.
3.Why do I need both baking powder and baking soda in this recipe? ▾
That combination gives you the most reliable, balanced rise! Baking powder creates initial lift when it hits wet ingredients and again at oven heat, while baking soda reacts with the acid in cold buttermilk to cut soapy aftertaste from extra baking powder, boost golden crust browning, and add extra lift for tall, fluffy biscuits.
4.How do I keep my biscuits from turning out tough instead of tender? ▾
The #1 culprit of tough biscuits is overworking the dough! When you mix, fold, or knead too much, you develop excess gluten in the all-purpose flour that makes biscuits chewy instead of soft. Stick to gentle folding just to bring the dough together, stop as soon as no dry flour patches remain, and never twist your biscuit cutter when punching shapes.
5.Can I make this dough ahead of time and bake it later? ▾
Absolutely! This dough actually benefits from a chill in the fridge. After you cut out your biscuit shapes, arrange them on a baking sheet, cover tightly with plastic wrap, and store in the fridge for up to 24 hours before baking. The extra chill keeps butter extra cold for even flakier layers, and you won’t need extra bake time going straight from fridge to oven.
6.Why don’t my biscuits rise tall and fluffy in the oven? ▾
Most flat biscuits come down to three common issues: your butter got too warm before baking, your baking powder or soda was expired, or you twisted your biscuit cutter when cutting shapes. Twisting seals dough edges so it can’t puff upward, warm butter melts too fast to create lift, and old leaveners won’t make the carbon dioxide needed for a tall rise.
7.Can I substitute a different flour for all-purpose flour here? ▾
I don’t recommend swapping in cake flour or bread flour for best results. Bread flour has too high a protein content, which creates tough, chewy biscuits, while cake flour has too little protein to hold flaky layers together as they rise. If you only have self-rising flour, skip added baking powder and soda to avoid over-leavening that leads to collapsed, crumbly biscuits.
8.What’s the best oven temperature to bake these biscuits for a crisp golden crust? ▾
Preheat your oven to 425°F for perfect results every time. That high, consistent heat hits cold butter immediately to create fast steam for maximum lift, and it cooks biscuits quickly enough that the outside develops a crisp, buttery golden crust before the inside has a chance to dry out. Make sure your oven is fully preheated—no cold starts!
9.Do I really need to grate the frozen butter, or can I cut it in with a pastry cutter? ▾
Grating frozen butter on the large holes of a box grater is the fastest, most consistent way to get evenly sized butter pieces without overworking the dough. You can cut butter in with a pastry cutter if you prefer, but work fast to keep butter frozen solid, and aim for pea-sized pieces to ensure you still get those distinct, flaky layers as it bakes.
10.How close together should I place the biscuits on the baking sheet? ▾
Arrange cut biscuits so their sides are almost touching, about ¼-inch apart on a parchment-lined baking sheet. When they’re close, they support each other as they rise upward instead of spreading sideways, giving you taller, softer-sided biscuits with that classic pull-apart texture. Space them 2 inches apart if you want extra crisp edges all around.
11.Can I freeze unbaked cut biscuits for later use? ▾
Yes! These freeze beautifully for quick weekday breakfasts. After cutting out biscuit shapes, freeze them solid on a baking sheet for 2 hours, then transfer to a labeled freezer bag for up to 3 months. Bake straight from frozen at 425°F, adding 3 to 5 minutes to total bake time—no thawing required, and you’ll get the same flaky results as fresh.
12.Why should I avoid twisting the biscuit cutter when punching out shapes? ▾
Twisting the cutter presses and seals the layered edges of the dough, which stops biscuits from puffing straight up to their full tall height in the oven. Instead, press a sharp, floured cutter straight down through the dough in one firm, clean motion, then lift it straight up. This leaves delicate layers unsealed so they can separate and rise fully as they bake.
13.How do I reheat leftover biscuits so they stay flaky and don’t get soggy? ▾
Skip the microwave—it makes biscuits gummy and tough. For best results, wrap leftover biscuits loosely in aluminum foil and reheat in a 350°F oven for 8 to 10 minutes, until warmed all the way through. If you want a little extra crisp on the crust, unwrap the foil for the last 2 minutes of heating, and brush with a tiny bit of melted butter before serving.
14.What if I don’t have buttermilk on hand? Can I make a quick substitute? ▾
For the closest match to full-fat buttermilk, stir 1 tablespoon of white vinegar or fresh lemon juice into 1 cup of cold whole milk, then let it sit for 5 minutes until it curdles slightly. It won’t have the exact creamy tang of cultured buttermilk, but it has the right acid content to react with baking soda for a tender, tall crumb—just make sure it’s ice cold before using.
15.How many times should I fold the dough to get maximum flaky layers? ▾
Aim for 4 to 5 gentle folds total, no more. After you pat the dough out into a rough rectangle, fold one third over the center, then fold the other third over like you’re folding a letter, pat it back out, and repeat. Those folds create dozens of thin dough and butter layers, but folding more than 5 times overworks gluten and leads to tough, dense biscuits.
16.Should I brush the tops of the biscuits with anything before baking? ▾
For that perfect glossy, deep golden crust, brush the tops of cold biscuits with a little extra melted butter or a light wash of buttermilk right before they go in the oven. Skip egg washes here—they create a shinier, firmer crust that takes away from that soft, buttery Southern biscuit texture, and can make tops cook too fast before the inside finishes rising.
17.How do I know when the biscuits are fully done baking? ▾
Your biscuits are done when they’re a deep, even golden brown on top, and puffed to about double their original height, usually 12 to 15 minutes at 425°F. If you’re unsure, gently pull the top of one biscuit open a little—the inside should be fluffy, with no raw doughy patches, and layers should pull apart easily without feeling gummy or dense. Cool 2 minutes before serving.
18.Can I add mix-ins like cheese, herbs, or bacon to these biscuits? ▾
Absolutely! Add up to 1 cup of total mix-ins right after you cut in the frozen butter, before you stir in the cold buttermilk. Shredded sharp cheddar, chopped fresh chives, crumbled cooked bacon, or even a pinch of black pepper work beautifully—just make sure any add-ins are cold so they don’t warm the dough and melt butter prematurely.
19.How should I store leftover baked biscuits? ▾
Let leftover biscuits cool completely to room temperature first, then store them in an airtight container at room temperature for up to 3 days. Don’t store them in the fridge, as the dry cold air will make them go stale much faster. For longer storage, wrap baked biscuits tightly in plastic wrap and freeze for up to 1 month, reheating in the oven straight from frozen.

Comments (5)

2 days ago

OMG these biscuits are SO good! I made them for Sunday family dinner last night and even my super picky 7 year old asked for seconds! The flaky layers were perfect, I couldn’t believe how easy they were too—15 minutes cook time? Total game changer for busy weeknights too, I’m gonna make a batch for meal prep this weekend to go with sausage gravy. 10/10 no notes!

yesterday

Wait do you freeze them after cutting or after baking for meal prep? I’ve been trying to find a good make-ahead biscuit for work breakfasts!

yesterday

So happy your family loved them! For meal prep, you can freeze the cut, unbaked biscuits for up to 3 months—just pop them straight in the oven from frozen and add 3-4 minutes to the cook time, no thawing needed!

1 week ago

Took these to our neighborhood potluck last weekend and they were gone in 10 minutes flat! Everyone kept asking who brought the biscuits and begging for the recipe. I brushed the tops with a little melted salted butter right when they came out of the oven, chef’s kiss. Only thing is I think I overworked the dough a tiny bit on my first batch so they weren’t as tall, but the second batch was perfect.

5 days ago

So glad they were a potluck hit! The key to tall flaky layers is handling the dough as little as possible—those cold butter chunks are what create all that lift, so don’t knead it too much next time and you’ll get perfect sky-high biscuits every time!

30 minutes ago

As someone who can barely boil water without messing it up, I was shocked these turned out! Super easy instructions, no fancy equipment needed, I just used a regular old cup to cut them since I don’t have a biscuit cutter. Ate them warm with honey butter last night and felt like a real Southern grandma lmao. Will definitely be making these again.

3 days ago

Wait has anyone tried making these with gluten free all purpose flour? My daughter has celiac and I’ve been searching for a decent flaky biscuit recipe that doesn’t turn into a crumbly brick. These look so good I’m tempted to test it out this weekend!

2 days ago

I made them with a 1:1 GF flour blend last week and they worked great! Just make sure your butter is extra cold and add a splash extra buttermilk if the dough feels too dry, mine came out just as flaky as the regular version!

5 minutes ago

Made these for brunch today with homemade jam and scrambled eggs, and my partner said they’re better than the ones we get at our favorite Southern diner down the street! The trick of folding the dough like a letter to get layers is genius, I never knew that trick before. I used cold grated butter like the recipe said and wow, the flakiness is unreal.

just now

Wait the grated butter trick is a game changer! I used to cut butter in with a pastry cutter and never got layers half this good, so worth the extra 30 seconds to grate it frozen.

just now

That frozen grated butter is the secret for sure! It melts in the oven to create those perfect fluffy, flaky layers without you having to work super hard to cut butter into the flour. So glad you and your partner loved them for brunch!



