
Classic Bread Stuffing

title 1
Classic Bread Stuffing
⏱️ cook time 45 minutes
🍽️ servings 8
⚡ Difficulty easy

intro

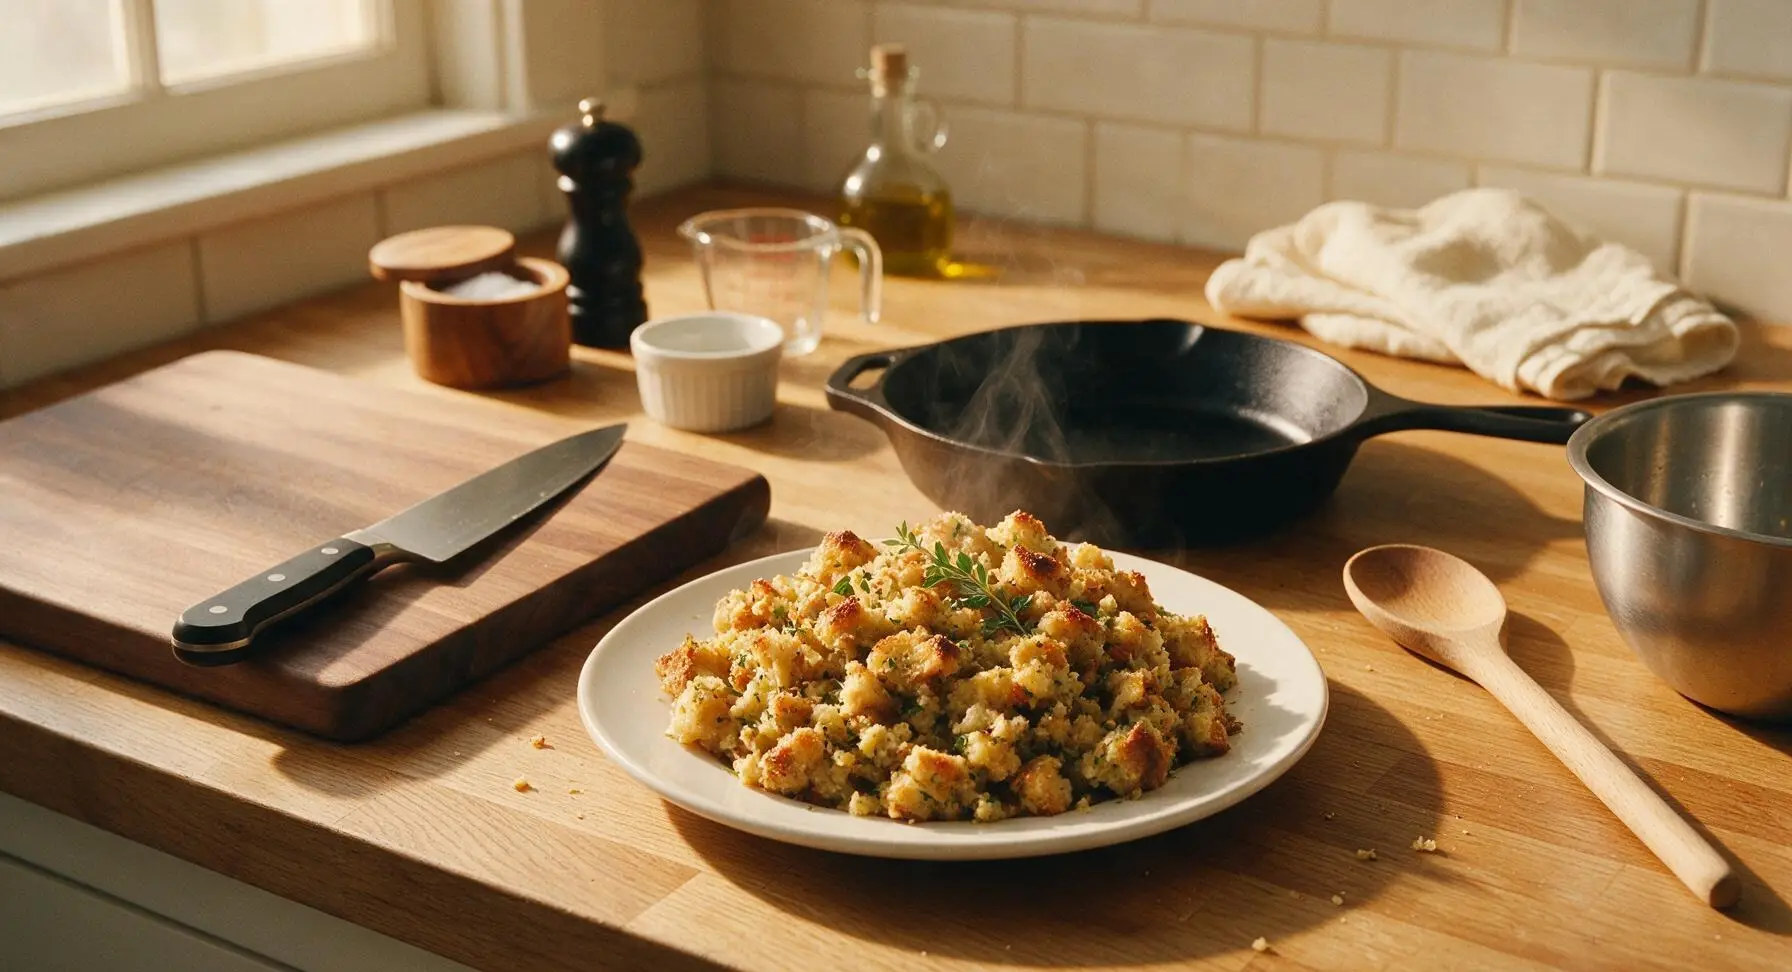
Buttery, herb-forward classic bread stuffing with crisp golden edges and a soft, savory, fluffy center: the iconic, nostalgic Thanksgiving side that tastes like holiday home.

Ingredients
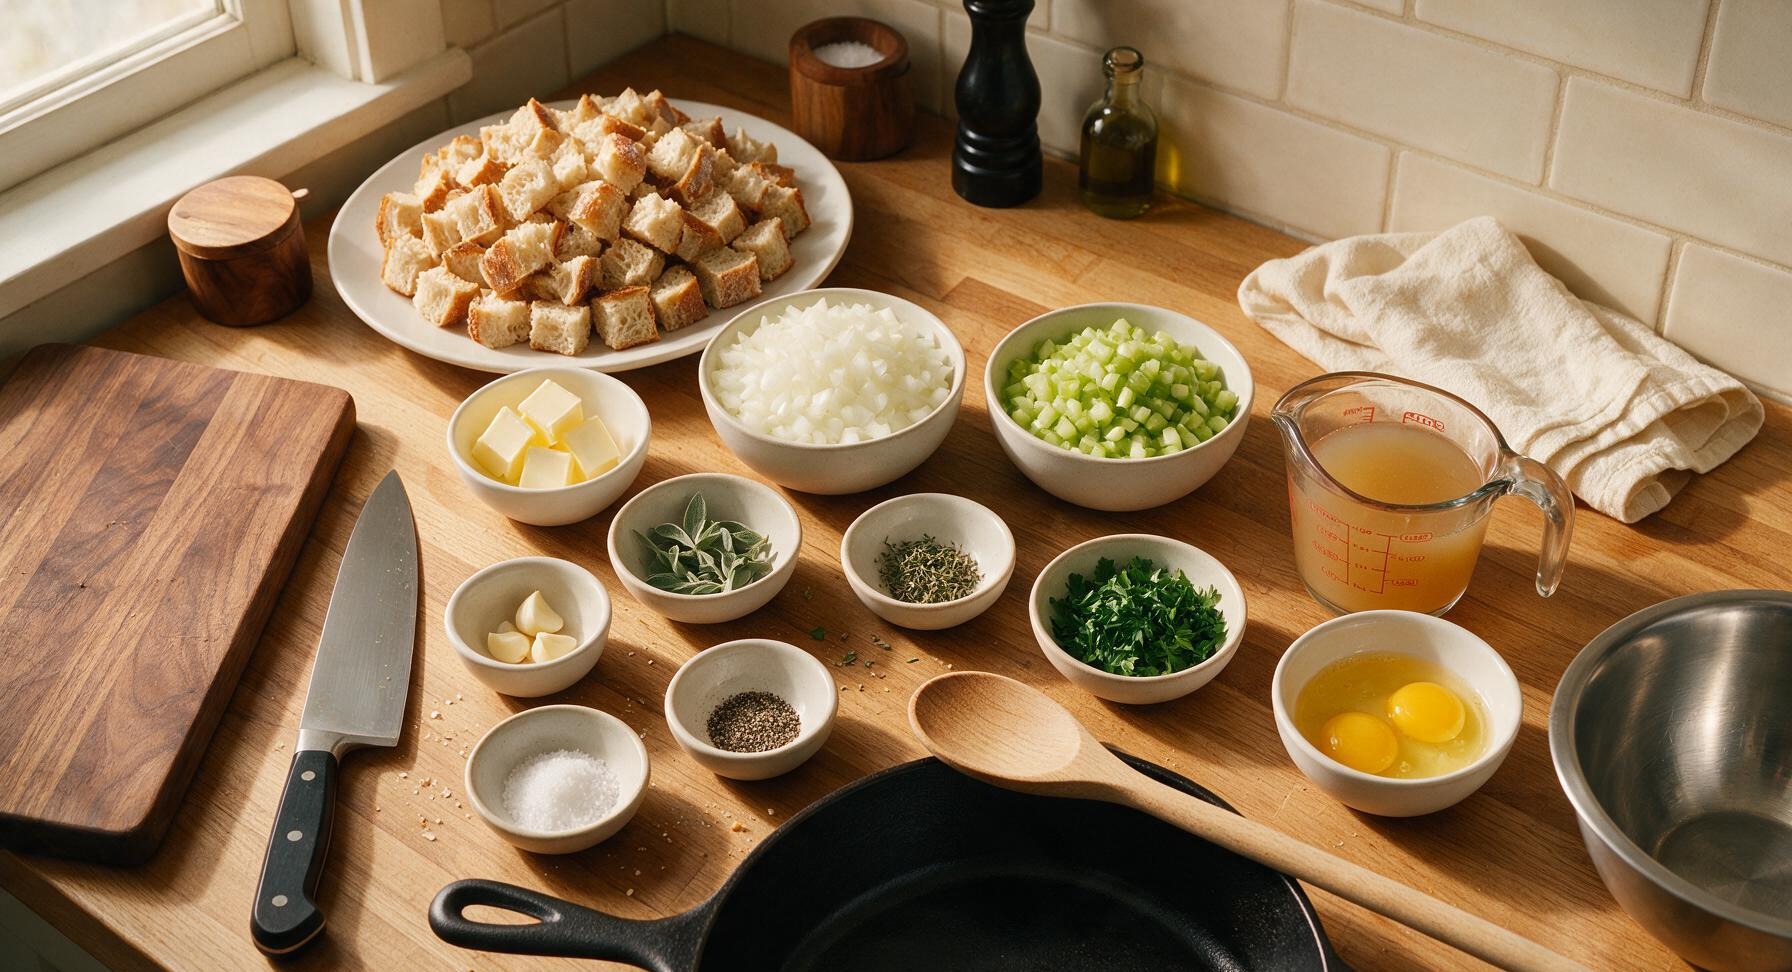
Day-old sourdough bread (cubed 1/2-inch) 10 cups (1 large loaf)
Unsalted butter 3/4 cup (1.5 sticks)
Yellow onion (finely diced) 2 cups (1 large)
Celery (finely diced) 1.5 cups (3 stalks)
Garlic (minced) 3 cloves
Fresh sage (chopped) 2 tablespoons
Dried thyme 1 teaspoon
Fresh flat-leaf parsley (chopped) 1/4 cup
Kosher salt 1.5 teaspoons
Freshly ground black pepper 1/2 teaspoon
Low-sodium chicken broth 2.5 cups
Large eggs (lightly beaten) 2

Steps

1

Toast the Bread Cubes

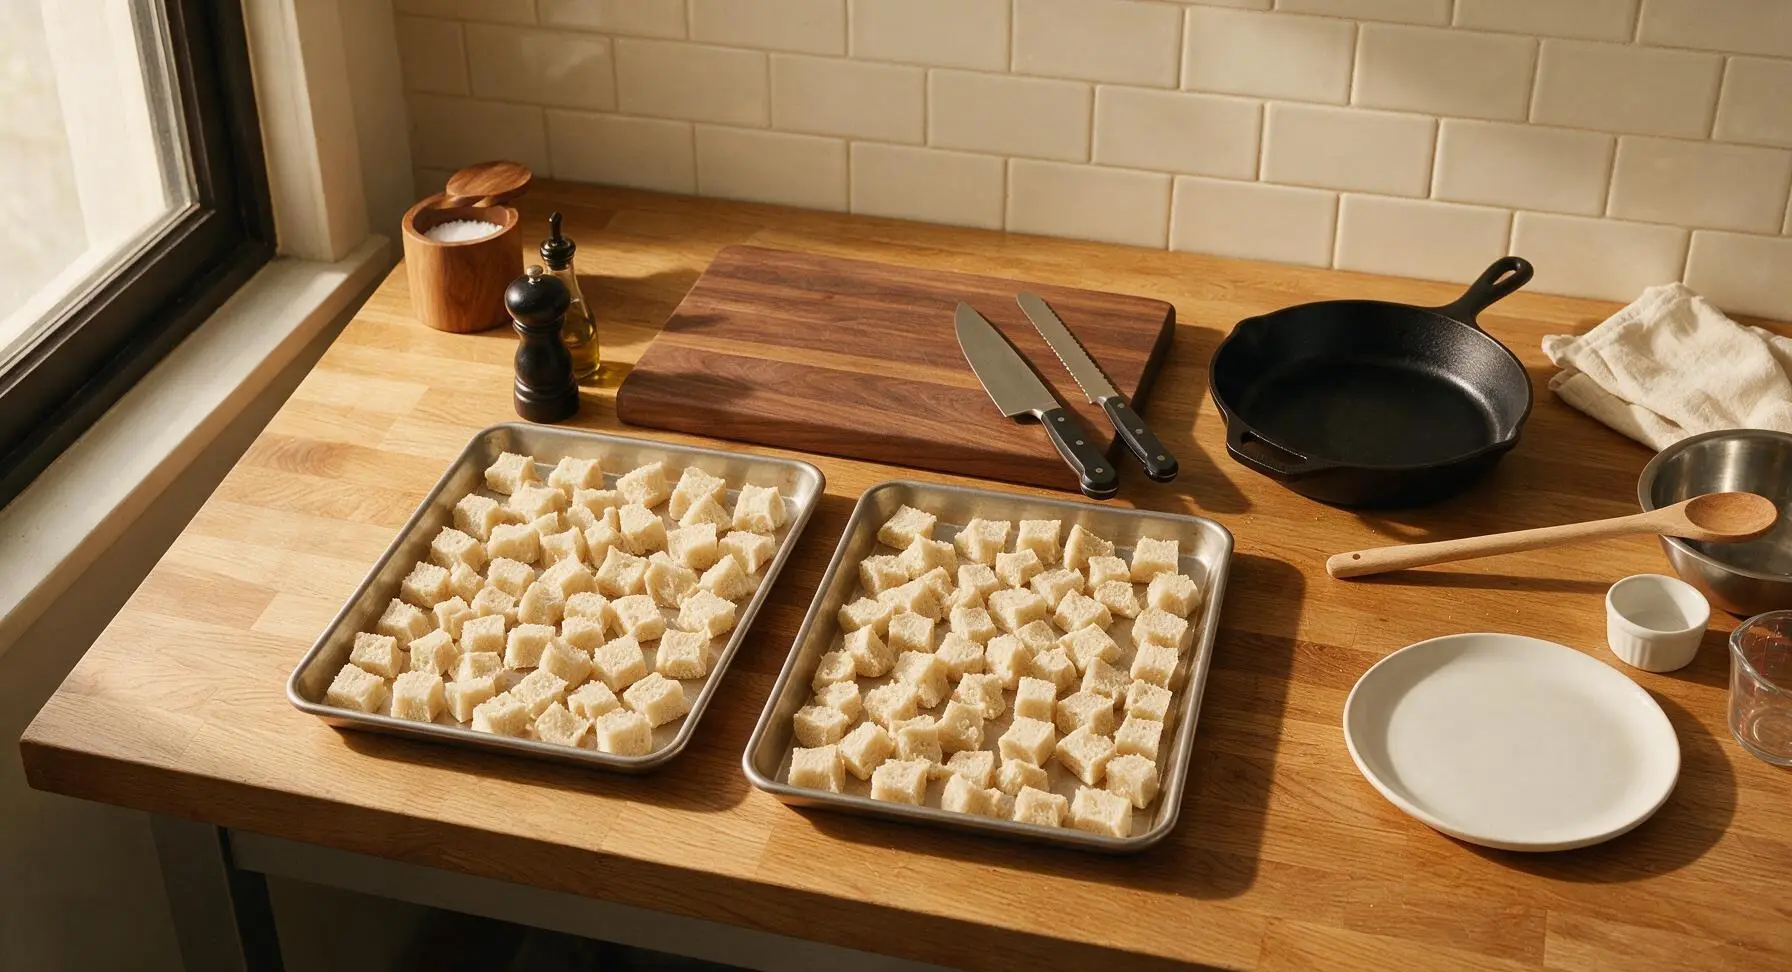
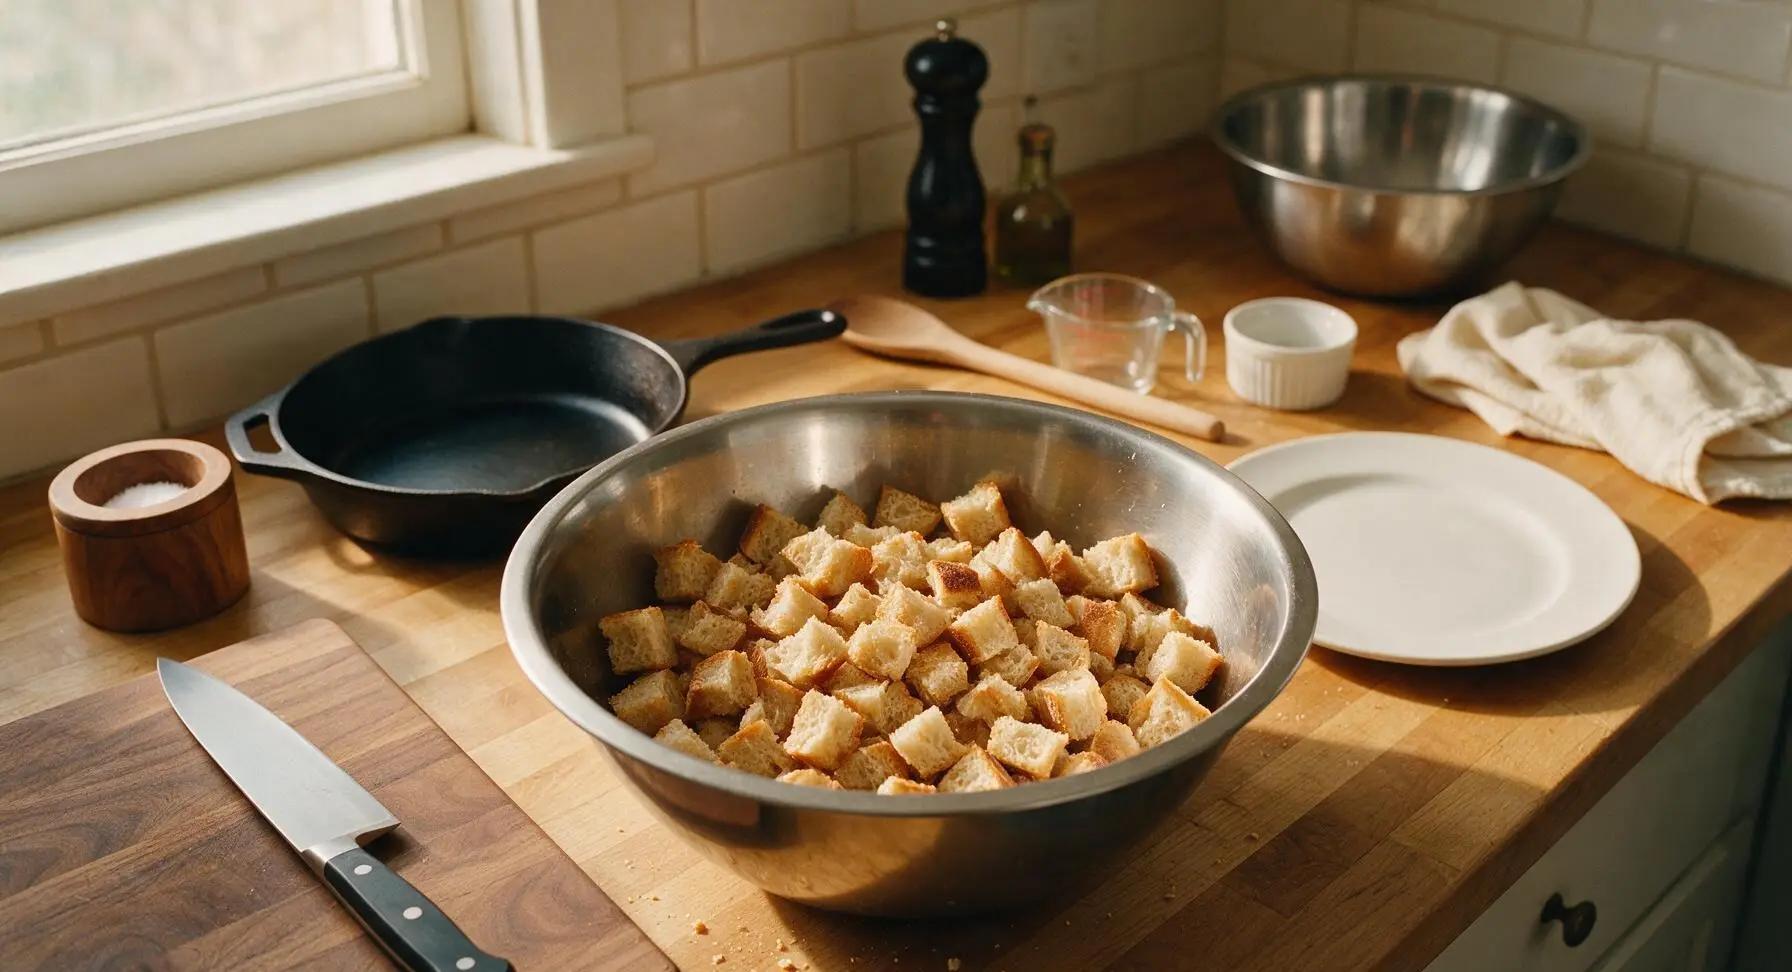
Preheat oven to 350°F (175°C). Spread 10 cups of 1/2-inch cubed day-old sourdough bread in a single even layer across the two stainless steel baking sheets. Bake for 8-10 minutes, until cubes are dry to the touch and lightly golden at the edges, with no soft, doughy centers remaining. Remove from oven and transfer cubes to the large mixing bowl to cool completely for 10 minutes on the wire rack.
Step 1
step1:Toast the Bread Cubes
Step 1
step1:Toast the Bread Cubes
2

Sauté Aromatic Vegetables

Melt 3/4 cup unsalted butter in the 10-inch stainless steel sauté pan over medium heat. Add 2 cups finely diced yellow onion and 1.5 cups finely diced celery, cooking for 7-8 minutes while stirring occasionally with the beech wood slotted spoon, until vegetables are soft and translucent with no raw crispness. Add 3 minced garlic cloves, 2 tablespoons chopped fresh sage, and 1 teaspoon dried thyme, cooking for 1 additional minute until fragrant, taking care not to burn the garlic. Remove pan from heat.
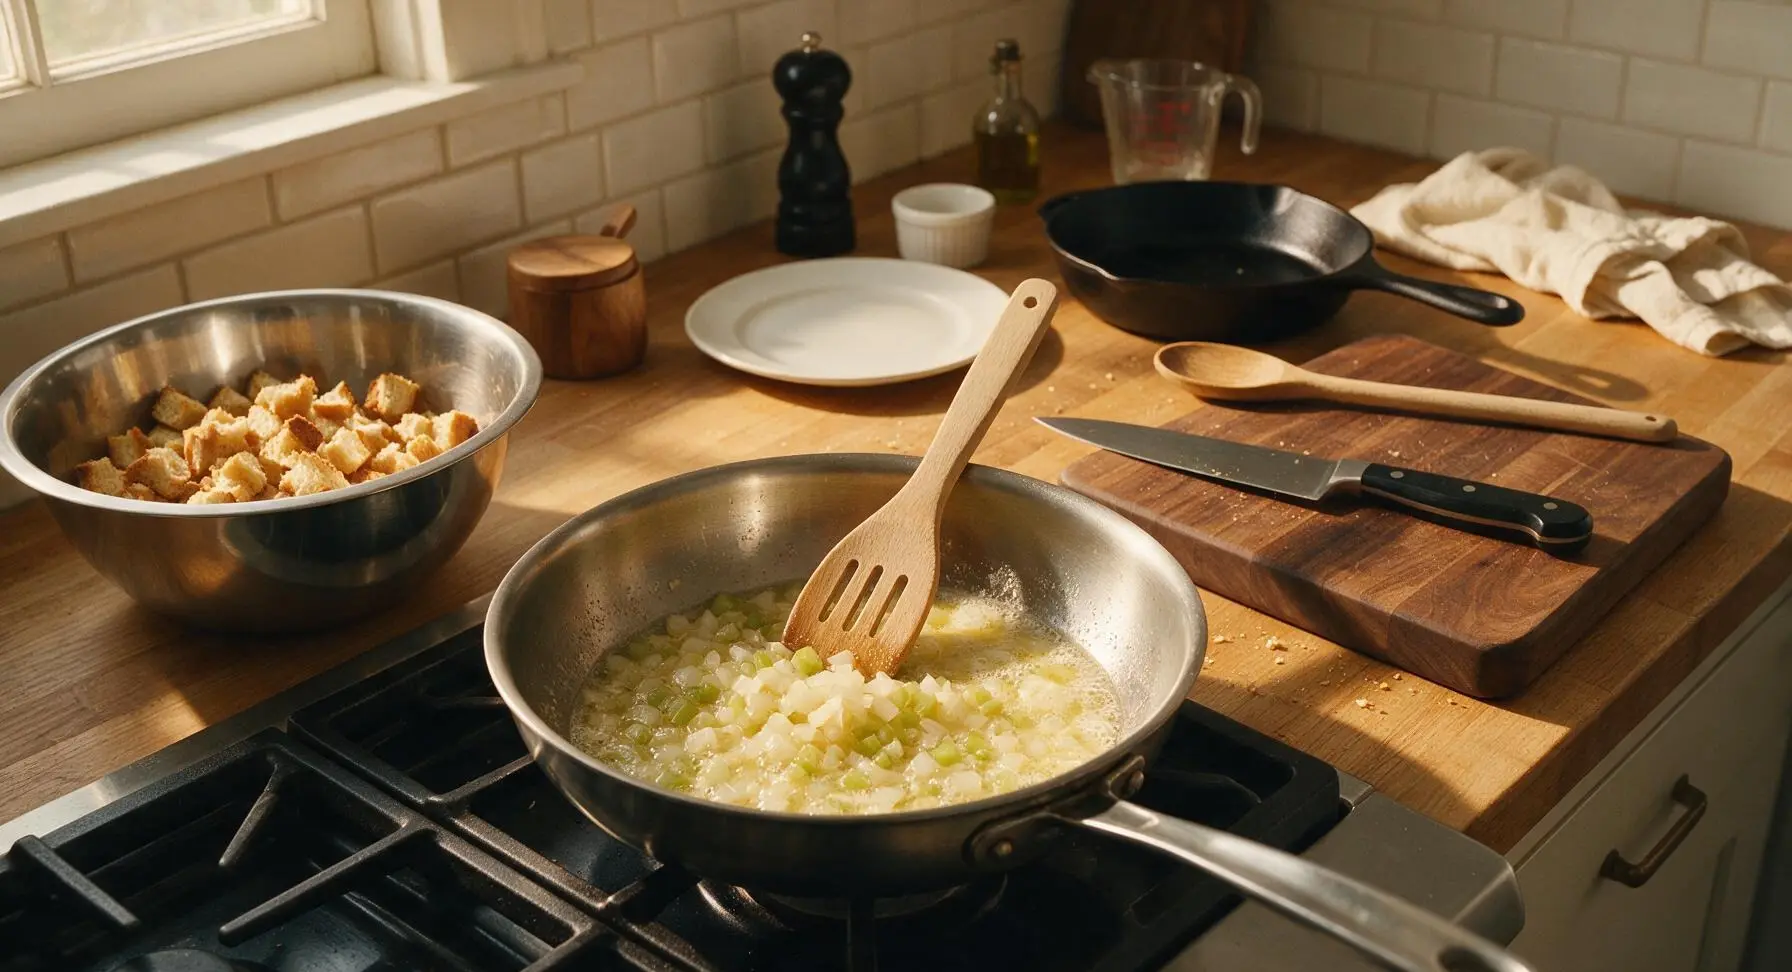
Step 2
step2:Sauté Aromatic Vegetables
3

Combine Bread and Veggies

Pour the entire contents of the sauté pan (melted butter, cooked onions, celery, garlic, and herbs) over the cooled toasted bread cubes in the large mixing bowl. Add 1/4 cup chopped fresh flat-leaf parsley, 1.5 teaspoons kosher salt, and 1/2 teaspoon freshly ground black pepper, tossing gently with the slotted spoon until all bread cubes are lightly coated in butter and evenly mixed with vegetables, taking care not to mash the cubes into a paste.
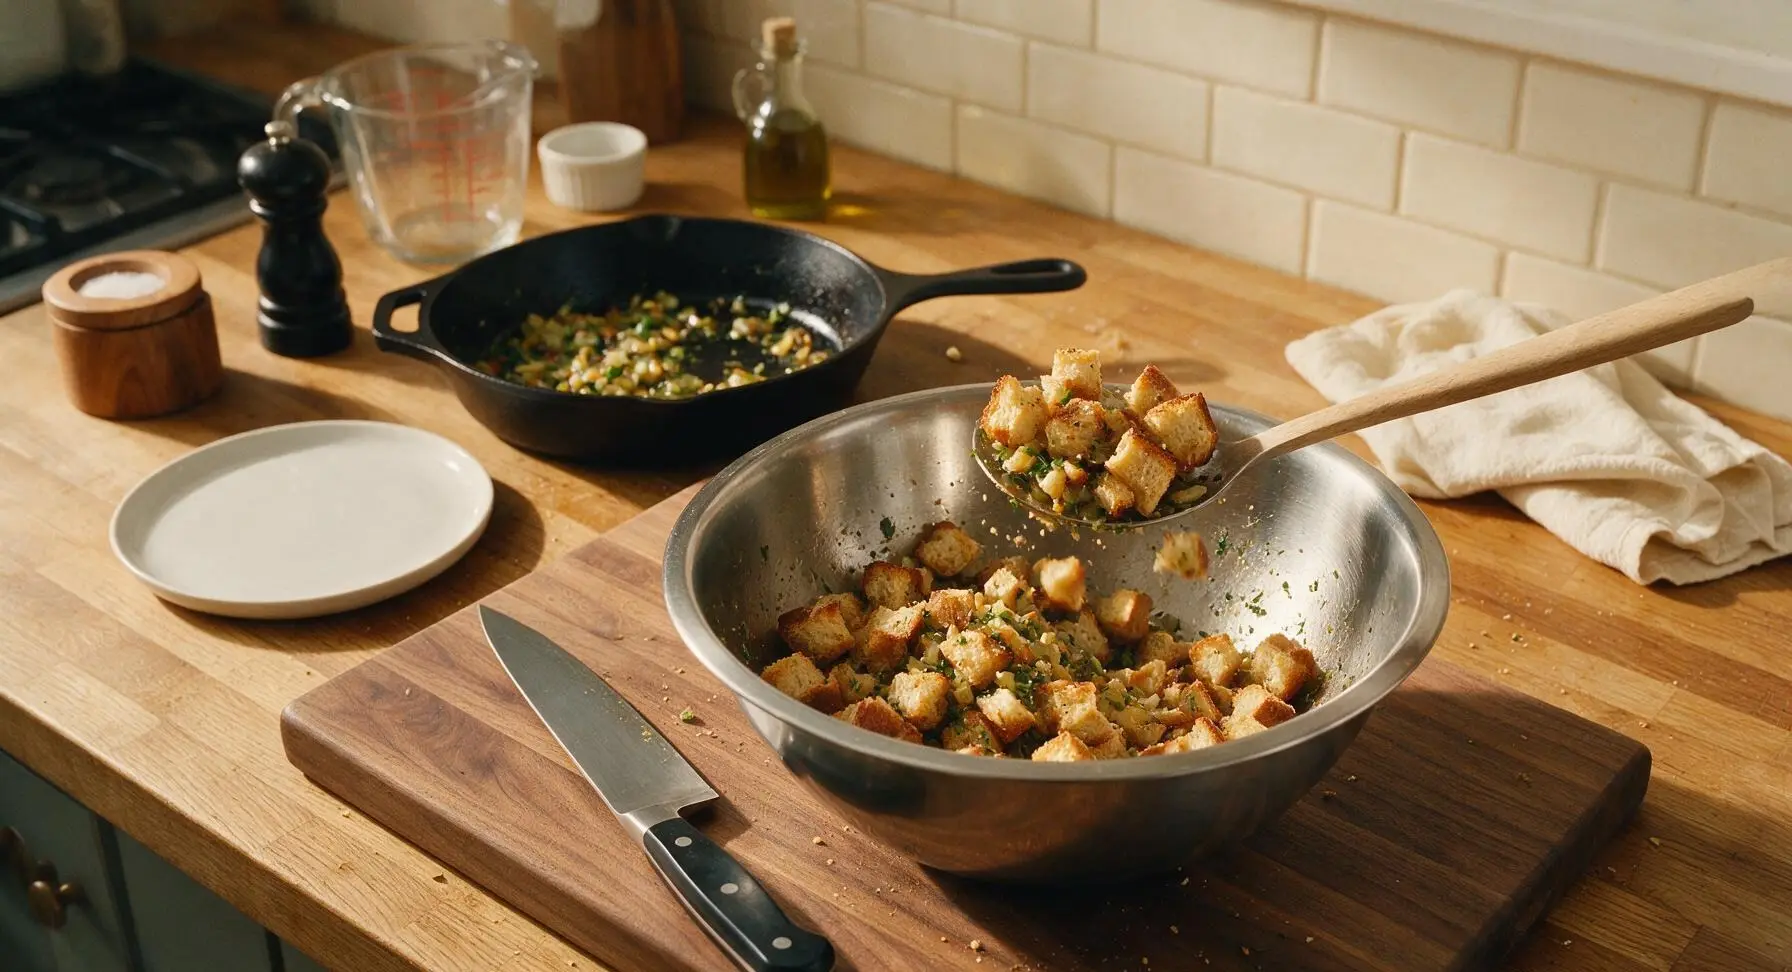
Step 3
step3:Combine Bread and Veggies
4

Mix Wet Custard Base

Crack 2 large eggs into the 2-cup clear glass measuring cup, whisking with the stainless steel whisk until completely smooth with no visible streaks of egg white. Slowly pour in 2.5 cups low-sodium chicken broth, whisking constantly to combine into a uniform, pale golden liquid with no lumps.
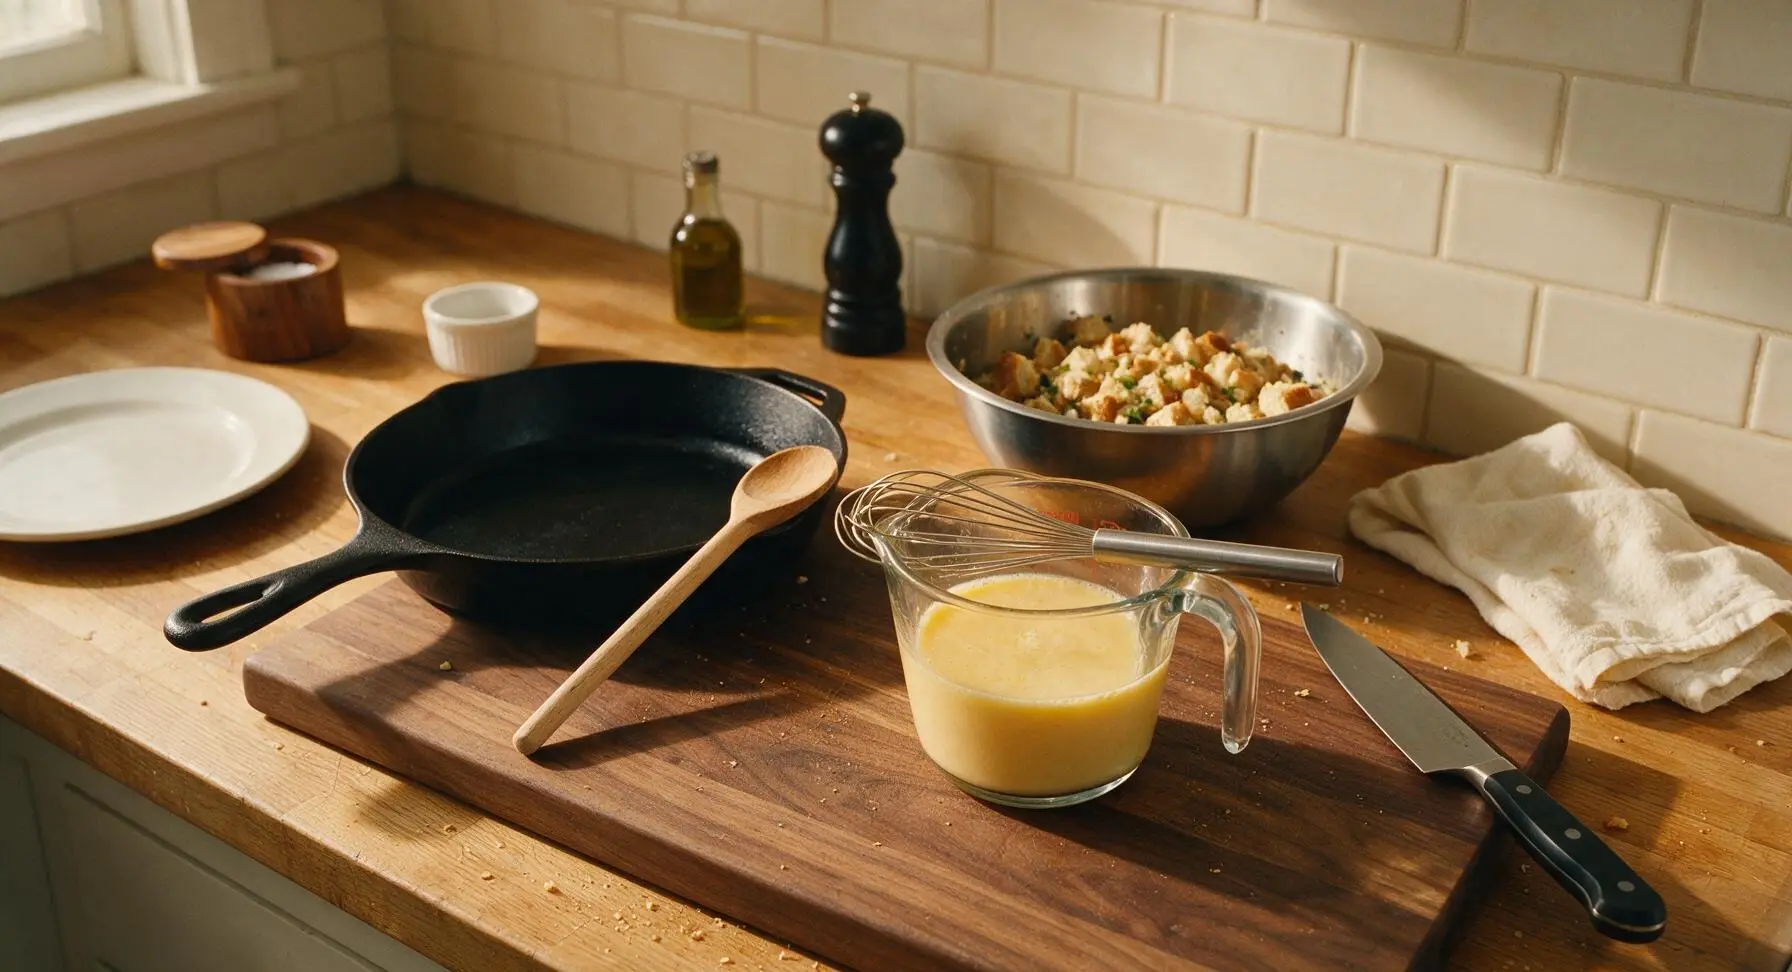
Step 4
step4:Mix Wet Custard Base
5

Combine and Rest Mixture

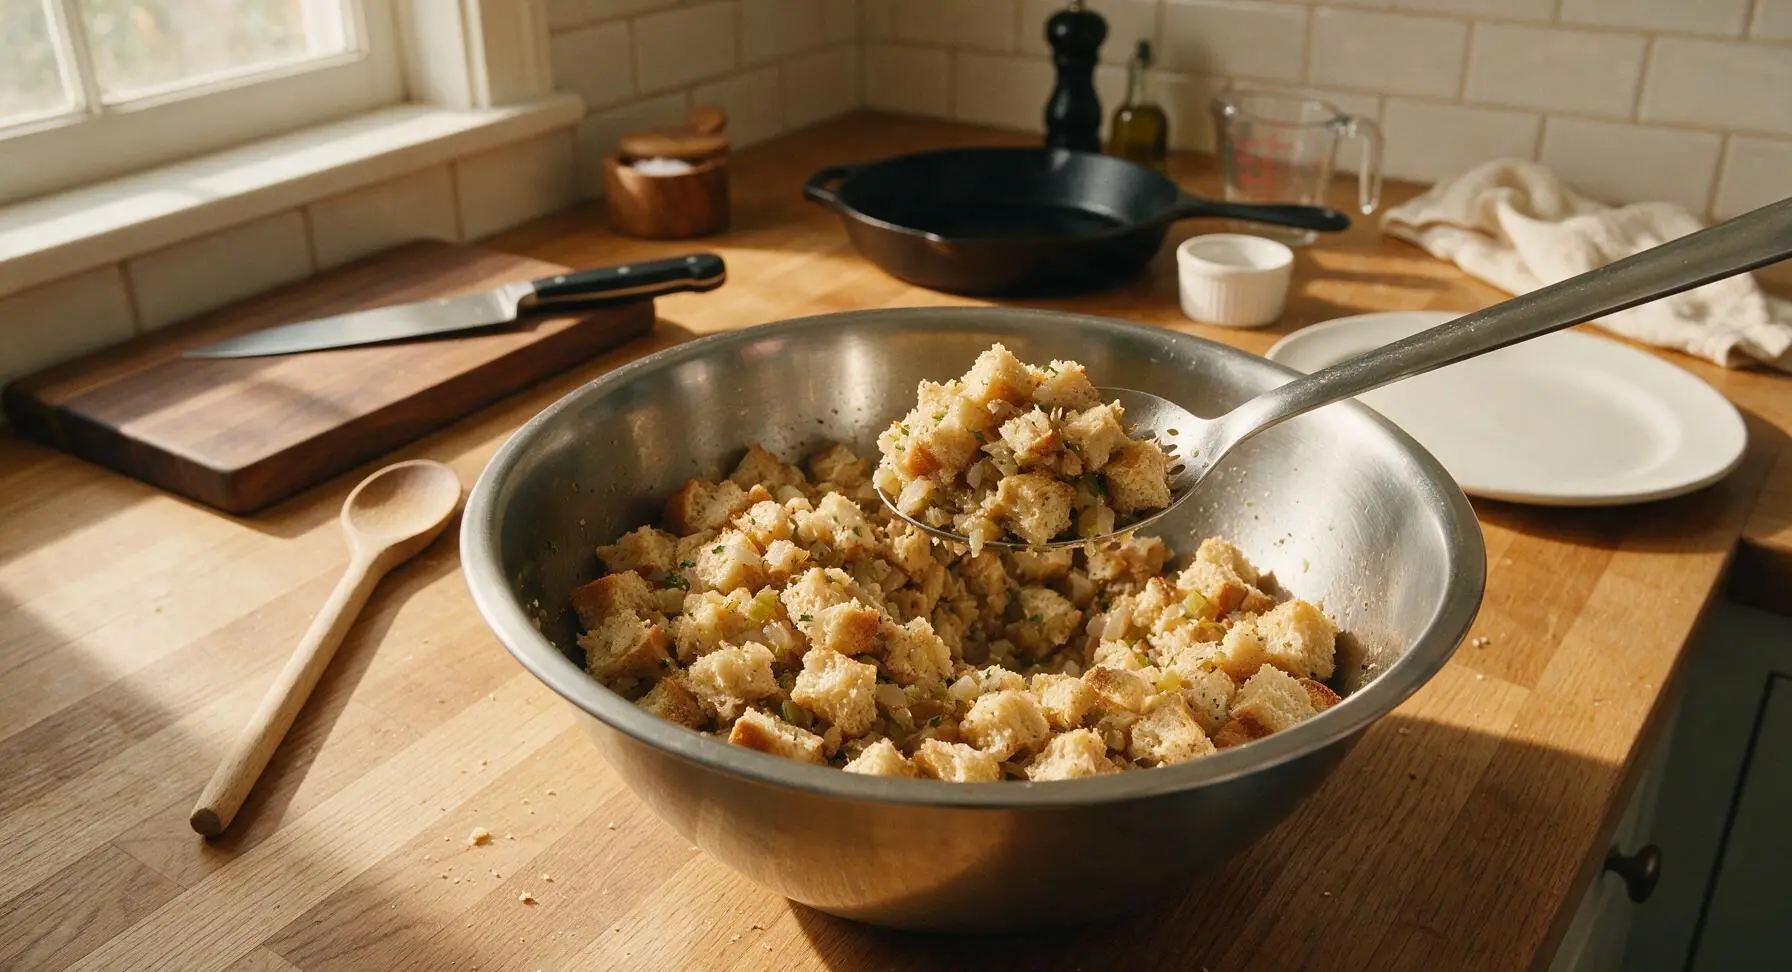
Slowly pour the egg and broth custard over the bread mixture in the large mixing bowl, tossing gently with the slotted spoon to ensure every cube is moistened but not soggy. Let the mixture rest for 10 minutes at room temperature to allow the bread to fully absorb the liquid, pressing down gently on the mixture with the back of the spoon once halfway through resting to encourage even absorption. The finished mixture should hold together softly when squeezed, with no excess liquid pooling at the bottom of the bowl.
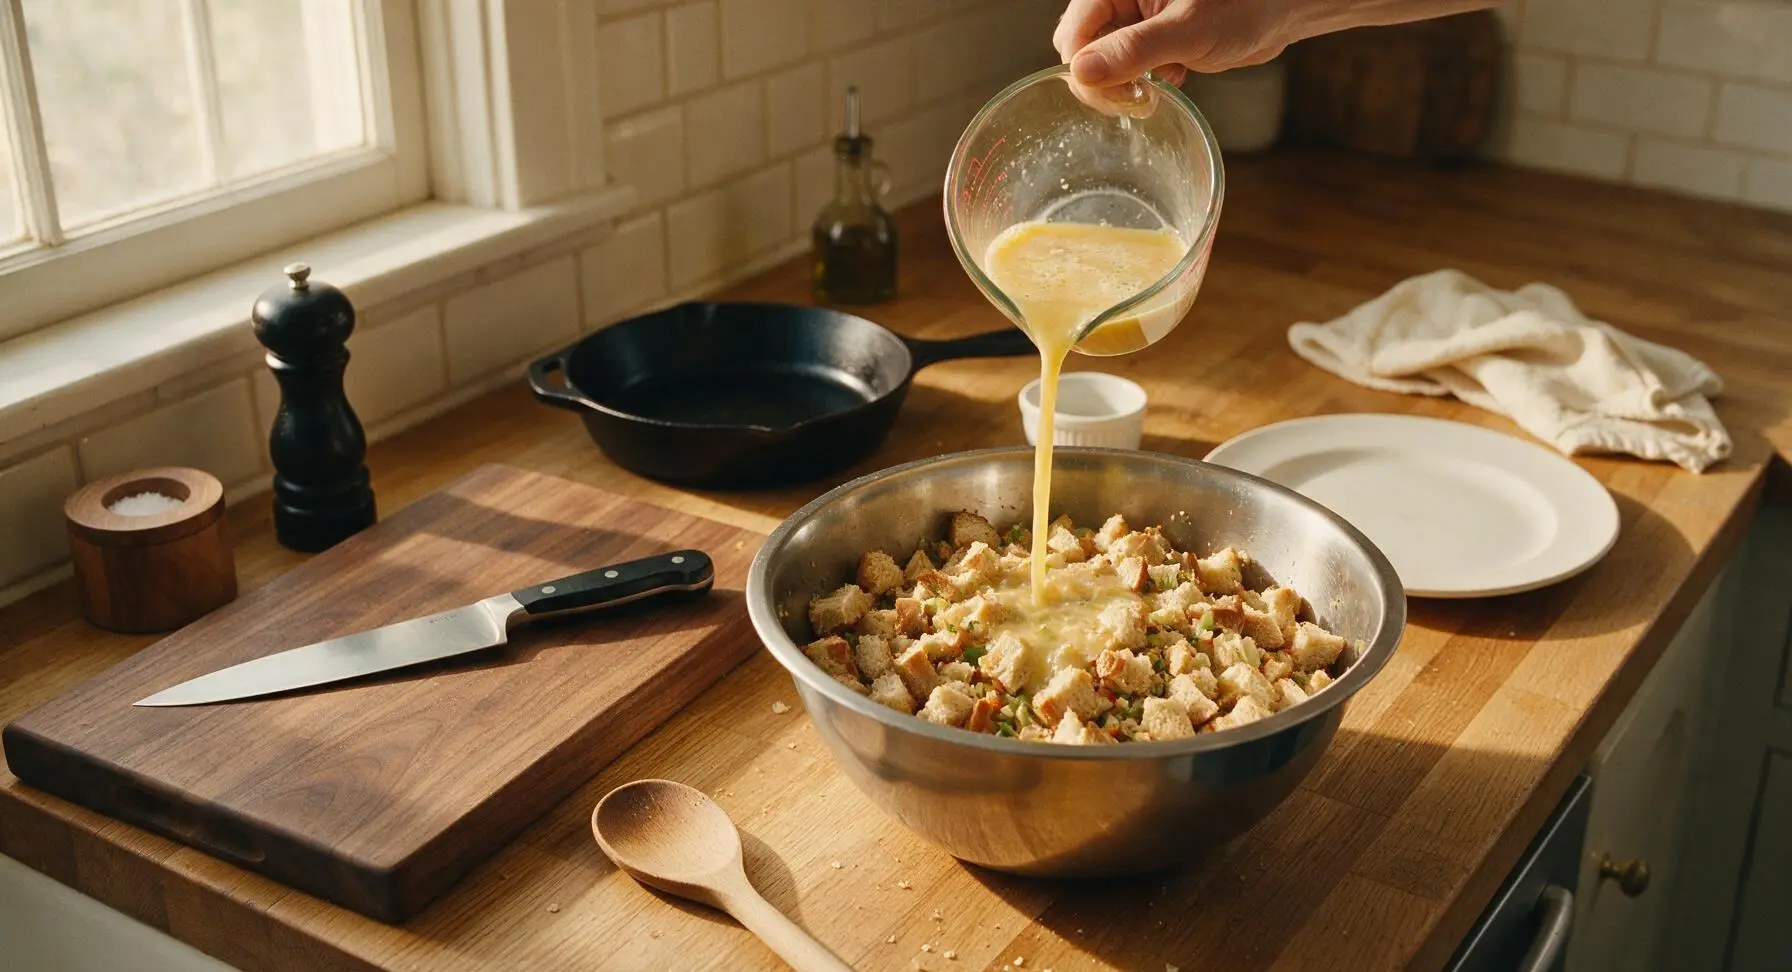
Step 5
step5:Combine and Rest Mixture
Step 5
step5:Combine and Rest Mixture
6

Transfer to Baking Dish

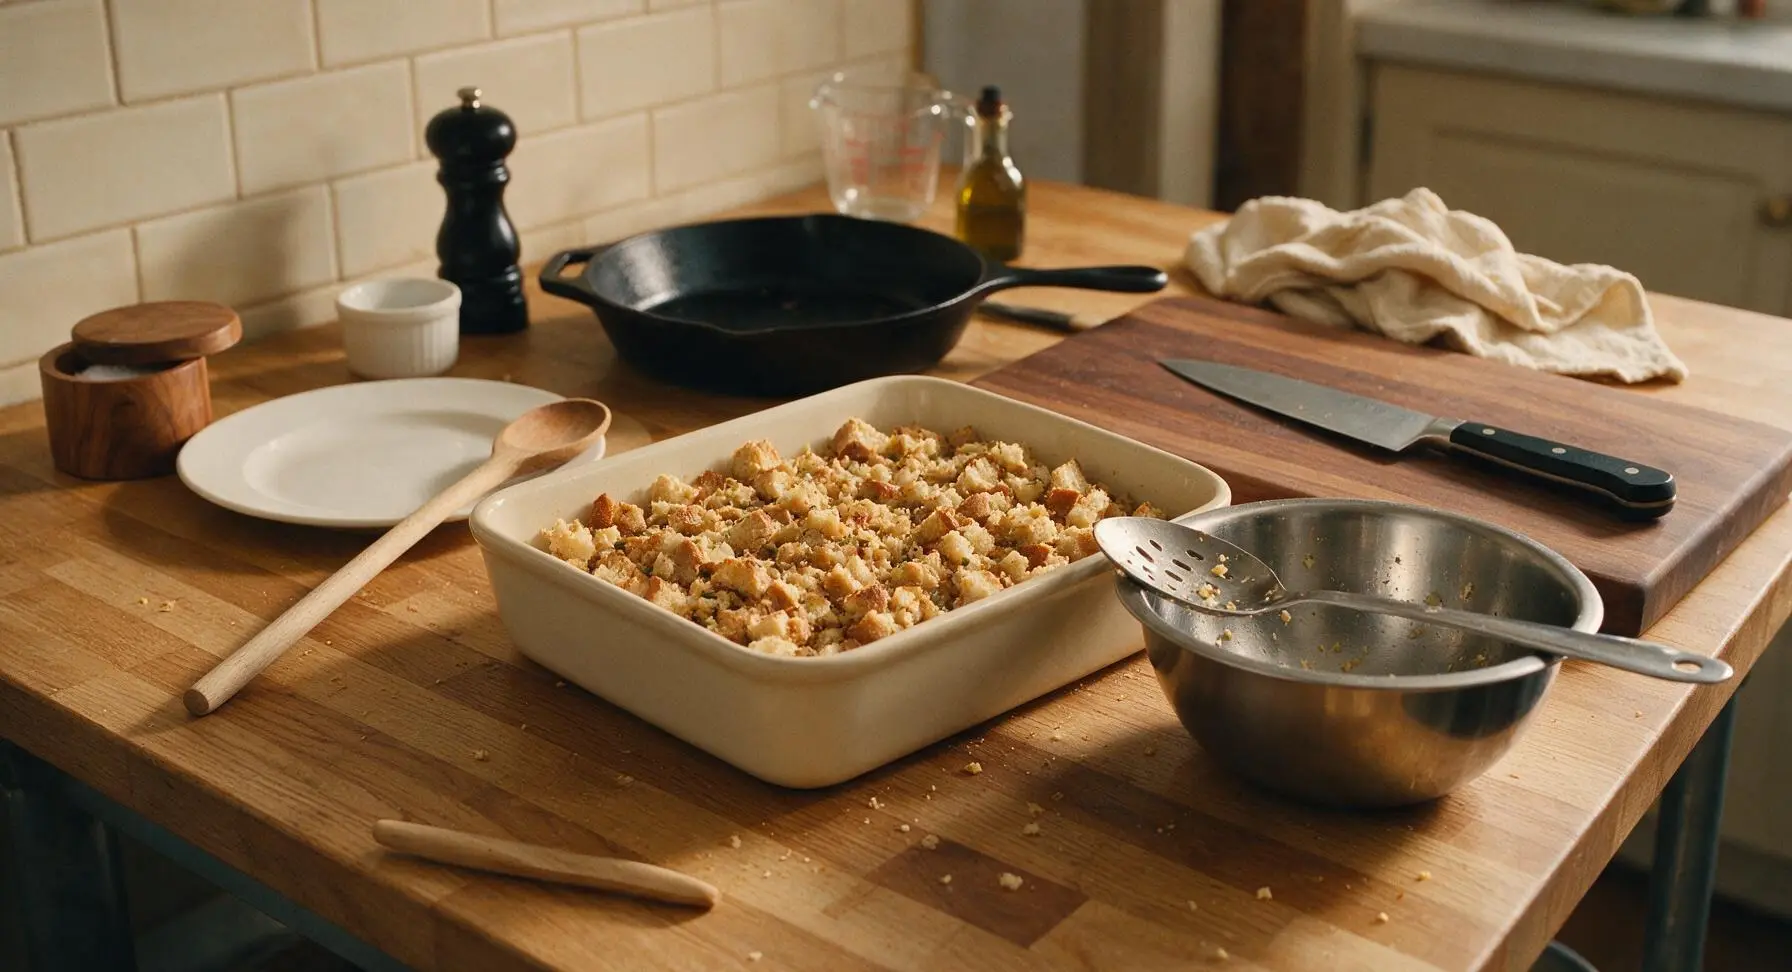
Lightly grease the interior of the 9x13 inch matte cream ceramic baking dish with a small pat of butter, then transfer the entire rested stuffing mixture into the dish, spreading it into an even, loosely packed layer with the back of the slotted spoon. Do not press the mixture down firmly, as this will create a dense, heavy final texture.
Step 6
step6:Transfer to Baking Dish
7

Bake to Golden Crisp

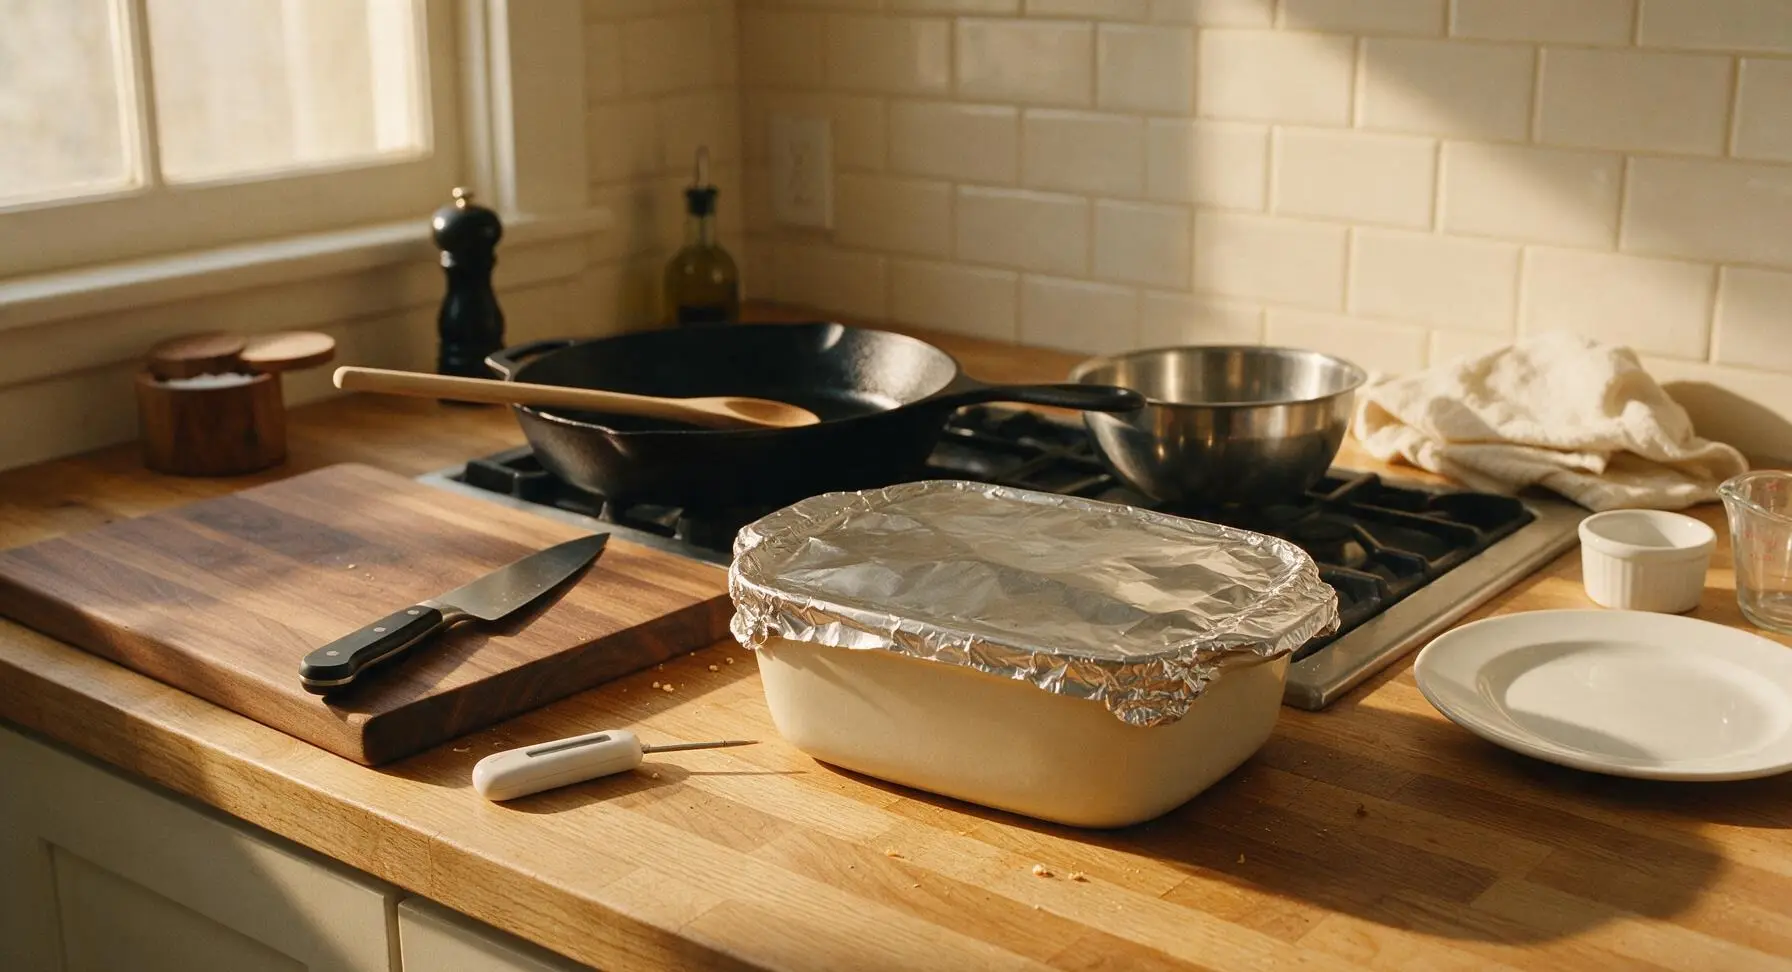
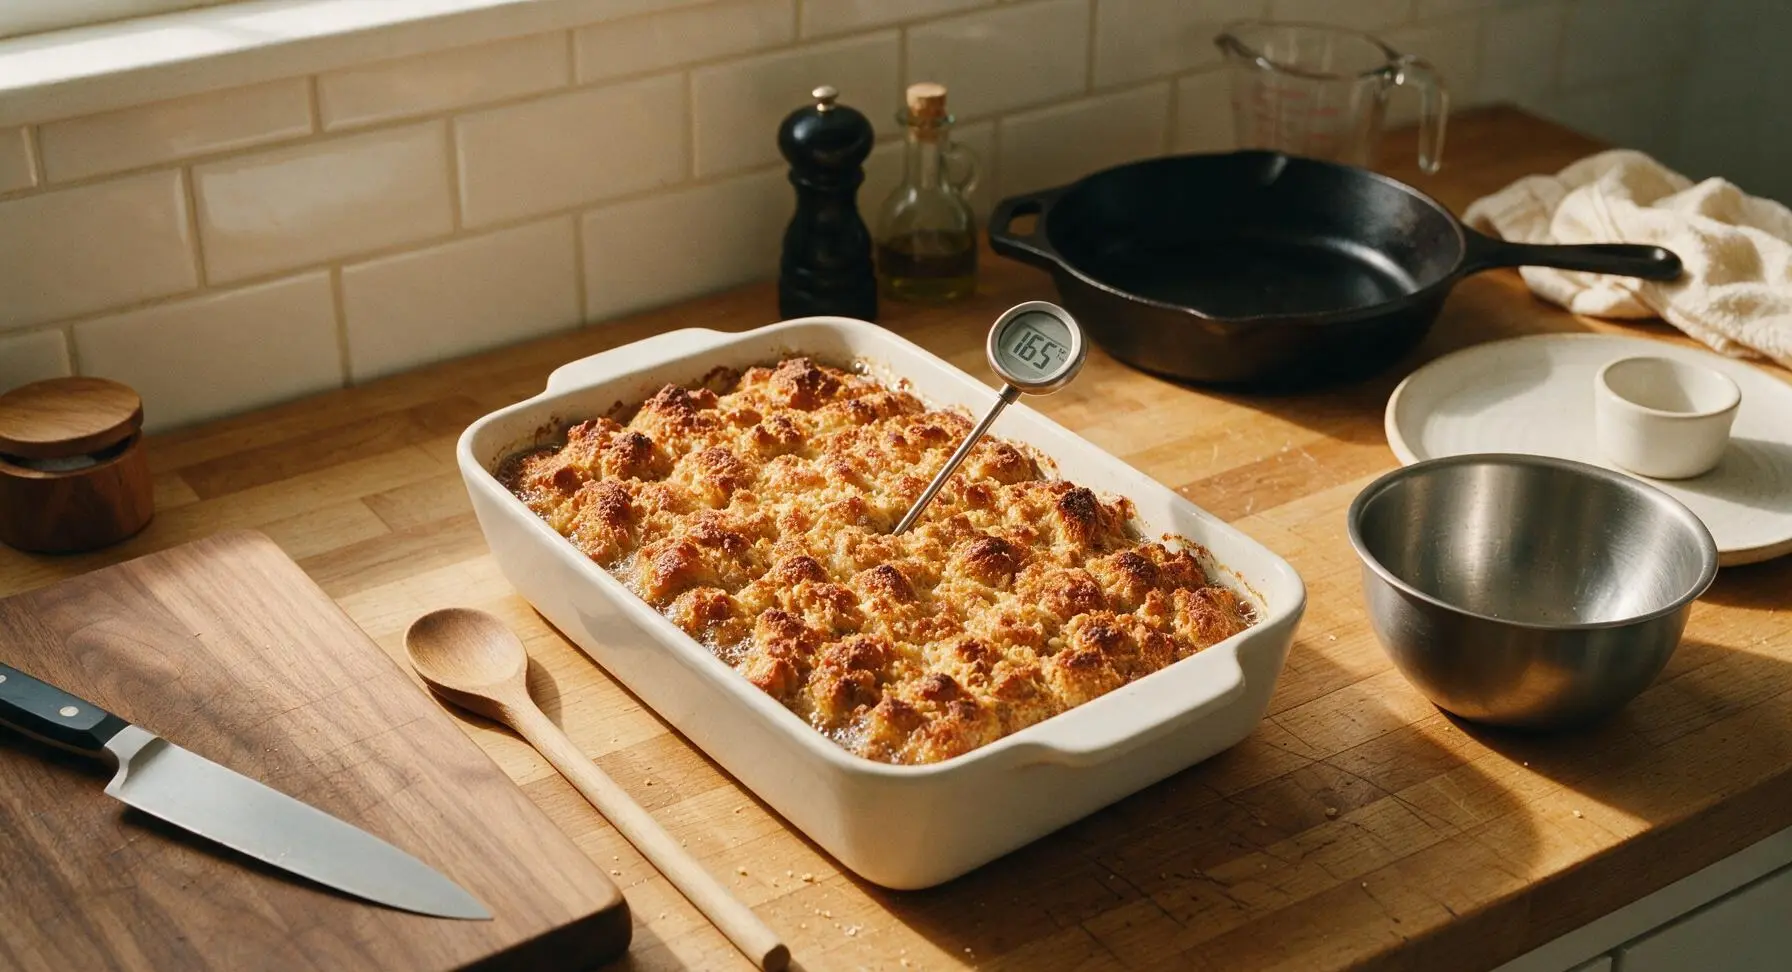
Cover the baking dish tightly with aluminum foil, then bake at 350°F (175°C) for 30 minutes. Remove the foil, then continue baking for an additional 15 minutes, until the top is deep golden brown and crisp to the touch, the edges bubble gently, and the internal temperature reads 165°F (74°C) on the instant-read thermometer. Remove from the oven and let rest 5 minutes before serving.
Step 7
step7:Bake to Golden Crisp
Step 7
step7:Bake to Golden Crisp

Tips

1.Use day-old (slightly stale) sourdough rather than fresh bread: Fresh bread retains excess moisture that leads to mushy stuffing. If you only have fresh bread, extend the toasting time by 3-4 minutes to fully dry out the cube centers before using.
2.Avoid pressing the stuffing mixture firmly into the baking dish: Tightly packed stuffing compresses as it bakes, creating a dense, gummy texture. Keep the mixture loosely mounded to allow air flow, which produces a fluffy interior and crisp, craggy golden top.
3.Let the bread and custard mixture rest the full 10 minutes before baking: This rest time lets every bread cube absorb liquid evenly, eliminating unpleasantly dry crunchy bits in the center and excess pooling liquid at the bottom of the dish.


✨ You May Also Like

Side Dishes
🍜 India

Velvety, aromatic all-purpose curry sauce perfect for tossing with roasted veggies, grilled protein, or rice for fast, cozy, flavorful meals.

⏱️ 25 minuteSide Dishes ★ 4.8
Side Dishes
🍜 Spain

Tender, starchy boiled yuca tossed in bright, garlicky citrus mojo sauce—an iconic, zesty side that pairs beautifully with roasted pork, grilled meats, and rice and beans.

⏱️ 40 minuteSide Dishes ★ 5
Side Dishes
🍜 United States

Tender, paper-thin potato flatbread, a beloved Norwegian-American Minnesota Christmas staple, griddled until softly spotted and served warm with butter.

⏱️ 1 hour 30Side Dishes ★ 4.6
Side Dishes
🍜 United States

Rich, deeply savory cured salt pork, a long-lasting kitchen staple perfect for frying crispy as a side or adding umami to stews, beans, and chowders.

⏱️ 7 days (2Side Dishes ★ 4.9
Side Dishes
🍜 United States

Crispy, tangy classic Southern fried green tomatoes with a crunchy cornmeal crust, served hot for a nostalgic, comforting summery bite.

⏱️ 25 minuteSide Dishes ★ 4.9
Side Dishes
🍜 United States

Moist, golden-crusted savory muffins with sweet corn, zesty jalapeño, and melted cheddar, perfect for pairing with smoky summer grilled fare.

⏱️ 30 minuteSide Dishes ★ 4.9

Classic Bread Stuffing:Frequently Asked Questions

1.Why do I need to use day-old sourdough instead of fresh bread for this stuffing? ▾
Fresh bread has too much residual moisture, which turns to mushy, soggy stuffing once mixed with butter and cooked veggies. Day-old sourdough has a sturdy, slightly dry crumb that absorbs buttery, herby flavors without falling apart, delivering that perfect fluffy center and crisp edges. If you only have fresh bread, cube it and toast at 300°F for 10–12 minutes to dry it out first.
2.Can I cut the bread cubes larger or smaller than the recommended 1/2-inch size? ▾
Stick close to 1/2-inch cubes for the most consistent, enjoyable texture. Larger cubes won’t absorb butter and seasoning evenly, leaving dry, bland bites at their center. Smaller cubes break down too easily during mixing and baking, turning the final dish mushy instead of light, fluffy, and punctuated with those signature crisp golden edges.
3.Do I have to use sourdough, or can I swap in another type of bread? ▾
Sourdough adds a subtle, pleasant tang that cuts through rich butter and savory vegetable notes, but you can absolutely swap it if needed. Great alternatives include day-old white sandwich bread, slightly sweet brioche, or crumbled cornbread—just make sure whatever bread you pick is slightly dried out so it doesn’t turn soggy as it bakes.
4.How do I get those perfectly crisp golden edges everyone loves on classic stuffing? ▾
For ideal crisp edges, don’t pack your stuffing mixture tightly into the baking dish; spread it in an even, loose layer, and dot the top with a few extra pats of unsalted butter before baking. Bake uncovered at 375°F for the last 15 minutes of cook time, rather than covering it the whole time, to let the top and perimeter brown to that perfect golden crunch.
5.Can I make this stuffing ahead of time for Thanksgiving to cut down on day-of work? ▾
Absolutely! You can assemble the full, unbaked stuffing up to 2 days ahead, stored tightly covered in the refrigerator. When you’re ready to bake, let it sit on the counter for 20 minutes to take the chill off, then bake as directed. Plan to add 5–10 minutes of extra cook time if the mixture is still cold going into the oven.
6.My bread isn’t day-old—what’s the fastest way to dry it out so I can make this today? ▾
No last-minute panic needed! Cut your fresh sourdough into uniform 1/2-inch cubes, spread them in a single layer on a rimmed baking sheet, and toast in a 300°F oven for 10 to 12 minutes, tossing halfway through. You’ll know they’re ready when the cubes feel dry and slightly firm on the outside, with no soft, squishy fresh-bread centers left.
7.How finely do I need to dice the onion and celery for this recipe? ▾
Aim for a 1/4-inch fine dice for both yellow onion and celery, so they cook evenly and distribute throughout every bite without being overly chunky. Pieces that are too large leave harsh, crunchy raw veggie bites, while pieces minced too fine break down completely and disappear, robbing the stuffing of its subtle, savory vegetable texture.
8.Do I cook the onion, celery, and garlic before mixing them into the bread cubes? ▾
Yes, always sauté your aromatics first for the best flavor. Melt unsalted butter in a skillet over medium heat, then cook diced onion and celery for 7–8 minutes until soft and translucent, adding minced garlic for the last 60 seconds so it doesn’t burn. Cooking first mellows sharp raw flavors and infuses the butter with warm, savory depth.
9.How do I keep the center of my stuffing light and fluffy instead of dense and gummy? ▾
First, don’t overmix your stuffing once you add the bread cubes—toss gently just to coat everything in butter and aromatics, so you don’t smash the bread into a paste. Second, add only enough broth (if using) to moisten the bread, not soak it, and avoid packing the mixture tightly into the baking dish before it goes in the oven.
10.Can I bake this stuffing inside the turkey instead of in a separate baking dish? ▾
You can, but you need to follow critical food safety rules. Stuff the turkey cavity loosely right before roasting, never ahead of time, and confirm the center of the stuffing reaches a safe 165°F internal temperature before serving. Note that in-bird stuffing will have softer, less crisp edges than stuffing baked in a standalone dish.
11.What herbs work best for this herb-forward classic stuffing? ▾
Stick to warm, traditional holiday herbs for that nostalgic, familiar flavor: fresh chopped sage, thyme, rosemary, and a small pinch of marjoram are ideal. Use about 2 tablespoons total of fresh herbs (or 2 teaspoons dried, if that’s what you have on hand) to complement the buttery bread and veggies without overpowering their simple, savory flavor.
12.How much butter do I need, and will using salted butter throw the recipe off? ▾
For a 9x13-inch pan of stuffing, you’ll need ¾ to 1 cup of unsalted butter to sauté aromatics and dot the top for crisp edges. If you only have salted butter, it works perfectly—just hold off on adding extra salt to the cooking veggies, and taste the mixture before baking to adjust seasoning so the final dish doesn’t end up too salty.
13.Why does my garlic always burn when I make stuffing, and how do I fix that? ▾
Minced garlic cooks extremely fast, going from perfectly fragrant to bitter and burnt in 30 to 60 seconds over high heat. To avoid this, add garlic to the skillet only after onion and celery are fully soft, turn the heat down to medium-low, and stir constantly for 60 seconds until you smell that warm garlic aroma, then pull the pan off heat immediately.
14.Can I add mix-ins like sausage, dried cranberries, or nuts to this classic recipe? ▾
Of course! This simple classic base is endlessly customizable. For extra savoriness, stir in 1 cup of cooked, crumbled breakfast sausage; for bright, sweet pops, add ½ cup dried cranberries; for crunch, toss in ½ cup toasted chopped pecans or walnuts. Just keep total mix-ins under 2 cups so you don’t lose that iconic buttery, herby bread flavor.
15.How long do I bake this stuffing, and how do I know it’s done? ▾
Bake covered with foil for 30 minutes at 375°F, then uncover and bake 15 more minutes to crisp up the edges. It’s fully done when the top is deep golden brown, the edges are bubbling, and the center is set but soft and fluffy. A knife inserted into the middle should come out hot to the touch, with no soggy, uncooked bread crumbs stuck to it.
16.What’s the best way to reheat leftover stuffing so it doesn’t dry out? ▾
To reheat leftovers without tough, dry bites, spread the stuffing in a baking dish, sprinkle 1 to 2 tablespoons of chicken or vegetable broth over the top to add moisture, and dot with a tiny bit of extra butter. Cover tightly with foil, bake at 350°F for 15–20 minutes until heated through, then uncover for the last 5 minutes to crisp the top back up.

Comments (18)

2 days ago

OMG this is exactly the classic bread stuffing my grandma used to make! I was stressing so hard about nailing Thanksgiving sides this year since it’s my first time hosting, and this was so easy — 45 minutes cook time, no fancy ingredients? Total game changer. My kids went back for seconds before I even got a scoop on my own plate. 10/10 will be a permanent holiday staple from now on.

1 day ago

This makes our day, Sarah! Nothing hits quite like that nostalgic, grandma-style stuffing, and we love that it took the pressure off your first hosting gig. Hope the rest of your Thanksgiving spread was just as big of a hit!

3 days ago

Made this for our neighborhood potluck last weekend and people were begging for the recipe! I added a little extra sage because I love that earthy flavor, and it turned out chef’s kiss. Way better than the boxed stuff I’ve been buying for years, can’t believe how simple it is.

2 days ago

Wait I did the extra sage trick too! Total pro move, I also tossed in a handful of dried cranberries for a little sweet pop and people lost their minds over it.

5 days ago

Total newbie cook here — my husband said this was better than his mom’s stuffing??? I was terrified I’d burn it or make it mushy, but the instructions were so straightforward. Wait, quick question: can I prep this the night before and bake it the next day for Christmas dinner?

4 days ago

Great question, Nora! You absolutely can prep this the night before — just assemble it, cover it tightly, and keep it in the fridge, then add 10-15 minutes to the bake time since it’ll be cold going in the oven. So stoked it got the husband approval, that’s the best win!

3 days ago

I do the night before prep every single year! It actually lets the flavors meld even better, in my opinion. No sogginess issues at all as long as you don’t douse it in too much broth before baking.

1 week ago

Meal prepped a batch of this on Sunday to pair with roasted chicken through the week, and it held up perfectly! Not too heavy, super flavorful, even my picky 7 year old ate every bite. SO good, I’ll be making this on regular rotation not just holidays.

yesterday

Took this to my family’s early Thanksgiving dinner last night and my uncle who swears he “hates all stuffing that doesn’t come from a box” had three servings. I used sourdough bread instead of plain white like the recipe suggested and it added such a nice tang. Obsessed.

5 hours ago

Sourdough swap is such a good call! That subtle tang cuts through the savory flavors so nicely, we’re definitely going to try that next time we make a batch. Nothing better than winning over the boxed-stuffing purists, that’s a major win!

1 week ago

Has anyone tried making this with gluten free bread? I have celiac and have been searching for a classic stuffing recipe that doesn’t taste weird or get gummy. This looks perfect but I don’t want to waste ingredients if it won’t turn out right!

6 days ago

I made this last week with gluten free sourdough cubes that I toasted first! Just make sure you really dry out the bread cubes before mixing, and it comes out exactly like the regular version. No gummy texture at all, my whole family ate it and didn’t even notice it was GF.

5 days ago

Great tip from Jen! We’ve tested this with a few GF bread blends, and toasting the cubes well is the secret to avoiding that soggy, gummy texture. You can also add an extra pinch of poultry seasoning to amp up the flavor if your GF bread is more plain!

30 minutes ago

Wait, this only takes 45 minutes total? I thought stuffing had to cook for hours! I’m making Friendsgiving for my roommates next week and I’m on a super tight class schedule, so this is perfect. Is it okay to use the pre-cut bread cubes from the grocery store bakery?

15 minutes ago

I used the pre-cut bakery cubes last time I made this and it saved me so much time! Just make sure they’re the dry, unseasoned ones so the flavor matches the recipe. The seasoned ones are too salty in my experience.

10 minutes ago

Liz is exactly right! Pre-cut unseasoned dry bread cubes work perfectly here, they’re our go-to shortcut when we’re short on time. Have the best Friendsgiving with your roommates!

2 weeks ago

Made this for my wife’s birthday dinner when we had the kids over a couple weeks back, paired with a roast turkey and mashed potatoes, and she said it was the best stuffing I’ve ever made in 40 years of marriage. The recipe was simple enough that I didn’t mess up the ratios, which is saying something for me. Fantastic recipe.

1 week ago

Bob, this is the sweetest review we’ve gotten all week! 40 years of marriage and a perfect stuffing win? That’s what easy, classic recipes are all about. Happy belated birthday to your wife!

2 hours ago

I love that this is easy enough to throw together on a weeknight! I skipped the celery because I didn’t have any on hand and added a little extra onion and thyme, and it still came out amazing. Will be keeping this recipe saved for sure.

5 minutes ago

I made this today and it was a little mushier than I expected? Did I do something wrong? Flavor was 10/10 but the texture was off, I really want to nail it for my family dinner next week.

2 minutes ago

I had the same issue my first time! I realized I added too much broth, and I didn’t toast my bread cubes enough before mixing. Let the cubes sit out for a few hours to get stale, or toast them in the oven for 10 minutes, and cut the broth by 1/4 cup, it’ll be perfect next time.

1 minute ago

Joe’s tips are spot on, Kai! Sogginess almost always comes from bread that’s too fresh or too much broth. If you like a firmer, crisp-topped stuffing, you can also bake it uncovered for the last 10 minutes to get that crispy top everyone fights over. Good luck next week!

3 days ago

Game. Changer. I’ve been making my mom’s stuffing recipe for years and it’s always a production, but this one is half the work and just as tasty. Brought it to my office potluck today and the entire pan was gone in 10 minutes. Zero leftovers, that’s how you know it’s good.

2 days ago

Wait were you the one who brought the stuffing to the downtown office potluck??? I had two servings and was asking everyone who made it! That was insane, I’m so glad I found the recipe now.

just now

Added a diced jalapeño and a handful of crumbled chorizo to this for a little Texas twist, and it was unreal. The base recipe is so solid it works with whatever add-ins you want to throw at it. 10/10, super versatile.

1 week ago

My teen daughter is super picky and usually only eats boxed mac and cheese for dinner, but she asked for seconds of this stuffing when I made it with baked chicken the other night. I almost fell over. Easy, cheap ingredients, minimal cleanup, what more could you ask for?

6 days ago

That’s the biggest win we can ask for! Picky teen approval is the highest rating a recipe can get, honestly. So glad this worked out for you and your daughter!

2 weeks ago

Thinking about adding cooked, crumbled bacon to this for our Thanksgiving spread. Has anyone tried that? I don’t want to overpower the classic flavors but bacon makes everything better, right?

12 days ago

I added bacon last year and it was incredible! Just make sure you drain it really well so it doesn’t make the stuffing greasy, and cut back a little on the butter since the bacon adds fat. My family still talks about it.

10 days ago

Bacon is such a delicious add-in, and Kelly’s tip about draining it well is key! We also love adding a handful of toasted pecans with the bacon for a little extra crunch if you’re feeling fancy. It doesn’t take away from the classic flavor at all, just adds a nice salty, smoky kick.

2 days ago

I swapped the butter for vegan butter and used vegetable broth instead of chicken, and it turned out perfectly! All my non-vegan family members said they couldn’t tell the difference. So happy to have a classic stuffing I can eat at holiday dinners now.

5 days ago

I’ve been making stuffing for over 50 years and I decided to try this recipe when my granddaughter sent it to me. I’ll admit I was skeptical of an “easy” recipe, but it was absolutely delicious. I added a little extra parsley like I always do, but the ratios were perfect. Great job on a true classic.

4 days ago

Grandma Joan, that is the highest compliment we could ever receive! We’re so honored this recipe measured up to your decades of stuffing expertise. Adding extra parsley is always a good call in our book.

yesterday

Made this to go with pork chops last night and it was chef’s kiss. The cook time is totally accurate too — I walked in the door at 6, had dinner on the table by 6:45. No fancy steps, no weird ingredients, just good, cozy comfort food. Will be making this all fall and winter.

1 week ago

Wait, how well do leftovers of this keep? I’m cooking for just me and my partner this year so I know we’ll have a ton left over, and I don’t want it to go to waste. Can you freeze it?

6 days ago

I freeze leftover stuffing all the time! Let it cool completely, portion it into freezer bags, squeeze out all the air, and it stays good for up to 3 months. Just reheat it in the oven with a little extra broth to keep it from drying out, it tastes just as good as fresh.

5 days ago

Fran’s freezing method works perfectly! Leftovers will keep in the fridge for 3-4 days if you store them in an airtight container, too. We love using leftover stuffing to make stuffing waffles for breakfast the next day, it’s a total game changer.



