
fried chicken breast sandwich

title 1
fried chicken breast sandwich
⏱️ cook time 15 minutes
🍽️ servings 4
⚡ Difficulty medium

intro

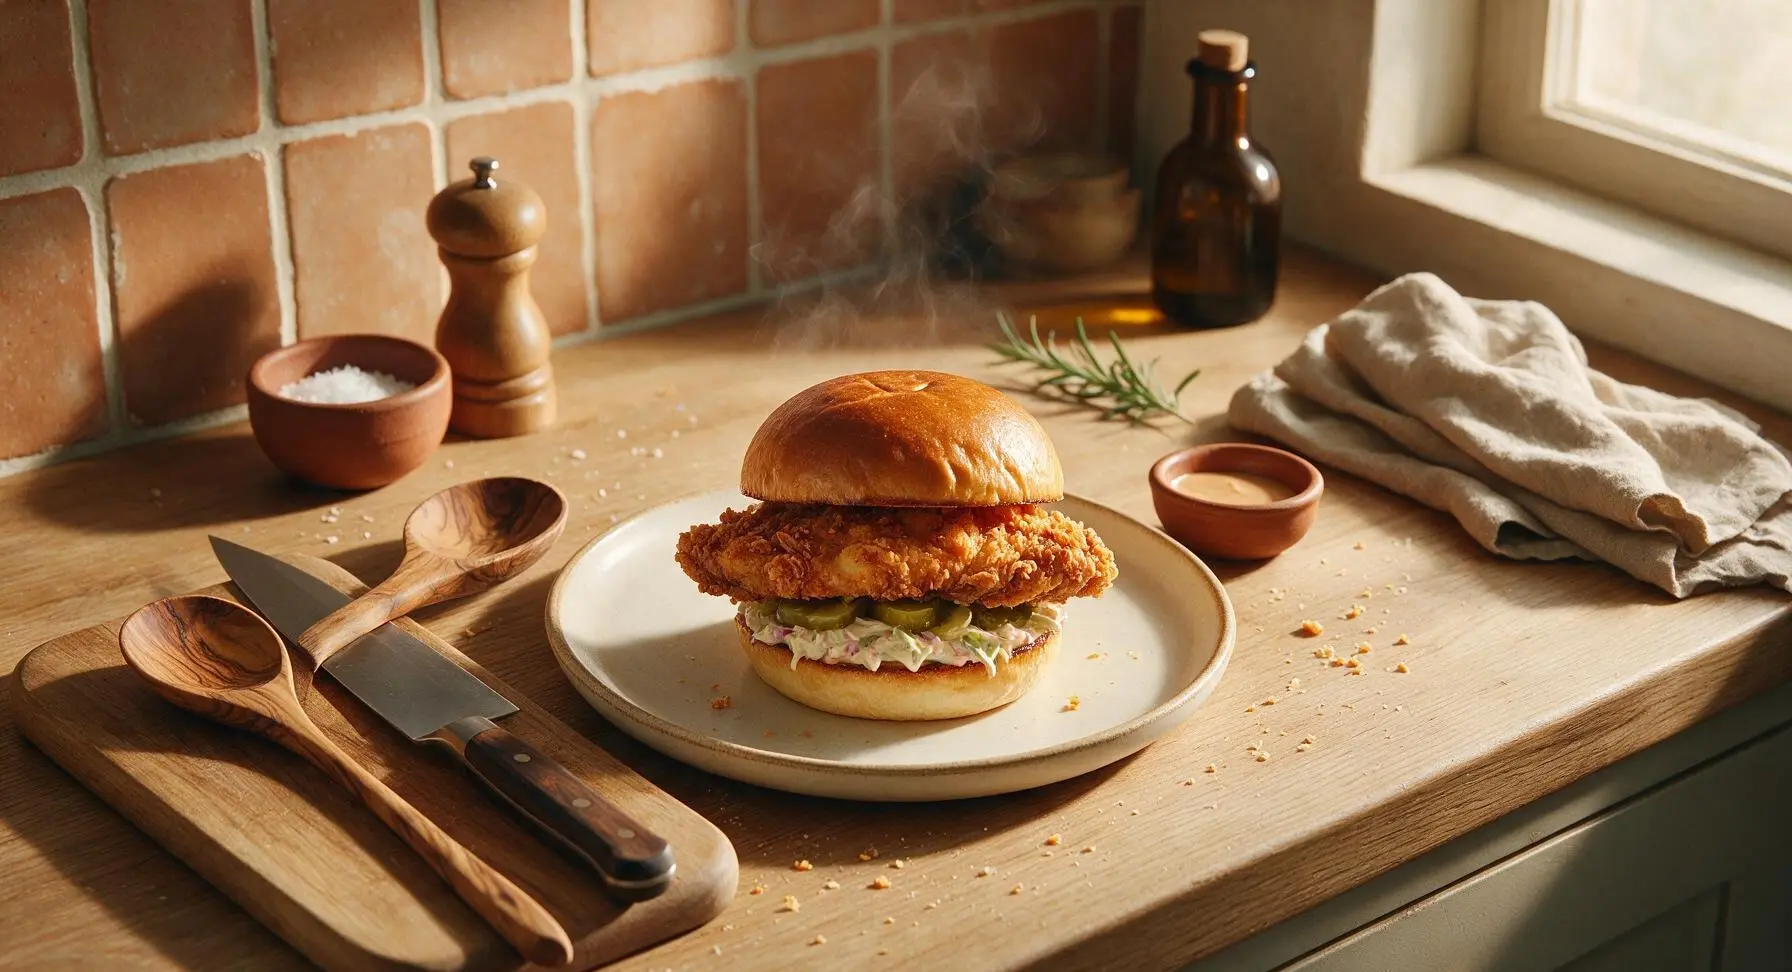
Crispy craggy fried chicken breast stacked with tangy pickles and creamy slaw on buttery toasted brioche: a classic, juicy, satisfying sandwich ready in under 40 minutes.

Ingredients
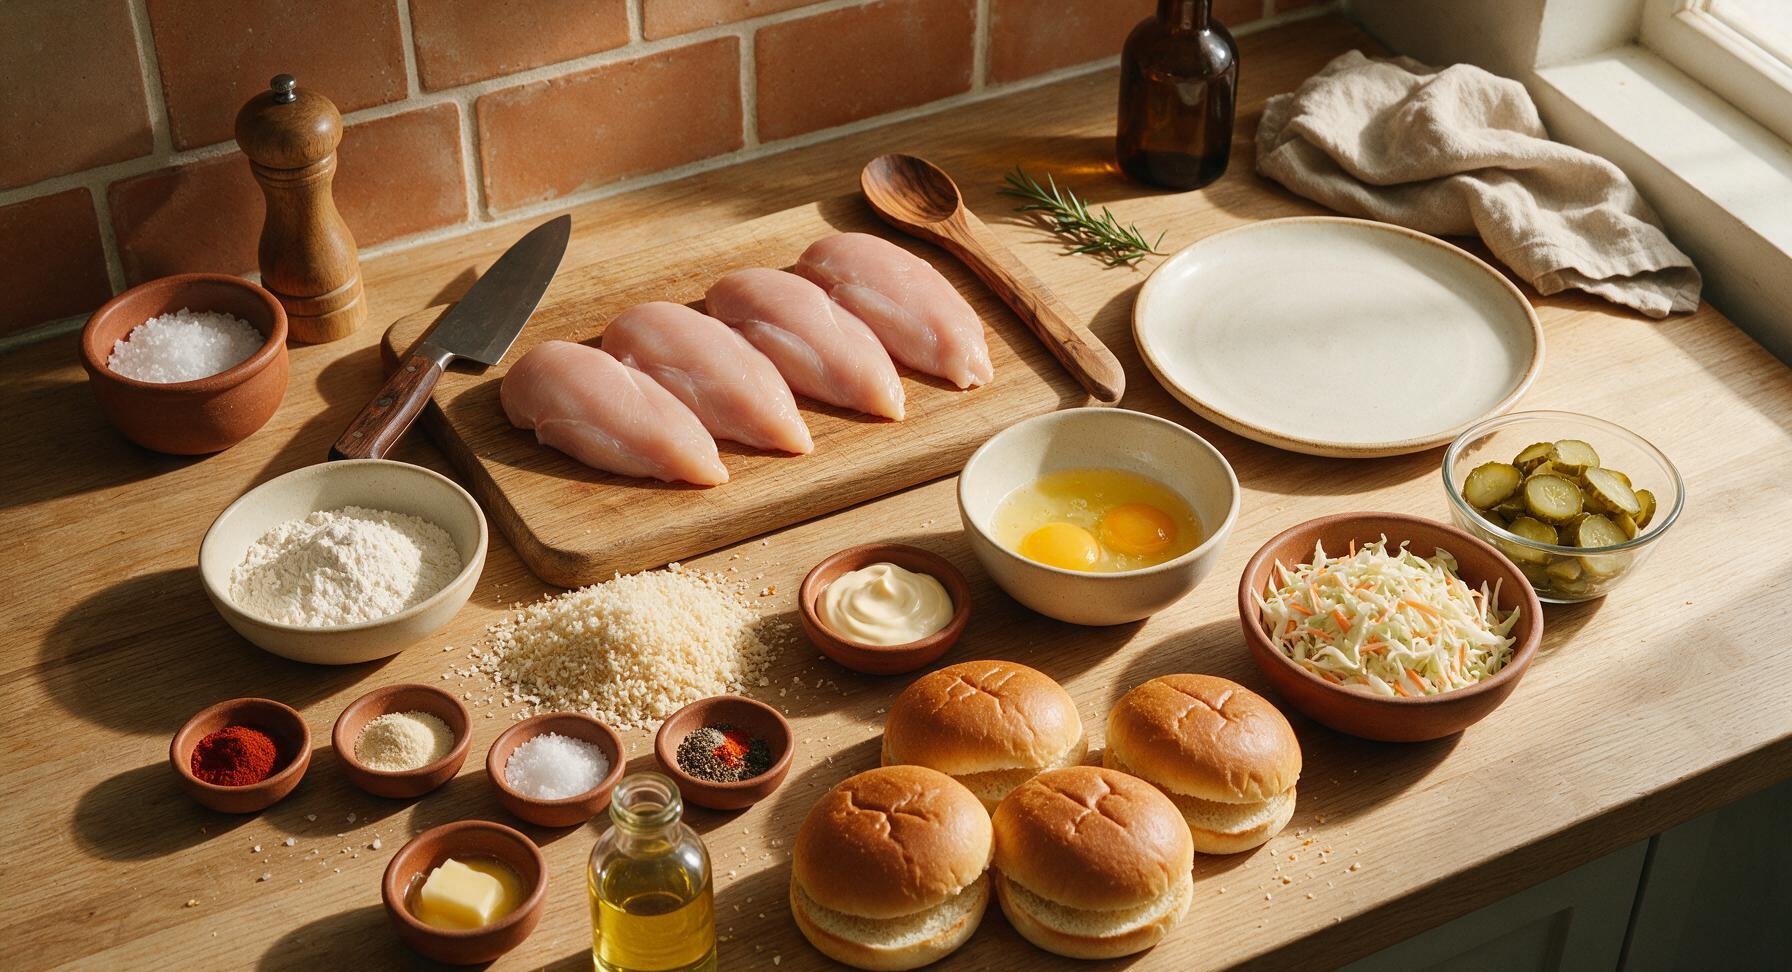
Boneless, skinless chicken breasts 680g (4 pieces, trimmed)
Brioche hamburger buns 4 (split)
All-purpose flour 120g
Large eggs 2 (beaten with 1 tbsp water)
Panko breadcrumbs 150g
Smoked paprika 1 tsp
Garlic powder 1 tsp
Kosher salt 1.5 tsp
Black pepper 0.5 tsp
Cayenne pepper (optional) 0.25 tsp
Mayonnaise 80g
Shredded coleslaw mix (cabbage and carrot) 200g
Dill pickle slices 120g (drained)
Vegetable oil 500ml (for shallow frying)
Unsalted butter 2 tbsp

Steps

1

Pound Chicken Cutlets

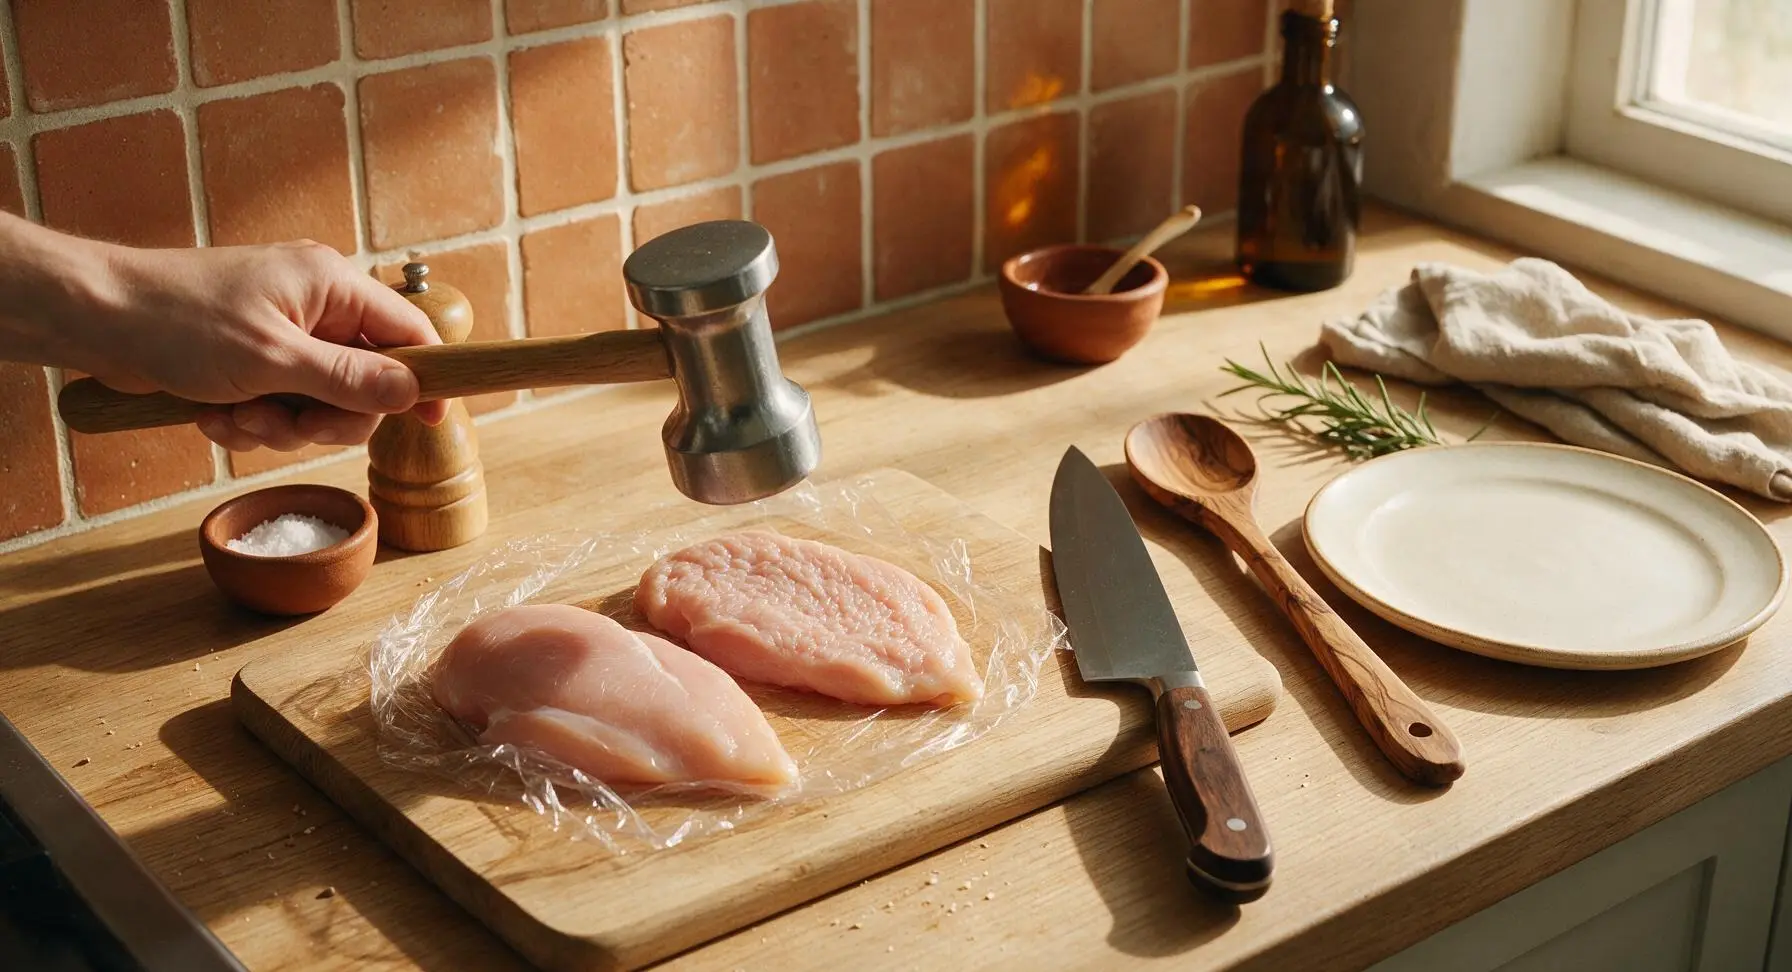
Place trimmed boneless chicken breasts on the center of the light maple cutting board. Cover loosely with a sheet of plastic wrap to prevent splatter. Use the stainless steel meat mallet to pound each breast to an even 1.5cm (0.6 inch) thickness, working from the thick center out to the thinner edges to create a uniform shape. Season both sides of each pounded cutlet evenly with 1 tsp kosher salt and 1/4 tsp black pepper, then let rest 5 minutes at room temperature to allow the salt to penetrate the meat. Even thickness eliminates overcooked, dry edges and ensures consistent doneness.
Step 1
step1:Pound Chicken Cutlets
2

Set Up Breading Station

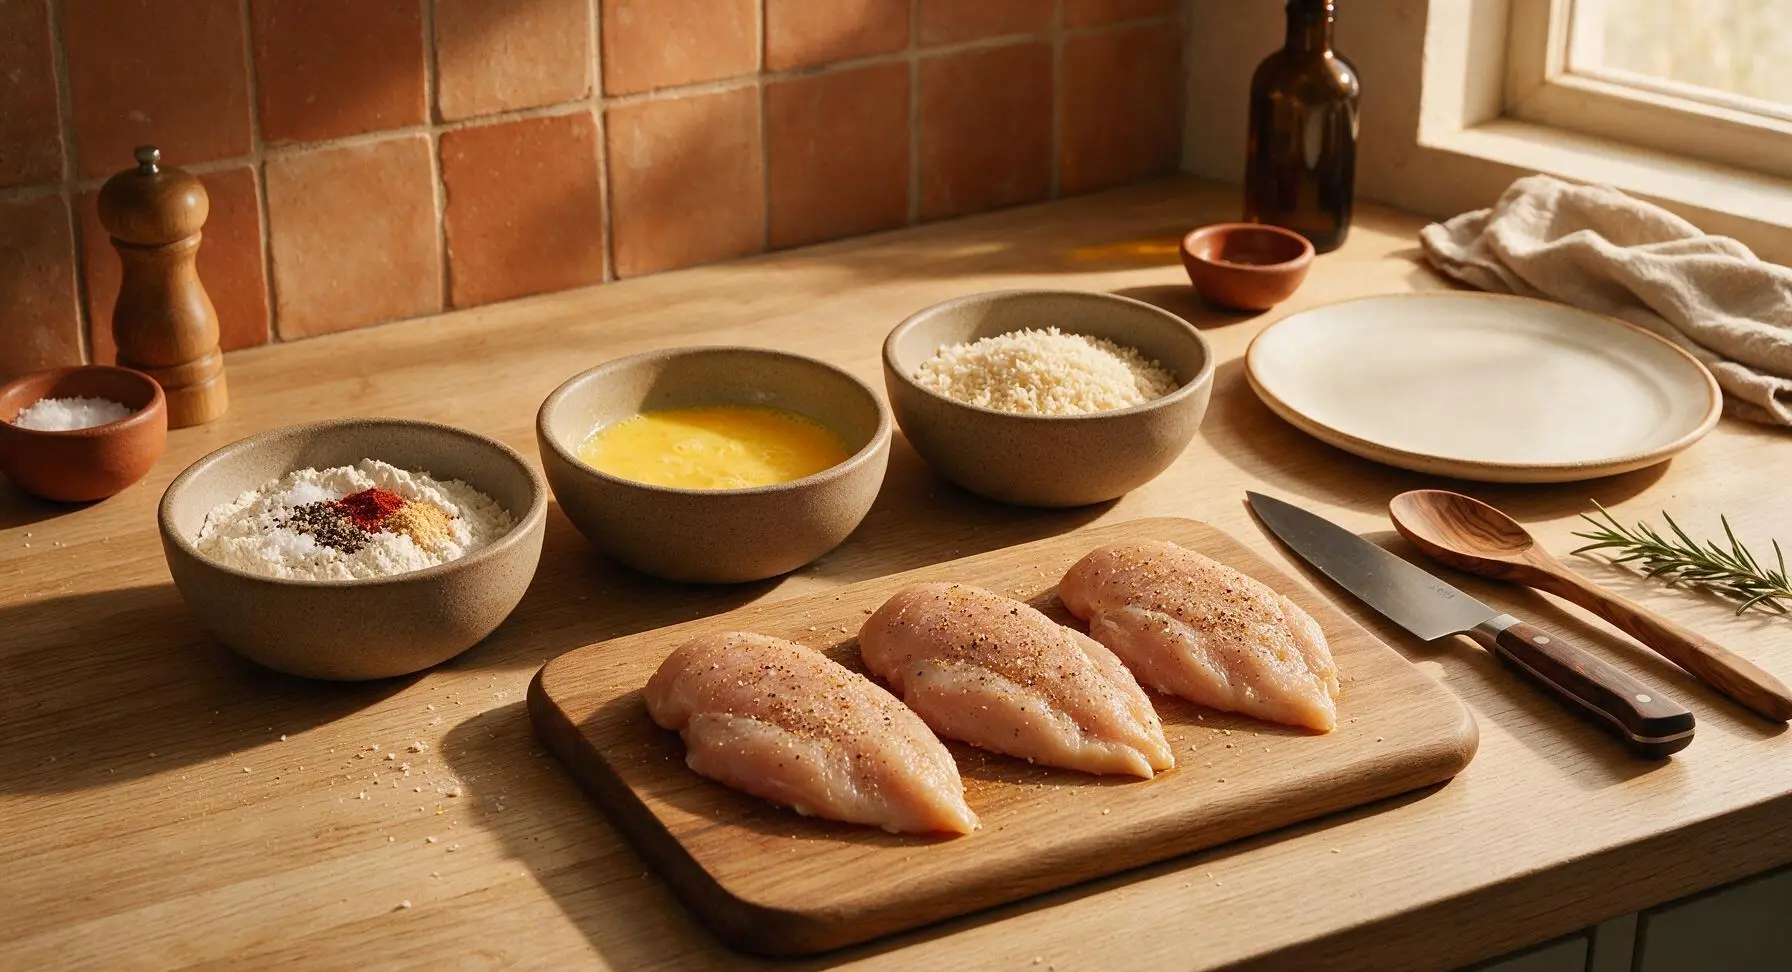
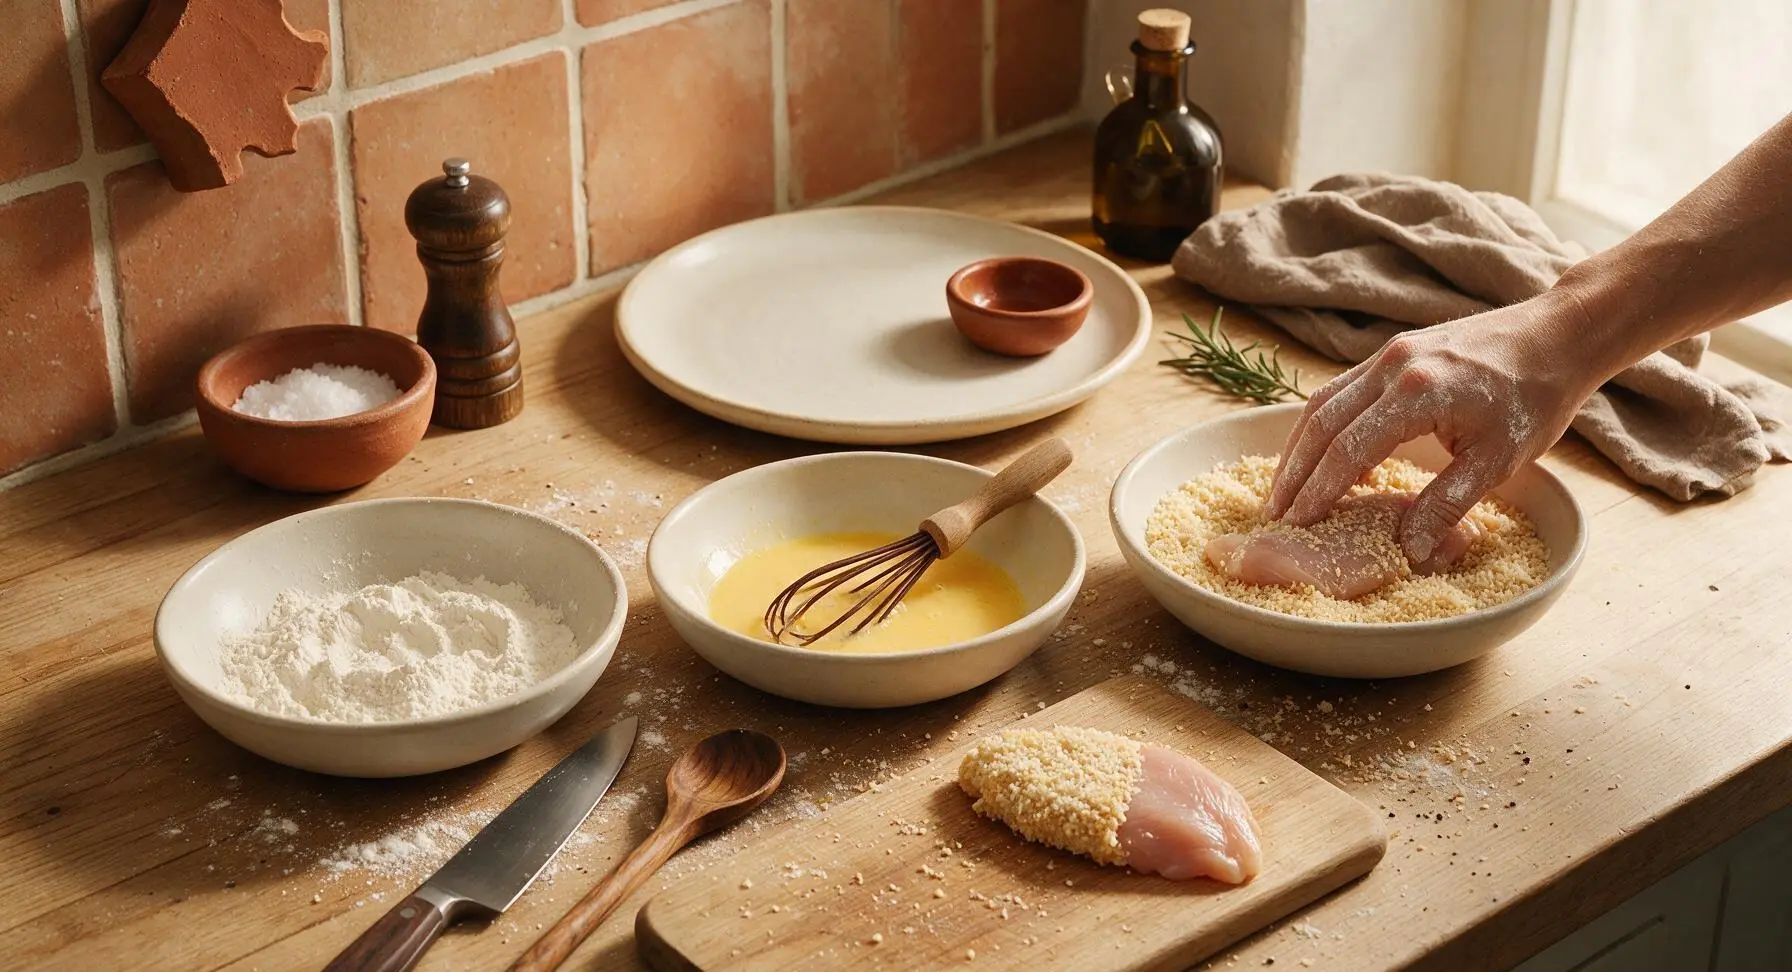
Arrange three 10cm warm taupe stoneware prep bowls in a straight line to the left of the cutting board. Fill the first bowl with all-purpose flour mixed with the remaining 0.5 tsp kosher salt, remaining black pepper, smoked paprika, garlic powder, and optional cayenne pepper, stirred to combine evenly. Fill the second bowl with two large eggs beaten with 1 tbsp cold water, whisked until completely smooth with no streaks of egg white. Fill the third bowl with panko breadcrumbs. Line the bowls up in flour-egg-panko order to create a smooth, one-way breading workflow that minimizes mess.
Step 2
step2:Set Up Breading Station
3

Bread Chicken Cutlets

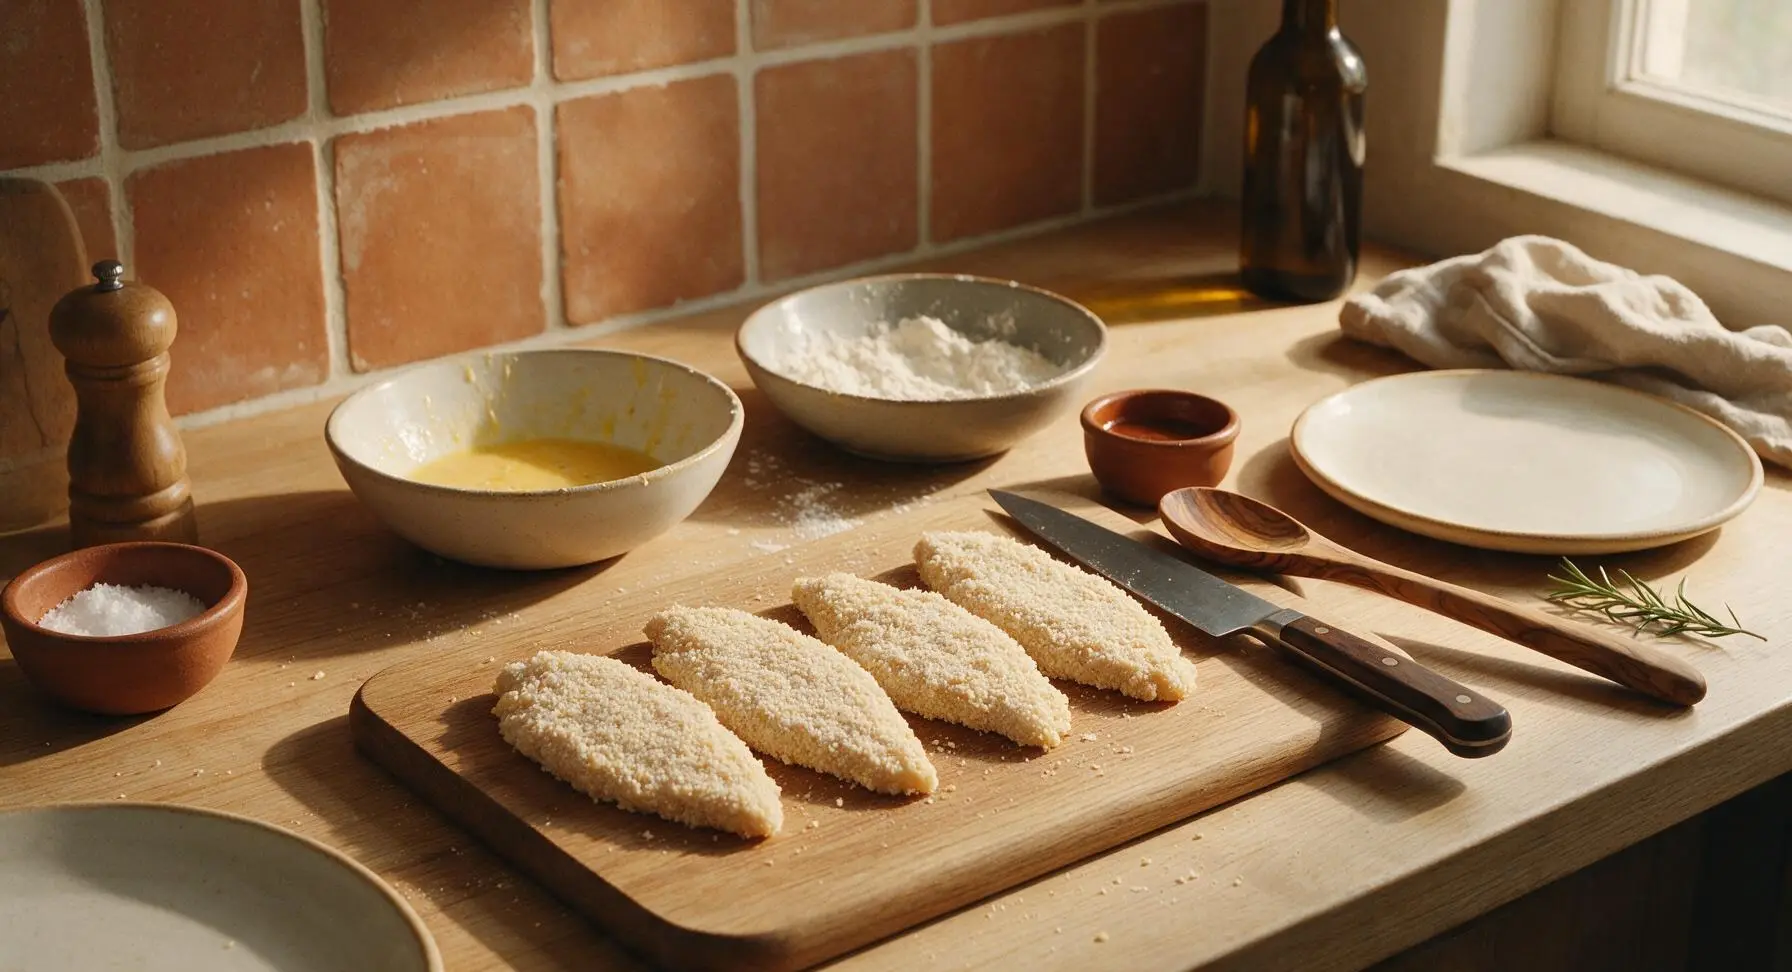
Working with one cutlet at a time to keep hands clean: first dredge the cutlet fully in the seasoned flour, pressing firmly to coat every surface, then shake off excess flour. Dip the floured cutlet completely into the egg wash, holding it above the bowl for 2 seconds to let excess egg drip off. Press the egg-coated cutlet firmly into the panko breadcrumbs, pressing crumbs onto all sides to create a thick, even coating. Place fully breaded cutlets in a single layer on the clean edge of the cutting board, and let rest 5 minutes to allow the breading to adhere firmly—this prevents crust from separating from the chicken during frying.
Step 3
step3:Bread Chicken Cutlets
Step 3
step3:Bread Chicken Cutlets
4

Heat Frying Oil

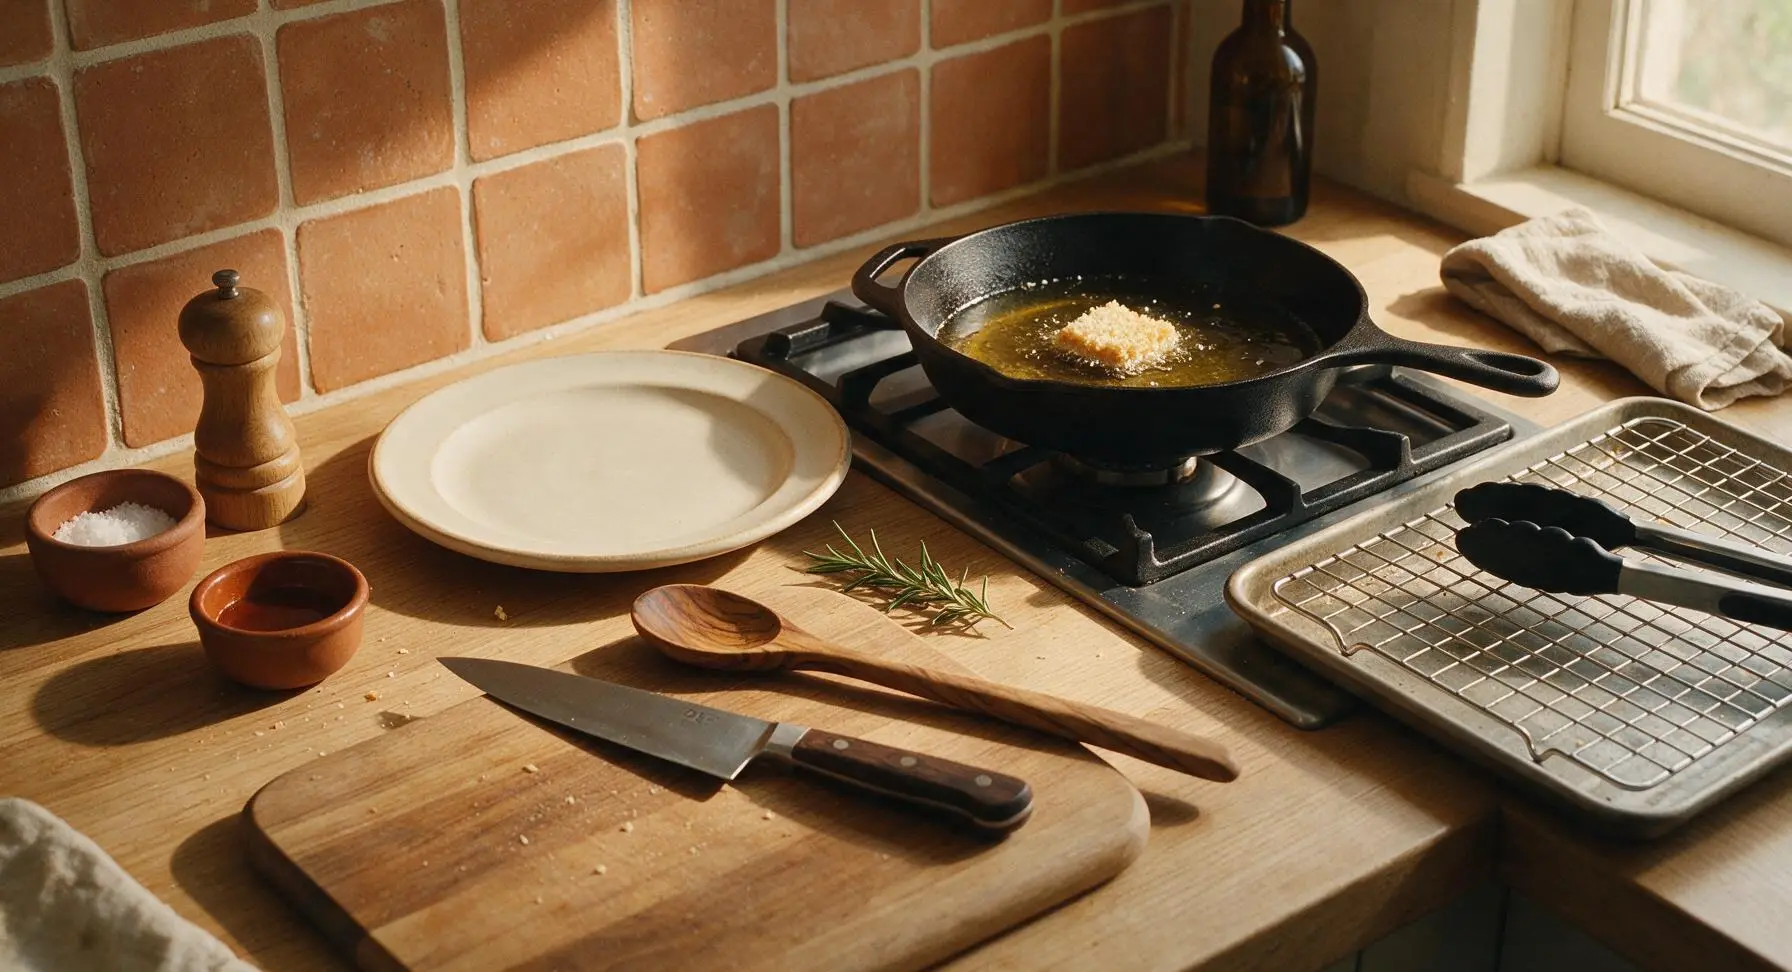
Retrieve the 10-inch matte black cast iron skillet and place it on the back-right stovetop burner. Pour vegetable oil into the skillet to a depth of 1cm (0.4 inch), then turn heat to medium. Heat the oil to 175C (350F), testing temperature by dropping a single panko crumb into the oil: it should sizzle immediately and turn pale golden in 10 seconds. If the crumb burns instantly, the oil is too hot and will burn the crust before the chicken cooks; if it doesn’t sizzle, the oil is too cold and will produce soggy chicken.
Step 4
step4:Heat Frying Oil
5

Fry Chicken Until Crisp

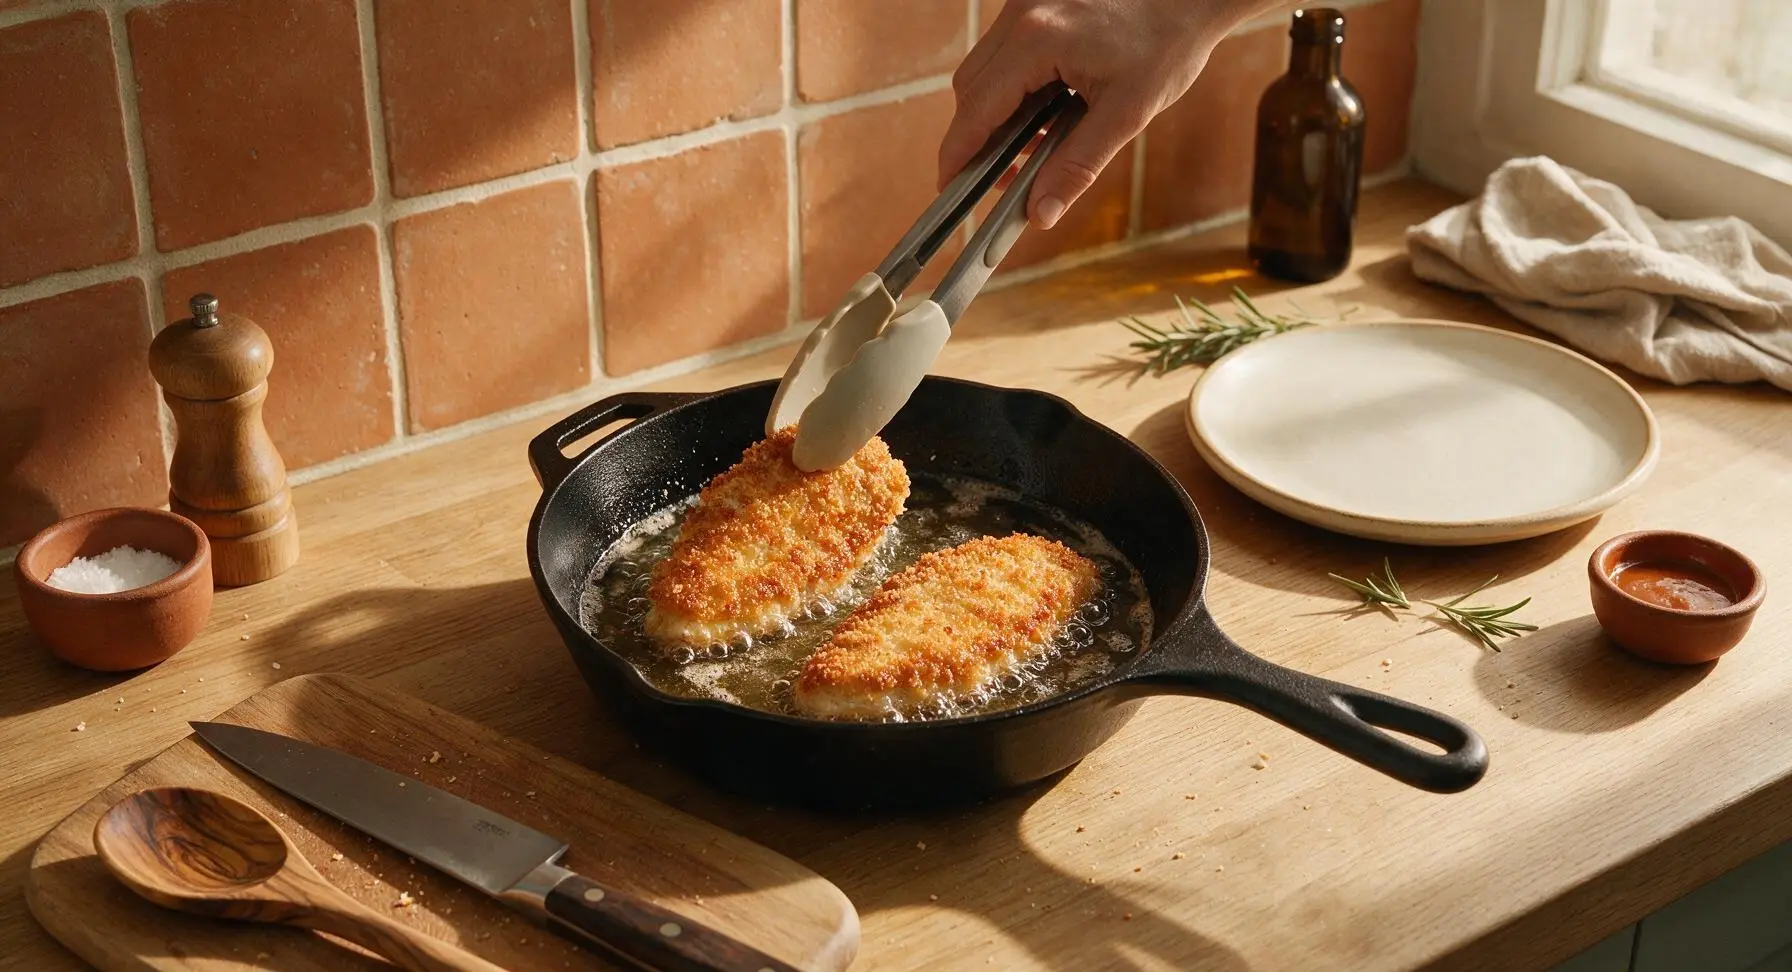
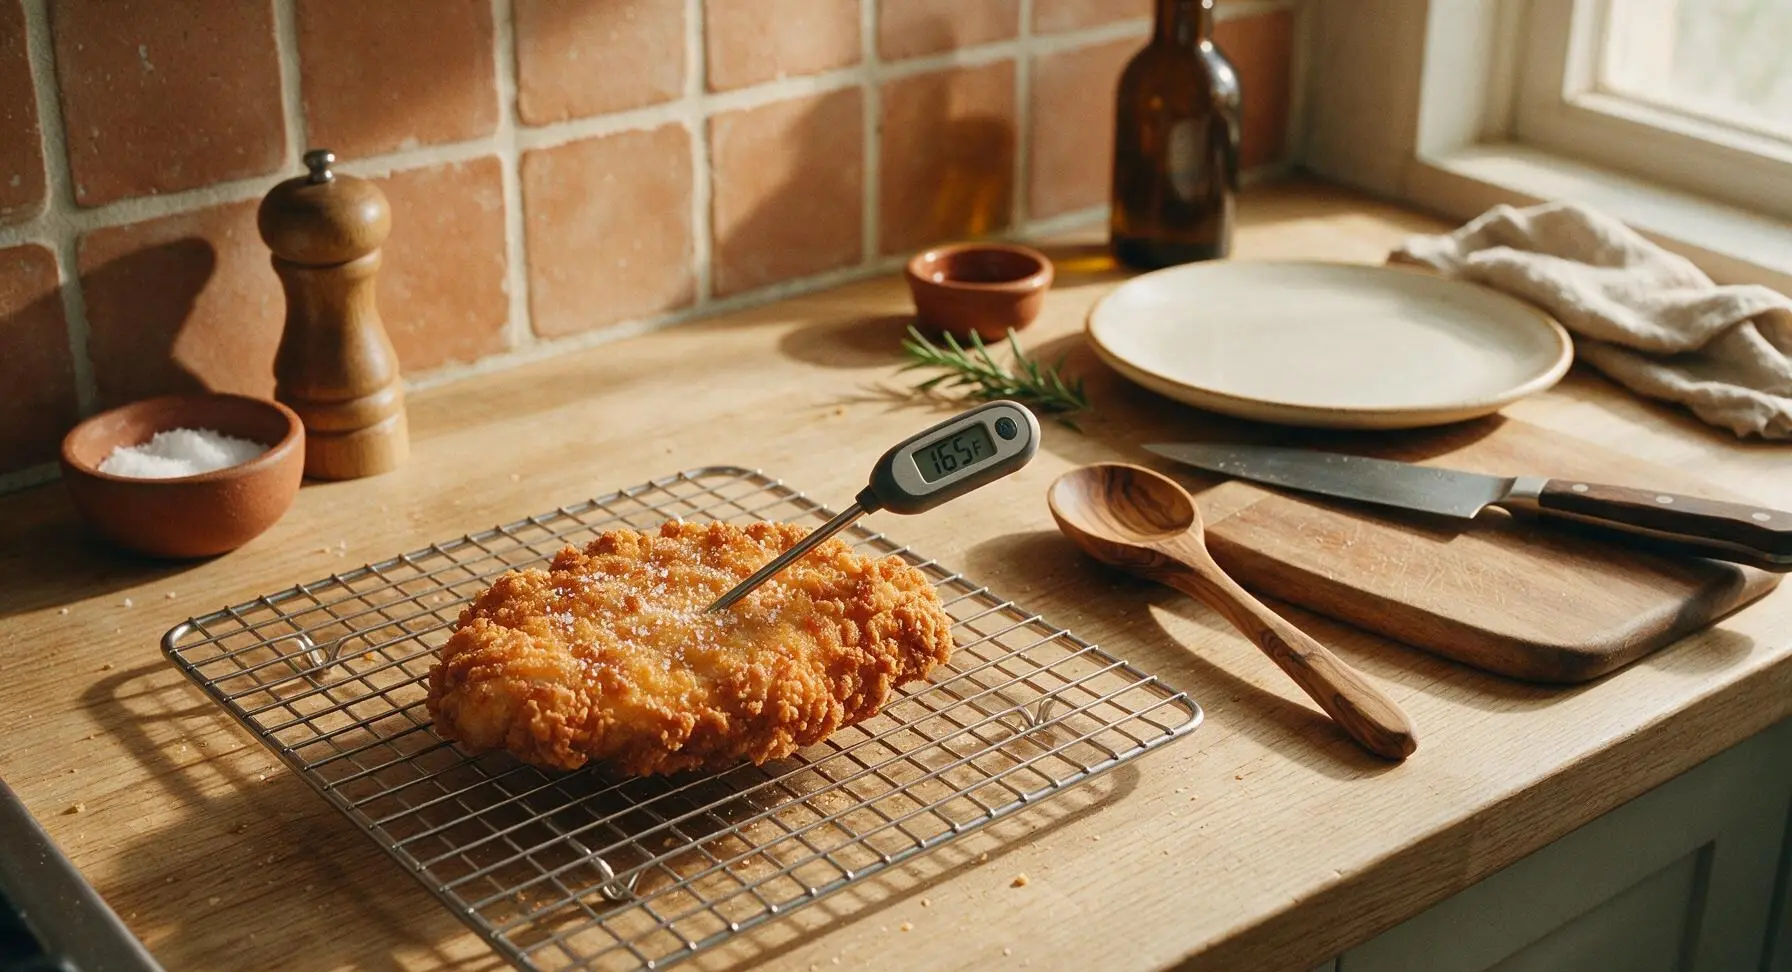
Using the silicone tongs, carefully lower 2 breaded cutlets into the hot oil, laying them away from you to avoid oil splatters. Do not overcrowd the pan, as this drops oil temperature and leads to soggy crust. Fry for 3-4 minutes per side, until the crust is deep golden brown and craggy across the entire surface. Check doneness by inserting the digital meat thermometer into the thickest part of the cutlet: internal temperature should read 74C (165F). Transfer cooked cutlets to the chrome wire rack to drain, and sprinkle immediately with a tiny pinch of flaky sea salt. Repeat with the remaining 2 cutlets.
Step 5
step5:Fry Chicken Until Crisp
Step 5
step5:Fry Chicken Until Crisp
6

Toast Brioche Buns

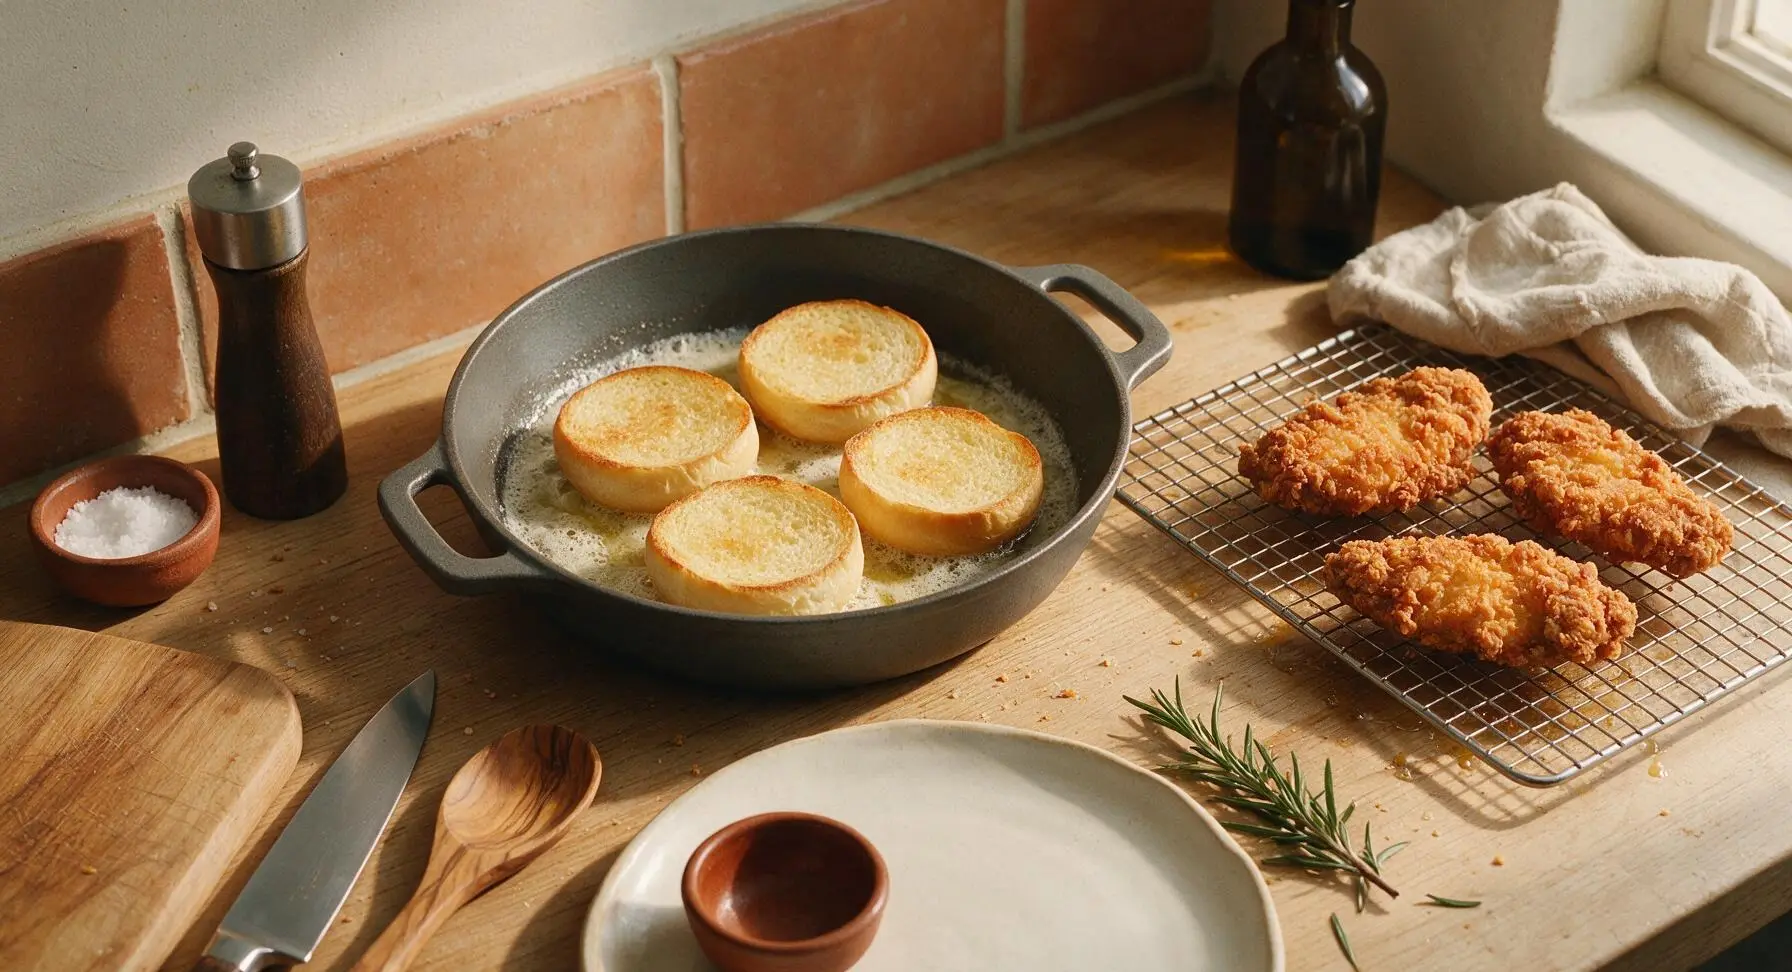
Once all chicken is fried and resting on the wire rack, carefully pour excess hot oil out of the cast iron skillet into a heat-safe container, then return the skillet to low heat. Add 2 tbsp unsalted butter to the skillet, let it melt and foam slightly. Place split brioche buns cut-side down in the melted butter, and toast for 1-2 minutes until the cut surface is pale golden, slightly crisp, and fragrant with butter. Remove toasted buns from the skillet and set aside.
Step 6
step6:Toast Brioche Buns
7

Assemble Sandwiches

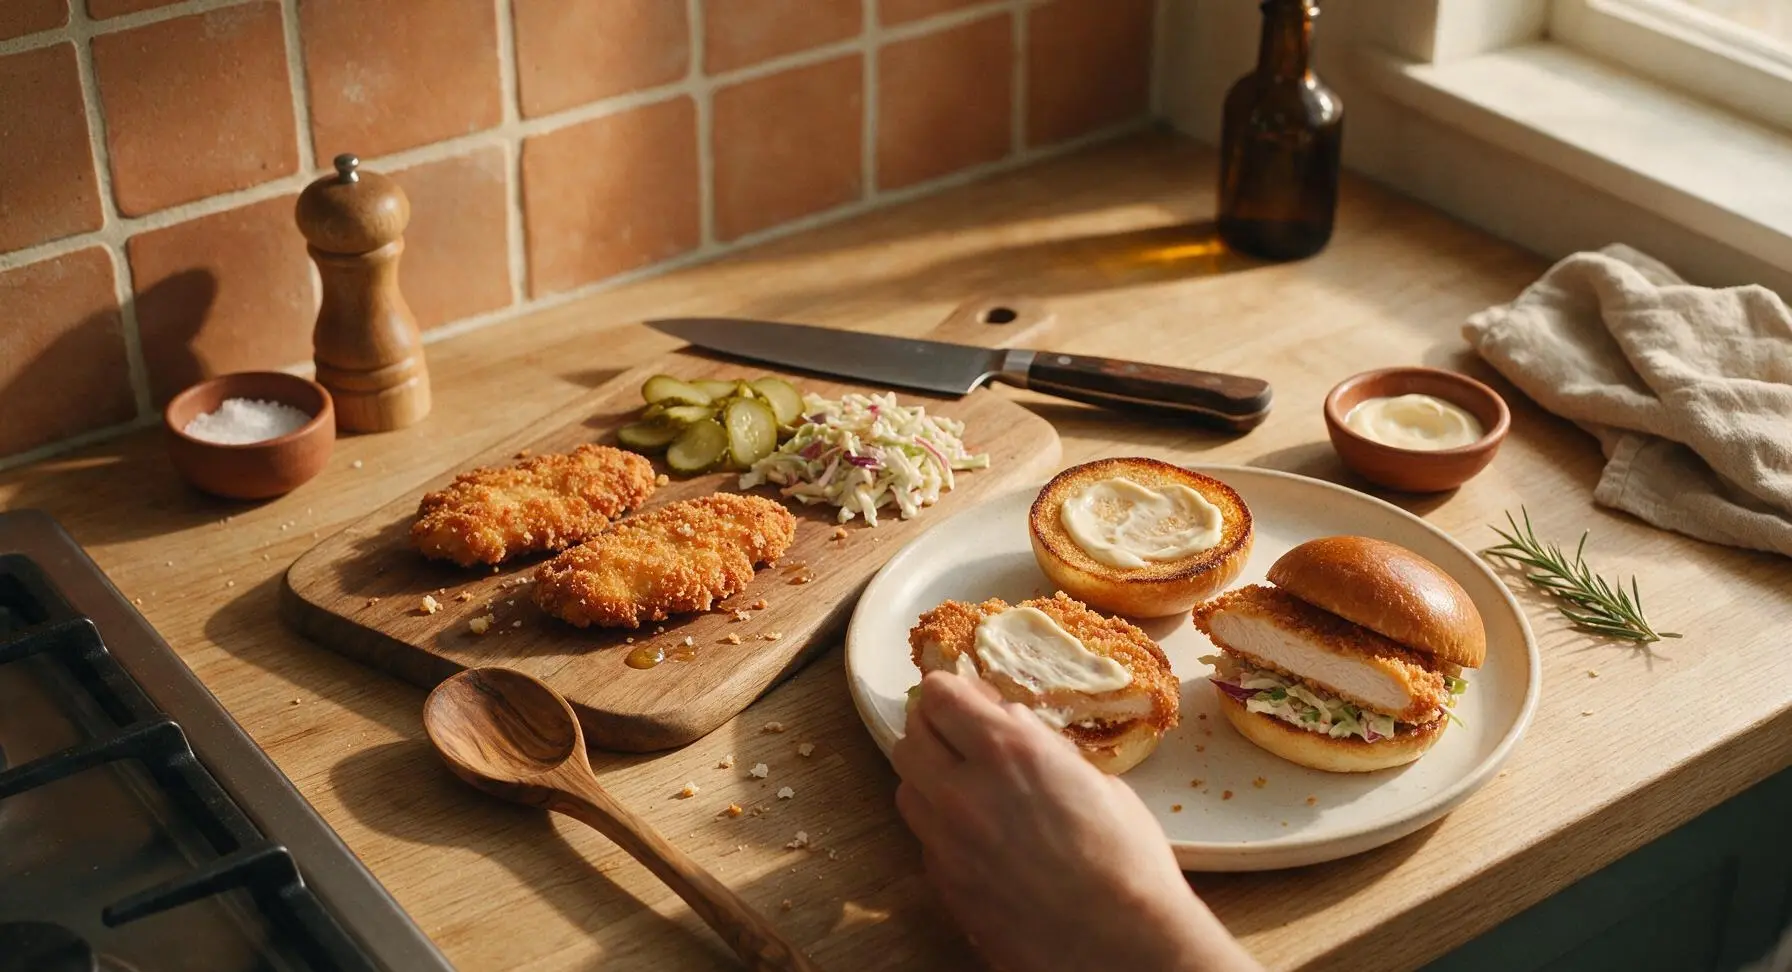
Pull one 24cm cream white ceramic dinner plate forward from its stacked position at back right. Spread 1 tbsp of mayonnaise evenly across the cut side of each toasted bun top and bottom. Place one fried chicken cutlet on each bottom bun, top with 3-4 drained dill pickle slices and a 50g handful of coleslaw. Add a dash of hot sauce if desired, then place the top bun on each sandwich, pressing down gently to hold all layers in place. Cut sandwiches diagonally in half before serving.
Step 7
step7:Assemble Sandwiches

Tips

1.Let breaded cutlets rest 5 minutes before frying: this resting period allows the flour, egg, and panko to form a tight, adhesive layer that will not slide off, bubble, or separate from the chicken during frying, ensuring a perfectly intact, evenly crisp crust.
2.Avoid overcrowding the skillet when frying: adding more than 2 cutlets at once drops the oil temperature by 20-30 degrees, which causes the breading to absorb excess oil and turn soggy instead of crisp. Frying in small batches maintains consistent oil temperature for light, non-greasy chicken.
3.Drain fried chicken on a wire rack instead of paper towels: placing hot crispy chicken directly on paper towels traps steam against the crust, making it soften and go soggy within 2-3 minutes. An elevated wire rack allows air to circulate under the chicken, keeping the crust crisp for 10-15 minutes while you prep buns and toppings.


✨ You May Also Like

Lunch
🍜 United States

Creamy, salty, tangy nostalgic Midwestern sandwich pairing rich peanut butter with crisp briny dill pickles for a fast, satisfying no-cook meal.

⏱️ 5 minutesLunch ★ 4.6
Lunch
🍜 United States

Crispy, melty pressed sandwich layered with savory roast pork, ham, Swiss cheese, pickles, and tangy mustard: a beloved Cuban-American comfort classic.

⏱️ 25 minuteLunch ★ 4.9
Lunch
🍜 United States

Hearty, briny New Orleans pressed sandwich stacked with cured Italian meats, provolone, and zesty olive salad, served cold for bold, portable flavor.

⏱️ 1 hour 20Lunch ★ 4.7
Lunch
🍜 United States

A tangy, creamy Southern American staple, this no-cook cheesy sandwich is packed with sharp cheddar and sweet pimentos for a satisfying, portable bite.

⏱️ 1 hour 15Lunch ★ 4.8
Lunch
🍜 United States

Crispy Cajun-spiced fried shrimp piled on crusty French bread with tangy remoulade and fresh toppings, the iconic Louisiana street food sandwich.

⏱️ 35 minuteLunch ★ 4.4
Lunch
🍜 United States

Stacked, savory deli-style corned beef sandwich with melted Swiss, tangy mustard, and crisp griddled rye— a fast, hearty, satisfying classic.

⏱️ 15 minuteLunch ★ 4.9

fried chicken breast sandwich:Frequently Asked Questions

1.How do I keep the chicken breast from drying out when frying? ▾
Start by pounding your boneless, skinless chicken breasts to a uniform ½-inch thickness so they cook evenly, with no overcooked thin, dry edges. Fry until the internal temp hits exactly 165°F at the thickest point, then let the chicken rest 3 minutes before assembling to lock in juices, rather than cutting into it right away.
2.Why doesn’t my fried crust get that signature craggy, crispy texture? ▾
That craveable craggy crust comes from pressing panko firmly onto the floured, egg-dipped chicken, and letting the breaded cutlets rest 5 minutes before frying so the coating adheres. Don’t shake off excess flour too aggressively, and keep oil at a steady 350°F so the coating puffs instead of turning soggy.
3.Can I prep the breaded chicken ahead of time to save time on weeknights? ▾
Absolutely! You can bread the chicken cutlets up to 24 hours in advance, store them on a wire rack set over a baking sheet in the fridge, uncovered. The cold, slightly dried-out panko coating actually gets extra crispy when you fry it, cutting your active cook time down to under 15 minutes for fast meals.
4.What oil is best for frying the chicken to get a neutral, non-greasy taste? ▾
Reach for high-smoke-point neutral oils like canola, vegetable, or peanut oil for the cleanest flavor. Heat it to a steady 350°F before adding chicken—if the oil is too cool, the coating will soak up excess grease, and if it’s too hot, the panko will burn before the chicken cooks through.
5.Do I have to use brioche buns, or can I swap for a different type of bread? ▾
Brioche is ideal because its soft, buttery, slightly sweet flavor balances salty, crispy chicken and tangy toppings, but you can swap for soft potato rolls, sourdough hamburger buns, or toasted ciabatta if that’s what you have. Always toast cut sides in a little butter for richness and a sogginess barrier.
6.How do I keep the bottom bun from getting soggy once I assemble the sandwich? ▾
The easiest trick is to toast the cut sides of your brioche buns in melted butter until golden and slightly crisp, which creates a moisture barrier. For extra insurance, spread a thin layer of mayo on the toasted bottom bun before adding pickles, then set hot chicken on top, rather than placing wet slaw directly against the bun.
7.Can I bake the breaded chicken instead of frying it for a lighter version? ▾
You totally can! Spray the breaded chicken cutlets generously with olive oil cooking spray, set them on a wire rack over a baking sheet, and bake at 425°F for 15-18 minutes, flipping halfway, until crispy and 165°F internal. The texture won’t be quite as shatteringly crisp as fried, but it’s still delicious and lower in oil.
8.What seasonings should I add to the flour and panko for the best flavor? ▾
Don’t skip seasoning every layer! Mix 1 tsp kosher salt, ½ tsp black pepper, ½ tsp garlic powder, ½ tsp paprika, and a pinch of cayenne into both your all-purpose flour and panko breadcrumbs. Seasoning only the final coating leaves chicken bland, so building flavor in every step makes a huge difference.
9.How thick should I cut or pound the chicken breasts for even cooking? ▾
Aim for a uniform ½-inch thickness across the entire cutlet. If your chicken breasts are extra large, first slice them horizontally into two thinner cutlets before pounding, which ensures you don’t have a thick center that stays undercooked while edges burn and dry out during frying.
10.Why does my breading fall off the chicken when I fry it? ▾
Breading slips off for two common reasons: the chicken was too wet when you started breading, or you didn’t let breaded cutlets rest before frying. Pat chicken completely dry with paper towels first, follow the order: dip in all-purpose flour, then beaten large eggs, then panko, press crumbs firmly, and rest 5 minutes so the coating sets.
11.What kind of pickles work best for this sandwich? ▾
Tangy dill pickles are the classic match—thick-cut dill pickle chips, not sweet bread-and-butter style, cut through the richness of fried chicken and buttery brioche. Pat pickle slices dry a little before adding them to the sandwich so extra brine doesn’t make your bun soggy mid-bite.
12.What goes in the creamy slaw that pairs with this sandwich? ▾
Keep the slaw simple and tangy to balance crispy chicken: toss shredded green cabbage, a little shredded carrot, and a dressing of mayo, apple cider vinegar, a pinch of sugar, salt, and pepper. Make it 10 minutes ahead so cabbage softens slightly, and shake off excess dressing before adding it to avoid sogginess.
13.Can I use regular breadcrumbs instead of panko? ▾
Panko is preferred for that light, shatteringly crisp, craggy crust because its coarser, flakier crumbs don’t compact as much as fine regular breadcrumbs. If you only have regular breadcrumbs, mix them 50/50 with crushed cornflakes to add extra crunch, otherwise your crust will be denser and less crispy.
14.How long do I need to fry the chicken breasts to get them fully cooked but juicy? ▾
At a steady 350°F oil temperature, your ½-inch thick pounded chicken cutlets will only need 3-4 minutes per side to turn golden crispy and reach 165°F internal. Don’t overcrowd the pan, which drops oil temp and leads to greasy, slow-cooked chicken—fry 1-2 cutlets at a time if you have a small skillet.
15.Do I need a deep fryer to make this, or can I use a regular skillet? ▾
No fancy deep fryer required! A heavy-bottomed cast iron or stainless steel skillet works perfectly—just add ½ inch of oil, enough to come halfway up the chicken cutlets, so you only need to flip once halfway through cooking. This uses way less oil than full deep frying and still gives you that perfect crispy crust.
16.Can I make this sandwich gluten-free for friends with dietary restrictions? ▾
Absolutely! Swap the all-purpose flour for a 1:1 gluten-free all-purpose flour blend, use certified gluten-free panko breadcrumbs, and pick up gluten-free brioche-style hamburger buns. Follow the exact same breading and frying steps, and you’ll get a nearly identical crispy, juicy result.
17.What sauces go well on this sandwich besides the creamy slaw and pickles? ▾
Classic add-ons include spicy mayo, honey mustard, hot honey, or a tangy comeback sauce. Skip heavy, watery sauces like runny barbecue sauce that will make the panko crust soggy. Stick to thick, creamy spreads, and add them to the toasted top bun rather than pouring them directly on hot chicken for best results.
18.How do I reheat leftover fried chicken so it stays crispy instead of getting soggy? ▾
Skip the microwave, which turns the panko crust rubbery and soggy. Reheat leftover chicken cutlets on a wire rack over a baking sheet in a 400°F oven for 8-10 minutes, until crispy and heated through. You can toast the brioche buns at the same time for a quick leftover sandwich that tastes almost fresh.
19.The recipe says it’s ready in under 40 minutes—how do I time it out to hit that mark? ▾
It’s easy to hit that 40-minute mark with simple, staggered timing: first, prep and pound chicken (5 mins), bread chicken and let it rest while you mix slaw and heat oil (10 mins), fry chicken in batches (15 mins), toast buns while chicken rests (3 mins), assemble (2 mins). No long marination required!
20.Should I brine the chicken breasts for extra juiciness, or is that unnecessary? ▾
For a quick weeknight sandwich, a 15-minute brine in 4 cups water mixed with 2 tbsp salt and 1 tbsp sugar while you prep other ingredients adds great juiciness, but it’s not required. If you’re crunched for time, just pound the chicken evenly and avoid overcooking it for juicy results without the extra step.

Comments (13)

2 days ago

OMG this crispy chicken sandwich was a total hit at our Sunday family dinner! The crust stayed crunchy even after I piled on pickles and mayo, my kids begged for seconds before they even finished their first serving. SO good, will be making this bi-weekly for sure.

30 minutes ago

Wait 15 minute cook time? No way that works for a crispy sandwich right? I tried so many fried chicken recipes that take forever and end up soggy, does this actually hold up for someone who only has a tiny dorm frying pan?

5 minutes ago

It absolutely works! The key is getting your oil to 350°F before adding the chicken, and don’t overcrowd the pan – even a small dorm pan works great if you cook one breast at a time. The thin-sliced breast cuts cook super fast in 6-7 minutes total, no sogginess promise!

1 week ago

Total game changer for my weekly meal prep! I made 4 of these on Sunday, kept the chicken separate from the buns and toppings, and the crust was still crispy when I reheated it in the air fryer at 400 for 3 minutes at lunch all week. Saved me so much money on fast food runs!

5 days ago

Wait how do you store the cooked chicken? I tried meal prepping fried chicken before and it got all slimy in the fridge, do you put it on a paper towel in the container or something?

3 days ago

Great question! For meal prep storage, let the cooked chicken cool completely on a wire rack first, then store in an airtight container lined with a paper towel to absorb excess moisture. Reheat on a wire rack in the oven or air fryer instead of the microwave for best crispiness!

3 days ago

I brought these to my neighborhood potluck last weekend and people were asking me for the recipe before I even set the platter down! I added a little hot honey to the brioche bun and it chef’s kiss, 10/10 no notes.

yesterday

Okay I was so nervous to make fried chicken for my boyfriend’s birthday because I’ve never deep fried anything before, but this recipe was so easy to follow! The only thing I messed up was adding a little too much salt to the flour mix, oops. Still turned out amazing though, he said it was better than the fast food place down the street!

2 hours ago

Pro tip: Taste your flour seasoning before you dredge! I dip a clean finger in after mixing to check salt level, saved me so many over-salted dinners over the years.

2 weeks ago

Wait, has anyone tried making this with gluten free flour? I have a wheat sensitivity but I’m dying for a good crispy chicken sandwich, all the GF versions I’ve tried have that weird grainy texture.

1 week ago

I used a 1:1 GF all purpose flour blend last week when I made these for my celiac cousin, and literally no one could tell the difference! Just make sure you let the dredge rest on the chicken for 5 minutes before frying so it doesn’t slide off.

5 days ago

That’s perfect advice! We’ve tested this with 1:1 GF flour blends and it works beautifully – just avoid using coconut or almond flour alone, as they won’t give you that same shaggy crispy crust.

just now

SO good. I skipped the regular bun and used a toasted Hawaiian roll with pickles, coleslaw, and a spicy mayo, and it tasted exactly like the fancy sandwich shop that charges $18 for one. Can’t believe I made this at home for like $3 a serving.

2 hours ago

Medium difficulty? I feel like this was way easier than I expected! The only tricky part was making sure the chicken was cooked all the way through without burning the crust. Should I pound the breasts thinner next time to make that easier?

30 minutes ago

Pounding the breasts to an even ½ inch thickness is absolutely the move here! It helps the chicken cook evenly in the time listed, so you get that perfectly golden crust without any raw spots in the middle. So glad you enjoyed it otherwise!

5 days ago

My granddaughter is a super picky eater and usually refuses any chicken that isn’t nugget shaped, but she ate an entire half of this sandwich last night! I added a little ranch to dip it in for her, and she said it was “the best chicken ever”. Made my whole week.

3 days ago

Aww that’s so sweet! My kids are the same way, I started cutting the cooked chicken into nugget-sized pieces after frying for them and they go crazy for it, works every time.

2 days ago

That makes our day to hear! Food that brings the whole family to the table is exactly what we love to share. The ranch dip idea is genius too, we’ll have to add that as a serving suggestion!

5 minutes ago

I added a tablespoon of cayenne and a teaspoon of paprika to the flour dredge for a little extra kick, and wow that heat hit so good with the crispy crust. If you love spicy food, don’t sleep on adding that extra spice!

just now

Oh that’s such a good call! I have a bottle of hot sauce I’ve been meaning to use up, I’m gonna toss a little in the egg wash next time I make these too.

3 days ago

15 minute cook time is no joke! I got home late from work last night, threw this together while my kids were doing homework, and we were all eating by 6:30. No sad takeout, no messy kitchen, total win for busy weeknights.

1 week ago

Help! I tried making this last night and my breading kept falling off the chicken when I put it in the oil. What did I do wrong? I followed the directions exactly as far as I could tell, but I ended up with a bunch of loose fried breading and naked chicken.

5 days ago

So sorry that happened! The most common reason breading falls off is if the chicken was too wet when you dredged it, or if you moved the chicken too soon after adding it to the oil. Try patting the chicken completely dry with paper towels first, then after dredging let it rest on a plate for 5 minutes so the coating can set before frying. Don’t flip it for the first 3 minutes of cooking and it should stay put!

2 weeks ago

Game. Changer. I’ve tried every copycat crispy chicken sandwich recipe out there and this is the first one that actually has that perfect shaggy, crunchy crust that doesn’t get soggy under toppings. I stacked mine with pickles, lettuce, tomato, and a slice of pepper jack and it was better than any drive-thru version hands down.

1 week ago

Right?! I was shocked how crispy the crust stayed even when I loaded on extra sauce, I thought for sure it would get soggy but it held up perfectly.

5 days ago

Pro move: toast the bun in a little butter right before you assemble, it adds so much extra flavor and keeps the bottom bun from getting soggy too!



