
grilled cheese ideas

title 1
grilled cheese ideas
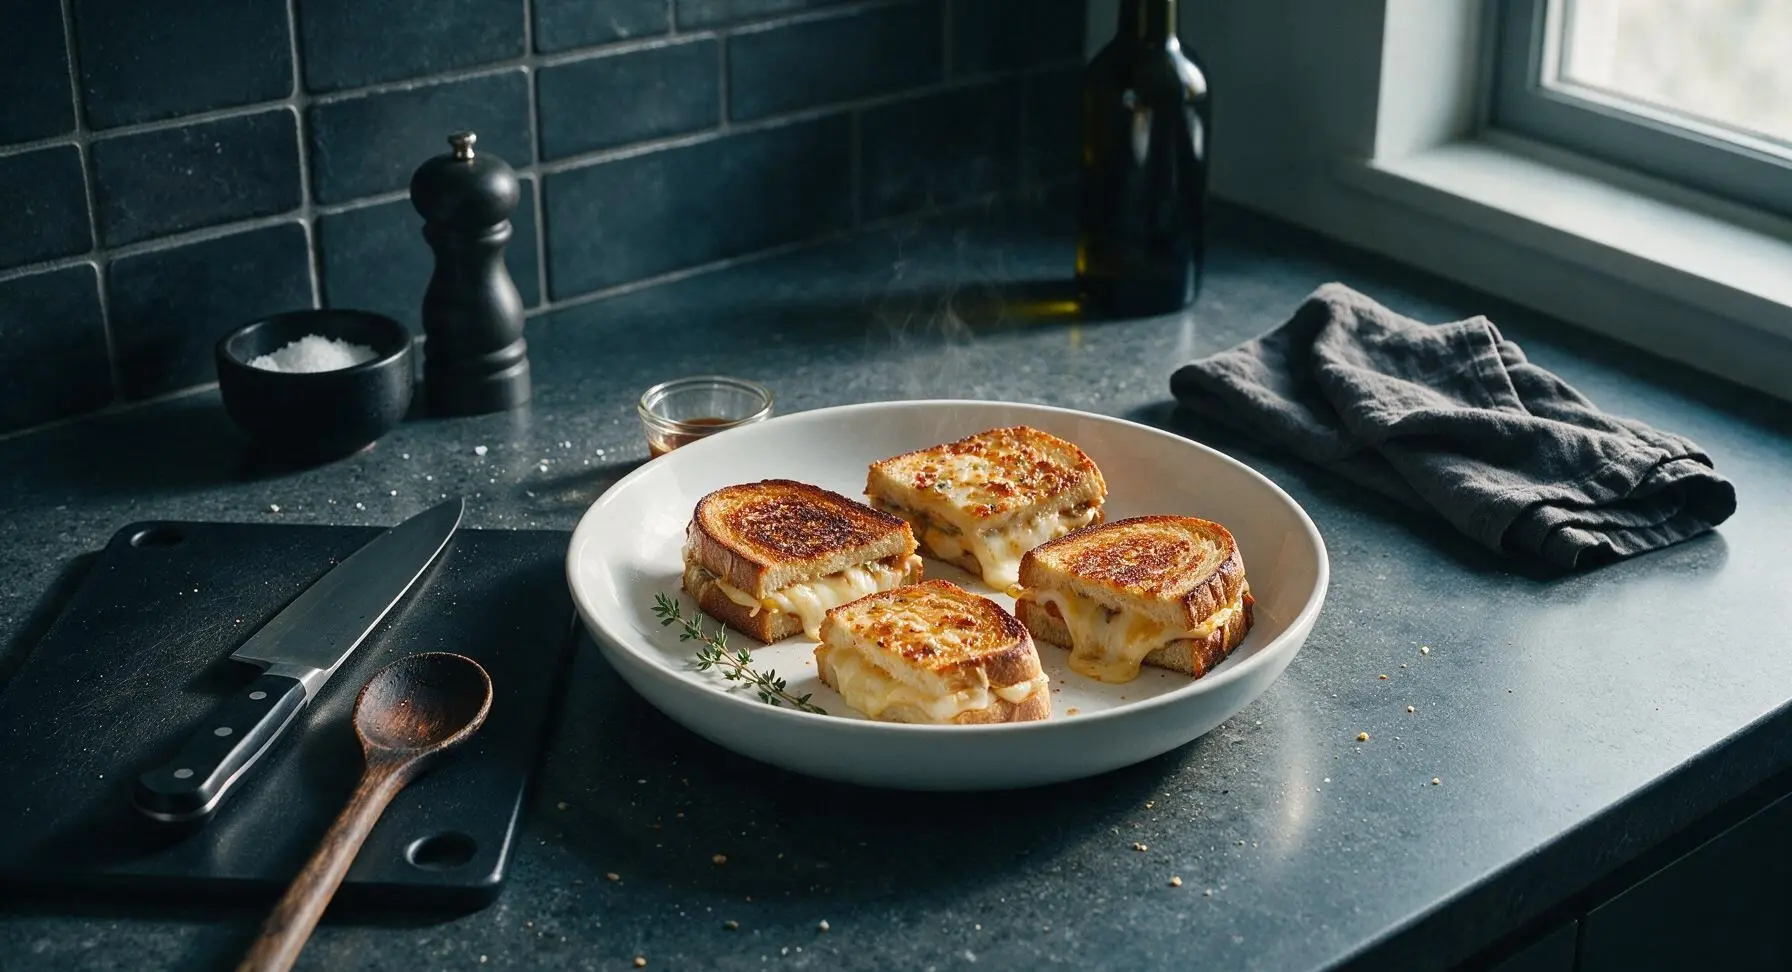
⏱️ cook time 15 minutes
🍽️ servings 4
⚡ Difficulty easy

intro

Four creative, melty grilled cheese twists—from classic tangy cheddar-tomato to sweet-savory brie-apple—all with crisp buttery crusts and oozing, stretchy cheese, ready in under 30 minutes.

Ingredients
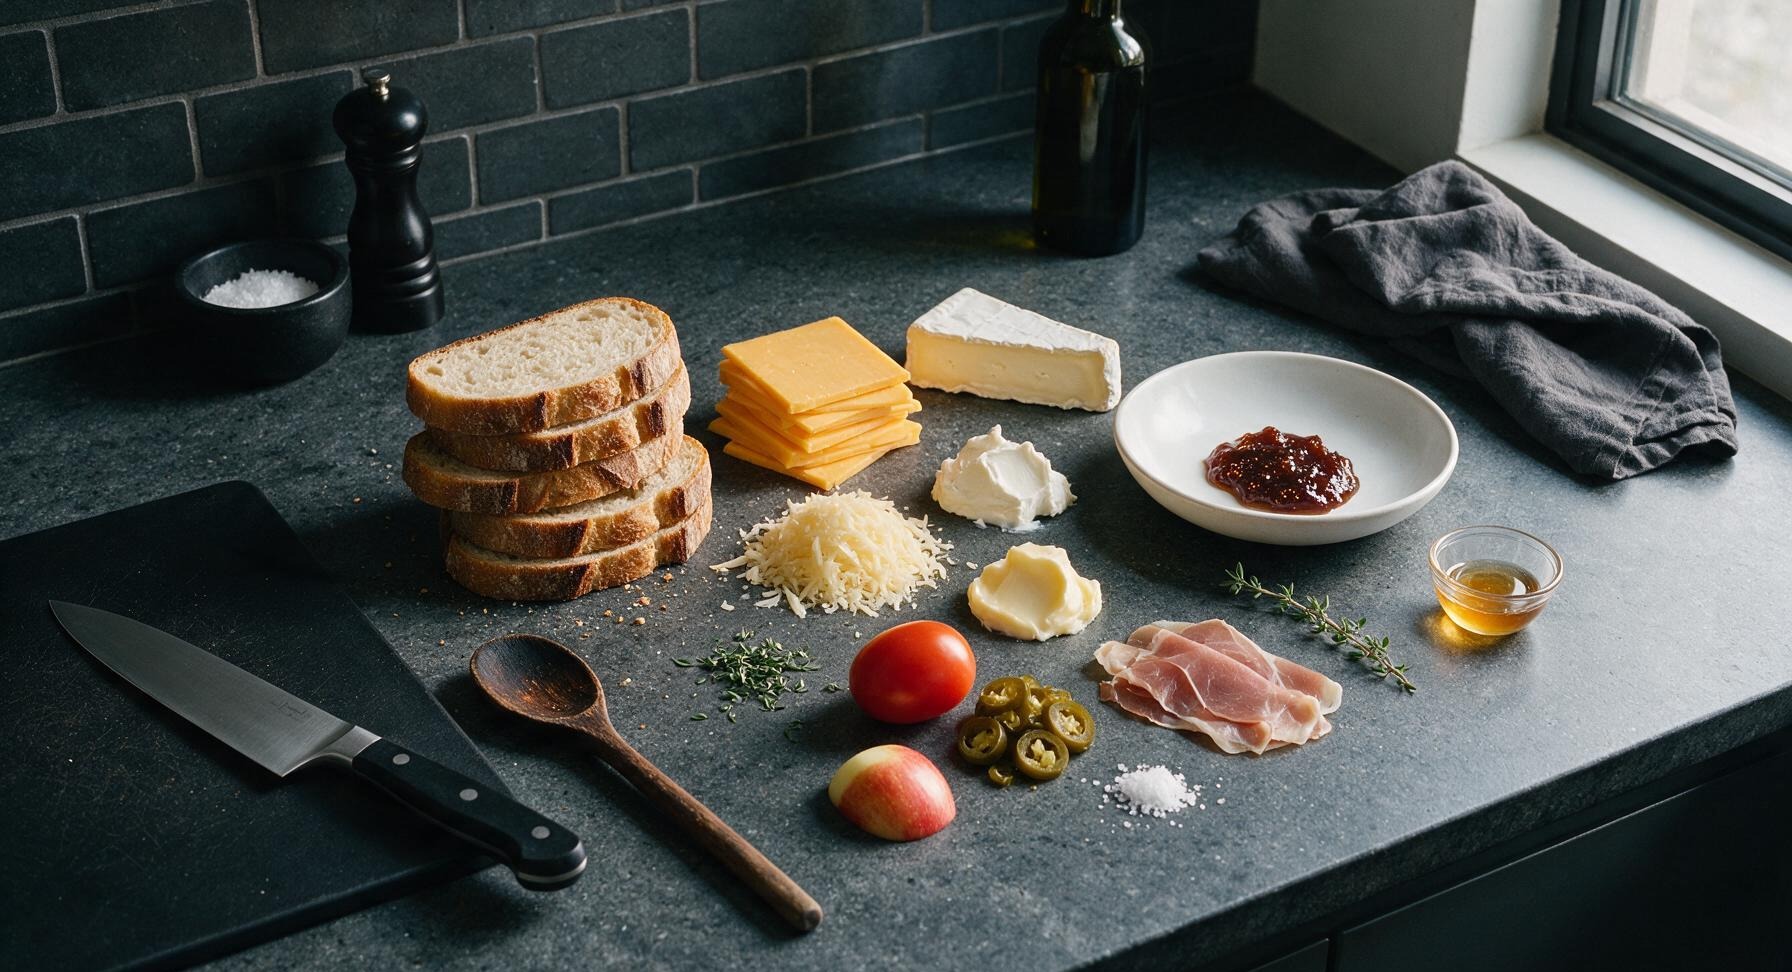
Thick-cut sourdough bread 8 slices (approx 400g, 1.5cm thick)
Sharp cheddar cheese 140g, thinly sliced
Brie cheese 85g, sliced (rind on)
Gruyere cheese 85g, coarsely grated
Cream cheese 55g, softened
Salted butter 60g, softened
Roma tomato 1 small (approx 100g)
Honeycrisp apple 1/4 small (approx 50g)
Pickled jalapeños 2 tbsp, drained and sliced
Fig spread 2 tbsp
Thinly sliced prosciutto 2 slices (approx 30g)
Raw honey 1 tsp
Flaky sea salt 1/4 tsp
Fresh thyme 1 tsp, leaves picked

Steps

1

Butter Bread Slices

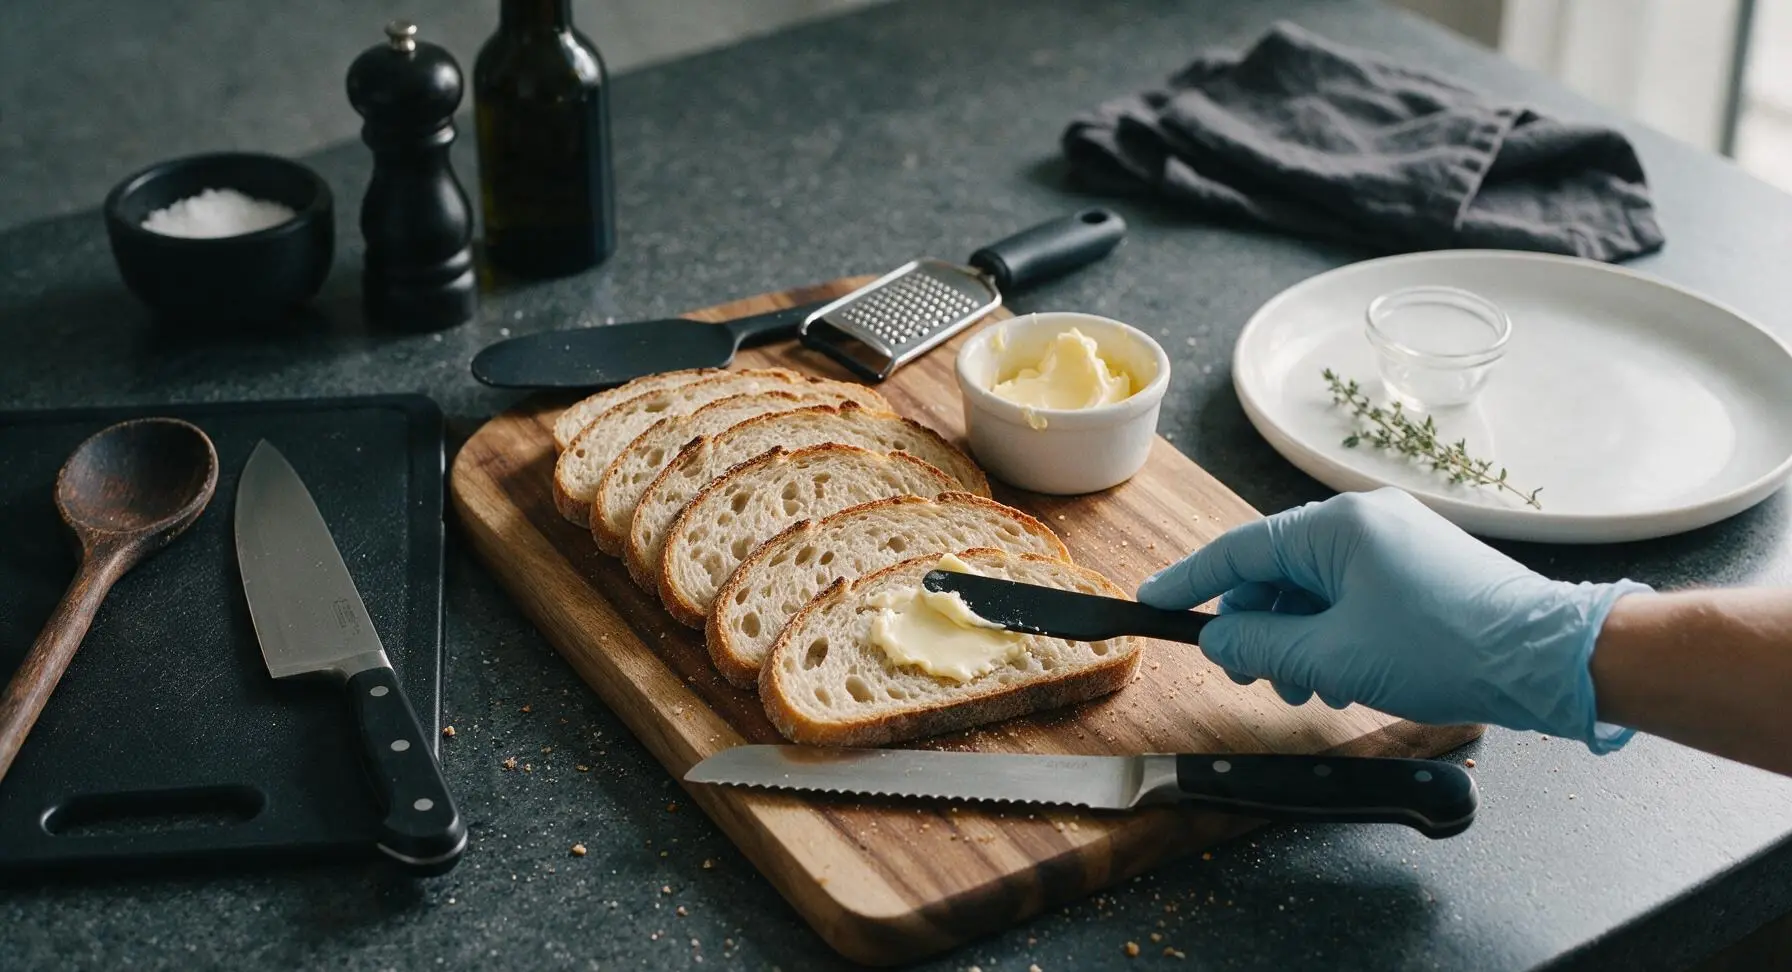
Lay all 8 sourdough slices flat on the acacia wood cutting board. Use the matte black butter knife to spread 1 teaspoon of softened salted butter evenly across one full side of each slice, spreading all the way to the crust edges to prevent burning and ensure uniform crisping. Set slices buttered-side down as you work, as these buttered sides will face outward against the pan during cooking.
Step 1
step1:Butter Bread Slices
2

Build Cheddar Tomato Sandwich

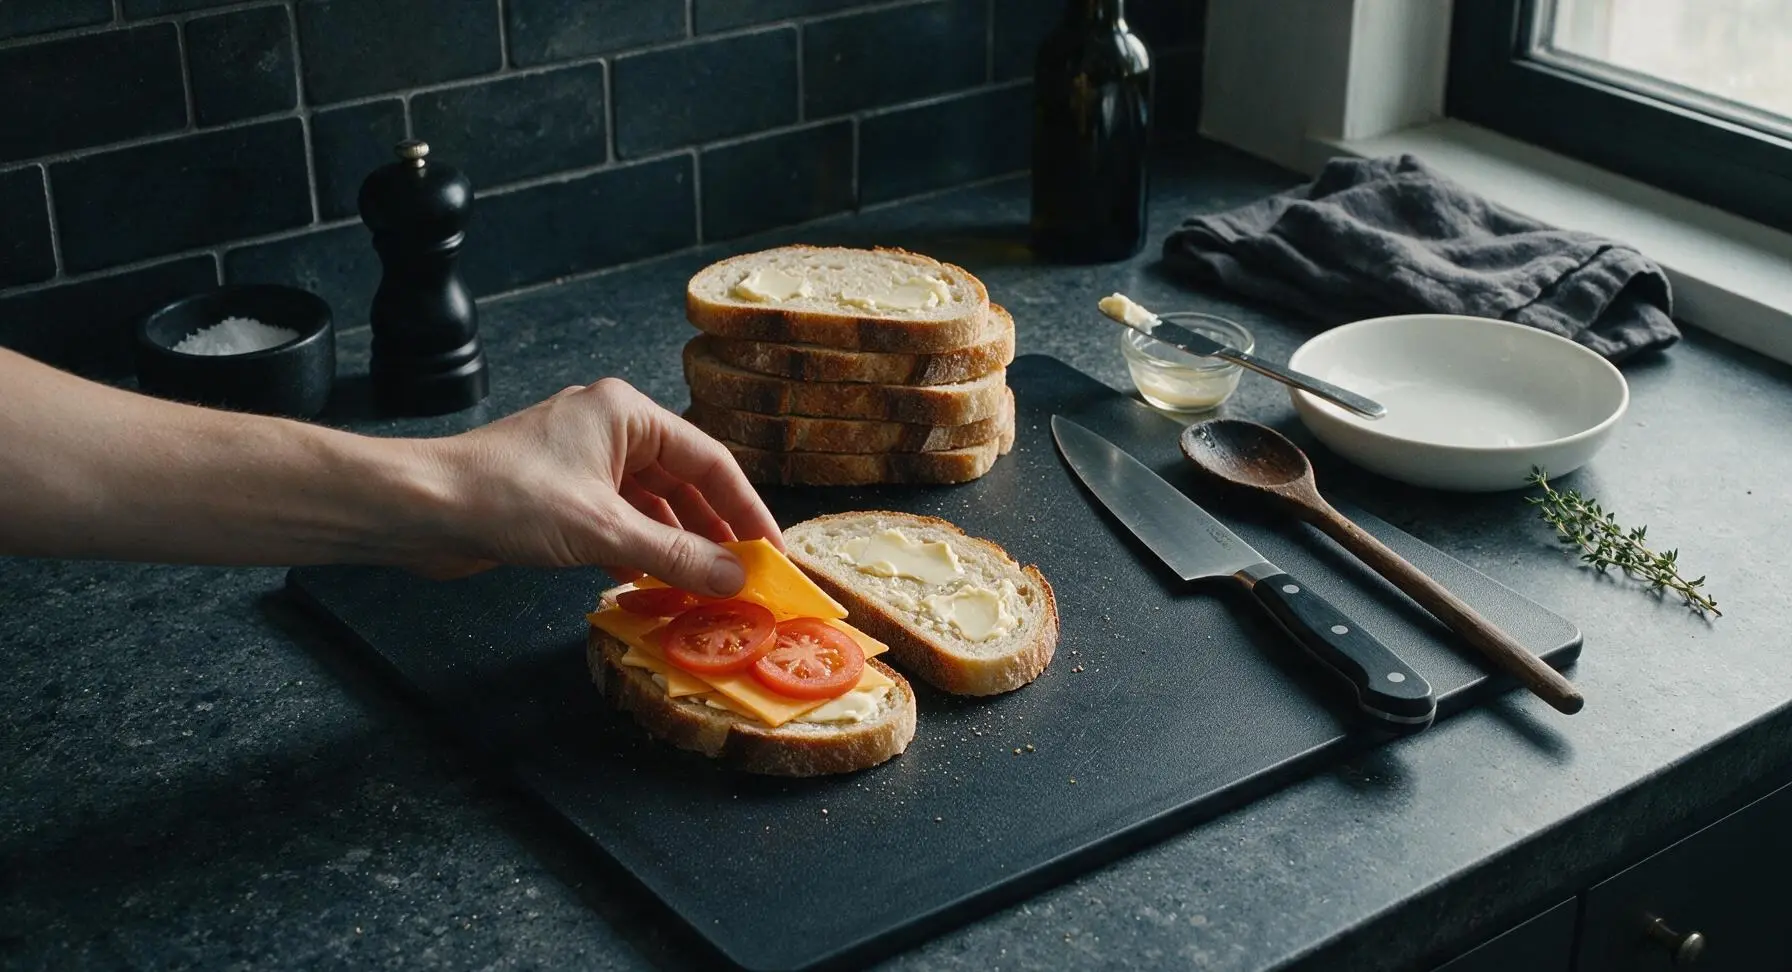
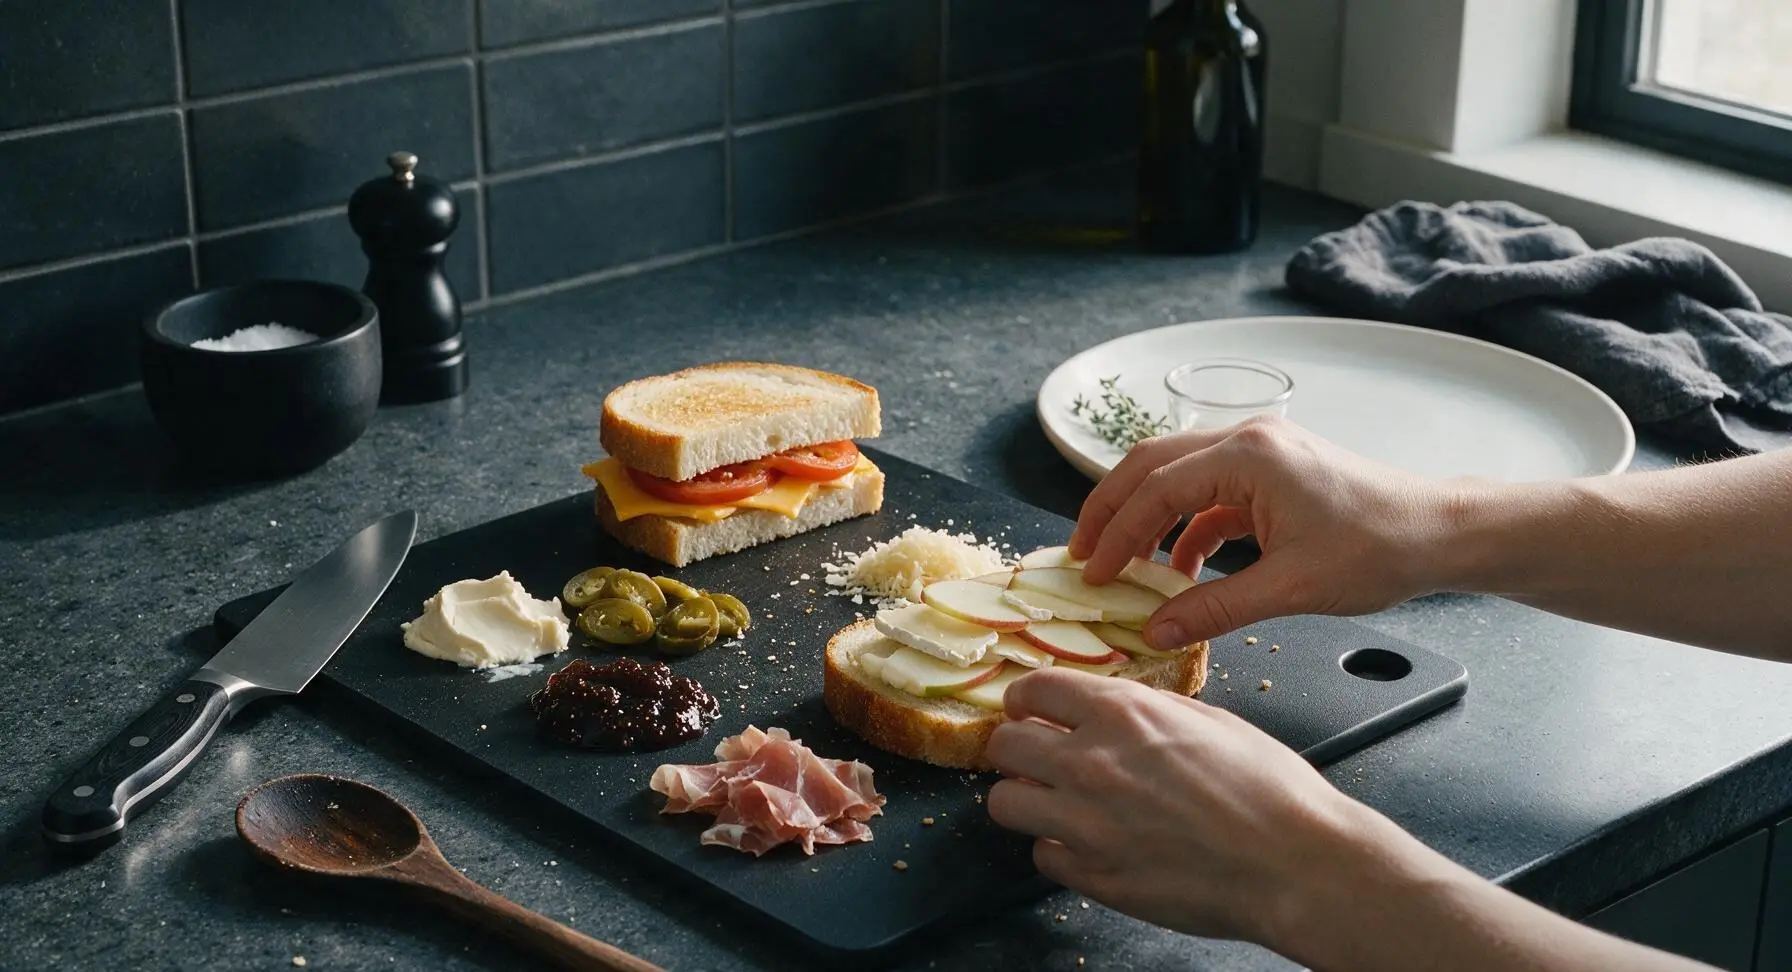
For the classic tangy cheddar-tomato variation: take two butter-side-down bread slices. Layer 70g of thin-sliced sharp cheddar across the unbuttered side of one slice, top with two 5mm-thick roma tomato slices (patted completely dry with a paper towel to avoid sogginess), a pinch of flaky salt, and a light sprinkle of fresh thyme leaves. Place the second bread slice on top, buttered side facing out, and press gently to adhere. Set the assembled sandwich on the far edge of the cutting board.
Step 2
step2:Build Cheddar Tomato Sandwich
3

Build Three Creative Twists

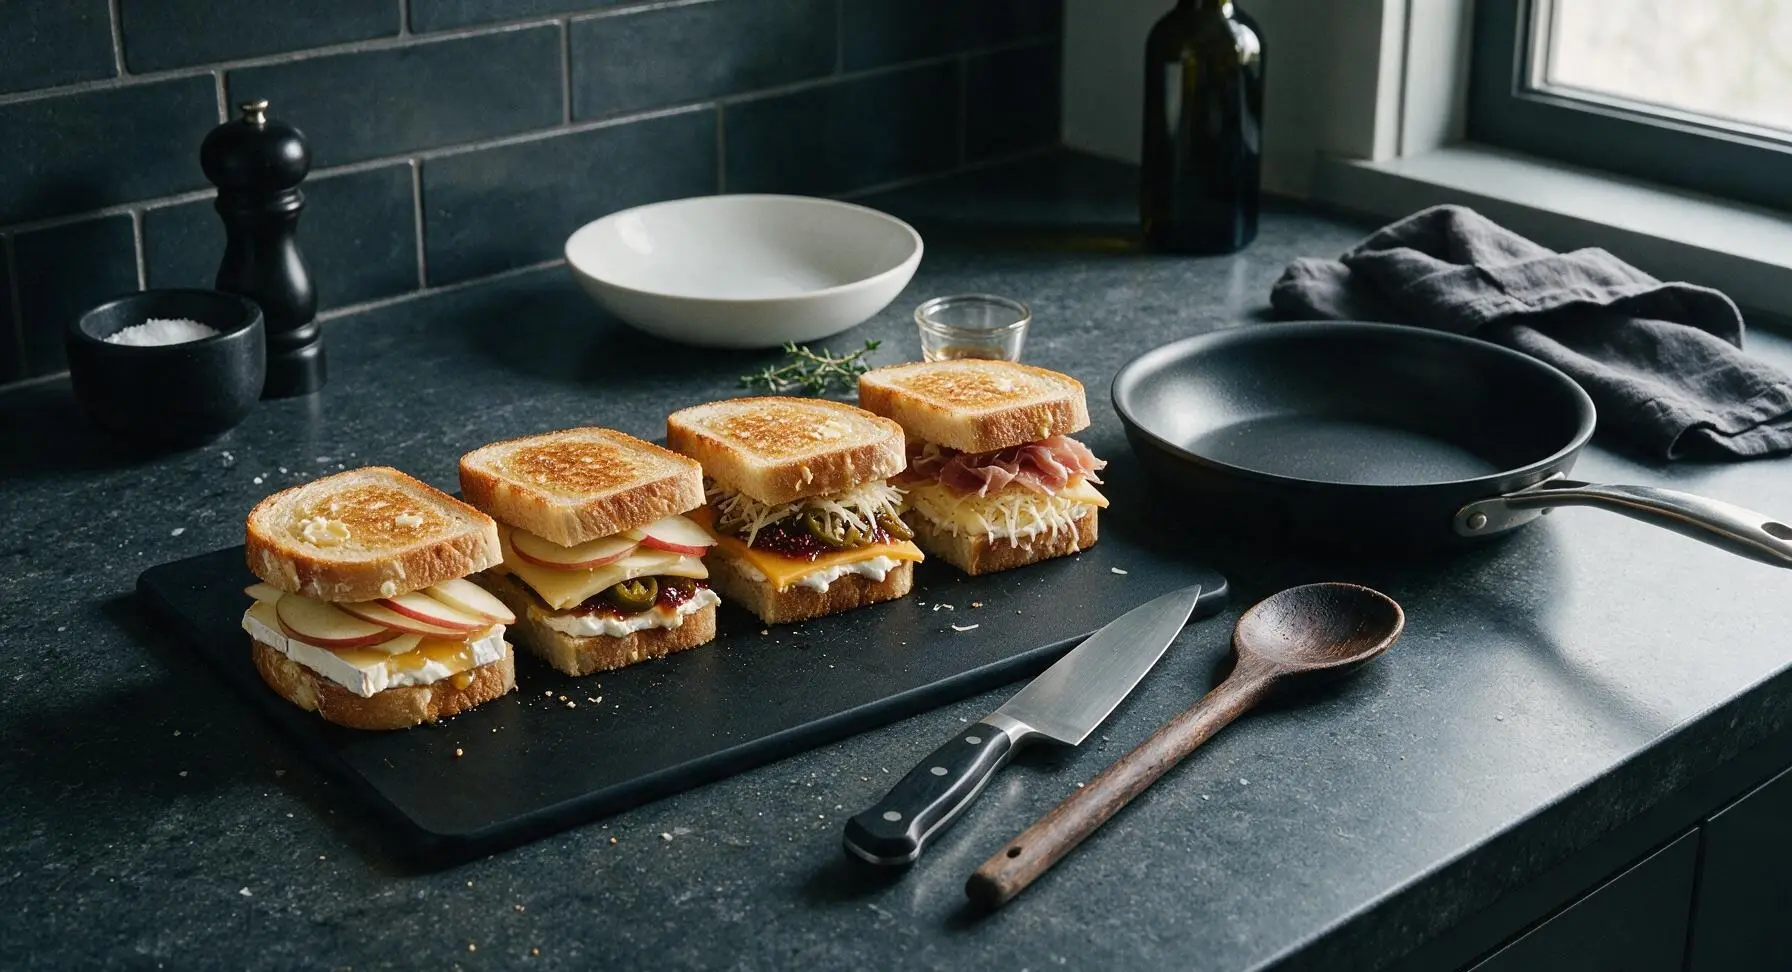
Assemble the remaining three grilled cheese variations, all on butter-side-down bread slices with buttered sides facing out: 1) Brie & apple: layer 85g sliced brie, 3 paper-thin honeycrisp apple slices, and a 1/4 tsp drizzle of raw honey between slices; 2) Jalapeño popper: spread 55g softened cream cheese across one unbuttered slice, top with the remaining 70g sliced sharp cheddar and 2 tbsp drained pickled jalapeños; 3) Fig & prosciutto: spread 2 tbsp fig spread across one unbuttered slice, top with 85g coarsely grated gruyere and 2 slices of torn prosciutto. Press each assembled sandwich gently to seal the edges.
Step 3
step3:Build Three Creative Twists
Step 3
step3:Build Three Creative Twists
4

Heat Pan to Medium

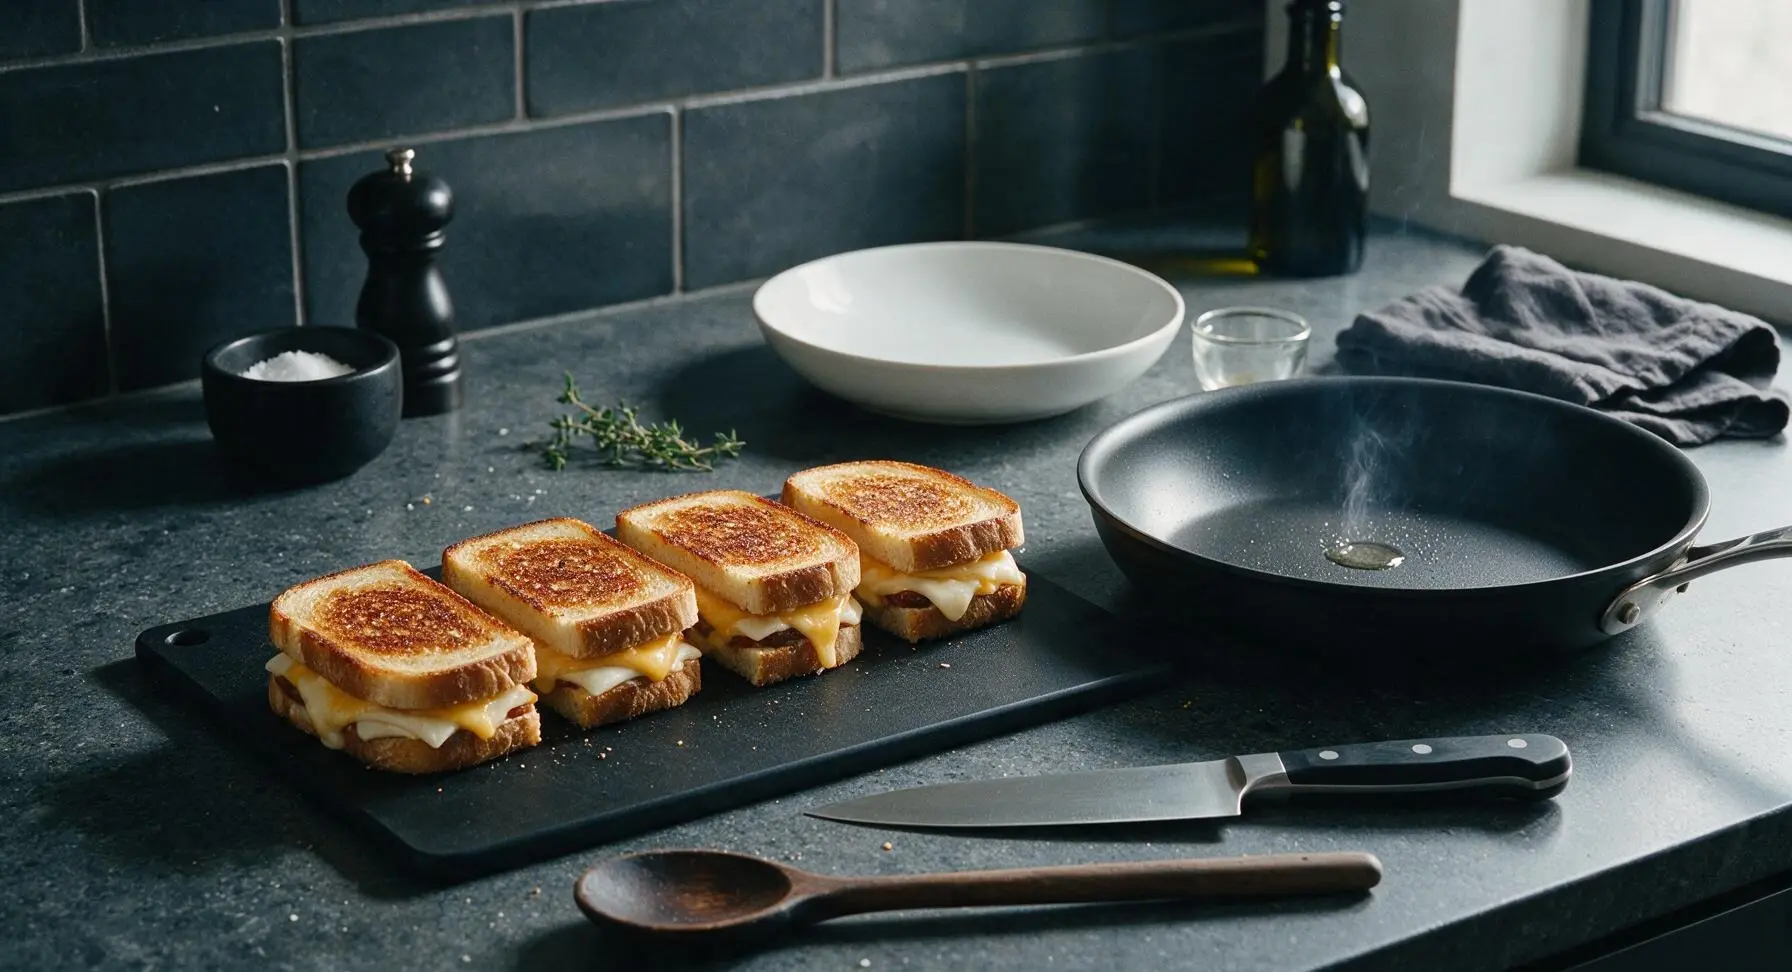
Turn the stovetop burner under the matte black non-stick skillet to medium heat, letting the pan preheat for 2 full minutes. Test the temperature by sprinkling a single drop of water onto the pan surface: it should sizzle and dance across the pan immediately. If the water evaporates instantly, the pan is too hot and will burn the bread; if it sits without bubbling, the pan needs another minute to preheat. No extra butter is needed in the pan, as the bread slices are already evenly buttered.
Step 4
step4:Heat Pan to Medium
5

Grill First Sandwich Side

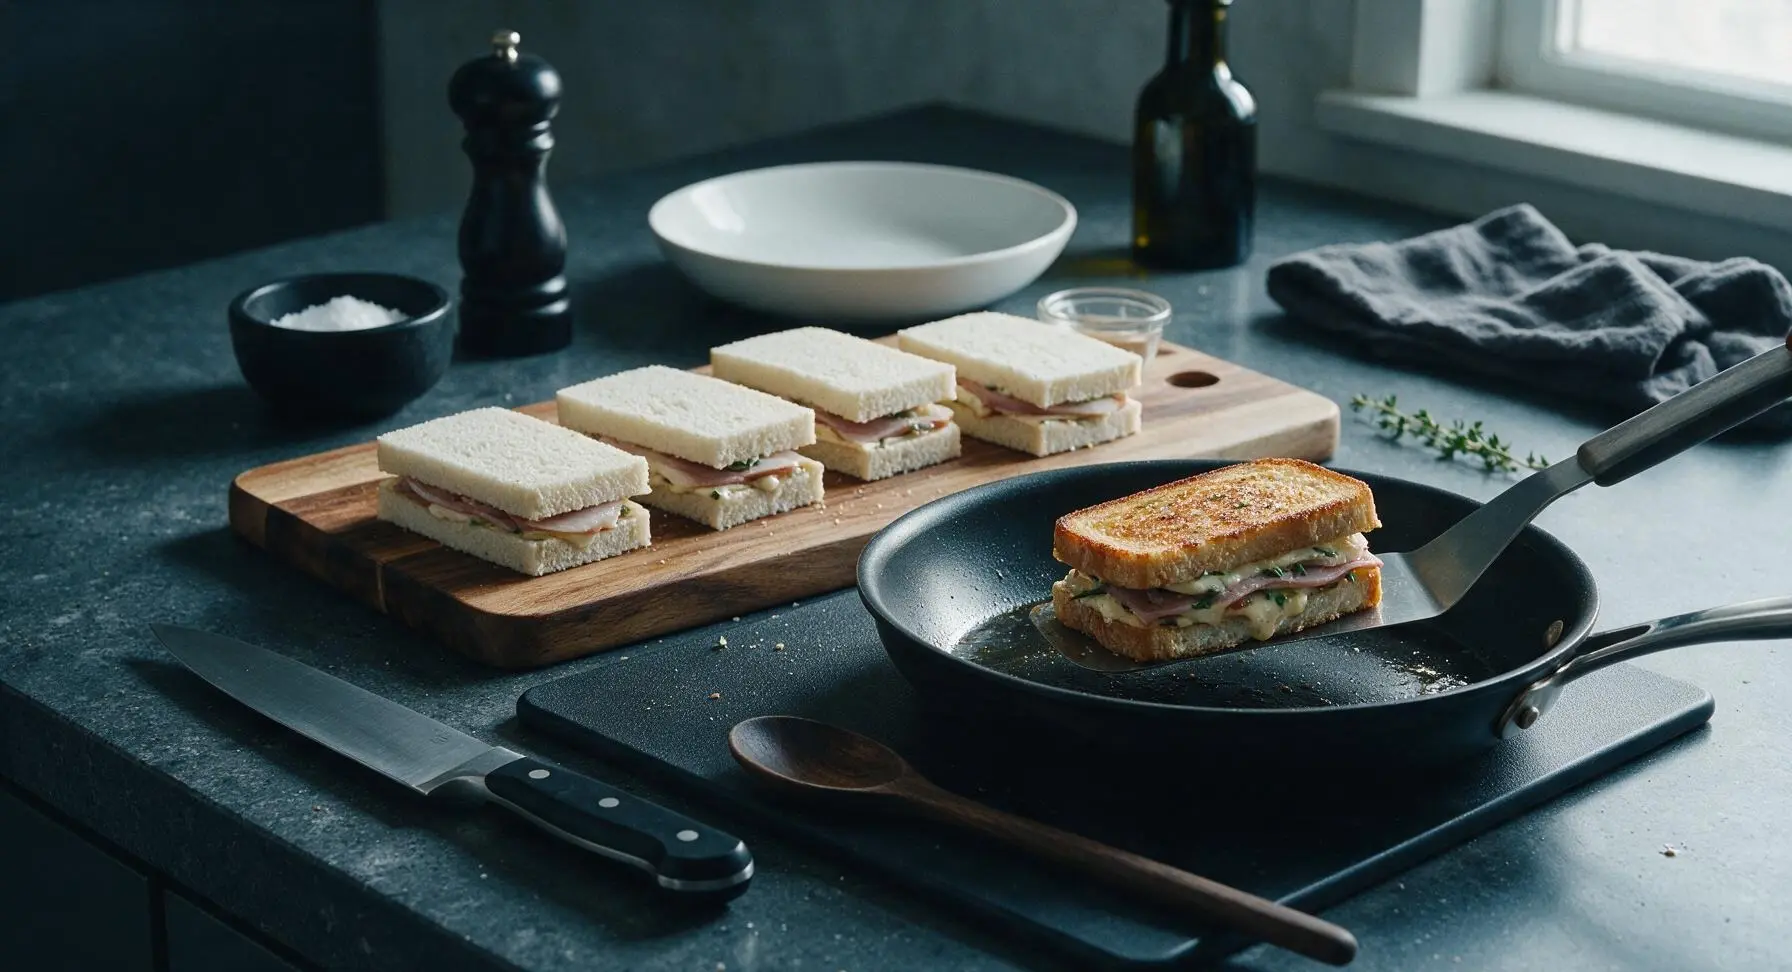
Use the stainless steel offset spatula to lift one assembled sandwich off the cutting board and place it gently into the preheated skillet. Cook for 3 minutes, adjusting the burner heat slightly if needed to maintain a steady, gentle sizzle. The bottom bread slice should turn a deep, even golden brown, and the cheese closest to the pan will begin to melt and bubble slightly at the edges. Do not press down hard on the sandwich while cooking, as this squeezes out melted cheese.
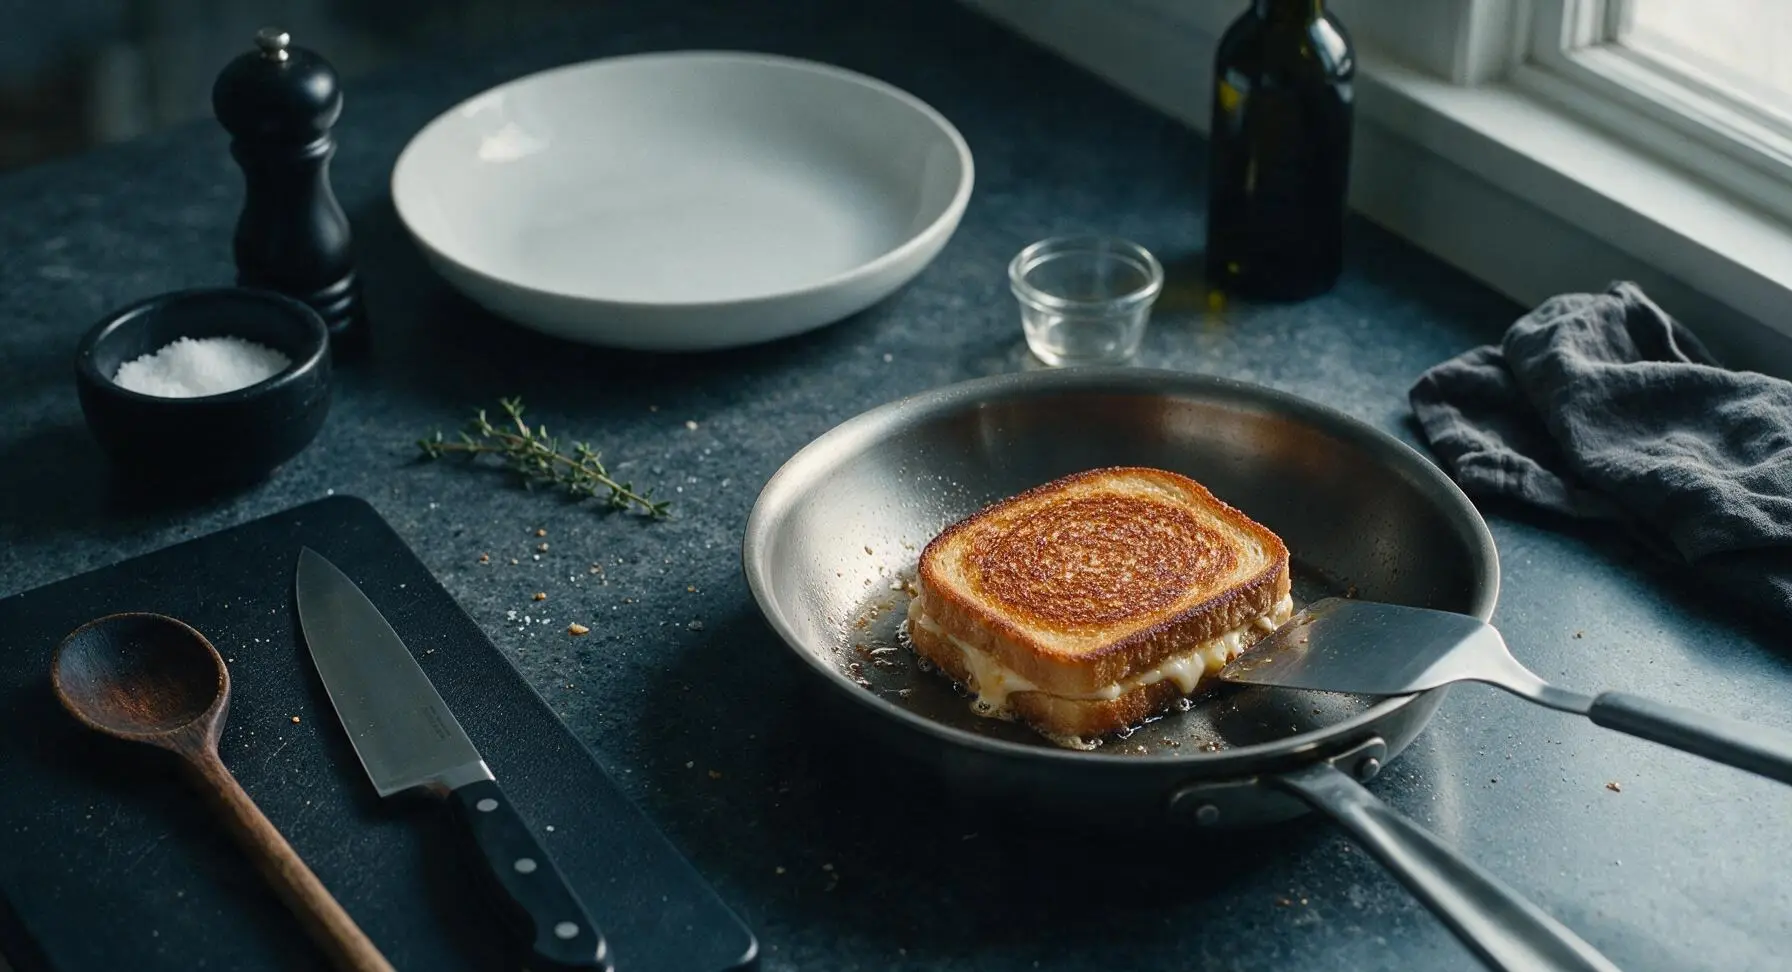
Step 5
step5:Grill First Sandwich Side
Step 5
step5:Grill First Sandwich Side
6

Flip and Finish Cooking

Slide the offset spatula fully under the sandwich to support it, then flip it in one smooth, quick motion to avoid tearing the bread. Cook the second side for 2 to 3 minutes, until it matches the first side’s golden crispness, and all cheese in the center is fully melted and stretchy (confirm by gently lifting a top bread corner with the spatula to check for unmelted cheese). Transfer the finished sandwich to the matte cream ceramic dinner plate, then repeat the cooking process for the remaining three sandwiches, turning the heat down slightly if the bread starts to darken too quickly.
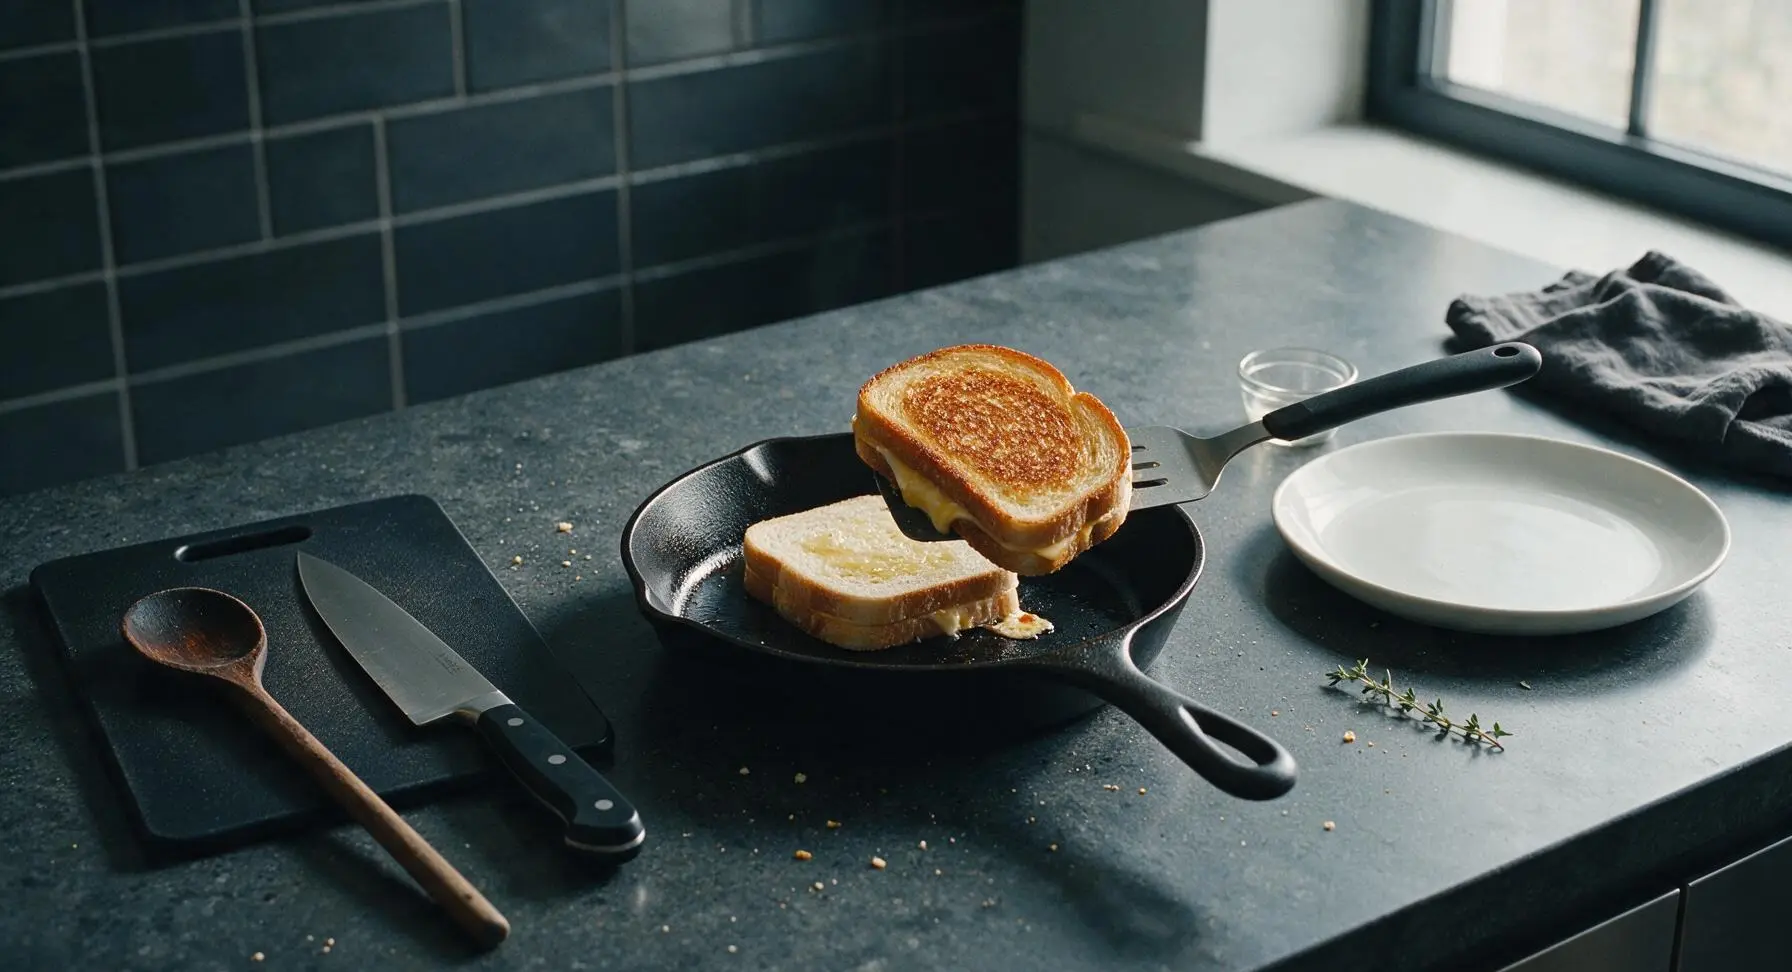
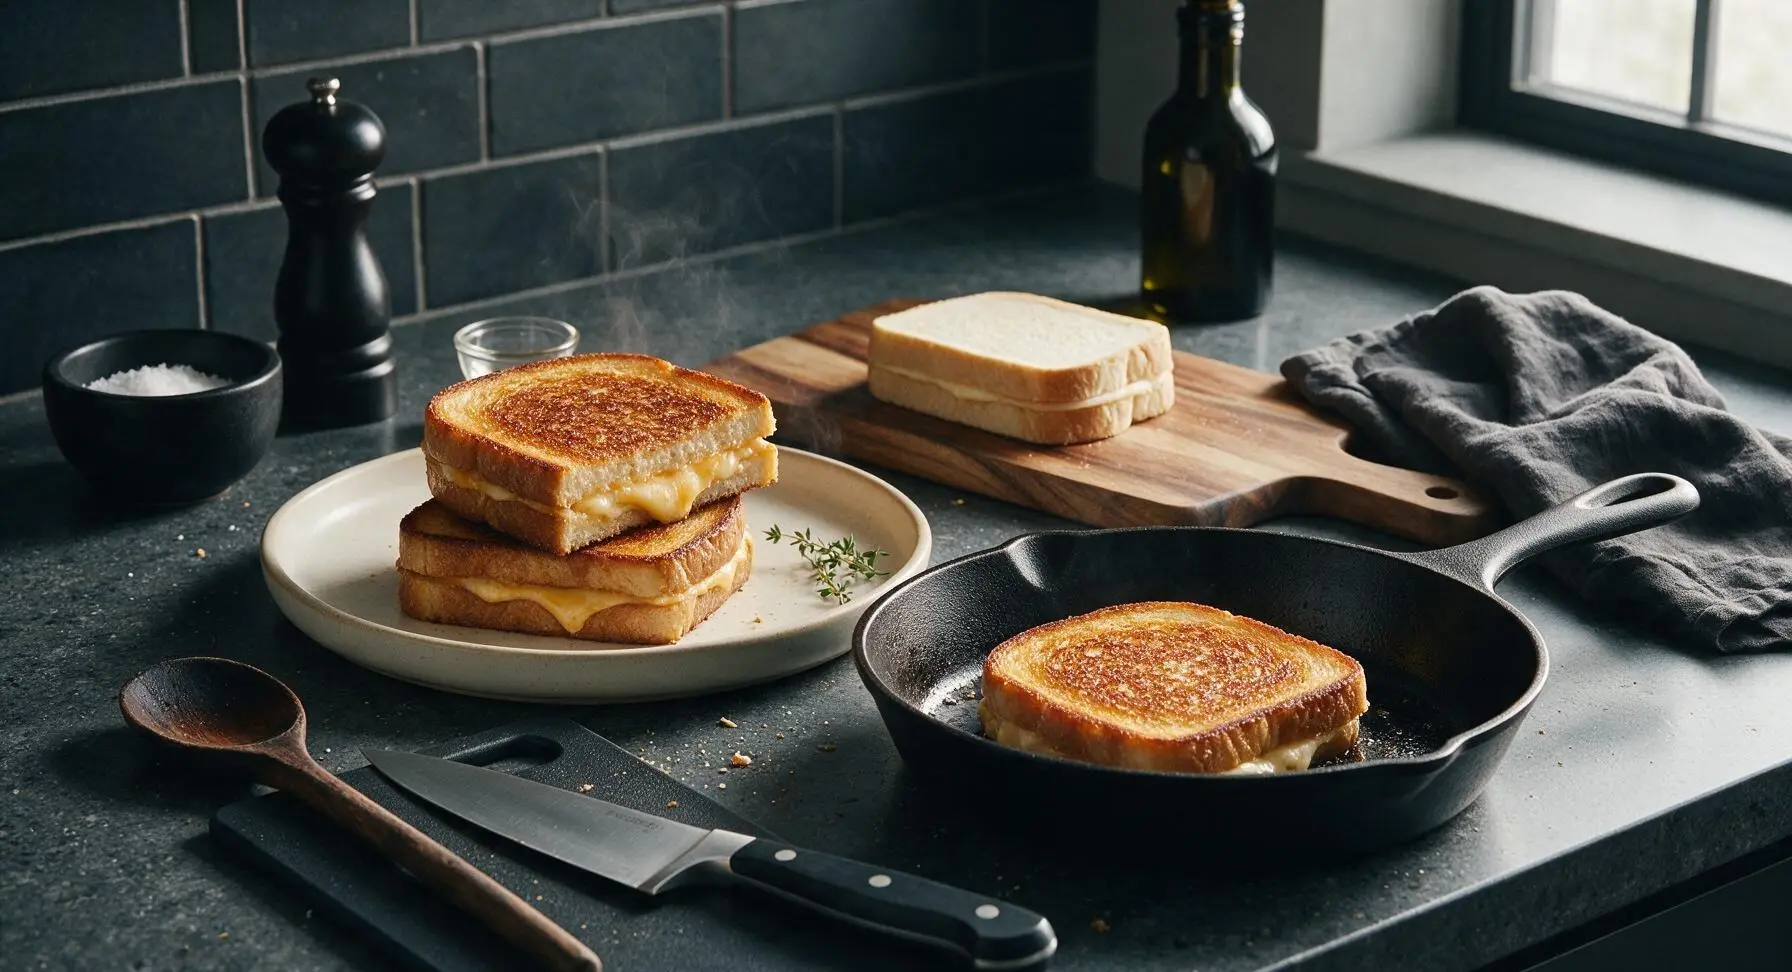
Step 6
step6:Flip and Finish Cooking
Step 6
step6:Flip and Finish Cooking
7

Slice and Season Sandwiches

Once all four sandwiches are cooked and stacked loosely on the cream ceramic plate, let them rest for 1 full minute to let the melted cheese set slightly—this prevents cheese from oozing out completely when cut. Use the serrated bread knife to cut each sandwich diagonally into two triangular halves, then sprinkle the crisp buttered crusts with a tiny pinch of flaky sea salt to amplify the nutty, buttery flavor.
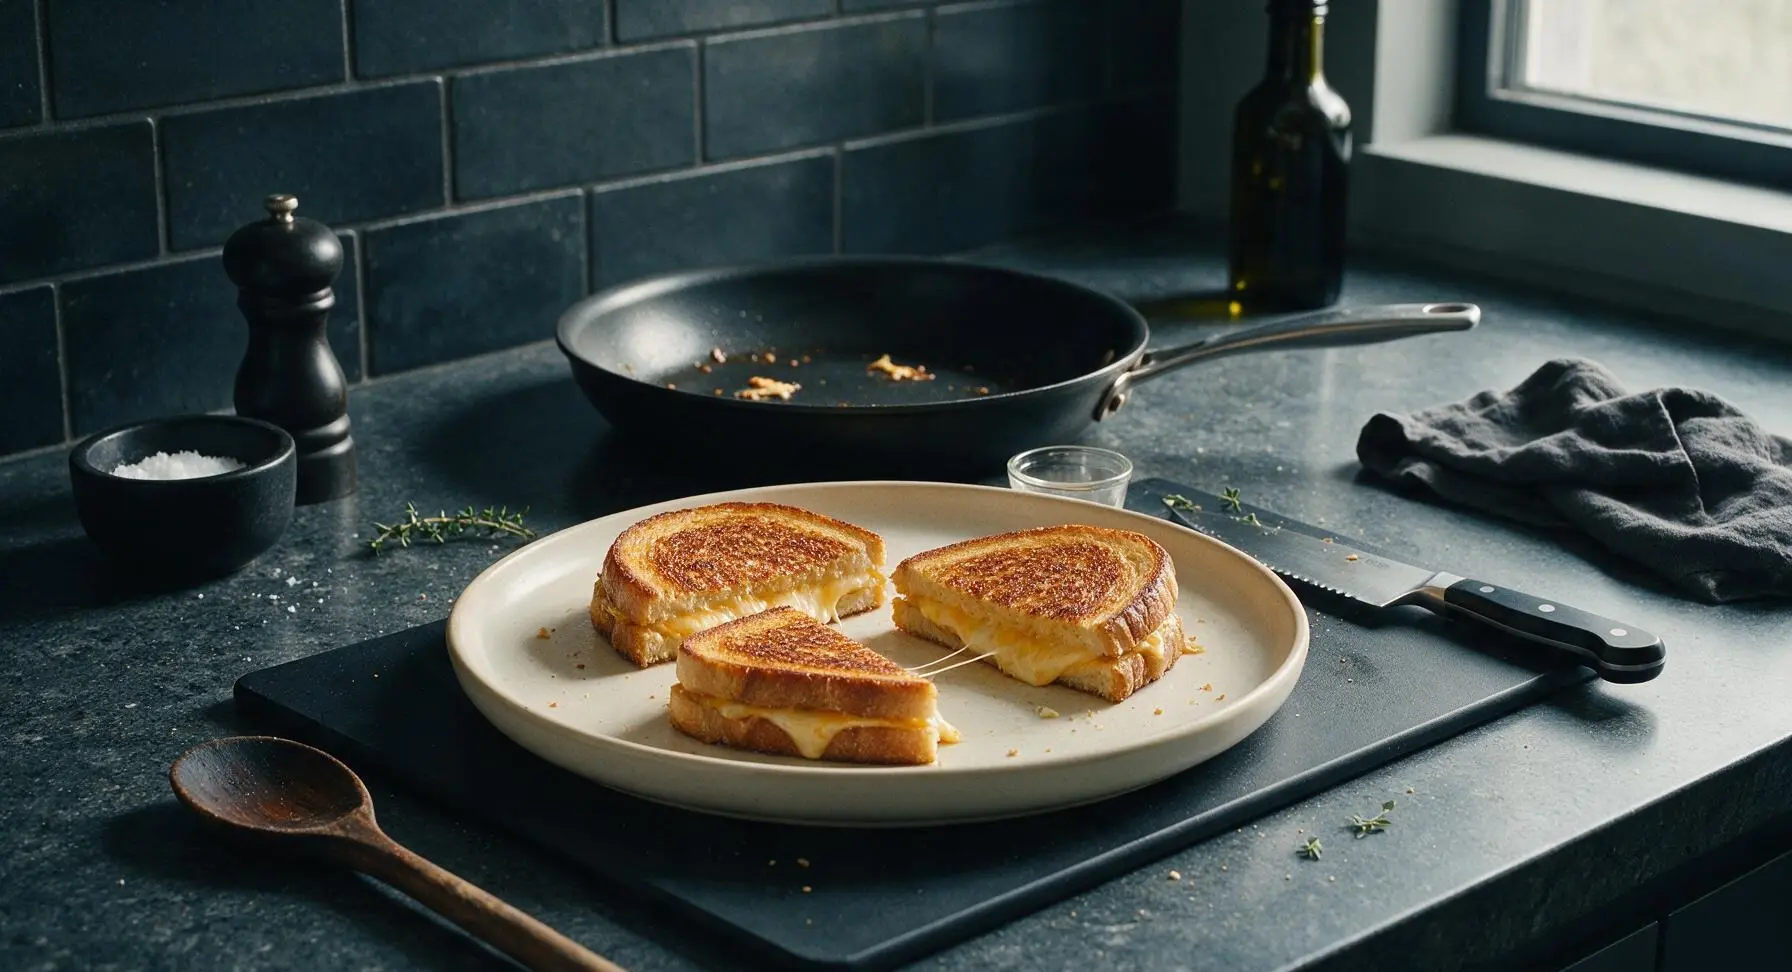
Step 7
step7:Slice and Season Sandwiches

Tips

1.Pat high-moisture fillings (tomato slices, pickled jalapeños) completely dry with a paper towel before adding them to sandwiches: excess moisture will seep into the bread during cooking, creating soggy spots instead of a uniform crisp crust.
2.Grate firm, hard cheeses like gruyere instead of slicing them: grated cheese has more surface area, so it melts faster and more evenly at medium heat, reducing the risk of burning the bread before the cheese turns fully gooey and stretchy.
3.Let cooked sandwiches rest for 1 minute before slicing: the melted cheese needs a moment to thicken slightly, so it won’t pour out of the cut sides and leave you with a dry, cheese-less bread pocket.


✨ You May Also Like

Lunch
🍜 United States

Creamy, salty, tangy nostalgic Midwestern sandwich pairing rich peanut butter with crisp briny dill pickles for a fast, satisfying no-cook meal.

⏱️ 5 minutesLunch ★ 4.6
Lunch
🍜 United States

Crispy, melty pressed sandwich layered with savory roast pork, ham, Swiss cheese, pickles, and tangy mustard: a beloved Cuban-American comfort classic.

⏱️ 25 minuteLunch ★ 4.9
Lunch
🍜 United States

Hearty, briny New Orleans pressed sandwich stacked with cured Italian meats, provolone, and zesty olive salad, served cold for bold, portable flavor.

⏱️ 1 hour 20Lunch ★ 4.7
Lunch
🍜 United States

A tangy, creamy Southern American staple, this no-cook cheesy sandwich is packed with sharp cheddar and sweet pimentos for a satisfying, portable bite.

⏱️ 1 hour 15Lunch ★ 4.8
Lunch
🍜 United States

Crispy Cajun-spiced fried shrimp piled on crusty French bread with tangy remoulade and fresh toppings, the iconic Louisiana street food sandwich.

⏱️ 35 minuteLunch ★ 4.4
Lunch
🍜 United States

Stacked, savory deli-style corned beef sandwich with melted Swiss, tangy mustard, and crisp griddled rye— a fast, hearty, satisfying classic.

⏱️ 15 minuteLunch ★ 4.9

grilled cheese ideas:Frequently Asked Questions

1.Do I have to use thick-cut sourdough for these grilled cheese recipes, or can I swap in a different bread? ▾
You absolutely can swap, but thick-cut sourdough is ideal because its sturdy crumb holds up to oozing cheese and juicy add-ins without getting soggy, and its tangy flavor complements every cheese blend. If you don’t have it, reach for other thick, crusty loaves like country white, brioche (perfect for the sweet brie-apple version), or whole grain—just skip thin, soft sandwich bread that falls apart easily.
2.How do I get that perfectly crisp, buttery crust without burning the bread before the cheese melts? ▾
The trick is to cook over medium-low heat, not high! Spread softened (not melted) butter evenly all the way to the edges of each bread slice, then cook 3-4 minutes per side, pressing gently with a spatula as you go. If the bread browns too fast, turn the heat down and cover the pan for 1 minute to help cheese melt evenly without scorching the crust.
3.What are the four specific grilled cheese variations included in this recipe? ▾
The four quick, elevated twists are: 1) Classic tangy sharp cheddar and roasted tomato, 2) Sweet-savory brie and spiced apple, 3) Nutty gruyere and caramelized onion, 4) Whipped cream cheese and berry jam with a sharp cheddar boost. All come together in under 30 minutes with that signature stretchy, melty cheese pull everyone loves.
4.Can I make these grilled cheeses ahead of time for meal prep or a party? ▾
These are best eaten fresh right off the griddle for maximum crispness and cheese pull, but you can prep components ahead to cut down on cook time: slice cheese, prep tomato/apple/onion add-ins, and butter bread slices up to 24 hours in advance, stored airtight in the fridge. Cook right before serving, rather than storing fully assembled, pre-cooked sandwiches.
5.My cheese never gets fully stretchy and melted before the crust burns—what am I doing wrong? ▾
This almost always happens when your heat is too high, or you’re using ice-cold cheese straight from the fridge. Grate hard cheeses like cheddar and gruyere for faster, even melting, and let softer cheeses like brie and cream cheese sit out 10 minutes before assembling. Medium-low heat ensures the crust crisps slowly while cheese melts all the way through.
6.Do I need to remove the rind from the brie for the apple-brie grilled cheese? ▾
That’s totally personal preference! The soft, edible brie rind adds a nice earthy, slightly funky depth that pairs beautifully with sweet apple, but it doesn’t melt quite as smoothly as the inner cheese. If you prefer a super silky, uniform melt, simply trim the thin top rind off before slicing brie to layer—no need to remove every last bit if you don’t want to.
7.Can I make these grilled cheeses in an air fryer instead of on the stovetop? ▾
Absolutely! Butter the outside of your bread slices as directed, assemble the sandwich, and air fry at 370°F for 4 minutes, flip carefully, then air fry 2-3 more minutes until the crust is golden crisp and cheese is fully melted. Keep a close eye on it the first time, as air fryer power varies, to avoid burning the bread edges.
8.What’s the best way to keep juicy add-ins like tomato or apple from making my grilled cheese soggy? ▾
For tomato slices, pat them completely dry with paper towels before layering, and give them a quick 1-minute sear in the pan first to draw out excess moisture. For apple slices, cut them ¼-inch thick so they cook quickly without releasing too much juice, and layer them between cheese slices to create a moisture barrier between fruit and bread.
9.Can I use pre-sliced deli cheese instead of block cheese for these recipes? ▾
You can, but block cheese that you grate fresh at home will give you that iconic stretchy, oozing melt pre-sliced cheese often can’t match. Pre-sliced deli cheese is often coated in anti-caking agents that prevent smooth melting, but if it’s what you have on hand, it will still taste great—just expect a slightly less dramatic cheese pull.
10.What add-ins pair best with the gruyere grilled cheese variation? ▾
Nutty, slightly salty gruyere pairs beautifully with mild, sweet add-ins that balance its rich flavor. My go-to for this twist is slow-cooked caramelized onions, a thin spread of Dijon mustard on the inner bread slices, and a pinch of fresh thyme. You can also add crispy ham or sautéed mushrooms for an extra-hearty, restaurant-worthy sandwich.
11.Is there a dairy-free swap that works well for all these grilled cheese ideas? ▾
There are great dairy-free options now that melt beautifully for this recipe! Look for block-style dairy-free cheddar, brie, and cream cheese alternatives (skip shredded versions with lots of anti-caking additives) and use plant-based butter for the crust. You may need an extra 30 seconds of cook time to get that same smooth, melty dairy-like texture.
12.How thick should I cut the sourdough slices to get the perfect texture? ▾
Aim for ¾-inch thick slices for the best balance of crisp crust and soft, chewy interior that holds up to fillings. Slices thinner than ½ inch will get too crispy and won’t contain oozing cheese well, while slices over 1 inch thick will take too long to cook through, leaving you with under-melted cheese or a burnt outer crust.
13.Do I need a special pan, like a cast iron skillet, to make these grilled cheeses? ▾
You don’t need any fancy equipment! A heavy-bottomed nonstick skillet works perfectly, as does a cast iron pan if you have one—its even heat retention makes for a super consistent crisp crust. The only key is to use a pan that heats evenly, so you don’t get random hot spots that burn patches of bread before the rest is golden.
14.How do I incorporate cream cheese into these variations without it tasting bland? ▾
Cream cheese adds a luxuriously creamy texture that cuts through sharper, nuttier cheeses, but it benefits from a little flavor boost! Whip it with a pinch of flaky salt, a tiny squeeze of lemon, or a dash of cinnamon (for the brie-apple version) before spreading. It works beautifully as a base for the sweet berry jam twist, or mixed with shredded cheddar for extra richness in the classic tomato version.
15.Can I add protein to these grilled cheeses to make them a more filling full meal? ▾
Absolutely—these elevated twists are super easy to bulk up into a full meal. Add crispy bacon, sliced deli turkey, prosciutto, or even sautéed white beans to any variation for extra protein. Just make sure any juicy add-ins (like sauce-coated pulled pork) are patted dry first to avoid making that perfect buttery crust soggy as it cooks.
16.Why does my butter always burn when I make grilled cheese, and how do I fix that? ▾
Burnt butter usually happens when you use melted butter instead of softened, room-temperature butter, or when your pan heat is too high. Softened butter spreads thin and evenly across the bread, so it crisps gradually instead of scorching. If you love extra butter flavor, add a tiny pat to the pan right before flipping, rather than piling it on at the start.
17.How long do these grilled cheeses actually take to make, from start to finish? ▾
All four variations come together in 20 to 25 minutes total, making them perfect for quick weeknight dinners or last-minute lunches. The only small prep step is slicing add-ins like apples, tomatoes, or onions, which takes 5 to 7 minutes, and each sandwich cooks in 6 to 8 minutes on the stovetop. Prep add-ins ahead to cut total cook time down to 10 minutes flat!

Comments (8)

3 days ago

OMG these elevated grilled cheese ideas are a total game changer! I made the fig & brie one last night for my girls’ night potluck and everyone was begging for the recipe. 15 minute cook time is no joke, I threw them together right before guests showed up. SO good, even my picky sister went back for seconds!

2 days ago

Ugh the fig & brie is my favorite too! I added a tiny sprinkle of candied walnuts on mine last week and it was chef’s kiss. Quick question though — what bread works best for it? I tried plain white sandwich bread last time and it got totally soggy halfway through cooking.

yesterday

So glad it’s been a hit for both of you! Sourdough is our go-to for the fig & brie, it holds up perfectly to the melty brie and sweet fig spread without getting soggy, even if you add extra toppings like candied walnuts.

5 days ago

Made the bacon jalapeño popper grilled cheese for my kids’ after school snack yesterday and holy cow, my 8 year old said it’s the best thing I’ve ever cooked. Even got my teen to put his phone down long enough to eat two! Super easy too, I didn’t have to run to the store for any fancy ingredients, just used what I had in the fridge.

3 days ago

Love hearing that! The jalapeño popper version is such a kid pleaser (even for hard-to-impress teens, apparently!) — pro tip, if you want a little extra crunch, toss in some crushed potato chips next time.

1 week ago

As someone who only has a mini George Foreman grill in my dorm, these were so easy to pull off! I did the tomato mozzarella pesto one for me and my roommate and we both were blown away that it wasn’t from the sandwich shop down the street. Way cheaper than takeout too, will be adding this to my weekly meal rotation.

2 days ago

Wait has anyone tried prepping these ahead for the week? I do meal prep every Sunday for work lunches and I’m wondering if these reheat well in the office toaster oven, or if they get soggy?

yesterday

I prepped three of them last week! I kept the bread, cheese, and fillings separate in containers and assembled when I got to work, zero sogginess. Works like a charm!

2 hours ago

Great question! If you’re prepping ahead, we recommend storing fillings separately as mentioned above, but if you do assemble them ahead, pop them in the toaster oven instead of the microwave to reheat to keep the bread crispy. They hold up great for 3-4 days in the fridge!

yesterday

Obsessed that one of the options is fully veggie! I made the roasted red pepper and feta grilled cheese for my meat-free Monday dinner and it was so flavorful, I didn’t even miss the meat. Next time I’m gonna add a little spinach for extra greens. 10/10

2 hours ago

I added spinach too! Just wilt it a tiny bit in the pan first so it doesn’t release extra water and make the bread wet, total game changer.

2 weeks ago

I’ve been making grilled cheese for 60+ years and I have to say, these elevated takes are really clever! Tried the caramelized onion and gouda one for lunch today and the depth of flavor was incredible. Who knew a little caramelized onion could take a classic to the next level? Great work on these easy recipes.

30 minutes ago

Made three of these for our family dinner last night because we couldn’t pick just one! Everyone got a quarter of each to try and the vote was unanimous: the apple cheddar with honey is the new household favorite. Even my husband, who is a total purist when it comes to grilled cheese, said he’d eat that every week.

5 minutes ago

That’s such a fun way to test all the flavors! The apple cheddar is such a perfect sweet-savory combo, we’re so glad your grilled cheese purist husband approved 😊

2 hours ago

Quick question: has anyone made these with gluten free bread? I have a gluten sensitivity and I’m dying to try the fig & brie one but I’m worried GF bread will get too crispy or fall apart on the grill.

30 minutes ago

I made them with my favorite sourdough GF bread last weekend! Just cook it on a slightly lower heat so it doesn’t burn before the cheese melts, it turned out perfectly!

just now

Great question! We’ve tested these with a few different GF sourdough loaves and as long as you keep the heat to medium (not high!) and butter both sides of the bread well, it comes out just as crispy and delicious as regular sourdough. Hope you love it!



