
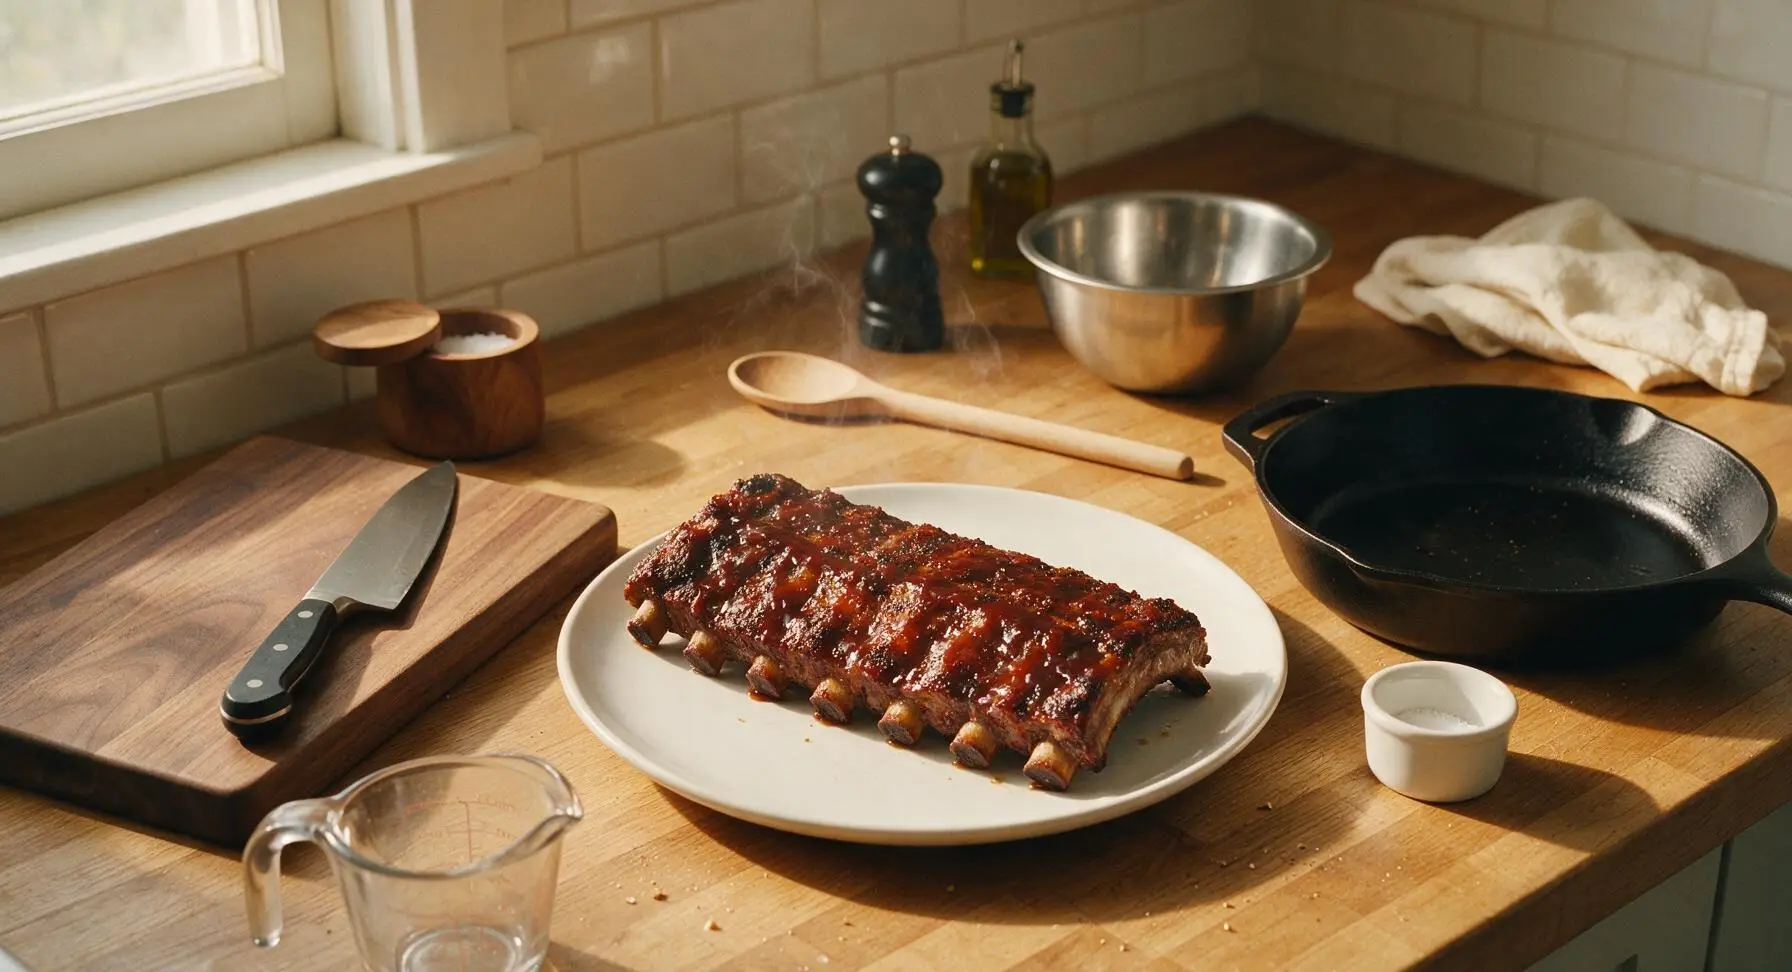
Half Rack of Ribs

title 1
Half Rack of Ribs
⏱️ cook time 2 hours 30 minutes
🍽️ servings 2
⚡ Difficulty medium

intro

Tender, fall-off-the-bone half rack of pork ribs coated in smoky dry rub, slathered in sticky caramelized BBQ sauce, a classic summer cookout favorite.

Ingredients
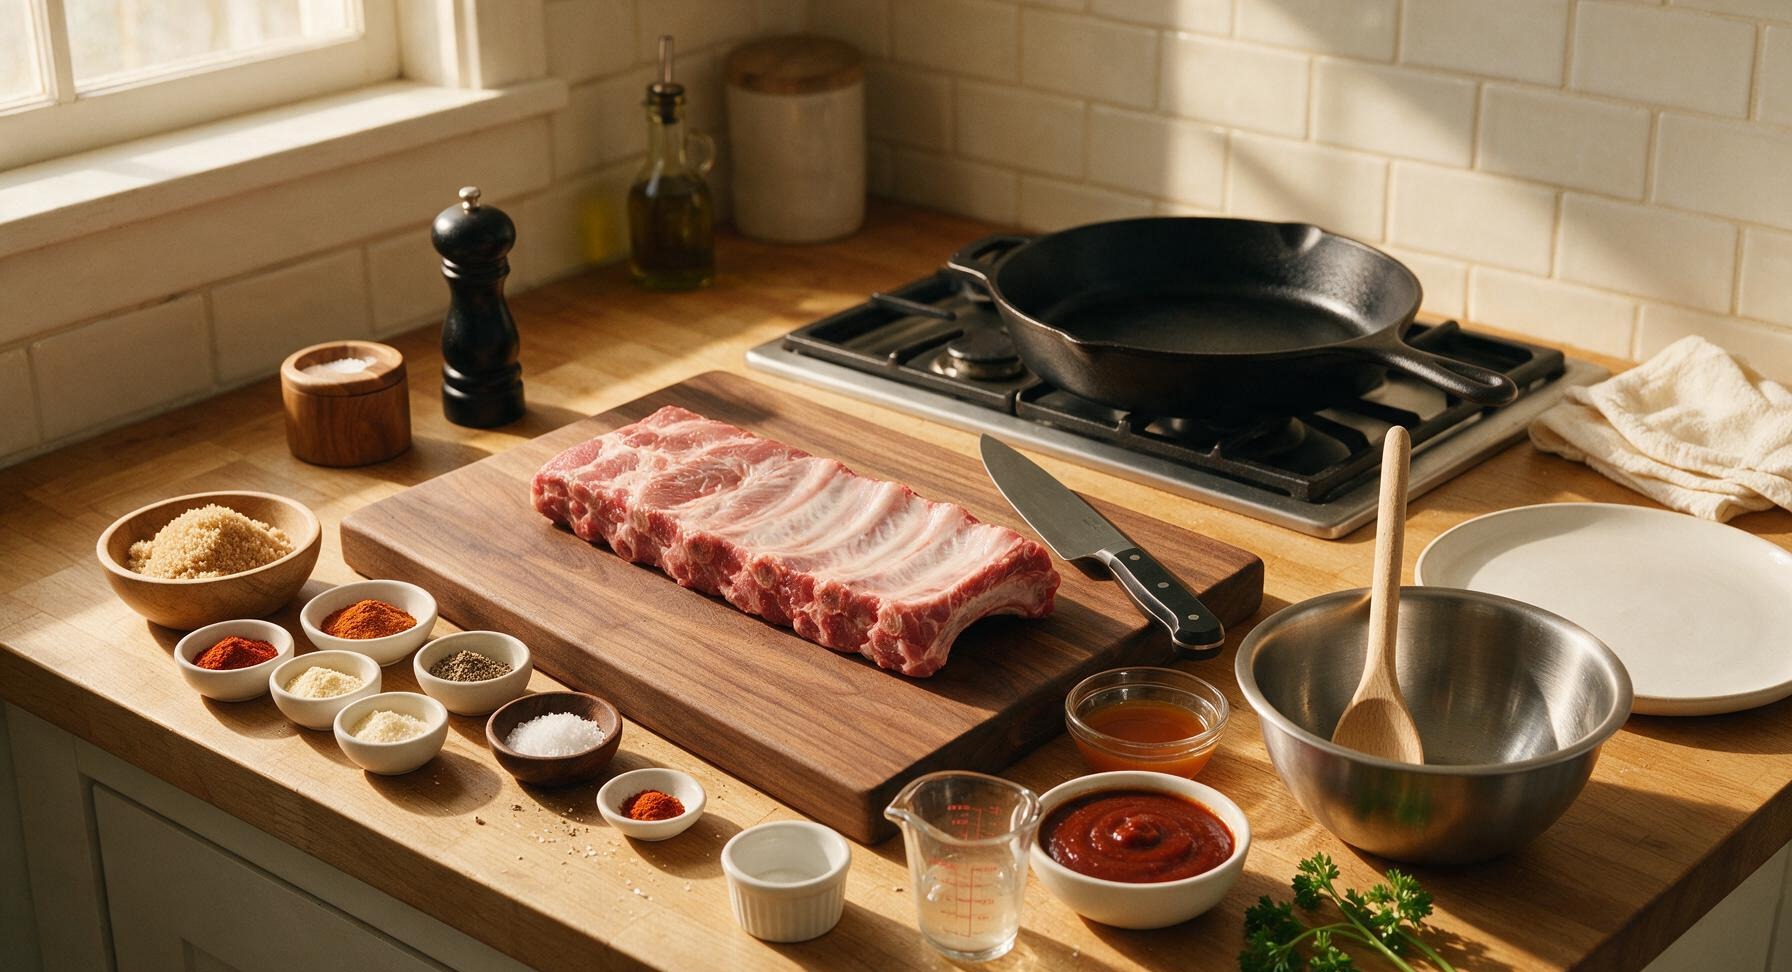
Half rack bone-in pork spare ribs 680g (1.5 lbs, ~6 ribs)
Light brown sugar 2 tbsp
Sweet paprika 1 tbsp
Smoked paprika 1 tsp
Garlic powder 1 tsp
Onion powder 1 tsp
Kosher salt 1 tbsp
Coarse ground black pepper 1 tsp
Cayenne pepper 1/4 tsp
Apple cider vinegar 2 tbsp
Smoky tomato-based BBQ sauce 1 cup (240ml)
Fresh curly parsley 2 sprigs

Steps

1

Prep the Rib Rack

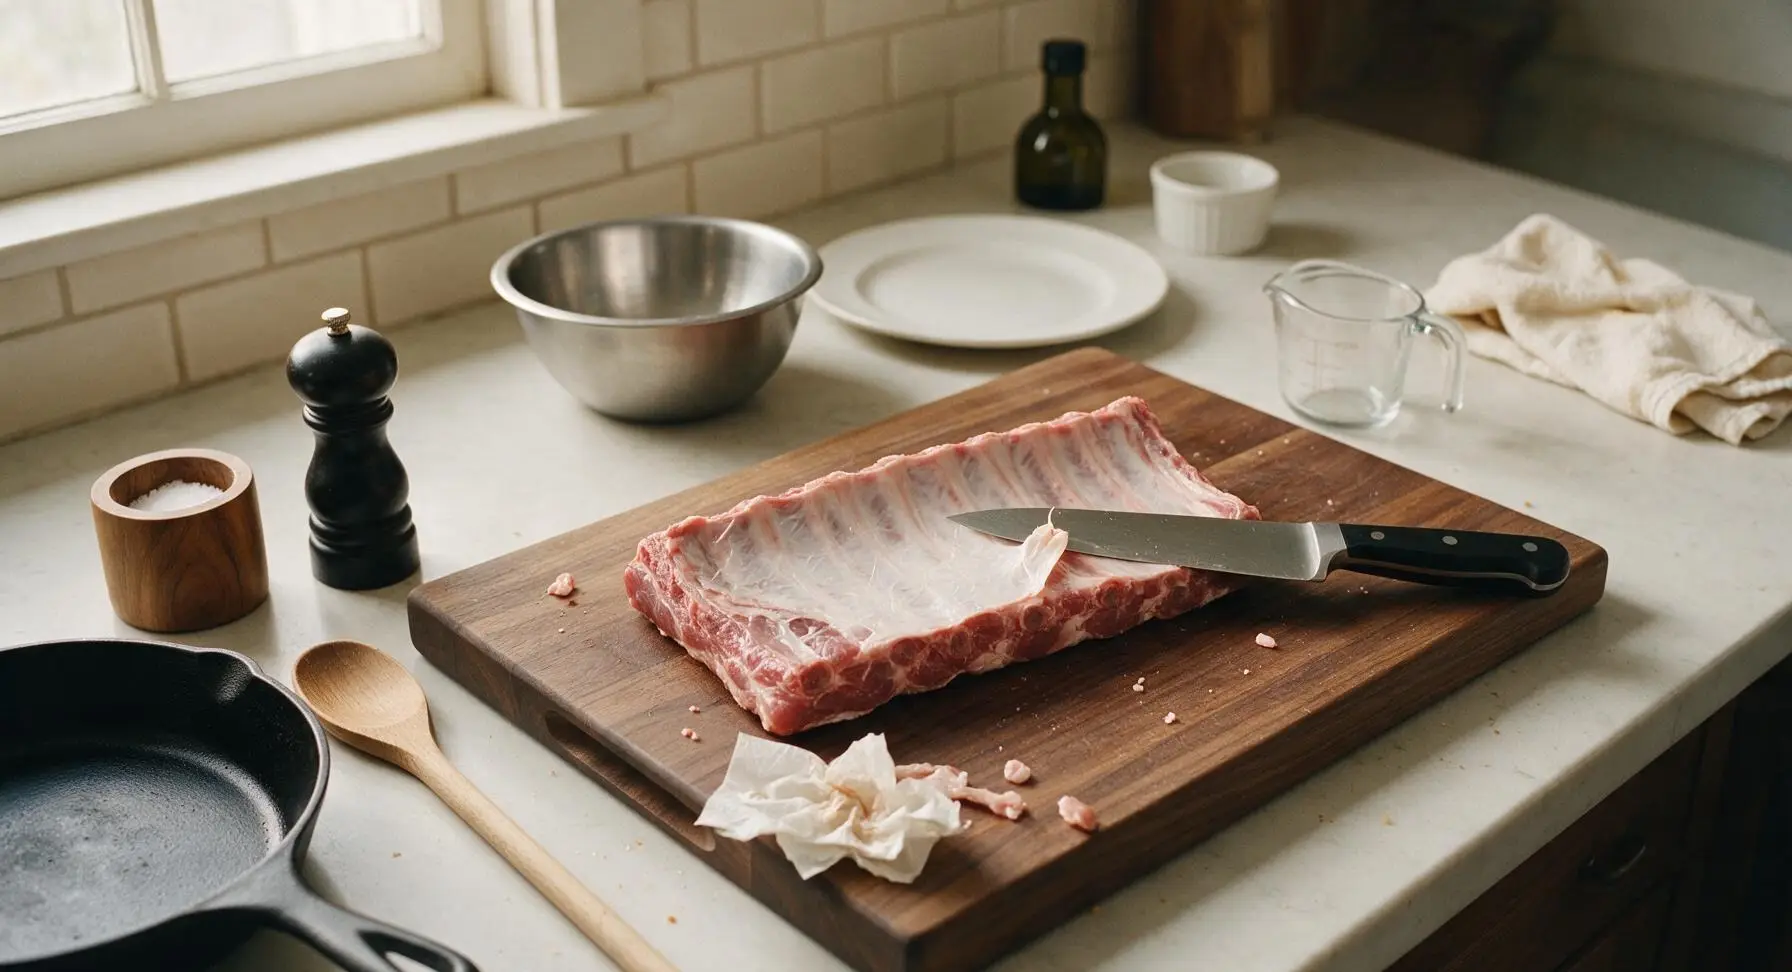
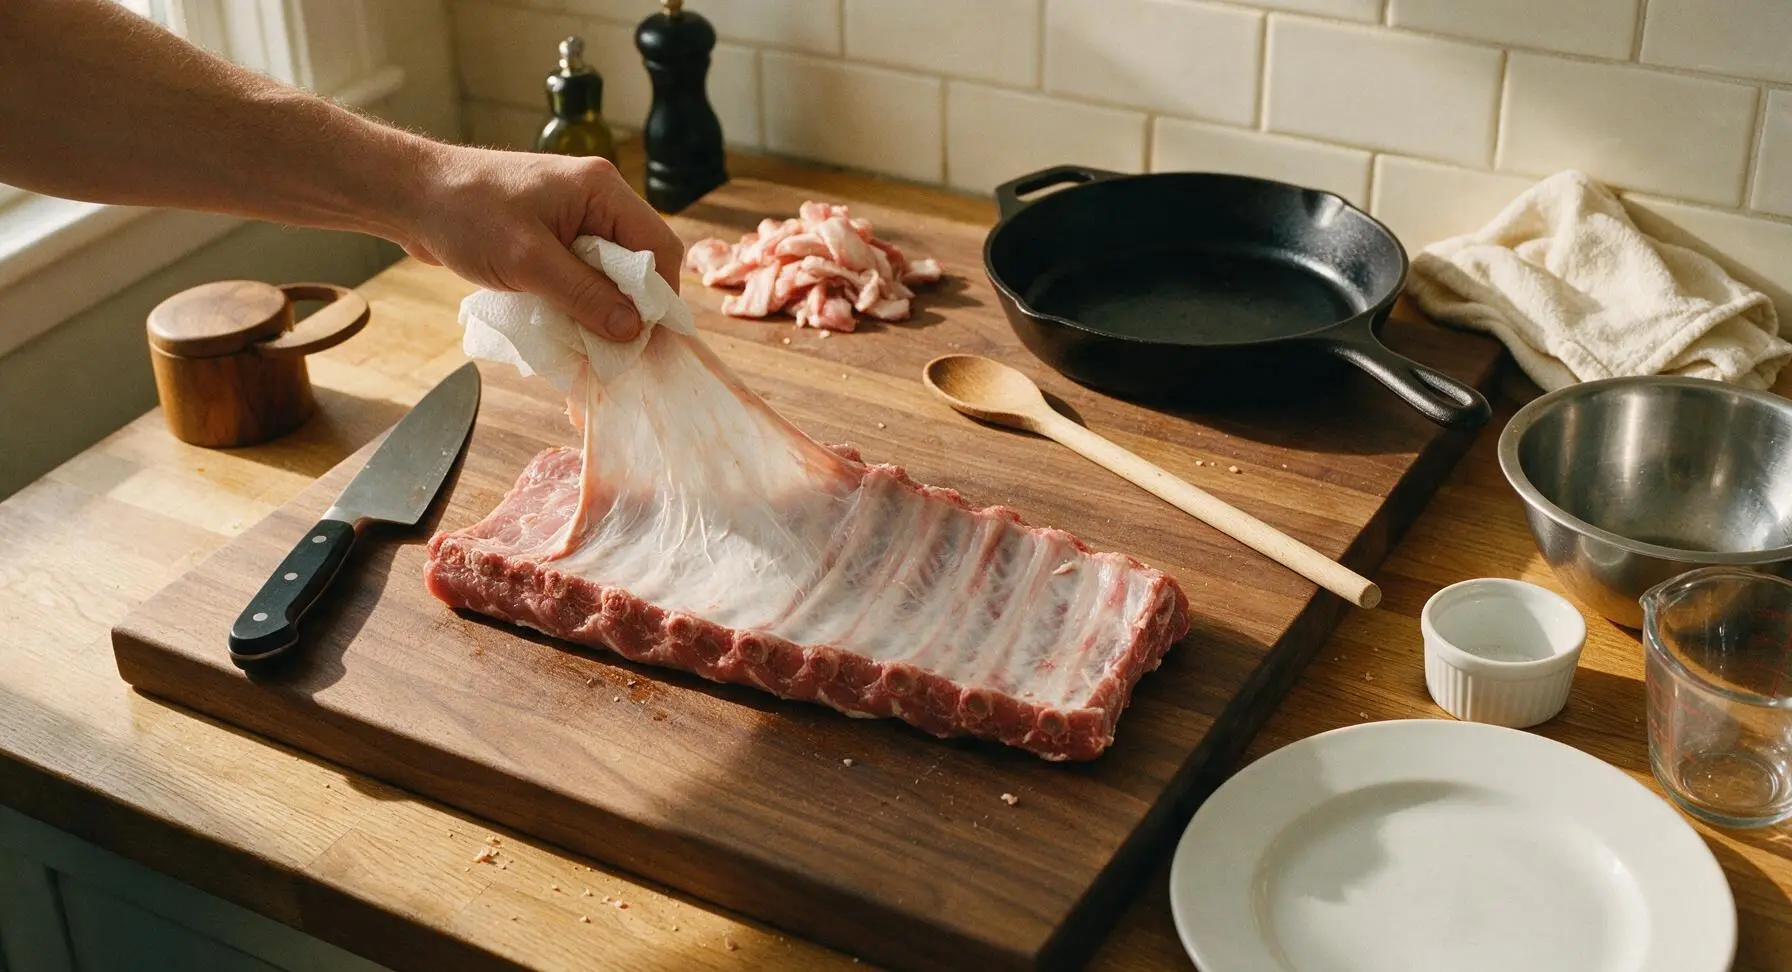
Remove the half rack of ribs from packaging and place on the acacia wood cutting board. Use the chef knife to trim any thick, hard excess fat from the meaty side, leaving a 1/4 inch thin fat layer to keep meat moist during cooking. Flip the ribs bone-side up, slide the tip of the knife under the thin white silverskin membrane on the back of the rack, grip it with a folded paper towel, and pull it off in one smooth piece. Pat both sides of the ribs completely dry with paper towels.
Step 1
step1:Prep the Rib Rack
Step 1
step1:Prep the Rib Rack
2

Mix Dry Rub

In the small brushed stainless steel mixing bowl, combine 2 tbsp light brown sugar, 1 tbsp sweet paprika, 1 tsp smoked paprika, 1 tsp garlic powder, 1 tsp onion powder, 1 tbsp kosher salt, 1 tsp black pepper, and 1/4 tsp cayenne pepper. Stir thoroughly with the measuring spoons until all spices are evenly combined, with no clumps of brown sugar remaining.
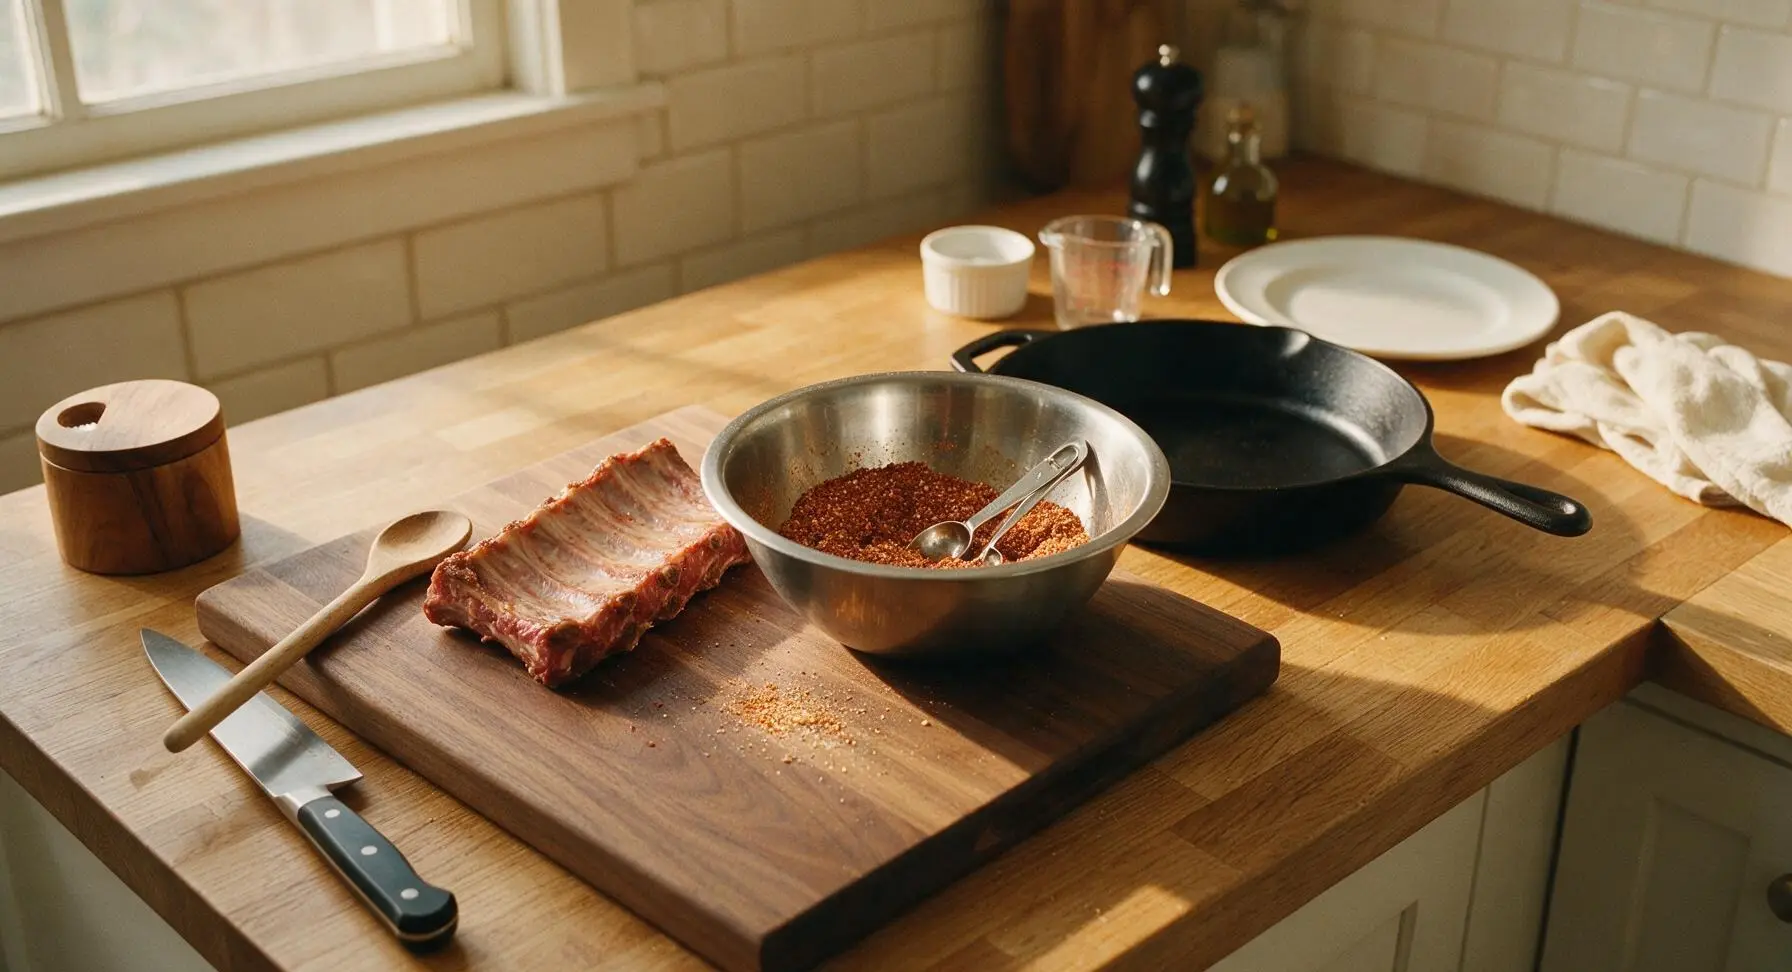
Step 2
step2:Mix Dry Rub
3

Apply Rub Evenly

Drizzle 1 tbsp apple cider vinegar over both sides of the trimmed ribs, rubbing it in lightly to help the spice stick. Sprinkle the dry rub mixture generously over every surface of the ribs—meaty side, bone side, and edges—pressing the rub firmly into the meat with your fingertips to create an even, thick coating. Let the seasoned ribs rest at room temperature for 20 minutes to allow the rub to penetrate, while you preheat your grill to 275°F (135°C) for indirect low-and-slow cooking.
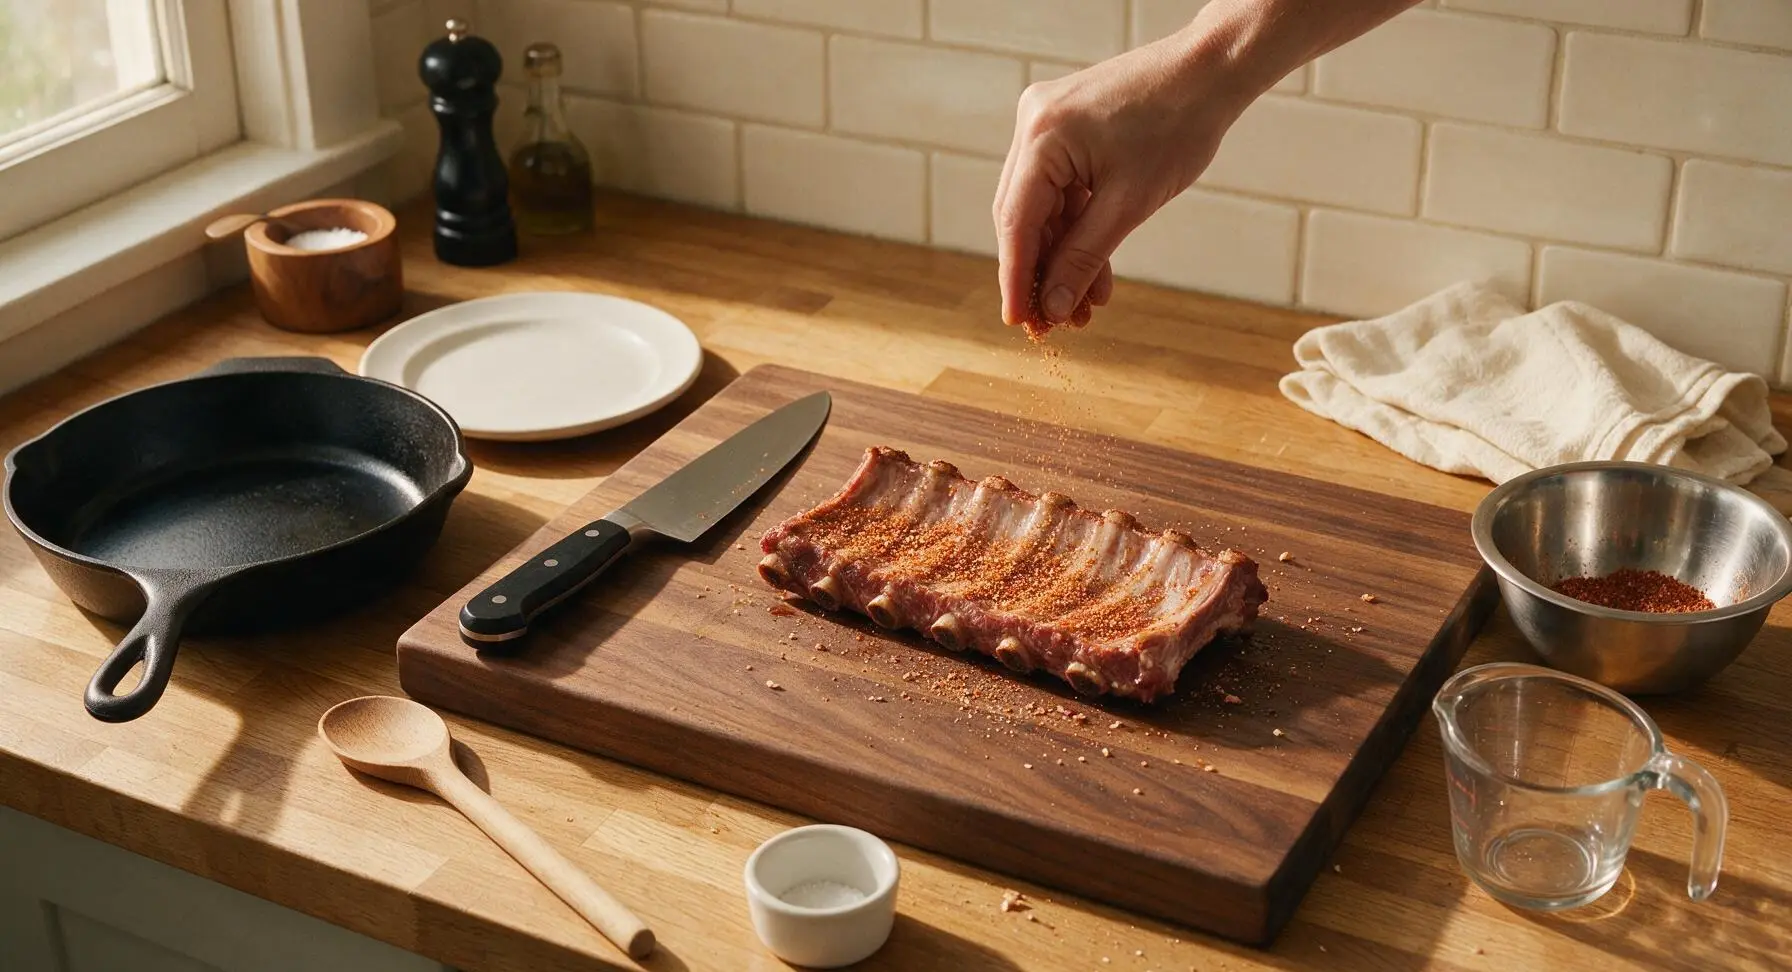
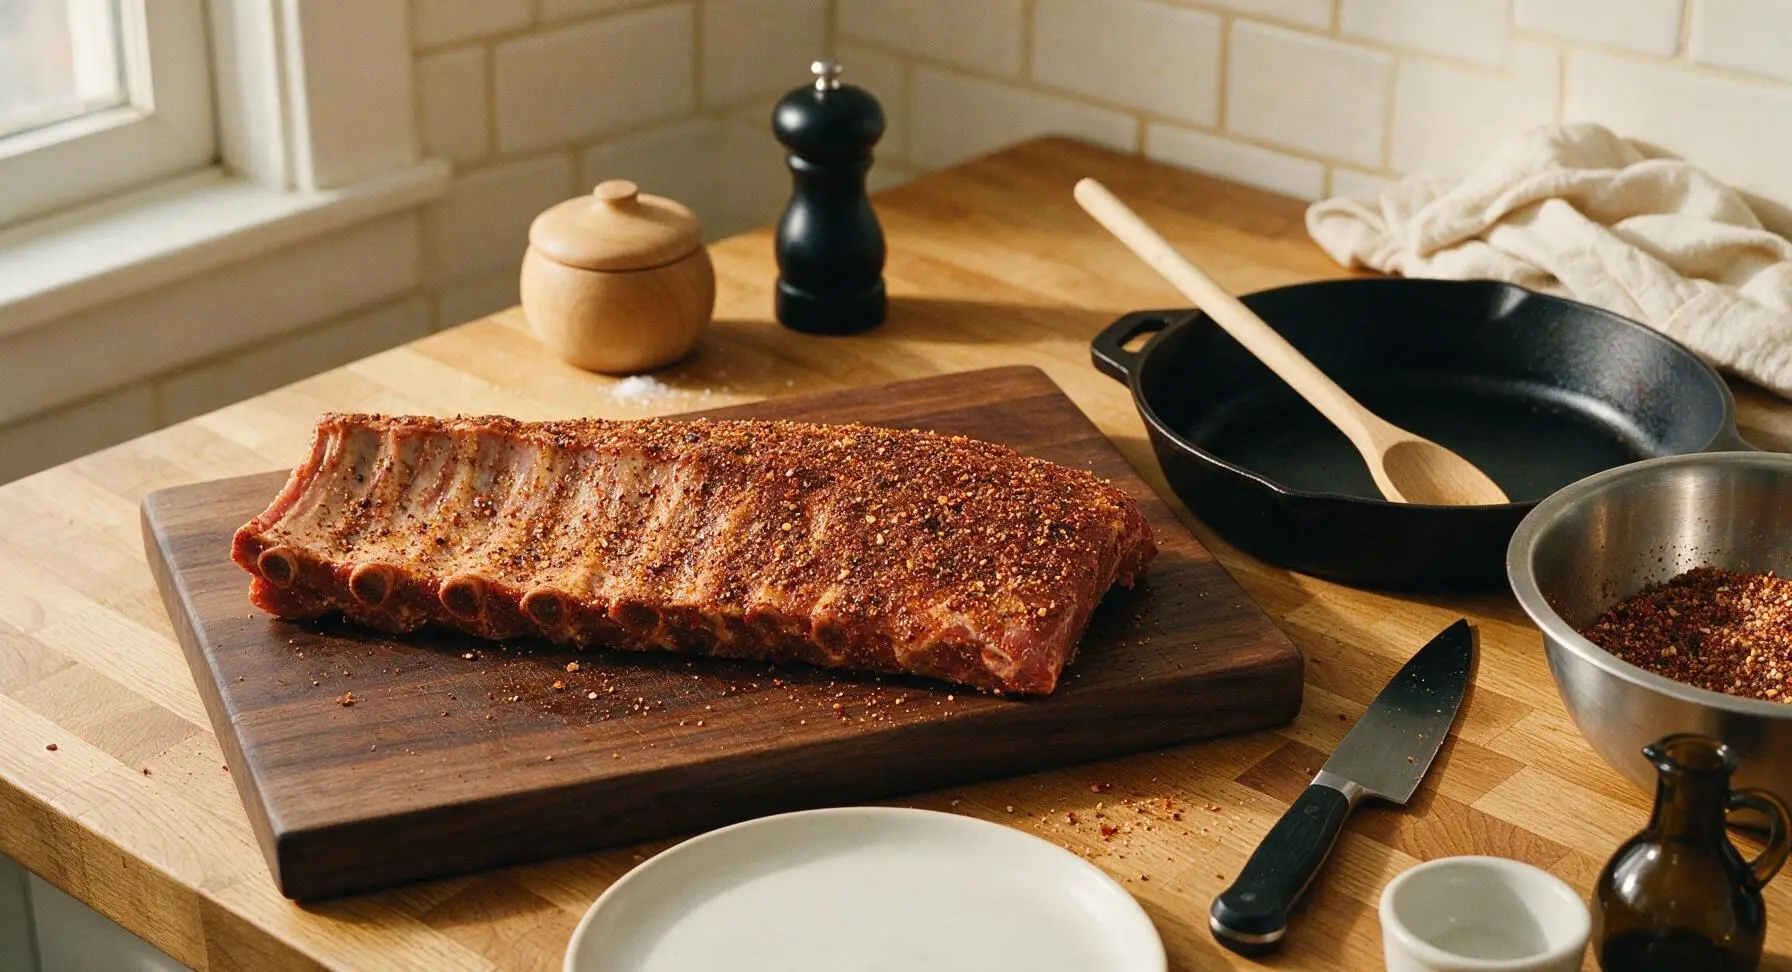
Step 3
step3:Apply Rub Evenly
Step 3
step3:Apply Rub Evenly
4

Grill Low and Slow

Line the aluminum tray with a sheet of heavy-duty aluminum foil, then set the seasoned ribs bone-side down in the tray. Carry the tray out to the preheated 275°F (135°C) grill, placing the ribs on the indirect heat side. Close the grill lid and cook for 2 hours, maintaining a consistent grill temperature between 270-285°F, avoiding direct flame under the ribs to prevent burning. The ribs are ready for saucing when the rub has set into a dark matte crust, and the meat has pulled back 1/4 inch from the ends of the bones.
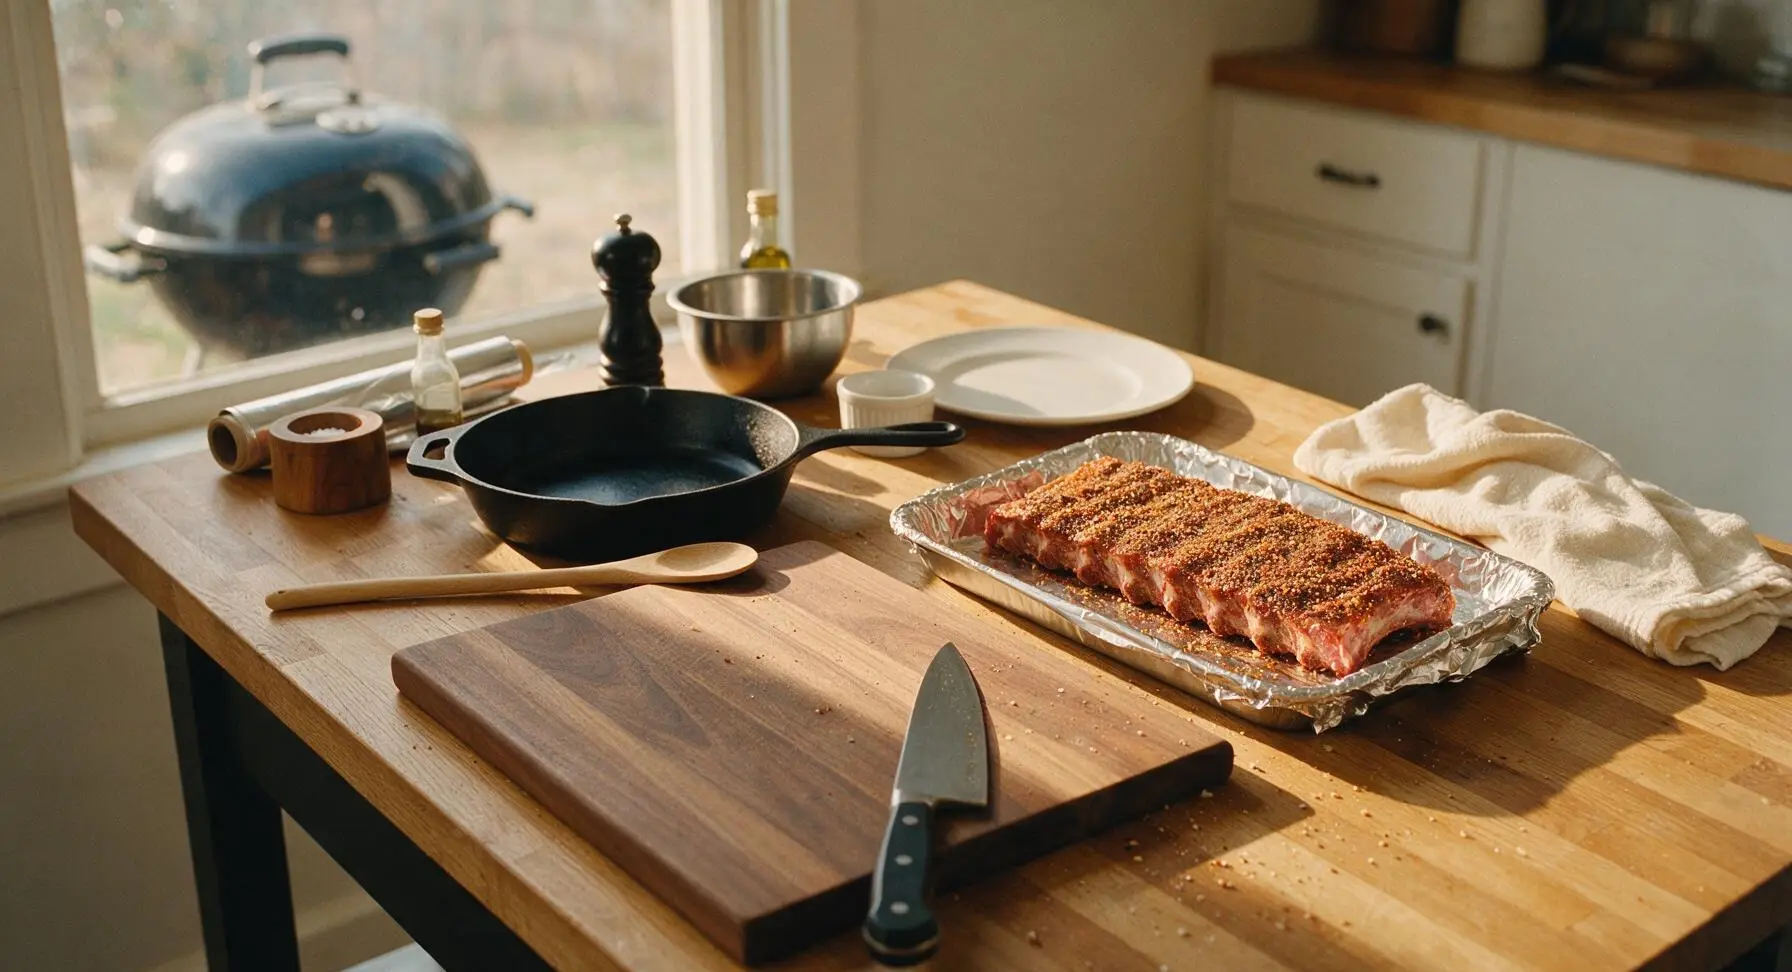
Step 4
step4:Grill Low and Slow
5

Baste with BBQ Sauce

After 2 hours of slow cooking, bring the tray of ribs back to the kitchen counter. Pour 1 cup of BBQ sauce into the clear glass measuring cup, use the long-handled basting brush to slather a thick, even layer of sauce over the meaty top side of the ribs. Return the sauced ribs to the grill, close the lid, and cook for an additional 20-25 minutes, until the sauce is sticky, caramelized, and set into a glossy deep mahogany crust with no runny areas.
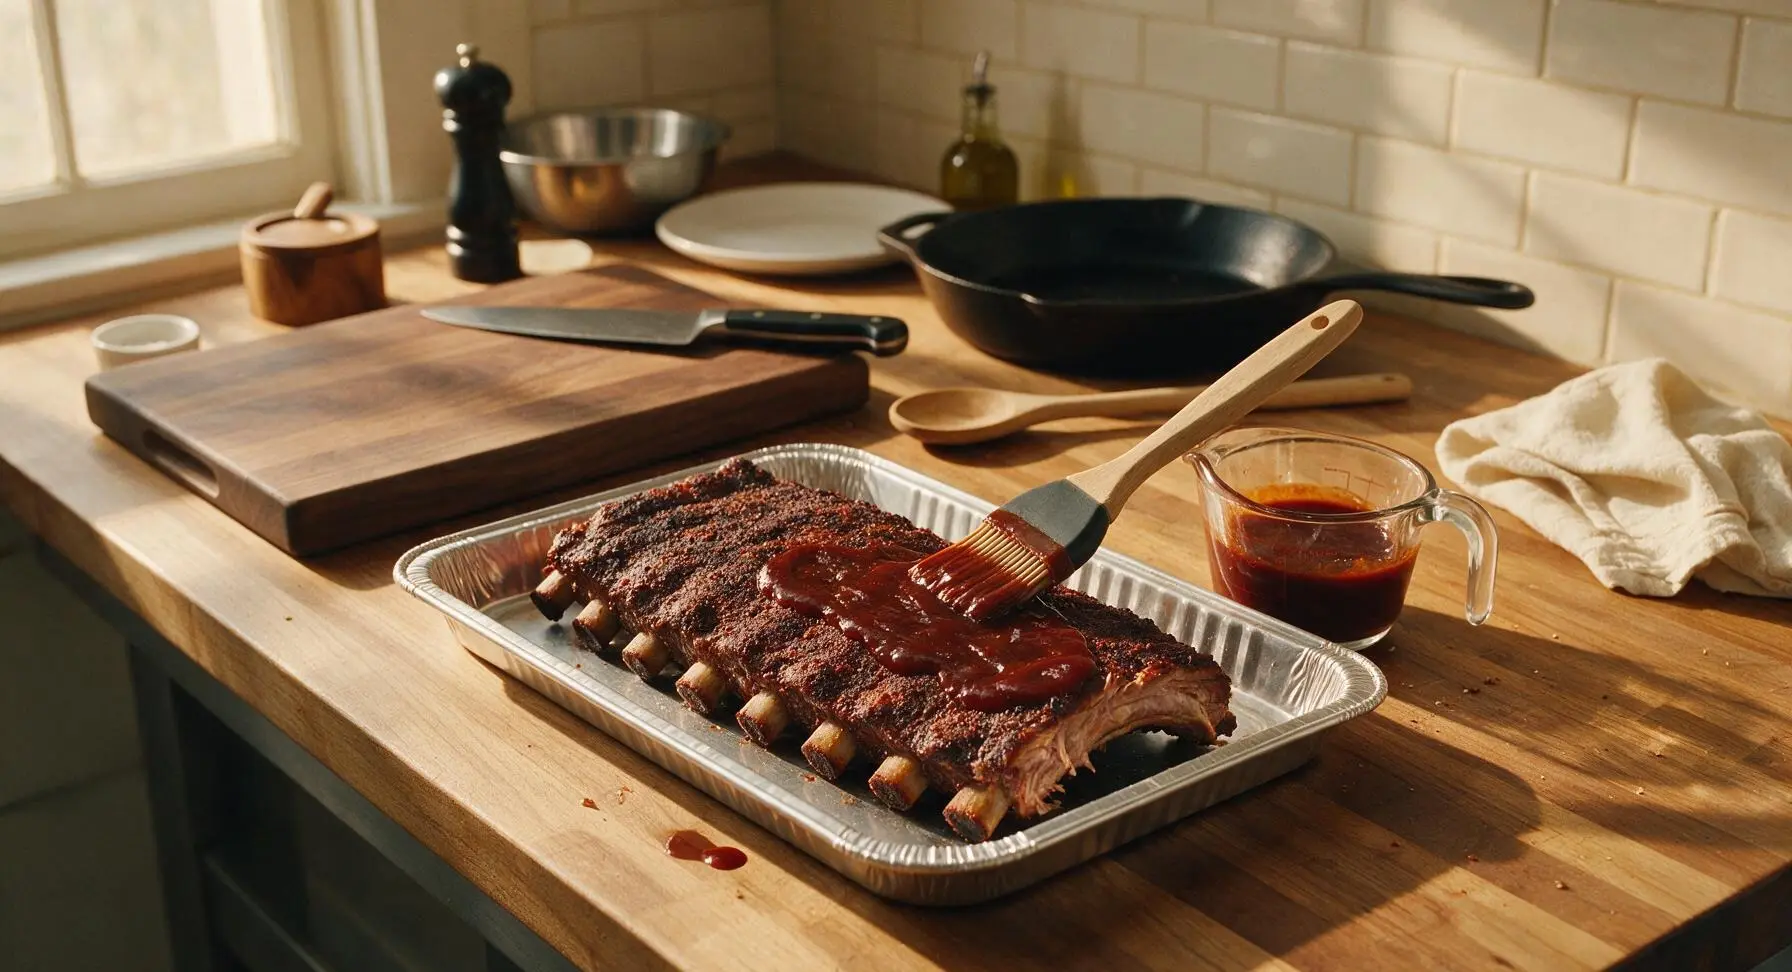
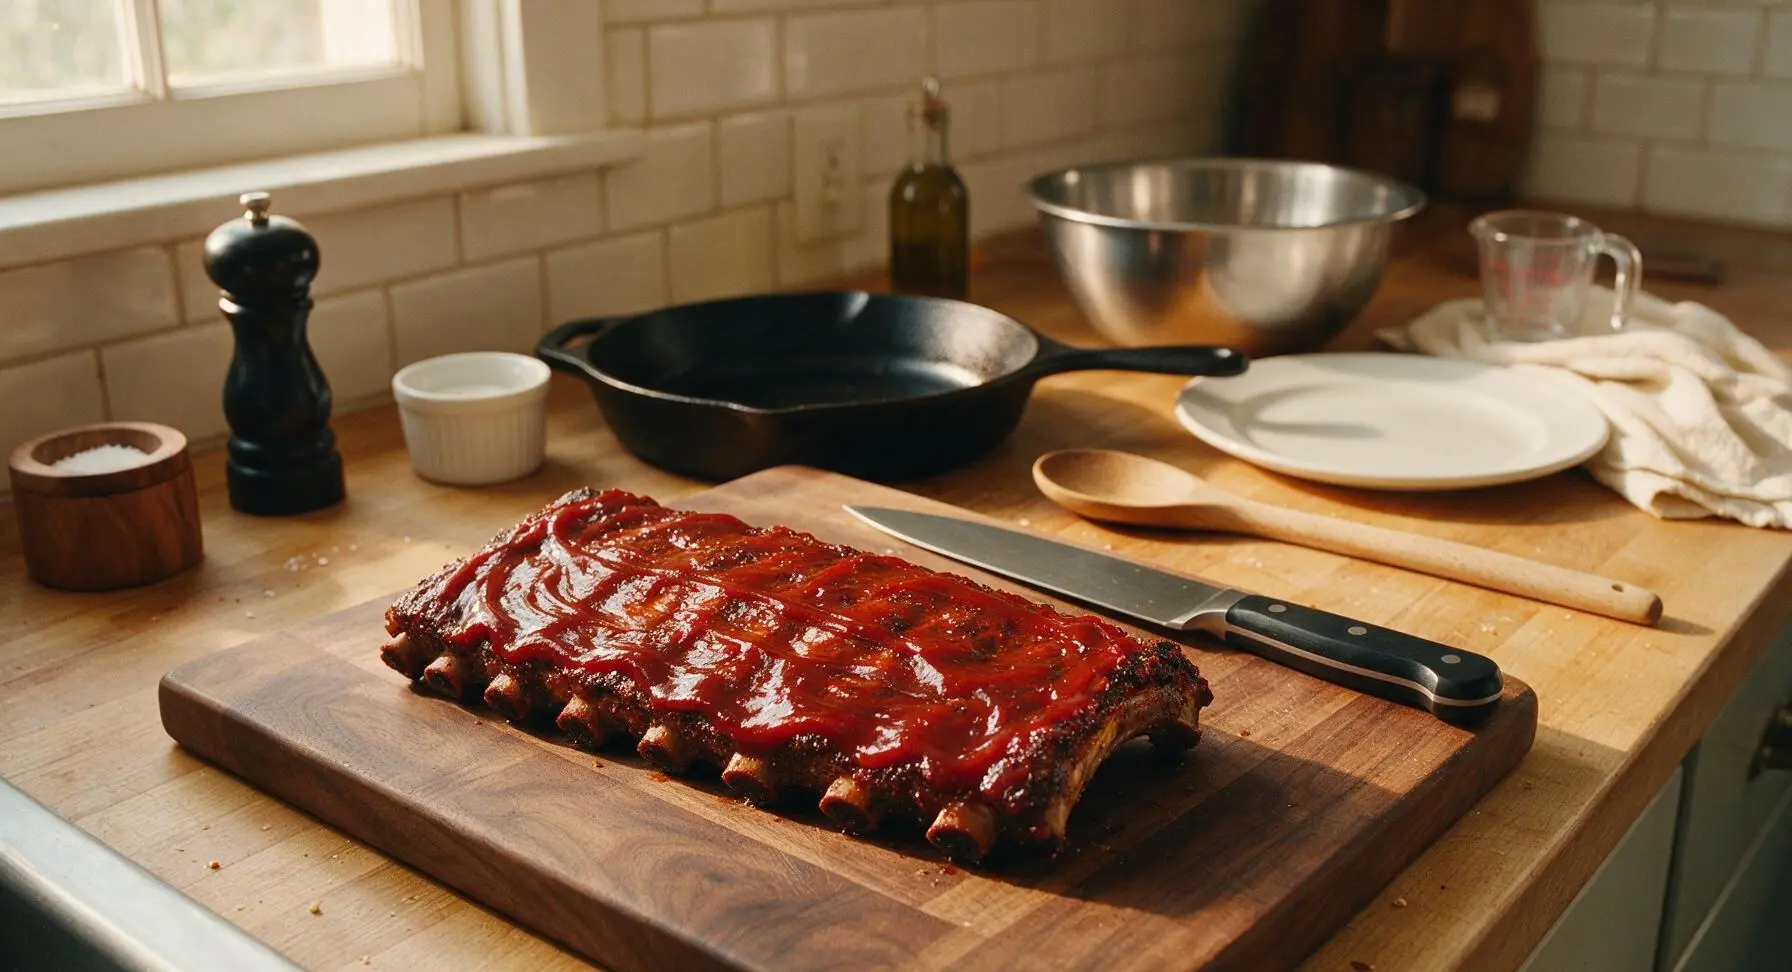
Step 5
step5:Baste with BBQ Sauce
Step 5
step5:Baste with BBQ Sauce
6

Rest Before Serving

Once the sauce is caramelized and sticky, transfer the ribs back to the kitchen counter, tent loosely with a small sheet of aluminum foil, and let rest for 10 minutes. Resting allows the meat juices to redistribute, so they do not run out when sliced, keeping the ribs tender and juicy. The ribs are fully done when the internal temperature at the thickest point reads 195-203°F (90-95°C), with no resistance when a toothpick is inserted between the bones.
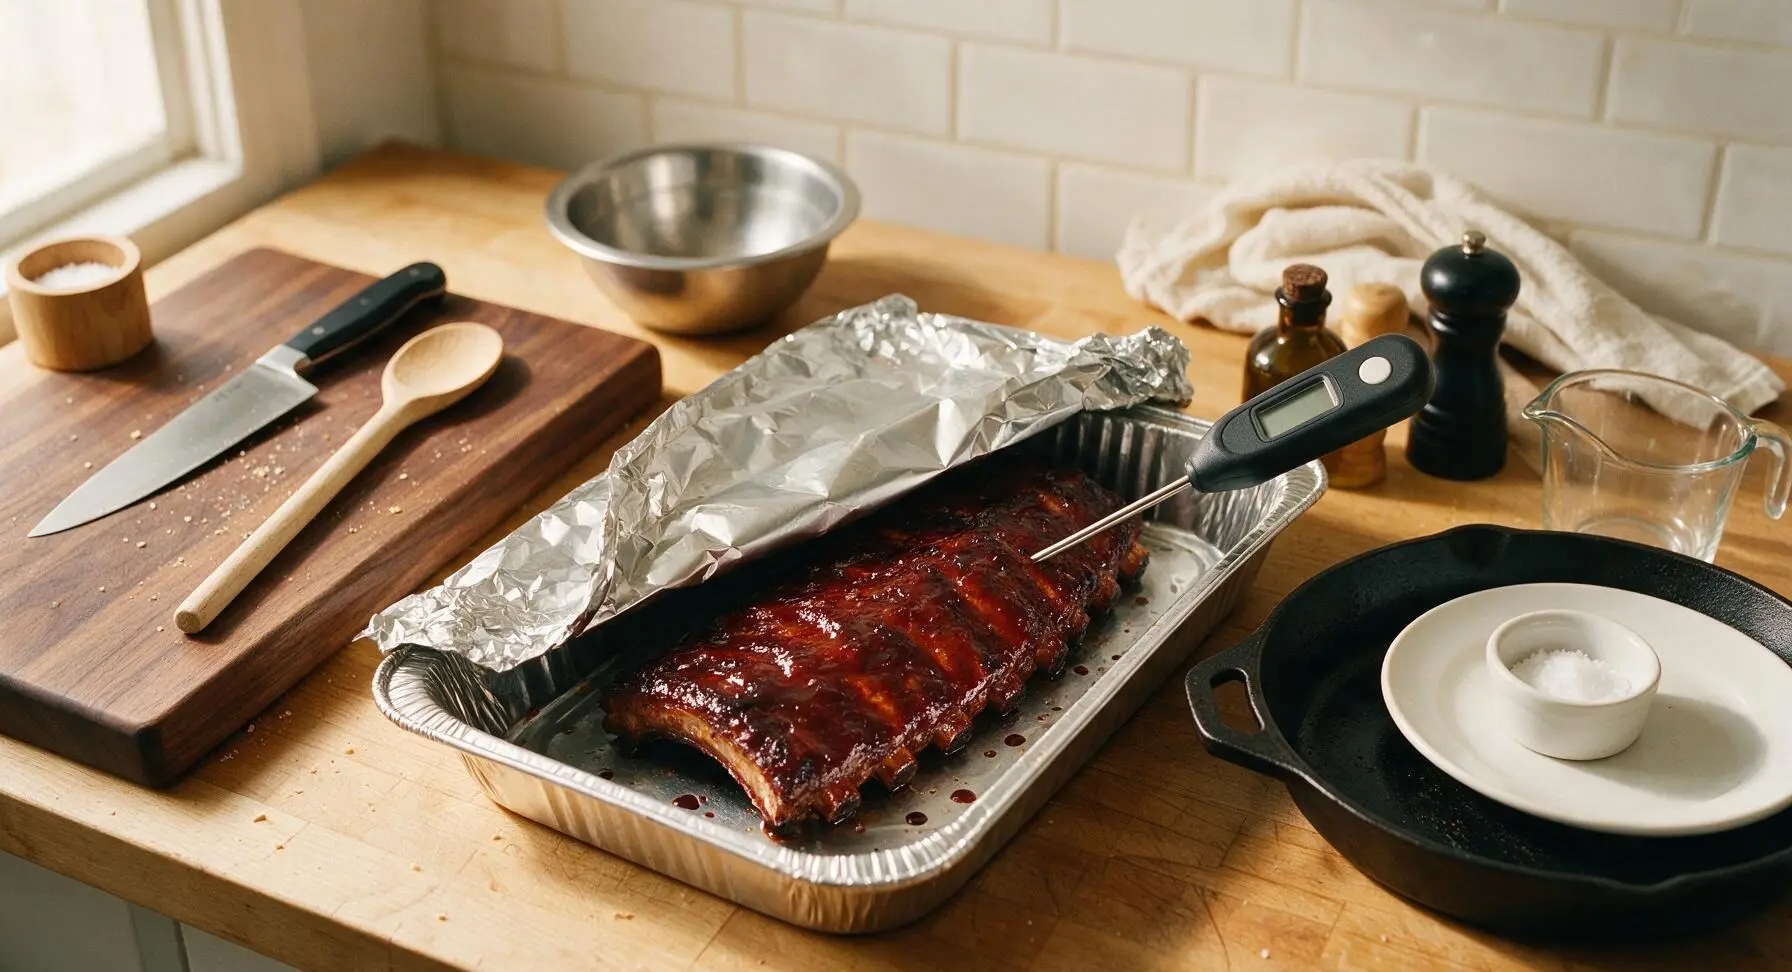
Step 6
step6:Rest Before Serving
7

Slice and Plate

Transfer the rested ribs from the tray to the acacia cutting board. Use the chef knife to slice cleanly between each rib bone, keeping the rack loosely connected for presentation. Carefully lift the sliced rack onto the oval matte cream ceramic serving platter, spoon a small amount of extra warmed BBQ sauce over the top, tuck a sprig of fresh parsley at the edge for garnish, and serve with the remaining sauce in the small terracotta ramekin on the side.
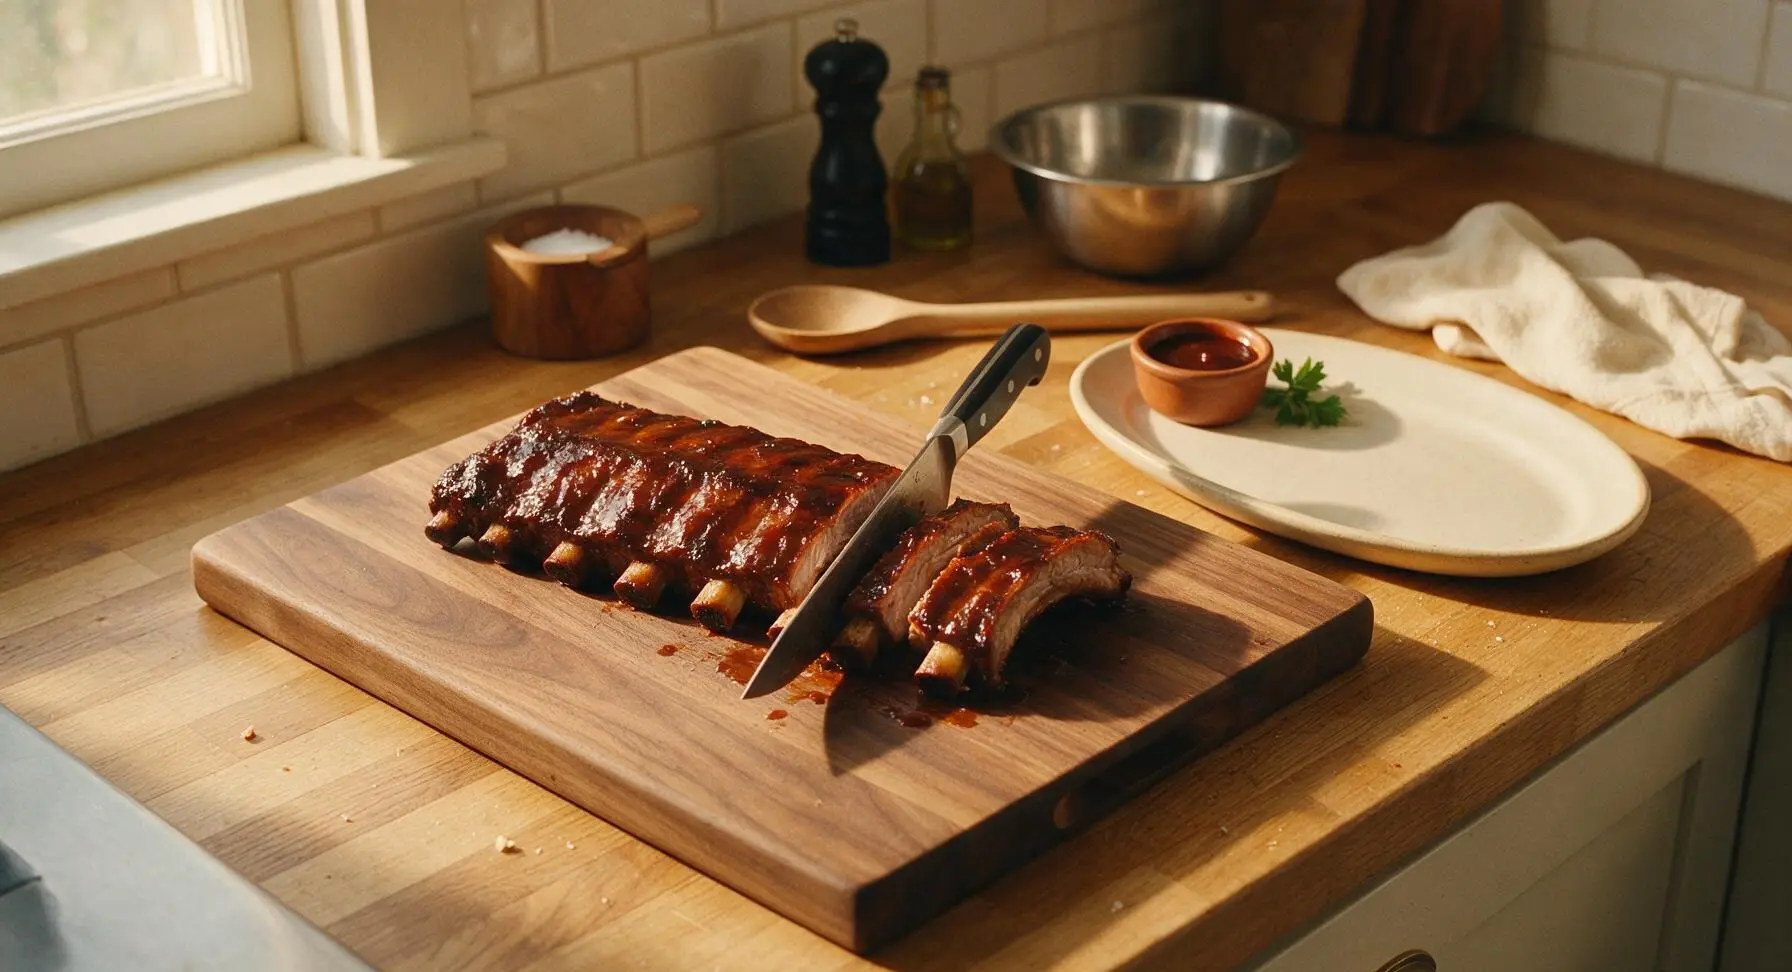
Step 7
step7:Slice and Plate

Tips

1.Always remove the tough silverskin membrane from the bone side of the ribs: this membrane becomes chewy and unpleasantly tough when cooked, and blocks rub and sauce from penetrating the meat from the underside, leading to less flavorful, unevenly seasoned ribs.
2.Maintain a consistent low grill temperature between 270-285°F for the duration of cook time: cooking ribs too hot will cause fat to render too quickly, making meat tough and dry, while temperatures too low will extend cook time and prevent BBQ sauce from caramelizing into a sticky glaze.
3.Avoid lifting the grill lid more than necessary during the first 2 hours of cooking: every lid lift drops the internal grill temperature by 25-50°F, adding extra cook time and causing uneven heat that can lead to undercooked or burnt spots on the ribs. Only open the lid to apply sauce at the 2-hour mark.


✨ You May Also Like

BBQ & Grilling
🍜 United States

Tender, melt-in-your-mouth beef brisket with a crisp, spiced bark, slow-smoked to deep smoky perfection, the iconic centerpiece of Texas backyard barbecue.

⏱️ 12 hours BBQ & Grilling ★ 4.4
BBQ & Grilling
🍜 Korea

Tender, sweet-savory marinated beef short ribs, a beloved Korean BBQ staple with caramelized, slightly charred edges and deep umami flavor, perfect for outdoor summer gatherings.

⏱️ 4 hours 2BBQ & Grilling ★ 4.8
BBQ & Grilling
🍜 United States

Juicy grilled beef patties topped with smoky homemade chili, melted cheddar, and tangy pickles on toasted brioche buns for a hearty, flavor-packed handheld meal.

⏱️ 40 minuteBBQ & Grilling ★ 4.7
BBQ & Grilling
🍜 United States

A sweet, smoky, tangy BBQ sauce brightened with peak-season dark cherries, ideal for glazing grilled ribs, chicken, pork, or summer roasted veggies.

⏱️ 35 minuteBBQ & Grilling ★ 4.7
BBQ & Grilling
🍜 United States

Rich, smoky, slightly sweet homemade bourbon BBQ sauce with deep caramel notes, ideal for glazing grilled ribs, chicken, and burgers at cookouts.

⏱️ 25 minuteBBQ & Grilling ★ 4.7
BBQ & Grilling
🍜 United States

Iconic Alabama-style BBQ featuring tender hickory-smoked chicken slathered in tangy creamy white sauce, a beloved regional Southern cookout staple.

⏱️ 3 hoursBBQ & Grilling ★ 5

Half Rack of Ribs:Frequently Asked Questions

1.What cut of ribs is used for this fall-off-the-bone half rack recipe? ▾
This recipe calls for a bone-in pork spare rib half rack, which usually has 6 to 7 individual ribs per serving. Spare ribs have more rich marbling than leaner baby back ribs, which is key to achieving that melt-in-your-mouth, fall-off-the-bone texture without drying out during cooking. Always peel off the tough papery silver skin on the bone side before seasoning for the best bite.
2.How do I get that true fall-off-the-bone texture without tough, chewy ribs? ▾
Low, slow cooking is non-negotiable here. Cook your seasoned ribs at 225°F for 3.5 to 4 hours, whether on a smoker, grill set up for indirect heat, or in your oven. Resist the urge to crank the heat to speed things up—high heat makes muscle fibers seize up and turn chewy, instead of breaking down into that tender, pull-away-from-the-bone texture.
3.What’s in the signature dry rub for these ribs, and can I make it ahead? ▾
The base dry rub mixes light brown sugar for caramelized sweetness, equal parts sweet and smoked paprika for deep, smoky warmth, and garlic powder for savoriness, plus a pinch of kosher salt and black pepper to taste. You can mix a big batch of the rub up to 3 months ahead, stored in an airtight jar in a cool, dark cabinet, to cut down on cookout prep time.
4.Do I really need to remove the membrane from the back of the ribs? ▾
Yes, absolutely. That thin, papery silver membrane on the bone side of the rack never breaks down fully during cooking, and it will leave a tough, chewy, rubbery bite even if the rest of the rib is perfectly tender. Slide a butter knife under the membrane at one end, grip it with a paper towel for traction, and pull it off in one smooth sheet before applying rub.
5.When should I apply BBQ sauce so it gets sticky and caramelized, not burnt? ▾
Wait to slather on your BBQ sauce until the last 20 to 30 minutes of cooking time. The sugar in both the rub and BBQ sauce burns quickly at cooking heat, so adding it too early will leave you with bitter, charred crust instead of that glossy, sticky, caramelized coating you want. Brush a thin even layer on, then let it set as the ribs finish cooking.
6.Can I make these ribs in the oven if I don’t have a smoker or outdoor grill? ▾
Absolutely, you don’t need fancy outdoor equipment to get great ribs. Set your oven to 225°F, place the seasoned ribs on a wire rack set over a rimmed baking sheet to let air circulate, and cook for the same 3.5 to 4 hour timeline. The smoked paprika in the dry rub will still deliver that classic smoky cookout flavor, even without a smoker.
7.How much dry rub should I use per half rack of ribs? ▾
Plan for about 2 tablespoons of dry rub per half rack of spare ribs. You want a thin, even coating across every surface of the ribs—top, bottom, and sides—rather than a thick, caked-on layer that will get powdery or fall off as the ribs cook. Pat the rub gently into the meat so it adheres before you start cooking.
8.Should I wrap my ribs in foil while cooking to get them extra tender? ▾
Wrapping is optional, but it can speed up cook time slightly and lock in extra moisture for that ultra fall-off-the-bone feel. If you wrap, do it after the first 2 hours of cooking, when the rub has set into a nice crust, and leave the foil slightly vented so you don’t steam all the smoky flavor out. Unwrap for the last 30 minutes to add sauce.
9.Can I use baby back ribs instead of spare ribs for this recipe? ▾
You can swap in a half rack of baby back ribs if that’s what you have on hand, just adjust your cook time. Baby backs are leaner and smaller than spare ribs, so they’ll only need 2.5 to 3 hours at 225°F to reach fall-off-the-bone tenderness. Keep a close eye on them, since their lower fat content means they can dry out faster if overcooked.
10.How do I know when the ribs are done and perfectly fall-off-the-bone tender? ▾
Skip relying solely on a meat thermometer for ribs—you’re looking for clear visual and texture cues. Gently pick up the rack from one end with a pair of tongs; if the rack bends easily and a small crack forms on the top surface where the meat pulls away from the bone, they’re done. If a bone wiggles loose with almost no effort, they’re perfect.
11.Can I prep these ribs the night before a cookout to save time? ▾
Absolutely, prepping ahead makes cookout day way less stressful. The night before, peel the membrane off your ribs, coat them evenly in the dry rub, then store them tightly wrapped in plastic on a tray in the fridge. The salt and spices will sink into the meat overnight for deeper flavor, and you can pop them straight onto the grill or oven the next day.
12.What’s the difference between sweet paprika and smoked paprika in the dry rub? ▾
Sweet paprika is made from dried, ground mild red peppers, and it adds bright, fruity, mild pepper flavor and a rich red color without heat. Smoked paprika is made from peppers dried over smoldering oak, so it adds that deep, woody, smoky cookout flavor, even if you make ribs in the oven. Using both gives you layered, perfectly balanced flavor.
13.Why is light brown sugar used in the rub instead of white sugar or dark brown sugar? ▾
Light brown sugar has a mild, caramel-like sweetness and a small amount of molasses that helps the rub form a glossy, sticky crust as it cooks, without the heavy, slightly bitter molasses punch you get from dark brown sugar. It balances the smoky paprika and savory garlic powder perfectly, and caramelizes smoothly for that perfect glazed edge.
14.Do I need to baste the ribs with liquid while they cook? ▾
You don’t have to baste, but a quick spritz of apple juice, apple cider vinegar, or even plain water every 45 minutes during the first two hours of cooking can help keep the rib surface moist and help the rub set into a nice, flavorful crust. Skip basting once you add the BBQ sauce, though, so you don’t wash off that sticky caramelized coating.
15.How long should I let the ribs rest after cooking before serving? ▾
Let your finished ribs rest for 10 to 15 minutes after you pull them off the heat, tented loosely with a piece of foil to hold in warmth. Resting lets the hot, juicy muscle fibers relax and reabsorb all their moisture, so you don’t lose all that delicious, flavorful juice all over your plate when you cut the rack into individual ribs to serve.
16.What’s the best way to reheat leftover ribs so they don’t get dry and tough? ▾
The best way to reheat ribs without drying them out is to wrap them tightly in foil with a tiny splash of apple juice or water, then heat them in a 250°F oven for 20 to 25 minutes until they’re warmed through. Unwrap them for the last 5 minutes, brush on a little extra BBQ sauce, and you’ll get that same tender, sticky texture as fresh off the grill.
17.Why do my ribs sometimes turn out mushy instead of nicely tender and fall-off-the-bone? ▾
Mushy ribs usually happen when you cook them at too high a temperature, wrapped too tightly in foil for too long, which steams the meat instead of slowly breaking down the connective tissue. Stick to 225°F, vent your foil if you use it, and pull them as soon as they pass the bend test—you want meat that pulls clean from bone, not meat that slides off completely.

Comments (11)

2 days ago

OMG these ribs were SO good! I made them for our Sunday football watch party and everyone was begging for the recipe. The meat slid right off the bone just like the title says, no tugging required! I used a sweet paprika dry rub because that’s what I had in the pantry and it still slapped. 10/10 will make again for our next potluck.

1 week ago

Great recipe for weekend meal prep! I made two racks on Sunday, portioned them out with coleslaw and cornbread, and had lunches set for the whole work week. Only note is I wish I’d trimmed a little more of the excess fat off the back before cooking, but that’s totally my bad. Super tender, way better than the takeout ribs I usually grab near my office.

yesterday

My kids loved it! I was worried the rub would be too spicy for my 7 and 9 year old so I cut the cayenne in half, and they both went back for seconds. We had these for our family dinner last night with roasted sweet potatoes and mac and cheese, and even my super picky husband cleaned his plate. Will be a regular fall meal for us for sure!

3 days ago

First time ever making ribs and I was so nervous I’d mess them up! The cook time felt long but I followed the directions exactly, and they turned out perfect? Like, I impressed my in-laws who are total BBQ snobs from Kansas City. Quick question though: has anyone tried finishing these on a charcoal grill for a little extra smoke flavor instead of the oven broil? Would love to try that next time.

2 days ago

So stoked you nailed your first rib cook! Finishing them on a charcoal grill for 5-7 minutes per side after the low-and-slow cook works beautifully for that smoky char — just keep a close eye so the sauce doesn’t burn. Enjoy!

5 days ago

Game changer. I’ve been making ribs for 10+ years and always struggled to get that perfect fall-off-the-bone texture without them turning mushy. The 2.5 hour low temp method here is exactly what I was missing. Used my own homemade hickory BBQ sauce instead of store bought and it was chef’s kiss. Already sent this recipe to my whole grill group chat.

3 days ago

Totally agree with the low temp trick! I tried cranking the heat up last time I made ribs to cut cook time and they came out tough as shoe leather. Slow and steady really does win the race with ribs.

1 week ago

Made these last night for date night and my boyfriend said they’re better than the ribs we got at that fancy BBQ spot in Brooklyn last month! Only tiny complaint is my apartment smelled like ribs for, like, 12 hours after cooking but that’s 100% worth it. Pro tip: line your baking sheet with two layers of foil for super easy cleanup.

5 days ago

Love the date night win! The foil pro tip is chef’s kiss — I do the double layer trick every time too, saves so much scrubbing. So glad you two enjoyed them!

yesterday

Wait, has anyone made this with a full rack instead of half? I’m hosting a small cookout next weekend and want to make sure I adjust the cook time correctly if I go for full racks. Don’t want to serve tough ribs to my neighbors!

2 hours ago

I did full racks last weekend! Just added 25 minutes to the covered cook time and they came out exactly the same, fall right off the bone. Just make sure your baking pan is big enough to fit them without squishing!

2 hours ago

I was so excited to make these but I think I messed up the sauce step? I slathered the sauce on at the start like I usually do and it got all burnt and crispy on the edges by the time the ribs were done. The meat was still super tender though, so that part was great! Did I misread the directions about when to add sauce?

30 minutes ago

Oh girl I did the exact same thing my first time! You add the sauce the last 15 minutes of cook time, not at the start. I set a timer for it this go around and it was perfect, no burnt sauce at all!

5 minutes ago

Hi Sarah! So glad the meat texture turned out for you — that’s the trickiest part! As Karen mentioned, the sauce goes on during the final 15 minutes of broiling so it caramelizes without burning. I’ll make that step a little bolder in the recipe to make it harder to miss for folks!

2 weeks ago

Made these for our annual fall bonfire last weekend and they were the hit of the whole party! People were going back for thirds, I swear. I paired them with apple cider coleslaw and it was the perfect cozy autumn meal. 1000/10, will be making these every October from now on.

1 week ago

That apple cider coleslaw pairing sounds insane! Do you have a recipe for that? I’m making these ribs for our church potluck next week and that would be the perfect side!

5 days ago

It’s super easy! Just shredded green cabbage, grated Honeycrisp apple, a splash of apple cider vinegar, a dollop of mayo, and a pinch of cinnamon. Toss it all up and let it sit in the fridge for an hour before serving, it’s chef’s kiss with the smoky ribs!

5 days ago

As someone who’s gluten free, I’m always paranoid about BBQ sauce having hidden wheat in it, so I swapped in my favorite GF Kansas City style sauce for this recipe and it worked perfectly! The ribs were so juicy and tender, I didn’t even miss the gluten filled sauces I used to eat as a kid. Thanks for such a solid, easy to follow recipe!

3 days ago

Thanks for sharing the GF swap! My son has a wheat allergy and I’ve been nervous to make ribs because so many sauces have hidden gluten. What brand of sauce did you use, if you don’t mind me asking?

2 days ago

No problem at all! I used G Hughes’ hickory smoked GF BBQ sauce, it’s got that perfect sweet-savory balance no weird artificial aftertaste. Grabbed it right off the regular grocery store shelf too, no fancy health food trip needed!

30 minutes ago

Wait, is there a way to make these in a slow cooker instead of the oven? My work schedule is wild this week and I don’t have 2.5 hours to be home to monitor the oven, but I’ve been craving ribs like crazy. Would the low slow cooker setting work here?

5 minutes ago

I did these in my slow cooker last month! Cook them on low for 6 hours, then brush with sauce and broil for 5 minutes to get that sticky caramelized top. They fall off the bone just the same, I promise!

just now

Great question, Ty! The slow cooker method Kelly shared works perfectly — I’ve tested it myself when I’m swamped with work too. Just make sure you put a little liquid (apple juice or broth) in the bottom of the crockpot to keep the ribs from drying out, and you’re golden!



