
hawaiian bread sandwiches

title 1
hawaiian bread sandwiches

⏱️ cook time 20 minutes
🍽️ servings 6
⚡ Difficulty easy

intro

Soft, pillowy sweet Hawaiian bread loaded with smoky ham, melted Swiss, and tangy poppy seed butter, baked until golden—an iconic, crowd-pleasing handheld treat perfect for sharing.

Ingredients
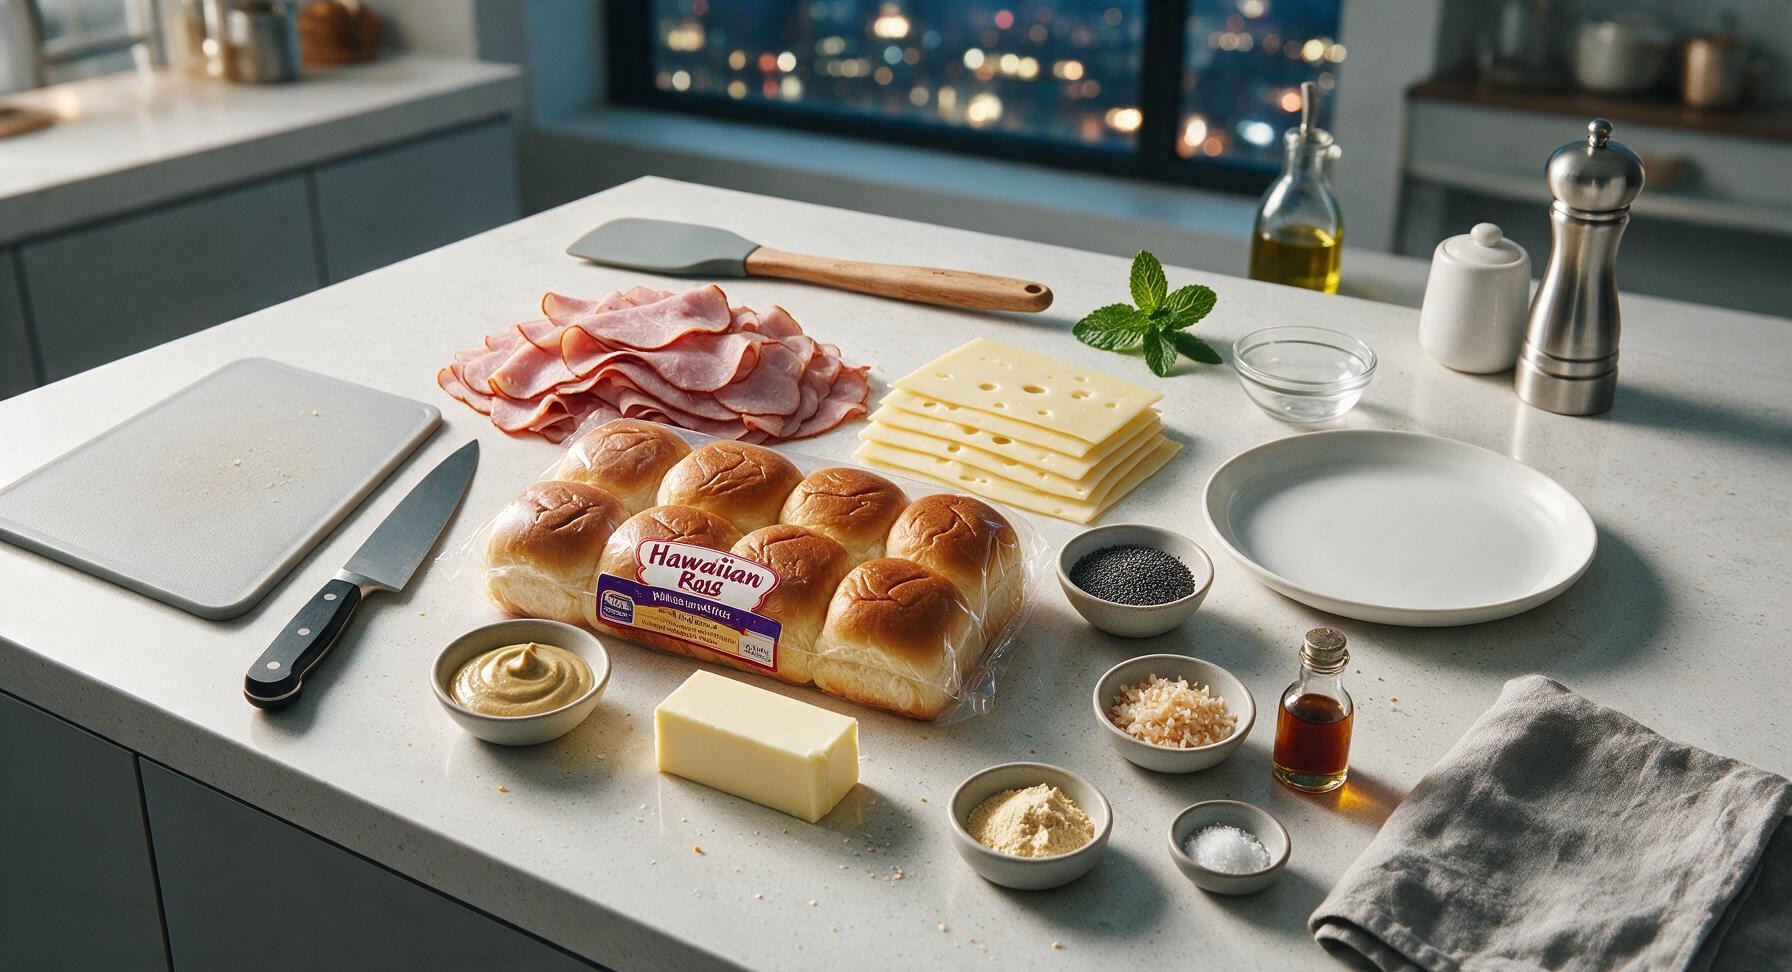
Hawaiian sweet dinner rolls (12-count pack) 450g (1 pack)
Thinly sliced smoked deli ham 340g
Sliced Swiss cheese 170g (8 slices)
Unsalted butter 113g (1 stick)
Dijon mustard 1 tbsp
Poppy seeds 1 tbsp
Dried minced onion 1 tsp
Worcestershire sauce 1/2 tsp
Garlic powder 1/4 tsp
Fine sea salt 1/8 tsp

Steps

1

Slice rolls horizontally

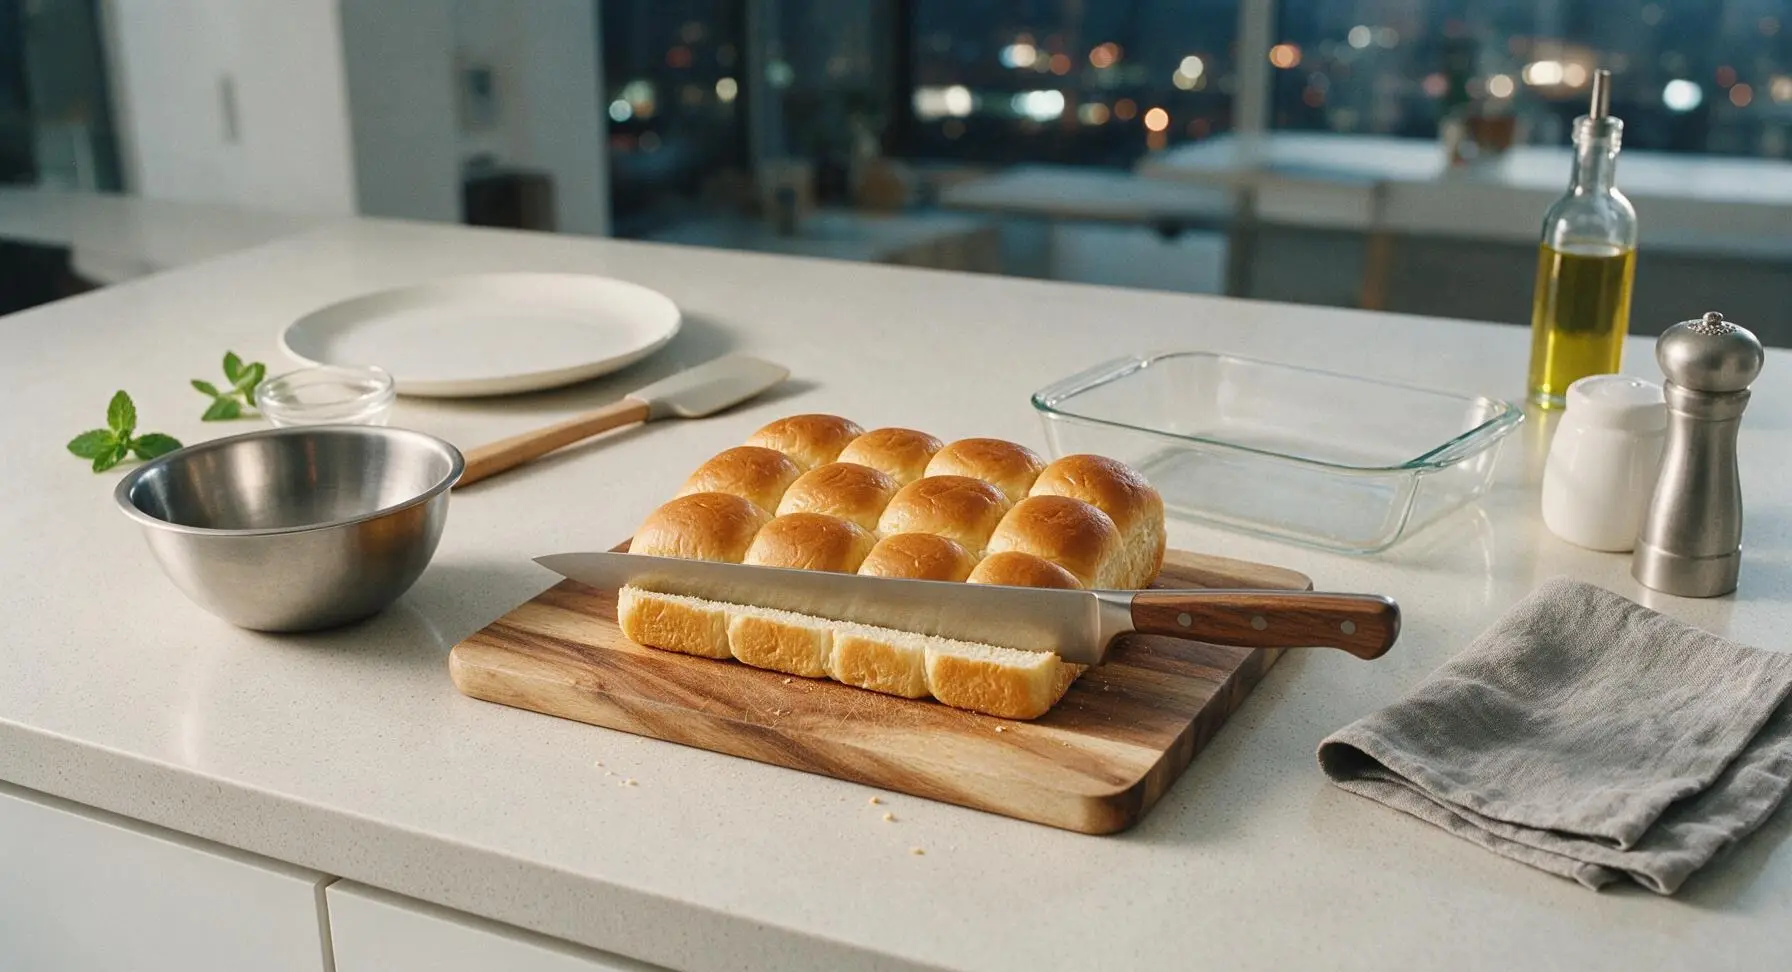
Preheat oven to 175°C (350°F). Remove the 12-count block of Hawaiian sweet rolls from packaging, keeping all rolls connected as a single solid loaf. Place the loaf on the acacia wood cutting board, then use the 8-inch chef knife to slice horizontally through the entire block, creating two even, intact slabs: a top bun layer and a bottom bun layer, with no individual rolls separated. Visual cue: the cut surfaces should be even, so the buns lay flat without tilting.
Step 1
step1:Slice rolls horizontally
2

Layer ham and cheese

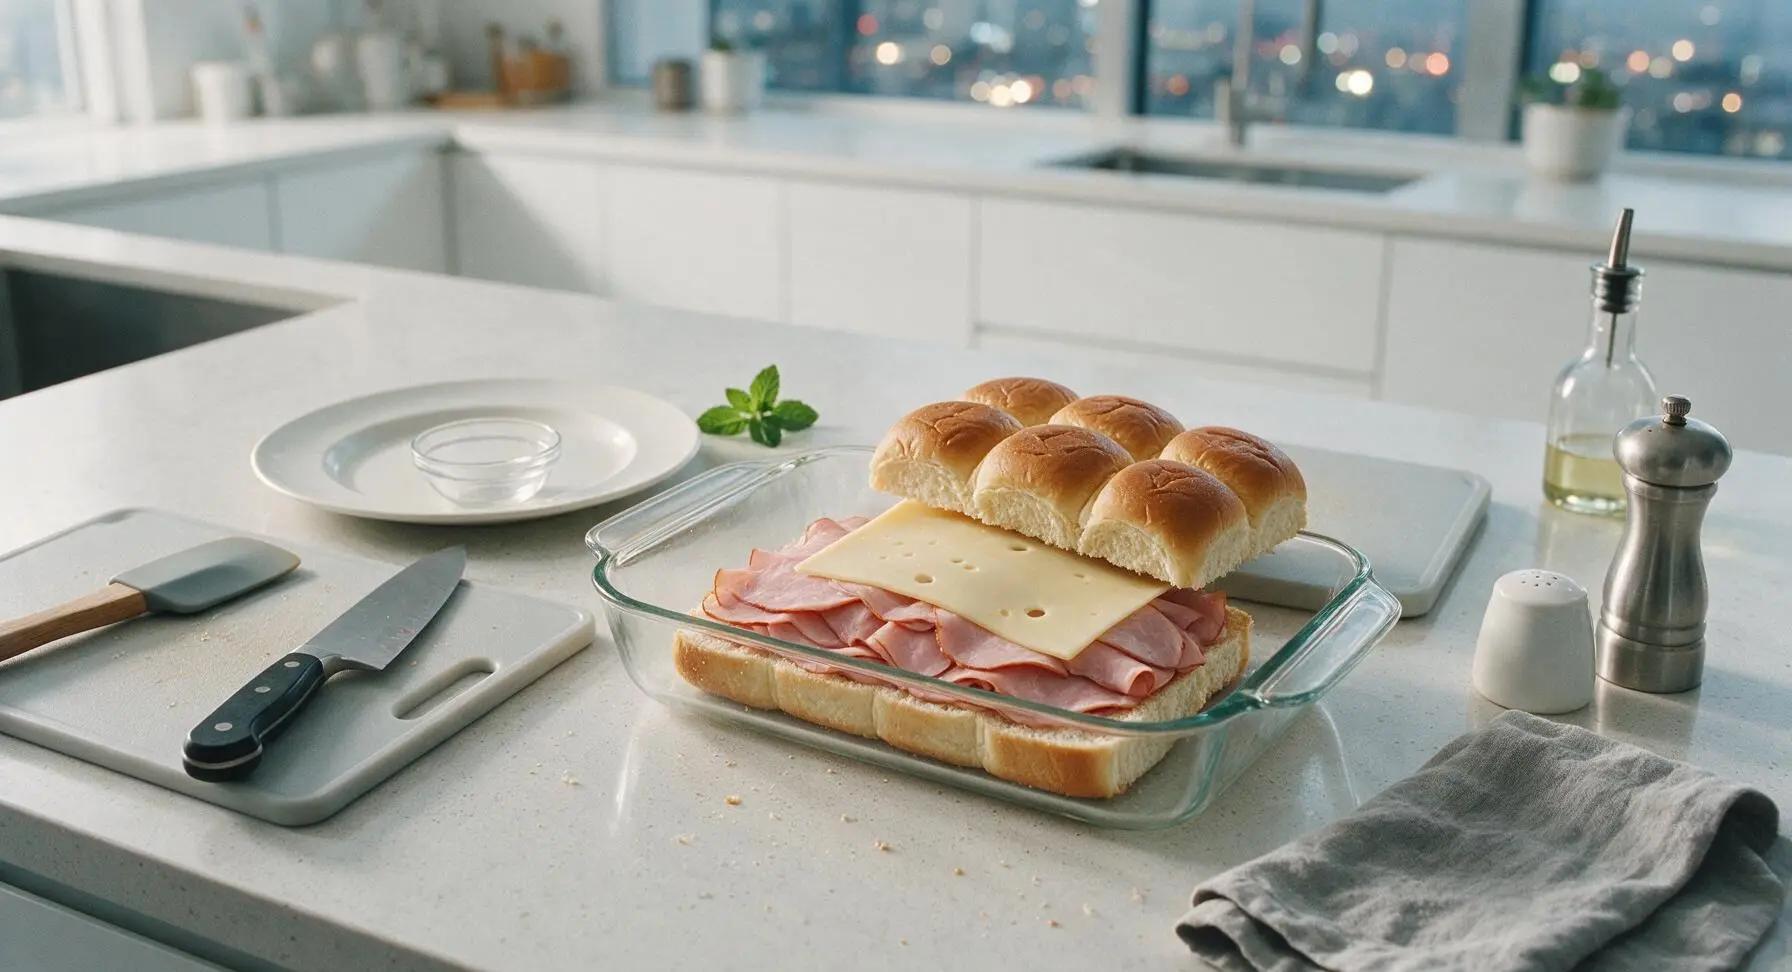
Place the bottom slab of rolls (cut side up) directly into the clear glass baking dish. Arrange all 340g of thinly sliced smoked deli ham in an even layer across the cut surface of the bottom buns, overlapping slices slightly to cover every edge. Top the ham with the 8 slices of Swiss cheese, tearing slices as needed to fully cover the ham with no cheese hanging over the edges of the rolls. Visual cue: no part of the bottom bun should be visible through gaps in the ham or cheese.
Step 2
step2:Layer ham and cheese
3

Replace top bun slab

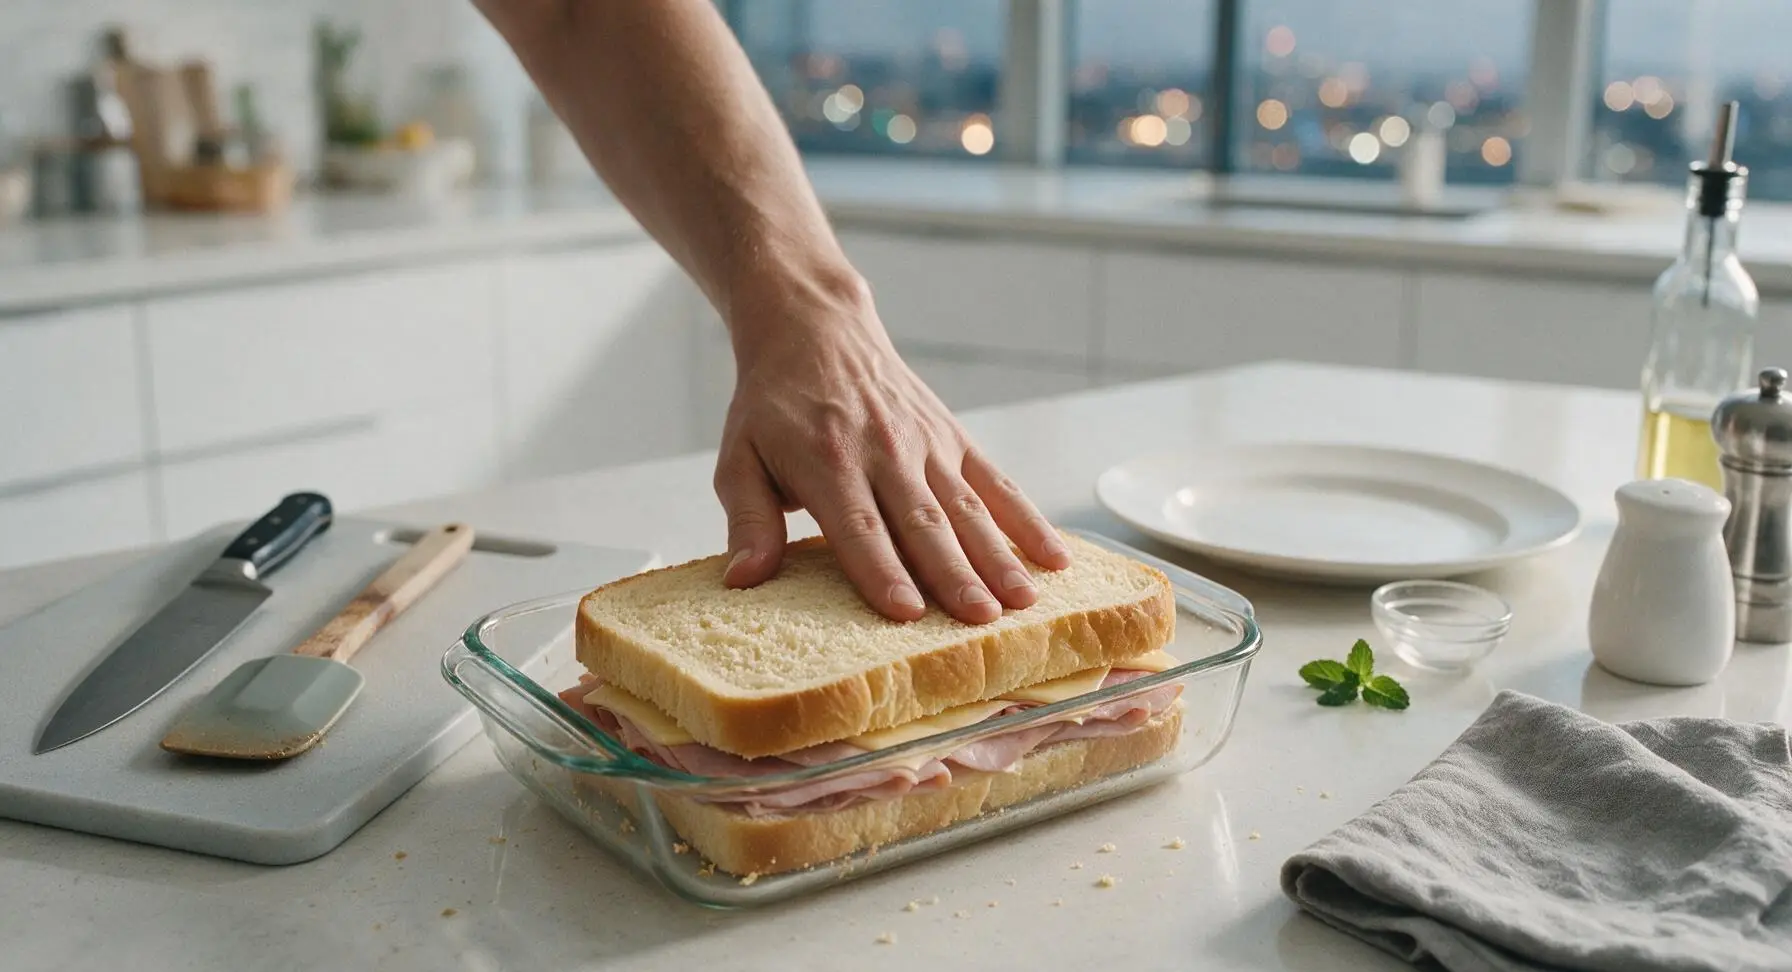
Once the ham and cheese layers are fully assembled, lift the intact top bun slab from the cutting board and place it directly over the cheese layer, pressing down gently with the palm of your hand to create a snug, even sandwich block that fits perfectly inside the baking dish. Visual cue: the edges of the top and bottom slabs should line up evenly, with no fillings peeking out from the sides before adding the butter topping.
Step 3
step3:Replace top bun slab
4

Make poppy seed butter

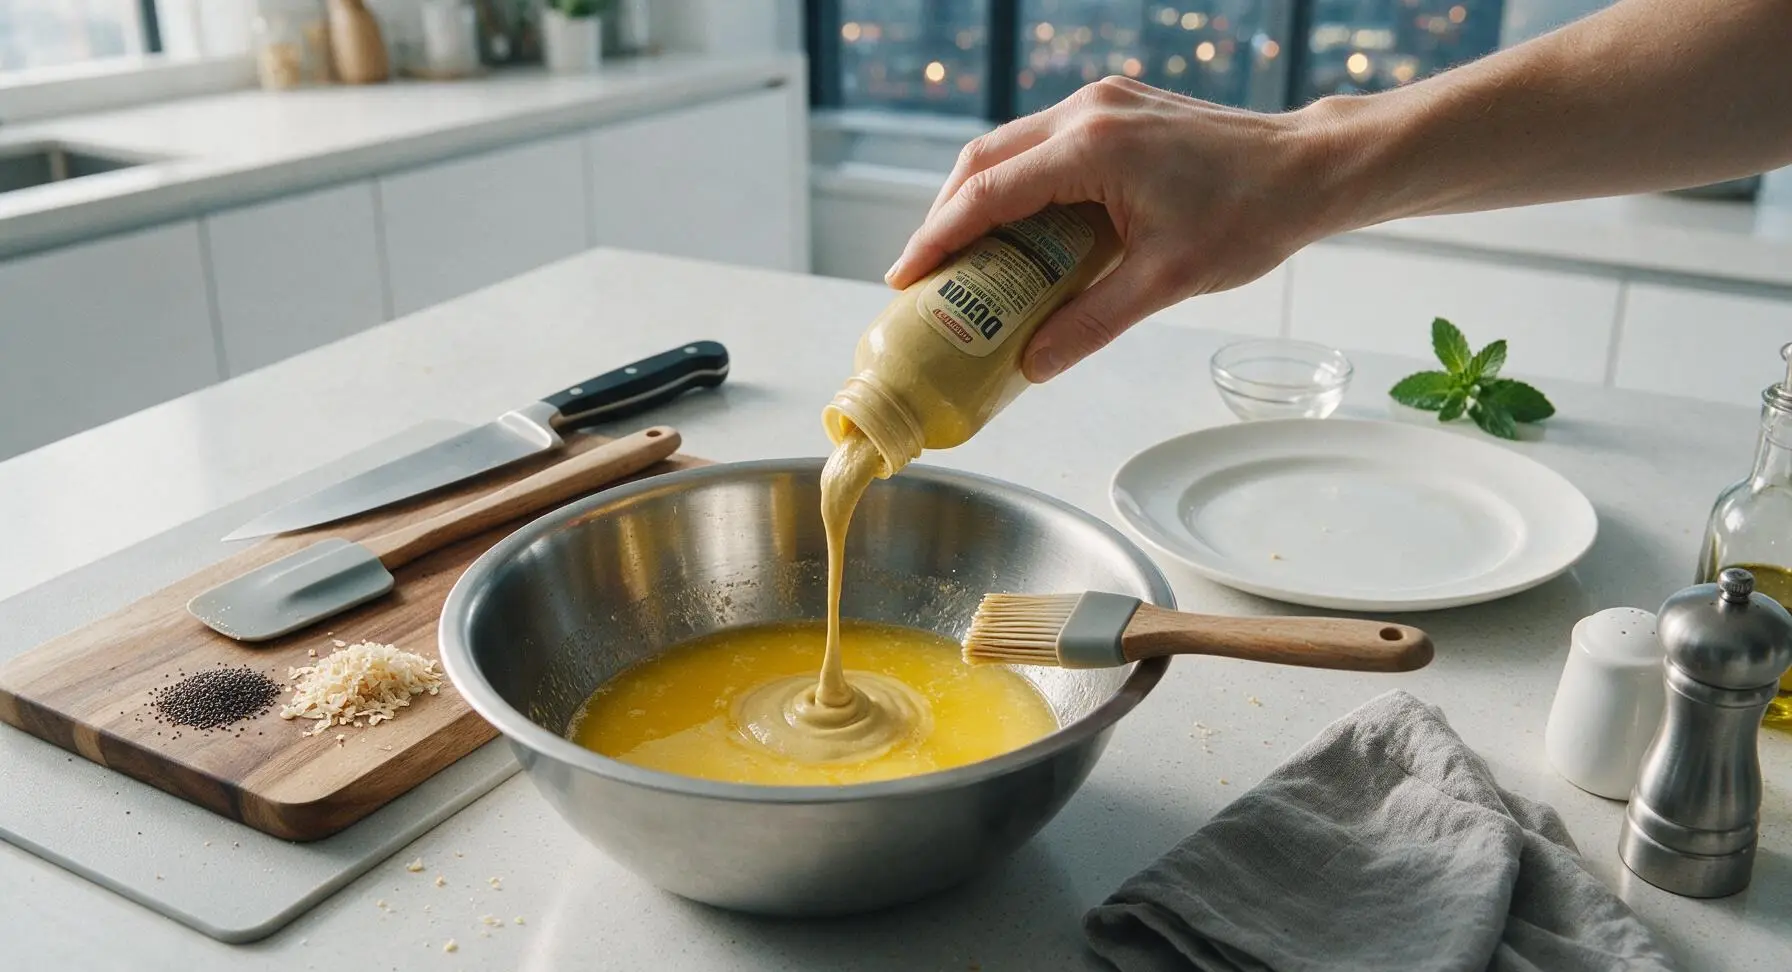
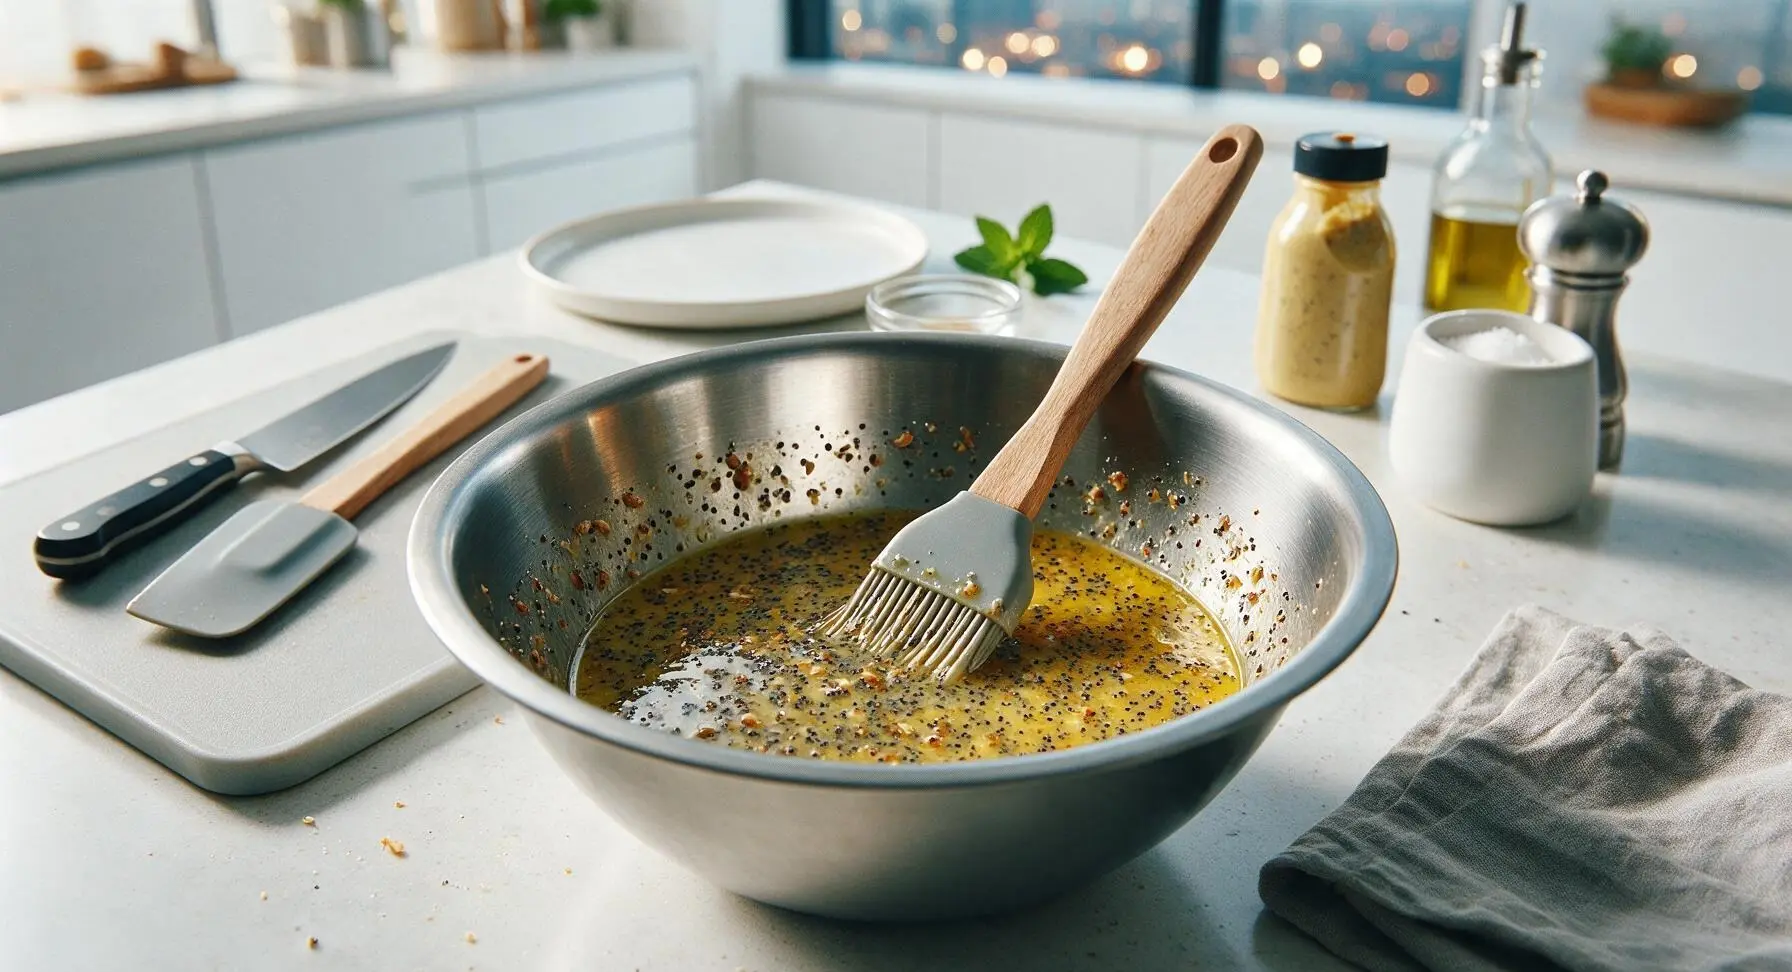
In the brushed stainless steel mixing bowl, combine the 113g melted unsalted butter, 1 tbsp Dijon mustard, 1 tbsp poppy seeds, 1 tsp dried minced onion, 1/2 tsp Worcestershire sauce, 1/4 tsp garlic powder, and 1/8 tsp fine sea salt. Stir thoroughly with the silicone basting brush until all ingredients are fully combined into a smooth, speckled golden sauce. Visual cue: no clumps of mustard or concentrated spice patches remain at the bottom of the bowl.
Step 4
step4:Make poppy seed butter
Step 4
step4:Make poppy seed butter
5

Brush butter over tops

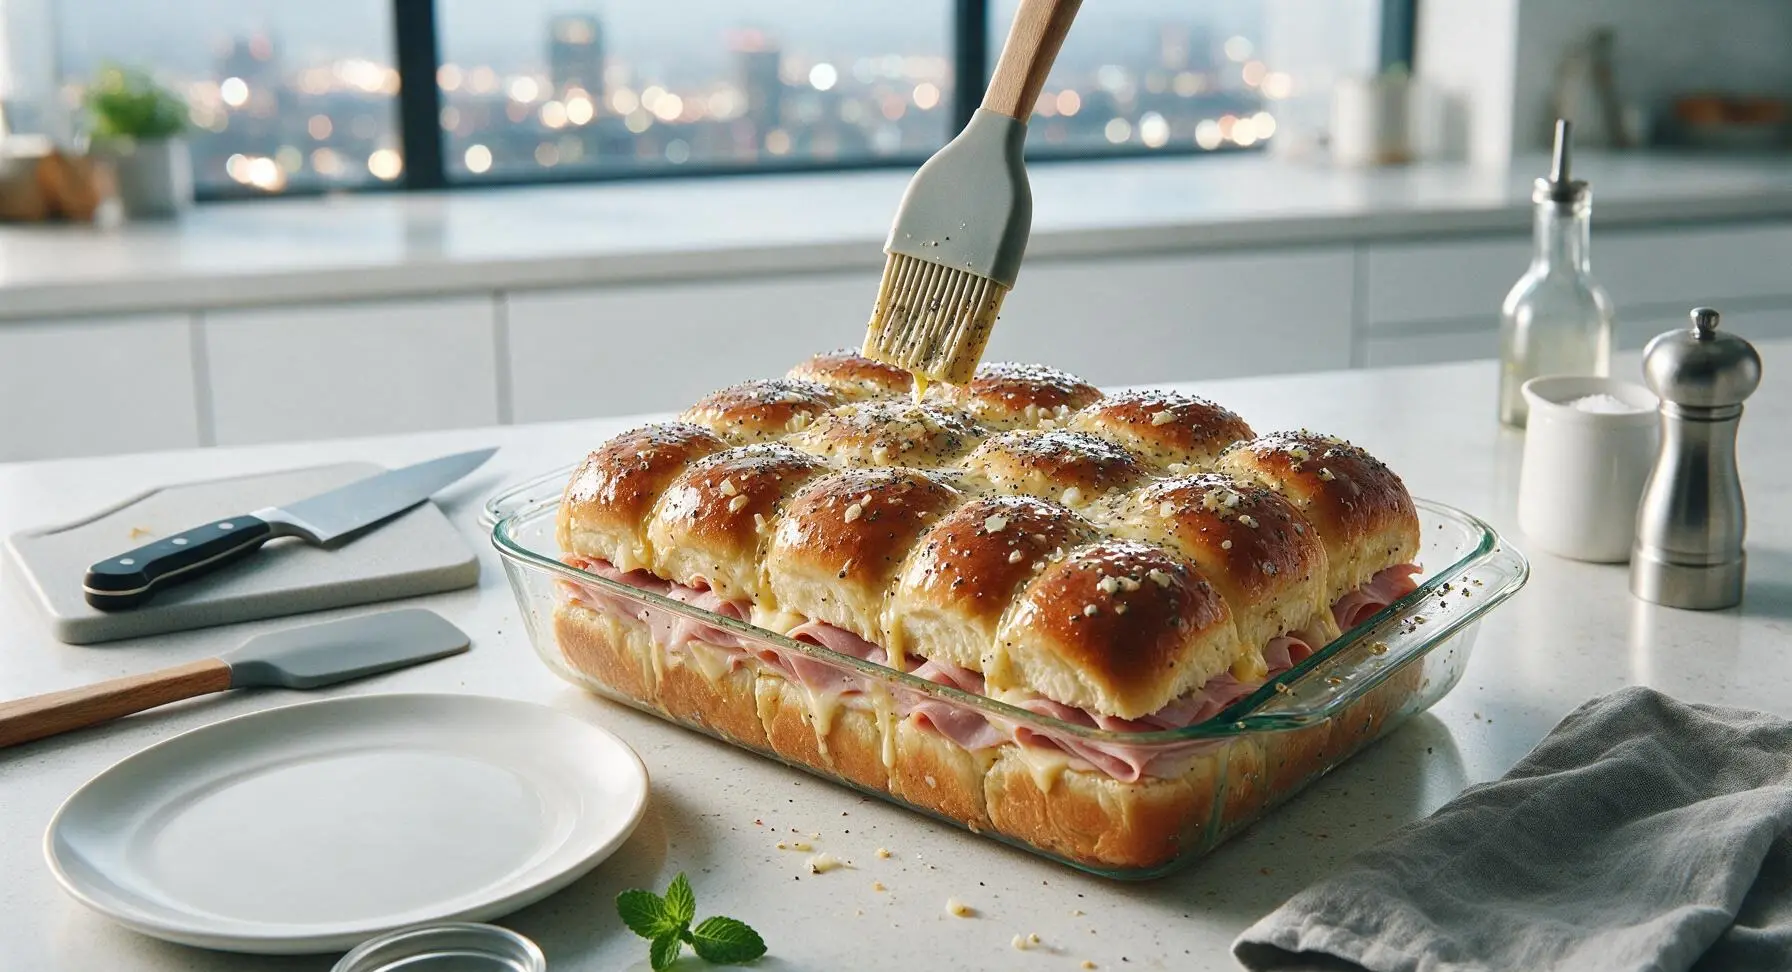
Use the silicone basting brush to generously brush every bit of the poppy seed butter mixture evenly over the entire top surface of the sandwich block in the baking dish. Make sure to brush butter all the way to the edges, and sprinkle any remaining poppy seeds and onion bits from the bowl over the top so no sauce is wasted. Let the sandwiches rest for 5 minutes so the butter soaks slightly into the top buns. Visual cue: the entire top bun surface is glossy and coated, with no dry bread patches left.
Step 5
step5:Brush butter over tops
6

Bake until cheese melts

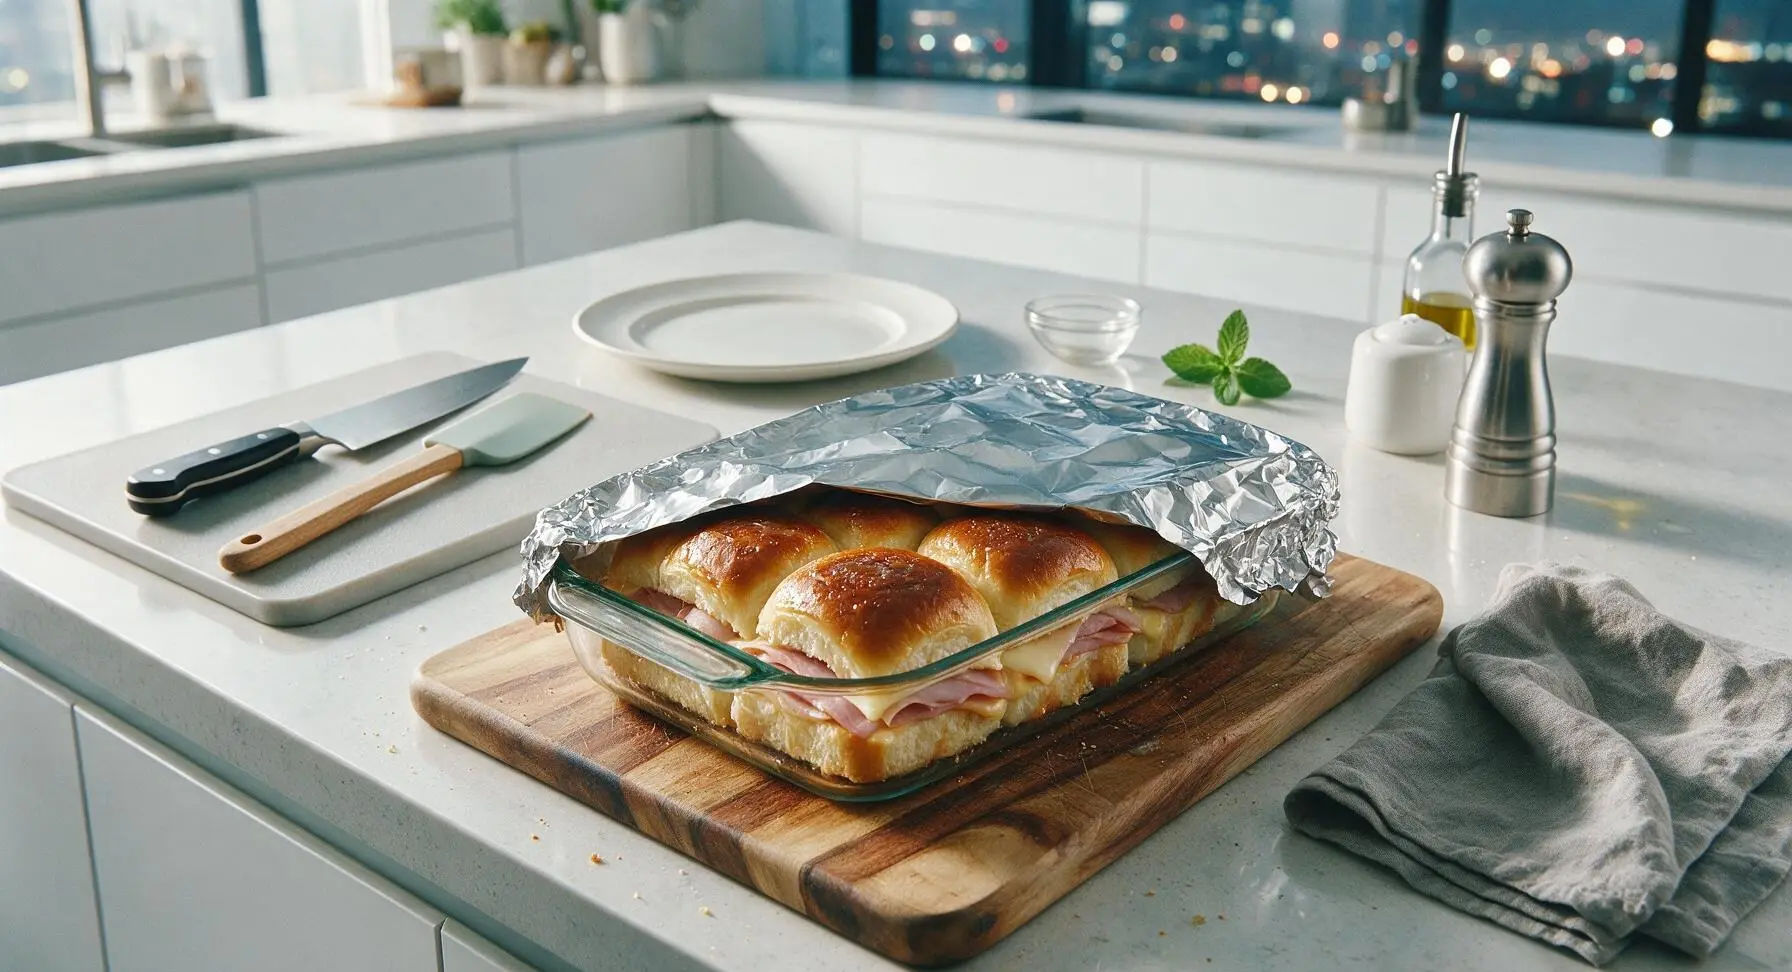
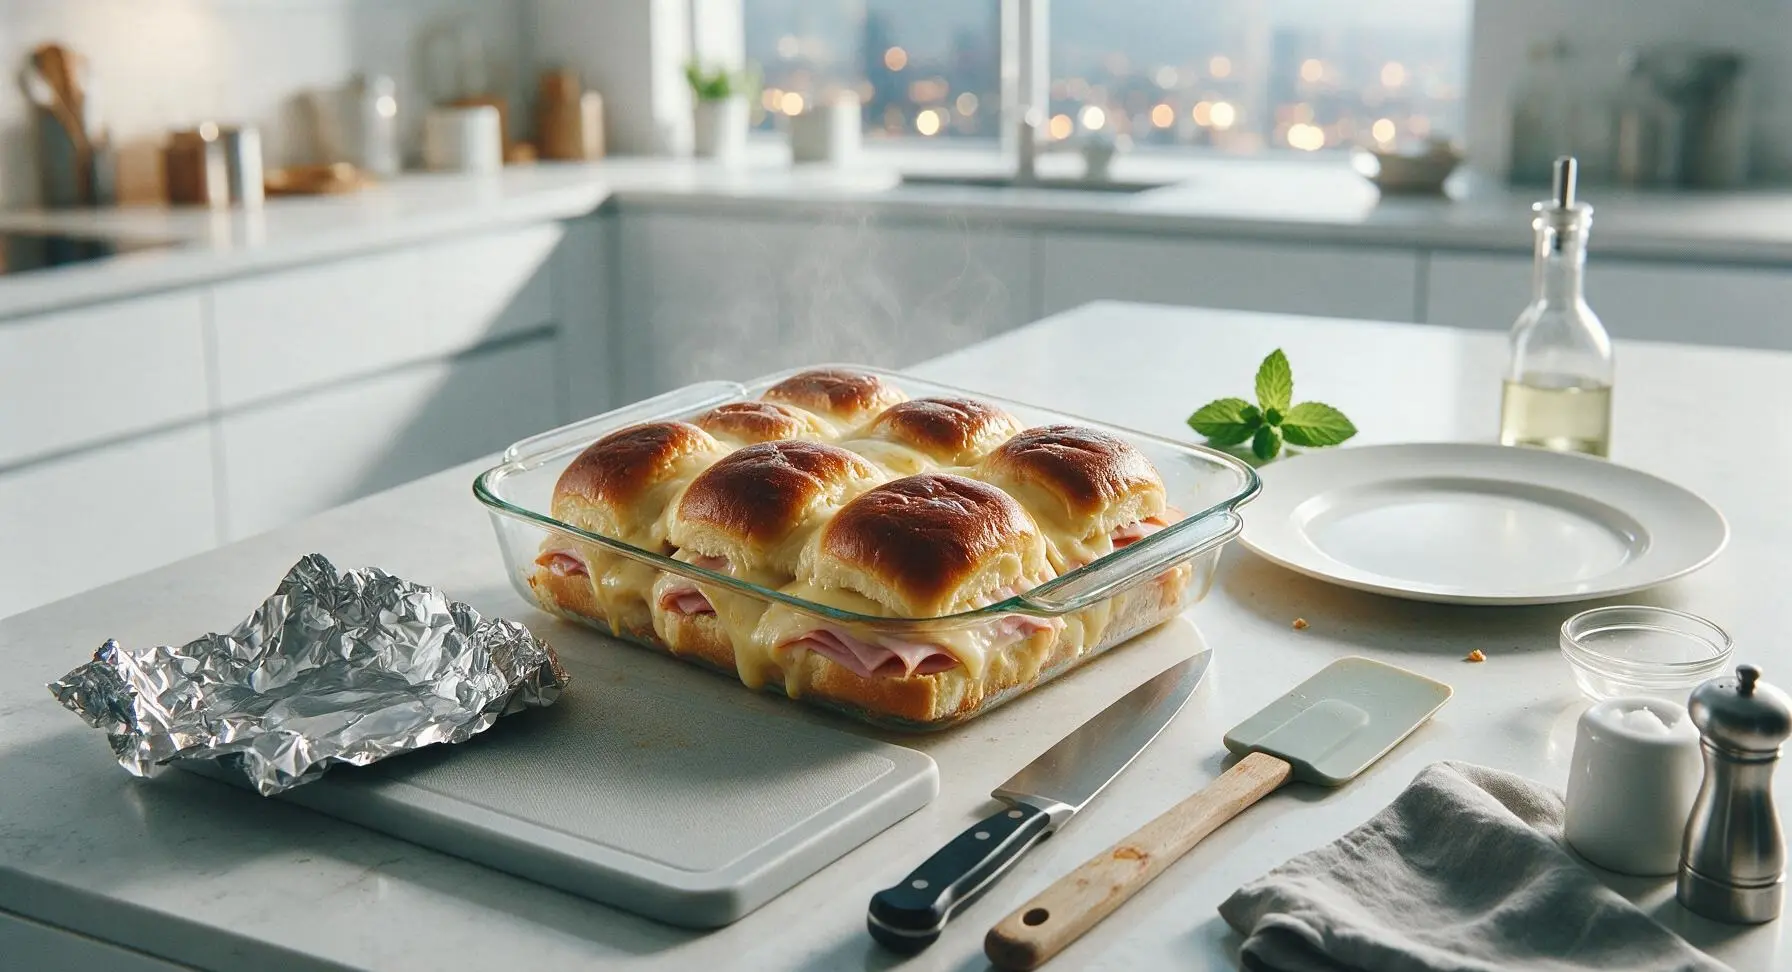
Cover the baking dish tightly with aluminum foil, then place in the preheated 175°C (350°F) oven. Bake for 15 minutes covered, then remove the foil and bake for an additional 5 minutes, until the top buns are light golden brown and the cheese is fully melted and bubbly around the edges. Remove from the oven and let rest for 5 minutes before slicing. Visual cue: cheese will bubble slowly between the roll seams when the dish is gently jiggled.
Step 6
step6:Bake until cheese melts
Step 6
step6:Bake until cheese melts
7

Cut into individual sliders

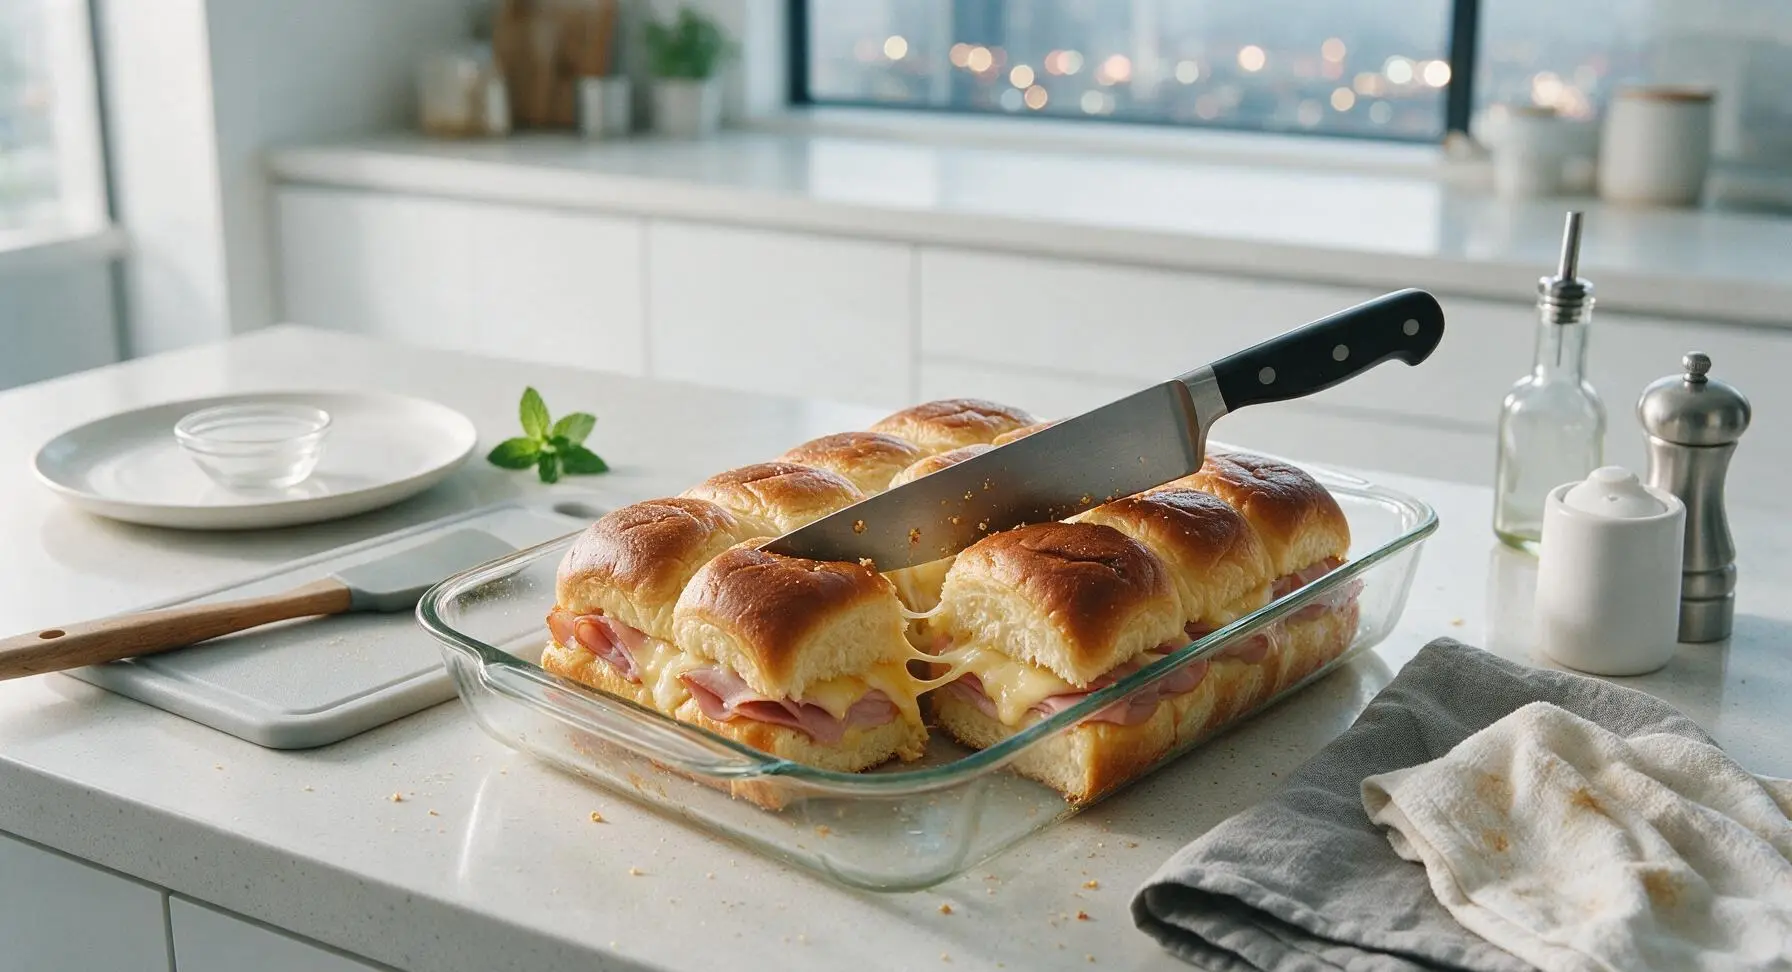
After the 5-minute rest, use the chef knife to cut cleanly through the pre-scored lines between each roll, creating 12 individual handheld sliders. Wipe the knife blade on the linen towel between cuts if cheese sticks to it, to keep slices neat. Visual cue: cuts are straight, with no squished buns or cheese oozing excessively from cut edges.
Step 7
step7:Cut into individual sliders
8

Plate and serve warm

Use the offset spatula to lift individual sliders from the baking dish and arrange them on the oval matte white ceramic serving platter. Garnish with a small sprig of fresh flat-leaf parsley, and serve warm. Visual cue: sliders sit evenly on the platter, with a small amount of melted cheese visible at the edges to signal they are perfectly warm.

Step 8
step8:Plate and serve warm

Tips

1.Keep the roll block fully intact when slicing horizontally – separating individual rolls before baking causes butter to drip down between them, leading to soggy bottom buns instead of a soft, cohesive baked slab.
2.Let the baked sandwiches rest for 5 full minutes before slicing – this allows the melted cheese to set slightly, so it doesn’t all ooze out when you cut between sliders, making for cleaner, neater servings with even cheese in every bite.
3.For make-ahead prep, assemble the ham and cheese layers 24 hours in advance, cover tightly, and refrigerate, but wait to mix and brush on the poppy seed butter until right before baking – adding the butter too early will soak into the buns and make them soggy overnight.


✨ You May Also Like

Lunch
🍜 United States

Creamy, salty, tangy nostalgic Midwestern sandwich pairing rich peanut butter with crisp briny dill pickles for a fast, satisfying no-cook meal.

⏱️ 5 minutesLunch ★ 4.6
Lunch
🍜 United States

Crispy, melty pressed sandwich layered with savory roast pork, ham, Swiss cheese, pickles, and tangy mustard: a beloved Cuban-American comfort classic.

⏱️ 25 minuteLunch ★ 4.9
Lunch
🍜 United States

Hearty, briny New Orleans pressed sandwich stacked with cured Italian meats, provolone, and zesty olive salad, served cold for bold, portable flavor.

⏱️ 1 hour 20Lunch ★ 4.7
Lunch
🍜 United States

A tangy, creamy Southern American staple, this no-cook cheesy sandwich is packed with sharp cheddar and sweet pimentos for a satisfying, portable bite.

⏱️ 1 hour 15Lunch ★ 4.8
Lunch
🍜 United States

Crispy Cajun-spiced fried shrimp piled on crusty French bread with tangy remoulade and fresh toppings, the iconic Louisiana street food sandwich.

⏱️ 35 minuteLunch ★ 4.4
Lunch
🍜 United States

Stacked, savory deli-style corned beef sandwich with melted Swiss, tangy mustard, and crisp griddled rye— a fast, hearty, satisfying classic.

⏱️ 15 minuteLunch ★ 4.9

hawaiian bread sandwiches:Frequently Asked Questions

1.Can I prep these baked ham and cheese sandwiches ahead of time for a party? ▾
Absolutely—they’re made for easy party prep! Assemble the full sandwiches, brush on the poppy seed Dijon butter, cover tightly with foil, and refrigerate for up to 24 hours. When ready to bake, add 5 to 7 minutes to the standard covered bake time to account for chilled ingredients, no pre-warming needed.
2.What if I can’t find Hawaiian sweet dinner rolls for this recipe? ▾
You can substitute soft, slightly sweet dinner rolls as a close stand-in—look for brioche slider rolls or soft white dinner rolls with a hint of sugar in the ingredient list. Skip crusty, dense artisan rolls, as they won’t get that soft, pillowy texture that pairs so well with savory ham and melted Swiss.
3.Do I have to keep the Hawaiian rolls connected when assembling the sandwiches? ▾
It’s highly recommended! Leaving the rolls attached as a single slab (sliced horizontally in one big piece) makes assembly much faster, keeps fillings from oozing out during baking, and makes it easy to pull apart individual servings once done. If your rolls are pre-separated, just handle them gently when buttering.
4.Can I use a different cheese instead of Swiss for these sandwiches? ▾
You can absolutely swap Swiss for other melty, mild cheeses if you prefer. Provolone, mild white cheddar, or gouda all work beautifully—just stick to thinly sliced deli-style cheese so it melts evenly across every sandwich. Skip crumbly cheeses like feta or extra-sharp hard cheeses that won’t get that gooey, stretchy melt.
5.How do I keep the tops of the rolls from getting too crispy while baking? ▾
The key is to cover the baking dish tightly with aluminum foil for the first 20 minutes of baking, which traps steam to keep the rolls soft and lets the cheese melt fully. Remove the foil for the last 5 to 7 minutes just to let the tops turn golden and crisp slightly for the perfect balance of textures.
6.Can I make these sandwiches with leftover holiday ham instead of deli ham? ▾
Definitely! Thinly sliced leftover baked smoked ham is actually a delicious upgrade from deli ham, as it adds extra deep, smoky flavor. Just slice it thin, trim any tough, fatty outer edges so every bite is tender, and layer it evenly across the rolls so fillings don’t slide around during baking.
7.What’s in the tangy poppy seed butter mentioned in the recipe intro? ▾
It’s a quick, flavor-packed spread made by melting unsalted butter and stirring in Dijon mustard, poppy seeds, a tiny pinch of dried minced onion, and a small splash of Worcestershire sauce for savoriness. Brush half on the cut bottom of the rolls before adding fillings, and the rest over top of assembled sandwiches before baking.
8.How long do these baked sandwiches stay good for after baking? ▾
Leftovers will keep well in an airtight container in the fridge for up to 3 days. To reheat, wrap individual sandwiches in foil and warm in a 350°F oven for 10 to 12 minutes until the cheese is melty again. Skip the microwave, as it will turn soft Hawaiian rolls tough and chewy instead of pillowy.
9.Can I add extra fillings to these sandwiches without ruining the texture? ▾
You can add small amounts of complementary fillings, like thin pickled jalapeño slices, a sprinkle of crispy cooked bacon, or a thin layer of pineapple jam to lean into the Hawaiian vibe. Just don’t overstuff them, as too many wet or bulky fillings will make roll bottoms soggy and cause fillings to slide out when serving.
10.What size baking dish do I need for a standard 12-count pack of Hawaiian rolls? ▾
A 9x13 inch baking dish is the perfect fit for a full 12-count pack of connected Hawaiian dinner rolls. If you only have a slightly smaller dish, you can gently squeeze the rolls in—they’re soft enough to fit without squishing fillings out, just make sure the dish is deep enough to cover with foil without pressing on the buttered tops.
11.Do I have to include poppy seeds in the butter topping? ▾
Poppy seeds add a subtle nutty crunch and tiny pop of visual appeal to the butter topping, but they’re not mandatory. If you don’t have them on hand or don’t care for their texture, you can leave them out entirely, or swap in a sprinkle of toasted sesame seeds for a similar mild crunch without throwing off the recipe’s flavor balance.
12.Can I freeze these assembled sandwiches for later use? ▾
Yes! Wrap fully assembled, unbaked sandwiches tightly in two layers of plastic wrap and a layer of foil, and freeze for up to 3 months. When ready to bake, don’t thaw them first—bake covered at 350°F for 40 to 45 minutes, then uncover for the last 10 minutes until golden and heated all the way through.

Comments (8)

2 days ago

OMG these were a total game changer for my kid’s soccer team potluck last weekend! I doubled the recipe and every single sandwich was gone before I even got to grab one for myself 😂 The sweet Hawaiian bread pairs so perfectly with the salty ham and melty cheese, I can’t believe I never thought to bake these before. 20 minute cook time is chef’s kiss for busy weeknights too!

yesterday

Wait did you add the poppy seed butter glaze that’s in the recipe? I almost skipped it but it makes all the difference!

yesterday

So glad these were a hit at the potluck, Mia! Don’t sleep on that optional glaze if you make them again—it adds that perfect little savory-sweet kick everyone raves about.

3 days ago

Bro this is the easiest dorm meal ever. I don’t even have a fancy baking sheet, just used a disposable aluminum pan in my tiny toaster oven and it came out perfect. Meal prepped 6 of these for the week and they reheat so good in the microwave. Way better than the sad dining hall sandwiches.

2 days ago

Love that hack for dorm cooking, Jake! So glad this works even with limited kitchen gear—pro tip: wrap them individually in foil before reheating to keep the bread from getting soggy.

1 week ago

Made these for my grandkids when they visited over spring break. They gobbled them right up! I did swap the Swiss cheese for cheddar because that’s what I had in the fridge, and I added a little sprinkle of garlic powder on top. Only reason I’m not giving 5 stars is I wish the recipe noted you can pull the whole loaf apart instead of slicing individual rolls first, that would’ve saved me time!

5 days ago

Brought these to our Cardinals tailgate last Sunday and people were begging for the recipe. I added a few slices of pickled jalapeño to half the batch for the folks who like a little heat, and that combo was insane. 20 minutes in the oven and you’ve got a crowd pleaser that doesn’t break the bank. 10/10 will be making these every game day from now on.

3 days ago

The jalapeño addition is genius! I’ve been putting pineapple slices on mine too for extra Hawaiian vibe, it slaps.

2 days ago

Love those custom tweaks, Troy! The jalapeño add is such a popular swap, I might have to add that as a variation note in the recipe card soon.

yesterday

SO good! I make a batch of these every other Sunday for my husband’s work lunches and my teen’s after school snacks. They hold up great in the fridge for 4-5 days, and you can toss them in the air fryer for 3 minutes to get the bread all crispy again. No more sad lunch meat sandwiches for us!

2 hours ago

Just pulled these out of the oven for our lazy Sunday brunch and my entire apartment smells amazing. I used honey ham instead of black forest and it’s so good with the sweet bread. Why did I waste so much money on takeout sandwiches when these are 10x better?

30 minutes ago

Wait I live in Brooklyn too! Have you tried making these with a little drizzle of hot honey on top? Life changing.

30 minutes ago

First recipe I’ve ever made completely on my own and I didn’t burn it!! I was so nervous I’d mess up the cook time but 20 minutes at 350 was exactly right, the cheese was perfectly melted and the bread was toasty on the edges. My roommate said it’s the best thing I’ve ever made, win for me!

5 minutes ago

That’s what we love to hear, Nate! There’s no better feeling than nailing a first recipe, so proud of you. These are almost impossible to mess up, which is why they’re one of our most popular easy dinner picks.

2 weeks ago

I’ve made this recipe for three different family dinners and two church potlucks in the last month and every single time people ask me for the recipe. It’s so easy to throw together last minute when you forget you signed up to bring food, and it feeds a crowd for way cheaper than ordering a sandwich platter from the grocery store. If you haven’t made these yet, what are you waiting for?

1 week ago

I made these for our 4H potluck last week too! Total crowd pleaser, even the picky 8 year olds ate two each.

1 week ago

You’re making us blush, Kari! We love hearing these are a go-to for gatherings—they really are the ultimate low-effort, high-reward crowd food.



