
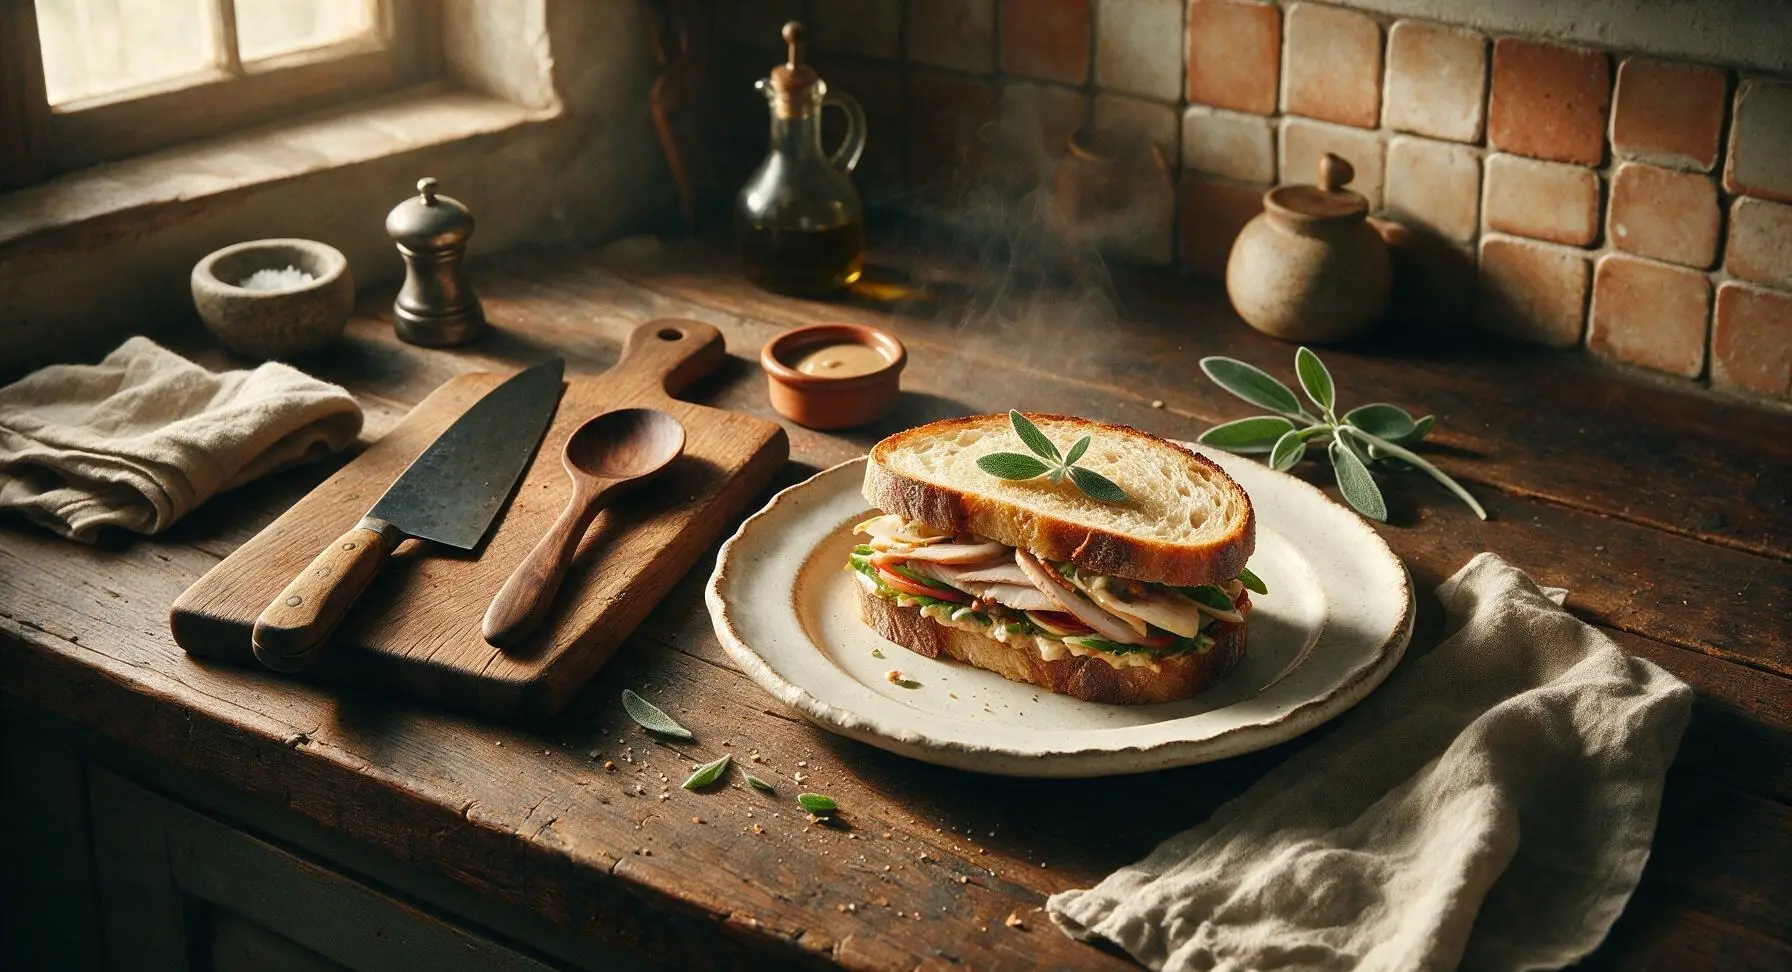
homemade sandwich

title 1
homemade sandwich
⏱️ cook time 5 minutes
🍽️ servings 2
⚡ Difficulty easy

intro

Crisp, creamy, and perfectly stacked, this classic homemade deli sandwich layers fresh veggies, savory turkey, and tangy spread between toasty sourdough for a fast, satisfying meal.

Ingredients
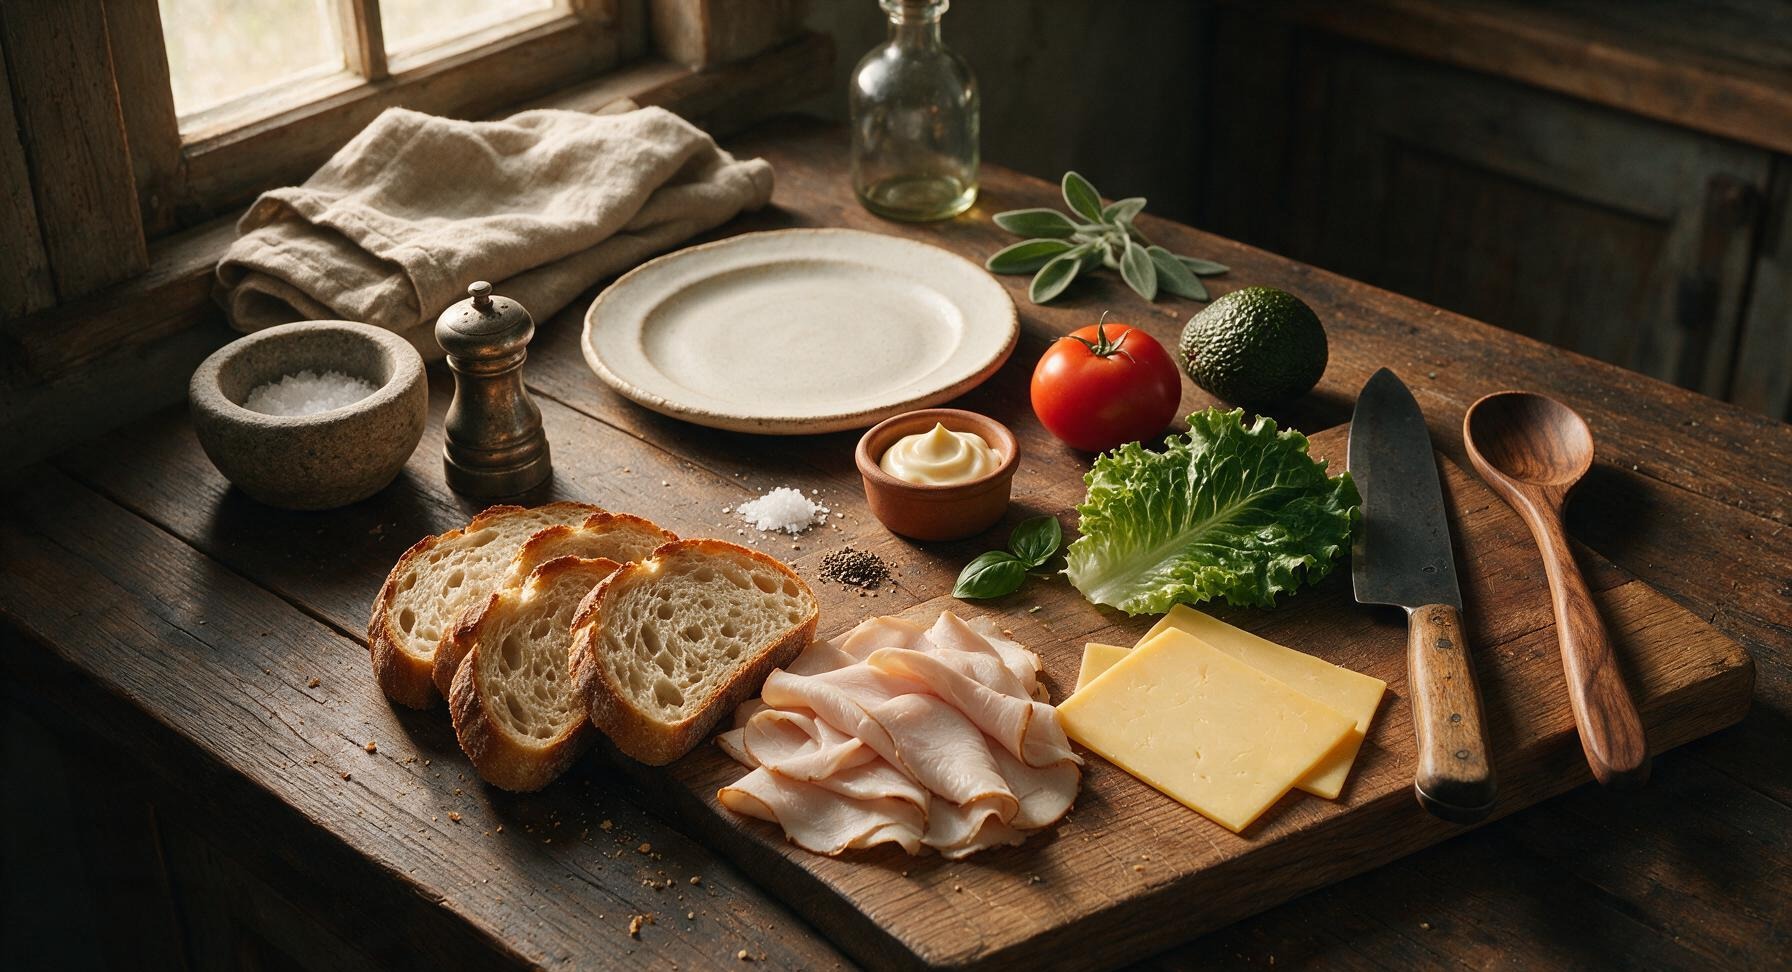
Sourdough bread 4 thick slices (120g)
Deli sliced roast turkey 120g, thinly sliced
Sharp cheddar cheese 2 slices (40g)
Ripe avocado 1 small (100g)
Roma tomato 1 medium (80g)
Green leaf lettuce 2 large leaves (30g)
Mayonnaise 2 tbsp (30g)
Kosher salt 1/4 tsp
Freshly ground black pepper 1/8 tsp
Fresh basil 2 small leaves

Steps

1

Prep Fresh Toppings

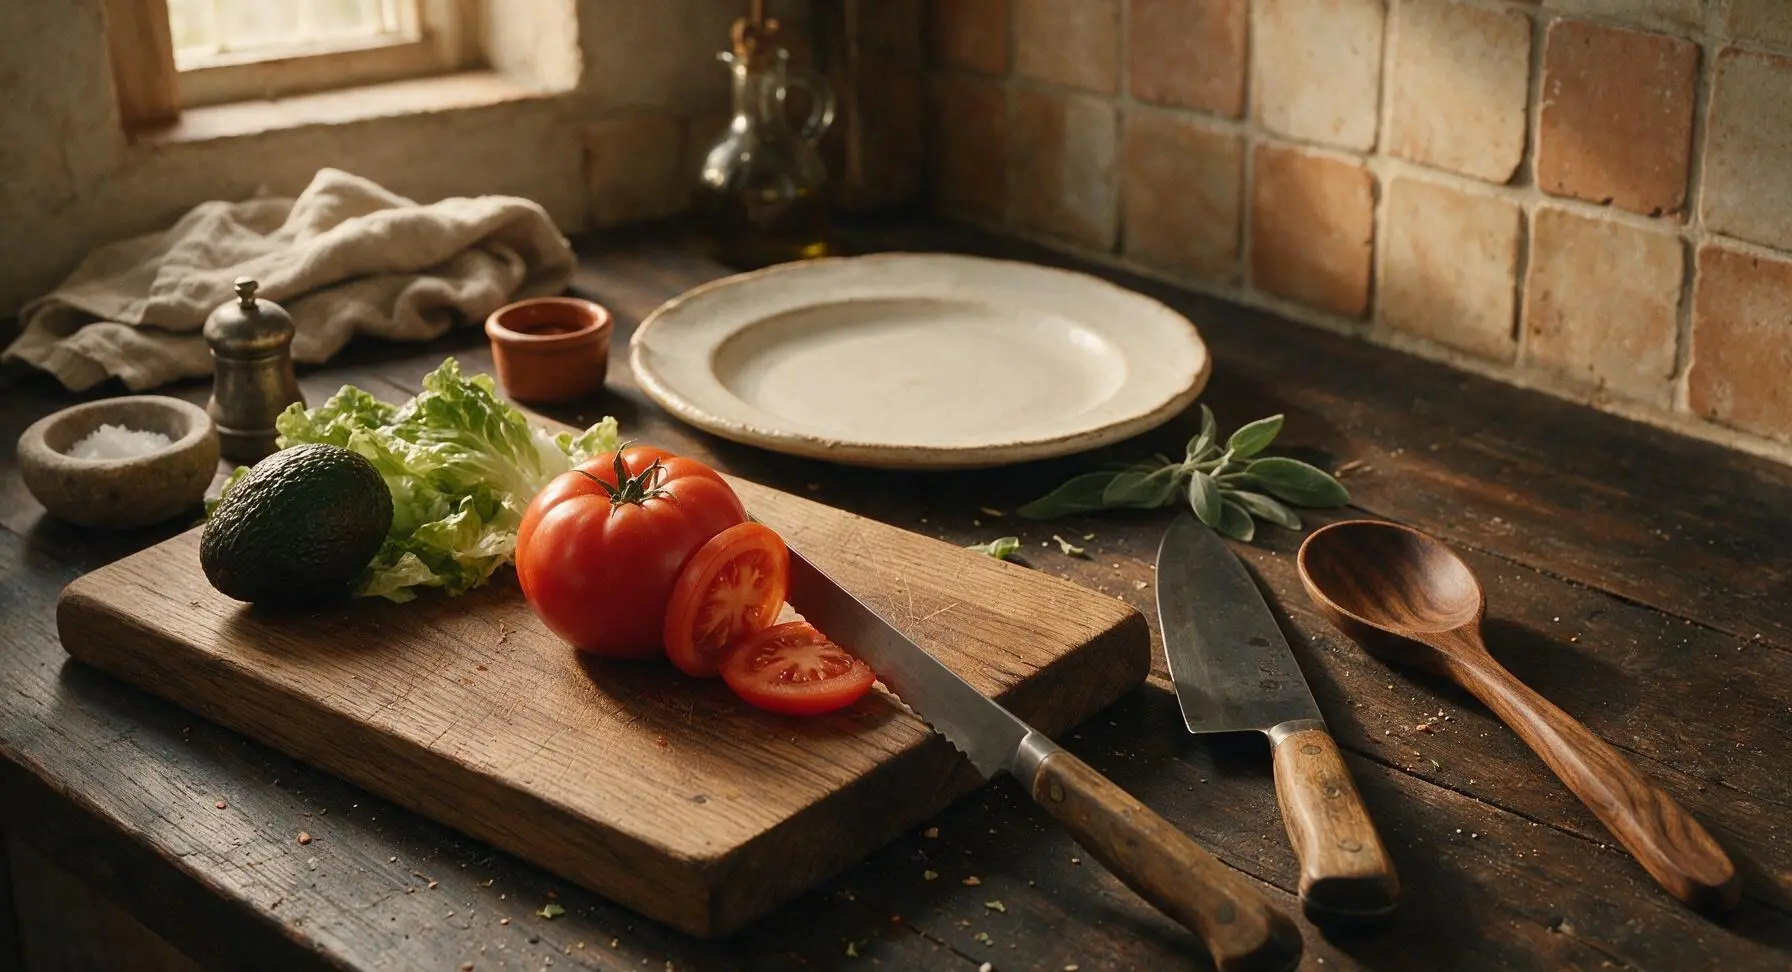
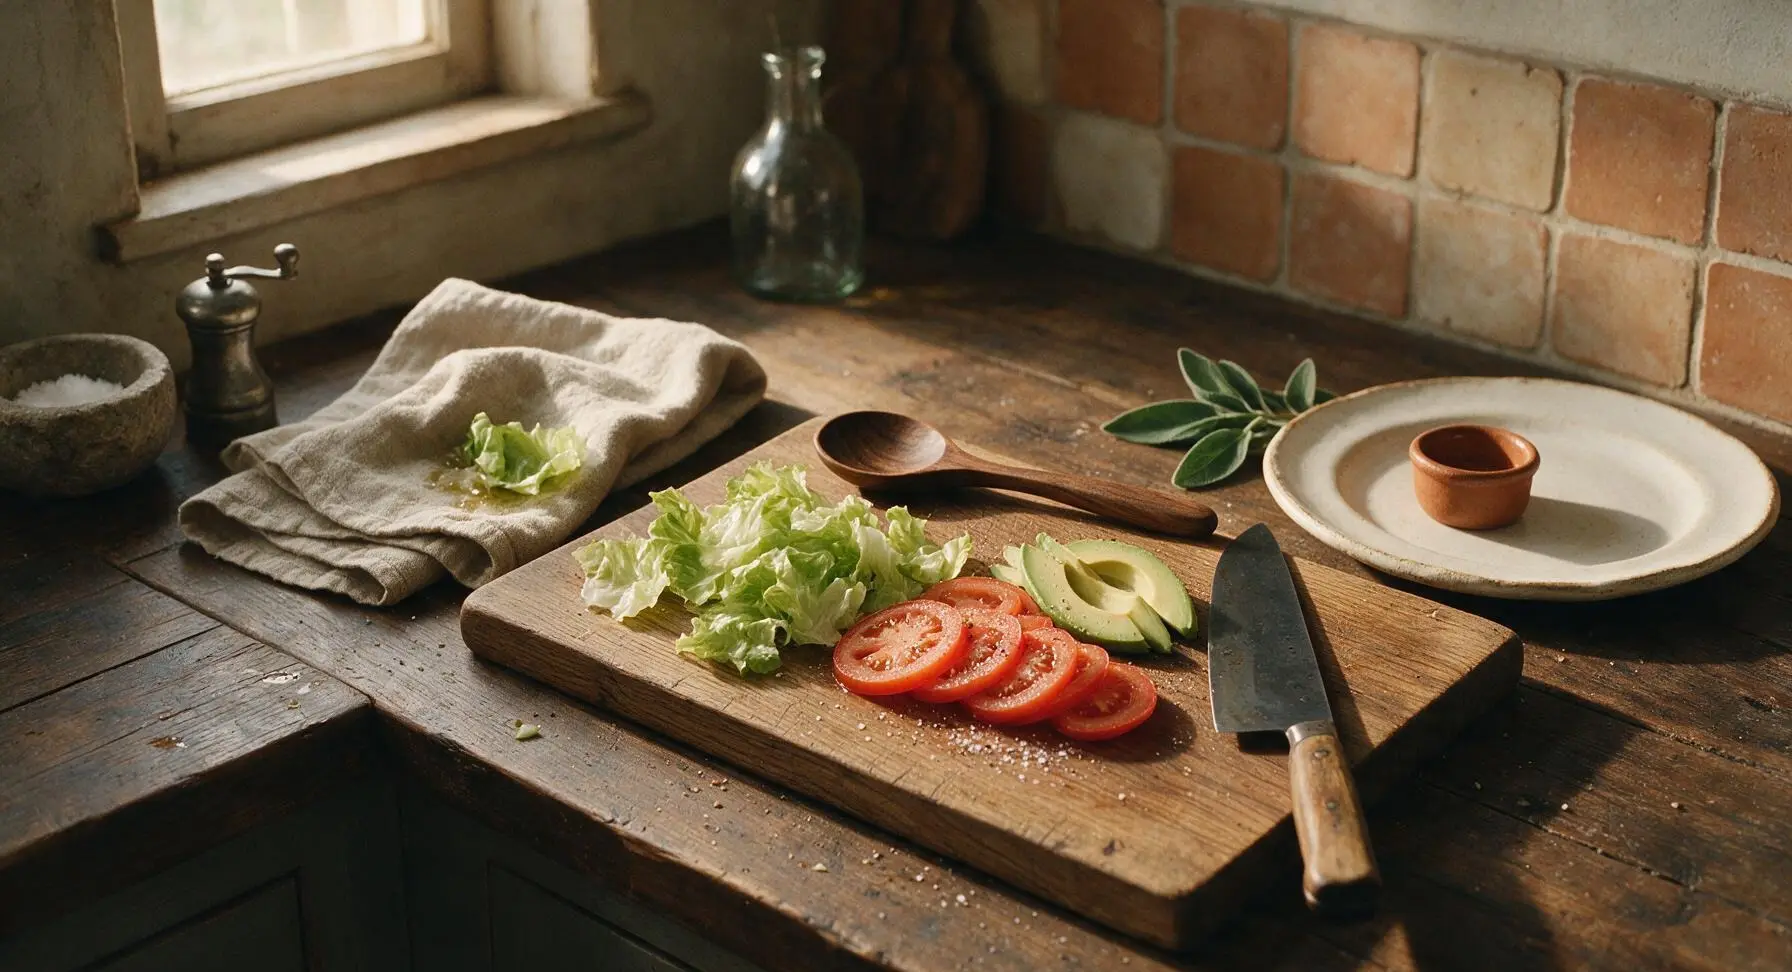
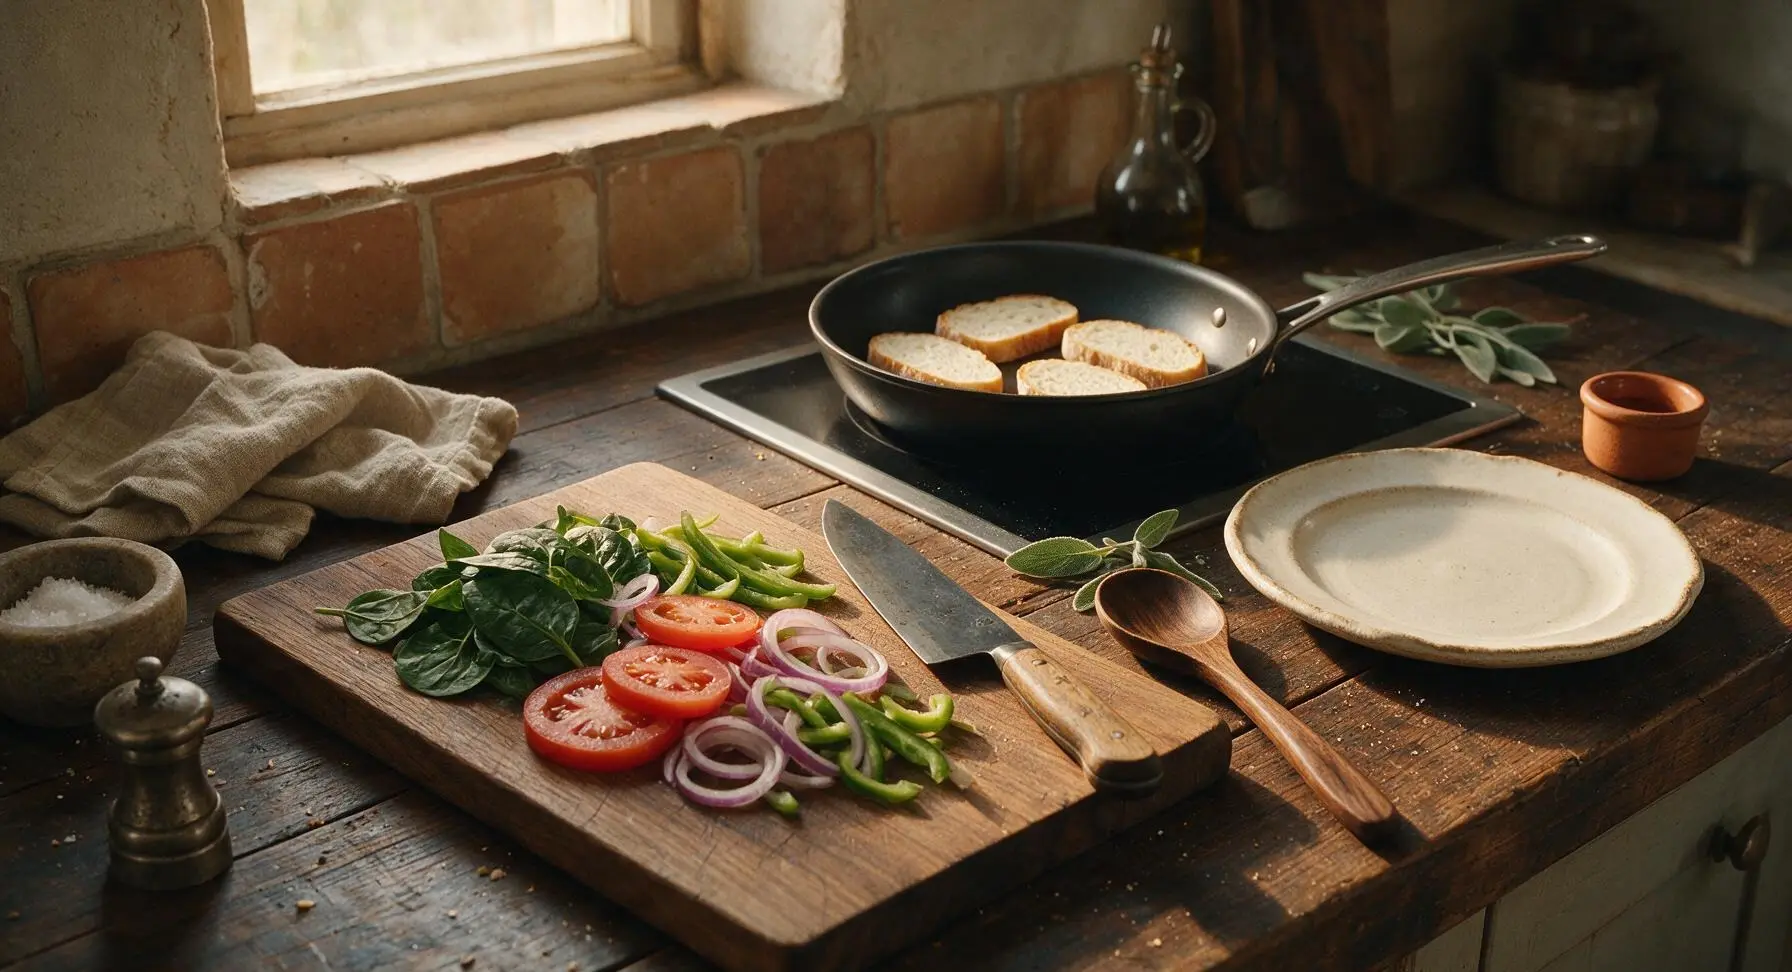
Place the Roma tomato on the maple cutting board. Use the serrated bread knife to slice it into 1/4-inch thick rounds, discarding the stem end. Pit the avocado, slice into 1/4-inch thick wedges, and peel away the skin. Rinse the lettuce leaves and pat dry with the corner of the kitchen towel, tearing away any thick, tough stem ends. Season tomato slices lightly with 1/8 tsp kosher salt and a pinch of black pepper, letting them rest for 2 minutes to draw out excess juice (this prevents soggy bread). Visual cue: tomato slices will look slightly glistening as salt draws moisture to the surface.
Step 1
step1:Prep Fresh Toppings
Step 1
step1:Prep Fresh Toppings
2

Toast Sourdough Slices

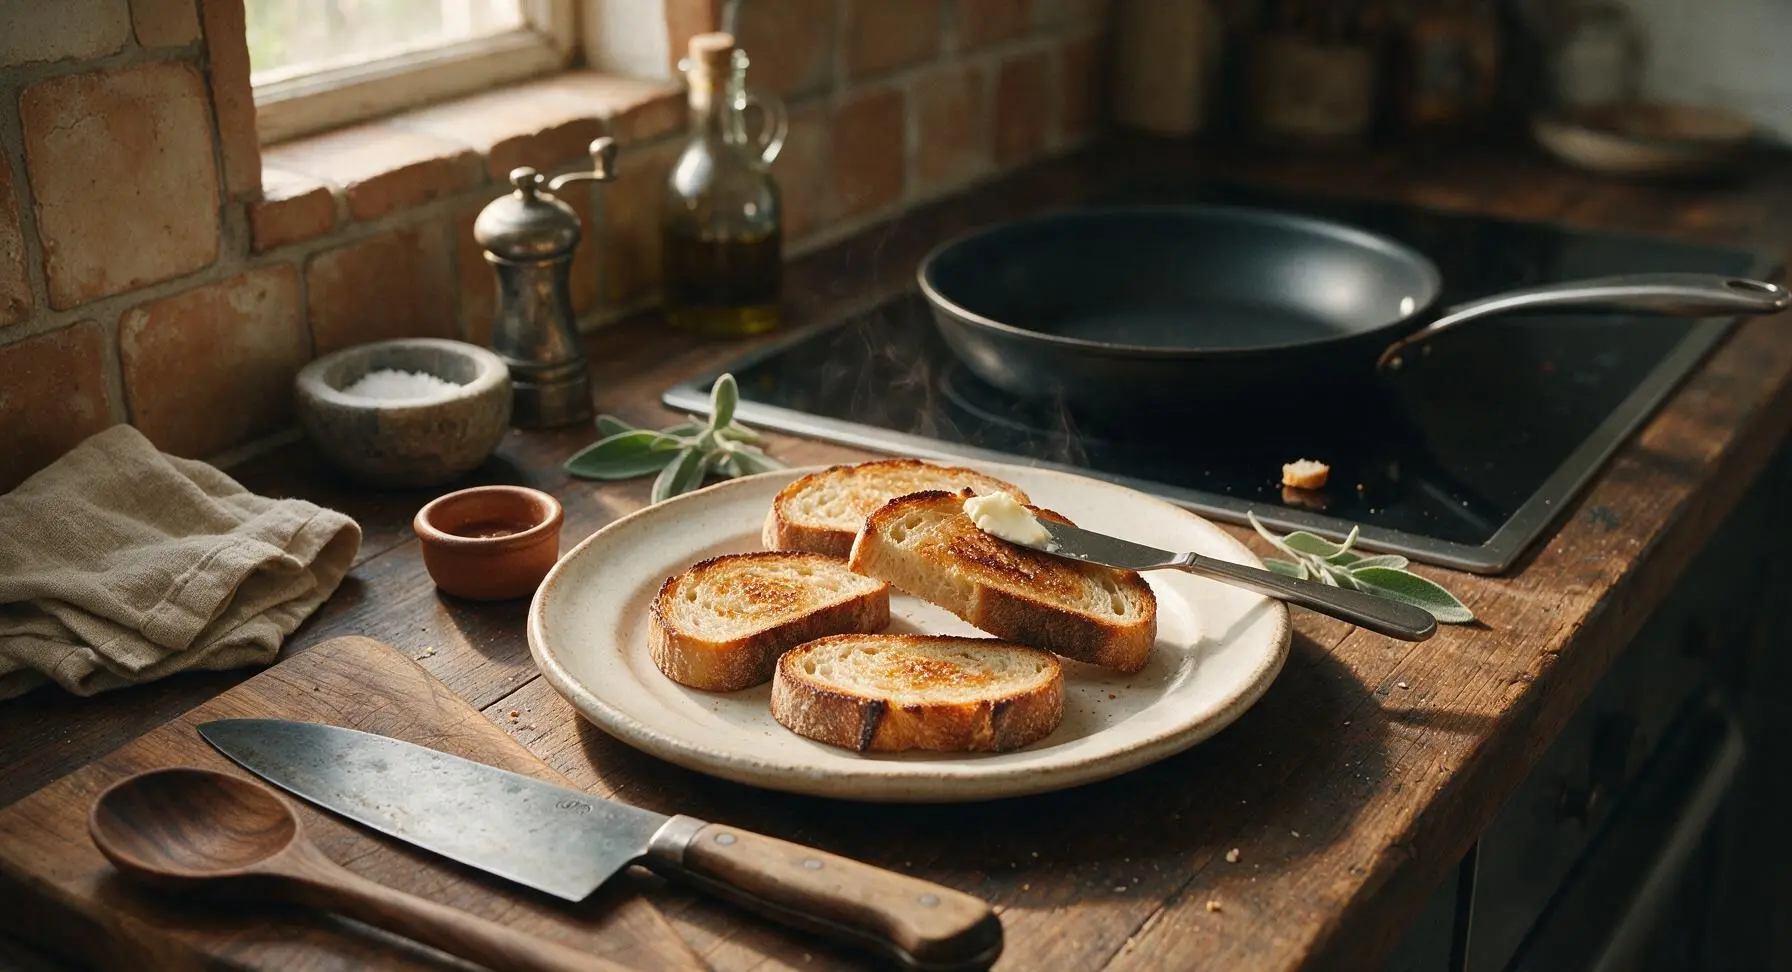
Place the matte black non-stick skillet on the induction cooktop over medium heat (350°F / 175°C). Add the 4 sourdough slices in a single layer, toasting for 2 minutes per side until golden brown with faint crisp edges and a soft, chewy center. Do not over-toast—bread should be firm enough to hold fillings without cracking, but not hard enough to shatter when bitten. Transfer toasted slices to the cream white plate temporarily while you assemble. Visual cue: toasted bread will have light golden brown marks, no dark burnt spots.
Step 2
step2:Toast Sourdough Slices
Step 2
step2:Toast Sourdough Slices
3

Mix Seasoned Spread

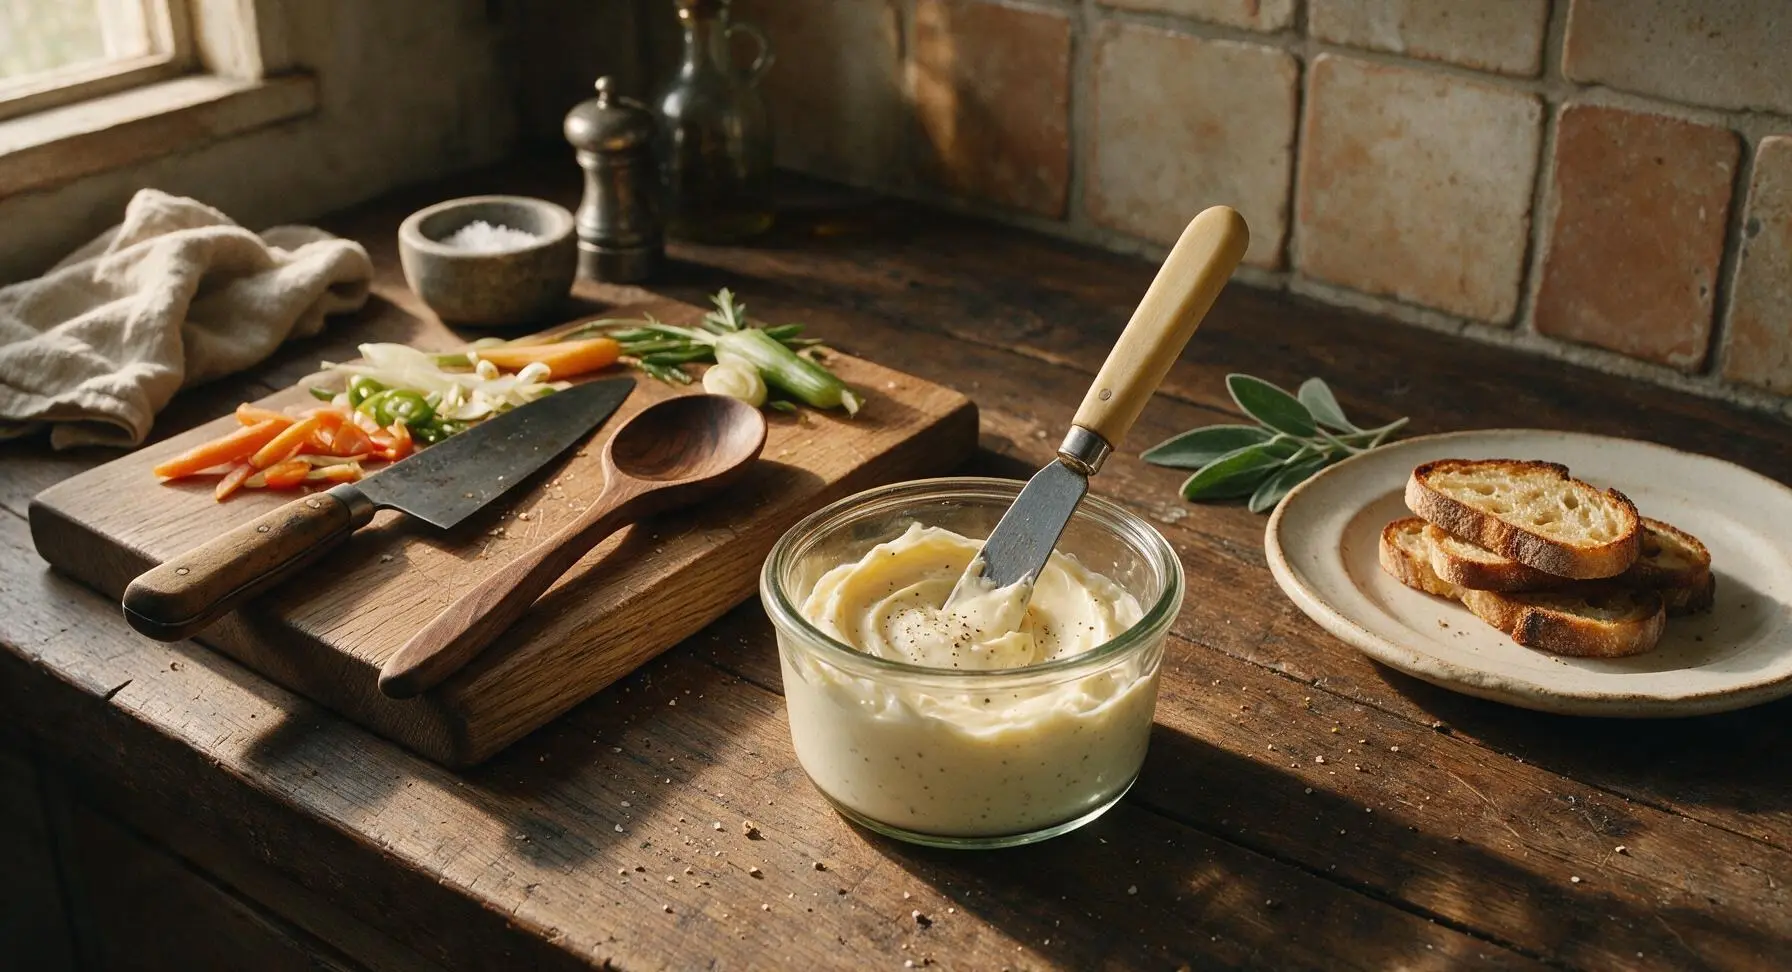
Scoop 2 tablespoons of mayonnaise into the small clear glass ramekin. Stir in the remaining 1/8 tsp kosher salt and 1/8 tsp black pepper with the tip of the butter spreader, mixing until fully combined with no visible clumps of spice. For extra brightness, tear 1 small basil leaf into tiny pieces and stir it into the mayo if desired. Visual cue: spread will have even flecks of black pepper distributed throughout.
Step 3
step3:Mix Seasoned Spread
4

Spread Bread Base

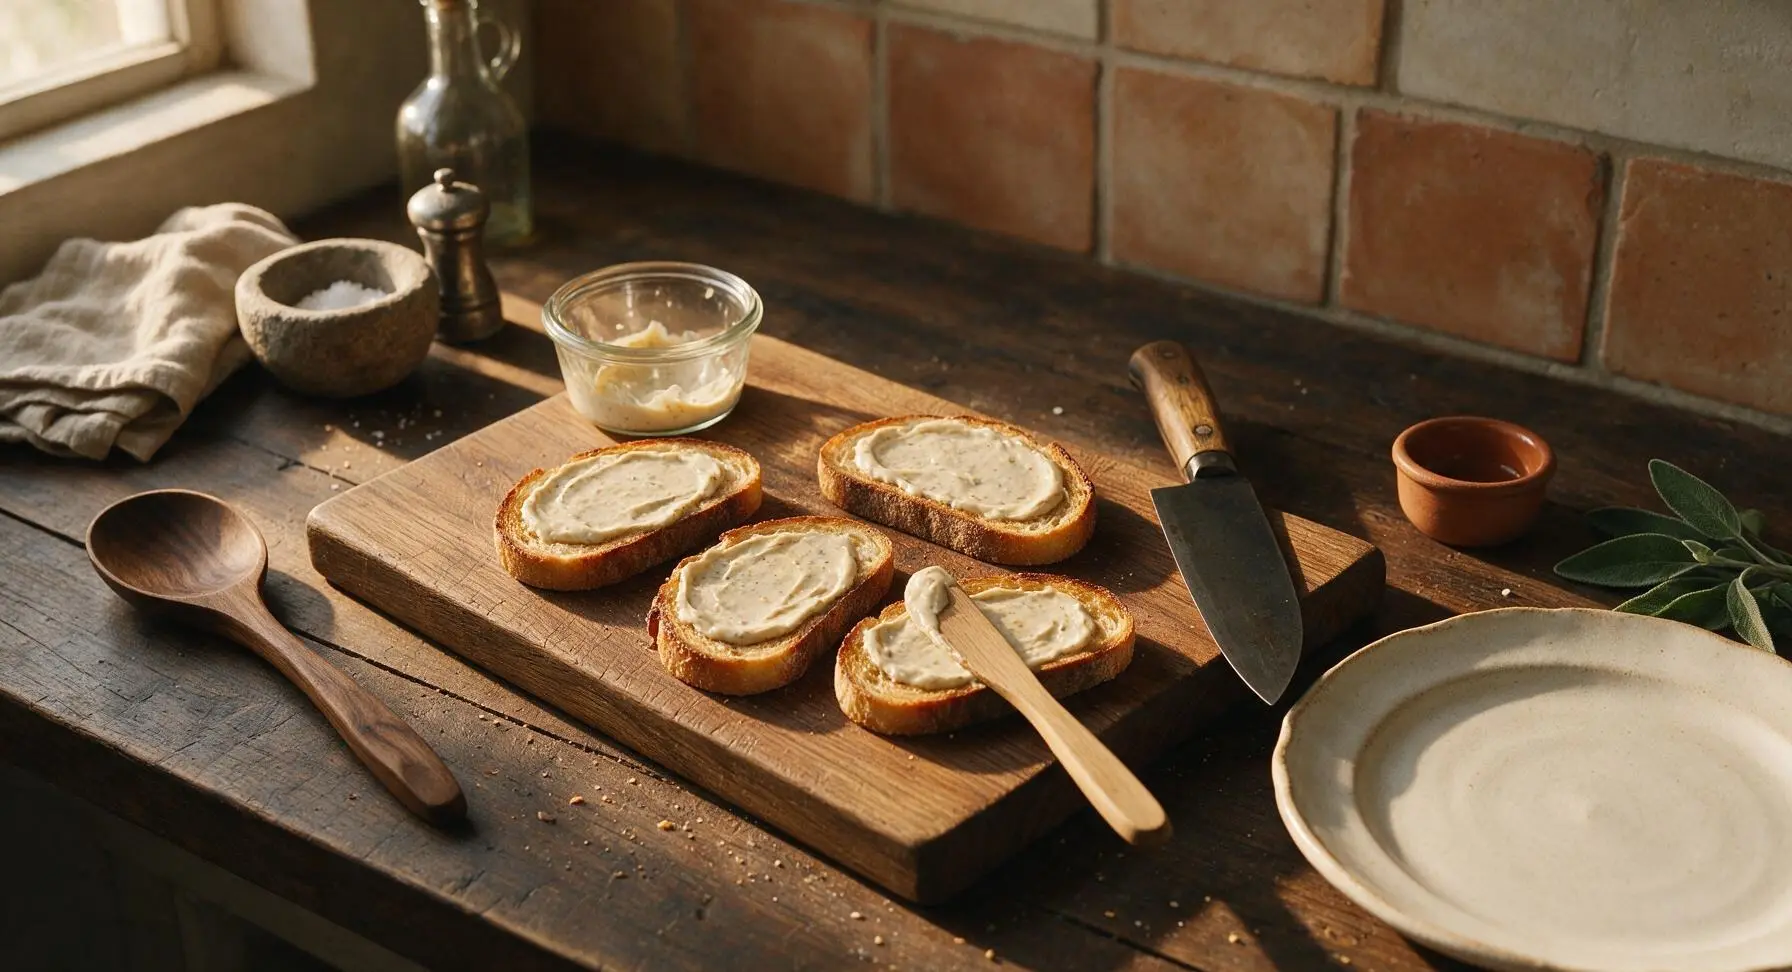
Arrange the 4 toasted sourdough slices on the maple cutting board. Use the butter spreader to coat one side of each slice evenly with the seasoned mayonnaise, spreading all the way to the edges to create a moisture barrier that prevents sogginess from juicy fillings. Use approximately 1.5 teaspoons of spread per slice. Visual cue: no dry bread spots are visible on the coated side of each slice.
Step 4
step4:Spread Bread Base
5

Layer Sandwich Fillings

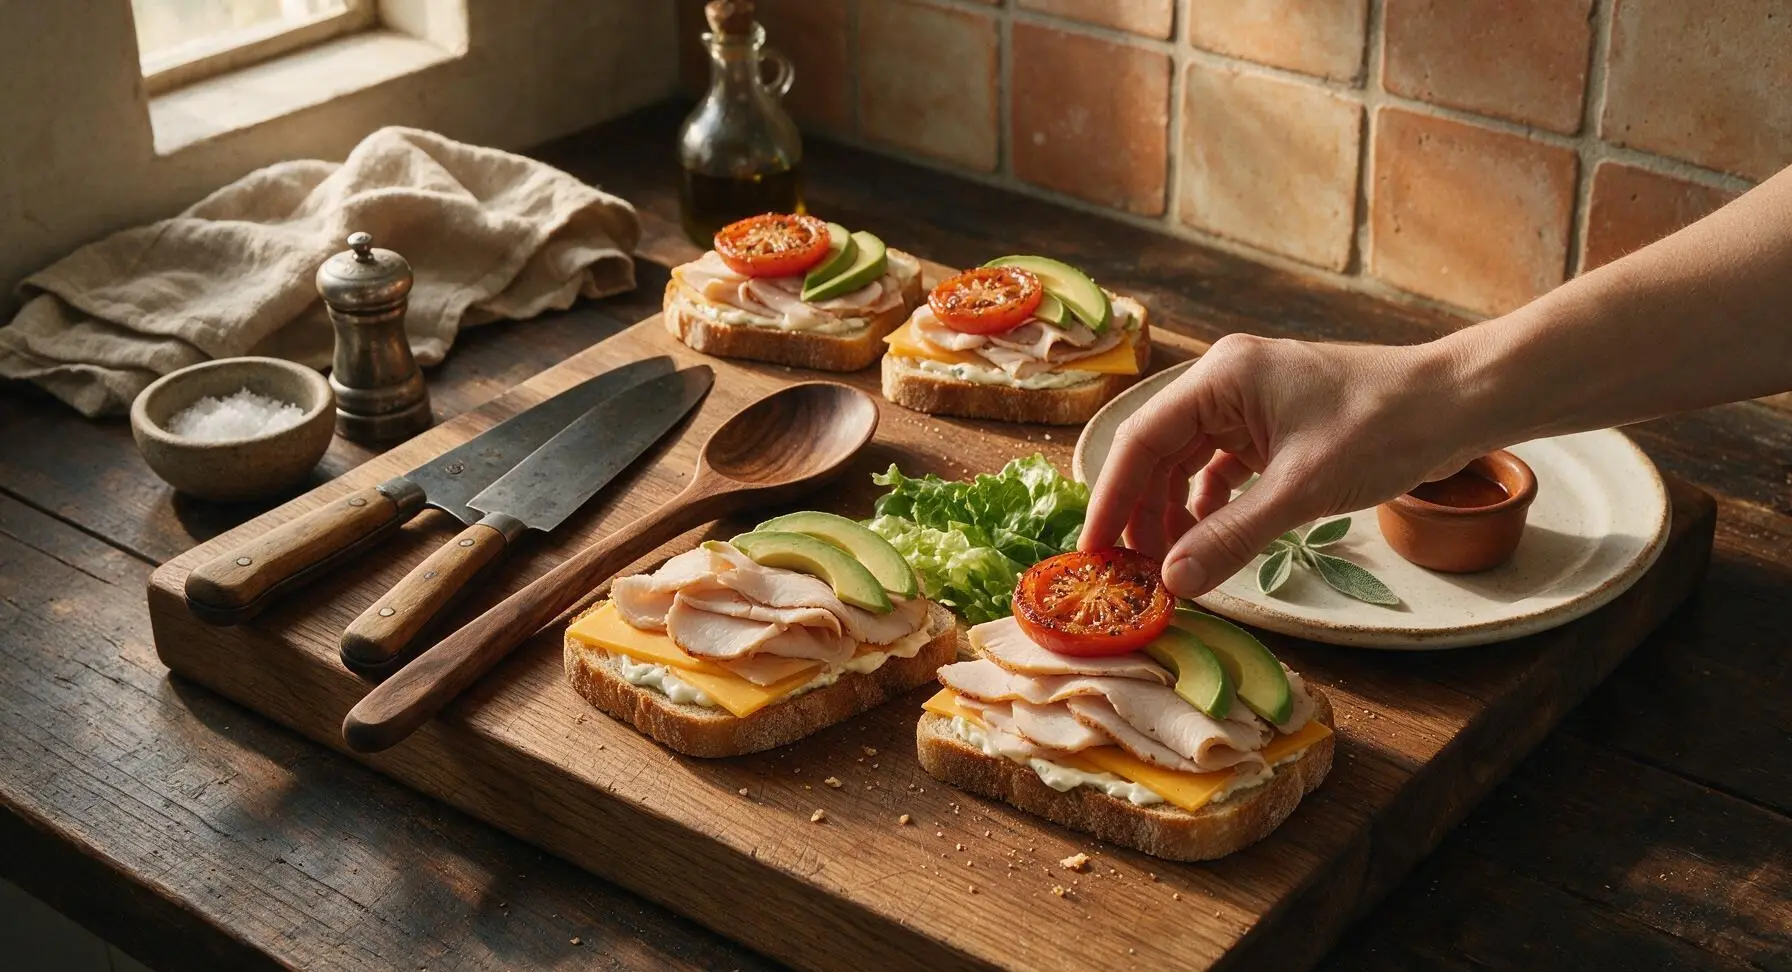
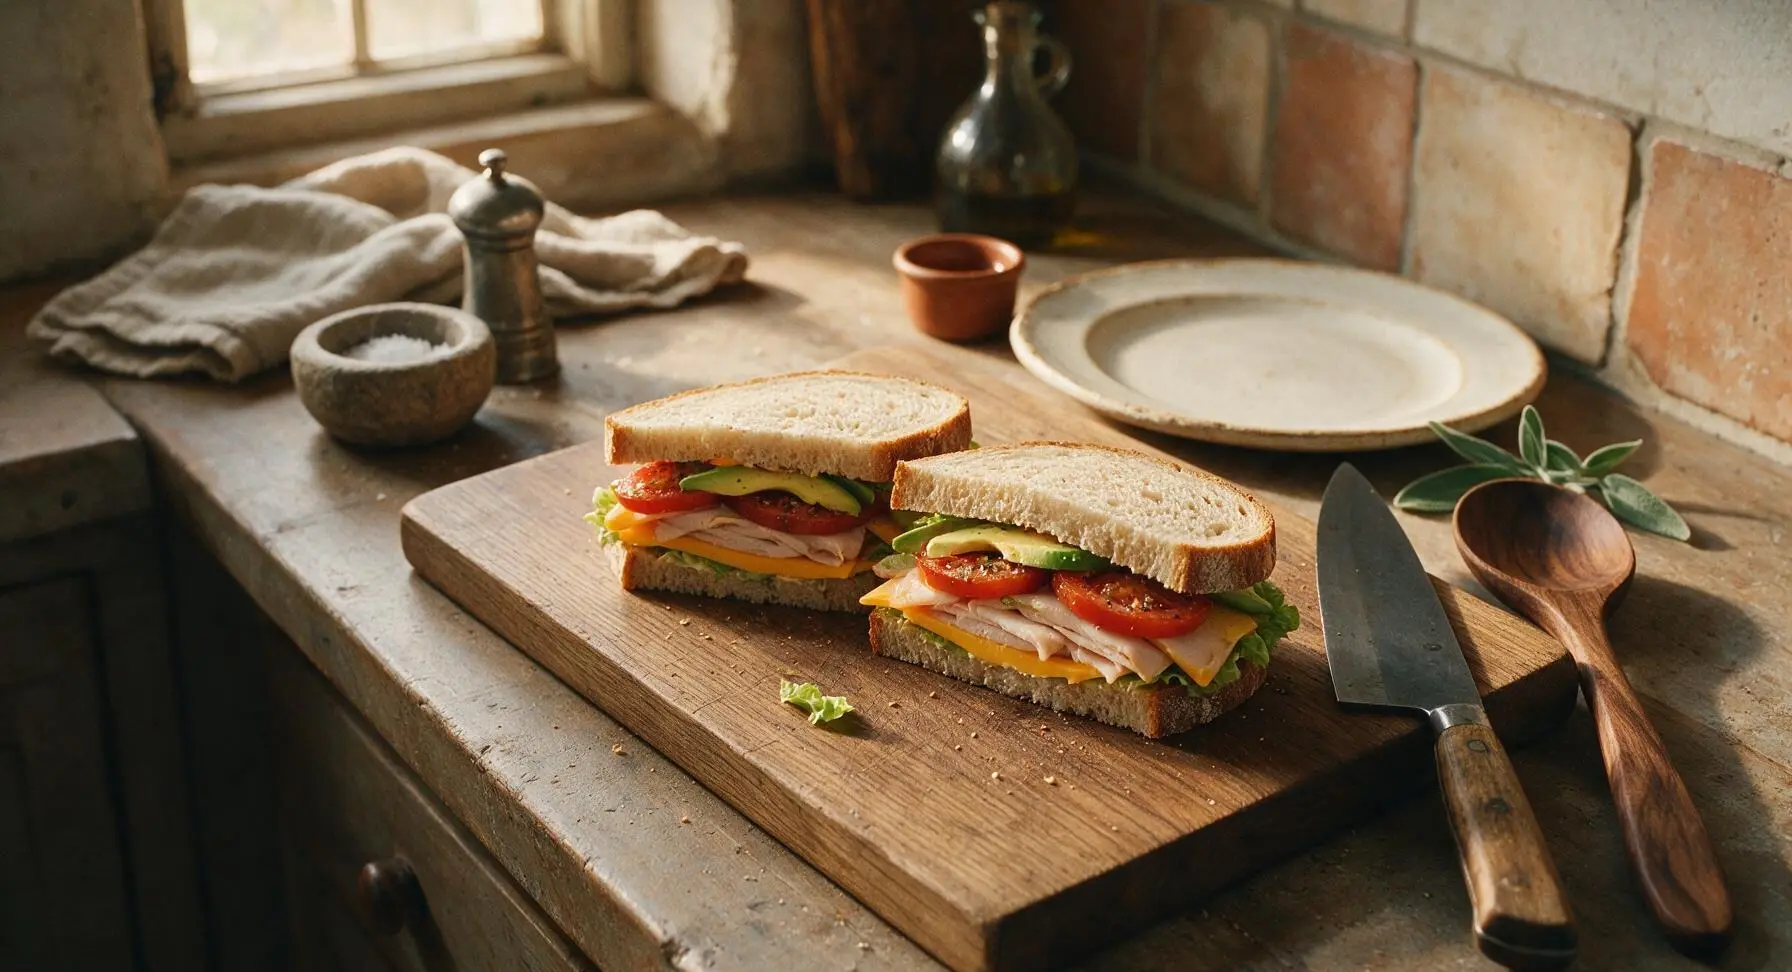
Build the sandwiches on two of the bread slices, mayo side up. First, place 1 slice of cheddar cheese directly on the spread, followed by 60g of thinly sliced roast turkey, fanned slightly for even coverage. Next, add 2 seasoned tomato rounds (patted dry of excess juice), 3-4 avocado slices, and 1 lettuce leaf, pressing each layer down gently to keep the stack stable. Top each stack with the remaining two bread slices, mayo side facing down against the fillings. Visual cue: fillings are evenly distributed, no large gaps between layers.
Step 5
step5:Layer Sandwich Fillings
Step 5
step5:Layer Sandwich Fillings
6

Cut Sandwiches Evenly

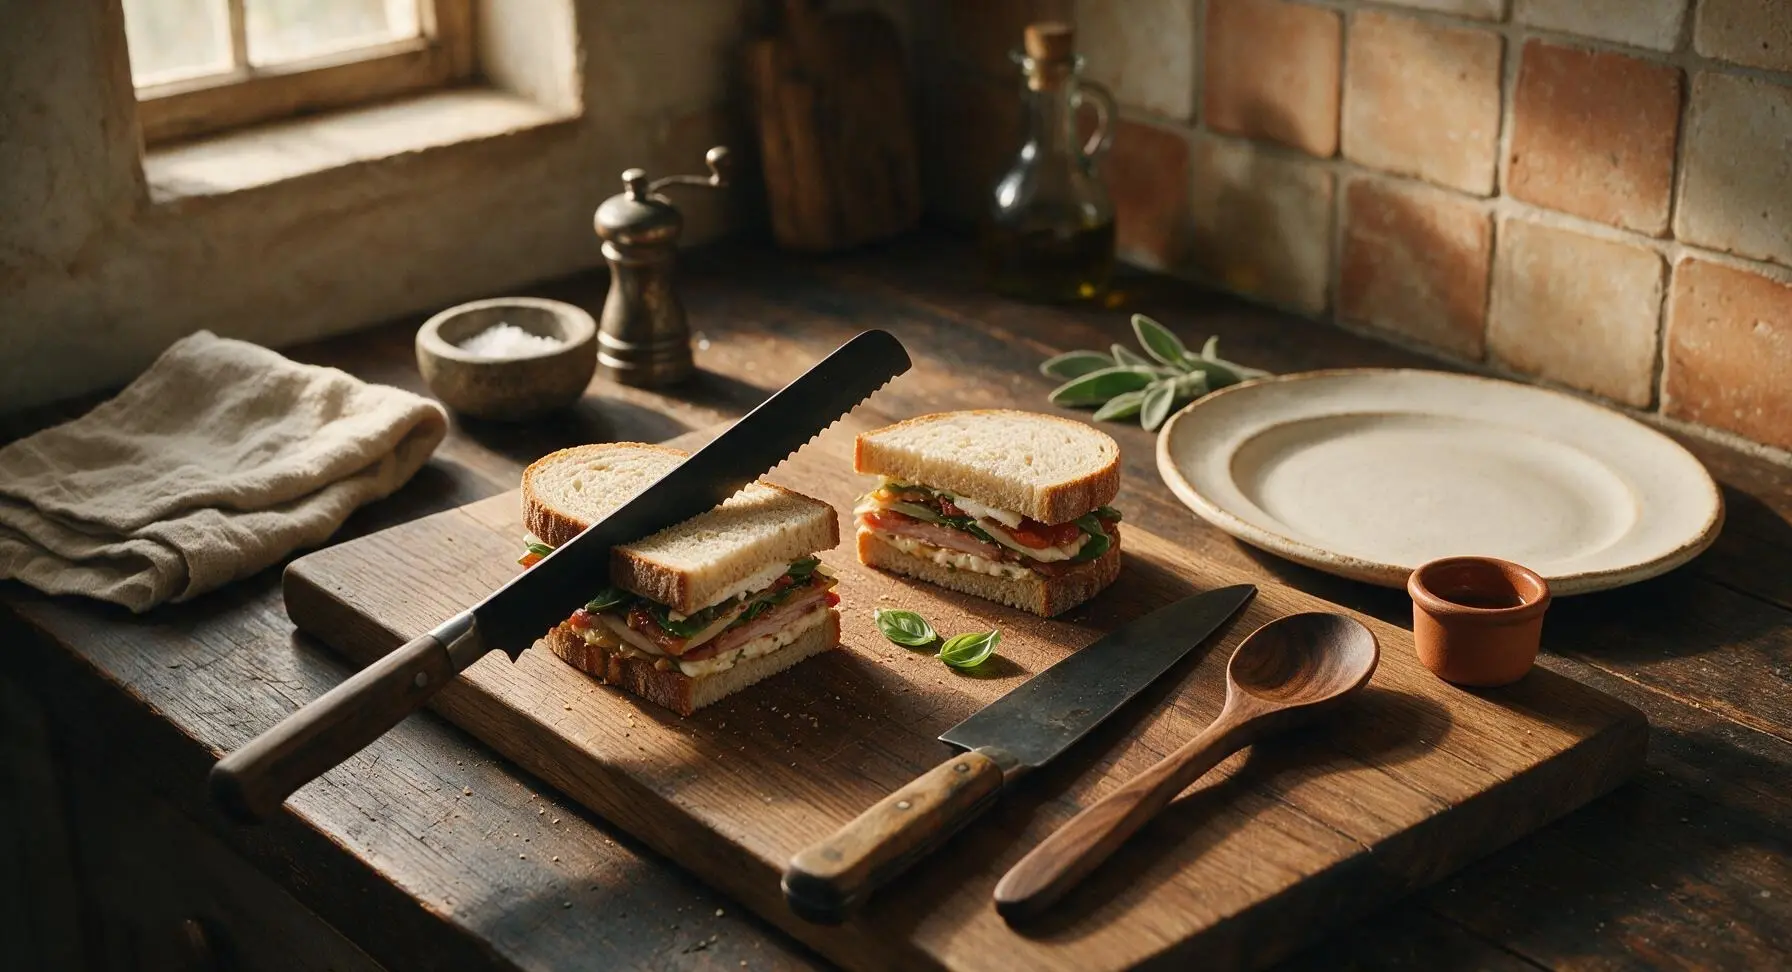
Place the serrated bread knife across the center of each sandwich at a 45-degree diagonal angle. Use a gentle sawing motion (don’t press straight down, which will squeeze fillings out) to cut each sandwich into two equal triangular halves. Insert a small fresh basil leaf between the top bread and tomato layer on each half for a fresh, aromatic garnish. Visual cue: cut edges show clean, even layers without fillings oozing out the sides.
Step 6
step6:Cut Sandwiches Evenly
7

Plate and Serve

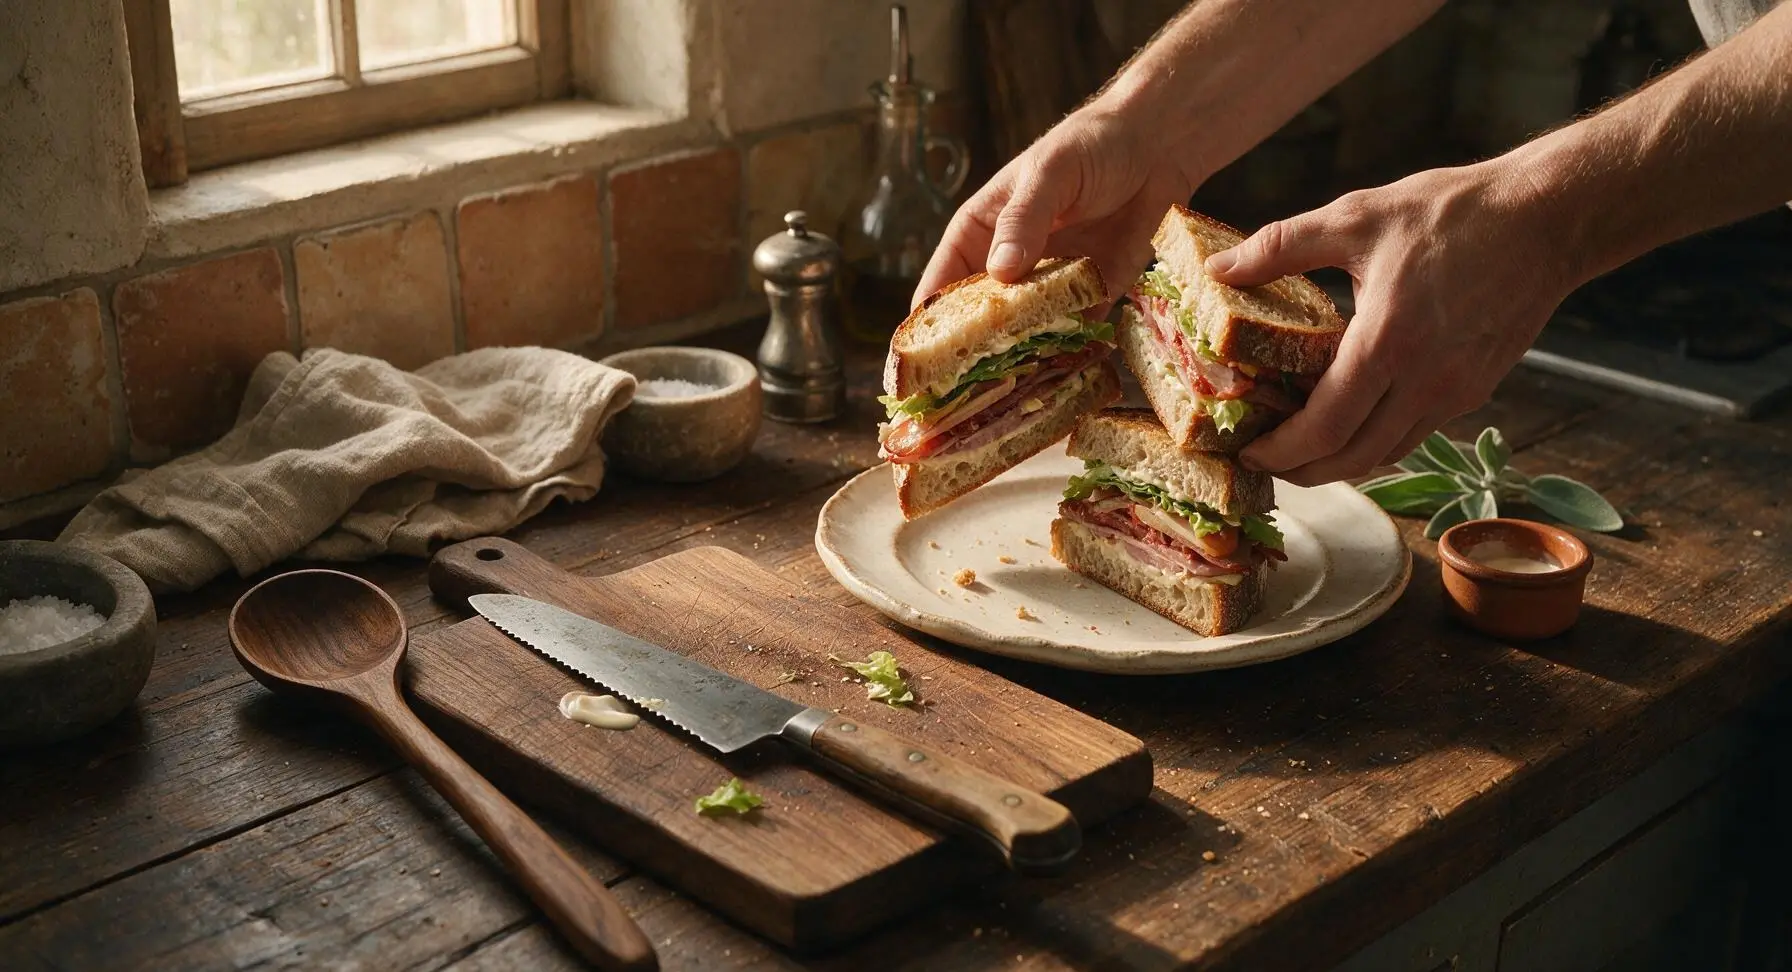
Transfer the cut sandwich halves to the cream white ceramic plate, arranging them slightly offset so the cut layered sides face outward to show the stacked fillings. Tuck the fresh basil garnish into place, and let any small crumbs fall naturally on the plate rim for a casual, inviting look. Serve immediately, or wrap tightly in parchment paper for transport. Visual cue: sandwich halves stand upright on the plate without sliding or falling over.
Step 7
step7:Plate and Serve

Tips

1.Always spread mayonnaise (or your chosen spread) all the way to the very edges of the bread: this creates a waterproof fat barrier that keeps juicy tomato and avocado from seeping into the bread and causing sogginess, even if you pack the sandwich 1-2 hours before eating.
2.After salting tomato slices, let them rest for 2 minutes then pat off excess drawn-out juice with the corner of a kitchen towel before adding to the sandwich: this removes watery liquid that would otherwise turn crisp bread mushy within 10 minutes of assembly.
3.Use a gentle sawing motion with a serrated knife when cutting assembled sandwiches, rather than pressing straight down: hard pressing squeezes fillings out the sides and creates a flattened, messy sandwich, while sawing cuts cleanly through bread and fillings without displacing layers.


✨ You May Also Like

Lunch
🍜 United States

Creamy, salty, tangy nostalgic Midwestern sandwich pairing rich peanut butter with crisp briny dill pickles for a fast, satisfying no-cook meal.

⏱️ 5 minutesLunch ★ 4.6
Lunch
🍜 United States

Crispy, melty pressed sandwich layered with savory roast pork, ham, Swiss cheese, pickles, and tangy mustard: a beloved Cuban-American comfort classic.

⏱️ 25 minuteLunch ★ 4.9
Lunch
🍜 United States

Hearty, briny New Orleans pressed sandwich stacked with cured Italian meats, provolone, and zesty olive salad, served cold for bold, portable flavor.

⏱️ 1 hour 20Lunch ★ 4.7
Lunch
🍜 United States

A tangy, creamy Southern American staple, this no-cook cheesy sandwich is packed with sharp cheddar and sweet pimentos for a satisfying, portable bite.

⏱️ 1 hour 15Lunch ★ 4.8
Lunch
🍜 United States

Crispy Cajun-spiced fried shrimp piled on crusty French bread with tangy remoulade and fresh toppings, the iconic Louisiana street food sandwich.

⏱️ 35 minuteLunch ★ 4.4
Lunch
🍜 United States

Stacked, savory deli-style corned beef sandwich with melted Swiss, tangy mustard, and crisp griddled rye— a fast, hearty, satisfying classic.

⏱️ 15 minuteLunch ★ 4.9

homemade sandwich:Frequently Asked Questions

1.What’s the best way to keep my deli sandwich from getting soggy when I pack it for lunch? ▾
Great question! First, toast your sourdough lightly and let it cool fully before assembling. Spread a thin layer of softened butter or spread on the inner sides of both bread slices to create a moisture barrier, then tuck juicy Roma tomato slices between turkey and cheese instead of directly against bread. Pack extra-wet toppings like pickles separately if prepping more than 4 hours ahead.
2.Can I swap the deli roast turkey for a different protein if I prefer other flavors? ▾
Absolutely! This recipe is super flexible. Thinly sliced deli ham, roast beef, smoked chicken, or even plant-based deli slices work perfectly as a turkey swap. Just stick to thinly sliced, evenly cut protein for that classic stacked texture—thick, chunky cuts will make the sandwich hard to bite through without fillings slipping out onto your plate or hands.
3.Do I have to use sharp cheddar cheese, or will other cheese varieties work? ▾
Sharp cheddar adds that perfect bold, tangy bite that cuts through creamy avocado and rich turkey, but you can absolutely swap it. Sliced Swiss, provolone, pepper jack for a little heat, or even smoked gouda all pair beautifully. Use sliced, not crumbled, cheese so it softens slightly against warm toasted bread for that classic deli feel.
4.How do I pick a ripe avocado for this sandwich so it’s not brown or mushy? ▾
Look for avocados that give slightly when you press the skin near the stem, with no large mushy dark spots. If the small stem cap pops off easily and shows bright green underneath, it’s perfectly ripe. Slice it right before assembling to prevent browning; if prepping early, toss slices with a tiny squeeze of fresh lemon juice to slow oxidation.
5.What’s the best order to stack ingredients so fillings don’t slip out when I bite in? ▾
Start with cooled, toasted sourdough, spread your chosen tangy spread on both slices. Add cheese first against the warm bread so it softens slightly, then turkey, then thin Roma tomato slices patted dry, then avocado, plus any crisp add-ons like lettuce or onion. Press down gently, then cut for the sturdiest, least messy bite.
6.Can I fully assemble this sandwich ahead of time for weekly meal prep? ▾
You can prep individual components 2–3 days ahead, but I don’t recommend fully assembling it more than 4 hours before eating. Store toasted bread in an airtight container, keep sliced turkey, cheese, and Roma tomato chilled separately, and slice avocado right before serving. This keeps bread crisp and veggies fresh, no soggy texture.
7.What kind of spread works best for this classic deli sandwich? ▾
My go-to classic is a mix of equal parts full-fat mayo and Dijon or yellow mustard for that perfect tangy, creamy balance. If you want to mix it up, try a little basil pesto, spicy aioli, or horseradish sauce for a zesty kick. Spread it all the way to the bread edges so every bite has even flavor, no dry spots.
8.Do I really need to toast the sourdough bread for this recipe? ▾
Toasting is highly recommended, even if you prefer soft sandwiches! A light toast gives the bread enough structure to hold up to juicy Roma tomato, creamy avocado, and spread without falling apart. You don’t need it crispy and crumbly—just 1–2 minutes in the toaster until it’s slightly firm on the surface, still soft in the middle.
9.Can I add extra veggies to this sandwich without ruining the classic deli flavor? ▾
Of course! Classic deli sandwiches are made to be customized. Thinly sliced red onion, shredded iceberg lettuce, crisp dill pickle slices, roasted red peppers, or alfalfa sprouts all make fantastic additions. Just pat any wet veggies dry with a paper towel before adding to cut down on excess moisture that makes bread soggy.
10.What’s the best way to cut this sandwich for the easiest, least messy eating? ▾
Skip cutting it straight down the middle! A sharp diagonal cut across the sandwich gives you two easier-to-hold triangular halves, and it shows off all those pretty stacked layers for that classic deli look. If packing it for lunch or a day trip, stick a small frilled toothpick through each half to hold layers in place.
11.Can I adjust this recipe to make it vegetarian or vegan? ▾
Definitely! Swap the deli turkey for your favorite thinly sliced plant-based deli roast, trade sharp cheddar for a tangy vegan cheddar slice, and use a vegan mayo or stone-ground mustard spread for the base. Double-check that your sourdough is vegan (most are, but some include honey or dairy additives) and keep all the fresh veggie layers for that same satisfying bite.
12.What sides pair best with this classic homemade deli sandwich? ▾
You can’t go wrong with classic deli sides! Serve it with crunchy dill pickle spears, salt and vinegar potato chips, a small cup of creamy tomato soup, or a simple side salad tossed in Italian vinaigrette. For a lighter option, pair it with fresh Honeycrisp apple slices or green grapes, which complement the tangy cheddar and creamy avocado perfectly.

Comments (12)

2 days ago

OMG this is such a game changer for weekday lunches! I’ve been wasting so much money on sad corner deli sandwiches that are skimpy on meat, but this takes literally 5 minutes to throw together before I run out the door. My husband even asked if I picked these up from our favorite local spot yesterday. SO good!

yesterday

Right?! I started making these on Sunday nights and wrapping them tight in parchment, they hold up perfectly all week for work lunches. No more $12 sandwich runs for me either!

yesterday

That’s the best hack! Wrapping in parchment really locks in the freshness so the bread doesn’t get soggy even after a couple days in the fridge. So glad you two are loving it for meal prep!

yesterday

Threw these together for my son’s post-football practice crew yesterday and they demolished every single one. I added a little extra spicy brown mustard per the kids’ requests and it hit so hard. Super easy, zero cleanup, 10/10.

3 days ago

Perfect quick dinner for those chaotic weeknights when we have back to back soccer practice and piano lessons. I didn’t even have to run to the store, I just used the deli meat and cheese I already had in the fridge, plus some leftover tomato and lettuce from taco night. My kids loved it, even my pickiest eater asked for seconds!

2 days ago

Love that this works for those busy nights! Using up leftover veggie odds and ends from the fridge is such a smart call, it cuts down on food waste too. So happy your picky eater approved!

1 week ago

Wait, hold up, as someone who grew up going to Jewish delis in Brooklyn I was skeptical a homemade version could hit the same, but this recipe is dead on. Pro tip: toast the rye bread *just* a little so it has that tiny crunch, don’t overdo it. Game changer for weekend lunches when I don’t feel like waiting 20 minutes in the deli line.

5 days ago

Fellow New Yorker here, can confirm the light rye toast trick is non-negotiable! I also add a thin layer of cream cheese under the mustard like my local deli does, chef’s kiss.

3 days ago

That cream cheese layer hack is brilliant! It acts as a barrier to keep the bread from getting soggy too, total win. So glad this lives up to your NYC deli standards!

just now

Made this in my dorm room between midterm study sessions, no fancy equipment needed at all. Used the pre-sliced turkey and cheddar I grabbed from the campus market, added a bag of chips on the side and it felt like a proper meal instead of the sad instant noodles I’ve been living on. 10/10 for broke college students.

2 weeks ago

Brought a platter of these cut into mini triangles to our neighborhood block party potluck last weekend and they were the first thing gone! People kept asking me for the recipe all night, I can’t believe how simple it is. I used a mix of ham, turkey, and roast beef so there was something for everyone.

1 week ago

I was at that potluck! Those sandwiches were unreal, I’ve already made them twice for my grandkids since you sent the recipe over. Can confirm they’re a crowd pleaser!

30 minutes ago

Super easy swap for gluten free sourdough and this worked perfectly for my dietary needs! I was worried the sandwich would feel lackluster without regular deli rye, but the layering tips from the recipe made every bite so flavorful. Will be adding this to my regular lunch rotation for sure.

5 minutes ago

Oh thanks for the GF tip! My kid has celiac and I’ve been looking for easy lunch ideas he won’t complain about, can’t wait to try this with GF bread.

just now

So happy the gluten free swap worked out for you! If you toast your GF bread lightly before layering, it holds up even better and doesn’t get crumbly. Hope your kid loves it, Kris!

5 days ago

Packed these for our day hike up Mount Evans last weekend and they held up way better than I thought they would! No soggy bread, all the fillings stayed put, and they were so filling after a couple hours of climbing. Way better than the crumbly granola bars I usually bring.

3 days ago

Great call! I usually pack PB&Js for hikes but they get so squished in my pack. I’m definitely making these for our backpacking trip next weekend, the no-soggy thing is a total game changer.

2 days ago

So stoked these worked for your hike, Rick! The layering order (wet ingredients like tomato and pickles in the middle between meat and cheese) is exactly why they don’t get soggy even when tossed in a backpack for hours. Great call bringing them on the trail, Jen — they’re perfect for backpacking trips too, just wrap them tight!

2 hours ago

Made these for a casual girls’ brunch last Sunday alongside some pickle spears and potato salad, it was the perfect low-fuss spread. We sipped mimosas and assembled our own custom sandwiches, it was way more fun than going out to a crowded brunch spot. Will definitely be doing this again soon!

30 minutes ago

This is such a cute brunch idea! I’ve been stressing about hosting my book club next weekend and this is way easier than making a fancy quiche. Stealing the build-your-own sandwich bar idea!

5 minutes ago

Okay full transparency, I’m 26 and this is the first actual meal I’ve ever made for myself that isn’t frozen pizza or microwave mac and cheese. It was so easy I didn’t even mess it up! I added extra pickles because I’m obsessed, and it tasted just like the sandwiches my dad used to make for me when I was little. Kinda emotional about it ngl.

just now

Dude, welcome to cooking! This is the perfect starter recipe, once you nail this you can start experimenting with different meats, cheeses, and spreads. You got this!

1 week ago

Made a huge batch of these for our Bills watch party tailgate last Sunday and they were a total hit. I added a little horseradish to the mayo for an extra kick and people were raving. Way cheaper and easier than ordering a bunch of party subs from the local shop, will be a regular tailgate staple from now on.

2 days ago

Wait, am I the only one who stacks extra dill pickles and banana peppers on mine? I thought that would make the bread soggy but following the layering tips from the recipe kept it perfect. My only complaint is I ate two whole sandwiches in one sitting because they were that good, oops.

yesterday

No judgment at all for eating two sandwiches, we’ve all been there! Those tangy pickles and banana peppers add such a great zing, that combo is one of our favorite variations too. The cheese layer really does lock out moisture so you can load up on all the briney toppings you want without soggy bread.



