
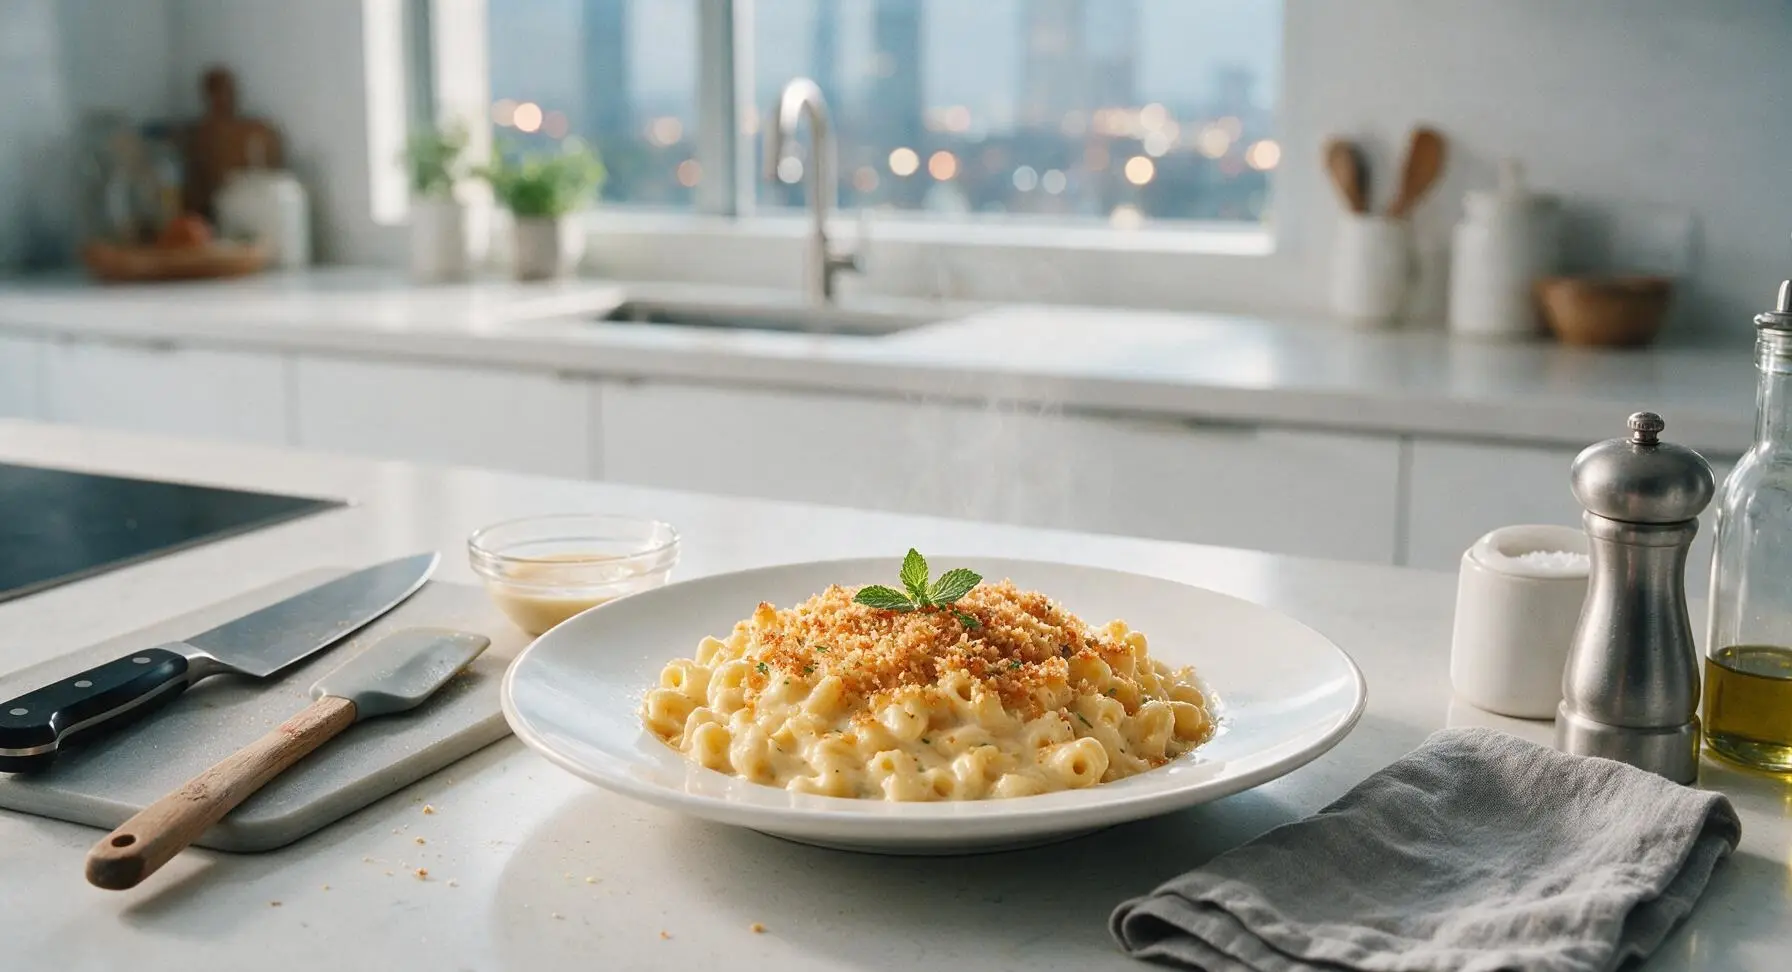
ina mac and cheese

title 1
ina mac and cheese
⏱️ cook time 35 minutes
🍽️ servings 6
⚡ Difficulty easy

intro

Creamy, tangy baked mac and cheese from Ina Garten, with a crispy buttered panko top, rich cheese sauce, and perfectly tender pasta: the ultimate cozy comfort food.

Ingredients
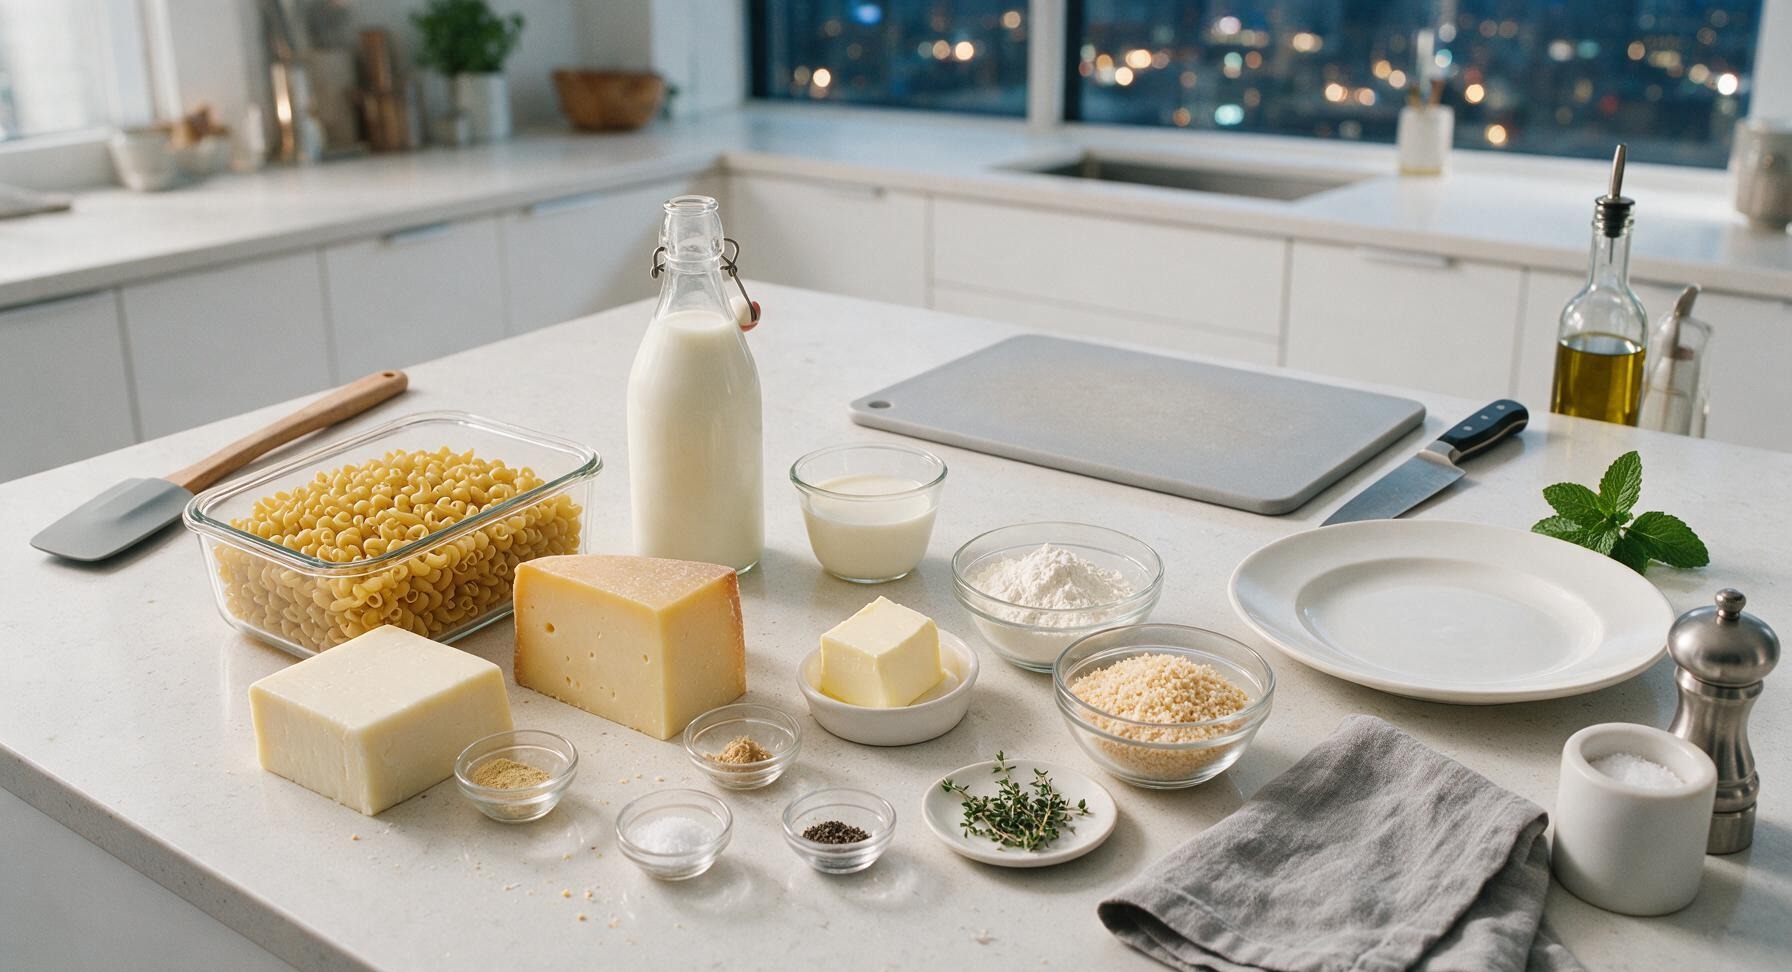
Dry elbow macaroni 450g (1lb)
Sharp white cheddar cheese 340g (12oz)
Gruyère cheese 170g (6oz)
Whole milk 4 cups (960ml)
Heavy cream 1/2 cup (120ml)
Unsalted butter 6 tbsp (85g)
All-purpose flour 1/4 cup (30g)
Panko breadcrumbs 1 cup (60g)
Dry mustard powder 1 tsp
Freshly grated nutmeg 1/4 tsp
Kosher salt 1 tbsp
Freshly ground black pepper 1 tsp
Fresh thyme 1 tsp, chopped

Steps

1

Cook the Pasta

Bring 4 quarts of heavily salted water to a rolling boil in the matte cream enamel Dutch oven. Add the dry elbow macaroni and cook 2 minutes less than the package’s al dente recommendation (approximately 6 minutes total), so pasta remains firm to the bite and will finish cooking during baking. Drain well and set aside; do not rinse the pasta, as residual starch helps the cheese sauce cling to noodles.
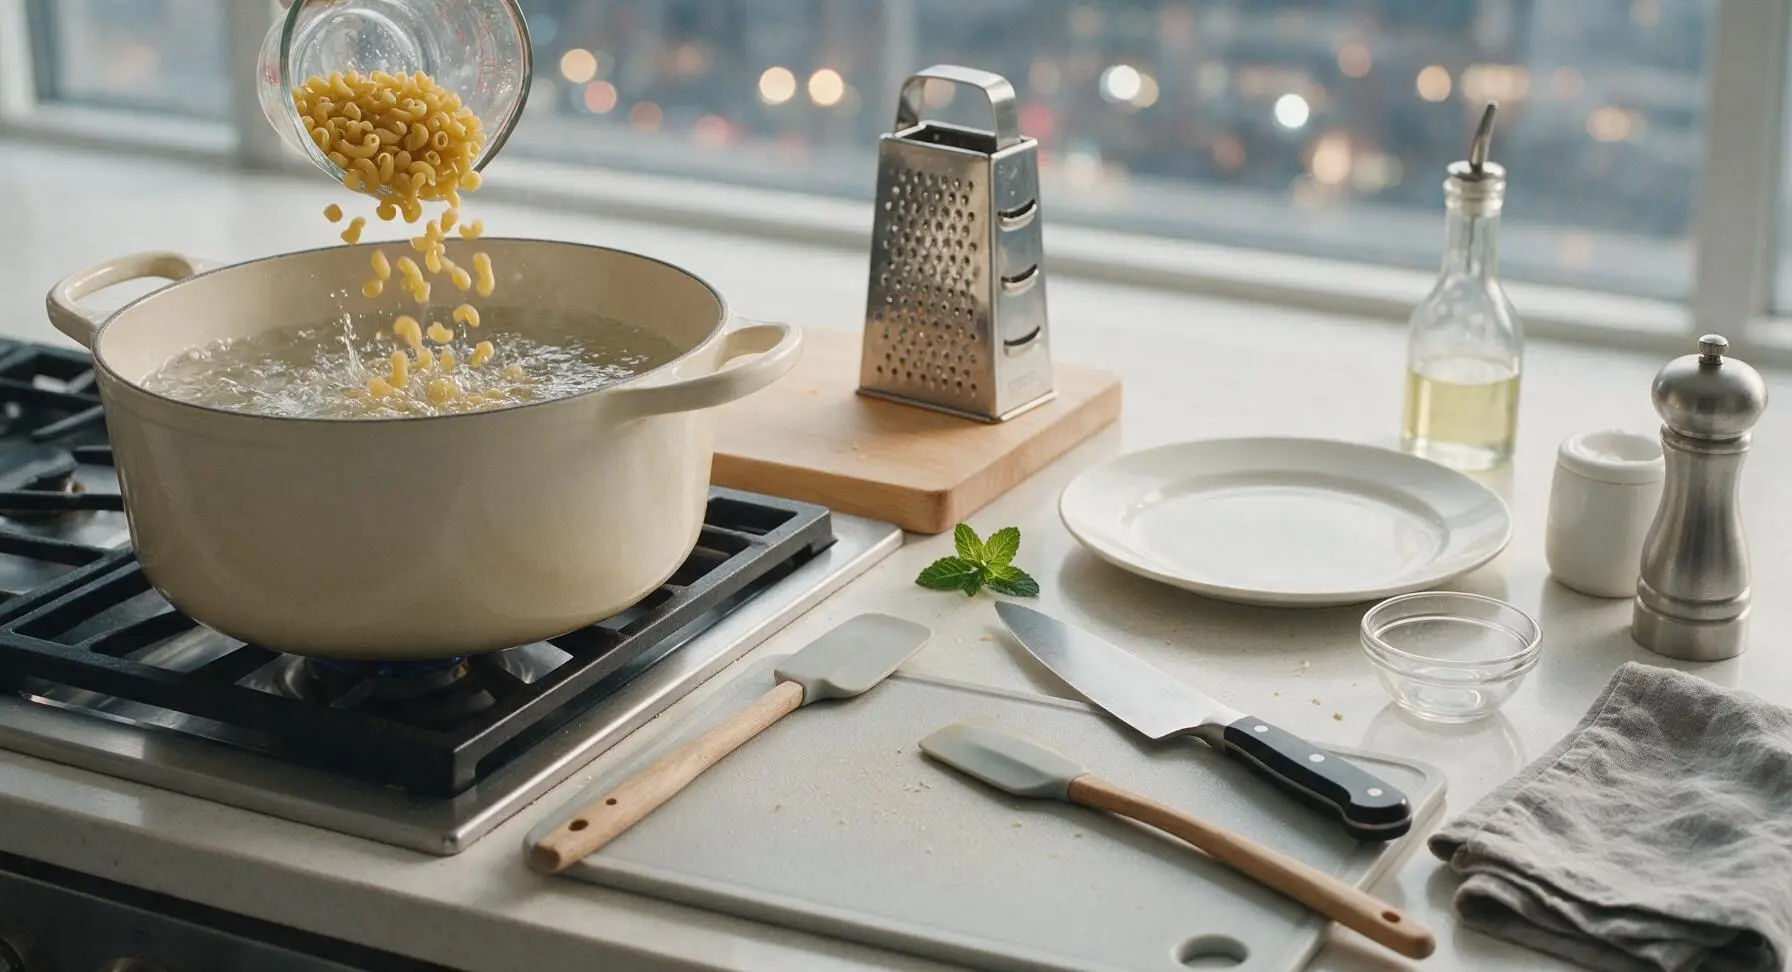
Step 1
step1:Cook the Pasta
2

Grate Fresh Cheeses

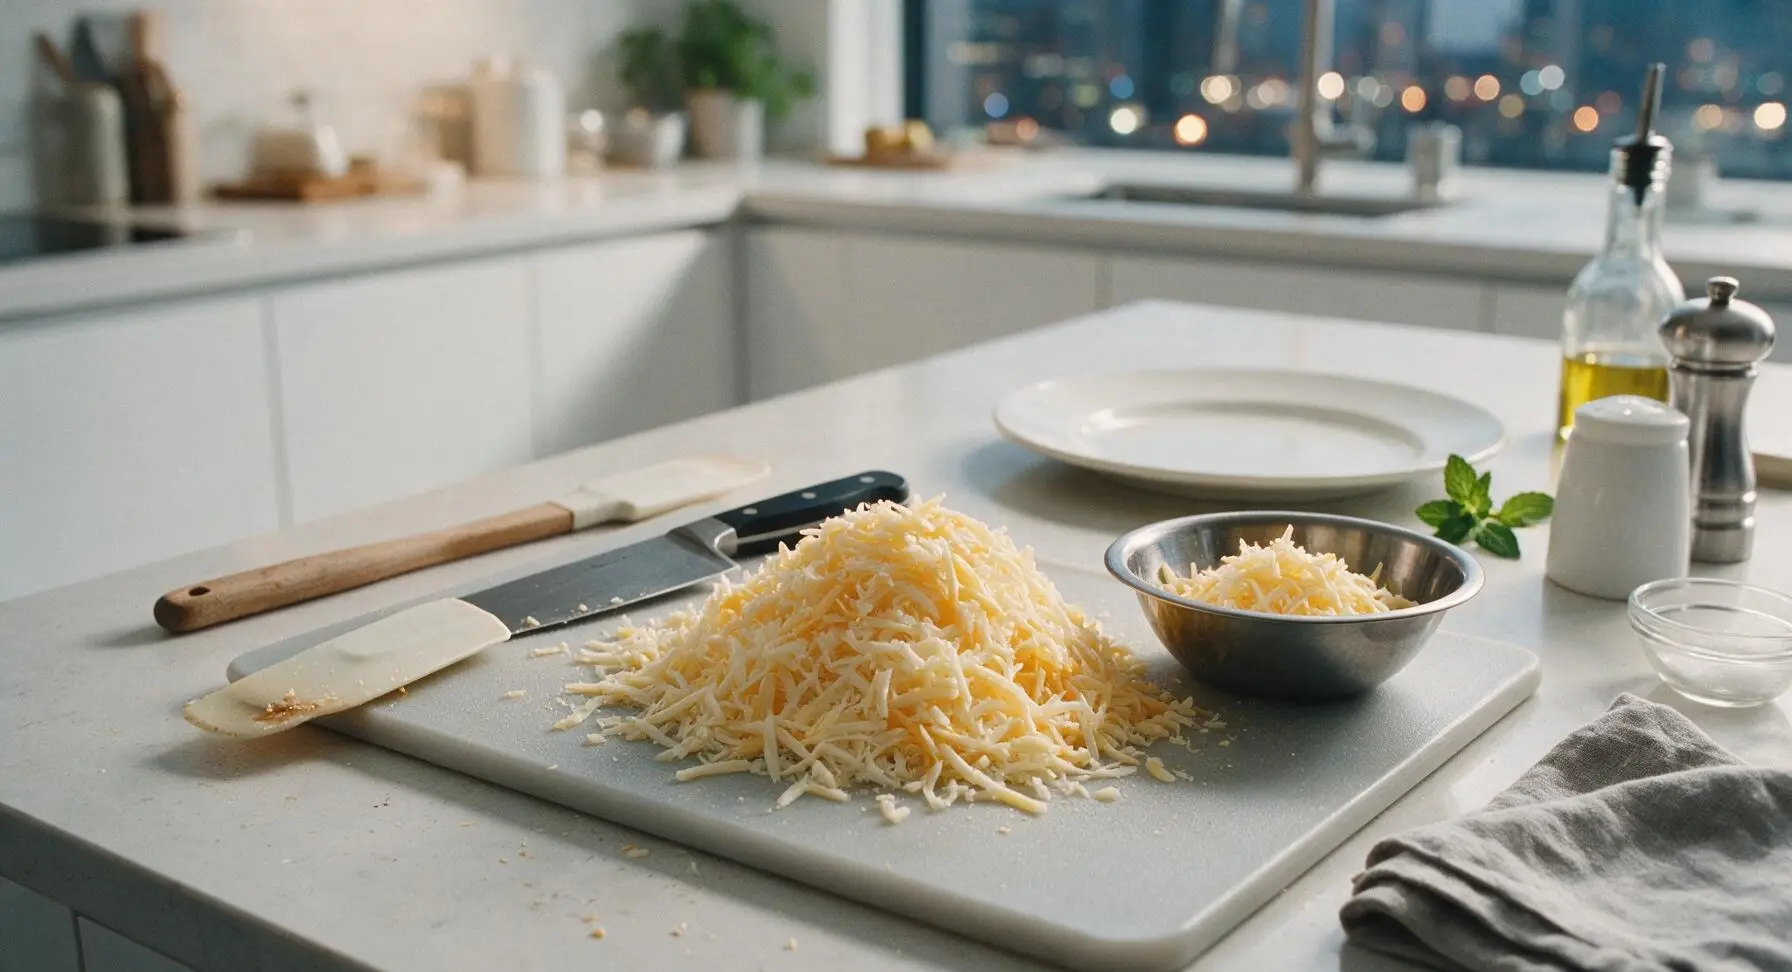
Set the stainless steel box grater on the light maple cutting board, and use the large grating holes to shred both the sharp white cheddar and Gruyère cheese. Toss the shredded cheeses together to combine, then set aside 1/2 cup of the mixture in the small stainless steel mixing bowl for the topping. Avoid pre-shredded store-bought cheese, as anti-caking coatings create a grainy sauce.
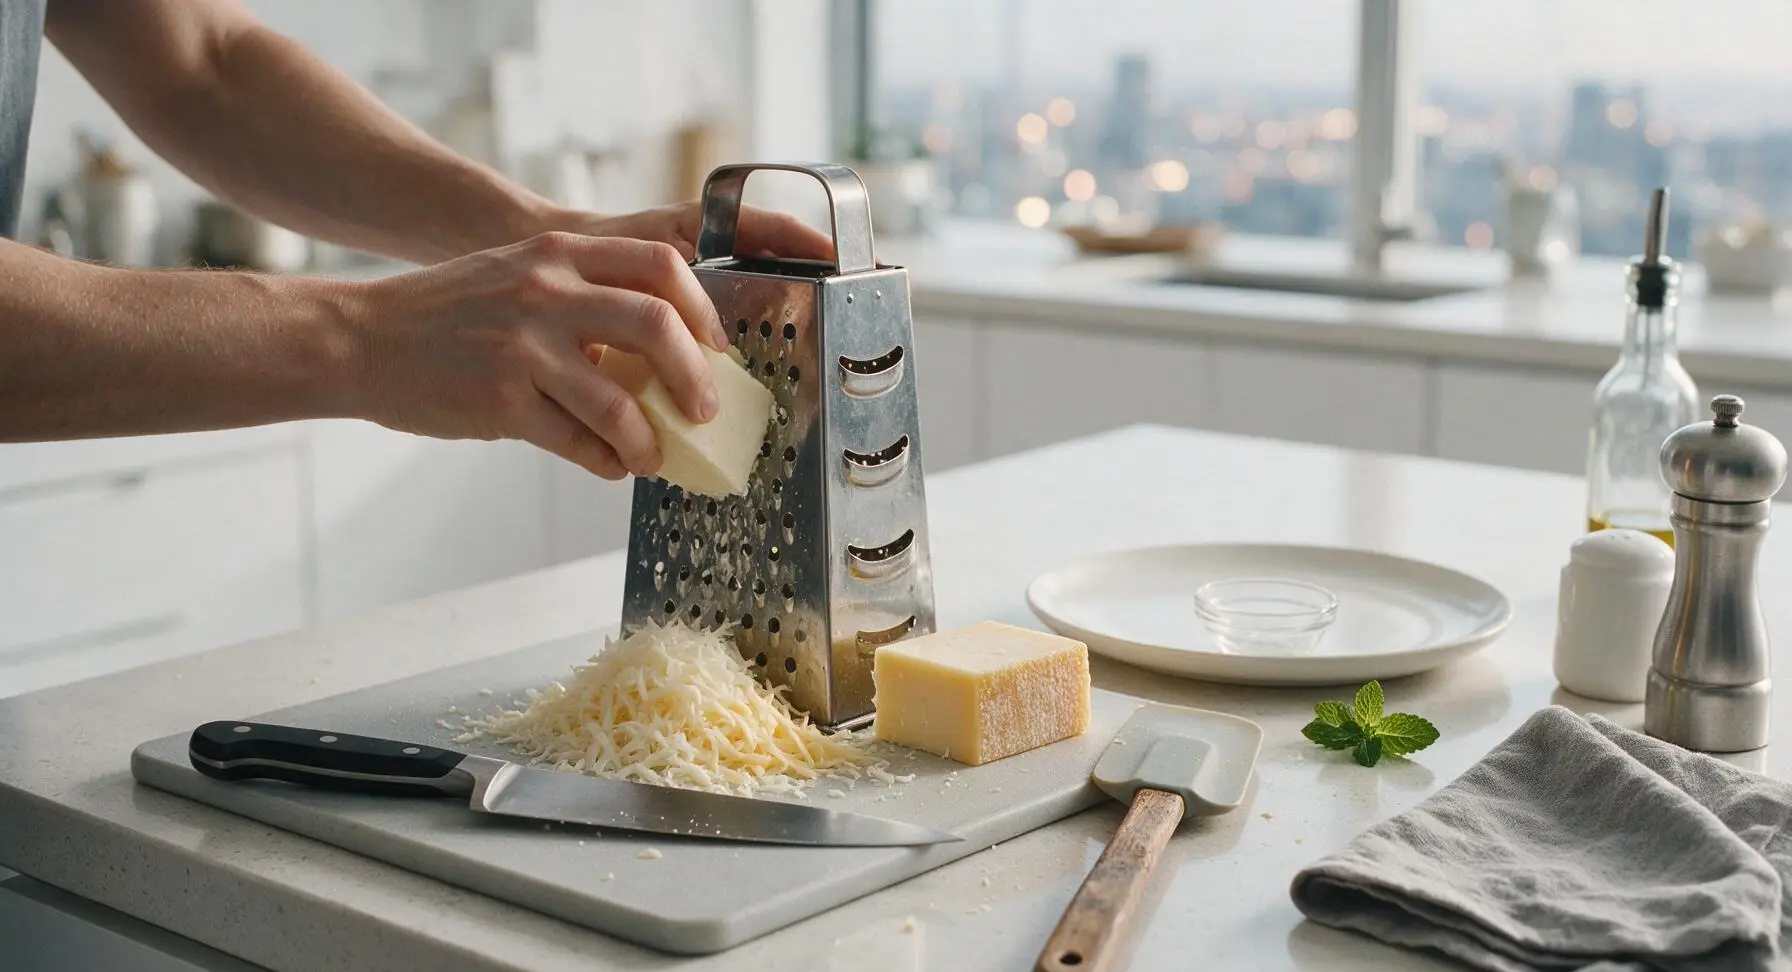
Step 2
step2:Grate Fresh Cheeses
Step 2
step2:Grate Fresh Cheeses
3

Build the Roux Base

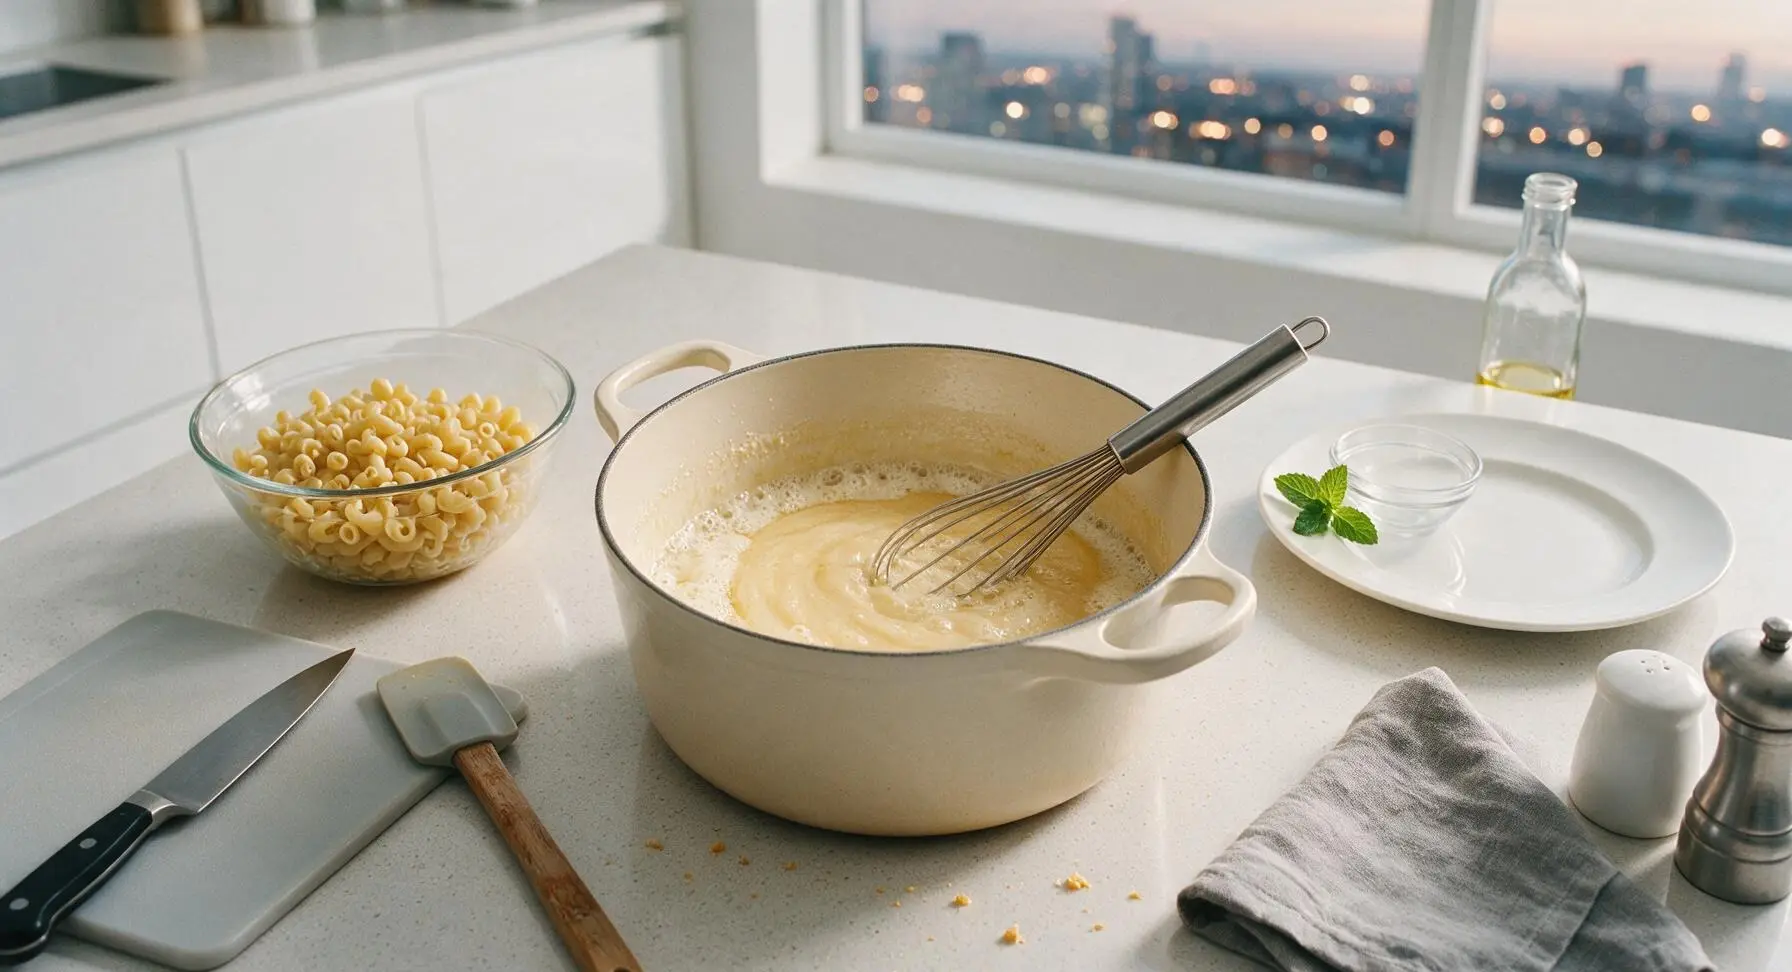
Return the same Dutch oven used to cook pasta to medium heat, and melt 4 tablespoons of unsalted butter. Once butter is foaming but not browned, use the stainless steel whisk to stir in 1/4 cup all-purpose flour. Cook the roux for 2 full minutes, stirring constantly, until it turns pale golden and smells faintly nutty, with no raw flour aftertaste.
Step 3
step3:Build the Roux Base
4

Add Milk and Cream

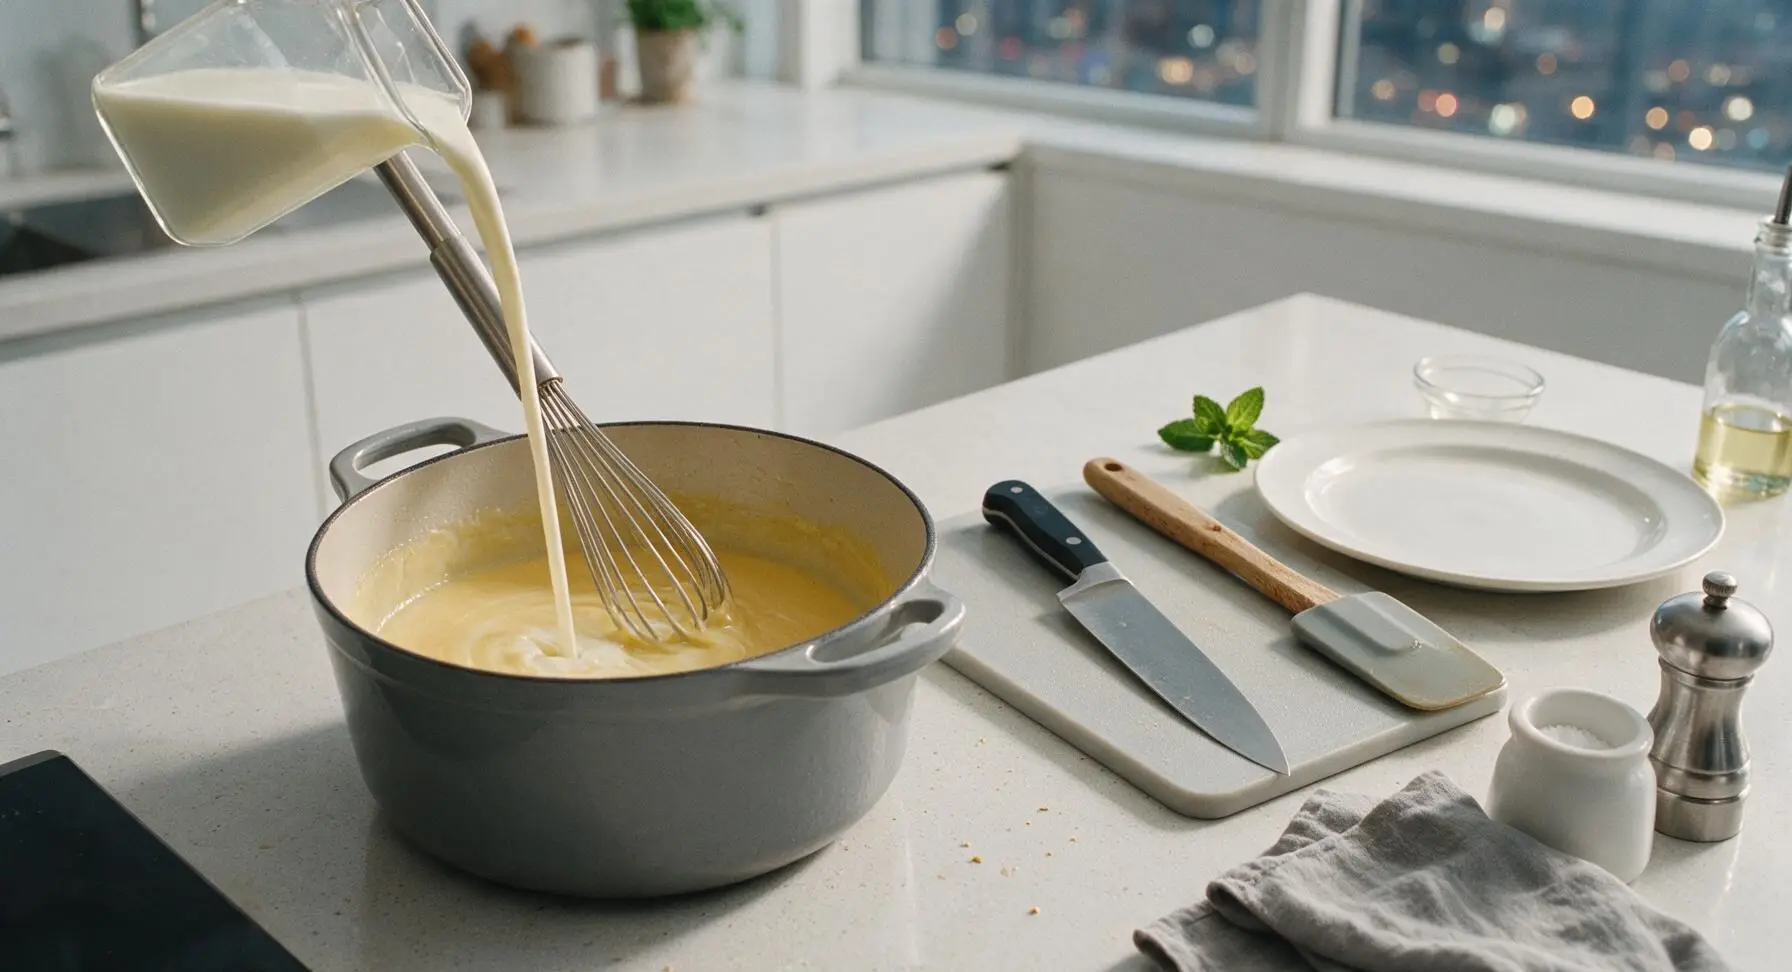
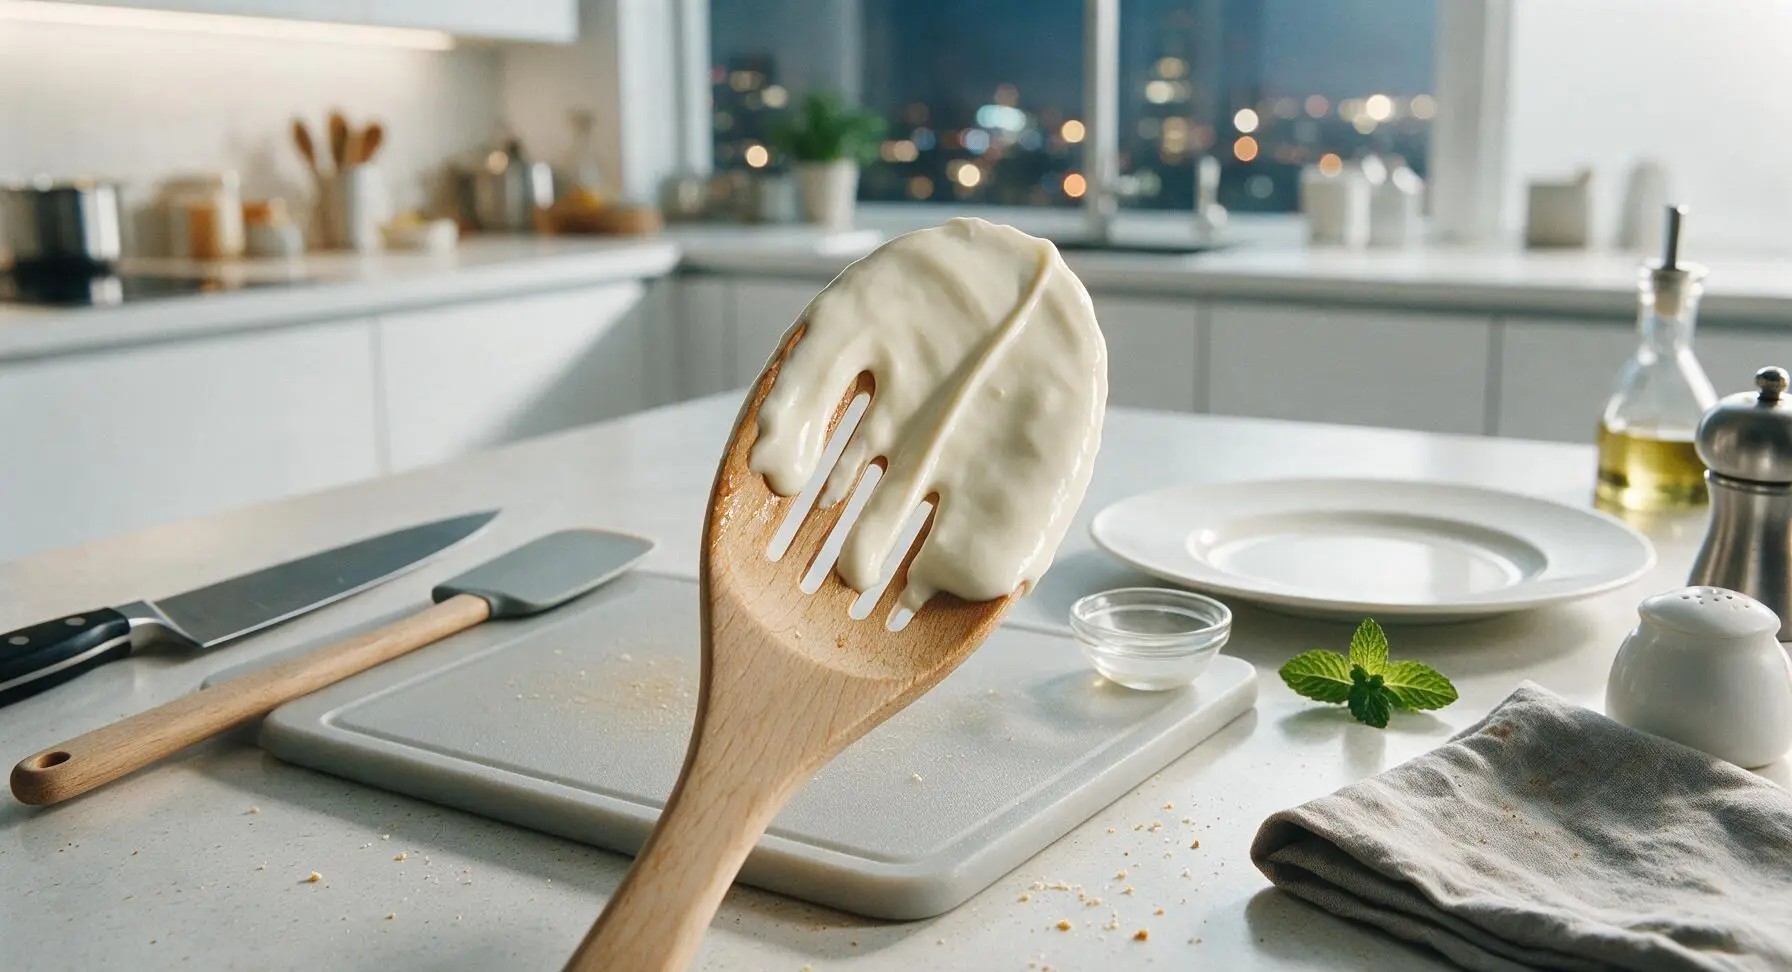
Slowly pour the whole milk and heavy cream into the roux in a thin, steady stream, whisking constantly to prevent lumps from forming. Continue cooking over medium heat, whisking regularly, for 5-7 minutes until the béchamel sauce thickens enough to coat the back of a spoon: when you run a finger across the coated spoon, the line will hold cleanly without running.
Step 4
step4:Add Milk and Cream
Step 4
step4:Add Milk and Cream
5

Melt Cheese and Season

Remove the Dutch oven from direct heat to prevent the cheese from separating. Stir in all but the reserved 1/2 cup of shredded cheese, dry mustard powder, grated nutmeg, kosher salt, black pepper, and chopped fresh thyme. Stir continuously until all cheese is fully melted and the sauce is completely smooth, with no lumps remaining.
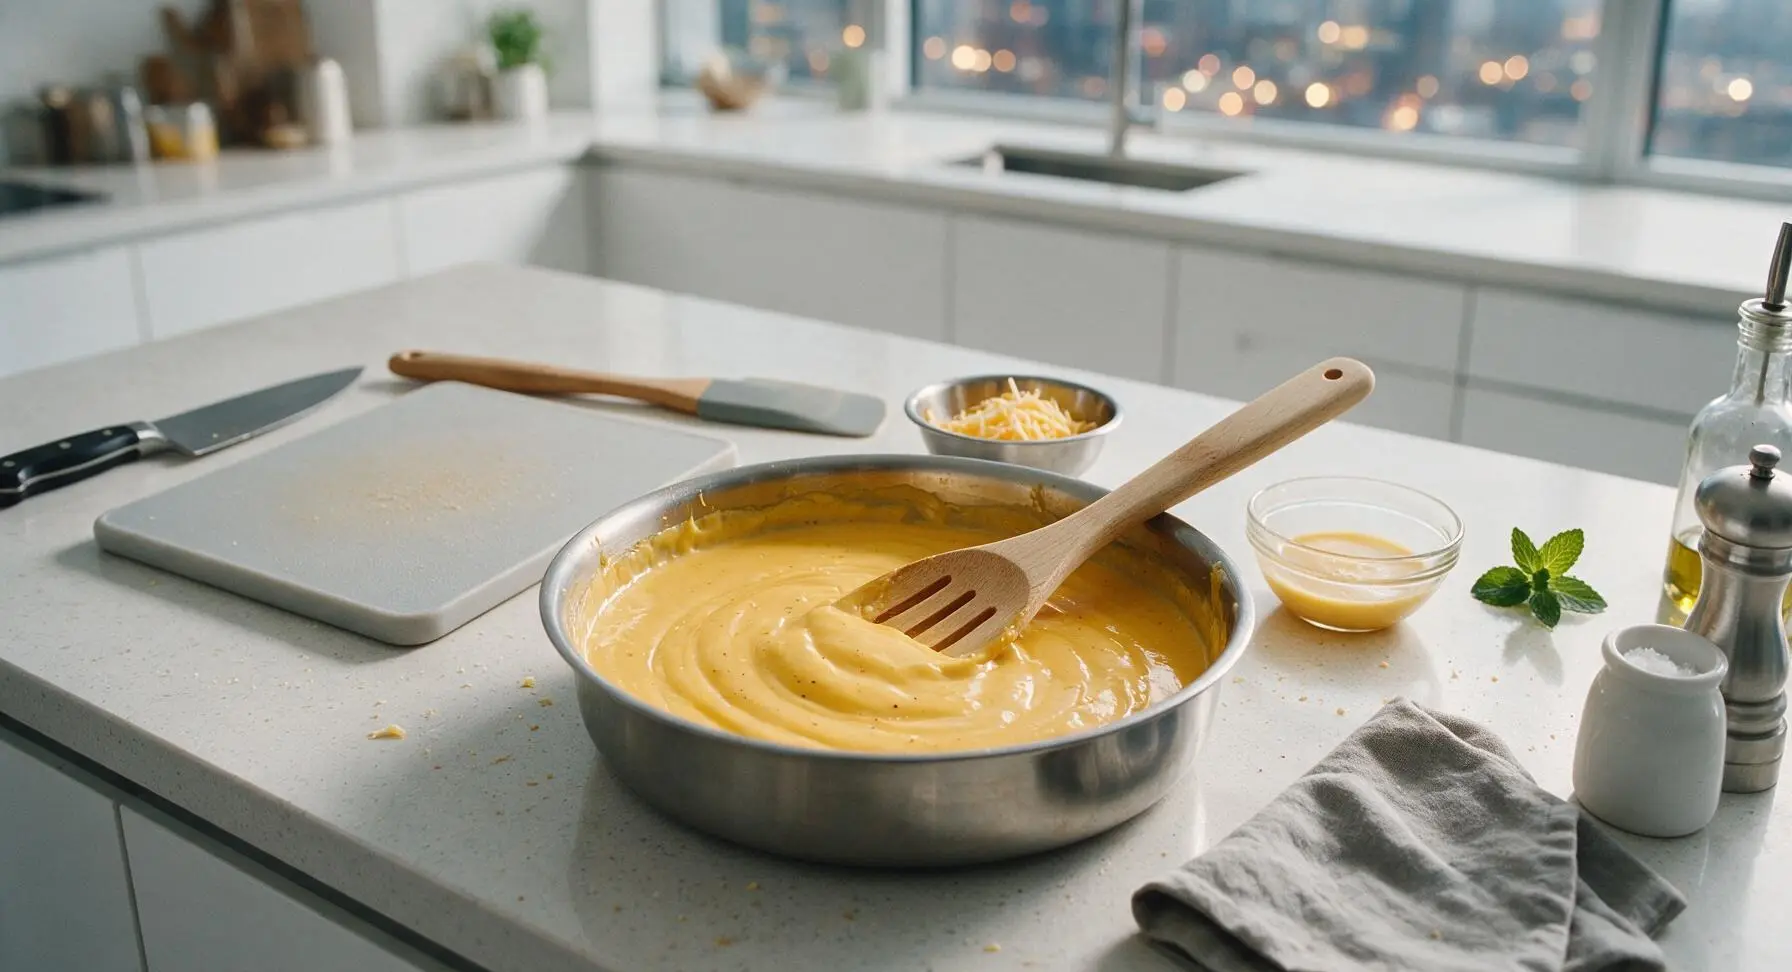
Step 5
step5:Melt Cheese and Season
6

Fold in Cooked Pasta

Add the drained, slightly undercooked elbow macaroni to the cheese sauce in the Dutch oven. Stir gently with the slotted spoon until every pasta noodle is evenly coated in the thick cheese sauce, taking care not to break or mash the tender noodles.
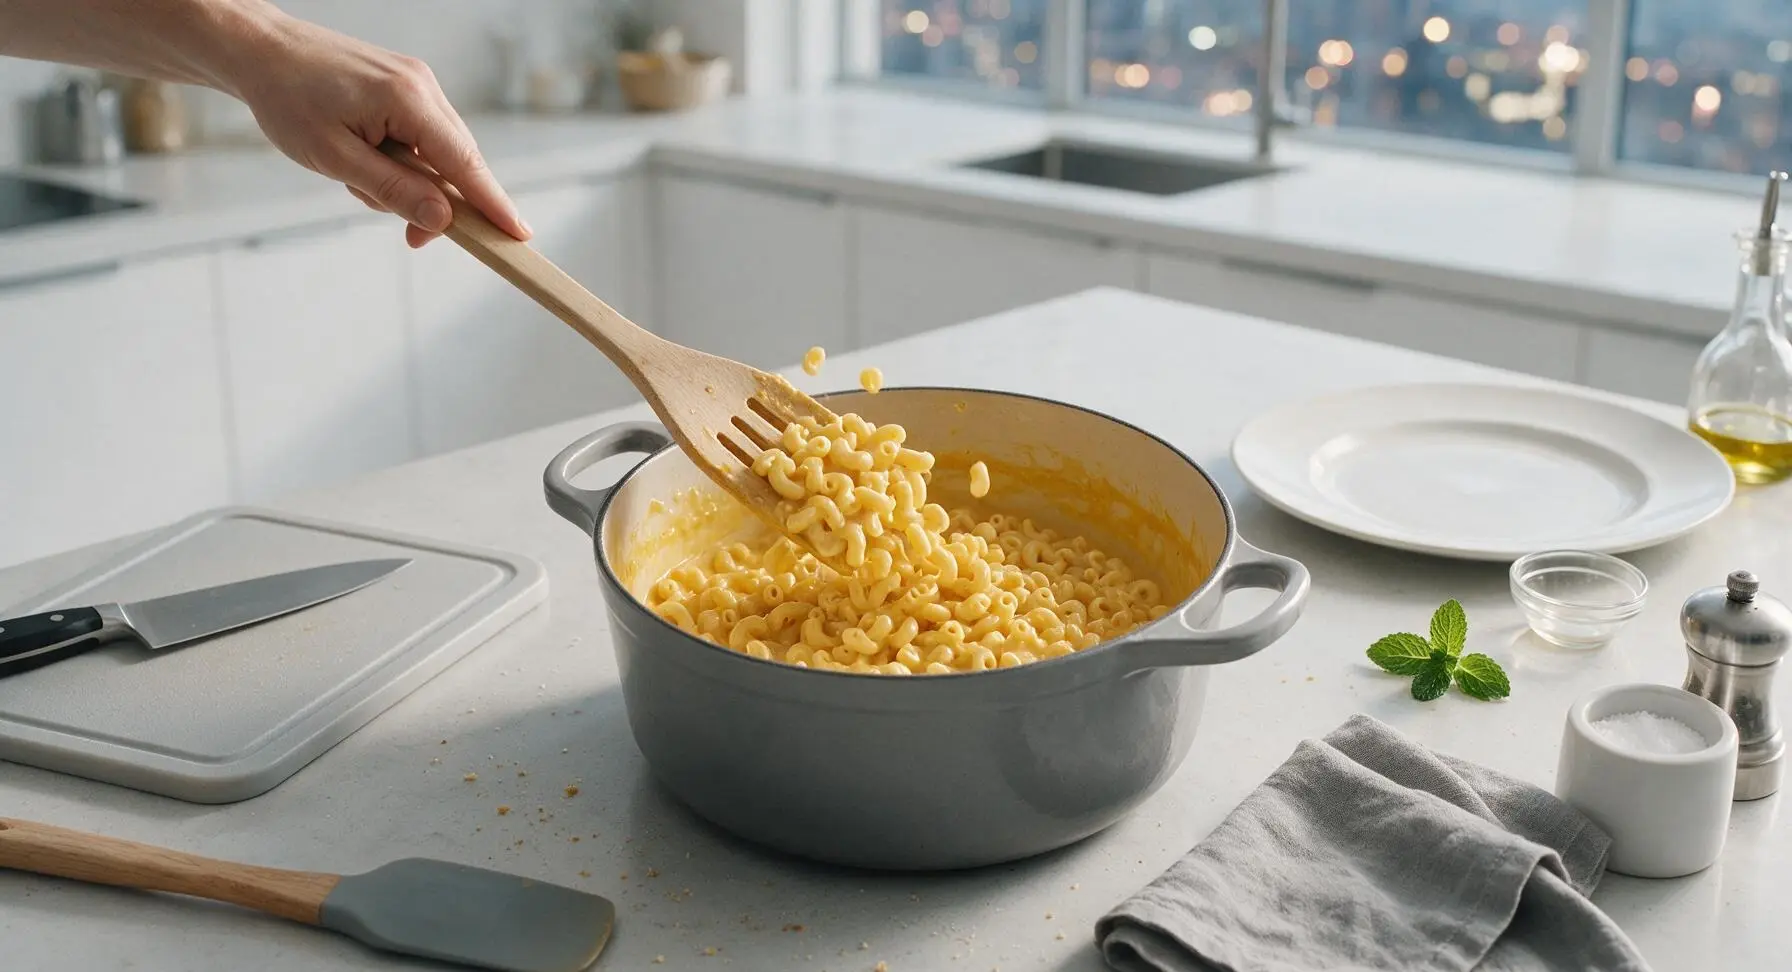
Step 6
step6:Fold in Cooked Pasta
7

Transfer to Baking Dish

Pour the fully coated macaroni and cheese into the 9x13 inch off-white ceramic baking dish, spreading it into a smooth, even layer with the back of the slotted spoon. Sprinkle the reserved 1/2 cup of shredded cheese evenly across the entire top surface of the pasta.
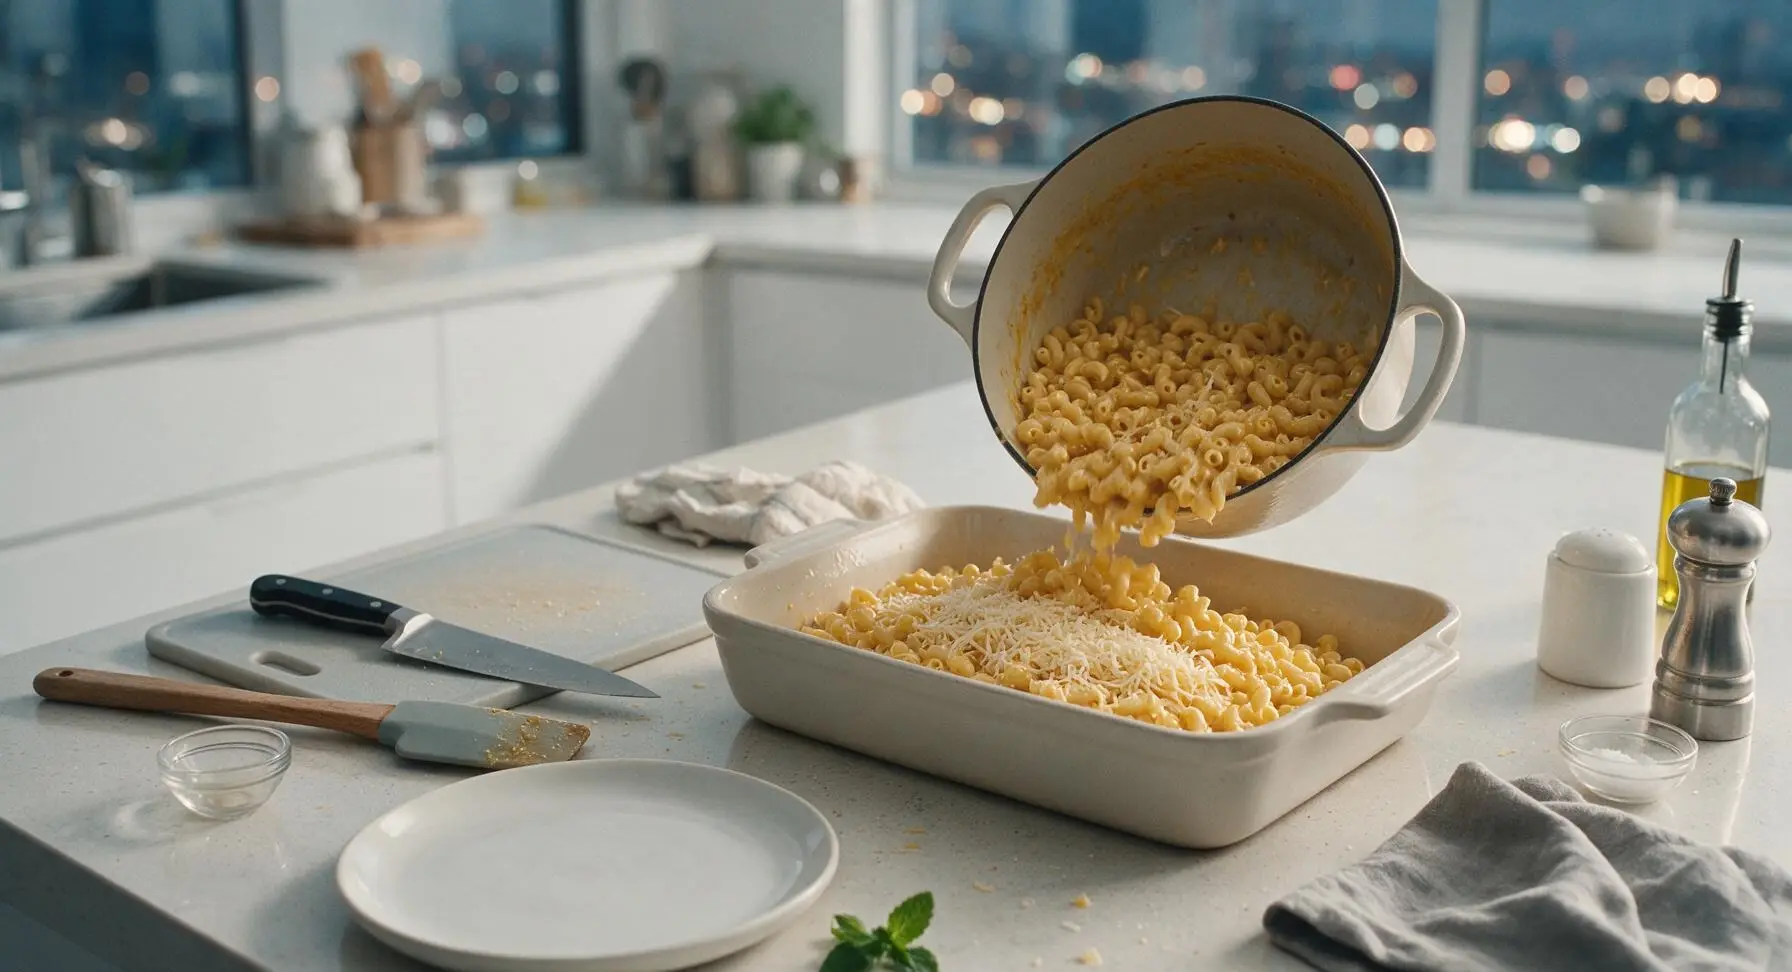
Step 7
step7:Transfer to Baking Dish
8

Top and Bake Until Golden

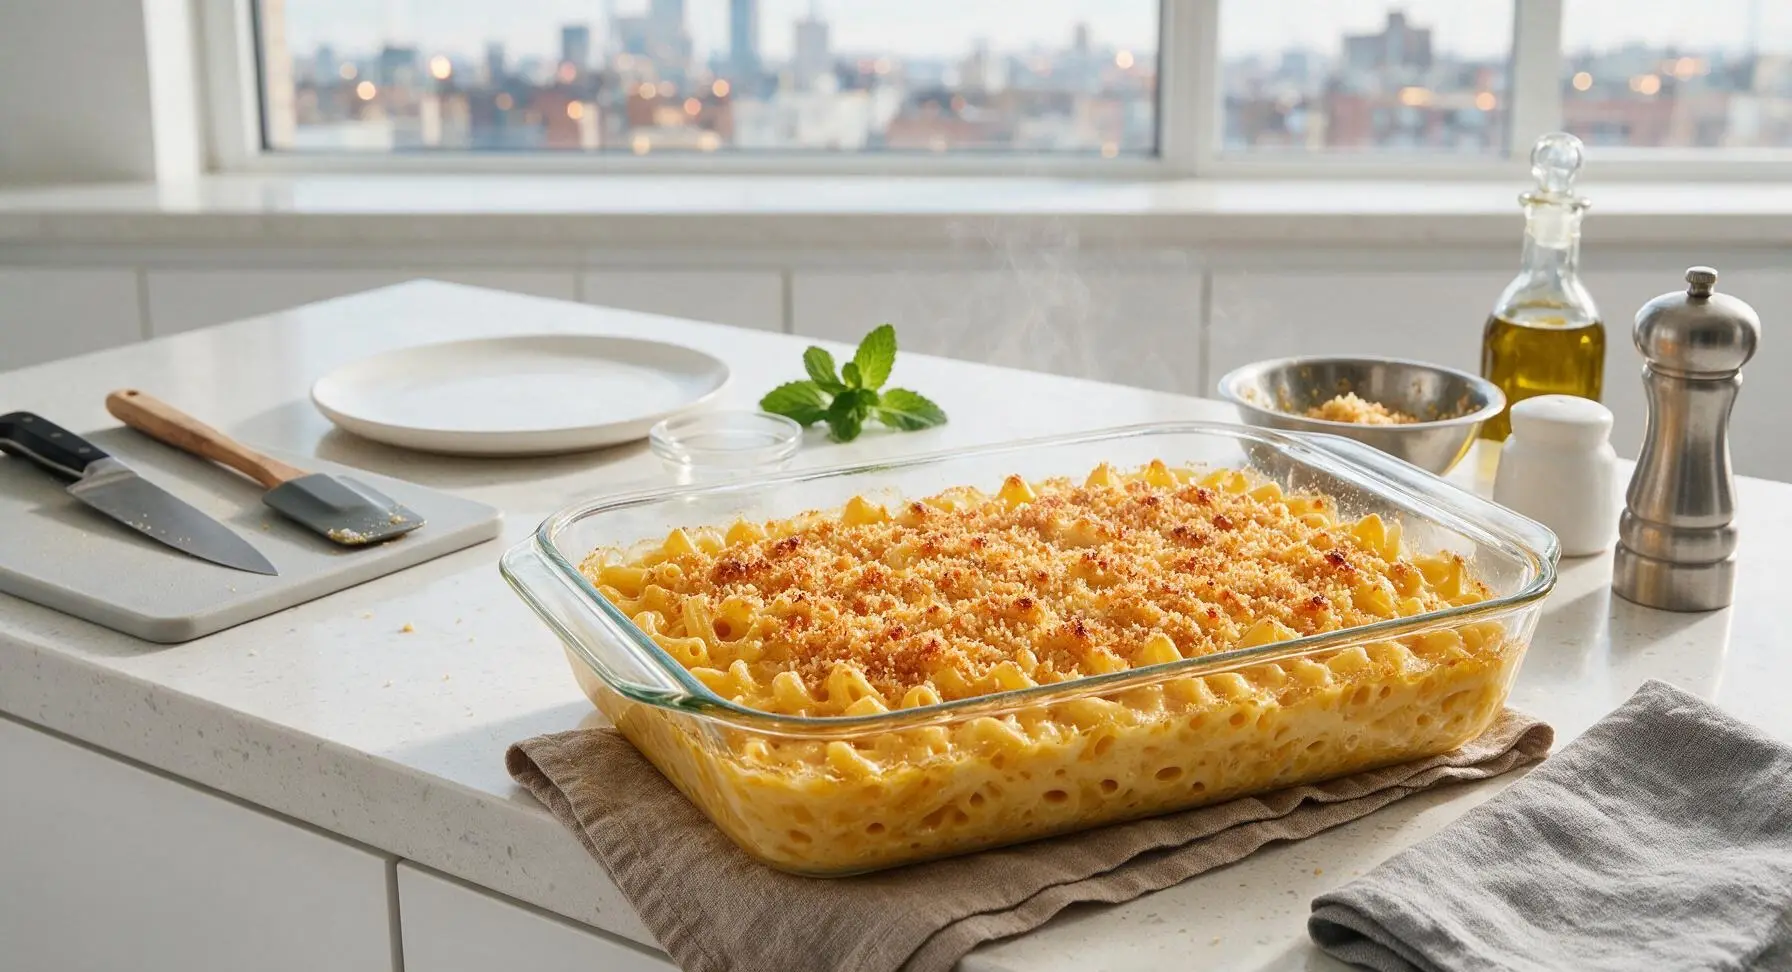
Melt the remaining 2 tablespoons of unsalted butter, then toss with panko breadcrumbs in the small stainless steel mixing bowl until crumbs are evenly coated in butter. Sprinkle the buttered crumbs in an even layer over the cheese-topped pasta. Bake at 375°F (190°C) for 30-35 minutes, until the sauce bubbles vigorously around the dish edges and the panko top is deep golden and crispy. Let rest 10 minutes before serving to allow the sauce to set.
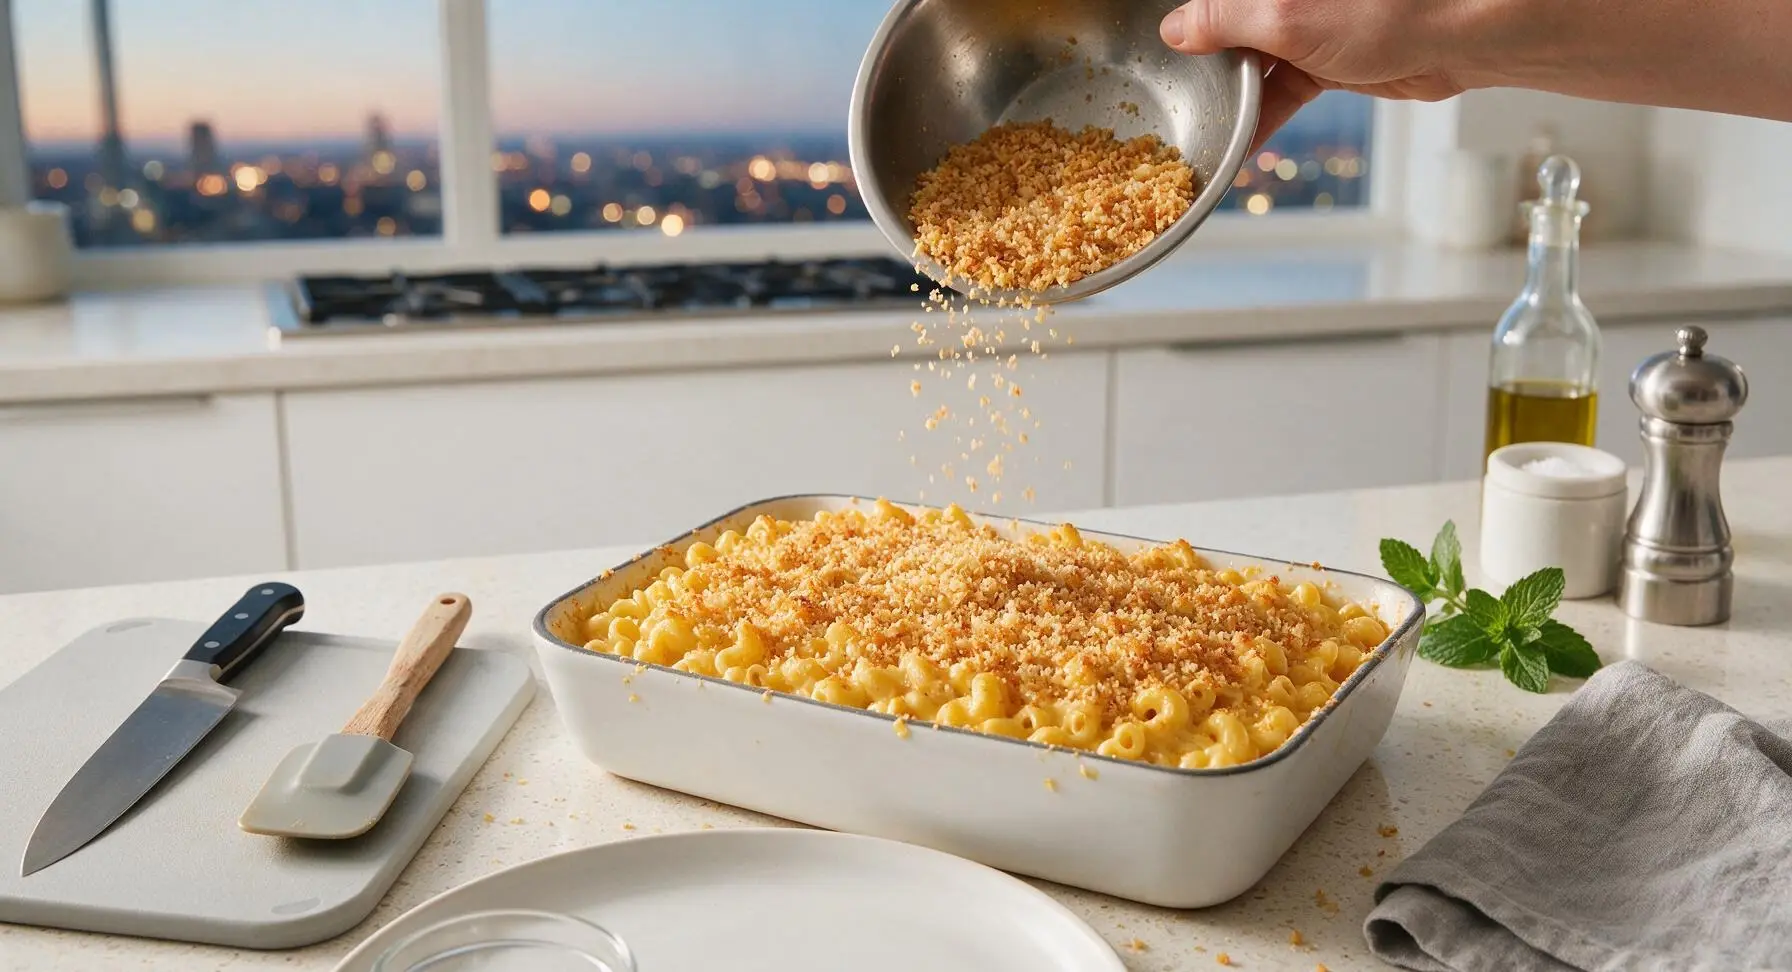
Step 8
step8:Top and Bake Until Golden
Step 8
step8:Top and Bake Until Golden

Tips

1.Grate your own cheese instead of using pre-shredded store-bought cheese: pre-shredded cheese is coated in potato starch and natural mold inhibitors to prevent clumping in the bag, which stops it from melting smoothly and results in a grainy, less creamy sauce.
2.Do not rinse your pasta after draining: the starchy coating on cooked pasta helps the thick cheese sauce cling tightly to every noodle, rather than sliding off and pooling at the bottom of the baking dish.
3.Let the baked mac and cheese rest for a full 10 minutes after removing it from the oven: this rest time allows the hot cheese sauce to thicken and set, so it holds its shape when scooped instead of running across the plate, and gives the flavors time to meld.


✨ You May Also Like

Side Dishes
🍜 India

Velvety, aromatic all-purpose curry sauce perfect for tossing with roasted veggies, grilled protein, or rice for fast, cozy, flavorful meals.

⏱️ 25 minuteSide Dishes ★ 4.8
Side Dishes
🍜 Spain

Tender, starchy boiled yuca tossed in bright, garlicky citrus mojo sauce—an iconic, zesty side that pairs beautifully with roasted pork, grilled meats, and rice and beans.

⏱️ 40 minuteSide Dishes ★ 5
Side Dishes
🍜 United States

Tender, paper-thin potato flatbread, a beloved Norwegian-American Minnesota Christmas staple, griddled until softly spotted and served warm with butter.

⏱️ 1 hour 30Side Dishes ★ 4.6
Side Dishes
🍜 United States

Rich, deeply savory cured salt pork, a long-lasting kitchen staple perfect for frying crispy as a side or adding umami to stews, beans, and chowders.

⏱️ 7 days (2Side Dishes ★ 4.9
Side Dishes
🍜 United States

Crispy, tangy classic Southern fried green tomatoes with a crunchy cornmeal crust, served hot for a nostalgic, comforting summery bite.

⏱️ 25 minuteSide Dishes ★ 4.9
Side Dishes
🍜 United States

Moist, golden-crusted savory muffins with sweet corn, zesty jalapeño, and melted cheddar, perfect for pairing with smoky summer grilled fare.

⏱️ 30 minuteSide Dishes ★ 4.9

ina mac and cheese:Frequently Asked Questions

1.Why does Ina’s recipe use both sharp white cheddar and Gruyère instead of a single cheese? ▾
That two-cheese blend is what gives this mac its signature balanced depth! Sharp white cheddar brings that bright, tangy bite everyone loves, while Gruyère adds a nutty, mellow, ultra-creamy melt that keeps the sauce from tasting flat or one-note. Using only one cheese will make the final dish feel far less complex and rich.
2.Can I use pre-shredded bagged cheese to cut down on prep time? ▾
I really don’t recommend it! Pre-shredded cheeses are coated in potato starch and anti-caking agents that prevent smooth melting, leaving you with a grainy, slightly gritty cheese sauce instead of that luxe, silky texture Ina’s recipe is known for. Freshly grating your cheddar and Gruyère only takes 5 minutes and is totally worth the payoff.
3.How do I keep the elbow macaroni from getting mushy in the finished bake? ▾
Cook your dry elbow macaroni 2 minutes less than the package’s al dente instruction, so it’s very firm to the bite! It will continue cooking as it bakes in the hot cheese sauce, and undercooking it upfront prevents that soggy, oversoft texture. Don’t forget to salt your pasta water generously, too—it’s the only chance to season the pasta itself.
4.Do I really need to use both whole milk and heavy cream for the cheese sauce? ▾
That specific dairy blend balances richness without making the mac feel heavy or cloying! Whole milk keeps the sauce light enough to coat every noodle evenly, while heavy cream adds that luxe, velvety thickness that doesn’t break or curdle while baking. Skimping on cream makes a thin sauce, while using all cream feels overly rich.
5.How do I get that perfectly crispy panko top without it burning? ▾
Toss your panko crumbs in melted, salted butter first so every crumb is evenly coated, then spread them in a thin, uniform layer over the top of the mac before baking. If you notice the crumbs browning too fast halfway through bake time, just tent the pan loosely with aluminum foil to keep them from charring before the center heats through.
6.Can I make this mac and cheese ahead of time for a party or potluck? ▾
Absolutely! Assemble the mac and cheese (hold off on adding the buttered panko topping) and store it covered in the fridge for up to 2 days. When you’re ready to bake, add the panko, tack 8-10 minutes onto the total bake time to account for the cold dish, and bake until the center is bubbly and the top is golden.
7.Why is my cheese sauce coming out grainy instead of smooth? ▾
Grainy sauce almost always comes from overheating your dairy once you add the cheese! Make sure your burner is on low when you stir in the grated cheddar and Gruyère, and take the pan off the heat entirely if the sauce starts to bubble. Never boil the sauce after adding cheese, as high heat makes milk proteins separate and create grit.
8.Can I swap the elbow macaroni for a different pasta shape? ▾
You can, but stick to short, ridged, hollow shapes that hold onto thick cheese sauce well! Great swaps include cavatappi, small shells, or campanelle. Long, smooth pasta like spaghetti or linguine won’t catch the sauce the way elbows do, and you’ll end up with most of the cheese pooling at the bottom of the baking dish.
9.How do I know when the baked mac and cheese is fully done cooking? ▾
You’re looking for two key visual cues: first, the edges of the dish should be bubbling vigorously around the sides of the pan, and second, the panko top should be a deep, even golden brown. For extra precision, the center of the dish should hit 165°F, which usually takes 30-35 minutes in a 375°F oven.
10.Can I add mix-ins like bacon, broccoli, or lobster to this base recipe? ▾
Definitely! This classic base is super customizable, just make sure any mix-ins are fully cooked and patted dry before you stir them into the pasta and sauce. Watery add-ins like steamed broccoli or canned tomatoes will thin your sauce if not drained well, and crispy add-ins like bacon taste best when fully crisped upfront.
11.What’s the best way to reheat leftover baked mac and cheese? ▾
The oven method gives you the best texture, with a crispy top and creamy center! Place leftovers in an oven-safe dish, add a splash of whole milk to loosen the set sauce, cover with foil, and bake at 350°F for 15-20 minutes until hot. For quick single servings, microwave in 30-second bursts, stirring between each, with a tiny splash of milk.
12.Why is my finished mac and cheese dry instead of rich and creamy? ▾
Dry mac usually happens for one of two reasons: either you overcooked your pasta so it soaked up too much sauce before baking, or you thickened your cheese sauce too much on the stovetop. Remember the sauce will thicken as it bakes, so it should feel just slightly loose when you pour it over the pasta going into the oven.
13.Can I use regular yellow cheddar instead of sharp white cheddar? ▾
You can, but it will change the flavor and appearance of the final dish! Sharp white cheddar has a brighter, tangier, less processed-tasting bite than most yellow cheddars, and it gives the sauce a pale, creamy look instead of the deep orange hue of boxed mac. If you swap, pick a high-quality sharp block, not mild processed cheddar.
14.Do I need to cover the baking dish with foil for the whole bake time? ▾
You don’t need to cover it for the full bake! Baking uncovered lets the panko top get crisp and golden, but if you notice the crumbs browning too quickly before the center is bubbly, you can tent a loose piece of foil over the top for the last 10 minutes of baking to prevent burning without making the panko soggy.
15.What size baking dish works best for this recipe? ▾
A 9x13 inch (3-quart) ceramic or glass baking dish is perfect for this recipe! It gives the mac enough room to bubble up without overflowing, and creates a thin enough layer that every serving gets a good amount of crispy panko top plus creamy center. If you use a deeper, smaller dish, add extra bake time to heat the center through.
16.Can I use regular fine breadcrumbs instead of panko for the topping? ▾
You can, but you won’t get that same light, shatteringly crisp top that makes Ina’s recipe so iconic! Panko crumbs are larger and airier than fine regular breadcrumbs, so they stay crunchy instead of getting soggy under the butter. If you use regular breadcrumbs, cut the amount by a quarter and watch them closely, as they brown faster than panko.
17.How long will leftovers stay fresh, and can I freeze this mac and cheese? ▾
Properly stored in an airtight container, leftover baked mac and cheese will stay fresh in the fridge for 3 to 4 days. I don’t recommend freezing this specific recipe, though—the high dairy content in the cream and cheese sauce tends to separate and turn grainy when thawed, leaving you with a watery, uneven texture after reheating.
18.Can I make a lighter version of this mac and cheese without ruining the creamy texture? ▾
You can swap up to a third of the heavy cream for extra whole milk to trim a little richness without sacrificing texture, but I don’t recommend using skim milk, low-fat cheese, or plant-based dairy as full swaps. Those ingredients have higher water content, curdle easily at high heat, and leave you with a thin, watery sauce instead of that velvety bite.

Comments (13)

2 days ago

OMG this baked mac and cheese is a total game changer! Made it for my kid’s soccer team potluck last night and every single pan was scraped clean. So creamy, no weird grainy cheese sauce at all, even with the 35 minute cook time I was shocked how fast it came together. 10/10 will be making this for every family gathering from now on.

1 week ago

Added this to my weekly meal prep rotation! It reheats like an absolute dream, no separated sauce, no mushy noodles. Super easy difficulty level is no lie — I even made it half asleep before my morning shift and it turned out perfect. SO good, way better than the boxed stuff I used to rely on.

5 days ago

Took this to a neighborhood block party over the weekend and got so many recipe requests! The crispy panko top is chef’s kiss, I added a tiny pinch of smoked paprika like I do for all my macs and it paired perfectly. Easy enough for a weeknight, fancy enough for company.

3 days ago

Swapped the regular pasta for gluten free elbow noodles and it still turned out amazing! Only reason I’m not giving 5 stars is I wish the recipe noted how much salt to add to the pasta water, I overdid it a tiny bit on my first try. Still, the cheese blend is insane, my whole family loved it.

yesterday

Wow, I’m literally a college student who can barely boil water and this turned out perfect? No lumpy sauce, no burnt edges, my roommates are convinced I’m a secret chef now. Thanks for such a straightforward easy recipe!

2 hours ago

That makes us so happy to hear, Jake! So glad it worked out for you and your roommates — it’s the perfect shareable weeknight meal for sure.

30 minutes ago

I’ve made this twice already and it’s been a hit every time! Has anyone tried adding bacon bits to this? I’m making it for my grandma’s birthday dinner this weekend and want to zhuzh it up a little without ruining the classic vibe.

5 minutes ago

I added crumbled crispy bacon last time I made it and it was chef’s kiss! Just toss it in right before you add the panko topping so it stays crispy, don’t mix it into the sauce too early.

2 weeks ago

My kids are SO picky about mac and cheese, they usually only eat the neon orange boxed kind, but they devoured this! They even asked for seconds before I finished serving my own plate. Game changer for busy school nights.

1 week ago

That’s the best win we could ask for! We love hearing that even the pickiest eaters enjoy this recipe — saves so much dinnertime stress, right?

2 hours ago

I made this last week for my family and it was SO good, I’m planning to bring it to my work potluck! How well does this hold up if I make it the night before an event? I don’t have time to bake it the morning of and don’t want it to be dried out.

30 minutes ago

I made it 24 hours ahead for my church potluck last month! Just undercook the pasta by a minute or two, keep it covered in the fridge, and add the panko right before baking. It came out exactly the same as making it fresh, no dryness at all.

just now

Wait the cheese blend here is out of this world! I used extra sharp cheddar and Gruyère like the recipe says and it’s so much more flavorful than any other baked mac I’ve made before. Why have I been using only cheddar my whole life?!

just now

That Gruyère really adds the perfect nutty depth, right? So glad you loved the cheese combo — it’s Ina’s secret to making it taste extra special without extra work!

1 week ago

Made this last night for our weekly family dinner and my husband said it’s the best mac and cheese he’s ever had — including his mom’s! Don’t tell his mom I said that, haha. Only thing is I didn’t have panko so I used regular breadcrumbs, still turned out crispy and delicious.

5 days ago

LMAO my husband said the EXACT same thing when I made this last month! I also used regular breadcrumbs because I forgot panko, no difference in taste as far as I’m concerned. His mom still doesn’t know, oops.

3 days ago

Your secret’s safe with us! So glad it was a hit with your husband — regular breadcrumbs work perfectly as a panko swap, we’re all about using what you have in the pantry.

3 days ago

I made this for dinner last week and my whole family went crazy for it! Has anyone tried mixing in roasted broccoli with this? I’m trying to sneak more veggies into my toddler’s meals and this seems like the perfect vessel, but I don’t want it to make the sauce watery.

2 days ago

I did this last week! Roast the broccoli first at 400 for 15 minutes to get it nice and caramelized and dry off any extra moisture, then toss it in right before baking. My toddler ate three servings and didn’t even complain about the green stuff, win!

yesterday

Great tip from ToddlerMomLife! Roasting veggies first to remove excess moisture is the key to avoiding watery sauce. Steamed broccoli can release too much water, so roasting is definitely the move if you’re adding mix-ins.

2 weeks ago

Planning to make this for our Thanksgiving spread this year! I made a test batch last weekend and it was so creamy and delicious, I knew it had to make the menu. How many people does one batch feed, roughly? I’m expecting 12 people total and want to make sure I make enough.

1 week ago

I made a double batch last year for 10 people and we had just enough leftovers for the next day, which is mandatory for Thanksgiving in my book. A single batch is probably enough for 6-8 people as a side, so I’d do a double batch for 12 to be safe!

5 days ago

Perfect call from ThanksgivingHostVet! A single batch serves 6-8 as a hearty side, so a double batch will give you plenty for 12 guests plus a little leftover for the day after, which is non-negotiable. Hope it’s a hit at your dinner!

yesterday

First time making this the flavor was incredible, but I messed up the roux a little and it was lumpy because I didn’t see any tips for avoiding that in the recipe! I still ate two big servings because it tasted so good, but does anyone have tips for getting a super smooth cheese sauce next time?

2 hours ago

Make sure you whisk the flour and butter together for a full 2 minutes before you start adding the milk, and add the milk SUPER slowly at first, like a tablespoon at a time, while whisking nonstop. No lumps ever when I do that! Also make sure your milk isn’t ice cold, room temp or slightly warmed helps a ton.

30 minutes ago

Couldn’t have said it better ourselves! Cooking the roux long enough to get that nutty smell and adding milk gradually is the secret to silky, lump-free sauce. You’ve got this on your next try, we know it’ll be perfect!



