
leftover mac and cheese

title 1
leftover mac and cheese
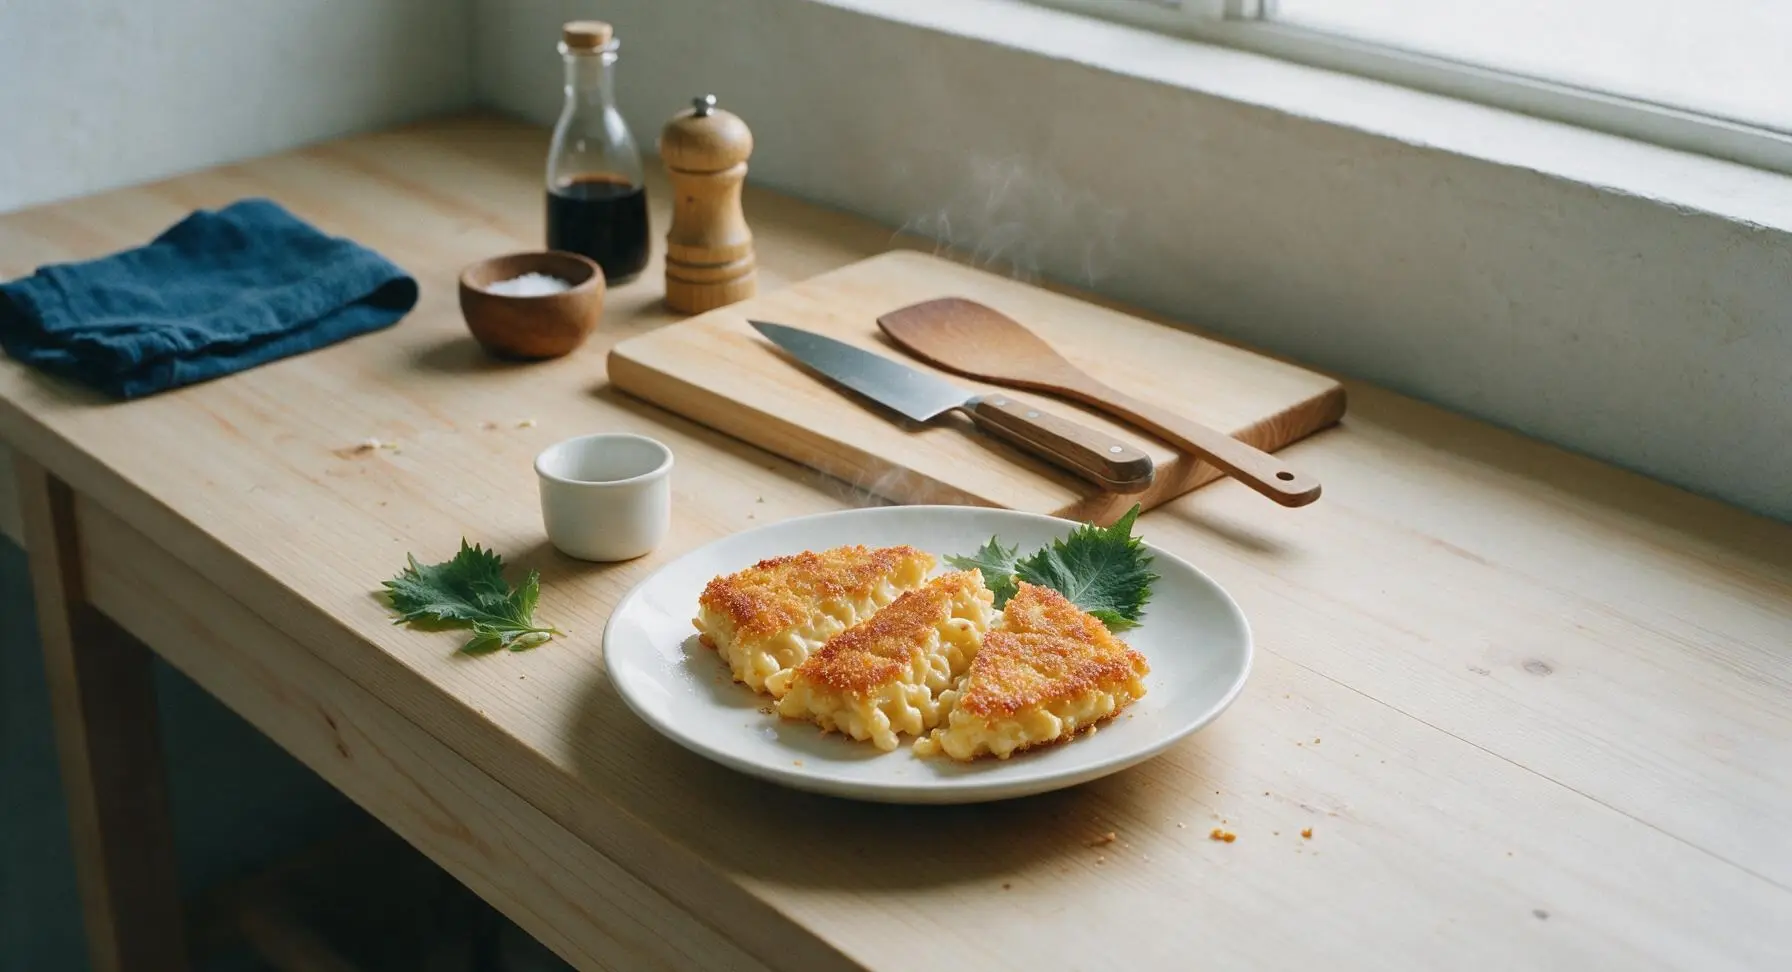
⏱️ cook time 12 minutes
🍽️ servings 4
⚡ Difficulty easy

intro

Transform cold, clumpy leftover mac and cheese into crispy, creamy golden wedges in under 20 minutes—no sad, mushy microwave leftovers here.

Ingredients
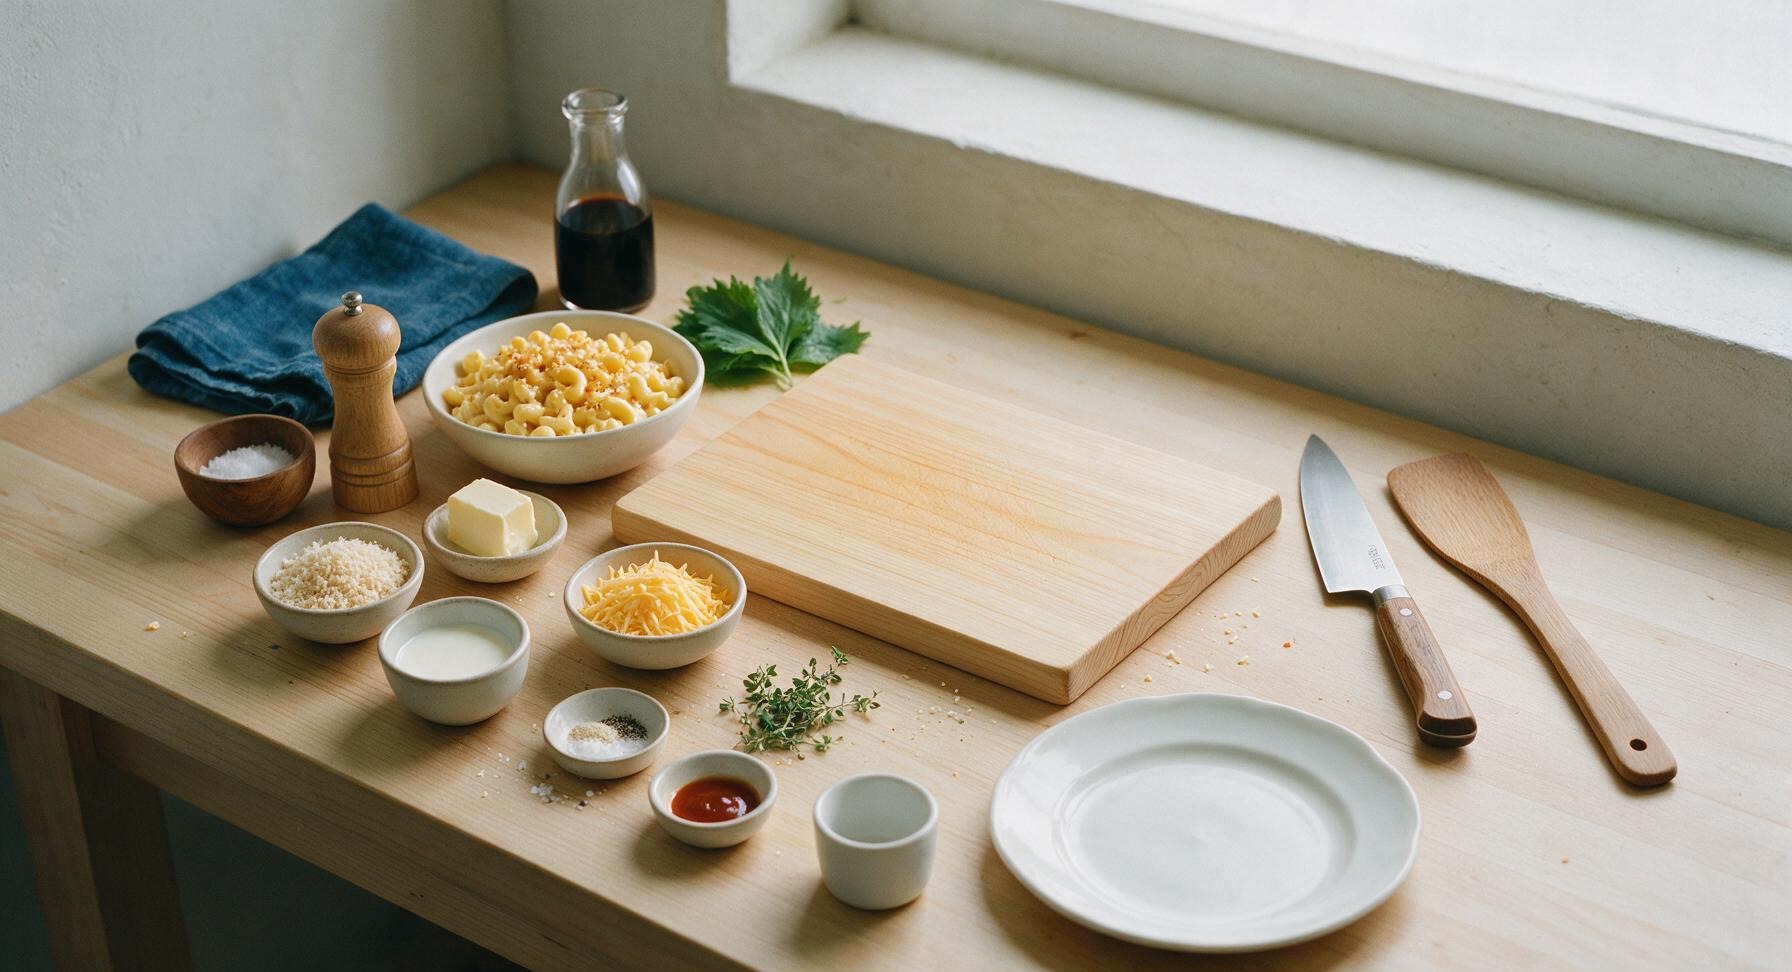
Chilled leftover baked mac and cheese 600g (about 4 cups)
Unsalted butter 2 tbsp (28g)
Panko breadcrumbs 1/4 cup (30g)
Whole milk 1/4 cup (60ml)
Shredded sharp cheddar cheese 1/2 cup (55g)
Fresh thyme leaves 1 tsp
Garlic powder 1/4 tsp
Flaky sea salt 1/8 tsp
Freshly ground black pepper 1/8 tsp
Hot sauce (optional, for serving) 1 tsp

Steps

1

Cut Mac into Wedges

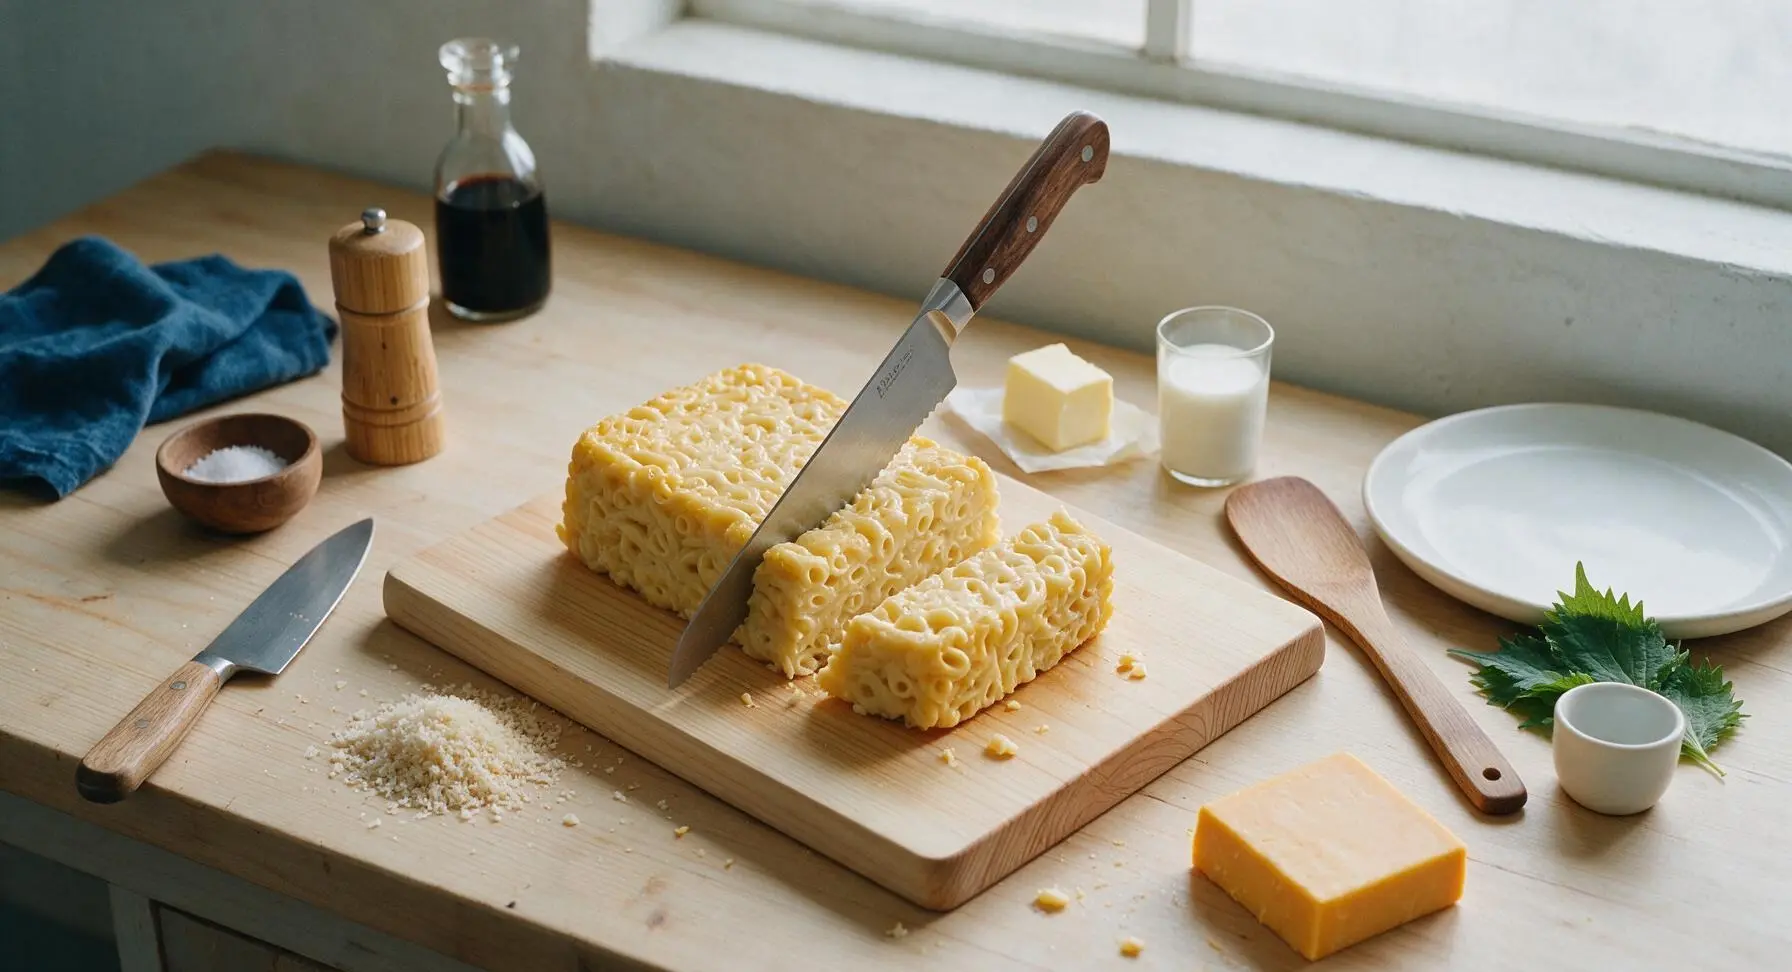
Remove the fully chilled, firm leftover mac and cheese from the fridge (it should hold its shape completely when lifted, with no soft oozing cheese). Place the block on the beech wood cutting board. Using the 8-inch serrated walnut-handle knife, cut the block into 4 equal 5cm-thick wedges, wiping the blade clean between cuts if soft cheese sticks to avoid ragged edges. Do not crumble or tear the mac, as clean cuts help wedges hold their shape during cooking.
Step 1
step1:Cut Mac into Wedges
2

Melt Butter in Skillet

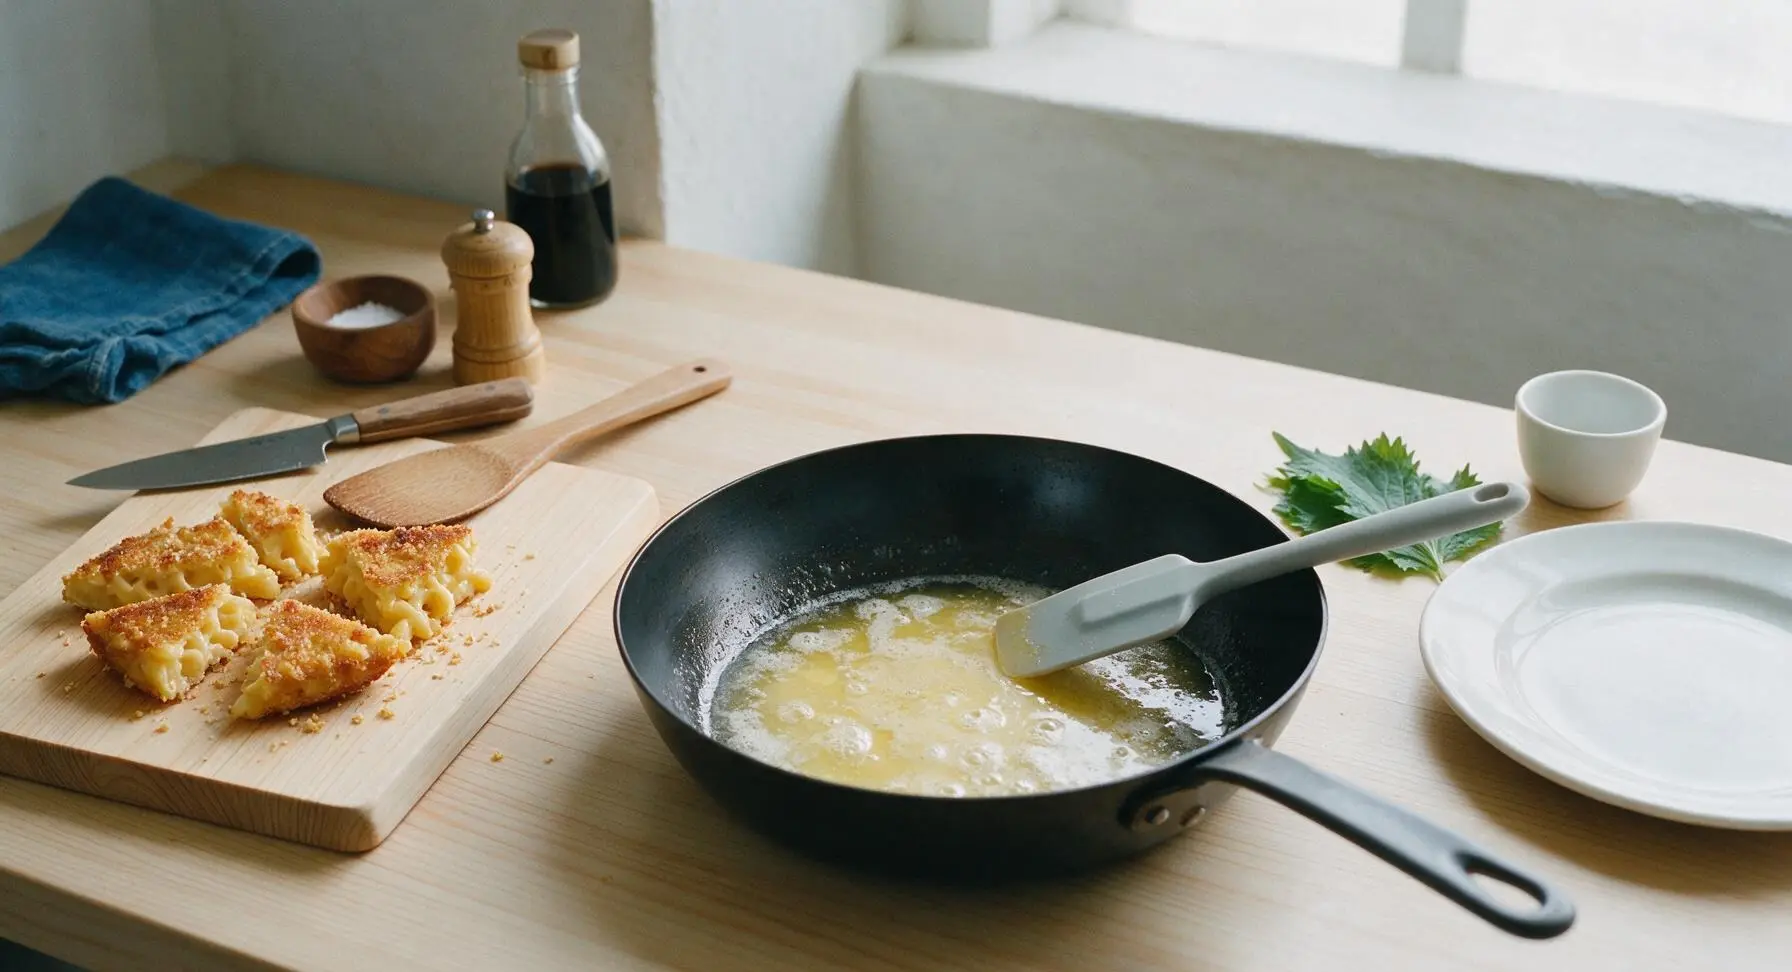
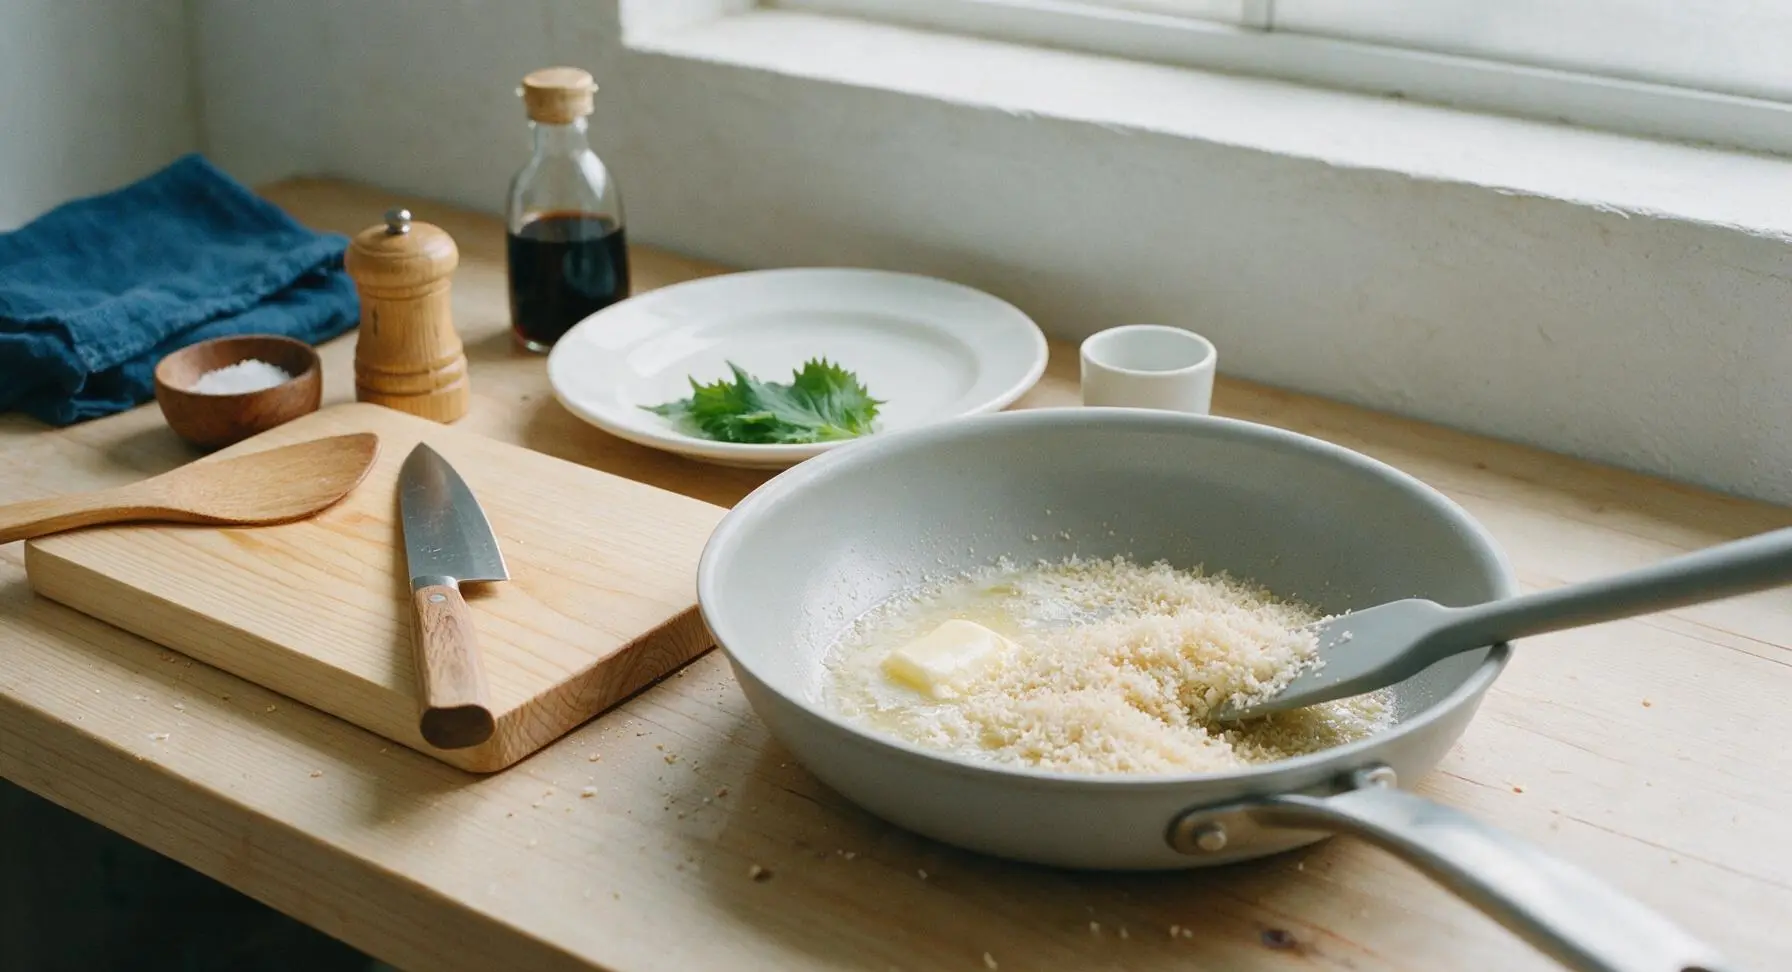
Bring the 10-inch matte black carbon steel skillet to the center of the stovetop burner set to medium heat (350°F / 175°C). Add the 2 tablespoons of unsalted butter to the pan, swirling gently as it melts for 1 minute until it forms a pale golden pool, foams slightly, and gives off a mild nutty aroma. Do not let the butter turn dark brown or burn, as this will make the crumbs taste bitter.
Step 2
step2:Melt Butter in Skillet
3

Toast Panko Crumbs

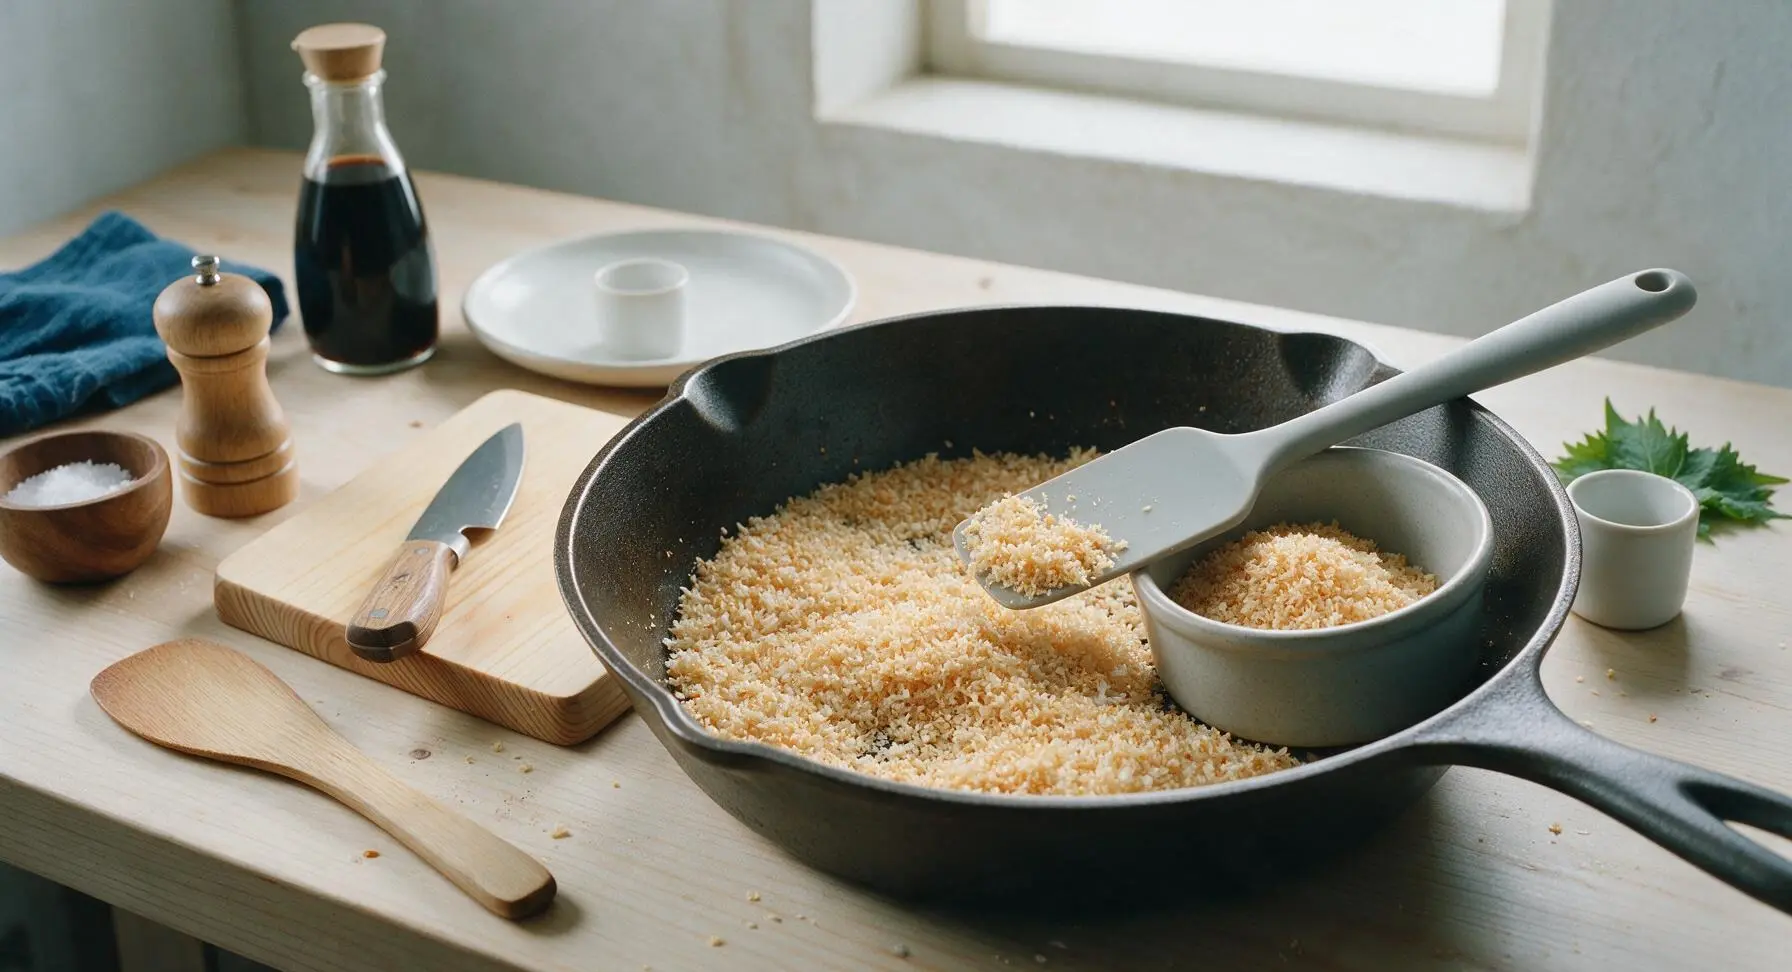
Add the 1/4 cup panko breadcrumbs, 1/4 teaspoon garlic powder, and 1/8 teaspoon freshly ground black pepper to the melted butter. Stir continuously with the silicone spatula for 2 minutes, until the crumbs turn an even light golden brown and smell deeply toasty. Immediately scoop half of the toasted crumbs back into the matte light grey ramekin and set aside to use as a final topping, leaving the other half in an even layer across the skillet base.
Step 3
step3:Toast Panko Crumbs
Step 3
step3:Toast Panko Crumbs
4

Arrange Mac in Skillet

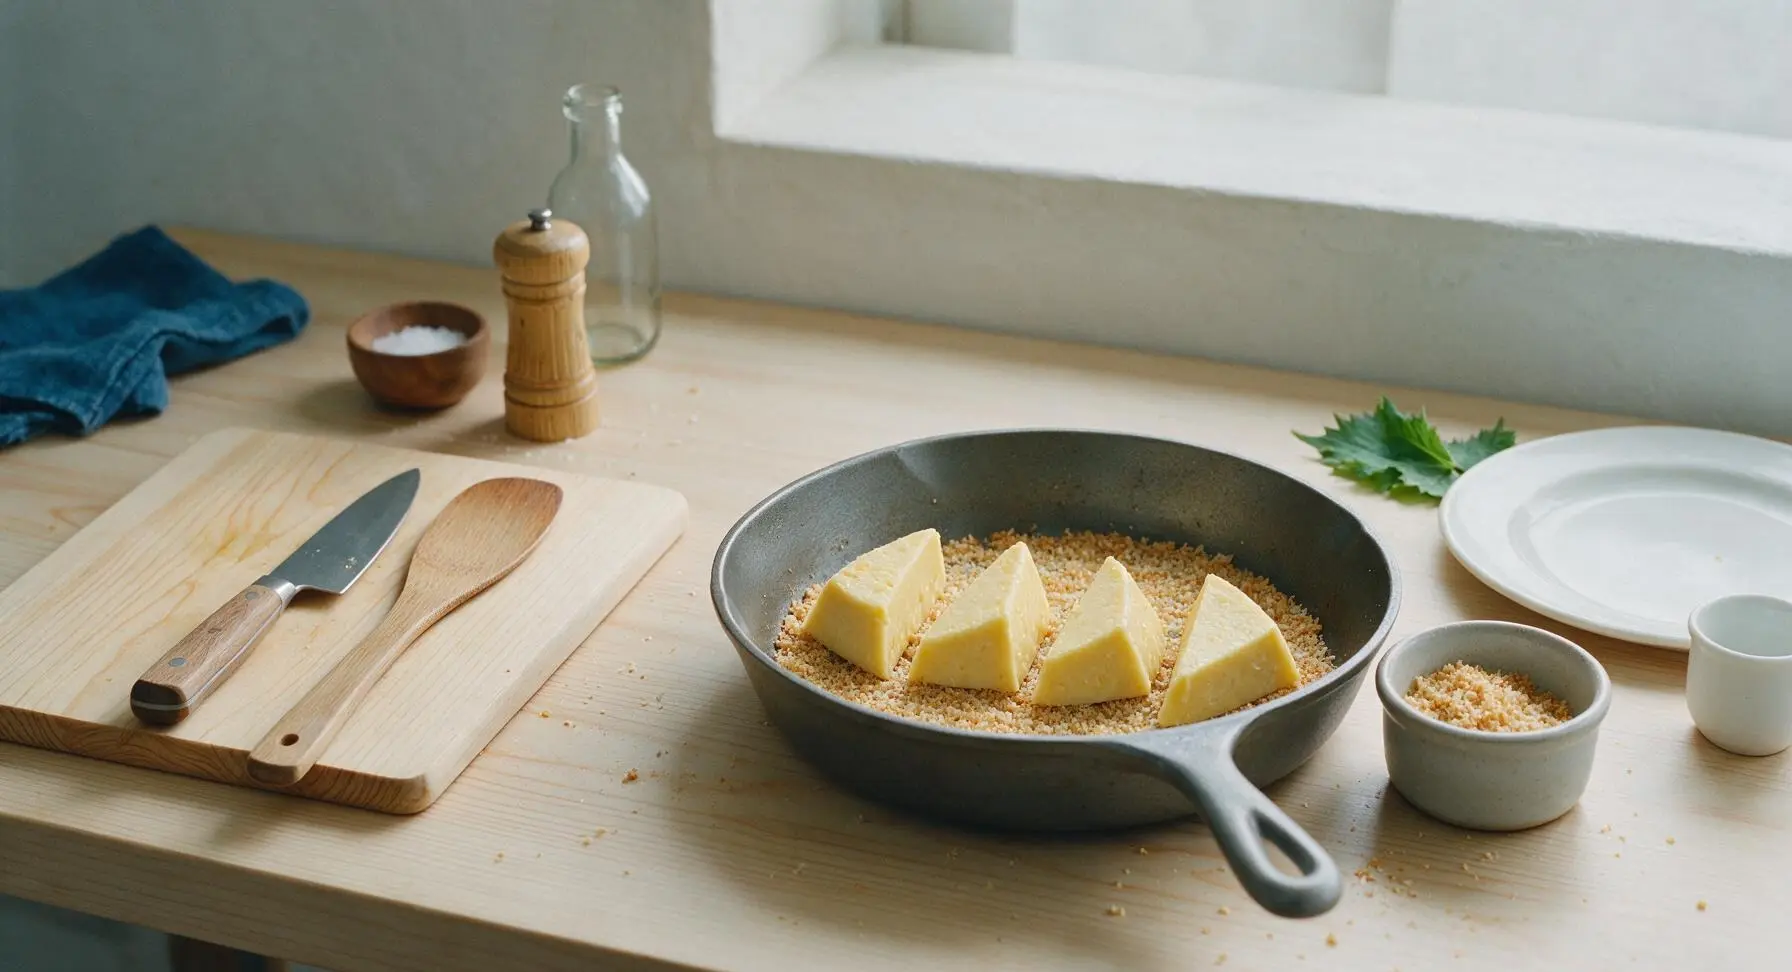
Carefully place the 4 cut cold mac and cheese wedges into the skillet in a single layer, sitting directly on the remaining layer of toasted panko, with 1cm of space between each wedge. Do not press down on the wedges, as this will squeeze out creamy cheese and make the crust soggy. If your skillet is too small to fit all wedges with space, cook them in two batches.
Step 4
step4:Arrange Mac in Skillet
5

Pan-Fry Until Crispy

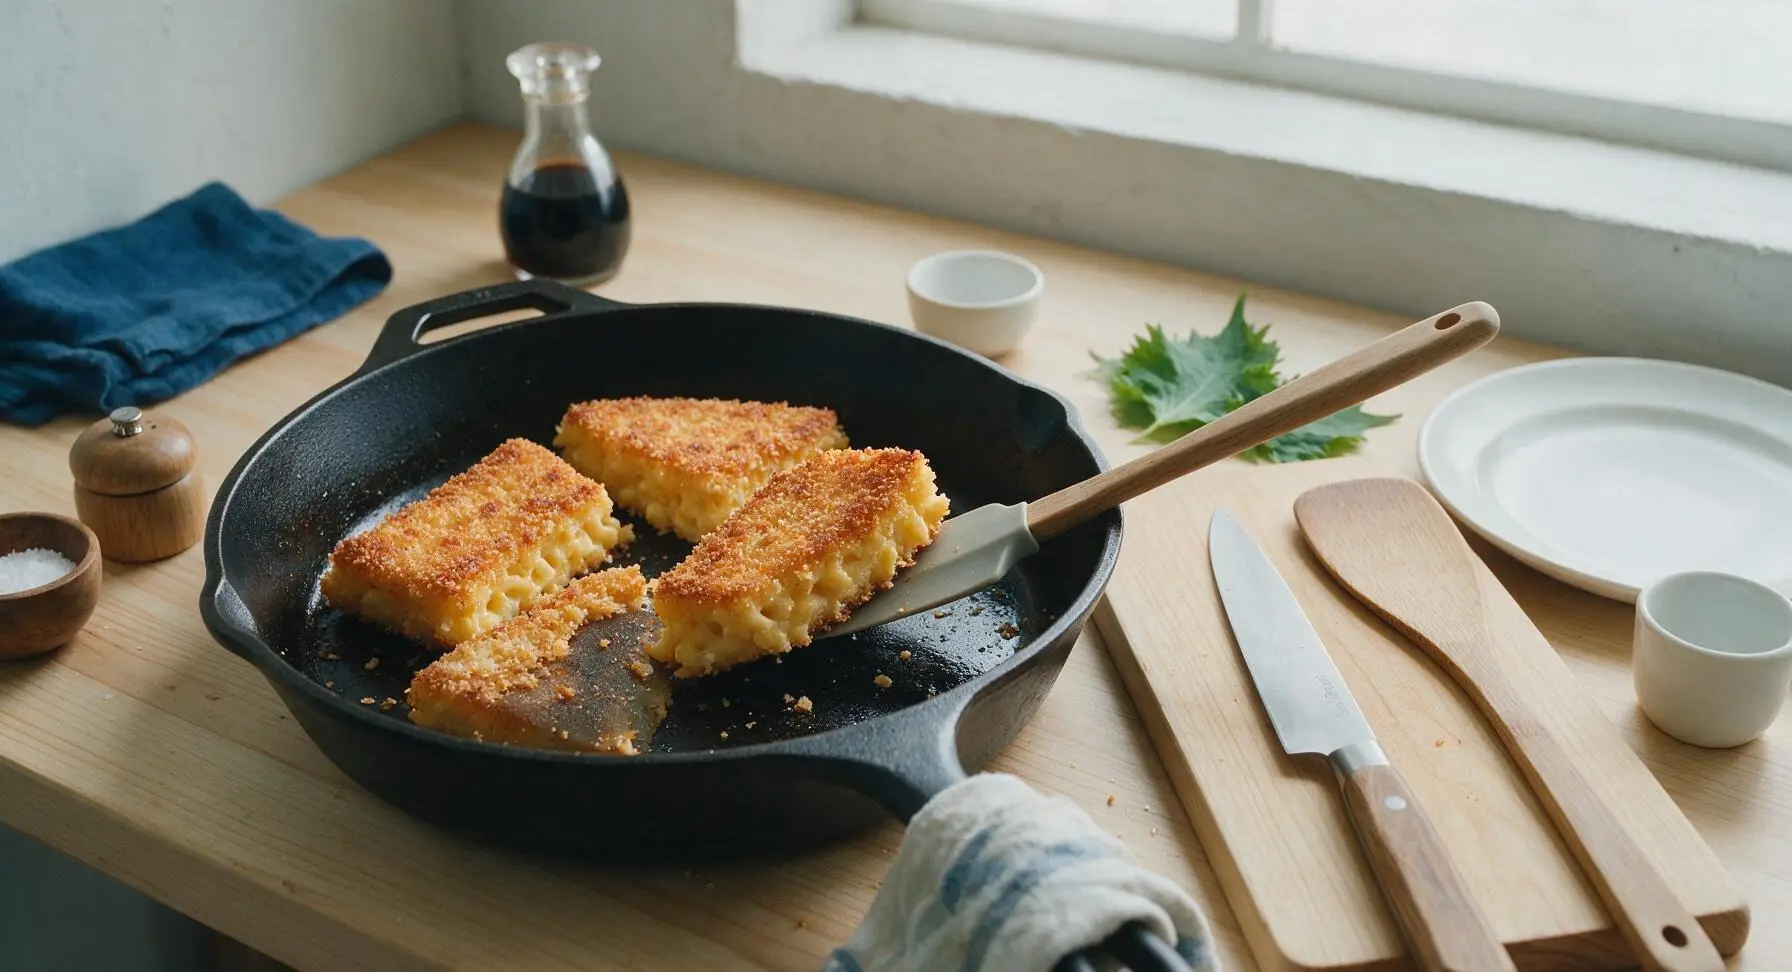
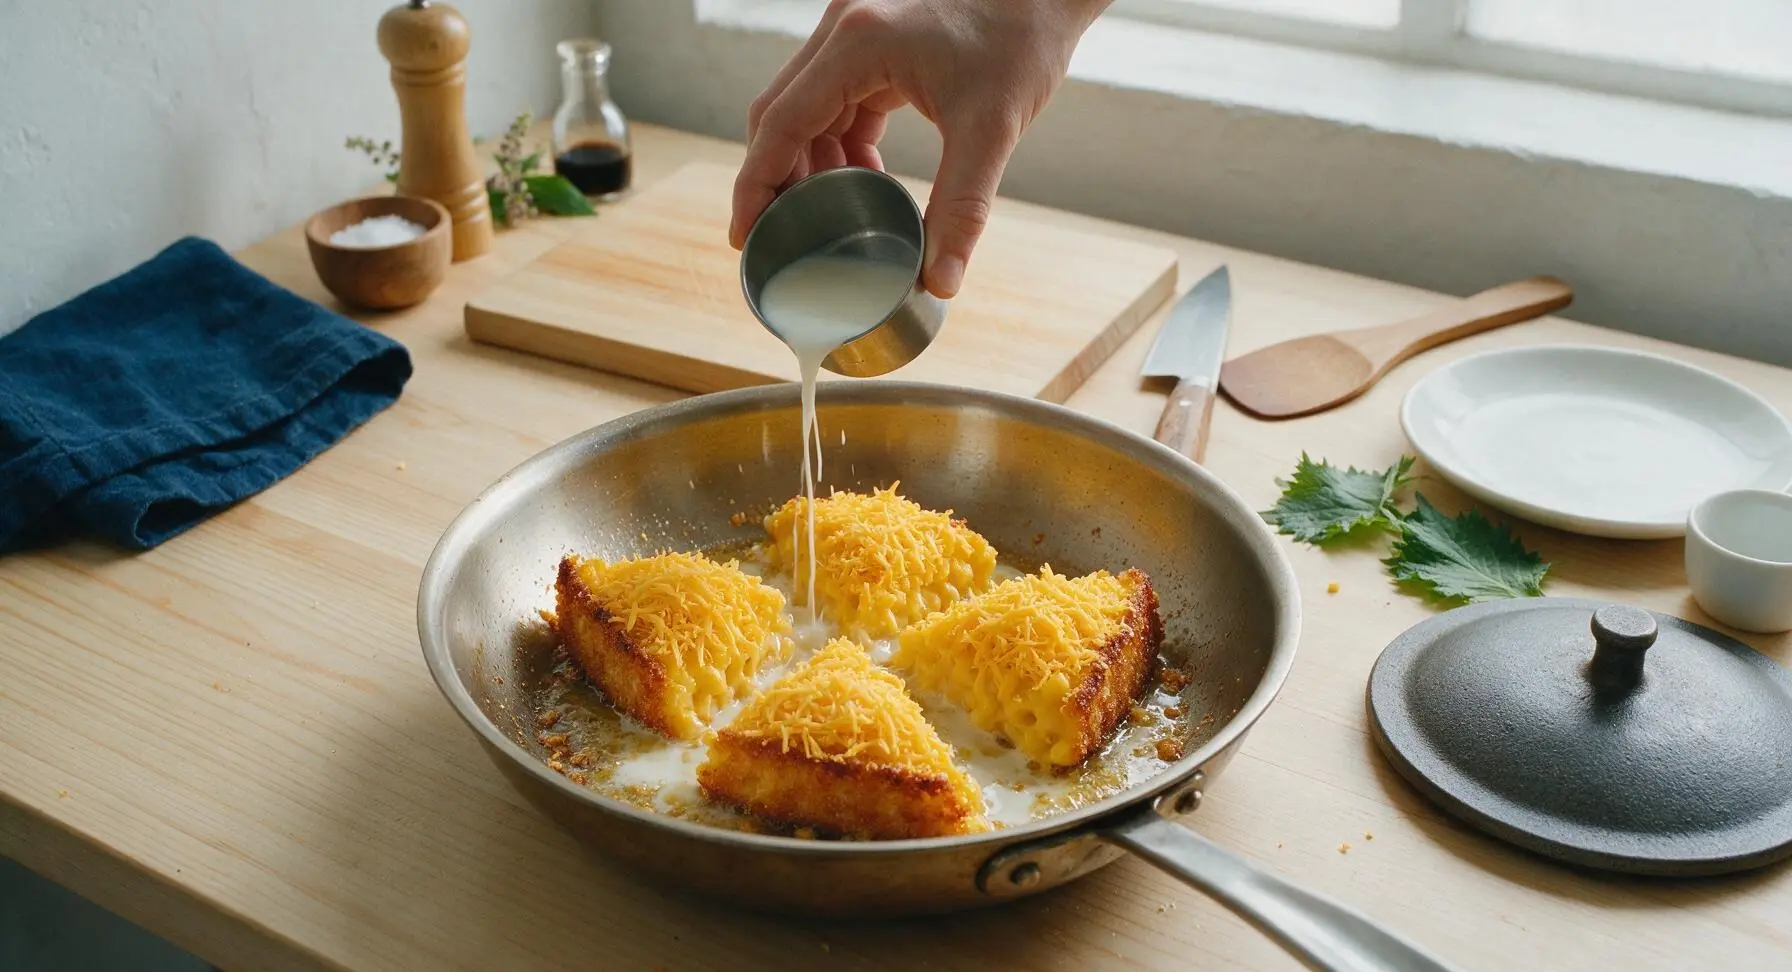
Cook the wedges undisturbed for 5 minutes over medium heat, until the bottom edge touching the pan forms a deep golden, crunchy crust. Drizzle 1 teaspoon of whole milk around the base of each wedge (pouring directly onto the pan, not on top of the mac) to create steam that heats the center without sogginess. Sprinkle half of the shredded sharp cheddar over the tops of the wedges, cover the skillet with a tight-fitting lid, reduce heat to medium-low (300°F / 150°C), and cook 3 more minutes until the cheese is fully melted and wedges reach an internal temperature of 165°F (74°C), with no cold clumpy centers.
Step 5
step5:Pan-Fry Until Crispy
Step 5
step5:Pan-Fry Until Crispy
6

Plate Cooked Wedges

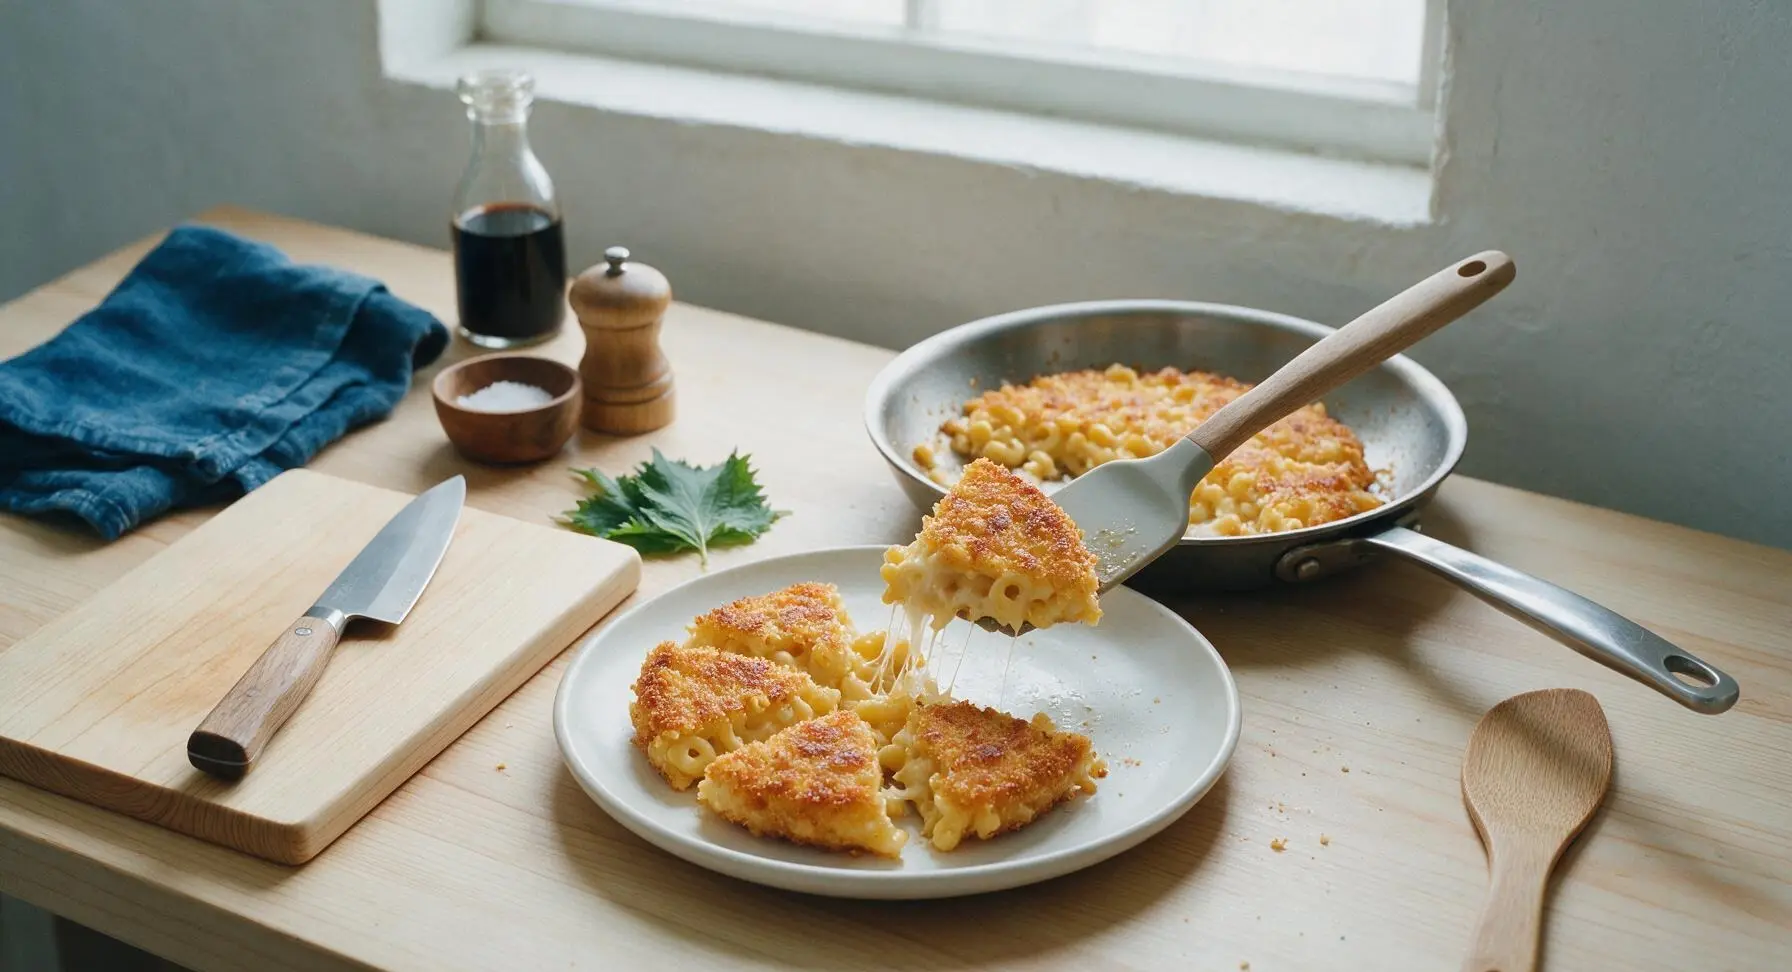
Turn off the stovetop heat. Remove the skillet lid, and use the silicone spatula to carefully lift each wedge from the pan, keeping the crispy crust intact. Transfer the wedges to the matte warm white ceramic dinner plate, which has been moved from its permanent top-right counter position to the front center of the frame, arranging them with the crispy side facing up.
Step 6
step6:Plate Cooked Wedges
7

Top and Serve Immediately

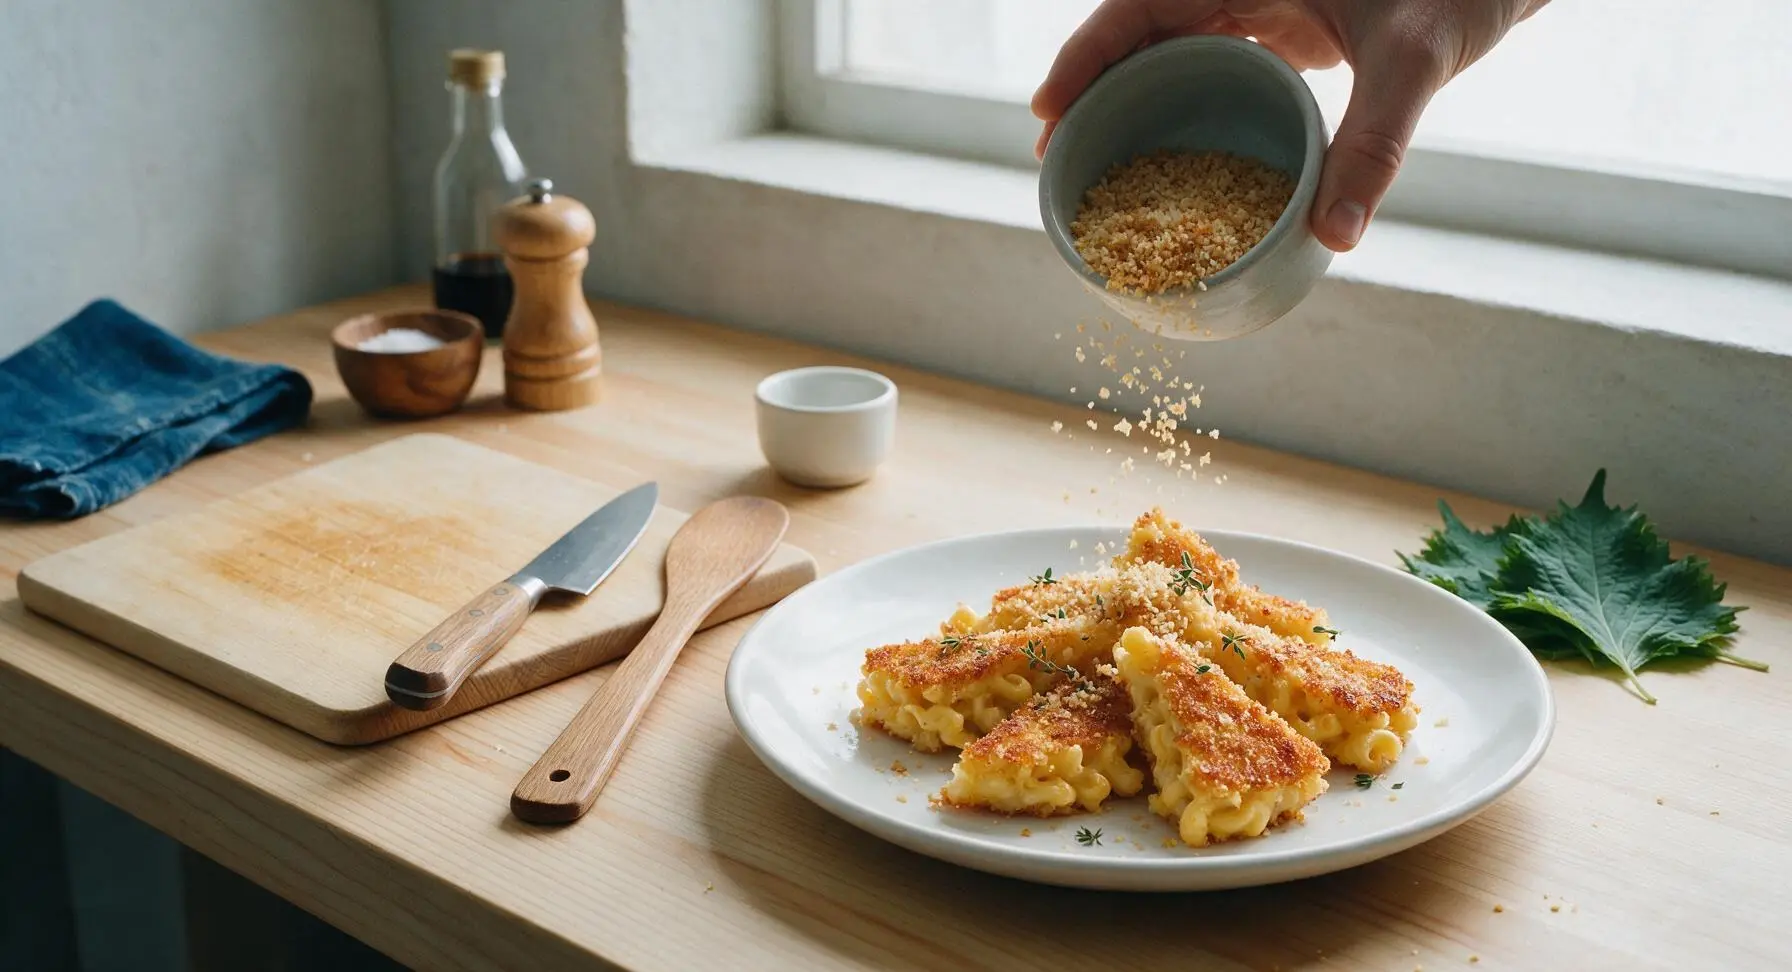
Sprinkle the reserved toasted panko crumbs over the plated wedges, followed by the remaining shredded cheddar, 1 teaspoon of picked fresh thyme leaves, a light pinch of flaky sea salt, and a crack of fresh black pepper. Drizzle with hot sauce if desired, and serve immediately while the crust is crisp and cheese is hot and melted.
Step 7
step7:Top and Serve Immediately

Tips

1.Only use fully chilled, firm leftover mac and cheese for this recipe: room-temperature or recently cooked mac will be too soft, fall apart during cooking, and turn mushy instead of forming a crisp crust. If your leftovers are loose, press them into a small lidded container and chill for 2 hours until firm before cutting.
2.Pour milk around the wedge edges, not directly on top: pouring milk on the crispy upper crust will make it soggy, while adding it to the pan base creates gentle steam that heats the pasta center evenly without ruining crunch.
3.Skip the microwave for reviving mac and cheese: microwaves heat unevenly and over-hydrate noodle surfaces to create a mushy texture, while stovetop pan-frying creates a satisfying contrast between crunchy crust and rich, creamy center.


✨ You May Also Like

Main Course
🍜 United Kingdom

A showstopping classic of tender seared beef, savory mushroom duxelles, and crisp prosciutto wrapped in flaky golden puff pastry, baked to juicy perfection.

⏱️ 2 hours 1Main Course ★ 4.7
Main Course
🍜 India

Tender charred marinated chicken simmered in a rich, spiced creamy tomato sauce, this iconic Anglo-Indian curry pairs perfectly with basmati rice or warm naan.

⏱️ 50 minuteMain Course ★ 4.6
Main Course
🍜 Thailand

Classic tangy, sweet, and savory Thai stir-fried rice noodles with shrimp, tofu, and crunchy garnishes, balancing all five core Thai flavor profiles.

⏱️ 30 minuteMain Course ★ 4.5
Main Course
🍜 United Kingdom

Crispy golden beer-battered cod and fluffy double-fried chips, served with tangy tartar sauce and malt vinegar: the timeless, beloved British pub comfort classic.

⏱️ 45 minuteMain Course ★ 4.7
Main Course
🍜 Mexico

Smoky, chile-marinated pork tacos with caramelized pineapple, fresh cilantro, and lime: a beloved classic Mexican street food perfect for casual summer gatherings.

⏱️ 1 hour 45Main Course ★ 4.8
Main Course
🍜 United States

Crunchy Fritos corn chips layered with savory beef chili and melted cheddar, topped with cool, zesty fixings for a beloved, cozy Tex-Mex comfort food.

⏱️ 35 minuteMain Course ★ 4.8

leftover mac and cheese:Frequently Asked Questions

1.How chilled does my leftover mac and cheese need to be to fry without falling apart? ▾
It needs to be fully firm, chilled for at least 4 hours (preferably overnight) in the fridge at 40°F or below. Soft, barely cold mac and cheese will break apart when sliced and moved around the pan, leaving you with mushy, crumbly bits instead of neat, cohesive wedges that hold their shape.
2.Can I use stovetop leftover mac and cheese instead of baked for this recipe? ▾
Stovetop mac and cheese works, but it often has a looser, creamier base that doesn’t set as firmly as baked. For best results, press leftover stovetop mac into a lined baking dish, chill it for 6+ hours until solid, then slice it into wedges before frying to avoid it falling apart in the pan.
3.Do I have to use panko breadcrumbs, or will regular fine breadcrumbs work? ▾
Panko is preferred for that extra shatteringly crisp crust, since its coarser, flakier texture doesn’t get soggy as fast as fine breadcrumbs. If you only have regular fine breadcrumbs, toast them lightly in butter first for 1-2 minutes before coating your wedges to boost crunch and prevent a mushy exterior.
4.How thick should I slice my mac and cheese wedges for the best crispy-to-creamy ratio? ▾
Aim for 1-inch thick wedges or squares, roughly 2 to 3 inches wide. Any thinner, and the creamy interior will cook out and turn greasy before the crust crisps; any thicker, and the outside might burn before the center warms all the way through to that perfect gooey consistency.
5.Can I use oil instead of unsalted butter to fry these mac and cheese wedges? ▾
You can use a neutral oil like canola or avocado, but butter adds that rich, nutty, savory depth that pairs perfectly with sharp cheddar. If you’re worried about butter burning, use a 50/50 mix of butter and high-smoke-point oil to get that great buttery flavor without bitter, burnt crusts.
6.Why is my fried mac and cheese coming out soggy instead of crispy? ▾
Sogginess usually comes from three issues: your pan wasn’t hot enough before adding the wedges, you overcrowded the pan (which steams instead of fries the mac), or your leftover mac was too wet to start with. Cook in batches over medium-high heat, and don’t move wedges for the first 3 minutes to let the crust set.
7.Do I need to dip the mac wedges in egg to get the panko breadcrumbs to stick? ▾
You don’t need egg! A quick, light brush of whole milk on the cut sides of each chilled wedge is enough to make panko adhere firmly without creating a heavy, eggy coating. Just press panko gently into the surface after brushing, and let wedges rest 2 minutes before frying so crumbs set.
8.How do I keep fried wedges warm while I cook batches so they don’t get soggy? ▾
Set a wire rack inside a rimmed baking sheet, and place cooked wedges on the rack in a 200°F oven while you finish frying the rest. Don’t stack them or set them directly on paper towels, as trapped steam will make that crisp crust turn soft and mushy in just a few minutes.
9.When is the best time to add the extra shredded sharp cheddar for maximum cheesiness? ▾
Absolutely add that extra sharp cheddar! A light sprinkle on top of hot wedges right as they come out of the pan will melt into a delicious, salty, cheesy layer. You can also press a tiny pinch of cheddar into the panko coating before frying for extra cheese pull and deeper, sharper flavor.
10.Can I prep these pan-fried mac and cheese wedges ahead for a party or game day? ▾
You can prep the sliced, panko-coated mac wedges up to 24 hours ahead, stored in a single layer on a lined tray in the fridge. Fry them right before serving for the best crunch—they only take 3-4 minutes per side, so you can crank out a big batch quickly without sacrificing texture.
11.My leftover mac and cheese has mix-ins like bacon or broccoli—will that ruin the recipe? ▾
Not at all! Mix-ins like cooked bacon, roasted broccoli, diced ham, or caramelized onions work beautifully, as long as they were mixed into the original mac and cheese and chilled with it. Just avoid very wet add-ins like runny salsa, which can make wedges fall apart when frying.
12.How do I tell when my pan is the right temperature to add the mac wedges? ▾
Heat your butter over medium-high heat until it’s fully melted, foamy, and just starting to turn pale golden. Toss a single panko crumb into the pan—if it sizzles immediately and browns in about 10 seconds, the pan is perfectly ready. If the crumb burns instantly, turn the heat down slightly.
13.Can I freeze uncooked, breaded mac wedges to fry later for quick meals? ▾
Yes! Arrange the breaded, uncooked wedges in a single layer on a baking sheet, freeze until solid, then transfer to a freezer bag for up to 3 months. Don’t thaw them before frying—cook straight from frozen over medium heat for 5-6 minutes per side so the center heats through without burning the crust.
14.What’s the best way to reheat leftover fried mac and cheese if I have extra? ▾
Skip the microwave, which will turn the crust soggy and the interior rubbery. Reheat wedges on a wire rack in a 375°F oven for 8-10 minutes, or air fry at 375°F for 4-5 minutes, until the crust is crisp again and the center is hot and creamy all the way through.
15.Do I need to add extra seasoning to the panko coating? ▾
It depends on how seasoned your original leftover mac and cheese is. At minimum, a pinch of black pepper and garlic powder in the panko adds great depth, but taste a crumb first—if your original mac was heavily salted or spiced, you won’t need much extra to avoid over-seasoning.
16.Why is cheese oozing out of my wedges while I’m frying them? ▾
A little cheese oozing is normal and creates delicious crispy frico bits on the pan, but excessive oozing means your wedges were either sliced too thin, the pan was too hot, or the mac wasn’t chilled long enough to set fully. Let the next batch chill longer, and adjust heat to medium-high instead of high.
17.Do I need a cast iron skillet to make these, or will a nonstick pan work? ▾
Both work great! Cast iron retains heat really evenly for a consistent, crisp crust, but a heavy-bottomed nonstick pan will also give you great results with less risk of panko sticking. Just avoid thin, lightweight pans that create hot spots, which burn crust in patches before the center warms.
18.What are the best dipping sauces to serve with these crispy mac wedges? ▾
These pair perfectly with classic dips like spicy marinara, ranch dressing, honey mustard, or a quick cheddar cheese sauce thinned with a splash of whole milk. For a fun twist, try a drizzle of hot honey or a sprinkle of flaky sea salt right after frying to cut through the rich, creamy cheese.

Comments (15)

2 days ago

OMG this is a total game changer! I had a whole container of leftover baked mac from Sunday family dinner sitting in the fridge, and I was just gonna toss it because no one eats reheated mushy mac. Tried this last night, 12 minutes flat, got that perfect crispy crust on the outside, gooey in the middle. My oldest asked for thirds! Pro tip: I dipped mine in a little ranch, chef's kiss.

yesterday

Wait the ranch dip idea is genius! I usually just squirt ketchup on mine but I'm definitely trying ranch next time I make this

yesterday

So glad your boys loved it! The ranch dip hack is such a fun add—lots of folks also love a side of hot honey for a sweet-savory kick too

3 days ago

As someone who meal preps big batches of mac and cheese for the week, this has saved my lunches. I used to just zap it in the microwave and end up with that weird rubbery cheese texture, but pan frying it in a little butter? SO good. Even my picky 7 year old asked if we can have "crunchy mac" every night now.

2 days ago

That makes our day! This recipe is perfect for meal prep leftovers—just make sure your mac is fully chilled before slicing it into patties and it’ll hold together perfectly every time

1 week ago

Brought these cut into bite-sized squares to our neighborhood potluck last weekend and they were gone in 10 minutes flat! People kept asking where I got the "fancy fried mac bites" and I was like, it's just leftover mac from dinner two nights ago lmao. So easy, zero waste, total crowd pleaser.

5 days ago

Wait bite-sized for potlucks? Why didn't I think of that? I was gonna make a big tray of regular mac for our cookout this weekend, I'm gonna make extra just to fry these up as appetizers now

5 days ago

We love the bite-sized potluck hack! If you’re making them for a crowd, you can fry them a couple hours ahead and keep them warm in a 200F oven until it’s time to serve—they stay perfectly crispy

5 days ago

Broke college student win! I had leftover mac from the dining hall I stashed in my mini fridge, fried it up in the tiny pan in my dorm kitchen. Took like 10 minutes, no fancy ingredients needed, tasted better than the actual dining hall meal. 10/10, will be making this every time I can sneak extra mac out of the caf.

3 days ago

LMAO I do the exact same thing with dining hall leftovers! Pro tip if you sneak a little hot sauce from the caf too, drizzle it on top, total game changer

30 minutes ago

Quick question—if I make a big batch of mac specifically to fry these, how long do I need to chill it in the fridge before it's firm enough to pan fry without falling apart? I tried it once with just cooled mac and it turned into a cheesy crumbly mess, still tasted good but not the cute crispy patties I was going for.

5 minutes ago

Great question! For the best texture, chill your mac and cheese for at least 4 hours (overnight is even better) so it firms up completely. If you’re short on time, you can pop scoops in the freezer for 20 minutes before frying and that works too!

2 weeks ago

Now this is the trick my mom used to do back in the day! Everyone thinks leftover mac is only for microwaving, but a little butter in a cast iron, fry it up till the edges are crispy? Tastes just like the comfort food I grew up on. My grandbabies had no idea it was leftovers, they thought I made a whole new special meal.

1 week ago

My grandma did the exact same thing with cast iron! Nothing beats that crispy edge you get from a well-seasoned pan, so much better than any fancy restaurant fried mac

yesterday

Wait a second, I used the leftover vegan mac I made (you know, the one with the cashew cheese that gets weird when you microwave it) and this actually worked? Got it crispy on both sides, didn't fall apart, even my roommate who hates vegan food stole a bite and said it was good. Wild.

2 hours ago

Wait I have leftover vegan mac in my fridge right now! Did you use olive oil or butter to fry it? I don't want it to stick

30 minutes ago

I used a little vegan butter and a nonstick pan, cooked it on medium low so it had time to crisp up before flipping! Worked like a charm

5 minutes ago

This is going into my regular weeknight rotation for real. 12 minutes, no weird ingredients, uses up leftovers so I don't waste food? Sign me up. I added a little sprinkle of panko on top while the second side was frying for extra crunch, highly recommend.

just now

Love the panko sprinkle hack! That extra crunch sounds incredible—thanks for sharing the tip with other readers

2 days ago

Tried this last night with the leftover lobster mac we had from our anniversary dinner, and oh my GOD. The crispy pan sear made the lobster bits taste even better, like a fancy upscale appetizer but zero extra work. My partner thought I spent forever making a new dish, I didn't have the heart to tell him it was just leftovers.

yesterday

Lobster mac fried up? That sounds insane, I'm definitely making extra lobster mac next date night just so I have leftovers to do this

2 hours ago

Wait, can you use frozen leftover mac for this? I made the fresh leftover version last week and it was amazing, but I froze individual portions for quick meals. Do I need to thaw them first or can I fry it straight from frozen? I'm lazy and don't want to wait for thawing if I don't have to lmao.

30 minutes ago

I tried it from frozen once! I cooked it on lower heat, covered the pan for the first 5 minutes so the middle thawed, then uncovered to crisp up the sides. Worked great, no thawing needed

5 minutes ago

That’s exactly the method we recommend for frozen portions! Low heat, covered to thaw the center, then crank the heat a touch at the end to get that perfect crispy crust. No thaw time required, perfect for quick meals

1 week ago

My kid who only eats plain buttered pasta and chicken nuggets ate two whole servings of this tonight. I didn't even tell him it was leftover mac from last night, he just kept saying "crunchy pasta is the best". Total mom win, no food waste, happy kid. 10/10.

3 days ago

Made these before a day hike last weekend, wrapped them in foil, and they were still crispy when we stopped for lunch at the summit. Way better than the sad granola bars I usually pack. Will be adding these to my trail meal rotation for sure.

yesterday

As someone who's been trying to cut down on food waste to save money, this recipe is a total godsend. I used to throw out at least half a container of leftover mac every time I made it because no one wanted to eat the reheated mushy version, and now we fight over who gets the last crispy piece. So simple, so cheap, zero fancy equipment needed.

5 days ago

Made these for game day last Sunday, cut into sliders with a little pulled pork on top? *Chef's kiss.* My friends were raving the whole game, kept asking for the recipe. Who knew leftover mac could end up being the best snack of the whole watch party?

2 weeks ago

Tossed a little extra cajun seasoning and a dash of hot sauce into the pan while frying these, and wow. That little kick of heat pairs so perfectly with the crispy cheese crust. If you like spicy food, don't sleep on adding your favorite seasoning, it takes this to a whole new level.



