
lithuanian bacon buns

title 1
lithuanian bacon buns
⏱️ cook time 20 minutes
🍽️ servings 6
⚡ Difficulty medium

intro

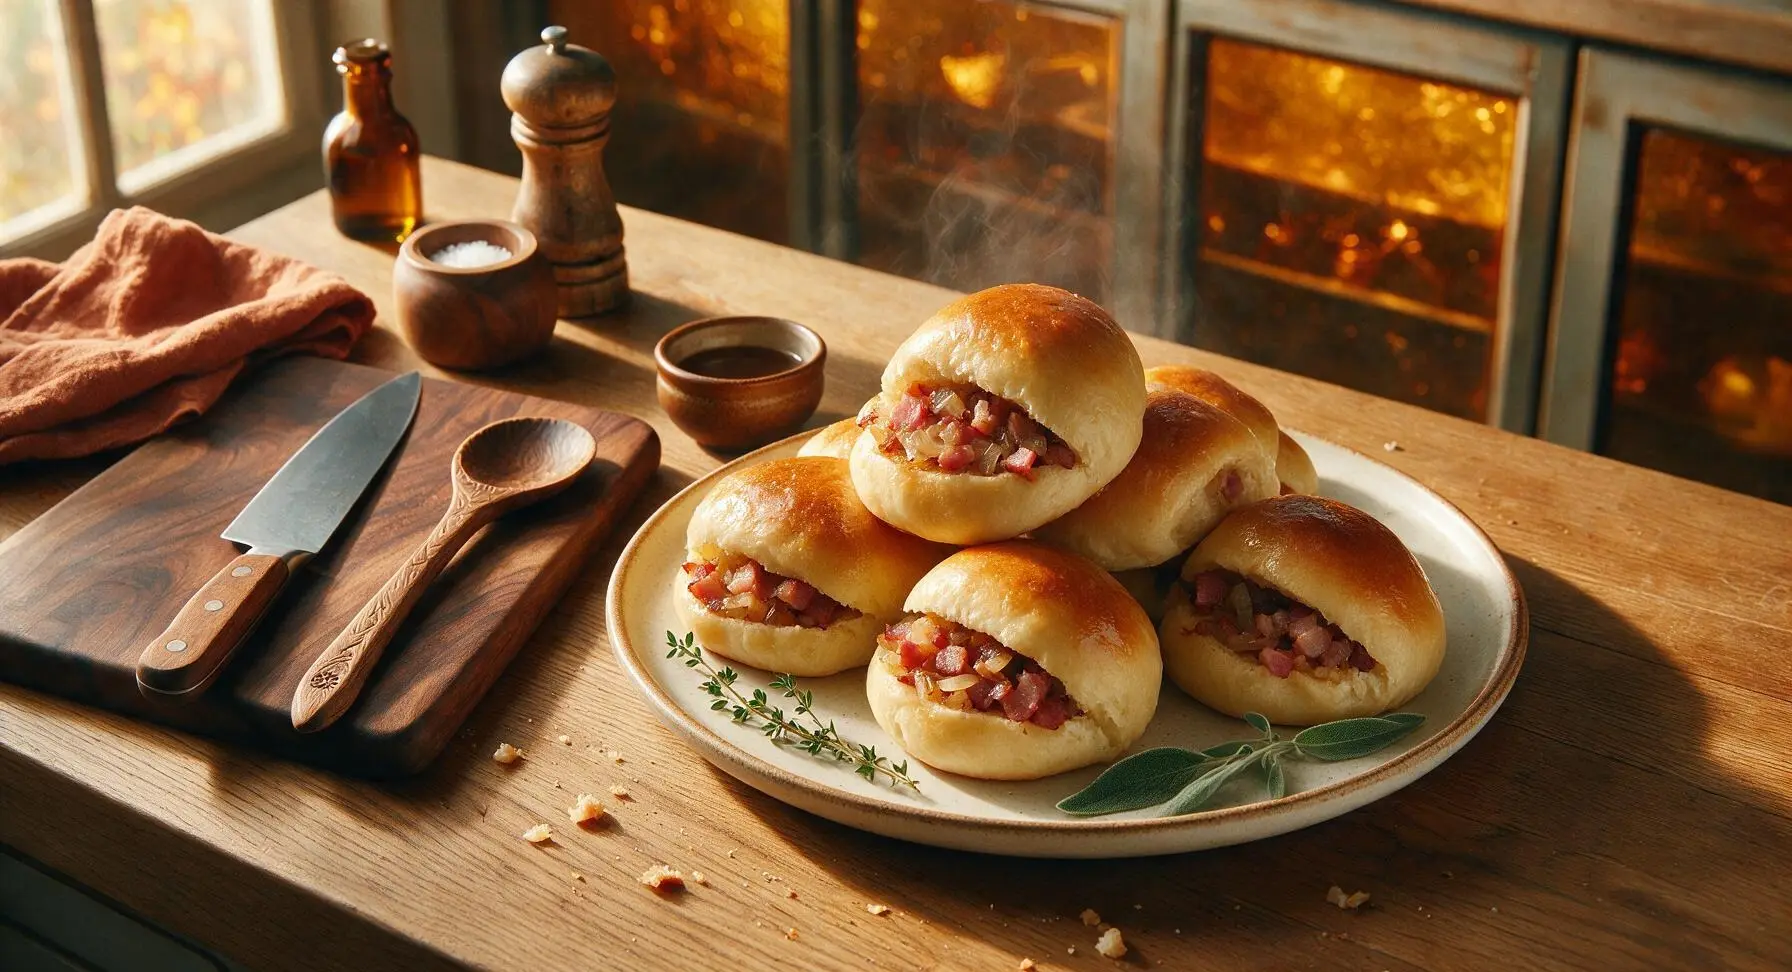
Soft, pillowy yeast buns stuffed with smoky diced bacon and sautéed onion, these traditional Lithuanian treats are golden, buttery, and perfect for cozy winter holiday gatherings.

Ingredients
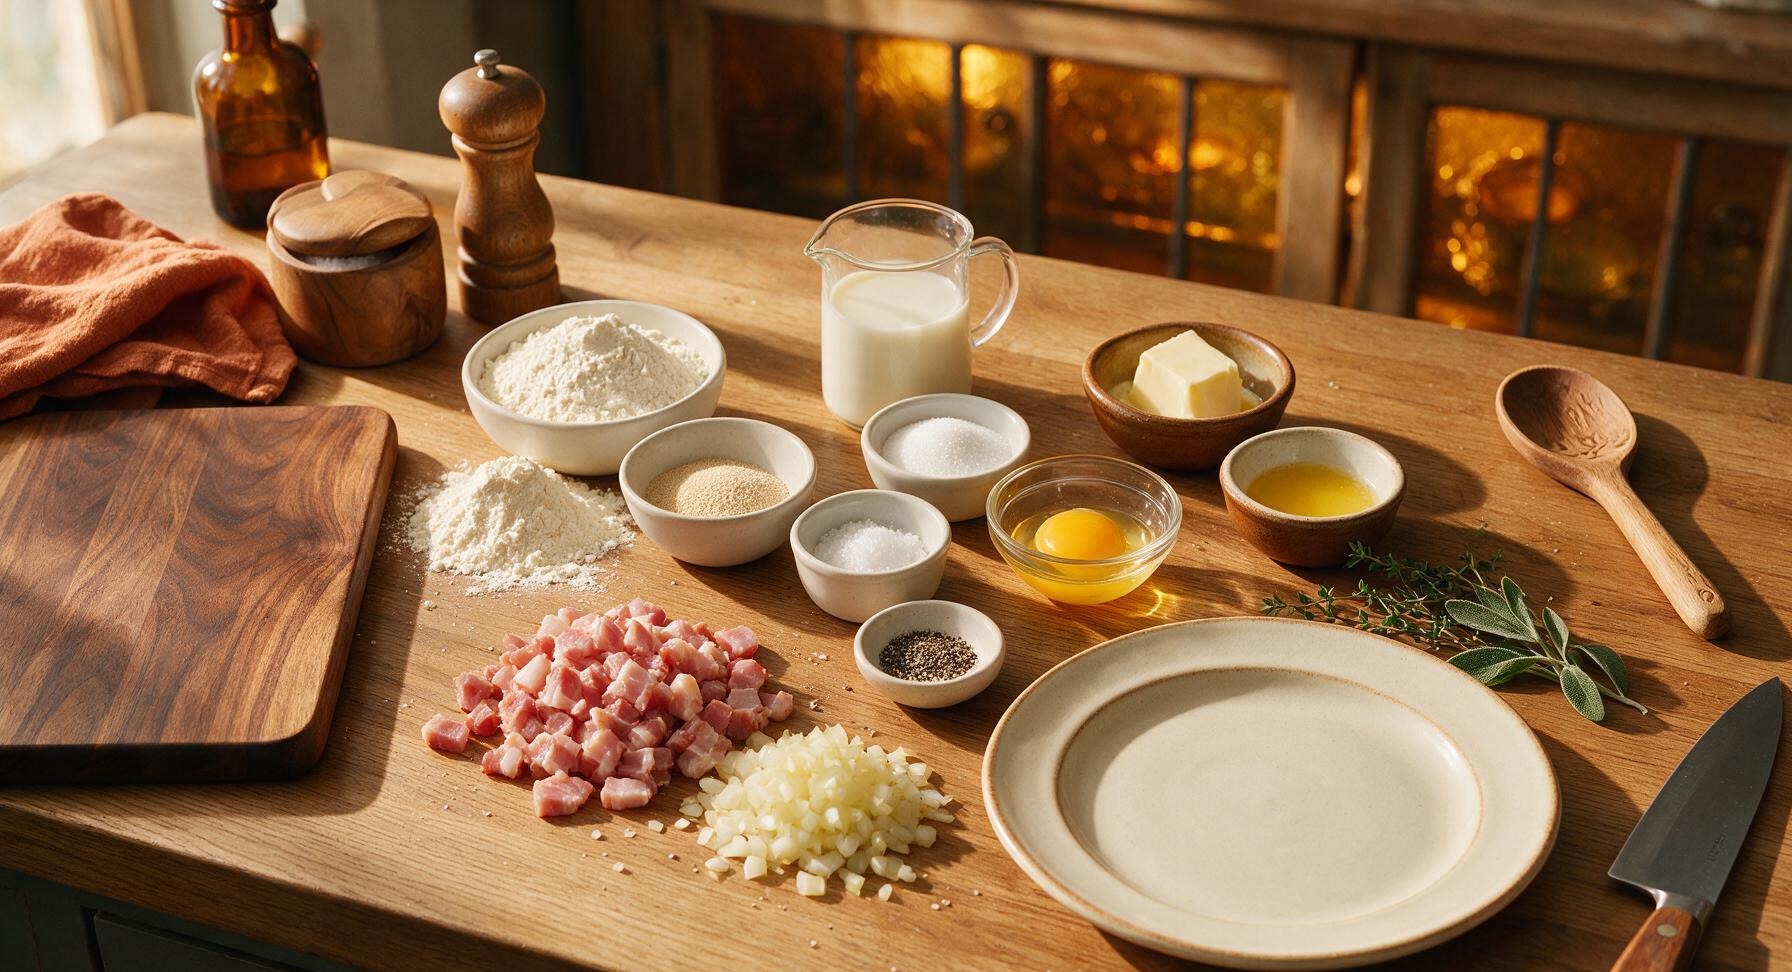
All-purpose flour 3 1/2 cups (440g)
Instant dry yeast 2 1/4 tsp (7g, 1 standard packet)
Whole milk, warmed to 110°F (43°C) 1 cup (240ml)
Granulated sugar 1 tbsp (12g)
Unsalted butter, melted and cooled 3 tbsp (42g)
Large egg, room temperature 1 each (50g)
Fine sea salt 1 tsp (5g)
Smoked bacon, diced into 1/4-inch pieces 8 oz (225g)
Yellow onion, finely diced 1 medium (150g)
Freshly ground black pepper 1/2 tsp
Unsalted butter, melted (for topping) 1 tbsp (14g)

Steps

1

Mix the yeast dough

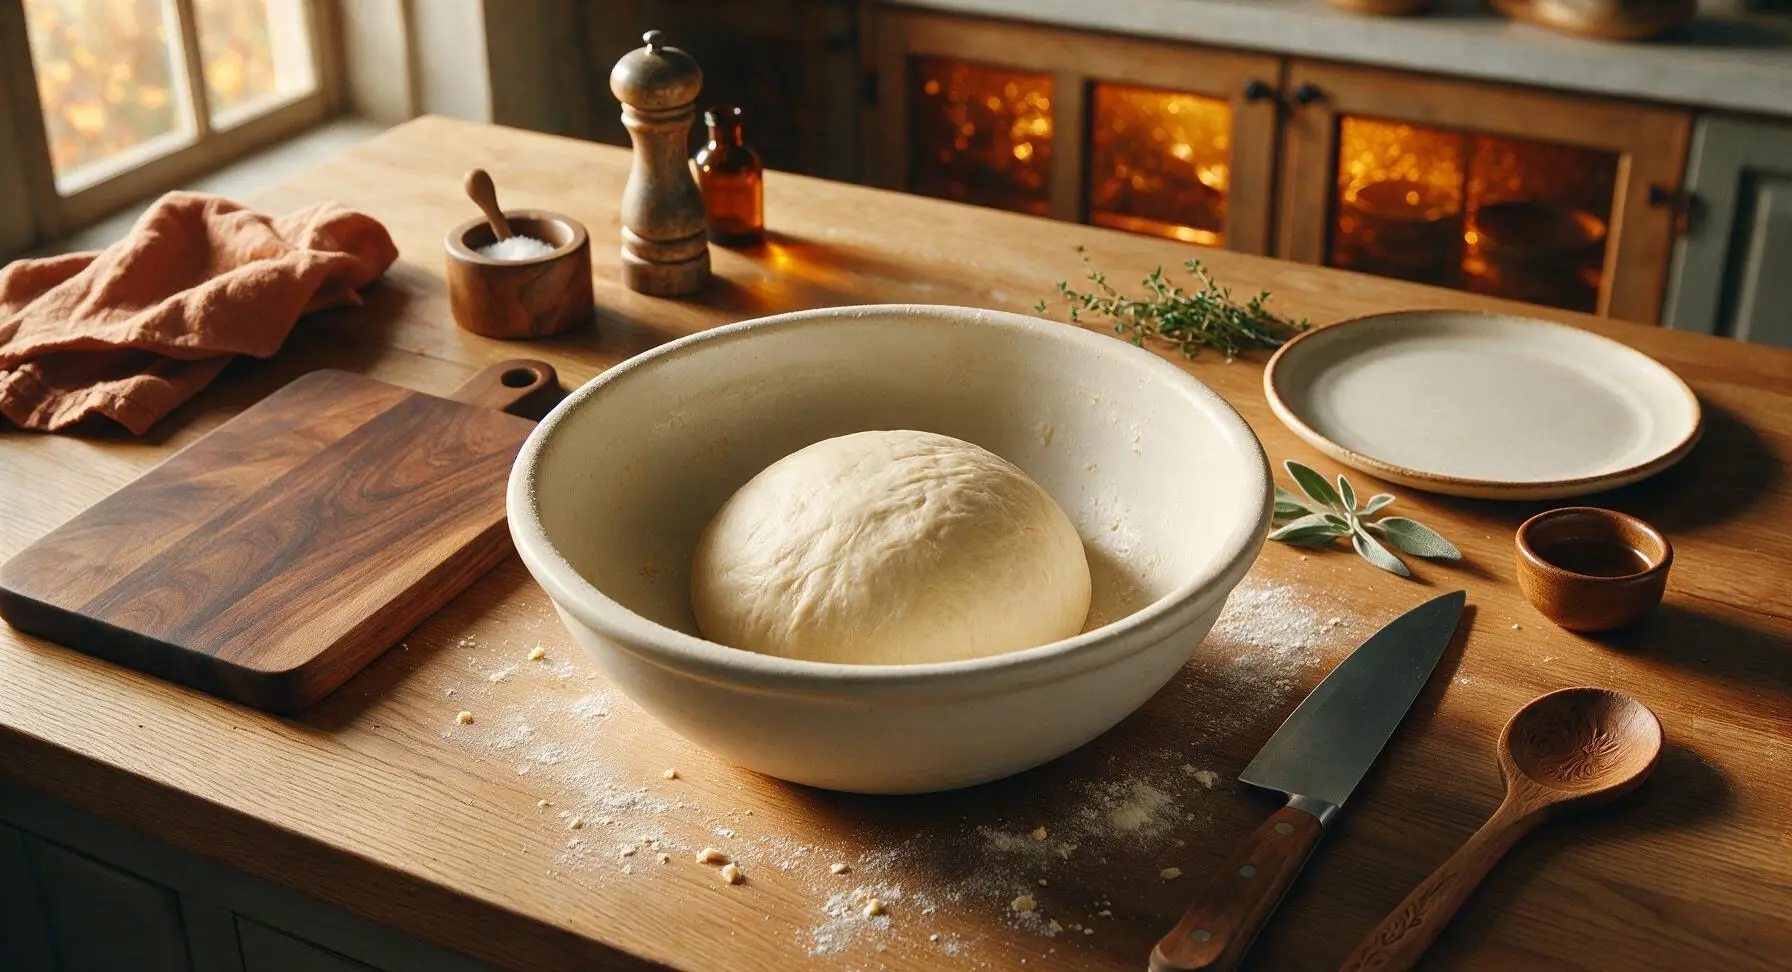
In the large cream white ceramic mixing bowl, combine warm 110°F (43°C) whole milk, granulated sugar, and instant yeast. Let sit 5 minutes until a foamy layer forms on top to confirm the yeast is active. Add cooled melted butter, room temperature egg, and fine sea salt, stirring with the light oak wooden spoon to combine evenly. Gradually add all-purpose flour, ½ cup at a time, stirring until a shaggy, slightly sticky dough forms. Turn dough out onto a lightly floured section of the counter and knead for 7 minutes until smooth, elastic, and only slightly tacky to the touch. Form the dough into a tight ball, place it back into the lightly greased mixing bowl, and cover with a clean kitchen towel to rise.

Step 1
step1:Mix the yeast dough
Step 1
step1:Mix the yeast dough
2

Cook the bacon filling

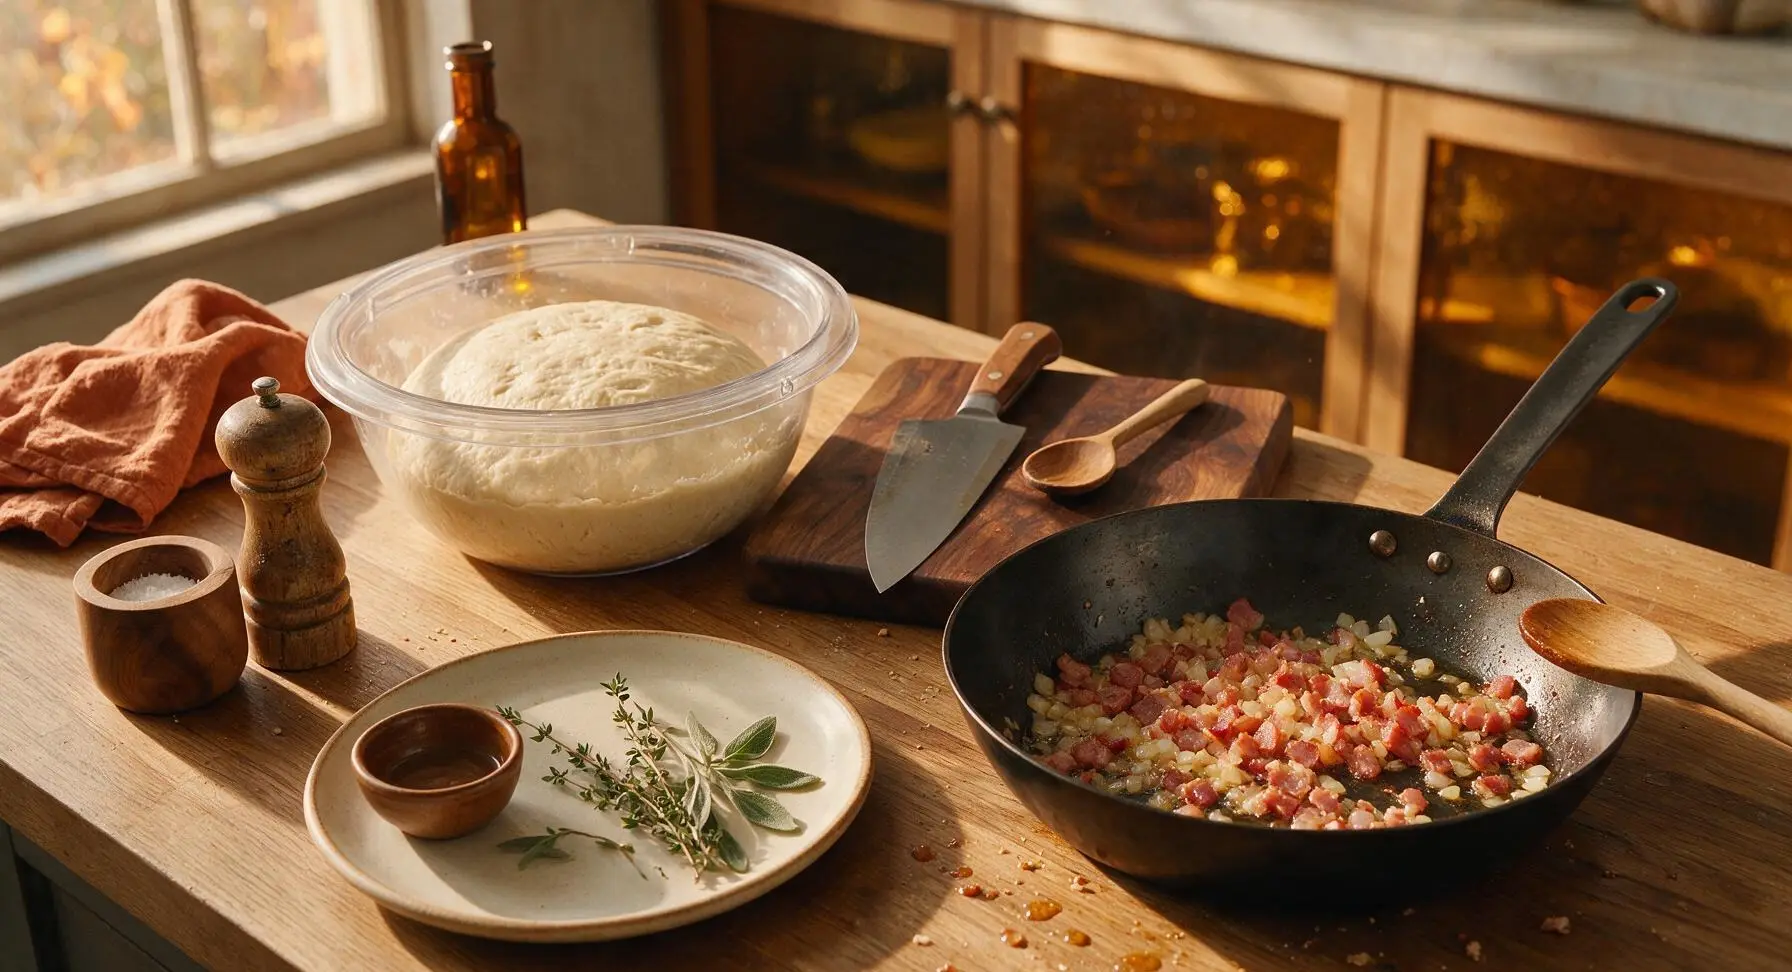
While the dough rests and rises for 1 hour in a warm, draft-free spot (until doubled in bulk), heat the seasoned 20cm carbon steel skillet over medium heat. Add diced smoked bacon and cook for 5 minutes until fat renders and edges start to crisp. Add finely diced yellow onion to the skillet, stirring with the wooden spoon, and cook for 8 more minutes until onion is soft and translucent with no raw bite. Stir in freshly ground black pepper, then transfer the filling to a small plate to cool completely—warm filling will melt dough and cause leaks during baking.
Step 2
step2:Cook the bacon filling
3

Portion the dough

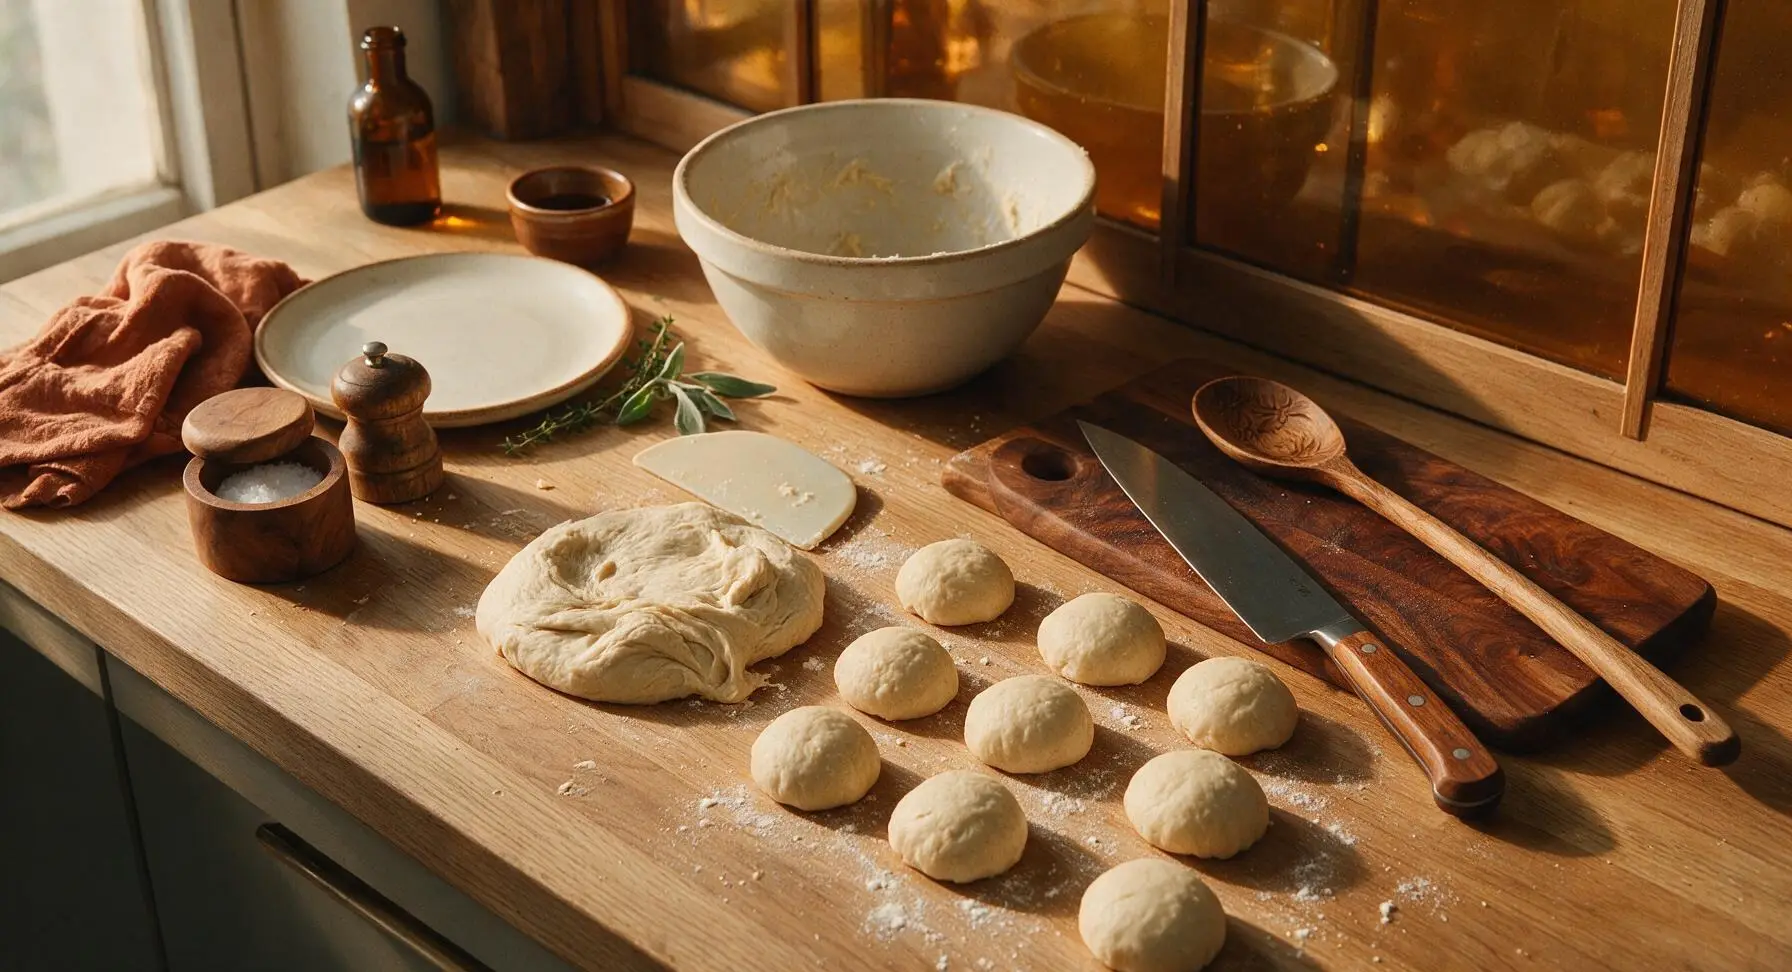
Once the dough has doubled in size (test by poking a floured finger 1 inch into the dough; the indent should remain without bouncing back), uncover the bowl and use the silicone dough scraper to turn the dough out onto a lightly floured counter surface. Punch the dough firmly to release all trapped air, then divide it into 12 equal portions (each about 55g), rolling each portion into a tight, smooth ball. Cover the dough balls loosely with the linen towel and let them rest for 10 minutes to relax the gluten, which makes shaping easier and prevents the dough from shrinking back when rolled.
Step 3
step3:Portion the dough
4

Shape filled buns

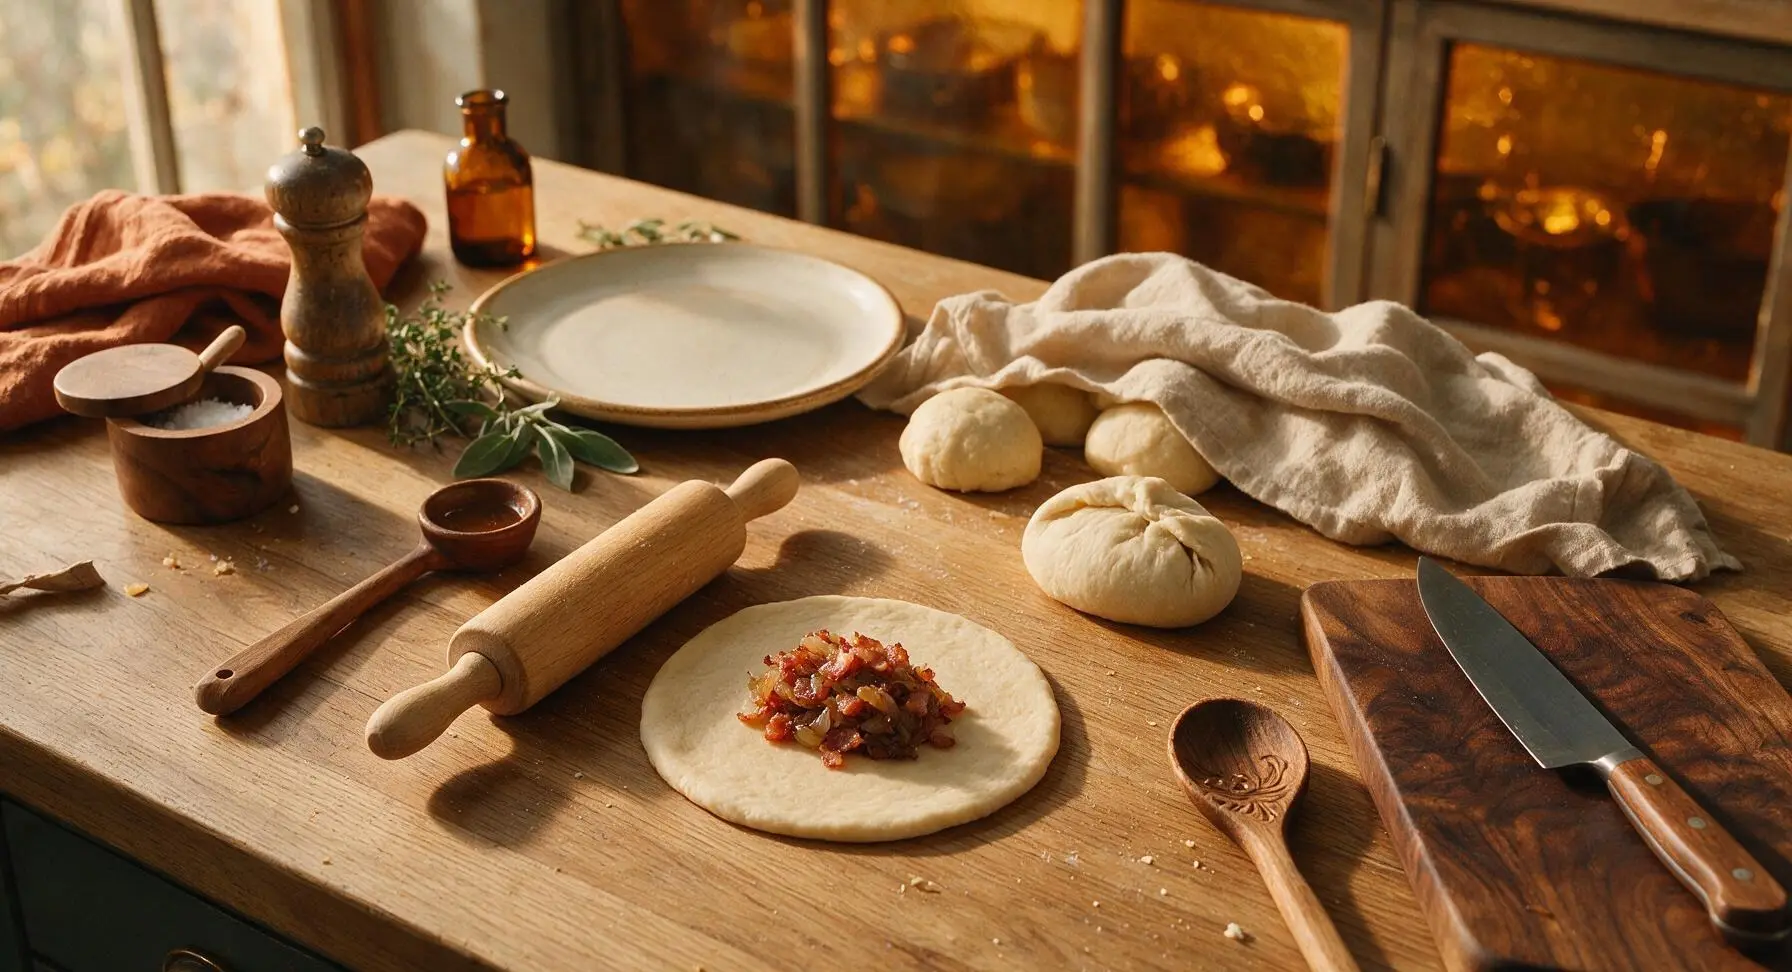
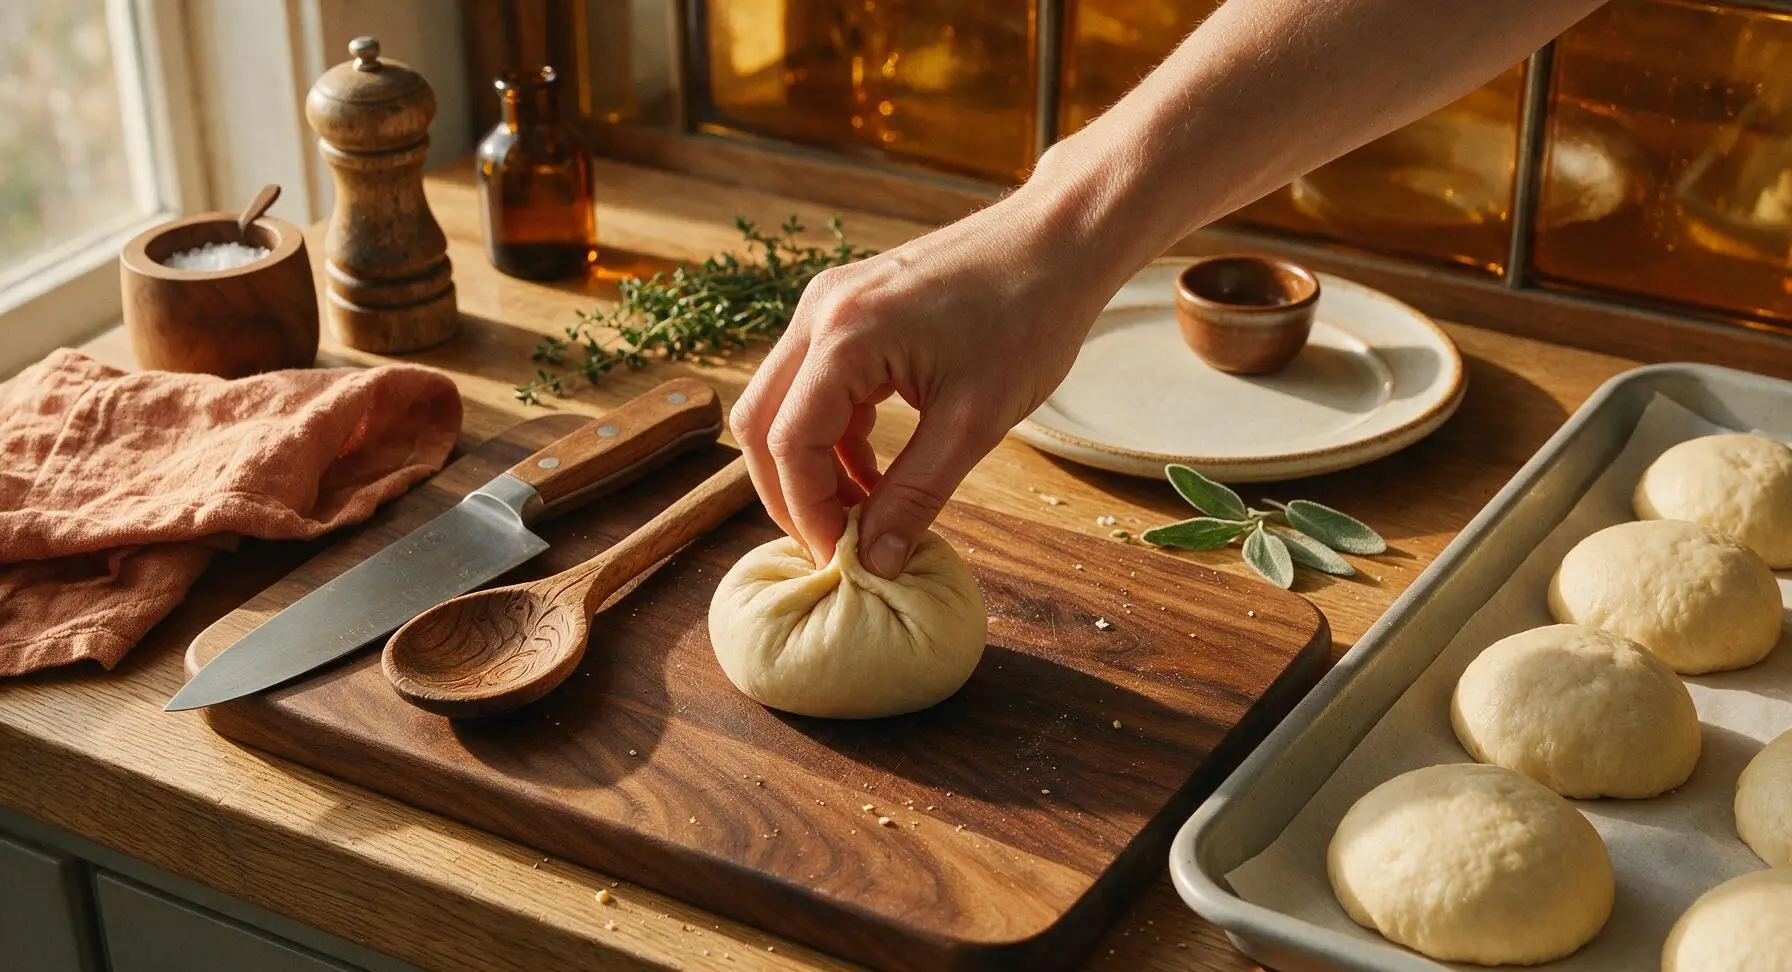
Working with one relaxed dough ball at a time (keep remaining balls covered with the towel to prevent drying), use the small oak rolling pin to roll each ball into a 10cm (4-inch) circle, slightly thicker in the center and thinner at the edges to prevent filling leaks. Place 1 heaping tablespoon of the cooled bacon and onion filling in the center of each dough circle. Pull the edges of the dough up and over the filling, pinching firmly to seal completely into a round, plump bun, making sure no gaps remain for filling to leak out during baking.
Step 4
step4:Shape filled buns
Step 4
step4:Shape filled buns
5

Let buns proof

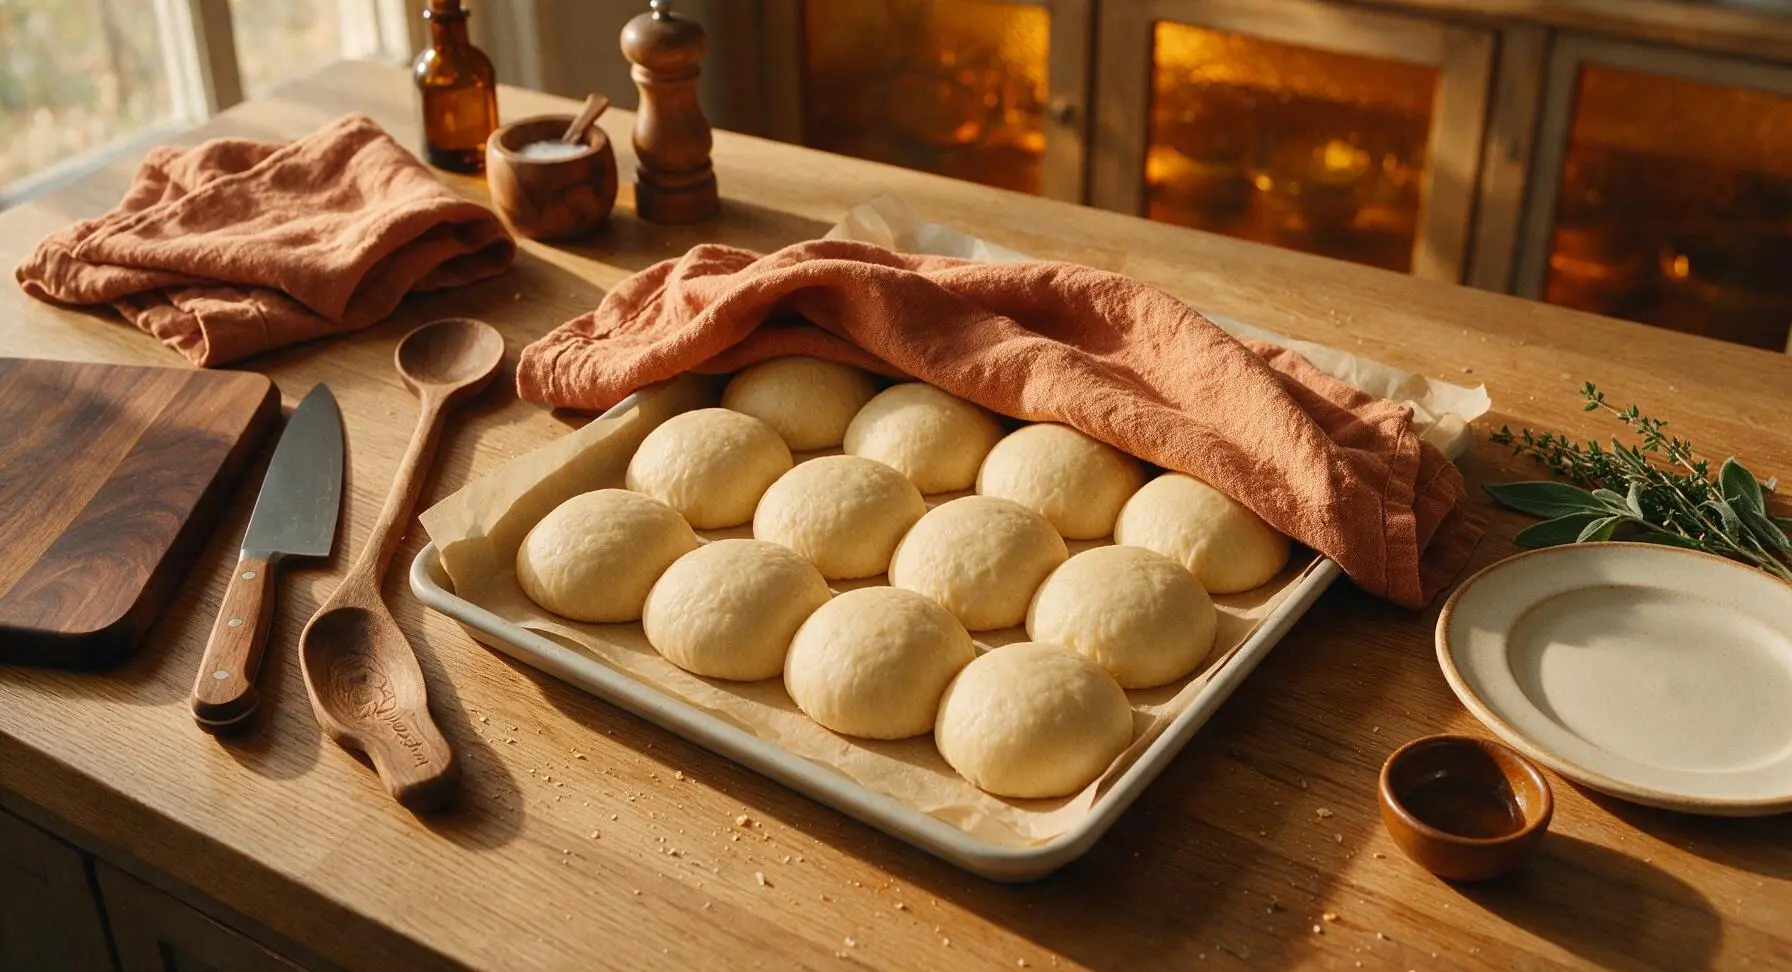
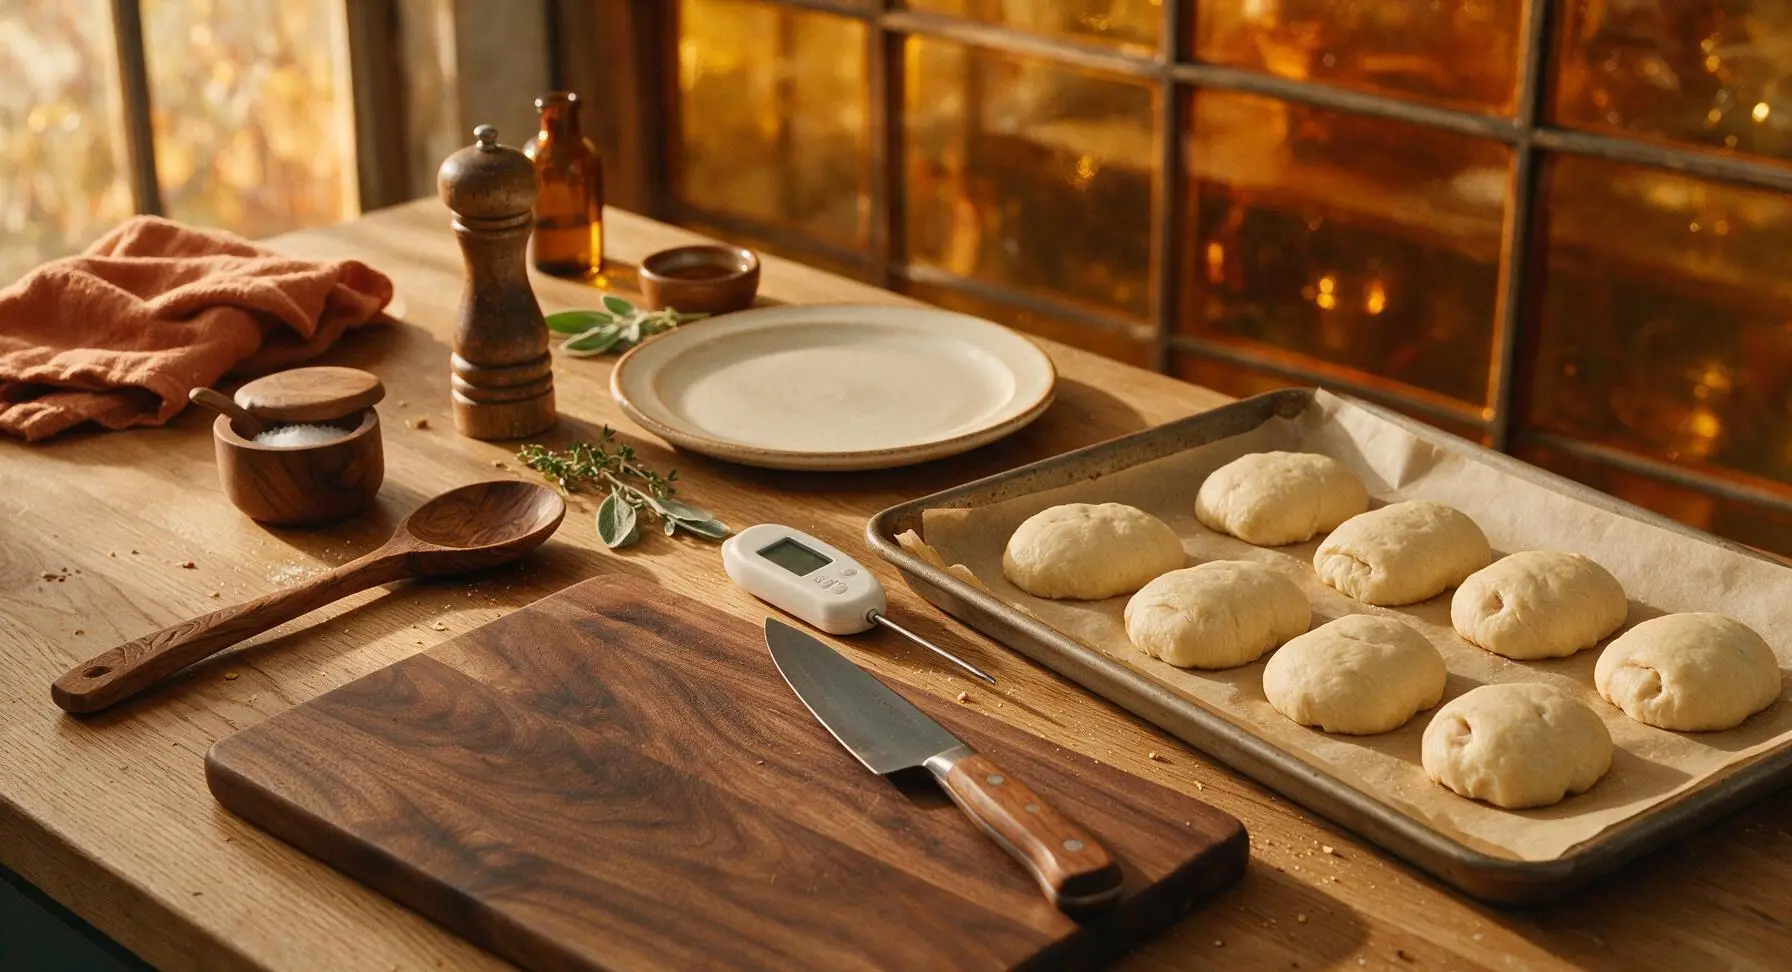
Arrange all shaped buns seam-side down on the parchment-lined rimmed baking sheet, leaving 5cm (2 inches) of space between each bun to allow for expansion. Cover loosely with the linen towel and let them proof in a warm, draft-free spot for 25 minutes, until puffy and increased in size by 50%. When ready to bake, the buns will hold a slight indent when gently pressed with a finger, without springing back fully. While the buns proof, preheat the oven to 375°F (190°C) with a rack in the center position.
Step 5
step5:Let buns proof
6

Bake the buns

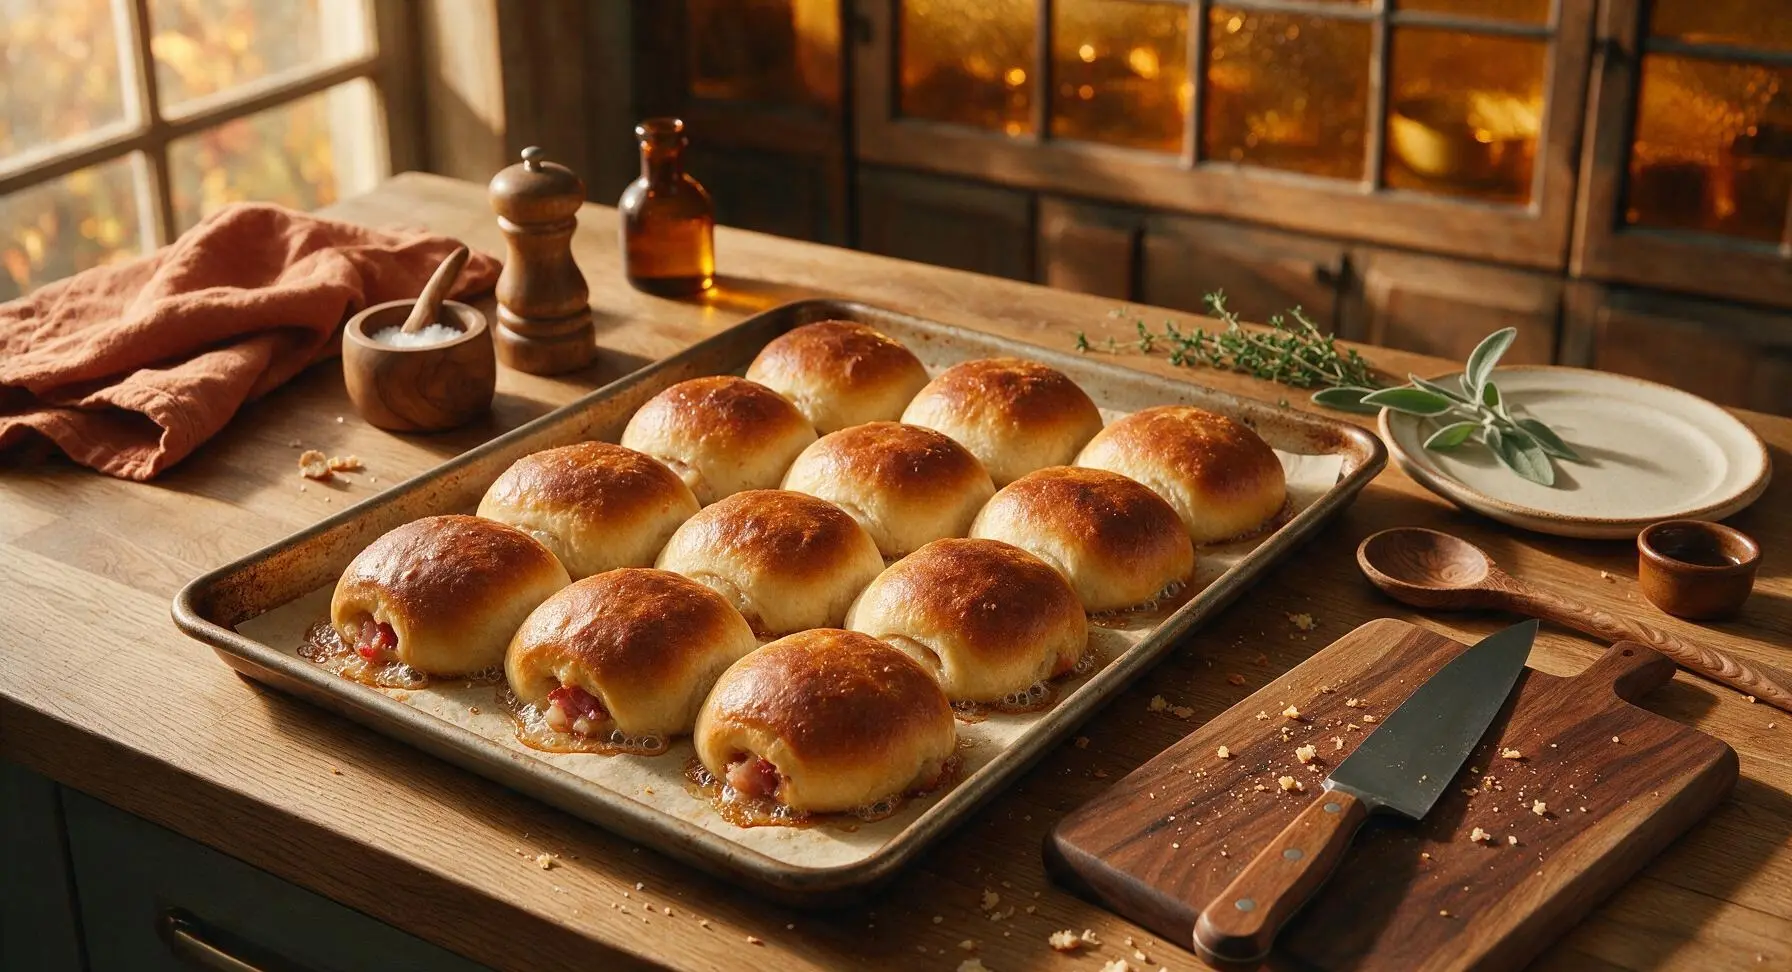
Uncover the proofed buns, and bake on the center oven rack for 18-20 minutes, until tops are deep golden brown, and the internal temperature of the dough reaches 190°F (88°C) when checked with the instant-read thermometer. Rotate the baking sheet halfway through baking to ensure even browning. Avoid overbaking, which will make the buns dry instead of soft and pillowy.
Step 6
step6:Bake the buns
Step 6
step6:Bake the buns
7

Butter and cool

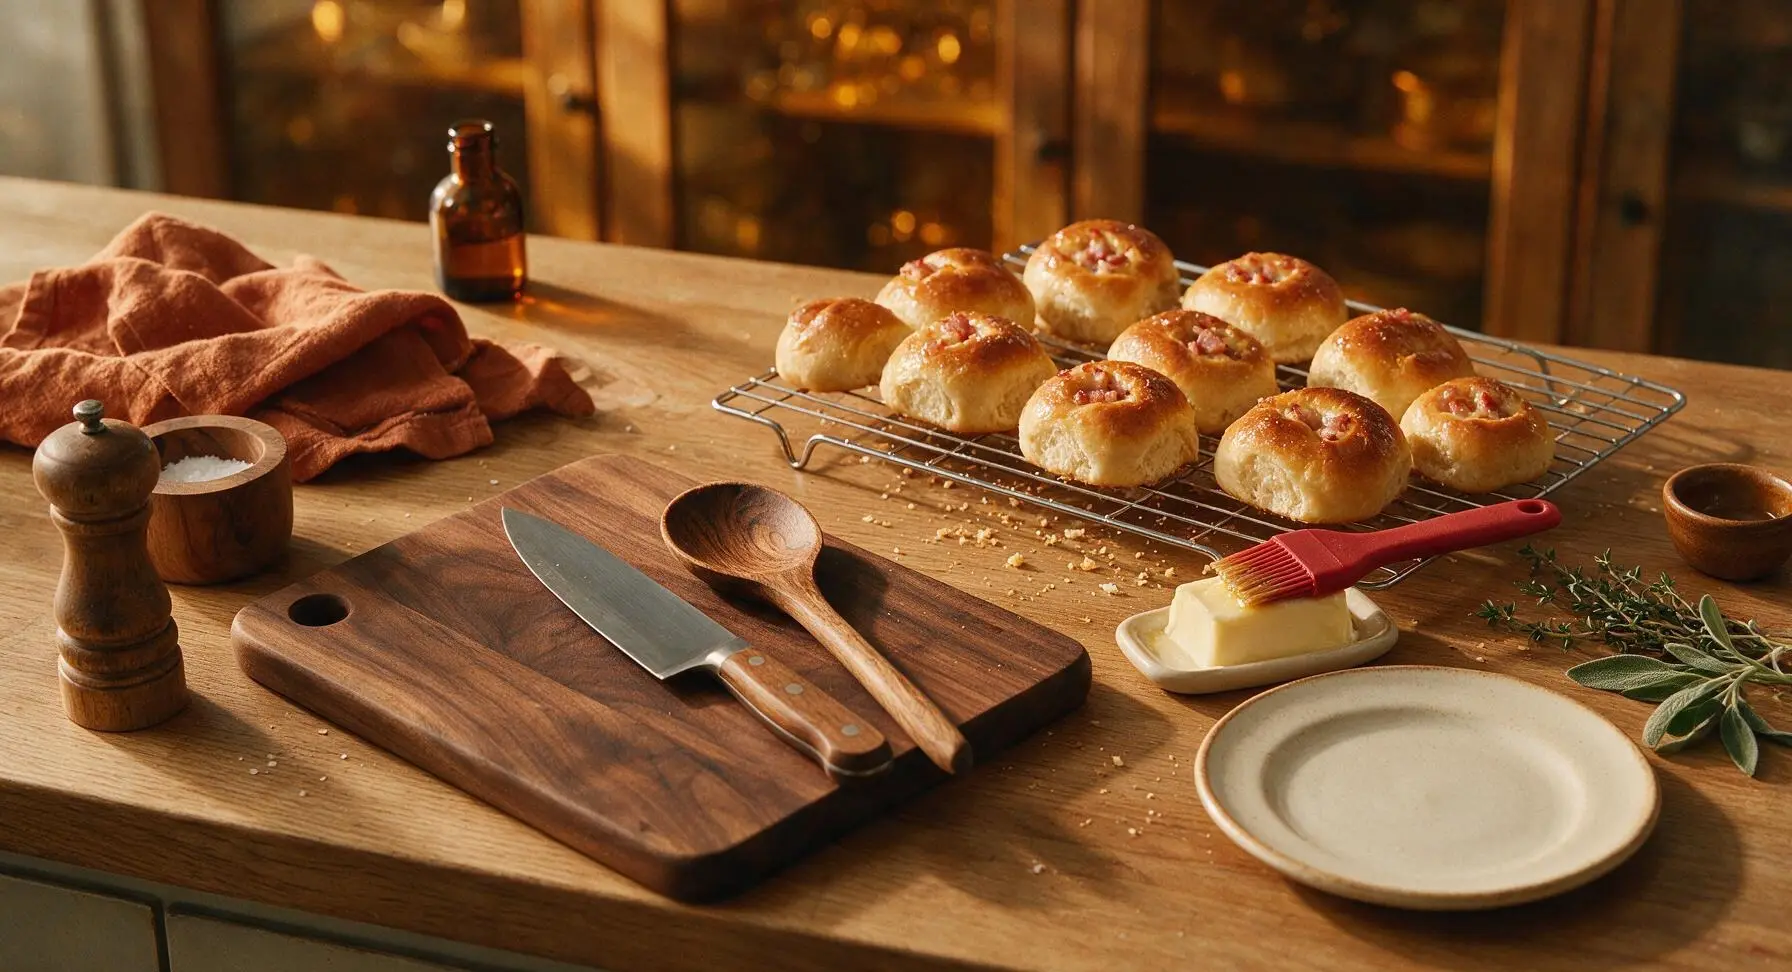
As soon as the buns come out of the oven, use the silicone pastry brush to brush the tops generously with the remaining 1 tablespoon of melted unsalted butter, which gives the buns a soft, glossy crust and rich, buttery flavor. Transfer the buns to the chrome wire cooling rack, and let them cool for 5 minutes before serving—these buns are best served warm, not piping hot.
Step 7
step7:Butter and cool

Tips

1.Always let the bacon-onion filling cool completely before stuffing the dough: warm filling melts the dough’s butter content, splits sealed seams during baking, and creates soggy bun bottoms that lose their soft, pillowy texture.
2.Do not rush the dough rising and proofing steps: fully fermented dough creates light, airy buns, while shortened rise time results in dense, tough rolls that do not expand properly in the oven. The finger indent test is far more reliable than strict timing for judging risen dough readiness.
3.Pinch bun seams repeatedly to create a tight, gapless seal: even a tiny opening will allow hot rendered bacon grease to leak out during baking, which burns on the baking sheet and leaves the buns dry with less savory filling inside.


✨ You May Also Like

Desserts & Baking
🍜 Italy

Creamy, coffee-kissed classic Northern Italian no-bake dessert, with layers of rum-spiked mascarpone cream, soft ladyfingers, and a rich cocoa dusting.

⏱️ 4 hours 3Desserts & Baking ★ 4.7
Desserts & Baking
🍜 France

Flaky, shatteringly crisp, buttery French croissants with golden exteriors and soft, airy layered interiors, perfect for pairing with coffee for a special morning treat.

⏱️ 12 hours Desserts & Baking ★ 4.5
Desserts & Baking
🍜 United States

Warm, spiced baked apples topped with a fluffy golden biscuit crust, this cozy dessert pairs perfectly with vanilla ice cream for cool-weather comfort.

⏱️ 55 minuteDesserts & Baking ★ 4.6
Desserts & Baking
🍜 United States

A star-spangled classic American blueberry pie with buttery flaky crust and bright sweet-tart filling, perfect for summer patriotic gatherings.

⏱️ 1 hour 25Desserts & Baking ★ 4.7
Desserts & Baking
🍜 United States

A beloved no-bake regional Maine candy with a chewy coconut-potato center coated in rich dark chocolate, a New England holiday staple since the 1870s.

⏱️ 2 hours 3Desserts & Baking ★ 4.8
Desserts & Baking
🍜 France

Luxuriously creamy, floral frozen custard made with aromatic Tahitian vanilla beans, boasting a smooth, rich texture that melts slowly on the tongue.

⏱️ 3 hours 3Desserts & Baking ★ 4.5

lithuanian bacon buns:Frequently Asked Questions

1.What sets Lithuanian bacon buns (Bandelės su Lašiniais) apart from other savory stuffed yeast buns? ▾
These buns stand out for their perfect balance of soft, slightly sweet pillowy yeast dough and a simple, rich filling of smoky diced bacon and sautéed onion—no heavy cheese or fussy seasonings to muddle the flavor. They’re a beloved cozy Lithuanian holiday staple, meant to be buttery, not greasy, with a delicate golden crust from the dough’s melted butter.
2.Why do I need to warm my whole milk to exactly 110°F (43°C) for the dough? ▾
That temperature is the sweet spot for instant dry yeast to activate reliably without dying off. If milk is cooler than 105°F, yeast will wake too slowly and lead to dense, flat buns; if it’s hotter than 115°F, it will kill the yeast entirely, leaving you with dough that never rises. A quick instant-read thermometer check takes all the guesswork out.
3.Can I use active dry yeast instead of instant dry yeast for this recipe? ▾
Absolutely! Swap instant yeast for active dry yeast at a 1:1.25 ratio (use 25% more active dry than the recipe calls for), and proof it in the warm milk with a pinch of sugar for 5 to 7 minutes first, until foamy on top, before mixing into the rest of the dough. It will produce the same soft, fluffy final result.
4.Do I need to cook the bacon and onion before stuffing the buns? ▾
Yes, always precook both filling components first. Dice bacon and cook until it just starts to crisp, then sauté diced onion in a little rendered bacon fat until soft and golden. Let the filling cool completely before stuffing—hot filling will melt dough prematurely and cause messy leaks while the buns proof and bake.
5.How do I keep the bacon filling from leaking out of the buns while baking? ▾
First, make sure your cooled filling is well-drained so excess bacon grease doesn’t seep through the dough. When sealing, pinch dough edges tightly all the way around the filling mound, then set buns seam-side down on your baking sheet. Give the sealed seam a quick extra pinch right before proofing to catch any loose spots.
6.Can I make the dough ahead of time to save prep work for a gathering? ▾
Definitely! After the first rise, punch the dough down, wrap it tightly in plastic wrap, and store it in the fridge for up to 24 hours. When you’re ready to assemble, let the dough come back to room temperature for about 30 minutes before portioning, stuffing, and completing the second rise right before baking.
7.What kind of bacon works best for the most authentic flavor? ▾
For the closest match to traditional Lithuanian lašiniai, look for thick-cut, smoky, lightly cured bacon without added sweeteners like maple or honey. If you can find Eastern European smoked pork belly at a local European market, that’s even better—it has the deep, wood-smoked savoriness that defines these classic buns.
8.My dough didn’t double in size during the first rise—what went wrong? ▾
The most common culprits are expired yeast, milk that was too hot and killed the yeast, or a rising spot that’s too cold. Yeast thrives at 75 to 80°F, so set your covered dough bowl in a turned-off oven with the light on if your kitchen is chilly. If your yeast is expired, you’ll need a fresh packet to get that soft, pillowy texture.
9.Can I freeze fully baked bacon buns for later? ▾
Yes, these freeze beautifully! Let fully baked buns cool completely to room temperature, then wrap them individually in plastic wrap and tuck them into a labeled freezer bag for up to 3 months. Reheat straight from the freezer in a 350°F oven for 8 to 10 minutes, wrapped loosely in foil, until soft and warmed through.
10.Do I need to brush the buns with anything before baking to get that golden crust? ▾
For the classic glossy, golden, buttery top, brush proofed buns lightly with a little extra melted unsalted butter right before they go in the oven. If you want a deeper, shinier crust, you can swap the butter for an egg wash of 1 whole egg beaten with 1 tablespoon of whole milk, though traditional versions use plain melted butter.
11.Can I use bread flour instead of all-purpose flour for a chewier bun? ▾
You can, but know it will shift the traditional texture slightly. All-purpose flour creates that signature soft, pillowy, tender crumb these buns are known for, while bread flour’s higher protein content produces a chewier, sturdier bun. If you swap, hold back 2 tablespoons of milk at first to account for bread flour’s higher absorption rate.
12.How long should I let the buns proof after stuffing them before baking? ▾
Let stuffed, sealed buns rest in a warm spot for 20 to 25 minutes, until they’re puffy and light to the touch. They won’t fully double in size here, but they will feel noticeably plumper. If you over-proof them at this stage, they may deflate when you slide them into the oven or split open at the seams while baking.
13.Are these buns meant to be served warm or at room temperature? ▾
They’re delicious both ways! Most traditional holiday spreads serve them slightly warm, about 10 minutes after they come out of the oven, when the butter is soft and the bacon filling is rich and fragrant. They hold up perfectly at room temperature for 2 to 3 hours, making them great for potlucks or casual gatherings.
14.Can I add cheese or other mix-ins to the bacon filling? ▾
You can absolutely customize the filling, though traditional versions stick to just bacon and onion. Popular modern tweaks include a sprinkle of grated sharp cheddar, a pinch of black pepper, or a little sautéed cabbage, but go light on add-ins—too much extra filling will make buns heavy and more likely to leak while baking.
15.What oven temperature and bake time gives the perfect soft bun without a tough crust? ▾
Bake buns at 375°F (190°C) for 15 to 18 minutes, rotating the baking sheet halfway through, until tops are deep golden and bottoms are lightly browned. Baking at a higher temperature will burn the crust before the inside cooks through, while a lower temp requires longer bake time that can dry out the soft, tender crumb you want.
16.How do I keep leftover buns from getting hard the next day? ▾
Store fully cooled leftover buns in an airtight container or sealed zip-top bag at room temperature for up to 2 days. Don’t refrigerate them, as the cold, dry air in the fridge will make the bread go stale much faster. When ready to eat, warm them for 10 seconds in the microwave or 3 minutes in a 350°F oven to bring back that soft texture.
17.Is the granulated sugar in the dough necessary, or can I cut it for a less sweet bun? ▾
The small amount of granulated sugar in the dough isn’t there to make the buns taste sweet—it feeds the yeast to help it rise properly, and balances the salty, smoky bacon filling for that classic balanced flavor. If you cut it entirely, your yeast won’t activate as reliably, and you’ll lose that subtle, rich contrast that makes these buns so cozy.

Comments (20)

2 days ago

OMG these are EXACTLY the bacon buns my Lithuanian great-aunt used to make for family holidays! I was so worried I’d never get the recipe right after she passed, but this nailed it. The flaky dough, the salty onion-bacon filling? *Chef’s kiss* Brought a batch to my office potluck yesterday and people were begging me for the recipe before I even left the break room. 10/10 will make every month from now on!

yesterday

Wait did you use regular bacon or the thicker cut? I’m making these for my kid’s soccer snack table this weekend and want to get it right!

yesterday

So happy these brought back such sweet family memories for you, Becky! Thick-cut bacon works perfectly for a heartier filling, but regular cut turns out great too — just pat off any excess grease after cooking so the dough doesn’t get soggy. Hope the soccer team loves them!

3 days ago

Really solid flavor! My only hangup was that the dough felt a little stiffer than I expected when I was rolling it out, so my buns came out a little lumpy. Taste was chef’s kiss though, my teen boys ate half the batch in 10 minutes flat after football practice.

2 days ago

So glad the flavor was a hit with your boys, Tim! If the dough feels too stiff next time, let it rest for 5-10 extra minutes after kneading before rolling — that lets the gluten relax so it rolls out smooth without bouncing back. Works like a charm!

1 week ago

Game. Changer. I swapped the regular bacon for turkey bacon to cut a little fat and added a pinch of black pepper to the filling, and wow. These are perfect for quick breakfasts on busy school mornings — I made a double batch on Sunday, froze them, and just pop one in the microwave for 30 seconds on the way out the door. SO good.

5 days ago

I’ve been making bandelės for 40 years and this recipe is spot on! I always add a tiny spoonful of sour cream to my filling for a little tang, and it pairs so nicely with the salty bacon. My grandkids beg for these every time they come to visit.

3 days ago

The sour cream addition sounds genius! Do you mix it right in with the cooked bacon and onion, or dollop it on top before sealing the buns?

1 week ago

Made these for our Sunday football watch party and they were the first appetizer gone! Everyone kept asking if I ordered them from some fancy European bakery, little did they know how straightforward they were once I got the hang of crimping the edges. Will absolutely be making these for the Super Bowl party next month.

5 days ago

How did you keep them warm during the game? I’m making these for our tailgate next weekend and don’t want them getting cold and greasy!

3 days ago

I kept them in a slow cooker on the warm setting lined with paper towels! Soaked up any extra grease and stayed perfectly toasty the whole first half.

30 minutes ago

Taste was really good but mine leaked bacon grease all over the baking sheet while cooking! Did I do something wrong sealing the edges? I was really looking forward to these being pretty for my book club meeting tomorrow.

5 minutes ago

So sorry to hear about the leaky buns! The most common culprit is not crimping the edges tightly enough — make sure you pinch the seams completely shut so there are no tiny gaps, and place the buns seam-side down on the baking sheet. A quick egg wash on the seams helps seal them extra tight too! They’ll still taste delicious for book club even if they’re a little messy.

2 weeks ago

These are my new go-to meal prep staple! I make a batch every Sunday, portion them out into containers, and they hold up perfectly in the fridge all week for quick lunches. I added a little shredded cheddar to the filling last week and it was chef’s kiss. 10/10, easy enough even for someone who hates working with yeast.

2 weeks ago

I grew up going to Lithuanian summer camp and we had these every Saturday morning at the mess hall. I’ve tried so many copycat recipes over the years and none of them got that perfect soft, pillowy dough paired with the smoky bacon filling until this one. Cried a little when I took the first bite, it tasted exactly like my childhood.

1 week ago

Oh my gosh I went to that same type of camp! Small world! Did they serve them with that little side of apple butter too? That combo is unbeatable.

1 week ago

There’s nothing quite like a recipe that transports you right back to happy childhood memories, Liz! So thrilled this one lived up to your camp-day expectations. The apple butter pairing sounds absolutely delicious, I’ll have to try that next time I make a batch!

3 days ago

Brought these to my neighborhood block party last weekend and I swear I got stopped by 10 different neighbors asking for the recipe. Even the lady who brings the famous pecan pie to every event asked for a second bun! Pro tip: double the batch, because they go fast.

2 days ago

How long did you prep these ahead of time? I want to make them for my church potluck this Sunday but I work late Saturday so I need to plan accordingly.

yesterday

These were a huge hit at family dinner last night! My only note is that I wish I’d made a dipping sauce to go with them — we tried ranch and it was great, but I think a spicy honey dip would be even better. The kids gave them two thumbs up (and they usually turn their noses up at anything that isn’t chicken nuggets, so that’s a win).

5 days ago

I made these with a 1:1 gluten free flour blend for my daughter who has Celiac, and they turned out so well! The texture was a tiny bit denser than the regular version I made for the rest of the family, but the flavor was spot on. She was so excited to have a bun she could eat at our family barbecue.

3 days ago

That makes me so happy to hear, Gail! Thanks for sharing that the 1:1 gluten free flour blend works — I know so many readers are always looking for accessible swaps for gluten-free family members. I’ll add that tip to the recipe notes soon!

1 week ago

As a broke college student with barely any baking supplies, I was shocked how easy these were to pull off! I used pre-made pizza dough from the grocery store (don’t come for me, baking purists) and pre-cooked bacon bits, and they still slapped. My roommates ate the whole batch in 15 minutes. 10/10 for low-effort, high-reward food.

5 days ago

Wait the pre-made pizza dough hack is genius! I’m terrible at making dough from scratch so I’m definitely stealing that for my next movie night.

3 days ago

It saved me so much time! Just make sure you roll it pretty thin so it doesn’t get too bready around the filling, that’s the only thing I messed up on my first test run.

2 days ago

Added these to my weekend brunch spread last weekend alongside scrambled eggs and fruit, and they were the star of the show! I sprinkled a little everything bagel seasoning on top before baking and it added the perfect savory crunch. My guests were raving about them for days.

yesterday

The everything bagel seasoning on top is such a brilliant hack, Bri! I love that idea — I’m testing that out this weekend for my own brunch. So glad your guests loved them!

2 weeks ago

I’m a retired baker so I’m pretty picky about dough recipes, and this one is perfectly balanced. Not too sweet, not too salty, the right amount of chew. I made these for my weekly poker night with the guys and everyone kept asking for seconds. Already passed the recipe along to three of my buddies.

2 hours ago

First time ever working with yeast and I was so nervous, but these turned out way better than I expected! I think I undercooked them by just a minute or two because the bottoms were a little pale, but the filling was so flavorful. My partner said they’re better than the ones we got at the Lithuanian festival downtown last summer.

30 minutes ago

I had the same issue on my first batch! I moved my oven rack up one slot and baked them for an extra 2 minutes and the bottoms were perfectly golden the second time around.

5 minutes ago

So proud of you for nailing a yeast recipe on your first try, Luna! That’s such a win. The oven rack tip from TampaTreats is spot on — every oven runs a little different, so don’t be afraid to add a minute or two if you notice the bottoms are too pale. Can’t wait to hear how your next batch turns out!

yesterday

Packed these for our day hike in the mountains and they were the perfect trail snack! They’re hearty, not too messy, and the salty bacon gave us the energy boost we needed to make it to the summit. Way better than boring granola bars.

2 hours ago

Such a good trail snack idea! I never think to bring baked goods on hikes, I usually just pack trail mix and protein bars. These sound way more satisfying.

5 days ago

Added a diced jalapeño to the bacon filling for a little kick and it was *chef’s kiss*. Gave the perfect amount of heat without overpowering that classic smoky bacon flavor. Next time I’m going to add a little pepper jack cheese too to make them extra indulgent. My whole family loved them.

1 week ago

Made these for our weekly Sunday dinner with my in-laws, and my Lithuanian mother-in-law said they taste exactly like the ones her mom used to make when she was a kid. That’s the highest possible praise I could ever get for a recipe! I was so nervous to make something from her culture, but this recipe was so easy to follow.

5 days ago

That’s the best compliment ever! I’m making these for my own Lithuanian MIL’s birthday next month and I’m so nervous, this gives me hope.

3 days ago

You’ve got this! Just make sure you don’t skimp on the onion in the filling, that’s the secret depth of flavor she said her mom always used.

just now

Wow, that 20 minute cook time is no joke! I was able to whip these up after work between helping the kids with homework and getting them to soccer practice, and they were ready in time for a quick weeknight dinner. Saved me from ordering takeout for the third night in a row, huge win.

just now

Love to hear that! Quick, satisfying weeknight meals are what it’s all about, especially with a busy schedule. So glad these helped you skip the takeout and get a delicious meal on the table for the kids.

2 days ago

My kids are OBSESSED with these! I’ve already made them three times in the last two weeks. They even ask for them in their school lunches instead of the usual peanut butter and jelly. I love that they’re filling enough to keep them full through the whole school day, and they don’t get soggy in their lunch boxes.



