
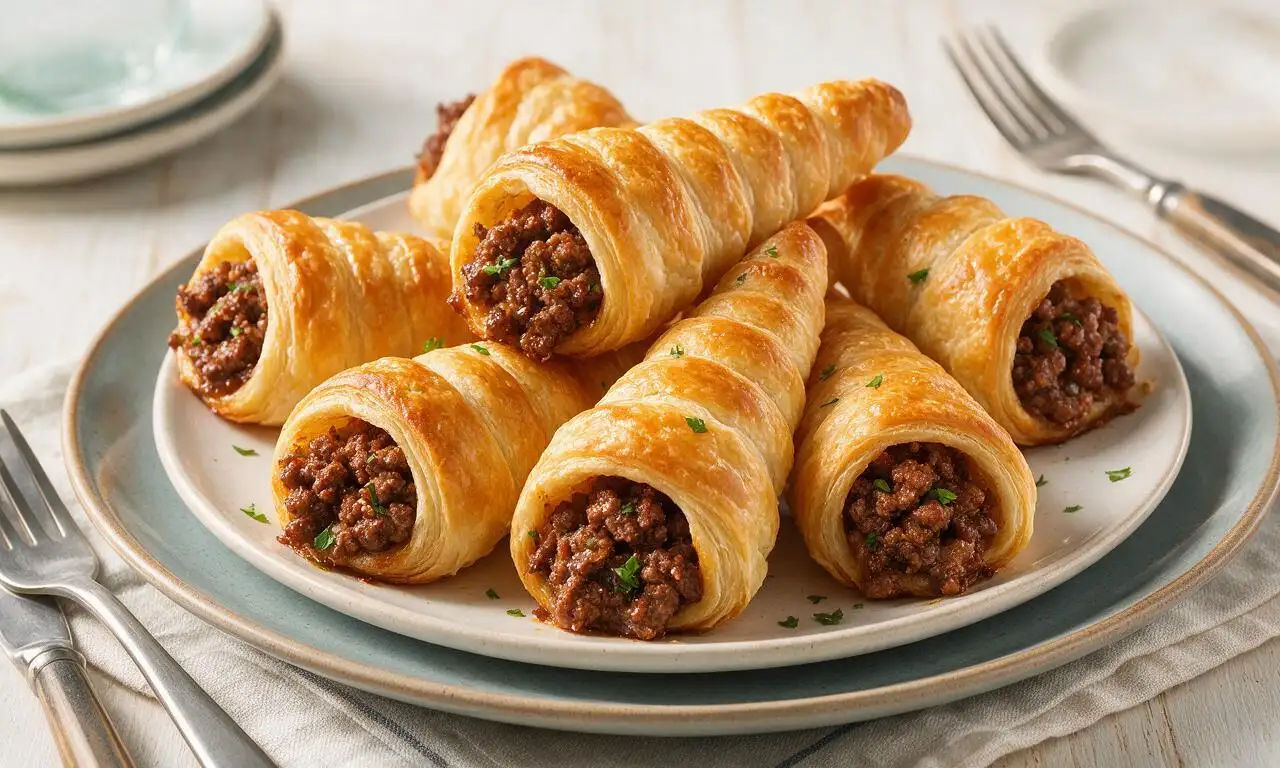
Meat Cone

title 1
Meat Cone
⏱️ cook time 45 minutes
🍽️ servings 4
⚡ Difficulty easy

intro

Crispy flaky puff pastry cones stuffed with spiced juicy ground beef, baked to golden perfection—portable, shareable bites ideal for casual gatherings.

Ingredients

80/20 ground beef 340 grams (12 oz)
All-butter puff pastry (thawed) 400 grams (2 standard sheets)
Yellow onion (finely diced) 110 grams (1 small)
Garlic (minced) 9 grams (3 cloves)
Tomato paste 2 tablespoons (32 grams)
Smoked paprika 1 teaspoon (2 grams)
Ground cumin 1/2 teaspoon (1 gram)
Kosher salt 1 teaspoon (5 grams)
Freshly ground black pepper 1/4 teaspoon (0.5 grams)
Shredded low-moisture mozzarella 56 grams (1/2 cup)
Large egg (beaten, for egg wash) 50 grams (1 large)
Extra-virgin olive oil 15 ml (1 tablespoon)

Steps

1

Sauté meat filling

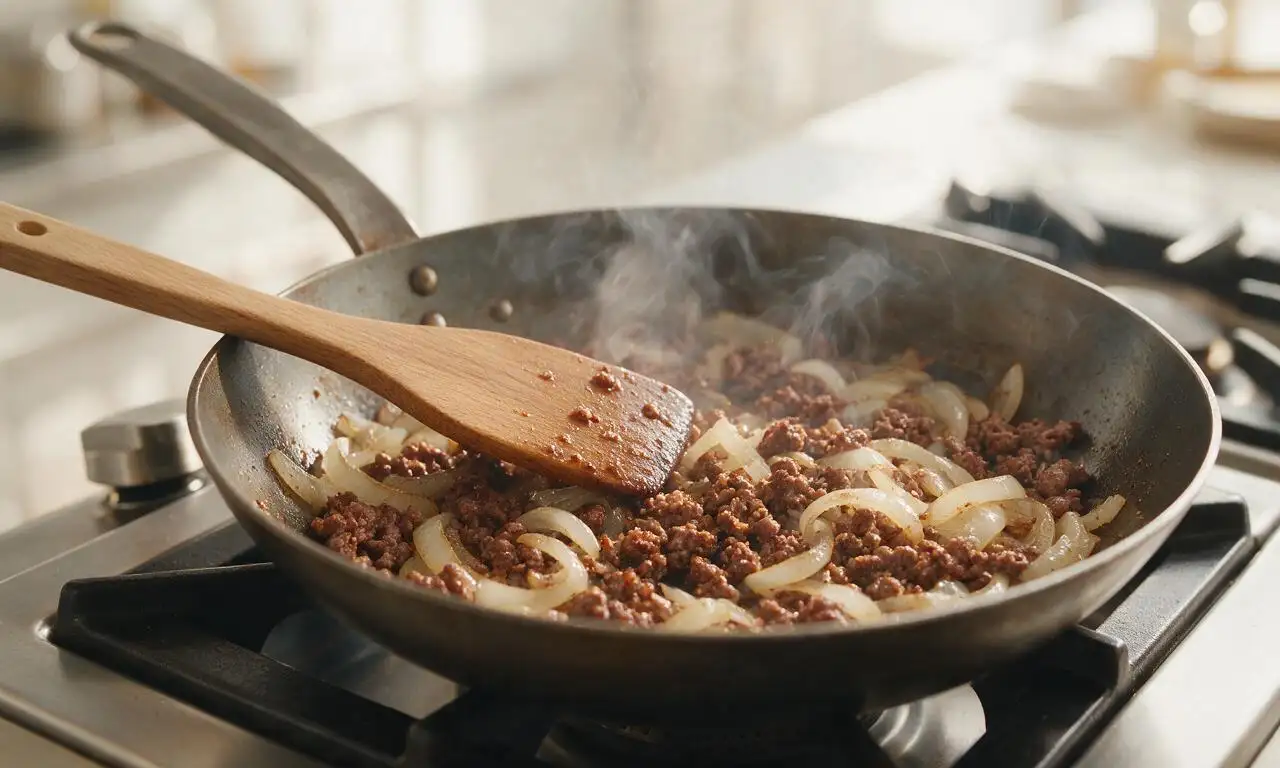
Heat 15ml (1 tablespoon) olive oil in a 25cm (10-inch) skillet over medium heat (175°C/350°F). Add 110g finely diced yellow onion, sauté for 3 minutes until soft and translucent, then add 9g minced garlic and cook for 30 seconds until fragrant. Add 340g ground beef, break apart with a spatula, and cook for 5 minutes until no pink remains. Drain excess grease, then stir in 32g tomato paste, 2g smoked paprika, 1g ground cumin, 5g kosher salt, and 0.5g black pepper. Cook 2 more minutes to meld flavors, then set aside to cool for 10 minutes.
Step 1
step1:Sauté meat filling
2

Prep pastry and molds

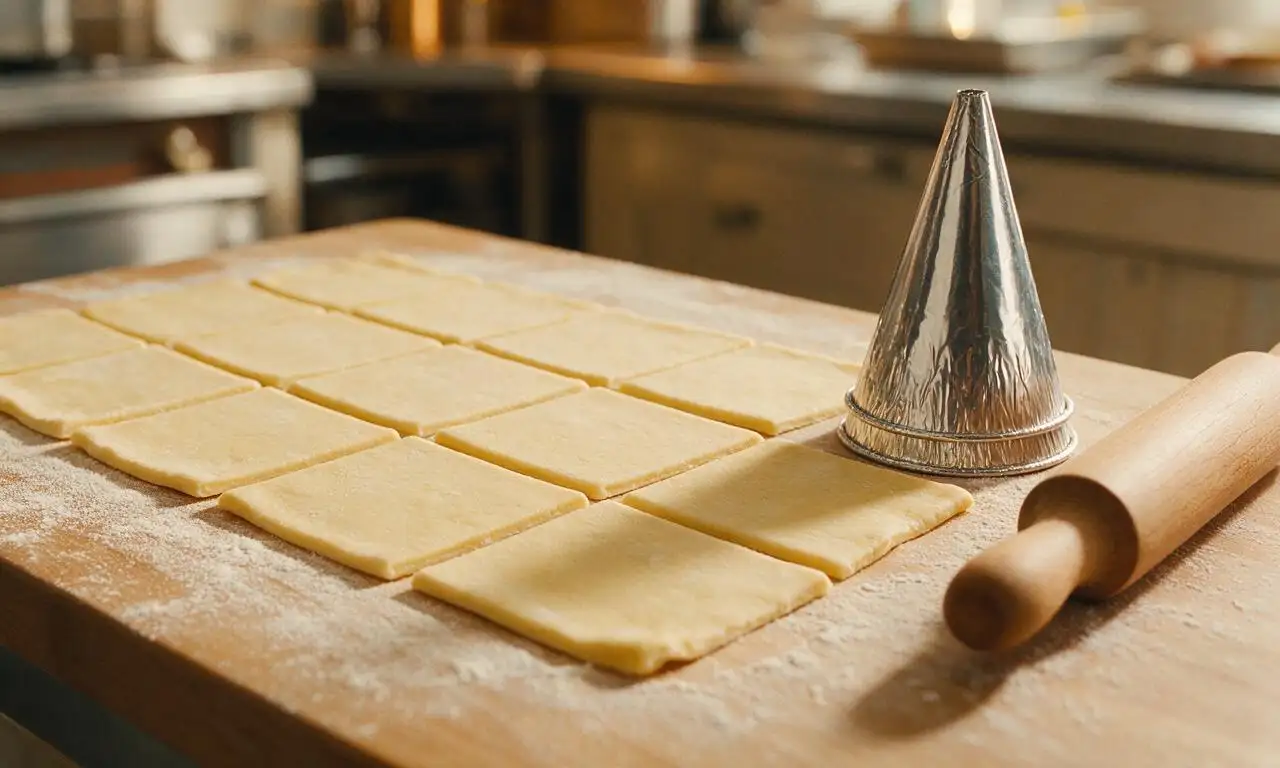
While the filling cools, cut 8 15cm (6-inch) squares from heavy-duty aluminum foil, crumple each lightly then form into tight cone molds 10cm (4 inches) tall with a 4cm (1.5-inch) wide open top; set aside. Unfold thawed 400g puff pastry onto a lightly floured work surface, roll to 3mm (1/8-inch) uniform thickness, then cut into 8 equal 15cm (6-inch) squares.
Step 2
step2:Prep pastry and molds
3

Fill and seal cones

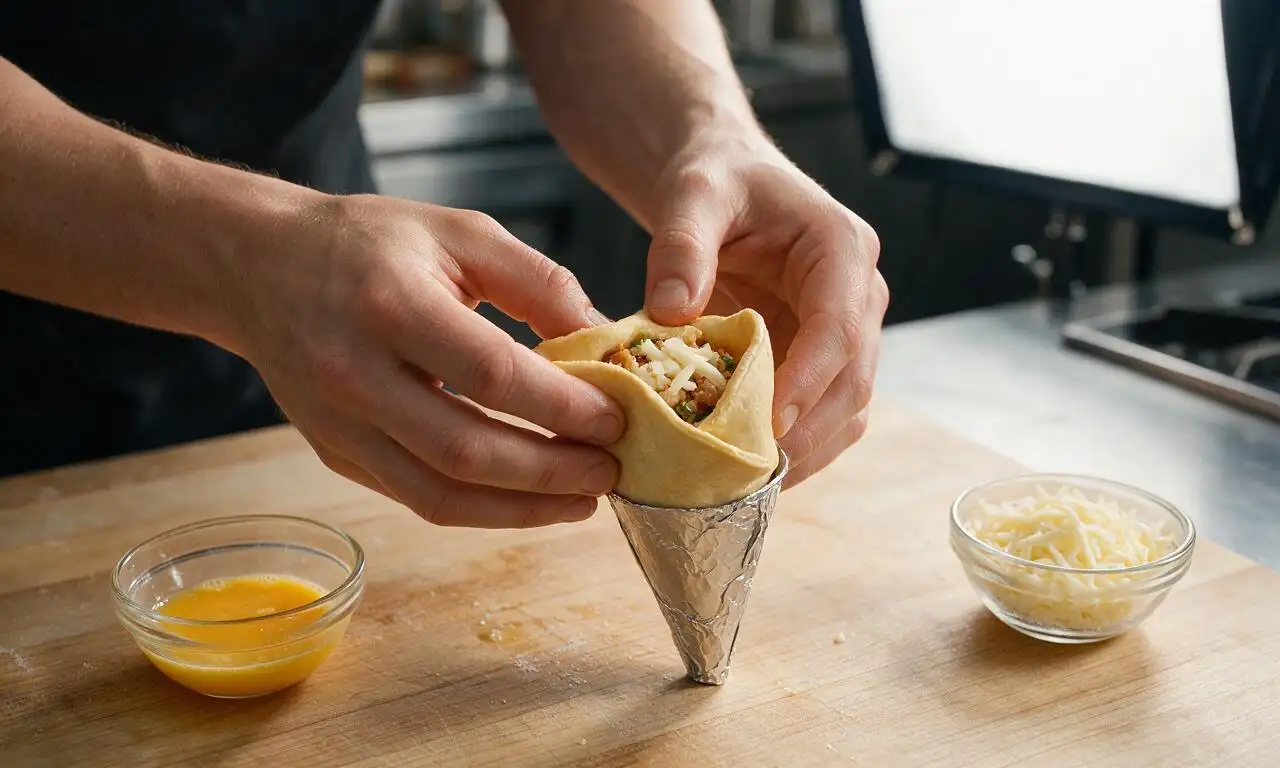
Scoop 35g (2 tablespoons) of cooled meat filling onto the center of each pastry square, top with 7g (1 teaspoon) shredded mozzarella. Brush two adjacent edges of each square with a thin layer of beaten egg, fold diagonally to form a tight triangle, and press edges firmly with a fork to seal. Wrap each sealed triangle around a foil cone mold, overlapping the sealed edge slightly, and pinch the pointed end tight to prevent filling leaks during baking.
Step 3
step3:Fill and seal cones
4

Prep for oven baking

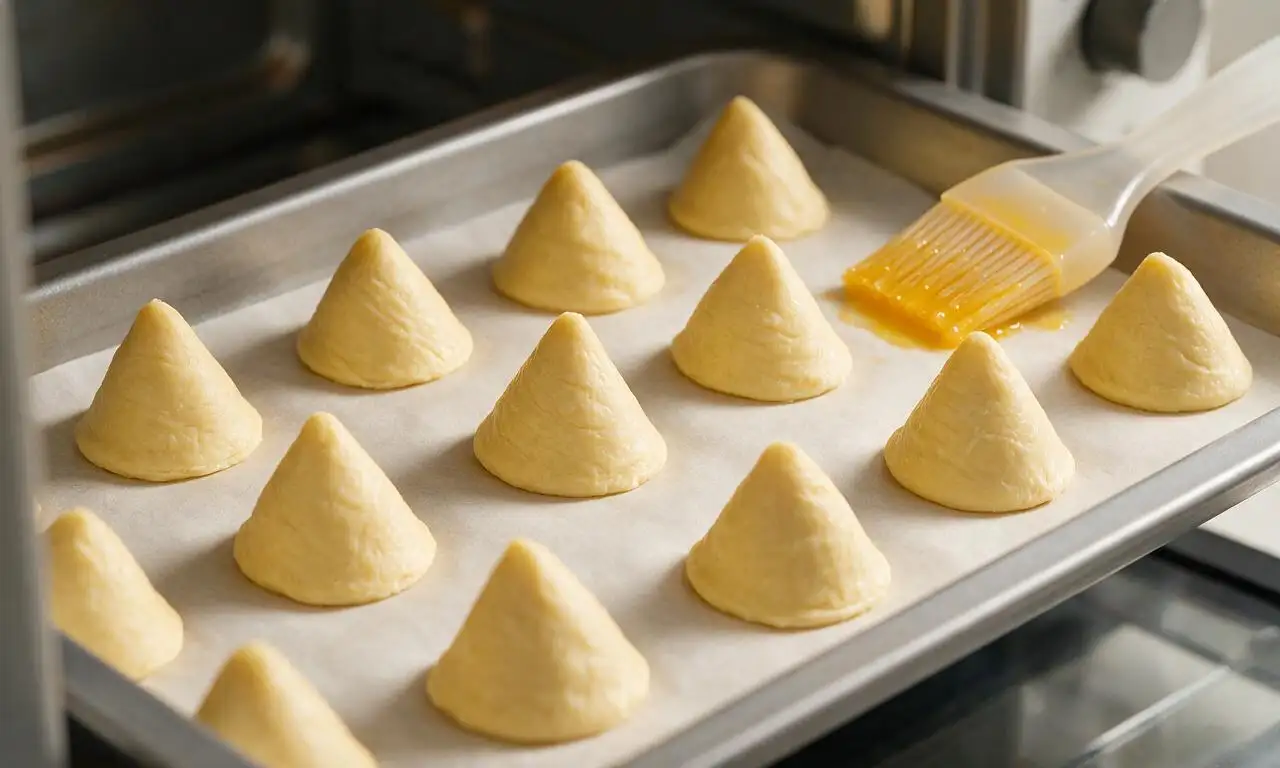
Preheat oven to 200°C (400°F), line a 33x45cm (13x18-inch) rimmed baking sheet with parchment paper. Place each formed pastry cone seam-side down on the sheet, spacing them 5cm (2 inches) apart to allow even air circulation. Brush the entire outer surface of every cone with remaining beaten egg to create a glossy, crisp crust.
Step 4
step4:Prep for oven baking
5

Bake to golden crisp

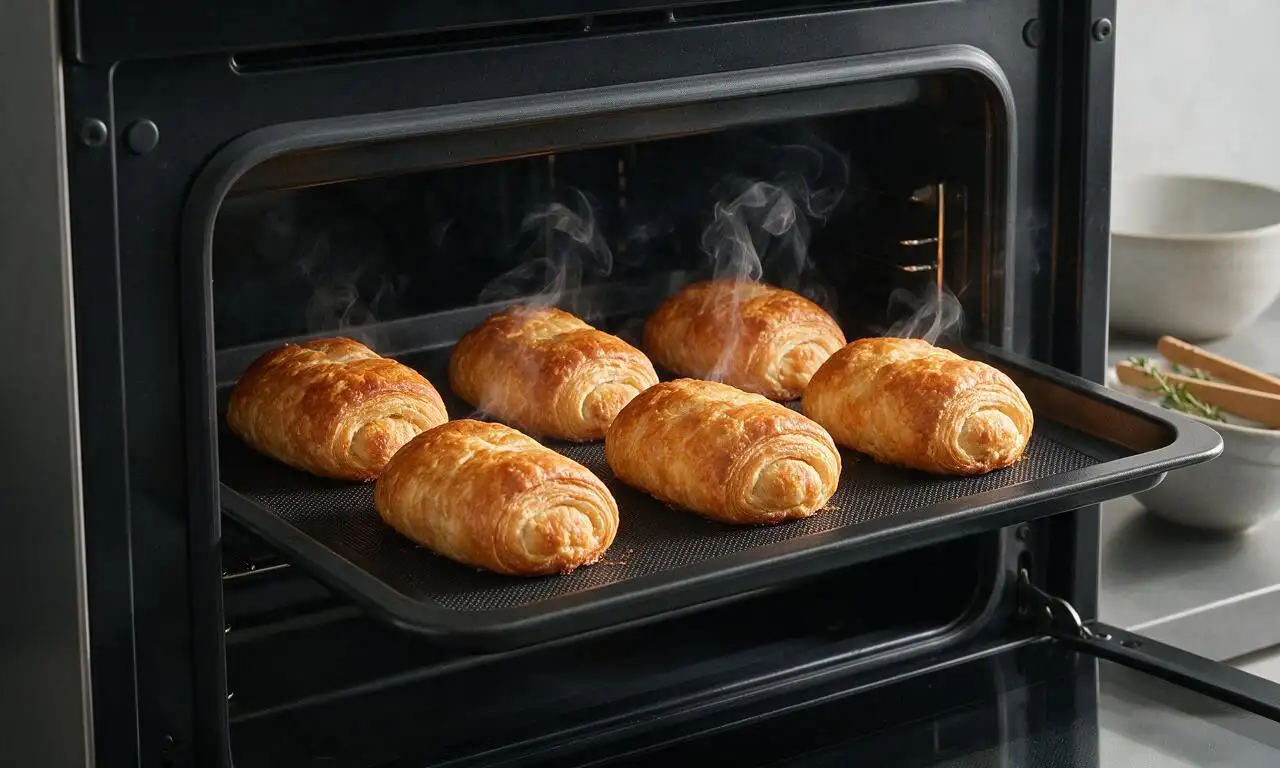
Place the baking sheet on the middle oven rack, bake for 18-20 minutes until pastry is deep golden brown, puffed, and crisp with no pale raw dough spots. Rotate the baking sheet 180 degrees at the 10-minute mark to ensure even browning across all cones, avoiding oven hot spots.
Step 5
step5:Bake to golden crisp
6

Cool and serve warm

Remove the baking sheet from the oven, let cones rest on the pan for 5 minutes to set, then carefully twist and pull out the aluminum foil molds from the center of each cone. Serve warm, with optional ketchup or garlic yogurt dip on the side.

Step 6
step6:Cool and serve warm

Tips

1.Keep puff pastry cold while assembling: if it becomes soft and sticky, chill it for 5 minutes to prevent excess shrinking during baking.
2.Seal all pastry edges tightly, especially the pointed cone tip, to prevent melted cheese and meat juices from leaking and burning on the pan.
3.For a bright flavor boost, stir 2 tablespoons (8g) of finely chopped fresh parsley into the cooled meat filling before assembling cones.


✨ You May Also Like

Snacks & Appetizers
🍜 Mexico

Crispy thick-cut tortilla chips piled high with seasoned beef, melted cheese, and bright fresh toppings for a shareable, crowd-favorite bite.

⏱️ 25 minuteSnacks & Appetizers ★ 4.8
Snacks & Appetizers
🍜 United States

Crisp, sweet-tangy spiced pickled watermelon rind is a zero-waste summer staple, perfect with grilled meats, charcuterie, or eaten straight from the jar as a bright snack.

⏱️ 30 minuteSnacks & Appetizers ★ 4.6
Snacks & Appetizers
🍜 Germany

A tangy, jellied pork cold cut slow-simmered with aromatic spices, set into a firm sliceable loaf, served cold with mustard and crusty bread.

⏱️ 3 hours 4Snacks & Appetizers ★ 4.8
Snacks & Appetizers
🍜 United States

Creamy, tangy, perfectly seasoned hard-boiled egg halves filled with a rich, smooth yolk mixture, a timeless, crowd-pleasing bite for holiday and casual gatherings alike.

⏱️ 40 minuteSnacks & Appetizers ★ 4.8
Snacks & Appetizers
🍜 Russia

Silky, dill-forward no-smoke cured salmon, a Scandinavian classic with bright salty-sweet flavor, ideal for holiday starter platters and open-faced rye sandwiches.

⏱️ 48 hours Snacks & Appetizers ★ 4.7
Snacks & Appetizers
🍜 Japan

Crisp golden bottoms, juicy savory pork and vegetable filling, and tangy dipping sauce make these pan-fried gyoza a beloved shareable bite.

⏱️ 45 minuteSnacks & Appetizers ★ 4.8

Meat Cone:Frequently Asked Questions

1.Can I use leaner ground beef instead of the recommended 80/20 blend for the filling? ▾
The 80/20 blend is ideal here because its moderate fat content keeps the spiced filling juicy as it bakes, so you won’t end up with dry, crumbly bites. If you only have leaner ground beef on hand, mix in 1 tablespoon of melted unsalted butter or olive oil before seasoning, and avoid overcooking the filling pre-bake.
2.My puff pastry is still partially frozen when I’m ready to prep—what’s the safest, fastest way to thaw it? ▾
Skip the microwave, it melts the delicate butter layers and ruins that signature flakiness. Instead, seal the frozen pastry sheets in their original wrapping, submerge them in a bowl of cool (not hot) tap water for 25 to 30 minutes, flipping once halfway. It’s ready when it unfolds easily without cracking, but still feels cool to the touch, not sticky.
3.How do I keep the puff pastry cones from unrolling or popping open while they bake? ▾
First, overlap the pastry seam by at least ½ inch when shaping, pressing firmly to seal it with a tiny dab of cold water. Place each cone seam-side down on the baking sheet, and if using molds, leave them in during baking to hold shape. A tiny brush of egg wash on the seam adds extra hold, too.
4.Do I need to cook the ground beef filling all the way through before stuffing it into the pastry cones? ▾
Yes, fully sauté the finely diced yellow onion, minced garlic, tomato paste, and ground beef until no pink remains before stuffing. The pastry only bakes for 18 to 22 minutes at 400°F, which isn’t long enough to safely cook raw ground beef, and pre-cooking lets you drain excess grease to avoid soggy crust.
5.Can I make these meat cones ahead of time for a party, and how do I reheat them without losing crispness? ▾
You can assemble them up to 1 day ahead, stored covered in the fridge, then bake right before serving. For pre-baked leftovers, reheat on a wire rack set over a baking sheet at 350°F for 8 to 10 minutes. Skip the microwave—it turns puff pastry soft and chewy instead of shatteringly crisp.
6.Why do you recommend all-butter puff pastry instead of cheaper vegetable oil-based versions? ▾
All-butter puff pastry has a richer, more savory flavor and creates far flakier, crispier layers as it bakes, since melting butter creates steam that puffs those distinct, delicate layers. Oil-based puff pastry often tastes bland, has a tougher texture, and won’t develop that signature deep golden crust.
7.My cooked filling came out a little too wet—will that make the pastry soggy, and how do I fix it? ▾
Excess moisture will definitely make the bottom of your pastry cones soggy, so address it first! If your cooked onion, beef, garlic, and tomato paste filling is wet, let it simmer 2 to 3 extra minutes over medium heat to cook off extra liquid, drain excess grease, then let it cool 10 minutes before stuffing.
8.I don’t have special metal cone molds—can I still shape these cones without fancy equipment? ▾
Absolutely! Make DIY molds by folding heavy-duty aluminum foil into tight, cone shapes roughly 5 inches long and 2 inches wide at the open end, doubling up the foil for sturdiness. If you don’t have foil, shape free-form cones, press the seam extra tight, and prop them against each other on the sheet to hold shape.
9.Do I need to use egg wash on the pastry to get that golden crispy finish, and what’s the best ratio? ▾
Egg wash is key for that deep, even golden crust and extra crisp edge. Whisk 1 large egg with 1 tablespoon of whole milk or heavy cream, then brush a thin, even coat over the entire outside of each cone right before baking. Don’t slather it on thick, as excess wash can drip and burn on your baking sheet.
10.Can I swap the ground beef for another protein to suit different dietary preferences, and which swaps work best? ▾
Absolutely! Ground lamb pairs beautifully with the spiced, tomato paste-infused filling for a richer twist, and ground turkey or chicken works too—just add 1 extra tablespoon of olive oil, since those are leaner than 80/20 beef. For a vegetarian option, use sautéed finely chopped mushrooms mixed with cooked lentils for hearty texture.

Comments (19)

3 days ago

OMG these were such a hit at my kid’s soccer team potluck last weekend! The crispy shell stayed crunchy even after sitting out for an hour, and the savory meat filling was so flavorful—all the parents were asking for the recipe. 10/10 will be making these for every family gathering from now on!

2 days ago

So glad these were a potluck hit, Liz! A quick tip: if you’re prepping ahead for events, you can keep the shells crisp by storing them in an airtight container separate from the filling until right before serving!

2 days ago

Seconding this! I brought these to a work potluck last week and not a single one was left. People thought I ordered them from a fancy caterer lmao

1 week ago

Game changer for my weekly meal prep! Super easy to throw together on a Sunday, I make a big batch and grab a couple for lunch between classes. They reheat really well in the air fryer too—still crispy, no soggy mess!

5 days ago

Love that this works for meal prep, Mike! Reheating in the air fryer at 350F for 3-4 minutes is our go-to trick to keep that crunch, so glad you found that works too!

3 days ago

I added a little extra paprika and a pinch of cayenne to the meat filling and wow, that little kick was perfect. The crispy exterior is insane—how is this recipe considered easy? It tastes like restaurant quality!

5 minutes ago

Okay I’m literally the worst at cooking, I burn toast half the time, and these actually turned out perfect?? The steps were so straightforward, no weird fancy ingredients, I was shocked. My roommate ate three in one sitting lmao

just now

Same here! I was so nervous the cones would fall apart while frying but they held their shape no problem, even with my clumsy hands

2 weeks ago

These remind me so much of the savory hand pies my mom used to make when I was a kid, just in a fun cone shape! My grandkids went crazy for them—they thought the cone shape was so fun, like a savory ice cream cone. I used ground turkey instead of beef and it worked beautifully.

2 weeks ago

What a sweet memory, Maggie! Ground turkey is such a great swap, we love that you made it work for your family. The “savory ice cream cone” comparison is exactly why we love this shape for kids!

1 week ago

Oh the savory ice cream cone bit is genius! My boys would lose their minds over that, definitely trying that angle when I make these this weekend

yesterday

Made these for the football watch party yesterday and they were the first plate to get cleared. Perfect handheld snack, no messy drips if you seal them right. Dipped them in ranch and queso, chef’s kiss.

yesterday

Queso dip with these sounds incredible, Greg! We’re stealing that pairing for our next game day spread—thanks for the idea!

30 minutes ago

Love that this uses super affordable pantry and fridge staples! I already had most of the ingredients on hand so I didn’t have to make a special grocery run. Total win for a weeknight dinner when I don’t feel like putting in a ton of effort.

3 days ago

Wait has anyone tried making these with gluten free wonton wrappers? I’m dying to make these for my celiac best friend but don’t want the wrappers to fall apart or get weirdly chewy.

3 days ago

Great question, Gabby! We’ve tested these with gluten free rice paper wrappers too, just spritz them with a little extra oil before baking/frying to get that same golden crisp, they hold up really well!

2 days ago

I used the gluten free wonton wrappers from my local Asian market last week and they worked perfectly! Just make sure you seal the edges really well with a little water so they don’t pop open while cooking

2 hours ago

Wait can you bake these instead of frying them? I hate dealing with hot oil on weeknights, makes such a mess on my stove.

30 minutes ago

Absolutely, Ryan! Brush the cones lightly with oil, bake at 400F for 18-20 minutes, flipping halfway through, and you’ll get that same golden crispy exterior without the deep frying mess!

5 days ago

I made a big batch of these for our neighborhood block party and people were coming back for thirds! I mixed a little shredded cheese into the meat filling and it got all melty and gooey, 10/10 decision.

1 week ago

Tested these in the air fryer instead of pan frying and WOW. 12 minutes at 375, spritzed with a little olive oil, and they were so crispy I couldn’t stop eating them before dinner even started. No grease splatters either!

5 days ago

Wait this is the hack I needed! I was gonna skip this recipe because I hate frying, but air fryer method is a game changer, thanks for sharing!

5 days ago

So glad the air fryer method worked for you, Luna! We actually added a note about air fryer instructions to the recipe card after seeing so many people test it out—works like a charm!

2 days ago

These were really tasty, but my first batch of cones opened up while frying because I didn’t seal the edges tight enough. Ended up with meat all in my oil, total mess. Still tasted good though, just user error I guess.

2 days ago

So sorry about the first batch mishap, Tyler! A quick trick to get a tight seal: dab a little beaten egg or cornstarch slurry along the edge of the wrapper before rolling, press firmly for a few seconds, and they’ll stay closed the whole time they cook!

1 week ago

I swapped the ground beef for lentil and mushroom crumbles and used vegan wonton wrappers, and even my meat-obsessed brother said these were amazing! The seasoning on the filling is so spot on you don’t even miss the meat.

5 days ago

Oh I was just wondering if these would work vegan! Thank you for testing the lentil mushroom swap, that’s exactly what I was gonna try. Did you adjust the seasoning at all?

3 days ago

I didn’t change the seasoning at all! The garlic, onion, and soy sauce in the filling is so flavorful it works perfectly with the lentils, no tweaks needed

just now

I made these last night for a late night snack after my shift at the hospital, and even my sleep-deprived brain could pull it off. Dipped them in hot honey and I’m not exaggerating when I say it was the best thing I’ve eaten all week.

5 days ago

Has anyone tried freezing these after cooking? I want to stock my freezer with quick snacks for when my teen has friends over after school.

3 days ago

I froze a batch last month! Let them cool completely, pop them in a freezer bag, and reheat in the oven or air fryer straight from frozen—they stay crispy, no sogginess!

yesterday

Made these for my date night in with my partner last night and they were so impressed! We had fun rolling the cones together, it was a cute little activity instead of just ordering takeout like we usually do. Paired them with a little sweet chili sauce for dipping, 10/10.

yesterday

Love that these made date night fun, Drew! Cooking together is such a great way to spend time, and the sweet chili dipping sauce sounds like the perfect pairing.

2 hours ago

Saving this for next week’s date night! We’ve been looking for fun, easy recipes to make together instead of getting takeout, this looks perfect

3 days ago

I added a little chopped collard greens to the meat filling for some extra veggies, and y’all it was so good. Gave it a little extra texture and flavor that paired perfectly with the crispy shell. My husband said these are going into the regular dinner rotation!

2 days ago

Adding collard greens is such a genius Southern twist, Ruby! We’re testing that variation in our test kitchen this week, it sounds absolutely delicious.

1 week ago

My 4 year old and 6 year old DEVOURED these. I was worried they’d think it was too savory or the wrapper would be too crunchy, but they loved holding the little cones and dipping them in ketchup. No dinner fights? Total win in my book.

2 hours ago

Used leftover taco meat from taco night to make these last night and it was the best leftover hack I’ve ever tried. Didn’t have to adjust a thing, just rolled the meat up in the wrappers and fried them up. Will be doing this every time we have taco leftovers from now on.



