
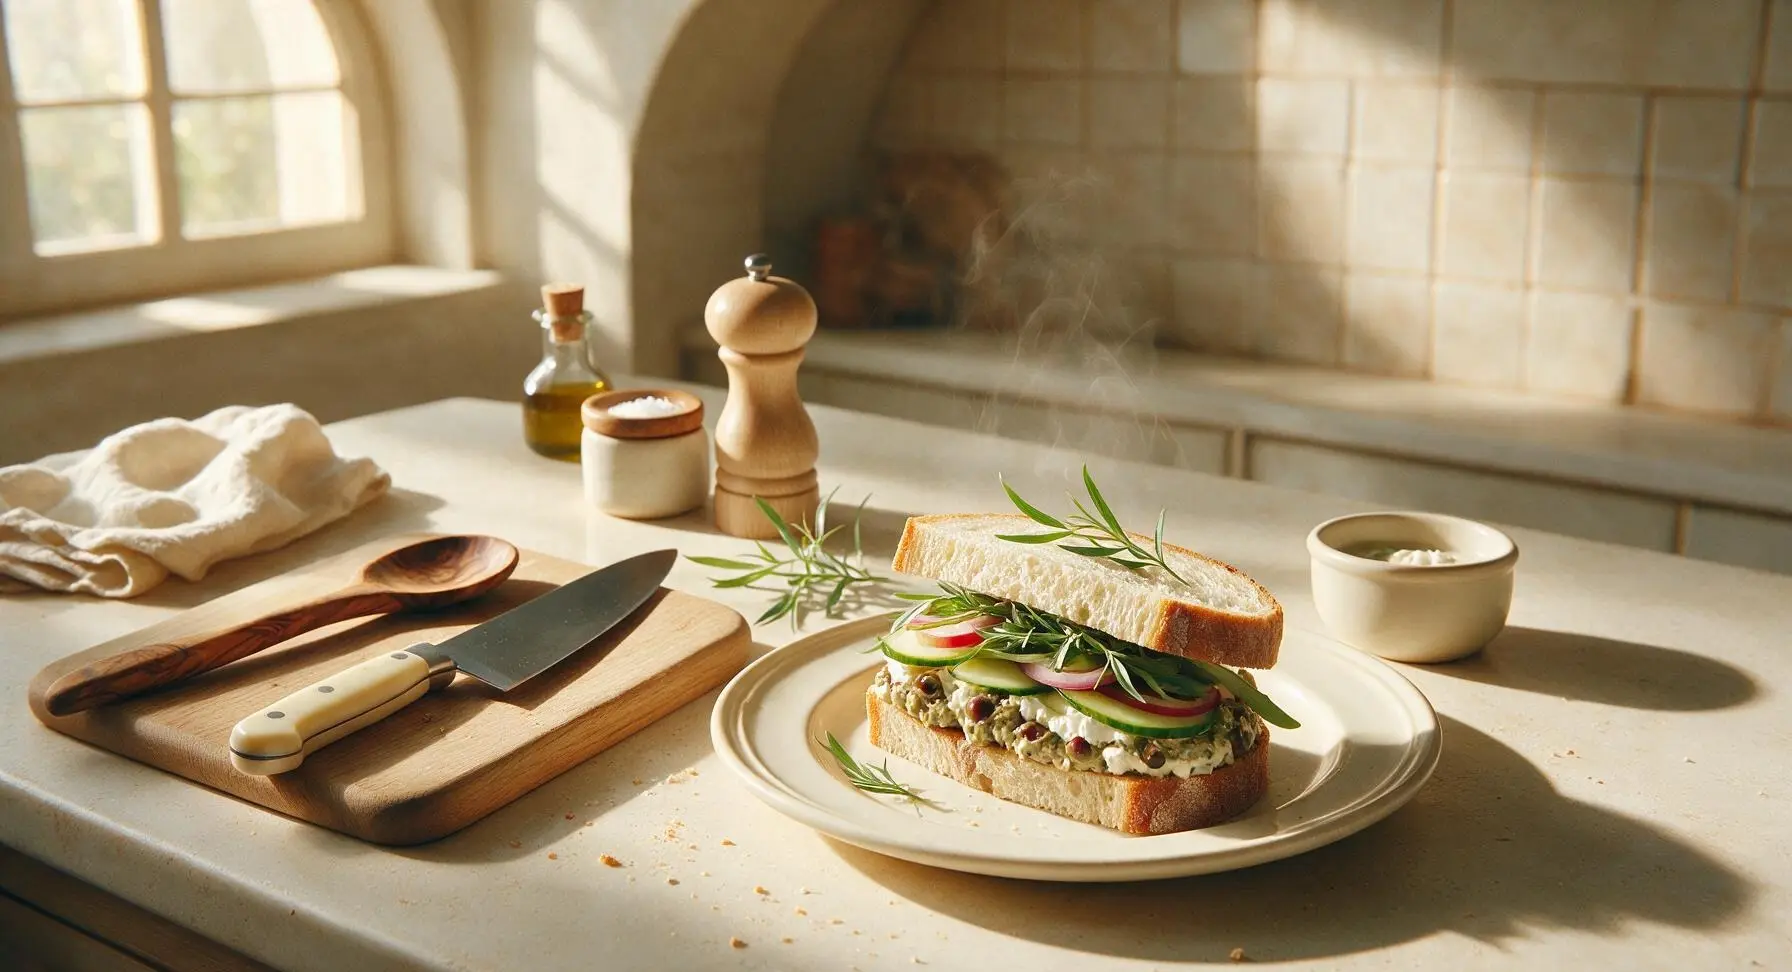
olive sandwich

title 1
olive sandwich
⏱️ cook time 0 minutes
🍽️ servings 4
⚡ Difficulty easy

intro

Tangy, briny olive spread layered with creamy cheese and crisp veggies between soft sourdough, this portable, flavor-packed sandwich is made for sunny summer picnic outings.

Ingredients
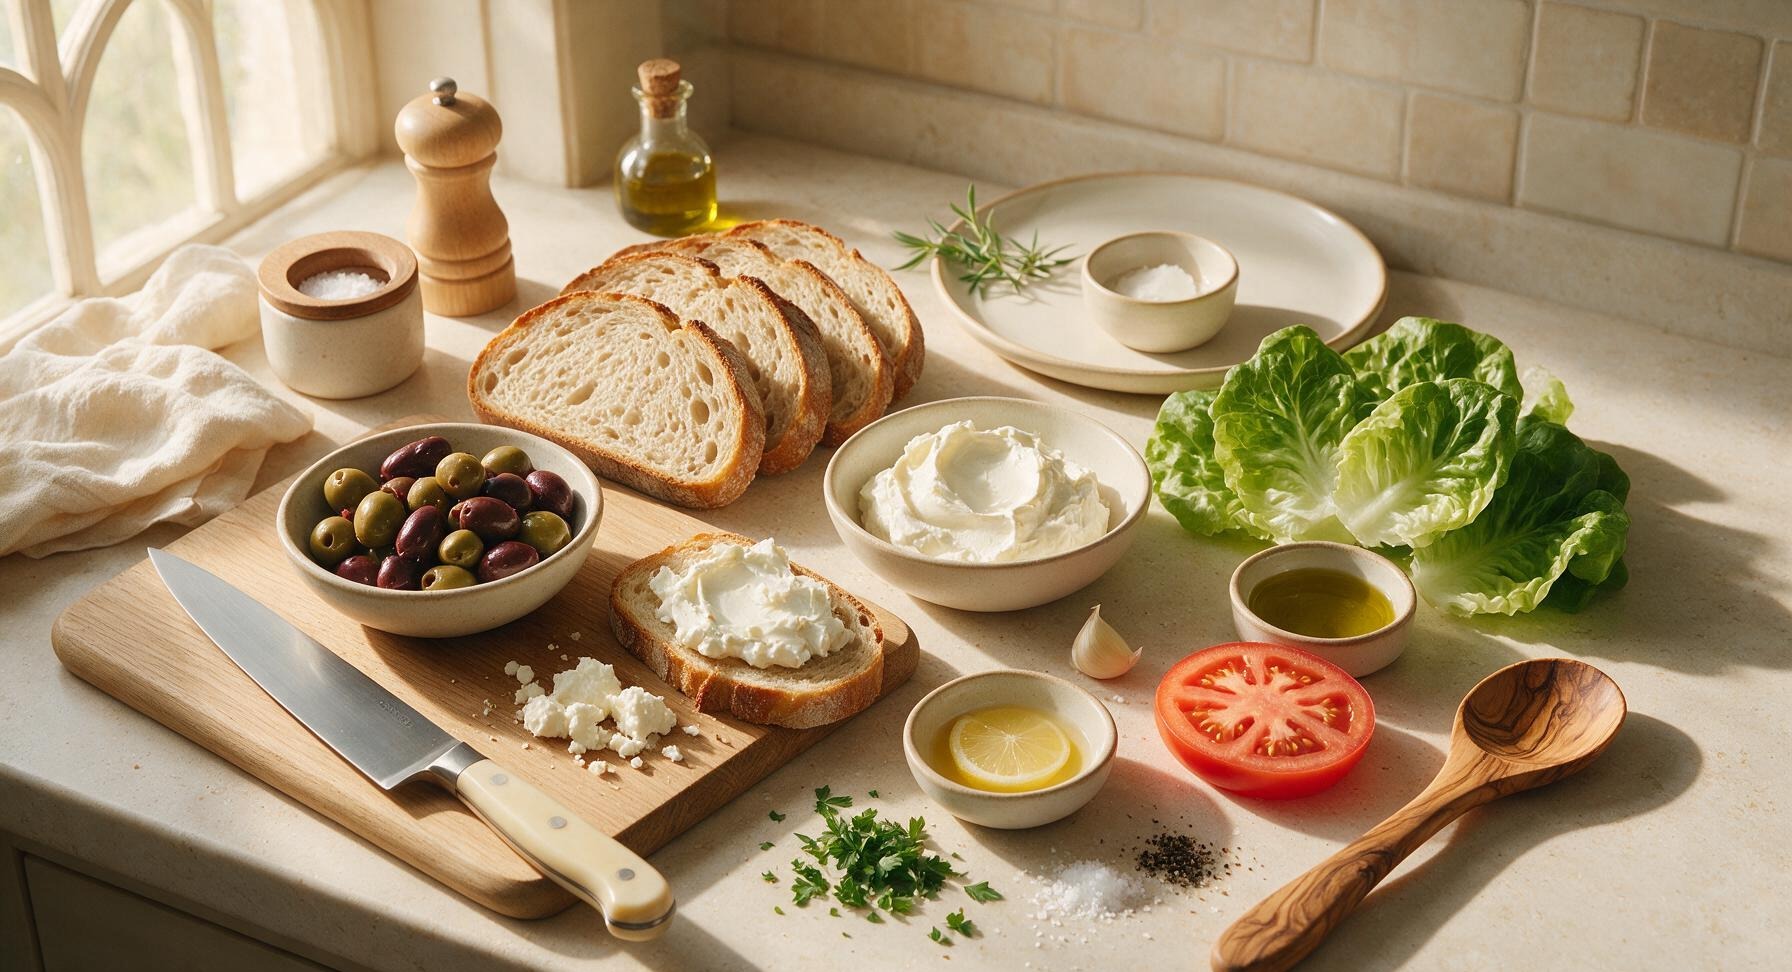
Sourdough bread 8 slices (1/2-inch thick, ~400g total)
Mixed pitted olives (green and kalamata, drained) 1.5 cups (~220g)
Full-fat cream cheese (softened) 8oz (225g)
Crumbled feta cheese 1/4 cup (30g)
Small garlic clove (minced) 1 each (~3g)
Fresh lemon juice 1 tablespoon (15ml)
Extra-virgin olive oil 1 tablespoon (15ml)
Butter lettuce leaves 8 large
Roma tomato 1 medium (~120g), sliced 1/4-inch thick, seeded
Flaky sea salt 1/4 teaspoon
Freshly ground black pepper 1/4 teaspoon
Fresh flat-leaf parsley (chopped) 2 tablespoons (~5g)

Steps

1

Chop Pitted Olives

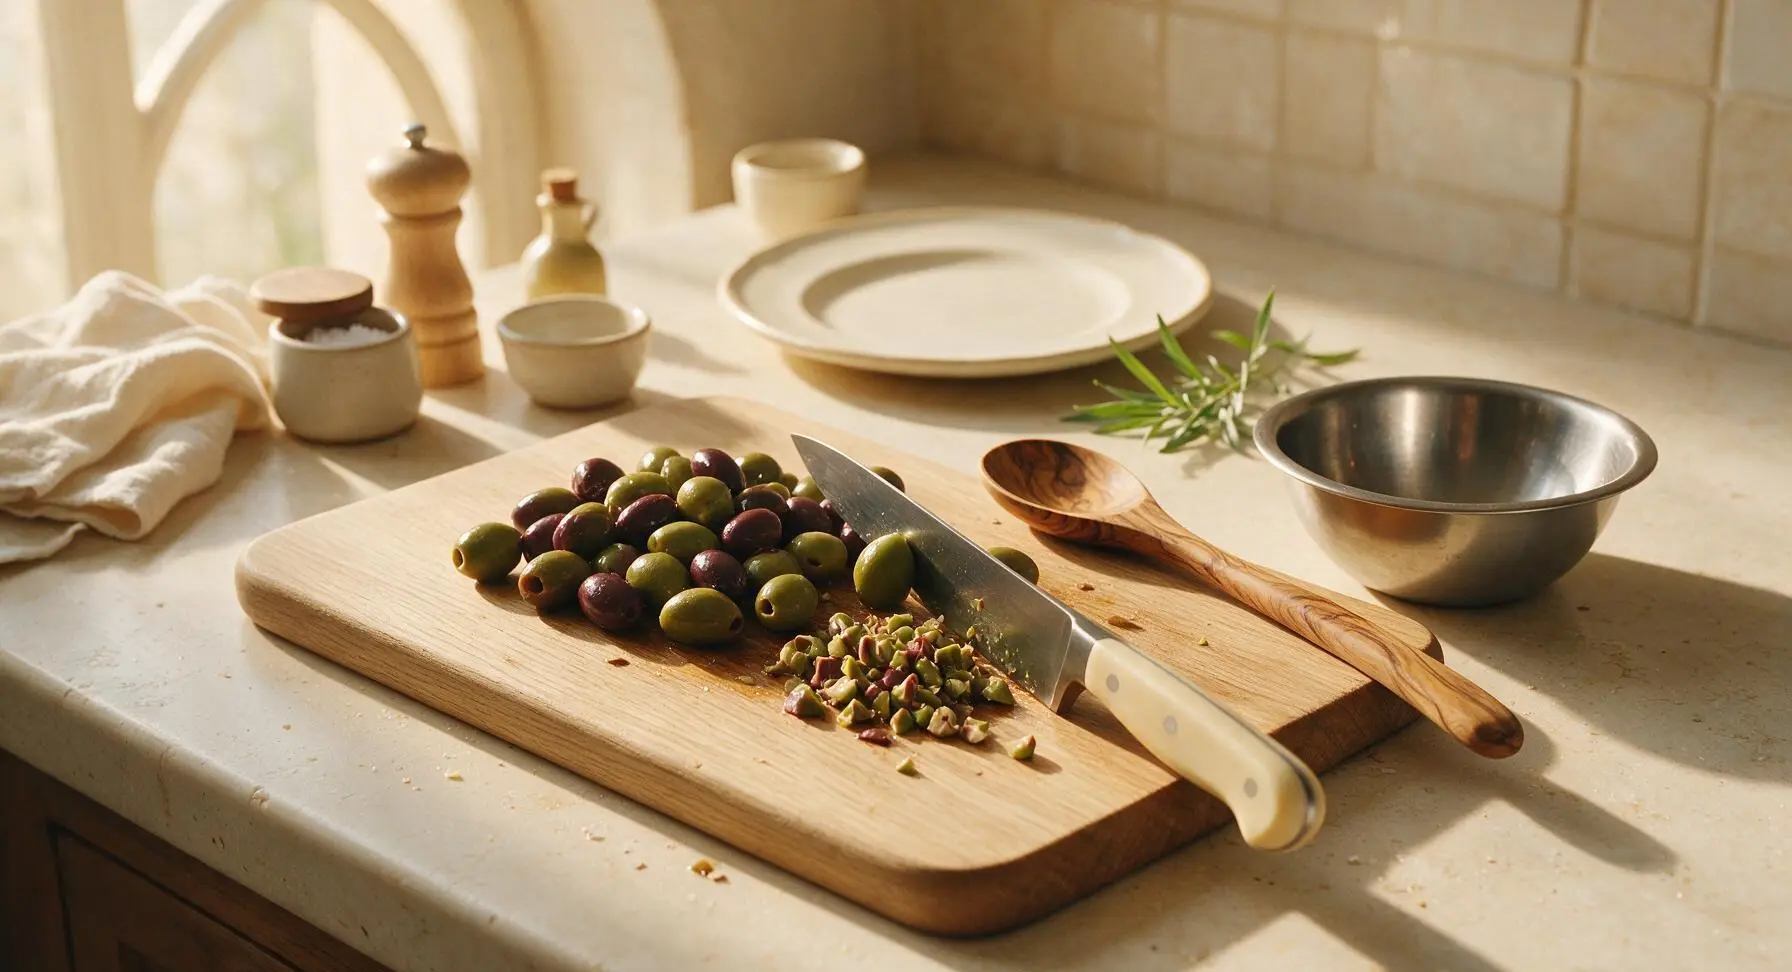
Place drained, pitted mixed green and kalamata olives on the walnut cutting board. Using the 8-inch chef knife, roughly chop the olives into rough 1/4-inch pieces—do not puree, as the spread needs pleasant, briny texture. Transfer chopped olives to the small stainless steel mixing bowl, leaving a few small olive bits on the board for natural, lived-in realism.
Step 1
step1:Chop Pitted Olives
2

Mix Olive Spread

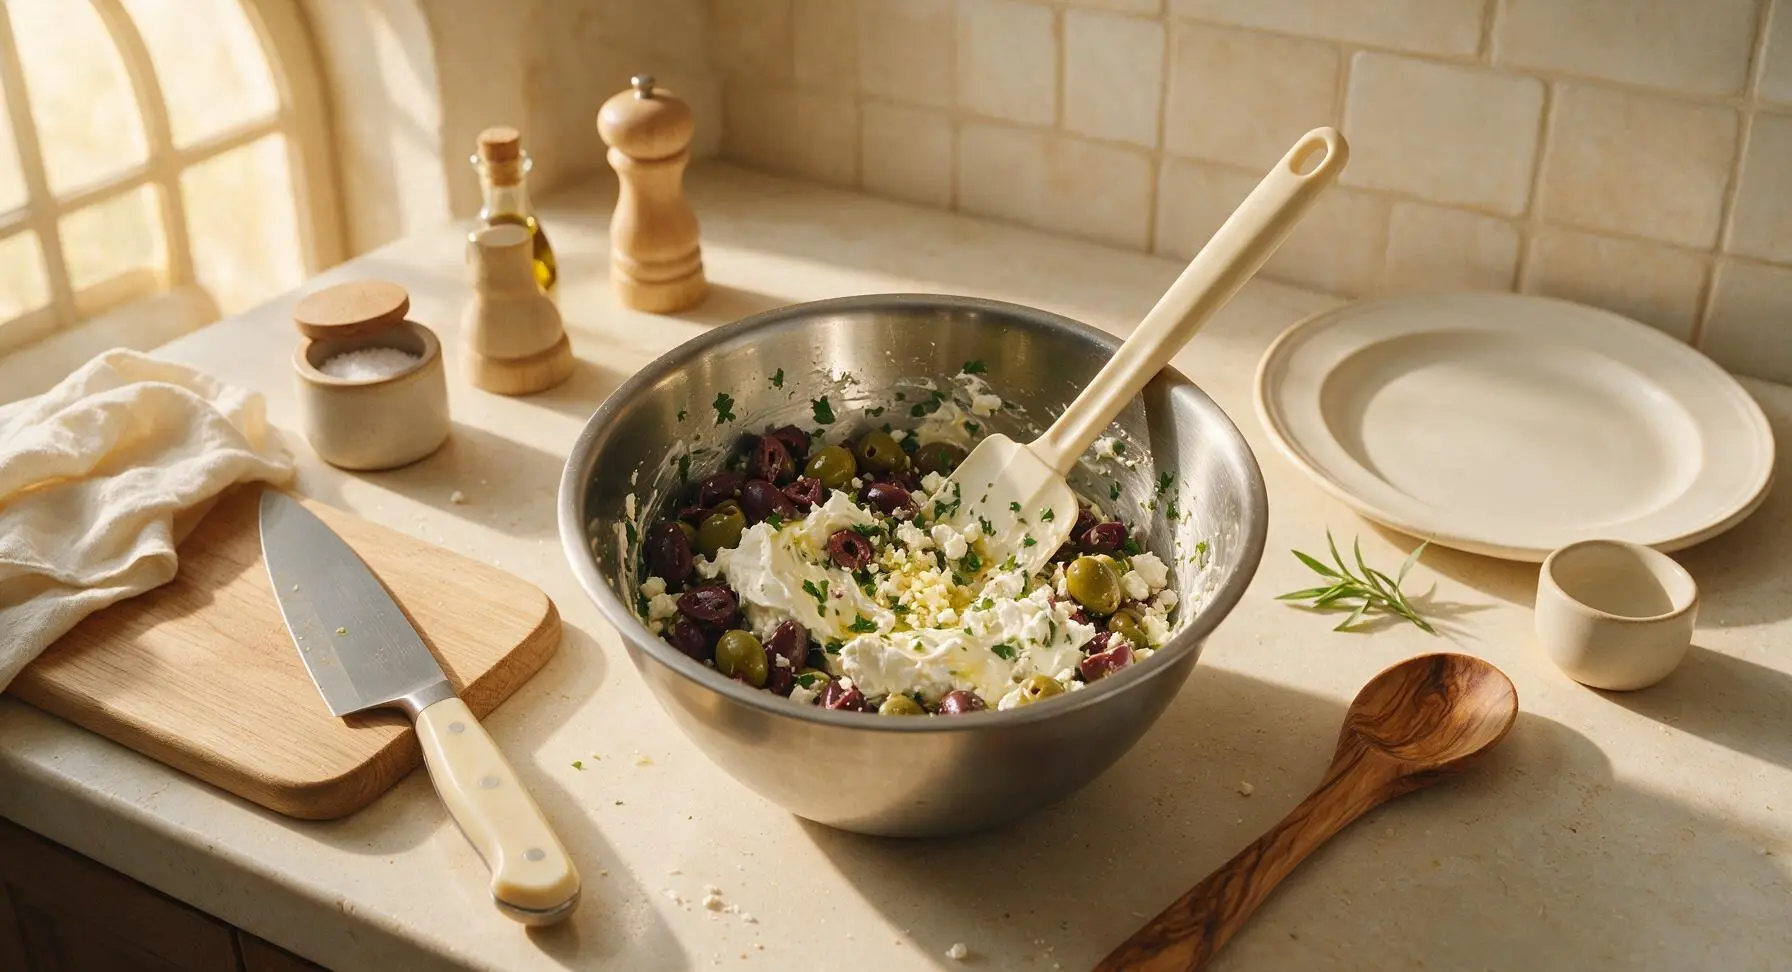
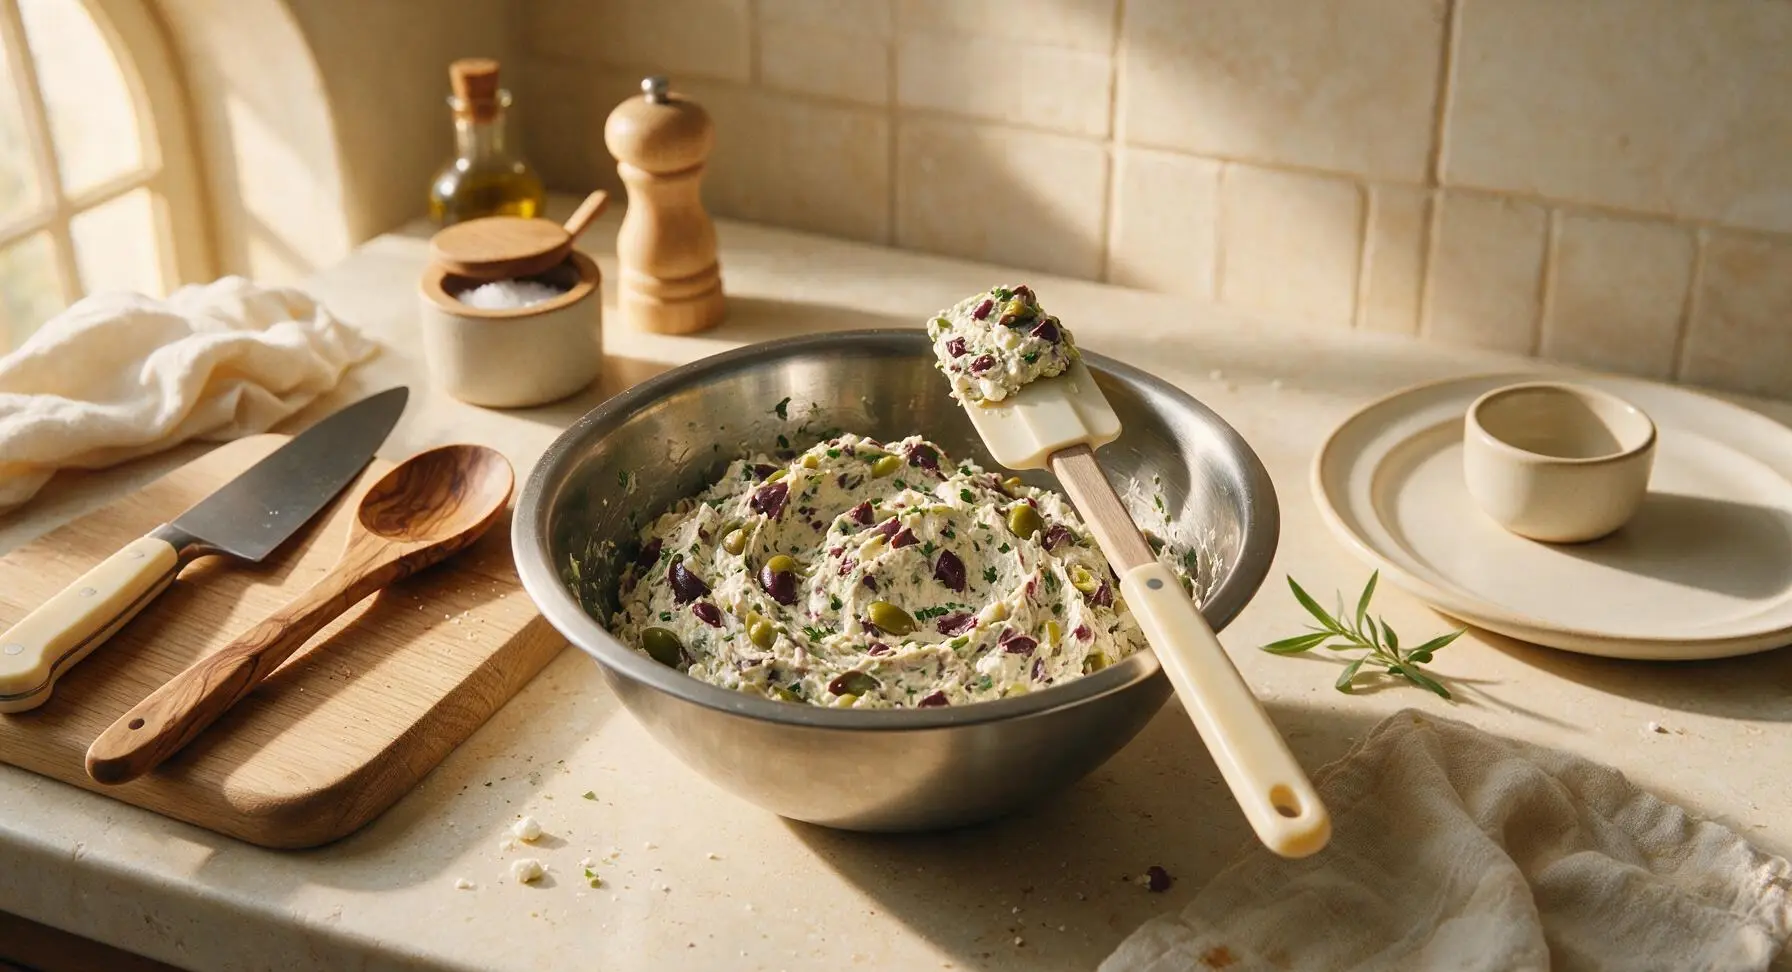
Add 8oz softened room-temperature cream cheese, 1/4 cup crumbled feta, 1 small minced garlic clove, 1 tablespoon fresh lemon juice, 1 tablespoon extra-virgin olive oil, 2 tablespoons chopped fresh parsley, 1/4 teaspoon flaky sea salt, and 1/4 teaspoon black pepper to the mixing bowl with the chopped olives. Use the cream-handled silicone spatula to fold all ingredients together until evenly combined, with visible flecks of dark purple kalamata, bright green olive, and green parsley throughout the pale creamy base. Do not overmix—small, distinct chunks of feta and olive should remain for texture, about 1 minute of gentle folding total.
Step 2
step2:Mix Olive Spread
Step 2
step2:Mix Olive Spread
3

Prep Vegetable Fillings

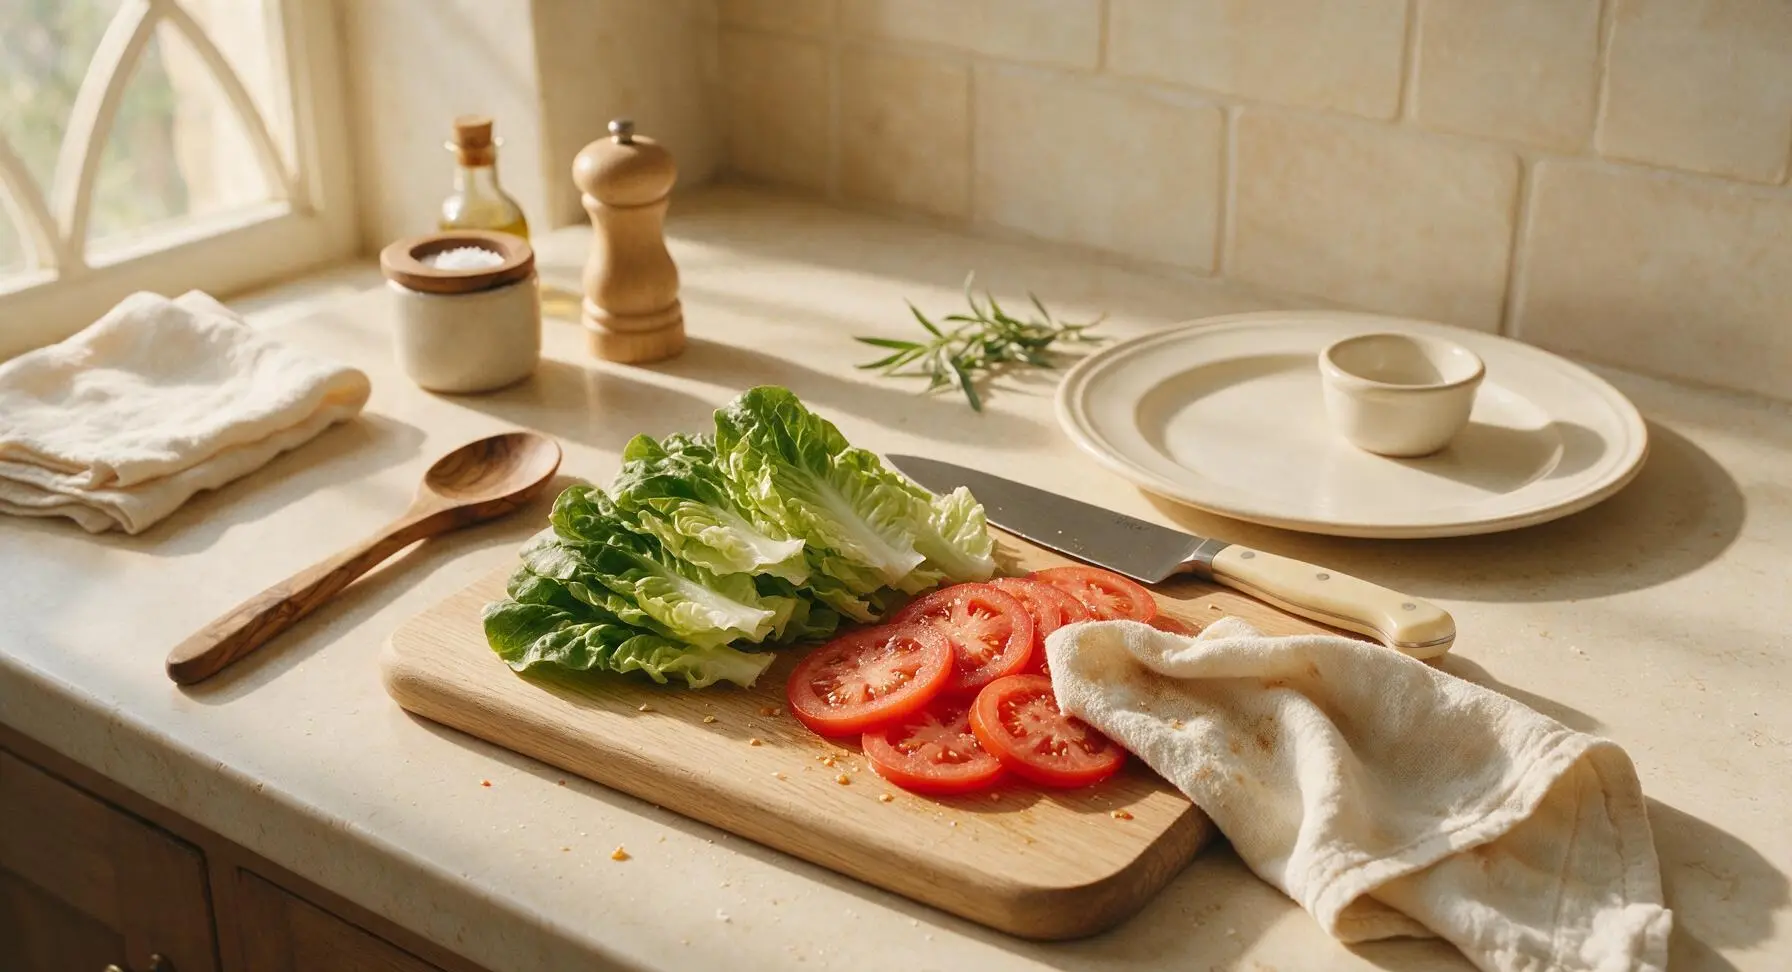
Place washed, fully patted-dry butter lettuce leaves and 1/4-inch thick seeded Roma tomato slices on the clean edge of the walnut cutting board. Use the chef knife to trim any tough lettuce stems, and lightly season tomato slices with a tiny pinch of flaky salt to draw out excess moisture. After 2 minutes, blot tomato slices gently with a corner of the cream linen towel to remove all beaded moisture—this is critical to prevent soggy sandwich bread. Discard any wilted brown lettuce edges.
Step 3
step3:Prep Vegetable Fillings
4

Slice Sourdough Bread

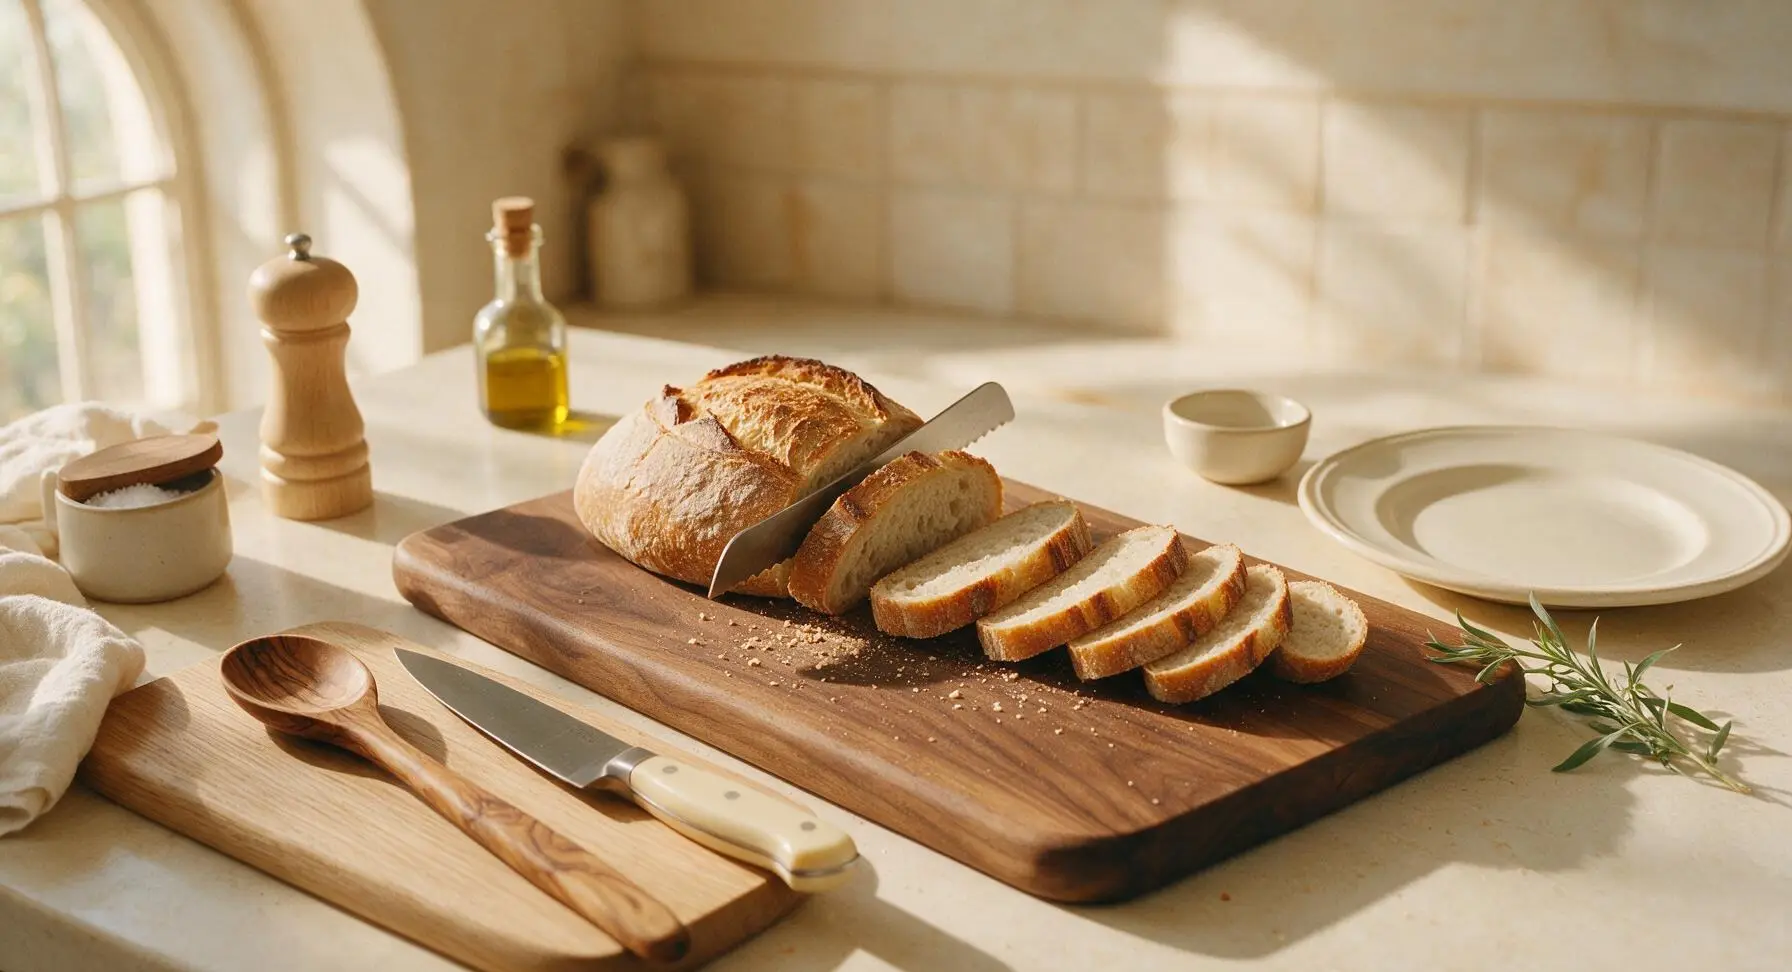
Use the serrated bread knife to cut the sourdough loaf into 8 even, 1/2-inch thick slices (if not pre-sliced). Lay all slices flat on the cutting board. If you prefer a firmer bite, toast slices very lightly until just crisp on the surface, then let cool completely to room temperature (about 5 minutes) before spreading—warm bread will melt the cream cheese spread and cause sogginess. Arrange slices in four matching pairs.
Step 4
step4:Slice Sourdough Bread
5

Apply Spread to Bread

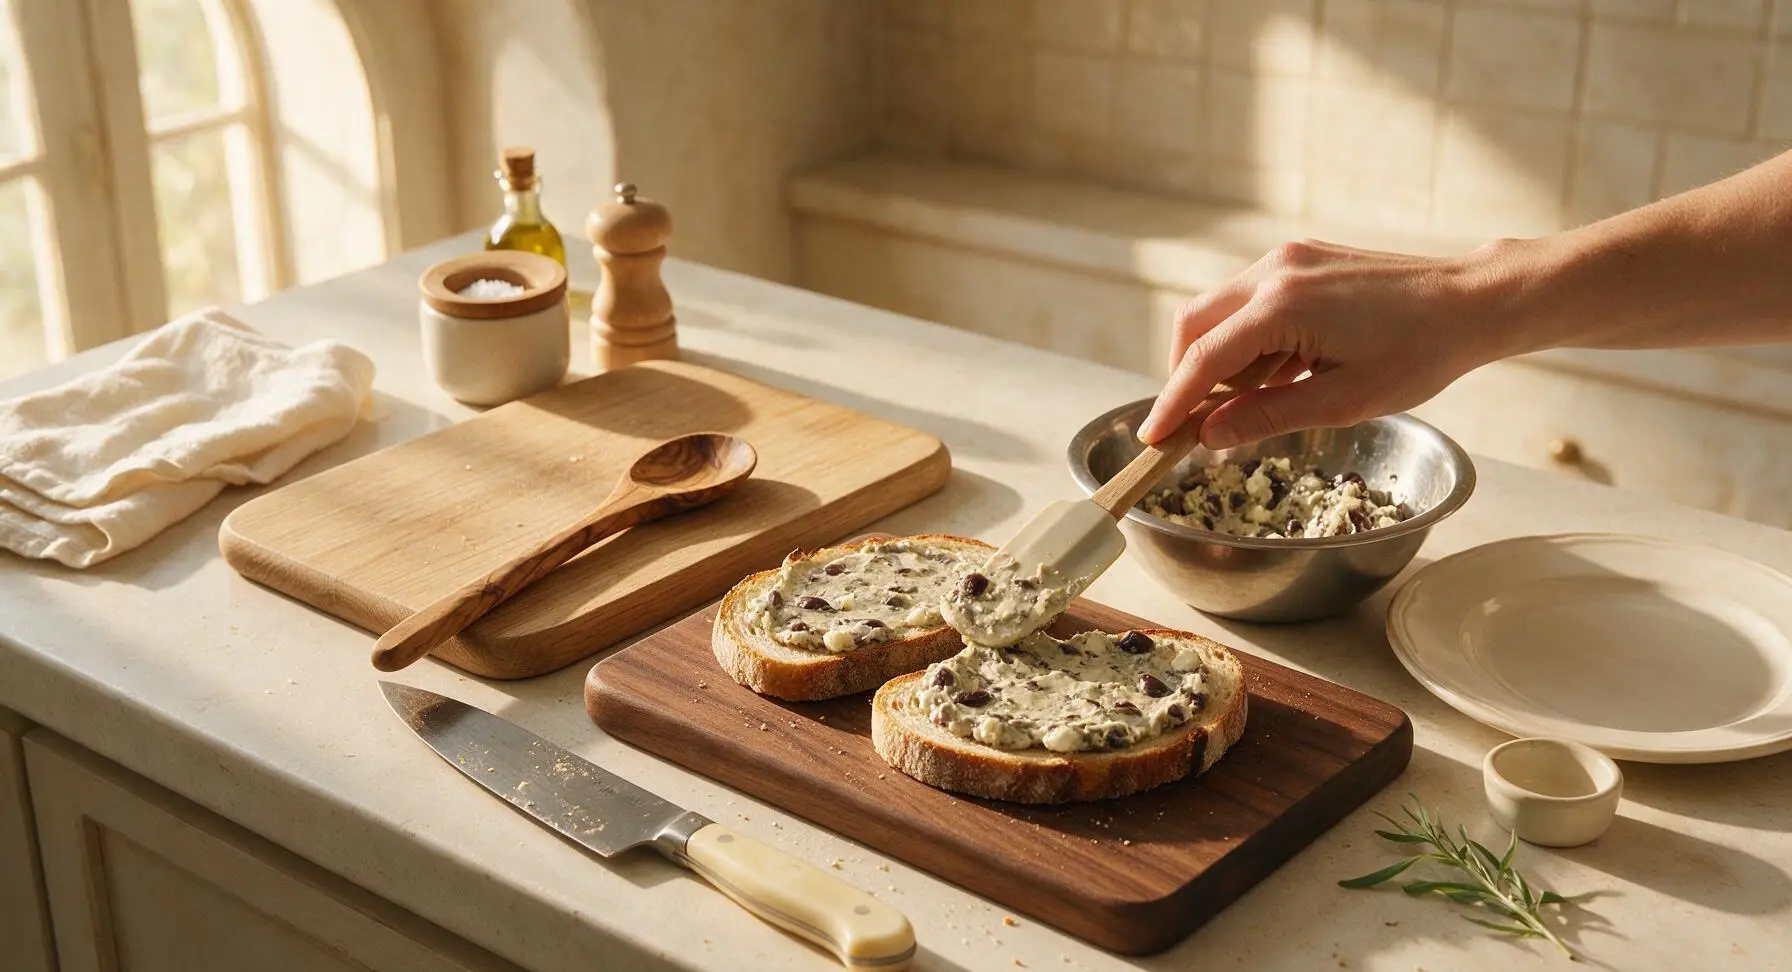
Use the silicone spatula to scoop a generous 1/4 cup of the olive spread onto one side of each of the 8 bread slices. Spread the mixture evenly all the way to the crust edges, creating a uniform 1/4-inch thick barrier that will block vegetable moisture from soaking into the bread. The spread should be smooth across the bread surface but still show distinct olive and feta chunks.
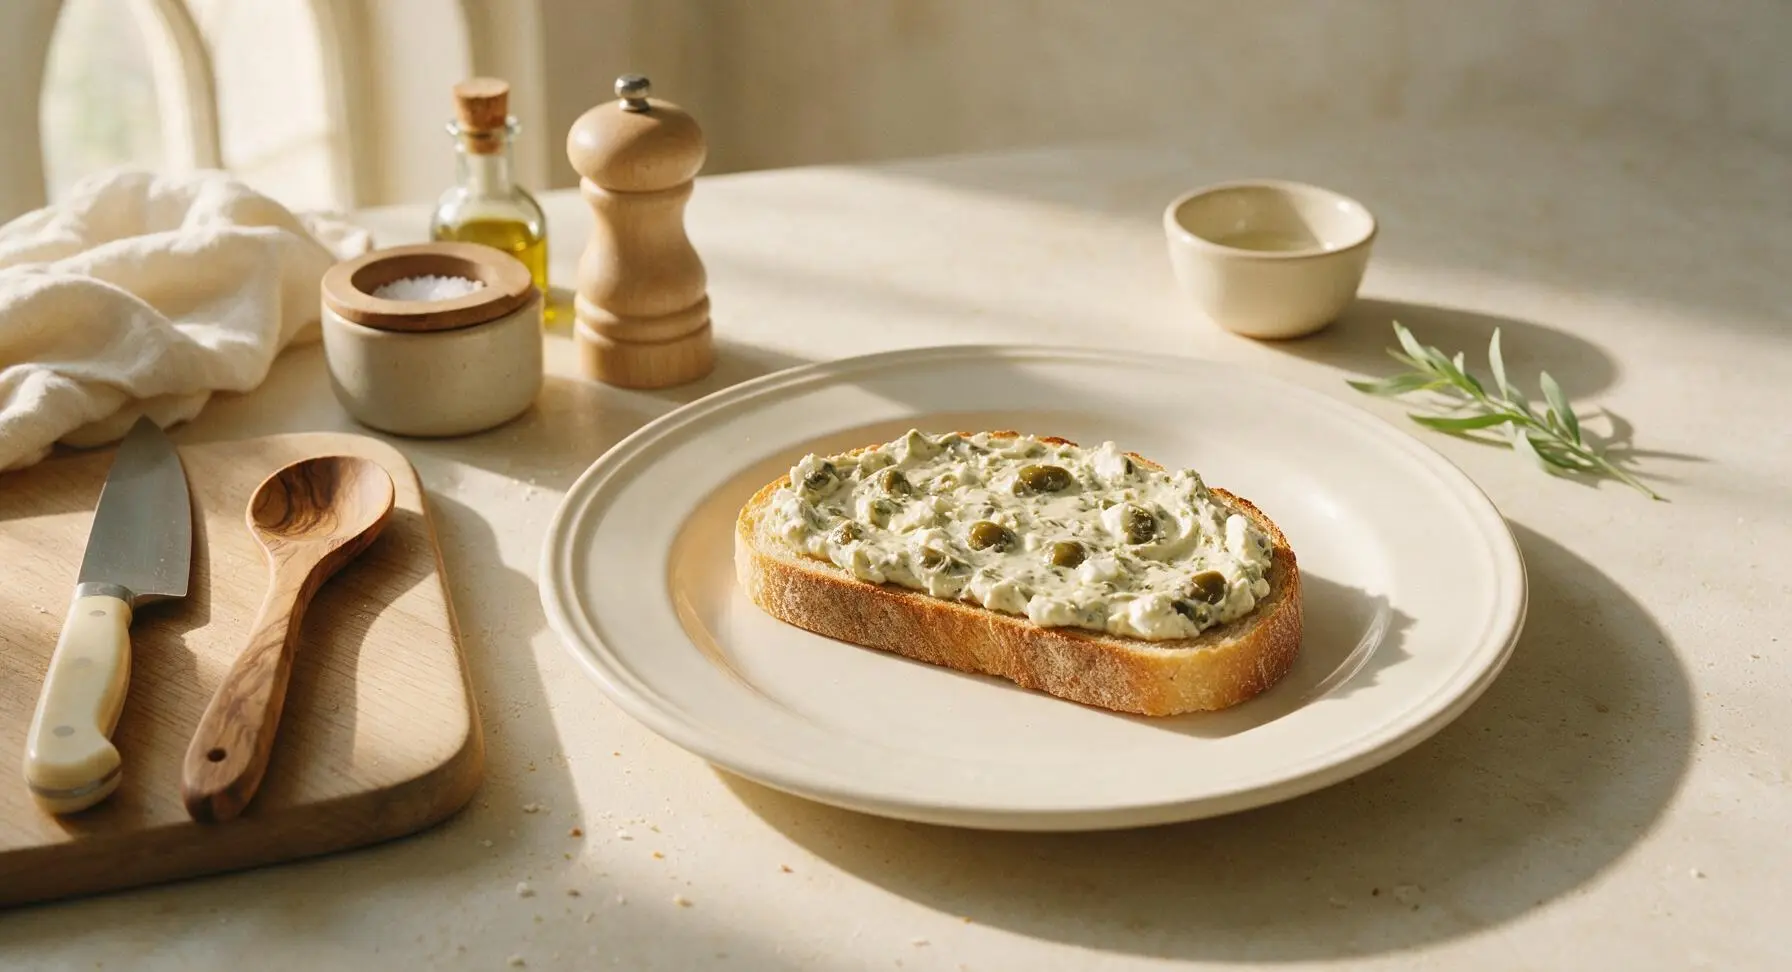
Step 5
step5:Apply Spread to Bread
Step 5
step5:Apply Spread to Bread
6

Layer Fresh Fillings

Arrange 2 butter lettuce leaves on top of the spread on 4 of the bread slices, pressing lightly to adhere to the spread. Top lettuce with 2-3 thin, blotted tomato slices, arranging them in a single even layer so they do not hang over the bread edges. Do not overstuff the sandwich, as excess filling will fall out when eating and create unnecessary mess.
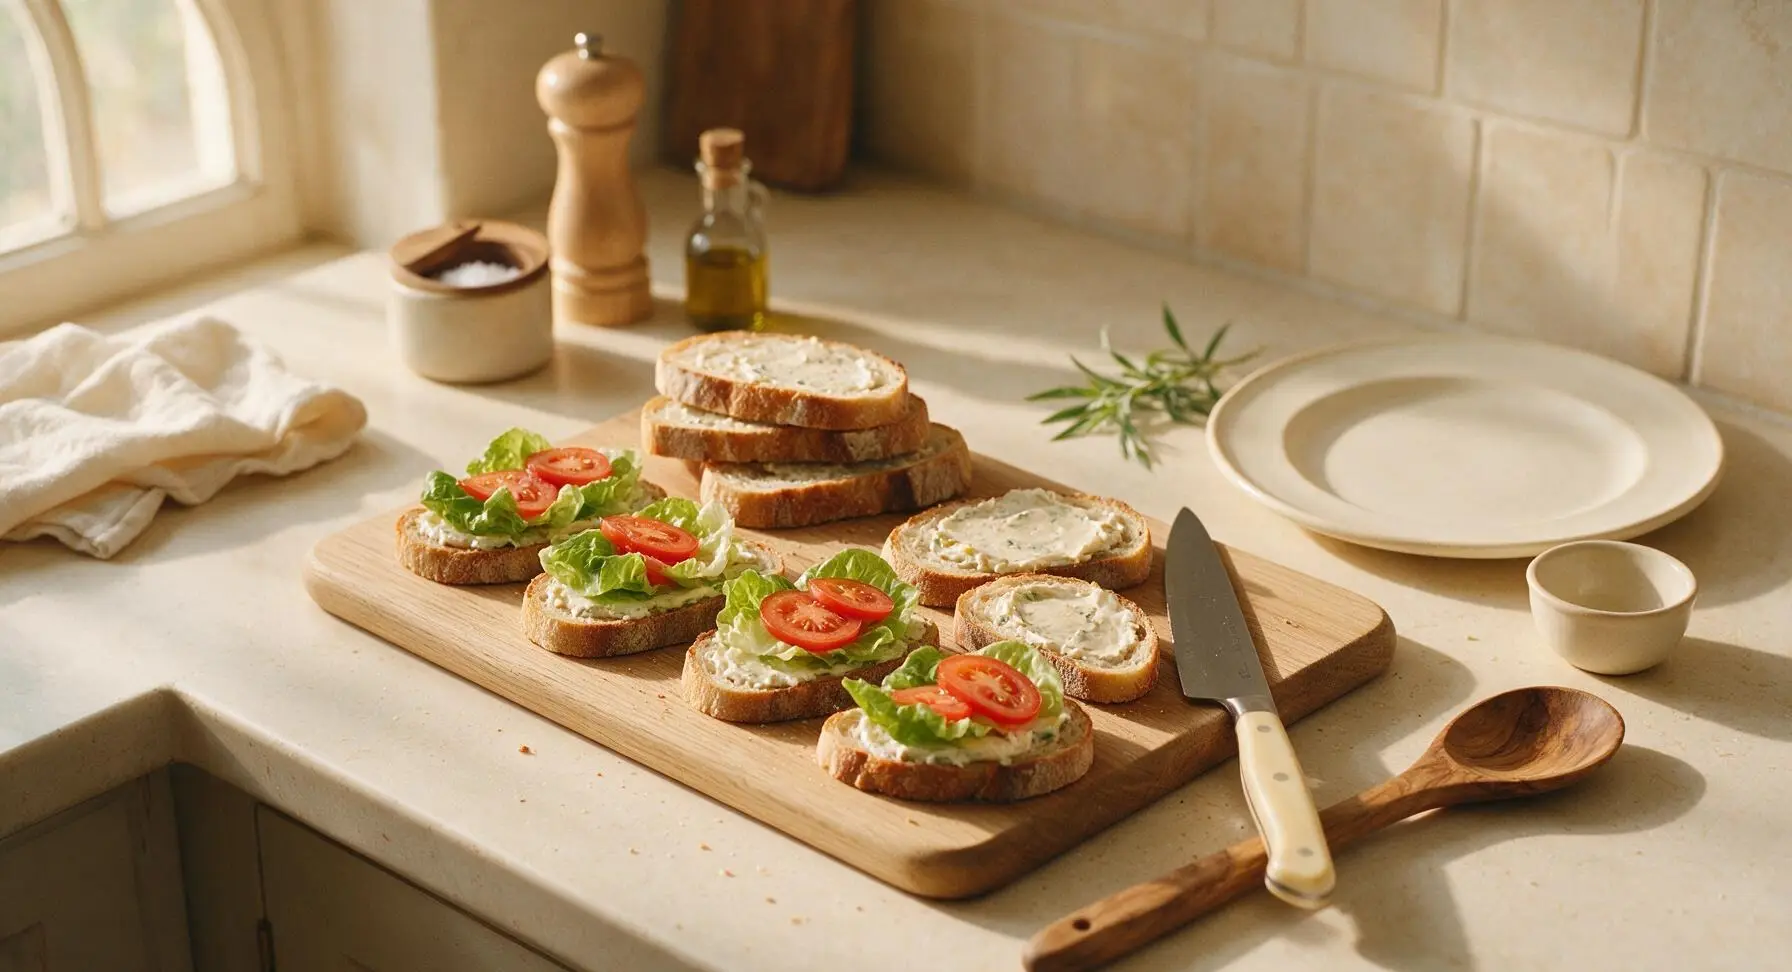
Step 6
step6:Layer Fresh Fillings
7

Assemble and Press Sandwiches

Place the remaining 4 spread-covered bread slices spread-side down on top of the vegetable-topped slices to form 4 complete sandwiches. Press down gently but firmly on the top of each sandwich with the palm of your hand for 3 seconds per sandwich to help the spread adhere to the fillings and create a compact, easy-to-hold shape. Wipe any smudges of spread from the bread crusts with the edge of the linen towel for a clean finish.
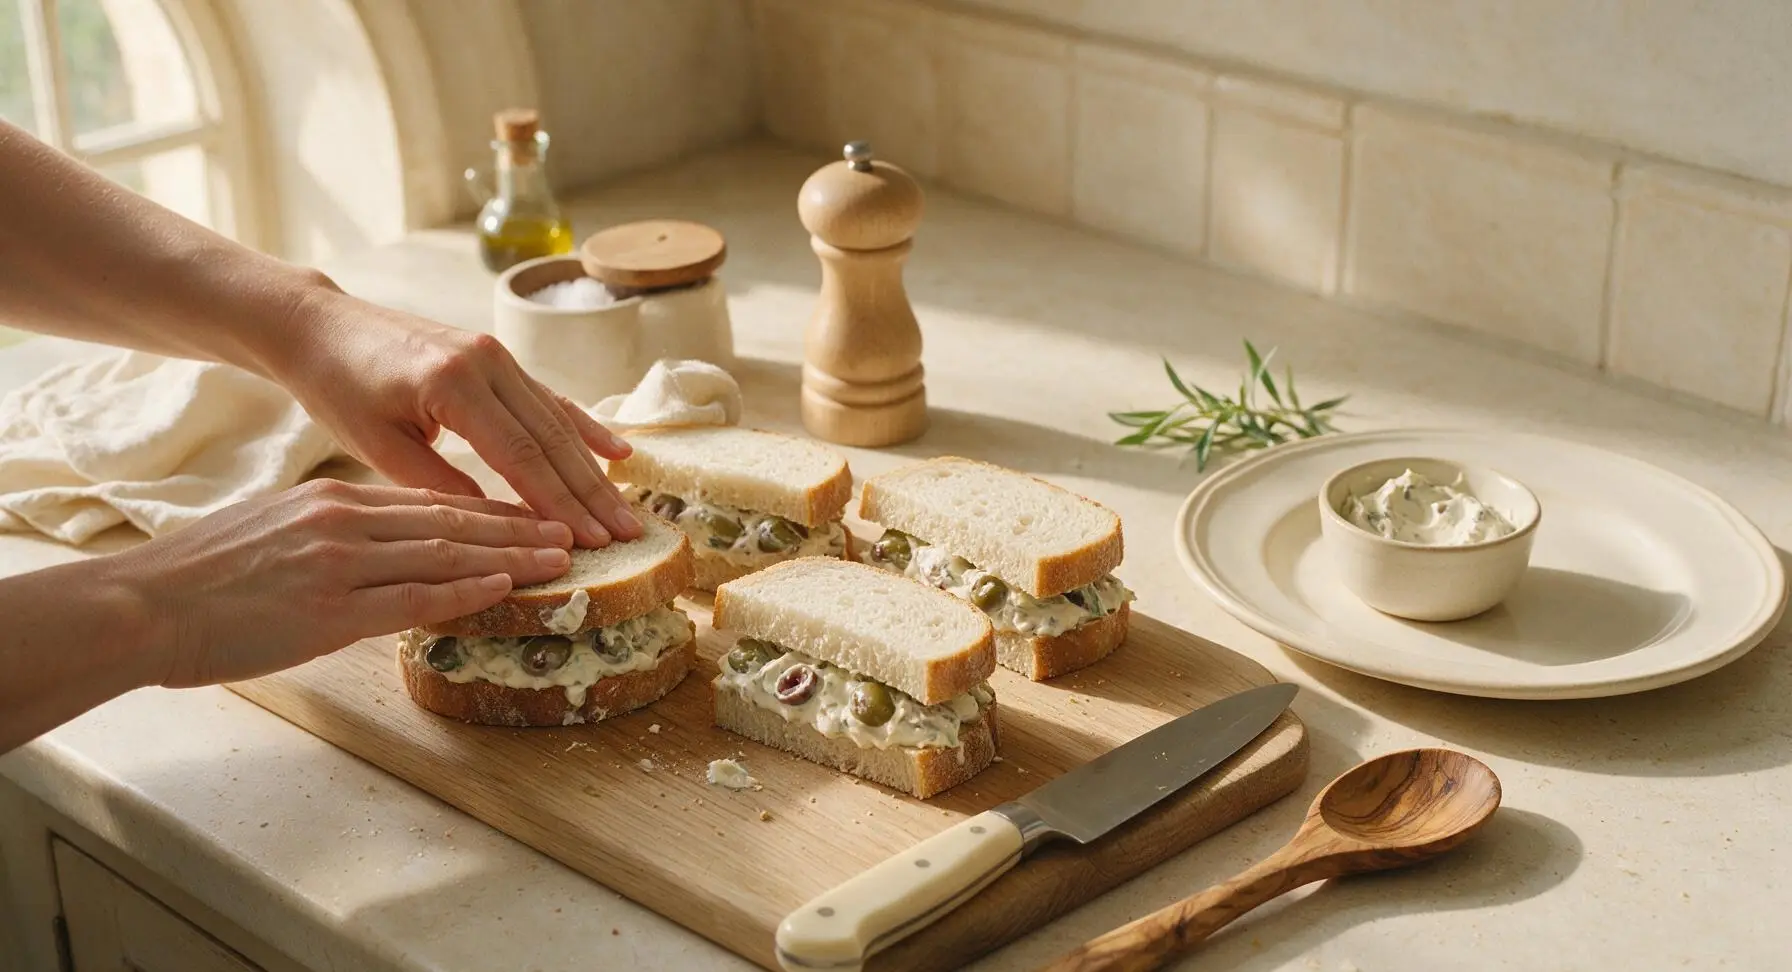
Step 7
step7:Assemble and Press Sandwiches
8

Slice and Plate Sandwiches

Use the serrated bread knife to cut each sandwich diagonally into two triangular halves, wiping the knife blade on the linen towel between cuts to avoid dragging spread across the clean cut surface. Arrange the cut sandwiches on the matte cream ceramic rectangular serving platter, leaning the halves against each other to show the colorful cross-section of fillings.
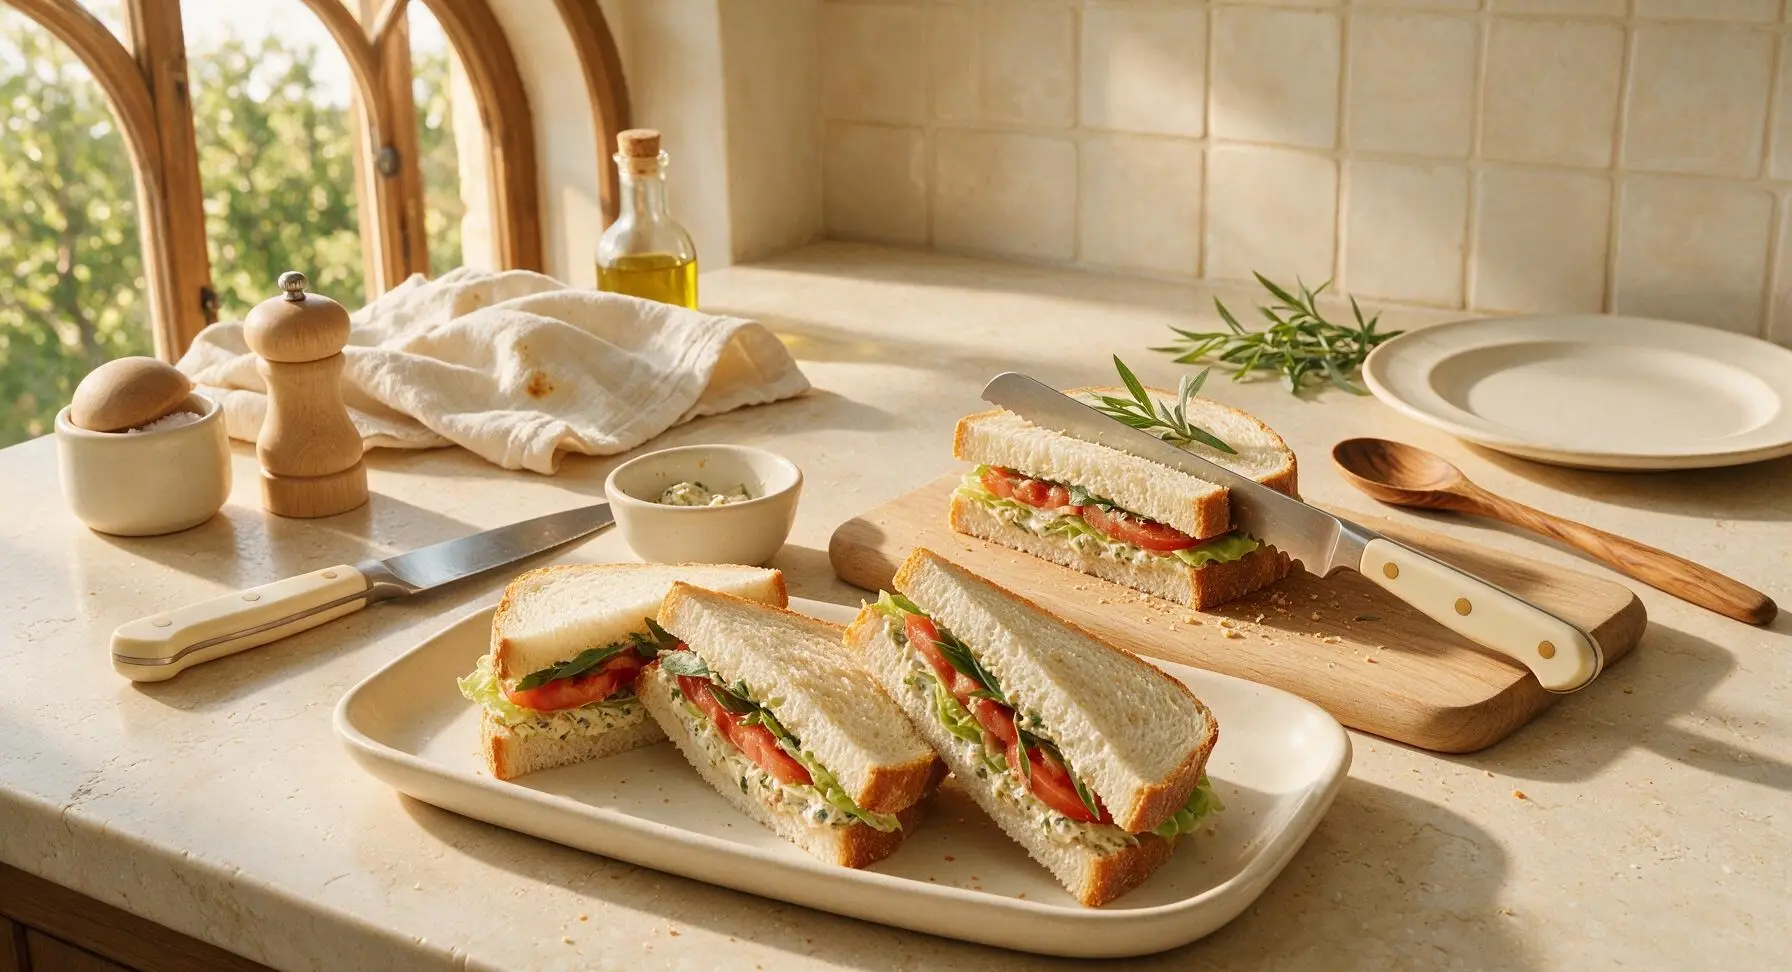
Step 8
step8:Slice and Plate Sandwiches

Tips

1.Always pat olives, lettuce, and tomatoes completely dry before building the sandwich—excess moisture from brine or vegetable juice will soak through the bread and create a soggy texture, even with the spread barrier, especially if making sandwiches a few hours ahead for a picnic.
2.For the best texture, do not use a food processor to chop olives or mix the spread—hand-chopping creates irregular, briny olive bits that have more bite, while over-processing will turn the spread into a smooth, uniform paste that lacks textural contrast.
3.If making these sandwiches ahead for a picnic, wrap each tightly in parchment paper and chill in the refrigerator for up to 4 hours before serving—chilling helps the spread firm up, and the tight wrap prevents fillings from shifting during transport. Avoid making them more than 6 hours ahead, as the bread will slowly absorb moisture even with proper prep.


✨ You May Also Like

Lunch
🍜 United States

Creamy, salty, tangy nostalgic Midwestern sandwich pairing rich peanut butter with crisp briny dill pickles for a fast, satisfying no-cook meal.

⏱️ 5 minutesLunch ★ 4.6
Lunch
🍜 United States

Crispy, melty pressed sandwich layered with savory roast pork, ham, Swiss cheese, pickles, and tangy mustard: a beloved Cuban-American comfort classic.

⏱️ 25 minuteLunch ★ 4.9
Lunch
🍜 United States

Hearty, briny New Orleans pressed sandwich stacked with cured Italian meats, provolone, and zesty olive salad, served cold for bold, portable flavor.

⏱️ 1 hour 20Lunch ★ 4.7
Lunch
🍜 United States

A tangy, creamy Southern American staple, this no-cook cheesy sandwich is packed with sharp cheddar and sweet pimentos for a satisfying, portable bite.

⏱️ 1 hour 15Lunch ★ 4.8
Lunch
🍜 United States

Crispy Cajun-spiced fried shrimp piled on crusty French bread with tangy remoulade and fresh toppings, the iconic Louisiana street food sandwich.

⏱️ 35 minuteLunch ★ 4.4
Lunch
🍜 United States

Stacked, savory deli-style corned beef sandwich with melted Swiss, tangy mustard, and crisp griddled rye— a fast, hearty, satisfying classic.

⏱️ 15 minuteLunch ★ 4.9

olive sandwich:Frequently Asked Questions

1.Can I make the creamy olive spread ahead of time for picnic prep? ▾
Absolutely! The spread actually tastes better when made 1 to 2 days in advance, as the garlic, briny olive, and cheese flavors have time to fully meld. Store it in a sealed airtight container in the fridge for up to 5 days, and give it a quick stir before spreading—just avoid assembling full sandwiches more than 4 hours ahead to prevent soggy bread.
2.What can I use if I don’t have sourdough bread for this sandwich? ▾
You have great flexible options here! Soft ciabatta, crusty French baguette cut into sandwich lengths, hearty whole grain bread, or even soft brioche hamburger buns work beautifully. Just skip ultra-soft white sandwich bread if you’re packing it for a picnic, as it gets soggy much faster from the creamy spread and vegetable moisture.
3.Do I have to use both green and kalamata olives for the spread? ▾
Not at all! The mixed olive blend gives a nice balance of bright, tangy green olive depth and rich, fruity kalamata savoriness, but you can use 100% of whichever olive you prefer. Just make sure all olives are fully pitted and well-drained first—excess brine left on the olives will make your spread runny and your bread soggy.
4.Can I substitute low-fat cream cheese to cut calories? ▾
You can, but I don’t recommend it for the best texture. Low-fat or non-fat cream cheese has a higher water content, which makes the spread thinner, runnier, and more likely to make bread soggy, plus it lacks the rich, creamy mouthfeel that balances the briny olives. If you want a lighter swap, use half full-fat cream cheese and half plain whole-milk Greek yogurt instead.
5.How do I keep these sandwiches from getting soggy on a summer picnic? ▾
It’s all about creating a moisture barrier! First, make sure your olives are fully drained and patted dry before mixing into the spread. Spread a thin, even layer of cream cheese on both cut sides of the bread to seal out veggie moisture, pack sandwiches in an insulated cooler with ice packs, and skip watery veggies like sliced tomato until right before eating.
6.What crisp veggies work best layered in this sandwich? ▾
My go-tos are thin-sliced crisp cucumber, shredded iceberg or romaine lettuce, thin rings of red bell pepper, and paper-thin slices of red onion for a little sharp bite. Pat any sliced veggies lightly with a paper towel before layering to remove excess surface moisture, and skip watery options like ripe tomato or pickles unless you’re eating immediately.
7.I don’t eat dairy—can I make this sandwich vegan? ▾
You absolutely can! Swap the regular full-fat cream cheese for a firm, plain vegan cream cheese (block form, not whipped tubs, works best), and replace the crumbled feta with vegan feta crumbles or chopped briny artichoke hearts for a similar salty, tangy bite. Double check that your olives are packed in brine without dairy additives, too.
8.Is the raw minced garlic too strong for people who don’t like bold garlic flavor? ▾
It doesn’t have to be! If you prefer milder garlic flavor, you can either cut the amount in half, roast the garlic clove first for a sweet, mellow taste, or swap fresh minced garlic for 1/8 teaspoon of garlic powder stirred into the spread. Letting the spread chill for 24 hours also softens the sharp raw garlic bite significantly as flavors meld.
9.How long do assembled Classic Creamy Olive Sandwiches stay fresh in the fridge? ▾
Properly stored in an airtight container or wrapped tightly in beeswax wrap or plastic wrap, assembled sandwiches will stay fresh for up to 24 hours in the fridge. I recommend adding leafy greens and crisp veggies right before serving if you plan to store them that long, as those ingredients wilt and release moisture faster than the olive and cheese spread.
10.Can I add sliced deli meat to this sandwich for extra protein? ▾
Absolutely! Thinly sliced salami, prosciutto, roasted turkey, or even grilled chicken all pair beautifully with the tangy olive and cheese spread. If you’re adding cured meats like salami, layer them directly against the cream cheese barrier on the bread to lock in moisture, and skip extra salty toppings, since olives and feta already bring plenty of briny saltiness.
11.My cream cheese is rock hard straight from the fridge—how do I soften it quickly? ▾
The fastest food-safe method is to unwrap the block of cream cheese, place it on a microwave-safe plate, and heat it in 10-second bursts on 50% power until it’s soft enough to stir easily, usually 20 to 30 seconds total. You can also leave it wrapped on the counter for 30 to 45 minutes before prepping if you don’t want to use the microwave.
12.Can I blend the olive spread until it’s completely smooth instead of chunky? ▾
Of course! The classic version has a coarse, chunky texture from roughly chopped olives and crumbled feta, but if you prefer a smooth, tapenade-like consistency, you can pulse the entire spread mixture in a food processor 5 to 7 times until it reaches your preferred texture. Just don’t over-blend it, or it will turn runny instead of thick and creamy.
13.Are these sandwiches appropriate to pack for kids’ school lunches? ▾
They’re a great kid-friendly option with a couple small tweaks! First, cut the garlic amount in half or skip it entirely for milder flavor, chop olives into very small pieces so there are no big briny chunks, and cut assembled sandwiches into fun finger-sized sticks or small triangles. Just double check your school’s allergen policies for any cross-contamination warnings on olive packaging.
14.What sides pair best with this sandwich for a summer picnic? ▾
Light, crisp sides work perfectly to balance the rich, briny sandwich. My top picks are cold vinaigrette-based potato salad, fresh cut cantaloupe or watermelon, crunchy dill pickle spears, salt and vinegar potato chips, or a simple arugula salad tossed with lemon vinaigrette. Skip heavy, ultra-creamy sides that will weigh down the meal on hot sunny days.
15.Can I toast the sourdough bread for this sandwich if I’m eating it at home? ▾
Absolutely! Toasted sourdough adds wonderful nutty crunch and extra sturdiness if you’re not packing the sandwich to go. Let the toast cool for 2 to 3 minutes before spreading the cream cheese mixture on, so the heat from the toast doesn’t melt the cheese and make the spread runny. It makes a fantastic quick weekday lunch served open-faced, too.

Comments (19)

2 weeks ago

OMG this is the easiest work lunch ever! I made a batch on Sunday and ate it all week, no sogginess at all if you keep the olive mix separate until you’re ready to assemble. Total game changer for my meal prep rotation!

1 week ago

Wait how do you store the olive mix? I tried keeping it in a tupperware last time and it got all weird and watery after 3 days?

1 week ago

Great tip from Liz! To keep the olive mix fresh, store it in an airtight glass container in the fridge, and drain any excess brine off before you spread it on bread - it’ll stay perfect for up to 5 days!

1 week ago

My kids LOVED this! I thought they’d turn their noses up at the olives but the creamy spread mellowed the brininess just enough. They asked for these in their school lunches every day this week, win for mom!

1 week ago

That makes us so happy to hear! So many parents tell us this is a great gateway recipe for kids who are wary of strong briny flavors - thanks for sharing!

5 days ago

Packed these for a day hike last weekend and they held up perfectly! No mushy bread, super satisfying after a few miles of climbing. I added a sprinkle of red pepper flakes for a little kick, highly recommend that tweak.

3 days ago

Brought these cut into little triangles to my neighborhood potluck last night and they were GONE in 10 minutes. People kept asking for the recipe, I told them it was literally 4 ingredients mixed together, no cooking required! Nobody believed me.

2 days ago

I did the same for my book club! I used mini croissants instead of regular sandwich bread and it felt so fancy, zero effort.

3 days ago

This is good but I tried making it with dairy free cream cheese and the texture was a little off. Anyone have luck with a dairy free swap that actually works?

2 days ago

I used the vegan cream cheese from Trader Joe’s and whipped it for a minute with a little splash of oat milk before mixing in the olives, it came out super creamy no weird grainy texture!

2 days ago

Great tip Pat! We’ve also had success with whipped feta for folks who tolerate dairy but want a tangier twist, and for dairy free folks, make sure your cream cheese is fully room temp before mixing to avoid lumps.

2 days ago

SO good for those nights I get home from the gym and don’t want to cook anything. Takes 2 minutes to throw together, way better than grabbing fast food on the way home. I use sourdough bread for extra tang, chef’s kiss.

2 days ago

Made these for a casual girls brunch yesterday alongside mimosas and it was the perfect spread. I added a few thin slices of cucumber on mine for crunch, *chef’s kiss*. Will be making these all summer long.

2 days ago

The cucumber addition sounds incredible - that fresh crunch pairs so well with the briny olives and creamy spread. We’ll have to test that variation for the site!

2 days ago

Tastes just like the olive sandwiches my grandma used to make for Sunday family dinner when I was a kid! Only thing I changed was adding a little diced celery to the mix for that extra crunch she always put in. Total nostalgia hit.

yesterday

Oh my gosh my grandma did the celery thing too! I forgot all about that, I’m adding it next time I make a batch.

yesterday

We love hearing these nostalgia connections! The celery addition is such a classic touch, it adds such a nice bright crunch against the creamy spread.

yesterday

Literally saved me during finals week. No cook, no fancy equipment, I mixed the spread in a solo cup with a fork because I don’t even own mixing bowls. Tastes way better than the dining hall food, 10/10.

yesterday

I made this with low carb wraps instead of bread and it’s perfect for my low carb lunch rotation! The fat from the cream cheese keeps me full for hours, no mid-afternoon slump at all. Obsessed.

2 hours ago

Great call on the wraps! I do the same but add a couple slices of turkey for extra protein, it’s my go-to work lunch now.

2 hours ago

Just made these for the office team lunch and everyone is hovering around the break room asking for seconds. I should have made double the batch! The creamy olive spread is so much better than plain old turkey and cheese.

30 minutes ago

Next time definitely double the batch! We’ve made the mistake of making a single batch for office events too, it disappears faster than anything else we bring.

2 hours ago

Used my homemade sourdough for these and the tang of the bread pairs so perfectly with the salty olives and rich cream cheese. Only note is I’d recommend toasting the bread lightly if you like a little texture contrast, it’s chef’s kiss.

30 minutes ago

I’ve hated olives my whole life but my partner made these for lunch today and I ate two full sandwiches??? What kind of witchcraft is this? The cream cheese cuts the brininess so much I actually loved it. Shoutout to this recipe for converting me.

5 minutes ago

Welcome to the olive fan club! I used to pick olives off everything too until I had a sandwich just like this, it’s the gateway olive recipe for sure.

just now

This is our favorite kind of review! So stoked we could help you find an olive prep you love - try adding a little chopped kalamata olive next time if you’re feeling extra adventurous.

3 days ago

Made these for the tailgate before the Bears game last weekend and they were a hit! No heating required, easy to pass around, even the guys who only eat wings and burgers were raving about them. Will be a regular tailgate menu item from now on.

5 days ago

Packed these for our picnic at Mount Rainier last weekend and they held up so well even in the 80 degree heat! No weird melted cheese mess, no soggy bread, they were the perfect portable picnic food. 10/10.

3 days ago

I brought these on a camping trip last month too! I pre-made the spread at home and just brought a loaf of bread to assemble on site, zero cleanup.

2 days ago

Really good base recipe! I added a dash of hot sauce, a sprinkle of garlic powder, and some chopped pickled jalapeños to the spread for a little Texas kick and it was *chef’s kiss*. Perfect quick lunch.

yesterday

That spicy twist sounds amazing! We love how customizable this base recipe is - the garlic powder and jalapeño addition is going on our test list for sure.

1 week ago

This recipe is so budget friendly! All the ingredients cost me less than $10 at the grocery store and I got 6 full sandwiches out of it. Way cheaper than buying lunch out every day, and tastier too.

5 days ago

Same! I bought generic cream cheese and a jar of store brand olive salad and it still tasted incredible. No fancy expensive ingredients required.

3 days ago

That’s what we love to hear! Good food doesn’t have to break the bank, and this recipe is intentionally made with simple, affordable pantry and fridge staples.

yesterday

I’ve been making a version of this for years but I never thought to add a little mayo to the cream cheese to make it extra spreadable, that tip was a game changer! No more tearing my sourdough when I spread the mix. Thanks for the pro tip!

5 days ago

Made this with gluten free sourdough and it was delicious! Only heads up for other GF folks: make sure your olive mix doesn’t have any hidden wheat-based additives, I almost grabbed a jar that had modified food starch in it. Otherwise, perfect easy no-cook lunch!

3 days ago

Thanks for the heads up! I almost made that same mistake last week, I ended up chopping my own kalamata and green olives instead of using pre-made olive salad to avoid cross contamination.

2 days ago

Such an important note! We always recommend checking labels for dietary restrictions, and chopping your own olives is a great way to control exactly what goes into the spread. So glad you enjoyed it!



