
One Hour Yeast Rolls

title 1
One Hour Yeast Rolls
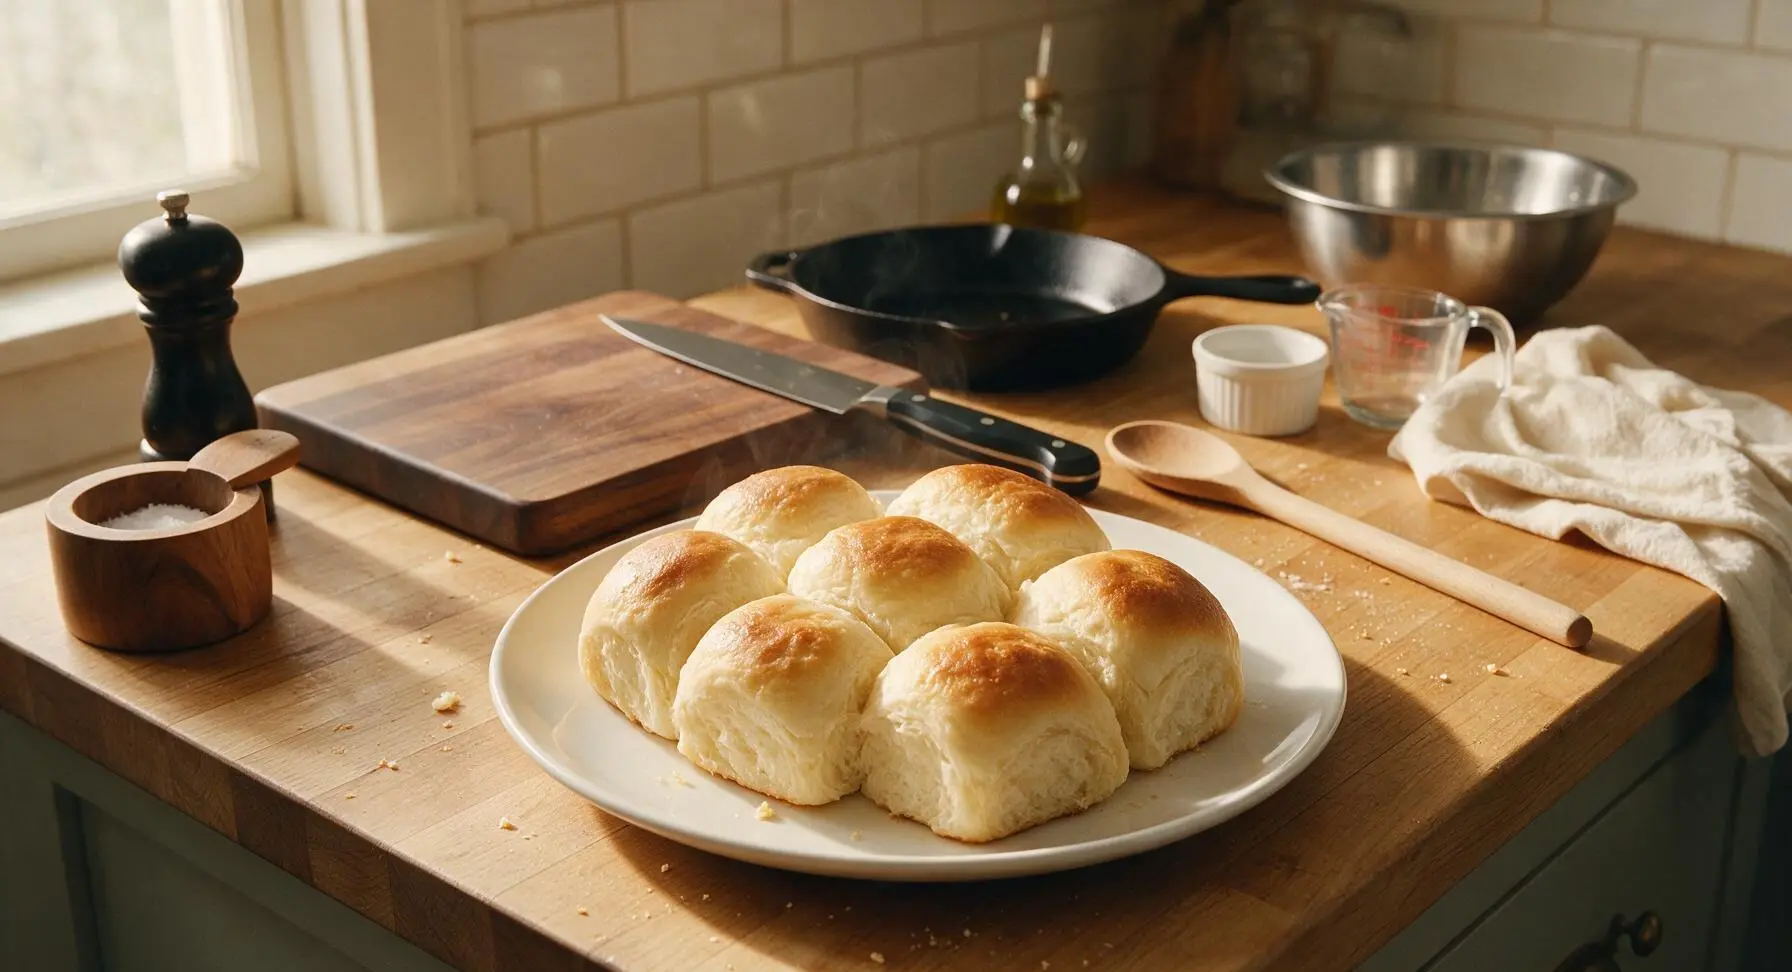
⏱️ cook time 20 minutes
🍽️ servings 12
⚡ Difficulty easy

intro

Fluffy, buttery pull-apart yeast rolls ready in just 60 minutes, with a golden tender crust and soft cloud-like crumb, perfect for sopping up gravy or slathering with salted butter.

Ingredients
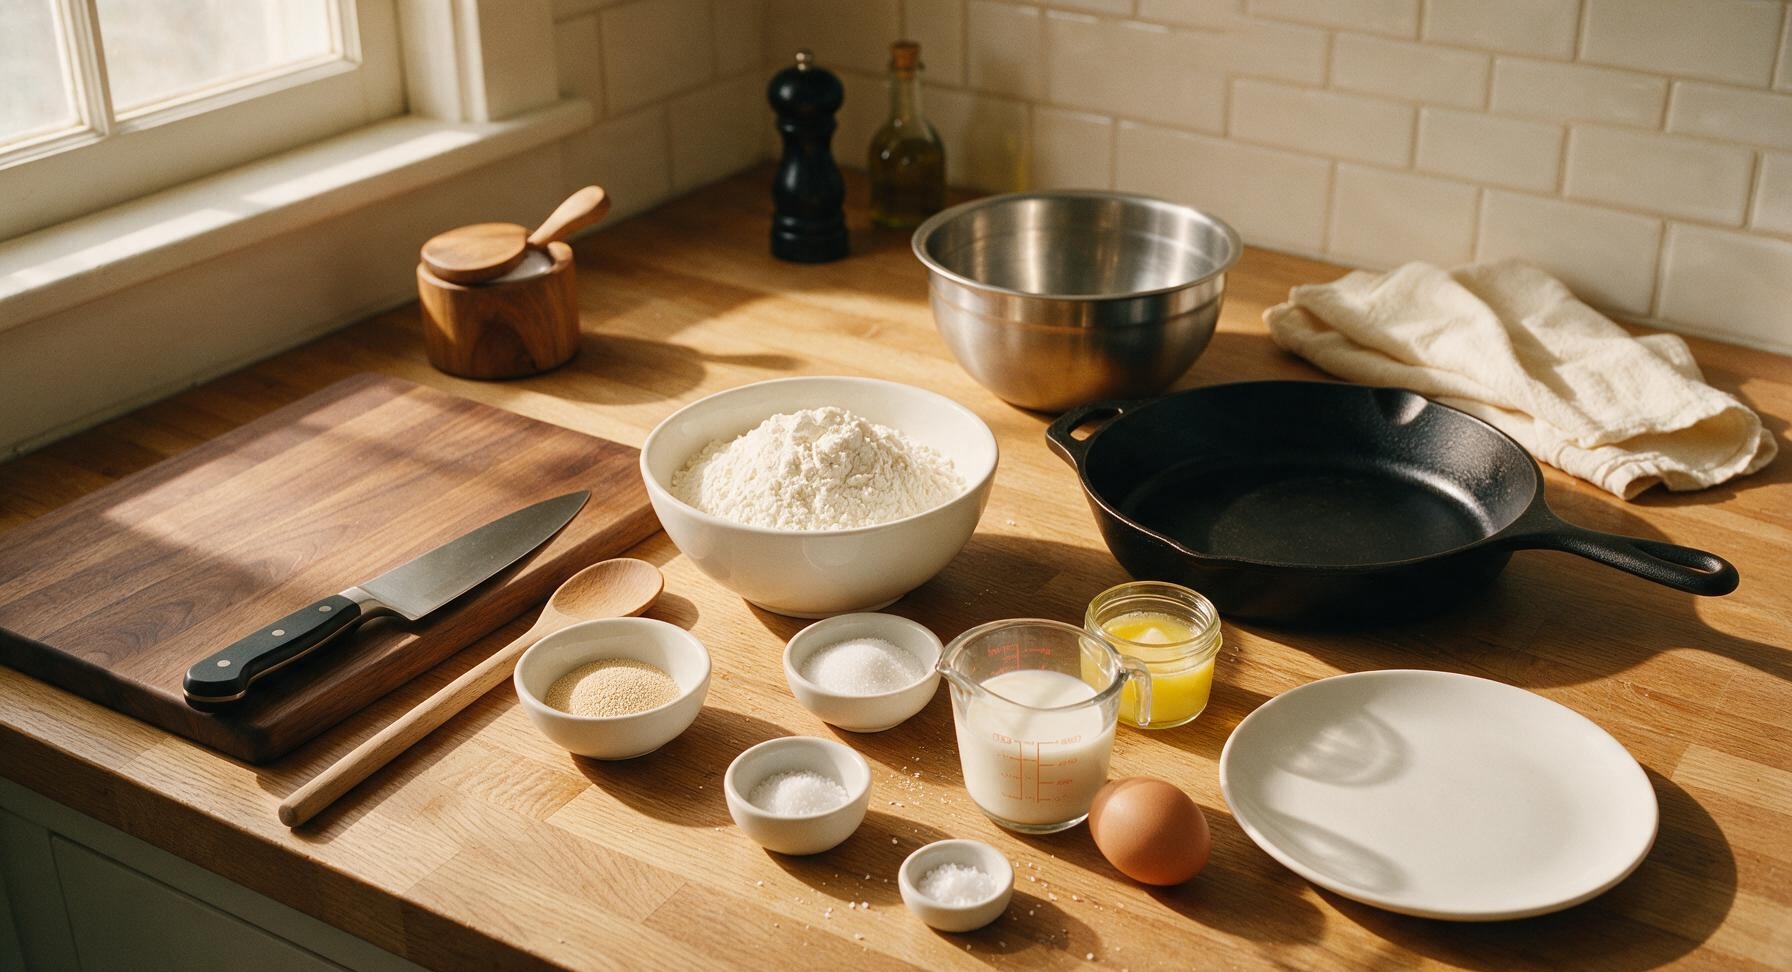
All-purpose flour 4 cups (480g)
Instant yeast 2 1/4 tsp (1 standard packet, 7g)
Granulated sugar 2 tbsp (25g)
Fine sea salt 1 tsp (5g)
Whole milk 1 cup (240ml, warmed to 110°F)
Unsalted butter 4 tbsp (57g, melted, divided)
Large egg 1 (50g, room temperature)
Flaky sea salt 1/4 tsp (for topping)

Steps

1

Warm the Liquid Base

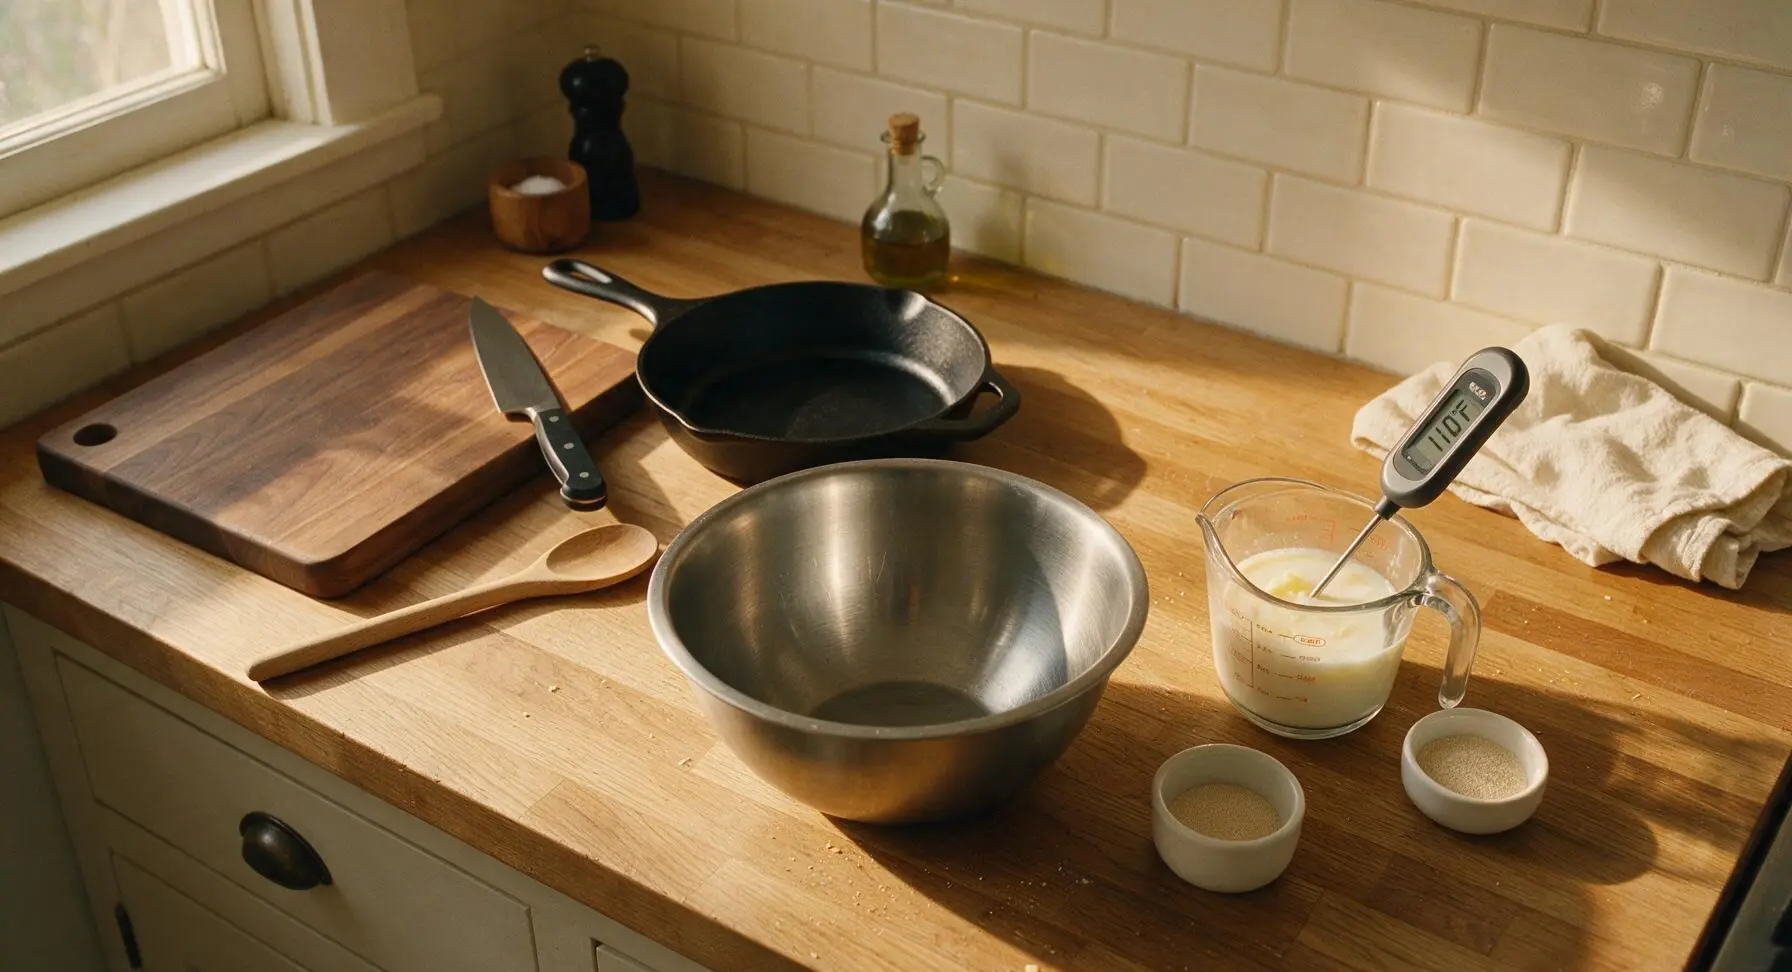
Pour 1 cup whole milk and 2 tablespoons of the melted unsalted butter into the 2-cup glass measuring cup. Warm in 10-second bursts in the microwave until the mixture reaches exactly 110°F (43°C), checked with the digital instant-read thermometer. Stir in 2 tablespoons granulated sugar until fully dissolved. Liquid that is too hot (over 115°F) will kill the yeast; liquid that is too cool will slow rising time.
Step 1
step1:Warm the Liquid Base
2

Activate the Yeast

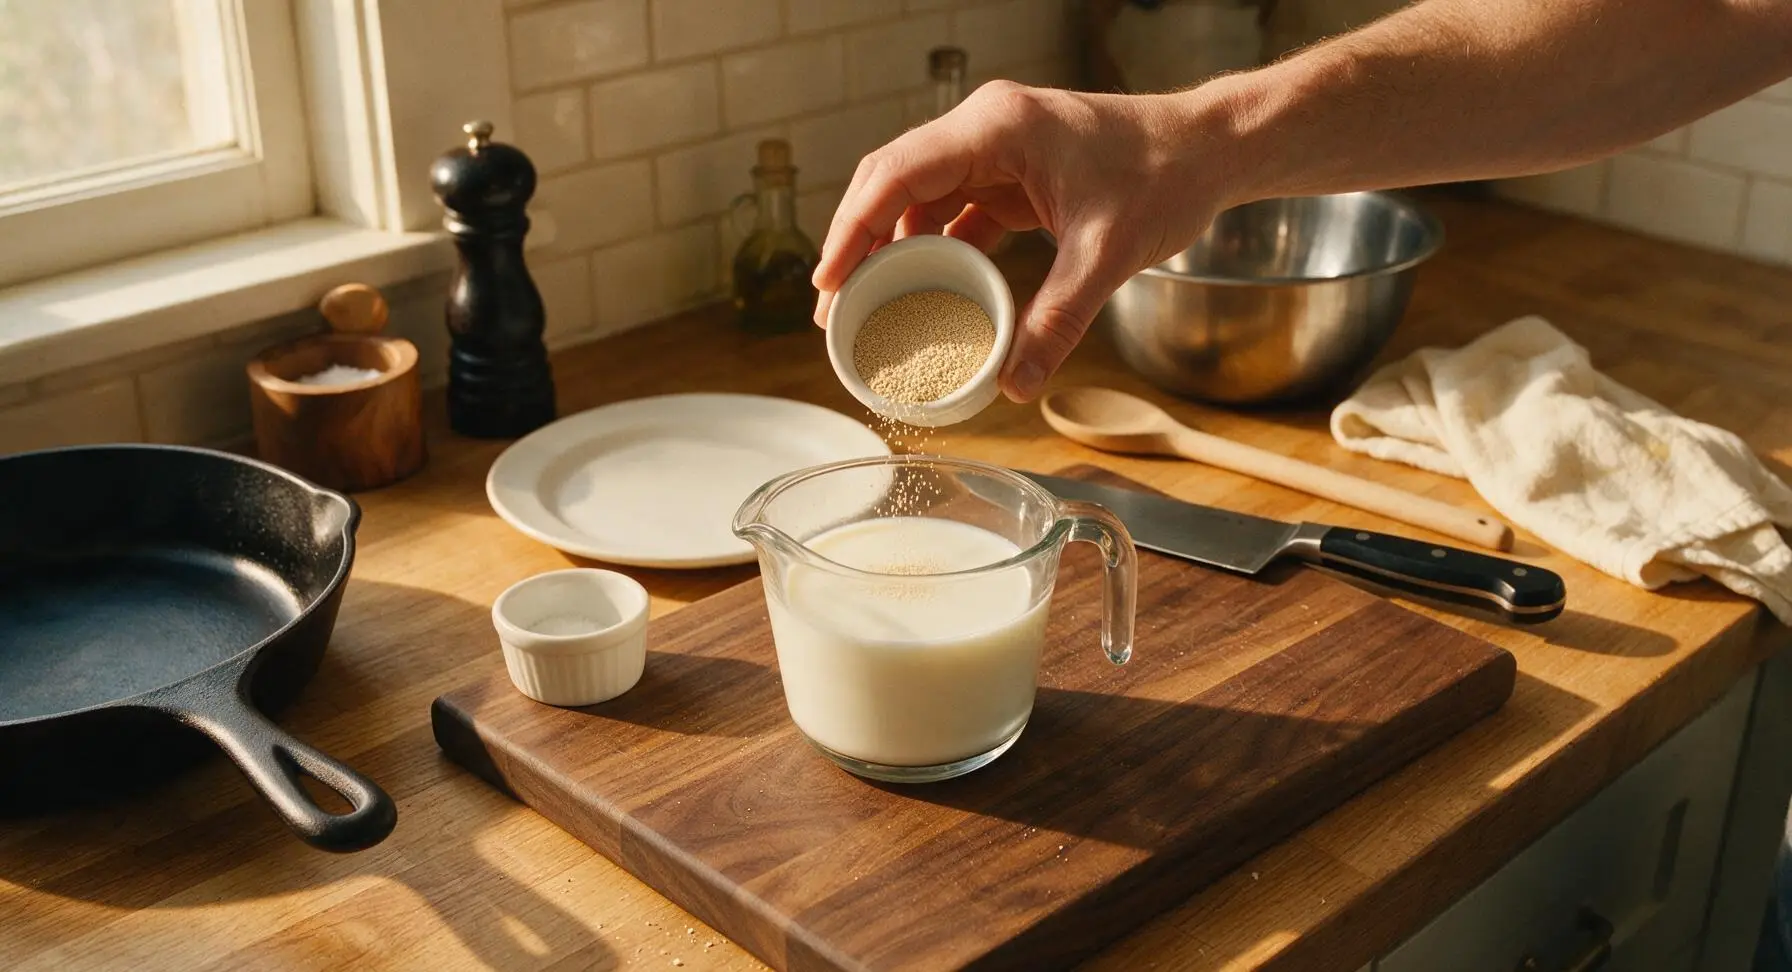
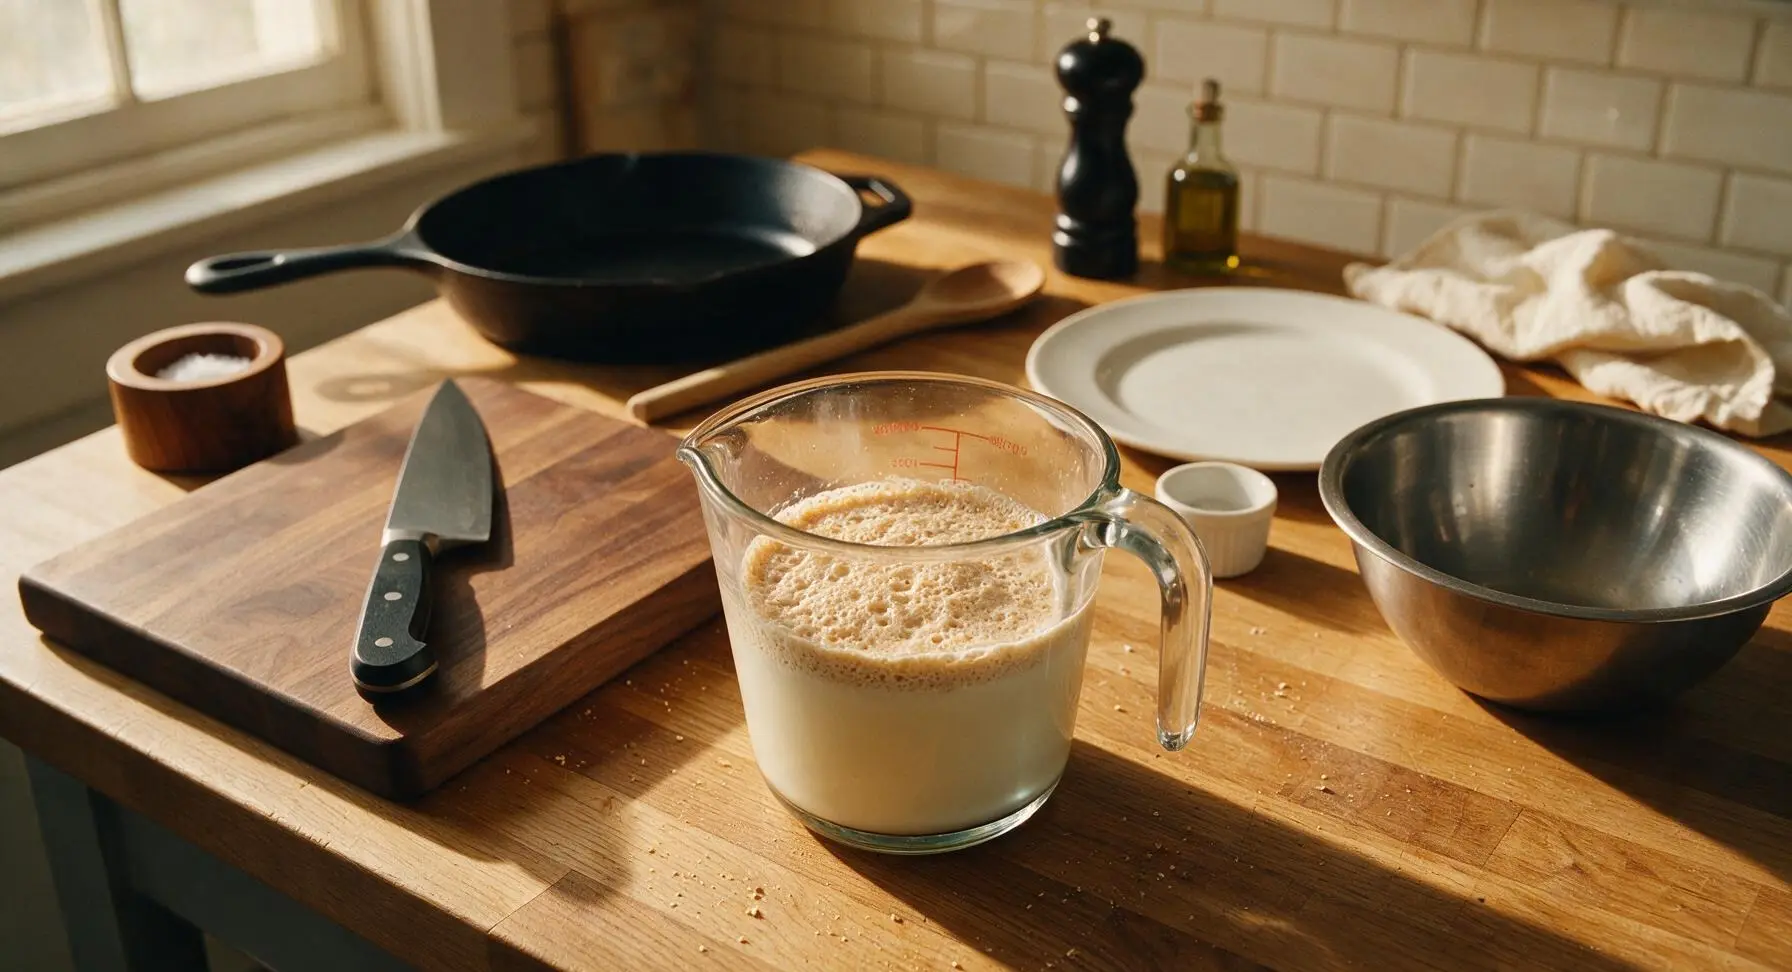
Sprinkle the full packet of instant yeast over the surface of the warm milk mixture. Let rest for 5 minutes in a warm spot until the surface becomes foamy and bubbly, confirming the yeast is active. If no foam appears after 5 minutes, the yeast is expired and should be replaced to avoid dense, flat rolls.
Step 2
step2:Activate the Yeast
Step 2
step2:Activate the Yeast
3

Mix the Dough

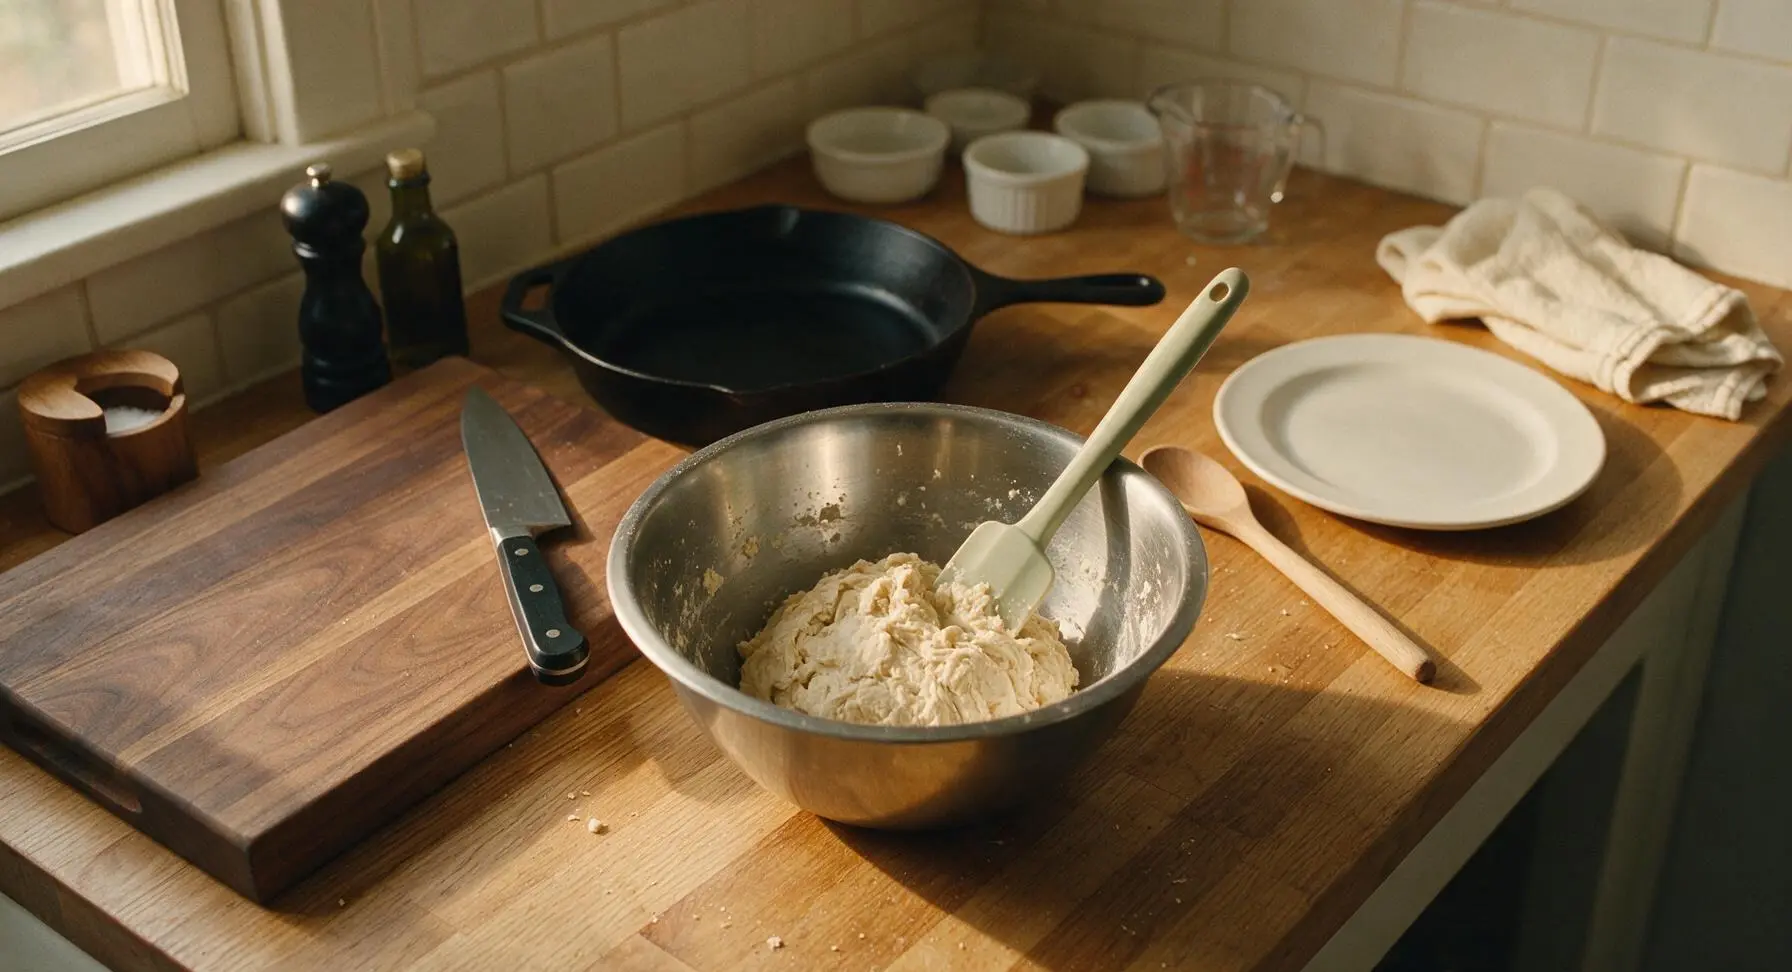
Pour the activated yeast mixture into the large stainless steel mixing bowl. Add the room temperature large egg and remaining 2 tablespoons melted unsalted butter, whisking to combine. Gradually stir in 4 cups all-purpose flour and 1 teaspoon fine sea salt with the silicone spatula, mixing until a shaggy, soft, slightly sticky dough forms that pulls away from the sides of the bowl. No lengthy kneading is required—just mix until no dry flour remains, as overworking the dough will create tough rolls.
Step 3
step3:Mix the Dough
4

First Quick Rise

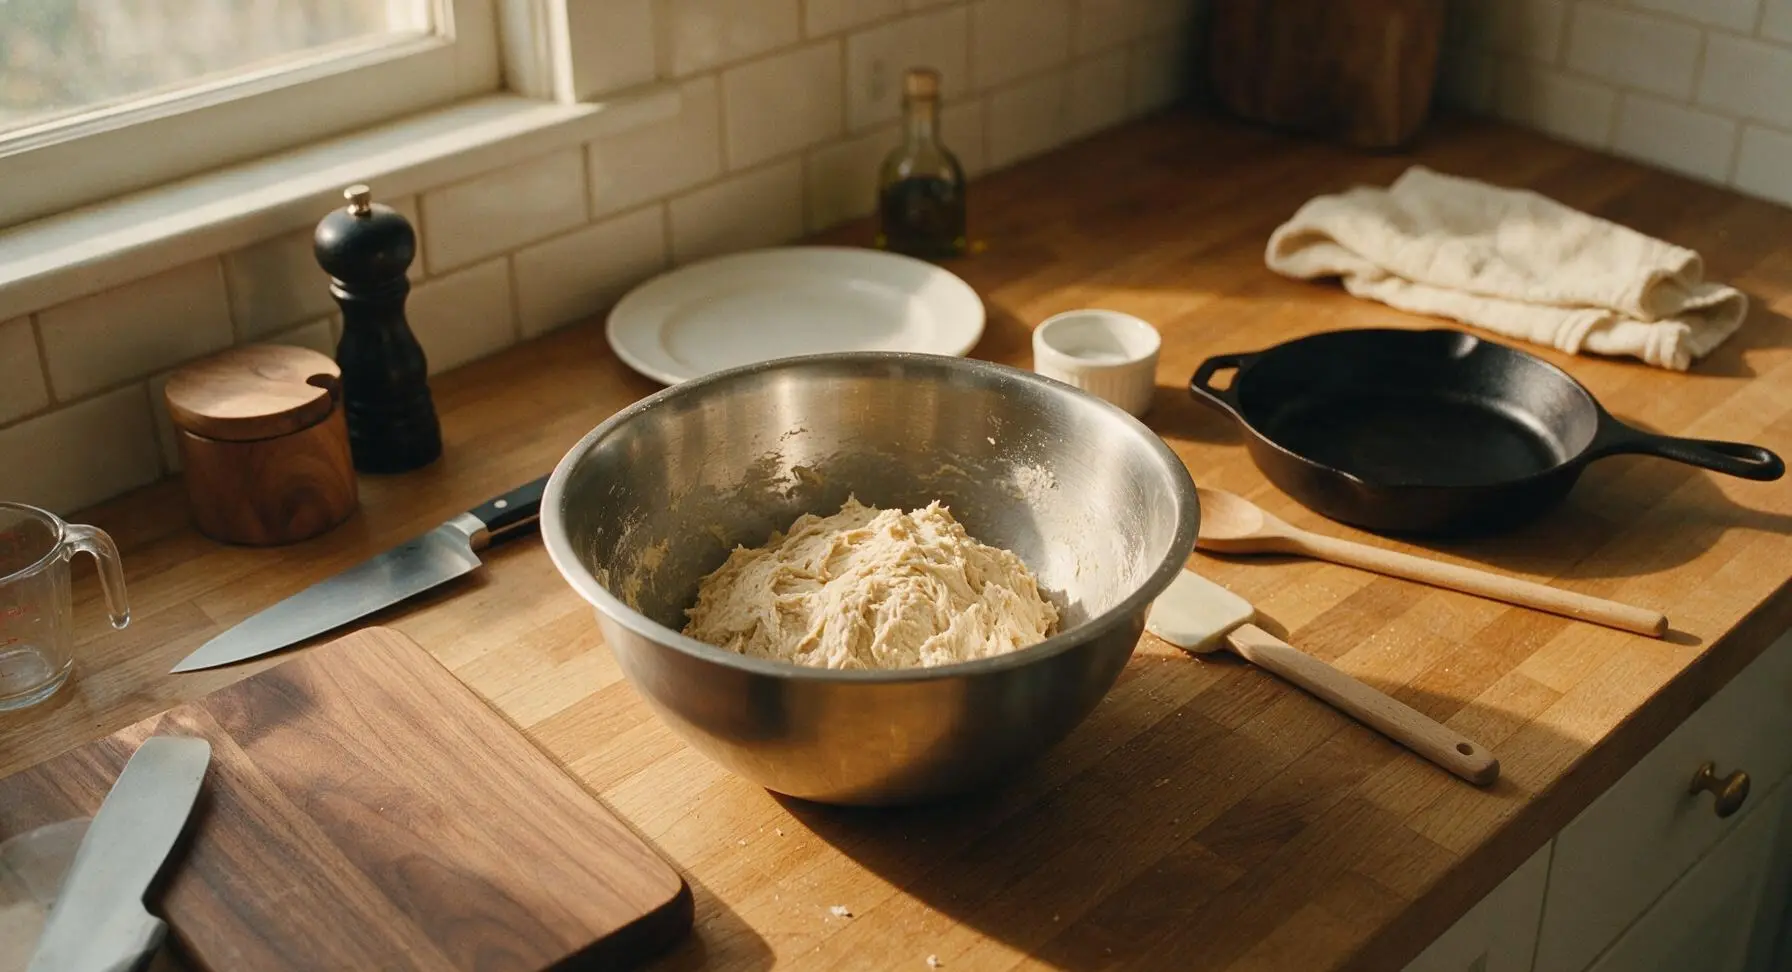
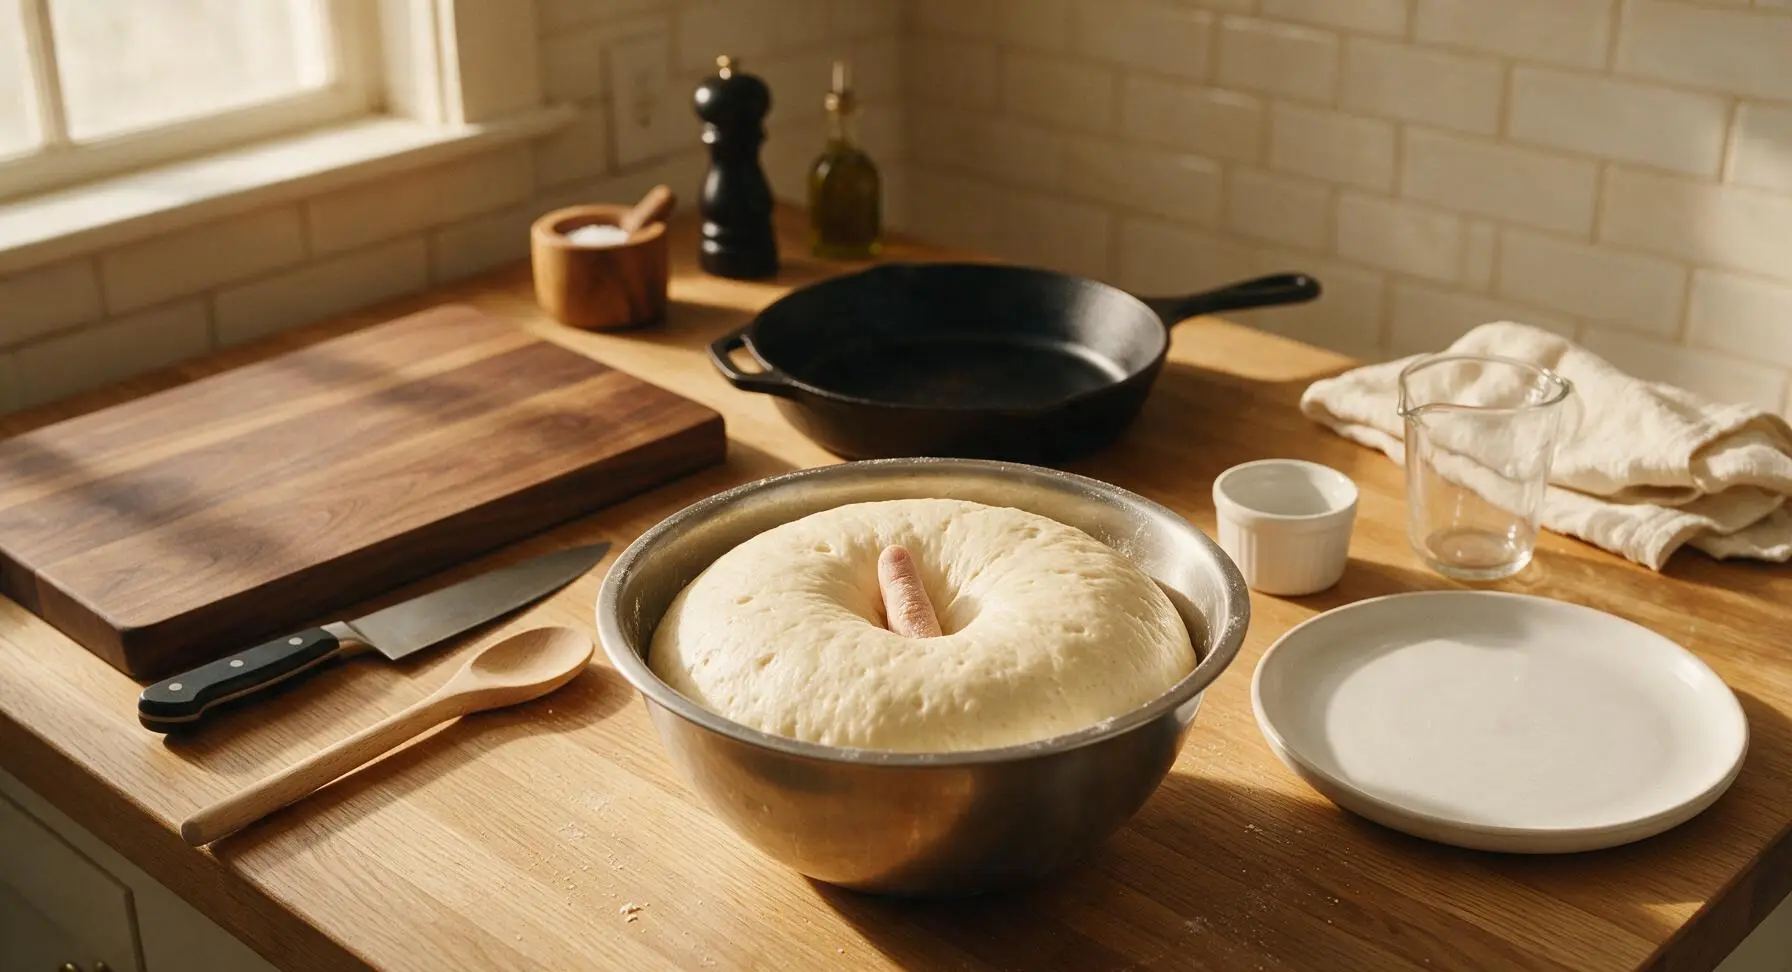
Let the mixed shaggy dough rest in the stainless steel mixing bowl in a warm draft-free spot (such as a turned-off oven with the interior light on) for 15 minutes, until the dough doubles in size and holds a 1/2-inch deep indentation when pressed with a lightly floured finger. A consistently warm environment cuts rise time dramatically to keep total recipe time under one hour.
Step 4
step4:First Quick Rise
Step 4
step4:First Quick Rise
5

Shape Individual Rolls

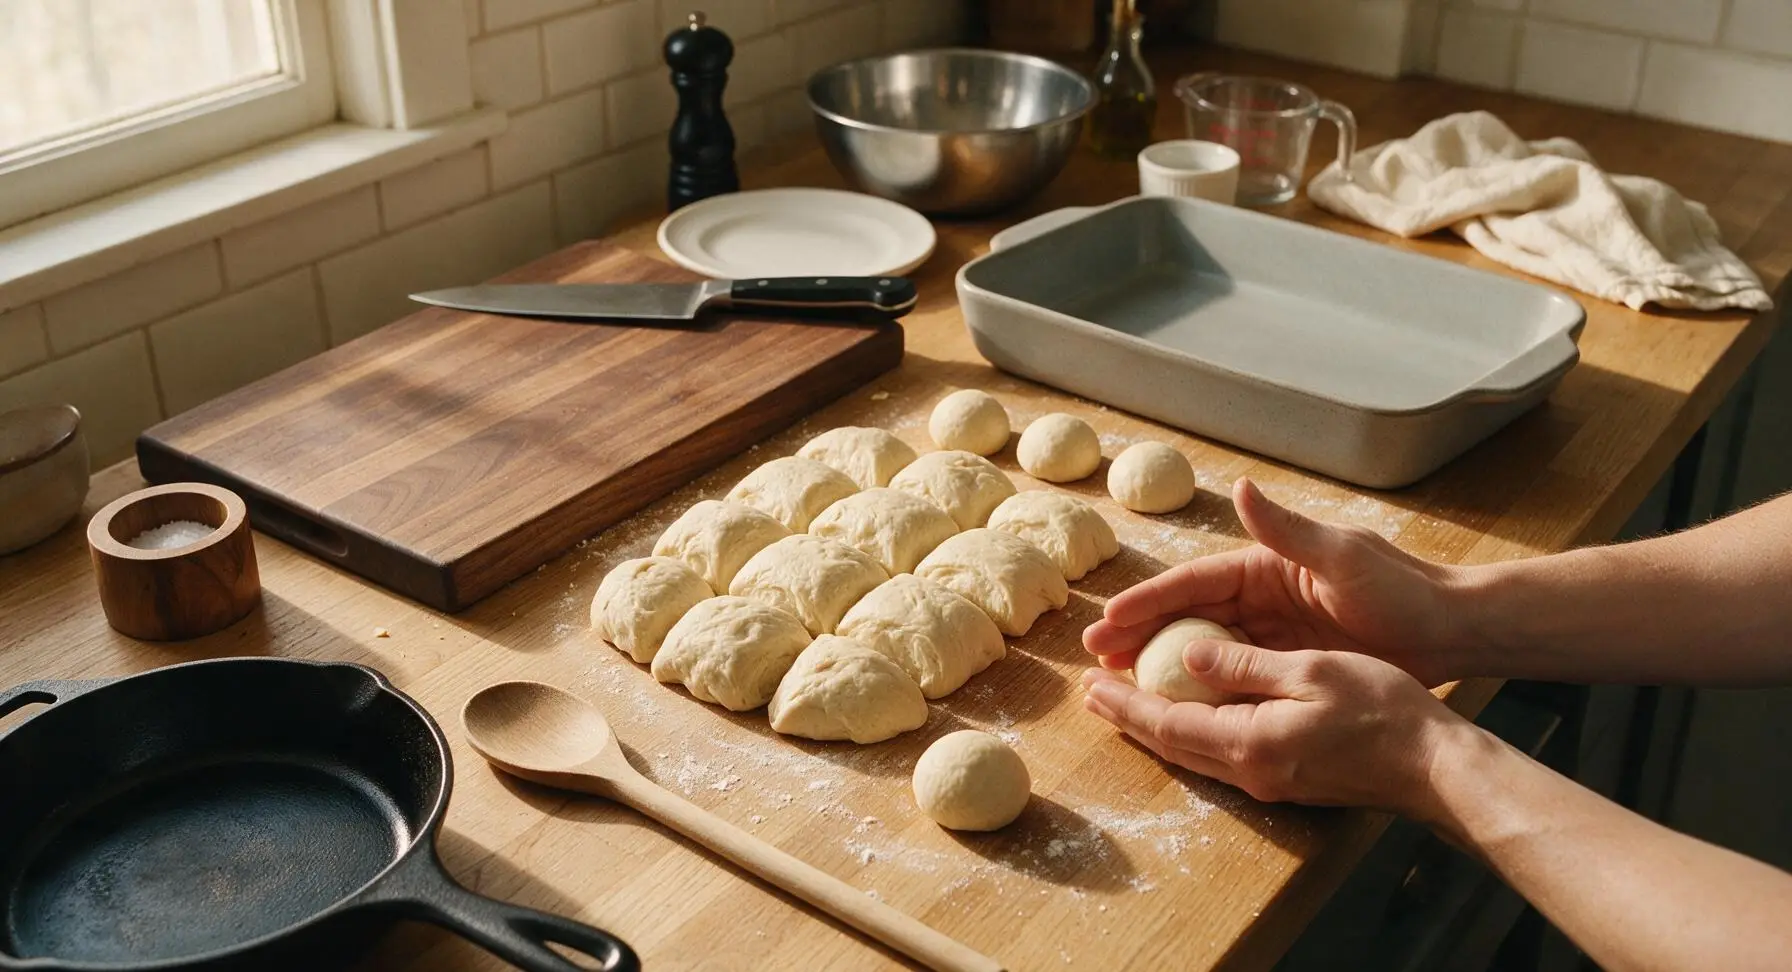
Lightly flour a small 6-inch section of the countertop (avoid adding too much flour, which will make rolls dry and dense). Punch the risen dough down firmly to release trapped air, then divide it evenly into 12 equal pieces (about 55g each). Roll each piece between your palm and the counter to form smooth, tight round balls, pinching the seams closed on the bottom to create a uniform shape.
Step 5
step5:Shape Individual Rolls
6

Arrange in Baking Dish

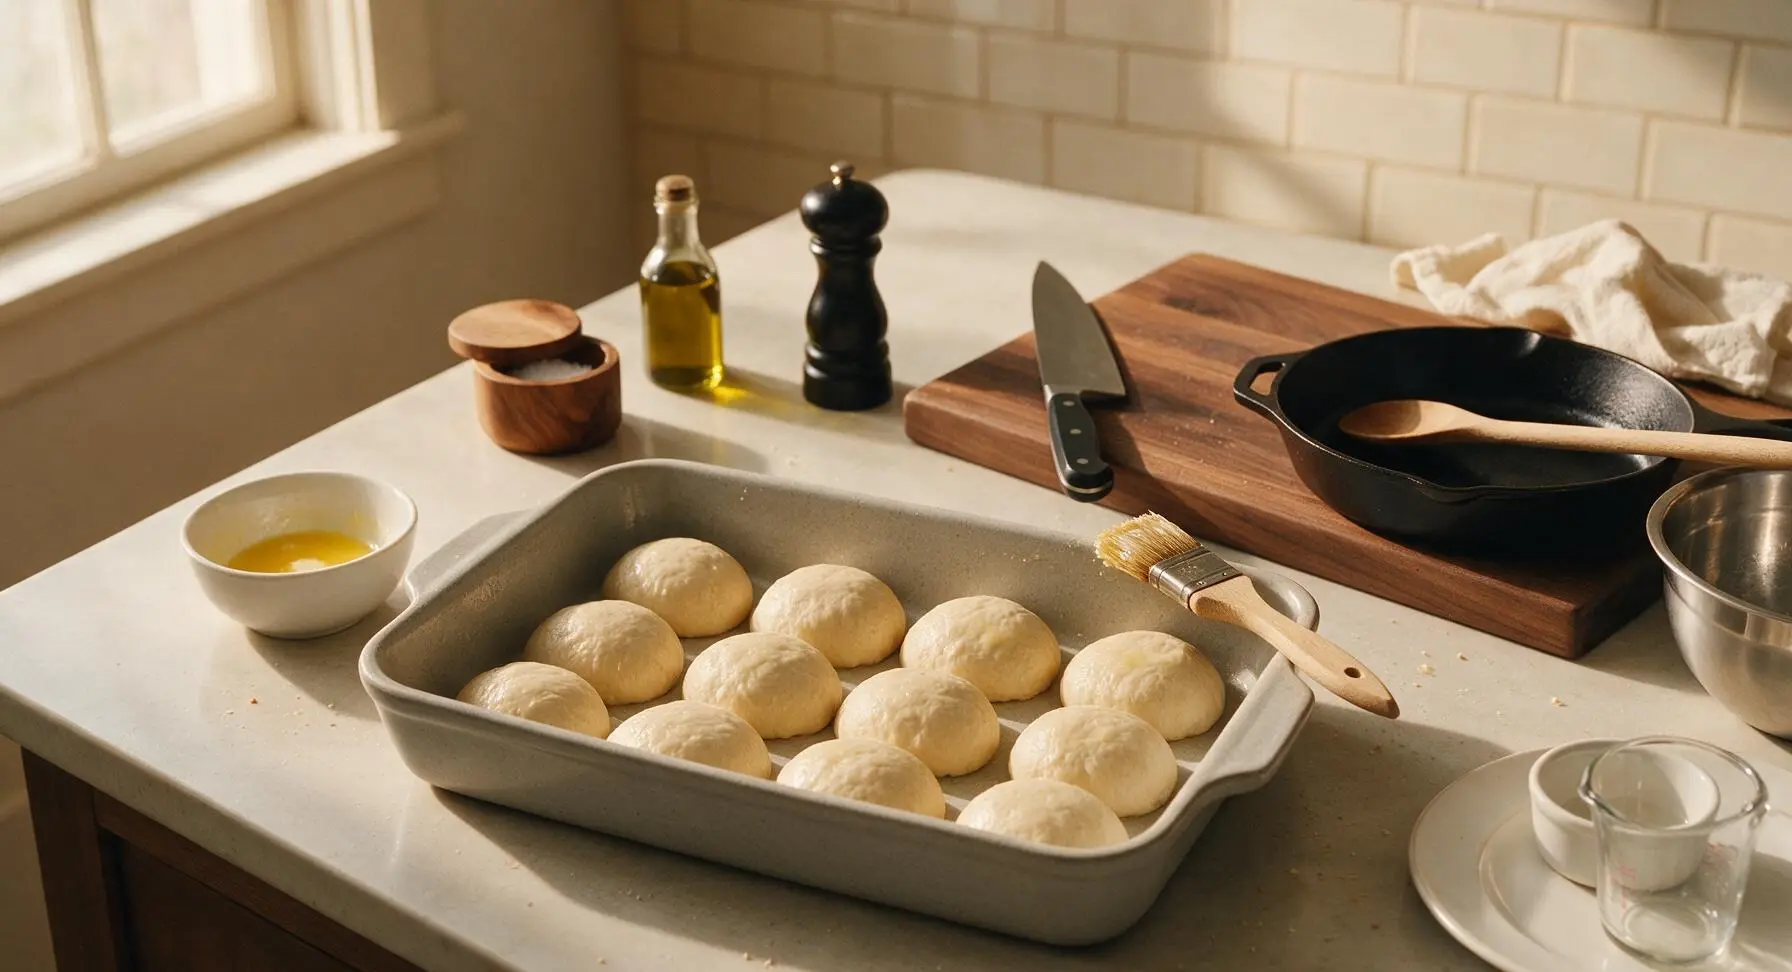
Brush the interior of the 9x13 inch stoneware baking dish with 1/2 tablespoon of reserved melted butter, using the pastry brush. Arrange the shaped dough balls evenly in the dish, spaced 1/2 inch apart in 3 rows of 4. The rolls will press against each other as they rise and bake, creating soft, pull-apart sides.
Step 6
step6:Arrange in Baking Dish
7

Second Quick Rise

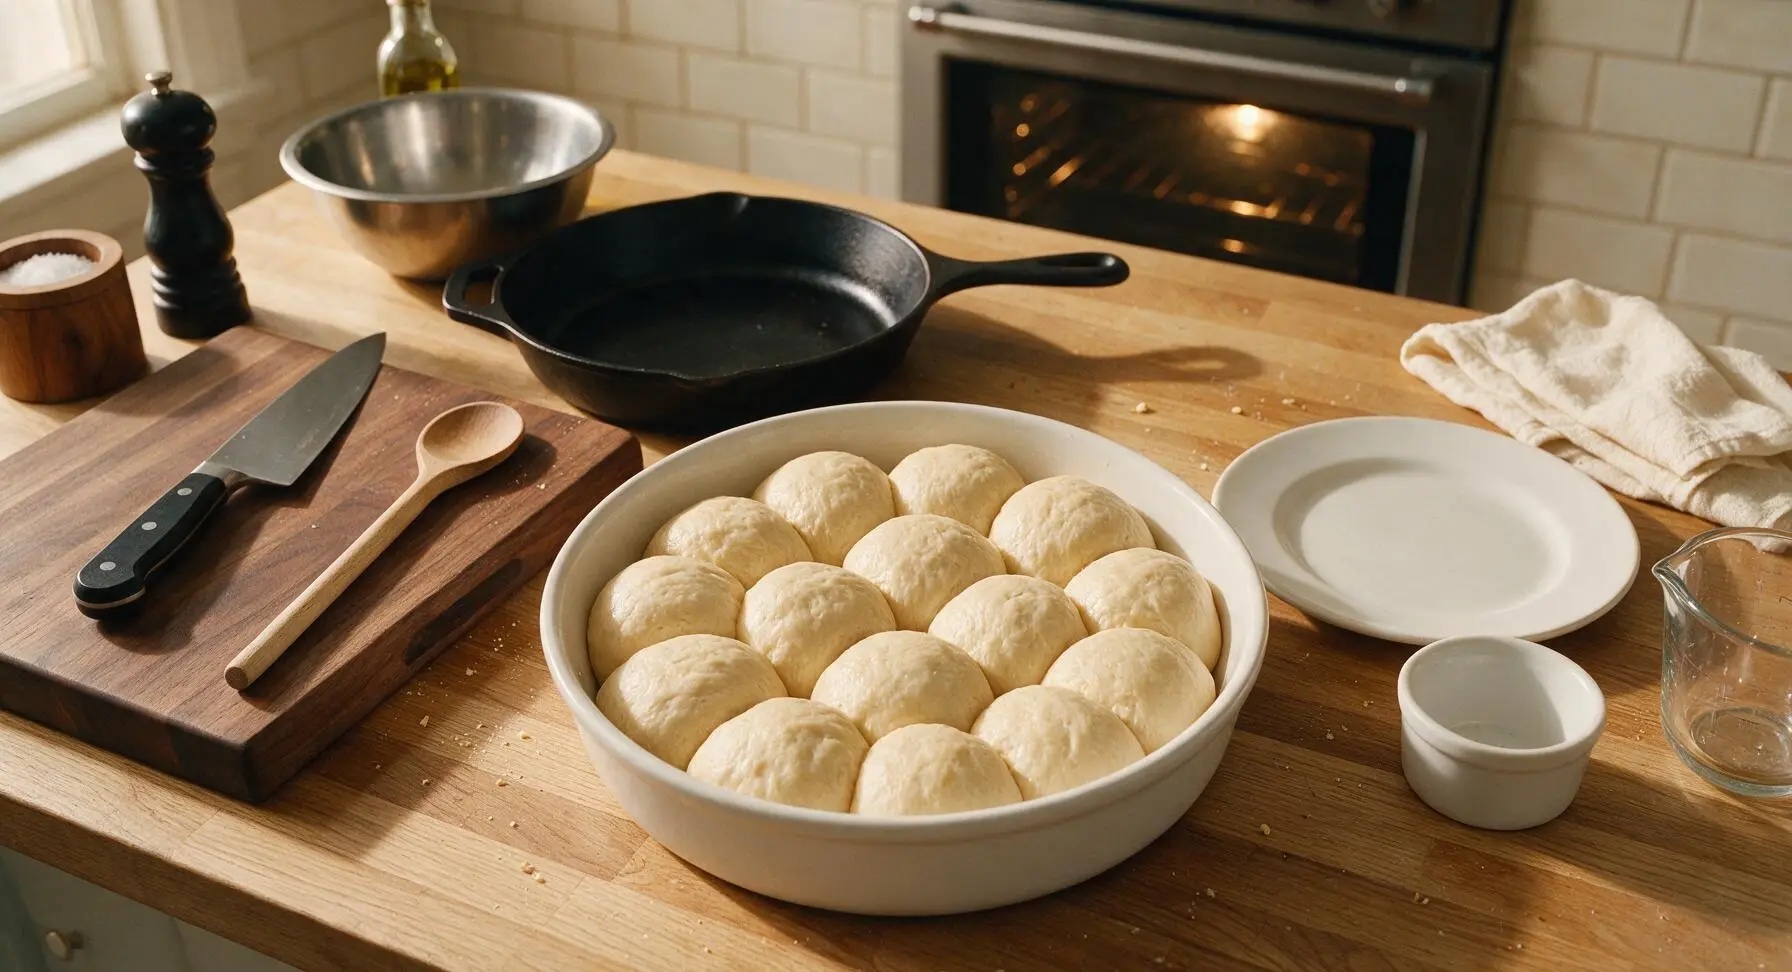
Let the arranged rolls rest in a warm draft-free spot for 10 minutes, until they puff up noticeably and press against each other, filling roughly 75% of the baking dish. While the rolls rise, preheat the oven to 375°F (190°C) to avoid waiting for oven preheat after rising is complete.
Step 7
step7:Second Quick Rise
8

Bake to Golden Brown

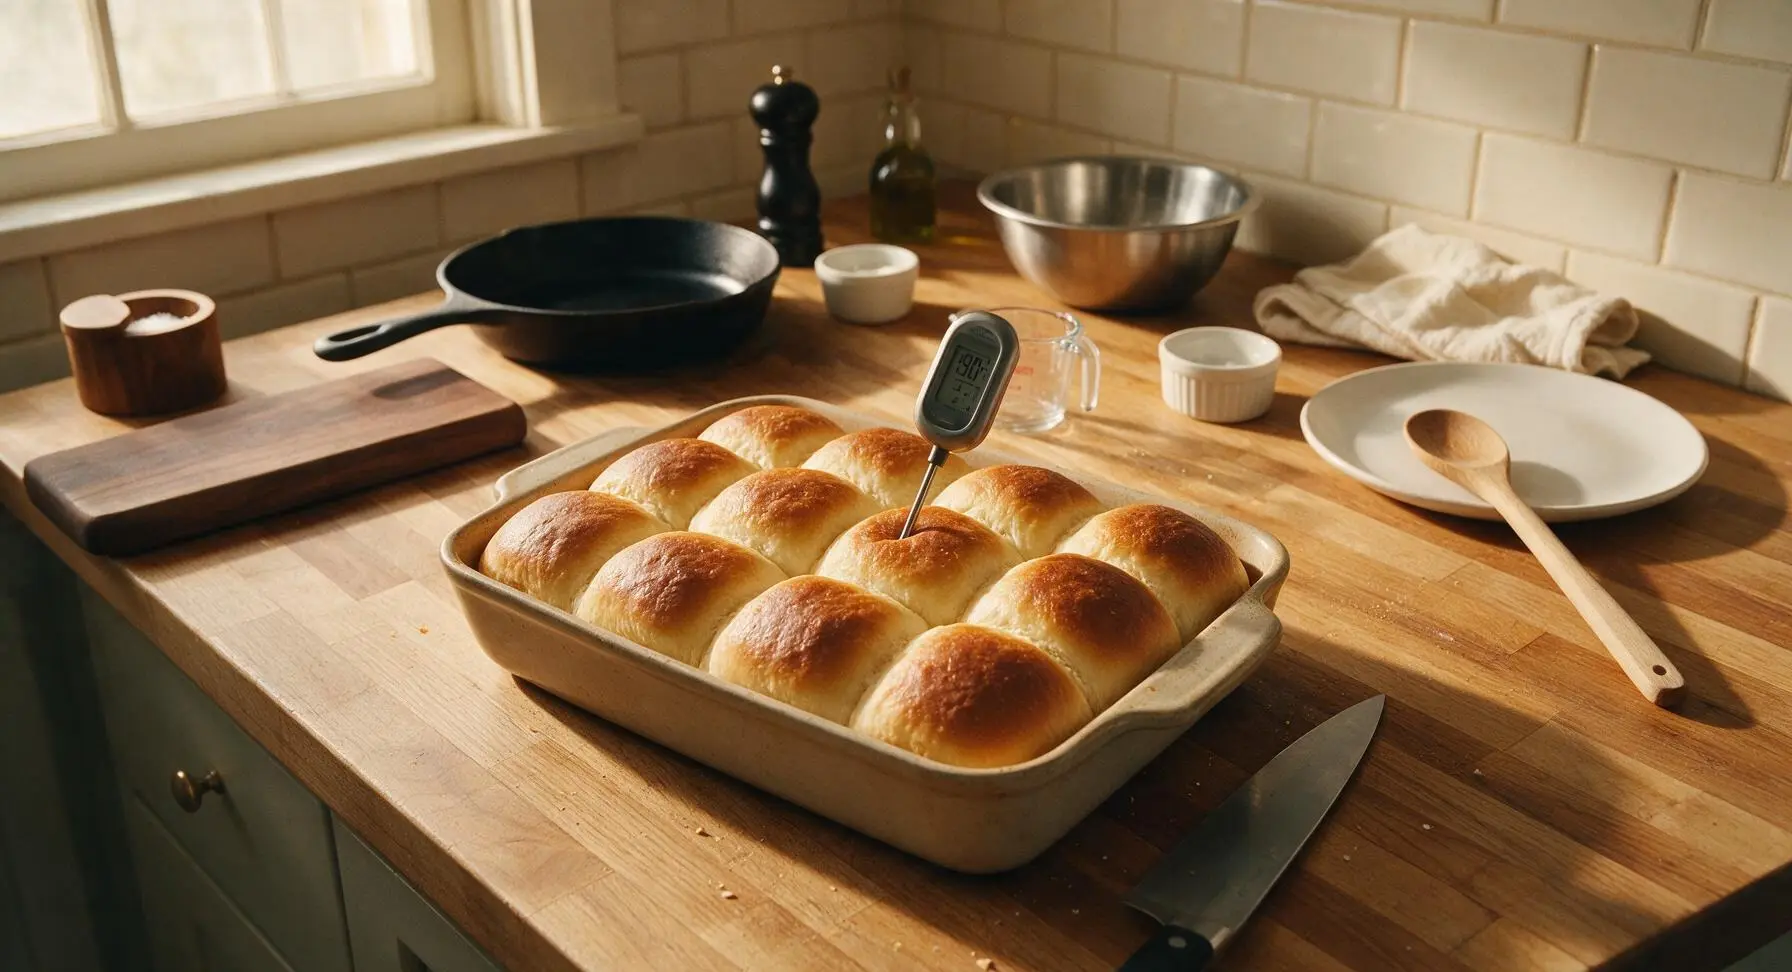
Place the baking dish on the middle rack of the preheated 375°F oven. Bake for 18-20 minutes, until the tops are deep golden brown and the internal temperature of the center rolls reaches 190°F (88°C), checked with the instant-read thermometer. Rotate the dish halfway through baking for even browning across all rolls.
Step 8
step8:Bake to Golden Brown
9

Butter and Cool Slightly

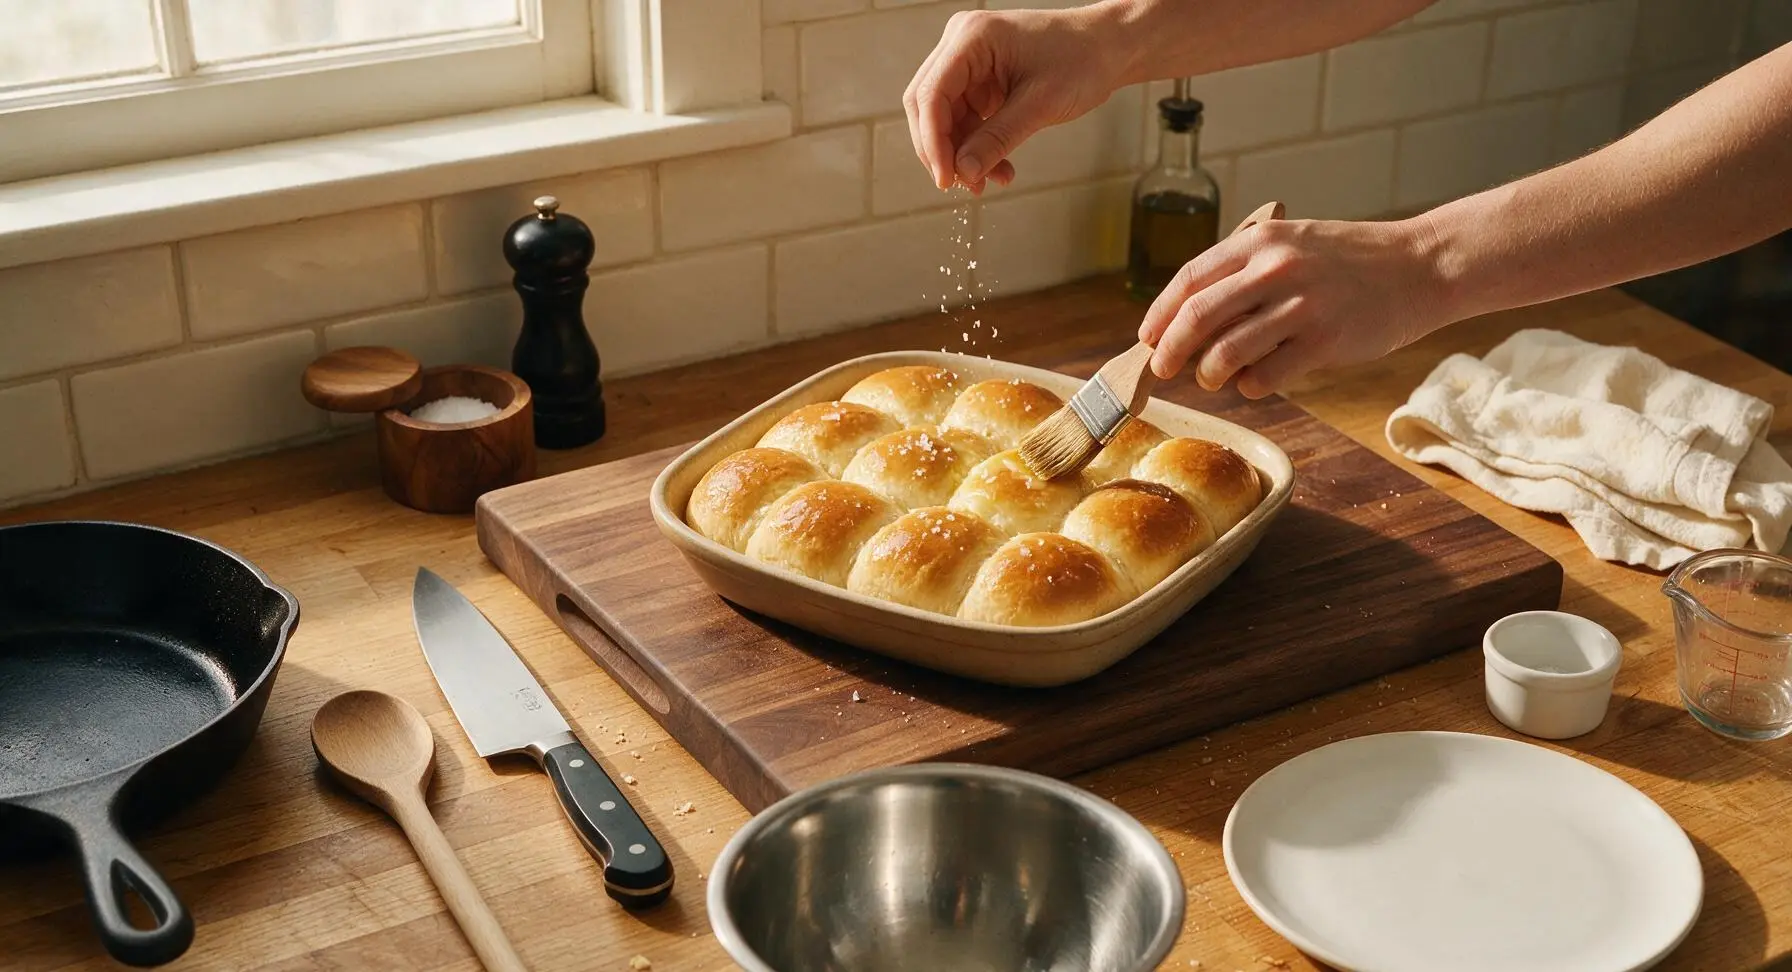
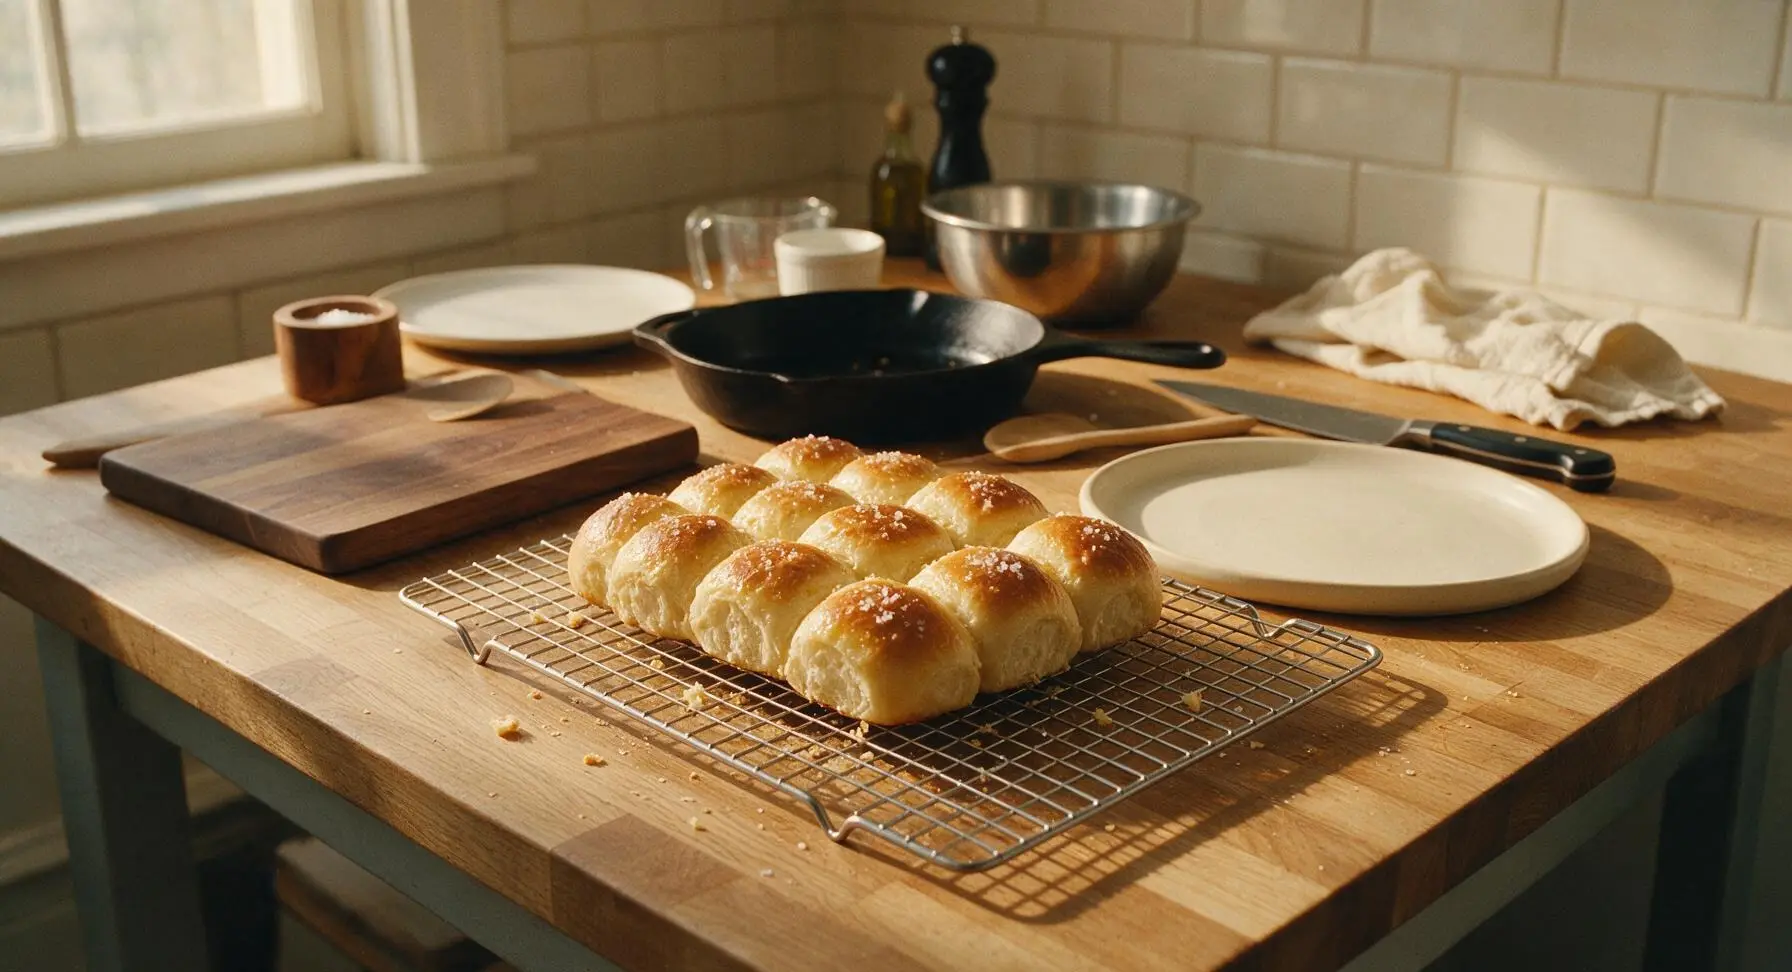
Remove the baked rolls from the oven, immediately brush the tops with the remaining 1.5 tablespoons melted butter using the pastry brush, and sprinkle with a pinch of flaky sea salt. Let the rolls rest in the baking dish for 5 minutes, then transfer to the matte chrome wire cooling rack for 5 more minutes to cool just enough to handle (serve warm, not piping hot, for best texture).
Step 9
step9:Butter and Cool Slightly
Step 9
step9:Butter and Cool Slightly

Tips

1.Do not heat milk above 115°F when preparing the liquid base: temperatures over 120°F will kill instant yeast, leading to dense, flat rolls that fail to rise properly, while liquid below 100°F will slow rise time and push total recipe time over an hour.
2.For the fastest, most consistent rise, place dough on the middle rack of a turned-off oven with the interior light on: the bulb creates a steady 75-80°F draft-free environment that cuts rise time in half compared to rising on a cool room-temperature counter.
3.Brush rolls with melted butter immediately after pulling them from the oven: the hot roll surface absorbs butter to create a soft, flavorful, non-greasy crust, while applying butter after rolls cool will leave a soggy, slick surface.


✨ You May Also Like

Desserts & Baking
🍜 Italy

Creamy, coffee-kissed classic Northern Italian no-bake dessert, with layers of rum-spiked mascarpone cream, soft ladyfingers, and a rich cocoa dusting.

⏱️ 4 hours 3Desserts & Baking ★ 4.7
Desserts & Baking
🍜 France

Flaky, shatteringly crisp, buttery French croissants with golden exteriors and soft, airy layered interiors, perfect for pairing with coffee for a special morning treat.

⏱️ 12 hours Desserts & Baking ★ 4.5
Desserts & Baking
🍜 United States

Warm, spiced baked apples topped with a fluffy golden biscuit crust, this cozy dessert pairs perfectly with vanilla ice cream for cool-weather comfort.

⏱️ 55 minuteDesserts & Baking ★ 4.6
Desserts & Baking
🍜 United States

A star-spangled classic American blueberry pie with buttery flaky crust and bright sweet-tart filling, perfect for summer patriotic gatherings.

⏱️ 1 hour 25Desserts & Baking ★ 4.7
Desserts & Baking
🍜 United States

A beloved no-bake regional Maine candy with a chewy coconut-potato center coated in rich dark chocolate, a New England holiday staple since the 1870s.

⏱️ 2 hours 3Desserts & Baking ★ 4.8
Desserts & Baking
🍜 France

Luxuriously creamy, floral frozen custard made with aromatic Tahitian vanilla beans, boasting a smooth, rich texture that melts slowly on the tongue.

⏱️ 3 hours 3Desserts & Baking ★ 4.5

One Hour Yeast Rolls:Frequently Asked Questions

1.How do these yeast rolls finish in just one hour when traditional yeast rolls take 2 or more hours? ▾
These rolls cut down on total time by using fast-acting instant yeast that doesn’t require pre-blooming, paired with a slightly warm 100°F proofing environment to speed yeast activity without killing it, plus a streamlined single post-shaping rise instead of two separate lengthy rise cycles.
2.Can I use active dry yeast instead of instant yeast and still keep the one-hour timeline? ▾
You can, but you’ll need one small adjustment. Bloom 25% more active dry yeast than the called-for instant yeast amount in warm 110°F milk with a pinch of sugar for 5 minutes until foamy before mixing, to make up for active dry yeast’s slower activation rate.
3.Do I have to use whole milk, or can I swap in lower-fat milk for this recipe? ▾
Whole milk gives these rolls their rich, tender crumb and subtle creamy flavor, but 2% milk works as a direct swap with no changes. Skim milk will produce slightly less soft rolls, so add 1 tablespoon of melted butter to the dough if using skim to make up for the missing fat.
4.Why is there granulated sugar in this savory roll recipe? Will the rolls taste sweet? ▾
The small amount of granulated sugar isn’t there to make the rolls sweet—it acts as fast, accessible food for the instant yeast to feed on during the quick proof, helping the dough rise fast. It also encourages that beautiful golden brown crust as it caramelizes during baking.
5.What temperature should the milk be to help dough rise fast without killing the yeast? ▾
Aim for whole milk heated to between 105°F and 110°F, which feels like warm bath water to the touch, with no scalding heat. If milk is over 120°F, it will kill instant yeast on contact, leading to dense, flat rolls that won’t puff properly during the short proof window.
6.Can I use bread flour instead of all-purpose flour for these rolls? ▾
Absolutely! Bread flour has a higher protein content than all-purpose flour, so it will give your rolls a slightly chewier, more structured crumb that holds up beautifully to sopping up gravy. Use the exact same measurement as the called-for all-purpose flour, with no timeline adjustments needed.
7.How do I tell when the rolls are fully baked so I don’t undercook or burn them? ▾
Fully baked rolls will have a deep golden, slightly crisp top crust, and register 190°F on an instant-read thermometer inserted into the center of the middle roll. Without a thermometer, tap the top of a roll—it should sound hollow, with set, lightly golden sides.
8.Do these rolls really only need one rise to get fluffy, instead of the usual two? ▾
Yes! The high ratio of instant yeast, paired with a warm, draft-free proofing spot, lets shaped rolls double in size in just 25 to 30 minutes in the pan. Skipping the initial pre-shaping bulk rise is what cuts total time to an hour without sacrificing that light, fluffy crumb.
9.What’s the easiest way to make a warm, draft-free proofing spot in a cool kitchen? ▾
My go-to trick is to turn your oven on for 1 minute, then turn it off before placing the covered pan of rolls inside—this creates a perfect 95–100°F, draft-free space. You can also set the pan on a rack over a baking dish of hot tap water for consistent gentle warmth.
10.Can I prep these rolls ahead of time instead of baking them start to finish in an hour? ▾
If you want to prep ahead, shape the rolls, cover the pan tightly with plastic wrap, and store it in the fridge for up to 16 hours. When ready to bake, let them sit at room temp for 20 minutes to rise slightly, then bake as directed—note this will push total time past one hour.
11.Can I swap table salt for the fine sea salt called for in the recipe? ▾
Use 1 ½ teaspoons of fine sea salt for the standard recipe to balance subtle sweetness and boost the rolls’ buttery, yeasty flavor. If you only have table salt, cut the measurement to 1 teaspoon, since table salt is denser and saltier per volume than fine sea salt to avoid over-salting.
12.Why did my rolls turn out dense instead of light and cloud-like? ▾
Dense rolls almost always trace back to one of three common missteps: your milk was too hot and killed the yeast, you didn’t let rolls double in size before baking, or you added too much flour, making the dough stiff and unable to puff properly during the quick proof.
13.Should I brush the rolls with butter before or after baking? ▾
For the richest flavor and soft, tender crust, brush the tops of rolls with 2 tablespoons of melted salted butter right when you pull them out of the oven. If you want an extra golden, crisp top, add a light butter brush right before baking too, just don’t overdo it or the crust will get greasy.
14.What size and type of pan works best for these pull-apart rolls? ▾
A 9x13 inch metal baking pan is perfect for 12 standard pull-apart rolls, giving each roll space to rise and press against neighbors as it bakes for that classic soft connected edge. If using a glass pan, reduce oven temp by 25°F to avoid over-browning the bottom crusts.
15.Can I freeze these baked rolls to enjoy later? ▾
Absolutely! Let baked rolls cool completely to room temperature, then wrap them tightly in a double layer of plastic wrap and aluminum foil, and freeze for up to 3 months. Reheat wrapped in foil in a 325°F oven for 10–12 minutes, and they’ll taste just as soft and fresh as baking day.
16.Do I need to knead the dough for a long time to develop enough gluten for fluffy rolls? ▾
No long kneading is required for this quick recipe! Once ingredients come together into a smooth, slightly tacky dough, knead by hand for 3–4 minutes (or 2 minutes in a stand mixer with a dough hook) to build enough gluten to trap yeast gas for that light, airy crumb.
17.Can I add mix-ins like garlic, cheese, or herbs without messing up the one-hour timeline? ▾
You absolutely can! Stir in up to ½ cup shredded cheese, 1 tablespoon minced fresh herbs, or 2 teaspoons garlic powder when mixing the dough for extra flavor. Avoid very wet mix-ins like un-drained roasted garlic, as extra moisture can throw off dough texture and slow the rise.
18.How should I store leftover rolls to keep them soft for a few days? ▾
Store fully cooled leftover rolls in an airtight container or sealed zip-top bag at room temperature for up to 3 days. Skip the fridge, as cold, dry air will make them go stale much faster. Reheat individual rolls for 10 seconds in the microwave or 3 minutes in a 300°F oven before serving.

Comments (7)

2 days ago

OMG these rolls are a total game changer! I’ve always been scared of yeast recipes because I thought they took forever to rise, but these were done start to finish in literally an hour? I brought them to my church potluck last Sunday and three people asked for the recipe. Soft, buttery, perfect little pillows of carbs, 10/10. Will be making these every Sunday dinner from now on.

5 minutes ago

Super easy even for a total baking newbie like me! I messed up the first rise a little because my kitchen was freezing, but I popped the dough bowl near my space heater for 10 extra minutes and they still turned out perfect. Cook time was spot on 20 minutes for my oven, they got that perfect golden top right at the mark. Great for weeknight dinners when I don’t have hours to prep bread.

just now

So glad you loved them, Jake! Pro tip for cold kitchens: you can also preheat your oven to the lowest setting for 1 minute, turn it off, and let the dough rise in there for super consistent results every time :)

1 week ago

My kids are OBSESSED with these rolls! I made them last night to go with meatloaf and my 7 year old ate three before dinner even hit the table. They’re so soft and fluffy, way better than the frozen dinner rolls I used to buy. Only thing is I added a little garlic butter on top before baking and *chef’s kiss*. Will these hold up if I make the dough the night before? I want to prep for my son’s team dinner this weekend.

3 days ago

I prepped the dough last weekend for a Friendsgiving potluck! I let it do the first rise, punched it down, covered it tight in the fridge overnight, then shaped them and let them sit 20 mins before baking the next day. Turned out perfect!

2 days ago

Great question, Liz! As MidwestBaker47 mentioned, prepping the dough ahead works wonderfully — just make sure to give the shaped rolls a little extra time to puff up before popping them in the oven if they’re cold from the fridge. The garlic butter addition sounds amazing, by the way!

30 minutes ago

Wait no way these are actually done in an hour? I thought yeast rolls needed like half a day to rise. Tried these last night when I realized I forgot to pick up bread for my roommate’s birthday dinner and they SLAPPED. So buttery, so easy, I didn’t even have a stand mixer and just mixed everything by hand with a wooden spoon. 10/10, no notes, will be making these for every last minute dinner invite from now on.

5 minutes ago

Right?! I was so skeptical too, I kept checking the clock the whole time waiting for them to rise. I don’t have a mixer either and they came out perfect for me too, no tough lumps or anything. I’m already planning to make them for my family’s Thanksgiving this year!

2 weeks ago

Made these to go with chili on our last camping trip (prepped the dry ingredients at home, mixed and baked them in our cast iron Dutch oven on the camp stove) and they were unreal. I was worried the altitude here in Colorado would mess them up, but they rose perfectly, cooked in 20 minutes just like the recipe said. SO good, even when you’re not making them in a fancy kitchen. Only knock is they’re so tasty I ate way too many and had a food coma on the hike back, so 4 stars instead of 5, lol.

yesterday

Okay I’ve tried like 4 different quick yeast roll recipes and this is the only one that doesn’t come out dense or tasting like baking soda? The texture is exactly like the old school cafeteria rolls I loved as a kid, but faster. I added a sprinkle of flaky sea salt on top right when they came out of the oven and I could’ve eaten the whole pan by myself. Quick question: can I use whole wheat flour for half the all purpose to make them a little heartier?

2 hours ago

So happy these hit that nostalgic cafeteria roll spot for you! You can absolutely swap up to half the all-purpose flour for whole wheat — just note the rolls might be a tiny bit denser, and you may need a splash more milk to get the dough to the right soft consistency. The flaky sea salt topping sounds chef’s kiss!

2 hours ago

Made these for my office potluck yesterday and people were literally fighting over the last one. I was running late so I didn’t even have time to let them cool all the way, and they still got devoured in 10 minutes flat. The easy difficulty is no lie, I’m a terrible baker and these came out looking like they came from a fancy bakery. Wait, has anyone tried making these into slider buns? I want to use them for pulled pork sliders this weekend.

1 hour ago

I made these into slider buns for pulled pork last month! Just divide the dough into slightly bigger pieces instead of small rolls, they hold up perfectly even with a heaping pile of pork and coleslaw on top. Total game changer for summer cookouts!

30 minutes ago

We love hearing they were a potluck hit! As BBQ_Dad_Steve mentioned, these work fantastic as slider buns — just shape them into slightly larger 2-inch rounds before the second rise, and they’ll be the perfect size for pulled pork sliders, or even breakfast sandwiches. Enjoy the cookout!



