
Quesadilla Burnt Ends

title 1
Quesadilla Burnt Ends
⏱️ cook time 35 minutes
🍽️ servings 6
⚡ Difficulty easy

intro

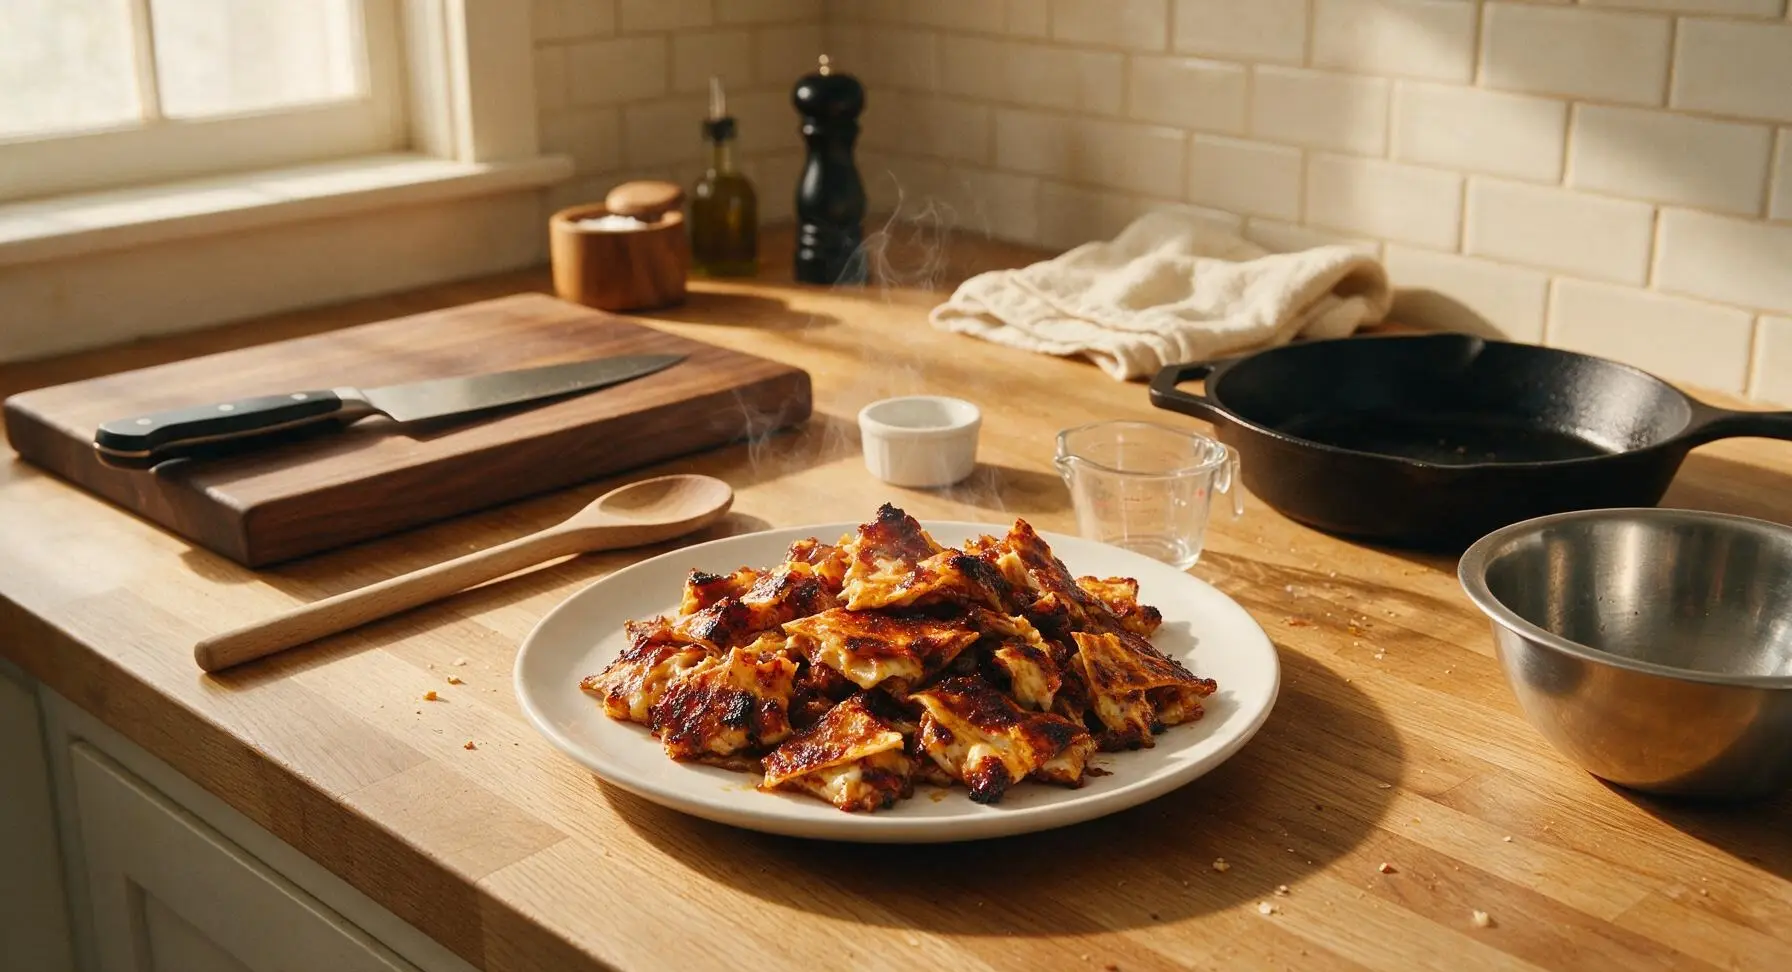
Sticky, smoky, crispy quesadilla burnt ends: caramelized BBQ-glazed tortilla and cheese bites with charred edges, the ultimate shareable backyard BBQ snack.

Ingredients
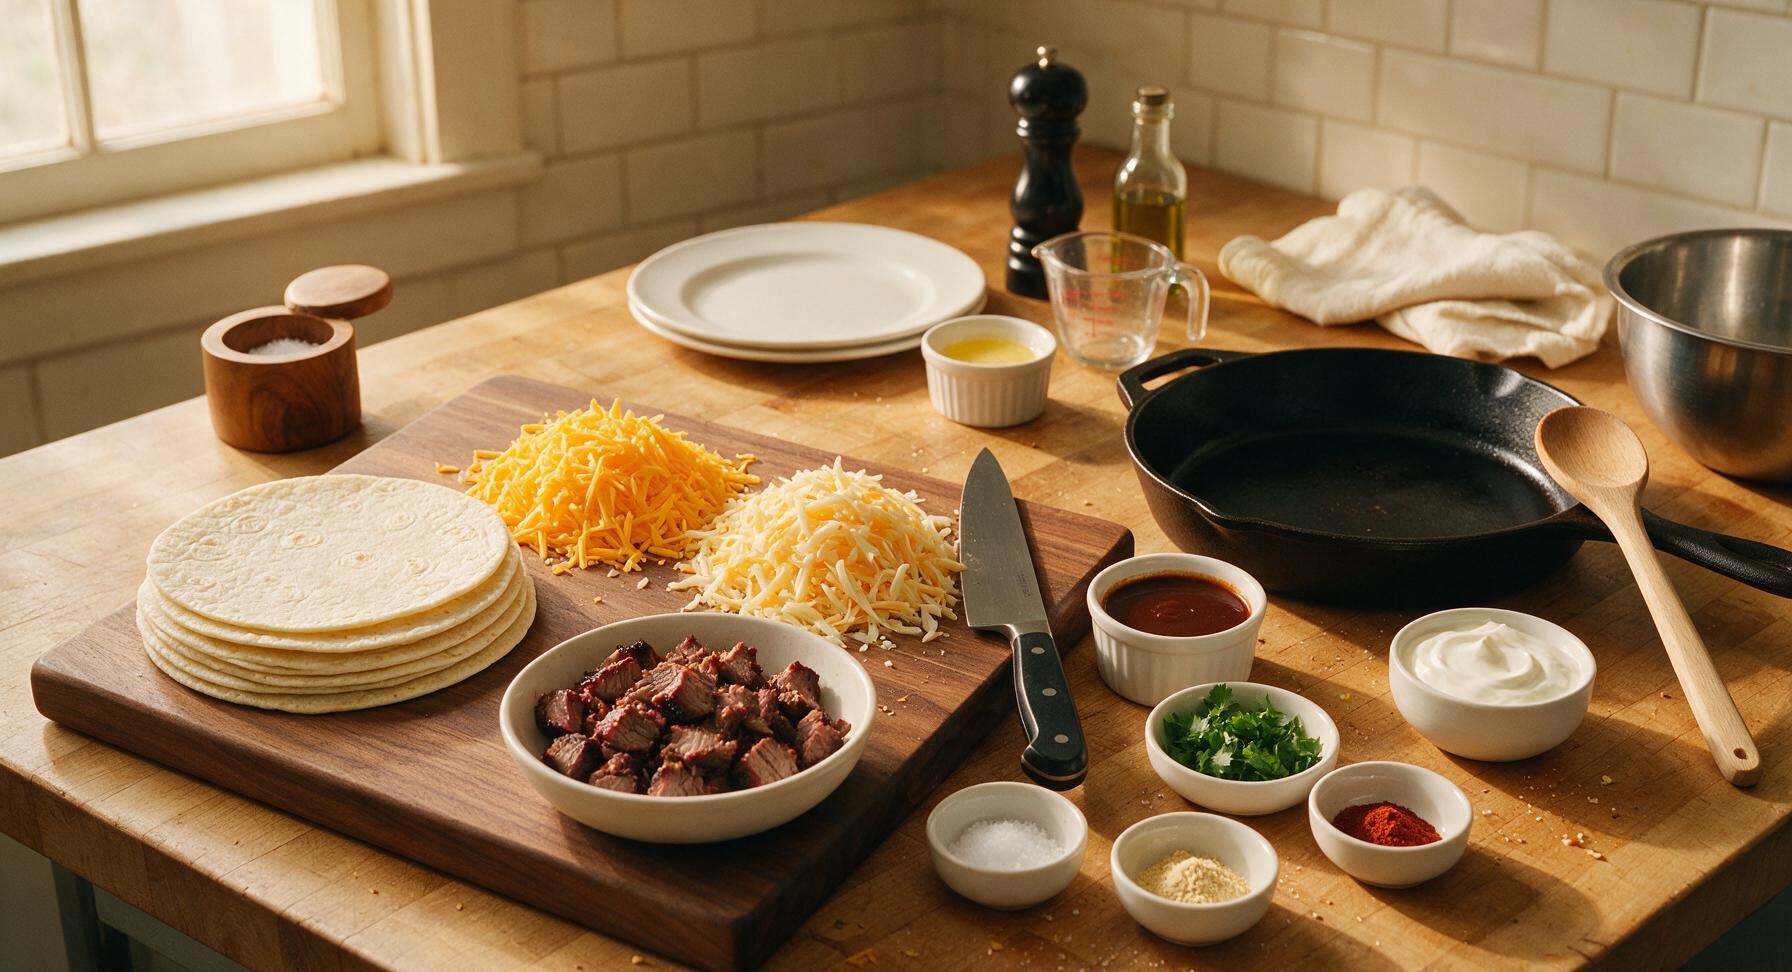
10-inch flour tortillas 6 each
Sharp orange cheddar cheese, shredded 1.5 cups (170g)
Monterey Jack cheese, shredded 1.5 cups (170g)
Cooked smoked brisket, finely chopped 6 oz (170g)
Hickory BBQ sauce 3/4 cup (180ml)
Unsalted butter 3 tbsp (42g)
Kosher salt 1 tsp
Garlic powder 1 tsp
Smoked paprika 1/2 tsp
Fresh cilantro, chopped 2 tbsp
Sour cream (for serving) 1/2 cup (120g)

Steps

1

Prep Cheese Filling

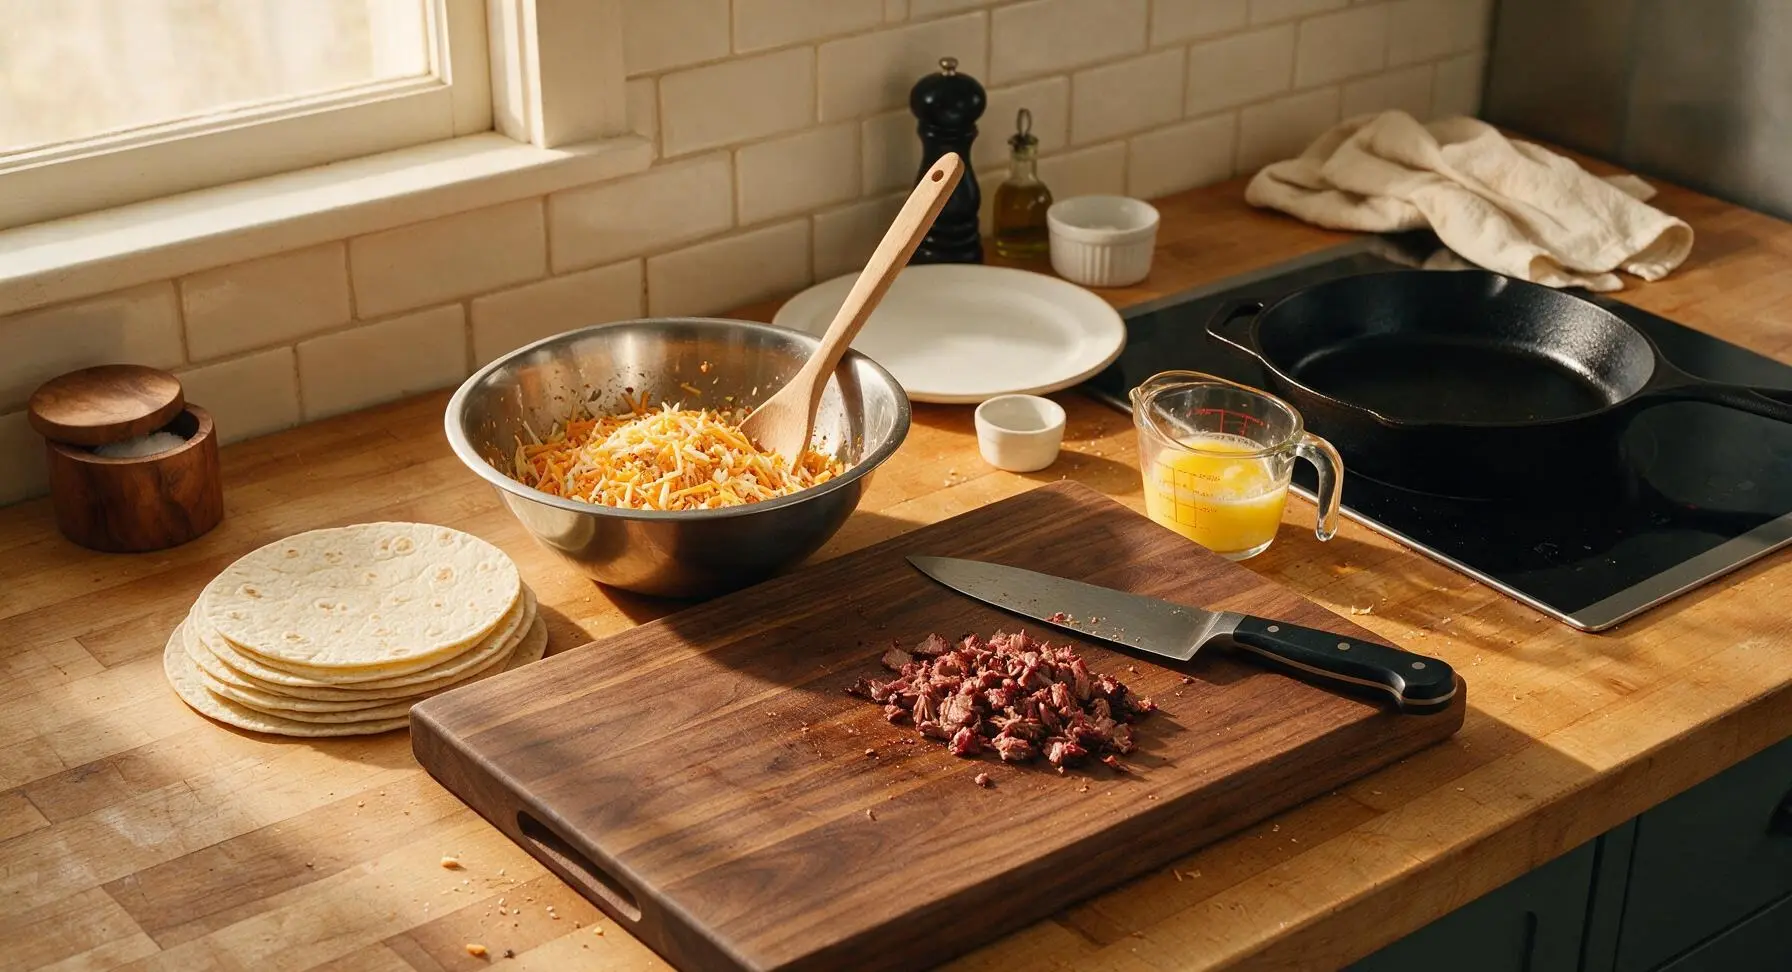
First, use the 8-inch chef knife to finely chop the smoked brisket into 1/4-inch pieces on the walnut cutting board. Melt 3 tbsp of unsalted butter in the clear glass measuring cup (microwave for 30 seconds) and set aside. In the medium stainless steel mixing bowl, combine the chopped brisket, shredded sharp cheddar, shredded Monterey Jack, garlic powder, smoked paprika, and 1/2 tsp kosher salt. Toss gently with the beech wood mixing spoon until ingredients are evenly distributed, with no clumps of spice or cheese. Set the bowl aside next to the cutting board.
Step 1
step1:Prep Cheese Filling
2

Assemble Stuffed Quesadillas

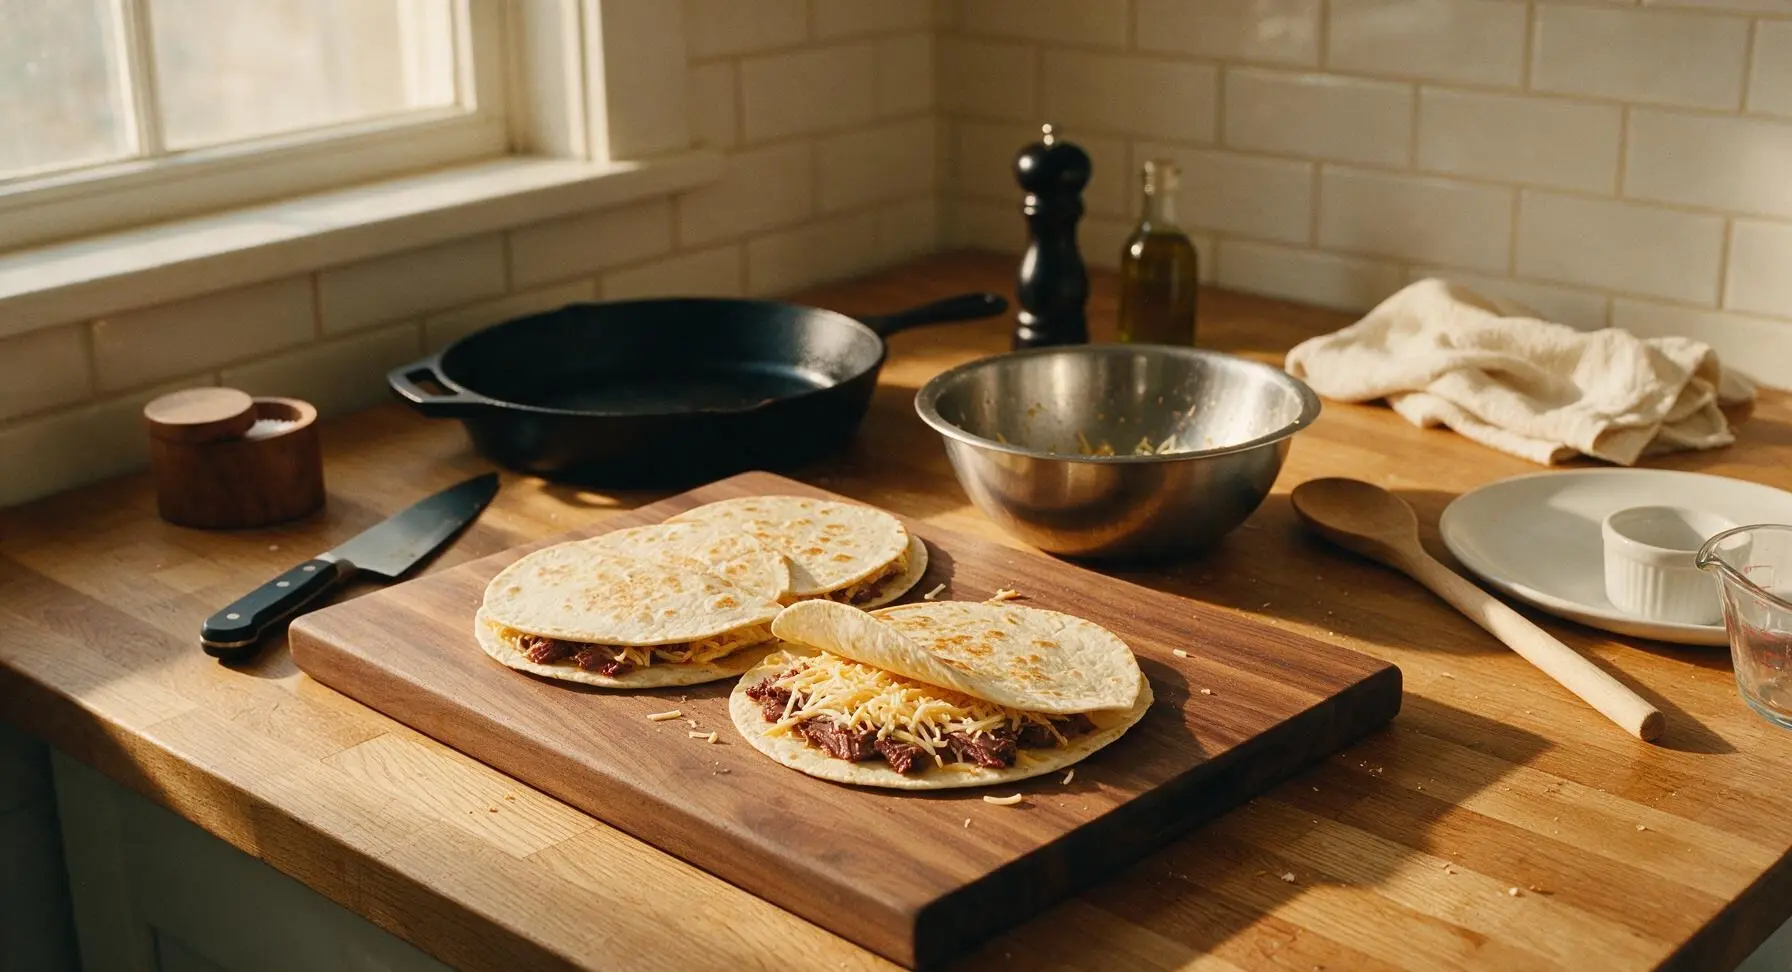
Lay 3 tortillas flat on the walnut cutting board. Divide the cheese and brisket filling evenly across each tortilla, spreading it in a thin, even layer and leaving a 1/2-inch border around the edge to prevent cheese oozing during cooking. Top each filled tortilla with a second tortilla, pressing down firmly with the palm of your hand to seal the edges. You will have 3 total double-layer assembled quesadillas.
Step 2
step2:Assemble Stuffed Quesadillas
3

Cook Crispy Quesadillas

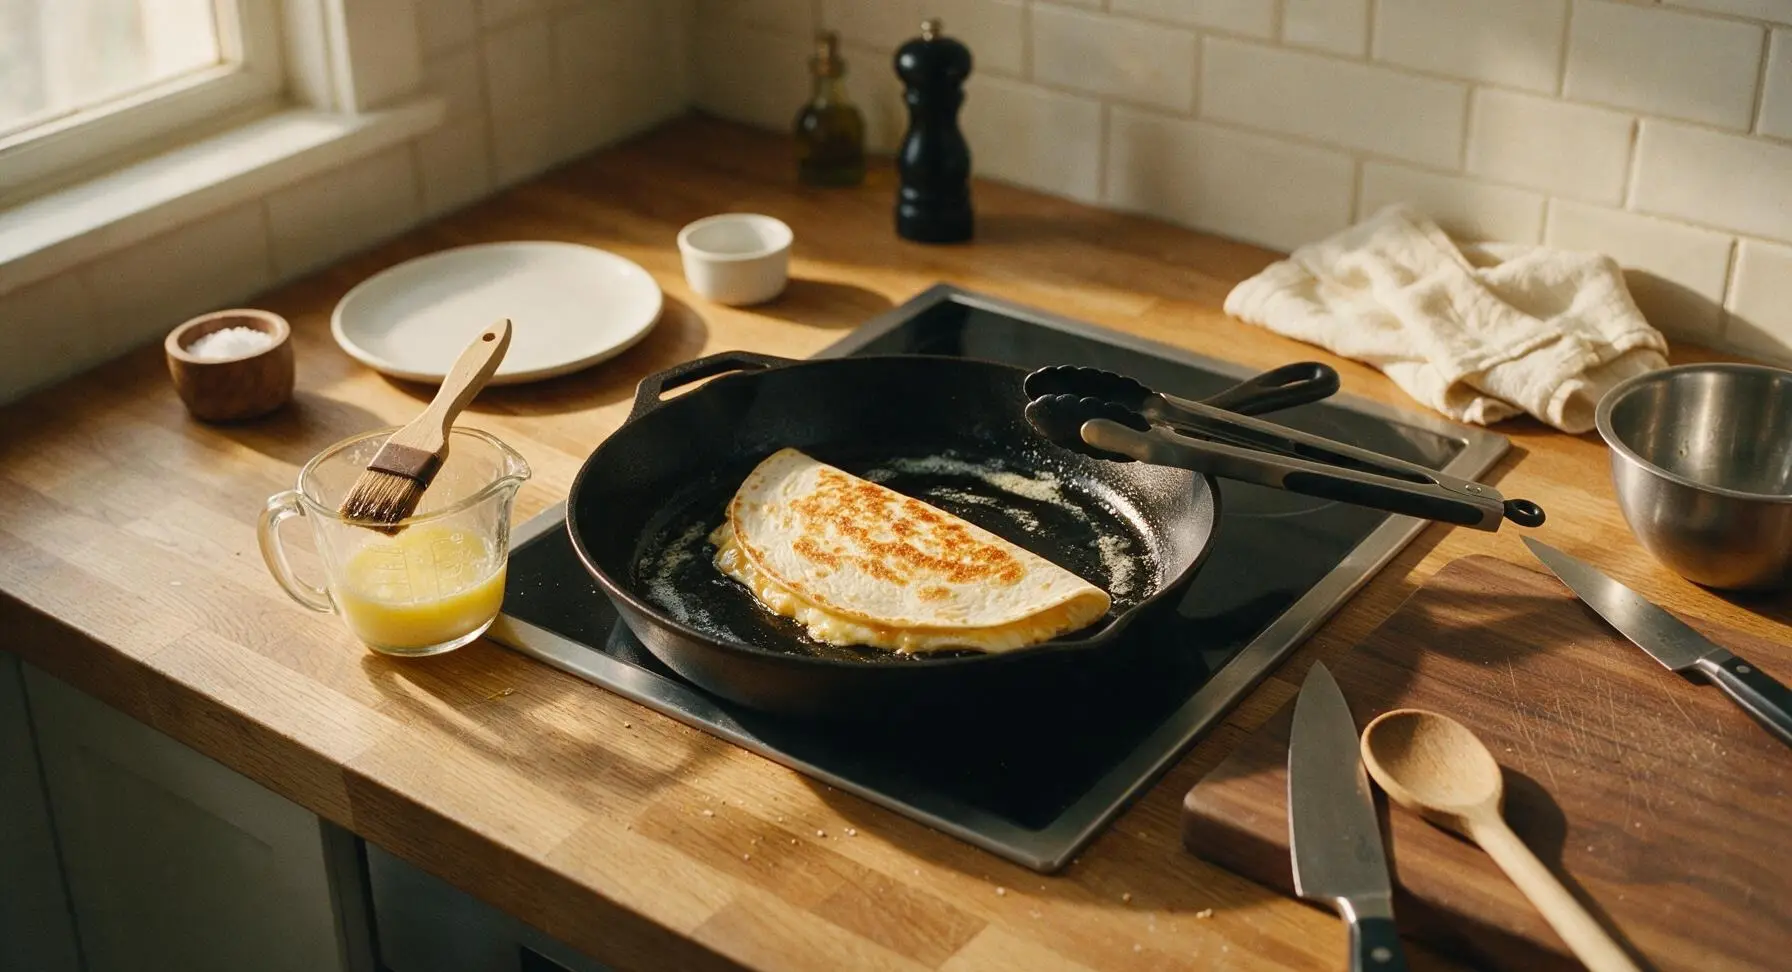
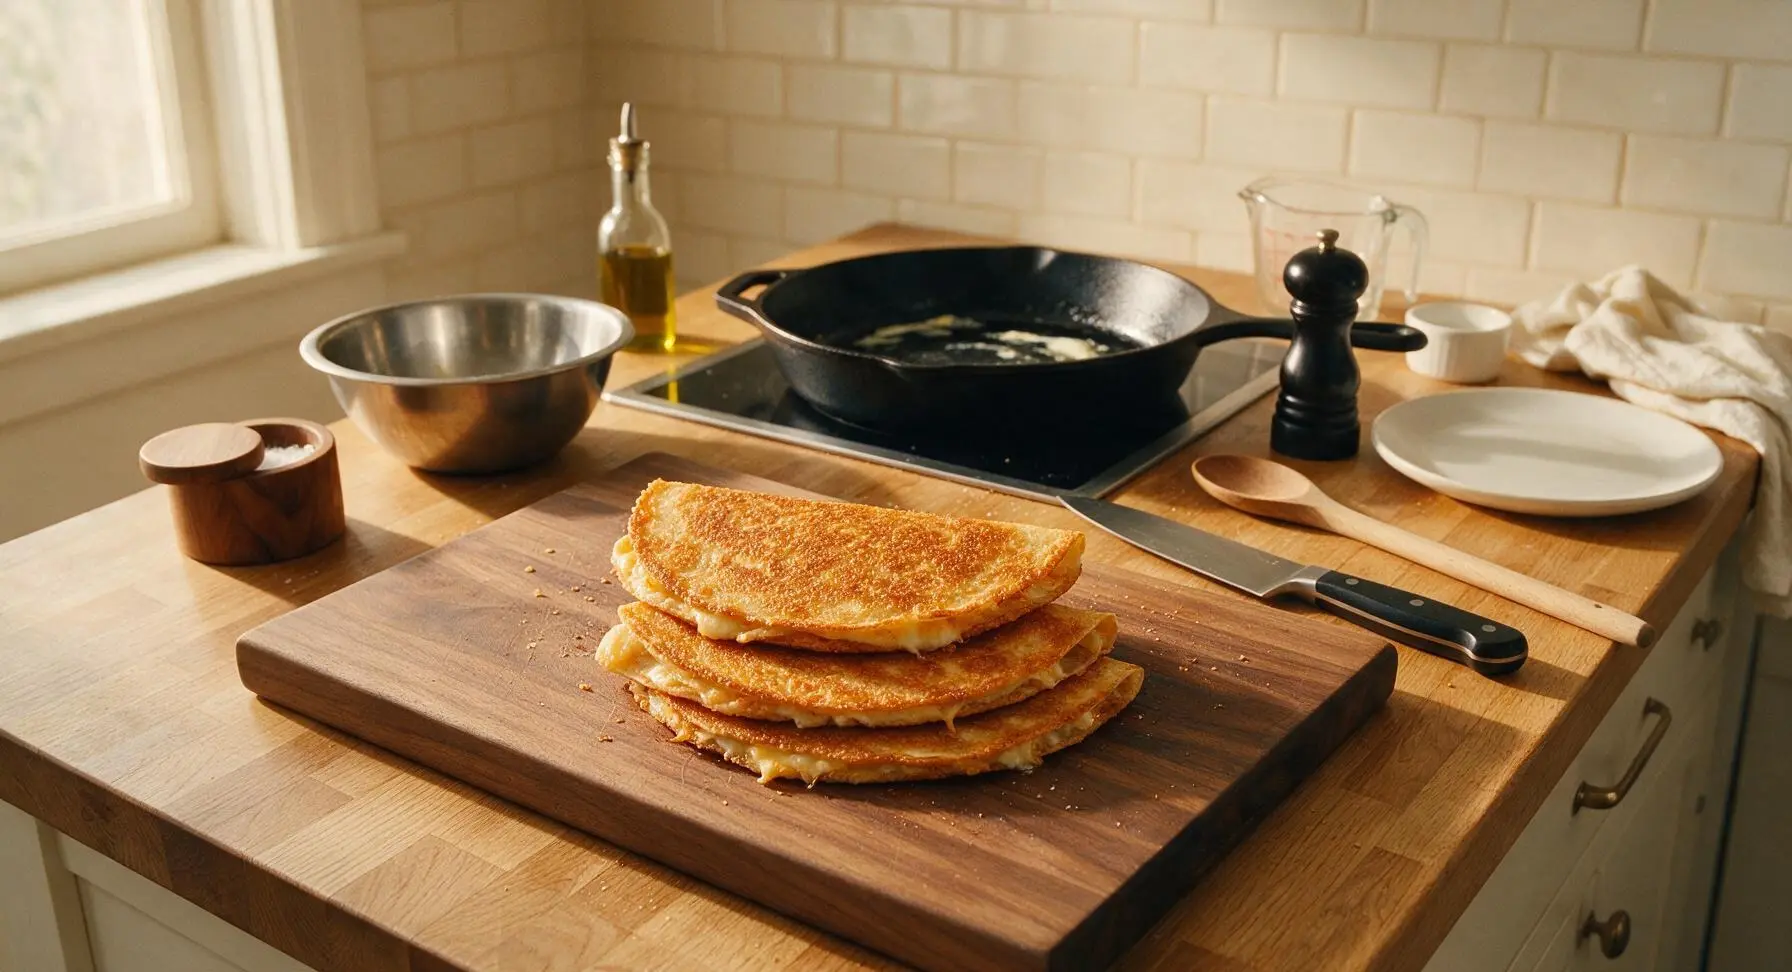
Heat the 12-inch black carbon steel skillet on the induction cooktop over medium heat (350°F / 175°C). Use the boar bristle pastry brush to coat the skillet surface with 1 tsp of melted butter from the measuring cup. Carefully transfer one assembled quesadilla to the skillet using the silicone-tipped tongs. Cook for 3-4 minutes per side, until the tortilla is deep golden and crispy, and the cheese is fully melted with no lumps visible when you lift the tortilla edge. Repeat with the remaining two quesadillas, adding 1 tsp of butter to the pan between each quesadilla (1 tbsp total butter used for cooking). Transfer cooked quesadillas back to the cutting board to cool for 5 minutes to set the cheese.
Step 3
step3:Cook Crispy Quesadillas
Step 3
step3:Cook Crispy Quesadillas
4

Cut into 1-inch Cubes

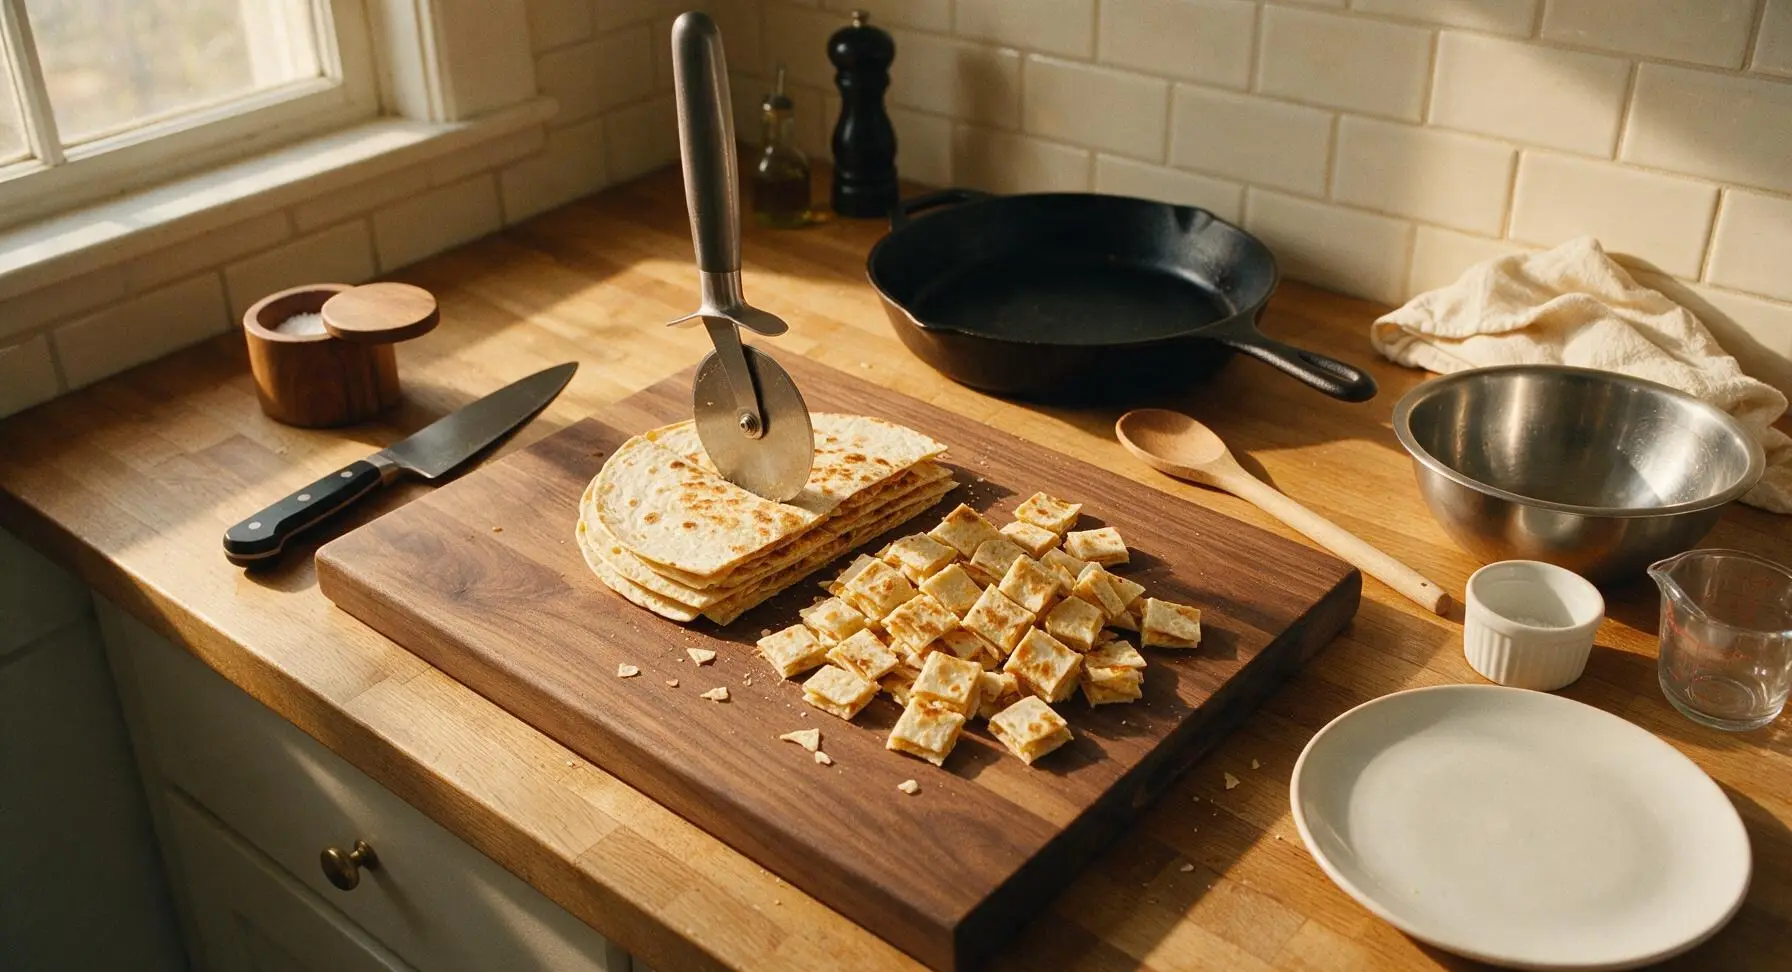
Once the quesadillas have cooled for 5 minutes (cheese will be set, not runny), use the sharp stainless steel pizza cutter to slice each quesadilla into uniform 1-inch square cubes. Set aside any uneven edge pieces that have no cheese filling for snacking, as these will not hold their glaze well. You should have roughly 60-65 uniform cubes total.
Step 4
step4:Cut into 1-inch Cubes
5

Toss in BBQ Glaze

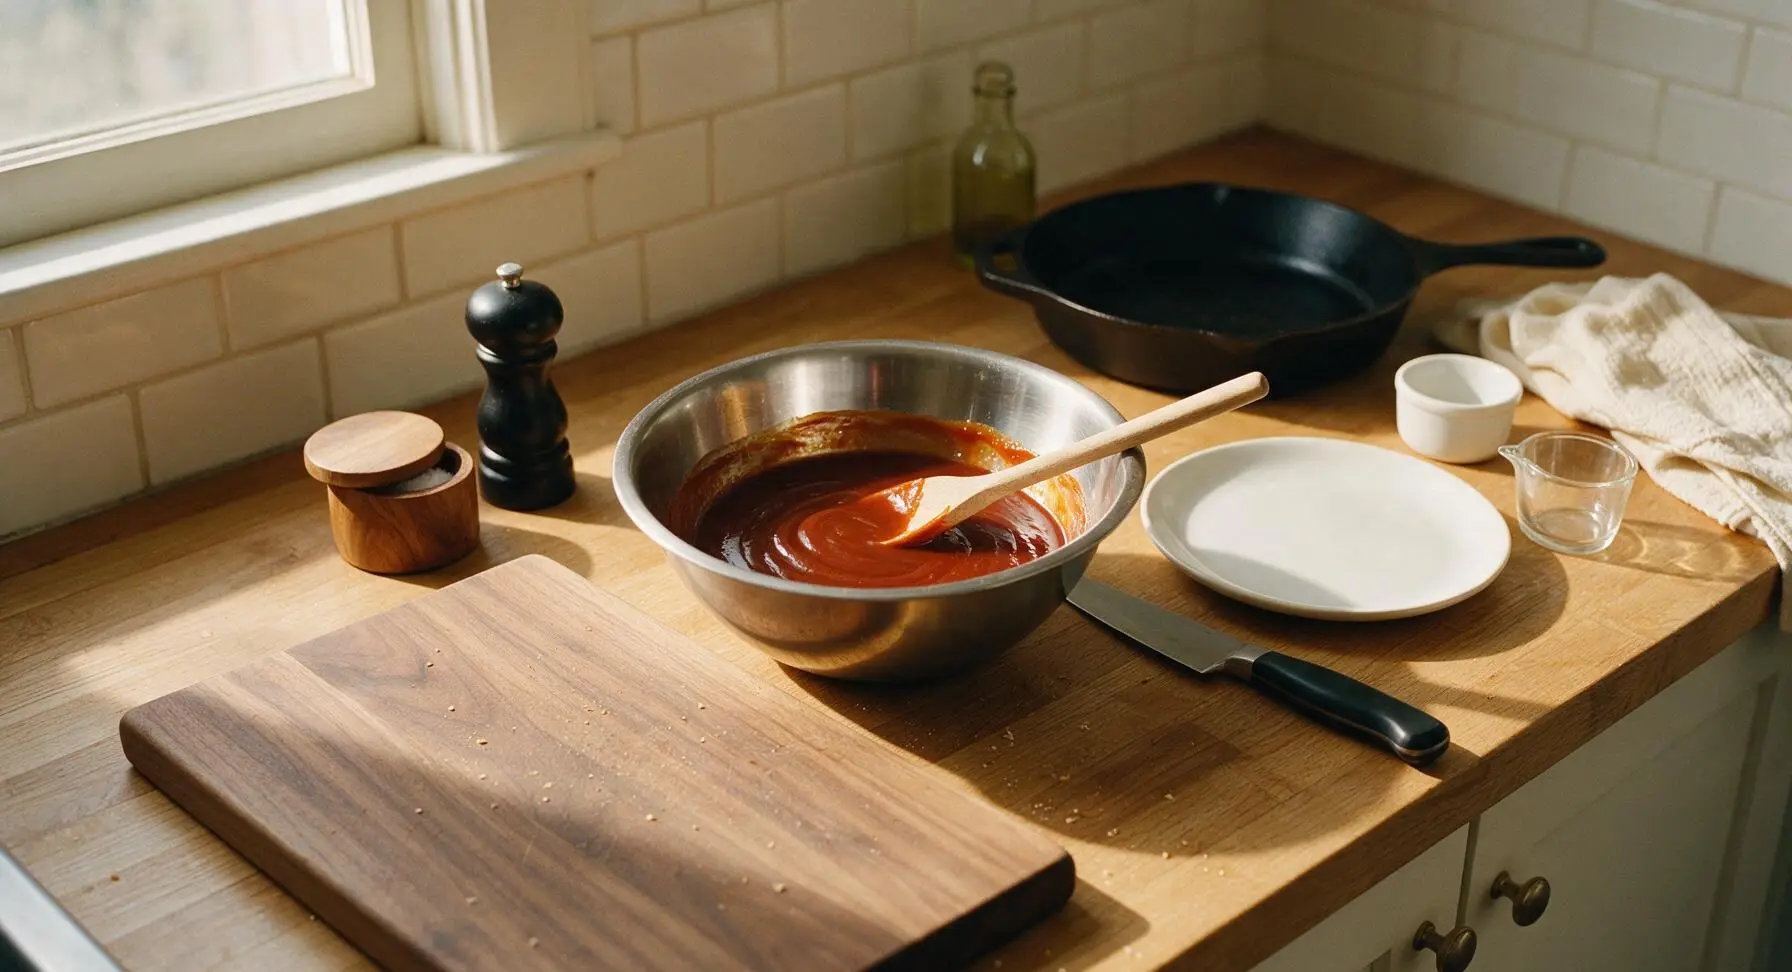
In the now-empty stainless steel mixing bowl, combine the remaining 2 tbsp of melted butter, 1/2 cup of hickory BBQ sauce, and the remaining 1/2 tsp kosher salt. Stir with the beech wood mixing spoon until completely smooth, with no streaks of butter visible. Add all the cut quesadilla cubes to the bowl, and toss very gently until every cube is evenly coated in the glossy sauce mixture, taking care not to squeeze or break apart the soft cubes.
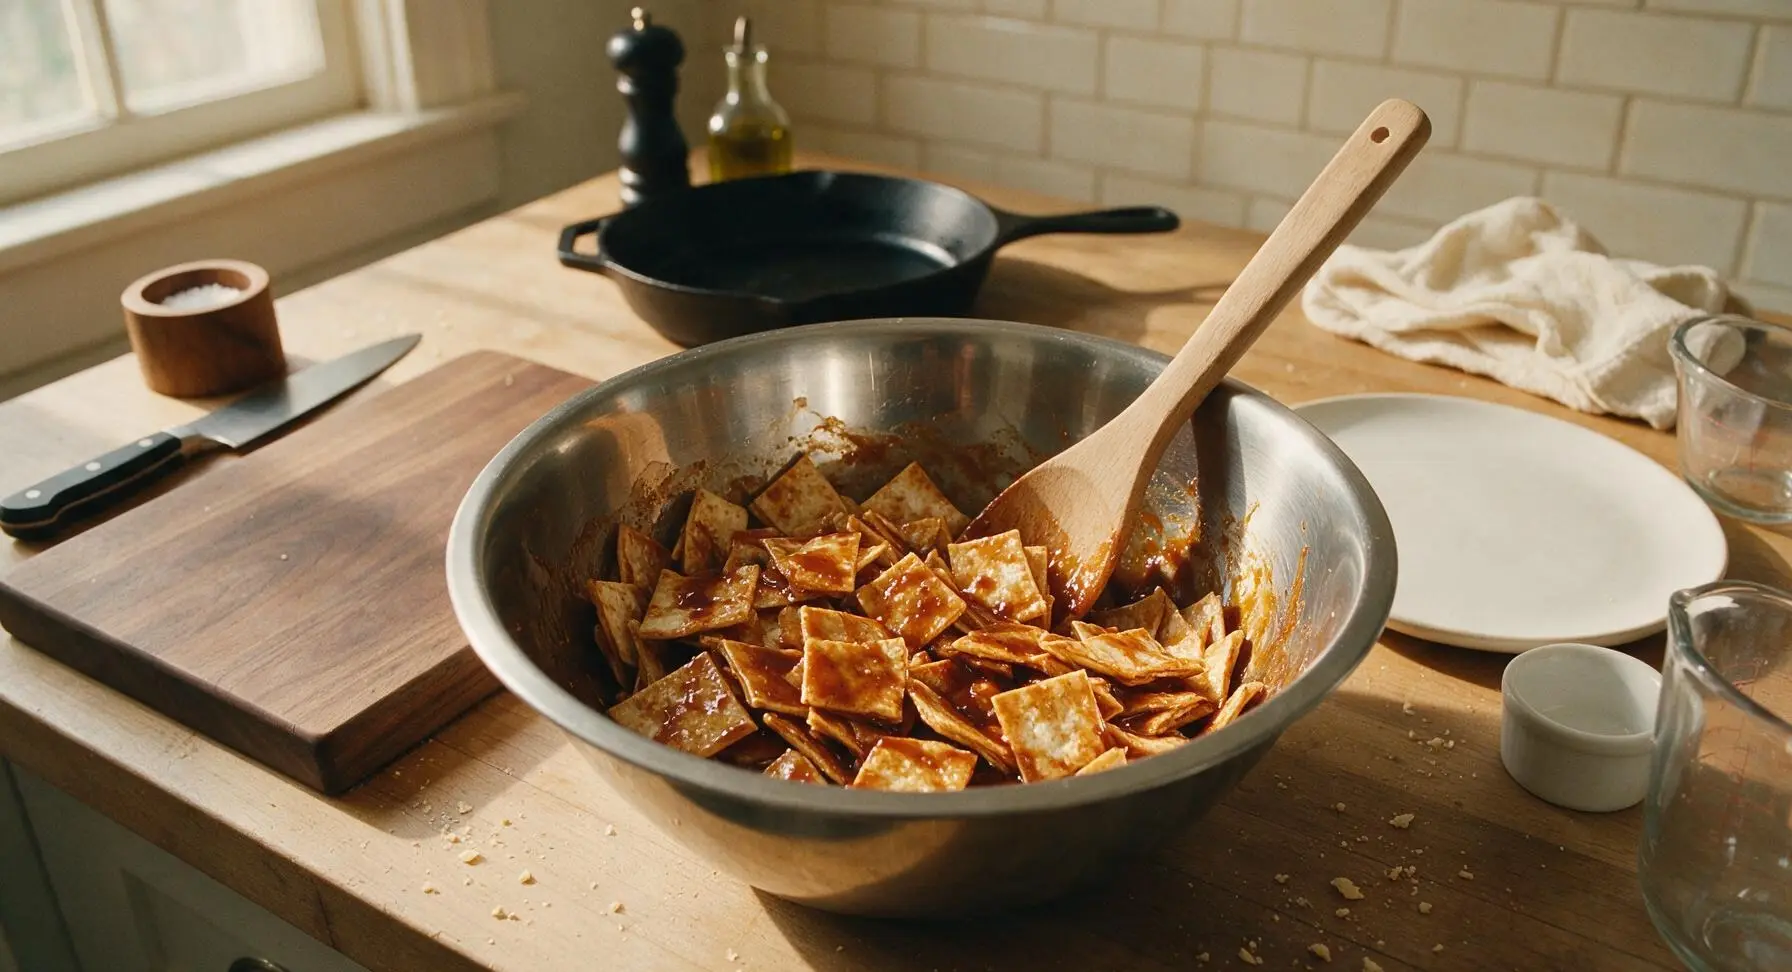
Step 5
step5:Toss in BBQ Glaze
Step 5
step5:Toss in BBQ Glaze
6

Bake to Caramelize Edges

Preheat your oven (or outdoor pellet grill for extra smoke flavor) to 400°F (200°C). Arrange the sauce-coated quesadilla cubes in a single, even layer across the 9x13 inch aluminized steel baking pan, leaving 1/4-inch gaps between each cube to allow hot air circulation. Bake for 15 minutes, then use the silicone-tipped tongs to flip each cube, and bake for an additional 10 minutes until the edges are dark golden, slightly charred (the signature "burnt end" look), and the sauce is sticky and caramelized, not runny.
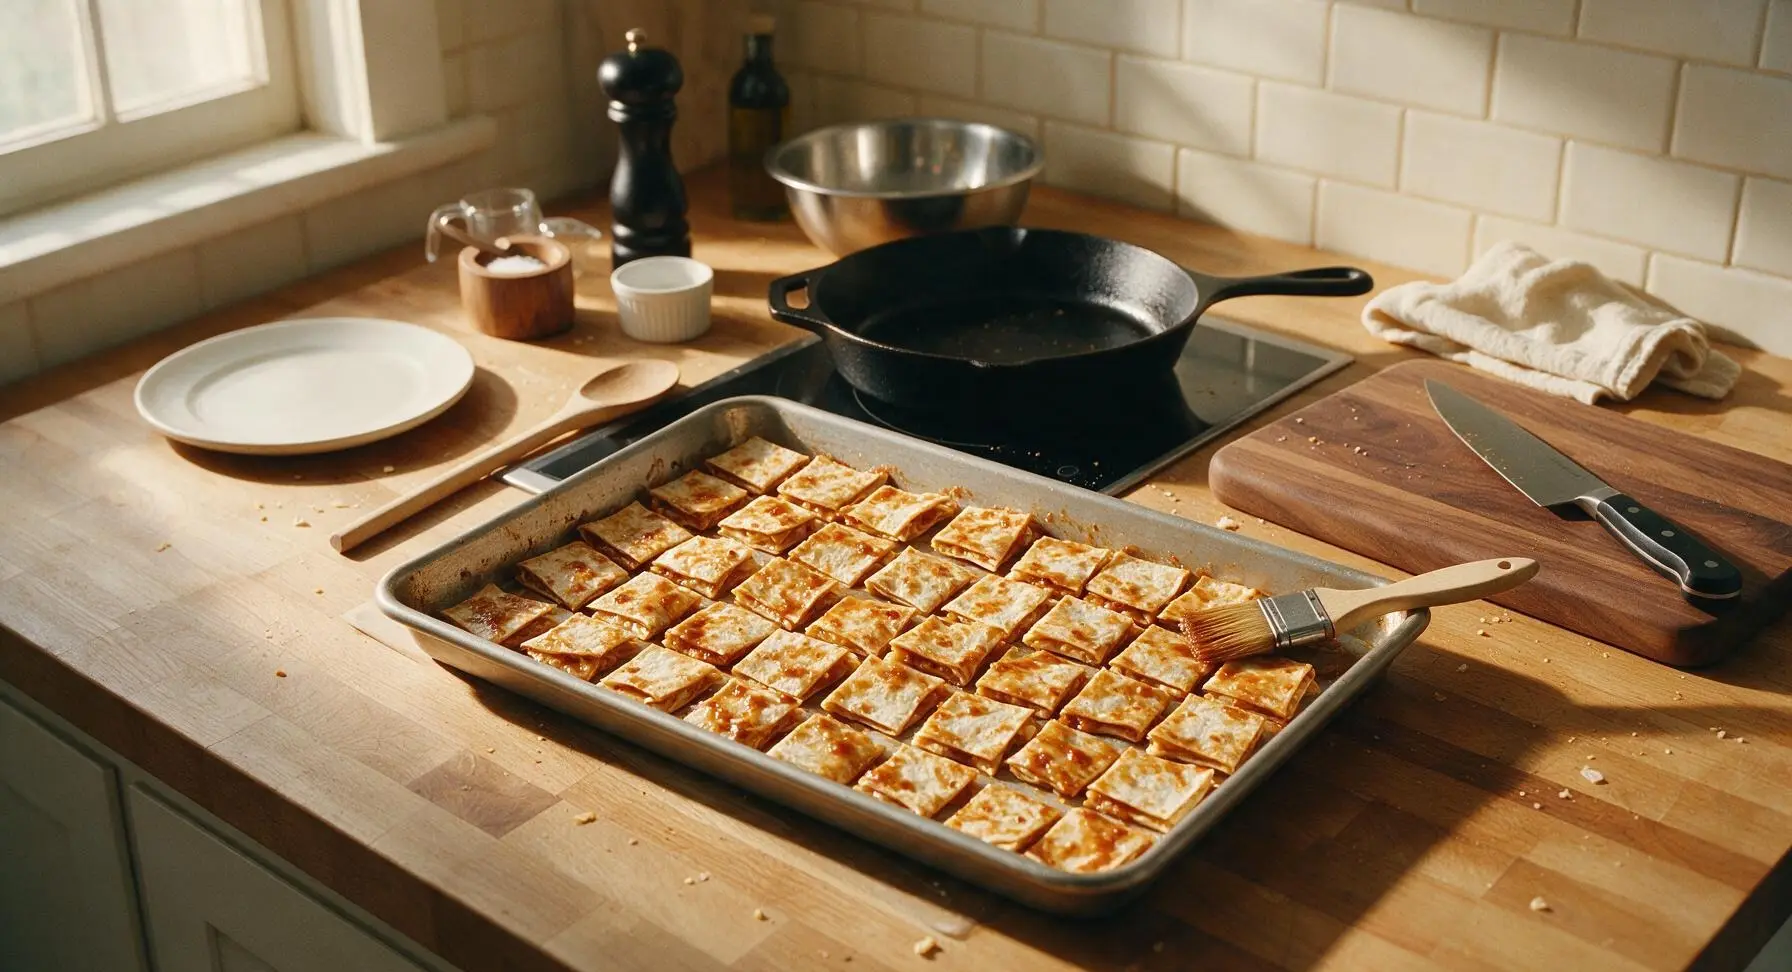
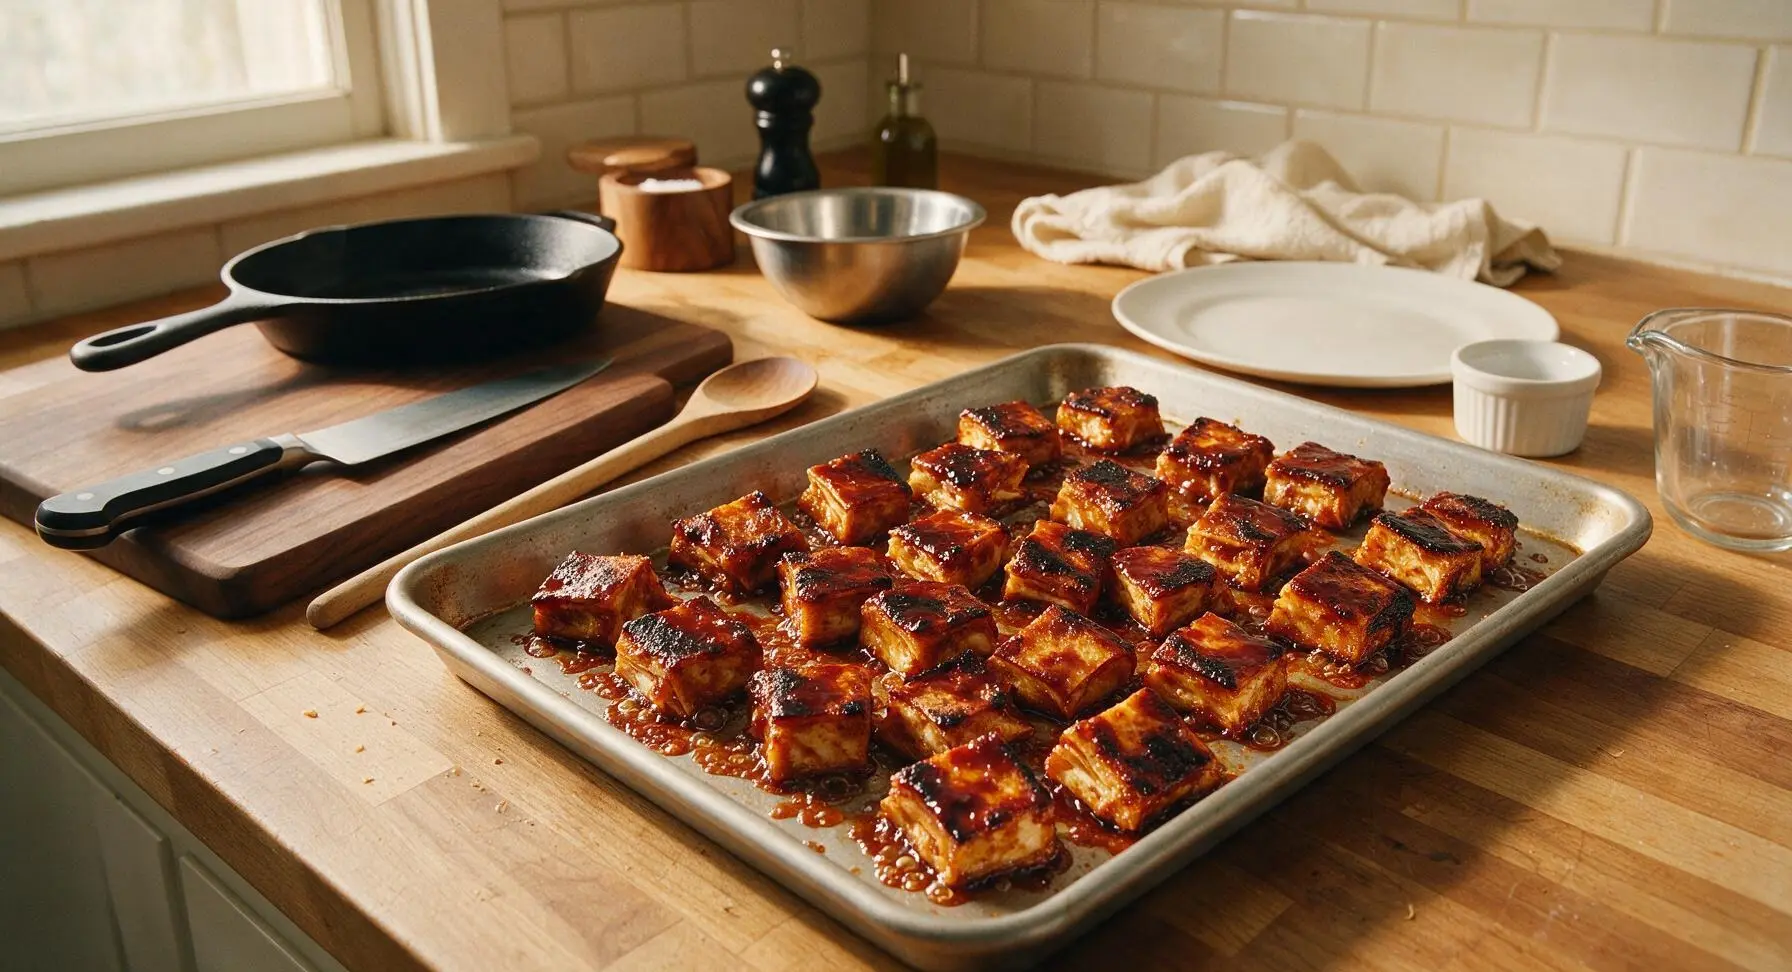
Step 6
step6:Bake to Caramelize Edges
Step 6
step6:Bake to Caramelize Edges
7

Plate and Garnish Bites

Remove the pan from the oven or grill, and let the burnt ends rest for 3 minutes to allow the sauce to set slightly. Use the silicone-tipped tongs to pile the cubes high on the matte terracotta dinner plate. Drizzle the remaining 1/4 cup of BBQ sauce lightly over the top of the pile, then sprinkle with chopped fresh cilantro. Serve immediately with the two small white ramekins (one filled with sour cream, one with extra BBQ sauce) for dipping.
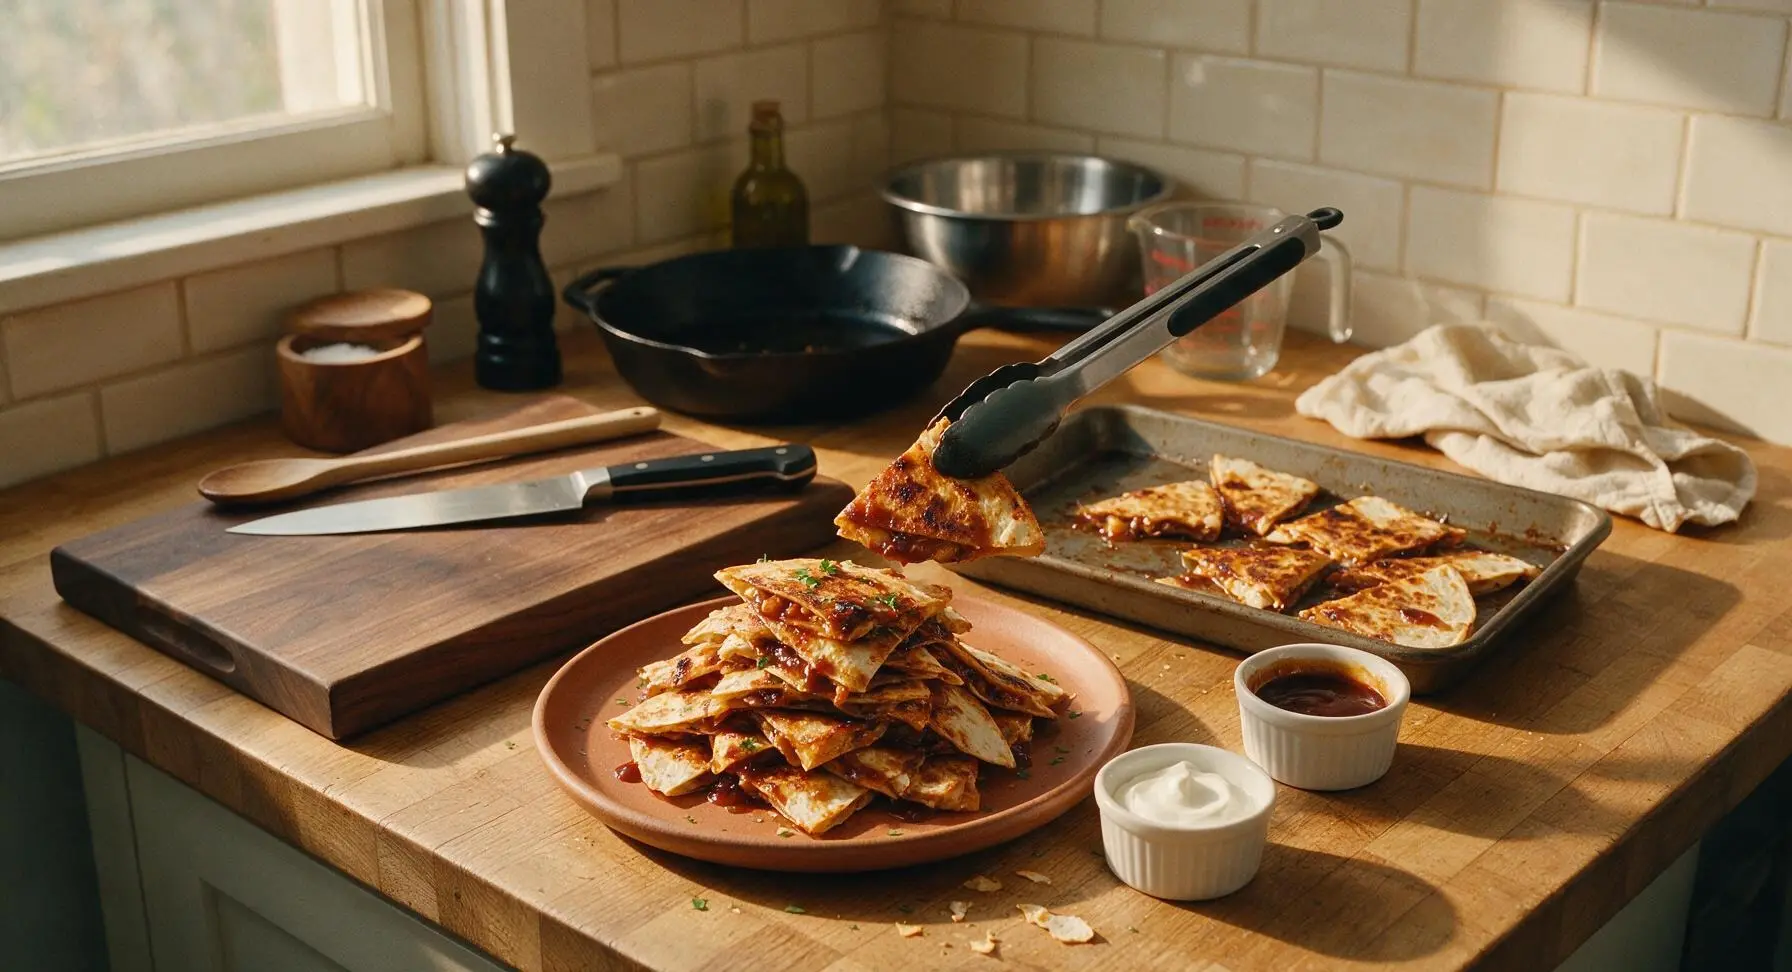
Step 7
step7:Plate and Garnish Bites

Tips

1.Let cooked quesadillas cool a full 5 minutes before cutting: this allows melted cheese to firm up, so cubes hold their shape instead of oozing out when tossed in sauce or baked, which prevents soggy, misshapen bites.
2.Don’t overcrowd the baking pan: leaving 1/4-inch gaps between cubes lets hot air circulate around every side, creating crispy, charred edges instead of soggy, steamed bites that don’t develop the classic burnt end texture.
3.For authentic smoky burnt end flavor, bake the cubes on a wood pellet grill set to 400°F instead of a conventional oven: 25 minutes of hickory or oak smoke infuses the tortilla and cheese to match the flavor profile of traditional brisket burnt ends.


✨ You May Also Like

BBQ & Grilling
🍜 United States

Tender, melt-in-your-mouth beef brisket with a crisp, spiced bark, slow-smoked to deep smoky perfection, the iconic centerpiece of Texas backyard barbecue.

⏱️ 12 hours BBQ & Grilling ★ 4.4
BBQ & Grilling
🍜 Korea

Tender, sweet-savory marinated beef short ribs, a beloved Korean BBQ staple with caramelized, slightly charred edges and deep umami flavor, perfect for outdoor summer gatherings.

⏱️ 4 hours 2BBQ & Grilling ★ 4.8
BBQ & Grilling
🍜 United States

Juicy grilled beef patties topped with smoky homemade chili, melted cheddar, and tangy pickles on toasted brioche buns for a hearty, flavor-packed handheld meal.

⏱️ 40 minuteBBQ & Grilling ★ 4.7
BBQ & Grilling
🍜 United States

A sweet, smoky, tangy BBQ sauce brightened with peak-season dark cherries, ideal for glazing grilled ribs, chicken, pork, or summer roasted veggies.

⏱️ 35 minuteBBQ & Grilling ★ 4.7
BBQ & Grilling
🍜 United States

Rich, smoky, slightly sweet homemade bourbon BBQ sauce with deep caramel notes, ideal for glazing grilled ribs, chicken, and burgers at cookouts.

⏱️ 25 minuteBBQ & Grilling ★ 4.7
BBQ & Grilling
🍜 United States

Iconic Alabama-style BBQ featuring tender hickory-smoked chicken slathered in tangy creamy white sauce, a beloved regional Southern cookout staple.

⏱️ 3 hoursBBQ & Grilling ★ 5

Quesadilla Burnt Ends:Frequently Asked Questions

1.What exactly are quesadilla burnt ends? ▾
These are a playful, shareable twist on classic brisket burnt ends made for backyard BBQ spreads. You’ll stuff flour tortillas with shredded sharp cheddar, Monterey Jack, and chopped smoked brisket, cook into crisp quesadillas, cube them, toss in hickory BBQ sauce, then roast until edges char and the glaze turns sticky and caramelized.
2.Can I make these if I don’t have pre-cooked smoked brisket on hand? ▾
Absolutely! If you don’t have leftover smoked brisket, grab pre-smoked brisket from your local BBQ joint, or swap in finely chopped smoked pulled pork or crispy chopped bacon. For a vegetarian version, use smoked portobello cubes tossed in a pinch of smoked paprika to match that signature deep, smoky profile.
3.Do I have to use 10-inch flour tortillas for this recipe? ▾
10-inch flour tortillas are ideal because they hold a generous amount of filling without tearing, and cut into uniform, bite-sized cubes once cooked. If you only have smaller 8-inch tortillas, just reduce filling per tortilla slightly to avoid oozing, and skip corn tortillas—they crack too easily when cubed and sauced.
4.Why use a mix of sharp orange cheddar and Monterey Jack cheese? ▾
That blend hits the perfect balance of flavor and texture! Sharp orange cheddar brings a bold, tangy bite and that classic golden hue that pairs beautifully with dark BBQ glaze, while Monterey Jack melts ultra-smooth and creamy, so you don’t end up with greasy, separated cheese or bland filling.
5.What’s the best way to keep cheese from oozing out when cooking the initial quesadillas? ▾
Keep your cooking temperature at medium, not high, and don’t overstuff each tortilla—stick to a thin, even layer of cheese and chopped brisket, leaving a ½-inch border around the edge. Press the quesadilla firmly with a spatula as it cooks, and wait until the bottom cheese layer melts fully before flipping to seal edges tight.
6.How big should I cut the quesadilla pieces before glazing and roasting? ▾
Aim for uniform 1-inch cubes for the perfect bite! Cutting them any smaller will make them fall apart when you toss them in BBQ sauce, and cutting them larger than 1.5 inches means you won’t get that ideal ratio of crispy charred edge, sticky glaze, and melty cheesy filling in every bite.
7.Can I use a different flavor of BBQ sauce instead of hickory? ▾
Hickory BBQ sauce pairs perfectly here because its bold, woody smoke notes complement the brisket and charred tortilla edges, but you can absolutely swap it for your favorite variety. Try a sweet brown sugar sauce, tangy vinegar-based sauce, or spicy chipotle BBQ sauce if you want to add a little kick.
8.Do I need a smoker to make these quesadilla burnt ends? ▾
No smoker required! While the smoked brisket brings that classic smoke flavor, you can make the burnt end bites entirely in a standard oven, on a pellet grill, or even in an air fryer. Cook the sauced cubes at 400°F, tossing halfway, until edges char and glaze caramelizes, roughly 15 minutes total.
9.How do I keep the burnt ends from getting soggy once I toss them in sauce? ▾
The key to avoiding soggy bites is to toss the quesadilla cubes in sauce right before roasting, not ahead of time, and don’t douse them—use just enough sauce to lightly coat each cube. Roast on a wire rack set over a baking sheet so air circulates around every side to crisp them evenly.
10.How long do these need to roast after I sauce the cubes? ▾
At 400°F, they’ll take 12 to 15 minutes total, and you’ll want to toss them once at the halfway point to make sure every side gets caramelized. You’ll know they’re done when the sauce is thick and sticky, tortilla edges have slight charred spots, and cheese just starts to bubble out of cube corners.
11.Are these a good make-ahead snack for parties or backyard BBQs? ▾
They’re best served fresh out of the oven or grill for maximum crispiness, but you can prep components ahead to cut down on day-of work. Cook and chop brisket, shred cheese, and prep sauce up to 3 days in advance; assemble, cook, cube, sauce, and roast right before guests arrive.
12.What are the best dipping sauces to serve with these? ▾
The hickory BBQ glaze already packs tons of flavor, but extra dips make these even more fun for a crowd. Serve them with cool sour cream, creamy cilantro lime crema, pickled jalapeños, guacamole, or extra warm BBQ sauce, plus a sprinkle of chopped cilantro or green onion for a bright garnish.
13.My burnt ends came out too chewy—what did I do wrong? ▾
Chewy burnt ends usually come from two common mistakes: either you cut the tortilla cubes too thick, or you roasted them at too low a temperature. Make sure your oven or grill is fully preheated to 400°F before adding cubes, and spread them in a single layer so every side crisps up evenly.
14.Can I make these in an air fryer instead of the oven? ▾
Absolutely—air fryers make extra crispy burnt ends in less time! Toss your quesadilla cubes in sauce, arrange them in a single layer in the air fryer basket (work in batches to avoid crowding), and cook at 380°F for 8 to 10 minutes, shaking the basket halfway to crisp every side.
15.How should I store leftover quesadilla burnt ends? ▾
Let any leftover bites cool completely to room temperature, then transfer them to an airtight container and keep them in the fridge for up to 3 days. To reheat, spread them on a baking sheet and warm in a 400°F oven for 5 to 7 minutes until crisp—skip the microwave, as it makes tortillas rubbery and soggy.
16.Can I add extra fillings to the quesadillas before cubing them? ▾
Absolutely, as long as you don’t overstuff them! Great add-ins include finely diced pickled jalapeños for a tangy kick, crispy bacon bits, a sprinkle of taco seasoning, or a thin layer of refried beans. Keep extra fillings finely chopped so they don’t fall out when you cube and roast the bites.
17.What’s the best way to serve these for a large backyard gathering? ▾
Pile the warm, sticky burnt ends on a large parchment-lined platter, stick a toothpick in each cube for easy, mess-free grabbing, and set out your dipping sauces in small bowls around the platter. Make a double batch—these go extremely fast with cold drinks, and you’ll want enough for guests to come back for seconds.

Comments (11)

2 days ago

OMG these quesadilla burnt ends are a total game changer for our Sunday football watch parties! I made a double batch last weekend and every single piece was gone before halftime. The crispy cheesy edges mixed with that smoky burnt end bite? *Chef’s kiss* My husband kept asking if I’d order more from the BBQ place down the street, nope—made em myself! Only note: I added a little extra pickled jalapeño on the side for people who like heat, worked perfectly.

yesterday

Wait the pickled jalapeño addition is genius! I’m making these for taco night tonight with my family, definitely stealing that idea.

yesterday

So glad these were a hit for your watch party! The pickled jalapeño hack is such a great call—briny heat cuts through the rich cheese so well, we love doing that too!

3 days ago

Super easy recipe, came out great overall! I messed up a little by leaving them in the broiler an extra 2 minutes so a few edges were more charred than burnt end style, but my roommates still devoured them. Cook time was right on 35 minutes for me, no fancy equipment needed which is perfect for my tiny apartment kitchen.

2 days ago

Thanks for giving the recipe a go! Pro tip next time: keep a close eye on them during the last 3-4 minutes under the broiler, since ovens run hot sometimes. A little extra char isn’t the worst thing though, right? 😉

1 week ago

Added these to my weekly meal prep rotation and they are SO good! I portion them out with a side of cilantro lime rice and a little cup of salsa for dipping, and they reheat perfectly in the air fryer for 3 minutes. Way cheaper than getting takeout BBQ during the work week, and my coworkers kept popping by my desk asking what smelled so good when I heated it up for lunch.

5 days ago

Wait how well do they hold up in the fridge? I’m a college student with super limited time between classes, so if these last 4-5 days that would be a lifesaver.

3 days ago

Love that these work for meal prep! To answer the question above: stored in an airtight container, they’ll stay good in the fridge for up to 4 days, and the air fryer reheat is exactly how we get them crispy again too!

yesterday

My kids loved it! I was worried the smoky flavor would be too much for my 7 and 9 year old, but they begged for seconds before I even sat down to eat. I used a mix of cheddar and pepper jack (mostly cheddar to keep the heat low) and served with a side of sour cream for dipping. 10/10, will be making this for our next family dinner for sure.

2 hours ago

Nothing makes us happier than hearing a recipe is a hit with the kids! The cheddar-heavy cheese mix is such a smart move for little palates, we’re so glad the whole family enjoyed it.

2 hours ago

Wait I was skeptical about combining burnt ends and quesadillas but this slaps? I used leftover brisket burnt ends from the BBQ joint I went to on Saturday instead of making them from scratch, cut the cook time down to like 15 minutes, and it was still incredible. 10/10 lazy weekend lunch hack.

30 minutes ago

Leftover burnt ends is such a pro move! I always have a random container of them in the freezer after weekend smokes, I’m defrosting a batch tonight to make these.

5 minutes ago

The leftover brisket hack is one of our favorite shortcuts too! No need to make burnt ends from scratch if you’ve got good leftovers, it cuts down on work and tastes just as delicious.

5 days ago

Brought these to my neighborhood block party potluck last weekend and people were asking for the recipe before I even set the platter down! I cut them into little bite-sized squares, stuck a toothpick in each, and set out a little station with salsa, guac, and sour cream for dipping. Zero leftovers, people were going back for thirds. So easy to make for a crowd too!

3 days ago

The bite-sized serving idea for a potluck is perfect! We’re so glad these were a hit with your neighbors—nothing beats a shareable snack everyone loves.

2 weeks ago

Made this with plant-based brisket and vegan cheddar for my partner who’s dairy free, and it still came out so tasty! It didn’t get quite as crispy as the photos look but I think that’s because of the vegan cheese, not the recipe. Would absolutely make again, might add a little extra taco seasoning next time for more flavor.

2 days ago

Made these on my Traeger last night instead of the oven, added a little extra BBQ glaze to the meat before folding into the quesadillas, and man oh man—these might be the best thing I’ve grilled all summer. My neighbor hopped the fence when he smelled them (jokingly… mostly) and asked for a piece, ended up staying for three.

yesterday

Wait Traeger version sounds insane! I’ve been looking for new pellet grill recipes, I’m firing mine up this weekend to make these.

yesterday

The Traeger twist sounds incredible, that extra wood-fired flavor would take these over the top! Love that your neighbor got to enjoy them too, that’s what good food is all about.

30 minutes ago

As someone who can barely boil water without burning it, this recipe was so easy to follow! I didn’t burn a single thing, and my roommates thought I ordered takeout from the fancy BBQ spot downtown. Total win for my limited cooking skills, 10/10.

5 minutes ago

That makes our day to hear! This recipe is designed to be super approachable for cooks of all skill levels, so we’re thrilled you pulled it off and impressed your roommates. Great job!

1 week ago

These were good, but I felt like they were missing a little something for me. I think next time I’ll add some caramelized onions into the filling to add a little extra sweetness to balance the smoky BBQ and cheese. Cook time was accurate though, and it was definitely easy to throw together after work.

just now

Just popped these in the oven! Prepped all the filling during my toddler’s nap time, can’t wait to try them for dinner tonight. The recipe instructions were so straightforward, I already know they’re gonna be a hit—smells amazing in my kitchen right now!



