
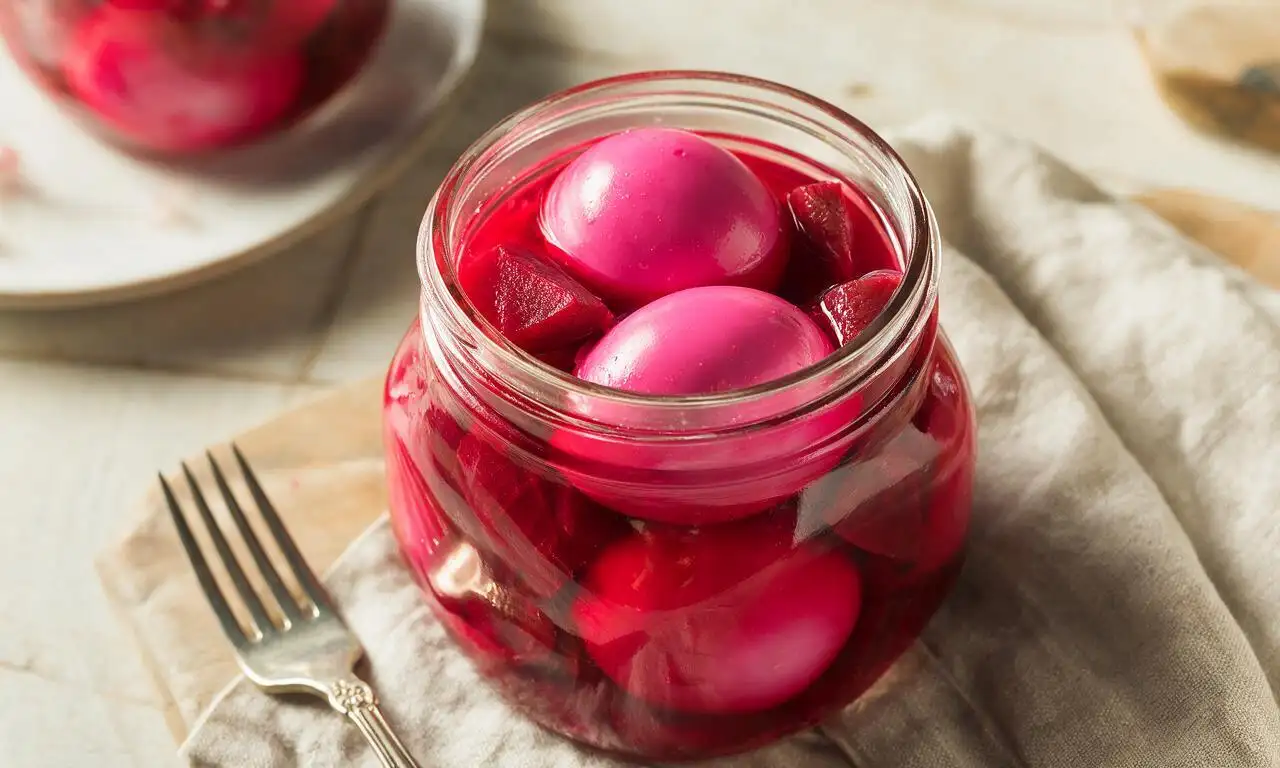
Red Beet Eggs

title 1
Red Beet Eggs
⏱️ cook time 30 minutes prep & cook, plus 24 hours required pickling chill time
🍽️ servings 8
⚡ Difficulty easy

intro

Vibrant magenta pickled eggs with a tangy, slightly sweet beet brine, a classic cold side perfect for outdoor summer spreads.

Ingredients

Large eggs 8 (400g total, ~50g each)
Canned sliced red beets 425g can, drained (reserve 120ml / ½ cup canning liquid)
Apple cider vinegar 180ml / ¾ cup
Granulated sugar 80g / ⅓ cup
Water 60ml / ¼ cup
Small yellow onion 1 (100g, thinly sliced into half-moons)
Whole black peppercorns 1 tsp (3g)
Whole cloves 4 whole pieces
Kosher salt 1 tsp (5g)

Steps

1

Boil and Cool Eggs

Place 8 large eggs in a medium 2L saucepan, cover with 2.5cm / 1 inch of cold tap water. Bring to a full rolling boil over medium-high heat, then immediately cover the pan with a tight lid, remove from the stovetop burner, and let rest for 10 minutes. Use a slotted spoon to transfer eggs to a prepared ice water bath (equal parts ice and cold water) for 5 minutes to halt cooking and loosen eggshells.

Step 1
step1:Boil and Cool Eggs
2

Crack and Peel Eggs

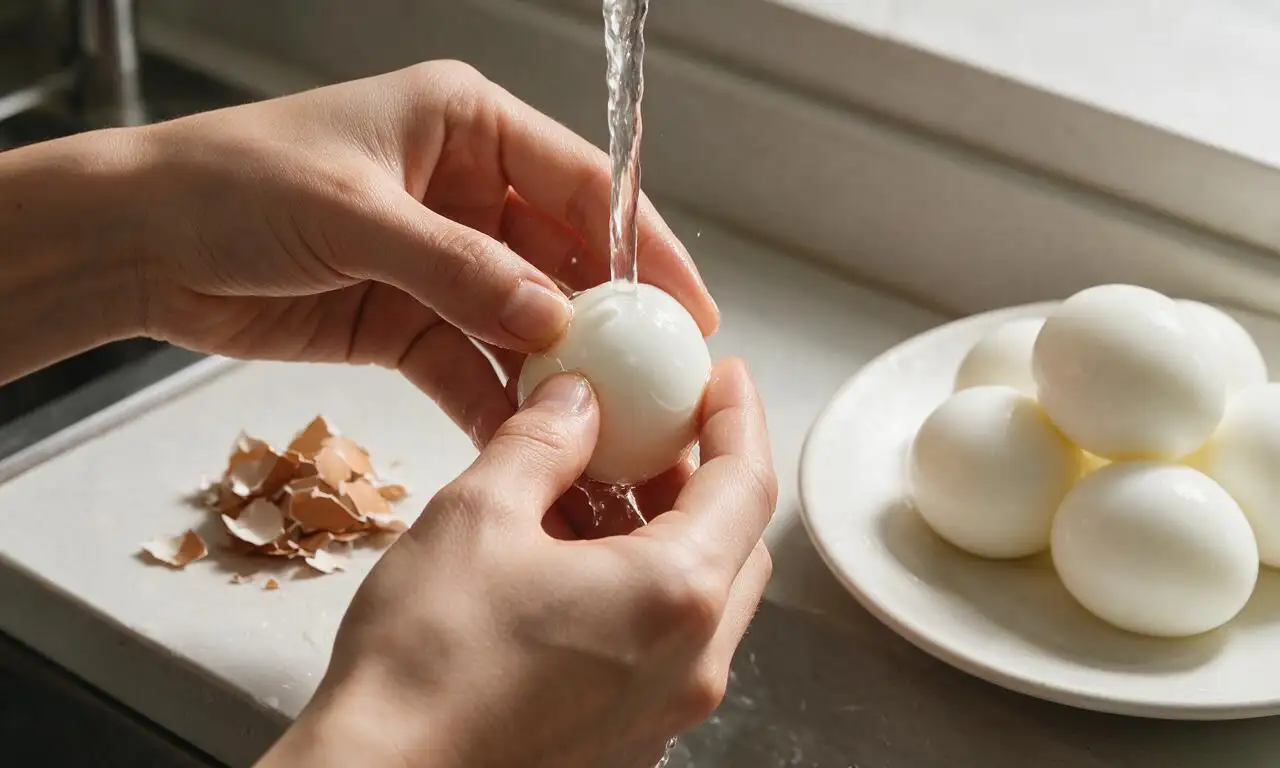
Drain cooled eggs completely, then gently tap each egg on a hard countertop to crack the shell across its entire surface, rolling the egg between your palms to loosen the thin membrane under the shell. Peel eggs under a thin stream of cool running water, then set smooth, fully peeled eggs on a clean plate; discard all shell fragments.
Step 2
step2:Crack and Peel Eggs
3

Prepare the Pickling Brine

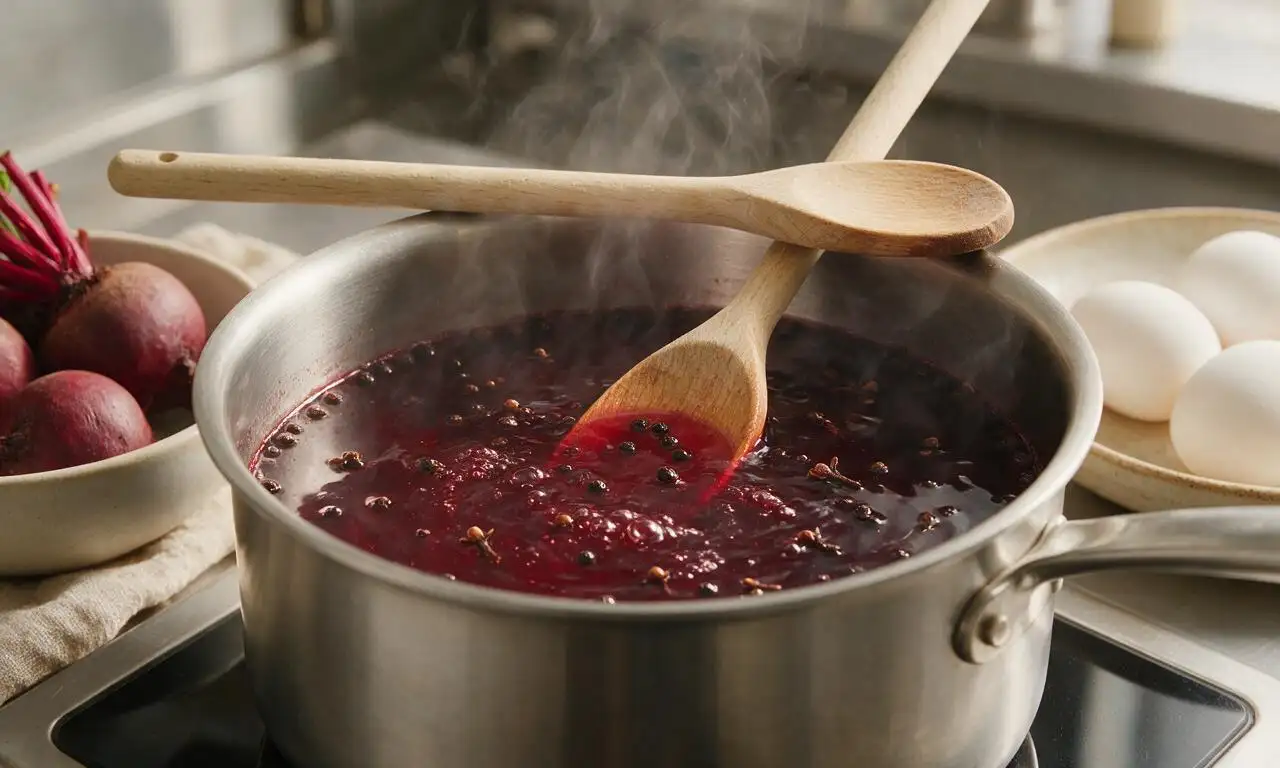
Use the same 2L saucepan to make the brine: combine the reserved 120ml / ½ cup beet canning liquid, 180ml / ¾ cup apple cider vinegar, 60ml / ¼ cup water, 80g / ⅓ cup granulated sugar, 1 tsp (5g) kosher salt, 1 tsp (3g) whole black peppercorns, and 4 whole cloves. Bring the mixture to a gentle simmer over medium heat, stirring occasionally with a wooden spoon until sugar and salt fully dissolve, about 3 minutes. Remove the pan from heat and let the brine cool for 10 minutes at room temperature.
Step 3
step3:Prepare the Pickling Brine
4

Layer Ingredients in Mason Jar

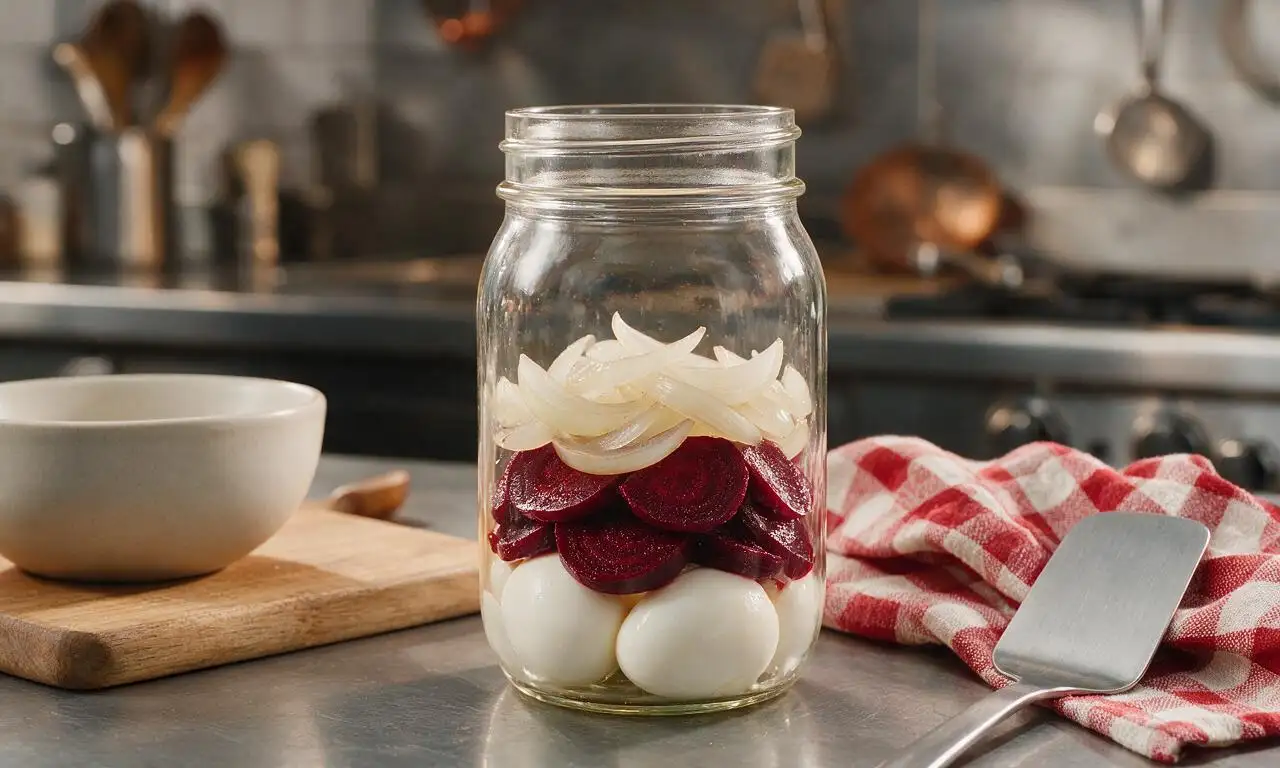
In a clean, dry 1.9L / 2 quart glass mason jar with a tight-sealing lid, alternate layers of peeled hard-boiled eggs, drained sliced red beets, and thinly sliced yellow onion to distribute ingredients evenly. Leave 2.5cm / 1 inch of headspace at the top of the jar, and do not pack ingredients so tightly that brine cannot circulate between pieces.
Step 4
step4:Layer Ingredients in Mason Jar
5

Pour Brine Over Ingredients

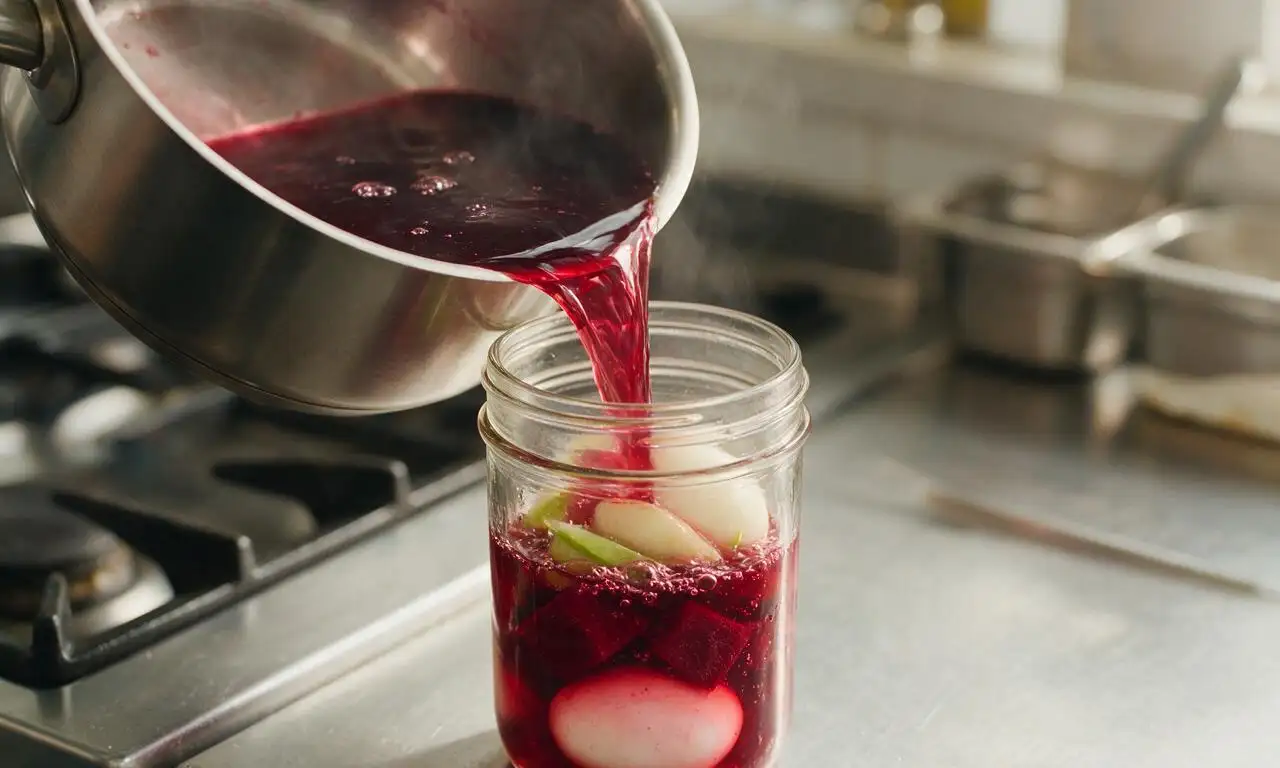
Pour the slightly cooled brine (including all the whole spices) over the layered ingredients in the jar, ensuring all eggs and vegetables are fully submerged under the red liquid. If any eggs float to the surface, place a small clean glass fermentation weight or a folded piece of food-safe plastic on top to hold them under the brine, then seal the jar tightly with its lid.
Step 5
step5:Pour Brine Over Ingredients
6

Refrigerate to Pickle Eggs

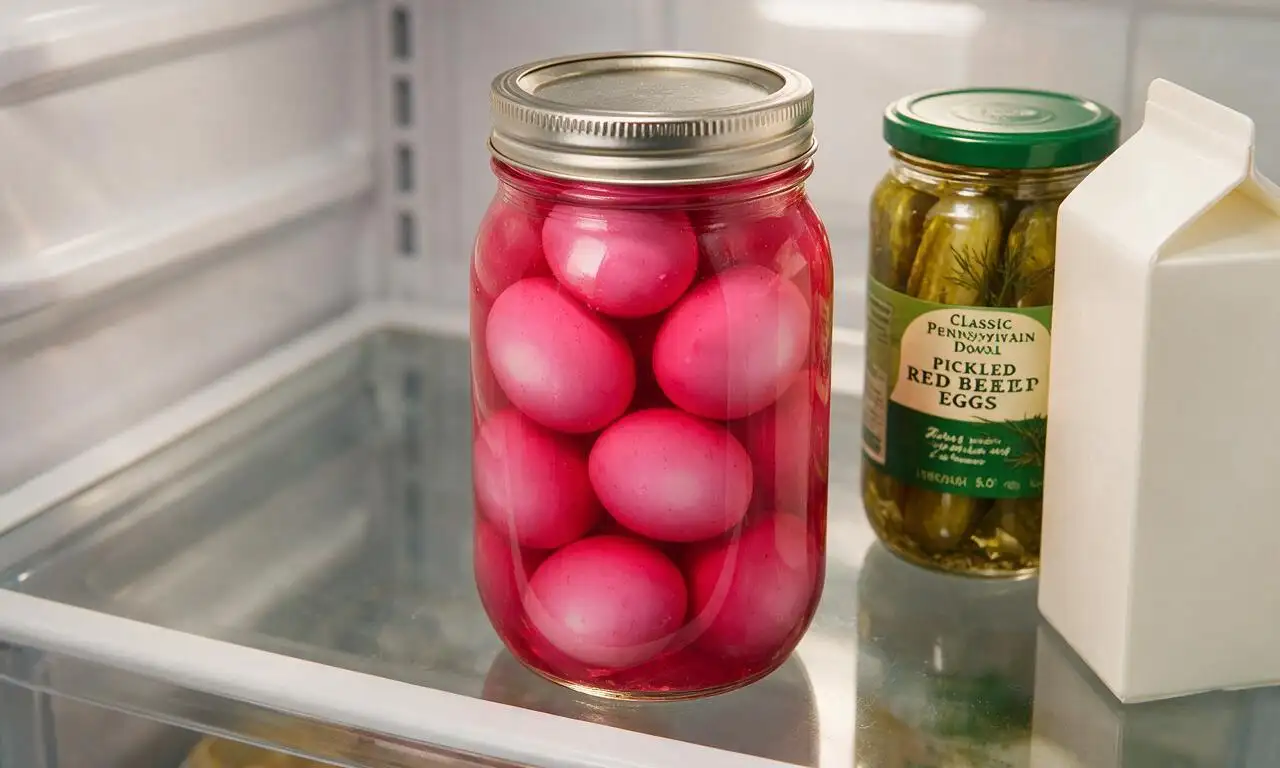
Transfer the sealed jar to the refrigerator set to 4°C / 40°F, and let the eggs pickle for a minimum of 24 hours (up to 7 days for deeper magenta color and tangier flavor) before serving. Gently flip the jar upside down and back right-side up once every 8 hours during the pickling process to ensure even color distribution across all eggs.
Step 6
step6:Refrigerate to Pickle Eggs

Tips

1.Never pour boiling hot brine directly over peeled eggs, as high heat will make egg whites rubbery and tough; always let brine cool for 10 minutes first.
2.If canned beets are unavailable, substitute with 2 medium (200g total) roasted, peeled red beets and 120ml / ½ cup water mixed with ¼ tsp (1g) beet powder to replicate the signature deep color and earthy flavor.
3.Wait to slice pickled eggs until right before serving; pre-slicing eggs before pickling will cause yolks to absorb excess brine, turn gray at the edges, and develop an overly sour, unbalanced flavor.


✨ You May Also Like

Side Dishes
🍜 India

Velvety, aromatic all-purpose curry sauce perfect for tossing with roasted veggies, grilled protein, or rice for fast, cozy, flavorful meals.

⏱️ 25 minuteSide Dishes ★ 4.8
Side Dishes
🍜 Spain

Tender, starchy boiled yuca tossed in bright, garlicky citrus mojo sauce—an iconic, zesty side that pairs beautifully with roasted pork, grilled meats, and rice and beans.

⏱️ 40 minuteSide Dishes ★ 5
Side Dishes
🍜 United States

Tender, paper-thin potato flatbread, a beloved Norwegian-American Minnesota Christmas staple, griddled until softly spotted and served warm with butter.

⏱️ 1 hour 30Side Dishes ★ 4.6
Side Dishes
🍜 United States

Rich, deeply savory cured salt pork, a long-lasting kitchen staple perfect for frying crispy as a side or adding umami to stews, beans, and chowders.

⏱️ 7 days (2Side Dishes ★ 4.9
Side Dishes
🍜 United States

Crispy, tangy classic Southern fried green tomatoes with a crunchy cornmeal crust, served hot for a nostalgic, comforting summery bite.

⏱️ 25 minuteSide Dishes ★ 4.9
Side Dishes
🍜 United States

Moist, golden-crusted savory muffins with sweet corn, zesty jalapeño, and melted cheddar, perfect for pairing with smoky summer grilled fare.

⏱️ 30 minuteSide Dishes ★ 4.9

Red Beet Eggs:Frequently Asked Questions

1.How long do I need to let these pickled red beet eggs cure before they’re ready to eat? ▾
Plan to let them cure sealed in the refrigerator for a minimum of 48 hours before serving for that signature tangy-sweet flavor and bright magenta edge on the egg whites. They’ll continue to develop deeper color and smoother brine flavor for up to 7 days, so don’t rush the resting step for the best results.
2.Can I use fresh cooked beets instead of canned sliced red beets for this recipe? ▾
Absolutely! Canned beets are the traditional, convenient pick for PA Dutch versions, but you can swap in 2 cups of peeled, sliced, fully cooked fresh red beets if you prefer. Just make sure they’re fork-tender before adding them to the brine so their color and earthy sweetness infuses properly.
3.How do I keep my hard-boiled eggs from getting a rubbery texture for this recipe? ▾
Start with cold large eggs lowered gently into boiling water, cook for exactly 9 minutes, then plunge them immediately into an ice water bath for 10 minutes to stop the cooking process. This creates firm but tender yolks without rubbery whites, and makes shells slide right off when peeling, too.
4.How long will finished pickled red beet eggs stay safe to eat in the fridge? ▾
When stored fully submerged in brine in a tightly sealed, non-reactive glass jar in the refrigerator, these eggs will stay fresh and safe to eat for up to 2 weeks. Always use a clean utensil to pull eggs out of the jar to avoid introducing bacteria that can shorten their shelf life.
5.Do I have to can these pickled eggs in a water bath canner for long-term storage? ▾
No, never water-bath can pickled eggs, even with this vinegar brine! This is a refrigerator-only pickle recipe, as eggs are a low-acid food that can support dangerous botulism growth if stored at room temperature long-term. Skip the canning pot and keep these chilled the entire time they’re stored.
6.Can I cut back on the sugar in the brine to make these less sweet? ▾
You can reduce the granulated sugar by up to 1/3 without throwing off the brine balance, but keep in mind the traditional PA Dutch profile is intentionally slightly sweet to balance the sharp tang of apple cider vinegar and earthy beets. Don’t cut out all the sugar, or the brine will taste unbalanced and overly sharp.
7.Why do my pickled beet eggs have a faint gray ring around the yolk? ▾
That harmless gray ring forms when eggs are overcooked, or not cooled quickly enough after boiling. It doesn’t impact safety or flavor much, but it does make for a less pretty finished egg. Stick to the 9-minute boil and immediate ice bath trick, and you’ll get bright golden yolks with no discoloration every time.
8.Can I add extra spices to the brine for more layered flavor? ▾
Absolutely! While the classic recipe sticks to the simple beet, vinegar, sugar, and water brine, common traditional add-ins include a couple whole cloves, a small cinnamon stick, a few thin slices of yellow onion, or a pinch of whole black peppercorns. Avoid adding too many strong spices that overpower the mild beet and egg flavor.
9.Do I need to fully peel the eggs before adding them to the pickling brine? ▾
Yes, you’ll want to fully peel every hard-boiled egg, and rinse off any tiny leftover shell fragments under cool running water before submerging them in the brine. The brine can’t penetrate the eggshell to flavor or color the white, so leaving shells on will leave you with plain, uncolored hard-boiled eggs instead.
10.Why are my pickled beet eggs only colored on the very outer edge instead of all the way through? ▾
That’s totally normal for properly cured eggs at the 48-hour mark! If you want deeper color that penetrates further into the white, let the eggs cure for 5 to 7 days fully submerged in the brine. The brine will slowly seep deeper over time, creating a bold magenta hue all the way to the yolk if you wait long enough.
11.Can I use white distilled vinegar instead of apple cider vinegar for this recipe? ▾
You can, but it will change the traditional flavor profile. Apple cider vinegar has a mellow, fruity tang that pairs perfectly with sweet beets for that classic PA Dutch taste. White vinegar is sharper and flatter, so if you swap it, add an extra tablespoon of sugar to balance the harsher acid.
12.What’s the best way to serve these classic pickled red beet eggs? ▾
These are an iconic cold side, perfect for summer cookouts, potlucks, and picnic spreads! Serve them chilled, sliced in half with a light sprinkle of salt and black pepper, alongside other favorites like potato salad and cold cuts. You can also chop them up to add a tangy pop to fresh green salads.
13.Should I keep the sliced beets in the brine with the eggs as they cure? ▾
Yes! Add the sliced beets right into the jar with the eggs and brine as the eggs cure—they’re not just for flavoring the brine. The pickled beets are a delicious, tangy side to serve right alongside the eggs, and they help keep the brine deeply colored and flavorful the entire time the eggs are stored.

Comments (15)

2 weeks ago

OMG I grew up eating these at every church potluck in eastern Ohio and I’ve been chasing that exact flavor for YEARS. This recipe is spot on! The balance of sweet brine and earthy beets is exactly how my great grandma used to make them. Game changer for summer cookouts, I brought a jar to our family Memorial Day gathering and everyone was begging for the recipe.

1 week ago

Wait how long did you let yours chill before serving? I tried a recipe last year that only said 4 hours and they had zero flavor, total flop for my block party.

1 week ago

Great question! This recipe needs the full 24 hours of pickling chill time in the fridge to let that brine fully penetrate the eggs — any less and you won’t get that classic deep magenta color and tangy, sweet flavor all the way through. Don’t skip that wait!

1 week ago

My kids loved it! I was worried the tangy beet flavor would be too weird for my picky eaters but they ate 3 eggs each straight out of the jar as soon as the 24 hours was up. I added a tiny extra clove like my mom used to and it was chef’s kiss. Perfect for quick after school snacks and packing in lunch boxes too!

5 days ago

How long do these stay good in the fridge for? I want to make a big batch for Sunday meal prep but don’t want them to go bad before we get through them!

3 days ago

Love that the kids enjoyed them! These will stay fresh in a sealed glass jar in the fridge for up to 2 weeks, which makes them perfect for meal prep — just make sure all the eggs and beets stay fully submerged in the brine for best results.

3 days ago

SO good! I’ve made regular pickled eggs before but never with the beet brine and the color alone is worth making these for — that bright magenta is so fun for charcuterie boards. I knocked off a star because I felt like it was a touch too sweet for my taste, next time I’ll cut the sugar by a tablespoon and add a pinch of black pepper.

2 days ago

Oh I did the same thing on my second batch! The reduced sugar was perfect for my taste too, I also threw in a couple slices of sweet onion for extra zing.

2 days ago

So glad you loved the look and flavor! This is such a flexible base recipe, so adjusting the sugar to taste or adding extra mix-ins like onion, peppercorns, or even a dash of hot sauce is totally encouraged — make it work for your preferences!

5 days ago

Made these for my annual guys’ poker night and they were the first snack gone! Everyone thought I spent hours on some fancy bar snack but it was literally 30 minutes of active work then letting them sit in the fridge. Who knew something so easy could impress so much? Will be making these on repeat all summer.

3 days ago

Did you use store bought canned beets or fresh cooked ones? I have a bunch of fresh beets from my garden I need to use up and wondering if that changes anything.

2 days ago

I used canned beets because I was crunched for time before poker night, but my neighbor used fresh homegrown beets when he made the recipe last week and said it was even better! Just make sure you cook them until tender before adding them to the brine.

2 weeks ago

I’ve been canning for 40+ years and this is the most straightforward pickled red beet egg recipe I’ve come across. No weird fancy ingredients, just the classic sweet-sour brine us PA Dutch folks know and love. I canned a dozen jars to give away to neighbors this year.

1 week ago

That makes our day to hear! These make such wonderful little homemade gifts for neighbors and friends, we’re so glad the simple, classic recipe works for your canning projects.

2 days ago

Wait I was so intimidated to make these because I thought pickling was super hard but this was literally so easy? I hard boiled the eggs, whipped up the brine, dumped everything in a mason jar and stuck it in the fridge. My roommates are convinced I’m a culinary genius now lmao.

yesterday

Right?! I thought pickling required special equipment and boiling jars and all that, but these refrigerator pickled eggs are zero stress. So good with a side of salty potato chips!

yesterday

So excited to find a naturally gluten free snack that’s actually flavorful and not just rice cakes or plain nuts! These are perfect to keep in the fridge for when I need a quick protein bite between work meetings. No weird additives or hidden gluten, just simple whole ingredients.

30 minutes ago

We love that too! It’s so nice having a quick, protein-packed snack on hand that fits all kinds of dietary needs without sacrificing any flavor. So happy you’re enjoying them!

3 days ago

Really solid recipe! My only note is that if you have extra large eggs from your backyard chickens like I do, you might want to let them brine for an extra 6-8 hours to get the flavor all the way to the yolk. Otherwise, turned out exactly like the ones I used to get at the local Amish market.

2 days ago

That’s such a great tip! Extra large or fresh farm eggs do need a little extra brine time to let that flavor penetrate all the way through — thanks for sharing that helpful hack with other readers!

1 week ago

Brought these to our Fourth of July picnic and people were hovering over the platter! The vibrant red color is so festive, and the tangy-sweet flavor pairs so well with burgers, potato salad, and all the classic picnic sides. 10/10, will be a permanent addition to my summer picnic menu.

5 days ago

I brought them to my Fourth of July cookout too! I sliced them up and sprinkled a little paprika on top for serving and they looked so fancy. Total crowd pleaser!

2 hours ago

Just pulled my batch out of the fridge after the full 24 hours and took my first bite — holy cow that’s good! I added a couple whole cloves and a cinnamon stick to the brine like my grandma used to and it tastes exactly like childhood summer visits to Lancaster County.

30 minutes ago

There’s nothing quite like that nostalgic, cozy flavor! Adding a cinnamon stick and cloves is such a lovely classic touch, so glad it turned out perfect for you.

2 days ago

These are the exact pickled eggs they used to serve at the old corner bar in my small hometown! I’ve been looking for this recipe for literal decades. Cracked one open last night and nearly teared up, it was exactly right. Even my teen son who swears he hates beets loved them.

3 days ago

Total game changer! I make a batch every Sunday now, they’re perfect for a quick high protein breakfast on my way out the door to work, or a mid-afternoon snack to keep me from hitting the vending machine. Way cheaper than buying pre-made protein snacks too!

1 week ago

Made these for my church potluck last Sunday and I left with an empty jar and 8 people asking for the recipe! I love that there’s zero fancy equipment needed, I just used an old cleaned-out pickle jar I had in the fridge to store them while they chilled. SO easy, so tasty.

5 minutes ago

Really great base recipe! I added a couple sliced jalapeños to the brine for a little kick and it was chef’s kiss. The sweet beet brine paired with the spicy jalapeño is such an underrated combo, highly recommend trying it if you like a little heat with your snacks.

just now

Wow you can make a whole batch of these for like $5? Eggs are cheap, a can of beets is less than a dollar, and the rest is just pantry staples. Perfect for when you need a cheap, impressive snack for guests without breaking the bank. My whole family devoured them at our last family dinner.



