
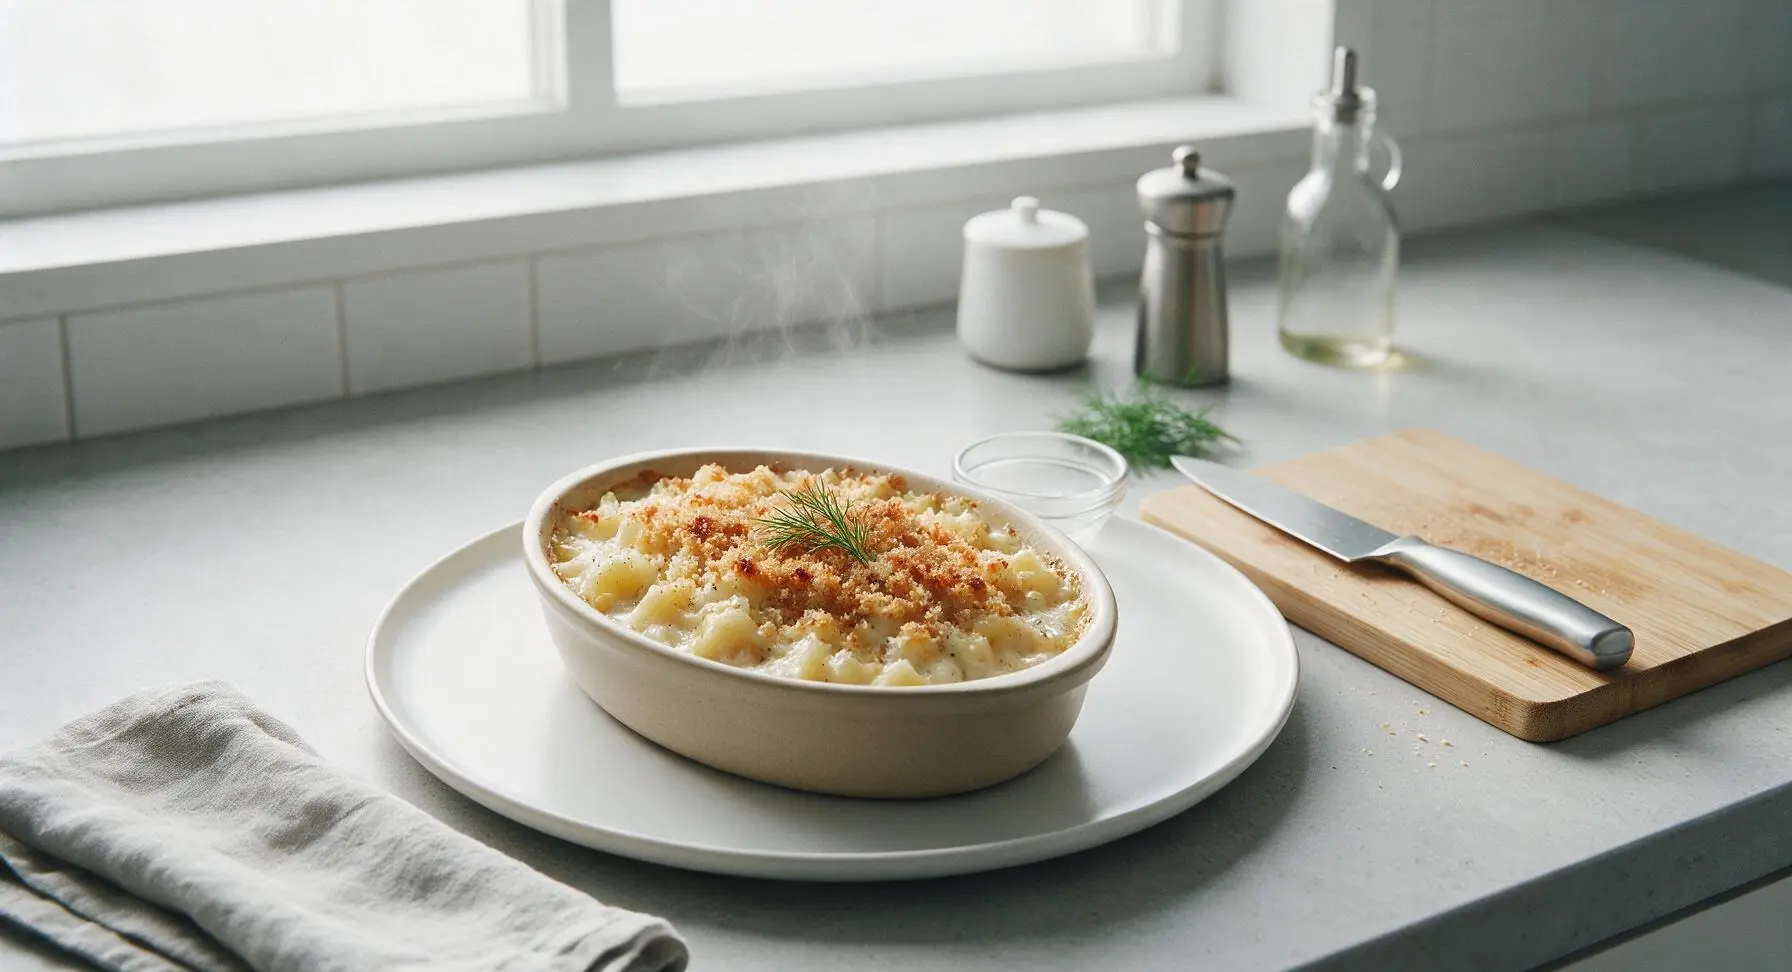
rutabaga casserole

title 1
rutabaga casserole
⏱️ cook time 1 hour 10 minutes
🍽️ servings 6
⚡ Difficulty easy

intro

Creamy, earthy rutabaga baked with warm spices, a buttery crisp breadcrumb topping, and a hint of maple, this cozy casserole is a comforting, classic holiday side.

Ingredients
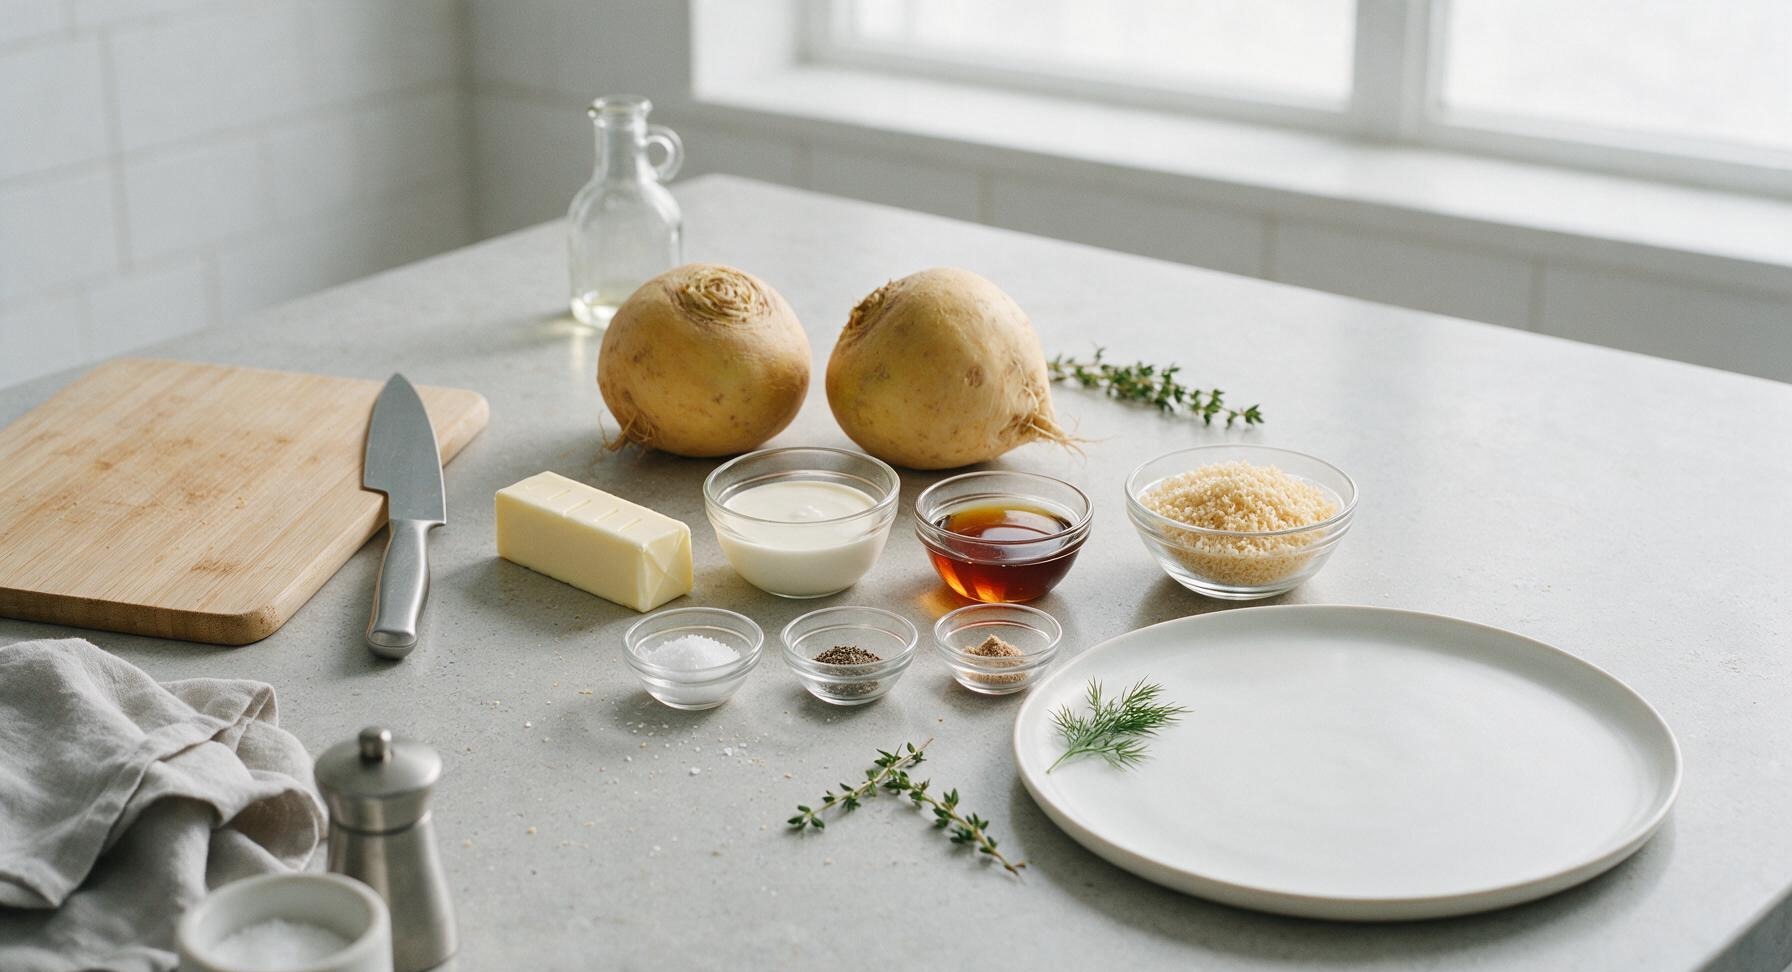
Rutabaga 1.2kg (about 2 large)
Unsalted butter 4 tbsp (56g), divided
Heavy cream 1/3 cup (80ml)
Pure maple syrup 2 tbsp (30ml)
Fine sea salt 1 tsp, divided
Freshly ground black pepper 1/2 tsp
Freshly grated nutmeg 1/4 tsp
Panko breadcrumbs 1/2 cup (30g)
Fresh thyme 4 sprigs (2 for mash, 2 for garnish)

Steps

1

Peel and cube rutabaga

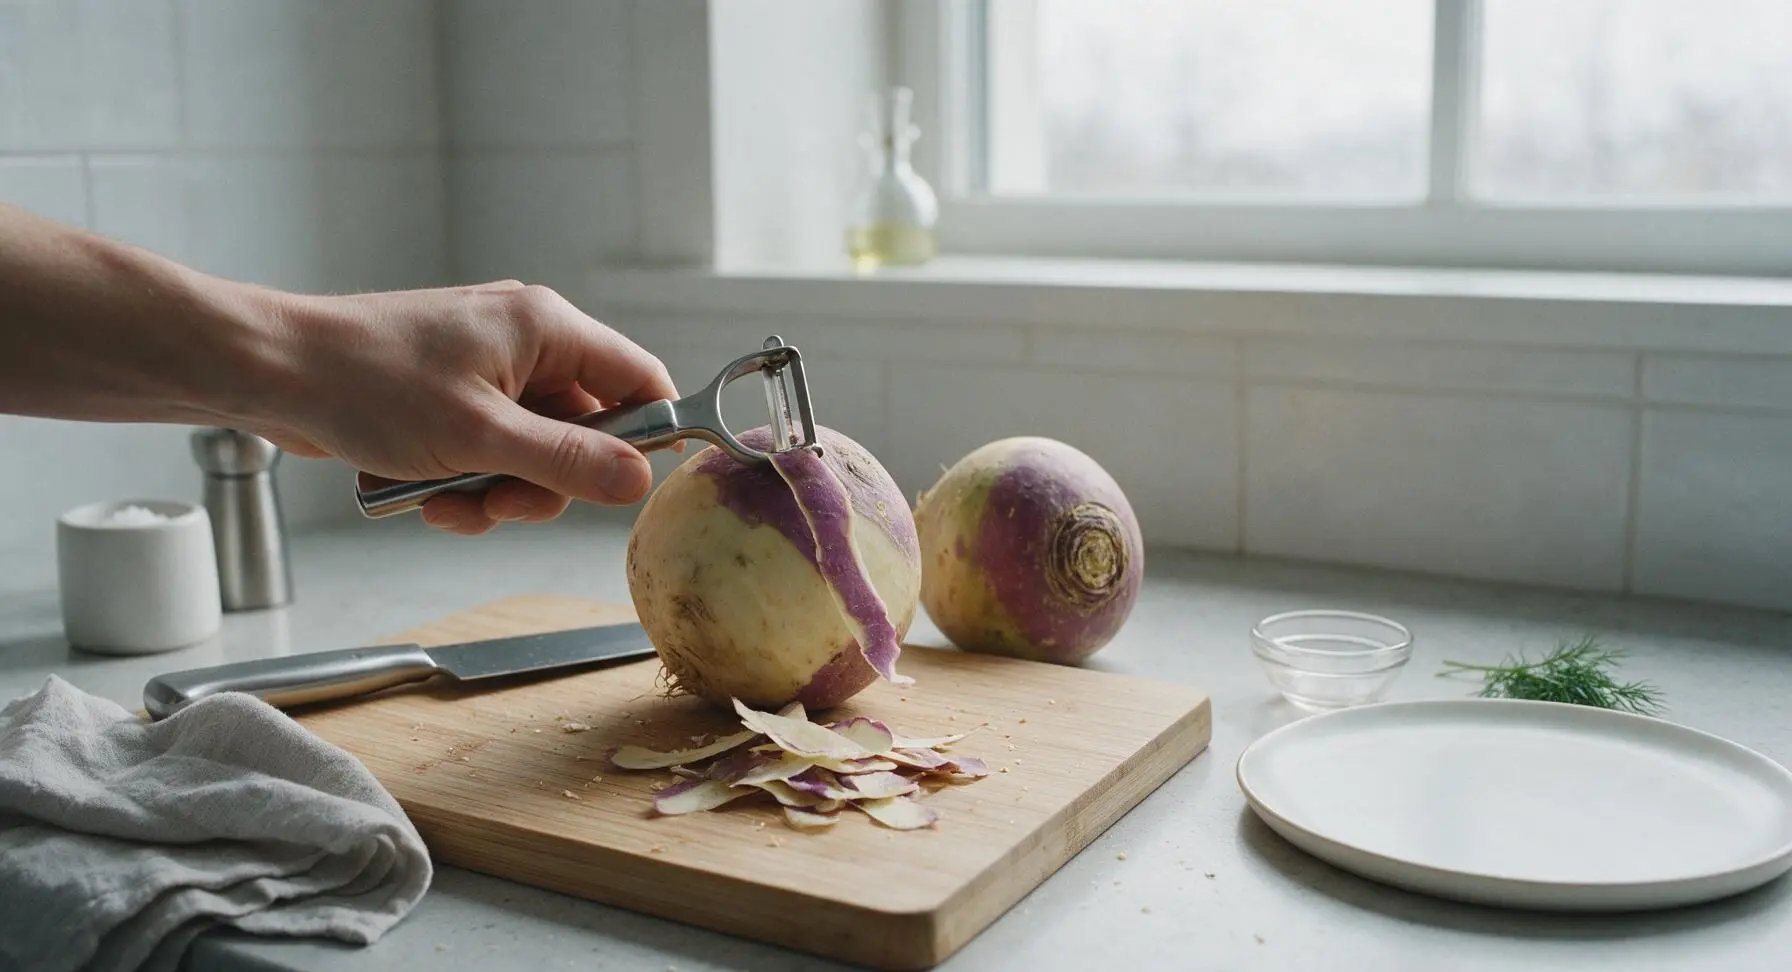
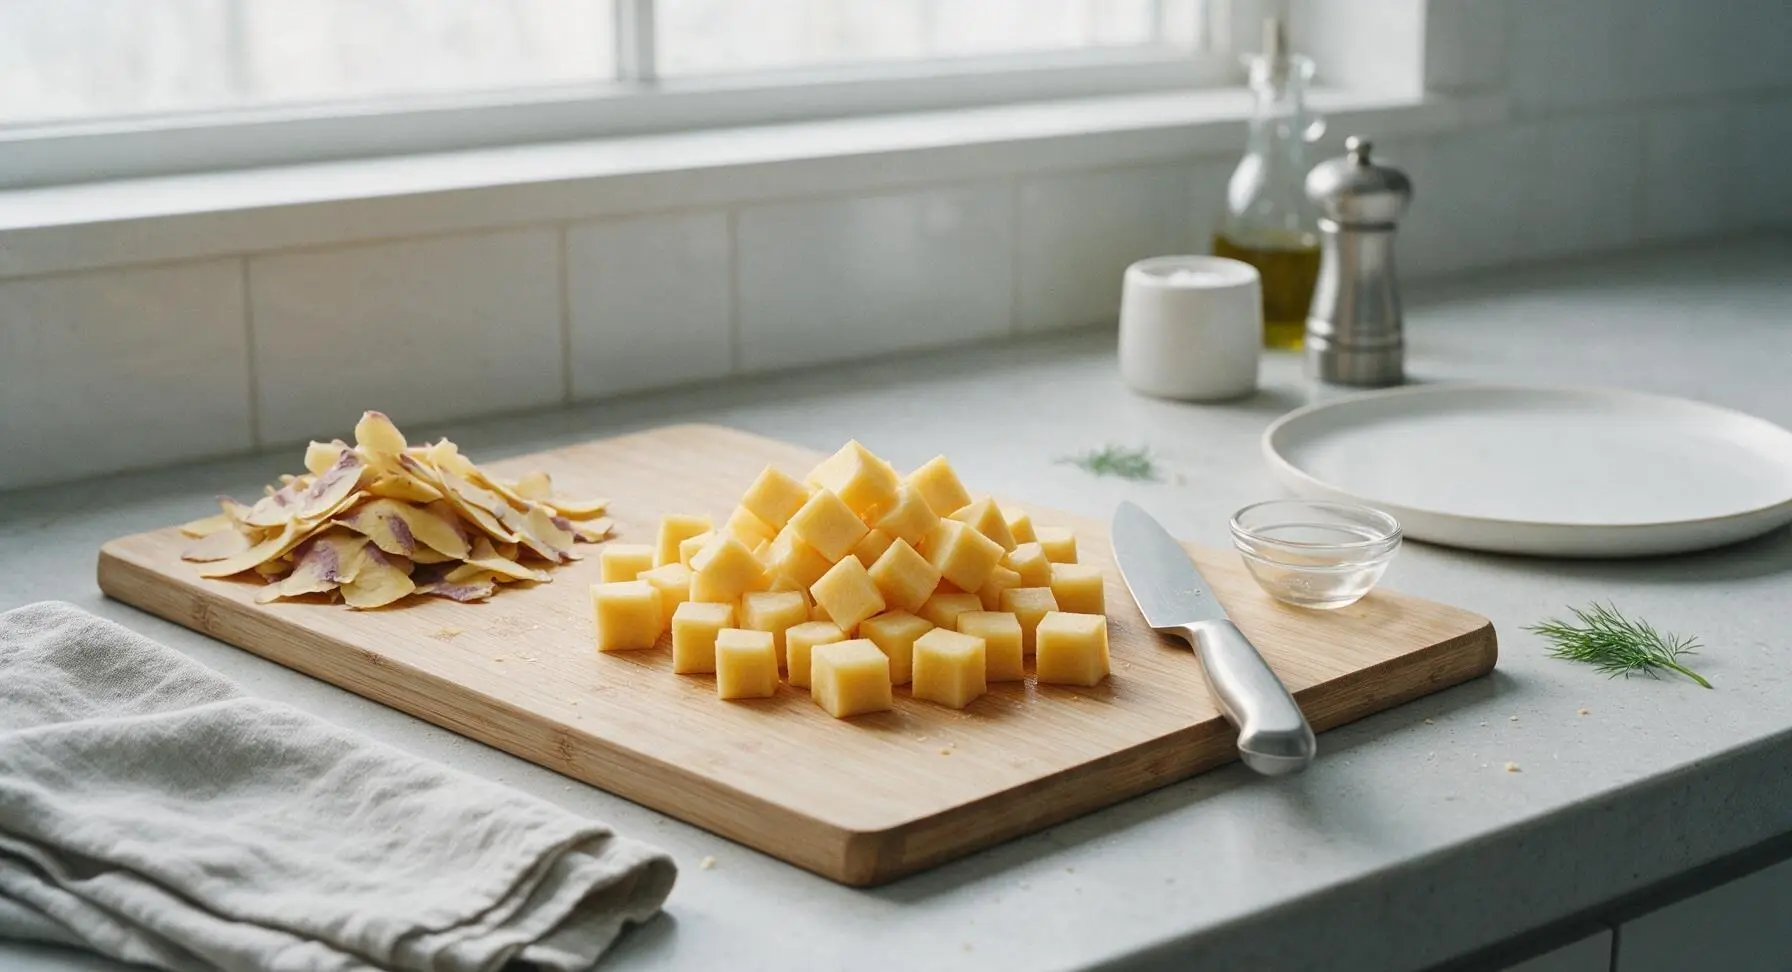
Set the light birch cutting board in its fixed center-left position. Use the stainless steel vegetable peeler to remove the thick, waxy purple-tan skin from both rutabagas, making sure to remove all fibrous outer layer just below the skin. Use the 8-inch chef’s knife to cut the peeled rutabaga into uniform 2.5cm (1-inch) cubes to ensure even cooking. Discard peels into a compost bowl set just off frame to the left. The finished cubed rutabaga should be pale golden-orange, with no remaining purple skin attached.
Step 1
step1:Peel and cube rutabaga
Step 1
step1:Peel and cube rutabaga
2

Boil rutabaga until tender

Transfer the cubed rutabaga to the 5L stainless steel stock pot, cover with cold water by 2cm, and add 1/2 teaspoon of the sea salt. Bring to a rolling boil over high heat, then reduce heat to medium-low to maintain a gentle simmer, and cook uncovered for 18-22 minutes. Test for doneness by piercing a cube with the tip of the chef’s knife; it should slide in with no resistance, and the cube should crush easily when pressed against the pot side. Drain thoroughly in the stainless steel colander, shaking off all excess water to avoid a watery casserole.
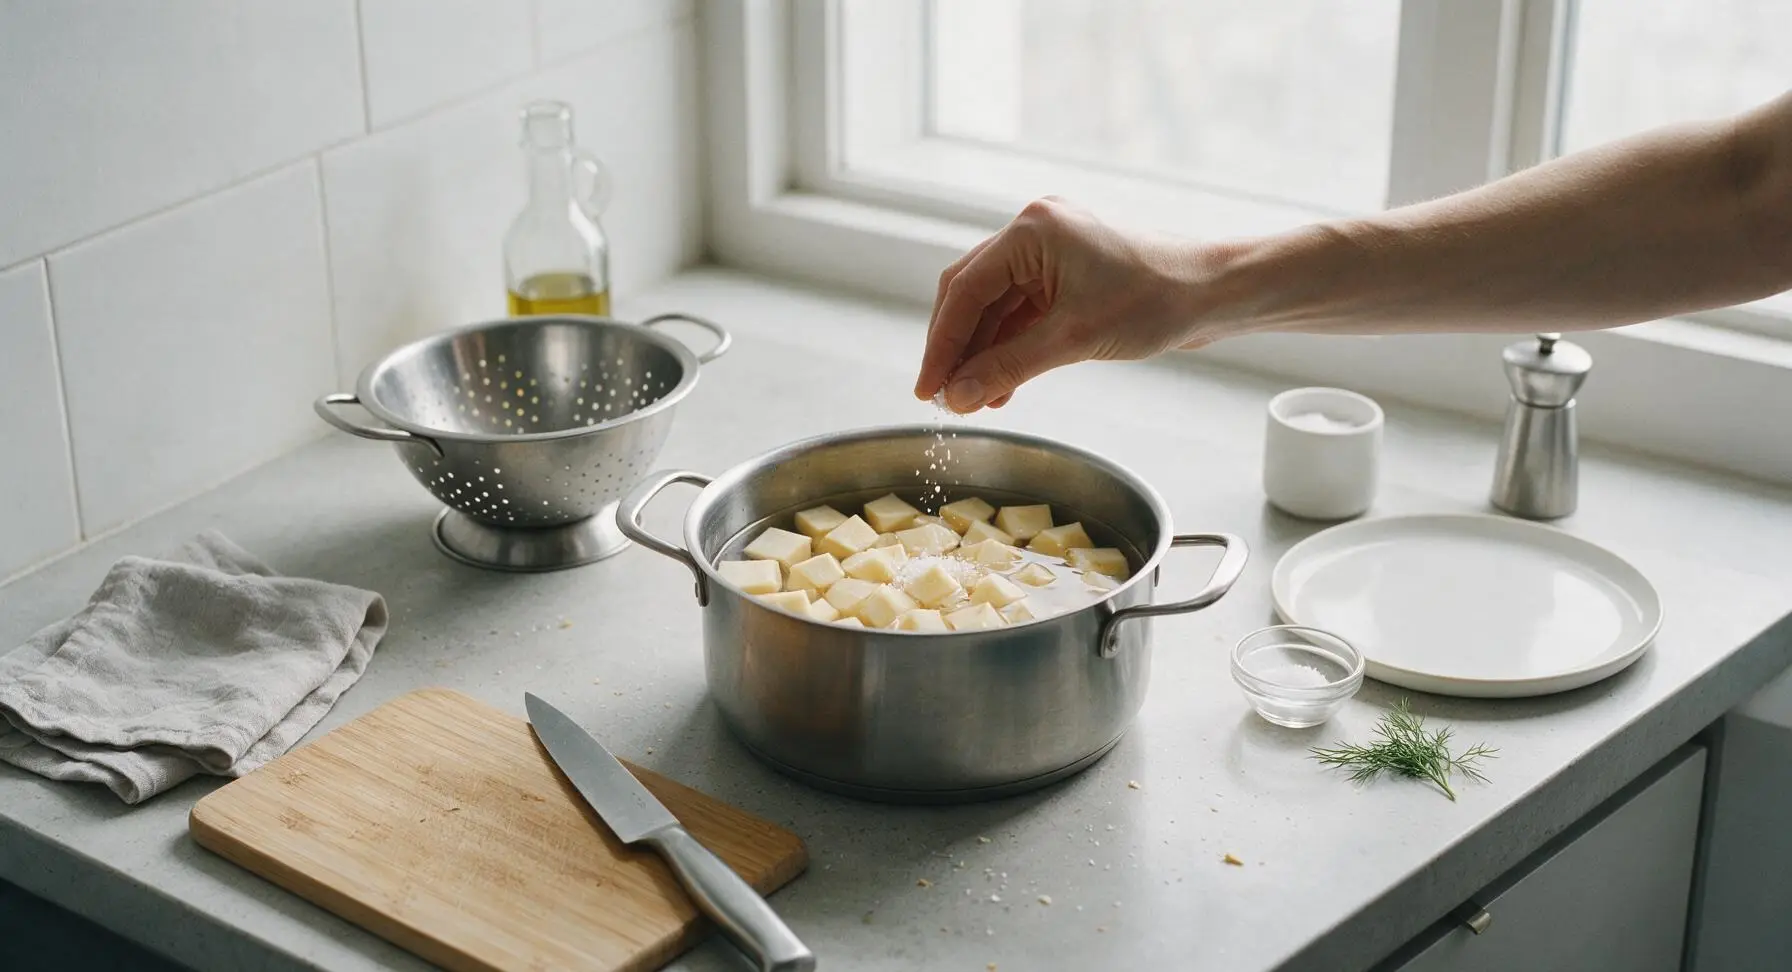
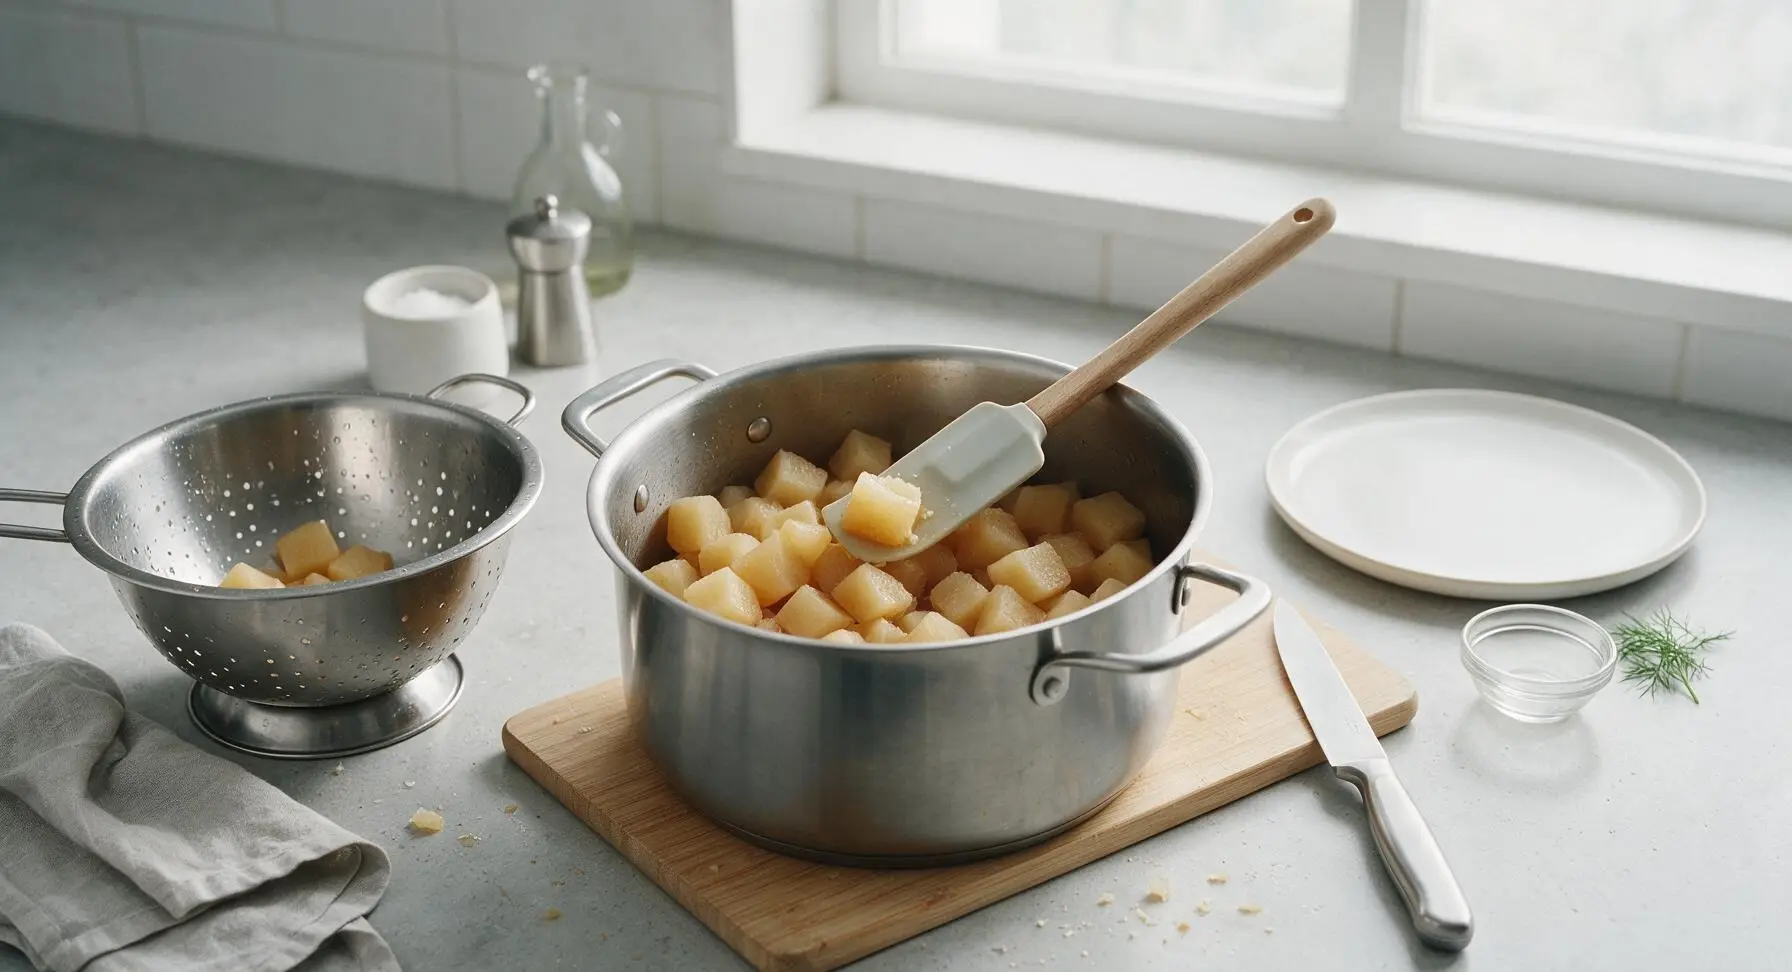
Step 2
step2:Boil rutabaga until tender
Step 2
step2:Boil rutabaga until tender
3

Mash rutabaga smooth

Return the drained hot rutabaga cubes to the warm stock pot. Add 3 tablespoons of the unsalted butter, 1/3 cup heavy cream, 2 tablespoons maple syrup, remaining 1/2 teaspoon sea salt, black pepper, and grated nutmeg. Use the stainless steel potato masher to mash the rutabaga until mostly smooth, with a few small, soft chunks remaining for texture — avoid over-mashing to a gluey consistency. Strip leaves from 2 fresh thyme sprigs and stir into the mash with the silicone spatula, mixing evenly. Taste and adjust salt or pepper if needed.
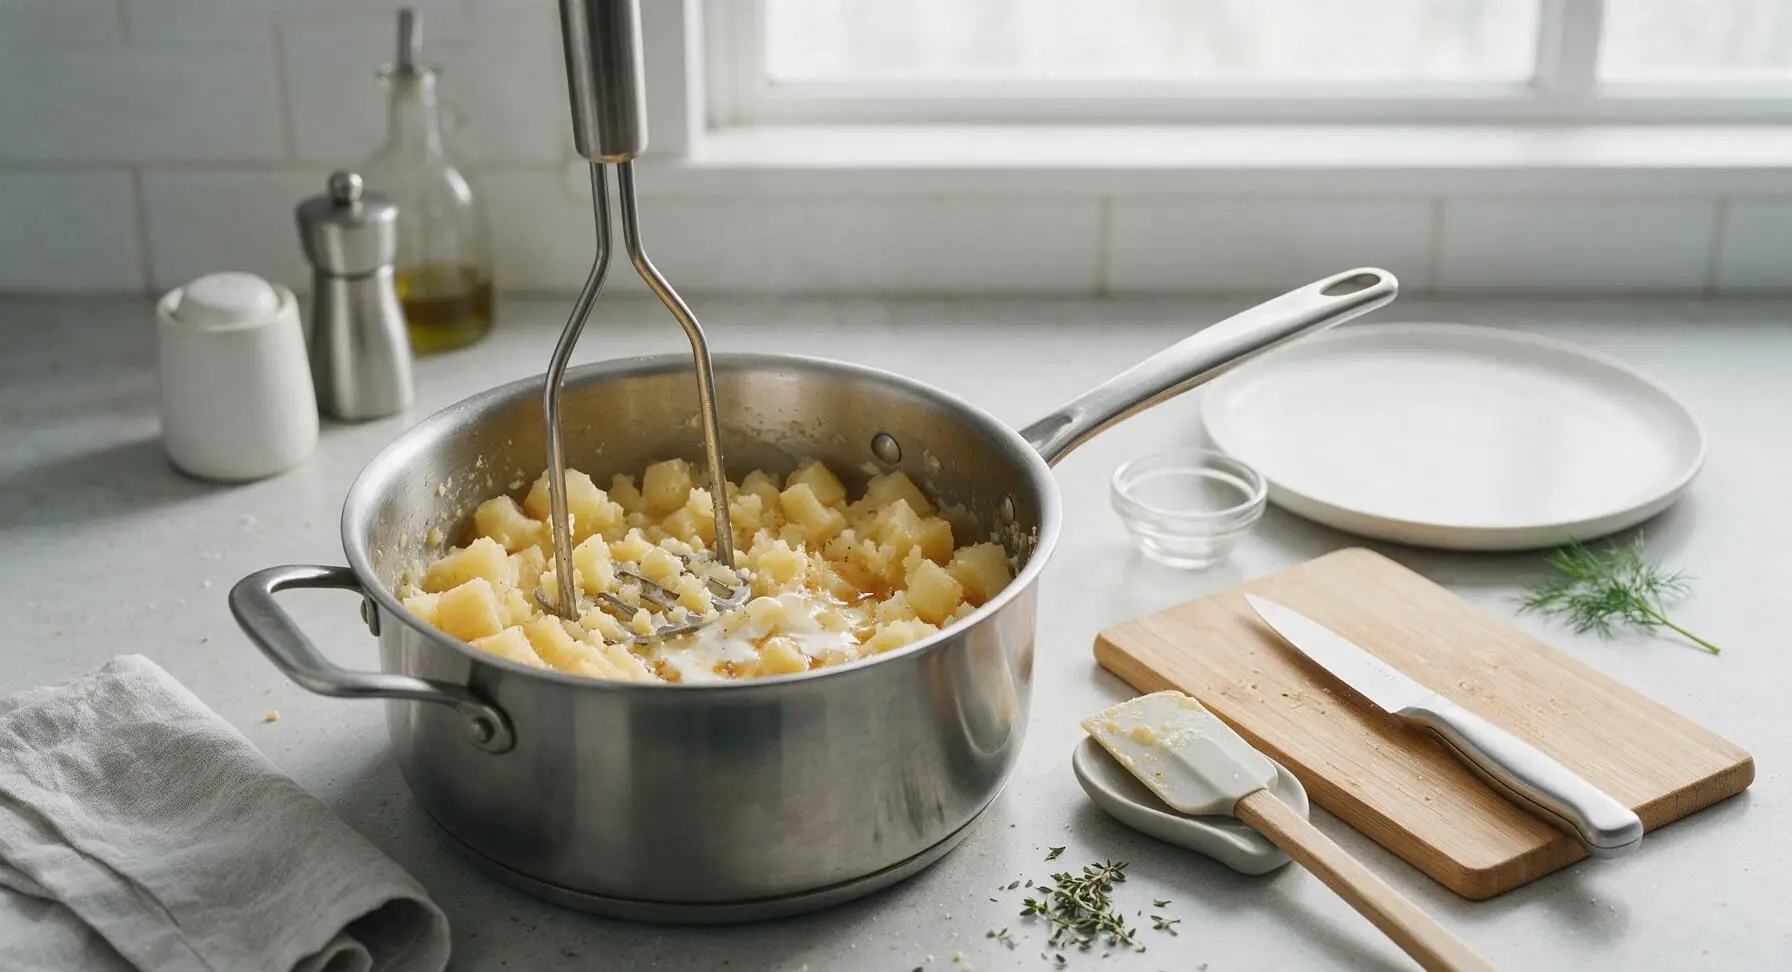
Step 3
step3:Mash rutabaga smooth
4

Transfer mash to dish

Use the silicone spatula to scrape all of the seasoned rutabaga mash into the off-white matte ceramic oval baking dish, set in the center of the counter. Spread the mash into an even layer, smoothing the top gently with the spatula — do not pack it tightly, to keep the texture light. Tap the dish firmly on the counter once or twice to release any trapped air bubbles.
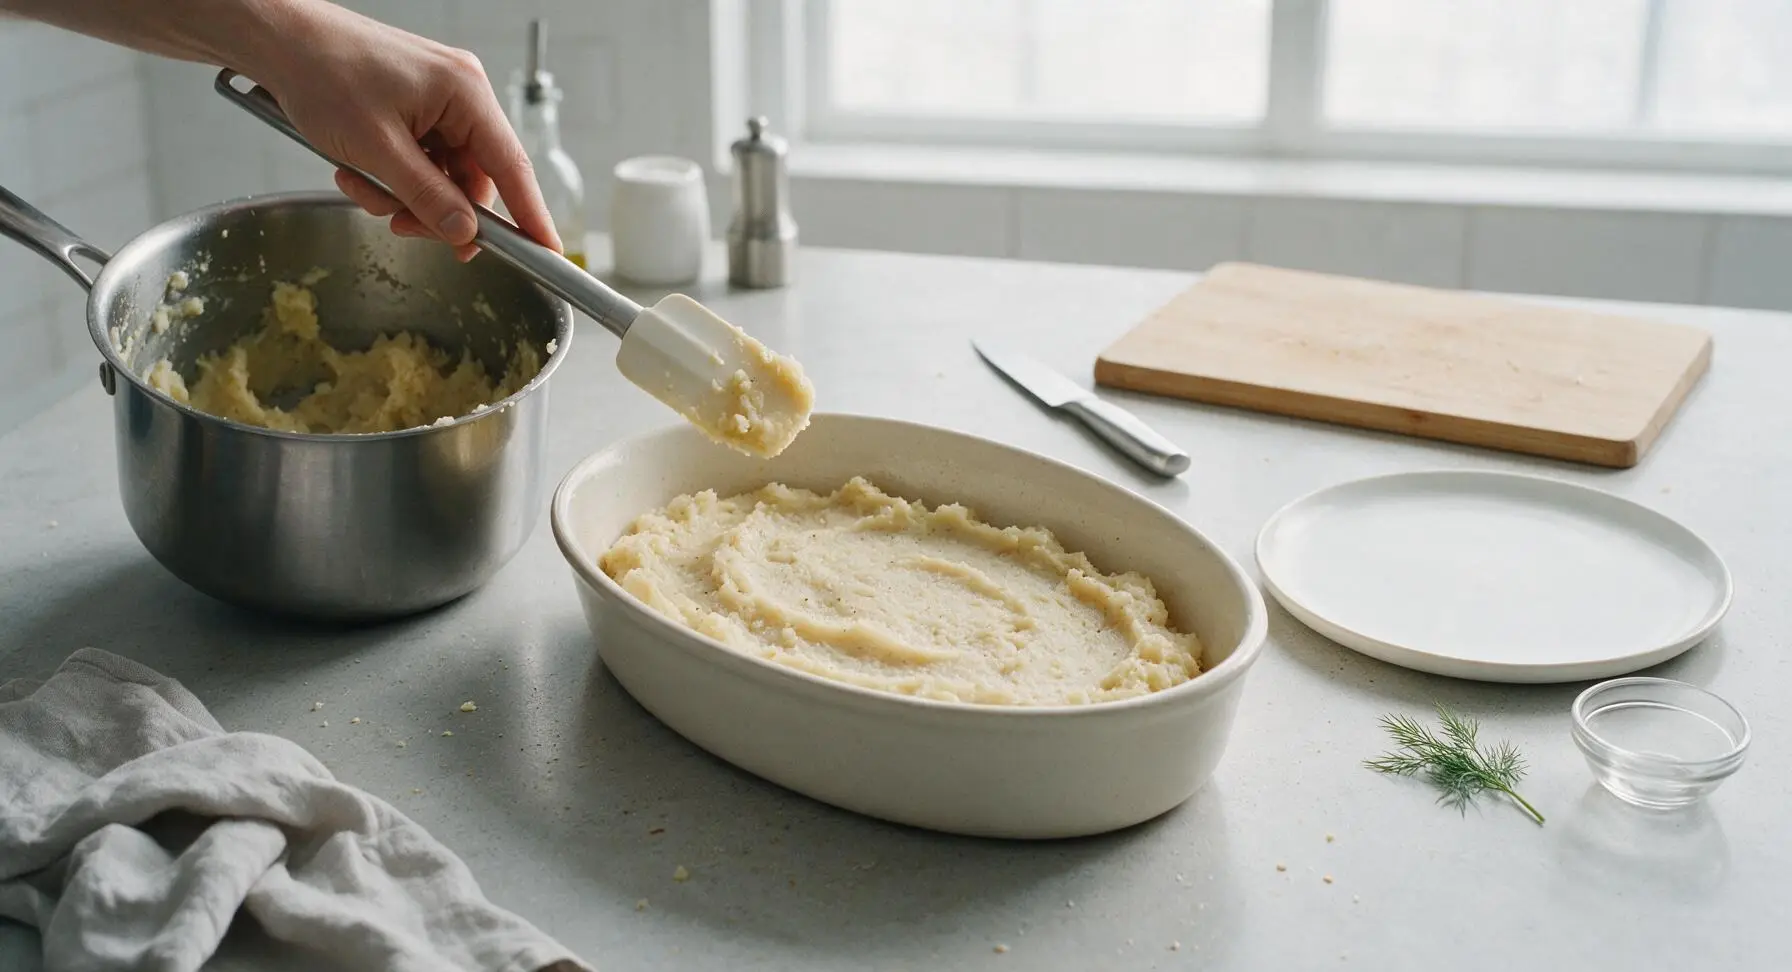
Step 4
step4:Transfer mash to dish
5

Add breadcrumb topping

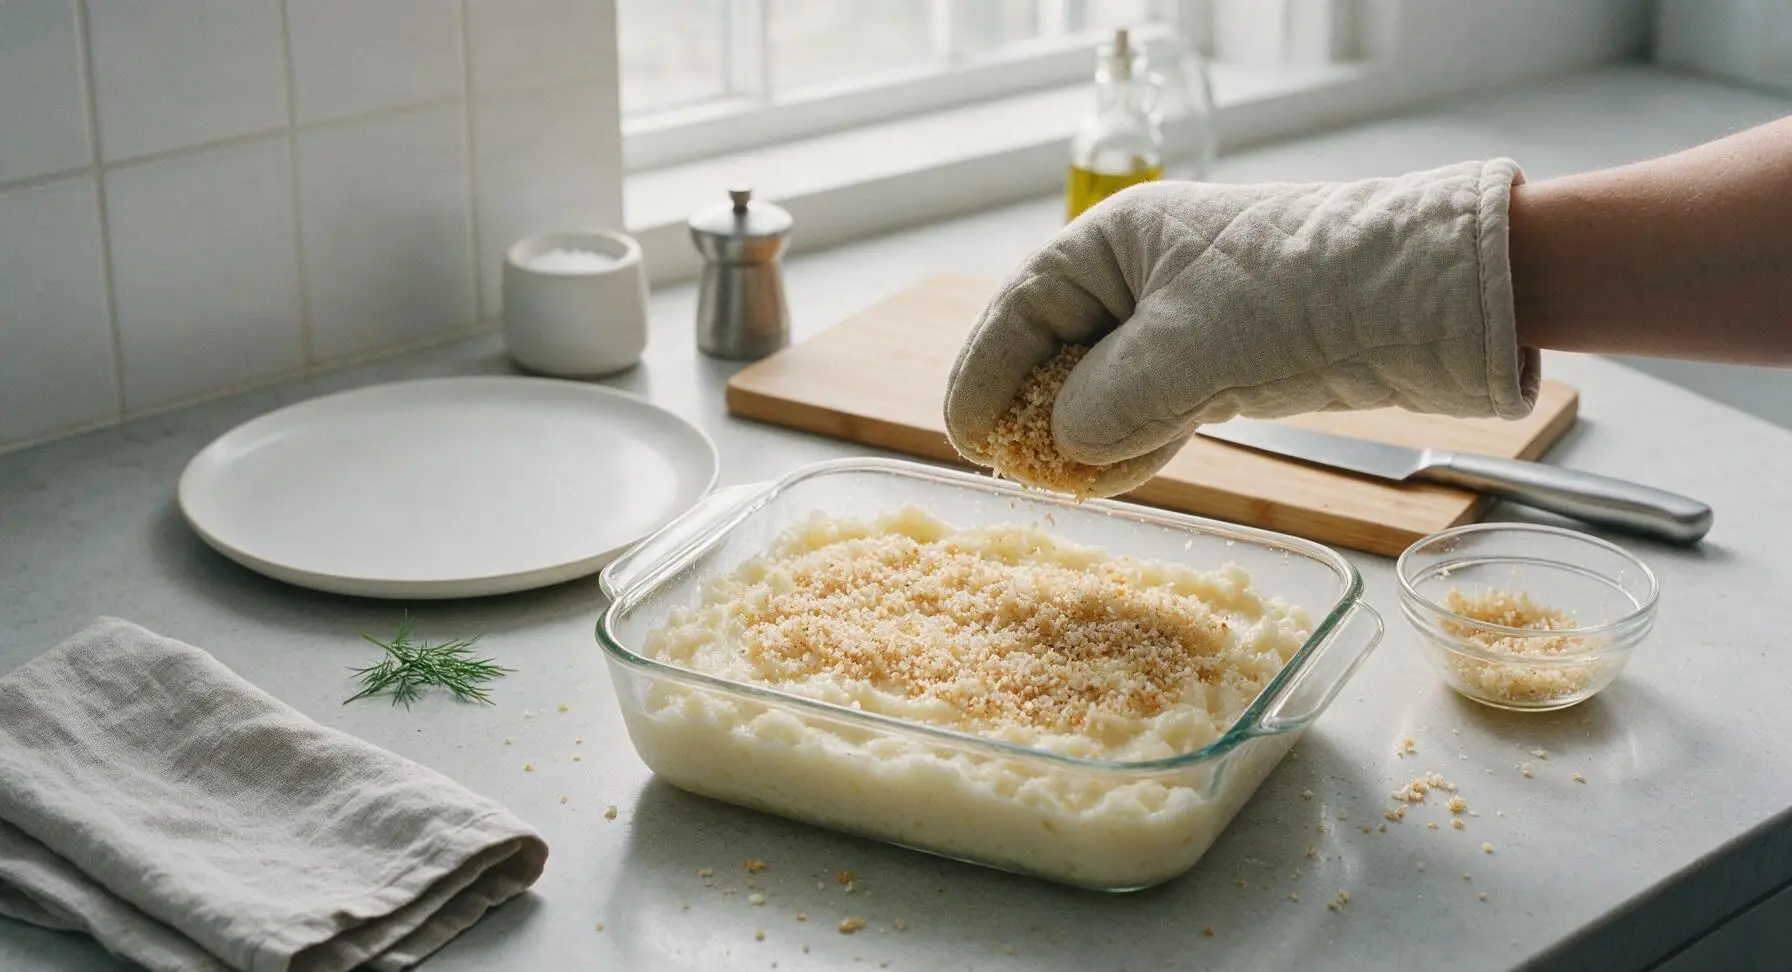
Melt the remaining 1 tablespoon of unsalted butter, then toss with the 1/2 cup panko breadcrumbs in a small bowl until all crumbs are evenly coated in butter. Sprinkle the buttered panko in an even, thin layer over the top of the rutabaga mash, covering the entire surface. Do not press the crumbs into the mash — keep them loose for a crispier topping.
Step 5
step5:Add breadcrumb topping
6

Bake until golden crisp

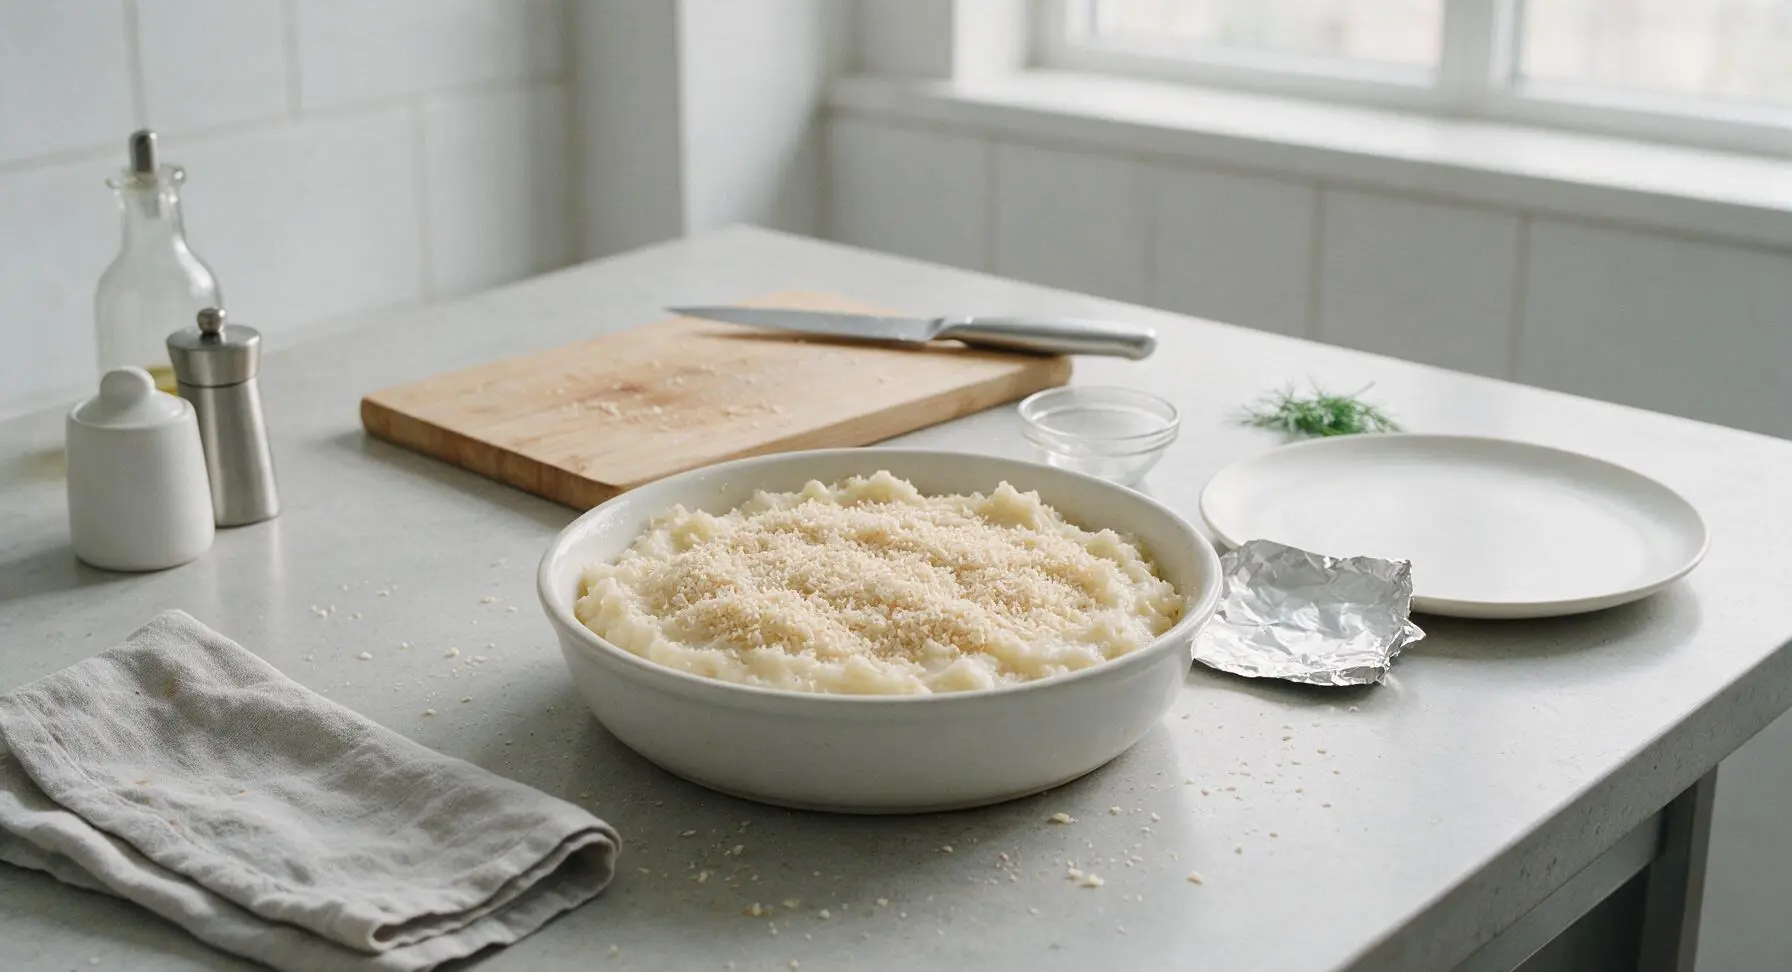
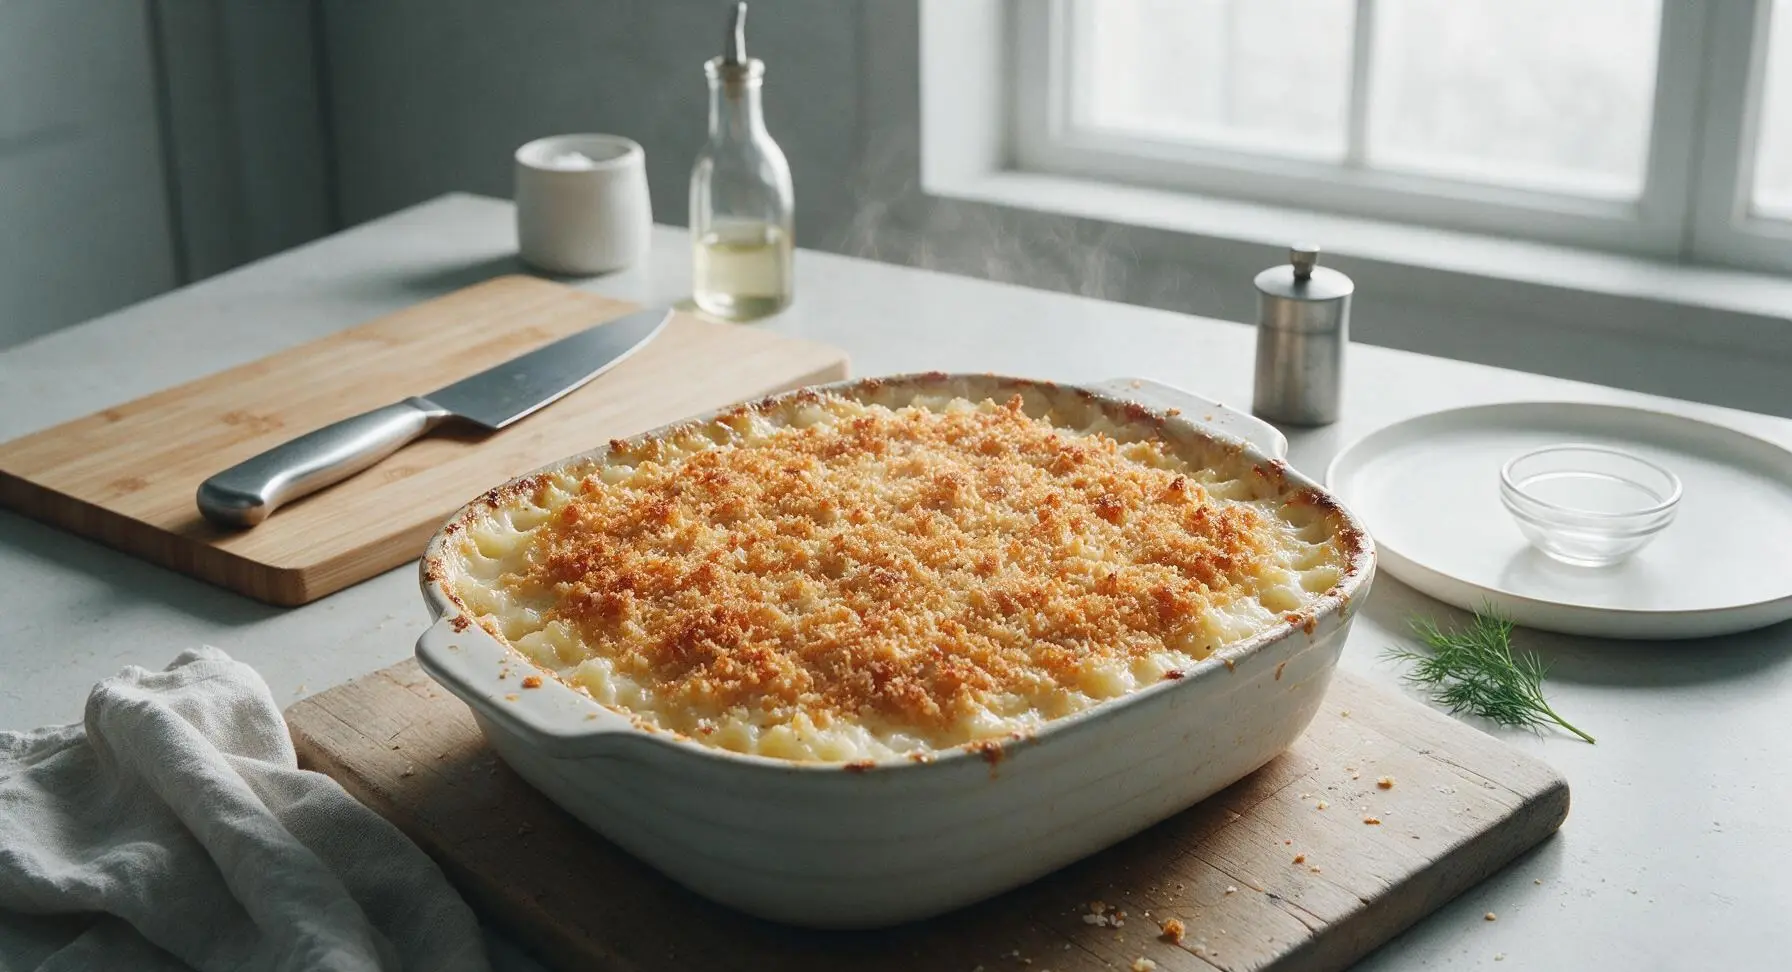
Place the baking dish in a preheated 190C (375F) oven, positioned on the middle rack. Bake for 45-50 minutes, until the edges of the casserole are bubbling, and the panko topping is deep golden brown and crisp. If the crumbs start to brown too quickly after 30 minutes, tent loosely with a small piece of aluminum foil. Remove from the oven and let rest for 10 minutes before serving, to allow the casserole to set.
Step 6
step6:Bake until golden crisp
Step 6
step6:Bake until golden crisp
7

Garnish and serve warm

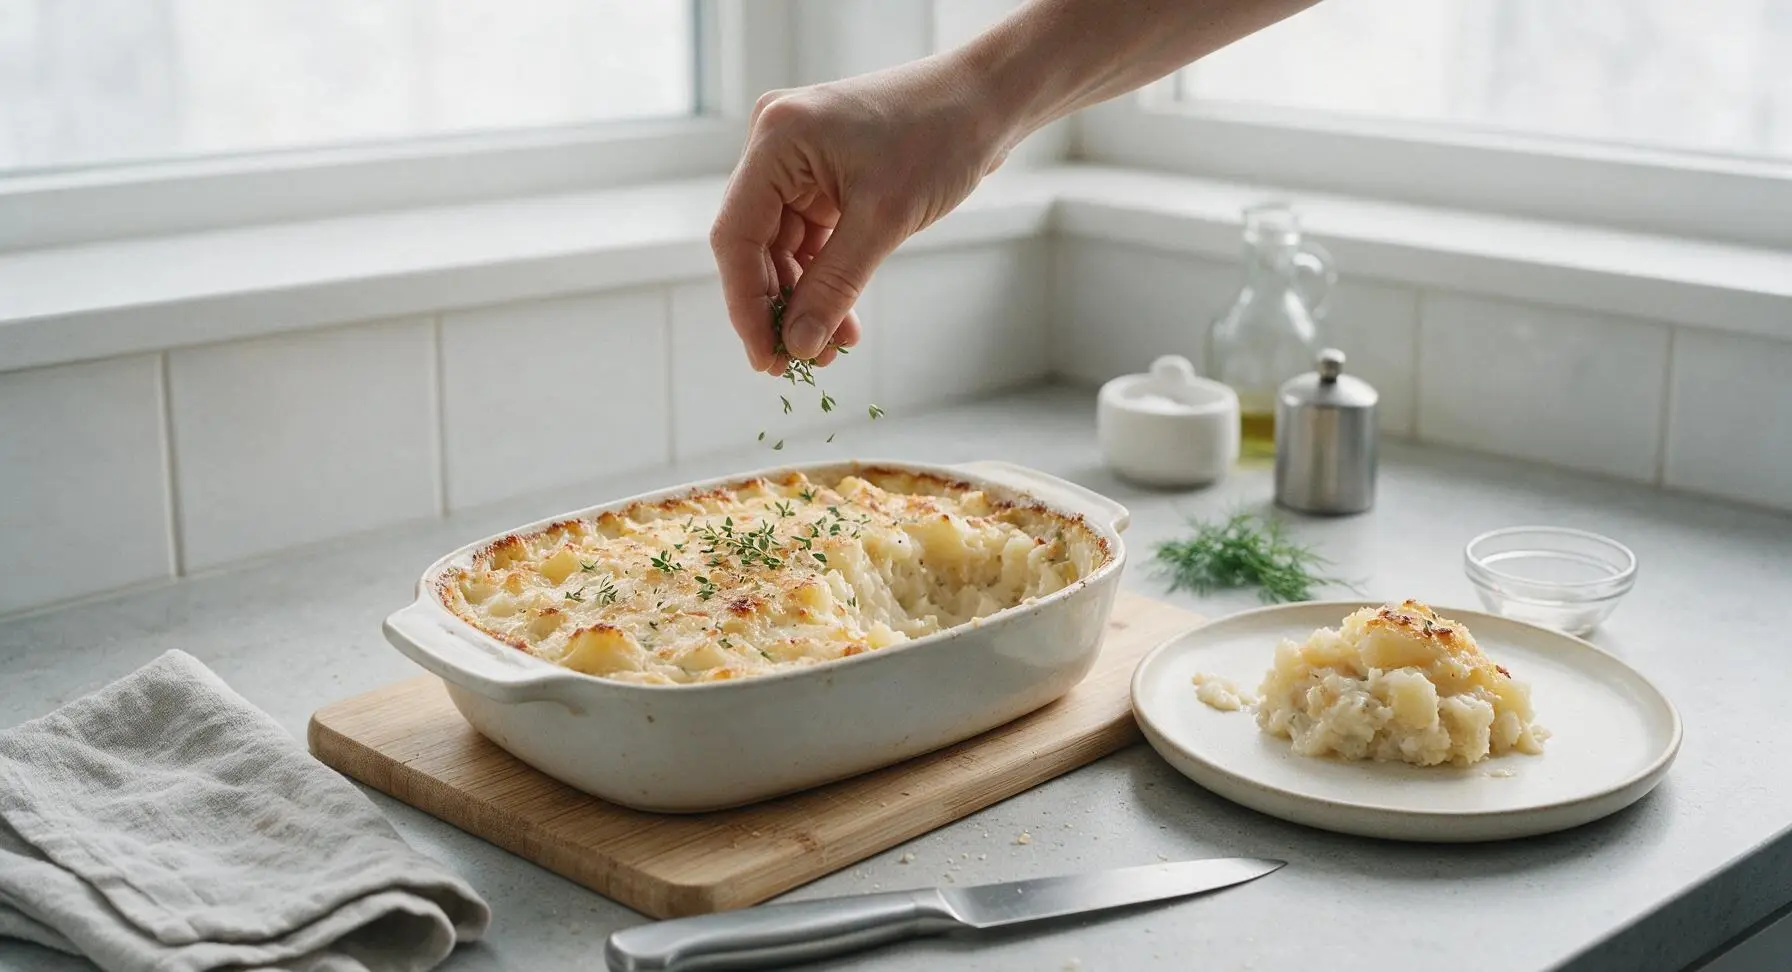
Sprinkle the top of the baked casserole with fresh thyme leaves for garnish. Scoop generous portions onto the off-white matte ceramic round serving platter, and serve warm as a side dish alongside roasted meats, green vegetables, or other holiday favorites.
Step 7
step7:Garnish and serve warm

Tips

1.Be sure to remove the full thick, waxy skin of the rutabaga, plus the thin pale fibrous layer directly under the skin. This layer is tough and slightly bitter, and will leave unpleasantly chewy bits in your otherwise smooth mash even after full boiling.
2.Drain boiled rutabaga extremely well, shaking the colander to remove all trapped excess water. Rutabagas hold more moisture than potatoes, and leftover water will result in a runny, watery casserole instead of the desired thick, creamy texture.
3.Let the baked casserole rest for 10 full minutes after removing it from the oven before serving. This rest time allows the mash to set slightly, making clean, neat scoops possible instead of soft, runny portions that spread across the plate.


✨ You May Also Like

Side Dishes
🍜 India

Velvety, aromatic all-purpose curry sauce perfect for tossing with roasted veggies, grilled protein, or rice for fast, cozy, flavorful meals.

⏱️ 25 minuteSide Dishes ★ 4.8
Side Dishes
🍜 Spain

Tender, starchy boiled yuca tossed in bright, garlicky citrus mojo sauce—an iconic, zesty side that pairs beautifully with roasted pork, grilled meats, and rice and beans.

⏱️ 40 minuteSide Dishes ★ 5
Side Dishes
🍜 United States

Tender, paper-thin potato flatbread, a beloved Norwegian-American Minnesota Christmas staple, griddled until softly spotted and served warm with butter.

⏱️ 1 hour 30Side Dishes ★ 4.6
Side Dishes
🍜 United States

Rich, deeply savory cured salt pork, a long-lasting kitchen staple perfect for frying crispy as a side or adding umami to stews, beans, and chowders.

⏱️ 7 days (2Side Dishes ★ 4.9
Side Dishes
🍜 United States

Crispy, tangy classic Southern fried green tomatoes with a crunchy cornmeal crust, served hot for a nostalgic, comforting summery bite.

⏱️ 25 minuteSide Dishes ★ 4.9
Side Dishes
🍜 United States

Moist, golden-crusted savory muffins with sweet corn, zesty jalapeño, and melted cheddar, perfect for pairing with smoky summer grilled fare.

⏱️ 30 minuteSide Dishes ★ 4.9

rutabaga casserole:Frequently Asked Questions

1.Can I prep this creamy rutabaga casserole ahead of time for holiday gatherings? ▾
Absolutely! You can assemble the entire casserole (hold the buttered breadcrumb topping) up to 2 days in advance, cover it tightly, and store it in the refrigerator. Add the breadcrumb topping right before baking, and tack on 5 to 7 minutes of extra bake time to account for the cold dish going into the oven.
2.I’ve never cooked with rutabaga before—how do I pick a good one at the grocery store? ▾
Look for small to medium rutabagas (3 to 5 inches across) that feel heavy for their size, with smooth, firm, blemish-free tan-purple skin. Skip any with soft spots, shriveled skin, or visible mold, as those will be woody, bitter, or dried out. Extra-large rutabagas almost always have a tough, fibrous texture.
3.Can I substitute the heavy cream for a lower-fat option to lighten this casserole up? ▾
For the closest creamy texture without heavy cream, use half-and-half mixed with 1 tablespoon of cornstarch per cup to help it thicken as it bakes. I don’t recommend plain low-fat or skim milk on its own—it will make the casserole watery, and won’t deliver the rich mouthfeel that balances rutabaga’s earthy flavor.
4.My rutabaga turned out really firm and undercooked when I made a similar casserole before—what went wrong? ▾
That almost always happens when rutabaga slices are cut too thick, or not par-cooked before baking. For tender, even results, slice rutabaga ¼-inch thick, and give it a quick 5-minute parboil before layering it in the dish. This ensures it softens fully during baking without drying out the creamy sauce.
5.Do I need to peel rutabagas before using them in this casserole? ▾
Yes, you absolutely should peel rutabagas for this recipe. Their outer skin is thick, waxy, and tough even after long cooking, and it will leave unpleasantly chewy bits in your finished dish. Use a sharp vegetable peeler or paring knife to remove both the outer colored skin and the thin pale layer just underneath it.
6.Can I make this casserole without maple syrup if I don’t have any on hand? ▾
If you don’t have pure maple syrup, swap in an equal amount of light brown sugar to get that same warm, subtle sweet note that balances rutabaga’s earthy, slightly peppery flavor. Skip regular pancake syrup, though—it has added artificial flavors and corn syrup that will make the casserole taste overly sweet and processed.
7.How do I get the breadcrumb topping perfectly crisp instead of soggy? ▾
First, toss your breadcrumbs in melted unsalted butter right before topping the casserole so every crumb is evenly coated. Bake the casserole uncovered for the final 15 minutes of cook time, and for extra crunch, broil it for 1 to 2 minutes at the very end—just watch closely so the crumbs don’t burn.
8.What main dishes pair well with this classic rutabaga casserole? ▾
This cozy, earthy casserole pairs beautifully with classic holiday mains like roast turkey, honey-baked ham, herb-crusted pork roast, or even simple weeknight roasted chicken. Its rich creaminess and subtle maple sweetness cut through salty, savory roasted meats, and it fits right in alongside other standard holiday sides like green beans or mashed potatoes.

Comments (13)

2 weeks ago

Made this on a random Tuesday night after work and it was so easy! I thought 1 hour 10 minutes sounded long but most of that is bake time where I could help the kids with homework while it cooked. Zero effort, huge payoff. Will make again.

1 week ago

Game changer for my weekly meal prep! I portion this out into containers with grilled chicken on Sundays and it holds up perfectly all week in the fridge. Super easy to throw together even on a busy weeknight, no fancy skills needed. 10/10.

1 week ago

This was really tasty! The only thing I’d note is that my rutabaga was still a little crisp after the full cook time, so I ended up leaving it in for an extra 15 minutes covered. Maybe my cubes were too big? Flavor was 10/10 though, even with the extra cook time.

5 days ago

I had the same issue! I ended up steaming my cubed rutabaga for 5 minutes before tossing it in the sauce and baking, and it came out perfectly tender. Saved so much bake time!

3 days ago

Thanks for the honest feedback, Liz! Oven temps can vary a lot, so that extra cook time is totally normal if your cubes are a little on the bigger side or your oven runs cool. Gabi’s pre-steam tip is such a great hack for extra tender veggies too!

1 week ago

I grew rutabagas in my garden this year and had no idea what to do with them until I found this recipe! It’s so nice to have a tasty way to use up my harvest, even my husband who swears he hates all turnip-adjacent veggies went back for a second helping. Win win!

5 days ago

Same! I had a whole bed of rutabagas I almost let go to waste because I didn’t have a good recipe for them. Tried this last week and I’ve already made it twice!

3 days ago

There’s nothing better than using homegrown produce, Jesse! So glad we could help you turn your garden harvest into a meal the whole family loves - that’s what cooking is all about!

5 days ago

I’ve been making rutabaga casserole for 40 years and this recipe is almost as good as my mom’s! The only swap I made was using half heavy cream half half-and-half to cut a little richness, and it turned out perfect. Great for holiday sides.

3 days ago

The half and half swap is such a good call! I don’t keep heavy cream on hand super often so I’ll definitely be doing that when I make this next week.

2 days ago

So glad you enjoyed it, Lynn! That half and half swap is totally flexible - we love that this recipe works with whatever dairy you have on hand.

3 days ago

Added a handful of crispy fried onions on top right before serving and oh my gosh, it was like the fancy casserole my grandma used to make at Thanksgiving. 10/10, will absolutely be making this every holiday from now on. The whole family raved.

2 days ago

OMG I made this for our Sunday family dinner last night and even my picky 7 year old asked for seconds! I was worried rutabaga would be too earthy for the kids but the creamy sauce totally mellowed it out. SO good, will be adding this to our regular rotation.

yesterday

That makes our day to hear, Molly! So glad the whole family loved it - the creamy sauce is our favorite trick for making root veggies a hit with picky eaters 😊

2 days ago

I’m a total beginner in the kitchen and this was the first casserole I’ve ever made all by myself! The instructions were so clear and easy to follow, and it turned out perfectly on the first try. I felt like a real chef serving it to my roommates, they all loved it too.

yesterday

Took this to my office potluck yesterday and people were hounding me for the recipe before I even left! I added a little extra shredded parmesan on top for the last 10 minutes of baking and *chef's kiss*. Only note is I wish I’d doubled the batch, it was gone in 15 minutes flat.

2 hours ago

Oh the extra parmesan idea is genius! I’m making this for Thanksgiving next month and definitely stealing that tip.

2 hours ago

Love the parmesan top hack, Jake! Doubling is always a smart call for potlucks - we’ve made that same mistake of bringing too small a batch too many times!

yesterday

I’ve never been a huge potato casserole fan so I tried this as a lower-carb swap for our usual holiday side and WOW. It’s so creamy and flavorful, I don’t think I’ll ever go back to regular potato casserole again. Who knew rutabaga was this good?!

2 hours ago

Same! I made this for my keto meal plan and it checks every box - creamy, satisfying, and way lower carb than potato versions. Obsessed.

2 hours ago

Making this for our Friendsgiving spread this year! Do you think I can assemble it the night before and bake it the next day? I’m trying to get as much prep done ahead as possible so I don’t stress the day of.

30 minutes ago

Great question, Zara! You absolutely can assemble this the night before - just keep it covered in the fridge, and add 5-10 minutes to the bake time since it’ll be cold going into the oven. It’s one of our favorite make-ahead holiday sides for exactly that reason!

30 minutes ago

Wait, quick question before I make this this weekend - do I need to peel the rutabaga first? I’ve never cooked with it before and I don’t want to mess this up, it looks so good! Also, how small should I cube the pieces so they cook all the way through?

5 minutes ago

Great questions, Nate! Yes, we definitely recommend peeling rutabaga first - the skin is pretty thick and tough even after cooking. Cube it into about 1-inch pieces and they’ll cook perfectly tender in the time listed! Can’t wait to hear how it turns out.

5 minutes ago

I added a pinch of nutmeg and a little cracked black pepper on top and it took this casserole to the next level! The creamy base is so perfect for adding little extra seasonings to match your taste. Super versatile, super easy.

just now

Nutmeg is such an underrated addition to creamy veggie dishes! I’m definitely adding that when I make this for dinner tonight, thanks for the tip!



