
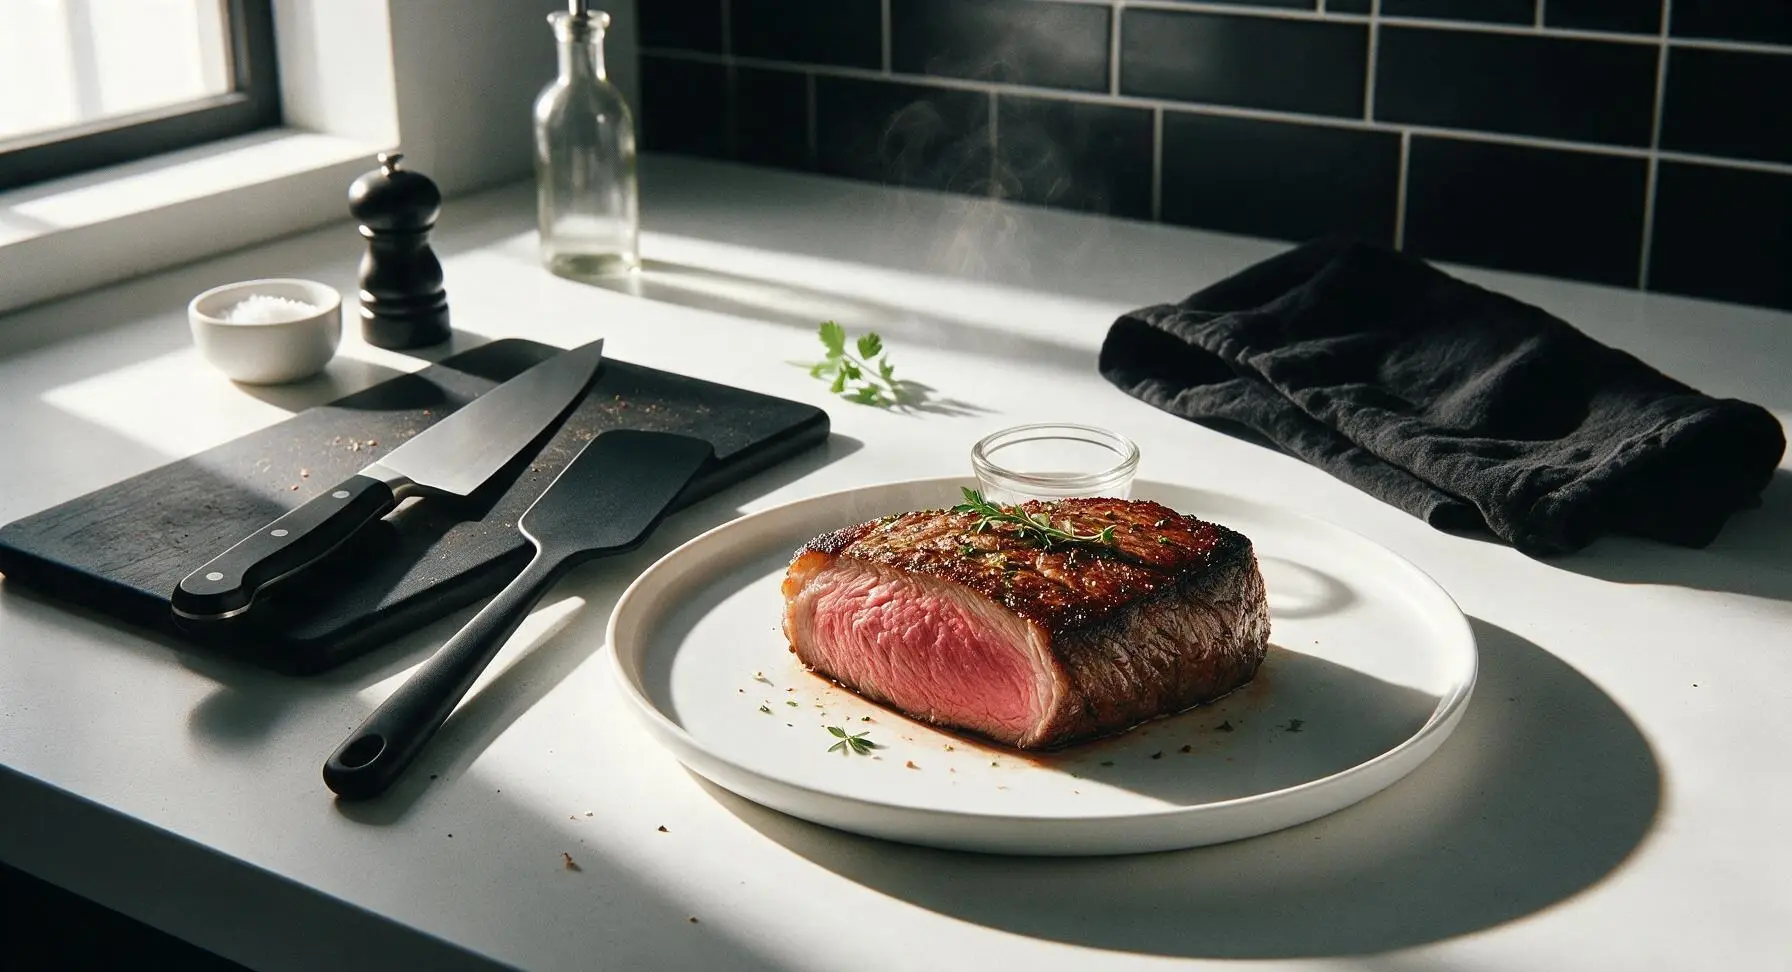
sirloin cap

title 1
sirloin cap
⏱️ cook time 15 minutes
🍽️ servings 4
⚡ Difficulty medium

intro

Juicy, crisp-crusted grilled sirloin cap (picanha) cooked to perfect medium-rare, with a tender rosy center and subtle herb-garlic aroma — the ideal showstopping centerpiece for summer cookouts.

Ingredients
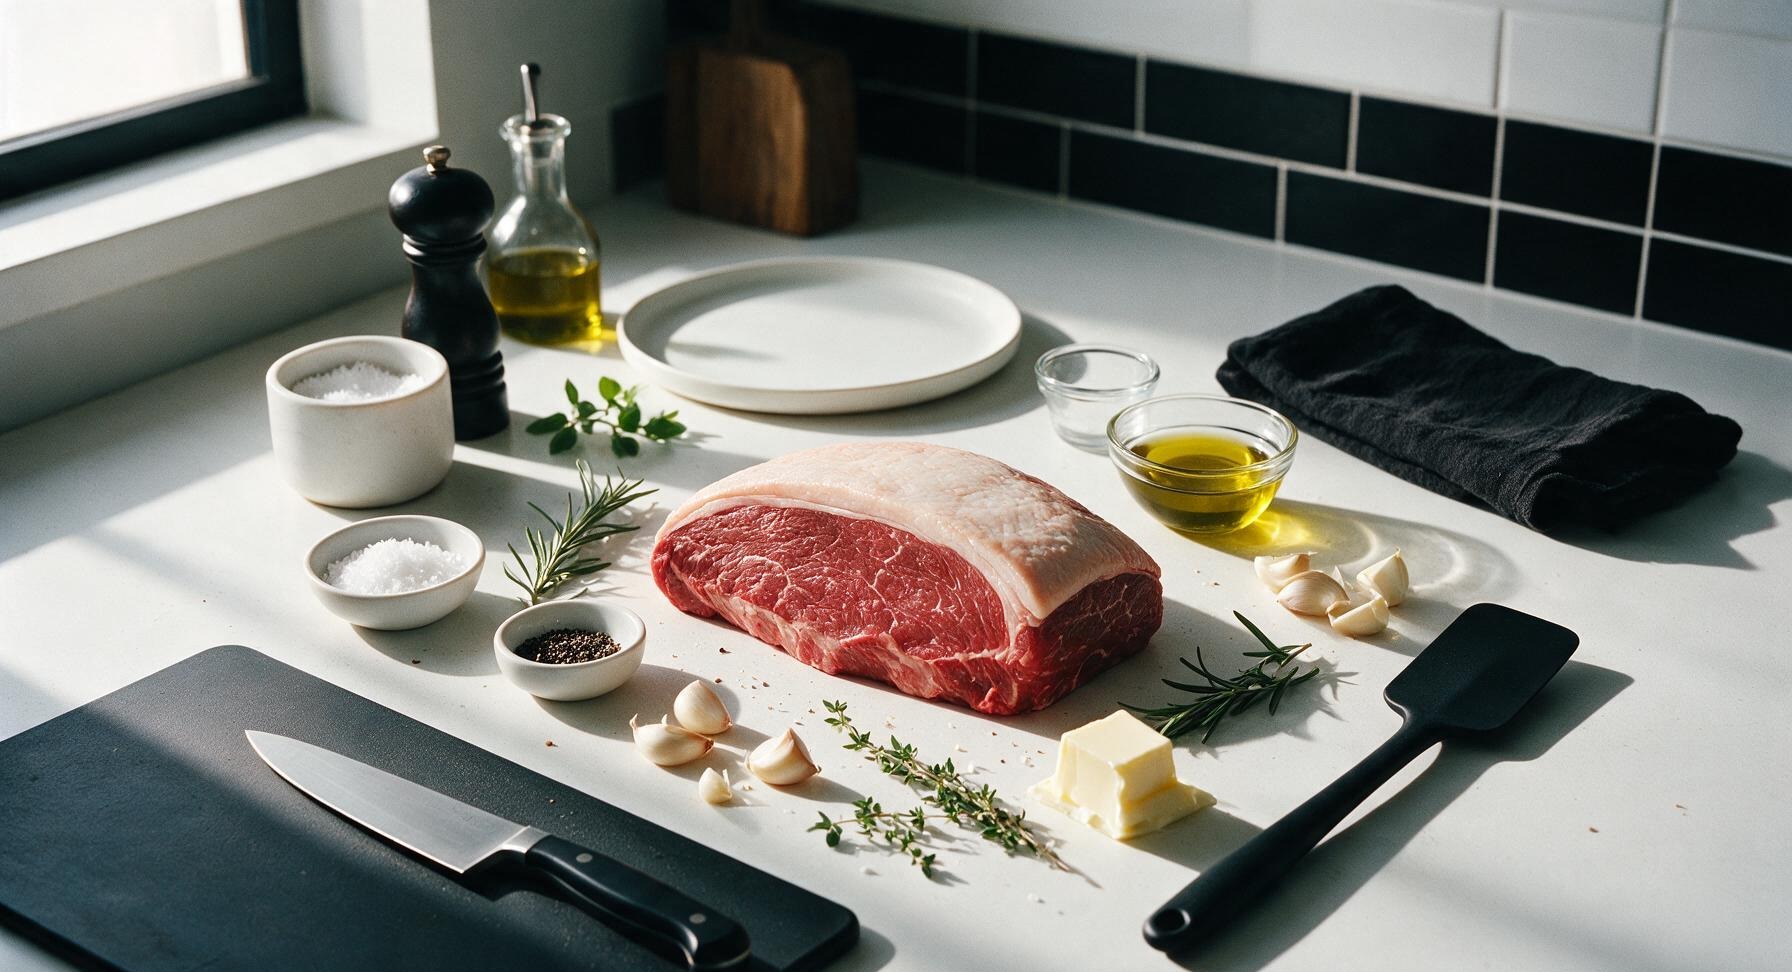
Whole sirloin cap (picanha, fat cap intact, 1.5-inch thick) 800g
Coarse kosher salt 2 tbsp
Freshly cracked black pepper 1 tsp
Extra virgin olive oil 2 tbsp
Garlic cloves, crushed 4 cloves
Fresh rosemary sprigs 2 sprigs
Fresh thyme sprigs 3 sprigs
Unsalted butter 2 tbsp

Steps

1

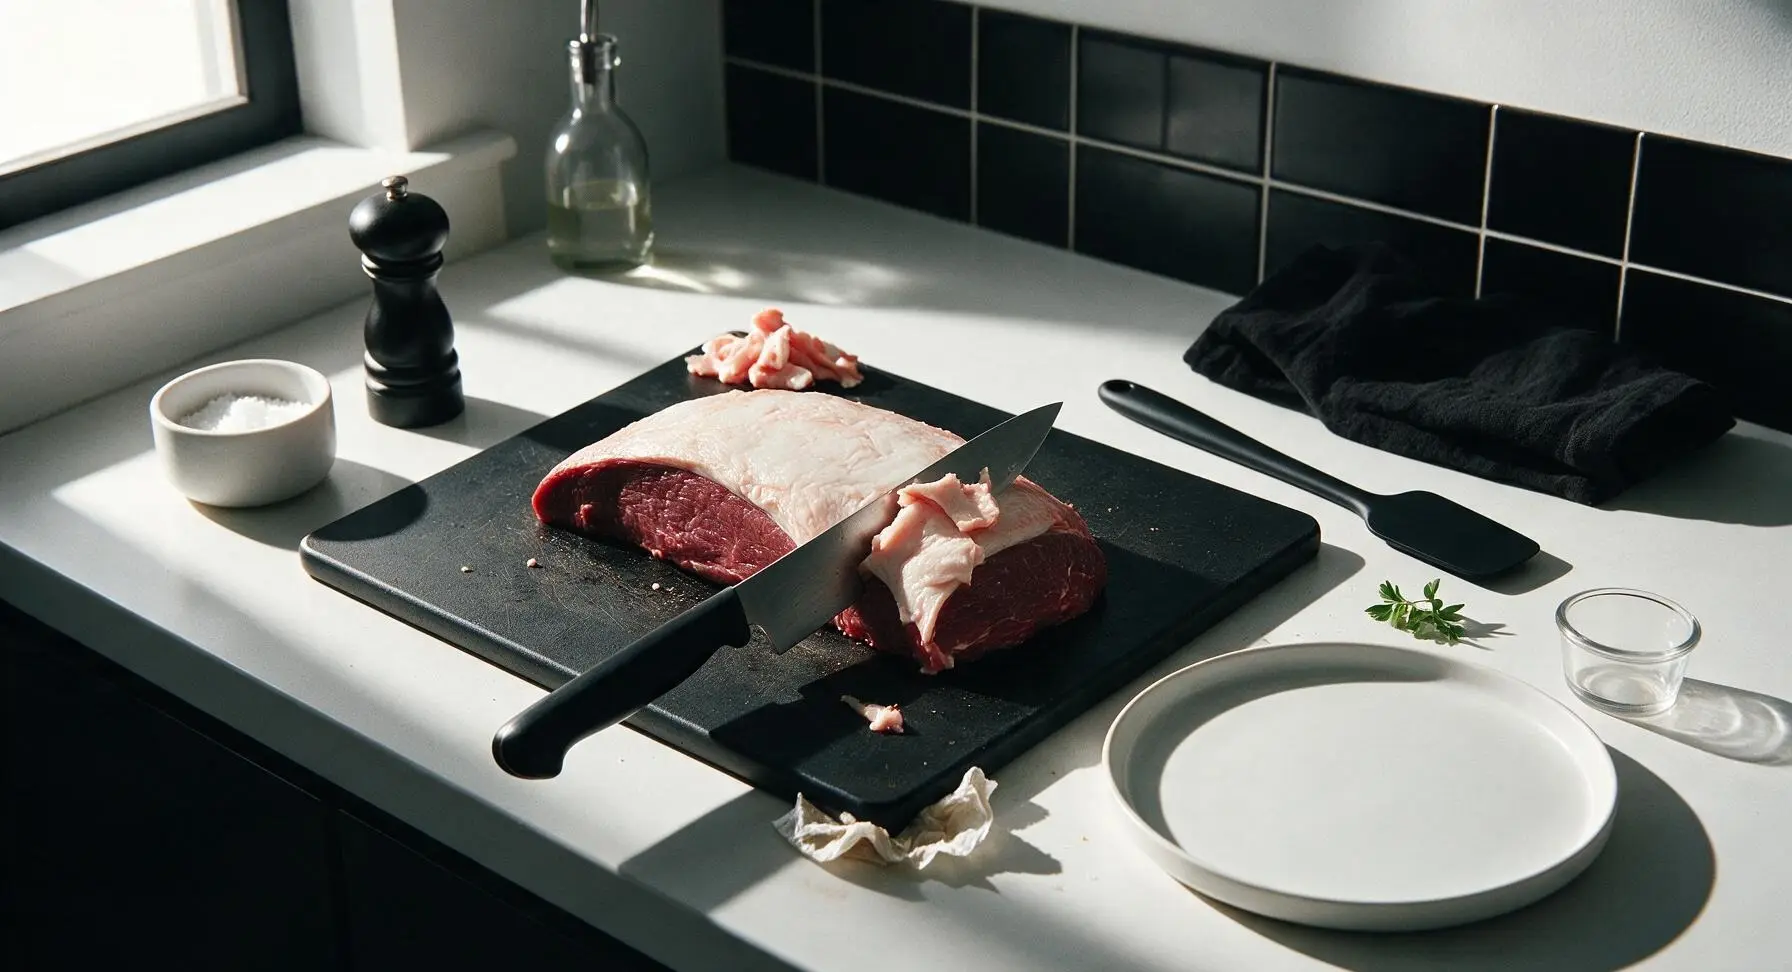
Trim fat cap evenly

Place the raw sirloin cap fat-side up on the teak cutting board. Use the 8-inch chef knife to trim the thick fat cap to a uniform 1/4-inch thickness, removing any hard, waxy fat chunks and all tough silver skin from the lean meat side. Do not remove the fat cap entirely — the thin even layer will render into a crisp, salty crust as it grills. Once trimmed, pat every surface of the meat completely dry with paper towels, discarding used towels off-frame.
Step 1
step1:Trim fat cap evenly
2

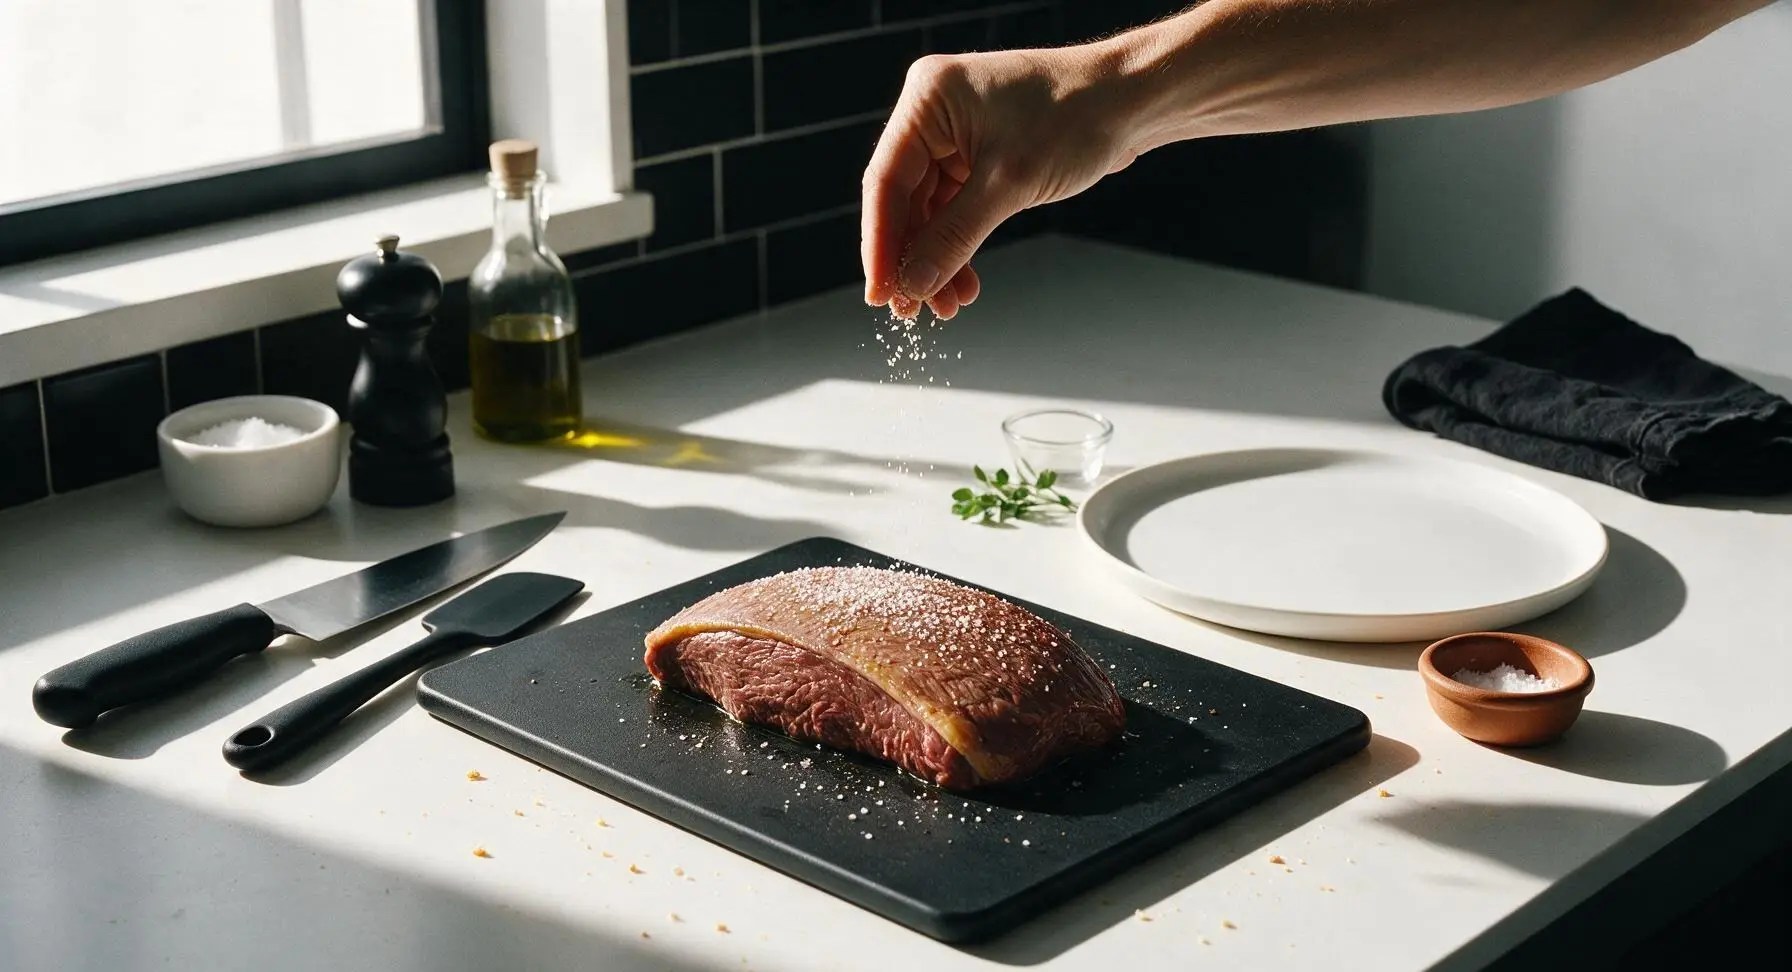
Season all surfaces

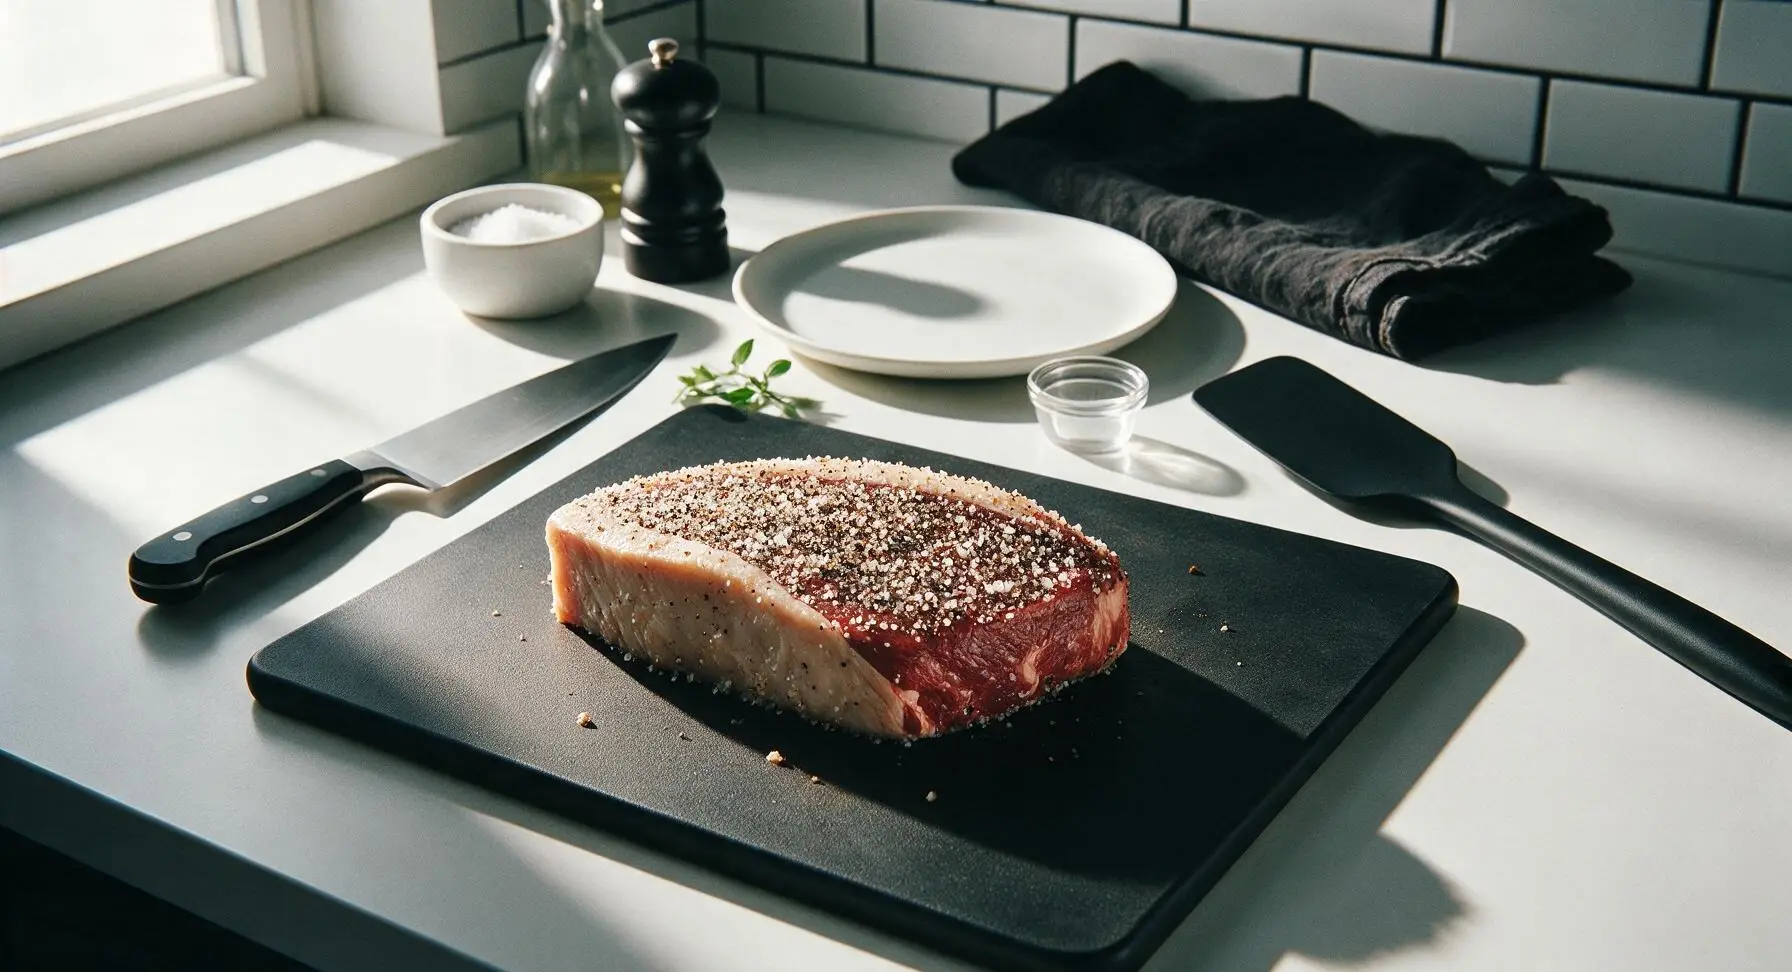
Drizzle 1 tablespoon of olive oil over the entire sirloin cap, rubbing it into both the meat and fat cap to help seasoning adhere. Sprinkle all 2 tablespoons of coarse kosher salt and 1 teaspoon of cracked black pepper evenly over every surface, pressing the seasoning gently into the meat so it does not fall off during grilling. Pay extra attention to coating the cut edges of the steak. Let the seasoned meat rest on the cutting board for 15 minutes at room temperature to allow the salt to penetrate before grilling.
Step 2
step2:Season all surfaces
Step 2
step2:Season all surfaces
3

Preheat two-zone grill

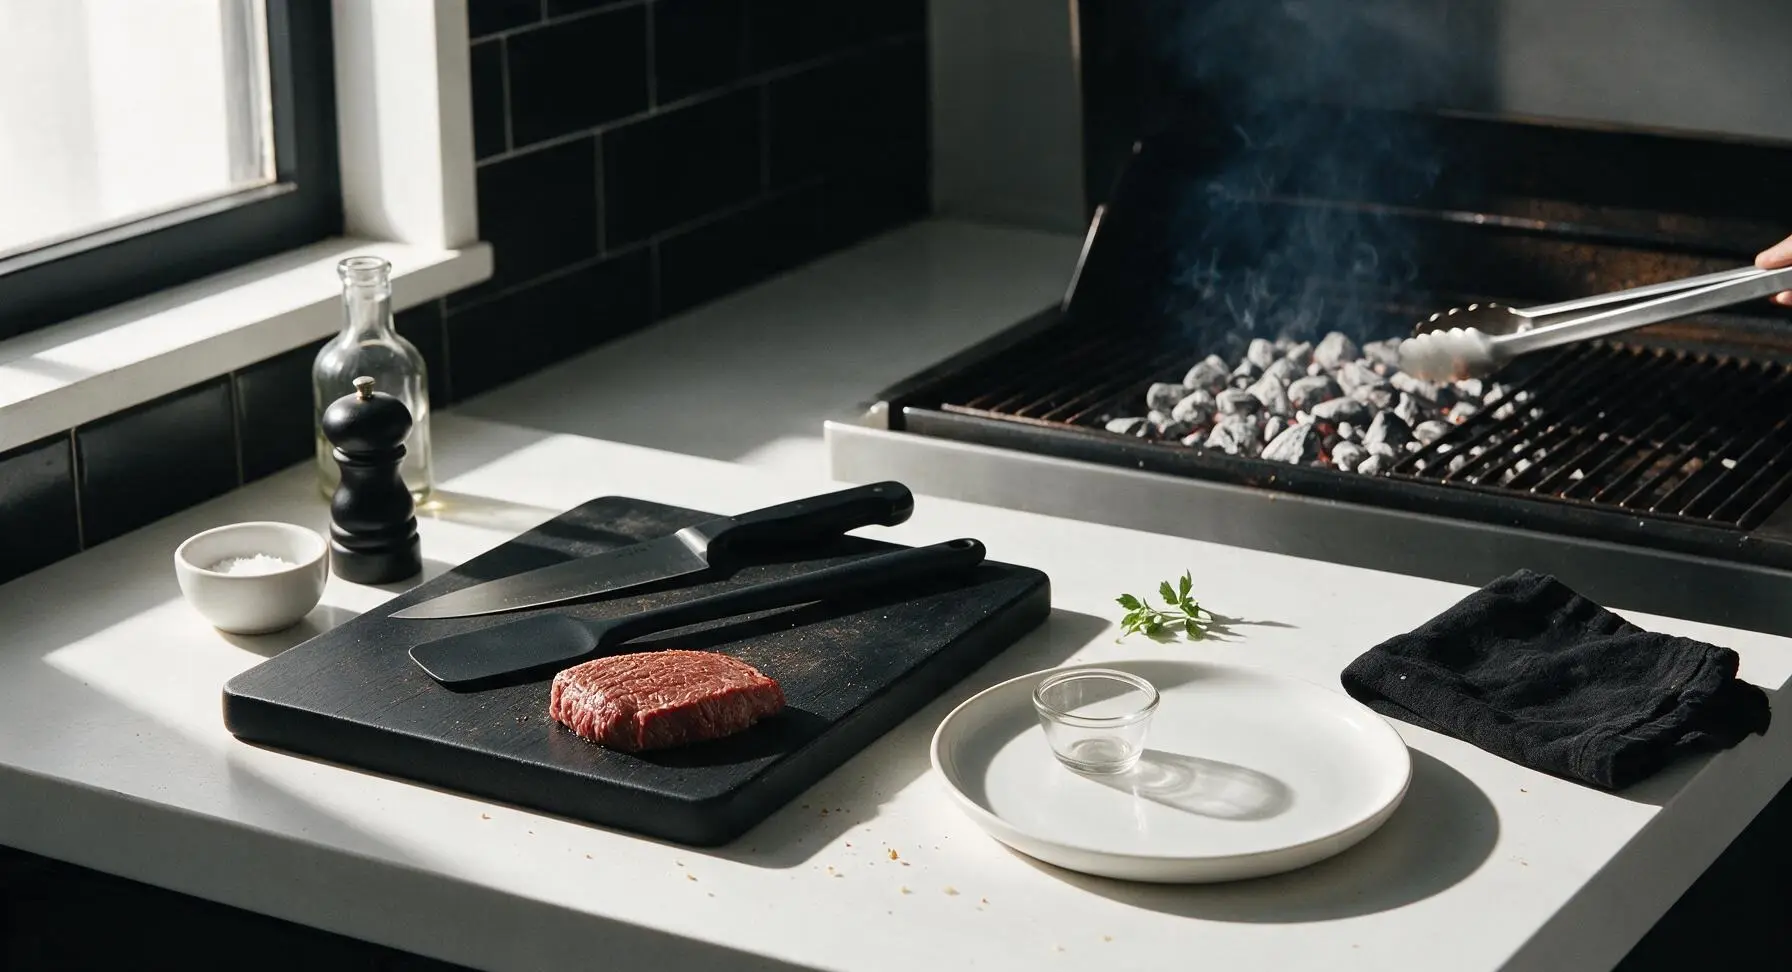
Prepare the built-in charcoal grill (visible in the far right background) for two-zone cooking: light a full chimney of charcoal, and once the coals are covered in thin gray ash, pour them onto one half of the grill grate, leaving the other half completely empty for indirect heat. Use the stainless steel tongs to spread the coals evenly across the hot zone. Close the lid and let the grill preheat to 220C (425F), brushing the grate lightly with the remaining 1 tablespoon of olive oil to prevent sticking.
Step 3
step3:Preheat two-zone grill
4

Sear fat cap first

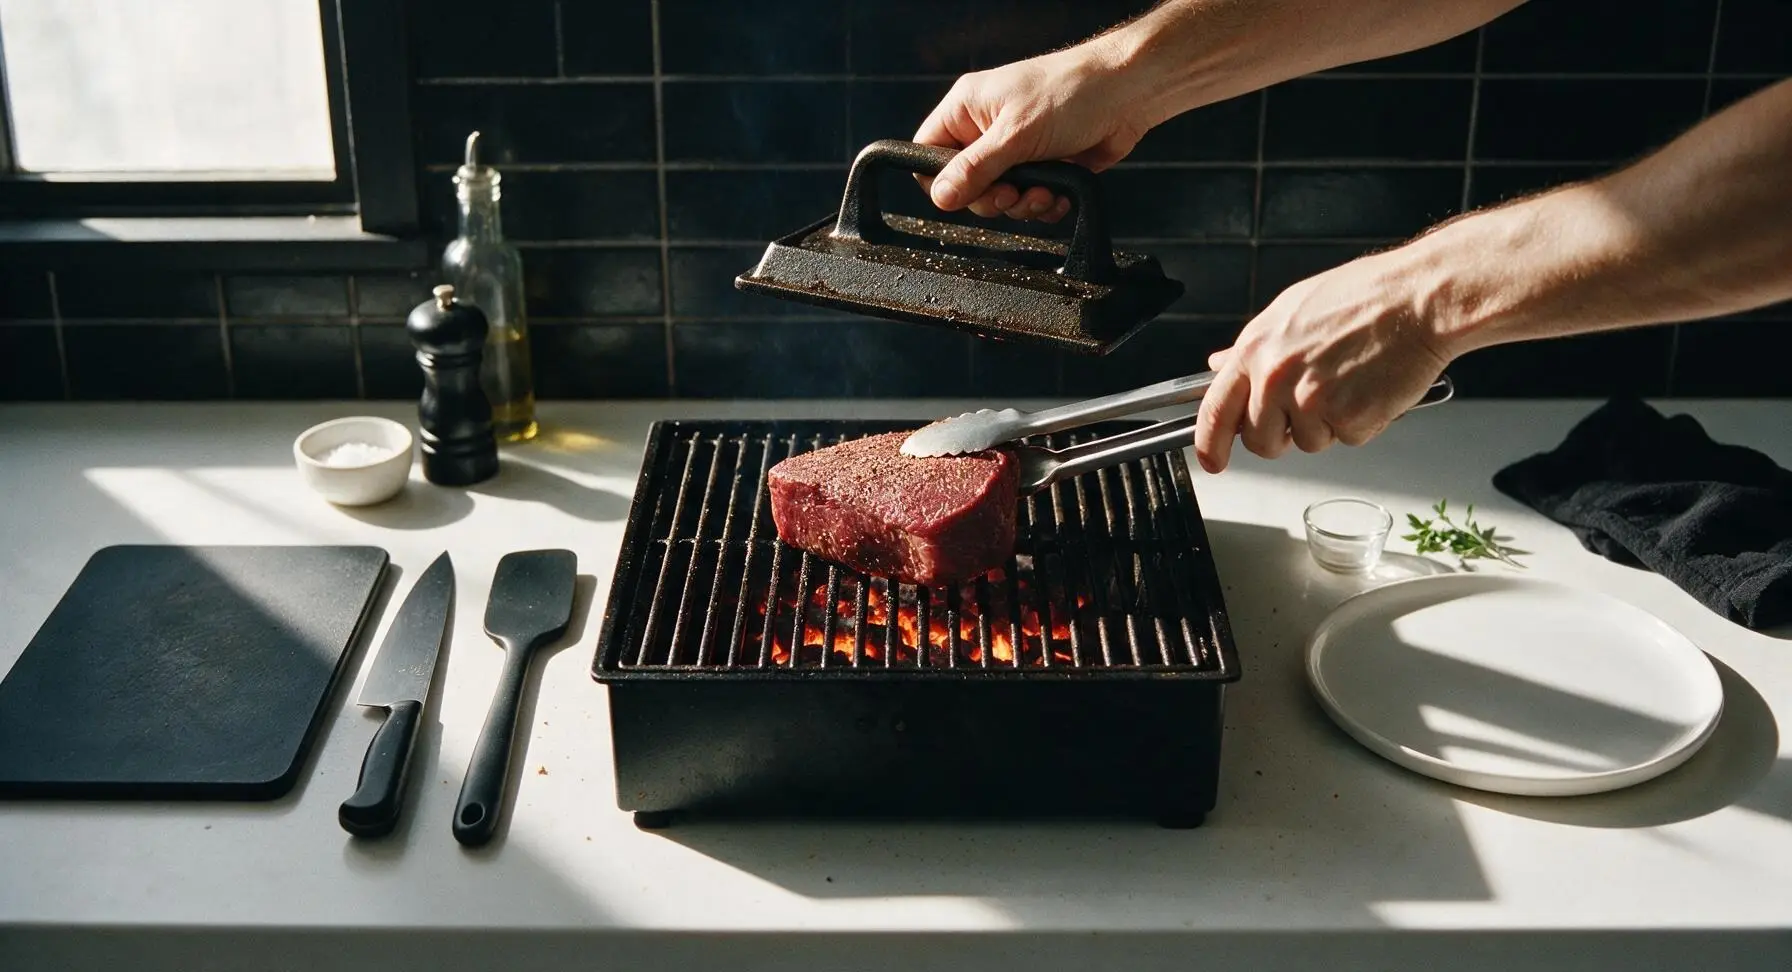
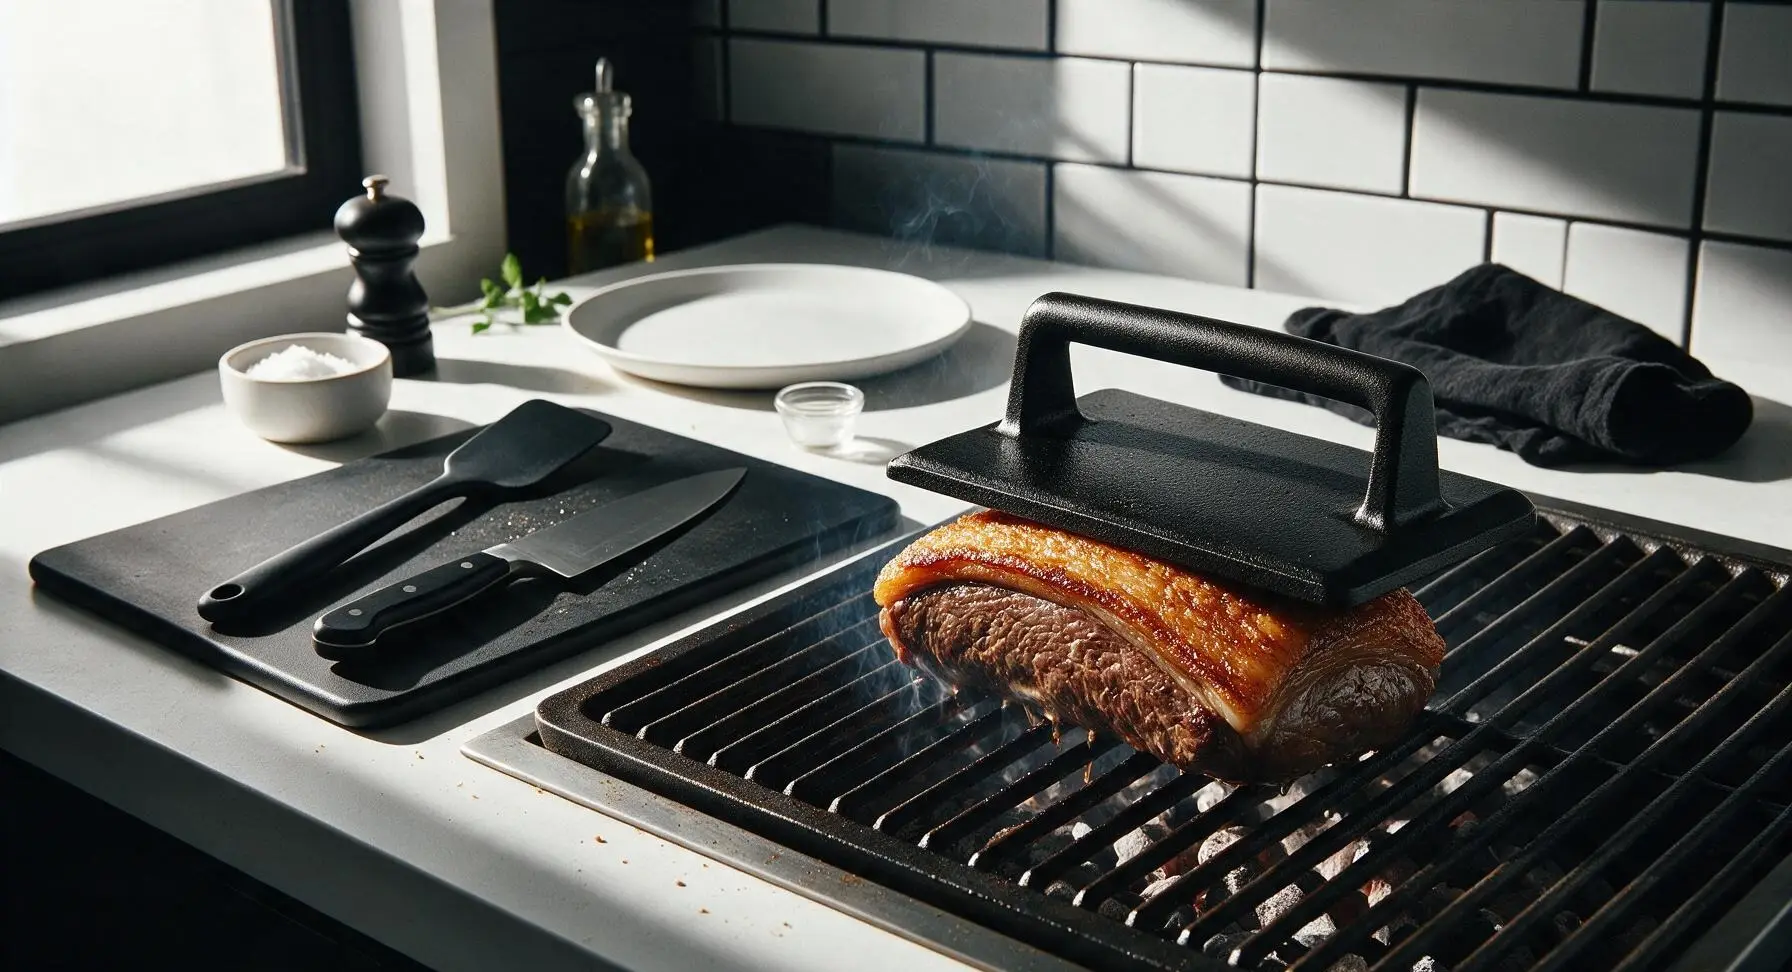
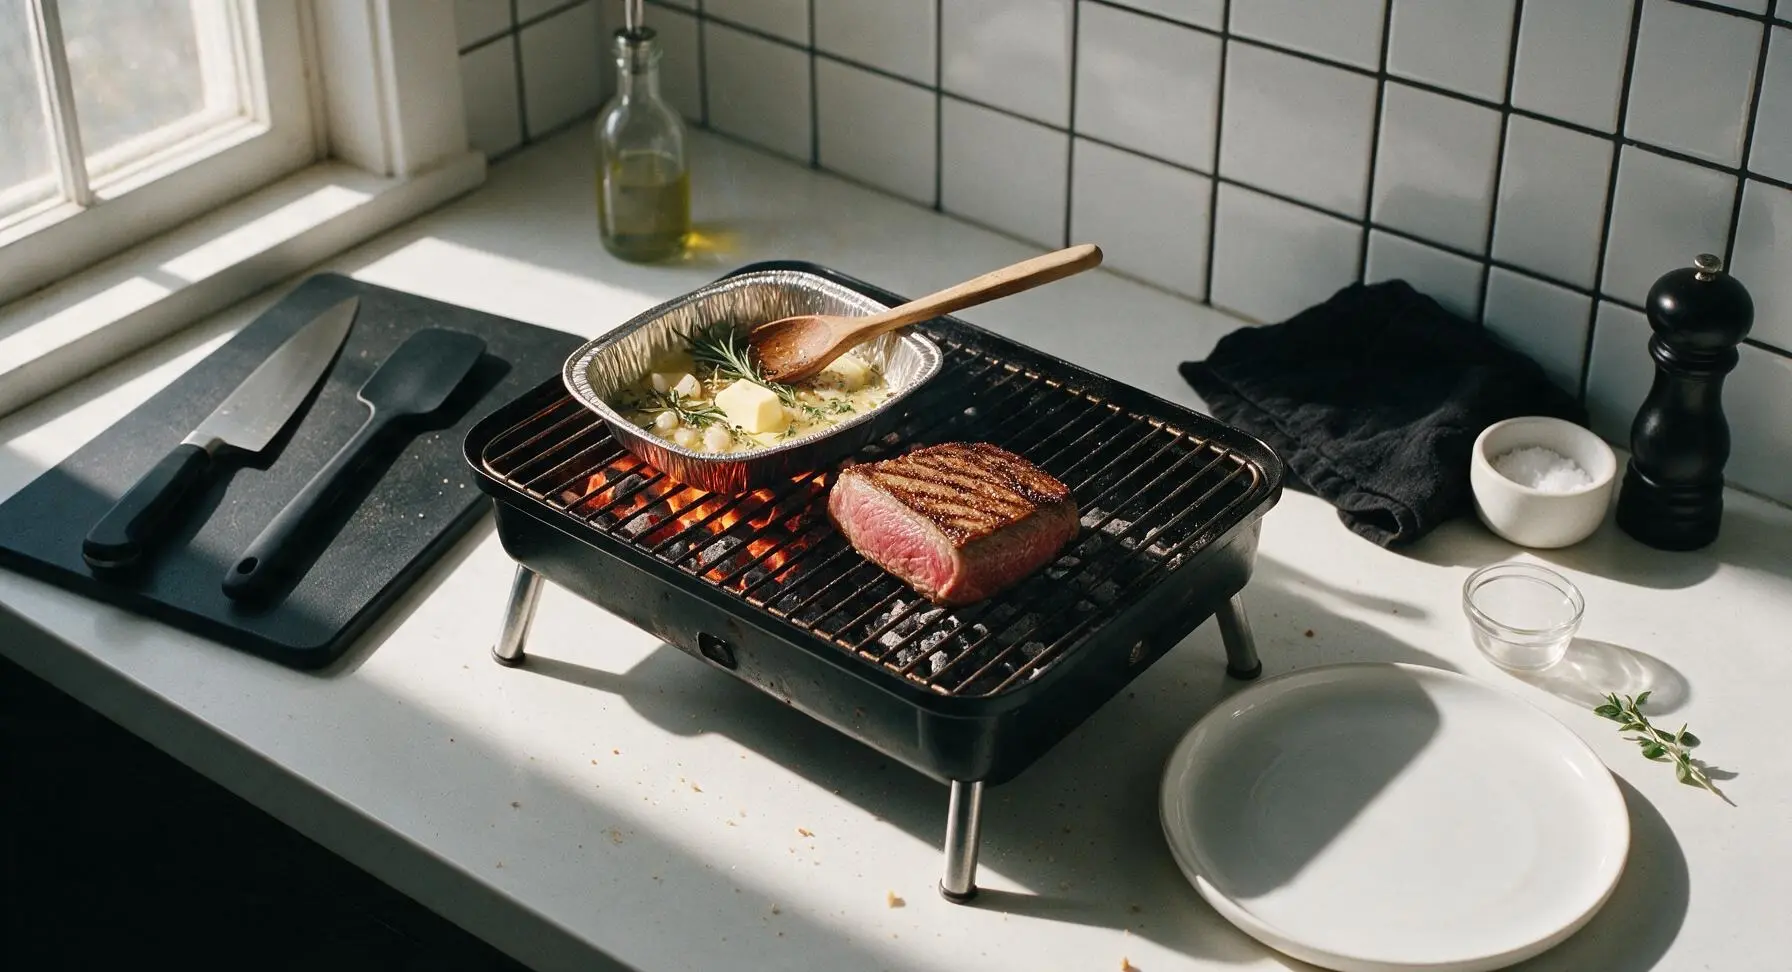
Use the tongs to place the sirloin cap fat-side down directly over the hot coal zone of the grill. Place the preheated cast iron grill press on top of the meat to ensure even, full contact with the grate. Sear for 3-4 minutes, until the fat cap is deeply golden, crisp, and fully rendered, with no soft white fat remaining. Watch for flare-ups from dripping fat, shifting the meat 2-3 inches if flames rise directly onto the meat surface to avoid burning.
Step 4
step4:Sear fat cap first
Step 4
step4:Sear fat cap first
5

Cook to medium-rare

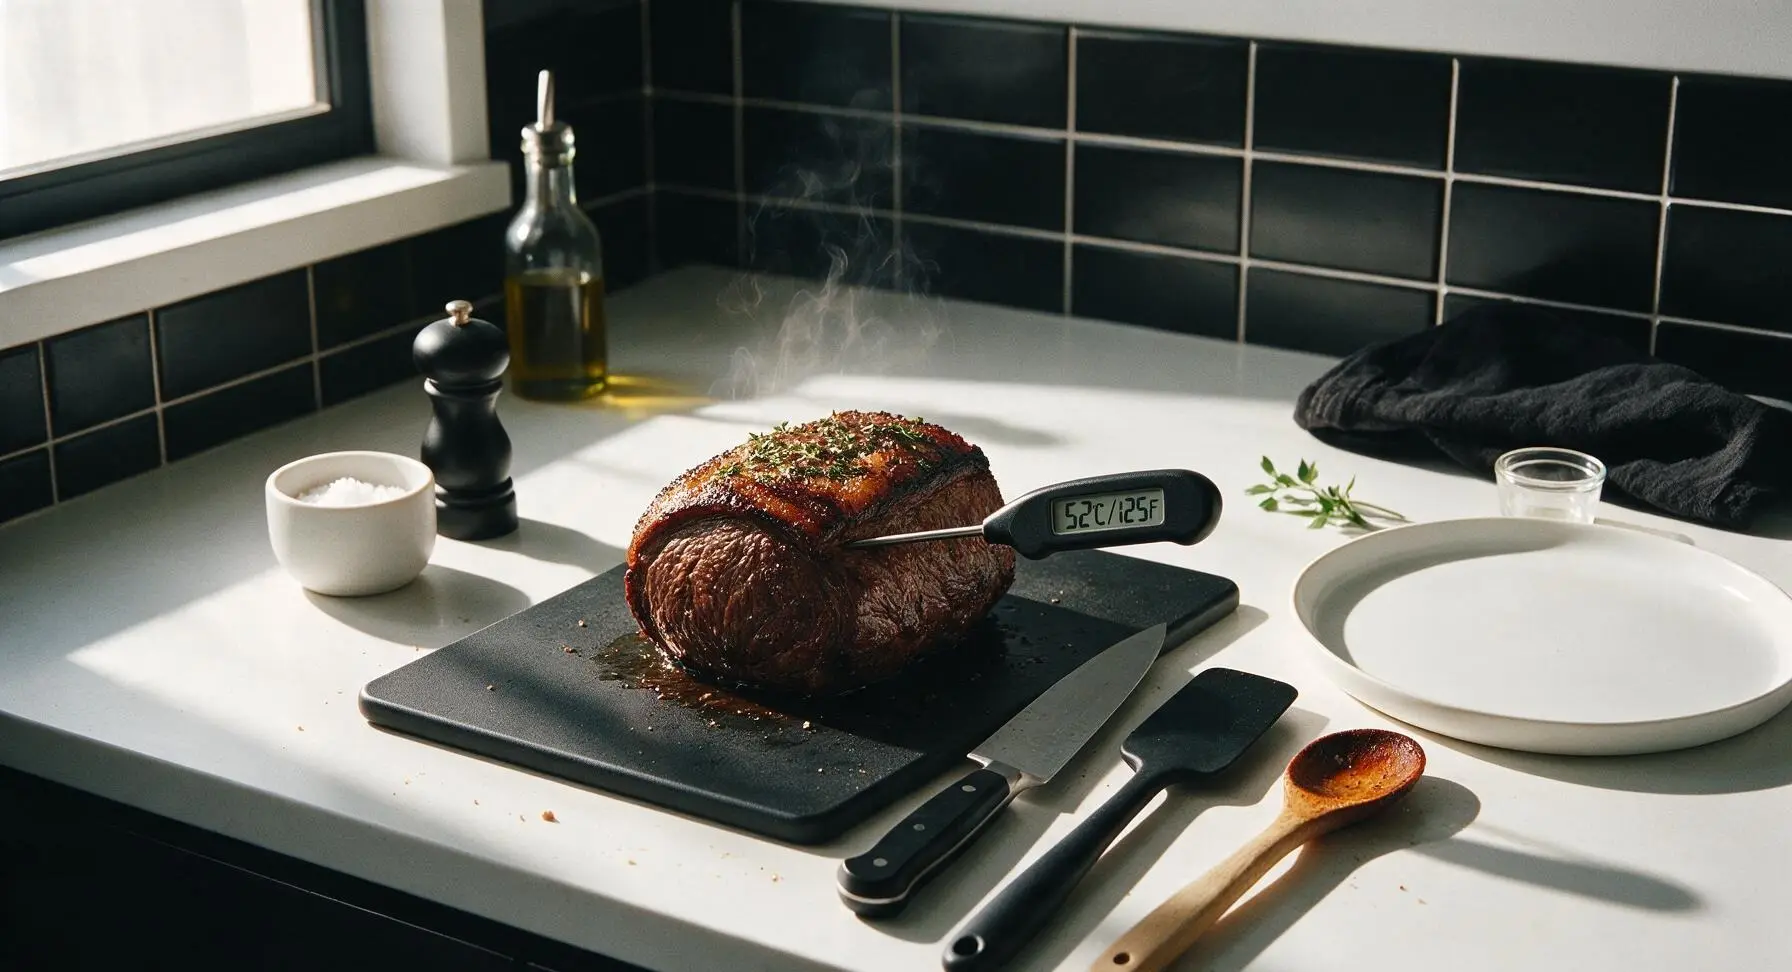
Flip the sirloin cap using tongs, moving it to the cool indirect zone of the grill. Add the 4 crushed garlic cloves, rosemary, thyme, and 2 tablespoons of unsalted butter to a small disposable aluminum heatproof pan on the hot zone, and use the long beech wood basting spoon to drizzle the melted, garlic- and herb-infused butter over the top of the meat every 3 minutes as it cooks. Close the grill lid and cook until the instant-read thermometer inserted horizontally into the thickest part of the meat (avoiding fat) reads 52C (125F) for medium-rare, approximately 8-10 minutes. Avoid squeezing the meat with the tongs during cooking, as this presses out valuable juice.
Step 5
step5:Cook to medium-rare
Step 5
step5:Cook to medium-rare
6

Rest cooked meat

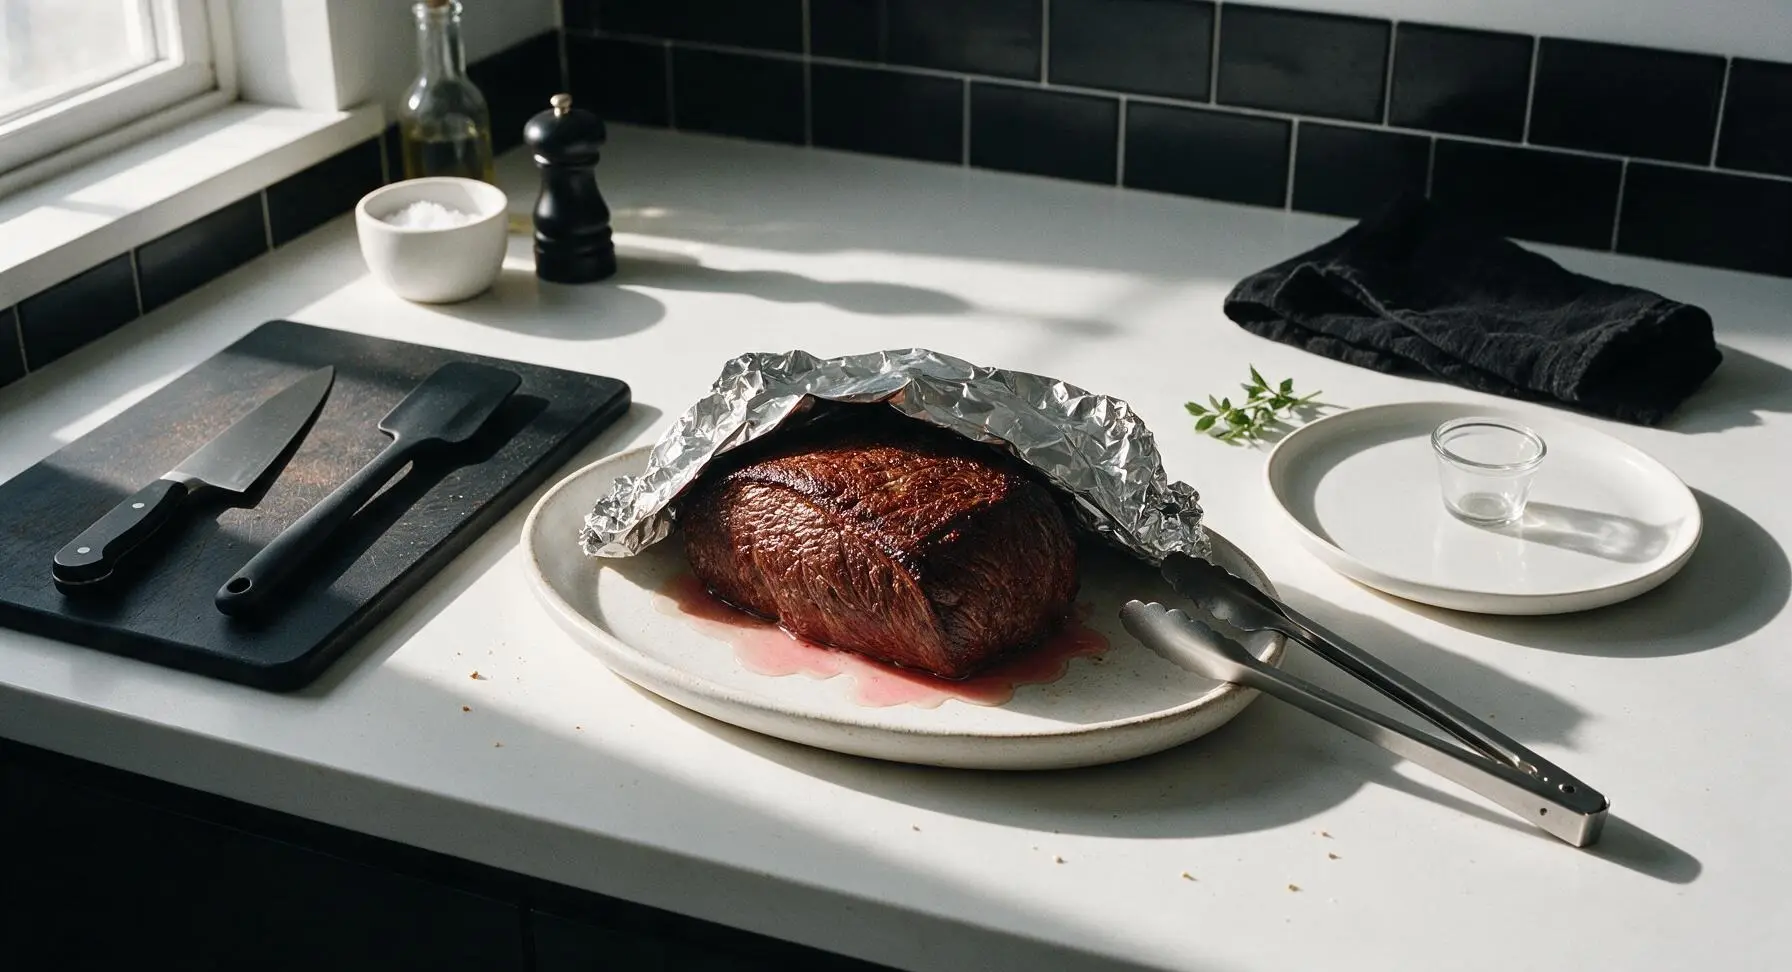
Use tongs to transfer the cooked sirloin cap to the matte white ceramic serving platter. Loosely tent the meat with a small sheet of aluminum foil, and let it rest for 10 full minutes at room temperature. This allows the tight muscle fibers to relax and reabsorb juices, ensuring every slice is juicy rather than leaking juice onto the plate when cut. Do not wrap the meat tightly in foil, as this will steam the crust and make it soggy.
Step 6
step6:Rest cooked meat
7

Slice against the grain

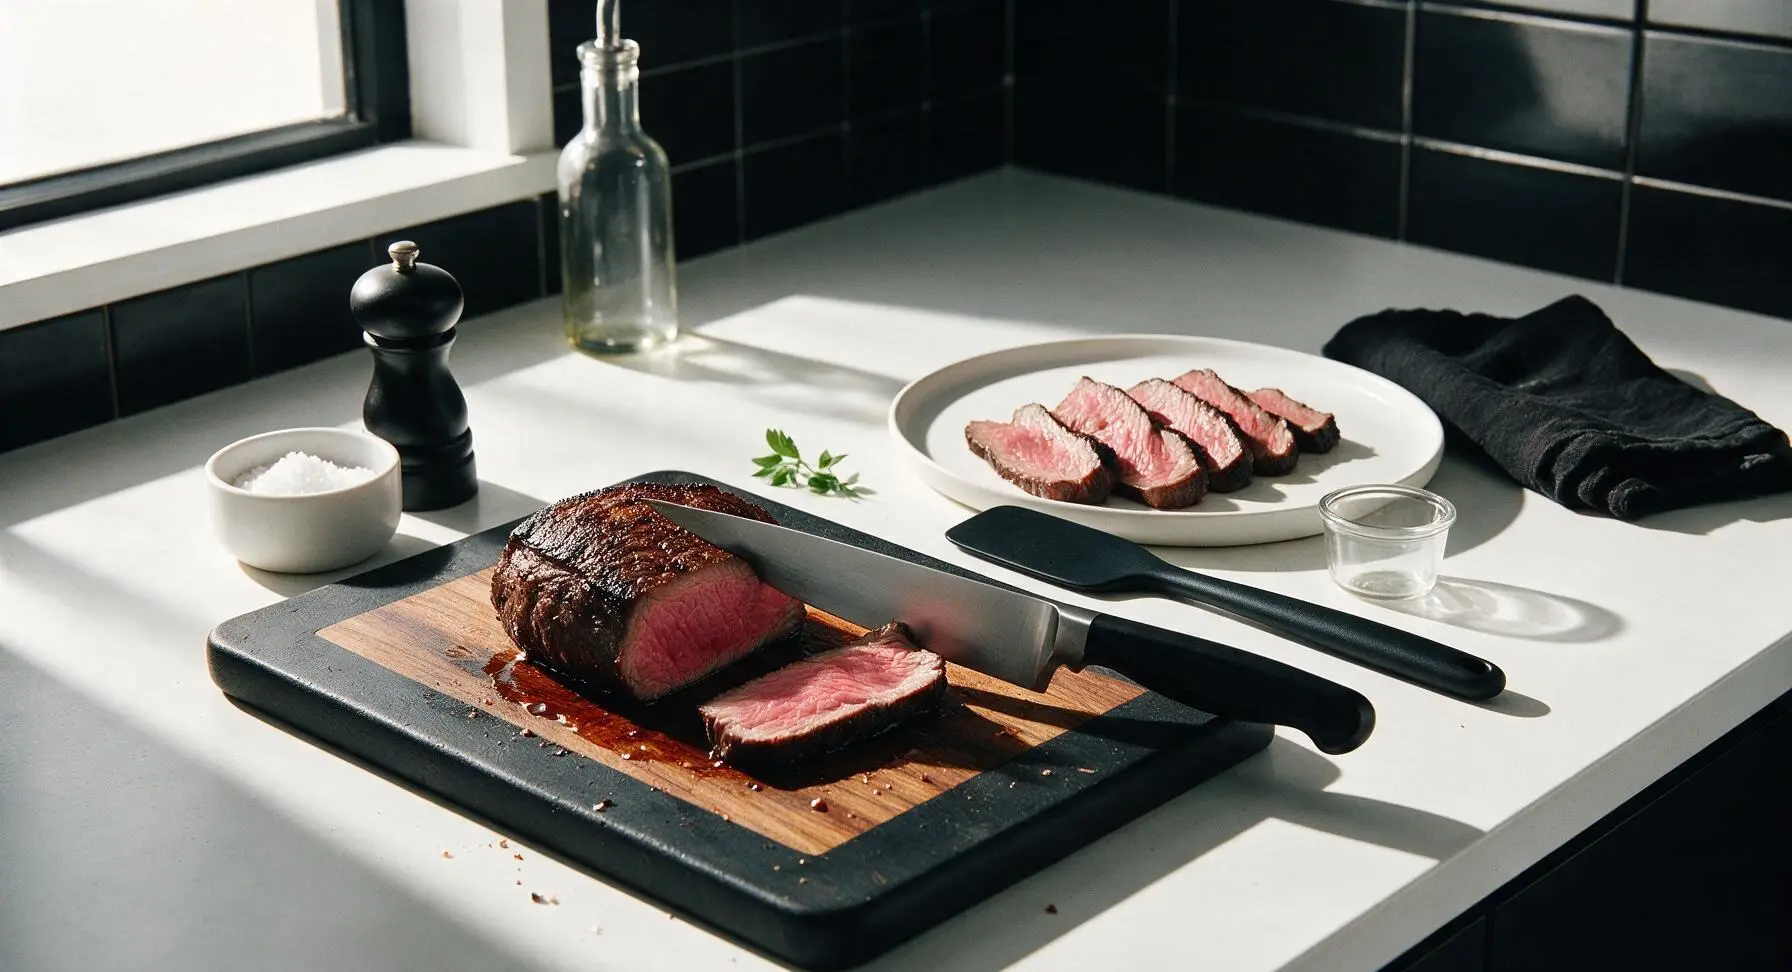
After resting, remove the foil tent. Transfer the sirloin cap back to the teak cutting board, using the chef knife to slice it into 1/2-inch thick slices, cutting firmly against the diagonal direction of the muscle grain at a slight angle to create wider, more attractive slices. Arrange the sliced meat back onto the white serving platter, spooning any accumulated juices from the cutting board and platter over the top of the slices before serving.
Step 7
step7:Slice against the grain

Tips

1.Keep the fat cap trimmed to exactly 1/4-inch thickness: any thicker and the fat will not fully render, leaving chewy, unpleasantly waxy bites; any thinner and you will lose the protective, self-basting layer that keeps the lean meat juicy during grilling.
2.Always slice sirloin cap against the grain at a slight diagonal: this cut’s long, tight muscle fibers run diagonally across the cap, so cutting perpendicular to those fibers shortens them dramatically, resulting in tender, easy-to-chew slices even if you slightly overcook the meat.
3.Never skip the two rest periods: let seasoned meat sit 15 minutes at room temperature before grilling to prevent cold meat from seizing on the hot grate (causing uneven cooking), and let cooked meat rest 10 minutes loosely tented to let fibers reabsorb juices instead of leaking onto your cutting board.


✨ You May Also Like

BBQ & Grilling
🍜 United States

Tender, melt-in-your-mouth beef brisket with a crisp, spiced bark, slow-smoked to deep smoky perfection, the iconic centerpiece of Texas backyard barbecue.

⏱️ 12 hours BBQ & Grilling ★ 4.4
BBQ & Grilling
🍜 Korea

Tender, sweet-savory marinated beef short ribs, a beloved Korean BBQ staple with caramelized, slightly charred edges and deep umami flavor, perfect for outdoor summer gatherings.

⏱️ 4 hours 2BBQ & Grilling ★ 4.8
BBQ & Grilling
🍜 United States

Juicy grilled beef patties topped with smoky homemade chili, melted cheddar, and tangy pickles on toasted brioche buns for a hearty, flavor-packed handheld meal.

⏱️ 40 minuteBBQ & Grilling ★ 4.7
BBQ & Grilling
🍜 United States

A sweet, smoky, tangy BBQ sauce brightened with peak-season dark cherries, ideal for glazing grilled ribs, chicken, pork, or summer roasted veggies.

⏱️ 35 minuteBBQ & Grilling ★ 4.7
BBQ & Grilling
🍜 United States

Rich, smoky, slightly sweet homemade bourbon BBQ sauce with deep caramel notes, ideal for glazing grilled ribs, chicken, and burgers at cookouts.

⏱️ 25 minuteBBQ & Grilling ★ 4.7
BBQ & Grilling
🍜 United States

Iconic Alabama-style BBQ featuring tender hickory-smoked chicken slathered in tangy creamy white sauce, a beloved regional Southern cookout staple.

⏱️ 3 hoursBBQ & Grilling ★ 5

sirloin cap:Frequently Asked Questions

1.Why is it so important to leave the fat cap intact on picanha? ▾
The fat cap is key to great picanha! As it grills, it slowly renders, basting the underlying meat to keep it juicy, and builds that iconic crispy, salty, umami-rich crust. If your fat cap is thicker than 1/4 inch, you can trim excess, but never remove it entirely before cooking—you’ll lose the signature texture and flavor.
2.What thickness of picanha works best for this grilled recipe? ▾
A 1.5-inch thick cut, as noted in the recipe, is ideal. Thinner cuts cook too fast, making it nearly impossible to build a deep crust before the center overcooks. If you end up with a thicker cut, use a two-zone grill setup to cook the center gently after searing to avoid burnt edges.
3.Do I need to marinate picanha before grilling? ▾
No, high-quality picanha doesn’t need a heavy, acidic marinade. Its rich, beefy flavor shines with simple seasoning: the coarse kosher salt, cracked black pepper, olive oil, and garlic used here is all you need. Long soaks in acidic marinades can break down tender meat and leave it mushy instead of juicy.
4.What grill temperature setup works best for cooking picanha? ▾
Use a two-zone fire for best results: build a hot direct-heat zone at 450–500°F for searing, and a cooler indirect-heat zone around 350°F for gentle finish cooking. Start by searing the fat-cap side down to render fat and crisp the crust, then move to indirect heat to cook the center without burning.
5.How do I tell when picanha is perfectly medium-rare without cutting into it? ▾
Always use an instant-read thermometer for accuracy, inserted into the thickest part of the meat away from the fat cap. Pull the picanha when it hits 125–128°F internal temp; carryover cooking will raise the temp 5–7°F as it rests, landing you at a perfect 130–135°F rosy, tender center.
6.How long should I rest picanha after grilling, and why does it matter? ▾
Let your grilled picanha rest loosely tented with foil for 10 full minutes before slicing. Resting lets tight, hot muscle fibers relax and reabsorb all their juicy, flavorful juices. If you slice immediately after grilling, those juices will run right onto your cutting board, leaving drier, less flavorful meat.
7.How do I slice picanha to make sure every bite is tender? ▾
First, identify the direction of the long muscle fibers (the grain) running across the cap. Slice against that grain into thin, 1/4-inch thick pieces, cutting cleanly through the crisp fat cap with each slice. Slicing with the grain will leave chewy, tough bites even if you cooked the meat perfectly.
8.Can I make this recipe on a gas grill, or do I need charcoal? ▾
You can absolutely make fantastic picanha on a gas grill! Preheat all burners on high for 10–15 minutes to get a hot sear zone, then turn one burner down to medium to create your cooler indirect zone. Add a small smoker box of wood chips if you want that classic smoky charcoal-style flavor.
9.How do I keep the crushed garlic from burning on the grill? ▾
Burnt garlic adds a harsh, bitter flavor, so don’t rub it directly on the meat before high-heat searing. Mix your crushed garlic with the extra virgin olive oil, and brush the mixture onto the picanha during the last 2–3 minutes of indirect cooking, so the garlic softens and releases aroma without charring.
10.What do I do if my fat cap is rubbery when the meat is almost done? ▾
If the fat cap hasn’t crisped up by the time the center is 5°F below your target temp, move the picanha fat-side down directly over the hottest part of the grill for 1–2 minutes. Watch closely for fat-driven flare-ups, and pull it as soon as the fat is crisp and golden to avoid overcooking the center.

Comments (17)

2 days ago

OMG this picanha was the star of our Memorial Day cookout! I was nervous to cook sirloin cap for the first time because I’d only had it at Brazilian steakhouses, but the 15 minute cook time was no joke. Crust was perfect, fat cap rendered just right, SO good. My husband already asked me to make it again next weekend.

yesterday

So stoked this was a cookout hit! Pro tip for next time: let it rest 10 full minutes before slicing against the grain for extra juicy bites, you’re gonna love it even more!

1 week ago

Game changer, y’all. I’ve been overcomplicating picanha for years with fancy rubs and low-and-slow cooks, and this simple high-heat grill method? Unreal. Took it to my buddy’s potluck in Brooklyn last week and people were hovering over the grill waiting for slices. Only thing I did different was add a little extra garlic salt because I’m a garlic fiend.

5 days ago

Wait how thick did you cut the steaks? I tried this last night and mine were a little thinner so they cooked way faster than I expected

3 days ago

Great question! We recommend cutting the picanha into 1.5 inch thick steaks for that perfect medium-rare center with a crispy fat cap. If you cut them thinner, just shave 1-2 minutes off the total cook time to avoid overcooking!

3 days ago

My kids absolutely loved this! I was worried the fat cap would be too rich for them, but they ate two servings each with roasted broccoli and garlic bread. Super easy to throw together on a busy school night even though it’s labeled medium difficulty, I didn’t think it was that hard at all.

2 days ago

Made this for my dad’s Father’s Day dinner and he said it was better than the picanha we had on our trip to Rio last year. That’s high praise coming from a guy who complains about every meal I grill, lmao. The only note is that my grill runs a little hot, so I pulled it at 12 minutes instead of 15 and it was perfect medium rare.

yesterday

That is the highest compliment! Grills do vary a ton in temperature, so trusting your meat thermometer over the clock is always the smart move—great call pulling it early!

5 days ago

Wait, has anyone tried making this on a charcoal grill vs gas? I only have a Weber charcoal and I’m worried about getting the temp right for the fat cap to render without causing giant flare ups. Don’t want to burn a $20 cut of meat for my small group dinner this Saturday!

3 days ago

I made it on my Weber last weekend! Bank the coals to one side so you have a hot zone and a cool zone, sear over the coals then move to the cool side if the fat starts flaring up. Worked like a charm!

2 days ago

Couldn’t have said it better! Charcoal adds such a great smoky note to picanha, just keep a spray bottle of water handy for any unexpected flare ups and you’ll be totally set for Saturday. Hope the dinner goes great!

1 week ago

Solid recipe, I use this for my weekly meal prep! Slice it thin and toss it on salads, rice bowls, even breakfast tacos all week. Holds up way better than chicken breast does in the fridge, I’m never going back to boring meal prep proteins. 10/10.

5 days ago

Ooh breakfast tacos with leftover picanha? That sounds insane, I’m stealing that idea for next week’s prep!

2 weeks ago

Took me two tries to get the fat cap rendered right the first time I made it, but this recipe’s timing guide was spot on for my second attempt. No more chewy unrendered fat, it was crispy and salty and perfect. Paired it with chimichurri just like the recipe suggested and *chef’s kiss*.

3 days ago

Eh, it was fine. I followed the directions exactly but my picanha came out a little tougher than I expected. Maybe I cut it with the grain by accident? Not sure, might give it another shot next time I see sirloin cap on sale at the grocery store.

2 days ago

Oh I did that the first time too! Slicing against the grain makes such a huge difference, I swear it was like two completely different pieces of meat when I got that right.

yesterday

We’ve all been there! Slicing direction makes such a massive difference with this cut. Next time, look for the long muscle fibers and cut perpendicular to them, and make sure your knife is nice and sharp for thin, even slices. We’re rooting for you on round two!

1 week ago

Brought this to our neighborhood park potluck last weekend and I swear people were asking me for the recipe before they even finished their first bite. So easy to transport too, I just wrapped it in foil after resting and sliced it when I got to the park. Will be making this for every potluck from now on!

5 days ago

That makes our day! Picanha is such a crowd-pleaser for potlucks because it tastes just as good slightly warm as it does straight off the grill. Thanks for sharing it with your neighbors!

2 days ago

This recipe looks so good, I’m planning to make it for my roommate’s birthday cookout at our apartment complex pool this weekend! Quick question: do y’all trim the fat cap at all before grilling? The recipe says to leave it on but I don’t want a huge chunk of chewy fat on each slice, don’t want to mess it up.

yesterday

Don’t trim it! That fat is what keeps the meat juicy while it grills, and if you cook it long enough it gets all crispy, no chewy bits I promise. I was scared of the fat too at first but it’s the best part.

30 minutes ago

Exactly right! You can score the fat cap in a crosshatch pattern (just don’t cut all the way through to the meat) before seasoning to help it render even faster, and you’ll get that perfect crispy, salty bite instead of chewy fat. Have fun at the birthday cookout!

2 weeks ago

I’ve been grilling for 40+ years and I’ll admit, I wrote picanha off as a trendy cut for a long time. Tried this recipe on a whim when my local butcher had sirloin cap on sale, and I’ve already been back to buy two more. Simple seasoning, hot grill, perfect results every time. Can’t beat it.

5 days ago

SO good!!! I made a spicy mango salsa to go on top and the sweet/spicy combo with the salty, beefy picanha was out of this world. Even my picky sister who only eats chicken and fish went back for a second helping. Total win for our family Sunday dinner.

3 days ago

Spicy mango salsa? That sounds amazing, do you have a quick recipe for that? I’m making this for taco night next week and that would be perfect!

yesterday

Tried making this on my indoor grill pan since it’s been pouring rain all week in Denver and I couldn’t fire up the outdoor grill. Anyone else try that? It was okay but I know it would’ve been 10x better with actual grill char and smoky flavor. Next time I’m waiting for a sunny day no matter what.

2 hours ago

I did the same thing back in March when we had that week of snow! I added a tiny bit of smoked paprika to the rub to make up for the lack of smoke, it helped a lot. Still not as good as outdoor grill, but solid for a rainy day.

30 minutes ago

Indoor grill pans are a great backup when the weather won’t cooperate! The smoked paprika trick is genius, and you can also finish it with a tiny pat of smoked butter if you want that extra smoky kick without going outside. Can’t wait for you to try it on the outdoor grill when the sun comes out!

1 week ago

I meal prepped this on Sunday and ate it all week with roasted veggies and quinoa. It stayed juicy the whole time, no dry bland bites like I get with some grilled beef recipes. The simple salt and pepper rub lets the actual beef flavor shine, which I love. No need for fancy seasonings here.

3 days ago

Made this for our big game watch party last weekend and it was gone in 10 minutes. I cut it into bite sized pieces and served it with toothpicks and a side of chimichurri for dipping, people were raving. Way better than ordering pizza for the group, will be my new go-to game day food.

2 days ago

Bite-sized picanha with chimichurri dip is such a smart game day move! We’re stealing that idea for our next watch party, thanks for the inspiration!

2 hours ago

First time cooking picanha ever and I was so intimidated because it’s labeled medium difficulty, but it was way easier than I thought! The cook time was exactly right for my gas grill, I didn’t even need to adjust anything. My in-laws were over for dinner and they thought I was a professional chef, lmao.

5 minutes ago

Right?! I was scared too because I’m a super new cook, but the instructions are so straightforward I didn’t mess it up either! It’s a great confidence builder for people who don’t grill a lot.

just now

Made this for my wife for our first married anniversary dinner at home and she said it was better than the steak we had at our wedding reception. Win for me! Paired it with roasted potatoes and a bottle of Malbec, 10/10 date night meal.



