
Portuguese Sweet Bread

Portuguese Sweet Bread
⏱️ cook time 3 hours (includes dough rising time)
🍽️ servings 8
⚡ Difficulty medium

intro

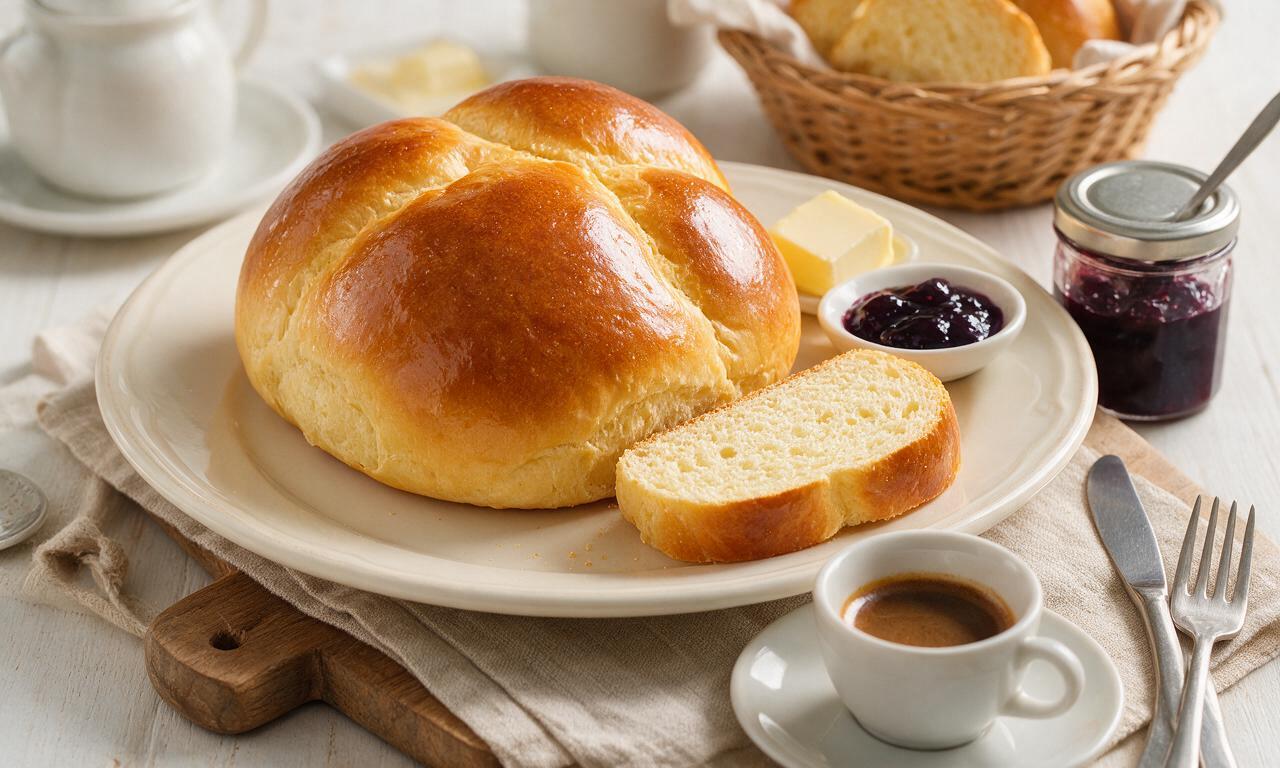
Soft, pillowy, slightly sweet enriched yeast bread with a shiny golden crust, traditionally served at Easter, perfect with butter, jam, or coffee.

Ingredients

All-purpose flour 500 grams (4 cups, spooned and leveled)
Whole milk 195ml (3/4 cup plus 1 tablespoon), divided (180ml for dough, 15ml for egg wash)
Granulated sugar 100 grams (1/2 cup)
Unsalted butter 57 grams (4 tablespoons / 1/4 cup), melted and cooled slightly
Large eggs 3 units, room temperature, divided (2 for dough, 1 for egg wash)
Active dry yeast 7 grams (2 1/4 teaspoons / 1 standard packet)
Fine table salt 5 grams (1 teaspoon)
Vanilla extract 5ml (1 teaspoon)
Fresh lemon zest 1 teaspoon (from 1 small lemon)

Steps

1

Activate the yeast

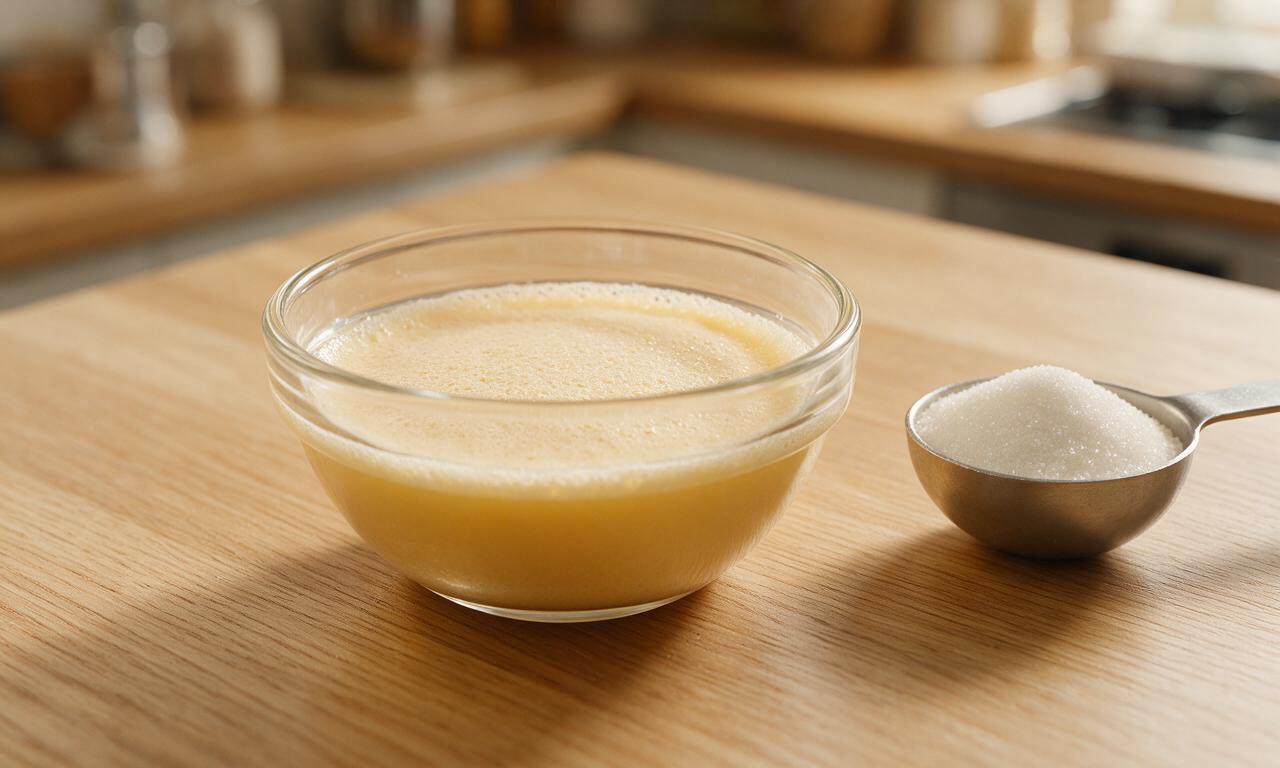
In a small bowl, combine 180ml of the warmed whole milk (heated to 38°C/100°F, no hotter to avoid killing yeast), 1 tablespoon of the measured granulated sugar, and the 7g of active dry yeast. Stir gently to combine, then let rest for 5-7 minutes in a warm, draft-free spot until the mixture becomes foamy and fragrant, confirming the yeast is active.
Step 1
step1:Activate the yeast
2

Mix the dough base

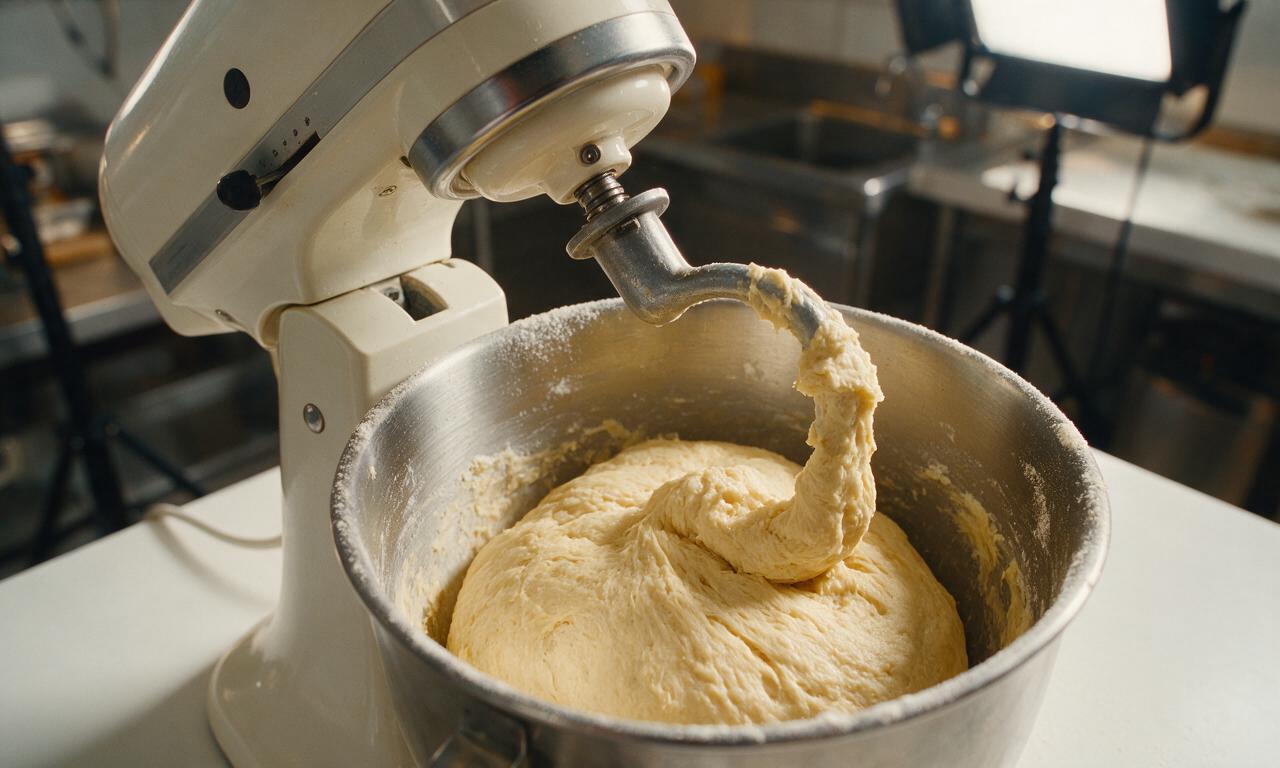
In the bowl of a stand mixer fitted with a dough hook, add 2 of the room-temperature large eggs, remaining granulated sugar, cooled melted unsalted butter, vanilla extract, lemon zest, and fine salt. Whisk on low speed for 30 seconds to combine evenly, then pour in the activated yeast mixture. Add 480g of the all-purpose flour, reserving 20g for adjusting dough consistency, and mix on low speed (speed 2 on most stand mixers) for 2 minutes until a shaggy, sticky dough forms.
Step 2
step2:Mix the dough base
3

Knead the dough thoroughly

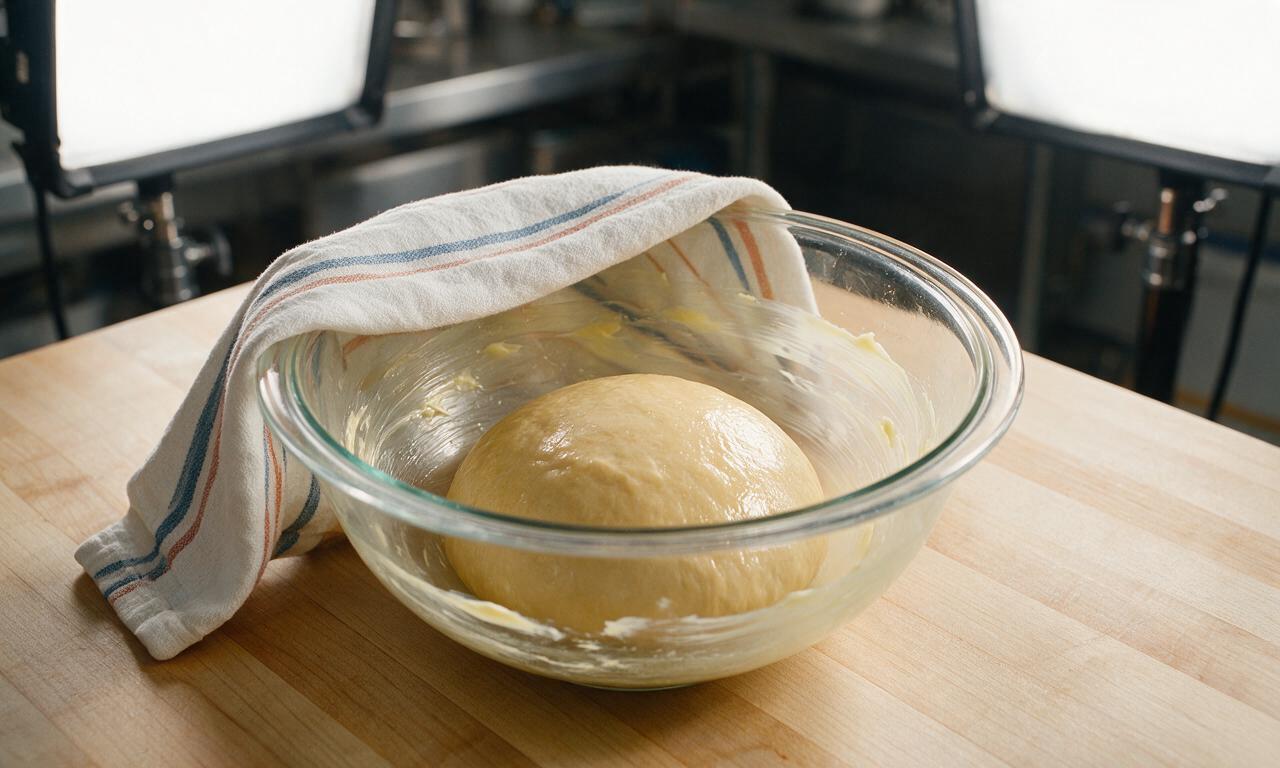
Increase mixer speed to medium-low (speed 3) and knead for 8-10 minutes, adding the reserved 20g of flour 1 teaspoon at a time only if the dough sticks heavily to the sides of the bowl. The finished dough should be smooth, soft, slightly tacky (not sticky), and pull away cleanly from the bowl sides. If kneading by hand, turn dough onto a lightly floured surface and knead for 12-14 minutes until the same smooth, elastic texture is achieved.
Step 3
step3:Knead the dough thoroughly
4

Complete first rise

Form the kneaded dough into a tight, smooth ball, and place it seam-side down in a large, lightly greased mixing bowl. Turn the dough once to coat its surface in a thin layer of melted butter, then cover the bowl tightly with plastic wrap or a clean damp kitchen towel. Let it rise in a warm, draft-free spot (24-27°C/75-80°F) for 60-75 minutes, until the dough doubles in size and leaves a slow-rebounding indentation when poked gently with a floured finger.
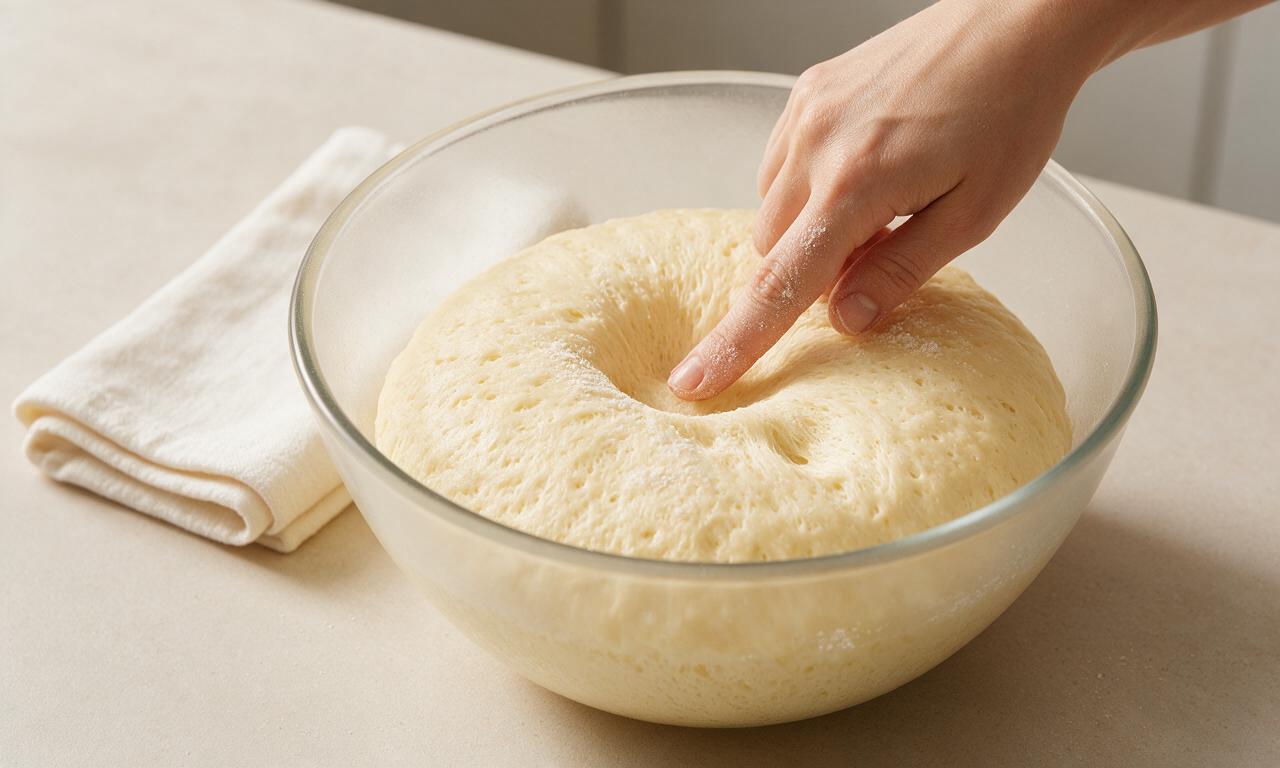
Step 4
step4:Complete first rise
5

Shape for final rise

Gently punch down the risen dough to release all trapped air, then turn it out onto a very lightly floured surface. Form the dough into a single tight, round loaf by tucking the edges under to create a smooth, taut top, then place it seam-side down on a parchment-lined baking sheet. Cover loosely with a greased piece of plastic wrap, and let it rise a second time for 40-45 minutes at room temperature, until it puffs up to 1.5 times its original size and jiggles slightly when the baking sheet is gently tapped.
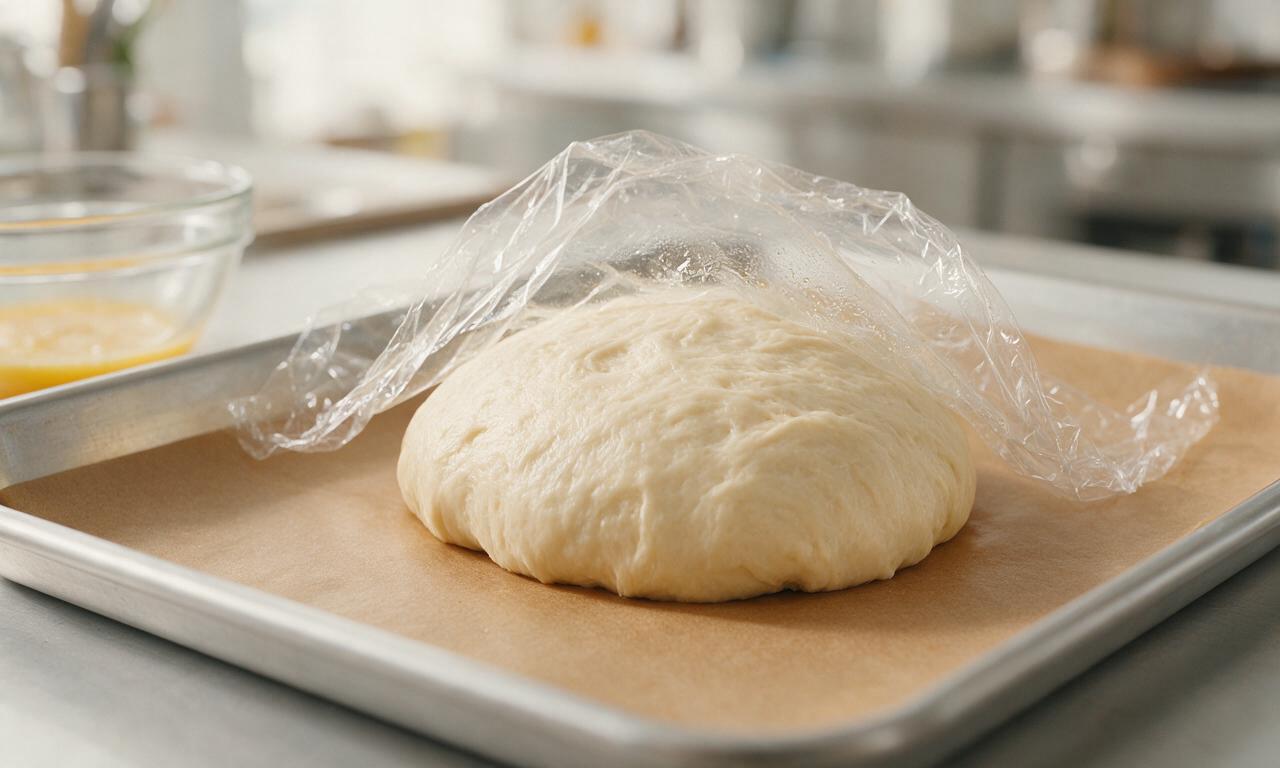
Step 5
step5:Shape for final rise
6

Bake to golden brown

While the dough finishes its second rise, preheat your oven to 175°C/350°F with a rack positioned in the center. Once the dough is fully risen, make the egg wash by beating the remaining 1 large egg with the reserved 15ml (1 tablespoon) of whole milk, then gently brush the entire top and sides of the loaf with the wash for a shiny golden crust. Bake for 35-40 minutes, until the crust is a deep, even golden brown, and the internal temperature of the bread reaches 90-93°C/195-200°F when measured with a digital instant-read thermometer. If the top browns too quickly after 20 minutes of baking, tent it loosely with a piece of aluminum foil to prevent burning.
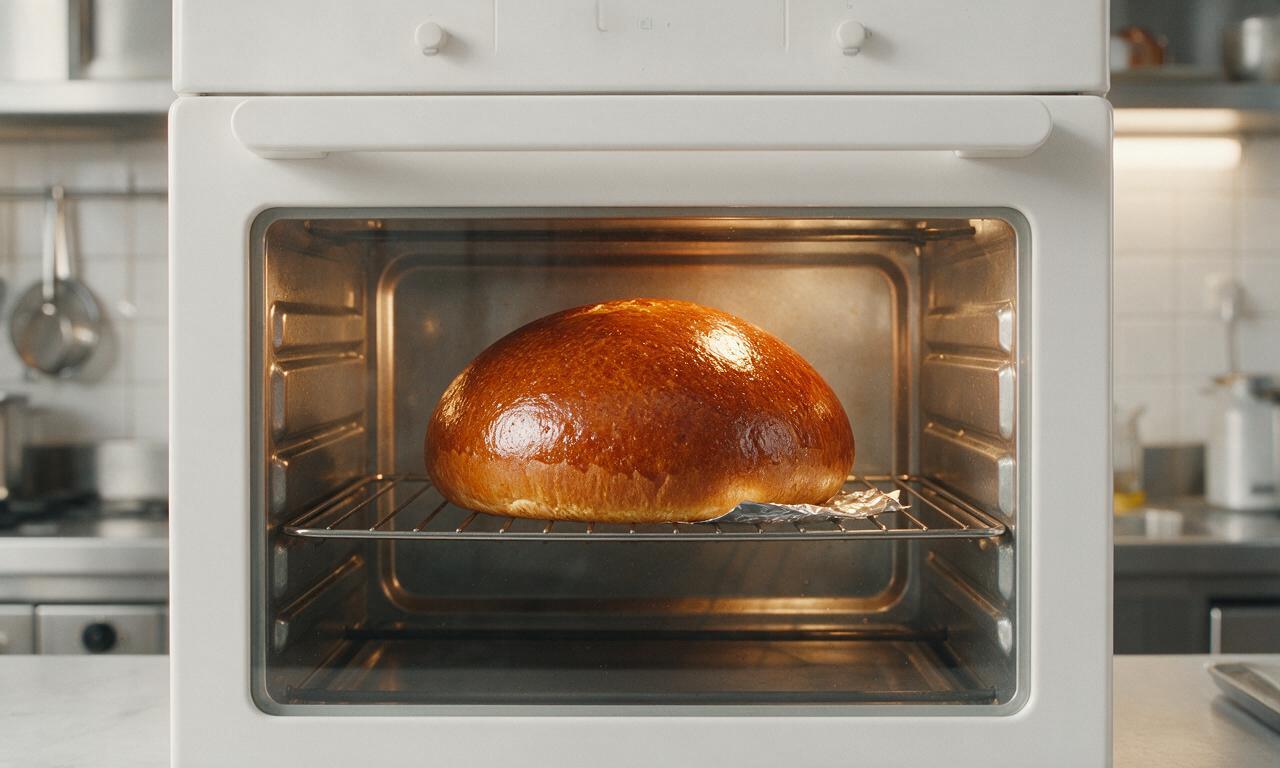
Step 6
step6:Bake to golden brown
7

Cool before serving

Once baked, carefully transfer the loaf from the baking sheet to a wire cooling rack. Let it cool completely for at least 45 minutes before slicing, to allow the soft crumb to set properly. Serve sliced plain, with softened butter, fruit jam, or alongside morning coffee or tea.
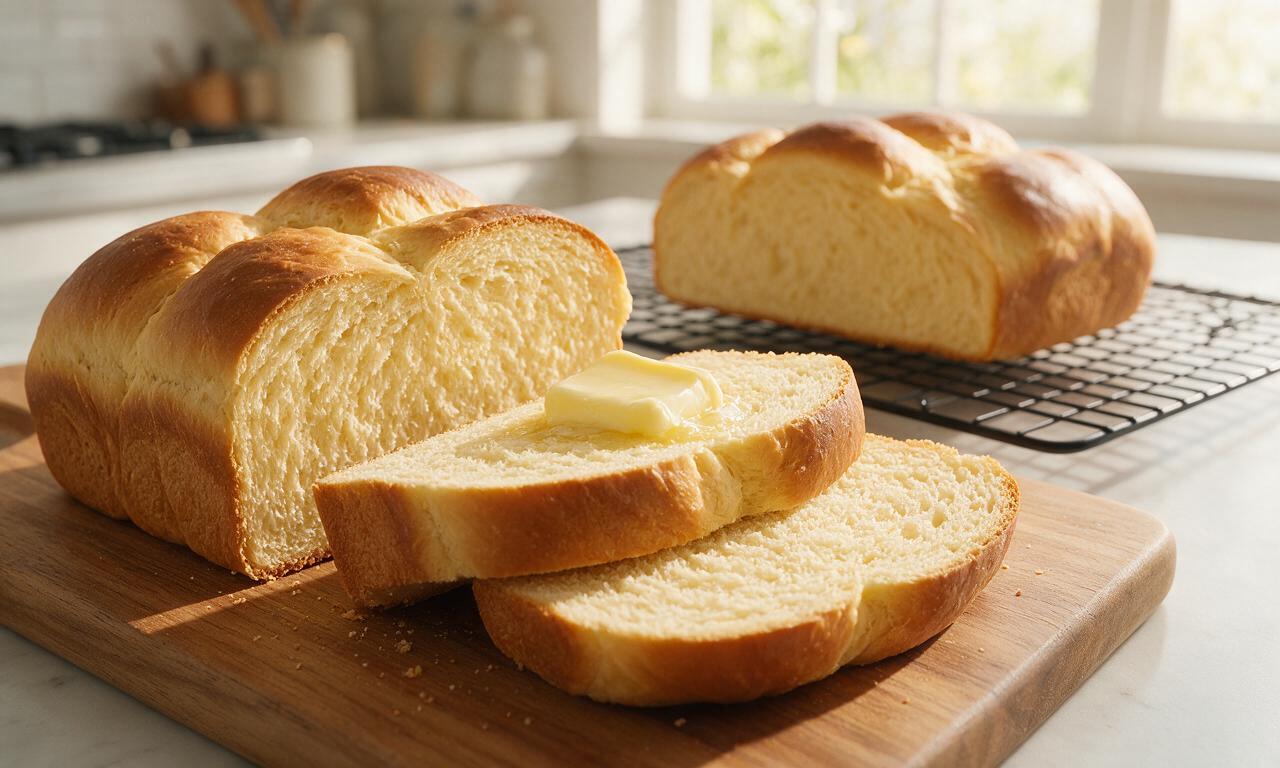
Step 7
step7:Cool before serving

Tips

1.Do not heat milk above 38°C/100°F when activating yeast, as high temperatures will kill live yeast and prevent the dough from rising properly.
2.Avoid adding extra flour while kneading if the dough feels slightly tacky; too much flour will create a dense, dry loaf instead of the signature light, pillowy texture.
3.Wait the full 45 minutes for the bread to cool before slicing; cutting into hot bread compresses the soft crumb and creates a gummy, uneven texture.


✨ You May Also Like

Desserts & Baking
🍜 Italy

Creamy, coffee-kissed classic Northern Italian no-bake dessert, with layers of rum-spiked mascarpone cream, soft ladyfingers, and a rich cocoa dusting.

⏱️ 4 hours 3Desserts & Baking ★ 4.8
Desserts & Baking
🍜 France

Flaky, shatteringly crisp, buttery French croissants with golden exteriors and soft, airy layered interiors, perfect for pairing with coffee for a special morning treat.

⏱️ 12 hours Desserts & Baking ★ 4.7
Desserts & Baking
🍜 United States

Warm, spiced baked apples topped with a fluffy golden biscuit crust, this cozy dessert pairs perfectly with vanilla ice cream for cool-weather comfort.

⏱️ 55 minuteDesserts & Baking ★ 4.7
Desserts & Baking
🍜 United States

A star-spangled classic American blueberry pie with buttery flaky crust and bright sweet-tart filling, perfect for summer patriotic gatherings.

⏱️ 1 hour 25Desserts & Baking ★ 4.8
Desserts & Baking
🍜 United States

A beloved no-bake regional Maine candy with a chewy coconut-potato center coated in rich dark chocolate, a New England holiday staple since the 1870s.

⏱️ 2 hours 3Desserts & Baking ★ 4.9
Desserts & Baking
🍜 France

Luxuriously creamy, floral frozen custard made with aromatic Tahitian vanilla beans, boasting a smooth, rich texture that melts slowly on the tongue.

⏱️ 3 hours 3Desserts & Baking ★ 4.6

Portuguese Sweet Bread:Frequently Asked Questions

1.What makes Massa Sovada different from regular homemade white bread?
Unlike plain white sandwich bread, Massa Sovada is an enriched yeast dough made with added butter, eggs, and whole milk for a pillowy, tender crumb and gentle, non-dessert level of sweetness. It develops a signature shiny golden crust from an egg wash, with a softer, airier texture than dense or crusty standard white loaves.
2.Do I have to serve this bread only at Easter?
Not at all! While it’s a beloved traditional Easter staple in Portuguese households, this soft, slightly sweet loaf works beautifully year-round. It’s perfect for weekend breakfasts with butter or jam, paired with afternoon coffee, used for rich French toast, or served alongside savory soups and stews as a comforting side.
3.Can I use bread flour instead of all-purpose flour for this recipe?
You absolutely can, if you prefer a slightly chewier crumb. Swap the all-purpose flour 1:1 for bread flour, which has higher protein content that builds a stronger gluten network. Just note your loaf may rise a touch taller and have a little less of the traditional melt-in-your-mouth softness.
4.How warm should the milk be to activate the yeast properly?
Aim for milk between 105°F and 110°F, which feels like warm bath water to the touch. If it’s hotter than 115°F, you risk killing the yeast so your bread won’t rise; if it’s too cold, yeast will activate too slowly, leading to a dense, low loaf that takes far longer to proof.
5.Do I need to knead this dough by hand, or can I use a stand mixer?
You can use either method with great results! If using a stand mixer, fit it with the dough hook and knead on low speed for 7 to 9 minutes, until the dough pulls away from the bowl sides and is smooth. If kneading by hand, expect 12 to 15 minutes of work on a lightly floured surface to build enough gluten.
6.Why is my dough really sticky even after I finish kneading?
A little stickiness is totally normal for this enriched dough, since butter and eggs keep it ultra soft! Resist the urge to dump in extra flour, which will make your final loaf dense. Instead, lightly oil your hands and work surface when handling it; the dough will firm up significantly as it rises and gluten relaxes.
7.How long does the first rise take, and how do I know it’s done?
At a warm room temperature (around 75°F), the first rise takes 1.5 to 2 hours, until the dough doubles in size. To test, poke a floured finger 1 inch into the center: if the indentation stays and doesn’t spring back immediately, it’s ready to shape. If it springs right back, let it rise a little longer.
8.Can I add mix-ins like raisins or citrus zest to the dough?
Definitely! Traditional variations often include a teaspoon of lemon or orange zest for bright, aromatic depth, or ½ cup of golden raisins, dried cranberries, or chopped toasted walnuts. Fold mix-ins in during the last 2 minutes of kneading so they distribute evenly without breaking down the dough’s gluten structure.
9.How do I get that signature shiny golden crust on the loaf?
The secret is a simple egg wash applied right before baking. Whisk one whole egg with a tablespoon of whole milk or heavy cream, then brush a thin, even coat over the entire exposed surface of the shaped loaf right before it goes in the oven. This creates that glossy, deep golden finish with no fancy glazes needed.
10.What oven temperature works best for baking this bread?
Preheat your oven to 350°F (conventional, not convection) for the most even bake. Bake the loaf for 35 to 40 minutes, until the top is deep golden and the center hits 190°F on an instant-read thermometer. If the top browns too fast, tent it loosely with aluminum foil halfway through baking.
11.My loaf sank in the middle after I took it out of the oven—what went wrong?
A sunken center almost always means the loaf was under-proofed before baking, or it wasn’t baked all the way through. If the dough hasn’t built enough structure during the final rise, it can’t support itself as it cools. Next time, confirm doneness with a thermometer, and make sure the shaped dough is puffy before baking.
12.How should I store leftover Massa Sovada to keep it soft?
Let the loaf cool completely to room temperature first, then wrap it tightly in two layers of plastic wrap or place it in an airtight bread bag. It will stay soft and fresh at room temperature for up to 4 days. Avoid storing it in the fridge, which speeds up staling and makes the crumb dry out much faster.
13.Can I freeze this bread for later use?
Absolutely! Wrap the fully cooled loaf tightly in plastic wrap, then a layer of aluminum foil, and freeze for up to 3 months. Thaw it overnight on the counter at room temperature, still wrapped, to lock in moisture. You can also toast individual slices straight from the freezer for a quick breakfast with butter or jam.
14.Can I make this dough ahead to bake the next day?
Yes, cold proofing works beautifully for this bread! After kneading, place the dough in a lightly oiled airtight container and refrigerate for 8 to 12 hours for the first rise. The slow cold rise develops a deeper, nuttier flavor, and you can shape, proof, and bake it as directed the following day.
15.Do I need a special pan to bake Massa Sovada, or can I bake it freeform?
You don’t need any special equipment! Traditional versions are often baked freeform on a parchment-lined baking sheet for a round, rustic loaf, but you can also use a standard 9x5 inch loaf pan for neater, sandwich-friendly slices. Just give freeform loaves enough space to spread as they rise and bake.
16.Is there a dairy-free swap I can use for the milk and butter?
You can easily make this dairy-free with simple swaps. Use unsweetened plain oat milk (it has the closest creaminess to whole milk) warmed to the standard 105-110°F for the dough, and swap unsalted butter for an equal amount of vegan baking butter formulated to match dairy butter’s baking performance for the best texture.
17.How do I know if my yeast is still active enough to use for this bread?
Do a quick bloom test before mixing your full dough: stir a pinch of sugar into your warmed milk, then sprinkle the yeast over top and let it sit for 5 to 7 minutes. If it gets foamy and smells like fresh baked bread, it’s active. If it doesn’t foam at all, your yeast is dead and you’ll need a fresh packet.
18.Can I use this bread to make French toast or bread pudding?
It’s perfect for both! The soft, enriched, slightly sweet crumb soaks up custard beautifully without turning mushy. For French toast, cut 1-inch thick slices of day-old bread, dip in egg custard, and pan fry until golden. For bread pudding, cube it, toss with custard and add-ins, and bake until set.
19.Why is this recipe called Massa Sovada, anyway?
The name comes from Portuguese, where “sovada” translates to “kneaded,” a nod to the traditional process of working dough by hand long enough to develop that signature soft, elastic crumb. Historically, families would gather to knead large batches together in the days before Easter, making it a beloved community tradition as much as a food.
20.My crust turned out too hard and crunchy instead of soft—how do I fix that next time?
A tough, crunchy crust usually comes from adding too much flour during kneading and shaping, or baking at too high a temperature. Next time, keep added flour to a minimum when working the dough, stick to the 350°F bake temp, and brush the warm loaf with melted butter right out of the oven to keep the crust tender.

Comments (20)

2 days ago

OMG this Massa Sovada is SO good! I made it for our Sunday family dinner and everyone was raving. The crust is perfectly crisp and the inside is so soft and slightly sweet, it pairs amazing with salted butter. I was worried the 3 hour total time would be too much but the rising steps were totally hands off so I got other chores done while it rested!

yesterday

So glad your family loved it! That crisp crust and fluffy crumb is exactly what we aim for – great call pairing it with salted butter, that's one of my favorite ways to serve it too!

1 week ago

Really solid recipe! I brought a loaf to my neighborhood potluck last weekend and it was gone in 10 minutes flat. Knocked off one star only because I accidentally over-kneaded it the first go around and it came out a little denser than I wanted, but the second loaf was perfect. My kids kept sneaking slices before dinner, total win.

3 days ago

Game changer! I grew up eating my avó's Portuguese sweet bread around the holidays and I've been chasing that flavor for years since she passed. This recipe is dead on – that subtle hint of lemon zest? *Chef's kiss* I was nervous about it being medium difficulty but the instructions were so clear even a dummy like me could pull it off.

2 days ago

Oh I feel this so much! My vovó used to make this for Easter every year and I haven't had it that good since I was a kid. Gonna have to try this recipe next weekend, thanks for the note about the lemon zest that's the secret I was missing!

2 days ago

That means the world to hear! We tested this recipe three times with home bakers of all skill levels to make sure the instructions were easy to follow, and that little bit of lemon zest is such a key traditional touch. Hope it brings back all those good memories for you.

5 days ago

Made two loaves for my office potluck and people were asking me for the recipe before I even set the platter down! It's sweet enough to eat plain for breakfast but not so sweet that it doesn't work with a slice of ham for a sandwich. Total versatile win for meal prep too, slices freeze really well.

3 days ago

Thanks for the tip about freezing! I was wondering if it would hold up, I'm gonna make a batch this Sunday to slice up for quick breakfasts for the kids all week.

yesterday

Just pulled my first loaf out of the oven and my whole apartment smells like a bakery! Had a slice warm with my morning coffee and I'm never buying store-bought sweet bread again. The texture is so pillowy, I can't stop picking at the end of the loaf while it cools.

1 week ago

Taste was great but I ran into a problem with my first rise – my kitchen was super cold (it's January in Chicago, duh) so the dough took almost double the time to double in size. I almost threw it out but I stuck with it and it ended up tasting fine, just took way longer than the 3 hours listed.

5 days ago

So glad you stuck with it! Cold kitchen temps are such a common culprit for slow rises – if your kitchen is under 70°F, we recommend sticking the dough in the oven with the light on to create a warm, draft-free spot for rising, that cuts down on extra wait time.

3 days ago

Oh I had the exact same issue last month! I started preheating my oven for 1 minute then turned it off before putting the dough in to rise, worked like a charm. The end result was so worth the extra wait.

2 weeks ago

Made this in my tiny dorm kitchen with a cheap hand mixer (no stand mixer, oops) and it actually turned out! My roommates devoured half the loaf in one sitting while we studied for midterms. Only reason it's not 5 stars is my arm was so sore from working the dough during the kneading step, but that's totally my bad for not having a stand mixer to do the work for me.

2 weeks ago

Way to improvise! We're so impressed you pulled this off in a dorm kitchen with just a hand mixer – pro tip for next time: you can do the kneading in short 1 minute bursts with 30 second breaks to give your arm a rest, it works just as well.

2 days ago

I added a tiny bit of cinnamon and a handful of golden raisins to my loaf and it was insane! Served it at our brunch gettogether with whipped honey butter and every single guest asked for the recipe. Will 100% be making this on repeat for weekend brunch.

yesterday

Golden raisins and cinnamon sound chef's kiss! I was thinking of adding some chopped walnuts to my next batch, do you think that would throw off the texture too much?

yesterday

We love seeing fun variations on the traditional recipe! The cinnamon and raisins sound delicious, and chopped walnuts would be a fantastic add too – just fold them in during the last minute of kneading to keep them evenly distributed without making the dough heavy.

30 minutes ago

Just took my loaf out, it looks perfect! Followed the recipe exactly, no substitutions, and the dough rose like a dream. Can't wait to slice into it once it cools a little, the smell is making my mouth water so bad I can barely wait.

5 days ago

Pro tip for my fellow high altitude bakers! I added an extra tablespoon of flour, reduced the yeast by 1/4 teaspoon, and let the rises go about 10 minutes shorter than the recipe said, and it came out absolutely perfect. No collapsed loaf, no gummy center, just fluffy sweet bread.

3 days ago

Thank you so much for sharing that high altitude adjustment! We get so many questions about high altitude baking, this is going to help so many other bakers pull off a perfect loaf. We appreciate you sharing what worked for you!

1 week ago

Flavor is 10/10, but I wish the recipe noted how big the finished loaves are! I expected two smaller loaves and ended up with one massive, lopsided loaf that barely fit in my 9x5 loaf pan. It still tasted amazing, we ate the whole thing in two days, it just looked a little silly coming out of the oven.

5 days ago

Oh I did the exact same thing! Next time I split the dough into two 9 inch loaf pans and they came out perfectly sized for sandwiches and toast. Learned my lesson the first time when I had dough oozing over the sides of my pan lmao.

2 weeks ago

I've been making Portuguese sweet bread for over 40 years and this recipe is one of the best I've ever tried. It's so close to the recipe my neighbor from Lisbon taught me when we were first married. I made three loaves last week and gave two away to my grandkids, they all texted me asking for more.

2 weeks ago

As a new baker this makes me so much more confident to try this! I'm still learning how to work with yeast doughs, so hearing that a seasoned baker approves of the recipe makes me way less nervous to mess it up.

1 week ago

That is such a high compliment coming from someone who's been making this bread for decades! We're so glad it lives up to your memories of your neighbor's recipe, and how sweet that you got to share loaves with your grandkids.

3 days ago

I think I messed this up bad? My dough never doubled in size even after waiting 2 full hours, and when I baked it it came out really dense with a hard, tough crust. I used instant yeast like the recipe said but I'm pretty sure my yeast was expired? Total bummer, I was really looking forward to having fresh sweet bread this week.

5 days ago

Made this for our Easter dinner this year and it's officially a new family tradition! We sliced it thick and served it alongside ham and roasted veggies, and even my picky 7 year old asked for a second slice. The slight sweetness pairs so well with salty savory dishes, I can't believe I never made this before.

3 days ago

That makes us so happy to hear! Easter is such a popular time to make Massa Sovada, and we love that it's going to be a new tradition for your family. Picky eater approval is the highest rating we could ask for!

2 days ago

I made mine for Easter too! My picky eater ate three slices slathered in jelly, I was shocked. It's such a crowd pleaser for sure, I already have plans to make another loaf next month for my mom's birthday.

yesterday

Used this bread to make French toast this morning and OMG it's the best French toast I've ever had. The sweet, fluffy bread soaks up the egg mixture perfectly without getting soggy, and the hint of lemon makes it taste so bright and fresh. Game changer for weekend brunch.

2 hours ago

Wait French toast?! Why didn't I think of that? I've just been eating it plain with butter, I'm definitely making a loaf this weekend just to try French toast with it. That sounds insane.

1 week ago

I brought a loaf on my group camping trip last weekend and it was the perfect post-hike snack! It held up really well in the cooler for 3 days, didn't get stale, and everyone kept asking where I bought it. When I told them I made it from scratch they couldn't believe it. This recipe is going into my permanent camping meal rotation.

5 days ago

What a fun use for it! We never would have thought to bring this camping, but that makes total sense – the sturdy crumb holds up so well, and it's such a satisfying snack after a long hike. Love that!

3 days ago

This is such a good idea! I do a lot of backcountry trips and I'm always looking for hardy, tasty breads that don't get squished in my pack. Definitely making a couple loaves for my trip next month.

2 hours ago

Just popped my dough in for its first rise! I split the batch into four mini loaves so I can give three away to my new neighbors as little welcome gifts. The dough came together so smoothly when I was mixing and kneading, I have super high hopes for how they turn out. I'll pop back with an update once they're out of the oven!

2 days ago

I made this yesterday after seeing the comment from the guy whose avó used to make it, and it's exactly like I remembered! I even added a little glaze on top made with powdered sugar and lemon juice like my vovó used to, and it was perfect. My husband ate three slices warm straight from the oven.

yesterday

That lemon glaze sounds absolutely divine! That's such a lovely traditional touch, we're so glad the recipe lived up to your childhood memories. Sounds like your husband is a big fan too!

yesterday

Took the advice from the earlier comment and added walnuts and golden raisins to my loaf, and it came out so good! I brought a slice to my next door neighbor who is Portuguese and she said it tasted just like the bread her mom used to make. Total win, I'm so proud of myself.

30 minutes ago

Yay! So glad the raisin and walnut combo worked out for you. There's no higher compliment than getting a stamp of approval from someone who grew up eating the real deal, that's awesome!

3 days ago

Made this with my 10 year old daughter for her school's international night, and we got so many compliments! We set out little sample slices with tiny pats of salted butter, and kids and parents alike were coming back for seconds. It was such a fun recipe to make together, too – the steps were straightforward enough for her to help with most of the mixing and kneading, no fancy skills required.



