
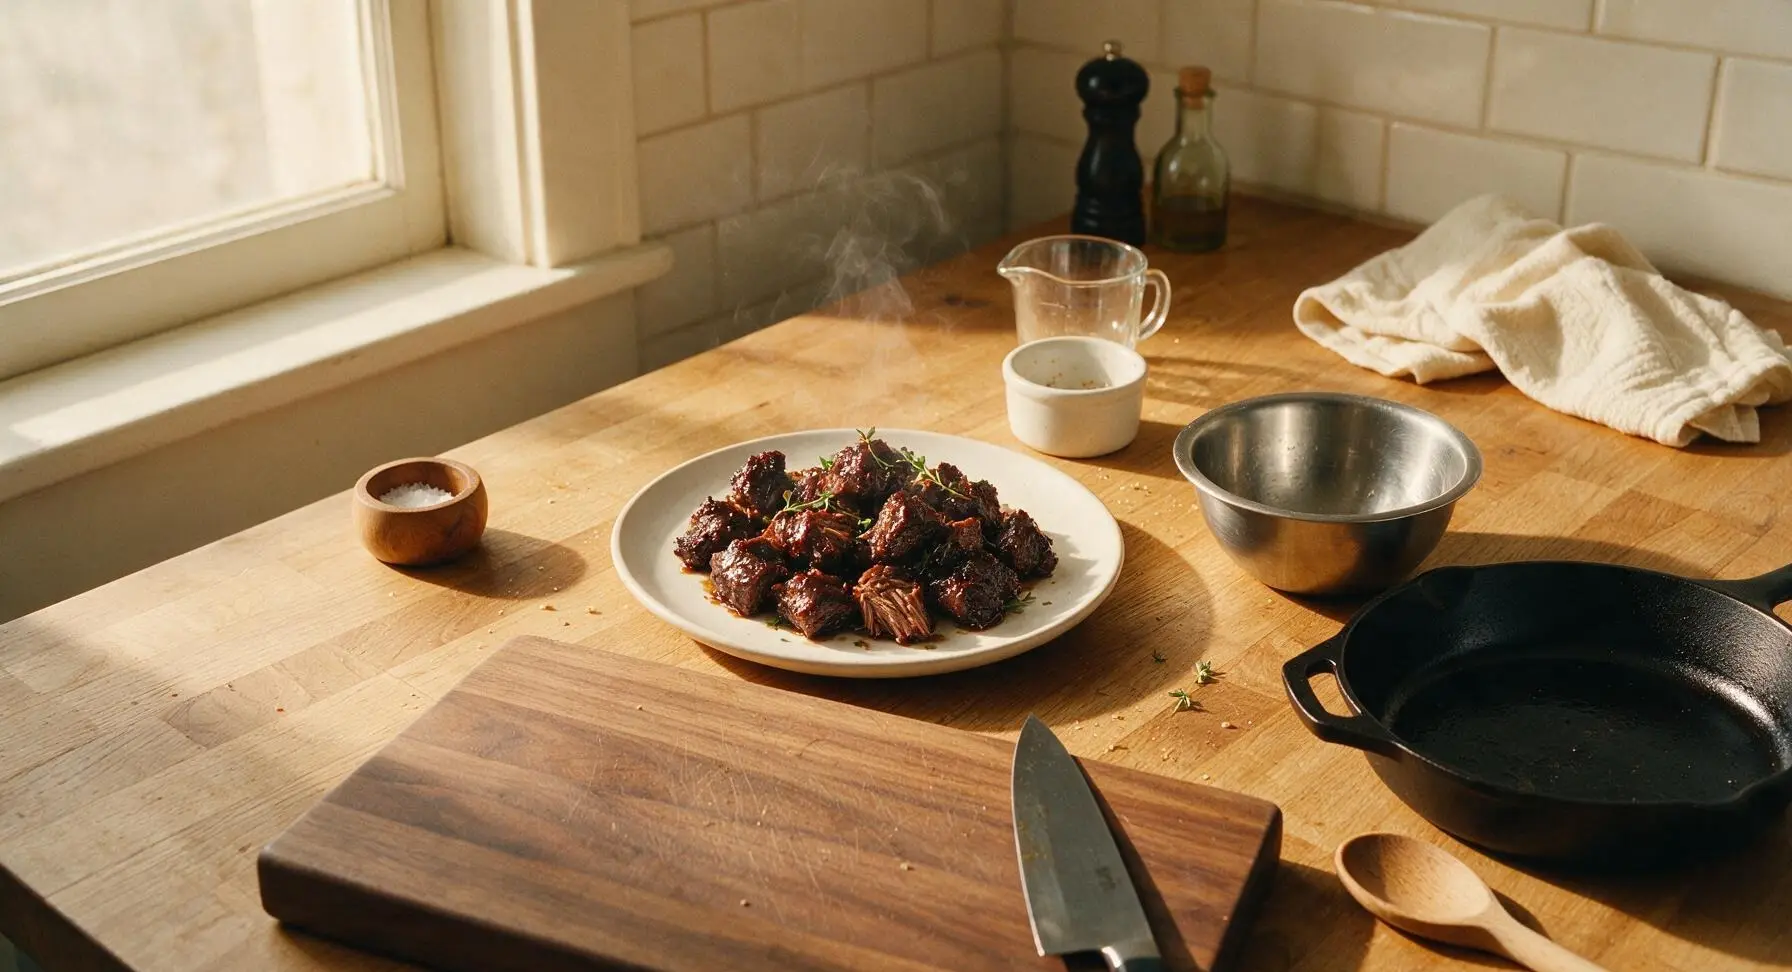
Venison Burnt Ends

title 1
Venison Burnt Ends
⏱️ cook time 3 hours 15 minutes
🍽️ servings 4
⚡ Difficulty medium

intro

Smoky, caramelized venison burnt ends coated in sticky sweet-savory glaze, pull-apart tender, a lean, rich twist on classic Kansas City BBQ.

Ingredients
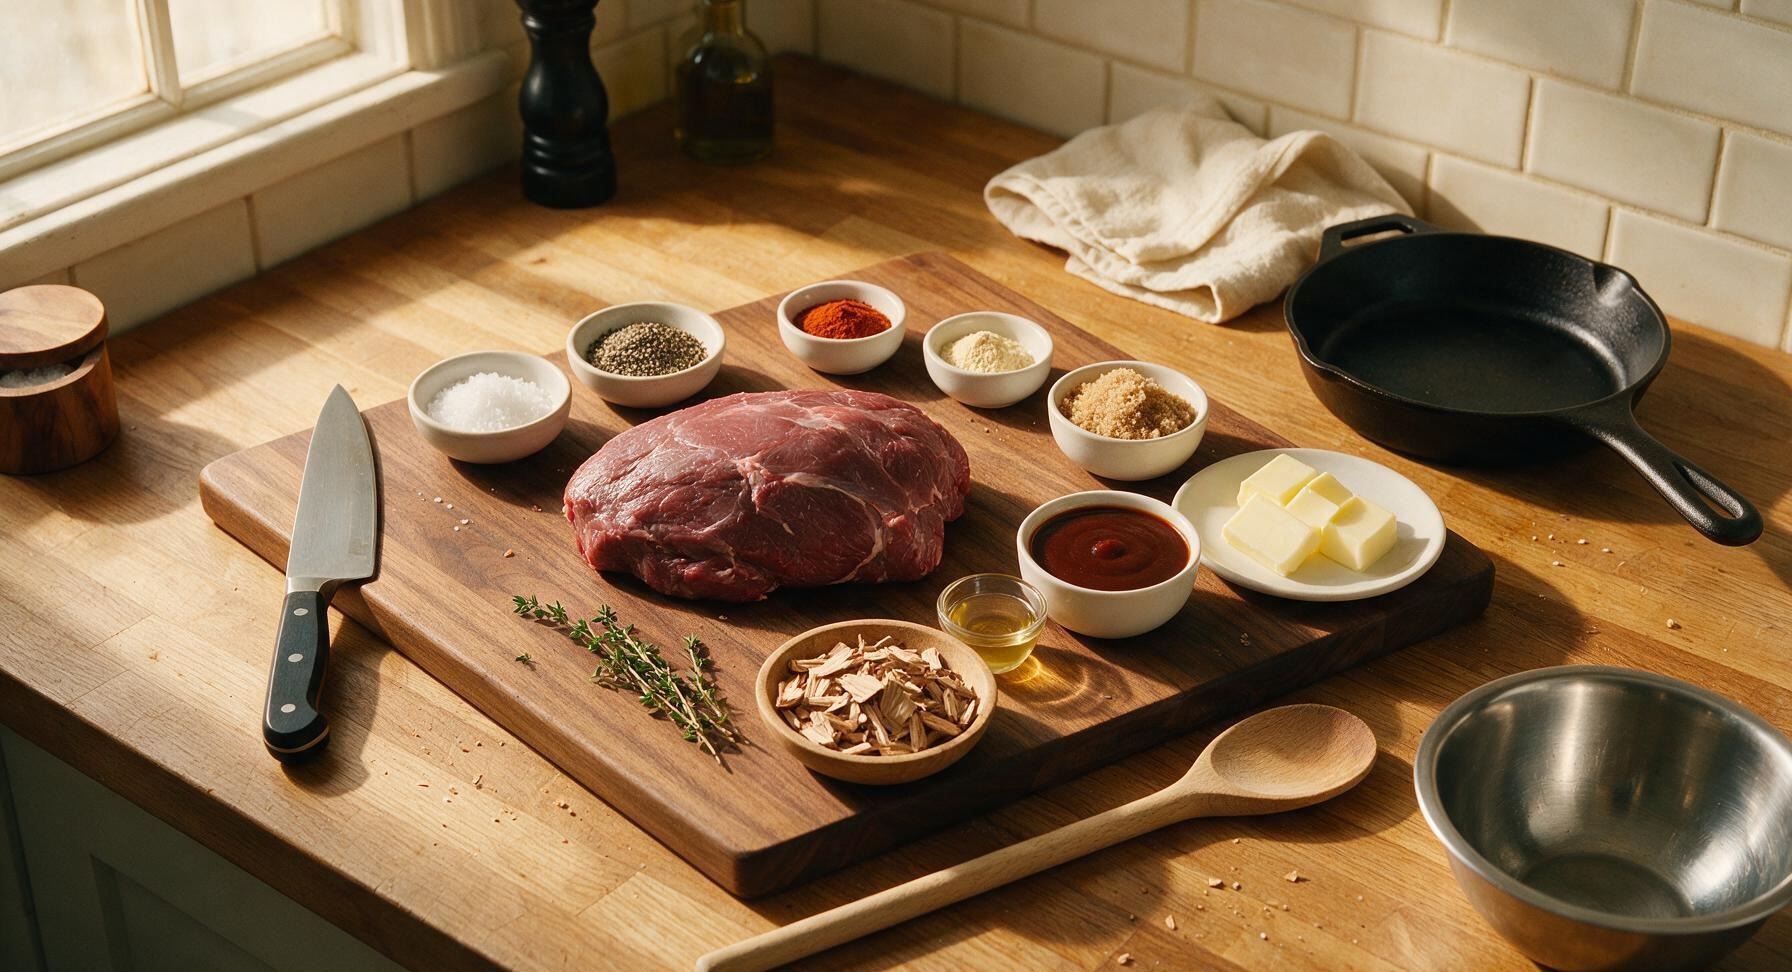
Boneless venison shoulder roast 2 lbs (900g)
Coarse kosher salt 1 tbsp
Coarse ground black pepper 1 tbsp
Smoked paprika 1 tsp
Garlic powder 1 tsp
Light brown sugar 2 tbsp
Unsalted butter 2 tbsp, cut into 4 tabs
Kansas City-style BBQ sauce 1 cup
Apple cider vinegar 1 tbsp
Fresh thyme sprigs 2
Hickory wood chips (for smoking) 2 cups

Steps

1

Trim the Venison Roast

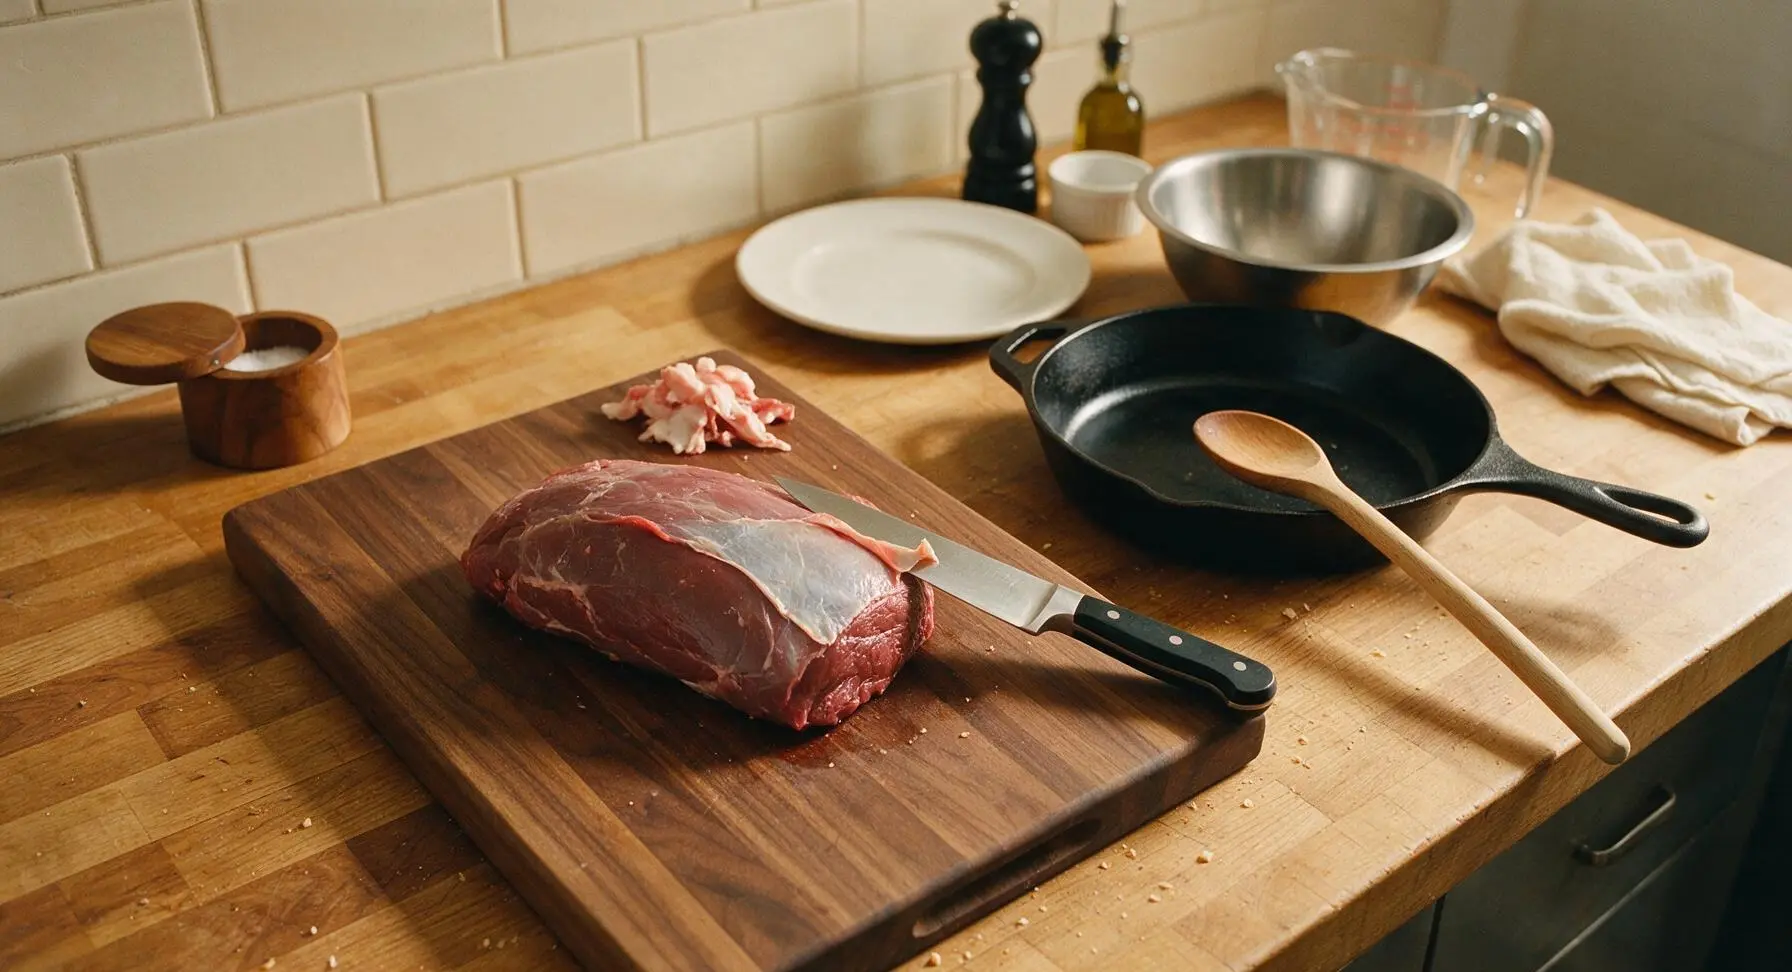
Place the 2lb boneless venison shoulder roast on the dark walnut cutting board. Use the 8-inch chef knife to trim away all visible silver skin and hard excess fat, leaving no more than 1/8 inch of fat on the roast surface. Pat the entire roast completely dry with a corner of the cream linen towel to help rub adhere. The finished roast will have a smooth, even surface with no tough connective tissue exposed.
Step 1
step1:Trim the Venison Roast
2

Apply Dry Rub

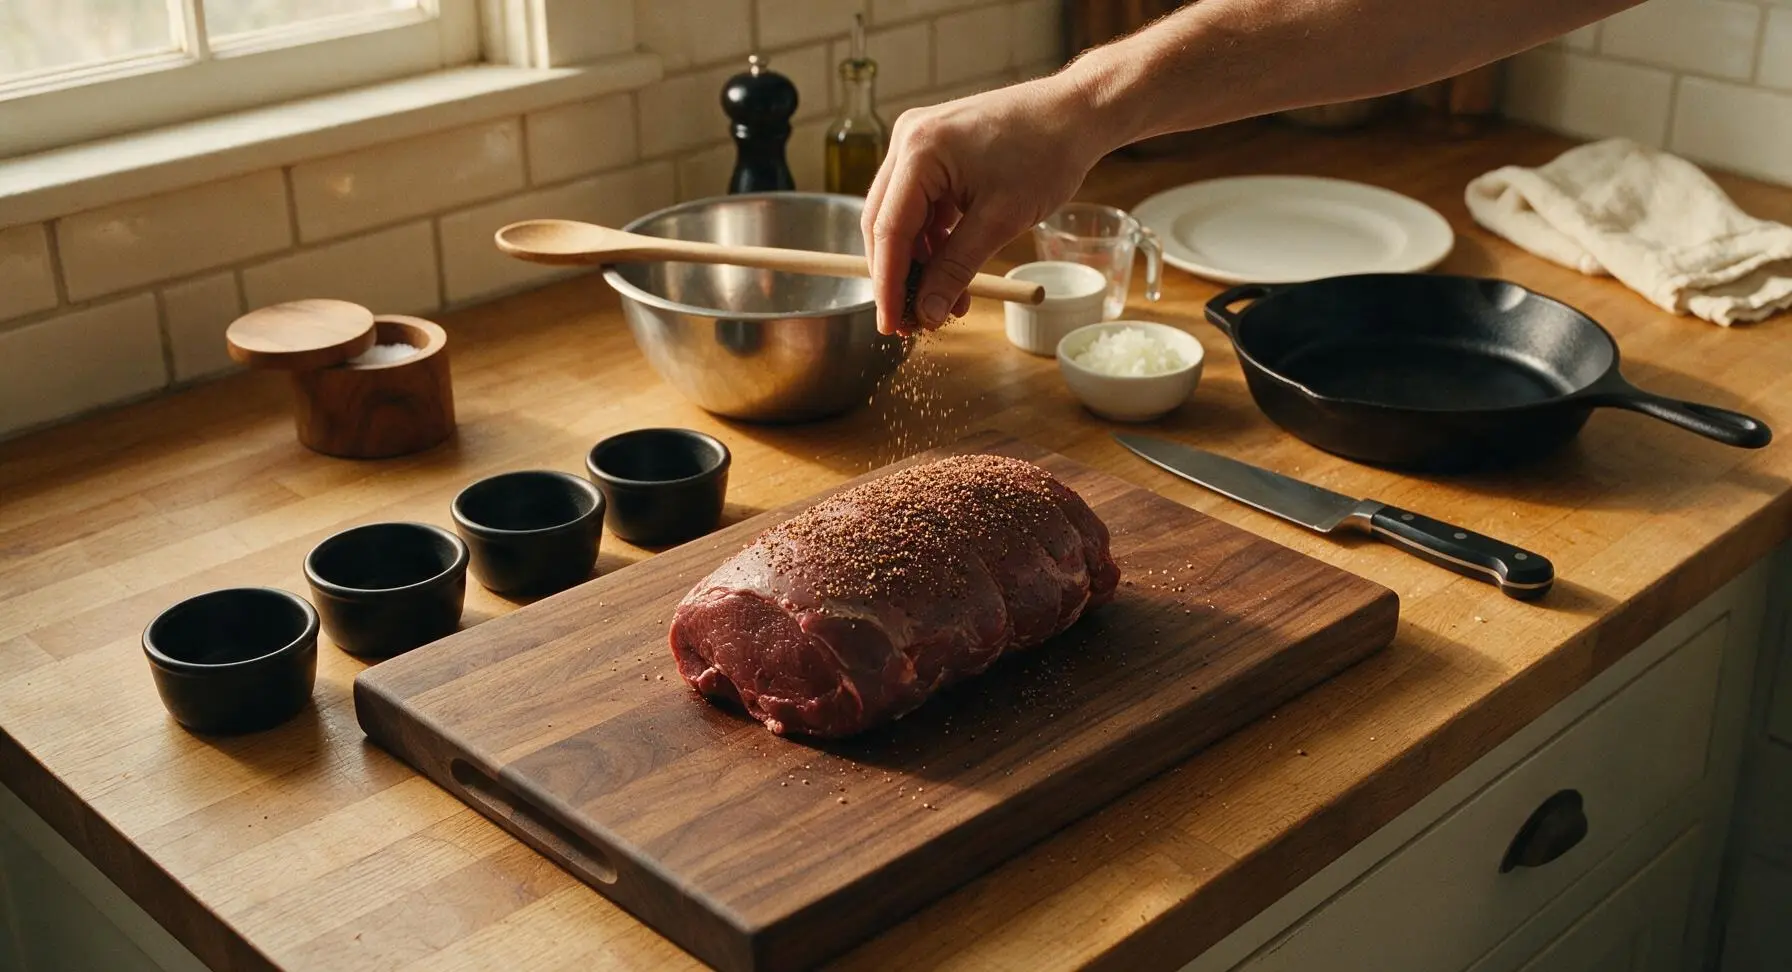
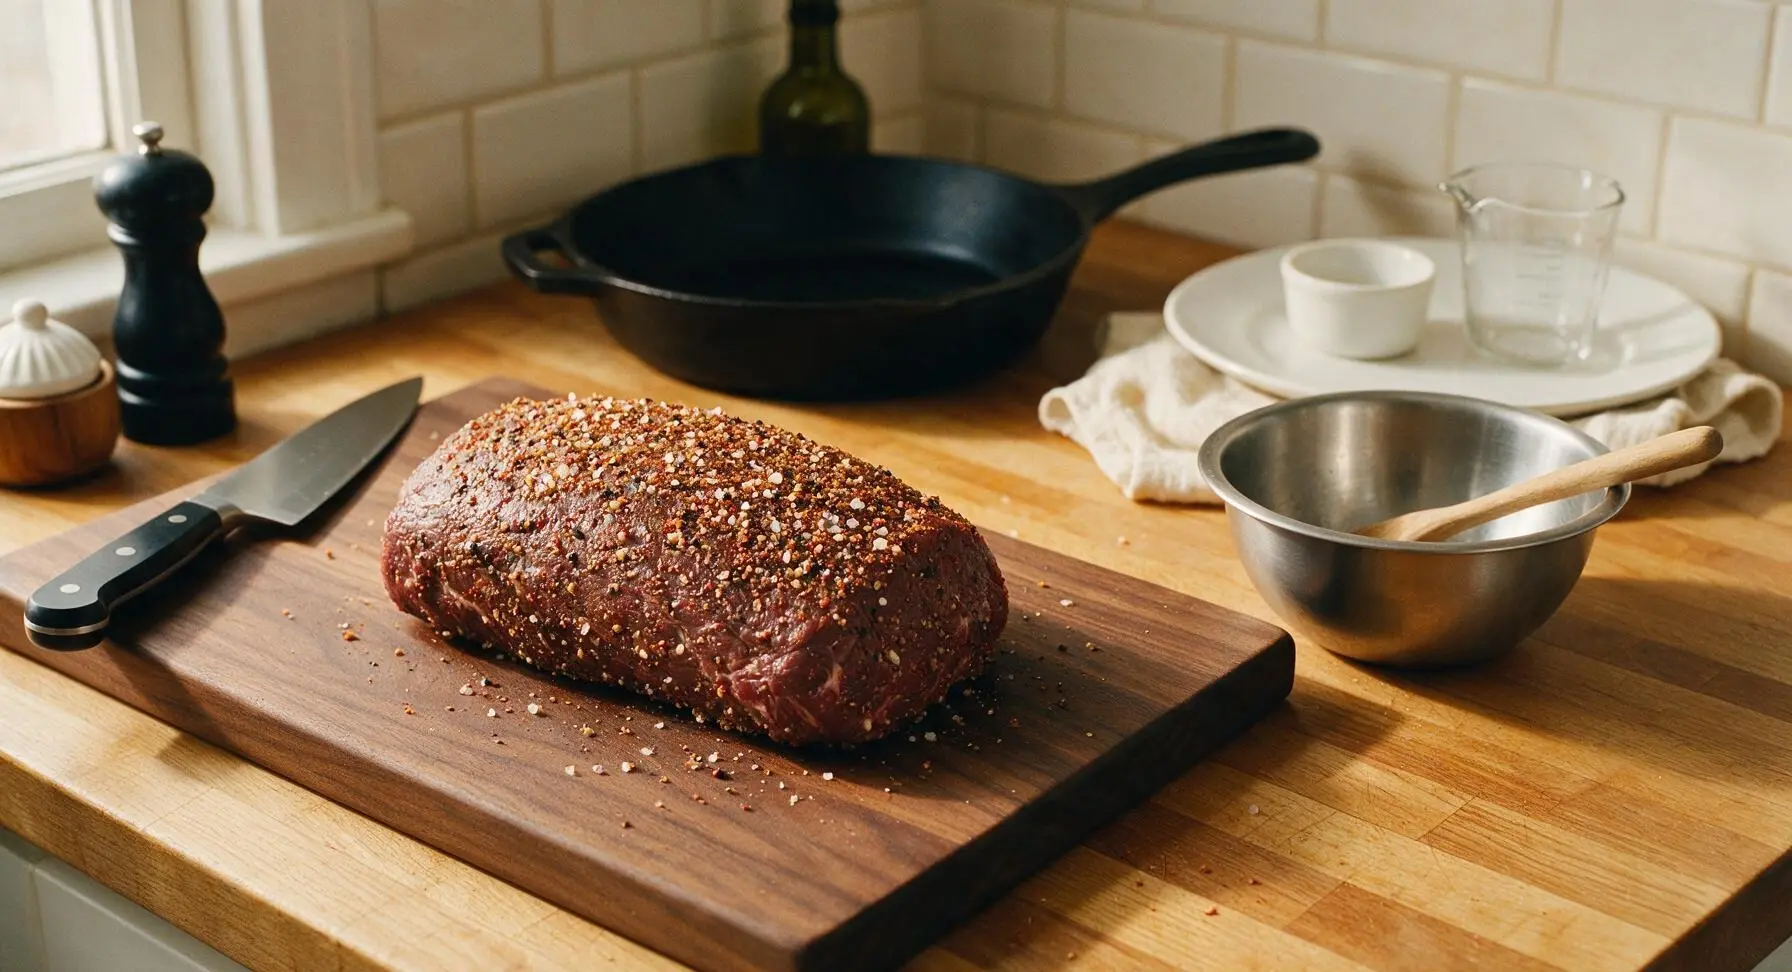
In the medium stainless steel mixing bowl, combine 1 tbsp coarse kosher salt, 1 tbsp coarse black pepper, 1 tsp smoked paprika, 1 tsp garlic powder, and 1 tbsp light brown sugar, stirring until fully blended. Sprinkle the rub evenly over every surface of the trimmed venison roast, pressing gently with your fingertips to help spices adhere. The entire roast should have a thin, even spice coating with no large bare patches of meat visible.
Step 2
step2:Apply Dry Rub
Step 2
step2:Apply Dry Rub
3

Smoke the Seasoned Roast

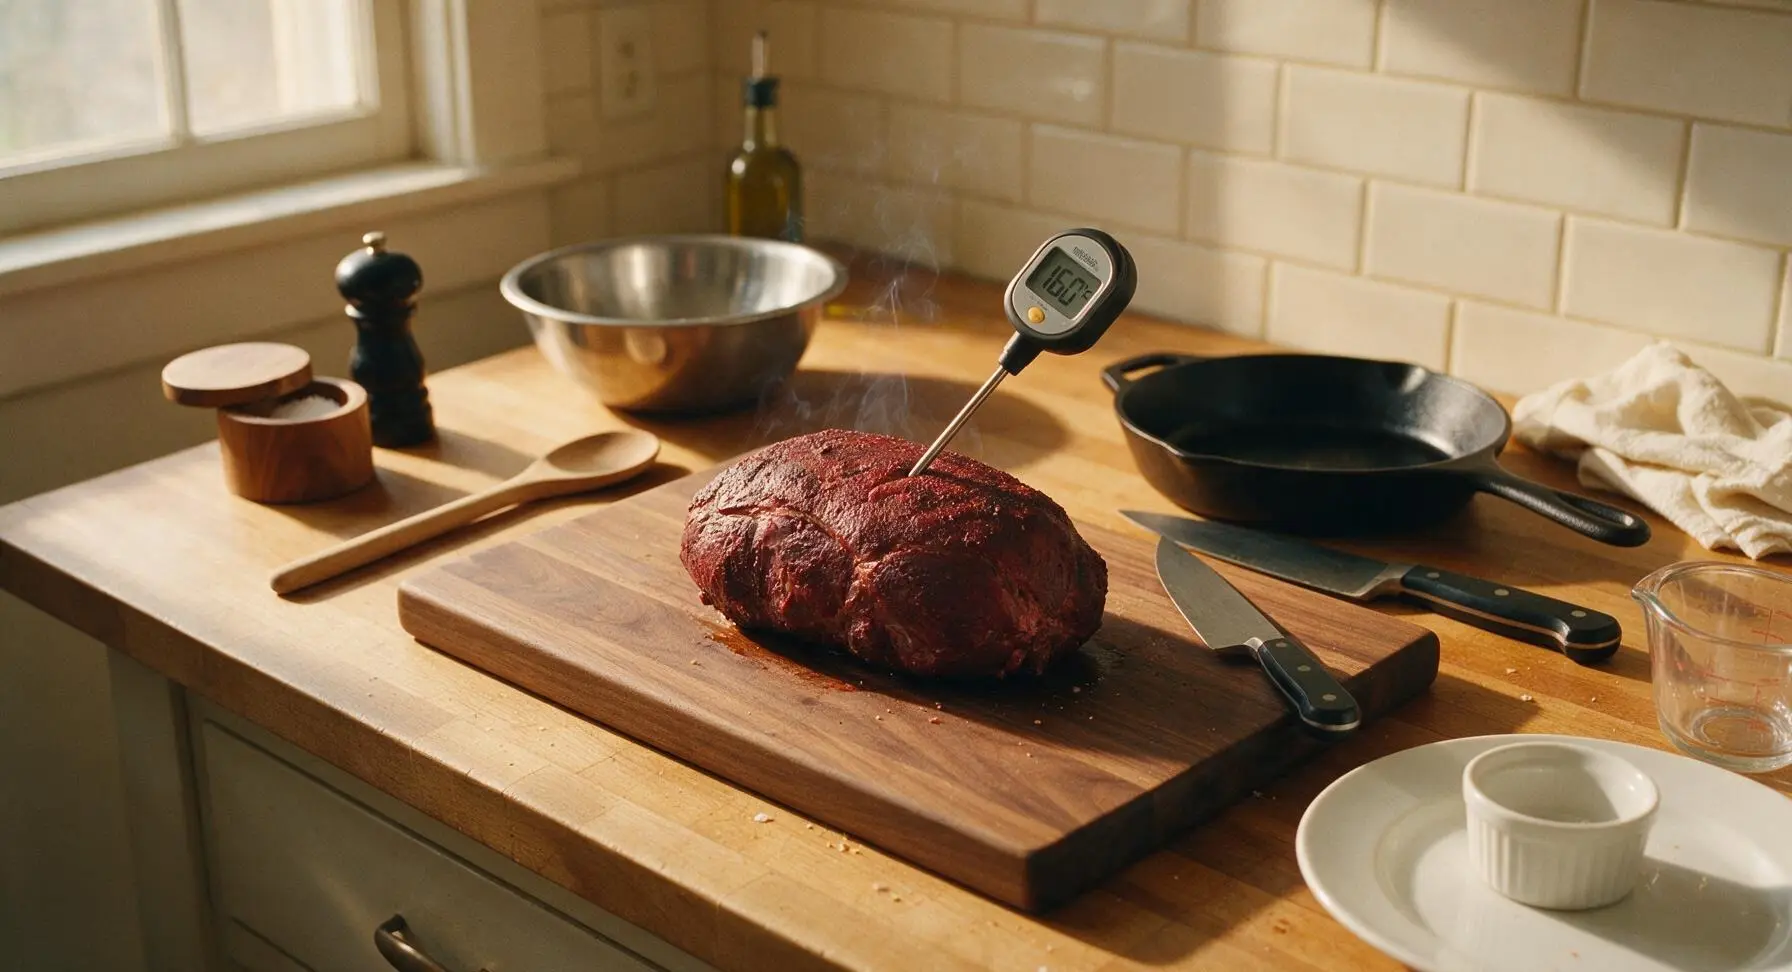
Preheat your smoker to 225°F (107°C) with 2 cups of hickory wood chips. Place the rub-coated venison roast directly on smoker grates, fat-side up, and smoke for 2 hours, maintaining consistent temperature. Transfer the partially smoked roast back to the walnut cutting board, and insert the digital instant-read thermometer into the thickest part of the roast to confirm an internal temperature of 160°F (71°C). The roast exterior will have a matte, deep reddish-brown bark at this stage.
Step 3
step3:Smoke the Seasoned Roast
4

Wrap to Tenderize

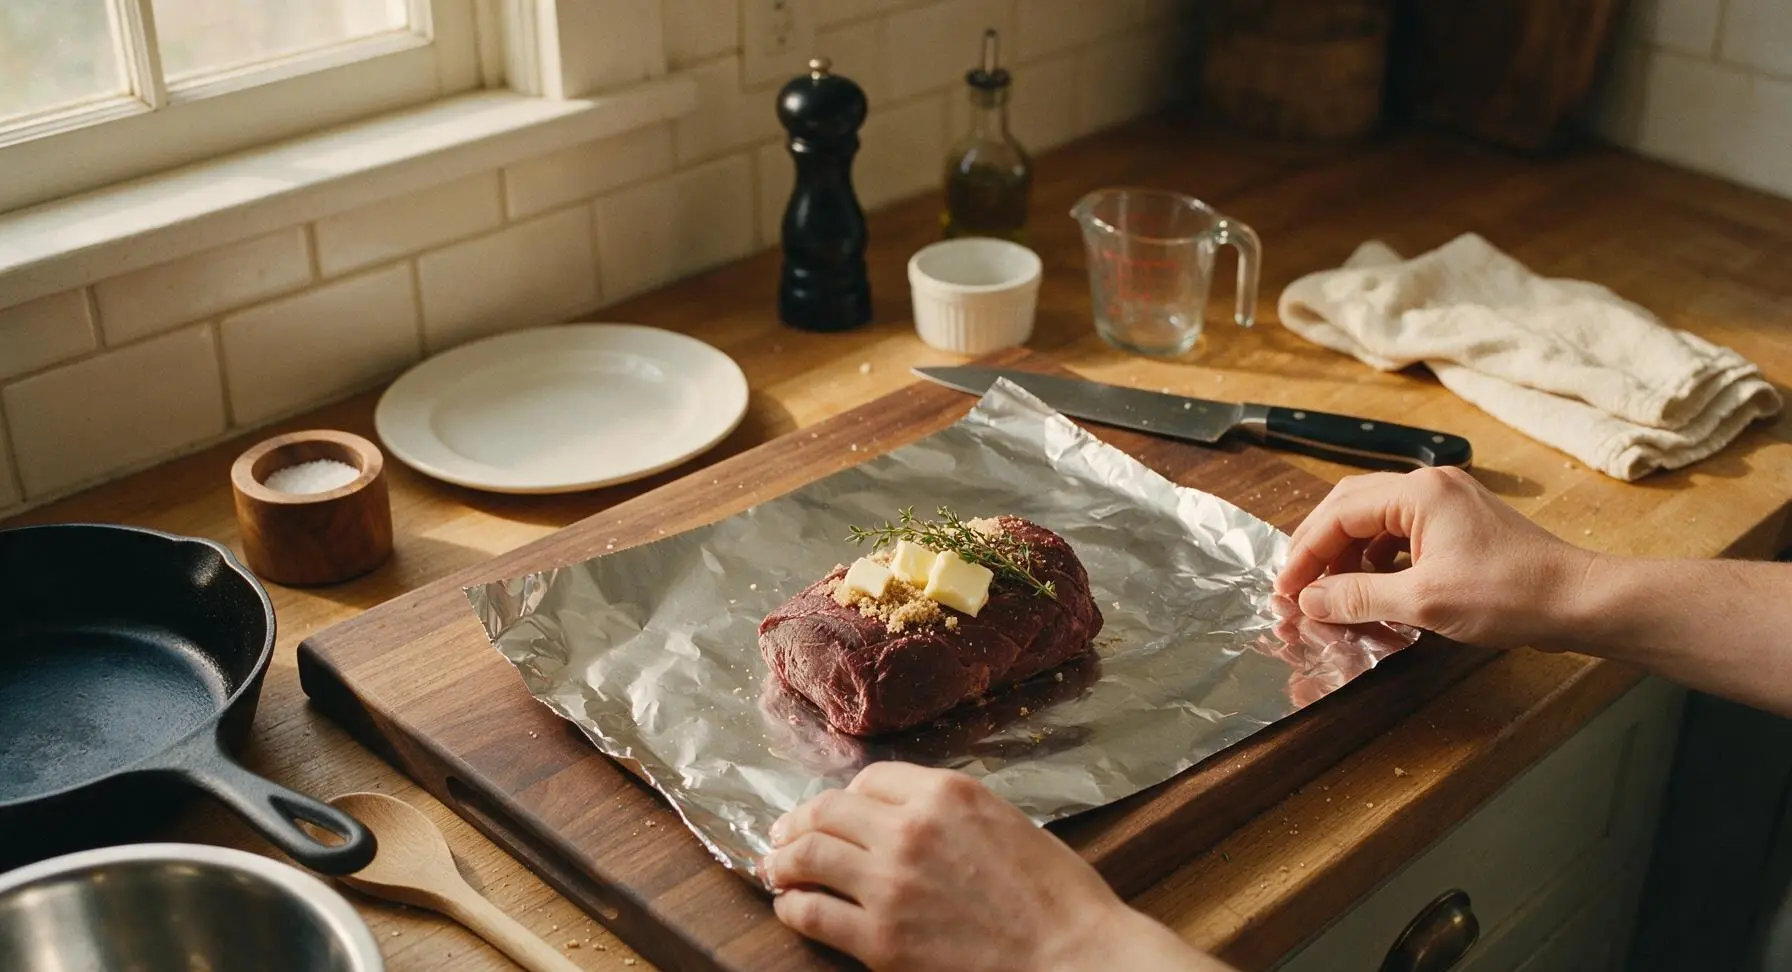
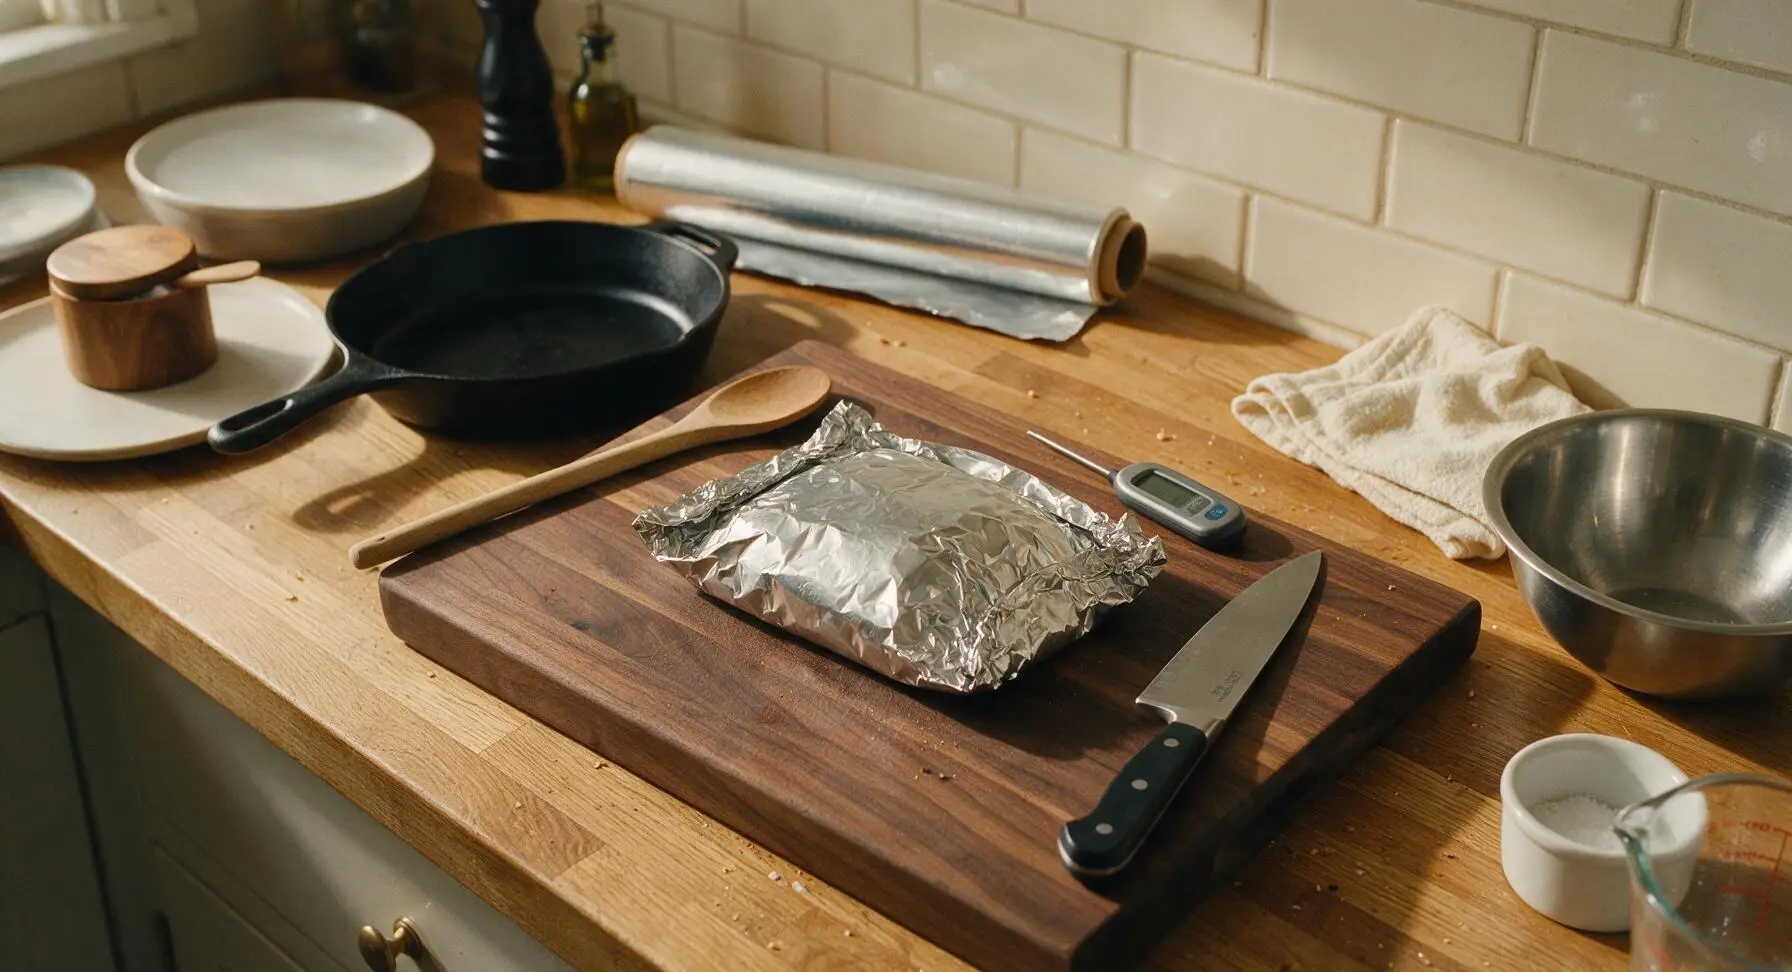
Tear a 2-foot long sheet of heavy-duty aluminum foil from the roll. Place the smoked roast in the center of the foil, top with 2 tbsp unsalted butter tabs, the remaining 1 tbsp light brown sugar, and 1 sprig of fresh thyme. Wrap the foil tightly around the roast to create a fully sealed packet with no gaps for steam to escape. Return the foil-wrapped roast to the smoker and cook for an additional 45 minutes, until the internal temperature reaches 190°F (88°C), when the meat pierces easily with the thermometer probe with no resistance.
Step 4
step4:Wrap to Tenderize
Step 4
step4:Wrap to Tenderize
5

Cube the Tender Roast

Carefully open the foil packet (watch for escaping hot steam) and transfer the tender venison roast back to the walnut cutting board. Use the 8-inch chef knife to cut the roast into uniform 1.5-inch cubes, taking care not to tear the delicate, tender meat. Pour all collected meat juices from the foil packet into the clear glass measuring cup with 1 cup BBQ sauce and 1 tbsp apple cider vinegar, stirring to combine. The cubed meat will hold its shape but give slightly when pressed.
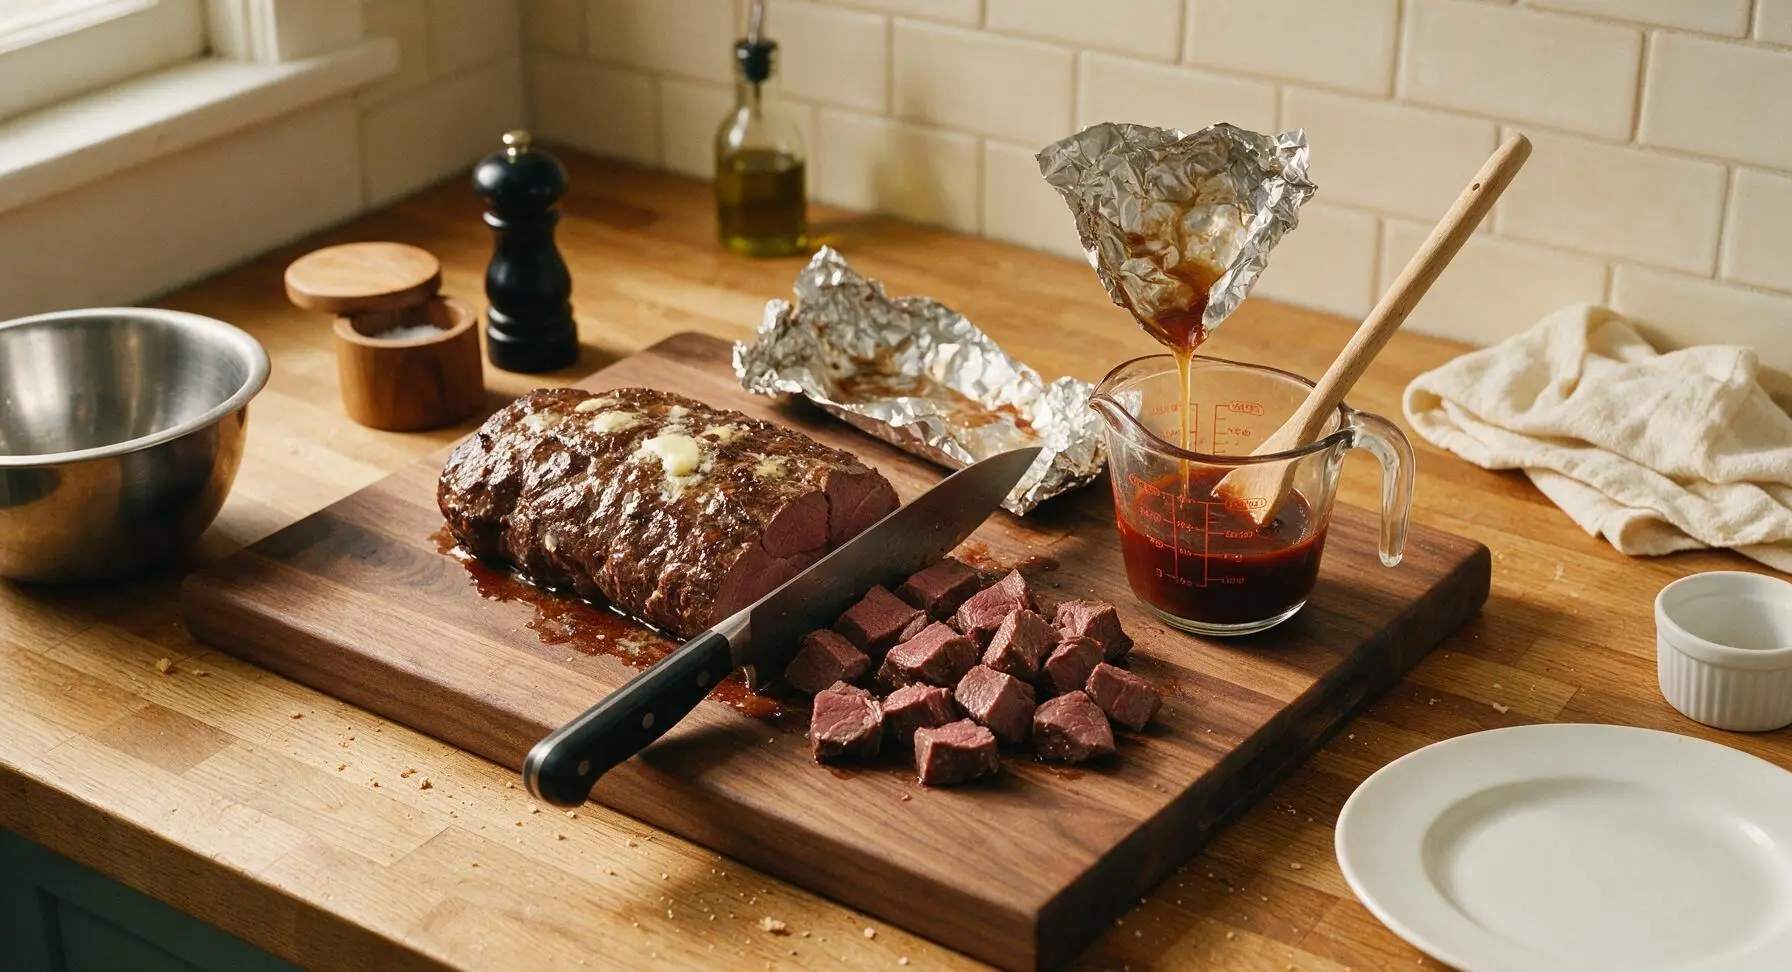
Step 5
step5:Cube the Tender Roast
6

Toss in BBQ Glaze

Transfer the cut venison cubes to the 9x13 inch disposable aluminum foil pan. Pour 3/4 of the BBQ sauce mixture over the cubes, using the boar bristle basting brush to toss and coat every cube evenly in glaze. Reserve the remaining 1/4 of the sauce for a final coat later. The cubes should be fully coated but not drowning in pooled sauce at the bottom of the pan.
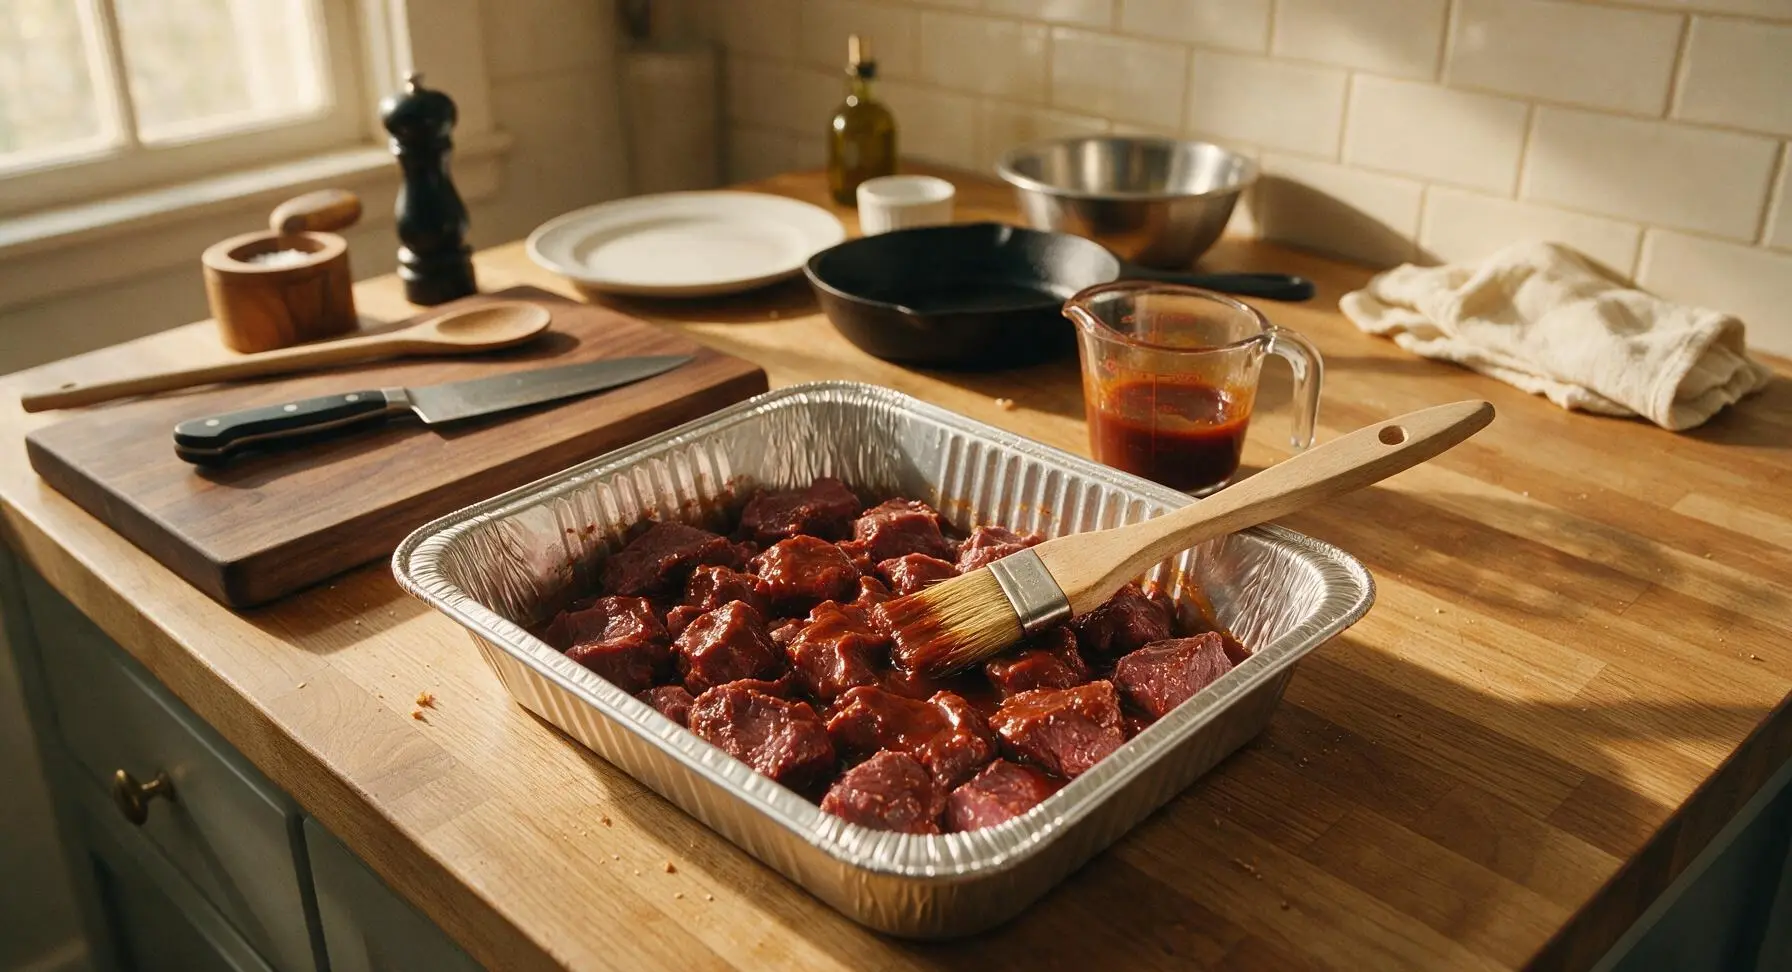
Step 6
step6:Toss in BBQ Glaze
7

Caramelize the Cubes

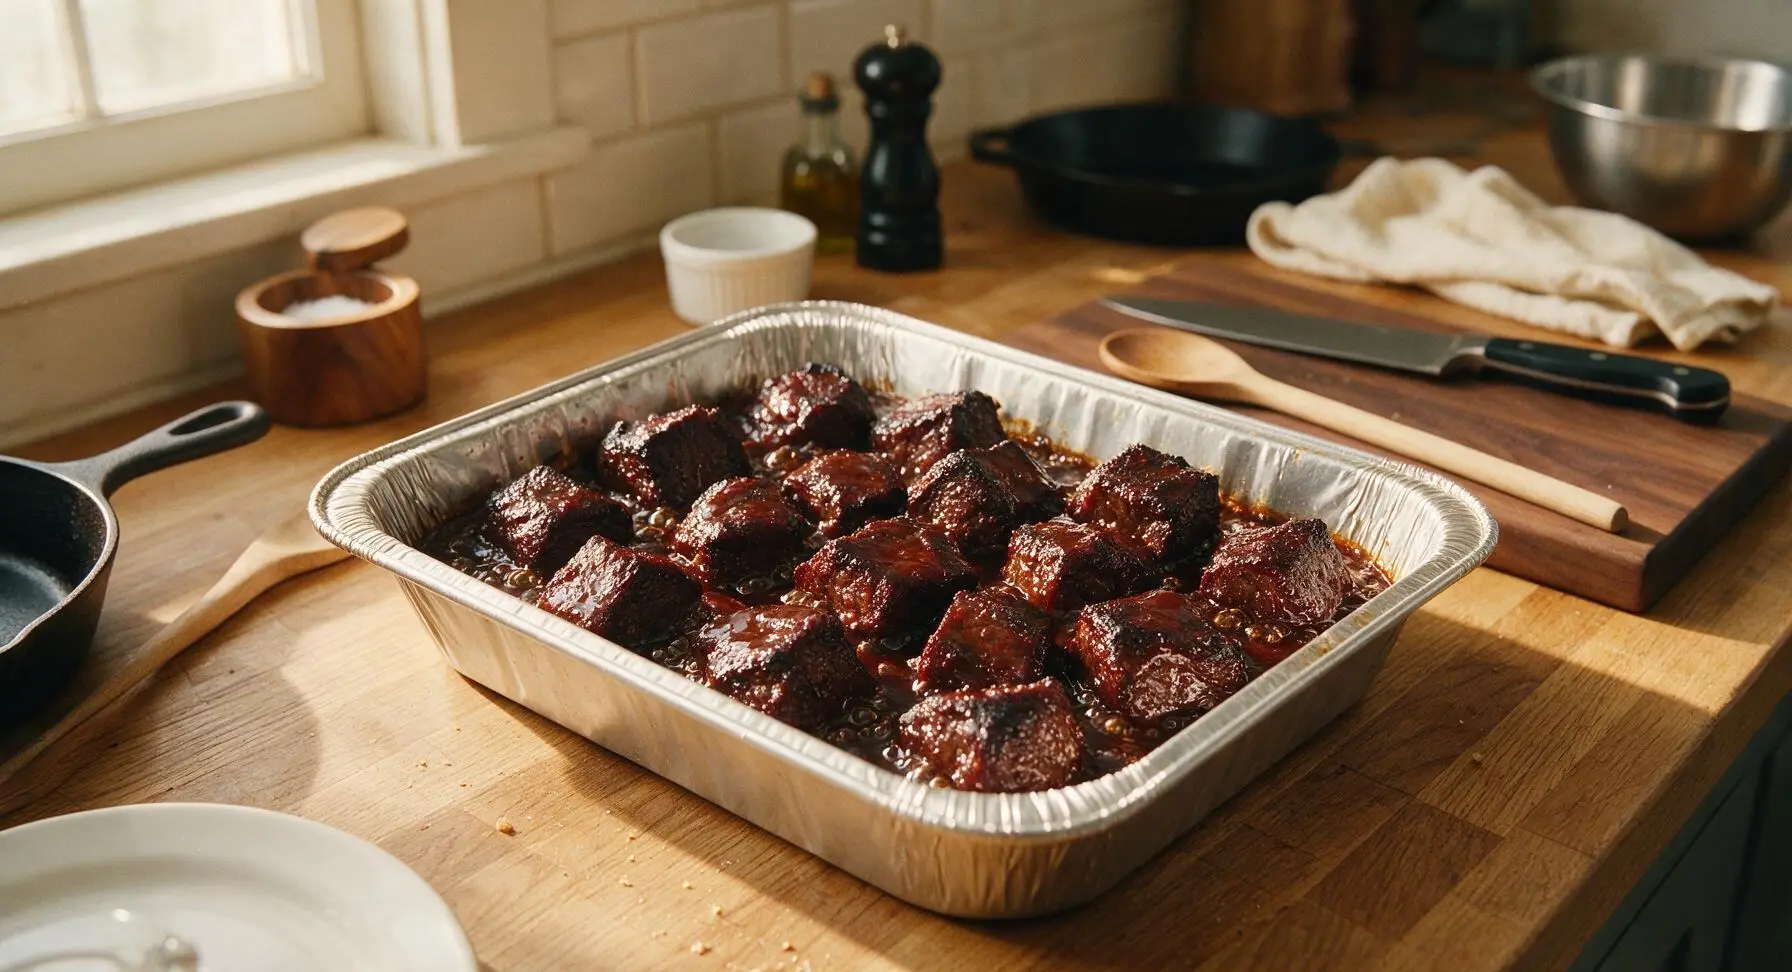
Place the uncovered foil pan of sauced venison cubes back in the 225°F smoker for 30 minutes, until the glaze is sticky, bubbly, and caramelized around cube edges, with dark, slightly crispy bark on every piece. Use the stainless steel tongs to toss the cubes once halfway through cooking, brushing with the remaining reserved BBQ sauce. The finished burnt ends will have a deep mahogany color, with sauce that sticks to the meat rather than running off.
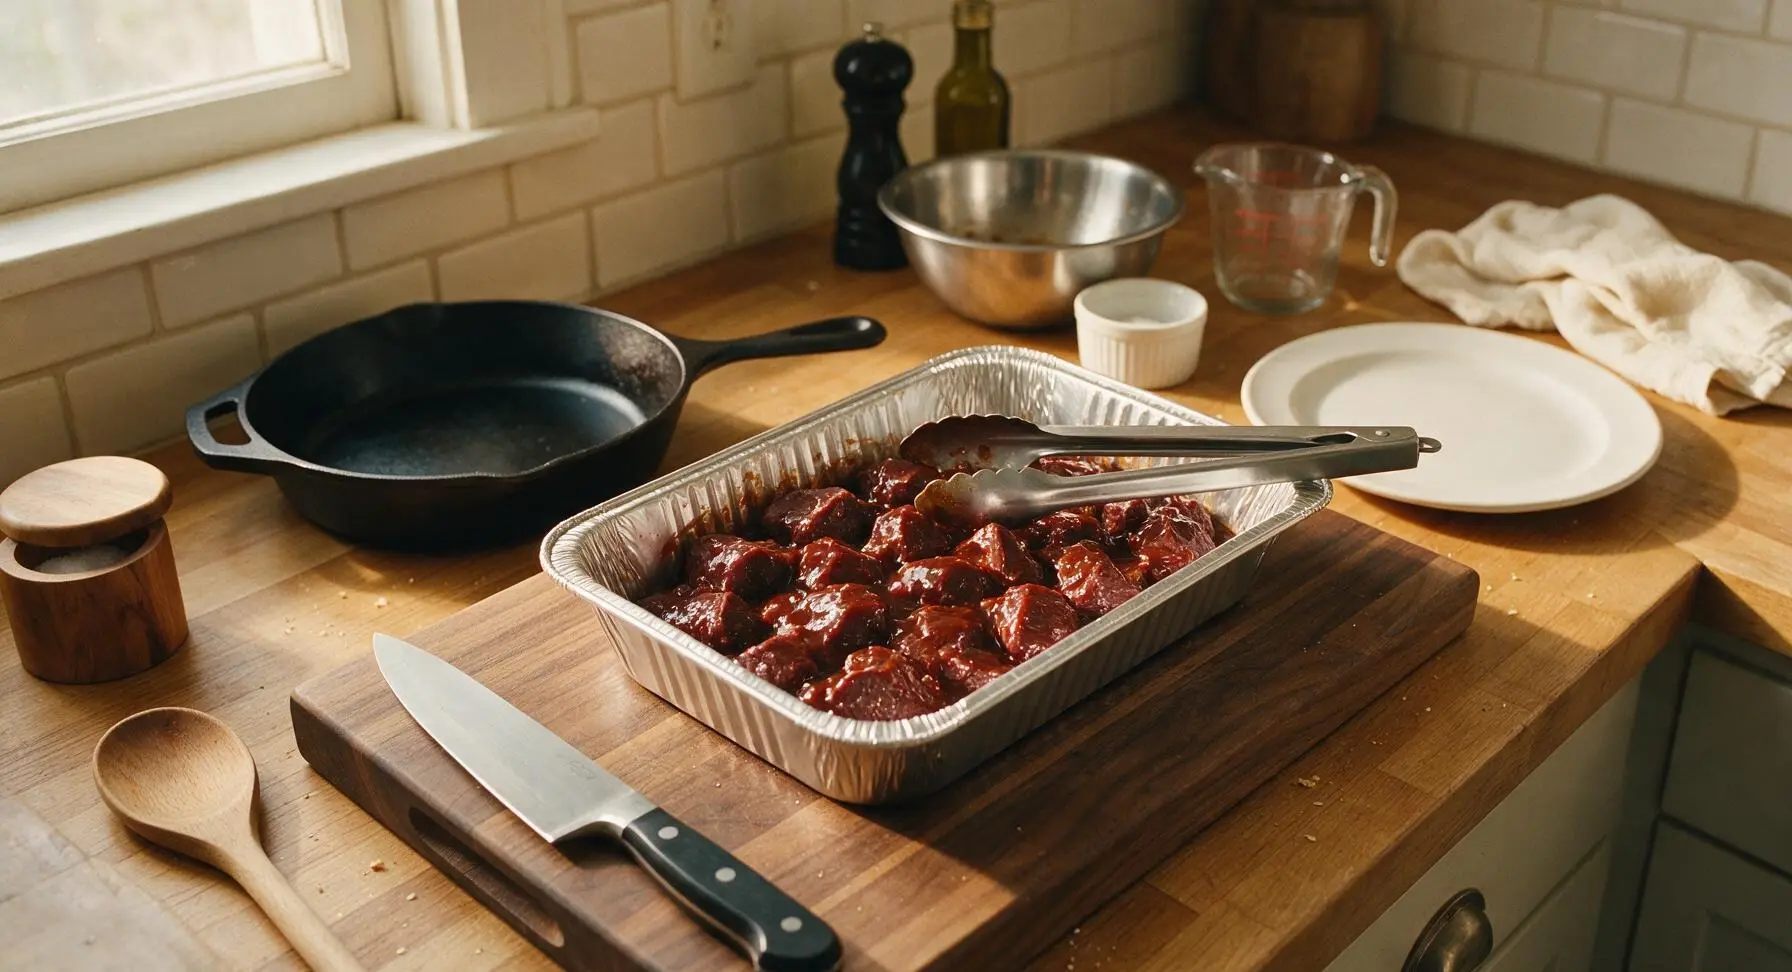
Step 7
step7:Caramelize the Cubes
Step 7
step7:Caramelize the Cubes
8

Plate and Serve

Remove the pan of burnt ends from the smoker and let rest for 5 minutes to allow the glaze to set and juices to redistribute. Use the stainless steel tongs to pile the burnt ends high on the matte off-white ceramic serving platter, drizzling any remaining pan sauce over the top. Garnish with the remaining fresh thyme sprig before serving.
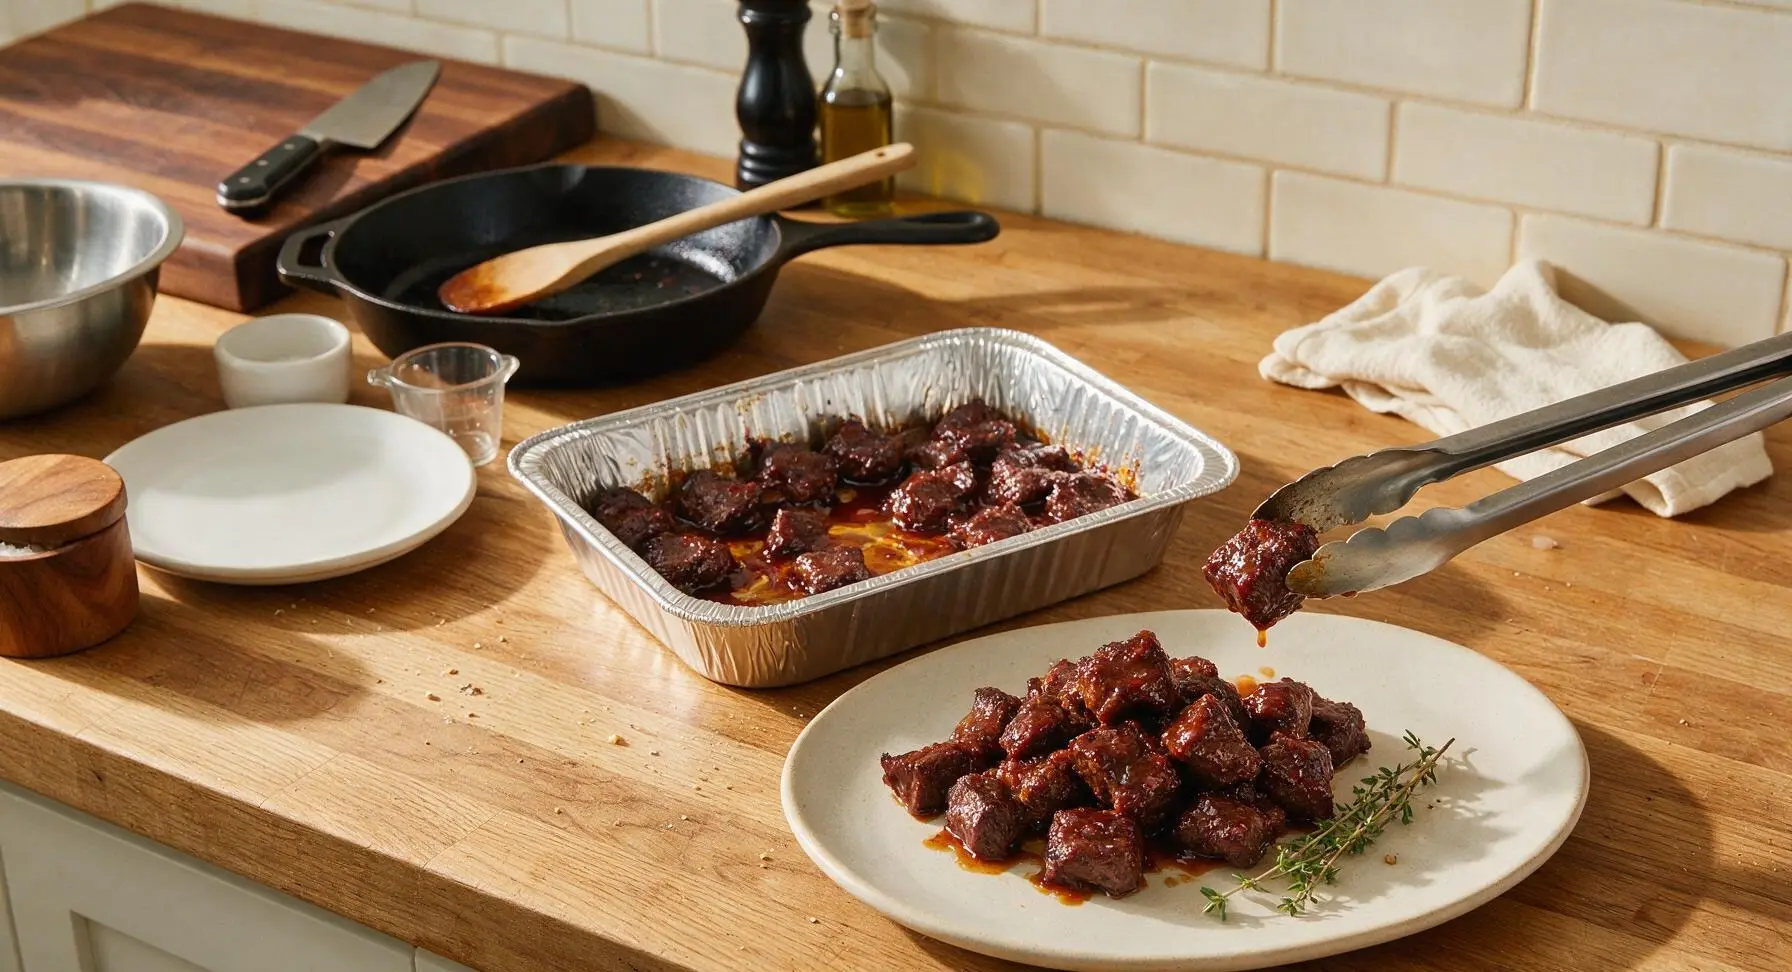
Step 8
step8:Plate and Serve

Tips

1.Avoid overcooking venison: Unlike fatty beef brisket, venison has almost no intramuscular marbling, so cooking past 195°F internal temperature will result in dry, tough burnt ends. Pull the roast at 190°F for juicy, pull-apart tender results.
2.Pat meat dry before adding rub: A dry meat surface allows spices to form a tight, flavorful bark during smoking; excess surface moisture will make the rub slide off and prevent crisp bark from forming.
3.Stick to mild smoking woods: Use hickory or oak for smoke, and avoid strong, bitter woods like mesquite. Venison has a delicate, slightly earthy game flavor that is easily overpowered by harsh, heavy smoke.


✨ You May Also Like

BBQ & Grilling
🍜 United States

Tender, melt-in-your-mouth beef brisket with a crisp, spiced bark, slow-smoked to deep smoky perfection, the iconic centerpiece of Texas backyard barbecue.

⏱️ 12 hours BBQ & Grilling ★ 4.4
BBQ & Grilling
🍜 Korea

Tender, sweet-savory marinated beef short ribs, a beloved Korean BBQ staple with caramelized, slightly charred edges and deep umami flavor, perfect for outdoor summer gatherings.

⏱️ 4 hours 2BBQ & Grilling ★ 4.8
BBQ & Grilling
🍜 United States

Juicy grilled beef patties topped with smoky homemade chili, melted cheddar, and tangy pickles on toasted brioche buns for a hearty, flavor-packed handheld meal.

⏱️ 40 minuteBBQ & Grilling ★ 4.7
BBQ & Grilling
🍜 United States

A sweet, smoky, tangy BBQ sauce brightened with peak-season dark cherries, ideal for glazing grilled ribs, chicken, pork, or summer roasted veggies.

⏱️ 35 minuteBBQ & Grilling ★ 4.7
BBQ & Grilling
🍜 United States

Rich, smoky, slightly sweet homemade bourbon BBQ sauce with deep caramel notes, ideal for glazing grilled ribs, chicken, and burgers at cookouts.

⏱️ 25 minuteBBQ & Grilling ★ 4.7
BBQ & Grilling
🍜 United States

Iconic Alabama-style BBQ featuring tender hickory-smoked chicken slathered in tangy creamy white sauce, a beloved regional Southern cookout staple.

⏱️ 3 hoursBBQ & Grilling ★ 5

Venison Burnt Ends:Frequently Asked Questions

1.What cut of venison works best for burnt ends? ▾
Boneless venison shoulder, the cut called for in this recipe, is absolutely the best pick. It has just enough marbled connective tissue to break down into pull-apart tender bites during low-and-slow cooking, without being overly tough. Skip ultra-lean cuts like backstrap for this—they’ll dry out long before they develop that signature caramelized, melt-in-your-mouth burnt end texture.
2.How do I keep lean venison from drying out when making burnt ends? ▾
Great question, since venison is far leaner than the beef brisket used for classic Kansas City burnt ends. Stick to a consistent low cooking temp of 225–250°F, don’t overcook past an internal temp of 195–203°F, and let the glaze lock in moisture during the final caramelization step. Skip unnecessary smoker lid openings, which cause temp swings that dry meat out fast.
3.What’s the right size to cube the venison for burnt ends? ▾
Aim for uniform 1.5-inch cubes once the roast finishes its initial low-and-slow smoke and rests briefly. This size is large enough that it won’t dry out during the final glazing step, but small enough to develop a perfect caramelized crust on every side with a tender, pull-apart center. Cut them too small and they’ll turn tough and jerky-like; too large and they won’t get that signature all-over sticky coating.
4.Do I need to trim the venison shoulder before cooking? ▾
Definitely take a few minutes to trim away any thick, shiny silverskin from the outside of the venison shoulder before seasoning, but you don’t need to pick out every tiny bit of connective tissue. That thick silverskin never breaks down fully during cooking, and will leave unpleasantly chewy, tough bits in your finished bites. Small flecks of connective tissue will melt away during the slow smoke to add rich depth.
5.How do I reduce the gamey flavor some venison has? ▾
If you’re working with wild-harvested venison that has a stronger, gamey note, soak the trimmed shoulder in cold salted water in the fridge for 4–6 hours before seasoning, changing the water once. Pat it completely dry before applying your salt, pepper, paprika, and garlic powder rub, and use a mild smoking wood so it doesn’t amplify any strong, earthy wild flavor notes.
6.What type of wood is best for smoking these venison burnt ends? ▾
Stick to mild, sweet hardwoods that complement venison’s rich, lean flavor without overpowering it—hickory is a classic Kansas City pick, and oak or applewood work beautifully too. Skip super strong, resinous woods like mesquite for this recipe, as it can make the lean venison taste bitter, and will throw off the balance of the sweet-savory glaze and simple spice rub.
7.What internal temperature means the venison is done enough to cube for the glaze step? ▾
Pull the whole venison shoulder from the smoker when it hits an internal temp of 165°F, right before you cube it for the burnt end step. At this point, the rub has set into a nice outer crust, the meat is firm enough to cube cleanly without falling apart, and it will finish cooking tenderly as it caramelizes in glaze during the final cooking phase.
8.What should the final internal temp be for finished burnt ends? ▾
Your venison burnt ends are fully done when they reach an internal temp between 195°F and 203°F, and a meat probe slides into the cubes with no resistance, like sticking a knife into soft butter. Don’t cook them past 205°F, since the lean venison will quickly dry out and turn tough once it climbs past that threshold, even with the sticky glaze coating.
9.Can I make these in the oven if I don’t have a smoker? ▾
Absolutely! You can get really solid results in a standard home oven if you don’t have a smoker. Set your oven to 250°F, cook the seasoned shoulder on a wire rack over a baking sheet until it hits 165°F, cube it, toss with glaze, and finish at 375°F until caramelized. Add a tiny extra pinch of smoked paprika or a drop of food-grade liquid smoke to mimic that classic smoky depth.
10.How long do these burnt ends take to make from start to finish? ▾
Plan for roughly 4 to 5 hours total from start to finish, depending on the size of your venison shoulder and how consistent your cooking temperature stays. The initial whole-shoulder smoke takes about 2.5 to 3 hours, then the cubed, glazed burnt ends need another 1 to 1.5 hours to caramelize and turn tender. Always go by internal temp instead of a strict timer for the most consistent results.
11.Do I need to wrap the venison shoulder during the initial smoke? ▾
You don’t need to wrap the shoulder during the initial smoke, since we’re pulling it at 165°F to cube anyway—wrapping can soften the nice, crisp spice crust you build from the salt, pepper, paprika, and garlic rub. If you notice the outside getting too dark before the meat hits 165°F, tent it loosely with foil for the last 30 minutes of the initial cook to prevent burning.
12.What kind of glaze works best for these venison burnt ends? ▾
A balanced sweet-savory glaze works perfectly to complement venison’s rich, earthy flavor—start with a base of your favorite tangy BBQ sauce, a splash of apple cider vinegar for brightness, a touch of brown sugar for caramelization, and a pinch of the same salt, pepper, paprika, and garlic rub you used on the roast. Skip overly sugary glazes, which burn quickly during the final high-heat step.
13.How do I get the glaze to stick properly to the burnt ends? ▾
For sticky, evenly coated burnt ends, toss the warm venison cubes in glaze right after cubing, when the meat is still hot from the initial smoke. Don’t douse them in too much glaze at once—add a thin layer, toss to coat, then let it set for 20 minutes before adding a second light coat if you want extra coverage. This builds a sticky coating instead of creating a runny puddle in your pan.
14.Do I need to rest the meat before serving? ▾
Yes, give the finished burnt ends a 10-minute rest in a loosely tented foil pan once you pull them from the smoker or oven. This lets the juices redistribute back through the meat instead of running all over your plate when you take a bite, and gives the glaze a minute to set into that perfect chewy, sticky coating. No need to rest longer than that—these are best served warm.
15.What sides pair best with venison burnt ends? ▾
These rich, smoky burnt ends pair perfectly with classic Kansas City BBQ sides that cut through the sweet-savory glaze. Opt for creamy coleslaw for bright, tangy crunch, smoky baked beans, buttery cast-iron cornbread, or crispy dill pickle slices. For a lighter option, serve them over a simple green salad with a sharp vinaigrette to balance the deep, meaty venison flavor.
16.Can I make these burnt ends ahead of time for a party? ▾
You can prep the seasoned venison shoulder the night before and keep it wrapped in the fridge to cut down on day-of cook time, but for the best texture, I recommend finishing the glazed burnt ends right before serving. If you do make them a day early, store them in an airtight container in the fridge, and reheat low and slow in a 275°F oven, tossed with a tiny extra splash of glaze to refresh them.
17.How should I store leftover venison burnt ends, and how long do they last? ▾
Let leftover burnt ends cool completely to room temperature, then transfer them to an airtight container and keep them in the fridge for up to 4 days. You can also freeze them for up to 3 months, wrapped tightly in foil and sealed in a freezer bag to prevent freezer burn. Reheat leftovers in a 300°F oven or air fryer until warmed through, to keep the glaze crispy instead of soggy.
18.Can I use a different spice rub if I don’t have all the listed seasonings? ▾
The simple base rub of coarse kosher salt, coarse black pepper, smoked paprika, and garlic powder is designed to let venison’s rich flavor shine, but you can absolutely adjust it to taste. Add a pinch of brown sugar for extra sweetness, a little cayenne for heat, or onion powder for extra savoriness—just don’t overdo it with heavy, pungent spices that will overpower the meat’s natural depth.
19.Why are my burnt ends coming out tough instead of pull-apart tender? ▾
Tough venison burnt ends almost always come from one of two issues: either you didn’t cook them long enough for the shoulder’s connective tissue to fully break down, or you cooked them at too high a temperature, which made the lean venison seize up and dry out. If they’re tough, pop them back in a 225°F cooker, tossed with a little extra glaze and a splash of beef broth, covered, for 30 minutes until they soften.

Comments (9)

2 days ago

OMG, these venison burnt ends were an absolute game changer for our annual deer camp potluck last weekend! I was worried the venison would come out too gamey or tough since it’s leaner than brisket, but following the cook time exactly left them melt-in-your-mouth tender, with that perfect sticky sweet bark. My hunting buddies were begging for the recipe before we even finished eating. 10/10 will make every hunting season from now on!

yesterday

Wait, did you wrap them in butcher paper or foil during the middle cook? I tried venison ends once and they dried out so bad I swore I’d never mess with ‘em again, but this looks too good to pass up!

2 hours ago

Great question! We recommend wrapping in peach butcher paper at the 2 hour mark to lock in moisture without steaming off that crispy bark you want on burnt ends. A quick spritz of apple cider vinegar every 45 minutes before wrapping also helps keep lean venison from drying out!

3 days ago

Made these for Sunday family dinner and my kids actually ate every bite without complaining, which is basically a miracle! I prepped the dry rub the night before as part of my weekly meal prep to save time, and the 3 hour 15 minute cook time was totally manageable even with running the kids to soccer practice in between. SO good, even my picky 7 year old asked for seconds. Already added this to our weekly rotation!

5 days ago

Took me a minute to get the temp dialed in on my offset smoker, but once I did? These came out better than the brisket burnt ends I get at my local BBQ joint. The medium difficulty rating is no joke though—don’t rush the cook, low and slow is non-negotiable here. Only thing I adjusted was adding a little extra cayenne to the rub for a kick, chef’s kiss.

3 days ago

Love that extra cayenne tweak! So glad the temp adjustment worked out for you—low and slow really is the secret to getting that perfect tender bite without drying out lean venison. Thanks for sharing your spin!

1 week ago

Full transparency, this was the first thing I ever made on my new pellet smoker and I was SO nervous I’d mess it up for my husband’s birthday dinner. The instructions were super clear though, and the burnt ends came out amazing! He said they tasted like something we’d pay $30 for at a fancy BBQ place, and I felt like a total pro. Only reason it’s not a 5 for me is I had to guess a little on the sauce thickness since I didn’t have a candy thermometer, plus I wish I’d made a double batch because they were gone in 10 minutes.

5 days ago

Happy belated birthday to your husband! Pro tip for next time: you don’t need a candy thermometer for the sauce—just simmer it until it coats the back of a spoon, that’s the perfect thickness. And trust us, we never make a single batch anymore either, they go way too fast!

yesterday

Wait a second, I’ve always written off venison as too gamey for my taste, but my brother dropped off a whole backstrap from his hunt last month and I figured I’d give this a shot. Y’all. I’m a convert. The sweet and savory rub cut through any gamey flavor perfectly, and the burnt ends were so juicy. Who knew?! I’m already texting all my hunter friends to bring me more meat so I can make this again.

2 hours ago

Right?! I used to turn down every venison invite until I had burnt ends made right. Try adding a splash of bourbon to the sauce next time, it’s insane.

30 minutes ago

That bourbon add-in sounds incredible, thanks for the tip! So glad we could help turn you into a venison fan—this recipe is actually one of our go-tos for people who say they don’t like wild game because the bark and sauce balance the flavor so well.

2 weeks ago

Made these for tailgate last weekend and people were lined up for seconds before the game even started. Cooked ‘em up the day before, reheated them in the foil pan on the grill at the stadium, and they held up perfectly. Way easier to transport than a whole brisket, and way more of a crowd pleaser. Will be my go-to tailgate food for the rest of football season, no question.

30 minutes ago

So happy this recipe is super easy to adapt for gluten free! I swapped the regular BBQ sauce for my go-to GF version, kept the rest of the ingredients exactly as written, and nobody at my potluck could even tell the difference. It’s so hard to find good smoked meat recipes that don’t have hidden gluten, so this is going straight into my saved folder. 10/10!

5 minutes ago

That’s such a great swap! We’re so glad the recipe worked for your gluten free needs—we intentionally keep the dry rub gluten free so folks can adapt the sauce to whatever dietary needs they have without messing up that classic burnt end flavor. Thanks for sharing!

2 hours ago

My partner and I made this for our date night in last night and it was so fun to cook together! We split up the prep (I made the rub, he manned the smoker) and the end result was restaurant quality. We paired it with coleslaw and cornbread, just like our favorite BBQ spot does, and it felt like a fancy date without the $100 bill. Already planning to make it for our families when they visit for Thanksgiving next month.

5 minutes ago

I’ve tried three different venison burnt end recipes over the last year and this one is hands down the best. The cook time is spot on—no chewy bits, no dried out edges, just perfect smoky, sticky, meaty goodness. I used a hickory and cherry wood mix for smoke and it paired perfectly with the venison. If you’re on the fence about making these, just do it. You won’t regret it.

just now

Seconded on the hickory cherry mix! I did the same last time I made these and my neighbor showed up at my door 10 minutes after I pulled them off the smoker because he smelled it down the block.



