
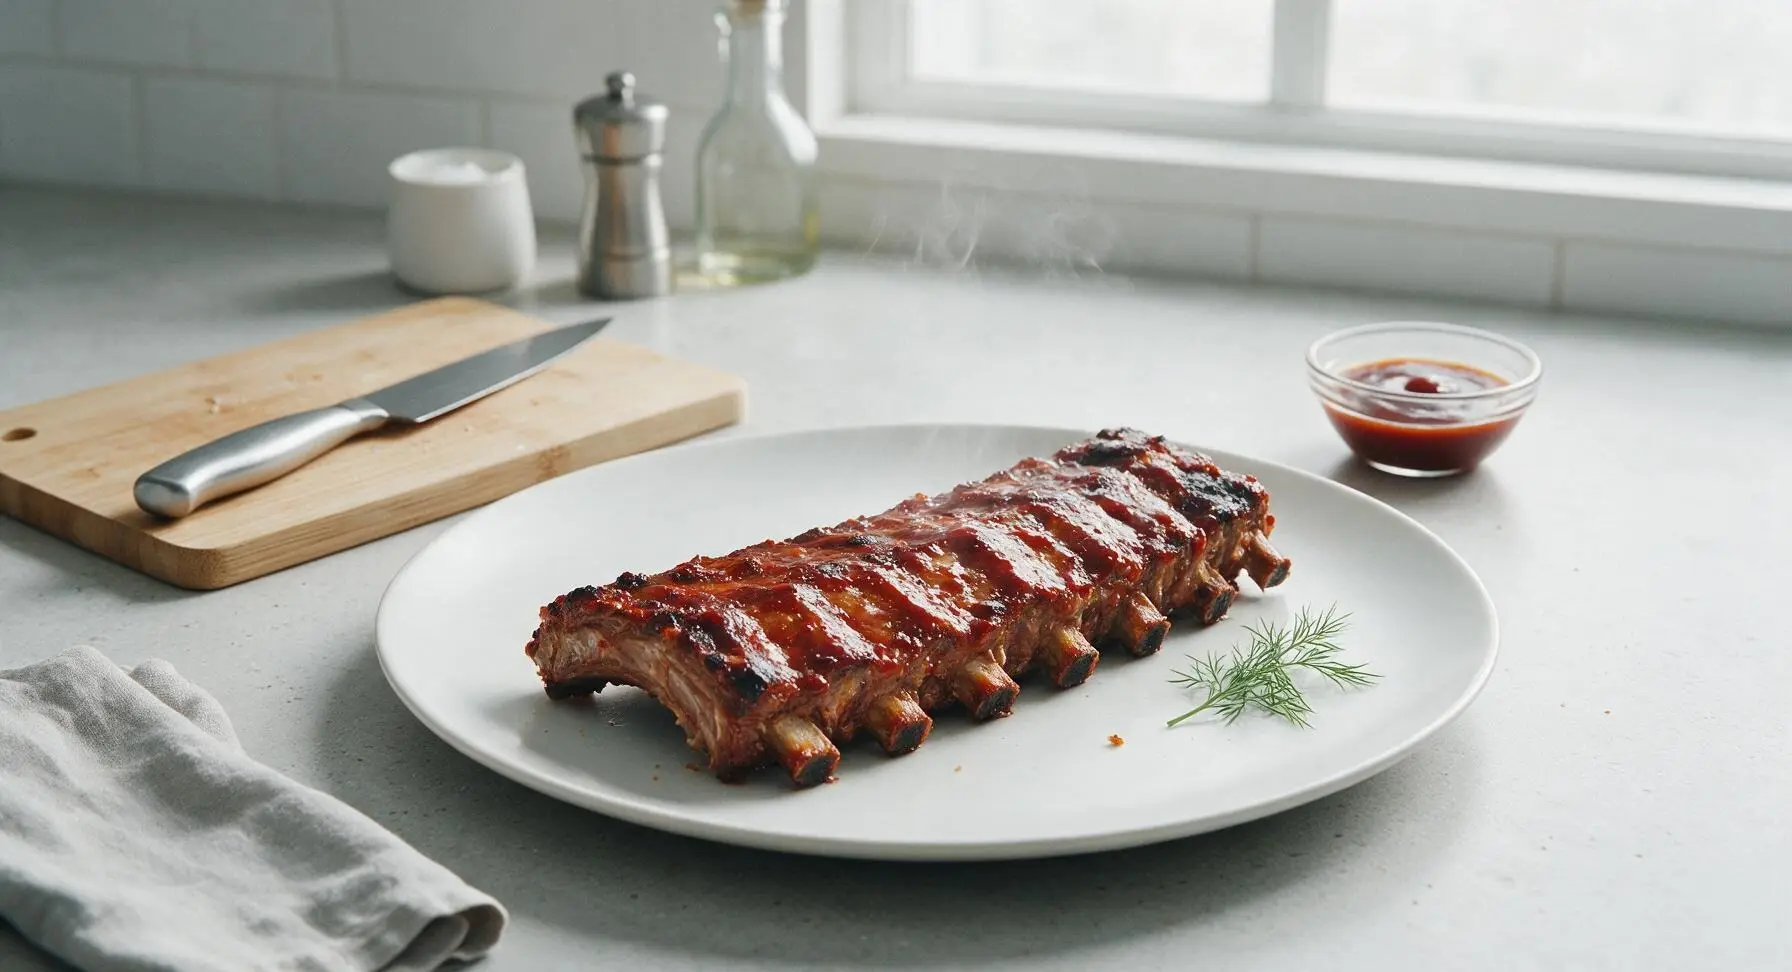
barbeque oven

title 1
barbeque oven
⏱️ cook time 2 hours 15 minutes
🍽️ servings 4
⚡ Difficulty medium

intro

Tender, fall-off-the-bone pork ribs slow-roasted in the oven, slathered in tangy sticky BBQ sauce with a caramelized smoky bark, ideal for casual summer gatherings.

Ingredients
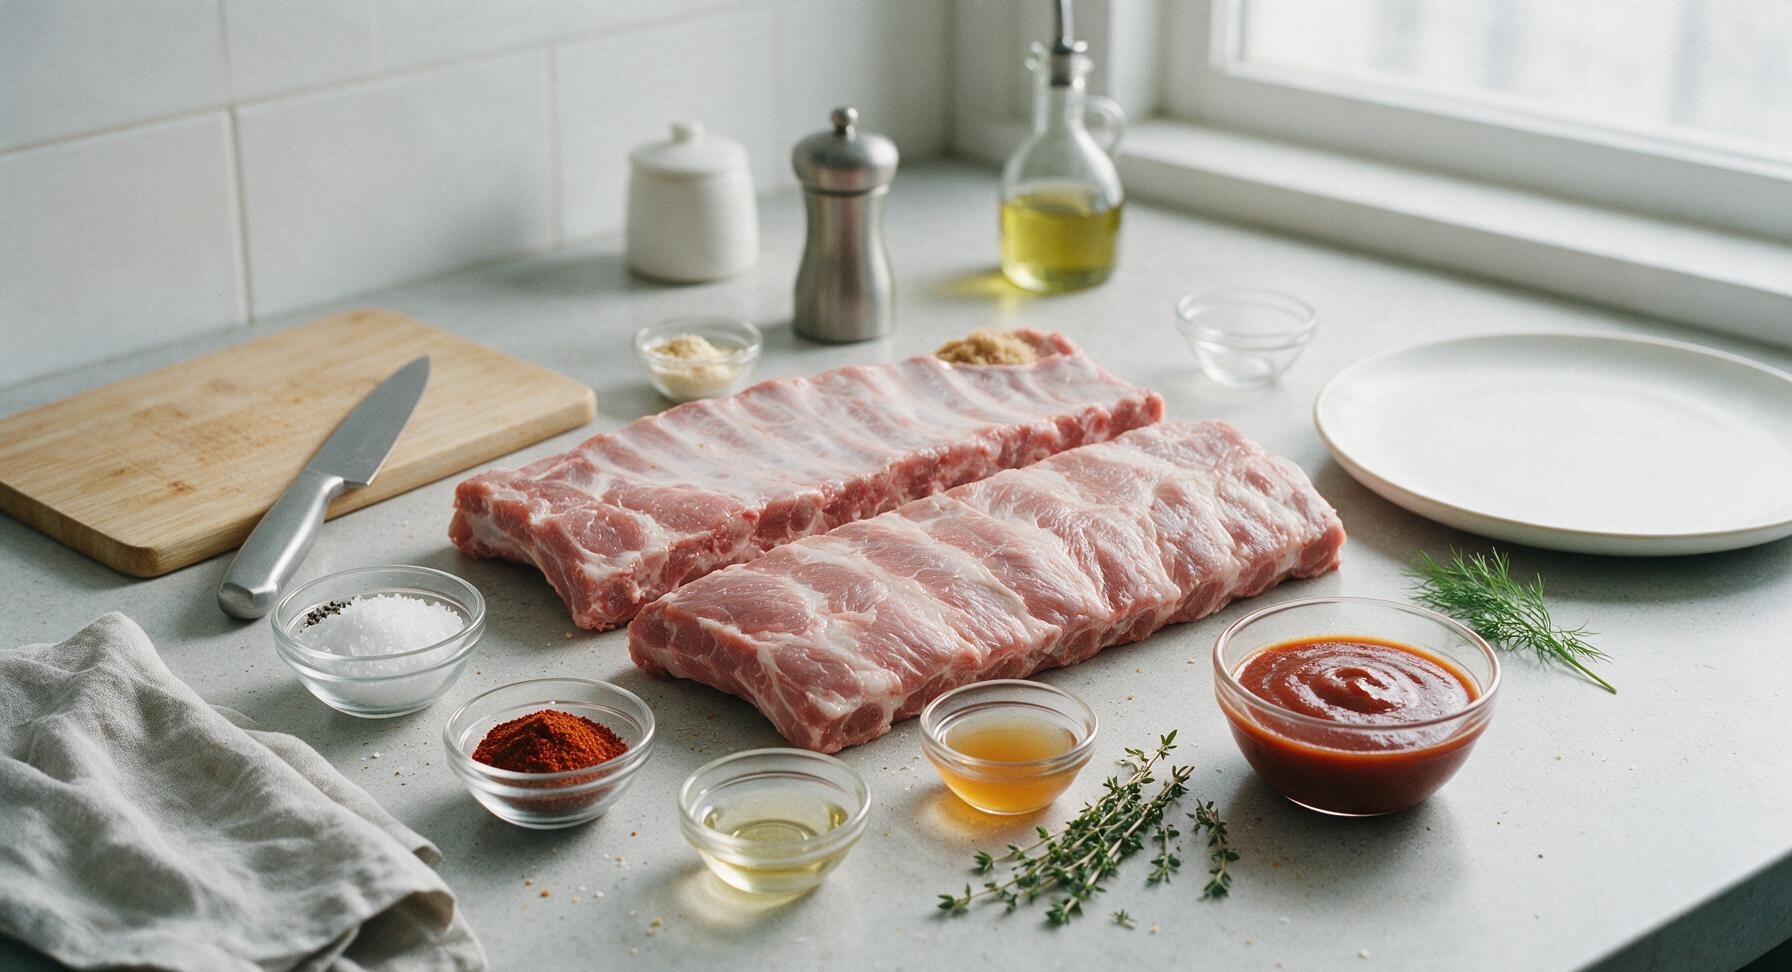
St. Louis style pork rib racks 1.2kg (2 racks)
Kosher salt 2 tbsp
Freshly cracked black pepper 1 tbsp
Smoked paprika 1 tbsp
Garlic powder 1 tsp
Light brown sugar 1 tbsp
Neutral canola oil 1 tsp
Apple cider vinegar 2 tbsp
Tangy tomato-based BBQ sauce 350ml
Fresh thyme sprigs 5 sprigs

Steps

1

Trim and Prep Ribs

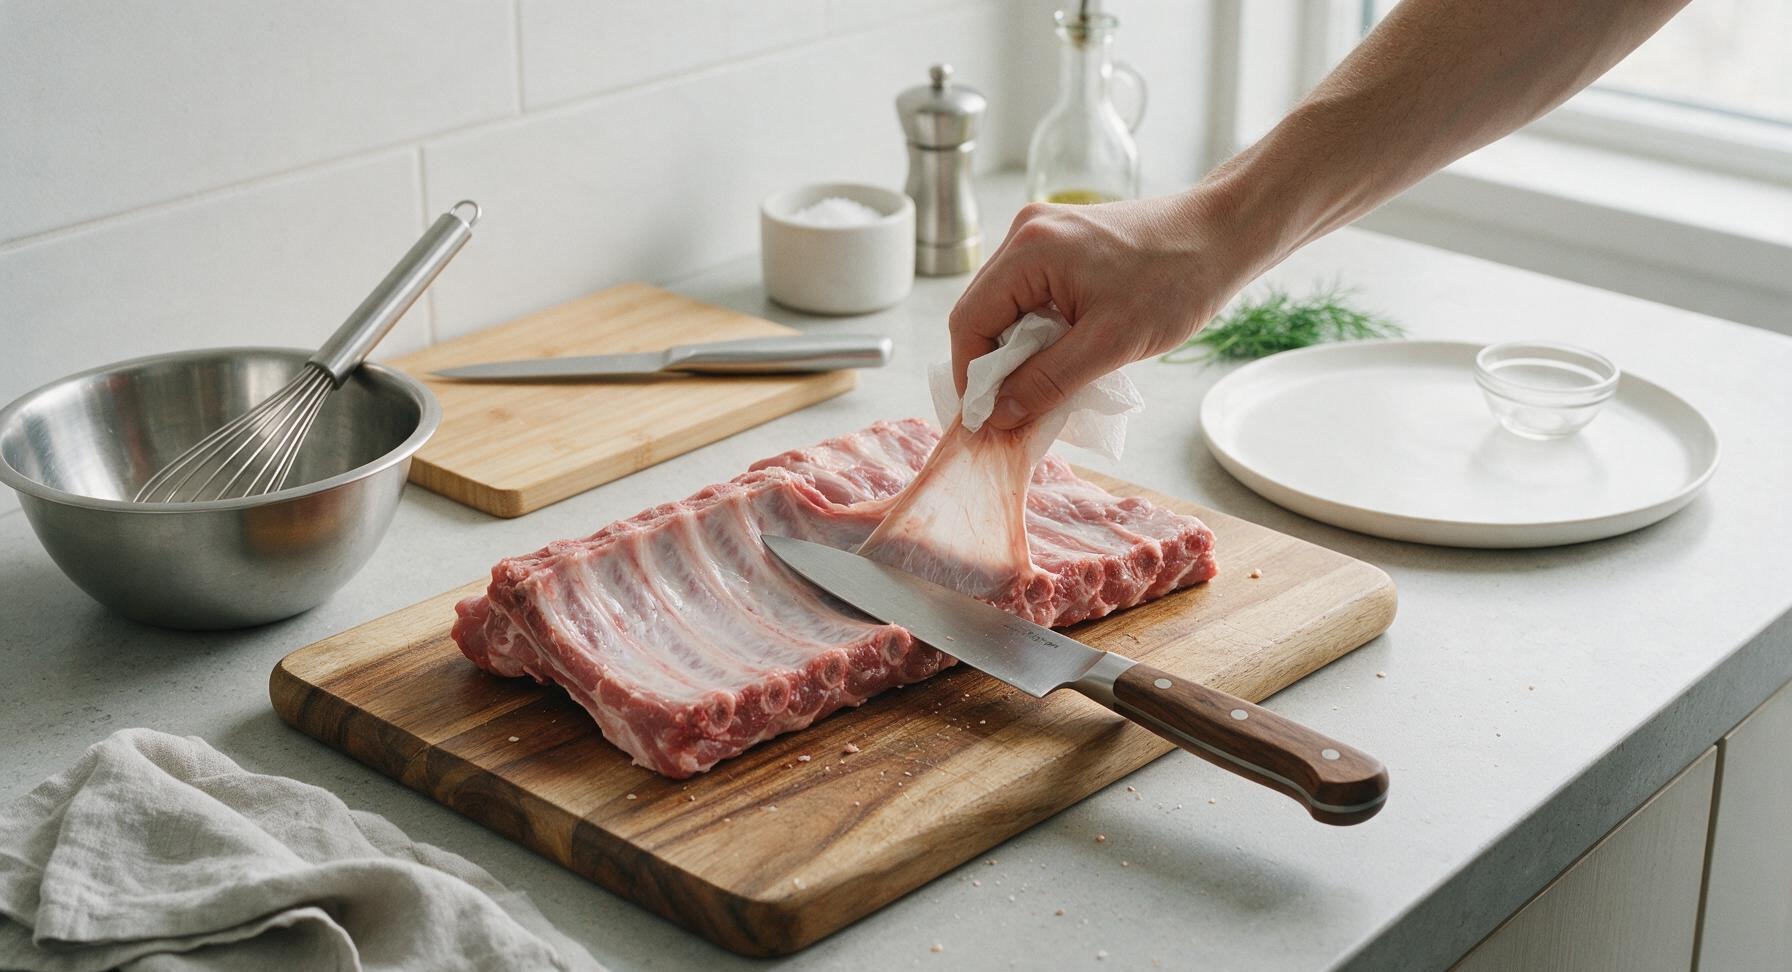
Remove the pork rib racks from packaging, pat completely dry with paper towels, and place on the acacia wood cutting board. Use the 8-inch walnut-handled chef knife to trim any loose, thick fat deposits from the meat surface, leaving a thin 1/8-inch fat cap. Flip the ribs bone-side up, slide the knife tip under the tough silverskin membrane at one rack end, grip the loose membrane edge with a paper towel, and pull it off in one smooth piece. Discard all trimmings. Visual cue: The bone-side surface will feel completely smooth, with no rubbery membrane remaining when you run a finger across it.
Step 1
step1:Trim and Prep Ribs
2

Mix Dry Rub Blend

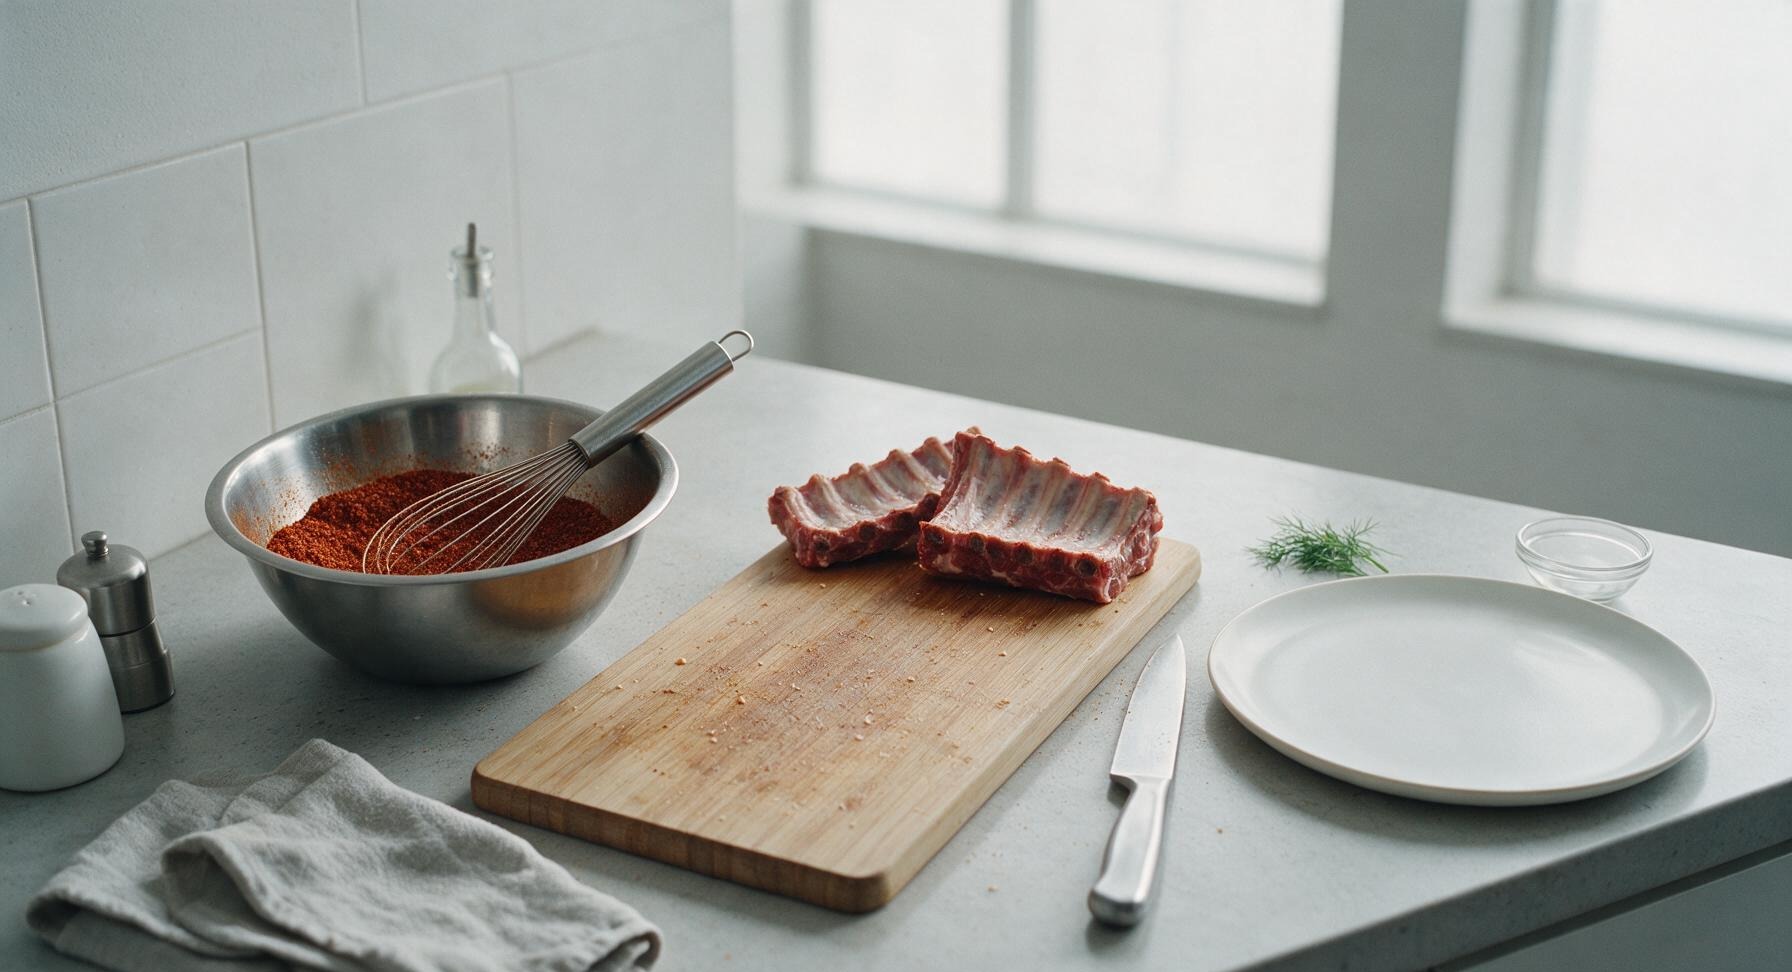
Add the measured kosher salt, black pepper, smoked paprika, garlic powder, and light brown sugar to the stainless steel mixing bowl. Use the stainless steel whisk to stir the blend for 30 seconds until all spices and sugar are evenly combined, with no clumps of brown sugar remaining. Visual cue: The finished rub is a uniform deep reddish-brown color, with consistent fine texture throughout.
Step 2
step2:Mix Dry Rub Blend
3

Coat Ribs with Rub

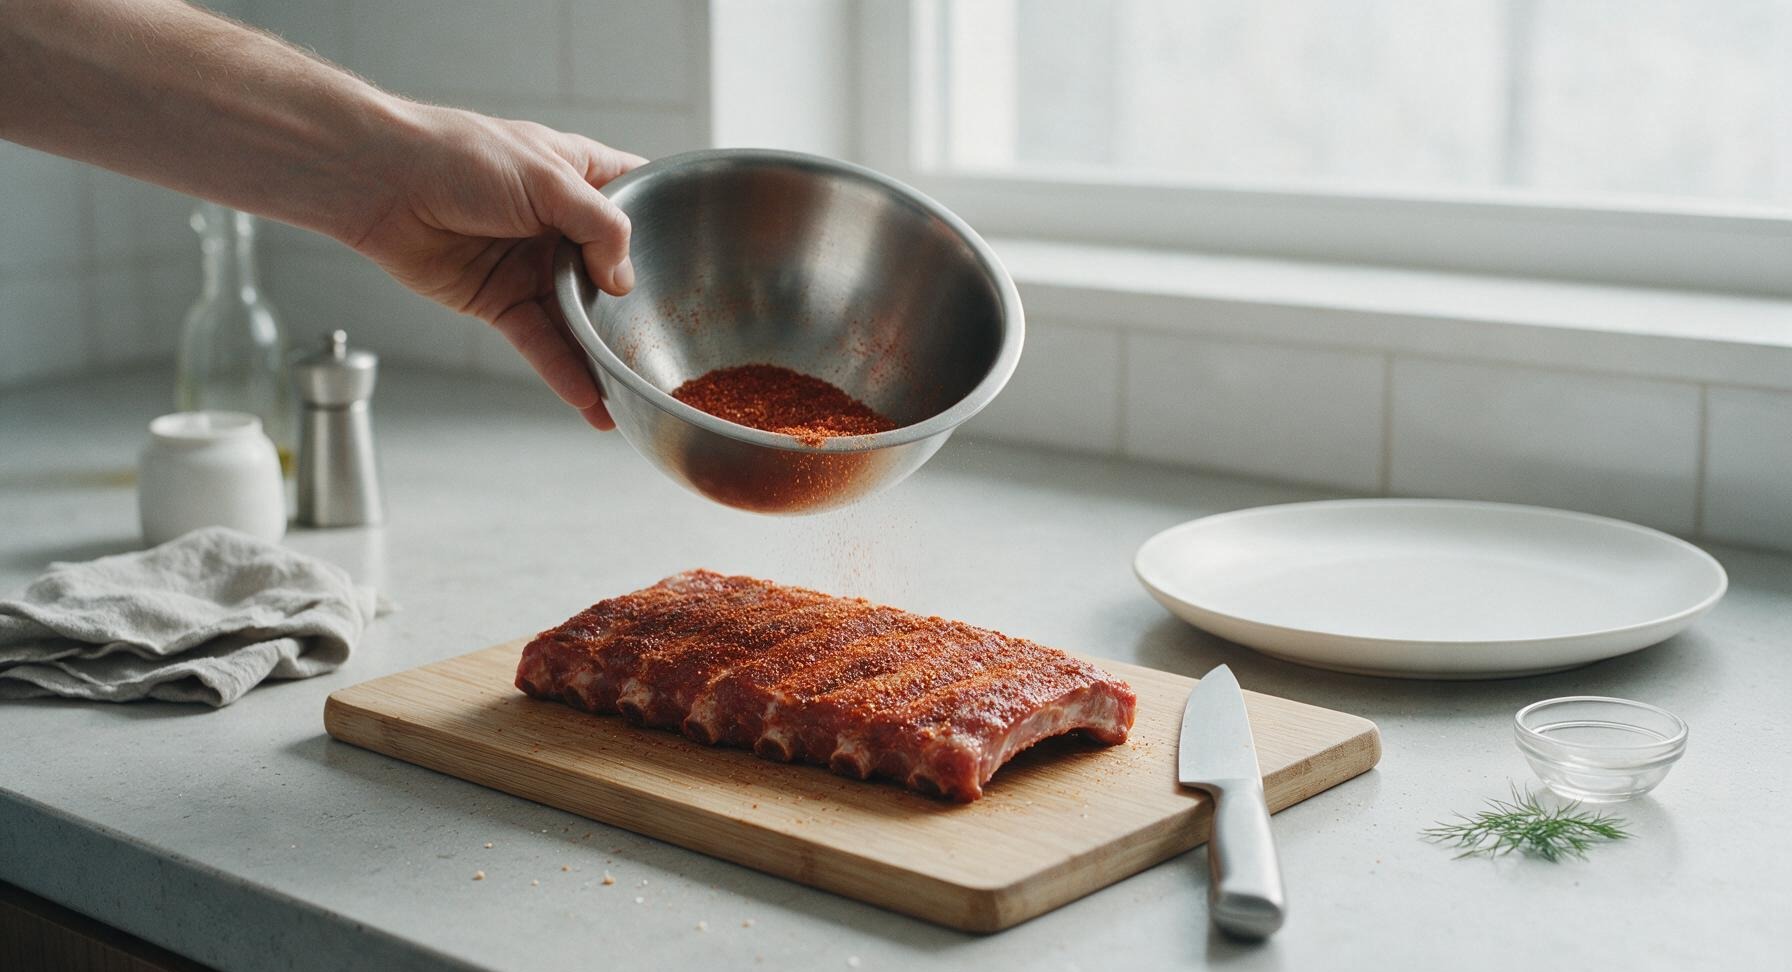
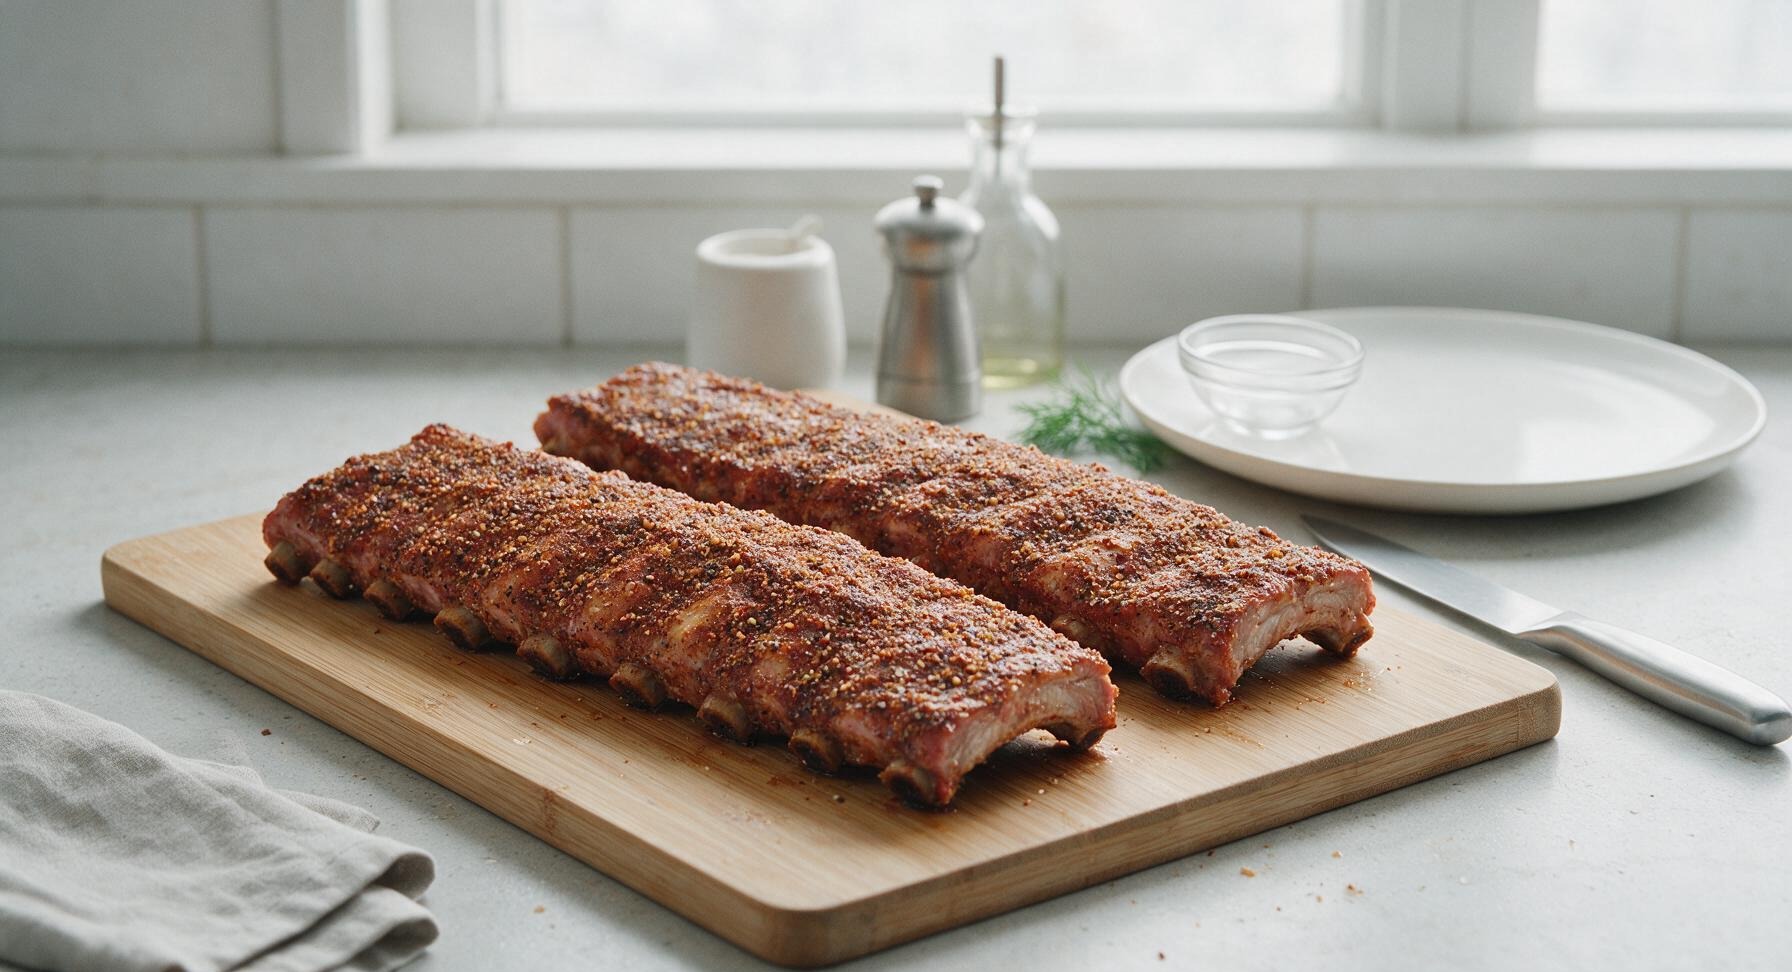
Lightly dab all rib surfaces with 1 tsp neutral canola oil to help the rub adhere. Sprinkle the dry rub evenly across every surface of both racks—meat side, bone side, and cut edges. Use clean hands to press the rub firmly into the meat to form a thin, even coating, with no bare spots visible. Let the seasoned ribs rest at room temperature for 15 minutes to allow the salt to penetrate, while preheating the oven to 150C (300F). Visual cue: The rub will darken slightly as it draws moisture from the meat, forming a slightly tacky surface that sticks to the meat rather than flaking off.
Step 3
step3:Coat Ribs with Rub
Step 3
step3:Coat Ribs with Rub
4

Wrap Ribs for Roasting

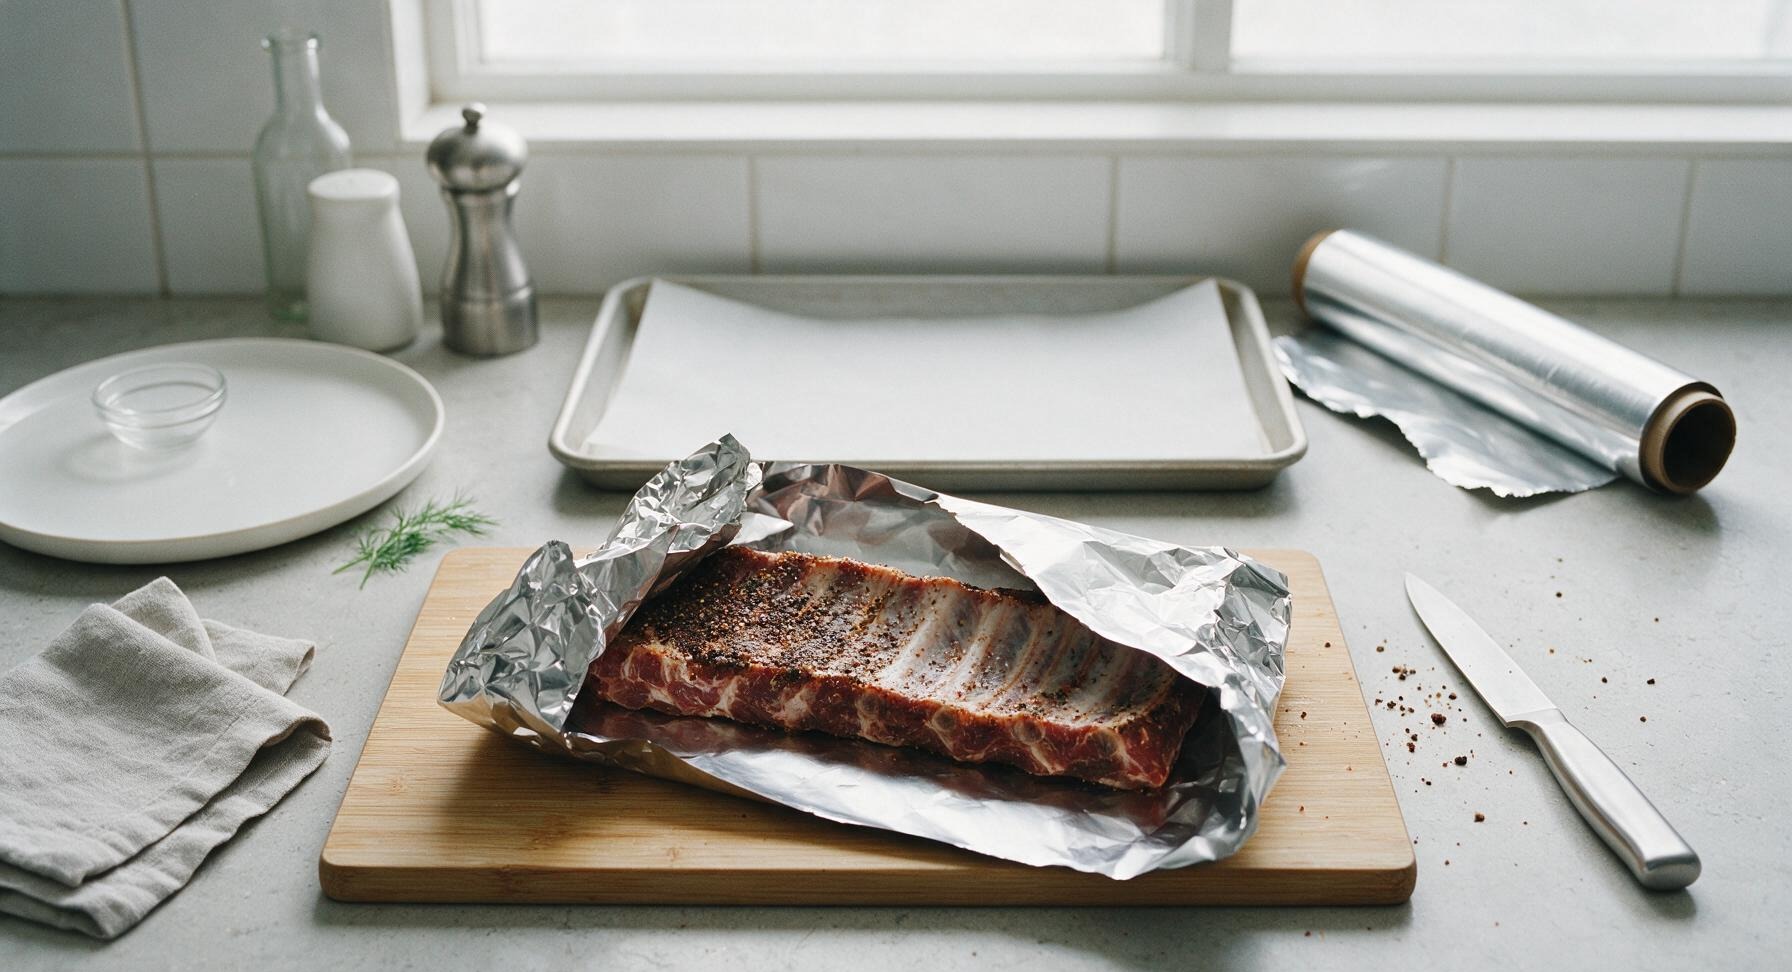
Tear two large sheets of heavy-duty aluminum foil from the back-right roll, each large enough to fully enclose one rib rack with 2 inches of overhang on all sides. Drizzle 1 tbsp of apple cider vinegar over the meat side of each seasoned rack, then fold the foil tightly around the ribs, crimping all edges to form a fully airtight packet. Place both foil packets seam-side up on the parchment-lined rimmed baking sheet. Visual cue: No gaps or holes are visible in the foil seal, so no steam can escape during cooking.
Step 4
step4:Wrap Ribs for Roasting
5

Slow Roast Ribs Low

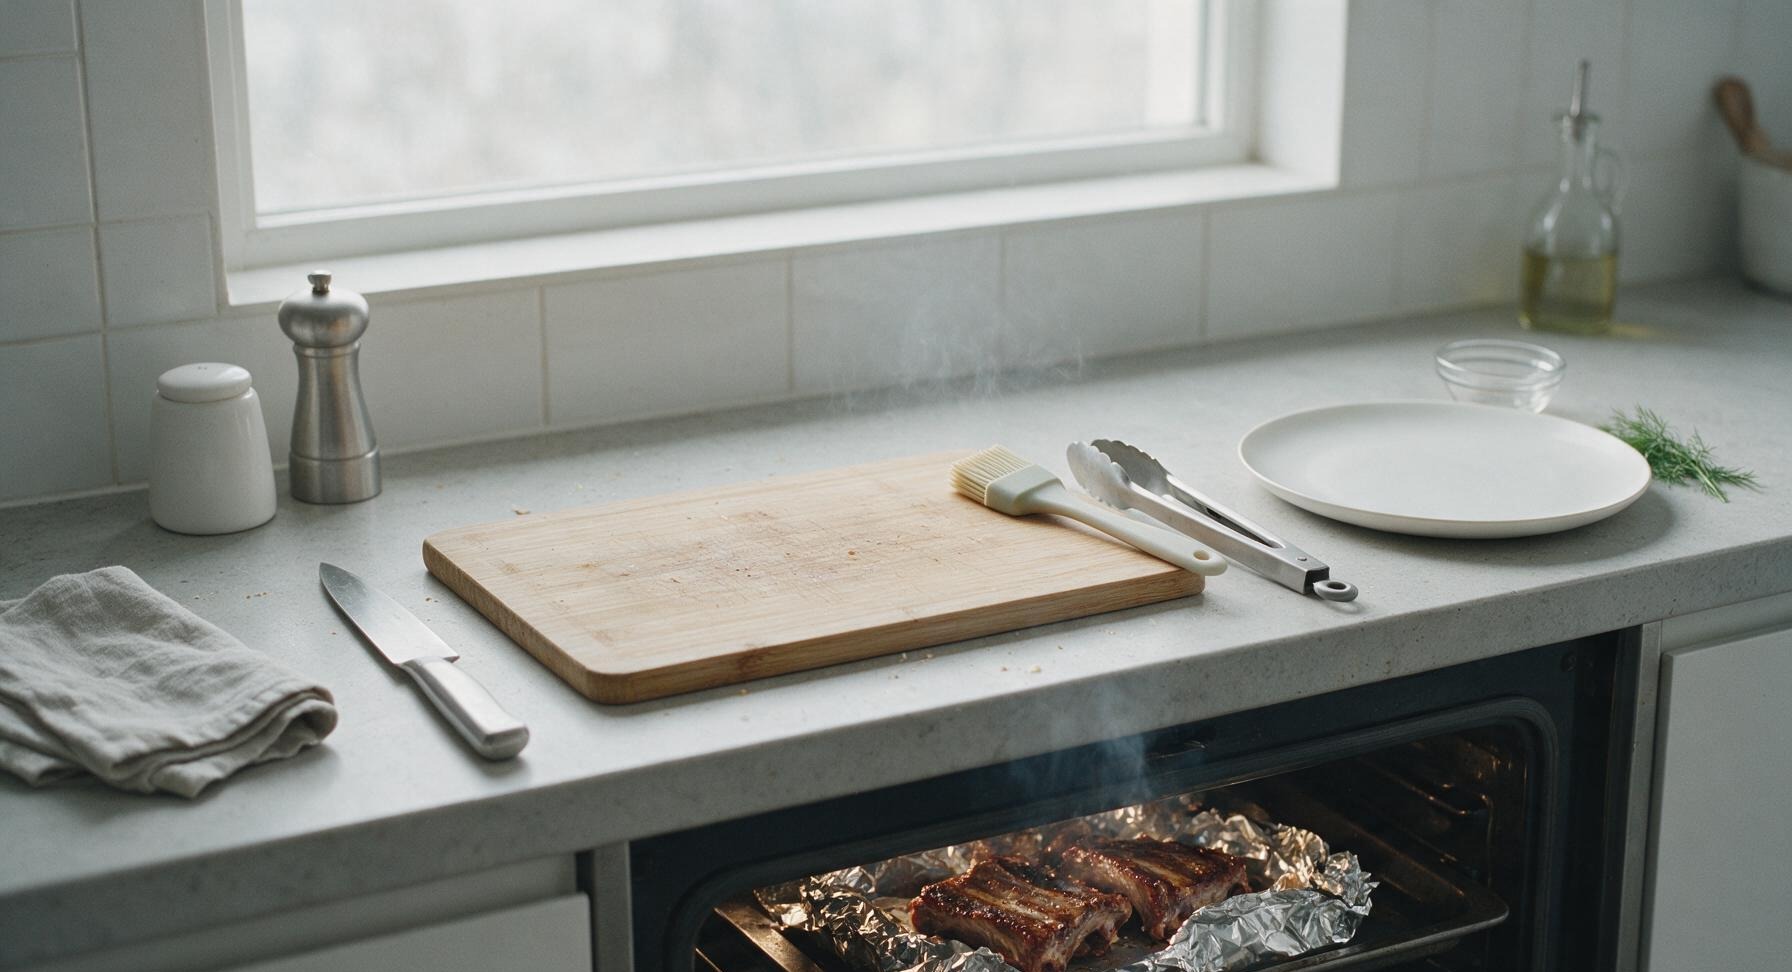
Slide the baking sheet with foil-wrapped ribs into the preheated 150C (300F) oven, positioned on the middle rack. Roast for 2 full hours, avoiding opening the oven door for the first 90 minutes to maintain consistent internal temperature. After 2 hours, carefully pull the oven rack out slightly to test doneness: a toothpick inserted into the thickest part of the rib should slide in with no resistance, and the meat should pull back roughly 1/4 inch from the ends of the bones. Visual cue: The foil packets will be slightly puffed up from trapped internal steam when fully tender.
Step 5
step5:Slow Roast Ribs Low
6

Brush on BBQ Sauce

Carefully pull the baking sheet from the oven, open the top of each foil packet (stand back to avoid burns from escaping hot steam) and fold the foil edges down to expose the ribs. Pour any collected rendered juices from the foil packets into a spare ramekin to reserve for later use. Use the matte black silicone basting brush to coat the meat side of each rack generously with half of the BBQ sauce, forming an even layer. Turn the oven temperature up to 200C (400F). Visual cue: The sauce forms a glossy wet layer across the rib surface, with no dry rub patches left exposed.
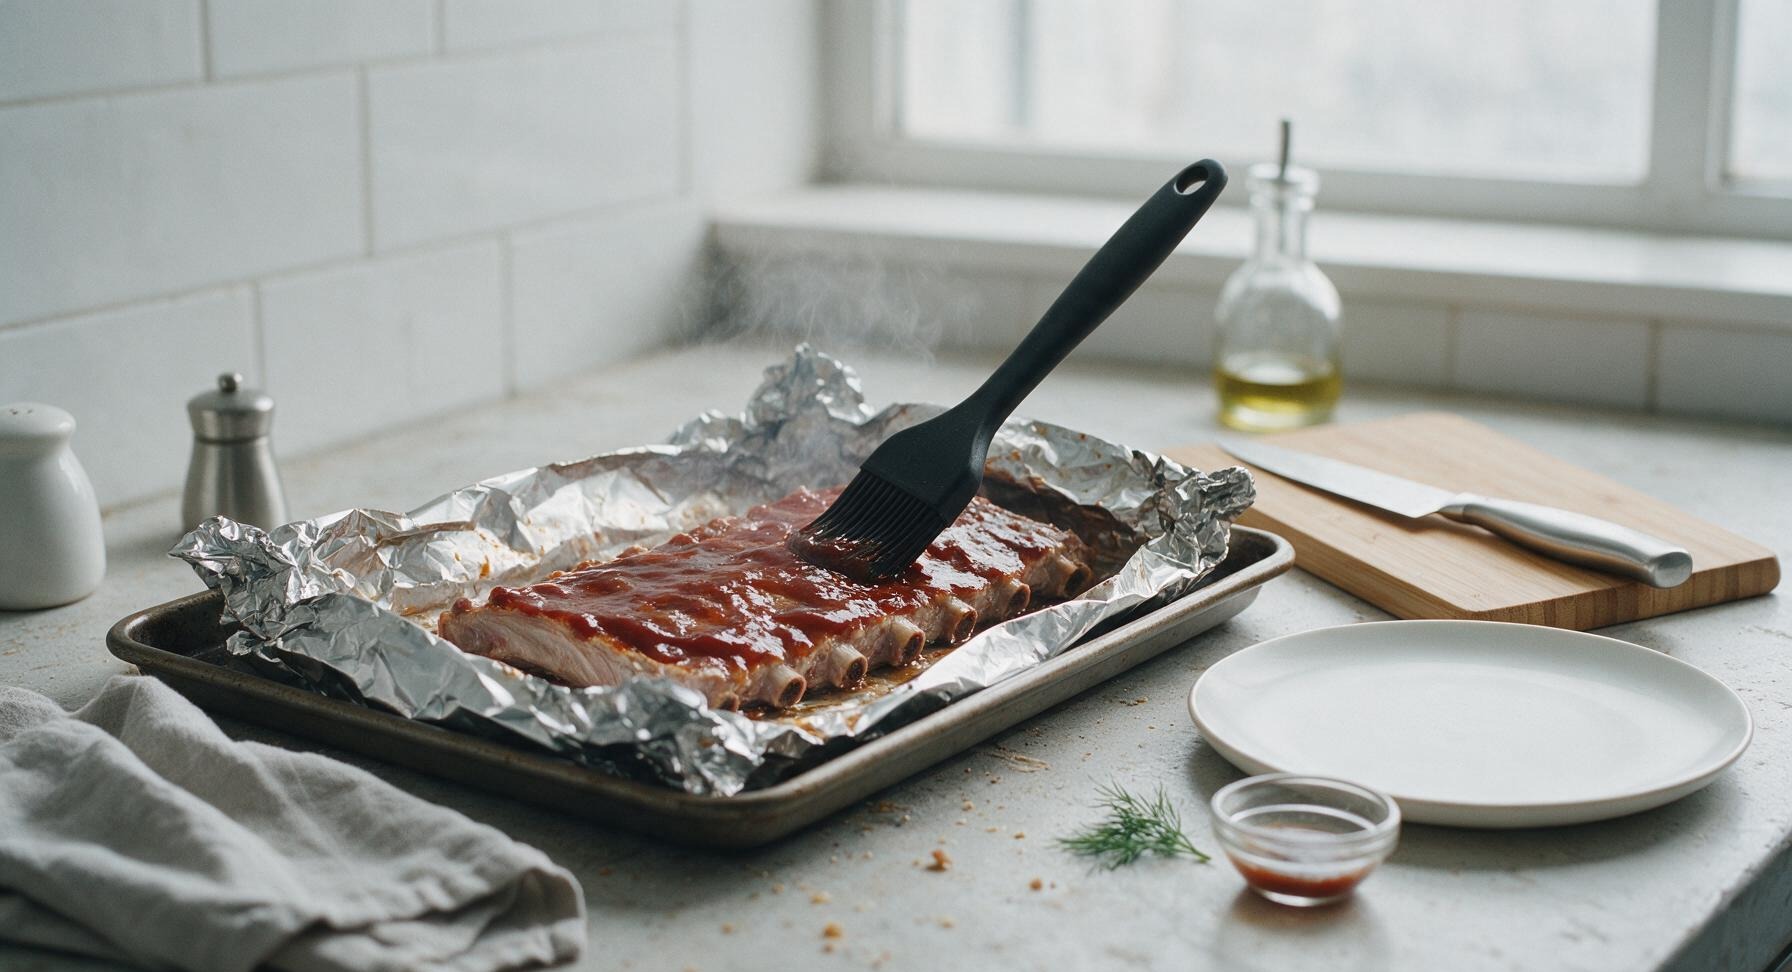
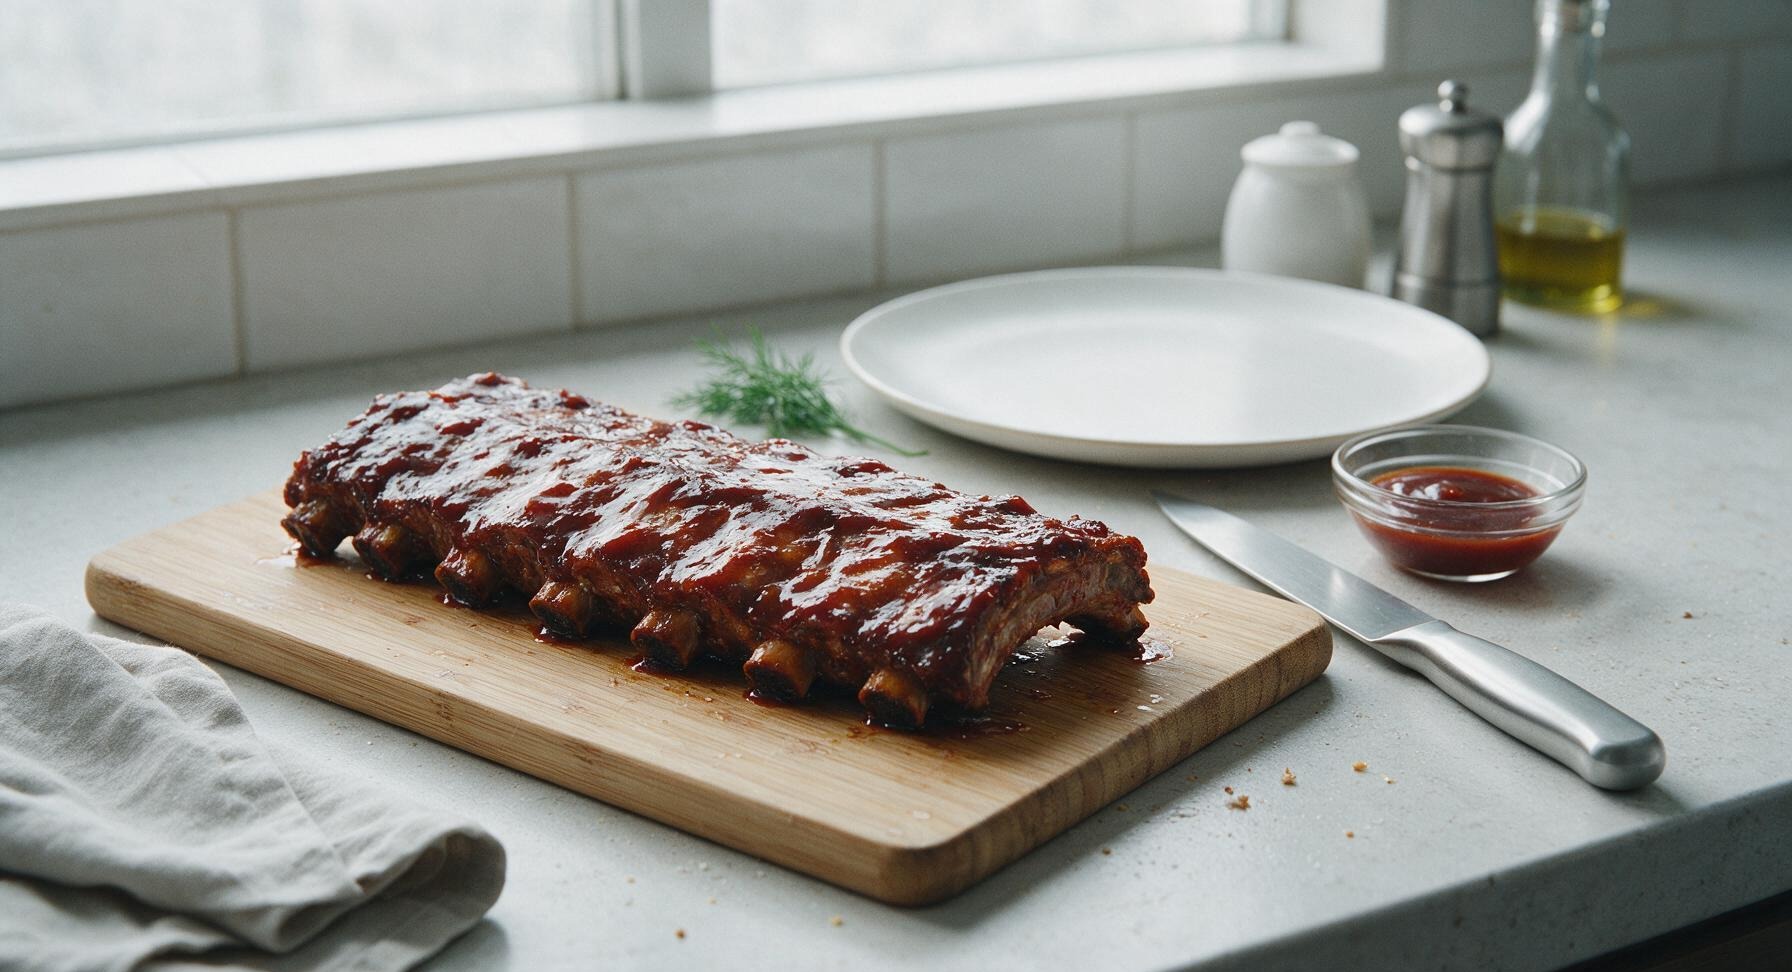
Step 6
step6:Brush on BBQ Sauce
Step 6
step6:Brush on BBQ Sauce
7

Caramelize Sauce Glaze

Return the uncovered ribs (still resting on the open foil on the baking sheet) to the 200C (400F) oven. Bake for 12-15 minutes, until the sauce is bubbly and sticky, with dark caramelized spots forming along the rib edges. Watch closely during the final 3 minutes to avoid burning the sugar in the sauce—if the sauce starts to turn black instead of deep mahogany, pull the ribs immediately. Visual cue: The sauce will thicken to a sticky glaze, and will not run freely when the baking sheet is tilted slightly.
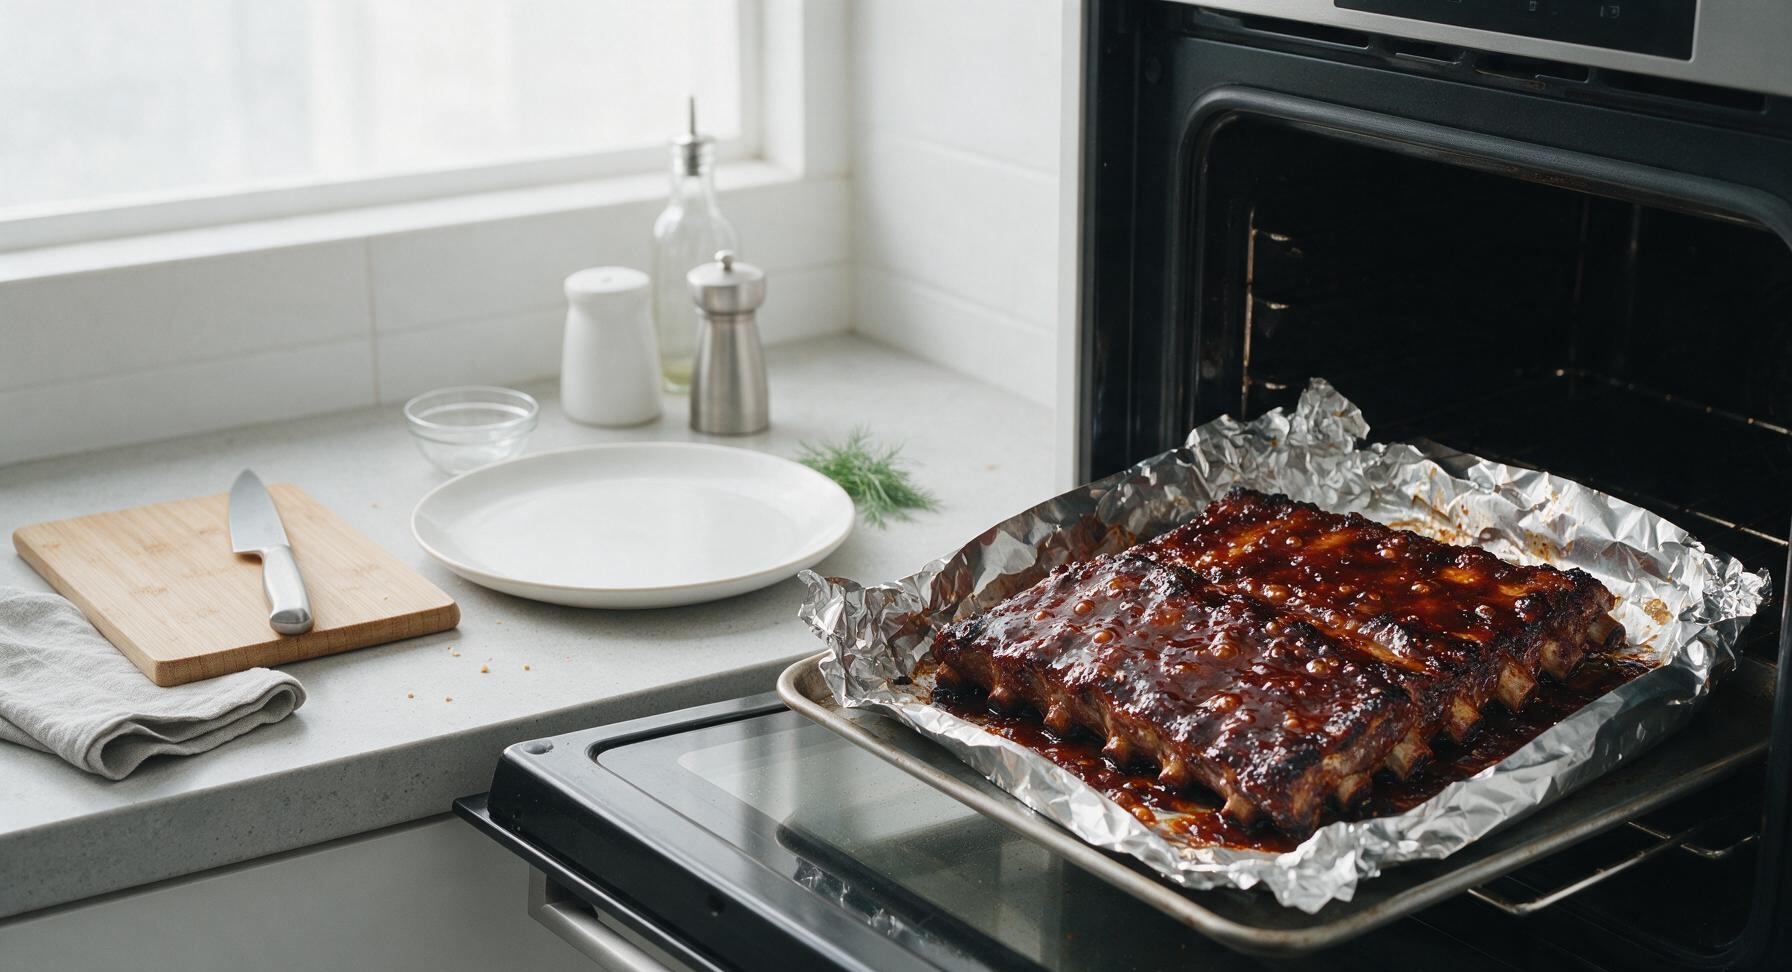
Step 7
step7:Caramelize Sauce Glaze
8

Rest and Plate Ribs

Remove the baking sheet from the oven, use the stainless steel tongs to transfer the whole rib racks to the matte terracotta oval serving platter. Let the ribs rest for 10 minutes at room temperature to allow juices to redistribute. Pick fresh thyme leaves from the back-right potted plant, sprinkle them lightly across the top of the ribs, and serve with the remaining BBQ sauce in a small ramekin on the side. To serve, cut between the bones into individual 1-2 bone pieces. Visual cue: The sauce will set slightly as the ribs rest, with a small amount of deep red juice pooling lightly at the bottom of the platter instead of running freely when cut.
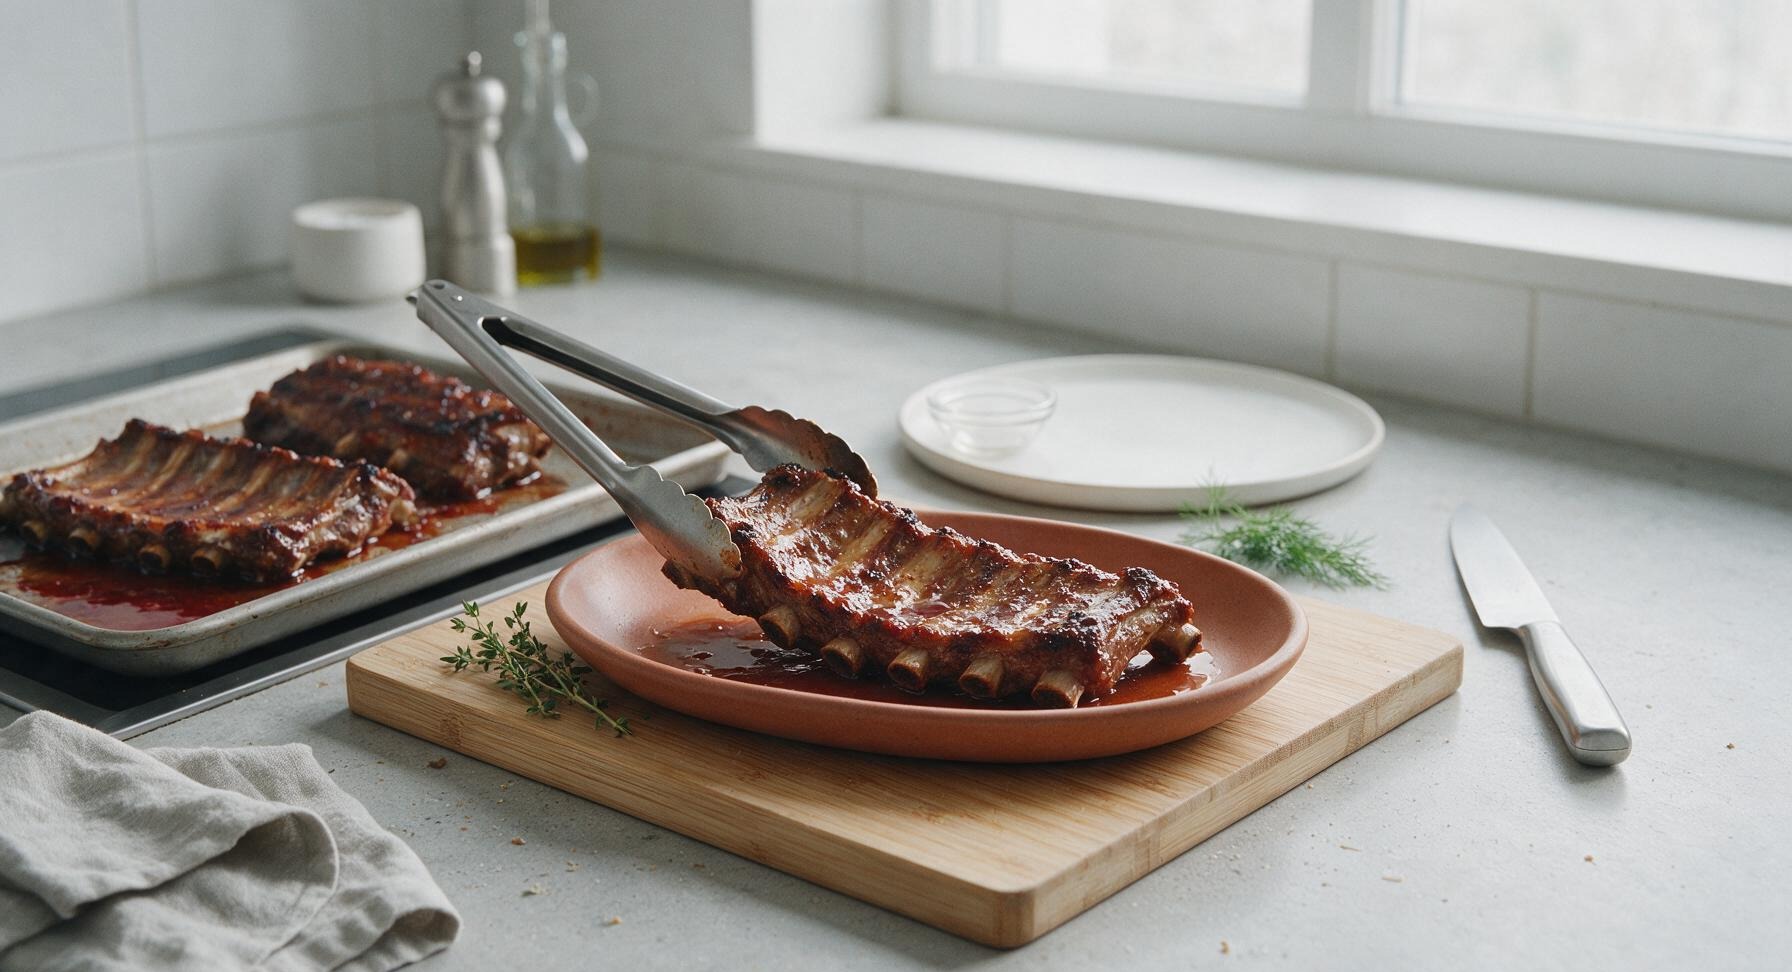
Step 8
step8:Rest and Plate Ribs

Tips

1.Always remove the tough silverskin membrane from the bone side of the ribs before cooking: this connective tissue never softens, even after hours of slow roasting, and will leave an unpleasantly chewy, rubbery texture if left attached.
2.Resist the urge to open the oven door during the first 90 minutes of slow roasting: dropping the oven temperature by even 25C (45F) will slow the breakdown of connective tissue, leading to tough ribs that require extra cook time and may dry out.
3.Let the ribs rest for a full 10 minutes after coming out of the oven: cutting into them immediately will cause all the hot, flavorful juices to run out onto the platter instead of staying locked in the meat, resulting in dry ribs even after perfect low-and-slow cooking.


✨ You May Also Like

BBQ & Grilling
🍜 United States

Tender, melt-in-your-mouth beef brisket with a crisp, spiced bark, slow-smoked to deep smoky perfection, the iconic centerpiece of Texas backyard barbecue.

⏱️ 12 hours BBQ & Grilling ★ 4.4
BBQ & Grilling
🍜 Korea

Tender, sweet-savory marinated beef short ribs, a beloved Korean BBQ staple with caramelized, slightly charred edges and deep umami flavor, perfect for outdoor summer gatherings.

⏱️ 4 hours 2BBQ & Grilling ★ 4.8
BBQ & Grilling
🍜 United States

Juicy grilled beef patties topped with smoky homemade chili, melted cheddar, and tangy pickles on toasted brioche buns for a hearty, flavor-packed handheld meal.

⏱️ 40 minuteBBQ & Grilling ★ 4.7
BBQ & Grilling
🍜 United States

A sweet, smoky, tangy BBQ sauce brightened with peak-season dark cherries, ideal for glazing grilled ribs, chicken, pork, or summer roasted veggies.

⏱️ 35 minuteBBQ & Grilling ★ 4.7
BBQ & Grilling
🍜 United States

Rich, smoky, slightly sweet homemade bourbon BBQ sauce with deep caramel notes, ideal for glazing grilled ribs, chicken, and burgers at cookouts.

⏱️ 25 minuteBBQ & Grilling ★ 4.7
BBQ & Grilling
🍜 United States

Iconic Alabama-style BBQ featuring tender hickory-smoked chicken slathered in tangy creamy white sauce, a beloved regional Southern cookout staple.

⏱️ 3 hoursBBQ & Grilling ★ 5

barbeque oven:Frequently Asked Questions

1.What cut of ribs works best for this fall-off-the-bone oven recipe? ▾
St. Louis style pork rib racks are ideal here, as called for in the recipe! These trimmed spare ribs have even fat marbling, a uniform flat shape that cooks consistently in the oven, and the perfect meat-to-bone ratio to get that tender, fall-off-the-bone texture without drying out, unlike leaner baby back ribs that can overcook quickly.
2.Do I need to remove the membrane from the back of the ribs before baking? ▾
Absolutely—don’t skip this step! The thin papery membrane on the bone side of the rack gets tough and chewy when cooked, and it blocks rub and sauce from soaking into the meat. Slide a butter knife under the membrane at one end, grab it with a paper towel for grip, and pull it off in one smooth sheet before seasoning.
3.What’s in the basic dry rub for these ribs, and do I need fancy specialty ingredients? ▾
You don’t need fancy specialty rubs for great ribs! The core rub mixes kosher salt, freshly cracked black pepper, smoked paprika, and garlic powder in balanced ratios to deliver smoky, savory depth that lets the pork flavor shine, without overpowering the tangy BBQ sauce you’ll add later in the cook.
4.How long do I need to bake the ribs to get that signature fall-off-the-bone texture? ▾
Plan for roughly 3 to 3.5 hours total in a 275°F oven, wrapped tightly in foil for the first 2.5 hours to trap steam that breaks down tough connective tissue. That low, slow heat is non-negotiable—cranking the temp higher will make the outside burn before the interior gets tender enough to pull clean from the bone.
5.Is wrapping the ribs in foil during baking actually necessary? ▾
Wrapping for the first portion of cook time is key for that fall-off-the-bone texture! The foil traps moisture and steam, which softens the tough connective tissue in the ribs without drying out the meat. Skipping the wrap will give you chewier, firmer ribs, even if you cook them low and slow, and you won’t get that tender pull-away texture.
6.When should I add BBQ sauce so it doesn’t burn in the oven? ▾
Wait to slather on BBQ sauce until the last 20 to 30 minutes of cook time, after you unwrap the foil. The high sugar content in most BBQ sauces burns quickly at oven temperatures, so adding it late lets it caramelize into that sticky, smoky bark without turning bitter or charring too much before the ribs are done.
7.Can I use baby back ribs instead of St. Louis style for this recipe? ▾
You absolutely can, but you’ll need to adjust your cook time! Baby back ribs are leaner and smaller than St. Louis cuts, so they’ll only need 2 to 2.5 hours total at 275°F, with 1.5 to 2 hours wrapped in foil. Keep a close eye on them, as they dry out much faster than the fattier St. Louis racks.
8.How do I tell when the ribs are truly fall-off-the-bone done, without overcooking them? ▾
There are two easy, reliable tests: first, pick up the rack with tongs from one end—if the rack bends easily and a small crack forms on the top where meat pulls away from bone, it’s done. You can also twist a middle bone; it should pull out cleanly with almost no resistance when connective tissue is fully broken down.
9.My last batch of oven ribs came out tough—what did I do wrong? ▾
Tough ribs almost always come down to two issues: cooking at too high a temperature, or not cooking them long enough to break down tough connective tissue. Make sure your oven holds a steady 275°F, keep the foil wrap tight to trap steam, and don’t rush the low-and-slow cook time—connective tissue needs time to melt into that rich, tender texture.
10.Do I need a smoker to get that smoky bark the recipe mentions? ▾
Nope! The smoked paprika in the dry rub adds that classic deep smoky flavor right in your oven, no special smoker required. When you unwrap the ribs to add sauce, the dry rub on the surface will crisp up into that perfect textured bark as the sauce caramelizes, giving you that smoke-kissed taste without extra equipment.
11.Can I prep these ribs ahead of time for a casual summer gathering? ▾
Absolutely—they’re perfect for prepping ahead! You can apply the dry rub to the rib racks 12 to 24 hours before baking, keep them tightly covered in the fridge, then pop them in the oven when you’re ready. You can even fully cook them a day ahead, reheat wrapped in foil at 250°F, then sauce and broil briefly to crisp the bark.
12.Should I add liquid like apple juice or beer to the foil wrap with the ribs? ▾
You can add a splash of apple juice, beer, or apple cider vinegar to the foil packet if you like a subtle extra layer of flavor, but it’s not required. The fat rendering from the St. Louis ribs creates enough moisture on its own to steam the meat tender, so skip the extra liquid if you want a more concentrated, pork-forward flavor.
13.What kind of BBQ sauce works best for these ribs? ▾
A tangy, slightly sweet tomato-based BBQ sauce works perfectly here—look for one with a balance of vinegar, brown sugar, and a hint of smoke to complement the rub. Avoid overly thick, cloyingly sweet novelty sauces, as they can clump and burn easily, and will overpower the savoriness of the dry rub and natural pork flavor.
14.Do I need any special equipment, like a roasting rack, to make these ribs? ▾
You don’t need any special equipment! A rimmed baking sheet lined with heavy-duty foil works perfectly—just set the wrapped ribs directly on the sheet. If you want extra crisp bark all around, you can set the ribs on a wire rack inside the baking sheet when you unwrap them to add sauce, to let air circulate under the rack too.
15.How much rib should I plan per person for a summer cookout? ▾
Plan for ½ to ¾ of a pound of St. Louis style ribs per guest for a casual gathering. That works out to roughly 3 to 4 ribs per adult, especially if you’re serving classic sides like coleslaw, potato salad, cornbread, or baked beans. Grab an extra half rack if you’re feeding big eaters, because these always go fast!
16.Why does the recipe call for kosher salt instead of regular table salt for the rub? ▾
Kosher salt has larger, flakier crystals that distribute more evenly across the rib surface than fine table salt, so you don’t end up with overly salty bites. It also draws out just enough moisture from the meat to help the rub stick and form that nice bark, without the harsh, overly salty bite table salt can give if you measure by volume.
17.Can I broil the ribs at the end to get extra caramelized sauce? ▾
Absolutely! After the sauce has baked on for 20 minutes, you can crank the broiler to high and broil the ribs for 2 to 3 minutes, watching extremely closely, to get those perfectly bubbly, slightly charred edges on the sauce. Just don’t walk away—sugary BBQ sauce can go from caramelized to burnt in 30 seconds under the broiler.
18.My rub never forms a nice, crisp bark—what am I missing? ▾
If your bark is soggy, you’re likely adding sauce too early, or not letting the ribs cook unwrapped long enough after the foil stage. After removing the foil, let the ribs cook for 10 minutes before adding sauce to let the surface dry out a bit—this lets the smoked paprika, garlic powder, and pepper crisp up into a sturdy base for the sauce to stick to.
19.How do I store leftover ribs, and how long do they keep? ▾
Let leftover ribs cool completely, then wrap them tightly in plastic wrap or foil and store them in an airtight container in the fridge for up to 4 days. To reheat, wrap them in foil and bake at 250°F for 20 to 25 minutes until heated through, then add a quick brush of extra sauce and broil for 1 minute to refresh the sticky bark.
20.Can I make these ribs if I don’t have smoked paprika on hand? ▾
You can substitute regular sweet paprika mixed with ¼ teaspoon of liquid smoke per tablespoon of paprika to get that same smoky depth, but I recommend grabbing smoked paprika if you can—it has a rounded, woody smoke flavor that doesn’t taste artificial like straight liquid smoke can, and it’s a pantry staple you’ll use for tons of recipes.

Comments (20)

2 days ago

OMG these ribs were a total game changer for our Sunday family dinner! I was worried I’d mess them up since I’ve never made ribs that weren’t on the grill, but they were literally fall off the bone tender. My 3 kids ate two servings each and asked when we’re making them again. 10/10

yesterday

So glad your whole family loved them, Sarah! The low slow oven temp is the secret to that fall-off-the-bone texture without a grill, so happy it worked for you!

3 days ago

Quick question—do I have to remove the membrane on the back of the ribs before cooking? I’ve skipped that step before and had chewy ribs, don’t wanna mess this up for my potluck this weekend!

2 days ago

I almost skipped that step too but did it last time I made these and it made such a huge difference! Takes 2 minutes with a paper towel to grip it, totally worth it.

2 days ago

Great question, Mike! We absolutely recommend removing that membrane—it keeps the ribs from getting chewy and lets the BBQ sauce sink in better. Good luck at the potluck, everyone’s gonna love ‘em!

1 week ago

SO good. I used a hickory smoked BBQ sauce instead of the original sweet kind I usually buy and it paired perfectly. Made enough for meal prep for the week and the leftovers held up amazing even after reheating in the air fryer.

5 days ago

These were really solid, but I had to add an extra 15 minutes of cook time at the end for them to get as tender as I wanted. My oven runs a little cool though, so that’s probably on me! Flavor was spot on, sauce caramelized perfectly.

3 days ago

Thanks for the honest feedback, Nick! Oven temps can vary so much from model to model, so extra cook time for cooler ovens is totally normal. So glad the flavor landed for you!

2 hours ago

Help! I followed the recipe exactly but my sauce burned a little on the bottom of the pan when I cranked the heat up at the end. What did I do wrong? 😭

30 minutes ago

Oh I did that the first time too! I put a layer of aluminum foil under the ribs on the baking sheet after that and no more burnt sauce mess. Total game saver.

5 minutes ago

Sorry that happened! A quick fix is to line your baking sheet with heavy duty foil before adding the ribs, which catches any dripping sauce and prevents burning. You can also baste a little lighter on the final sauce layer if your oven runs hot!

1 week ago

Brought these to my neighborhood block party last weekend and people were begging me for the recipe! Everyone kept saying they were better than the ribs from the local BBQ joint down the street. Win for this home cook!

5 days ago

Wow, that’s the highest compliment! Nothing beats beating local BBQ spot ribs at a block party, that’s such a win. Thanks for sharing the recipe with your neighbors too!

2 weeks ago

Made these for my partner’s birthday dinner and he said they’re the best thing I’ve ever cooked. We paired them with coleslaw and baked beans just like the recipe suggested, chef’s kiss. Will be making these all fall long for game days.

2 days ago

Has anyone tried making these with a gluten free BBQ sauce? My son has a gluten sensitivity and I wanna make these for his birthday dinner next week but don’t wanna mess up the texture or flavor.

yesterday

I made them with a GF brown sugar BBQ sauce last week and you literally couldn’t tell the difference! Just make sure you don’t get one that’s too watery, otherwise the sauce won’t caramelize right.

yesterday

Great question! Gluten free BBQ sauce works perfectly here, just as the previous commenter said—opt for a nice thick one so it sticks to the ribs and caramelizes well, and you’ll be all set. Hope your son loves his birthday dinner!

yesterday

I saw this was marked medium difficulty and almost skipped it because I burn toast half the time, but it was way easier than I thought! The step by step instructions were super clear, no fancy equipment needed. Already sent the recipe to my whole family group chat.

2 hours ago

Love hearing that, Kevin! We marked it medium just because of the membrane removal and temp timing, but it’s totally doable even if you’re new to cooking ribs. So glad you gave it a shot!

30 minutes ago

Wait the cook time says 2 hours 15 minutes total? Is that active time or total from when you put them in the oven to when they’re done? I need something I can pop in the oven after school drop off before soccer practice.

5 minutes ago

It’s almost all inactive time! You just pop ‘em in low temp for most of it, then baste and crank the heat at the end. I did work emails while mine cooked last week, no standing over the stove required.

just now

Hi Bree! That 2h15m is total cook time, almost all of which is hands-off while the ribs slow bake in the oven. Perfect for busy school nights—you can even prep the dry rub on the ribs the night before to save extra time!

3 days ago

I was a total skeptic about oven ribs being as good as smoked ribs, but color me impressed. The dry rub ratio was perfect, not too salty not too sweet, and that final high heat bake gave the sauce that perfect sticky char I usually only get on the smoker. Will be making these when it’s too rainy to grill out.

2 weeks ago

Made these for my roommates on a budget and we ate like kings for 3 days straight! The ribs were cheap from the grocery store, the ingredients were all stuff we already had in the pantry, and they tasted restaurant quality. 10/10 for broke college students.

1 week ago

That’s what we love to hear! Restaurant quality food on a college budget is the dream, so glad you and your roommates got to enjoy them. Leftover rib sandwiches the next day are chef’s kiss too, if you haven’t tried that!

yesterday

Do these work better with spare ribs or baby back ribs? The store had both on sale this week and I can’t decide which to grab for game night on Sunday.

2 hours ago

I used baby backs last time and they were perfect! My cousin used spare ribs with the same recipe and said they were amazing too, just needed an extra 10 mins of cook time since they’re a little thicker.

30 minutes ago

Hi Dee! Both work wonderfully, as Rob mentioned! Baby backs cook a little faster and are a bit leaner, while spare ribs are a little fattier and extra juicy. Just adjust cook time 10-15 mins if you go with thicker spare ribs, and you’ll be golden for game night!

5 days ago

These were great, but I added a teaspoon of cayenne to the dry rub and a splash of hot sauce to the BBQ sauce to give ‘em a little kick, and it was chef’s kiss. If you like heat, I highly recommend that tweak!

3 days ago

That sounds like an amazing tweak! We love a little extra heat too, that cayenne addition is perfect for anyone who doesn’t love super sweet BBQ. Thanks for sharing the tip!

1 week ago

I’ve been making ribs for 50 years and I have to say, this method is better than my old recipe! My grandkids kept coming back for more, and even my picky great-grandson ate a whole rib without complaining. That’s the highest seal of approval I can give.

2 days ago

I was looking for a high protein meal prep option that wasn’t just boring chicken and rice, and these fit the bill! I paired them with roasted broccoli and sweet potato for my lunches all week, and it didn’t feel like a sad desk lunch at all. So flavorful.

yesterday

Yes! Ribs are such an underrated meal prep pick—high protein, super satisfying, and way more fun than plain chicken. So glad you found a new go-to lunch option!

3 days ago

Can I freeze these after cooking? I wanna make a double batch this weekend so I have easy dinners for nights when I don’t feel like cooking after work, but I don’t want them to get soggy when I reheat them.

2 days ago

I froze half a batch last month! I wrapped them tight in plastic wrap then foil, squeezed all the air out, and they reheated perfectly in the oven at 350 for 20 mins. No sogginess at all, just as good as fresh.

yesterday

Great question, Mia! They freeze beautifully if you wrap them tightly to avoid freezer burn, just as Flo mentioned. Reheat low and slow in the oven instead of the microwave to keep that tender texture, and they’ll taste just like the day you made them!

1 week ago

Made these for our tailgate last weekend before the college football game and they were a total hit. I prepped them the night before, heated them up in a portable oven at the tailgate, and everyone was raving. Way easier than manning a grill for 2 hours in the parking lot.

yesterday

I can’t believe I made ribs that actually fall off the bone! I’ve tried 3 other oven rib recipes before and they always came out tough and chewy, but this one worked on the first try. I feel like an actual professional cook now lmao

2 hours ago

That’s the magic of the low slow bake! So proud of you for nailing it on the first try, there’s no better feeling than nailing a recipe you’ve struggled with before. Can’t wait for you to make them again!

just now

Made these for my third date with my now boyfriend and he said he knew I was a keeper after the first bite. 10/10, great for impressing people without spending all day in the kitchen. We’re making them together for our 3 month anniversary next week!



