
cooking fresh kielbasa

title 1
cooking fresh kielbasa
⏱️ cook time 25 minutes
🍽️ servings 4
⚡ Difficulty easy

intro

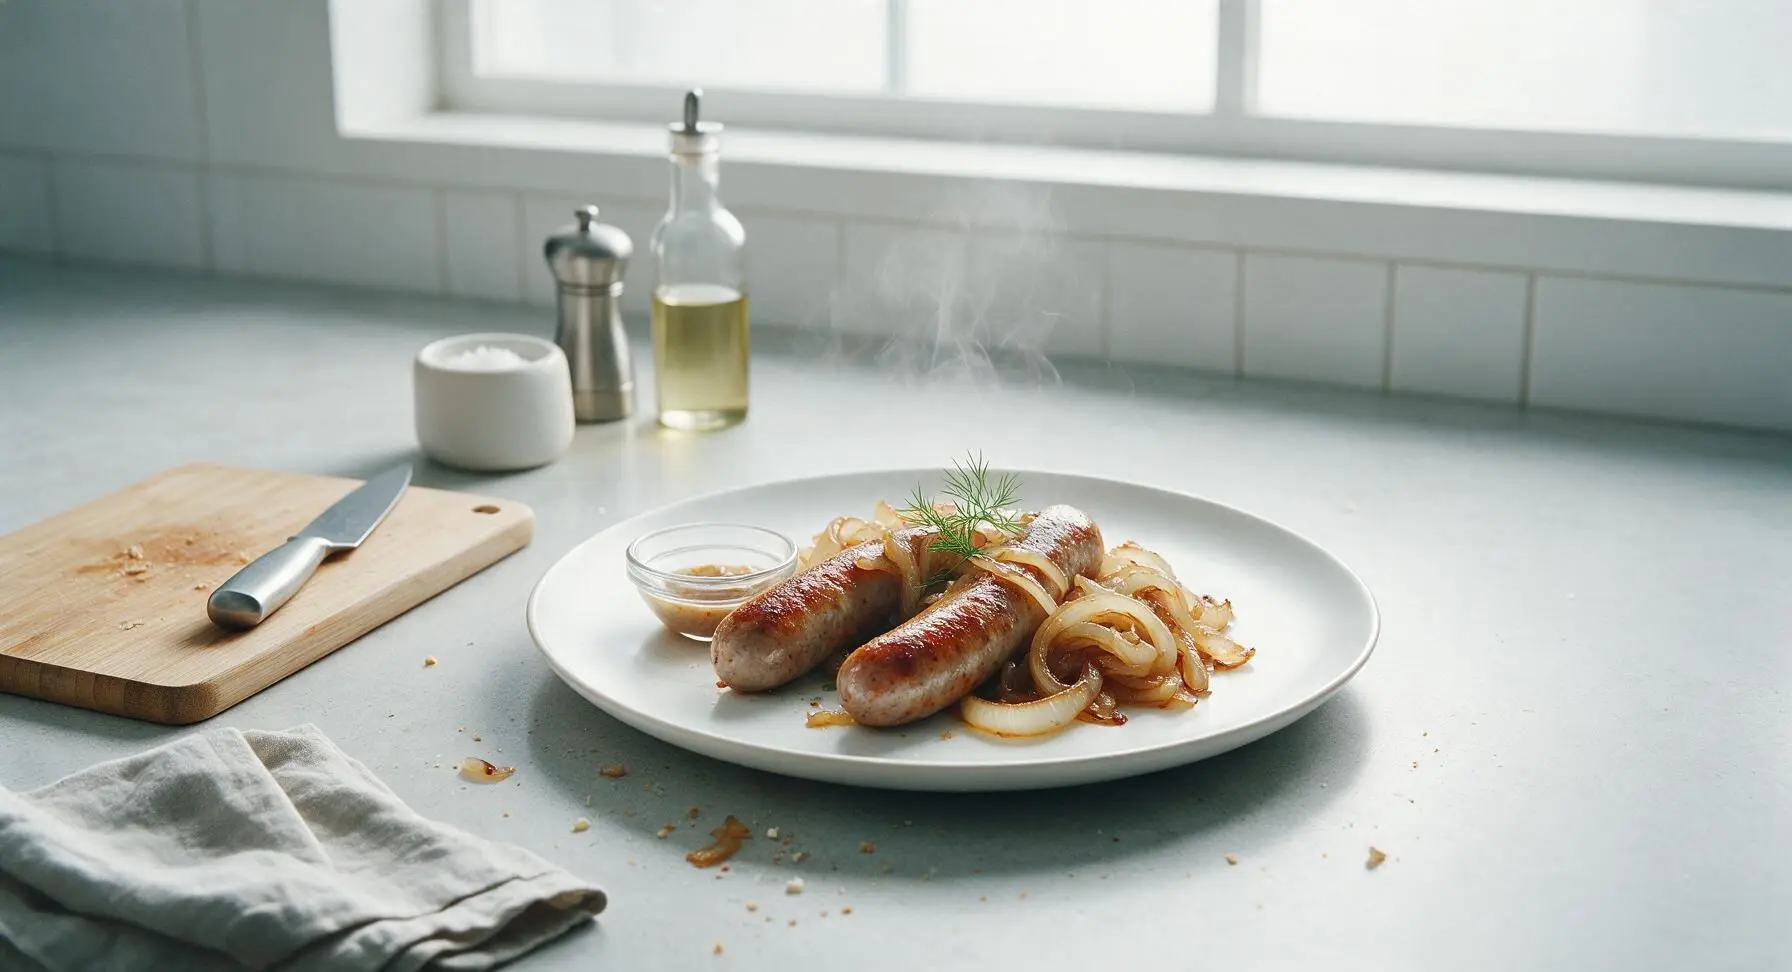
Juicy, garlicky fresh kielbasa with crisp golden casings, served alongside slow-caramelized sweet onions for a cozy, satisfying autumn family meal with minimal cleanup.

Ingredients
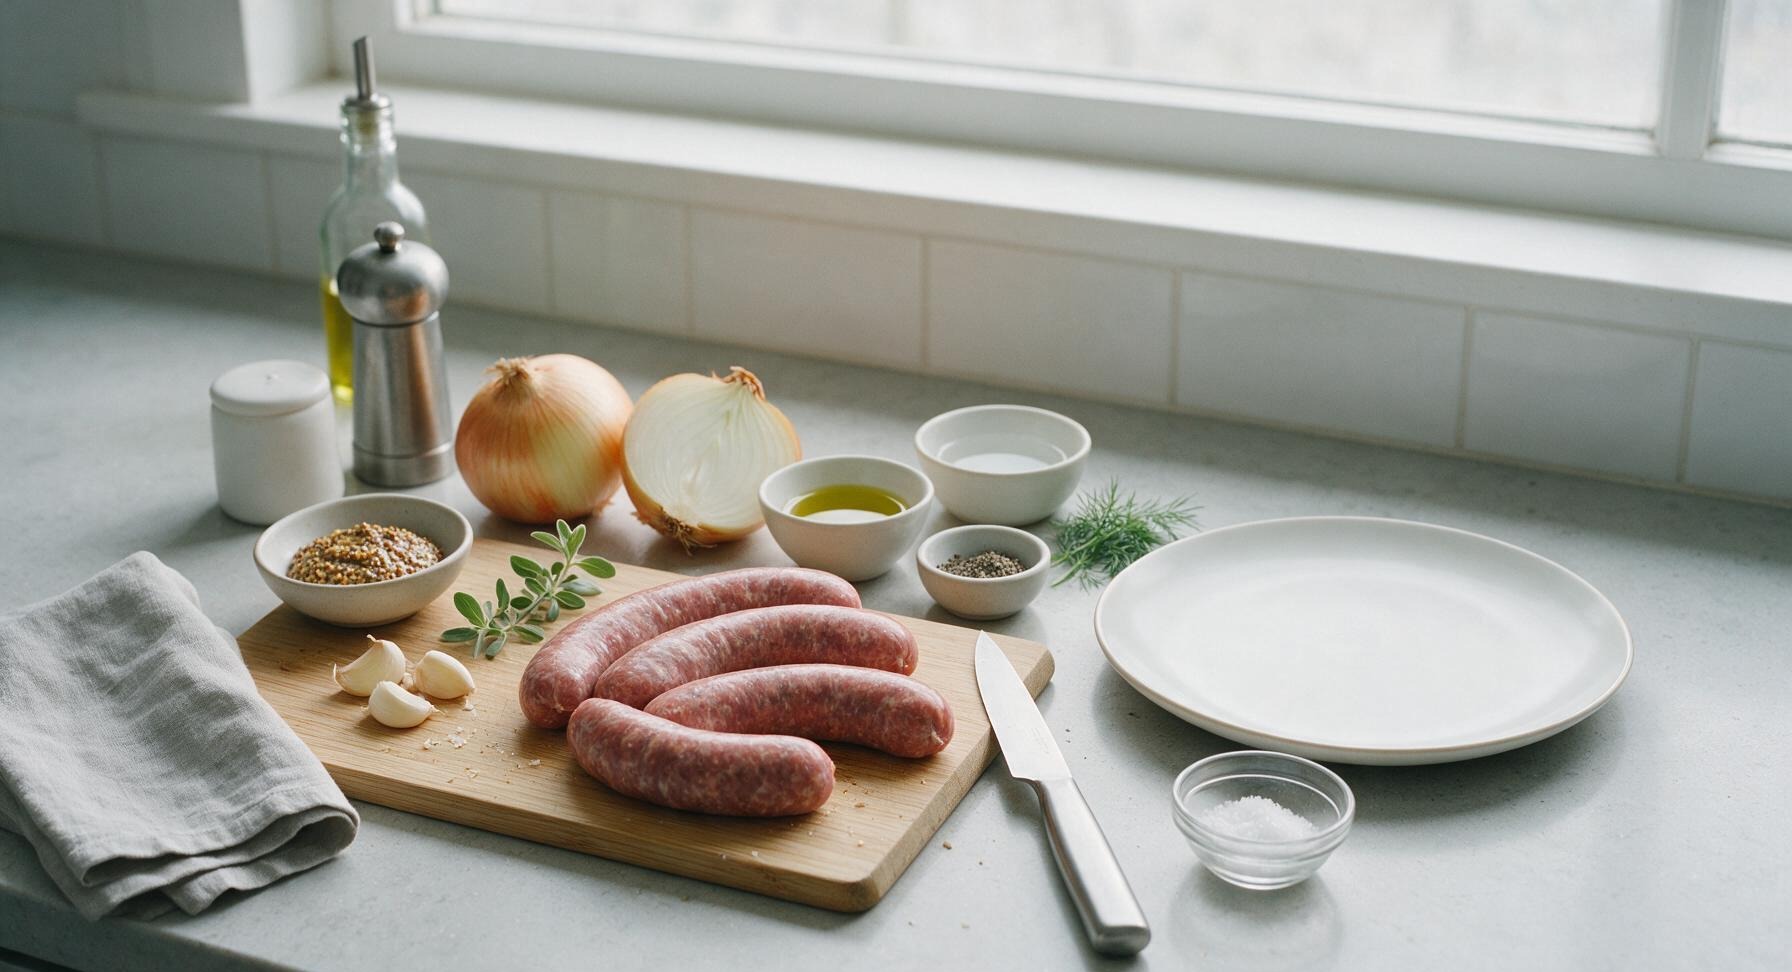
Fresh uncooked pork kielbasa (cased) 1.5 lbs (4 links)
Yellow onions 2 large (≈1 lb), thinly sliced
Extra-virgin olive oil 1 tbsp
Water ¼ cup
Garlic cloves 3, lightly crushed
Whole grain mustard 2 tbsp (for serving)
Kosher salt 1 tsp, divided
Freshly ground black pepper ½ tsp, divided
Fresh marjoram 2 sprigs

Steps

1

Prep Sausage and Aromatics

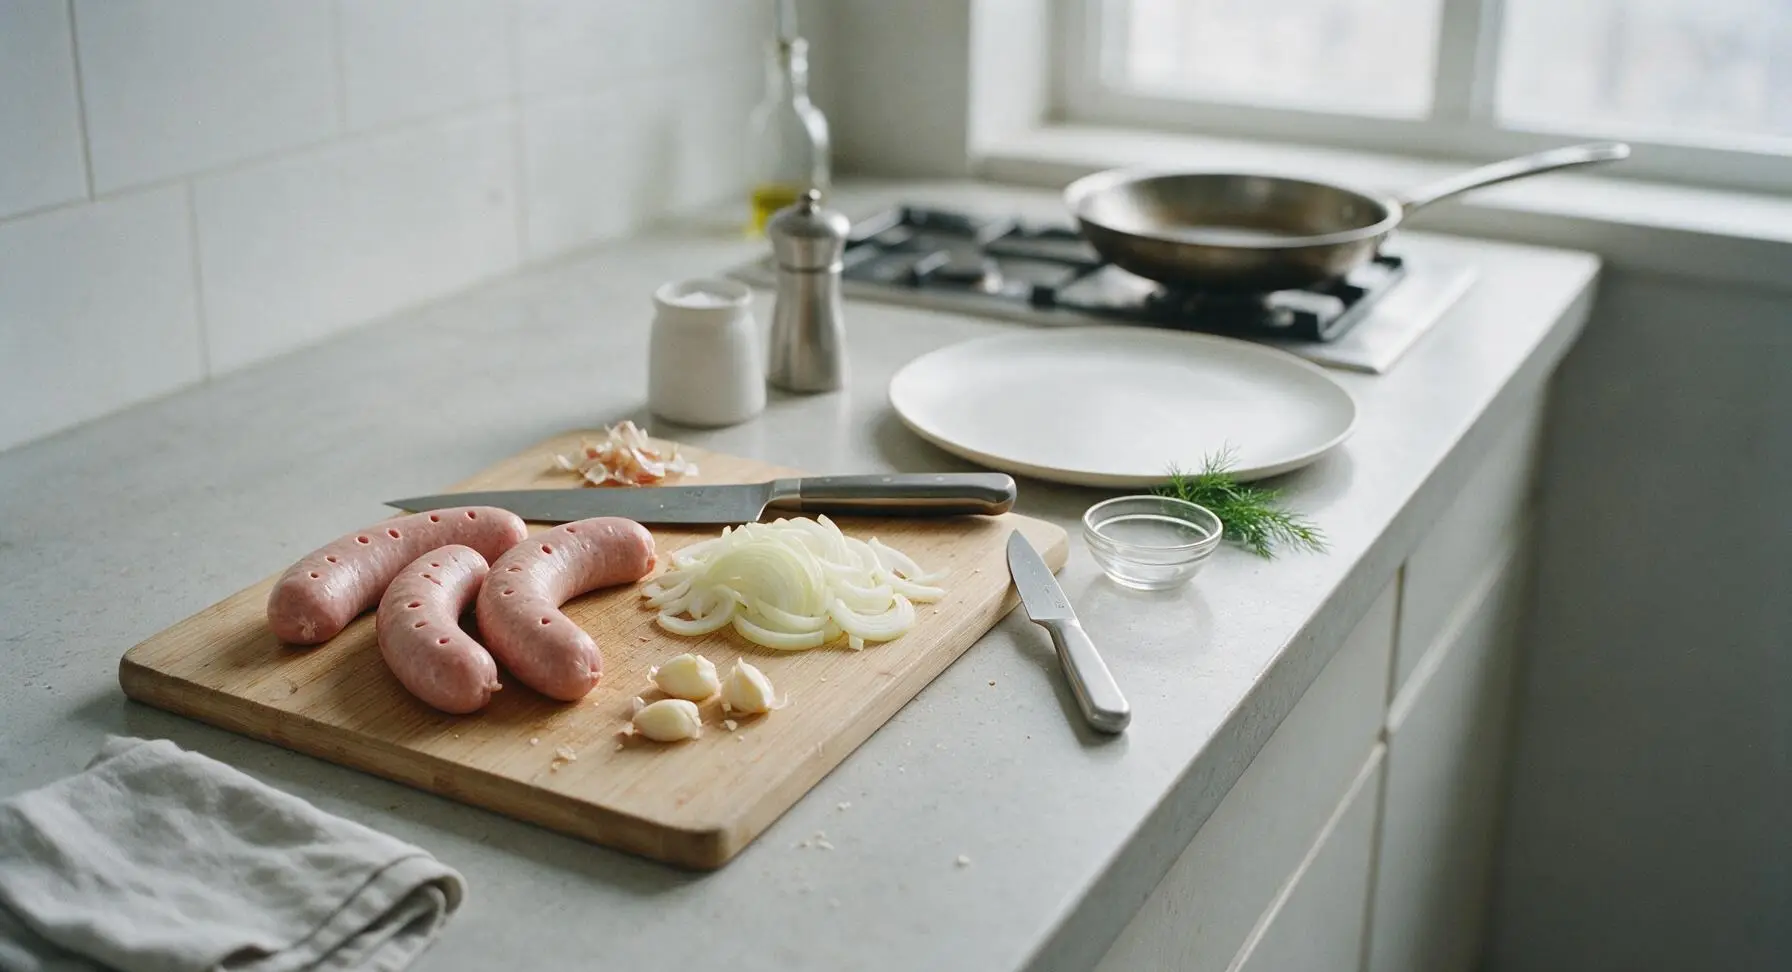
Place the bamboo cutting board in its fixed left counter position. Using the 8-inch chef knife, slice the yellow onions into ¼-inch thick half-moons. Lightly crush the garlic cloves with the flat side of the knife, removing papery skins. Use the tip of the knife to prick each kielbasa link 3-4 times on all sides to prevent casings from bursting during cooking. Only pierce the outer casing, not the deep sausage meat, to keep moisture locked in.
Step 1
step1:Prep Sausage and Aromatics
2

Warm Skillet with Oil

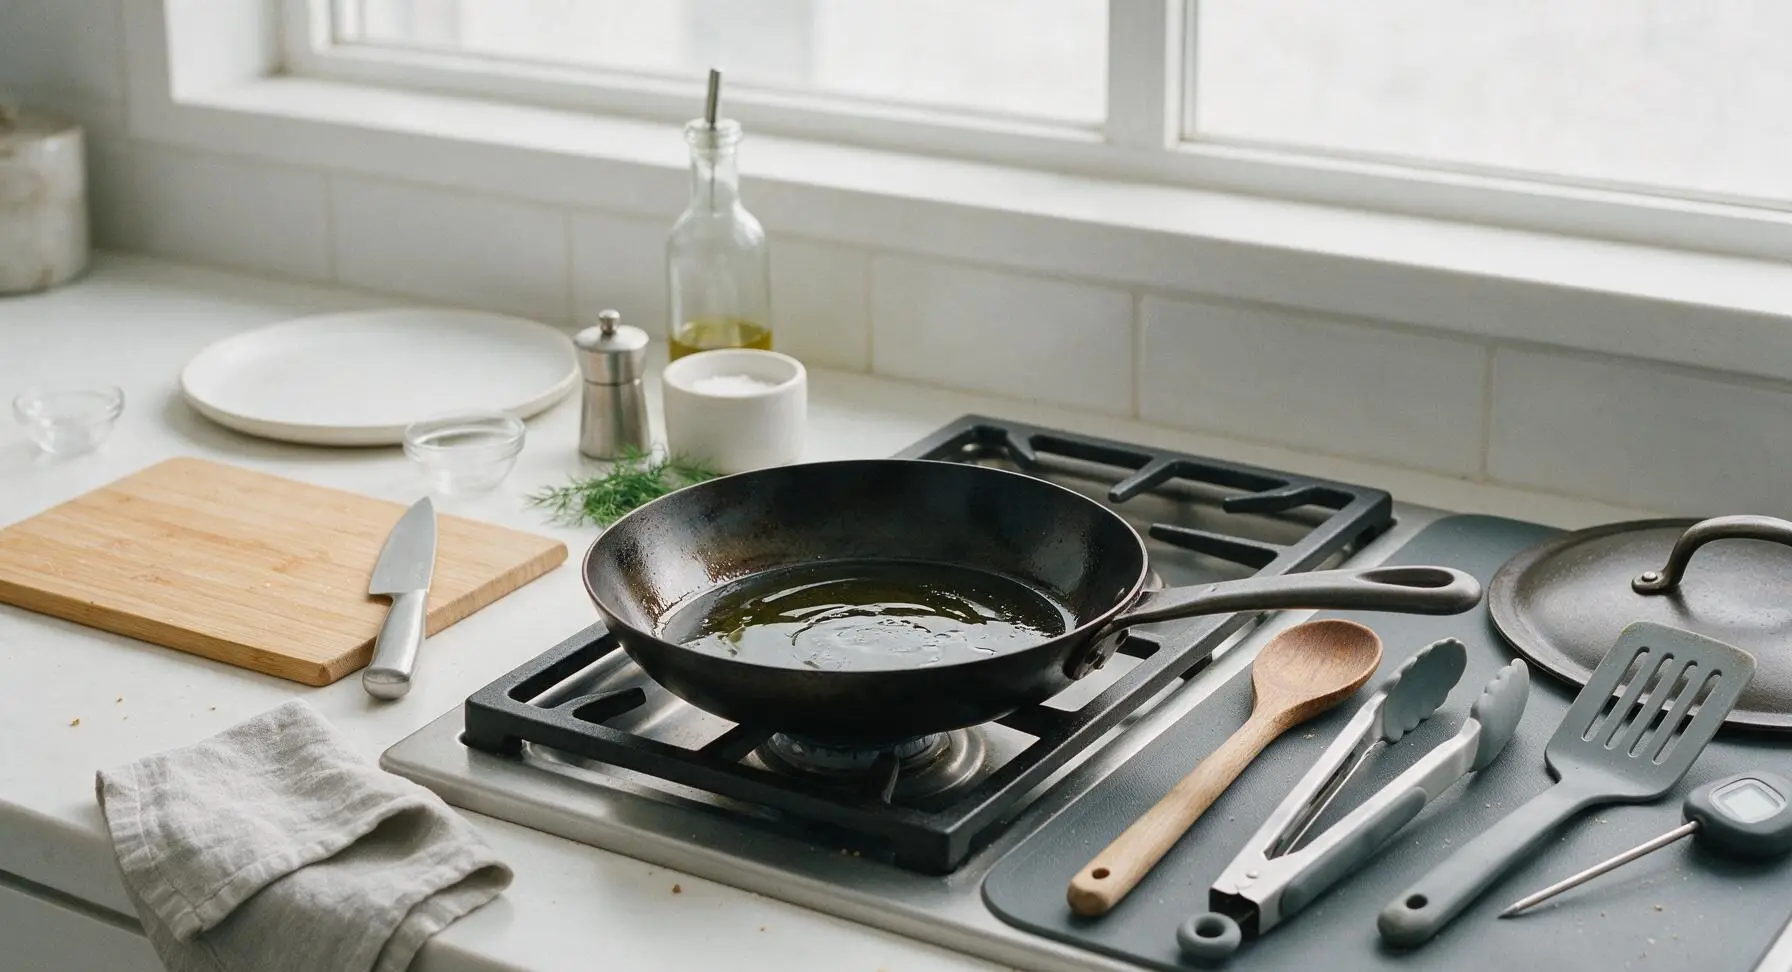
Place the 12-inch carbon steel skillet on the stovetop over medium heat (350°F / 175°C). Add 1 tablespoon of olive oil to the pan, heating for 1 minute until the oil shimmers but does not smoke. Swirl the pan to coat the bottom evenly with oil.
Step 2
step2:Warm Skillet with Oil
3

Cook Caramelized Onions

Add the sliced onions to the heated oil, stirring with the beechwood wooden spoon to coat fully in oil. Reduce heat to medium-low (300°F / 150°C), cook for 10 minutes, stirring every 2 minutes, until onions are soft, deep golden brown, and sweet smelling. Add crushed garlic, ½ tsp salt, and ¼ tsp black pepper during the last 2 minutes of cooking, stirring to combine. Do not burn the garlic – it should turn fragrant and pale gold, not dark brown.
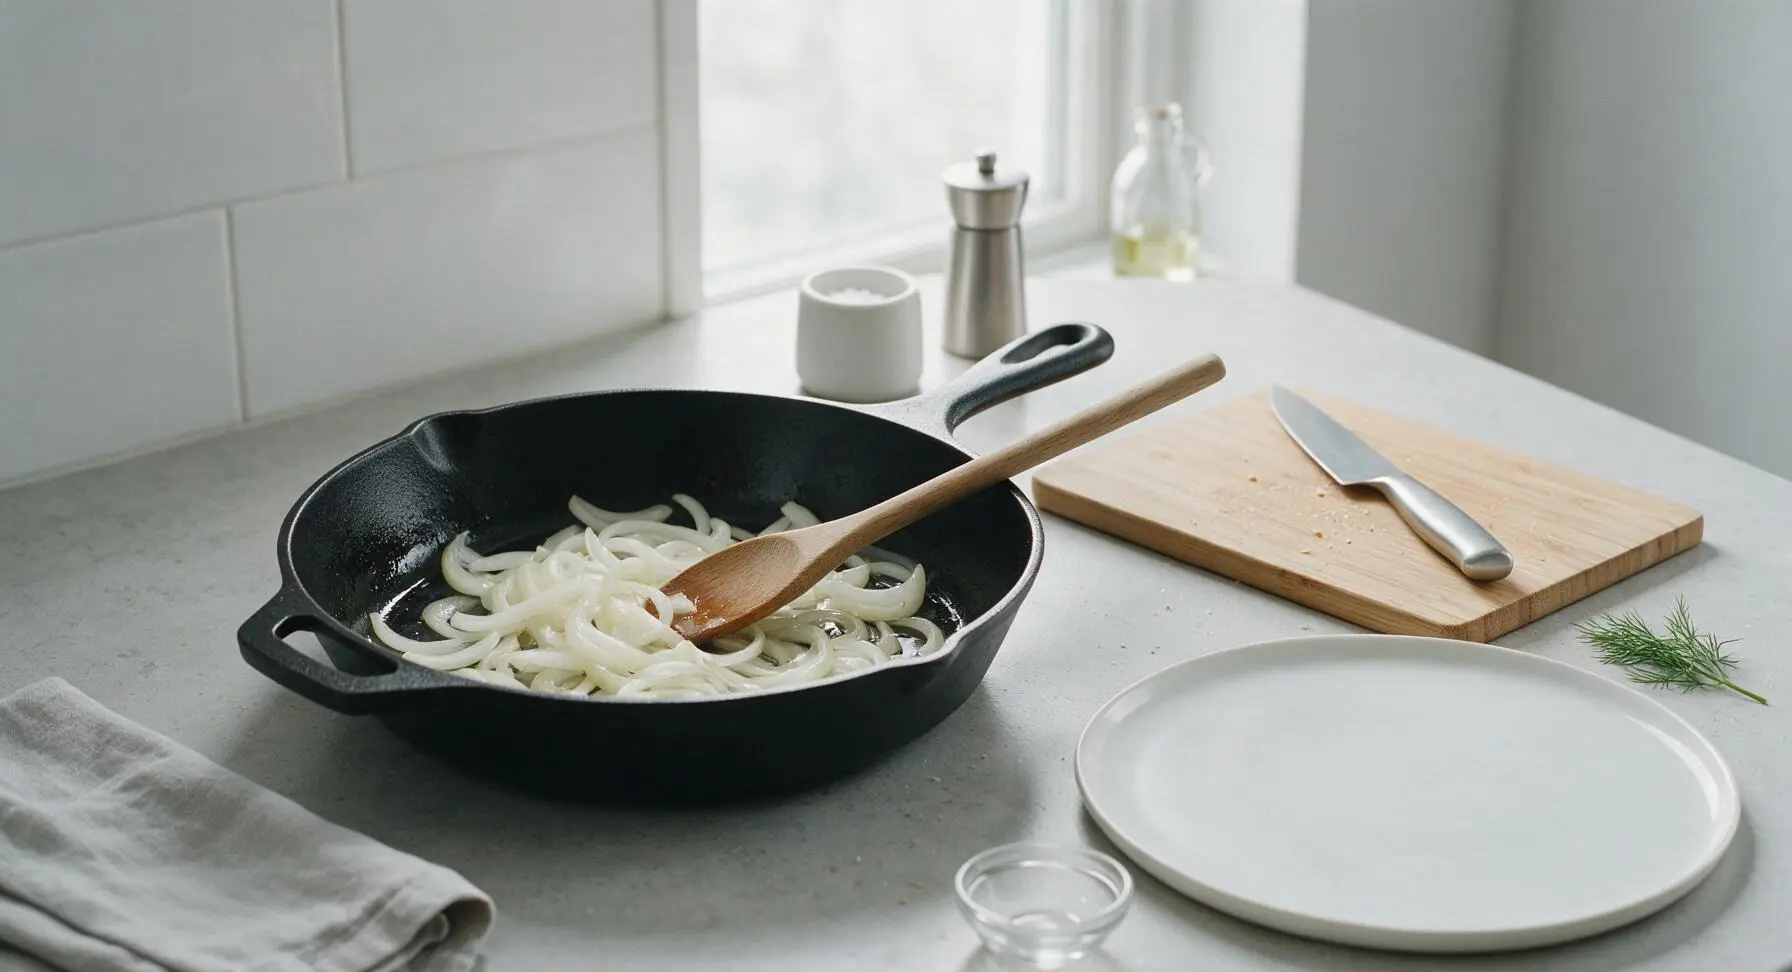
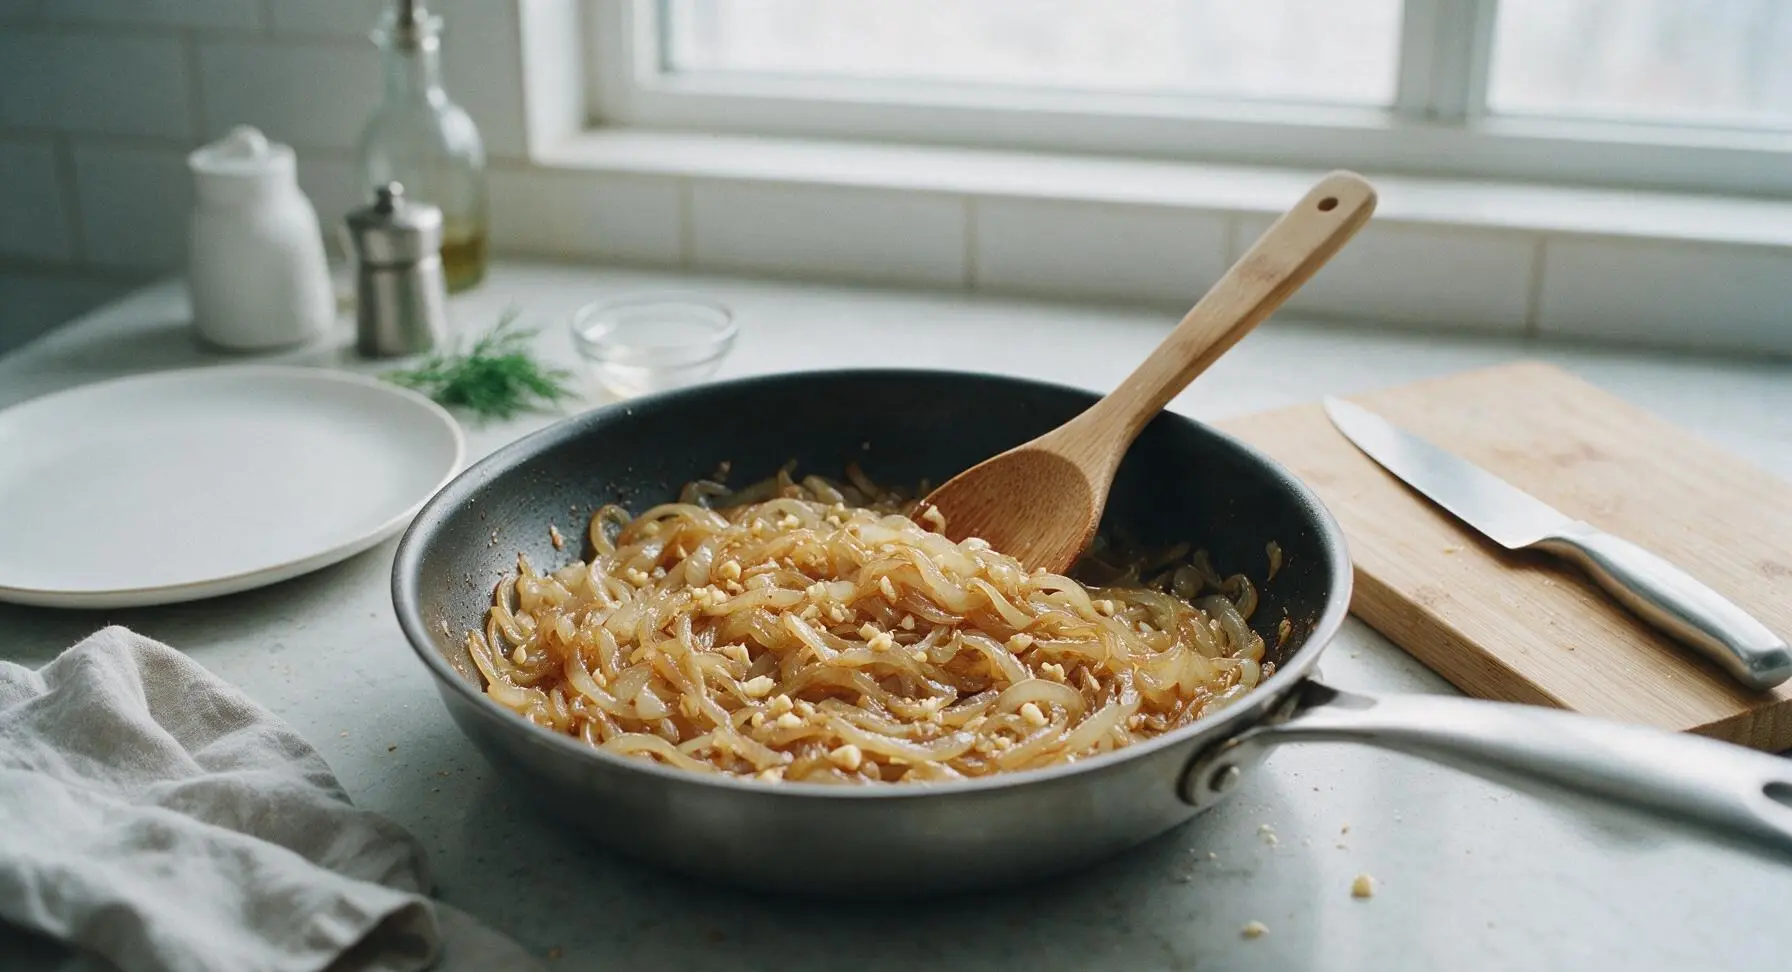
Step 3
step3:Cook Caramelized Onions
Step 3
step3:Cook Caramelized Onions
4

Add Sausage to Pan

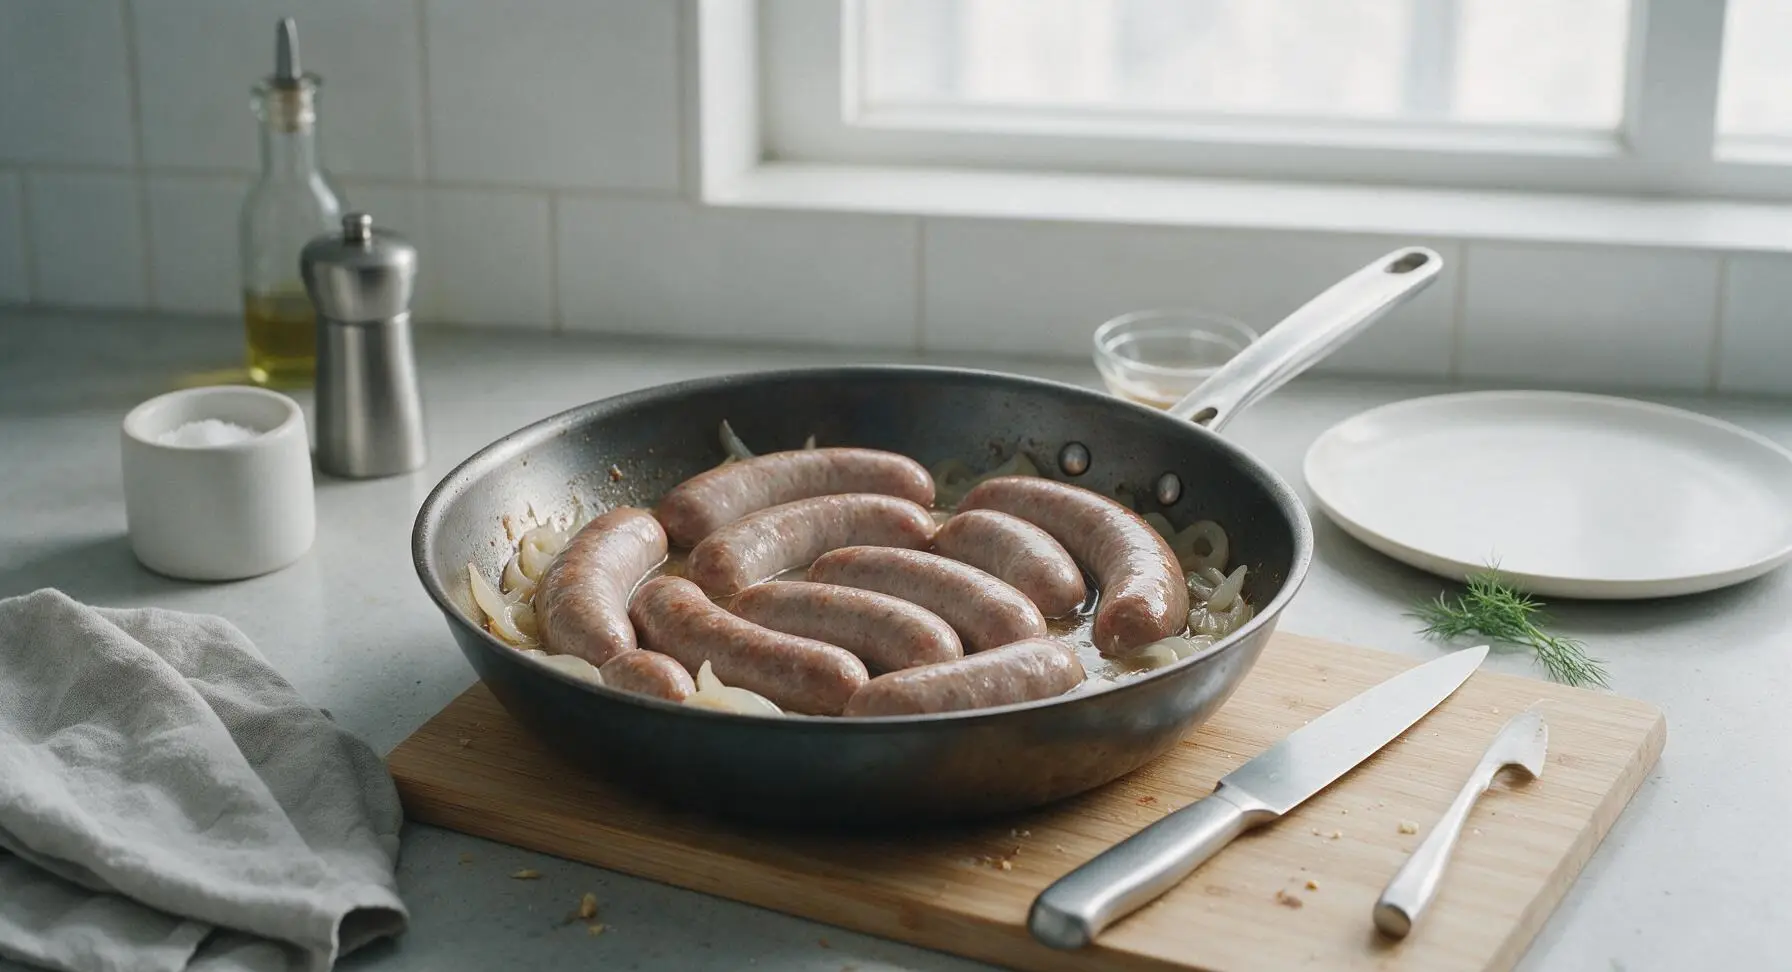
Push the caramelized onions to the outer edges of the skillet, creating an open space in the center of the pan. Arrange the pricked kielbasa links in a single layer in the center of the pan, making sure no links overlap. Let the sausage sear for 2 minutes on the first side until light golden.
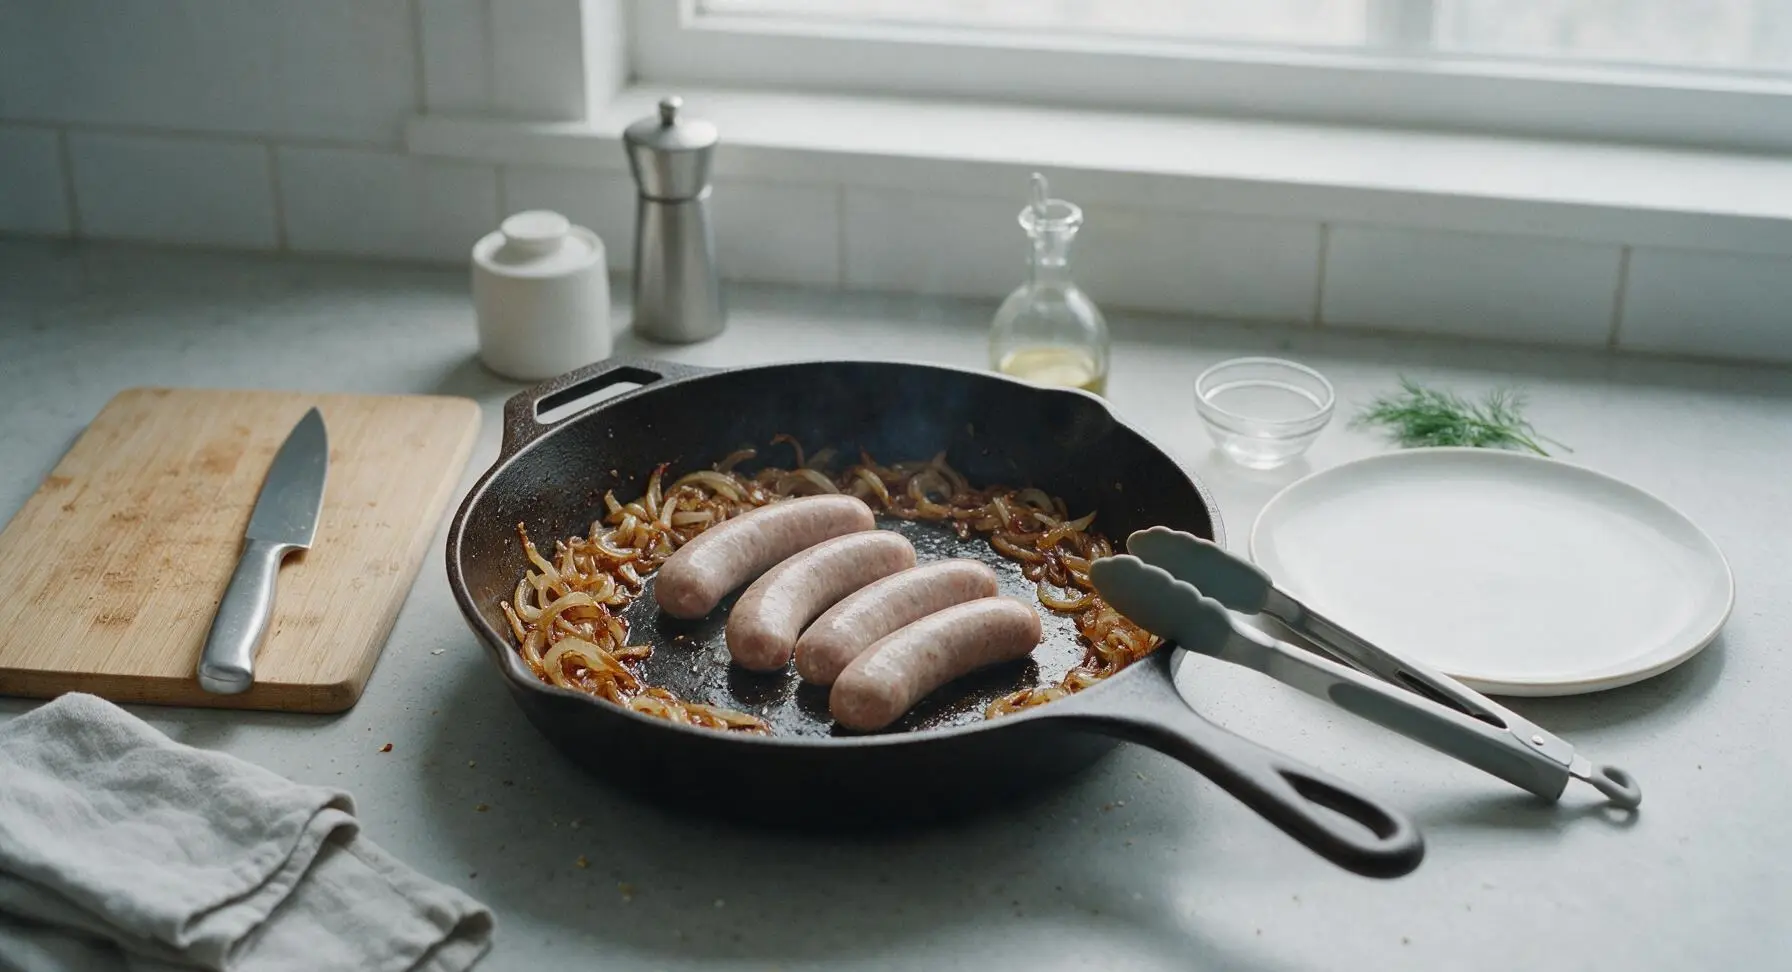
Step 4
step4:Add Sausage to Pan
5

Simmer Sausage Gently

Pour ¼ cup of water into the skillet, taking care to avoid splashing hot oil. Immediately cover the skillet with the tight-fitting carbon steel lid, reduce heat to medium-low, and simmer for 7 minutes. This gentle steam cooks the sausage evenly all the way through without splitting the casings, ensuring juicy meat inside. After 7 minutes, remove the lid – the water should be mostly evaporated, with only a thin layer of flavorful liquid left in the pan.
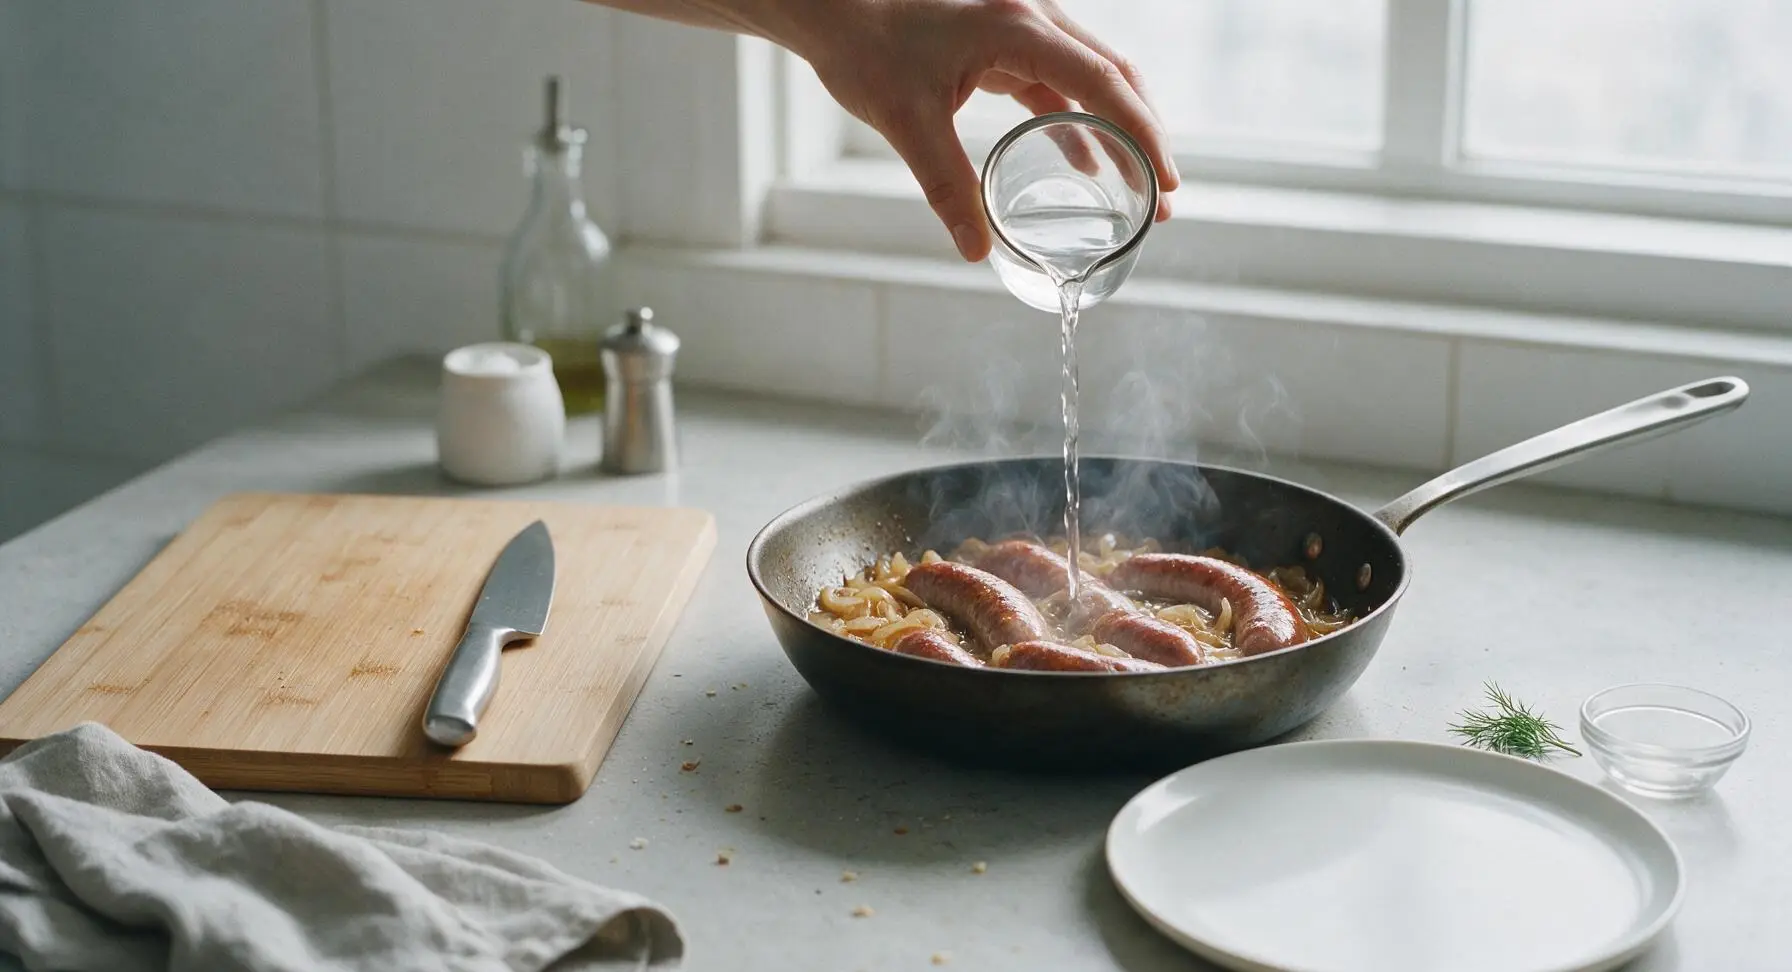
Step 5
step5:Simmer Sausage Gently
Step 5
step5:Simmer Sausage Gently
6

Sear to Crisp Exterior

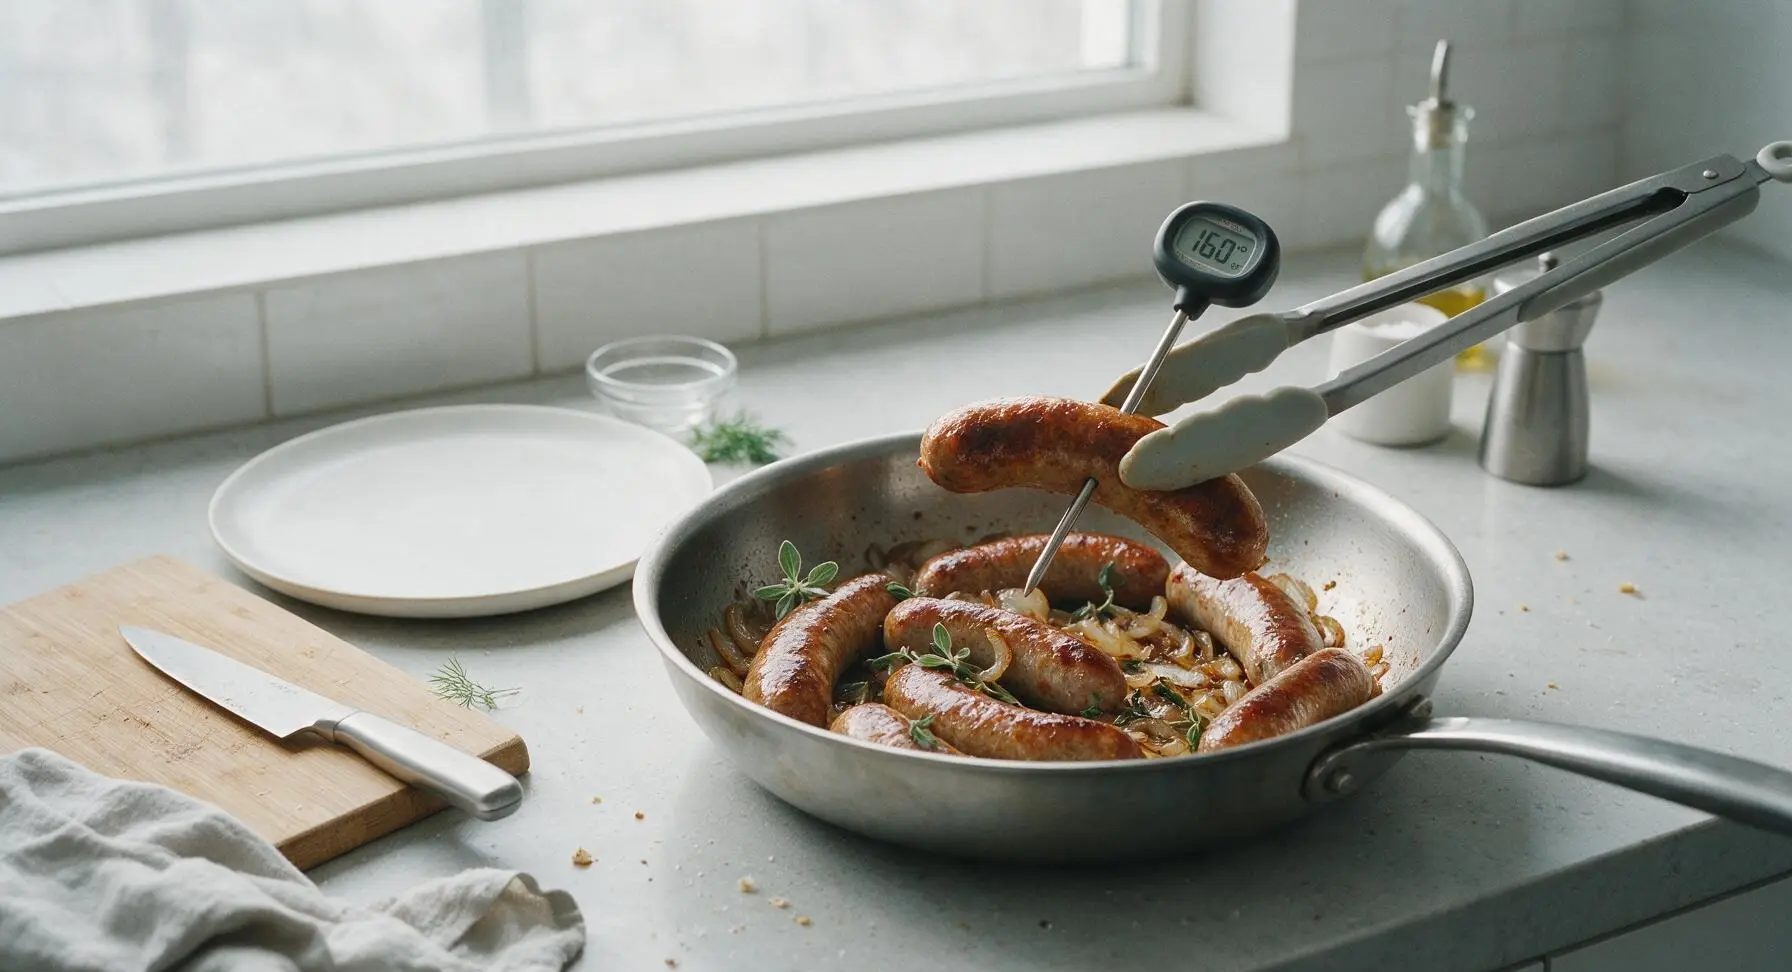
Use the silicone-tipped tongs to turn the kielbasa links every 1.5 minutes, searing all sides for a total of 5 minutes, until the casings are deep golden brown, slightly crisp, and the internal temperature of the sausage reaches 160°F (71°C) on the instant-read thermometer. Toss the onions with the sausage juices as the sausage sears, adjusting seasoning with remaining ½ tsp salt and ¼ tsp pepper if needed. Add the fresh marjoram sprigs to the pan during the last minute of cooking to infuse their aroma.
Step 6
step6:Sear to Crisp Exterior
7

Rest and Slice Sausage

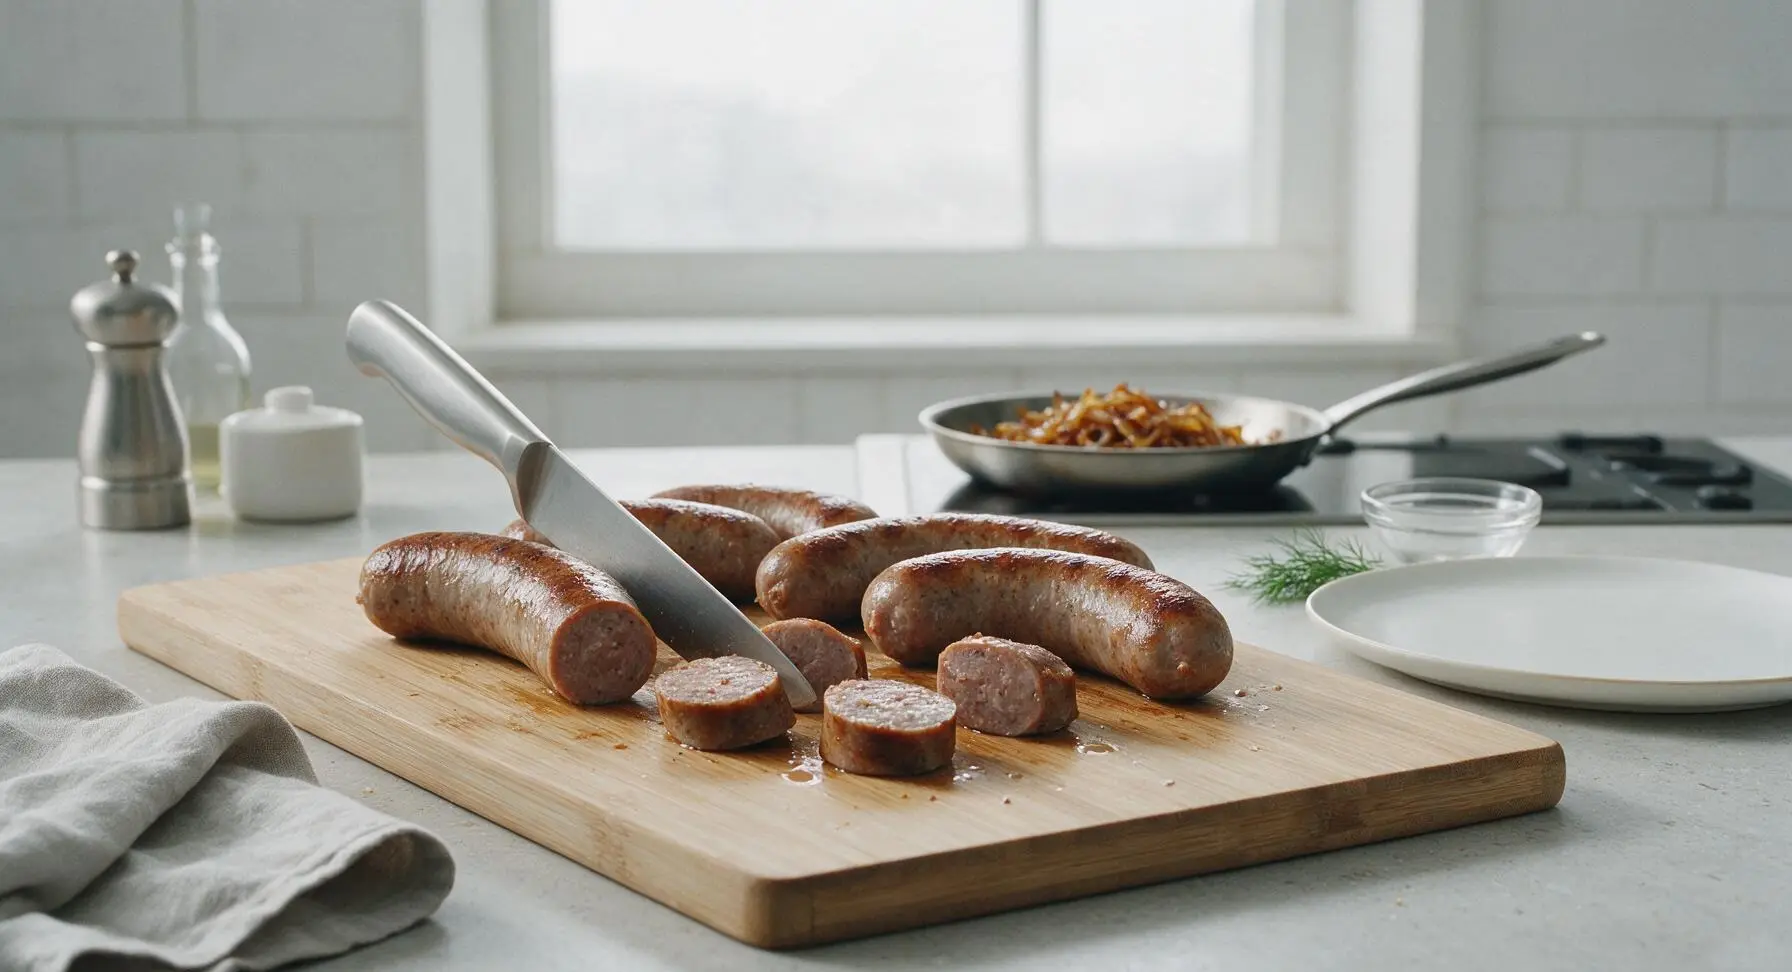
Use the tongs to transfer the seared kielbasa links from the skillet to the bamboo cutting board. Let the sausage rest for 3 minutes to allow juices to redistribute through the meat, so they do not run out when sliced. After resting, use the chef knife to slice the links on a slight diagonal into ½-inch thick pieces, leaving some end pieces whole for visual appeal.
Step 7
step7:Rest and Slice Sausage
8

Plate and Serve Hot

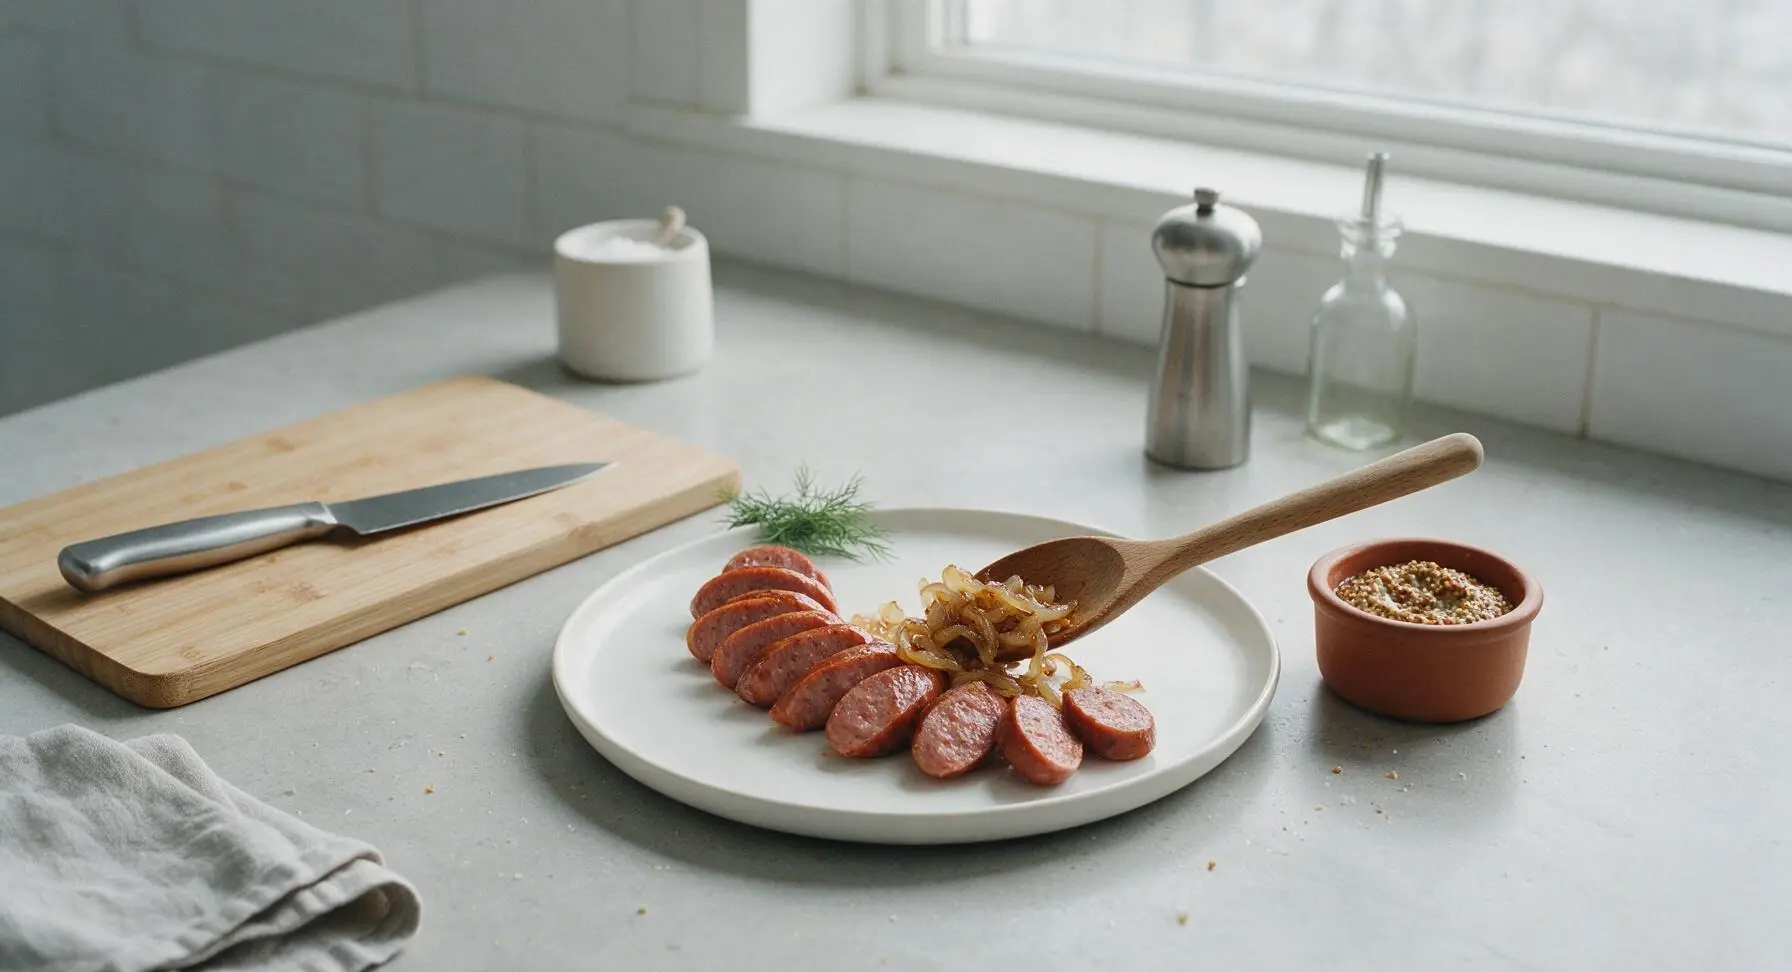
Arrange the sliced kielbasa on the cream stoneware dinner plate, fanning the pieces slightly to show the crisp exterior and juicy interior. Spoon the caramelized onions over and alongside the sausage, tuck a fresh marjoram sprig in for garnish, and serve with the whole grain mustard in the small terracotta ramekin on the side. Serve immediately while hot.
Step 8
step8:Plate and Serve Hot

Tips

1.Always prick fresh kielbasa casings 3-4 times per link before cooking: this allows trapped steam to escape as the sausage heats, preventing casings from splitting open and leaking flavorful juices into the pan. Only pierce the casing, not the deep meat, to keep moisture locked in.
2.Avoid cooking fresh kielbasa over constant high heat: high heat causes casings to shrink and burst quickly, and can burn the sausage exterior before the interior reaches a food-safe 160°F. The simmer-then-sear method guarantees juicy, evenly cooked meat and crisp, snappy casings.
3.Let the cooked sausage rest for 3 minutes on the cutting board before slicing: just like other cuts of meat, resting allows the muscle fibers to relax and reabsorb juices, so every bite stays moist instead of having juices run out onto the plate when cut.


✨ You May Also Like

Main Course
🍜 United Kingdom

A showstopping classic of tender seared beef, savory mushroom duxelles, and crisp prosciutto wrapped in flaky golden puff pastry, baked to juicy perfection.

⏱️ 2 hours 1Main Course ★ 4.7
Main Course
🍜 India

Tender charred marinated chicken simmered in a rich, spiced creamy tomato sauce, this iconic Anglo-Indian curry pairs perfectly with basmati rice or warm naan.

⏱️ 50 minuteMain Course ★ 4.6
Main Course
🍜 Thailand

Classic tangy, sweet, and savory Thai stir-fried rice noodles with shrimp, tofu, and crunchy garnishes, balancing all five core Thai flavor profiles.

⏱️ 30 minuteMain Course ★ 4.5
Main Course
🍜 United Kingdom

Crispy golden beer-battered cod and fluffy double-fried chips, served with tangy tartar sauce and malt vinegar: the timeless, beloved British pub comfort classic.

⏱️ 45 minuteMain Course ★ 4.7
Main Course
🍜 Mexico

Smoky, chile-marinated pork tacos with caramelized pineapple, fresh cilantro, and lime: a beloved classic Mexican street food perfect for casual summer gatherings.

⏱️ 1 hour 45Main Course ★ 4.8
Main Course
🍜 United States

Crunchy Fritos corn chips layered with savory beef chili and melted cheddar, topped with cool, zesty fixings for a beloved, cozy Tex-Mex comfort food.

⏱️ 35 minuteMain Course ★ 4.8

cooking fresh kielbasa:Frequently Asked Questions

1.Can I substitute smoked kielbasa for the fresh uncooked pork kielbasa called for in this recipe? ▾
You absolutely can, just adjust your cook time! Smoked kielbasa is fully cured and pre-cooked, so you’ll skip the initial steam step and only sear it 3–4 minutes per side to crisp the casing and warm it through. It has a deeper, smokier flavor that pairs beautifully with sweet caramelized onions; just don’t overcook it, or the casing will turn tough and chewy.
2.How do I know when fresh kielbasa is fully cooked and safe to eat? ▾
Fresh kielbasa is raw pork, so you’ll need to reach an internal temperature of 160°F measured with an instant-read thermometer stuck into the thickest part of the sausage, away from the casing. When done, juices will run clear with no pink tint, and the casing will be crisp, deep golden brown. Never rely on color alone—a thermometer is the only foolproof way to avoid undercooked or dry, overcooked sausage.
3.Why do you add water to the pan when searing the kielbasa? ▾
That small splash of water creates gentle steam that cooks the raw sausage evenly all the way through before the casing gets too dark or burns. It also helps render excess fat out of the sausage slowly, so you get a juicy interior instead of a charred outside with a cold, raw center. Once the water evaporates, the kielbasa sears in rendered fat and oil for that perfect crisp, golden casing.
4.My caramelized onions always burn or turn out bitter—what am I doing wrong? ▾
Most people rush caramelized onions by cranking the heat too high! Cook thinly sliced onions over medium-low heat, stirring every 3–4 minutes, for 25–30 minutes total. If they start to stick or brown too fast, add a tiny splash of water to deglaze the pan, and don’t add salt until halfway through—salt draws out moisture too early and slows the softening process, leading to uneven browning.
5.Can I make the caramelized onions ahead of time to cut down on weeknight cook time? ▾
Definitely! Caramelized onions keep beautifully for up to 5 days in an airtight container in the fridge, or up to 3 months in the freezer. When you’re ready to make the meal, reheat them gently in the same skillet you’ll use for the kielbasa before searing—this adds extra deep flavor to the pan and cuts your total active cook time to under 15 minutes, perfect for busy school nights.
6.Do I need to prick the kielbasa casings before searing to keep them from bursting? ▾
Skip pricking the casings! Poking holes lets all the juicy, garlicky fat and rendered juices leak out into the pan, leaving you with dry, flavorless sausage. The initial steam step from adding water cooks the sausage gently and evenly, so pressure builds slowly without bursting casings, as long as you don’t have the heat cranked to high the whole time.
7.What’s the best way to slice onions for even caramelization? ▾
Slice your yellow onions into uniform ¼-inch thick half-moons for the most consistent results. If slices are too thick, they’ll stay crunchy and raw in the center before the outside caramelizes; if they’re paper-thin, they’ll burn quickly before developing that deep, sweet, jammy texture. A sharp chef’s knife or mandoline (with a ¼-inch guard) makes quick, even work of this prep.
8.Can I use a different type of onion if I don’t have yellow onions on hand? ▾
Yellow onions are ideal because they have the perfect balance of sugar and sharpness that mellows into classic sweet caramelized flavor, but you can swap in sweet Vidalia onions for an even sweeter end result, or red onions for a brighter, slightly tangier profile. Avoid white onions if possible—they have a sharper, more astringent flavor that doesn’t mellow as nicely during slow cooking.
9.What sides pair best with this dish for a full family meal? ▾
This cozy kielbasa and onion dish pairs perfectly with simple, hearty autumn sides! Try serving it over buttery mashed potatoes, roasted root vegetables, buttered egg noodles, or tangy sauerkraut for a classic Polish-inspired meal. For a lighter option, serve it alongside a crisp green apple salad with simple vinaigrette to cut through the richness of the sausage and sweet onions.
10.My kielbasa casings turned out chewy instead of crisp—what went wrong? ▾
Chewy casings almost always come from not letting the pan get hot enough after the initial steam step, or overcrowding the pan. Once the water evaporates, set heat to medium, and give sausages space between them in the skillet—if they’re touching, they’ll steam instead of sear. Don’t move them too much; let them sit undisturbed 2–3 minutes per side to build that crisp, golden crust.
11.Can I cook this recipe in a cast iron skillet, or do I need a nonstick pan? ▾
Cast iron is actually my top pick for this recipe! It holds heat super evenly, which helps you get a perfectly crisp casing on the kielbasa and deep, even browning on the onions without hot spots that cause burning. A heavy-bottomed stainless steel skillet works great too; nonstick works, but you won’t get quite the same deep, golden sear because the surface doesn’t get as hot.
12.How long does it take to properly caramelize onions for this recipe? ▾
Plan for 25–30 minutes total to get perfectly jammy, deep golden caramelized onions—there are no good shortcuts! If you try to rush them on high heat, they’ll burn and turn bitter instead of developing that rich, sweet, mellow flavor. I recommend starting the onions first before prepping the kielbasa, so they can cook low and slow while you get the rest of your meal ready.
13.Can I add other seasonings or mix-ins to customize this recipe? ▾
Absolutely! A teaspoon of whole grain mustard stirred into the onions at the end adds a bright, tangy kick, a pinch of smoked paprika or caraway seeds leans into classic Eastern European flavor profiles, or a splash of apple cider vinegar right before serving cuts through richness beautifully. You can also toss in sliced apples or sauerkraut with the onions for extra fall flavor depth.
14.How do I store leftovers, and how long will they keep? ▾
Let leftover kielbasa and onions cool completely, then store them in an airtight container in the fridge for up to 4 days. To reheat, warm them in a skillet over medium-low heat for 5–7 minutes, flipping the sausage halfway, until the casing crisps back up and the onions are warmed through. Skip the microwave for reheating—it makes sausage casings rubbery and onions soggy.
15.Do I need to remove the kielbasa casings before cooking? ▾
No, leave the casings on! The natural pork casing is what gets crisp and golden during the searing step, and it holds all the juicy, garlicky sausage inside while it cooks. If you have a personal preference for skinless sausage, you can peel casings off after cooking if you’d like, but removing them before cooking makes sausage fall apart during searing and leads to crumbly, dry meat.
16.I don’t eat pork—can I make this with a different type of fresh kielbasa? ▾
You can absolutely swap in fresh turkey or chicken kielbasa for the pork version, just adjust your cook time slightly because poultry sausage is leaner and can dry out faster. Cut the initial steam time by 2–3 minutes, and check for an internal temp of 165°F to confirm it’s fully cooked. Add an extra teaspoon of olive oil to the pan, since leaner sausage will render less fat.
17.Why do you add garlic at the end instead of cooking it with the onions? ▾
Garlic burns extremely fast—if you add it at the start with the onions, it will turn bitter and acrid long before the onions are done caramelizing. Instead, toss your smashed or minced garlic into the pan during the last 1–2 minutes of cooking the kielbasa, so it just softens and releases its aromatic, mellow flavor without getting crispy or burnt. That small step makes a huge flavor difference.
18.Can I make this recipe on an outdoor grill instead of the stovetop? ▾
You can! For grilling, cook fresh kielbasa over indirect medium heat for 10–12 minutes, turning occasionally, until it hits 160°F internally, then move it over direct heat for 1–2 minutes per side to crisp the casing. Cook the caramelized onions ahead in a cast iron skillet set on the grill grates next to the sausage for that same low-cleanup meal with subtle smoky grilled flavor.
19.The recipe mentions minimal cleanup—do I cook the onions and kielbasa in the same pan? ▾
Exactly! That’s one of the best parts of this cozy weeknight meal. You’ll cook the caramelized onions first in the skillet, then scoop them out to a plate and use that same exact pan (with all the flavorful browned bits left from the onions) to sear and steam the kielbasa. Toss the onions and garlic back in at the end to warm through, and you’ll only have one skillet to wash when dinner is done.

Comments (4)

2 days ago

OMG this was such a game changer for our weeknight family dinner! I’ve always boiled kielbasa before and never thought to pan sear it with slow caramelized onions — the whole house smelled incredible for hours. My two picky kids devoured it, even asked for seconds! Served it with some buttery mashed potatoes and roasted green beans, 10/10 will be adding this to our regular meal prep rotation.

yesterday

Same! I used to boil my kielbasa too and it always tasted so bland and watery. Tried this last night after seeing your comment and served it with tangy sauerkraut and grainy mustard on the side — SO good, my husband raved about it and asked when I’m making it again.

yesterday

So glad the whole family loved it! Pro tip: if you toss a tiny splash of apple cider vinegar into the onions right at the end, it cuts the richness and sweetness and makes the flavor pop even more. Thanks for taking the time to leave such a sweet review!

1 week ago

Brought this to our neighborhood block party potluck last weekend and people were hovering around the platter asking for the recipe before I even set it down! It’s so easy to throw together even after a long work day, and the caramelized onions make it feel way fancier than the 25 minute cook time makes it sound. Only tweak I made was adding a pinch of smoked paprika to the onions while they cooked, total chef’s kiss.

5 days ago

Love the smoked paprika addition — that’s such a smart call to add a little extra smoky depth that pairs perfectly with the savory kielbasa. So stoked it was a hit at the block party!

3 days ago

Perfect easy recipe for my Sunday meal prep! I made a big batch on Sunday and portioned it out with roasted sweet potato wedges for lunches all week, and it reheats like an absolute dream. No sad desk lunch for me this week! The caramelized onions stay sweet and the kielbasa gets that perfect crispy edge from the pan sear. Only knock is I wish the recipe noted that caramelizing onions low and slow takes a bit longer than the listed cook time — mine took closer to 15 extra minutes, so total time was more like 40 minutes for me. Still SO good, will definitely be making it again!

2 hours ago

About to make this for my casual date night in tonight, quick question — do I need to poke holes in the kielbasa before searing it? I tried making pan seared sausage once before and all the hot fat splattered everywhere and left a huge mess on my stovetop, scared to repeat that lol. This looks too good to mess up!

30 minutes ago

I made this last night and didn’t poke any holes! Just keep the heat on medium instead of cranking it super high, and you’ll get that perfect crisp outside without all the crazy splatters. I used a cheap mesh splatter screen over my pan too just to be safe, worked like a charm! Your date is gonna love it.



